You should upgrade or use an alternative browser.
Hacking 3DS An Error occured (ErrDisp) error type: Generic error code: 0xd900182f
-
Thread starterMewtwoFanz
-
Start dateJan 25, 2019
-
Views
59,017 -
Replies
31
- Status
- Not open for further replies.
-
#1


this only happens when I try to download and install anything official, but it doesn’t happen when when I install something unofficial or hacked, like a .cia file.
Can anyone help me?
-
#2
Hi, I have a n3DS running 11.9 CFW, but there’s a problem I’ve been having for awhile. whenever I try to update a game, download a game off the eshop, or a 3ds theme off the theme shop , I get an error saying this:this only happens when I try to download and install anything official, but it doesn’t happen when when I install something unofficial or hacked, like a .cia file.
Can anyone help me?
- Take a spare SD card and copy everything off it onto a computer.
- Minimum size of 4 GB. Smaller is bigger for quicker testing.
- Reformat the card in FAT32 + 32 KB cluster size with Windows File Explorer or guiformat (if bigger than 32 GB).
- Full Write + Verify the empty card with H2testw. No skipping this step!
- If the card passes without error, delete the *.h2w test files.
- A failed card must be replaced. Doing so requires going back to step 1 or 2.
- Build a super bare minimum test CFW setup. Download Luma3DS v9.1 and put the boot.firm on the card root.
- Do not use any other files or put back your main setup at this moment.
- Insert the SD card into the 3DS, hold (Select) button to access Luma3DS v9.1 configuration, and select (x) Show NAND or user string in System Settings.
- Boot to HOME Menu and enter the Nintendo eShop. Download a single free title update.
- Choose something small. Here are several options:
- Siesta Fiesta Update v1.0
- Link-a-Pix Color Update v1.01
- Go! Go! Kokopolo Update v1.1
- Choose something small. Here are several options:
This test will check if there is something wrong with the 3DS firmware. Is it or is it not capable of downloading an official title update when the SD card setup is not at fault?
-
#3
-
#4
TurdPooCharger I got the same error. However, this only happens when I try to play my Sushi Striker cartridge. I can play all my other games without a problem, I can also play download games from e-shop and games that I download .cia. I don`t have any problem with my Luma. So, my 3ds is American and my Sushi Striker cartridge is European.
- Create a CIA version of your Sushi Striker (EUR) cart game.
- GodMode9 Usage — Dumping a Game Cartridge
- Install this CIA onto HOME Menu using FBI.
- If the CIA version also displays an error, try using Luma3DS Locale Emulation.
- With SD card inserted, turn on the system and hold (SELECT) to access Luma3DS v9.1 configuration.
- (x) Enable game patching
- sdmc:/luma/titles/00040000001C1D00/locale.txt
- For the written text in locale.txt,
- With SD card inserted, turn on the system and hold (SELECT) to access Luma3DS v9.1 configuration.
- If you somehow manage to get the CIA working, see if the cart version works too.
In the scenario the above doesn’t work, consider acquiring a digital copy of this game elsewhere like at one of those […] sites (no asking where).
-
#5
-
#6
I followed the instructions you gave me, but i’m still getting the same error. any suggestions?
-
#7
-
#8
TurdPooCharger,I followed the instructions you gave me, but i’m still getting the same error. any suggestions?
Some of these steps may not apply to you if you do not have certain types of games. Back up your game progress data for extra piece of mind.
Using your main SD card that has all your titles,
- Back up the saves + extdata for all 3DS games using Checkpoint or JKSM.
- Back up the saves for all GBA VC games:
- GodMode9 Usage — Backup GBA VC Saves
- Back up the DSiWare games and saves:
- GodMode9 → [S:] SYSNAND VIRTUAL → twln.bin → Copy to 0:/gm9/out.
On the separate, spare SD card:
5. For extra precaution, back up the current SysNAND:
- GodMode9 → (HOME) button → Scripts… → NANDManager → <X> Backup SysNAND → etc.
6. Back up the tickets, title, and import *.db files. These will be needed for later injection.
- GodMode9 → (HOME) button → Scripts… → GM9Megascript → Dump Options → System File Dump Options → Dump ticket.db → etc.
- Repeat the process for title.db and import.db.
***
Option A
If you have a backed up SysNAND *.bin image that should have been created when you first installed custom firmware, haven’t performed a Format System Memory or System Transfer between the time it was hacked and now, and it has a 3DS firmware version older than 11.9.0-42:
- sdmc:/gm9/out/######_XX########_sysnand_000.bin
- sdmc:/gm9/out/######_XX########_sysnand_000.bin.sha (not required but recommended)
- This is not the one created in step 5.
8A. Restore the state of the 3DS firmware to when it was first hacked:
- GodMode9 → 0:/…/######_XX########_sysnand_000.bin → NAND image options… → Restore SysNAND (safe) → etc.
9A. Update the 3DS firmware to 11.9.0-42 using either:
- Recovery Mode
- System Settings → Other Settings → System Update
10A. Attempt downloading a free game update in Nintendo eShop such as [post #2, step 7].
- If you succeed, go to step 11; if the problem persist, go to Option B.
***
Option B
If you do not have a previously created SysNAND *.bin, that image does not meet the criteria in Option A, or the test download in step 10A did not work,
- Match the region and old/new series that is on your system. Assuming USA n(2/3)DS(XL):
- sdmc:/gm9/out/11.5.0-38U_ctrtransfer_n3ds.bin
- sdmc:/gm9/out/11.5.0-38U_ctrtransfer_n3ds.bin.sha
8B. Update the 3DS firmware back to 11.9.0-42.
9B. Press (UP), (UP), (DOWN), (DOWN), (LEFT), (RIGHT), (LEFT), (RIGHT), (B), (A).
- This step is filler, but do this anyway for good luck.
10B. (Re)attempt downloading a free game update in Nintendo eShop.
- If you succeed, go to step 11; if the problem persist, go to Option C.
***
Option C
If the test download did not work in step 10B,
- smdc:/files9/11.5.0-38U_ctrtransfer_n3ds.bin
- smdc:/files9/11.5.0-38U_ctrtransfer_n3ds.bin.sha
- Decrypt9WIP → SysNAND Options → CTRTransfer… → Auto CTRNAND Transfer → button combo → 11.5.0-38U_ctrtransfer_n3ds.bin → etc.
8C. Update the 3DS firmware back to 11.9.0-42.
9C. Do a barrel roll! Press (L) or (R) twice.
- If you do a real life barrel roll, not with your n3DS in hand.
10C. (Re)-(Re)attempt downloading a free game update in Nintendo eShop.
- I ain’t got anything left if downloading is still broken. With that said, go to step 11.
***
Still using the spare SD card,
- GodMode9 → (HOME) button → Scripts… → GM9Megascript → Inject Options → Inject ticket.db → <A> yes → XX########_ticket_00.db → <A> yes → button combo → etc.
- Repeat the process for title.db.
Due to this GM9 script missing the option to inject the import.db,
- (LEFT) / (RIGHT) d-pad = scroll the ^ symbol side-to-side
- (UP) / (DOWN) d-pad = change the letter
- (X) = delete a character or space
- (Y) = add a space
- (B) = cancel the edits
- (A) = save the edits
13. Press (Y) once on import.db to [CLIPBOARD] select it.
- If a mistake is made in CLIPBOARD selection, press (SELECT) to reset.
14. Back out with (B) button. Go into the [1:] SYSNAND CTRNAND/dbs directory.
15. Press (Y) → Copy path(s) → <A> yes → button combo → Overwrite file(s) → <A> yes.
16. Back out with (B) button.
17. While hovering on (highlighting white) [1:] SYSNAND CTRNAND, hold (R)-shoulder and press (A) → Fix CMACs for drive → <A> yes → button combo → <A> yes → button combo → <A> to continue → <A> yes.
18. Switch back to using the main SD card.
***
(Conditional) if there are DSiWare games and saves that require restoration:
20. While in the 7:/ directory, hold (L) shoulder and press (RIGHT) d-pad to highlight select everything in yellow.
21. Press (Y) once to [CLIPBOARD] select everything. Press (B) button to back out.
- If a mistake is made in CLIPBOARD selection, press (SELECT) to reset.
22. Go into the [2:] SYSNAND TWLN directory, hold (L) shoulder and press (RIGHT) d-pad to highlight select everything in yellow.
23. Press (X) → <A> yes → <A> yes → button combo → <A> yes.
- This will delete everything currently in the [2:] SYSNAND TWLN.
24. With the files from twln.bin still CLIPBOARD selected, press (Y) → Copy path(s) → <A> yes → button combo → <A> yes.
- This will copy & paste (or restore) the previous DSiWare library.
***
26. (Re)-(Re)-(Re)attempt downloading a free game update in Nintendo eShop.
27. Assuming everything checks out and nothing is amiss, make a new (clean) SysNAND *.bin image.
- Joined
- Apr 14, 2019
- Messages
- 2
- Trophies
- 0
- Age
- 27
- XP
-
34
- Country
-


-
#9
i ve met the same problem: when downloading the game it appears. BUT there is a question that if i reformat the sd card my whole documents is cleaned up ,so after checking out with H2test, how do i restore my b9s documents? Is simply pasting of copy into SD card feasible ?
Attachments
-
#10
TurdPooCharger Plz can u help me ?i ve met the same problem: when downloading the game it appears. BUT there is a question that if i reformat the sd card my whole documents is cleaned up ,so after checking out with H2test, how do i restore my b9s documents? Is simply pasting of copy into SD card feasible ?
Judging by your UK flag flair and JPN firmware, was your o3DSXL originally EUR but region changed to JPN?
- Joined
- Apr 14, 2019
- Messages
- 2
- Trophies
- 0
- Age
- 27
- XP
-
34
- Country
-
-
#11
-
#12
TurdPooCharger, it’s an original japanese one .
Follow in order the troubleshooting steps found in posts 2, 4, and 8 *. Copying files off an SD card and putting them back on will not affect or remove sighax/boot9strap custom firmware.
* For post 8, if you happen to reach Option C, substitute Decrypt9WIP CTRtransfer instead with gm9 script CTRTransfer (Type D9).
Also check against this SeedDB list for games that require additional decryption. Here’s a reference post for info about importing seed.
~~~~~~
Typical 3ds software debugging checklist.
- Battery trick to reset RAM.
- Copy your SD card setup to computer.
- SD card reformat and write & read hardware testing.
- Add back your setup to the card and/or use a reference CFW files setup.
- Update the trifecta boot9strap/fastboot3ds, godmode9, and luma3ds CFW setup on both SD card and CTRNAND.
- Repair the 3DS firmware with a combination of restoring sysnand, CTRTransfer(s), and/or updating to latest version through Recovery Mode or System Settings.
- Back up game saves + extdata with Checkpoint or JKSM. Backup GBA VC and DSiWare saves in Godmode9.
- Verify the CIA files are good in GodMode9 if they’re not installed yet.
- Install CIA files. Import their seeds if required.
- Restore game saves + extdata. Restore tickets with faketik app if games are missing on HOME Menu.
- For out of region games, use Luma3DS Locale Emulation game patching.
-
#13
- Joined
- Jan 31, 2021
- Messages
- 12
- Trophies
- 0
- Age
- 34
- XP
-
52
- Country
-

-
#15
EDIT* This is my h2w test results
Test finished without errors.
You can now delete the test files *.h2w or verify them again.
Writing speed: 5.08 MByte/s
Reading speed: 16.3 MByte/s
H2testw v1.4
Attachments
Jan 31, 2021
-
#16
I tried to follow this steps when I got to the Nintendo Eshop I am still getting the same errors. Sorry I’m new at using 3DS console but my 3DS is running Luma 10.2.1. Hope someone can help me. ThanksEDIT* This is my h2w test results
Test finished without errors.
You can now delete the test files *.h2w or verify them again.
Writing speed: 5.08 MByte/s
Reading speed: 16.3 MByte/s
H2testw v1.4
About this:
Perharps same error occurs when you just turn on the WiFi connection (and no error while you turn it off)? If yes, then it could be a WiFi card hardware disconnection or failure
Jan 31, 2021
- Joined
- Mar 12, 2010
- Messages
- 19
- Trophies
- 1
- XP
-
837
- Country
-

-
#17
- Joined
- Jan 31, 2021
- Messages
- 12
- Trophies
- 0
- Age
- 34
- XP
-
52
- Country
-
-
#18
-
#19
I’ll try to turn off the wifi and see if that error will be there. Now I’m facing another issue I’m not seeing the homebrew apps and CIA installed apps after testing my SD card. I think I’m lost now hahahaha..
did you do the hwtest with a fully empty card?
- Joined
- Jan 31, 2021
- Messages
- 12
- Trophies
- 0
- Age
- 34
- XP
-
52
- Country
-
-
#20
- Status
- Not open for further replies.
Similar threads
You may also like…
- No one is chatting at the moment.
![]()
@
ZeroT21:
went there once, disneyland just ain’t for me
Today at 2:53 AM
Содержание
- Проблемы и их решения
- DSi / DS игры не работают после завершения руководства
- Что понадобится
- Инструкция
- Удаление NNID без форматирования устройства
- Что понадобится
- Инструкция
- Не работает интеграция в Health & Safety на устройстве с пониженной прошивкой при помощи Gateway
- Не работает эксплойт на основе браузера
- При загрузке запускается SafeA9LHInstaller
- Видны искажения на экране после запуска SafeA9LHInstaller
- Черный экран при загрузке SysNAND
- Черный экран при загрузке SysNAND после установки a9lh
- Ошибка во время SafeCTRTransfer
- Welcome to Nintendo Support
- What does this error code mean?
- What can I do?
- 1. Enter SSID/Security Key correctly
- 2. Port Forwarding
- Hacking 3DS An Error occured (ErrDisp) error type: Generic error code: 0xd900182f
- MewtwoFanz
- TurdPooCharger
- nemofio
- TurdPooCharger
- nemofio
- MewtwoFanz
- nemofio
- TurdPooCharger
- Nicedays4ever
- Attachments
- TurdPooCharger
- Nicedays4ever
- TurdPooCharger
Проблемы и их решения
Если ваша консоль не загружается, найдите раздел, соответствующий вашей проблеме, и следуйте его инструкциям. После решения возникшей проблемы, вернитесь к основному руководству (Этот раздел весьма обширный, воспользуйтесь Ctrl+F для поиска своей проблемы)
Если решения вашей проблемы здесь не оказалось, то загрузите содержимое всех .log файлов из корня SD-карты на Gist, а затем обращайтесь за помощью, детально описав проблему и испробованные способы решения.
Для использования magnet-ссылок в этом руководстве необходим torrent-клиент, например Deluge
DSi / DS игры не работают после завершения руководства
Что понадобится
- TWL_FIRM .cia , соответствующие вашему устройству
- — New_3DS TWL_FIRM — v9936.cia — Old_3DS TWL_FIRM — v8817.cia
— TWL Version Data — v0.cia — DS Internet — v2048.cia — DS Download Play — v1024.cia — Nintendo DS Cart Whitelist — v11264.cia
Инструкция
Часть I — Подготовительные работы
- Создайте папку cias в корне SD-карты, если таковой нет
- Скопируйте TWL Version Data — v0.cia в папку /cias/ на SD-карте
- Скопируйте DS Download Play — v1024.cia в папку /cias/ на SD-карте
- Скопируйте DS Internet — v2048.cia в папку /cias/ на SD-карте
- Скопируйте Nintendo DS Cart Whitelist — v11264.cia в папку /cias/ на SD-карте
- Скопируйте New_3DS TWL_FIRM — v9936.cia или Old_3DS TWL_FIRM — v8817.cia в папку /cias/ на SD-карте
Часть II — Установка
- Запустите FBI
- Перейдите в SD -> cias
- Выберите “ ”
- Выберите “Install and delete all CIAs”
- Нажмите (Home) для выхода из FBI
Удаление NNID без форматирования устройства
Что понадобится
Инструкция
- Скопируйте GodMode9.bin из .zip-архива GodMode9 в директорию /luma/payloads/ на SD-карте и переименуйте GodMode9.bin в up_GodMode9.bin
- Перезагрузите приставку, удерживая (Вверх), чтобы запустить GodMode9
- Перейдите в SYSNAND CTRNAND -> data -> (32-значный ID) -> sysdata -> 00010038
- Зажмите (R), затем нажмите (X) на файле 00000000 , чтобы переименовать его
- Нажмите (Вверх), чтобы переименовать файл в 10000000
- Нажмите (A), чтобы сохранить изменения
- Нажмите (A), чтобы разрешить запись в SysNAND и введите указанную комбинацию кнопок
- Вернитесь в главное меню
- Нажмите (Start) для перезагрузки
Не работает интеграция в Health & Safety на устройстве с пониженной прошивкой при помощи Gateway
Это вызвано крайне некорректной процедурой понижения прошивки Gateway, которая дублирует каждое приложение в системе. Одно из них не используется, но это сбивает с толку систему интеграции в H&S, из-за чего она интегрирует FBI в неиспользуемый дубликат.
- Включите вашу консоль, удерживая (Start), чтобы запустить меню Luma3DS chainloader
- Запустите GodMode9, нажав кнопку (A)
- Перейдите в SYSNAND CTRNAND -> title -> 00040010
- Перейдите в папку, соответствующую вашей приставке и региону:
- Old 3DS EUR: 00022300 -> content
- Old 3DS JPN: 00020300 -> content
- Old 3DS USA: 00021300 -> content
- New 3DS EUR: 20022300 -> content
- New 3DS JPN: 20020300 -> content
- New 3DS USA: 20021300 -> content
- Заметьте, что есть два вида app и tmp файлов, одни имеют расширение, написанное прописными буквами ( .TMD и .APP ), а другие строчными ( .tmd и .app )
- Удерживая (R), нажмите (Y), чтобы создать новую папку
- Нажмите (А), чтобы подтвердить название новой папки — newdir (название папки не играет роли)
- Нажмите (A), чтобы разрешить запись в SysNAND (lvl1) и введите указанную комбинацию кнопок
- Нажмите (L) на каждом файле, расширение которого написано прописными буквами ( .TMD и .APP ), чтобы отметить его
- Нажмите (Y), чтобы скопировать эти файлы
- Перейдите в папку newdir
- Нажмите (Y), чтобы вставить скопированные ранее файлы
- Выберите “Move path(s)”
- Теперь файлы с расширением из прописных букв перемещены в папку newdir
- Нажмите (Start) для перезагрузки
- Вернитесь к установке A9LH и попробуйте интегрировать FBI еще раз
- Если это не помогло, верните файлы с расширением .TMD и .APP обратно в папку content , а файлы с расширением .tmd и .app переместите в папку newdir , затем попытайтесь интегрировать FBI еще раз
Не работает эксплойт на основе браузера
Эксплойты, базирующиеся на браузере (например, browserhax или 2xrsa), нестабильны и часто не срабатывают, но в некоторых случаях это можно исправить, следуя рекомендациям ниже
- Откройте браузер, затем настройки браузера (Settings)
- Прокрутите до конца вниз и выберите “Удалить сохр. данные” (Initialize Savedata/Clear All Save Data)
- Попробуйте запустить эксплойт еще раз
При загрузке запускается SafeA9LHInstaller
Вы скопировали неверный файл arm9loaderhax.bin на SD-карту (следовало скопировать только папку 3ds и файл SafeA9LHInstaller.dat из архива SafeA9LHInstaller)
- Используйте верный файл arm9loaderhax.bin
- Скопируйте файл arm9loaderhax.bin из .zip-архива Luma3DS в корень SD-карты
- Выключите приставку, зажмите (Select) и включите
Видны искажения на экране после запуска SafeA9LHInstaller
Такое иногда происходит, но причины этого неизвестны. Кнопки продолжат работать, однако изображение на экране будет искажено
- Продолжайте следовать инструкции
- Нажмите (Select) и arm9loaderhax будет установлен
- Подождите несколько секунд
- Выключите консоль, нажав любую кнопку
Черный экран при загрузке SysNAND
- Попробуйте загрузиться без SD-карты, а затем верните ее в консоль
- Выключите консоль
- Извлеките SD-карту из консоли
- Включите консоль
- Когда появится меню HOME, вставьте SD-карту обратно в консоль
- Если это сработало, вам следует очистить данные меню HOME, удалив соответствующую вашему региону папку, находящуюся в /Nintendo 3DS/(32-значный ID)/(32-значный ID)/extdata/00000000/
- EUR регион: Удалите 00000098
- JPN регион: Удалите 00000082
- USA регион: Удалите 0000008f
- CHN регион: Удалите 000000A1
- KOR регион: Удалите 000000A9
- TWN регион: Удалите 000000B1
- Попробуйте включить устройство без каких-либо картриджей (включая флеш-картриджи)
- Если у вас есть хардмод и резервная копия NAND, прошейте бэкап обратно в SysNAND
- Попробуйте загрузиться в режим восстановления и обновить систему
Скорее всего это не будет работать на Old 3DS с прошивкой 2.1.0
Вы получите БРИК на New 3DS c прошивкой 2.1.0- Выключите консоль
- Зажмите (L)+(R)+(A)+(Вверх)
- Включите консоль
- Если вы вошли в режим восстановления, обновите консоль при условии, что у вас есть возможность запустить Homebrew Launcher на последней версии прошивки, и понизить версию прошивки, и попробуйте понизить прошивку ещё раз.
- Ваша консоль, скорее всего, превратилась в брик. Вы можете обратиться за поддержкой на канал #3dshacks Rizon IRC (англ.) или Nintendo Homebrew в Discord (англ.)
Черный экран при загрузке SysNAND после установки a9lh
- Убедитесь, что у вас установлен рабочий загрузчик
- Проверьте, есть ли в корне SD-карты файл arm9loaderhax.bin .
- Попробуйте сбросить настройки Luma3DS
- Удалите файл /luma/config.bin с SD-карты
- Выберите нужные настройки при запуске
- Попробуйте запустить GodMode9
- Для устройства с Luma3DS, зажмите (Start) при включении
- Попробуйте очистить данные меню HOME
- Чтобы очистить данные меню HOME перейдите в папку /Nintendo 3DS/(32 Character ID)/(32 Character ID)/extdata/00000000/ на SD-карте и удалите папку, соответствующую вашему региону
- EUR регион: Удалите 00000098
- JPN регион: Удалите 00000082
- USA регион: Удалите 0000008f
- CHN регион: Удалите 000000A1
- KOR регион: Удалите 000000A9
- TWN регион: Удалите 000000B1
- Чтобы очистить данные меню HOME перейдите в папку /Nintendo 3DS/(32 Character ID)/(32 Character ID)/extdata/00000000/ на SD-карте и удалите папку, соответствующую вашему региону
- Попробуйте включить устройство без каких-либо картриджей (включая флеш-картриджи)
- Если вы понижали прошивку через Gateway, то убедитесь, что у вас установлена самая последняя версия Luma3DS (не ниже 6.2.3)
- Если версия вашего NAND между 3.0.0 и 4.5.0, проделайте следующие действия:
- Убедитесь, что используете самую свежую версию Luma 3DS (6.6, или выше)
- Скачайте этот файл и переименуйте его в firmware.bin
- Скачайте этот файл
- Скопируйте firmware.bin и cetk в папку /luma/ на SD-карте
- После обновления прошивки удалите оба этих файла
- Попробуйте выполнить 9.2.0 CTRTransfer
- Вы можете обратиться за поддержкой на канал #3dshacks Rizon IRC (англ.) или Nintendo Homebrew в Discord (англ.).
Ошибка во время SafeCTRTransfer
Если во время процесса SafeCTRTransfer возникнет ошибка, вам будет предложено запустить стороннее приложение (payload) для того, чтобы восстановить вашу консоль.
Источник
Welcome to Nintendo Support
What does this error code mean?
This error code indicates one of the following: that your device may not be connected to internet properly, that your network may be currently unstable, or that there is a server issue.
What can I do?
If you are using a public network, this could be the cause of your issue and in some cases it might be difficult to fix it without contacting the network administrator. If you are using a secure/personal network, please try the following before contacting Customer Support.
If you’re unsure about following the instructions, please ask a friend or family member to help you.
1. Enter SSID/Security Key correctly
- First, check if other devices (cell phone, tablet, PC, etc.) using the same access point have a stable internet connection, and ensure there are no obstacles between the access point and your Nintendo 3DS family system.
- Check if the SSID (name of your network) and Security Key (main Wi-Fi password) are entered into your Nintendo 3DS family system correctly. The default SSID and the Security Key (which could go under a different name, such as Network Key or Password) may be found on a sticker on the side or bottom or your router.
How to:

From the HOME Menu, go to System Settings > Internet Settings > Connection Settings > New Connection > Manual Setup > Search for Access Point. Then select the name of your wireless access point, input the security key, then tap OK.
2. Port Forwarding
a) First, please make sure that an IP address is manually assigned to your Nintendo 3DS family system before setting up port forwarding.
b) Log in to your router’s setup page.
c) Find “Port Forwarding”. It depends on the router, but you’ll probably find it under the categories such as Security, Application, Firewall or Gaming, etc.
d) Enter required information:
[Ports] 442 — 445 and 28000 — 29500
[UDP] Allow traffic to all addresses. This is necessary for the peer-to-peer connection during the game (Ports 1 — 65000)
e) Enter the IP address of your Nintendo 3DS family system, and save the changes
If the solutions suggested above don’t solve your issue, please Contact Us with the following information:
- Name of your internet service provider.
- Model and brand of your router.
- Serial number of your Nintendo 3DS family system: depending on the system that you own, this may be on the back of the system, underneath the battery, on a sticker near the battery, or underneath one of the cover plates.
Источник
Hacking 3DS An Error occured (ErrDisp) error type: Generic error code: 0xd900182f
MewtwoFanz
Active Member
Hi, I have a n3DS running 11.9 CFW, but there’s a problem I’ve been having for awhile. whenever I try to update a game, download a game off the eshop, or a 3ds theme off the theme shop , I get an error saying this:
this only happens when I try to download and install anything official, but it doesn’t happen when when I install something unofficial or hacked, like a .cia file.
Can anyone help me?
TurdPooCharger
Hi, I have a n3DS running 11.9 CFW, but there’s a problem I’ve been having for awhile. whenever I try to update a game, download a game off the eshop, or a 3ds theme off the theme shop , I get an error saying this:
this only happens when I try to download and install anything official, but it doesn’t happen when when I install something unofficial or hacked, like a .cia file.
Can anyone help me?

nemofio
Member
TurdPooCharger
- Create a CIA version of your Sushi Striker (EUR) cart game.
- GodMode9 Usage — Dumping a Game Cartridge
- Install this CIA onto HOME Menu using FBI.
- If the CIA version also displays an error, try using Luma3DS Locale Emulation.
- With SD card inserted, turn on the system and hold (SELECT) to access Luma3DS v9.1 configuration .
- (x) Enable game patching
- sdmc:/luma/titles/00040000001C1D00/ locale.txt
- For the written text in locale.txt ,
- With SD card inserted, turn on the system and hold (SELECT) to access Luma3DS v9.1 configuration .
nemofio
Member
MewtwoFanz
Active Member
I followed the instructions you gave me, but i’m still getting the same error. any suggestions?
nemofio
Member
TurdPooCharger
I followed the instructions you gave me, but i’m still getting the same error. any suggestions?
Some of these steps may not apply to you if you do not have certain types of games. Back up your game progress data for extra piece of mind.
Using your main SD card that has all your titles,
- Back up the saves + extdata for all 3DS games using Checkpoint or JKSM.
- Back up the saves for all GBA VC games:
- GodMode9 Usage — Backup GBA VC Saves
- Back up the DSiWare games and saves:
- GodMode9 → [S:] SYSNAND VIRTUAL → twln.bin → Copy to 0:/gm9/out.
On the separate, spare SD card:
Option A
If you have a backed up SysNAND *.bin image that should have been created when you first installed custom firmware, haven’t performed a Format System Memory or System Transfer between the time it was hacked and now, and it has a 3DS firmware version older than 11.9.0-42:
Option B
If you do not have a previously created SysNAND *.bin, that image does not meet the criteria in Option A , or the test download in step 10A did not work,
Option C
If the test download did not work in step 10B,
Still using the spare SD card,
- (LEFT) / (RIGHT) d-pad = scroll the ^ symbol side-to-side
- (UP) / (DOWN) d-pad = change the letter
- (X) = delete a character or space
- (Y) = add a space
- (B) = cancel the edits
- (A) = save the edits
13. Press (Y) once on import.db to [CLIPBOARD] select it.
- If a mistake is made in CLIPBOARD selection, press (SELECT) to reset.
14. Back out with (B) button. Go into the [1:] SYSNAND CTRNAND/dbs directory.
15. Press (Y) → Copy path(s) → yes → button combo → Overwrite file(s) → yes.
16. Back out with (B) button.
17. While hovering on (highlighting white) [1:] SYSNAND CTRNAND, hold (R)-shoulder and press (A) → Fix CMACs for drive → yes → button combo → yes → button combo → to continue → yes.
18. Switch back to using the main SD card.
(Conditional) if there are DSiWare games and saves that require restoration:
19. GodMode9 → 0:/gm9/out/ twln.bin → Mount as FAT image.
20. While in the 7:/ directory, hold (L) shoulder and press (RIGHT) d-pad to highlight select everything in yellow .
21. Press (Y) once to [CLIPBOARD] select everything. Press (B) button to back out.
- If a mistake is made in CLIPBOARD selection, press (SELECT) to reset.
22. Go into the [2:] SYSNAND TWLN directory, hold (L) shoulder and press (RIGHT) d-pad to highlight select everything in yellow .
Nicedays4ever
New Member
TurdPooCharger Plz can u help me ?
i ve met the same problem: when downloading the game it appears. BUT there is a question that if i reformat the sd card my whole documents is cleaned up ,so after checking out with H2test, how do i restore my b9s documents? Is simply pasting of copy into SD card feasible ?
Attachments

TurdPooCharger
TurdPooCharger Plz can u help me ?
i ve met the same problem: when downloading the game it appears. BUT there is a question that if i reformat the sd card my whole documents is cleaned up ,so after checking out with H2test, how do i restore my b9s documents? Is simply pasting of copy into SD card feasible ?
Nicedays4ever
New Member
TurdPooCharger
Follow in order the troubleshooting steps found in posts 2, 4, and 8 *. Copying files off an SD card and putting them back on will not affect or remove sighax/boot9strap custom firmware.
* For post 8, if you happen to reach Option C , substitute Decrypt9WIP CTRtransfer instead with gm9 script CTRTransfer (Type D9).
Also check against this SeedDB list for games that require additional decryption. Here’s a reference post for info about importing seed.
Typical 3ds software debugging checklist.
- Battery trick to reset RAM.
- Copy your SD card setup to computer.
- SD card reformat and write & read hardware testing.
- Add back your setup to the card and/or use a reference CFW files setup.
- Update the trifecta boot9strap/fastboot3ds, godmode9, and luma3ds CFW setup on both SD card and CTRNAND.
- Repair the 3DS firmware with a combination of restoring sysnand, CTRTransfer(s), and/or updating to latest version through Recovery Mode or System Settings.
- Back up game saves + extdata with Checkpoint or JKSM. Backup GBA VC and DSiWare saves in Godmode9.
- Verify the CIA files are good in GodMode9 if they’re not installed yet.
- Install CIA files. Import their seeds if required.
- Restore game saves + extdata. Restore tickets with faketik app if games are missing on HOME Menu.
- For out of region games, use Luma3DS Locale Emulation game patching.
Источник
Press J to jump to the feed. Press question mark to learn the rest of the keyboard shortcuts
Log In
Found the internet!
Feeds
HomePopular
Topics
ValheimGenshin ImpactMinecraftPokimaneHalo InfiniteCall of Duty: WarzonePath of ExileHollow Knight: SilksongEscape from TarkovWatch Dogs: Legion
NFLNBAMegan AndersonAtlanta HawksLos Angeles LakersBoston CelticsArsenal F.C.Philadelphia 76ersPremier LeagueUFC
GameStopModernaPfizerJohnson & JohnsonAstraZenecaWalgreensBest BuyNovavaxSpaceXTesla
CardanoDogecoinAlgorandBitcoinLitecoinBasic Attention TokenBitcoin Cash
The Real Housewives of AtlantaThe BachelorSister Wives90 Day FianceWife SwapThe Amazing Race AustraliaMarried at First SightThe Real Housewives of DallasMy 600-lb LifeLast Week Tonight with John Oliver
Kim KardashianDoja CatIggy AzaleaAnya Taylor-JoyJamie Lee CurtisNatalie PortmanHenry CavillMillie Bobby BrownTom HiddlestonKeanu Reeves
Animals and PetsAnimeArtCars and Motor VehiclesCrafts and DIYCulture, Race, and EthnicityEthics and PhilosophyFashionFood and DrinkHistoryHobbiesLawLearning and EducationMilitaryMoviesMusicPlacePodcasts and StreamersPoliticsProgrammingReading, Writing, and LiteratureReligion and SpiritualityScienceTabletop GamesTechnologyTravel
Create an account to follow your favorite communities and start taking part in conversations.
r/3dspiracy
Posts
r/3dspiracy
2
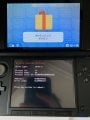
Posted by9 months ago
![]()
HELP

2 comments
75% Upvoted
![]()
level 1
· 9 mo. ago
do you have the luma 3gx loader edition?
1
level 1
· 9 mo. ago
Put it in the SD card the original luma archive (boot.firm and the boot.3dsx
1
About Community

r/3dspiracy
A safe haven where piracy discussion is allowed.
Created Apr 29, 2016
70.9k
Members
127
Online
Top posts may 10th 2022Top posts of may, 2022Top posts 2022
User AgreementPrivacy policy
Content policyModerator Code of Conduct
Reddit Inc © 2023. All rights reserved

a guest
Feb 3rd, 2018
140
0
Never
Not a member of Pastebin yet?
Sign Up,
it unlocks many cool features!
-
An error occurred (ErrDisp)
-
Error Type: generic
-
Process ID: 33
-
Process Name: boss
-
Process Title ID: 0x0004013000003402
-
Address: 0x0010265e
-
Error Code: 0xd900458b
-
Press any button to reboot
Сразу отмечу, что автор статьи не несет ответственности за работоспособность Ваших девайсов! Помните: все, что Вы делаете — Вы делаете на свой страх и риск!
Мне удалось заполучить 3DS в 2022 году, ко мне в руки она попала уже взломанная, но мне было интересно как же можно обновить прошивку и как это работает. В этот момент я начал смотреть видео гайды на ютубе и везде была одна и та же проблема, за основу брался некий архив, в котором уже было что-то установлено. Автор предлагает скачать архив, закинуть все содержимое в корень флеш карты и забыть об этом. Меня этот подход не очень устроил, поэтому я решил попытался разобраться что же находится в этом загадочном архиве, а за одно расписать по пунктам как же делается прошивка.
Весь процесс делится на два простых шага: подмена bootloader’а, чтобы он позволял запускать нам свои прошивки и установка прошивки на флешку с окружением для дальнейшей работы.
Замена bootloader’a
1) Обновляем прошивку консоли до последней версии (на данный момент это 11.15.0)
2) Подготавливаем флеш карту
Нам нужно отформатировать флеш карту в формат fat32.
Инструкция для Linux
Открываем устройство через fdisk
1) «o» — выбираем DOS partition table
2) «n» — создаем партицию на весь размер флеш карты
3) «t» — запускаем смену типа партиции и выбираем ‘c’ — W95 FAT32 (LBA)

Инструкция для Windows
Скачиваем rufus https://rufus.ie
Выбираем флеш карту в выпадающем списке
Выставляем следующие настройки:
1) Метод загрузки — Незагрузочный образ
2) Метка — оставляем пустым
3) Файловая система — FAT32
4) Убираем галочку — Создать расширенную метку и значок устройства

3) Как только у нас есть готовая флешка, устанавливаем ее в консоль и запускаем ее. Приставка создаст на флеш карте папки, которые нам потребуются в дальнейшем. После этого консоль можно выключать и подключать флеш карту обратно к ПК.
4) На флешке в корне должна появиться папка Nintendo 3DS, а внутри нее будет папка содержащая в названии 32 шестнадцатеричных цифры — это идентификатор консоли, нужно его сохранить. Для удобства назовем его ID0.
5) Так же нам нужно получить свой friend code. Для этого нужно будет создать аккаунт в консоли, если он у вас отсутствовал, либо же просто скопировать его, если аккаунт уже есть.
6) Заходим на сайт https://seedminer.hacks.guide/, там нужно будет указать свой friend code и ID0. После этого на консоли к нам в друзья добавится бот, нужно принять заявку. После добавления бота в друзья, смотрим за прогрессом на сайте и ожидаем завершения процесса. Как только все завершится, появится возможность скачать файл movable.sed, скачиваем его.
7) После получения файла заходим на другой сайт https://3ds.nhnarwhal.com/3dstools/unsafemode.php и указываем ранее полученный movable.sed файл. Нажимаем кнопку Build and Download, скачиваем полученный архив unSAFE_MODE.zip. Архив содержит в себе два файла: F00D43D5.bin и usm.bin
 Файл usm.bin помещаем в корень флеш карты.
9) В корне флешки, внутри папки Nintendo 3DS находится папка с именем ID0, который мы до этого скопировали. А внутри папки ID0, находится еще одна папка содержащая в названии 32 шестнадцатеричных цифры (пусть будет ID1), вот внутри нее нам нужно создать еще одну директорию Nintendo DSiWare и поместить туда F00D435.bin
Т.е. итоговый путь должен выглядеть как-то так:
Nintendo 3DS/ID0/ID1/Nintendo DSiWare/F00D435.bin
10) Скачиваем zip архив прошивки luma https://github.com/LumaTeam/Luma3DS/releases из последнего релиза. Внутри архива находится два файла boot.firm и boot.3dsx, оба файла помещаем в корень флешки — это и есть новая прошивка, которая будет запускаться вместо стандартной нинтендовской.
11) Скачиваем boot9strap https://github.com/SciresM/boot9strap/releases/ релизную версию. В корне флеш карты создаем папку boot9strap и копируем в нее из архива файлы boot9strap.firm и boot9strap.firm.sha
12) Скачиваем SafeB9SInstaller https://github.com/d0k3/SafeB9SInstaller/releases/ последнюю версию. Из архива копируем файл SafeB9SInstaller.bin в корень флеш карты.
13) Подготовка завершена, вставляем флеш карту назад в консоль и запускаем ее.
В следующих шагах произойдет подмена bootloader’а консоли на новый.
14) Заходим в “Системные настройки” (System Settings) -> “Управление данными” (Data Management) -> “DSiWare”
Выбираем на нижнем экране вкладку сверху «SD Card«
Выбираем «Inject Haxx» и приставка должна перезагрузиться.
15) Теперь зажимаем одновременно 4 клавиши: L + R + крестовину вверх + A, а затем, не отпуская указанные кнопки, включите приставку. Когда подсветка экранов засветится, отпустите кнопки. Приставка загрузиться в режим восстановления.
16) В меню восстановления:
-
Нажмите “OK”, чтобы начать поиск точки доступа
-
Согласитесь с условиями пользования и нажмите ОК
-
Поиск завершится с ошибкой 003-109. Так и задумано, нажмите ОК
-
На запрос “Выполнить Интернет-настройки” (Would you like to configure Internet settings?), нажмите “Выполнить”
-
В появившемся меню нажмите несколько раз “Далее”, затем выберите Связь 1 (Connection 1) -> Изменить настройки (Change Settings) -> перейдите на следующую страницу (стрелка в правой части экрана) -> Настройки прокси (Proxy Settings) -> Подробнее (Detailed Setup)
-
Когда верхний экран окрасится в серый и на нём появится сообщение B9S install SUCCESS, нажмите любую кнопку
17) После рестарта консоли вы должны попасть в меню настройки Luma3DS. Можно просто нажать Start и ничего не изменять. Вы в любой момент можете зайти в него, при выключенной консоли зажать и держать клавишу Select и после этого клавишу Power, дождаться включения консоли и вы должны увидеть это же меню.

Если все прошло успешно, то поздравляю, вы обладатель взломанной консоли!
Так же хочу отметить, если вы сторонник чистой флеш карты как и я, из-за чего я, собственно, и сел разбираться как работает установка прошивки, то на этом этапе вы спокойно можете удалять с флеш карты все, кроме загрузчика Luma, который мы установили на шаге 10.
Настройка окружения
В данном блоке мы выполним установку приложений, которые помогут нам пользоваться нашей консолью на полную. Краткое описание каждого приложения:
-
FBI — установщик пакетов *.cis, с помощью которого и будут производиться все установки
-
Homebrew Launcher Loader — приложение, которое позволяет запускать *.3dsx файлы без установки в систему
-
Checkpoint — приложение, позволяющее делать бэкапы своих сохранений
-
GodMode9 — утилита, которую можно запустить при старте консоли. Вообще обладает мощным функционалом, но для нас самое главное, что она позволяет конвертировать *.3dsx в *.cis файлы, чтобы их можно было устанавливать полноценно в систему
-
ndsForwarder — позволяет создавать иконки для DS приложений и запускать их
-
Anemone3DS — менеджер тем
FBI
По сути — это главное приложение, которое будет позволять нам, устанавливать другие приложения. Поэтому его мы и устанавливаем первым делом.
Для начала скачиваем архив из последнего релиза https://github.com/TheRealZora/FBI-Reloaded/releases нам понадобятся оба файла FBI-Reloaded.3dsx и FBI-Reloaded.cia, светлую или же темную тему — это уже на ваш выбор.
Дело в том, что FBI мы установим при помощи FBI. В новой прошивке можно хитрым образом запустить Homebrew Launcher, который позволит нам, запустить FBI-Reloaded.3dsx приложение, при помощи которого мы уже и установим FBI-Reloaded.cia.
В корне флеш карты создаем две папки 3ds и cias. FBI-Reloaded.3dsx помещаем в 3ds, а FBI-Reloaded.cia в cias.
Теперь нам нужно запустить Homebrew Launcher, делается это следующим способом. Запускаем в консоли приложение Download Play, после этого зажимаем комбинацию клавиш L + вниз на крестовине + Select.
На нижнем экране вы должны увидеть черный экран с меню.
Выбираем пункт Miscellaneous options -> Switch the hb. title to the current app.
После этого выходим из меню несколько раз нажав B, а затем закрываем приложение.
То что мы выполнили временно заменяет приложение Download Play на Homebrew Launcher. После закрытия приложения повторно запускам его и должны увидеть заветный Homebrew Launcher.
На нижнем экране в списке приложений мы должны увидеть FBI, запускаем его.
После запуска FBI на нижнем экране заходим в верхний пункт SD, далее выбираем папку cias, внутри нее выбираем FBI-Reloaded.csi, в контекстном меню выбираем либо Install CIA, либо же Install and delete CIA если не планируете сохранять эти файлы после установки.
Если все прошло успешно, то на главном экране мы должны увидеть новое приложение.
Так же нам больше не требуются файлы, которые мы изначально копировали в 3ds и cias, их можно удалять.
Так же можно не переживать по поводу приложения Download Play, после перезагрузки консоли Homebrew Launcher больше не будет запускаться вместо него.
Homebrew Launcher
В этот раз все гораздо проще. Скачиваем Homebrew_Launcher.cia https://github.com/PabloMK7/homebrew_launcher_dummy/releases, помещаем в /cias, запускаем FBI и устанавливаем с удалением или же оставляем cia файл.
Checkpoint
GodMode9
Как и было указано выше — это утилита с мощным функционалом, но мы не будем рассматривать его весь. Дело в том, что в интернете очень часто встречаются приложения в формате *.3dsx, которые мы не можем установить к себе в систему. Через GodMode9 мы будем конвертировать их в *.cia, а потом обычным способом будем устанавливать их через интерфейс приложения FBI.
Скачиваем zip архив https://github.com/d0k3/GodMode9/releases из последнего релиза. В этом архиве нам интересен файл GodMode9.firm и папка gm9. Сам файл GodMode9.firm — это приложение, которое и будет запускаться, а в gm9 лежат скрипты для этого приложения, которые могут быть исполнены в интерфейсе.
Папку gm9 помещаем в корень флеш карты. А файл GodMode9.firm должен лежать по пути /luma/payloads/GodMode9.firmЧтобы проверить как работает эта утилита, поместим какой-нибудь *.3dsx файл в /cias, например test.3dsx.
Чтобы попасть в GodMode9 нам нужно выключить консоль, а затем зажать и удерживать клавишу Start и включить консоль, дождаться загрузки и мы должны увидеть интерфейс приложения.

Выбираем первый пункт SDCARD, далее заходим в папку cias, выбираем test.3dsx, в контекстном меню выбираем пункт NCSD image options -> Build CIA from file, ждем завершения процесса и нажимаем клавишу A для подтверждения. Готовый *.cia файл будет находиться по пути /gm9/out/test.cia
Теперь мы можем перезагрузить консоль нажав Start.
Дальше открываем FBI, переходим в директорию /gm9/out и устанавливаем приложение.
Больше нам test.3dsx и test.cia не нужны, можем удалять их.
ndsForwarder
Для запуска DS приложений можно установить эмулятор и через его контекстное меню можно заходить в папку с ромами, запускать нужный, но это неудобно. Лаконичнее выглядит вариант, когда для каждой игры на главном экране присутствует иконка, через которую мы и можем запускать приложение. ndsForwarder по сути не производит установку приложения как это делает FBI с *.cia файлами, а просто создается иконка для приложения, которая автоматически запускает эмулятор с указанием *.nds файла.
Скачиваем ndsForwarder.3dsx https://github.com/MechanicalDragon0687/ndsForwarder/releases и помещаем в папку 3ds.
Скачиваем TWLFix-CFW.3dsx https://github.com/MechanicalDragon0687/TWLFix-CFW/releases и помещаем в папку 3ds.
Скачиваем 7z архив https://github.com/RocketRobz/NTR_Forwarder/releases, внутри архива находится папка _nds, ее помещаем в корень флеш карты.
Теперь нам нужно поместить какое-нибудь *.nds приложение на флеш карту в любое удобное место. Например создадим директорию DS Apps в корне флеш карты и поместим туда файл test.nds
Загружаем консоль, открываем Homebrew Launcher, находим в списке NDS Forwarder Generator, запускаем его. Переходим в директорию DS Apps, соглашаемся на установку приложения и можем выходить на главный экран, там должна появиться иконка только что созданного ярлыка.
Если вы хотите, чтобы изображение при запуске DS приложения не растягивалось на весь экран, то вы можете зажать клавишу Start перед запуском и тогда у вас по бокам появятся рамки, но зато картинка будет в оригинальном разрешении.
Замечу еще раз, в данном случае мы не можем удалять файлы из папки DS Apps т.к. сами эти приложения и запускаются.
Для того, чтобы удалить ярлык с главного экрана, в настройках нужно заходить в пункт Data Management -> DSiWare
Anemone3DS
И завершим наш список приложением для установки кастомных тем для главного меню.
Скачиваем Anemone3DS.cia https://github.com/astronautlevel2/Anemone3DS/releases, помещаем в cias и устанавливаем через FBI.
В корне флешки создаем две папки themes и splashes.
Найти готовые темы можно тут https://themeplaza.art/themes. Скаченные zip архивы кладем в папку themes.
Единственный подвох, с которым вы можете столкнуться — это при первом запуске в приложении отображается ошибка «Theme extdata does not exist! Set a default theme from the home menu.» Для решения этой проблемы выходим в главное меню, в левом верхнем углу нажимаем на кнопку «HOME Menu Settings» и изменяем тему на любую из представленных, например красную. После этого снова заходим в приложение и устанавливаем загруженную.
Тема применяется только после перезагрузки консоли.
Использованные материалы:
-
https://3ds.customfw.xyz/
Детальнее весь процесс описан на сайте https://3ds.hacks.guide, спасибо@aikза нее