New issue
Have a question about this project? Sign up for a free GitHub account to open an issue and contact its maintainers and the community.
By clicking “Sign up for GitHub”, you agree to our terms of service and
privacy statement. We’ll occasionally send you account related emails.
Already on GitHub?
Sign in
to your account
Closed
gian-te opened this issue
Sep 15, 2016
· 14 comments
Comments
![]()
Hi I’ve encountered an error in the Do() method in CommandExecutorBase clas
saying:
A packaging error prevented this application from installing.
I am attempting to push/install a .xap file to the windows phone using your driver similar to what Appium does when installing apk files from my local drive to the attached device. This xap file is the app that i will run tests on from my team’s automation framework. I am encountering the said error in this line of code in the Driver.

I am able to break point on your code by instantiating a remoteWebDriver with C# using this line of code on our team’s framework:
AutoDriver = new RemoteWebDriver(new Uri(mobileDevice.MobileUrl), capabilities);
where mobile url is «http://127.0.0.1:9999»,where AutoDriver inherits from IWebDriver and capabilities is:
capabilities = new DesiredCapabilities();
capabilities.SetCapability(«locale», «en-US»);
capabilities.SetCapability(«app», mobileDevice.Path);
![]()
I configured the build on the Winium solution on Any CPU and it now installed and launched by doing the ff steps:
//if (PackageType.Framework != manifestInfo.PackageType && WinTrust.VerifyEmbeddedSignature(packageFile))
//{
// throw new Exception(
// string.Format(
// CultureInfo.CurrentUICulture,
// Resources.InvalidPackaging,
// new object[0]));
//}
and set GlobalOptions.LaunchAfterInstall = true. when assigning a value to app
but I can’t execute my selenium commands yet because it fails on SendPing(Session session). Even after commenting out the ping functionality it says:

I will appreciate any help I can get with this. thank you
![]()
Are you using device or emulator? Could you please provide full logs from the driver. You can copy them from console window by right clicking window title and selecting Mark option, then scrolling to the start and selecting all the way down. I believe pressing enter key after selection should copy it to buffer, or you can again right-click the title and select Copy option.
![]()
If I understood the error correctly, I think «outerDriver» or listener in port 9999 was able to receive the AutoDriver.Manage().Window.Size command from our framework but when sending the command to the innerServer it failed. I think it is possible that there is a missing desired capability. In android we have desiredcapabilities called «androidDeviceSocket» , can you tell me thr equivalent of this desiredcapability in winium.storeapps.codedui driver? I have a feeling that this is what made it fail
Also, in this line:
var commandToExecute = new Command(commandName, acceptedRequest.MessageBody);
commandToExecute.SessionId is always null
![]()
Part of the reason we tried to prototype CodedUI is that it does not require adding any server into the app or adding any Internet Server capability directly to your app.
If you are using device, then you can try rebooting the device, some time our CodedUI test server does not close correctly which might break following sessions.
Note that it is more proof of concept than ready tool, it is not as stable as Winium.StoreApps for example.
![]()

I will try to reboot the device
![]()
For some reason I am still encountering the No connection could be made because the target machine actively refused it exception. Are there any settings that I need to configure in the windows phone 8.1 device for this to work? I am debugging your solution and it seems that the commands from my solution are being received in your solution and interpreted by JWP.. but it seems the problem is executing the command in the device..
![]()
If you a trying to run tests on device, you should follow steps described in #1 (comment) to allow port forwarding of a port used by CodedUI server for ip over usb. Then set deviceIpAddress to localhost.
![]()
I tried adding the registry keys:

but I’m still encountering the error

Any help with this ConnectFailure status? I think it’s probably the codedui test project not being deployed and is not running in parallel to the AUT in the device or it is not listening for commands.. Can you tell me how you debugged the codedui test project on your device?
![]()
In your tests set debugCodedUI capability to true, this should skip CodedUI deployment. Run driver as usualy. But before running tests, do following steps:
Winium.StoreApps.CodedUITestProject is the test project that contains test class CodedUiTestLoop. Open CodedUiTestLoop.cs and add break point at Automator.Instance.Start(); so that you can step in and see if server started and is running. You can also add break points in PingExecuter or SocketServer to see if it gets ping command or any incoming request at all.
Build this project and open Test Explorer (Test → Windows → Test Explorer). You should see a test named CodedUiTestMethod1. Run this test in debug mode, step into Start method to see if it working and continue to let the server run its way.
Now you can run tests and you should be able to hit breakpoints if server started and is able to receive incoming requests
![]()
Sometimes it works when I change the deviceIpAddress capability from localhost to the IP address of the device. I also modified the timeout from 2500 to 25000. It might have been an ipoverusb issue or something.. not sure. Changing the deviceIpAddress every once in a while might be a workaround for this situation.
![]()
I’ll investigate and look at the CodedUITestProject tomorrow. Thank you.
![]()
One more thing you might try before debugging. If you are running on Windows 10 host system, try enabling Developer Mode on the host. If you are deploying to Windows 10 Mobile device try enabling Developer Mode on the device if you haven’t done so (but I think you have done it already as you can side load the app on the device).
If you have setup registry keys as described, you can use 127.0.0.1 as deviceIpAddress, it should work. As you mentioned, timeout might be to low if you have some problems with ip over usb, we did not encounter any, so we used standard timeout as in other Winium drivers.
![]()
Yes, it looks like Coded UI Test server was able to start and the driver was able to connect to Coded UU Test Server.
getWindowSize is not implemented in this version of the driver. You can see what commands are implemented by looking at filenames in Winium.StoreApps.CodedUITestProject/CommandExecutors and Winium.StoreApps.Driver/CommandExecutors
Almost all of the commands have to be implemented on CodedUiTestProject side, Driver side has only session lyfe-cycle related commands and status command.
![]()
It turns out that all I needed was to restart the machine after adding registry keys. I also restarted my phone and now able to debug coded ui project although u missed the step saying to set startup project to the sample project and run the driver from exe after building. Thank you
2 participants
![]()
![]()
- Remove From My Forums
-
Question
-
I have created an Mobile App for Windows Phone 8.1 using tools for Apache Cordova. When trying to sideload the app using the windows phone 8.1 application deployment tool i receive an error «Error — A packaging error prevented this application from
installing». Does anyone know what this means, the cause and how to fix it? The process is inconsistent as there are times it works without issues and other times it doesn’t work constantly any ideas.-
Edited by
Monday, April 18, 2016 5:11 AM
add tag
-
Edited by
Здравствуйте, дорогие друзья! Как многим известно, с выходом Windows Phone 8.1 система стала поддерживать формат файлов, помимо стандартного .XAP, созданные приложения на котором раньше не удавалось установить с помощью привычных программ бесплатно, — .APPX. Относительно недавно ребята из популярного ресурса WP-Seven научились обходить эту защиту, собственноручно пересобирая «правильные» сборки в данном формате.
С помощью простой инструкции вы в 3 шага сможете установить приложения, созданные в формате .APPX. И так:
- Чтобы удачно устанавливать приложения на Windows Phone 8.1, необходим компьютер под управлением Windows 8 и выше, смартфон под управлением Windows Phone 8.1 и выше.
- Если у вас не установлена программа Windows Phone Application Deployment 8.1 Lite, то скачайте и установите по инструкциям, описанным в этой статье.
- Если у вас не «зарегистрирован» смартфон как телефон разработчика, то откройте программу Windows Phone Developer Registration 8.1 и нажмите кнопку «зарегистрировать», введя далее данные аккаунта live.com
- Откройте программу Windows Phone Application Deployment 8.1, нажмите кнопку «Обзор» и выберите файла формата .appx или appxbundle (конечно можно и.хар)
- Далее нажмите кнопку «Развернуть». После этого в статусе должна появиться надпись «Развертывание» файла.
- Если все прошло успешно, в строке состояния будет надпись: «Развертывание приложения завершено».
Важно! Во время всей операции дисплей смартфона должен быть разблокирован; если вы до этого уже установили 2 приложения, то их необходимо удалить со смартфона (если не поможет — удалить программой WPPT (или 1 из них), подробнее — спрашивайте в комментариях). Если во время установки пишет: «install path not found in registry» — необходимо скачать и установить эти файлы, после чего перезагрузить компьютер и снова попробовать установить appx.
Уже сейчас вы можете попробовать установить этим способом такие популярные приложения, как Minecraft PE.
Asked
8 years, 2 months ago
Viewed
4k times
I download an app (xap/appx) from Windows Phone Store (ex: clock-tile-diy.appx). I use Windows Phone Application Deployment (8.1) to deploy the app on my phone from pc. But it have error: A packaging error prevented this application from installing. Why do it have errors and How do I fix it?
Please help me.
Thanks for your help.
asked Nov 18, 2014 at 14:46
![]()
1
You can’t deploy xap or appx packages you downloaded from the store as they are different from the ones that Visual Studio generates.
To install packages you downloaded from the store, simply put them on your SD card or the internal documents folder of your phone. Open store and look into the command bar, there should be an option allowing you to install the file.
answered Nov 18, 2014 at 17:30
![]()
sibblsibbl
3,16426 silver badges36 bronze badges
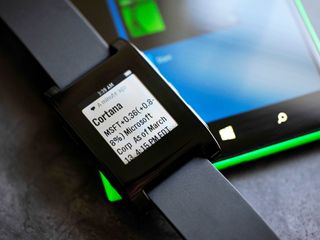
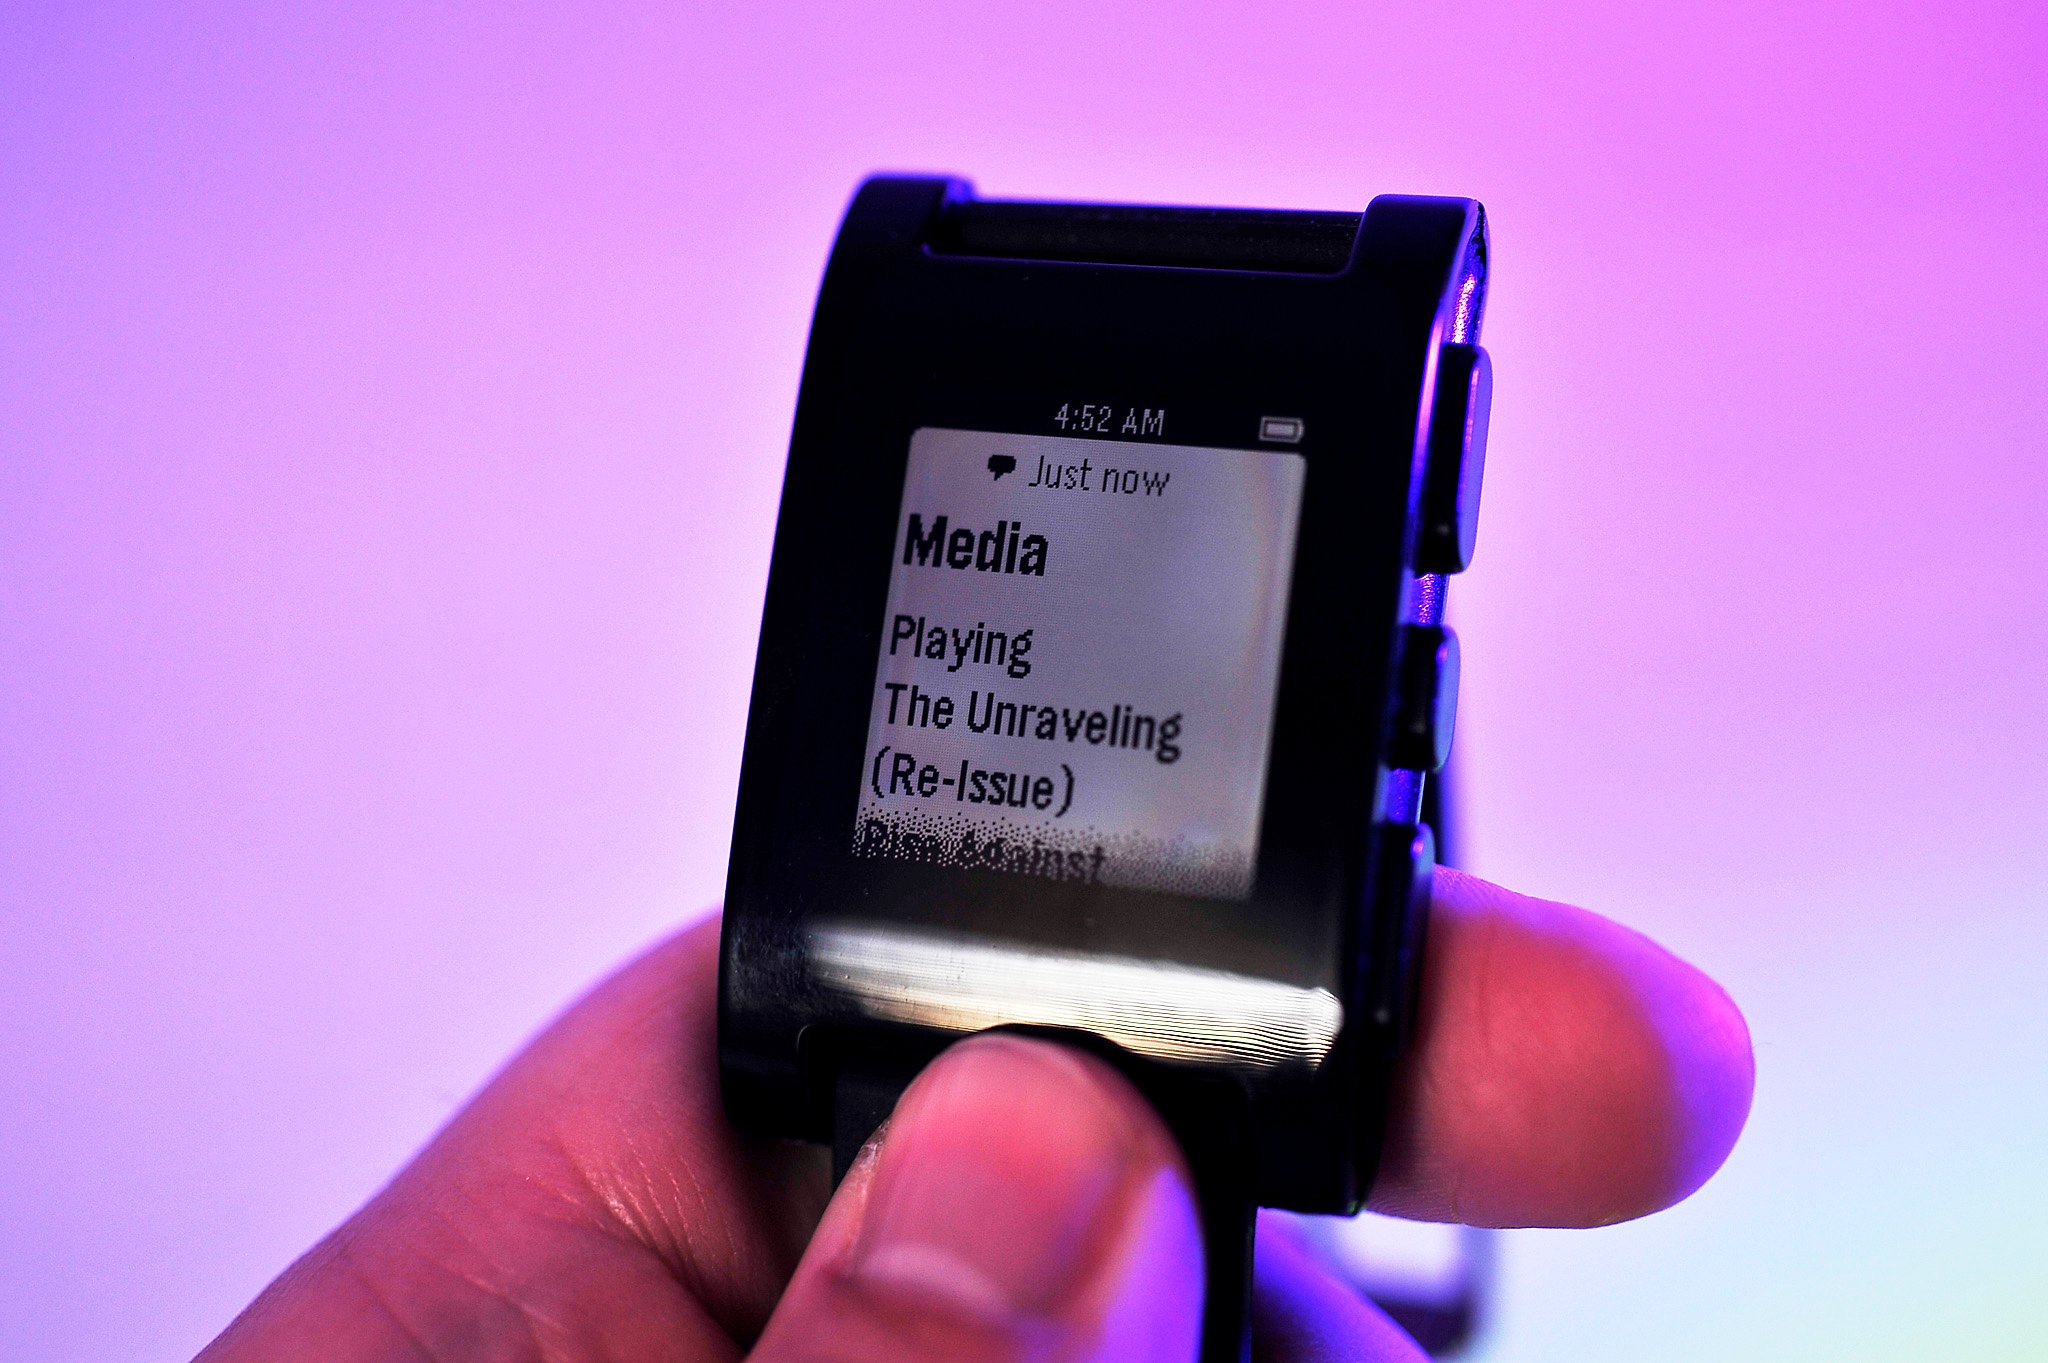
Pebble is arguably one of the most important smartwatch brands available to consumers these days. Indeed, the private company has been very successful in raising money for its new Pebble Time device, suggesting that the company has some legs.
However, Pebble and Windows Phones are two things that do not match. We detailed the story of the failed attempt at bringing the Pebble app to Windows Phone before so today we want to talk about that ‘demo’ app for notifications.
We will also tell you where you can get it and how it works in our hands-on video.
Hands on video of Pebble Connect
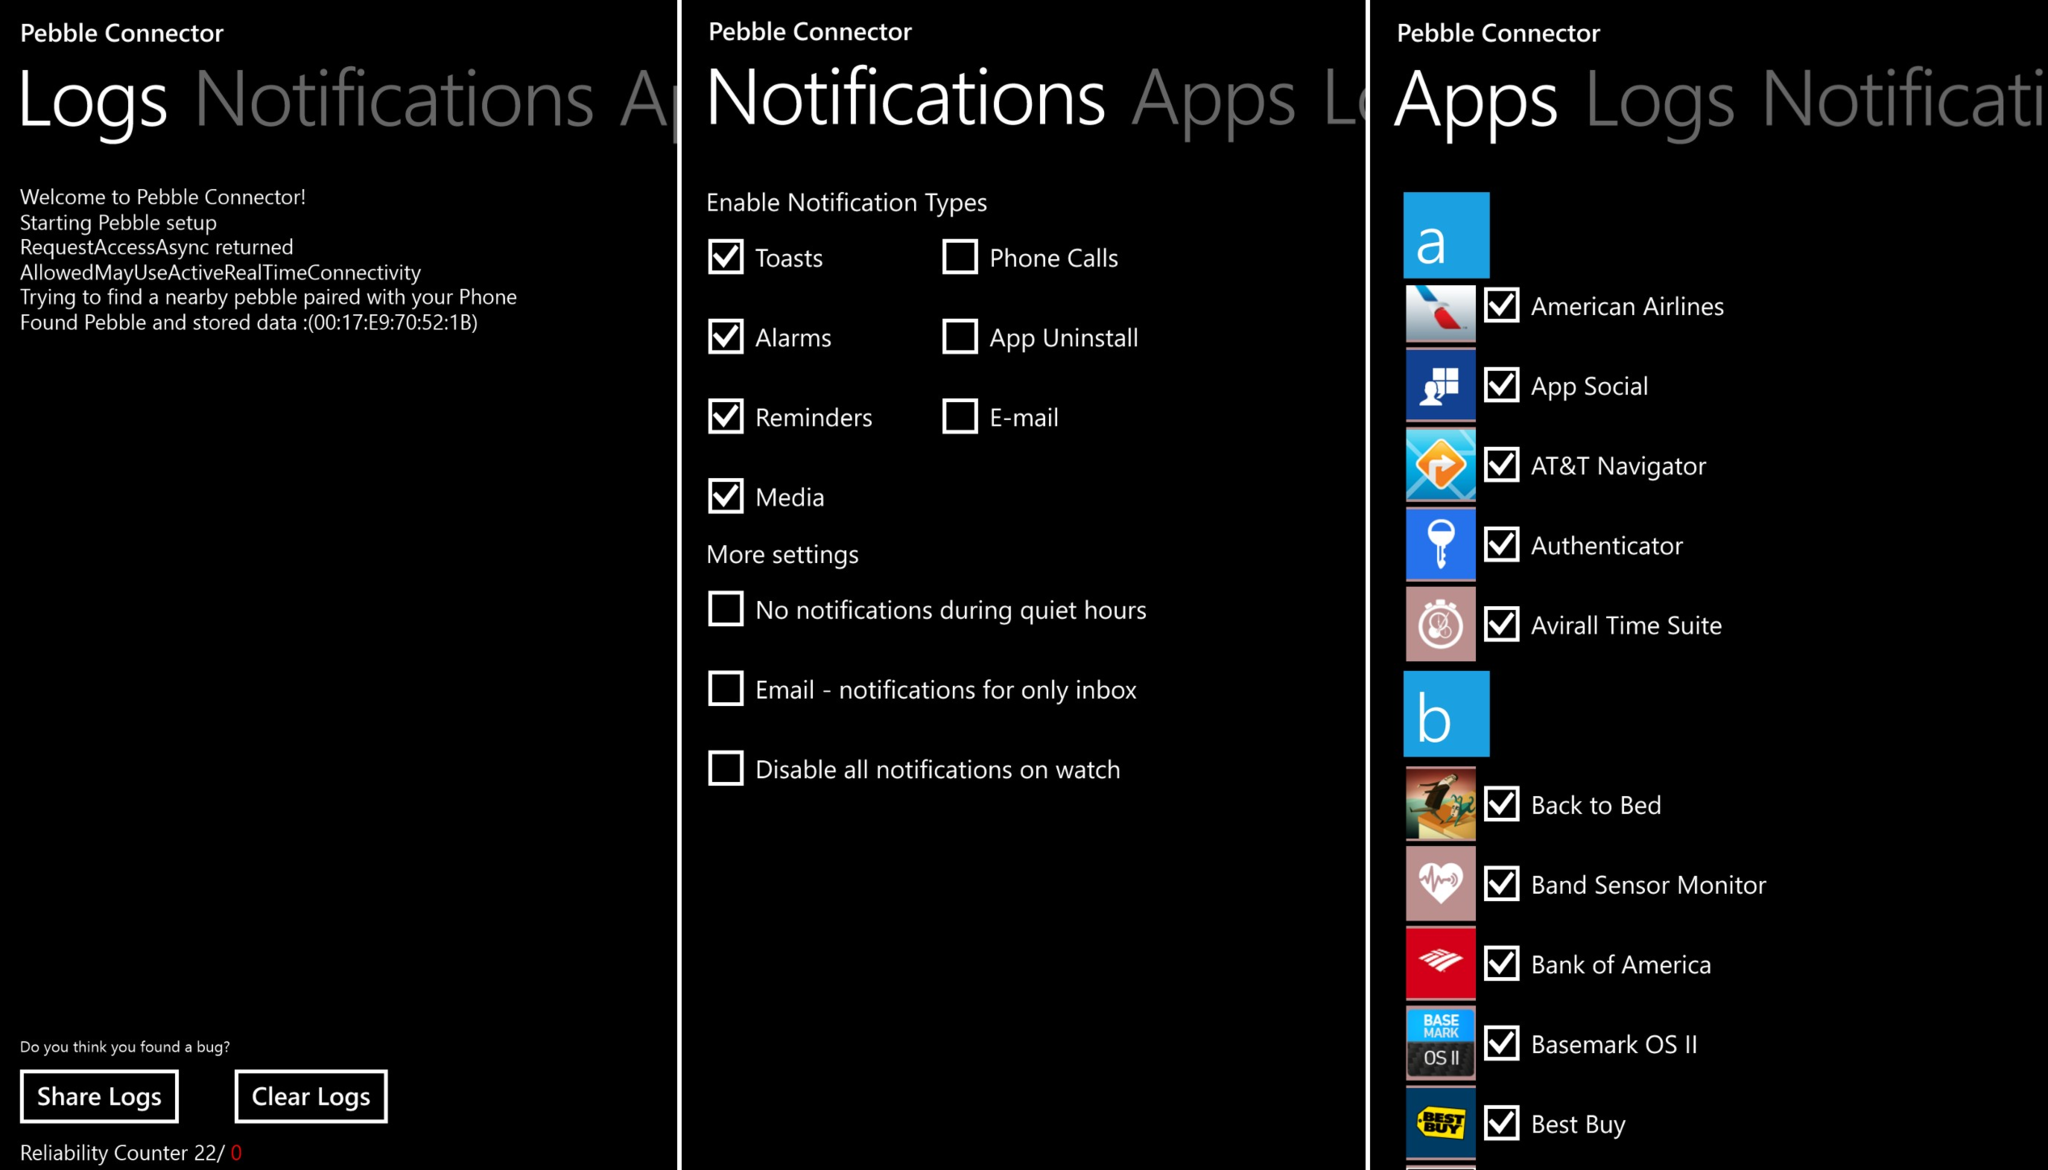
First discovered a few weeks ago, the app is an internal beta used for testing Windows Phone notifications with a Pebble smartwatch. It does not have more advanced features like access to the Pebble Store (for installing apps), music controls and more.
However, it can hook into your Windows Phone notification system to alert you to phone calls, email, general notifications, even when music stops/start playing (the ‘Media’ option).
And yes, it runs in the background.
Can I download it from the Store?
Unfortunately, since it is a private beta, none of us have permission to download it to our phones. Many people have noticed the ‘Download and install manually’ option, but this too will not work for sideloading due to restrictions placed on the APPX.
But, there is a way. Here’s how.
Sideloading the modified Pebble Connect app
Luckily, through various friends, we have found a way to remove those restrictions. As a result, we have a modified version of the Pebble Connect APPX.
This version can be sideloaded to any Windows Phone 8.1 device using the Windows Phone SDK. Through the SDK, you can developer unlock your phone and manually install (‘sideload’) the APPX to your phone.
To learn how to developer unlock your Windows Phone, please read our tutorial.
Read: How to Developer Unlock your Windows Phone
Download the modified Pebble Connect APPX file
To grab the modified APPX file for Pebble Connect, simply hit the link up below. Note: this file will only be available for 48 hours, after that, it is up to you what happens to it!
You will need to download this to a PC with the Windows Phone 8.1 SDK and Developers tool installed. Copying directly to your Windows Phone and using local apps will not work.
- Download Pebble Connect APPX (modified)
Using Pebble Connect
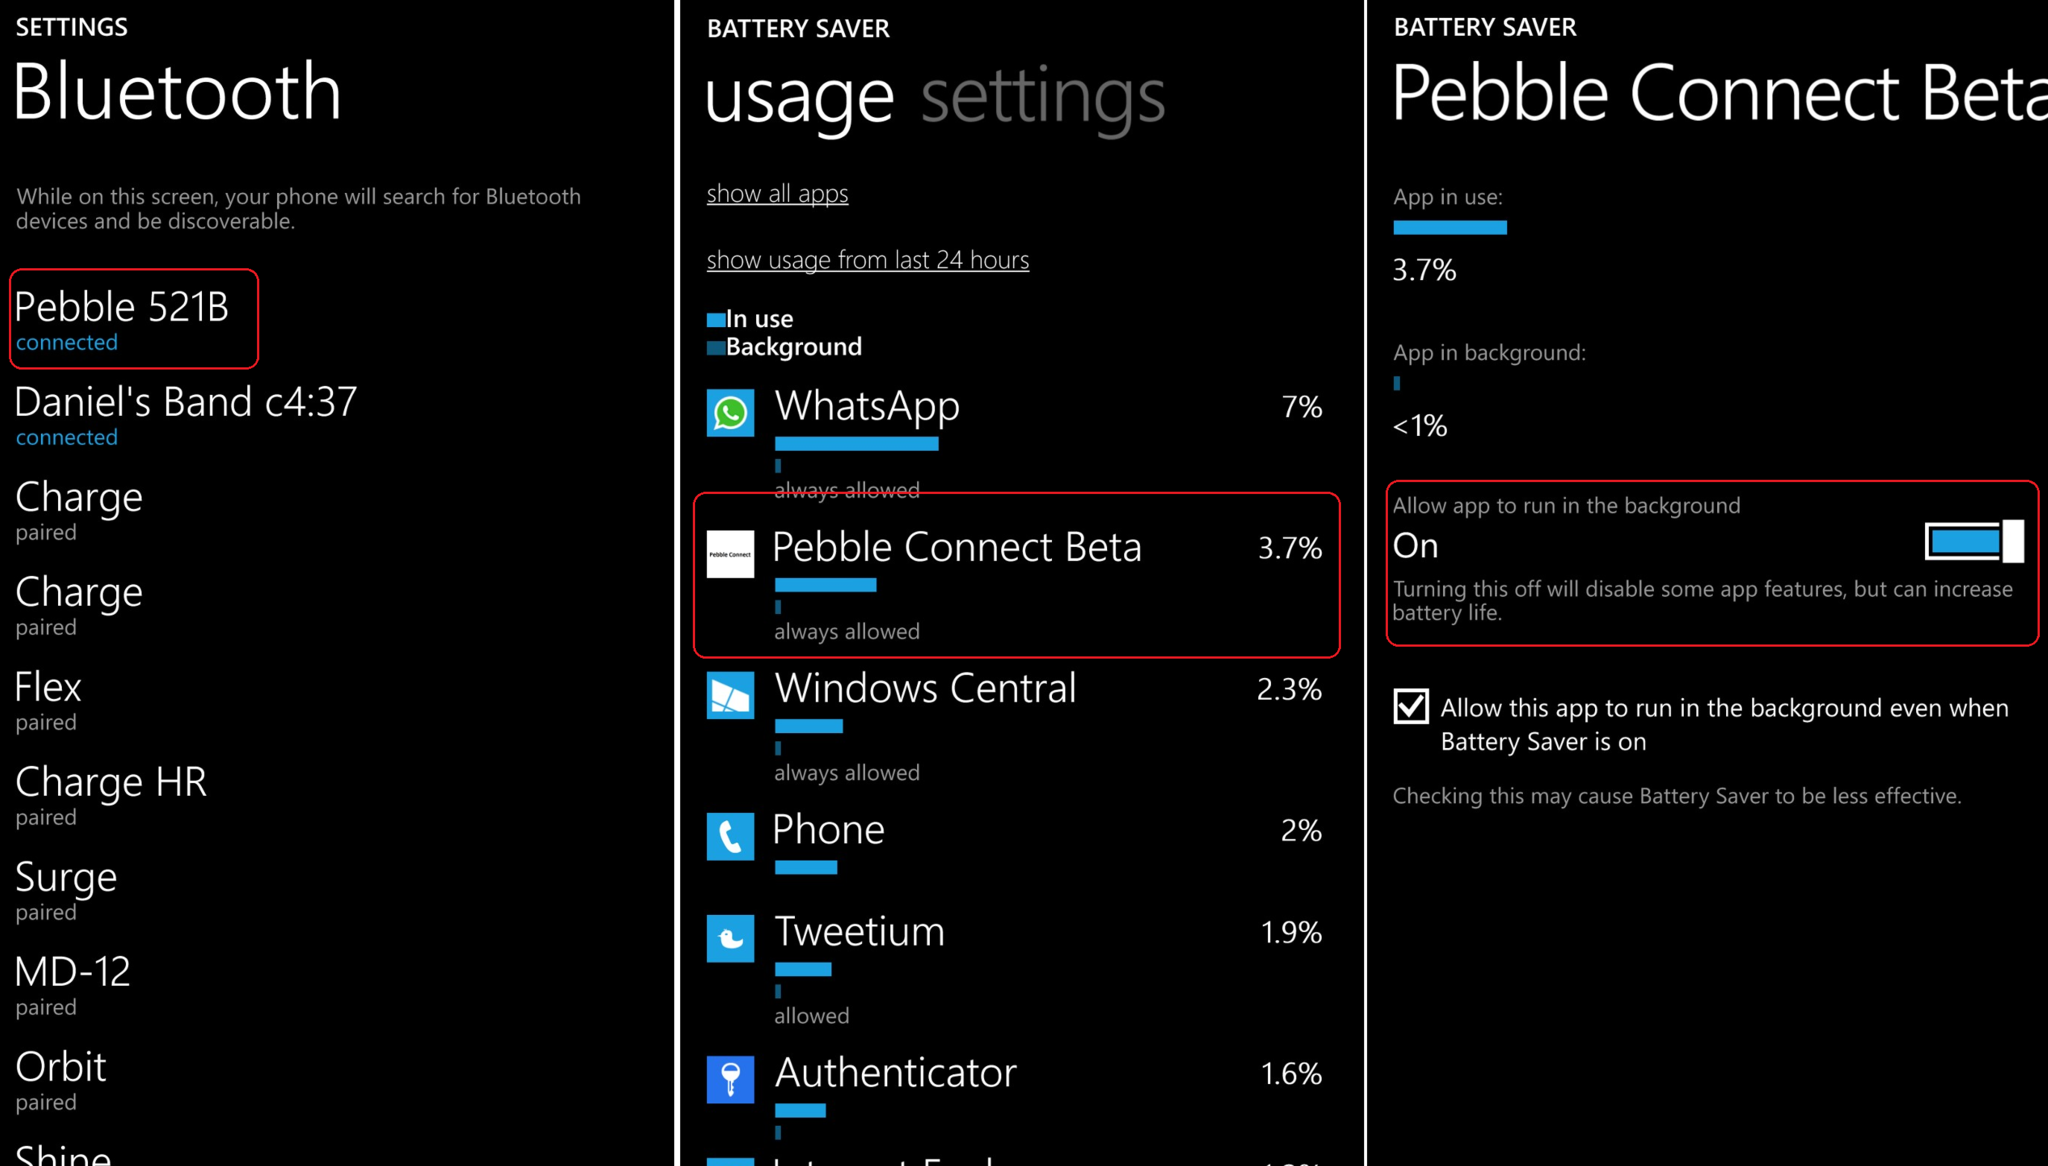
Once installed, you want to launch the Pebble Connect app. You should see a warning about it not being able to run in the background due to its task being disabled. To solve this, follow these steps:
- Settings
- Battery Saver
- Usage
- Choose ‘Pebble Connect Beta’
- Enable ‘Allow app to run in the background’
Now, you need to pair the Pebble with your Windows Phone (you could also do this step earlier, the ordering does not matter)
Paring your Pebble to Windows Phone
- Put Pebble into pairing mode (middle button, settings, Bluetooth)
- On Windows Phone: Settings, Bluetooth
- Your Pebble should eventually show up in the list of devices (it can take some time)
- Tap to pair, follow the instructions
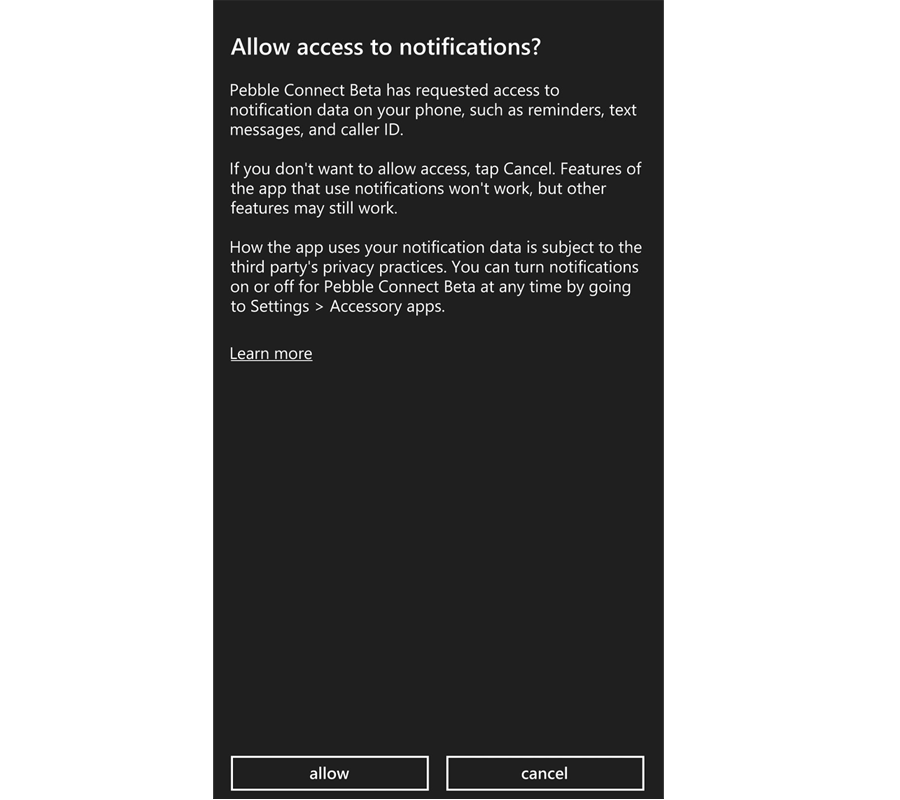
Once completed, close out the Pebble Connect Beta app and re-launch it. You should no longer see the error message about it running in the background. Instead, you should have an ‘allow access to notifications’ dialog. Hit ‘Agree’ and you should now see the Log screen and the Pebble Connect app finding your Pebble.
A few more things
Just to be clear, this app is only for notifications on your Windows Phone.
- Cannot install Pebble apps
- Cannot install new watch faces
- Cannot control music (although there are some media notifications)
In that sense, Pebble Connect is only partially useful to Windows Phone users. However, if you already have a Pebble that is sitting around, it just became much more helpful to you. At the very least, you can have this app until hopefully someday, Pebble comes around again to Windows Phone.
Get the best of Windows Central in in your inbox, every day!
Daniel Rubino is the Editor-in-chief of Windows Central, head reviewer, podcast co-host, and analyst. He has been covering Microsoft since 2007 when this site was called WMExperts (and later Windows Phone Central). His interests include Windows, laptops, next-gen computing, and for some reason, watches. Before all this tech stuff, he worked on a Ph.D. in linguistics, watched people sleep (for medical purposes!), and ran the projectors at movie theaters because it was fun.
Windows, Windows 10, Windows 7, Windows 8, Windows Server, Windows Vista, Windows XP
- 03.08.2020
- 2 701
- 0
- 1
- 1
- 0
- Содержание статьи
- Описание
- Причины возникновения ошибки
- Исправляем ошибку
- Способ 1. Выдаем права доступа на папку TEMP
- Способ 2. Перерегистрация msiexec
- Способ 3. Смена каталога TEMP
- Добавить комментарий
Описание
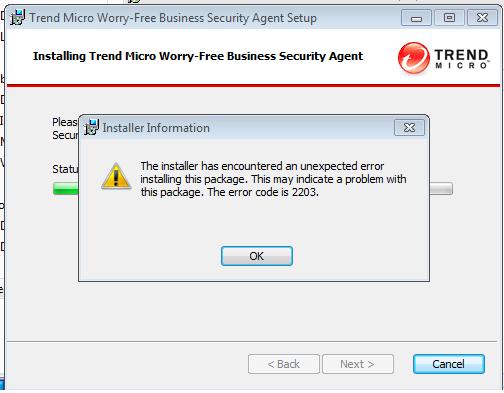
В ОС Windows при установке различных приложений может возникать ошибка с кодом 2203, которая целиком выглядит следующим образом:
The installer has encountered an unexpected error installing this package.
This may indicate a problem with this package. The error code is 2203.
Причины возникновения ошибки
Данная ошибка возникает из-за того, что программа инсталлятор не может получить доступ к папке TEMP по каким-либо причинам. Иногда это бывает из-за того, что имя пользователя на русском языке с пробелами, иногда из-за каких-либо внесенных изменений в разрешения на доступ к папке TEMP.
Исправляем ошибку
Если у вас учетная запись на русском языке с пробелом, то тогда вы можете сразу переходить к способу 3, т.к. первые два способа вам вряд ли помогут.
Способ 1. Выдаем права доступа на папку TEMP
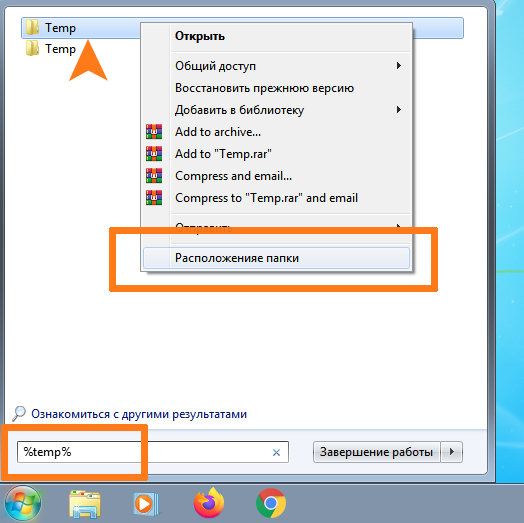
Для начала попробуем выдать полные права доступа к папке TEMP для всех пользователей. Для этого открываем пуск и в поле «Найти программы и файлы» набираем %temp%, после чего жмем правой кнопкой мыши на появившуюся папку и выбираем из контекстного меню пункт «Расположение папки«.
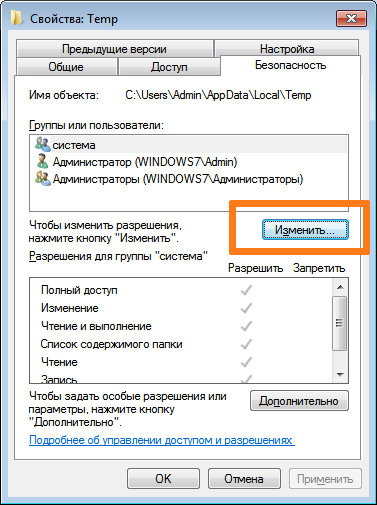
Откроется окно с папкой TEMP, выделяем ее и жмем правой кнопкой мыши и выбираем пункт «Свойства«.
В открывшемся меню выбираем пункт «Изменить…»
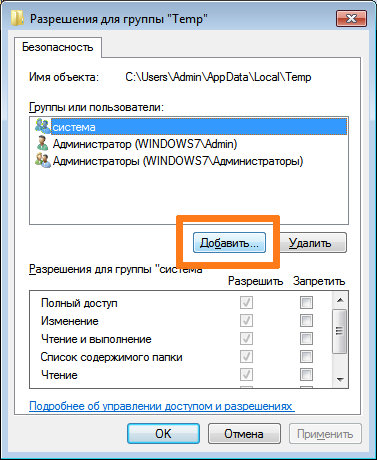
В открывшемся меню выбираем пункт «Добавить…»
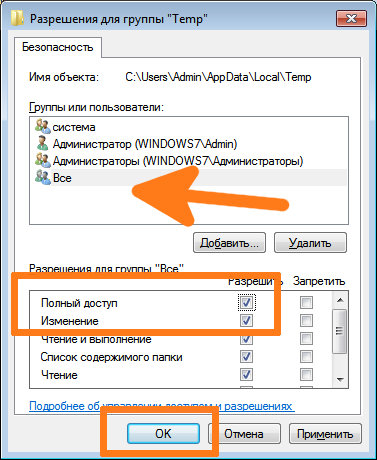
В поле «Введите имена выбираемых объектов» введите «Все«. Вводить необходимо с заглавной буквы. Если у вас английская версия Windows, то нужно вводить Everyone, т.к. группы Все в ней не существует. После чего жмем на кнопку «ОК«.
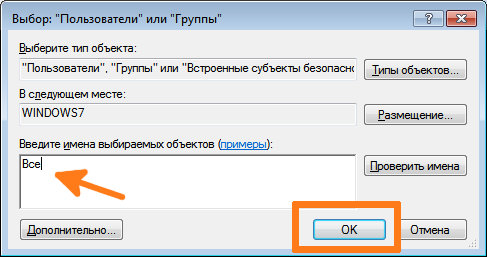
В итоге в списке объектов безопасности должна добавиться учетная запись «Все«. После чего нам необходимо поставить галку разрешить напротив пункта «Полный доступ» и нажать кнопку «ОК«, чтобы настройки доступа сохранились.
После этого необходимо попытаться установить программу, которая выдавала ошибку еще раз. В случае, если данная манипуляция не помогла, то переходим к следующему способу.
Способ 2. Перерегистрация msiexec
Для этого запускаем командную строку с правами администратора и выполняем там поочередно следующие команды:
msiexec /unregistermsiexec /regserver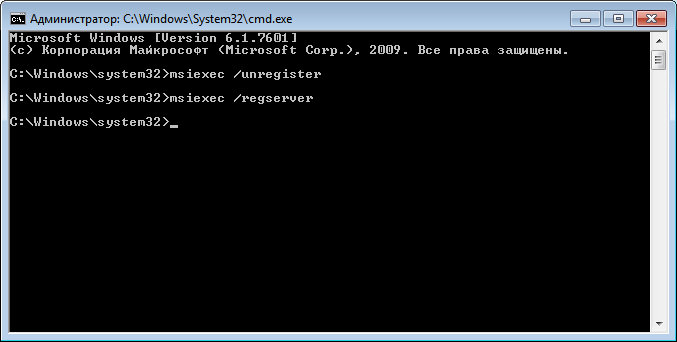
Они могут выполняться без каких-либо видимых последствий, либо курсор может поменяться на песочные часы. После окончания выполнения команды, пытаемся установить проблемный установочный файл. Если не помогло, то переходим к следующему способу.
Способ 3. Смена каталога TEMP
Создаем в корне системного диска папку Temp, например, C:Temp
После этого заходим в свойства «мой компьютер«, вкладка «дополнительные параметры» и в появившемся окне с настройками выбираем пункт «переменные среды«. Ищем там строчки TEMP и TMP и для каждой из них меняем путь на созданную папку C:Temp. В нижнем окне можно сделать тоже самое: найти TEMP и TMP и заменить на C:Temp.
После этого пытаемся установить проблемный файле еще раз.