Update, 18.06.2018, by Microsoft:
We are aware of an issue affecting the recent media on VLSC. The ISO has been replaced on VLSC. If you have encountered issues installing with this media, we recommend you download and install the refreshed ISO now available on VLSC or wait until we release a new version later in June.
This blog post will be a short one. I just would like to publish my workaround regarding Windows 10 1803 upgrade issue.
Issue: after the upgrade, I’ve received this prompt message “A winpeshl.ini file is present, but no commands were successfully launched. This could be caused by incorrect formatting or an invalid executable name.” It may result from a corrupted installation file, which lead to failure during setup.
This seems to be a problem with the current install media from VLSC (filename SW_DVD9_Win_Pro_Ent_Edu_N_10_1803_64BIT_English_-3_MLF_X21-82160.iso). It doesn’t matter if you run the upgrade through SCCM or just mount the ISO and run it through the GUI, it fails just like this. If you have a previous ISO version SW_DVD9_Win_Pro_Ent_Edu_N_10_1803_64BIT_English_-3_MLF_X21-79647.iso it will work.
Microsoft says: We are aware of the issue and are investigating solutions. Will update when we know more. (Wednesday, June 13, 2018 12:15 AM)
Solution 1: when it gets hung at the command prompt after the first reboot.
- Just search for RecEnv.exe
dir RecEnv.exe /s
- Jump to that directory
- Run this file
- Setup will now continue!

Solution 2: modify install.wim file.
- Mount boot.wim from the ISO
dism /mount-image /imagefile:"C:W10_1803sourcesboot.wim" /mountdir:"C:W10_1803MountBOOT" /index:1
- Check install.wim for indexes
dism /get-wiminfo /wimfile:"C:W10_1803sourcesinstall.wim"
- Choose and mount your correct index
dism /mount-image /imagefile:"C:W10_1803sourcesinstall.wim" /mountdir:"C:W10_1803Mount" /index:3
- Mount winre.wim from mount directory
dism /mount-image /imagefile:"C:W10_1803MountWindowsSystem32RecoveryWinre.wim" /mountdir:"C:W10_1803MountWINRE" /index:1
- Copy sources folder
cpi -Path C:W10_1803MountBOOTSources -Destination C:W10_1803MountWINRE -Recurse
- Unmount winre.wim file with commit command
dism /unmount-image /mountdir:"C:W10_1803MountWINRE" /commit
- Unmount install.wim file with commit command
dism /unmount-image /mountdir:"C:W10_1803Mount" /commit
- Unmount boot.wim file
dism /unmount-image /mountdir:"C:W10_1803MountBOOT" /discard
For sure, I prefer the solution 2. Because now you are able to update your deployment with this new modified install.wim media and automatize your upgrade process.
Until Microsoft is not updating this ISO file on the VLSC paltform, we have to work with this workaround. I hope this helps you!
Последнее обновление: 06/30/2022
[Необходимое время для чтения: ~4–6 мин.]
Файлы Windows Initialization, такие как winpeshl.ini, используют расширение INI. Файл считается файлом Параметры (Windows Initialization) и впервые был создан компанией CyberLink для пакета ПО CyberLink Media Suite 13.
Первая версия winpeshl.ini была выпущена для операционной системы Windows 10 08/26/2019 в составе MiniTool Partition Wizard Free Edition 11.5.
Самая последняя версия [версия 13] была представлена 07/22/2015 для CyberLink Media Suite 13.
В этой статье обсуждаются подробные сведения о файлах, порядок устранения неполадок с файлом INI при проблемах с winpeshl.ini, а также полный набор бесплатных загрузок для каждой версии файла, которая была зарегистрирована нашей командой.
Что такое сообщения об ошибках winpeshl.ini?
Общие ошибки выполнения winpeshl.ini
Ошибки файла winpeshl.ini часто возникают на этапе запуска CyberLink Media Suite, но также могут возникать во время работы программы.
Эти типы ошибок INI также известны как «ошибки выполнения», поскольку они возникают во время выполнения CyberLink Media Suite. К числу наиболее распространенных ошибок выполнения winpeshl.ini относятся:
- Не удается найти winpeshl.ini.
- winpeshl.ini — ошибка.
- Не удалось загрузить winpeshl.ini.
- Ошибка при загрузке winpeshl.ini.
- Не удалось зарегистрировать winpeshl.ini / Не удается зарегистрировать winpeshl.ini.
- Ошибка выполнения — winpeshl.ini.
- Файл winpeshl.ini отсутствует или поврежден.
Библиотека времени выполнения Microsoft Visual C++
![]()
Ошибка выполнения!
Программа: C:Program Files (x86)CyberLinkPower2Go11MakeWinPEISOwinpeshl.ini
Среда выполнения получила запрос от этого приложения, чтобы прекратить его необычным способом.
Для получения дополнительной информации обратитесь в службу поддержки приложения.

В большинстве случаев причинами ошибок в INI являются отсутствующие или поврежденные файлы. Файл winpeshl.ini может отсутствовать из-за случайного удаления, быть удаленным другой программой как общий файл (общий с CyberLink Media Suite) или быть удаленным в результате заражения вредоносным программным обеспечением. Кроме того, повреждение файла winpeshl.ini может быть вызвано отключением питания при загрузке CyberLink Media Suite, сбоем системы при загрузке или сохранении winpeshl.ini, наличием плохих секторов на запоминающем устройстве (обычно это основной жесткий диск) или заражением вредоносным программным обеспечением. Таким образом, крайне важно, чтобы антивирус постоянно поддерживался в актуальном состоянии и регулярно проводил сканирование системы.
Как исправить ошибки winpeshl.ini — 3-шаговое руководство (время выполнения: ~5-15 мин.)
Если вы столкнулись с одним из вышеуказанных сообщений об ошибке, выполните следующие действия по устранению неполадок, чтобы решить проблему winpeshl.ini. Эти шаги по устранению неполадок перечислены в рекомендуемом порядке выполнения.
Шаг 1. Восстановите компьютер до последней точки восстановления, «моментального снимка» или образа резервной копии, которые предшествуют появлению ошибки.
Чтобы начать восстановление системы (Windows XP, Vista, 7, 8 и 10):
- Нажмите кнопку «Пуск» в Windows
- В поле поиска введите «Восстановление системы» и нажмите ENTER.
- В результатах поиска найдите и нажмите «Восстановление системы»
- Введите пароль администратора (при необходимости).
- Следуйте инструкциям мастера восстановления системы, чтобы выбрать соответствующую точку восстановления.
- Восстановите компьютер к этому образу резервной копии.
Если на этапе 1 не удается устранить ошибку winpeshl.ini, перейдите к шагу 2 ниже.

Шаг 2. Если вы недавно установили приложение CyberLink Media Suite (или схожее программное обеспечение), удалите его, затем попробуйте переустановить CyberLink Media Suite.
Чтобы удалить программное обеспечение CyberLink Media Suite, выполните следующие инструкции (Windows XP, Vista, 7, 8 и 10):
- Нажмите кнопку «Пуск» в Windows
- В поле поиска введите «Удалить» и нажмите ENTER.
- В результатах поиска найдите и нажмите «Установка и удаление программ»
- Найдите запись для CyberLink Media Suite 13 и нажмите «Удалить»
- Следуйте указаниям по удалению.
После полного удаления приложения следует перезагрузить ПК и заново установить CyberLink Media Suite.
Если на этапе 2 также не удается устранить ошибку winpeshl.ini, перейдите к шагу 3 ниже.
![]()
CyberLink Media Suite 13
CyberLink
Шаг 3. Выполните обновление Windows.
Когда первые два шага не устранили проблему, целесообразно запустить Центр обновления Windows. Во многих случаях возникновение сообщений об ошибках winpeshl.ini может быть вызвано устаревшей операционной системой Windows. Чтобы запустить Центр обновления Windows, выполните следующие простые шаги:
- Нажмите кнопку «Пуск» в Windows
- В поле поиска введите «Обновить» и нажмите ENTER.
- В диалоговом окне Центра обновления Windows нажмите «Проверить наличие обновлений» (или аналогичную кнопку в зависимости от версии Windows)
- Если обновления доступны для загрузки, нажмите «Установить обновления».
- После завершения обновления следует перезагрузить ПК.
Если Центр обновления Windows не смог устранить сообщение об ошибке winpeshl.ini, перейдите к следующему шагу. Обратите внимание, что этот последний шаг рекомендуется только для продвинутых пользователей ПК.

Если эти шаги не принесут результата: скачайте и замените файл winpeshl.ini (внимание: для опытных пользователей)
Если ни один из предыдущих трех шагов по устранению неполадок не разрешил проблему, можно попробовать более агрессивный подход (примечание: не рекомендуется пользователям ПК начального уровня), загрузив и заменив соответствующую версию файла winpeshl.ini. Мы храним полную базу данных файлов winpeshl.ini со 100%-ной гарантией отсутствия вредоносного программного обеспечения для любой применимой версии CyberLink Media Suite . Чтобы загрузить и правильно заменить файл, выполните следующие действия:
- Найдите версию операционной системы Windows в нижеприведенном списке «Загрузить файлы winpeshl.ini».
- Нажмите соответствующую кнопку «Скачать», чтобы скачать версию файла Windows.
- Скопируйте этот файл в соответствующее расположение папки CyberLink Media Suite:
Windows 10: C:Program Files (x86)AOMEI Backupper
Windows 10: C:Program Files (x86)AOMEI BackupperWinpe64
Windows 10: C:Program Files (x86)AOMEI Partition Assistant
Windows 10: C:Program Files (x86)AOMEI Partition Assistantx64
Windows 10: C:Program Files (x86)Lazesoft Recover My Password
Показать на 10 каталогов больше +Windows 10: C:Program Files (x86)EaseUSTodo BackupBUILDPEx64Windowssystem32
Windows 10: C:Program Files (x86)EaseUSTodo BackupBUILDPEx86Windowssystem32
Windows 10: C:Program FilesMiniTool Partition Wizard 11
Windows 10: C:Program FilesParagon SoftwareBackup and Recovery 16 Freeprogramwinpe_custom_x64Windowssystem32
Windows 10: C:Program Files (x86)CyberLinkPower2Go11MakeWinPEISO
Windows 10: C:Program Files (x86)Lazesoft Recovery Suite
Windows 10: C:Program Files (x86)EaseUSEaseUS Partition Master 13.5BUILDPEx64WindowsSystem32
Windows 10: C:Program Files (x86)EaseUSEaseUS Partition Master 13.5BUILDPEx86WindowsSystem32
Windows 10: C:Program Files (x86)EaseUSDisk CopyBUILDPEx64Windowssystem32
Windows 10: C:Program Files (x86)EaseUSDisk CopyBUILDPEx86Windowssystem32 - Перезагрузите компьютер.
Если этот последний шаг оказался безрезультативным и ошибка по-прежнему не устранена, единственно возможным вариантом остается выполнение чистой установки Windows 10.
СОВЕТ ОТ СПЕЦИАЛИСТА: Мы должны подчеркнуть, что переустановка Windows является достаточно длительной и сложной задачей для решения проблем, связанных с winpeshl.ini. Во избежание потери данных следует убедиться, что перед началом процесса вы создали резервные копии всех важных документов, изображений, установщиков программного обеспечения и других персональных данных. Если вы в настоящее время не создаете резервных копий своих данных, вам необходимо сделать это немедленно.
Скачать файлы winpeshl.ini (проверено на наличие вредоносного ПО — отсутствие 100 %)
ВНИМАНИЕ! Мы настоятельно не рекомендуем загружать и копировать winpeshl.ini в соответствующий системный каталог Windows. CyberLink, как правило, не выпускает файлы CyberLink Media Suite INI для загрузки, поскольку они входят в состав установщика программного обеспечения. Задача установщика заключается в том, чтобы обеспечить выполнение всех надлежащих проверок перед установкой и размещением winpeshl.ini и всех других файлов INI для CyberLink Media Suite. Неправильно установленный файл INI может нарушить стабильность работы системы и привести к тому, что программа или операционная система полностью перестанут работать. Действовать с осторожностью.
Файлы, относящиеся к winpeshl.ini
Файлы INI, относящиеся к winpeshl.ini
| Имя файла | Описание | Программа (версия) | Размер файла (байты) | Расположение файла |
|---|---|---|---|---|
| StartMenu.ini | Windows Initialization | CyberLink Media Suite 13 | 162 | C:Program Files (x86)CyberLinkPerfectCamMUI… |
| EVO.ini | Windows Initialization | CyberLink Media Suite 13 | 132 | C:ProgramDataCyberLinkEvoParserWaveEditor2… |
| desc_u.ini | Windows Initialization | CyberLink Media Suite 13 | 508 | C:Program Files (x86)CyberLinkMediaShow6sub… |
| DHProcedure.ini | Windows Initialization | CyberLink Media Suite 13 | 231 | C:Program Files (x86)CyberLinkPowerDVD18Ker… |
| desc_u.ini | Windows Initialization | CyberLink Media Suite 13 | 458 | C:Program Files (x86)CyberLinkMediaShow6sub… |
Вы скачиваете пробное программное обеспечение. Для разблокировки всех функций программного обеспечения требуется покупка годичной подписки, стоимость которой оставляет 39,95 долл. США. Подписка автоматически возобновляется в конце срока (Подробнее). Нажимая кнопку «Начать загрузку» и устанавливая «Программное обеспечение», я подтверждаю, что я прочитал (-а) и принимаю Лицензионное соглашение и Политику конфиденциальности компании Solvusoft.
- Remove From My Forums
-
Question
-
When updating my samsung tablet to windows 8 consumer preview — I followed the instructions in the topic on this board, and did the network install. However, after «installing» and rebooting (automatically), I get a command window with the error «A winpeshl.ini
file is present, but no command were successfully launched. This could be caused by incorrect formatting or an invalid executable name. Please consult the documentation for more information».Is there any recovery from this?
Answers
-
If anyone else gets this, this is what I did to fix it:
Exiting the command prompt led to a reboot, which gave me the option to boot to Windows Setup, Windows 8 Consumer Preview, and Windows 8 Developer Preview.
Neither an external keyboard nor touch work at the boot menu, but you can use the volume up/Volume down to highlight the OS and press the rotate lock (on the right side) to enter. The only option that did anything was booting the old developer preview,
and I was able to get back to my old desktop. From there, I reinstalled the Consumer Preview, and this time it went all the way through successfully.-
Proposed as answer by
Tuesday, March 27, 2012 2:24 PM
-
Marked as answer by
Bill-Support Engineer
Wednesday, April 11, 2012 9:06 PM
-
Proposed as answer by
@Catiew12,
Welcome to the HP Forums!
This is a wonderful place to converse with the community, get assistance and find tips.
I reviewed your post and understand that you are unable to boot after Windows upgrade and getting an error message.
I’ll be glad to help you 
In order that I may provide you with an accurate solution, I will need a few more details.
- When was the last time the computer was working fine?
- How do you do the upgrade on the computer?
- Have you made any software or hardware changes on the computer?
- Have you performed any troubleshooting steps before posting?
While you respond to that, I would like to inform you that Winpeshl.ini files basically control whether a customized shell is loaded in Win PE installed of default command prompt and I would also like to know how exactly you had performed the upgrade to Windows 10.
It looks like the Windows update didn’t go through successfully and you need to reset the computer. I recommend you follow the steps in the below article to perform a reset on the computer.
https://support.hp.com/in-en/product/—/3982088/document/c04742289
Let me know how it goes. Awaiting your reply!
If you wish to show appreciation for my efforts, mark my post as Accept as Solution. Your feedback counts!
Good day! Take care
Cheers!
The_Fossette
I am an HP Employee
Yesterday I started a new Windows 10 1803 project with a customer. They want to start deploying Windows 10 1803 to new machines and also start upgrade existing Windows 10 clients to 1803.
To upgrade existing clients, I’ve created a Task Sequence template that I’ve been using at many different customers in previous projects (including 1803).
But yesterday I got the following error displayed in a Command Prompt during the deployment:
winpeshl.ini file is present, but no commands were successfully launched. This could be caused by incorrect formatting or an invalid executable name. Please consult the documentation for more information.
New (bare metal) deployment works as expected.
After some spending some time digging into to this issue and asking for ideas from other OSD experts (Johan Arwidmark and Michael Niehaus), I’ve come to the conclusion that the current release of the Windows 10 1803 ISO most likely is broken if you want do an in-place upgrade. New deployments works as expected.
I have tested the upgrade using 2 different versions of the 1803 ISO:
- SW_DVD5_Win_Pro_Ent_Edu_N_10_1803_64BIT_Danish_-2_MLF_X21-79647
- SW_DVD9_Win_Pro_Ent_Edu_N_10_1803_64BIT_Danish_-3_MLF_X21-82164
When using the “79647” build everything works as expected, but if I use the “82164” build, it fails. Unfortunately, it’s the version that is currently available the that fails.
Check this thread for more information: https://www.reddit.com/r/SCCM/comments/8nnx1q/win10_1703_to_1803_ts_upgrade_winpeshlini_error/
Conclusion
- If you bump into this problem, try to use an older version of the ISO (until it gets fixed).
- If you don’t have a copy of the old ISO the best option is to open a support ticket with Microsoft.
- Always keep a backup of you old Windows 10 ISO’s.
Happy upgrading… 🙂
Update 1: Microsoft has now confirmed the issue and has promised a fix.
Update 2: Microsoft has now released an updated version of the ISO. SW_DVD9_Win_Pro_Ent_Edu_N_10_1803_64BIT_English_-4_MLF_X21-87129 is now available form the Volume Licensing Service Center.
/Enjoy
+Ronni Pedersen
-
Tweet -
Share
0 -
+1 -
LinkedIn
0
About Author

My name is Ronni Pedersen and I’m currently working as a Cloud Architect at APENTO in Denmark. My primary focus is Enterprise Client Management solutions, based on technologies like AzureAD, Intune, EMS and System Center Configuration Manager. I’m is also a Microsoft Certified Trainer and Microsoft MVP in Enterprise Mobility.
@83austin
Welcome to HP Support Community
I suggest you download and run the HP Support Assistant from this Link: https://www8.hp.com/us/en/campaigns/hpsupportassistant/hpsupport.html?jumpid=va_r602_us/en/any/psg/p…
HPSA will automatically search for all the latest drivers for your Notebook
-
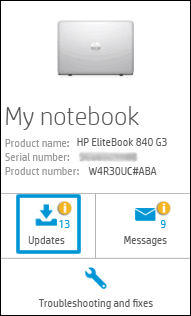
Click My devices in the top menu, and then click Updates in the My PC or My notebook pane.

-
Click Check for updates and messages to scan for new updates.
-
Review the list of updates. Updates with a yellow information icon are recommended. Updates with a blue information icon are optional.
-
Click the update name for a description, version number, and file size.
-
Select the box next to any updates you want to install, and then click Download and install.

Also ensure Windows is up to date.
Select the Start button, and then go to Settings > Update & security > Windows Update , and select Check for updates. If Windows Update says your device is up to date, you have all the updates that are currently available
If the issue persists you can try a System Restore to an earlier time before the issue started
— Select the Start button, type control panel and then choose it from the list of results.
— Search Control Panel for Recovery.
— Select Recovery > Open System Restore > Next.
— Choose the restore point related to the problematic app, driver, or update, and then select Next > Finish.
Keep me posted how it goes
Thank you and have a wonderful day 
If the information I’ve provided was helpful, give us some reinforcement by clicking the «Solution Accepted» on this Post and it will also help other community members with similar issue.
KrazyToad
I Am An HP Employee
@Catiew12,
Welcome to the HP Forums!
This is a wonderful place to converse with the community, get assistance and find tips.
I reviewed your post and understand that you are unable to boot after Windows upgrade and getting an error message.
I’ll be glad to help you 
In order that I may provide you with an accurate solution, I will need a few more details.
- When was the last time the computer was working fine?
- How do you do the upgrade on the computer?
- Have you made any software or hardware changes on the computer?
- Have you performed any troubleshooting steps before posting?
While you respond to that, I would like to inform you that Winpeshl.ini files basically control whether a customized shell is loaded in Win PE installed of default command prompt and I would also like to know how exactly you had performed the upgrade to Windows 10.
It looks like the Windows update didn’t go through successfully and you need to reset the computer. I recommend you follow the steps in the below article to perform a reset on the computer.
https://support.hp.com/in-en/product/—/3982088/document/c04742289
Let me know how it goes. Awaiting your reply!
If you wish to show appreciation for my efforts, mark my post as Accept as Solution. Your feedback counts!
Good day! Take care
Cheers!
The_Fossette
I am an HP Employee