TL;DR
Trying to sideload Lineage, I hit a brick wall getting the following error:
D:SetupsXXXXXLineage FP3platform-tools_28.0.2(ADB_1.0.41)>
    adb sideload lineage-17.1-20210104-nightly-FP3-signed.zip
adb: failed to read command: No error
The phone displays Timed out waiting for fuse to be ready. simultaneously.
Setting:
I’m trying to install LineageOS on my Fairphone FP3+ using Windows 10. Through workarounds including first difficulties and exploiting the manufacturer flash all .exe, I was able to boot the Lineage recovery and start sideload. adb devices returns the following:
List of devices attached
A2XXXXXXXXX1    sideload
The phone display prints Now send the package you want to apply to the device with "adb sideload <filename>"...
Problem:
I now enter adb sideload lineage-17.1-20210104-nightly-FP3-signed.zip, paying attention on having the archive in the same folder as adb (that’s the default way, even if about to change). The result was
- either
adb: failed to read command: Connection reset by peerwith aparent restart of the recovery boot - or a
adb: failed to read command: No errorin the cmd, giving meTimed out waiting for fuse to be ready.on the phone. I don’t trust that error as it doesn’t time out by waiting but in an instant after sending the sideload command.
I also double checked and cross-switched the cable, USB port, downloads, software versions (Lineage and recovery/ADB), as well as un- and reinstalled all respective drivers.
More references:
- Manage the bootloader of your FP3/FP3+
- Manually install Fairphone OS on FP3/FP3+ (from part «Setting:«, in the process leads to this link from above for Windows)
I also went through these possibly related questions on this site among others:
- Android adb sideload command
- adb sideload CM,it shows error
-
#1
Yesterday I tried to sideload something (Custom ROM and Magisk) onto my android device and got the error messages: adb: failed to read command: No error: 0. First I thought this was because of the package and ROM error during download process. But it’s actually not, I jumped onto another machine (Running Windows 10) with the same package and ROM I was able to sideload those without any issue. After that I think the problem is somewhat relate to the android-tools-adb itself, with both from pkg and ports, it produce the same error message.
Code:
Note: The command adb devices still recognize my device every time it plugged.Some information
Code:
FreeBSD FreeBSD 12.1-RELEASE-p10 FreeBSD 12.1-RELEASE-p10 GENERIC  amd64
android-tools-adb-29.0.6_1     Android debug bridge command line tool
Dmesg
Last edited by a moderator: Mar 21, 2022
keyboard_arrow_left Back to the overview
Basic requirements
- Read through the instructions at least once before actually following them, so as to avoid any problems due to any missed steps!
- Make sure your computer has
adbandfastboot. Setup instructions can be found here. - Enable USB debugging on your device.
- Make sure that your model is actually listed in the “Supported models” section here (exact match required!)
- Boot your device with the stock OS at least once and check every functionality.
Make sure that you can send and receive SMS and place and receive calls (also via WiFi and LTE, if available), otherwise it won’t work on PixelExperience either! - PixelExperience is provided as-is with no warranty. While we attempt to verify everything works you are installing this at your own risk!
Unlocking the bootloader
-
Enable OEM unlock in the Developer options under device Settings, if present.
- Connect the device to your PC via USB.
- On the computer, open a command prompt (on Windows) or terminal (on Linux or macOS) window, and type:
You can also boot into fastboot mode via a key combination:
- With the device powered off, hold Volume Up + Volume Down + Power.
- Once the device is in fastboot mode, verify your PC finds it by typing:
If you don’t get any output or an error:
- on Windows: make sure the device appears in the device manager without a triangle. Try other drivers until the command above works!
- on Linux or macOS: If you see
no permissions fastboottry runningfastbootas root. When the output is empty, check your USB cable and port!
-
Now type the following command to unlock the bootloader:
- If the device doesn’t automatically reboot, reboot it. It should now be unlocked.
- Since the device resets completely, you will need to re-enable USB debugging to continue.
Booting a custom recovery using fastboot
-
Download the PixelExperience Recovery. Simply download the latest recovery file.
- Connect your device to your PC via USB if it isn’t already.
- If your device isn’t already in fastboot mode, on the computer, open a command prompt (on Windows) or terminal (on Linux or macOS) window, and type:
You can also boot into fastboot mode via a key combination:
- With the device powered off, hold Volume Up + Volume Down + Power.
- Once the device is in fastboot mode, verify your PC finds it by typing:
If you don’t get any output or an error:
- on Windows: make sure the device appears in the device manager without a triangle. Try other drivers until the command above works!
- on Linux or macOS: If you see
no permissions fastboottry runningfastbootas root. When the output is empty, check your USB cable (preferably use a USB Type-A 2.0 one or a USB hub) and port!
- Flash a recovery on your device by typing (replace
<recovery_filename>with the actual filename!):fastboot flash boot <recovery_filename>.img - Now reboot into recovery to verify the installation.
- Use the menu to navigate to and to select the
Recoveryoption.
- Use the menu to navigate to and to select the
Installing PixelExperience from recovery
- Download the PixelExperience installation package that you would like to install or build the package yourself.
- If you are not in recovery, reboot into recovery:
- With the device powered off, hold Volume Down + Power.
- Now tap Factory Reset, then Format data / factory reset and continue with the formatting process. This will remove encryption and delete all files stored in the internal storage, as well as format your cache partition (if you have one).
- Return to the main menu.
- Sideload the PixelExperience
.zippackage:- On the device, select “Apply Update”, then “Apply from ADB” to begin sideload.
- On the host machine, sideload the package using:
adb sideload filename.zip.
- Once you have installed everything successfully, click the back arrow in the top left of the screen, then “Reboot system now”.
Get assistance
After you’ve double checked that you followed the steps precisely, didn’t skip any and still have questions or got stuck, feel free to ask on our Telegram group.
In this guide, we will show you the steps to install the Pixel Experience ROM onto your device without using the TWRP Recovery. One of the biggest perks of having an open-source ecosystem like Android is the ability to try out a plethora of mods and tweaks. In this regard, replacing the device’s stock ecosystem with customized firmware has always been one of the preferred tweaks for the end-users. And the reason for the same is hardly a secret either.
![]()
The fact that you will get a plethora of additional goodies and features right out of the box has always managed to grab all the headlines. But that isn’t the only reason out there. these custom ROMs also bless your device with the latest OS upgrades, even if the OEM’s official cycle has come to an end. So this brings us to the all-important question- how to install a custom ROM? Well, taking the help of a custom recovery like TWRP has always been the go-to choice for tech enthusiasts.
All that you need to do is Factory Reset the device and then flash the ROM ZIP file. Unfortunately, not every device has a working custom recovery. To solve this major concern, various custom ROM developers like the ones from Lineage, Arrow, and Pixel Experience have started porting their own recovery along with the ROM. So you will have to first flash their custom recovery and then flash the ROM using that recovery. Following in that footsteps, this guide will show you the steps to install the Pixel Experience ROM onto your device. Follow along.
![]()
The below instructions are listed under separate sections for ease of understanding. Make sure to follow the same sequence as mentioned. Droidwin and its members wouldn’t be held responsible in case of a thermonuclear war, your alarm doesn’t wake you up, or if anything happens to your device and data by performing the below steps.
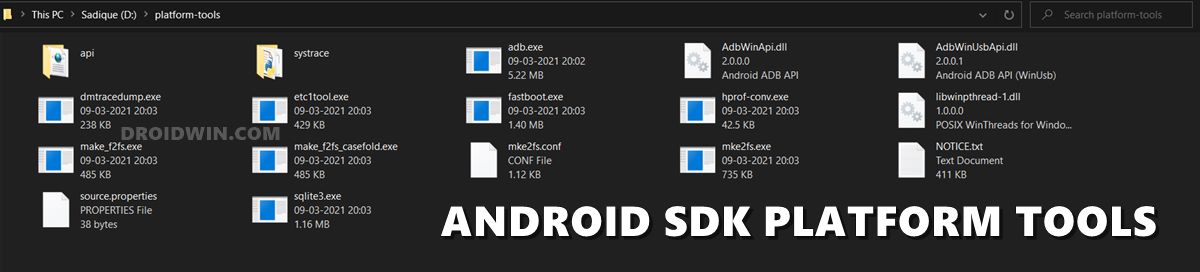
STEP 1: Install Android SDK
First and foremost, you will have to install the Android SDK Platform Tools on your PC. This is the official ADB and Fastboot binary provided by Google and is the only recommended one. So download it and then extract it to any convenient location on your PC. Doing so will give you the platform-tools folder, which will be used throughout this guide.
STEP 2: Enable USB Debugging and OEM Unlocking
Next up, you will have to enable USB Debugging and OEM Unlocking on your device. The former will make your device recognizable by the PC in ADB mode. This will then allow you to boot your device to Fastboot Mode. On the other hand, OEM Unlocking is required to carry out the bootloader unlocking process.
![]()
So head over to Settings > About Phone > Tap on Build Number 7 times > Go back to Settings > System > Advanced > Developer Options > Enable USB Debugging and OEM Unlocking.
STEP 3: Unlock Bootloader
Next up, you will also have to unlock the device’s bootloader. Do keep in mind that doing so will wipe off all the data from your device and could nullify its warranty as well. So if that’s all well and good, then please refer to our detailed guide on How to Unlock the Bootloader of any Android Device.
![]()
STEP 4: Download Pixel Experience ROM and Recovery
- Now, get hold of the Pixel Experience ROM and Recovery files from their official site.
- The ROM file will be present as a ZIP whereas the recovery will be an IMG file.
- Once both the files have been downloaded, transfer them to the platform-tools folder on your PC.

- Next up, rename the recovery file to recovery, so that the complete name becomes recovery.img.
- Likewise, rename the ROM file to rom, so that the complete name becomes rom.zip.
STEP 5: Boot to Fastboot Mode
- Connect your device to the PC via USB cable. Make sure USB Debugging is enabled.
- Then head over to the platform-tools folder, type in CMD in the address bar, and hit Enter. This will launch the Command Prompt.
- After that, type in the following command in the CMD window to boot your device to Fastboot Mode
adb reboot bootloader

- To verify the Fastboot connection, type in the below command and you should get back the device ID.
fastboot devices

STEP 6: Flash Vendor Boot Partition
Some devices need to flash an additional Vendor Boot ZIP file in order for the custom recovery to work properly. So grab the file from below and refer to the instructions that follow.
NOTE: Only the following devices need to flash the Vendor Boot ZIP file, the rest should skip this step.

MI 11 DOWNLOAD
MI 11 LITE 5G DOWNLOAD
MI 11 PRO DOWNLOAD
REDMI K40 PRO / REDMI K40 PRO+ / MI 11X PRO / MI 11i DOWNLOAD
PIXEL 4A 5G DOWNLOAD
PIXEL 5 DOWNLOAD
PIXEL 5A DOWNLOAD
- To begin with, download the Vendor Boot file from above
- Then transfer it to the platform-tools folder. Likewise, rename it to vendor_boot.img
- Now launch CMD inside the platform-tools folder
- Finally, execute the below command to flash this file:
fastboot flash vendor_boot vendor_boot.img
STEP 7: Flash Pixel Experience Recovery
- Some devices come with a separate recovery partition. Hence the Pixel Experience Recovery should be flashed in the recovery partition on those devices.
- On the other hand, in many devices, the recovery partition has been replaced by the boot partition. So you will have to flash the Pixel Experience Recovery in the boot partition on those devices.
- We have prepared a list for the same at the end of this guide [FAQ 2]. You should refer to it and then use the flashing command accordingly-
Device with boot partition: fastboot flash boot recovery.img
Device with recovery partition: fastboot flash recovery recovery.img

- Once the flashing is complete, use the hardware keys to bring up the Recovery menu and hit the Power key to confirm it.

- Your device will now boot to the Pixel Experience Recovery [it is a touch-based recovery, so you could use it without interacting with the hardware keys].
STEP 8: Copy Content of Slot A to Slot B
In order to maintain consistency of the firmware versions between the two partitions on your device, we will now be copying all the contents of Slot A to Slot B.
NOTE: Only the below-listed devices should flash this file, the rest should skip it.

MOTO EDGE S/ MOTO G100
MOTO G7 PLUS
MOTO X4
MOTO Z3 PLAY
ONEPLUS 7
ONEPLUS 7 PRO
ONEPLUS 7T
ONEPLUS 7T PRO
ONEPLUS 8 PRO
- Download the copy-partitions ZIP file and transfer it to the platform-tools folder on your PC.
- Then on the Pixel Experience recovery, select Apply Update > Apply from ADB.

- After that, open CMD inside the platform-tools folder and execute the below command
adb sideload copy-partitions-20210323_1922.zip
- Once flashed, go to Reboot and select Recovery. Your device will reboot to Pixel Recovery.
STEP 9: Factory Reset Device
- From the Pixel Experience Recovery, go to Factory Reset.
- Then select Format Data/Factory Reset > Format Data.
Open image in New Tab to expand it - Your device will now undergo a reset.
- Once done, you shall get the “Data wipe complete” message.

STEP 10: Install Pixel Experience ROM
- From the Pixel Experience Recovery, go to Apply Update > Apply from ADB.
Open image in New Tab to expand it - Then head over to the platform-tools folder, type in CMD in the address bar, and hit Enter.
- This will launch the Command Prompt. So type in the below command to flash the ROM file via Sideload:
adb sideload rom.zip

- The process will now begin and once done, you shall get the Total xfer: 1.00x message [Got an error? See FAQ below].

- Now go back to the home screen of the recovery and select Reboot System Now. Your device will now boot to the newly installed OS.

That’s it. These were the steps to install the Pixel Experience ROM without using TWRP Recovery. If you have any queries concerning the aforementioned steps, do let us know your doubt and the device that you are using in the comments. We will get back to you with a solution at the earliest.
FAQ 1: Error during ADB Sideload
If you get one of the below error messages, then it signifies a successful installation and you could reboot the device to the OS without any issues:
- Total xfer: 1.00x
- adb: failed to read command: Success/No error
- adb: failed to read command: No error
- (~47%) adb: failed to read the command: No error
- adb: failed to read command: Undefined error: 0
FAQ 2: Devices with Boot and Recovery Partition
Boot Partition
Here’s the list of devices with boot partition. These devices should use the fastboot flash boot recovery.img command to flash the recovery file.
GOOGLE PIXEL 2
GOOGLE PIXEL 2XL
MOTO EDGE S/ MOTO G100
MOTO G7 PLUS
MOTO X4
MOTO Z3 PLAY
MOTO ONE VISION/MOTO P50
ONEPLUS 7
ONEPLUS 7 PRO
ONEPLUS 7T
ASUS ZENFONE MAX PRO M1
ASUS ZENFONE MAX PRO M2
LENOVO K10 NOTE
LENOVO Z5S
LENOVO Z6 LITE
LENOVO Z6 PRO
MI 10S
POCO X3 PRO
REDMI K40
REDMI NOTE 10
REDMI NOTE 11
PIXEL 3
PIXEL 3XL
PIXEL 3A
PIXEL 3A XL
PIXEL 4 [ANDROID 11 FIRMWARE]
PIXEL 4XL [ANDROID 11 FIRMWARE]
PIXEL 4A [ANDROID 11 FIRMWARE]
MI 11
MI 11 LITE 5G
MI 11 PRO
REDMI K40 PRO / REDMI K40 PRO+ / MI 11X PRO / MI 11i
PIXEL 4A 5G
PIXEL 5
PIXEL 5A
Recovery Partition
Given here is a list of devices with the recovery partition. These devices should use the fastboot flash recovery recovery.img command to flash the recovery file.
ONEPLUS 7T PRO
ONEPLUS 8 PRO
ONEPLUS 3
ONEPLUS 5
ONEPLUS 5T
ONEPLUS NORD
REALME 5 PRO
REALME 6 PRO
MI 10 LITE 5G
MI 10 LITE ZOOM
MI 8
MI 8 LITE
MI 8 SE
MI 9
POCO F1
POCO F2 PRO
POCO M2 PRO
REDMI 9 PRIME/POCO M2
REDMI K20 PRO
REDMI K30
REDMI NOTE 10 PRO
REDMI NOTE 8 PRO
REDMI NOTE 8/8T
REDMI NTOE 9
REDMI NOTE 9 PRO 5G/MI 10i/MI 10T LITE
About Chief Editor

Sadique Hassan
administrator
A technical geek by birth, he always has a keen interest in the Android platform right since the birth of the HTC Dream. The open-source environment always seems to intrigue him with the plethora of options available at his fingertips. “MBA by profession, blogger by choice!”
keyboard_arrow_left Back to the overview
Basic requirements
- Read through the instructions at least once before actually following them, so as to avoid any problems due to any missed steps!
- Make sure your computer has
adbandfastboot. Setup instructions can be found here. - Enable USB debugging on your device.
- Boot your device with the stock OS at least once and check every functionality.
- LineageOS is provided as-is with no warranty. While we attempt to verify everything works you are installing this at your own risk!
Unlocking the bootloader
-
Enable OEM unlock in the Developer options under device Settings, if present.
- Connect the device to your PC via USB.
- On the computer, open a command prompt (on Windows) or terminal (on Linux or macOS) window, and type:
You can also boot into fastboot mode via a key combination:
- With the device powered off, hold Volume Down + Power.
- Once the device is in fastboot mode, verify your PC finds it by typing:
If you don’t get any output or an error:
- on Windows: make sure the device appears in the device manager without a triangle. Try other drivers until the command above works!
- on Linux or macOS: If you see
no permissions fastboottry runningfastbootas root. When the output is empty, check your USB cable and port!
-
Now type the following command to unlock the bootloader:
- If the device doesn’t automatically reboot, reboot it. It should now be unlocked.
- Since the device resets completely, you will need to re-enable USB debugging to continue.
Booting a custom recovery using fastboot
- Download Lineage Recovery. Simply download the latest recovery file, named something like
lineage-20.0-20230208-recovery-sunfish.img. - Connect your device to your PC via USB if it isn’t already.
- If your device isn’t already in fastboot mode, on the computer, open a command prompt (on Windows) or terminal (on Linux or macOS) window, and type:
You can also boot into fastboot mode via a key combination:
- With the device powered off, hold Volume Down + Power.
- Once the device is in fastboot mode, verify your PC finds it by typing:
If you don’t get any output or an error:
- on Windows: make sure the device appears in the device manager without a triangle. Try other drivers until the command above works!
- on Linux or macOS: If you see
no permissions fastboottry runningfastbootas root. When the output is empty, check your USB cable (preferably use a USB Type-A 2.0 one or a USB hub) and port!
- Flash a recovery on your device by typing (replace
<recovery_filename>with the actual filename!):fastboot flash boot <recovery_filename>.img - Now reboot into recovery to verify the installation.
- Use the menu to navigate to and to select the
Recoveryoption.
- Use the menu to navigate to and to select the
Installing LineageOS from recovery
- Download the LineageOS installation package that you would like to install or build the package yourself.
- (Optionally): If you want to install an application package add-on such as Google Apps (use the
arm64architecture), please read and follow the instructions on Google Apps page
- (Optionally): If you want to install an application package add-on such as Google Apps (use the
- If you are not in recovery, reboot into recovery:
- With the device powered off, hold Volume Down + Power. Then use the menu to select Recovery Mode.
- Now tap Factory Reset, then Format data / factory reset and continue with the formatting process. This will remove encryption and delete all files stored in the internal storage, as well as format your cache partition (if you have one).
- Return to the main menu.
- Sideload the LineageOS
.zippackage:- On the device, select “Apply Update”, then “Apply from ADB” to begin sideload.
- On the host machine, sideload the package using:
adb sideload filename.zip.
-
(Optionally): If you want to install any add-ons, click
Advanced, thenReboot to Recovery, then when your device reboots, clickApply Update, thenApply from ADB, thenadb sideload filename.zipthose packages in sequence. - Once you have installed everything successfully, click the back arrow in the top left of the screen, then “Reboot system now”.
Get assistance
After you’ve double checked that you followed the steps precisely, didn’t skip any and still have questions or got stuck, feel free to ask on our subreddit or in
#LineageOS on Libera.Chat.