Hi, I have been struggling with this After Effects for 2 days now and badly need to fix this.
When I try to preview what I am working on in my composition by pressing my space bar and clicking on the play button, I get this pop up message: «Cached Preview needs 2 or more frames to playback». When I click OK, I usually get the following pop-up: «Fresh layer cache check-out failed».
I cannot seem to get more than one frame in green or blue (cached). I have already tried Purging the memory, cleaning the database & cache and emptying my disk cache. I have also tried working on my other after effects files ( which all worked fine a few days ago) and they all have trouble previewing. I also tried working on earlier versions of After Effects and that either did not change my situation or could not open my files (not compatible versions, which is confusing to me because I have switched versions in the past when having a problem in AE and never had files not open because of version compatibility).
My max disk cache size is 75, which has always worked fine for me, with 12 GB RAM available for AE.
My «Reduce cache size when system is low on memory» is NOT checked and I have no other programs running.

Running latest version of After Effects 2017, 14.0.1.5
It’s my first time posting a question on here so if I’m missing any useful info, please let me know.
I see a lot of people asking this same question on forums and have tried many of the tricks and tips, even the strange or very general ones, cleaned up a ton and restarted the computer and the program many times. None of the forums questions seemed to have been answered with a clear answer though, so hoping someone can help me as the Adobe chat will only open in two days and I have clients waiting for their work.
Thank you
Hi, I have been struggling with this After Effects for 2 days now and badly need to fix this.
When I try to preview what I am working on in my composition by pressing my space bar and clicking on the play button, I get this pop up message: «Cached Preview needs 2 or more frames to playback». When I click OK, I usually get the following pop-up: «Fresh layer cache check-out failed».
I cannot seem to get more than one frame in green or blue (cached). I have already tried Purging the memory, cleaning the database & cache and emptying my disk cache. I have also tried working on my other after effects files ( which all worked fine a few days ago) and they all have trouble previewing. I also tried working on earlier versions of After Effects and that either did not change my situation or could not open my files (not compatible versions, which is confusing to me because I have switched versions in the past when having a problem in AE and never had files not open because of version compatibility).
My max disk cache size is 75, which has always worked fine for me, with 12 GB RAM available for AE.
My «Reduce cache size when system is low on memory» is NOT checked and I have no other programs running.
Running latest version of After Effects 2017, 14.0.1.5
It’s my first time posting a question on here so if I’m missing any useful info, please let me know.
I see a lot of people asking this same question on forums and have tried many of the tricks and tips, even the strange or very general ones, cleaned up a ton and restarted the computer and the program many times. None of the forums questions seemed to have been answered with a clear answer though, so hoping someone can help me as the Adobe chat will only open in two days and I have clients waiting for their work.
Thank you
![]()
Adobe Support Community
![]()
-
Global community
- Language:
-
Deutsch
-
English
-
Español
-
Français
-
Português
- 日本語コミュニティ
- 한국 커뮤니티
-
-
Home
-
After Effects
-
Discussions
-
- Re: AFTER EFFECTS «ERROR: CACHED PREVIEW NEEDS 2 O…

1 Correct answer

Explorer
,
Sep 26, 2018
Sep 26, 2018
I tried all of the advice online, and nothing worked for me. I was using the puppet tool on photoshop assets, as soon as I changed the puppet engine from Advanced to Legacy, my content reappeared in the preview window, and I was able to Ram Preview like normal. If this is happening in your comp, make sure to change the puppet engine on all your layers that are using it.

14
Replies
14
![]()
After Effects Community Recap
Getting started with After Effects
Содержание
- Работа над ошибками
- How to Fix the ‘Cached Preview’ Error in After Effects
- Let’s fix the dreaded вЂCached Preview’ error in After Effects.
- What’s the ‘Cached Preview’ Problem?
- How to Fix the ‘Cached Preview’ Error
- 1. PURGE RAM CACHE (MEMORY)
- 2. EMPTY YOUR DISK CACHE
- 3. CHANGE RAM RESERVED FOR OTHER APPLICATIONS
- 4. CLOSE OUT UNNECESSARY APPLICATIONS
- 5. CHANGE PREVIEW QUALITY
- 6. INCREASE DISK CACHE SIZE
- 7. UNCHECK вЂREDUCE CACHE SIZE WHEN SYSTEM IS LOW ON MEMORY’
- 8. CHANGE DISK CACHE LOCATION
- 9. SAVE AND CLOSE AFTER EFFECTS
- 10. CLEAN DATABASE & CACHE
- 11. SET WORK AREA TO THE APPROPRIATE DURATION
- 12. SET YOUR REGION OF INTEREST
- 13. OPTIMIZE YOUR EFFECTS
- 14. ORGANIZE YOUR PROJECT
- 15. RENDER INSTEAD OF PREVIEWING
- 16. OPTIMIZE YOUR MACHINE
Работа над ошибками
11. При открытии mov файла в программе After Effects СС получаем ошибку. Это происходит на платформе Mac OS X когда компонент DVCPROHDVideoOutput QuickTime конфликтует с программой After Effects CC (12.0). Ошибка также может возникнуть при просмотре, визуализации и экспорте видео. Встречаются следующие варианты ошибок:
— «After Effects error: file ‘file name.mov’ cannot be imported — this ‘Mov file is damaged or unsupported.’»
— «After Effects: One of the output modules could not be imported. It has been reset to use the default setting for the selected file format.»
— “Error reading frame from file ‘[file path and name].mov’. (86 :: 2)”
— “[file path and name].mov”. An output module failed. The file may be damaged or corrupted. (-1610153464)”
Решение проблемы: это происходит потому что, для воспроизведения и экспорта Adobe After Effects СС использует QT32 Server. И с этим процессом происходит сбой из-за плохого взаимодействия с QuickTime video out, при установленном компоненте DVCPROHDVideoOutput QuickTime component. Поэтому идем в [OS Drive]/Library/QuickTime делаем резервную копию DVCPROHDVideoOutput.component перетащив его на рабочий стол. Теперь удаляем DVCPROHDVideoOutput.component из папки Library/QuickTime перетащив его в корзину. И соответственно не забываем очистить корзину. Также как вариант, можно попробовать установить последнююю сборку кодеков Apple ProApps QuickTime Codecs 1.0.x update.
*При открытии проекта в версии программы Adobe After Effects CC 2020 появляются следующие сообщения об ошибках:
«After Effects error: The source compression type is not supported. (86 :: 1)»
Нажимаем на кнопку ОК и появится ещё одно сообщение:
«After Effects error: file ‘file name.mov’ cannot be imported — this ‘.mov’ file is damaged or unsupported.»
Проблема в том, что версия программы Adobe After Effects CC 2020 не поддерживает связанное с проектом видео в контейнере MOV. Т.е. не поддерживается кодек которым пожато видео в контейнере MOV.
12. После запуска программы на плфтформе Mac OS X Maverics появляется сообщение: You can’t use this version of the application “Adobe After Effects CC” with this version of OS X. You have “Adobe After Effects CC” 12.0. Или: Данная версия программы “Adobe After Effects CC” не может быть использована с этой версией OS X. Вы используете “Adobe After Effects CC” 12.0.
Необходимо установить обновление Adobe After Effects CC (12.1) Update и выше, при установке обновления 12.2 и выше необходимо использовать следующую методику.
Если при попытке поставить или скачать обновление, получаем ошибку: The most likely causes for this failure are an inability to connect to the internet or being logged in as a non-administrative user. То вот следующие методы решения проблемы: удалить или переименовать, файл в следующих директориях:
Mac OS X / Library / Application Support/Adobe/AAMUpdaterInventory/1.0/AdobeUpdaterAdminPrefs.dat. Или / Library / Application Support/Adobe/AAMUpdater/1.0/ AdobeUpdaterAdminPrefs.dat.
Windows C:Program files(x86)common filesadobeAAMUpdaterInventory1.0AdobeUpdaterAdminPrefs.dat.
Или искать файл в этой папке: C:Program DataAdobeAAMUpdater1.0AdobeUpdaterAdminPrefs.dat.
И далее вручную ставим скачанное обновление.
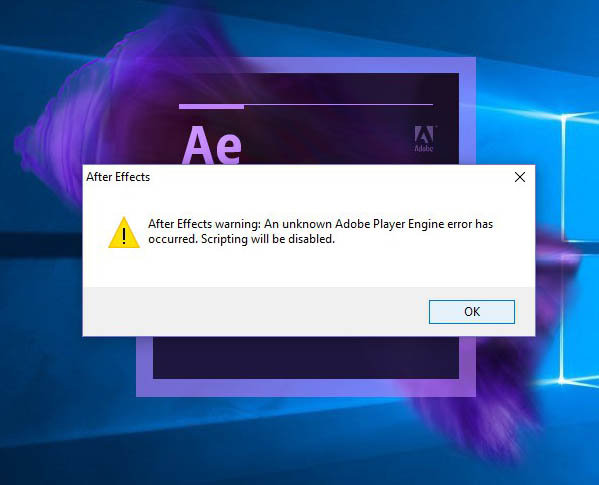
13. Ошибка при загрузке программы: «After Effects warning: An unknown Adobe Player Engine error has occurred. Scripting will be disabled.«. Вариант решения проблемы: попробовать поставить последнее обновление, переустановить или если есть ошибки в работе Adobe Media Encoder, переустановить и его.
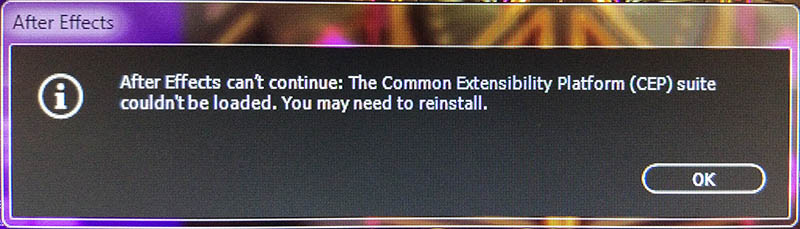
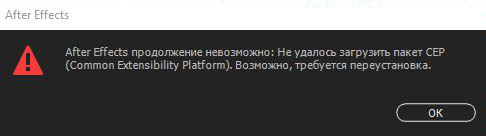
14. Ошибка при загрузке программы: «After Effects can’t continue: The Common Extensibility Platform (CEP) suite couldn’t be loaded. You may need to reinstall.«. / After Effects продолжение невозможно: Не удалось загрузить пакет CEP (Common Extensibility Platform). Возможно, требуется переустановка.
Как исправить? Попробовать запустить приложение от имени администратора. Нажимаем на AfterFX.exe правую кнопку мыши и выбираем: Запуск от имени администратора.
15. Ошибка при проигрывании таймлайна композиции: After Effects error: Cached Preview needs 2 or more frames to playback / After-Effects Fehler: Wiedergabe einer Cache-Vorschau benotigt mindestens 2 Frames. Данная ошибка связана с недостатком памяти.
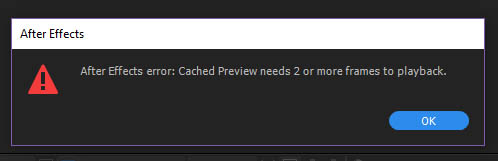
Несколько вариантов решения проблемы:
— Чистим память командой: Edit > Purge > All Memory & Cache.
— Перезагружаем программу Adobe After Effects CC 2017.
— Включаем Enable Disk Cache, если данная опция включена, то чистим ее содердимое нажав на кнопки: Empty Disk Cache и Clean Database & Cache, в настройках программы: Edit > Preferences > Media & Disk Cache.
— Снижаем качество предварительного просмотра в окне композиции с Full на Quarter.
— Проверяем наличие свободной памяти в Диспетчере задач. Т.е. память может быть занята какими-то процессами, или наоборот, для превью используется только часть свободной памяти, выделенной для Adobe After Effects CC 2017.
— Снимаем галку перед пунктом Reduce Cache Size when system is low on memory (this will shorten cached preview) в настройках Edit > Preferences > Memory.
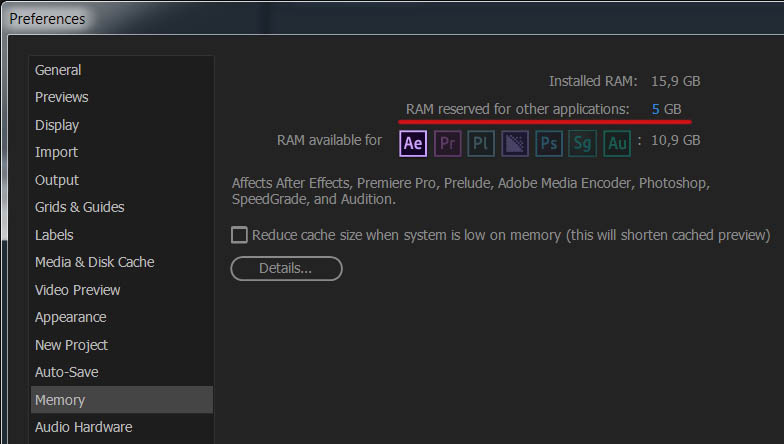
— Также стоит обратить внимание на размер файла подкачки и чтобы достаточно памяти было выделено для операционной системы: RAM reserved for other applications.
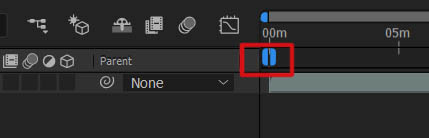
— Проверяем, чтобы рабочая область (Work Area) не находилась в следующем положении:
16. Ошибка: After Effects warning: Unspecified drawing error. Решение: сбрасываем рабочее пространство до дефолтного (делаем его по-умолчанию).
Источник
How to Fix the ‘Cached Preview’ Error in After Effects


Let’s fix the dreaded вЂCached Preview’ error in After Effects.
If you’re reading this article then chances are you probably have just recently received the dreaded вЂCached Preview Needs 2 or More Frames to Playback’ error in After Effects. This error usually leaves me feeling like this. but that doesn’t mean you can’t do something about it. In this article we’re going to talk about how to fix this common error. If you follow all of the steps below there’s a good chance that you’ll fix this error in only a matter of seconds. If you just want to fix the error you can follow the steps below, but first we thought it’d be helpful to talk about why you get this error in the first place.
What’s the ‘Cached Preview’ Problem?
After Effects previews compositions by creating temporary video files that are stored on your machine. These files are known as вЂcached’ preview files and they come in two flavors: Disk Cache and RAM Cache files.

RAM cache files are the preview video files that After Effects plays when you hit the spacebar. The bright green bar at the top of the timeline indicates the portion of your composition that is playing off of your RAM. Most of the time when you get the вЂCached Preview Needs 2 or More Frames to Playback’ error it is because there is not enough room on your RAM (memory) to load these temporary video files. Because After Effects utilizes RAM to playback preview files it’s advised that you have at least 8GB or RAM if not more in order to ensure that you have enough memory to playback large compositions.
Disk cache files are temporary video files that are typically rendered in the background while you’re working in After Effects. After Effects does not directly preview video from the disk cache. Instead video files from your disk cache are loaded into your RAM cache when you’re ready to preview. You can tell if a frame is rendered in the disk cache by looking for the dark blue bar at the top of the After Effects timeline. Disk cache files can be stored anywhere you want. You can even control how big your disk cache can get under the preferences menu.
How to Fix the ‘Cached Preview’ Error
Here’s a step-by-step guide for fixing the вЂCached Preview Needs 2 or More Frames to Playback’ error in After Effects.
1. PURGE RAM CACHE (MEMORY)

The first thing you should do is purge your RAM. This will erase any temporary cache files currently stored in your memory. To do this navigate to Edit>Purge>All Memory. This will reset your RAM cache from scratch.
2. EMPTY YOUR DISK CACHE
![]()
You can also try emptying your disk cache. The fastest way to do this is to navigate to Edit>Purge>All Memory and Disk Cache. This will (obviously) purge both your RAM and Disk Cache.
3. CHANGE RAM RESERVED FOR OTHER APPLICATIONS

After Effects allows you to set how much RAM is available for other applications. This is especially important if you have multiple applications open at the same time. If you use After Effects a lot I recommend giving After Effects as much RAM as you can. Navigate to After Effects>Preferences>Memory… From the popup menu change the value of вЂRAM reserved for other applications’ to a low number.
4. CLOSE OUT UNNECESSARY APPLICATIONS

If you have a lot of applications open on your machine you may need to close them out so After Effects isn’t competing for memory. I have a nasty habit of leaving Premiere Pro open when I’m working on After Effects projects. Go ahead and close out any unnecessary applications. This includes Spotify and iTunes. Just listen to music on your phone if you can’t stand the silence.
5. CHANGE PREVIEW QUALITY

The fastest way to reduce the size of the file being written to your RAM is to reduce the preview quality on your machine. To change this hit the menu at the bottom of the composition panel. By default it should be set to вЂAuto’. If you have a complicated project that won’t render go ahead and reduce this to half, third, or quarter. There’s also some handy keyboard shortcuts for doing this:
- Full: Cmd + J
- Half: Cmd + Shift + J
- Quarter: Cmd + Opt + Shift + J
6. INCREASE DISK CACHE SIZE

You also might be running into an issue where your disk cache is simply not large enough to effectively render in the background. To troubleshoot this go to After Effects>Preferences>Media & Disk Cache. Once the popup window appears increase the size of your disk cache. I like to keep mine above 50GB, which should be more than enough for most projects.
7. UNCHECK вЂREDUCE CACHE SIZE WHEN SYSTEM IS LOW ON MEMORY’

Some people have found success by navigating to After Effects>Preferences>Memory… and deselecting the вЂReduce cache size when system is low on memory’ button.
8. CHANGE DISK CACHE LOCATION

One common problem that people have when it comes to rendering in After Effects is placing their project files and their disk cache on the same drive. This can bog down your machine as After Effects will read and write files simultaneously to the same drive. Instead it is recommended that you separate your disk cache and project files across two separate drives. I typically have my project files on an external SSD and my disk cache on my local storage.
To change your disk cache location navigate to After Effects > Preferences > Media and Disk Cache and select вЂChoose Folder’ under Disk Cache.
9. SAVE AND CLOSE AFTER EFFECTS

While it may seem obvious sometimes this error can be often be solved by simply closing out After Effects and opening it back up. In my experience this will fix the problem for a few preview renders, but the error will likely pop-up again.
10. CLEAN DATABASE & CACHE

If you’ve made it this far and are still seeing that dreaded error it’s not the end of the world, but we will need to start getting creative. Try cleaning the database and cache by navigating to After Effects > Preferences > Media and Disk Cache. Once you’re there, hit вЂClean Database & Cache’.
11. SET WORK AREA TO THE APPROPRIATE DURATION

Sometimes this annoying error can be fixed by setting your work area to the exact length that it needs to be. You can very quickly change your previewable work area by using the B and N keys to set the start and end of your work area.
12. SET YOUR REGION OF INTEREST

You’ve likely accidentally set your region of interest once or twice when working in After Effects, but this little-used tool can actually be very helpful when you’re trying to preview a small portion of your video frame in After Effects. In short, After Effects will render a smaller portion of the video instead of the entire frame. You can activate the вЂRegion of Interest’ tool by navigating to the small region of interest button at the bottom of the composition panel.
13. OPTIMIZE YOUR EFFECTS

Not all After Effects are created equal. Some effects like the Lens Blur effect are simply much more intense on your machine than say a Fast Box Blur effect. Before you give up on your project try changing out any effects that may be unnecessary for your scene.
14. ORGANIZE YOUR PROJECT

Ask yourself if you’ve organized your project in an efficient and practical way. A project with hundreds of pre-comps and unnecessarily large asset files could possibly benefit from some better organization. It may be tempting to want to just hop into a big project and start animating, but this is actually a fast way to get lost in a disorganized project. Spend some time on the front-end to plan out your project and you might not end up with the вЂCached Preview’ error.
15. RENDER INSTEAD OF PREVIEWING

While this is certainly not what After Effects was designed to do one solution that could work would be to render out your project in the Render Queue instead of previewing the project in After Effects. For example, if you’re working on a huge Element 3D sequence it might make sense to work in the wireframe preview mode until you’re ready to export. In a way this method of animating is very similar to a 3D pipeline, we’ve just been spoiled by After Effects’ quick previews inside of the composition.
16. OPTIMIZE YOUR MACHINE

It’s time to take a look at your computer. We all know that After Effects is an incredibly intense program to operate. If you’ve optimized your project and are still receiving an error it might be time to consider upgrading your hardware. The first place to look would be your RAM (because that’s where RAM cache is stored), but honestly if any part of your system is lacking it can bring the whole animation process to a screeching halt. Go check out Adobe’s recommended system specs to get an idea for the type of machine you should be running. Sure a system upgrade can cost some money, but if you’re working in After Effects every day it is definitely worth it.
So that is every way that we were able to find that could potentially fix the вЂCached Preview Needs 2 or More Frames to Playback’ error in After Effects. If you want to learn more about After Effects check out the rest of the site here on School of Motion. Hopefully this error hasn’t completely ruined your day, but look on the bright side. a bad day in After Effects is better than a good day at a вЂnormal’ job.
Источник
Если все перечисленное выше не помогло (или просто вам неохота возиться, пробуя все подряд), значит, скорее всего ошибка происходит из-за конкретного проекта. При возникновении ошибки или другой проблемы обратите внимание на таймкод (время) ошибки. Если баг возникает каждый раз в одном и том же месте, то есть вероятность, что он вызывается каким-нибудь конкретным эффектом или анимацией, которую придется изучить и, возможно, изменить. Например, при работе с частицами можно выбрать другой режим работы CPU/GPU в плагине (если поддержка есть), уменьшить количество частиц, для Element 3D упростить геометрию, уменьшить количество полигонов, проверить материалы, текстуры, размер и т.п.
Для уточнения проблемного слоя или эффекта мне несколько раз помогал такой способ. Вы выбираете половину слоев в композиции и удаляете их все. Рендерите видео, ну или как вы там предпочитаете проверять. Тут возможны два варианта:
- Если ошибка пропала, значит, она была в удаленных слоях композиции, отменяем удаление, и теперь удаляем только половину удаленных ранее слоев. И снова запускаем рендер.
- Если ошибка осталась, то продолжаем дальше удалять слои, упрощая проект.
Если ошибку вызывает что-то конкретное, рано или поздно мы найдем виновника таким методом. Я понимаю, что это долгий, муторный и неудобный способ, но если вы знаете лучше, то пишите мне, буду благодарен! ![]()
А если ошибка возникает каждый раз в случайных местах композиции, то можно попробовать рендерить не готовое видео, а набор кадров Image Sequence. В After Effects есть несколько пресетов для этой цели под общим названием Multi-Machine Settings/Sequence в очереди рендера Render Queue.
В таком случае каждый кадр будет отдельным изображением на диске, и если рендер оборвется, вы не потеряете уже просчитанный готовый материал. А когда вы продолжите рендер (можно продублировать задание в очереди рендера Render Queue), After Effects пропустит уже существующие на диске кадры и начнет считать со следующего места. За это отвечает отдельная настройка в Render Settings — Skip existing files (allows multi-machine rendering) («Пропустить существующие файлы (позволяет осуществлять рендеринг на нескольких компьютерах)«).
Но, естественно, звук в таком виде не получится вывести из программы After Effects и придется потом дополнительно его считать как WAV файл без видео и объединять с набором отрендеренных кадров композиции. Их, конечно же, надо предварительно импортировать в любую программу для работы с видео — After Effects, Premiere Pro, да любую. Даже мой любимый FFMPEG может это сделать, да все нормальные программы умеют делать такое. Только проверьте частоту кадров, так как куча файлов на диске не имеет такой информации, и это надо задавать руками.
Вообще, это было сделано для рендеринга по сети несколькими компьютерами одновременно, чтобы они не считали одинаковые кадры, назначенные другому After Effects. А самое интересное, что такое можно провернуть и на одной машине для ускорения рендера, ведь одна копия After Effects не задействует ресурсы процессора CPU на полную. Уменьшение времени рендера в After Effects