Very annoying with CUPS is that when an error on the communication between the CUPS backend and the printer occurs, CUPS disables the print queue and to be able to continue printing an administrator (root access required) has to re-enable the queue. It is not enough to simply fix the printer’s communication problem (like turning it on, fixing the network connection, …).
This is especially a very bad design for desktop/home users. They often only turn on their printers when they really want to print (to save energy). Then it happens easily that they send a job and forget to turn on the printer. CUPS disables the queue and the annoying re-enabling procedure has to be done. And many users even do not know about the problem. So the printer does not print and the queue gets nuked and re-created. Or the people cry on the help forums or at the installation support of their distributions.
This problem can be easily worked around by installing beh, the Backend Error Handler. This script makes the handling of such backend errors configurable, so that the problem can easily be worked around. The new possibilities are:
-
Let queues simply not being disabled. Simple approach, but job gets lost.
-
Repeat a given number of times.
-
Repeat infinitely often, until the job gets finally through. This is the standard of LPRng, and it eliminates loss of the job.
-
The interval between two attempts to run the backend can also be configured.
-
Configuration is done independently for each print queue. So local printers and network printers can be treated differently.
Simply download the script, copy it into the CUPS backend directory (normally /usr/lib/cups/backend/), and make it executable with “chmod 755 beh. Then restart CUPS that it registers the new backend, usually with ”killall -HUP cupsd“ or ”/etc/init.d/cups restart“. If you did all correctly, there must be a line containing ”beh“ in the output of ”lpinfo -v“.
beh is a wrapper which is called by CUPS in place of the usual backend, which is called by beh now. This way beh can, depending on its configuration, repeat the call of the backend or simply hide the error status of the backend from being seen by the CUPS daemon.
To make a print queue using beh, get root and call a command as follows:
lpadmin -p <queue name> -E -v beh:/<dd>/<att>/<delay>/<originaluri>
with
-
<queue name>: -
The name of your print queue
-
<dd>: -
Don’t Disable, if ”
1“,behalways exits with zero status, so the queue gets never disabled when the original backend exits with an error. ”0“ carries the error status of the last call of the backend (after<att>retries) on to CUPS, so the queue usually gets disabled. -
<att>: -
Attempts, number of attempts to recall the backend in case of an error. ”
0“ means infinite retries. In this case<dd>gets meaningless. -
<delay>: -
Delay between two attempts to call the beckend, to be given in seconds and as an integer number. Meaningless if
<att>is one. -
<originaluri>: -
The original URI, which your queue had before (use ”
lpstat -v“ to get your queue’s URI shown).
All parameters, especially, <dd>, <att>, and <delay> have always to be specified, even if one of them is meaningless due to the setting of the others.
beh works with every backend except the hp backend from HPLIP. If beh is used with the hp backend, the HP Toolbox will not find the printers any more.
Example URIs:
beh:/1/3/5/socket://printer:9100
On the network printer with host name ”printer“ it is tried to access 3 times with 5 second delays between the attempts. If the job still fails, the queue is not disabled (and the job discarded).
beh:/0/10/60/socket://printer:9100
Retry 10 times in one minute intervals, disable the queue when still not succeeding.
beh:/1/0/60/usb://Brother/HL-5040%20series
On a Brother HL-5040 on the USB try infinitely often until the printer comes back, in intervals of one minute. This way the job does not get lost when the printer is turned off and one can intendedly delay printing by simply switching off the printer. The ideal configuration for desktop printers and/or home users.
Print accounting is usually done by a wrapper backend provided by the accounting software. You can also use beh in combination with accounting, if you choose the correct order for the wrapper backends.
I (Till) have tried out pykota and accsnmp. For accsnmp only the version
beh:/1/0/30/accsnmp://socket://printer:9100
works, but as accsnmp being a pure hardware accounter, wrong accounting by the retries of beh can never happen. Only exception would be if the real backend has a bug leading to an error exit when the job has actually been printed (but then the real backend should not be used with beh anyway). The other way arround (accsnmp://beh:/1/0/30/…) does not work (Already reported to the author of accsnmp).
In case of pykota with hardware accounting it only works with:
beh:/0/3/5/cupspykota://socket://myprinter.example.com:9100
So this version has to be used for hardware accounting. And as hardware accounting only counts actually printed pages there is no problem of the cupspykota backend being called repeatedly. On all unsuccessful attempts (printer off, no paper/toner, …) cupspykota counts zero pages with hardware accounting.
With software accounting both orders of beh and cupspykota work, but here the recommended form is to let cupspykota call beh to avoid repeated counting of the pages if the printer fails.
So for now beh and accounting software should be combined as follows:
accsnmp
beh:/1/0/30/accsnmp://socket://printer:9100
pykota
-
Hardware accounting
-
beh:/0/3/5/cupspykota://socket://myprinter.example.com:9100 -
Software accounting
-
cupspykota://beh:/0/3/5/socket://myprinter.example.com:9100
In general
-
Always the accounter first if possible, especially when using software accounting
-
Use hardware accounting whenever possible (as then always only the actually printed pages are counted)
Report bugs to our bug tracking system (Component: foomatic-filters).
In this blog we will be making the Error Handler for handling Unhandled Promise Rejection, Uncaught Exception, Cast Errors
Step-1 Unhandled Promise Rejection
This type of error occurs if there if any mistakes are there in our env variables

So to fix it we just add these codes

Here, we are using on() which takes two function, the error and a callback function. In the callback function we just log the error message and then close the server
The Server

Closing function of the server

Step-2 Now lets handle the uncaught exception error. This error occurs if there is an undefined variable.
This is the same as Step-1 just we change the first parameter to uncaughtException.

Step-3 Lets handle some MongoDb error.
Here the error comes if we gives an invalid ID in the routes

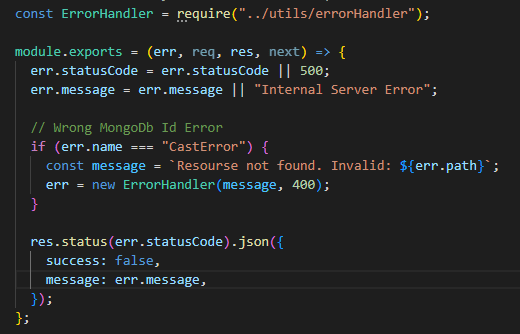
We see a CastError so to fix this lets open error.js file and write these codes.

The Code is pretty code simple, we just check the Error Code with an if-else statement & pass a new message with error code 400.
The error.js file will look like this
In future if there are more Errors we will just make it on the go.
In the next blog we will make paginations, search filters etc
OpenPrinting CUPS Filters v2.0b3 — 2023-01-31
Looking for compile instructions? Read the file «INSTALL»
instead…
INTRODUCTION
CUPS is a standards-based, open-source printing system used by Apple’s
Mac OS® and other UNIX®-like operating systems, especially also
Linux. CUPS uses the Internet Printing Protocol («IPP») and provides
System V and Berkeley command-line interfaces, a web interface, and a
C API to manage printers and print jobs.
This package contains backends, filters, and other software that was
once part of the core CUPS distribution, but during the time when CUPS
was developed at Apple, Apple stopped maintaining these parts as they
were not needed by Mac OS.
In addition it contains more filters and software developed
independently of Apple, especially filters for the PDF-centric
printing workflow introduced by OpenPrinting.
Since CUPS 1.6.0 cups-filters is required for using printer
drivers (and also driverless printing) with CUPS under Linux. This
version of cups-filters is only for CUPS 2.2.2 or newer. Please
use the cups-filters 1.x line for older CUPS versions.
CUPS 3.x has a vastly changed architecture (what we call the New
Architecture for printing) being all-IPP, only supporting driverless
IPP printers and no PPD files and classic CUPS drivers any more. It
will not use external filters any more and so will not need this
package. This package retro-fits the filter functions of
libcupsfilters and libppd to CUPS 2.x.
For compiling and using this package CUPS (2.2.2 or newer),
libcupsfilters 2.x, and libppd are needed. It is highly recommended,
especially if non-PDF printers are used, to have at least one of
Ghostscript (preferred), Poppler, or MuPDF installed.
It also needs gcc (C compiler), automake, autoconf, autopoint, and
libtool. On Debian, Ubuntu, and distributions derived from them you
could also install the «build-essential» package to auto-install most
of these packages.
If Ghostscript is used (via the «gsto…» or the «universal» CUPS
filters), Ghostscript 10.00.0 is required (10.01.0 is highly
recommended) and it has to be built at least with the «pdfwrite»,
«ps2write», «cups», «pwgraster», «appleraster», «pclm», «pclm8»,
«pdfimage24», «pdfimage8», «pxlcolor», and «pxlmono» output
devices. libcups of CUPS 2.2.2 or newer is required to build
Ghostscript this way.
If you use MuPDF as PDF renderer make sure to use at least version
1.15, as the older versions have bugs and so some files get not
printed correctly.
CUPS, this package, and Ghostscript contain some rudimentary printer
drivers and especially the filters needed for driverless printing
(currently PWG Raster, Apple Raster, PCLm, and PDF output formats, for
printers supporting IPP Everywhere, AirPrint, Wi-Fi Direct, and other
standards). See the links to the Printer Applications below and also
http://www.openprinting.org/drivers/ for a comprehensive set of
printer drivers for Linux.
Report bugs to
https://github.com/OpenPrinting/cups-filters/issues
See the «COPYING», «LICENCE», and «NOTICE» files for legal
information. The license is the same as for CUPS, for a maximum of
compatibility.
LINKS
cups-filters
- Short history
- cups-filters 2.x development
- PDF-based printing workflow
The New Architecture of Printing and Scanning
- The New Architecture — What is it?
- Ubuntu Desktop Team Indaba on YouTube
DOCUMENTATION FROM CUPS-FILTERS 1.x
Most of this is still valid for the current version of cups-filters.
IMAGE PRINTING DEFAULT CHANGED TO «SCALE TO FIT»
Compared to the PostScript-based original CUPS filters there is a
change of defaults: The imagetopdf and imagetoraster filters print in
«print-scaling=fit» or «scale-to-fit» mode (image is scaled to fill
one page but nothing of the image being cut off) by default.
This is done to support photo printing via AirPrint. The photo apps on
Apple’s iOS devices send print jobs as JPEG images and do not allow to
set any options like «print-scaling» or the page size. With
«scale-to-fit» mode set by default, the iOS photos come out on one
page, as expected.
To get back to the old behavior, supply one of the options
«print-scaling=none», «nofitplot», «filplot=Off», «nofit-to-page», or
«fit-to-page=Off».
GHOSTSCRIPT RENDERING OF FILLED PATHS
When Ghostscript is rendering PostScript or PDF files into a
raster format the filled paths are ususally rendered with the
any-part-of-pixel method as it is PostScript standard. On
low-resolution printers, like label printers with 203 dpi,
graphics output can get inaccurate and so for example bar codes do
not work any more. This problem can be solved by letting
Ghostscript use the center-of-pixel method.
This can be done by either supplying the option «-o
center-of-pixel» or «-o CenterOfPixel» on the command line when
printing or by adding a «CenterOfPixel» option to the PPD file and
set it to «true», for example by adding the following lines to the
PPD file of the print queue (usually in /etc/cups/ppd/):
*OpenUI *CenterOfPixel/Center Of Pixel: PickOne
*OrderDependency: 20 AnySetup *CenterOfPixel
*DefaultCenterOfPixel: true
*CenterOfPixel true/true: ""
*CenterOfPixel false/false: ""
*CloseUI: *CenterOfPixel
This option can be used when the print queue uses the gstoraster
filter.
POSTSCRIPT PRINTING RENDERER AND RESOLUTION SELECTION
If you use CUPS with this package and a PostScript printer then
the included pdftops filter converts the print job data which is
in PDF format into PostScript. By default, the PostScript is
generated with Ghostscript’s «ps2write» output device, which
generates a DSC-conforming PostScript with compressed embedded
fonts and compressed page content. This is resource-saving and
leads to fast wire transfer of print jobs to the printer.
Unfortunately, Ghostscript’s PostScript output is not compatible
with some printers due to interpreter bugs in the printer and in
addition, processing (by Ghostscript or by the printer’s
interpreter) can get very slow with high printing resolutions when
parts of the incoming PDF file are converted to bitmaps if they
contain graphical structures which are not supported by
PostScript. The bitmap problem especially occurs on input files
with transparency, especially also the ones produced by Cairo
(evince and many other GNOME/GTK applications) which unnecessarily
introduces transparency even if the input PDF has no transparency.
Therefore there are two possibilities to configure pdftops at
runtime:
- Selection of the renderer: Ghostscript, Poppler, pdftocairo,
Adobe Reader, or MuPDF
Ghostscript has better color management and is generally optimized
more for printing. Poppler produces a PostScript which is
compatible with more buggy built-in PostScript interpreters of
printers and it leads to a somewhat quicker workflow when
graphical structures of the input PDF has to be turned into
bitmaps. Adobe Reader is the PDF renderer from Adobe, the ones who
created PDF and PostScript. pdftocairo is a good choice for the
PDF output of Cairo (for example when printing from evince). It
is less resource-consuming when rasterizing graphical elements
which cannot be represented in PostScript (like
transparency). Note that pdftocairo only supports PDF input using
DeviceRGB, DeviceGray, RGB or sGray and is not capable of
generating PostScript level 1. So its support is only experimental
and distributions should not choose it as default.
The selection is done by the «pdftops-renderer» option, setting it
to «gs», «pdftops», «pdftocairo», «acroread», «mupdf», or «hybrid»:
Per-job: lpr -o pdftops-renderer=pdftops …
Per-queue default: lpadmin -p printer -o pdftops-renderer-default=gs
Remove default: lpadmin -p printer -R pdftops-renderer-default
By default, pdftops uses Ghostscript if this does not get changed
at compile time, for example by the Linux distribution vendor.
Hybrid means Ghostscript for most printers, but Poppler’s pdftops
for Brother, Minolta, and Konica Minolta. Printer make and model
information comes from the PPD or via the «make-and-model» option.
- Limitation of the image rendering resolution
If graphical structures of the incoming PDF file have to be
converted to bitmaps due to limitations of PostScript, the
conversion of the file by pdftops or the rendering by the printer
can get too slow if the bitmap resolution is too high or the
printout quality can degrade if the bitmap resolution is too low.
By default, pdftops tries to find out the actual printing
resolution and sets the resolution for bitmap generation to the
same value. If it cannot find the printing resolution, it uses 300
dpi. It never goes higher than a limit of 1440 dpi. Note that this
default limit can get changed at compile time, for example by the
Linux distribution vendor.
The resolution limit for bitmaps can be changed to a lower or
higher value, or be set to unlimited. This is done by the option
«pdftops-max-image-resolution», setting it to the desired value
(in dpi) or to zero for unlimited. It can be used per-job or as
per-queue default as the «pdftops-renderer» option described
above.
The «pdftops-max-image-resolution» option is ignored when Adobe
Reader is selected as PDF renderer.
POSTSCRIPT PRINTING DEBUG MODE
Sometimes a PostScript printer’s interpreter errors, crashes, or
somehow else misbehaves on Ghostscript’s output. To find
workarounds (currently we have already workarounds for Brother and
Kyocera) it is much easier to work with uncompressed PostScript.
To get uncompressed PostScript as output, send a job with the
«psdebug» option, with commands like the following:
lpr -P <printer> -o psdebug <file>
lp -d <printer> -o psdebug <file>
If you want to send your job out of a desktop application, run
lpoptions -p <printer> -o psdebug
to make «psdebug» a personal default setting for you.
To extract the PostScript output for a developer to analyse it,
clone your print queue to a one which prints into a file:
cupsctl FileDevice=yes
lpadmin -p test -E -v file:/tmp/printout
  -P /etc/cups/ppd/<name of original queue>.ppd
and print into this queue as described above. The PostScript
output is in /tmp/printout after the job has completed.
This option does not change anything if Poppler’s pdftops is used
as renderer.
CUPS FILTERS FOR PDF AS STANDARD PRINT JOB FORMAT
Here is documentation from the former CUPS add-on tarball with the
filters for the PDF-based printing workflow: imagetopdf, texttopdf,
pdftopdf, and pdftoraster
The original filters are from http://sourceforge.jp/projects/opfc/
NOTE: the texttops filter shipping with this package is a simple
wrapper script for backward compatibility with third-party PPD files
and custom configurations. It is not referred to in the
cupsfilters.convs file and therefore not used by the default
configuration. Direct conversion of text to PostScript is deprecated
in the PDF-based printing workflow. So do not use this filter when
creating new PPD files or custom configurations. The parameters for
this filter are the same as for texttopdf (see below) as the texttops
filter calls the texttopdf filter plus Ghostscript’s pdf2ps.
Filters
IMAGETOPDF
- INTRODUCTION
This program is «imagetopdf». «imagetopdf» is a CUPS filter which reads
a single image file, converts it into a PDF file and outputs it to stdout.
This program accepts the following image file format;
gif, png, jpeg, tiff, photocd, portable-anymap, portable-bitmap,
portable-graymap, portable-pixmap, sgi-rgb, sun-raster, xbitmap,
xpixmap, xwindowdump
xbitmap, xpixmap and xwindowdump images are converted into png images by
the «convert» command. Other kinds of image file format can be supported
if the «convert» command support them.
Output PDF file format conforms to PDF version 1.3 specification, and
input image is converted and contained in the output PDF file as a binary
format non-compression image.
«imagetopdf» may outputs multiple pages if the input image exceeds page
printable area.
- COMMAND LINE
«imagetopdf» is a CUPS filter, and the command line arguments, environment
variables and configuration files are in accordance with the CUPS filter
interface.
imagetopdf <job> <user> <title> <num-copies> <options> [<filename>]
«imagetopdf» ignores and .
<title> is appended into the PDF dictionary as /Title.
specifies the number of document copies.
is a CUPS option list.
is an input image file name.
When omit the , «imagetopdf» reads an image file from stdin.
- ENVIRONMENT VARIABLES
This program refers the following environment variable;
PPD: PPD file name of the printer.
- COMMAND OPTIONS
«imagetopdf» accepts the following CUPS standard options;
fitplot
mirror
PageSize
page-left, page-right, page-bottom, page-top
OutputOrder
Collate
sides
cupsEvenDuplex
position
scaling
ppi
natural-scaling
landscape
orientation-requested
See the CUPS documents for details of these options.
- KNOWN PROBLEMS
Problem:
PBM and SUN raster images can not be printed.
Solution:
Due to the CUPS libcupsimage library’s bug. Update the CUPS on your system.
- INFORMATION FOR DEVELOPERS
Following information is for developers, not for driver users.
6.1 Options handled by a printer or «imagetopdf»
Following options are handled by a printer or «imagetopdf»:
Collate, Copies, Duplex, OutputOrder
Which handles these options depends on following options and attributes:
Collate, Copies, Duplex, OutputOrder, cupsEvenDuplex, cupsManualCopies
«imagetopdf» judges whether a printer can handle these options according to
the followings option settings in a PPD file.
Collate:
  If Collate is defined, "imagetopdf" judges the printer supports Collate.
Copies:
  If cupsManualCopies is defined as True, "imagetopdf" judges the printer
  does not support Copies feature.
Duplex:
If Duplex is defined, «imagetopdf» judges the printer supports Duplex.
If cupsEvenDuplex is True, Number of pages must be even.
OutputOrder:
If OutputOrder is defined, «imagetopdf» judges the printer supports
OutputOrder.
If the printer cannot handle these options, «imagetopdf» handles it.
Following pseudo program describes how «imagetopdf» judges to handle
these options.
Variables
Copies: specified Copies
Duplex: specified Duplex
Collate: specified Collate
OutputOrder: specified OutputOrder
EvenDuplex: specified cupsEvenDuplex
pages: number of pages
number_up: specified number-up
device_copies: Copies passed to the printer
device_duplex: Duplex passed to the printer
device_collate: Collate passed to the printer
device_outputorder: OutputOrder passed to the printer
soft_copies: copies by imagetopdf
device_copies = 1;
device_duplex = False;
device_collate = False;
device_outputorder = False;

if (Copies == 1) {
  /* Collate is not needed. */
  Collate = False;
}

if (!Duplex) {
  /* EvenDuplex is not needed */
  EvenDuplex = False;
}


if (Copies > 1 && the printer can handle Copies) device_copies = Copies;
if (Duplex && the printer can handle Duplex) {
       device_duplex = True;
} else {
   /* imagetopdf cannot handle Duplex */
}
if (Collate && the printer can handle Collate) device_collate = True;
if (OutputOrder == Reverse && the printer can handle OutputOrder)
             device_outputorder = True;

if (Collate && !device_collate) {
   /* The printer cannot handle Collate.
      So imagetopdf handle Copies */
              device_copies = 1;
}

if (device_copies != Copies /* imagetopdf handle Copies */ && Duplex)
    /* Make imagetopdf handle Collate, otherwise both paper side may have
       same page */
              Collate = True;
              device_collate = False;
}

if (Duplex && Collate && !device_collate) {
   /* Handle EvenDuplex, otherwise the last page has
      the next copy's first page in the other side of the paper. */
   EvenDuplex = True;
}

if (Duplex && OutputOrder == Reverse && !device_outputorder) {
   /* Handle EvenDuplex, otherwise the first page's other side of paper
      is empty. */
   EvenDuplex = True;
}

soft_copies = device_copies > 1 ? 1 : Copies;
6.2 JCL
When you print PDF files to a PostScript(PS) printer, you can specify
device options in PS. In this case, you can write PS commands in a PPD file
like as follows.
*OpenUI *Resolution/Resolution : PickOne
*DefaultResolution: 600
*Resolution 300/300 dpi: "<</HWResolution[300 300]>>setpagedevice"
*Resolution 600/600 dpi: "<</HWResolution[600 600]>>setpagedevice"
*CloseUI: *Resolution
However, if options cannot be described in PS file, you can write JCLs
as follows;
*JCLOpenUI *JCLFrameBufferSize/Frame Buffer Size: PickOne
*DefaultJCLFrameBufferSize: Letter
*OrderDependency: 20 JCLSetup *JCLFrameBufferSize
*JCLFrameBufferSize Off: '@PJL SET PAGEPROTECT = OFF<0A>'
*JCLFrameBufferSize Letter: '@PJL SET PAGEPROTECT = LTR<0A>'
*JCLFrameBufferSize Legal: '@PJL SET PAGEPROTECT = LGL<0A>'
*JCLCloseUI: *JCLFrameBufferSize
Because PDF cannot specify device options in a PDF file, you have to define
all the device options as JCLs.
When a printer does not support PS or PDF, you can use Ghostscript (GS).
In this case, you can specify device options like a PS printer.
If you want to use the same printer and same PPD file for both PDF and PS
printing, when you print a PS file, you can specify that GS handles it,
and when you print a PDF file, you can also specify that PDF filters handle
it in the same PPD file. However in this case, previous methods is not
appropriate to specify device options.
So, «imagetopdf» handles this case as follows;
(In following pseudo program, JCL option is an option specified with JCLOpenUI)
if (Both JCLBegin and JCLToPSInterpreter are specified in the PPD file) {
    output JCLs that marked JCL options.
}

if (pdftopdfJCLBegin attribute is specified in the PPD file) {
    output it's value
}

if (Copies option is specified in the PPD file) {
    mark Number of copies specified
} else if (pdftopdfJCLCopies is specified in the PPD file) {
    output JCL specified with JCLCopies
}

for (each marked options) {
    if (pdftopdfJCL<marked option's name> is specified in the PPD file) {
	output it's value as a JCL
    } else if (pdftopdfJCLBegin attributes is specified in the PPD file) {
	output "<option's name>=<marked choice>;" as a JCL
    }
}
output NEWLINE
Thus, if you want to use both PDF filters and GS by single PPD file,
what you should do is to add the following line in the PPD file;
*pdftopdfJCLBegin: "pdfto... jobInfo:"
Replace «pdfto…» by the name of the actual filter to be called after
pdftopdf.
Note:
If you specify JCLBegin, you have to specify JCLToPSInterpreter as well.
Note:
When you need to specify the value which is different from the choosen
value based on the PPD into the jobInfo, you have to specify the values
with the key started by «pdftopdfJCL» string.
For example, if the page size is defined in a PPD file as following;
  *OpenUI *PageSize/Page Size: PickOne
  *DefaultPageSize: A4
  *PageSize A4/A4:
  *PageSize Letter/US Letter:
  *CloseUI: *PageSize
if you choose the page size «Letter», the string «PageSize=Letter;» is
added to jobInfo. On the other hand, if the driver requires the different
value for the «Letter» size, for instance driver requires «PS=LT;»
instead of «PageSize=Letter;» as the jobInfo value, the PPD file has to
be defined as following;
  *OpenUI *PageSize/Page Size: PickOne
  *DefaultPageSize: A4
  *PageSize A4/A4:
  *pdftopdfJCLPageSize A4/A4: "PS=A4;"
  *PageSize Letter/US Letter:
  *pdftopdfJCLPageSize Letter/US Letter: "PS=LT;"
  *CloseUI: *PageSize
6.3 Temporally files location
«imagetopdf» creates temporally files if needed. Temporary files are created
in the location specified by TMPDIR environment variable. Default location
is «/tmp».
PDFTOPDF
The pdftopdf filter depends on libqpdf to read and write PDF files.
It replaces and imitates the pstops filter in the PDF-based workflow.
A similar filter (which can serve as behavior reference)
is called «cgpdftopdf» in OS X (not open source).
Command line
pdftopdf follows the usual CUPS filter calling conventions, i.e.
pdftopdf <job> <user> <title> <num-copies> <options> [<filename>]
together with the environment variables «PPD» and «CLASSIFICATION».
When omitting , «pdftopdf» reads a PDF file from stdin.
Internally this will write the data to a temporary file, because
the PDF format cannot be processed in a streaming fashion.
are delimited by space; boolean type CUPS options can be set
by only adding the option key, other types are provided as
pairs of key and value, =.
pdftopdf processes the following standard command-line and/or PPD options:
Copies      # ppd will only override, when commandline parameter was 1
fitplot / fit-to-page / ipp-attribute-fidelity
landscape / orientation-requested
PageSize / page-size / MediaSize / media-size
page-left / page-right / page-bottom / page-top
media-top-margin / media-left-margin / media-right-margin /
    media-bottom-margin
Duplex / JCLDuplex / EFDuplex / JD03Duplex / sides
number-up / number-up-layout
page-border
OutputOrder / OutputBin / DefaultOutputOrder / page-delivery
page-label
page-set
page-ranges
MirrorPrint / mirror
emit-jcl
position
Collate / multiple-document-handling / sheet-collate
cupsEvenDuplex
cupsManualCopies  # via ppd
Additional (non-standard) options
-
Booklet printing
booklet=Off/On/Shuffle-Only
«On» also tries to set DuplexTumble (two-sided-short-edge) and forces number-up=2
booklet-signature=(multiple of 4, or default: -1 to use "all pages")
- Page autorotate
pdftopdf automatically rotates pages to the same orientation,
instead of (e.g. fitplot) scaling them down unrotated.
This behavier can be controlled by
pdfAutorotate / nopdfAutorotate
Specifically, if a PDF file contains pages with page width greater than
page height (a landscape page), such pages are automatically rotated
anticlockwise by 90 degrees, unless the PPD file specifies
«*LandscapeOrientation: Minus90». In this case, clockwise rotation is used.
To turn off the feature on a job-by-job basis use
lp -d <print_queue_name> -o nopdfAutorotate <document>
On a per-queue basis use
-o nopdfAutorotate-default
as an option to lpadmin.
When the ‘landscape’ or ‘orientation-requested=4’ (or =5) option of CUPS is
given, the pdfAutorotate processing will adjust and accordingly rotate the
non-landscape pages are rotated instead.
Note: Some pages might end up 180 degree rotated (instead of 0 degree).
Those should probably be rotated manually before binding the pages together.
- Method of flattening interactive PDF forms and annotations.
Some PDF files (like application forms) contain interactive forms
which the user can fill in inside a PDF viewer like evince. The filled
in data is not integrated in each page of the PDF file but stored in
an extra layer. Due to this the data gets lost when applying
manipulations like scaling or N-up to the pages. To prevent the loss
of the data pdftopdf flattens the form before doing the
manipulations. This means the PDF will be converted into a static PDF
file with the data being integral part of the pages.
The same flattening is needed for annotations in PDF files.
By default the actual flattening work is done by QPDF, as QPDF is also
doing everything else in pdftopdf. This way no external utilities need
to be called and so extra piping between processes and extra PDF
interpreter runs are avoided which makes the filtering process faster.
As we did not test the new QPDF-based form-flattening with thousands
of PDF files yet and it has not been available to actual users yet it
is possible that there are still some bugs. To give users a
possibility to work around possible bugs in QPDF’s form flattening, we
have introduced an option to get back to the old flattening by the
external tools pdftocairo or Ghostscript.
The selection of the method is done by the «pdftopdf-form-flattening»
option, setting it to «auto», «qpdf», «pdftocairo», «ghostscript»,
«gs», «internal» or «external»:
Per-job: lpr -o pdftopdf-form-flattening=pdftocairo …
Per-queue default: lpadmin -p printer -o pdftopdf-form-flattening-default=gs
Remove default: lpadmin -p printer -R pdftopdf-form-flattening-default
By default, pdftopdf uses QPDF if the option is not supplied, also the
settings «auto» and «internal» make QPDF being used. «external»
auto-selects from the two external utilities, trying pdftocairo at
first and on failure Ghostscript. If the selected utility fails, the
form stays unflattened and so the filled in data will possibly not get
printed.
Native PDF Printer / JCL Support
Note that for most modern native PDF printers JCL is not needed any
more as they are controlled via IPP. For these the PPD files get
auto-generated by the support of CUPS and cups-filters for driverless
IPP printing.
pdftopdf will emit JCL when provided with a PPD file that includes the
«*JCLToPDFInterpreter:» keyword.
This enables for hardware copy generation and device collate; e.g. with PJL:
*JCLBegin:           "<1B>%-12345X@PJL JOB<0A>"
*JCLToPDFInterpreter: "@PJL ENTER LANGUAGE = PDF <0A>"
*JCLEnd:             "<1B>%-12345X@PJL EOJ <0A><1B>%-12345X"
For each marked option, the prefixed «pdftopdfJCL» keywords
can also be used to send raw JCL strings for that option.
These keywords also include *pdftopdfJCLBegin and *pdftopdfJCLCopies,
This allows the use of the same PPD for PDF- and PS-based workflows,
as pdftopdfJCL… will not be read in the PS case.
When the PPD contains the «Copies» keyword, pdftopdf will detect the use
of PJL and has special code which adds «@PJL SET COPIES=…»,
or «@PJL SET QTY=…», respectively.
Other JCL code can be injected via «*JCLOpenUI: …» … «*JCLCloseUI: …».
Special PDF comments
pdftopdf adds comments to the pdf preamble that might esp. be of use
to subsequent filters, e.g.
% This file was generated by pdftopdf
%%PDFTOPDFNumCopies : 1
%%PDFTOPDFCollate : false
The «NumCopies» and «Collate» values refer to the expected device/hardware
copies, i.e. when pdftopdf’s soft-copy generation did not handle this options.
Limitations
pdftopdf does not support functions that are not related to printing
features, including interactive features and document interchange features.
Many of these operators and sections are just ignored.
Some of these may be output, but those functions are not assured.
Known issues
-
Borders, esp. in the «number-up=1 fitplot=false»-case might be drawn
at incorrect locations. -
JCL documentation is sparse.
The imagetopdf or old pdftopdf documentation contains a tad more information. -
Missing AcroForm-content might surprise users printing PDF files directly /
from the command-line (see the Limitations section, above).
TEXTTOPDF
This implements a texttopdf filter, and is derived from cups’ texttops.
To configure
-
texttopdf uses CUPS_DATADIR/charset/pdf.utf-8 for font configuration
(when utf-8 was requested as charset). The font names given there are
used as fontconfig selectors; the best matching font, that is both
monospaced and in a supported format (TTC, TTF or OTF) will then be used. -
As a special exception, all fontnames that start with a ‘.’ or ‘/’ are
considered filenames, and fontconfig is skipped; the name is used directly
for loading the font file. -
Implementation note: TrueType Collections (.TTC) are internally handled
by appending ‘/’ and the index of the font inside the collection to
the filename (e.g. to use the second font of uming.ttc, the filename
uming.ttc/1 must be given to the fontembed-library).
By appending the index-field returned from fontconfig, this is completely
transparent to the user (but currently not widely tested). -
You may look at the two examples: pdf.utf-8.simple and pdf.utf-8.heavy.
To use
The filter is called just like any other cups filter. Have a
look at test.sh for example.
Known Issues
-
Text extraction does not work (at least for pdftotext from xpdf)
for the resulting pdfs. -
OTF(CFF) embedding currently does not subset the fonts.
-
Text wrapping in pretty-printing mode does not respect double-wide
characters (CJK), and thus produce wrong results (wrap too late)
for lines where they occur. The fix is not trivial, since all the
pretty-printing processing is done without knowledge of / prior to
the font configuration (which is where single or double width
code-ranges are specified). -
The hebrew example in test5.pdf shows one of our limitations:
Compose glyphs are not composed with the primary glyph but printed
as separate glyphs.
Further Info
Font embedding is handled by libfontembed in the cupsfilters/fontembed
subdirectory.
Please report all bugs to
https://github.com/OpenPrinting/cups-filters/issues
PDFTORASTER
1. INTRODUCTION
«pdftoraster» is a filter for CUPS. It reads PDF files, convert it and
output CUPS raster.
«pdftoraster» does not support functions that are not related to printing
features, including interactive features and document interchange features.
Many of these operators and sections are just ignored.
Some of these may be output, but those functions are not assured.
Encryption feature is not supported.
2. COMMAND LINE
«pdftoraster» is a CUPS filter, and the command line arguments, environment
variables and configuration files are in accordance with the CUPS filter
interface.
pdftoraster <job> <user> <title> <num-copies> <options> [<filename>]
«pdftoraster» ignores and .
<title> is appended into the PDF dictionary as /Title.
specifies the number of document copies.
is a CUPS option list.
is an input PDF file name.
When omit the , «pdftoraster» reads a PDF file from the stdin,
and save it as a temporary file.
3. ENVIRONMENT VARIABLES
This program refers the following environment variable;
PPD: PPD file name of the printer.
4. COMMAND OPTIONS
See CUPS documents for details.
5. INFORMATION FOR DEVELOPERS
Following information is for developers, not for driver users.
5.1 Options handled by a printer or «pdftoraster»
«pdftopdf» outputs the following special comments from the 4th line in the
created PDF data.
%%PDFTOPDFNumCopies : <copies> --- <copies> specified Number of Copies
%%PDFTOPDFCollate : <collate> --- <collate> is true or false
«pdftoraster» overrides the command line options by above two option’s values.
5.2 Temporally files location
«pdftoraster» creates temporally files if needed. Temporary files are created
in the location specified by TMPDIR environment variable. Default location
is «/tmp».
PCLMTORASTER
1. INTRODUCTION
«pclmtoraster» is a filter for pclm and raster-only pdf files.
It reads the raster graphics from each page using the QPDF API and converts
it to CUPS/PWG Raster. This filter supports all PCLm files. PDF files with
single page bitmap for each page and one of the following colorspaces with
8 Bits-per-component are supported DeviceGray, DeviceRGB and DeviceCMYK.
2. ENVIRONMENT VARIABLES
This program refers the following environment variable;
PPD: PPD file name of the printer.
3. COMMAND OPTIONS
Bi-Level output
print-color-mode=bi-level
Use «bi-level» color mode to apply threshold dithering for 1 bit B/W outputs.
By default, ordered dithering is used.
For other options, see CUPS documents for more details.
4. INFORMATION FOR DEVELOPERS
Following information is for developers, not for filter users.
4.1 Temporary files location
«pclmtoraster» creates temporary files if needed. Temporary files are created
in the location specified by TMPDIR environment variable. Default location
is «/tmp».
TEXTTOTEXT
This is a special filter for text-only printers (e. g. line printers,
daisy-wheel printers, POS printers, …) or for using printers in
their text mode (e. g. dot-matrix printers or otherwise unsupported
printers). It takes plain text (UTF-8-encoded as this is standard with
CUPS) and not PDF as input.
The texttotext filter replaces the former textonly filter.
It is for the following use cases:
-
Using text-only printers, like line printers or daisy-wheel
printers. Note that only text can get printed in the way the printer
is designed. No support for graphics printing tricks like ASCII art
or printing pixels with the period character. -
Fast and less resource-consuming text printing with dot-matrix
printers using the printer’s text mode instead of converting the
text to PDF and printing the PDF in the printer’s graphics mode,
which is slow, loud, and consumes much more ink. -
POS printing. POS printers often print only text on roll paper. This
filter has a non-paginated mode which prints continuously, ignoring
page height definitions.
The filter has the following features:
-
Conversion of UTF-8 to most printer’s encodings.
-
To each page size a number of lines and columns is assigned, after that
you only need to select the size of the paper in use. -
At end of page you can optionally send a Form Feed or let the filter fill
up the rest of the page with blank lines. -
New lines can be initiated by Line Feed, Carriage Return, or both.
-
Adjustable margins.
-
Adjustable width for tab stops.
-
Pagination can be turned off for roll paper or continuous printing in
general. -
Wrapping or truncation of long lines
-
Support for most of CUPS’ page management options (only with
pagination turned on): page-ranges, page-set, output-order, collate,
multiple copies.
Setting up the printer
In the printer setup tool select the «Generic Text-Only Printer» (with
lpadmin use «-m drv:///cupsfilters.drv/textonly.ppd»), then under the
«Installable Options» adjust the following:
-
Which page sizes to use and how many lines and columns the printer
is capable to print on them. The default setting for lines and
columns assume 6 lines per inch and 10 columns per inch. -
Whether to send a Form Feed character after each page. Sending a
Form Feed is highly recommended to get the content of each page
exactly onto the desired sheet. If the printer does not support Form
Feed characters, turn them off and make sure that you have adjusted
the correct number of lines for each page size, as the printer is
advancing pages by filling up the rest of the paper with blank
lines. -
How the printer advancs to a new line. Most printers require both
Crriage Return and Line Feed (the DOS/Windows standard), but some
would also work with either Carriage Return or Line Feed. -
The printer’s encoding: Most text and dot-matrix printers (usually
older devices) do not understand CUPS’ standard encoding UTF-8 but
instead, the use a simpler encoding (where each character is
represented by one byte). ASCII should always work, but does not
support letters with accents. So check the printer’s manual what is
supported. You cannot only use the encodings suggested by the PPD
file, but any one-byte-per-character encoding which the «iconv»
utility supports (see «iconv —list» for a list of encodings).
Also note that text-only and dot-matrix printers often have a DIP
switch block which allows for some hardware configuration, like
newline characters, length of page, input encoding, …
Options of the texttotext filter:
To be usually used when sending a job:
PageSize: Paper format to be used. Make sure that the number of lines
and columns printable on each paper size are correctly adjusted with
the appropriate setup option. The page height is ignore when
pagination is turned off. Possible values: Letter, Legal, Tabloid,
Ledger, A4, A3, FanFoldGerman, FanFoldGermanLegal, 11x14Rotated,
LegalRotated, Custom1, Custom2, Custom3
OverLongLines: What to do with lines longer that the width of the
page: Truncate: Simply drop the extra characters; WrapAtWidth
(default): Continue the line in the next line on the paper; WordWrap:
As WrapAtWidth, but do not cut in the middle of a word.
TabWidth: Width of a tab stop. Can be any positive number.
Pagination: On: Text is divided in pages depending on the page size
selection, with each page having the user-selected margins,
recommended for sheet paper; Off: Text is printed continuously,
ignoring page breaks and the height and upper and lower margins of the
destination page size, recommended for roll paper, POS, long lists on
continuous paper, … Note that with pagination turned off, multiple
copies, collate, page-ranges, page-set, and output-order are not
supported and therefore ignored.
page-left, page-right, page-top, page-bottom: Width of the margins
left blank, counted in lines or columns. Top and bottom margins are
ignored when pagination is turned off. Can be any positive number or
zero for no margin.
To be usually used when setting up the printer:
PrinterEncoding: The printer’s character encoding (code page). Any
encoding which the iconv utility can generate (see «iconv —list») and
which uses only one byte per character can be used. This should
support practically any printer which is capable of printing
text. ASCII is the default setting. See the printer’s manual for the
correct encoding to use.
NewlineCharacters: The characters sent on the end of a line, LineFeed
(LF), Crriage Return (CR), or both Carriage Return and Line Feed
(CRLF). Default is CRLF as most printers require this.
SendFF: On: Send a Form Feed after each page, so that printer changes
to the next sheet. Off: Do not send Form Feeds. To advance to the next
page blank lines are printed to fill up the page (requires the number
of limes for the selected page size correctly being set). When
pagination is off, Form Feeds are never sent.
LetterAvailable, LegalAvailable, TabloidAvailable, LedgerAvailable,
A4Available, A3Available, FanFoldGermanAvailable,
FanFoldGermanLegalAvailable, 11x14RotatedAvailable,
LegalRotatedAvailable, Custom1Available, Custom2Available,
Custom3Available: On: Paper of this size is available; Off: This paper
size is not available.
LetterNumLines, LegalNumLines, TabloidNumLines, LedgerNumLines,
A4NumLines, A3NumLines, FanFoldGermanNumLines,
FanFoldGermanLegalNumLines, 11x14RotatedNumLines,
LegalRotatedNumLines, Custom1NumLines, Custom2NumLines,
Custom3NumLines: Maximum number of text lines fitting on the paper
size. Default value is selected assuming 6 lines per inch. Can be any
positive number.
LetterNumColumns, LegalNumColumns, TabloidNumColumns,
LedgerNumColumns, A4NumColumns, A3NumColumns, FanFoldGermanNumColumns,
FanFoldGermanLegalNumColumns, 11x14RotatedNumColumns,
LegalRotatedNumColumns, Custom1NumColumns, Custom2NumColumns,
Custom3NumColumns: Maximum number of columns (characters) fitting on
the paper size. Default value is selected assuming 10 characters per
inch. Can be any positive number.
Standard CUPS options supported:
page-ranges, page set, output-order, collate
Note that these options and multiple copies are ignored when
pagination is turned off.
BEH — Backend Error Handler wrapper backend
A wrapper for CUPS backends to make error handling more configurable
Usually, if a CUPS backend exits with an error status other than zero
(for example if a printer is not turned on or not reachable on the
network), CUPS disables the print queue and one can only print again
if a system administrator re-enables the queue manually. Even
restarting CUPS (or rebooting) does not re-enable disabled queues.
For system administrators this can get annoying, for newbie users who
are not aware of this problem it looks like that CUPS is severely
broken. They remove and re-install print queues, getting on the nerves
of distro install support, people, or even switch back to a
proprietary operating system.
Nowadays CUPS allows some configurability to avoid this, setting the
Error Policy to «retry-job», but this does not allow to retry for
infinitely many times and generally does not allow to change the
number of repetitions. It is also not possible to simply drop the job
without disabling the queue when CUPS gives up repeating the job.
This script makes the handling of such backend errors more
configurable, so that the problem can easily be worked around. The new
possibilities are:
-
Let queues simply not being disabled. Simple approach, but job gets
lost. -
Repeat a given number of times.
-
Repeat infinitely often, until the job gets finally through. This
is the standard of LPRng, and it eliminates loss of the job. -
The interval between two attempts to run the backend can also be
configured. -
Configuration is done independently for each print queue. So local
printers and network printers can be treated differently.
Usage:
Activate «beh» for your print queue(s) with command(s) like this:
lpadmin -p <queue name> -E -v beh:/<dd>/<att>/<delay>/<originaluri>
with
<queue name>:     The name of your print queue
<dd>:             Don't Disable, if "1", beh always exits with zero
                  status, so the queue gets never disabled when the
                  original backend exits with an error. "0" carries
                  the error status of the last call of the backend
                  (after <att> retries) on to CUPS, so the queue
                  usually gets disabled.
<att>:            Attempts, number of attempts to recall the backend
                  in case of an error. "0" means infinite retries. In
                  this case <dd> gets meaningless.
<delay>:          Delay between two attempts to call the beckend, to
                  be given in seconds and as an integer number.
                  Meaningless if <att> is one.
<originaluri>:    The original URI, which your queue had before. Can
                  be determined with "lpstat -v".
All parameters, especially,
specified, even if one of them is meaningless due to the setting of
the others.
beh works with every backend except the «hp» backend of HPLIP, as the
«hp» backend repeats failed jobs by itself.
Example URIs:
beh:/1/3/5/socket://printer:9100

  On the network printer with host name "printer" it is tried to
  access 3 times with 5 second delays between the attempts. If the job
  still fails, the queue is not disabled (and the job discarded).

beh:/0/10/60/socket://printer:9100

  Retry 10 times in one minute intervals, disable the queue when still
  not succeeding.

beh:/1/0/60/usb://Brother/HL-5040%20series

  On a Brother HL-5040 on the USB try infinitely often until the
  printer comes back, in intervals of one minute. This way the job
  does not get lost when the printer is turned off and one can
  intendedly delay printing by simply switching off the printer. The
  ideal configuration for desktop printers and/or home users.
Originally this backend was written in Perl and part of the
foomatic-filters package. It was not overtaken into cups-filters
together with foomatic-rip to avoid the introduction of a dependency
on Perl. Now it has been re-written in C and so it can be part of
cups-filters without introducing new dependencies.
Today I want to talk about a very interesting topic: how to handle errors that happens on backend. These may include database errors, validation errors, server faults, etc. There are two major situations when an error may occur, and these situations should be handled differently.
An error during a transition into a route (i.e. in a model hook)
When Ember.js performs a transition to a new route, it calls a model method of that route. Here is a code of a typical route:
//..app/routes/posts.js
import Ember from 'ember';

export default Ember.Route.extend({
  model: function () {
    return this.store.findAll('post');
  }
});
In this example (given that post model is defined, and backend is up and running), Ember will make a GET request to /posts and then render a posts template with some data. But what if server will not respond or will respond with an error? A transition will fail and user either will stay on a previous page or will see a blank page (if they came directly to route with error). In both cases they will not understand what is going on and will become irritated. For these kind of situations it would be great to create a nice error page with an error message and a “Try again” button on it.
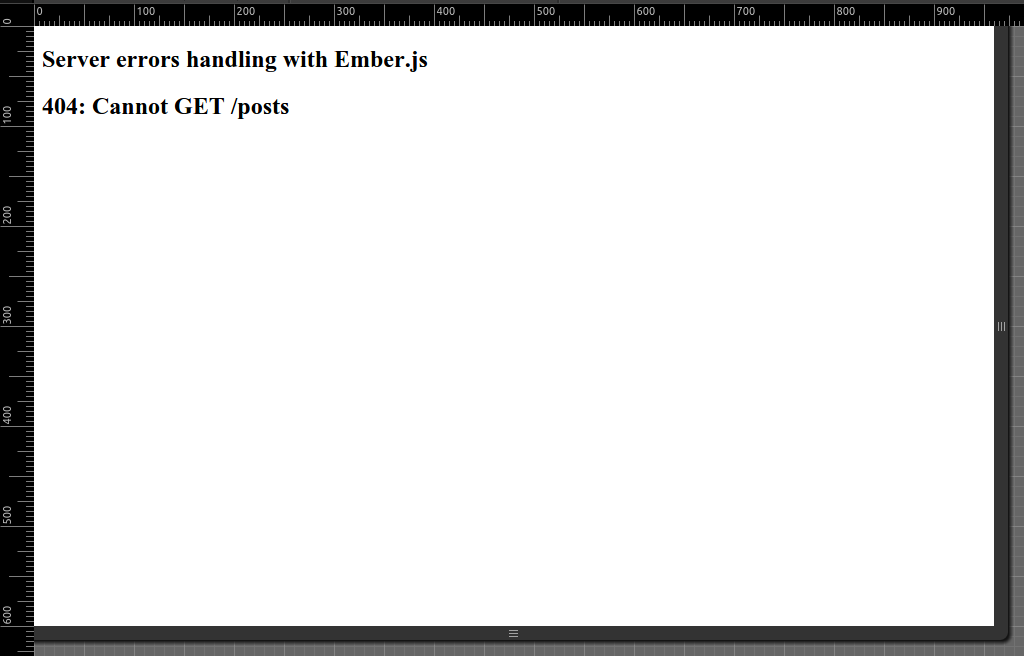
The first part of a task (create an error page) is easy, because if an error happens during transition, Ember will try to render an error template (documentation). We just need to create such a template:
{{!--//..app/templates/error.hbs--}}
<h2>{{model.errors.[0].status}}: {{model.errors.[0].detail}}</h2>
Here is a screenshot of an error page (of course, it’s appearance can be changed with css):
As for a “Try again” button, more coding is necessary. We need to abort a failed transition, store it and retry it after user presses a button.
First, let’s create a service to save a failed transition:
//..app/services/memory-storage.js
import Ember from 'ember';

export default Ember.Service.extend({
  getAndRemove: function (key) {
    var obj = this.get(key);
    if (obj !== undefined) {
      this.set(key, undefined);
    }
    return obj;
  }
});
This service is useful to store any object in memory and get access to it from anywhere. It inherits methods from Ember.Object , so .set, .get and other methods are available. I also added a new method, .getAndRemove, that allows to get an object from a storage and then “remove” it, replacing with undefined.
From Ember’s documentation you may already know that before rendering an error template, Ember will fire an error event and pass an error object and a failed transition to it’s handler. The best place to handle this event is an application route, because it is a parent of all routes in any Ember app:
//..app/routes/application.js
import Ember from 'ember';

export default Ember.Route.extend({
  memoryStorage: Ember.inject.service('memory-storage'), //inject a storage service, created ealier

  actions: {
    error: function (error, transition) {
      console.log('Application route error handler', error, transition);

      transition.abort(); //abort transition, so it can be retried later
      this.get('memoryStorage').set('failedTransition', transition); //save transition to storage

      return true; //return true to display an error page that we created
    }
  }
});
UPD: In newer Ember versions (I found this in 2.4.2) “transition.abort();” line causes an error and should be removed.
UPD2: In 2.8 you don’t need to remove “transition.abort();”, it works fine with it.
Now, let’s create an error controller with a retry action and a couple of useful computed properties:
//..app/controllers/error.js
import Ember from 'ember';

export default Ember.Controller.extend({
  memoryStorage: Ember.inject.service('memory-storage'), //inject a storage service

  /**
   * These computed properties will help to handle a special case,
   * when there is no error status and message (usually when internet
   * connection is gone)
   */
  status: Ember.computed('model', function () {
    if (
      this.model !== undefined &&
      this.model.errors !== undefined &&
      this.model.errors.length > 0 &&
      this.model.errors[0].status !== undefined
    ) {
      return this.model.errors[0].status;
    } else {
      return 0;
    }
  }),
  message: Ember.computed('model', function () {
    if (
      this.model !== undefined &&
      this.model.errors !== undefined &&
      this.model.errors.length > 0
    ) {
      for (var i = 0; i < this.model.errors.length; i++) {
        if (this.model.errors[i].detail !== undefined && this.model.errors[i].detail !== '') {
          return this.model.errors[i].detail;
        }
      }
    }

    return undefined;
  }),
  actions: {
    retry: function () {
      //get a failed transition from storage
      var transition = this.get('memoryStorage').getAndRemove('failedTransition');
      if (transition !== undefined) {
        transition.retry(); //retry transition
      }
    }
  }
});
And modify an error template:
{{!--..app/templates/error.hbs--}}
<h2>
    {{#if message}}
        {{status}}: <small>{{message}}</small>
    {{else}}
        Your internet connection is gone
    {{/if}}
</h2>

<div>
    <button {{action 'retry'}}>Try again</button>
</div>
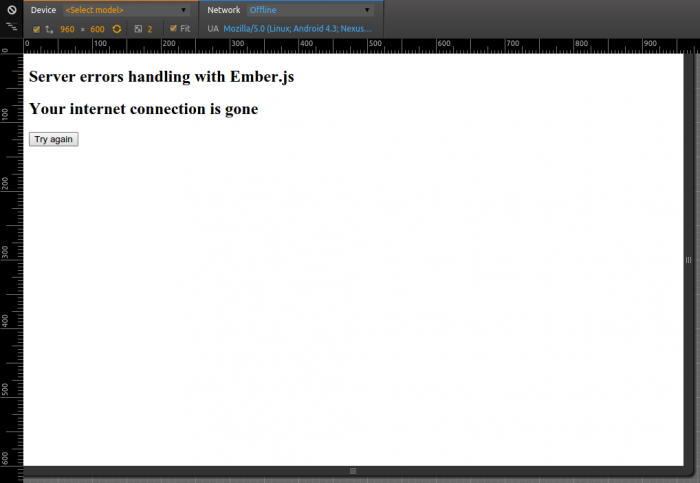
A final version of an error page (with internet switched off) looks like:
An error after a transition to a route
If an error happens after a transition is made (i.e. we call a model.save() in one of a controller’s actions and backend does not respond), the previous solution will not work, as Ember will not fire an error event. In this case we need to use a .then method from a RSVP.Promise class. This method accepts two arguments: a success handler and a failure handler. Take a look at an example:
//..app/controllers/index.js
import Ember from 'ember';

export default Ember.Controller.extend({
  actions: {
    generatePost: function () {
      var post = this.get('store')
        .createRecord('post');
      post.set('title', 'Generated post');
      post.set('text', 'I like Ember.js');
      post.save().then(undefined, (error) => { console.log(error); });
    }
  }
});
In order to inform a user about an error, we need to extract errors from an error object and display a message somehow (I will use an alert to simplify things, but there is some addons for nice flash messages on GitHub). Given the fact, that there can be a lot of such places in an application, we need to create a method, that will accept an error object and will be available from any controller or route. It’s easy to do with a mixin:
//..app/mixins/handle-errors.js
import Ember from 'ember';

export default Ember.Mixin.create({
  handleErrors: function (error) {
    console.log(error); //dump an error object to see it's structure

    for (var i = 0; i < error.errors.length; i++) {
      if (error.errors[i].detail !== undefined && error.errors[i].detail !== '') {
        //use some addon to show a nice message, I'll use an alert
        alert(error.errors[i].detail);
      }
    }
  }
});
Using a mixin is simple:
//..app/controllers/index.js
import Ember from 'ember';
import ErrorHandler from '../mixins/error-handler';//Import a mixin

//Pass a mixin as the first parameter to extend method
export default Ember.Controller.extend(ErrorHandler, {
  actions: {
    generatePost: function () {
      var post = this.get('store')
        .createRecord('post');
      post.set('title', 'Generated post');
      post.set('text', 'I like Ember.js');
      post.save().then(undefined, (error) => {
        this.handleErrors(error);
        post.rollbackAttributes(); //As saving is failed, we need to rollback changes
      });
    }
  }
});
A few words about an error object
A structure of an error object may be different, depending on Ember version and a backend response. If you use Ember 1.13.x or 2.x and your backend returns errors as a string with 400x status, an error object will look like
{
  "message": "Adapter operation failed",
  "name": "Error",
  "errors":
  [
    {
      "status": "404",
      "title": "The backend responded with an error",
      "detail": "Cannot POST /posts"
    }
  ]
}
But if your server responds with some JSON, it is possible that you will get something different in your error handler. It’s a good idea to use console to see what do you get and adopt your code to situation.
I created an application, that demonstrates these techniques, so you may run it and see how it works for yourself (GitHub repository).
That’s all. Have a nice code!
Featured image source – pxhere.com
I’ve read few other similar questions, but the information there didn’t help me find the answer to my problem. I have trouble trying to pass errors that I manage to catch inside services to components. So this is my onSubmit method inside component, which registers an user:
    onSubmit({ value, valid }) {
      console.log(value, valid);
      if (valid) {
      this.userService.trySaveUser({ email: value.email, password: value.password.pass }).subscribe(
        (user) => {
          console.log('saved user ' + user.email);
        }),
        (error) => {
          console.log('inside error');
        };
      }
    }
It works as it should when everything is correct on backend side. But in case of error I can’t manage to catch it here. However, it is caught in the service:
trySaveUser(body: User): Observable<any> {
    return this.http.post<any>(this.pathAPI + '/user', JSON.stringify(body), super.header()).pipe(
      catchError(super.handleError));
}
Inside super.HandleError method I retrieve data from the error and can print it into console without any problems. This method looks like this:
    public handleError(error: HttpErrorResponse | any) {
        //...fetching data from the error to errMsg

        //console.error(errMsg);
        return throwError(errMsg);
    }
I think I don’t really know how it works, as I’d expect the error returned from the method above to be caught again in the component here:
(error) => {
  console.log('inside error');
};
…but it doesn’t happen. Why so, and how can I correct this? I need to have it in component so that I can display the error message to the user. I’d be grateful for any help!