Bios extended memory copy error

Platinum Member Редактировать | Профиль | Сообщение | Цитировать | Сообщить модератору
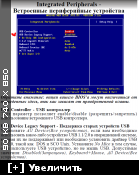
yukpxe.htm created 02-Oct-2003
Readme File for yukpxe.rom v1.11
PXE ROM Yukon
This file contains
1 Overview
2 Installation
2.1 Installation of binary
2.2 Removal of binary
3.1 PXELINUX
3.2 WINDOWS 2000/XP Remote Installation Services (RIS)
4 PXE Client Status/Error Codes
4.1 Init/Boot/Loader Codes
4.2 BIOS Codes
4.3 Base-Code/UNDI Loader Codes
1 Overview
YUKPXE is the PXE support software for the Marvell Yukon Gigabit Ethernet
Adapter.
2.1 Installation of binary
yukpxe.rom must be flashed to the network adapter using the YUKONDG
utility.
To flash the binary to the network adapter, proceed as follows:
1. Start YUKONDG.
2. Select ‘FLASH PROM . ‘ > ‘Load FLASH PROM from file».
3. Type the path and filename of the binary (yukpxe.rom).
4. Press .
5. After the process is finished, exit the utility.
PXE support is now installed on the network adapter.
2.2 Removal of binary
To disable all actions of yukpxe.rom, the network adapter FLASH PROM must
be cleared using the YUKONDG utility.
To clear the Flash PROM, proceed as follwows:
1. Start YUKONDG.
2. Select ‘FLASH PROM . ‘ > ‘Clear FLASH PROM’.
3. After the process is finished, exit the utility.
PXE support is now removed from the network adapter.
If you use LINUX as bootserver, you must include the Marvell Yukon
Gigabit Ethernet Adapter driver in the kernel of the downloadable image.
For details, please refer to the PXELINUX manual.
3.2 WINDOWS 2000/XP Remote Installation Services (RIS)
NOTE: WINDOWS 2000 Advanced Server can provide images of WINDOWS 2000
Professional and Windows XP Professional to clients.
For details on how to install and configure the WINDOWS 2000 Remote
Installation Services please refer to the WINDOWS 2000 Advanced
Server online help.
When you create an image of the WINDOWS installation CD (2000 or XP), it
does not contain a driver for the Marvell Yukon Gigabit Ethernet Adapter.
The WINDOWS setup utility that is transferred to the client, expects a
driver for the network adapter in the installation image. It stops the
installation and displays an error message if it can not find any
suitable driver.
To create an installation image that contains the Marvell Yukon Gigabit
Ethernet Adapter driver, proceed as follows:
1. Create a new image from the WINDOWS installation CD (2000 or XP).
(For details, refer to the WINDOWS 2000 Advanced Server online help.)
2. Copy the file YUKONW2K.INF (2000) or YUKONWXP.INF (XP) from the network
adapter driver CD to the directory i386 of the image directory on the
server.
3. Copy the file YUKONW2K.SYS (2000) or YUKONWXP.SYS (XP) from the network
adapter driver CD to the directory i386 of the image directory on the
server.
WINDOWS setup can now use the correct driver from the image. It copies
installation files to the client, then unloads the network adapter driver
and reboots the PC.
Be prepared to supply the Marvell Yukon Gigabit Ethernet Adapter driver
CD to install and configure the network adapter when WINDOWS setup asks
for it.
4 PXE Client Status/Error Codes
4.1 Init/Boot/Loader Codes
Error: PXE-E01
Description: PCI Vendor and Device IDs do not match!
Reason: The Vendor/Device IDs in the PXE binaries that are flashed to
ROM do not match those of the network adapter. One possible
reason is that the binaries are flashed to the wrong network
adapter.
Solution: Check if installed on a compatible adapter. See chapter
‘Overview’ for the compatible adapter family.
Error: PXE-E04
Description: Error reading PCI configuration space.
Reason: This message is displayed if any of the PCI BIOS calls made
to read the PCI configuration space return an error code.
This error must not occur with a final released BIOS and
hardware operating correctly.
Solution: Get the latest release version of your BIOS from your BIOS
manufacturer.
Error: PXE-E06
Description: Option ROM requires DDIM support.
Reason: This error must not occur with a final released BIOS.
Solution: Get the latest release version of your BIOS from your BIOS
manufacturer.
Error: PXE-E07
Description: PCI BIOS calls not supported.
Reason: This error must not occur with a final released BIOS.
Solution: Make sure the PCI BIOS has PCI BIOS services.
Error: PXE-E20
Description: BIOS extended memory copy error. AH == nn
Reason: This message is displayed if the BIOS extended memory copy
service returns an error.
4.3 Base-Code/UNDI Loader Codes
NOTE: The base-code ROM is part of yukpxe.rom.
Error: PXE-E61
Description: Media test failed, check cable.
Reason: The cable is not plugged in, or not connected.
Solution: Check the cable.
Error: PXE-EC1
Description: Base-code ROM ID structure was not found.
Reason: UNDI boot module did not find the base-code ROM ID structure.
If there is a base-code ROM image in the system, it may have
been corrupted.
Solution: Repeat the installation procedure as described above.
Error: PXE-EC3
Description: Base-code ROM ID structure is invalid.
Reason: The base-code ROM ID structure is invalid. The base-code ROM
image may have been corrupted.
Solution: Repeat the installation procedure as described above.
Error: PXE-EC6
Description: UNDI driver image is invalid.
Reason: The UNDI ROM image may have been corrupted.
Solution: Repeat the installation procedure as described above.
Error: PXE-EC8
Description: !PXE structure was not found in UNDI driver code segment.
Reason: The UNDI ROM image may have been corrupted, or has not been
initialized by the BIOS.
Possible reasons for this error:
— A network adapter image was programmed into a BIOS, not
into the network adapter.
— The memory allocated by the POST Memory Manager ($PMM)
during PXE option ROM initialization has been corrupted or
erased before PXE option ROM boot.
— The UNDI_Loader structure was not initialized correctly
during option ROM initialization.
Solution: Repeat the installation procedure as described above.
Error: PXE-EC9
Description: PXENV+ structure was not found in UNDI driver code segment.
Reason: The UNDI ROM image may have been corrupted, or has not been
initialized by the BIOS.
Possible reasons for this error:
— A network adapter image was programmed into a BIOS, not to
the network adapter.
— The memory allocated by the POST Memory Manager ($PMM)
during PXE option ROM initialization has been corrupted or
erased before PXE option ROM boot.
— The UNDI_Loader structure was not initialized correctly
during option ROM initialization.
Solution: Repeat the installation procedure as described above.
Источник
Bios extended memory copy error
The Message Text column in the table below contains an alphanumeric list of error and informational messages that the Boot Agent may display during initialization. Possible causes for the messages are listed in the table’s Cause column. Wherever applicable, advice regarding how to avoid an error condition also appears in the Cause column.
Flash device wrong size.
This can occur as an error message when using IBAUtil. The full version of Boot Agent software cannot be loaded into a flash ROM device smaller than 64 KB. If a 32 KB (or smaller) flash ROM device is detected in the adapter, the flash update software returns this message. Assuming the device is socketed, remove the «too small» device and install a blank 64 KB (or larger) flash ROM device. Invalid PMM function number. PMM is not installed or is not working correctly. Try updating the BIOS. PMM allocation error. PMM could not or did not allocate the requested amount of memory for driver usage. Press Ctrl+S to enter the Setup Menu. Instructs you how to enter the Configuration Setup Menu. PXE-E00: This system does not have enough free conventional memory. The Boot Agent cannot continue. System does not have enough free memory to run PXE image. The Boot Agent was unable to find enough free base memory (below 640K) to install the PXE client software. The system cannot boot via PXE in its current configuration. The error returns control to the BIOS and the system does not attempt to remote boot. If this error persists, try updating your system’s BIOS to the most recent version. Contact your system administrator or your computer vendor’s customer support to resolve the problem. PXE-E01: PCI Vendor and Device IDs do not match! Image vendor and device ID do not match those located on the card. Make sure the correct flash image is installed on the adapter. PXE-E04: Error reading PCI configuration space. The Boot Agent cannot continue. PCI configuration space could not be read. Machine is probably not PCI compliant. The Boot Agent was unable to read one or more of the adapter’s PCI configuration registers. The adapter may be mis-configured, or the wrong Boot Agent image may be installed on the adapter. The Boot Agent will return control to the BIOS and not attempt to remote boot. Try to update the flash image. If this does not solve the problem, contact your system administrator or Customer Support. PXE-E05: The LAN adapter’s configuration is corrupted or has not been initialized. The Boot Agent cannot continue. The adapter’s EEPROM is corrupted. The Boot Agent determined that the adapter EEPROM checksum is incorrect. The agent will return control to the BIOS and not attempt to remote boot. Try to update the flash image. If this does not solve the problem, contact your system administrator or Customer Support. PXE-E06: Option ROM requires DDIM support. The system BIOS does not support DDIM. The BIOS does not support the mapping of the PCI expansion ROMs into upper memory as required by the PCI specification. The Boot Agent cannot function in this system. The Boot Agent returns control to the BIOS and does not attempt to remote boot. You may be able to resolve the problem by updating the BIOS on your system. If updating your system’s BIOS does not fix the problem, contact your system administrator or Customer Support. PXE-E07: PCI BIOS calls not supported. BIOS-level PCI services not available. Machine is probably not PCI compliant. PXE-E09: Unexpected UNDI loader error. Status == xx The UNDI loader returned an unknown error status. xx is the status returned. PXE-E20: BIOS extended memory copy error. BIOS could not move the image into extended memory. PXE-E20: BIOS extended memory copy error. AH == xx Error occurred while trying to copy the image into extended memory. xx is the BIOS failure code. PXE-E51: No DHCP or BOOTP offers received. The Boot Agent did not receive any DHCP or BOOTP responses to its initial request. Make sure that your DHCP server (and/or proxyDHCP server, if one is in use) is properly configured and has sufficient IP addresses available for lease. If you are using BOOTP instead, make sure the BOOTP service is running and is properly configured. PXE-E53: No boot filename received. The Boot Agent received a DHCP or BOOTP offer, but has not received a valid filename to download. If you are using PXE, please check your PXE and BINL configuration. If using BOOTP, be sure that the TFTP service is running and that the specific path and filename are correct. PXE-E61: Media test failure. The adapter does not detect link. Please make sure that the cable is good and is attached to a working hub or switch. The link light visible from the back of the adapter should be lit. PXE-EC1: Base-code ROM ID structure was not found. No base code could be located. An incorrect flash image is installed or the image has become corrupted. Try to update the flash image. PXE-EC3: BC ROM ID structure is invalid. Base code could not be installed. An incorrect flash image is installed or the image has become corrupted. Try to update the flash image. PXE-EC4: UNDI ROM ID structure was not found. UNDI ROM ID structure signature is incorrect. An incorrect flash image is installed or the image has become corrupted. Try to update the flash image. PXE-EC5: UNDI ROM ID structure is invalid. The structure length is incorrect. An incorrect flash image is installed or the image has become corrupted. Try to update the flash image. PXE-EC6: UNDI driver image is invalid. The UNDI driver image signature was invalid. An incorrect flash image is installed or the image has become corrupted. Try to update the flash image. PXE-EC8: !PXE structure was not found in UNDI driver code segment. The Boot Agent could not locate the needed !PXE structure resource. An incorrect flash image is installed or the image has become corrupted. Try to update the flash image. PXE-EC9: PXENV + structure was not found in UNDI driver code segment. The Boot Agent could not locate the needed PXENV+ structure. An incorrect flash image is installed, or the image has become corrupted. Try to update the flash image. PXE-M0F: Exiting Intel PXE ROM. Ending execution of the ROM image. This option has been locked and cannot be changed.
You have attempted to change a configuration setting that has been locked by your system administrator with the IBAUtil. This message can appear either from within Intel® PROSet’s Boot Agent tab when operating under Windows* or from the Configuration Setup Menu when operating in a stand-alone environment. If you think you should be able to change the configuration setting, consult your system administrator.
Источник
← Вернуться в раздел «Драйверы и прошивки BIOS»
проблема кратко такая: на материнской плате из за заводского брака в негарантийный срок сгорели USB порты. порты карточки PCI to USB не загрузочные. морщил моск и тут случайно надыбал такую штуку:
Цитата:
PLoP Boot Manager http://www.plop.at/
12. Create a PCI boot manager option ROM (save in bios)
You can create a pci option rom file with [110]plpbtrom-0.5.zip. You
can store the option rom in your bios or to the rom of a network card
and run it from there.
[more]
12. Create a PCI boot manager option ROM (save in bios)
__________________________________________________________________You can create a pci option rom file with [110]plpbtrom-0.5.zip. You
can store the option rom in your bios or to the rom of a network card
and run it from there.
Usage: plpbtrom [OPTIONS] input-file output-fileOptions:
========
-h this help
-vendorid id hex value of the card vendor
-deviceid id hex value of device
-grabid grab vendor/device id from PCI ROM file
-hidden disable option rom text output
-nodisable do not allow option rom disable
-forceINT force hook interrupt
-INT18 hook int 18h
-compress compress option rominput-file boot manager file (ex. plpbtrom.bin)
output-file ROM file nameExamples
* plpbtrom plpbtrom.bin plpbt.rom
* plpbtrom -vendorid 0x10ec -deviceid 0x8139 plpbtrom.bin plpbt.rom
* plpbtrom -grabid netcard.rom plpbtrom.bin plpbt.romSpecial parameters
* -forceINT: This forces the boot manager to hook the INT 19h/INT
18h. If you have a PNP bios, then the boot manager does not use the
PNP bios feature of the boot device sequence. The boot manager will
be started before any boot devices is tried (when INT 19h mode is
used) or the boot manager is the last program that is started when
all boot devices failed to boot (when INT 18h mode is used).
* -INT18: Hook INT18h instead of INT19h. INT19h is the default mode.Files
plpbtrom — Linux executable
plpbtrom.exe — Windows executable
plpbtrom.bin — Boot ManagerDifference plpbtrom.bin and plpbt.bin
plpbtrom.bin gives the control of the boot process back to the bios
with a far return if you press esc. plpbt.bin makes a reboot with
int 19h.
Passing parameters to the boot manager with the linux kernel
command line is not supported by plpbtrom.bin
You can configure plpbtrom.bin like plpbt.bin with [111]plpcfgbt.
You can enable/disable a hotkey to start the boot manager.How to test a ROM
You can test your rom file with the free virtual machine [112]qemu.
qemu -hda harddisk.img -option-rom plpbt.rom
If you have no harddisk image file then take one from the qemu
download page or use a floppy image.
qemu -fda floppy.img -option-rom plpbt.romHow to flash an AMI bios
Do this at your own risk! This can damage your pc.
* Download the Ami bios flash utility and save your current bios.
[113]AMI Homepage
Its a DOS program, run the following command from a DOS floppy to
save your bios
afudos /obios.rom
* Use the Windows tool [114]MMTools to replace the network rom with
the plpbt.rom.
* Load the file bios.rom
* Find the network option rom. It has the id 20, the name PCI Option
ROM and the RunLoc number VendorID:DeviceID of your network card.
Maybe there are other option roms in your bios. Take care that you
choose the network option rom.
* Click on it that its marked.
* Click at the Replace Tab
* Load as Module file the plpbt.rom file.
* Press the Replace button
* Press the Save ROM as and give it the name mybios.rom
* Now comes the dangerous part. Flashing the bios.
I suggest to set the bios to the default settings and save it. Then
boot from a dos floppy and run
afudos /imybios.rom
Do not turn off the pc during flash. After the flash has completed,
go to the bios and do again a reset to the default settings.
* If all is ok, you should be able to configure the bios and start
the boot manager during the boot process.How to flash an AWARD bios
Do this at your own risk! This can damage your pc.
* Download the Award bios flash utility aflash. You should find it at
your Motherboard homepage in the bios section.
* Run it from a DOS floppy and save your current bios to a file. Give
it the name bios.rom.
* Search the file cbrom in the web. There are different version, not
all will work with your bios file, so you have to test it with
different versions.
* Run cbrom bios.rom /d
* This should list all parts of the bios rom. I cannot give you the
command to replace the rom. None of the cbrom programs where able
to display the content of my bios rom file. You have to test it by
your self.
* When you updated the bios rom file, then flash it. I suggest to set
the bios to the default settings and save it. Then boot from a dos
floppy and run with awdflash.
* If all is ok, you should be able to configure the bios and start
the boot manager during the boot process.
[/more]
не совсем понял вот это процитированное, точно не понял как патчить биос, но как я понял что — на материнских платах есть такая штука как загрузка по сети используя встроенную сетевую карту, чем например лично я не пользуюсь, хотя когда то давно мне так ставили винду техработники одного провайдера. и вот вроде как в процитированном тексте предлагается биос (или прошивку сетевой карты) заменить на PLoP (или какой то файл из набора). начал искать как перепрошить сетевую карту, ниче толкового не нагуглил — но тут скачал с офсайта драйвера на встроенную карту которой не пользуюсь, и в старом выпуске оказалась перепрошивалка и инструкцией
Цитата:
[more]
yukpxe.htm created 02-Oct-2003
Readme File for yukpxe.rom v1.11
PXE ROM Yukon
This file contains
1 Overview
2 Installation2.1 Installation of binary
2.2 Removal of binary3 Boot servers
3.1 PXELINUX
3.2 WINDOWS 2000/XP Remote Installation Services (RIS)4 PXE Client Status/Error Codes
4.1 Init/Boot/Loader Codes
4.2 BIOS Codes
4.3 Base-Code/UNDI Loader Codes———————————————————————————
1 Overview
YUKPXE is the PXE support software for the Marvell Yukon Gigabit Ethernet
Adapter.2 Installation
2.1 Installation of binary
yukpxe.rom must be flashed to the network adapter using the YUKONDG
utility.To flash the binary to the network adapter, proceed as follows:
1. Start YUKONDG.
2. Select ‘FLASH PROM …’ > ‘Load FLASH PROM from file».
3. Type the path and filename of the binary (yukpxe.rom).
4. Press <ENTER>.
5. After the process is finished, exit the utility.
PXE support is now installed on the network adapter.2.2 Removal of binary
To disable all actions of yukpxe.rom, the network adapter FLASH PROM must
be cleared using the YUKONDG utility.To clear the Flash PROM, proceed as follwows:
1. Start YUKONDG.
2. Select ‘FLASH PROM …’ > ‘Clear FLASH PROM’.
3. After the process is finished, exit the utility.
PXE support is now removed from the network adapter.3 Boot servers
3.1 PXELINUX
If you use LINUX as bootserver, you must include the Marvell Yukon
Gigabit Ethernet Adapter driver in the kernel of the downloadable image.
For details, please refer to the PXELINUX manual.3.2 WINDOWS 2000/XP Remote Installation Services (RIS)
NOTE: WINDOWS 2000 Advanced Server can provide images of WINDOWS 2000
Professional and Windows XP Professional to clients.
For details on how to install and configure the WINDOWS 2000 Remote
Installation Services please refer to the WINDOWS 2000 Advanced
Server online help.When you create an image of the WINDOWS installation CD (2000 or XP), it
does not contain a driver for the Marvell Yukon Gigabit Ethernet Adapter.
The WINDOWS setup utility that is transferred to the client, expects a
driver for the network adapter in the installation image. It stops the
installation and displays an error message if it can not find any
suitable driver.To create an installation image that contains the Marvell Yukon Gigabit
Ethernet Adapter driver, proceed as follows:
1. Create a new image from the WINDOWS installation CD (2000 or XP).
(For details, refer to the WINDOWS 2000 Advanced Server online help.)
2. Copy the file YUKONW2K.INF (2000) or YUKONWXP.INF (XP) from the network
adapter driver CD to the directory i386 of the image directory on the
server.
3. Copy the file YUKONW2K.SYS (2000) or YUKONWXP.SYS (XP) from the network
adapter driver CD to the directory i386 of the image directory on the
server.WINDOWS setup can now use the correct driver from the image. It copies
installation files to the client, then unloads the network adapter driver
and reboots the PC.
Be prepared to supply the Marvell Yukon Gigabit Ethernet Adapter driver
CD to install and configure the network adapter when WINDOWS setup asks
for it.4 PXE Client Status/Error Codes
4.1 Init/Boot/Loader Codes
Error: PXE-E01
Description: PCI Vendor and Device IDs do not match!
Reason: The Vendor/Device IDs in the PXE binaries that are flashed to
ROM do not match those of the network adapter. One possible
reason is that the binaries are flashed to the wrong network
adapter.
Solution: Check if installed on a compatible adapter. See chapter
‘Overview’ for the compatible adapter family.Error: PXE-E04
Description: Error reading PCI configuration space.
Reason: This message is displayed if any of the PCI BIOS calls made
to read the PCI configuration space return an error code.
This error must not occur with a final released BIOS and
hardware operating correctly.
Solution: Get the latest release version of your BIOS from your BIOS
manufacturer.Error: PXE-E06
Description: Option ROM requires DDIM support.
Reason: This error must not occur with a final released BIOS.
Solution: Get the latest release version of your BIOS from your BIOS
manufacturer.Error: PXE-E07
Description: PCI BIOS calls not supported.
Reason: This error must not occur with a final released BIOS.
Solution: Make sure the PCI BIOS has PCI BIOS services.4.2 BIOS Codes
Error: PXE-E20
Description: BIOS extended memory copy error. AH == nn
Reason: This message is displayed if the BIOS extended memory copy
service returns an error.4.3 Base-Code/UNDI Loader Codes
NOTE: The base-code ROM is part of yukpxe.rom.
Error: PXE-E61
Description: Media test failed, check cable.
Reason: The cable is not plugged in, or not connected.
Solution: Check the cable.Error: PXE-EC1
Description: Base-code ROM ID structure was not found.
Reason: UNDI boot module did not find the base-code ROM ID structure.
If there is a base-code ROM image in the system, it may have
been corrupted.
Solution: Repeat the installation procedure as described above.Error: PXE-EC3
Description: Base-code ROM ID structure is invalid.
Reason: The base-code ROM ID structure is invalid. The base-code ROM
image may have been corrupted.
Solution: Repeat the installation procedure as described above.Error: PXE-EC6
Description: UNDI driver image is invalid.
Reason: The UNDI ROM image may have been corrupted.
Solution: Repeat the installation procedure as described above.Error: PXE-EC8
Description: !PXE structure was not found in UNDI driver code segment.
Reason: The UNDI ROM image may have been corrupted, or has not been
initialized by the BIOS.
Possible reasons for this error:
— A network adapter image was programmed into a BIOS, not
into the network adapter.
— The memory allocated by the POST Memory Manager ($PMM)
during PXE option ROM initialization has been corrupted or
erased before PXE option ROM boot.
— The UNDI_Loader structure was not initialized correctly
during option ROM initialization.
Solution: Repeat the installation procedure as described above.Error: PXE-EC9
Description: PXENV+ structure was not found in UNDI driver code segment.
Reason: The UNDI ROM image may have been corrupted, or has not been
initialized by the BIOS.
Possible reasons for this error:
— A network adapter image was programmed into a BIOS, not to
the network adapter.
— The memory allocated by the POST Memory Manager ($PMM)
during PXE option ROM initialization has been corrupted or
erased before PXE option ROM boot.
— The UNDI_Loader structure was not initialized correctly
during option ROM initialization.
Solution: Repeat the installation procedure as described above.***End of Readme file***
[/more]
надеюсь хоть на какие то каментарии по этому поводу. испытал PLoP-ROM в описании написнао, что его отличие в том что по нажатию ESCAPE происхоит выход в биос, а не перезагрузка. проверил — происходит косяк а не выход в биос, так что тузла эта не надежная видимо работает только на оборудовании автора, переделывать биос явно не стоит, а вот перепрошить сетевую карту в принципе можно, особенно если ее потом можно перепрошить назад. 
Автор: Aleks78
Дата сообщения: 01.02.2011 11:16
bomzzz
Цитата:
на материнской плате из за заводского брака в негарантийный срок сгорели USB порты.
За USB у нас вроде всегда отвечал южный мост и если прошибло до него то плату на выброс…
Автор: bomzzz
Дата сообщения: 01.02.2011 11:20
уже больше года назад сгорели а плата работает. мимо кассы. ближе к телу
хотел для начала прошивку сохранить. вроде все правильно делаю а файл пустой получается, одни нули внутри. в архиве с утилитой лежит какой то файл yukpxe.lom, а в описании идет речь о yukpxe.rom, и размер у него, этого lom — 62,0 КБ (63 488 байт), не такой как получается при сохранении бекапа, хоть и пустого — 96,0 КБ (98 304 байт). то есть не понятно есть ли родная прошивка или нету
еще такой вопрос давно понять не могу что вот это такое IBA FE Slot 0258 v4110 ?
[more]


[/more]
нашел тута на форуме тему по марвелу скачал с офсайта более модерновую утилиту для прошивки
http://www.marvell.com/support.html
вот она вроде пишет что вообще прошивки нету, хотя когда пытаешься грузиться с PXE то ищет кабель, пишет что кабеля нет и запускается с винта

афтар раскачался. вообщем фигу — нужно выкалупывать основной биос, в нем исправлять часть которая запускает сеть, а сам плоп можно или туда добавить, или использовать биос сетевой карты, чета такое. хотя я толком так и не понял.
http://forum.plop.at/index.php/topic,1070.msg3910.html#msg3910
еще ворчит. сам написал черти что — ИЛИ значит или там или там
Цитата:
You can create a pci option rom file with [110]plpbtrom-0.5.zip.
You can store the option rom in your bios or to the rom of a network card and run it from there.
Автор: bomzzz
Дата сообщения: 01.02.2011 22:30
всё я совсем разобрался. объяснять все просто лень
Автор: uk12
Дата сообщения: 21.11.2011 10:09
Цитата:
всё я совсем разобрался. объяснять все просто лень
а ты все таки попробуй.
Тема тоже интересна.
Автор: bomzzz
Дата сообщения: 21.11.2011 10:18
uk12
я на форуме PLoP-а расписал подробней и тута http://www.rom.by/forum
с тех пор на мою INTEL 100M вышла DOS версия FlashRom и теперь можно без линукса обойтися.
ты как то спроси конкретней что надо.
Добавлено:
http://forum.plop.at/index.php?PHPSESSID=55a6a21d56de0de2733374cfc66513d8&topic=1070.0
Добавлено:
http://www.rom.by/forum/Universalnaja_utilita_dlja_chtenija_zapisi_flash-chipov_-?page=5#new
Добавлено:
обычно проблемы с загрузкой бывают или с сата контролерами добавочными и вот как у меня с сгоревшими юсб на матплате. может просто быть очень старая матплата на которой юсб порты есть но загрузки с них нет. PLoP (сразу отмечу что юсб драйвер не идеальный и может не помочь но другого нет) позволяет интегрировать его в биос матплаты как OptionROM — расширенный биос, при запуске компьютера матплата проверяет есть ли на PCI устройствах свой биос и если есть или выполняет его — как на видео карте или если он загрузочный добавляет его в загрузочное меню. изменение биоса материнской платы дело достаточно рискованное, особенно если результат не гарантированный. но есть интересная возможность — на компьютере могут быть PCI устройства со своим флешчипом. например сетевые карты, а загрузку по сети используют вообще редко, так что его можно абсолютно безболезненно заменить на PLoP. чтоб это сделать надо альтернативный софтину для прожига, потому что родные утилиты чисто заточены под родную прошивку и просто не дадут прошить ничего левого. сначала узнаем есть ли у нас такие дополнительные утсройства и есть ли у них флеш чип. например у меня еще есть сетевуха REALTEK но у нее есть только краватка для установки флеш памяти а самой памяти нет. а вот в сетевой карте INTEL 100 M такая память есть. альтернативных прошивальщиков вот знаю всего два FlashROM и UniFLASH (которая уже не поддерживается искать там же на форуме). теперь надо узнать сможет ли одна из этих утилит прошить наше PCI устройво, они поддерживают не любые определенные. если да — то это еще не все, нельзя прошить любой флеш чип памяти, а только те которые поддерживаются, получаем список поддерживаемых и смотрим какой чип у нас — я разобрал комп и посмотрел что на сетевухином чипе написано — ура совпало можем прошить.
теперь согласно инструкции PLoP настраиваем и создаем PLOP.ROM, и прожигаем его в флеш чип сетевой карты согласно инструкции FlashROMю вуаля в загрузочном меню биоса появляется пункт PloP Boot Manager. но и это еще не все, он не со всеми USB чипами работает хорошшо. если все срастется — USB стали загрузочными.
Добавлено:
как все делать там на форумах подробно расписано. на ромбае по русски на плопе по англиски. с досом еще проще.
Добавлено:
http://forum.ixbt.com/ про сата контролеры вот тут побольше можно найти, тут и как найти модуль для своего контролера поясняется и как потом его в биос засунуть. в АМИ биос засовывается AMITool утилита. про AWARD BIOS не знаю
Добавлено:
в Marvel ниче прошить не удалось, это сетевая карта не поддерживается альтернативными прошивальщиками (по крайней мере пока, автор раз в пол года что нибудь добавляет), какой в ней флешчип даже не знаю, он кстати пустой, его сетевой загрузчик асус в основной биос встроил. появится утилита можно туда прошить.
Добавлено:
http://forum.ru-board.com/topic.cgi?forum=5&bm=1&topic=32855&start=5340#lt
как запустить образ флоппи дискетки с досом в теме груба можно спросить
Автор: uk12
Дата сообщения: 21.11.2011 22:35
Дело в следующем.
Есть мать 865PE Neo2-S (MS-6728) с АМИ биосом в которой задокументирована загрузка с usb, но загрузка c usb не идет и видимо не только у меня одного, т.к. на форуме microstara задавали аналогичный вопрос. на что был ответ типа: но проблем формат фат 16 или фат 32.
Поэтому я и подумал о внедрении в bios plop, но возникла проблема MMTool не хочет работать с моей прошивкой bios (пробовал и 3.12 и 3.19 и 3.22 — при открытии ошибка, а 2.22 при открытии зависает).
По сетевухам: есть REALTEK с пустой краваткой, в компе стоит тоже REALTEK — какая завтра разберу комп узнаю.
Цитата:
как запустить образ флоппи дискетки с досом в теме груба можно спросить
С дискеты запускал, грузится плоп, выбираю юсб, идет загрузка с юсб. Это все хорошо, но хотелось бы иметь загрузку с биоса.
В любом случае огромное спасибо за информацию.
Бу копать дальше.
Автор: bomzzz
Дата сообщения: 22.11.2011 09:43
я смотрб ты уже углубился в тему.
а копать нечего больше я уже все раскопал. тебя в любом случае остается возможность интегрировать плоп в биос матплаты — то что ммтул не открывает биос очень странно. флеш память можно без труда купить, если ты не в очень маленьком городе живешь. только ты возьми список чипов поддерживаемых.. потом можно купить специально новое устройство.
и кажется тебе надо все таки в микростар написать, может они уже новый биос выпустили на твою матплату или хотя скажут чем открыть
Автор: uk12
Дата сообщения: 22.11.2011 10:03
bomzzz
Спасибо за ответ.
Теперь надо либо ехать покупать флеш память, либо крутить биос далее. Писать в MSI думаю бесполезно, да и последнее ихнее обновление биоса было: Release Date 2004-10-07 6728v25.zip ( http://www.msi.com/product/mb/865PE-Neo2-S—LS—FIS2R.html#/?div=BIOS ).
Странно конечно, что MMTool не хочет работать с этой прошивкой bios. Хотя слик мне в нее ребята прошили.
Автор: bomzzz
Дата сообщения: 22.11.2011 10:07
uk12
может после прошивки открываться перестало? у них и спроси.
если матплата старая то конечно нового не будет, только странно что не исправили. может не все порты загрузочные?
я где то выкладывал в тех постах все чипы поддерживаемые. щас с ходу не вспомнб как это делать. щас попробую сделать список
Добавлено:
http://zalil.ru/32108842
вот список чипов. но уже вышла новая версия флешрома может и чипов добавили кроме интеловскиъ карт
Добавлено:
http://zalil.ru/32108869
вот последней версии лист поддерживаемых чипов. если конечно еще более новая версия не вышла
Автор: bomzzz
Дата сообщения: 22.11.2011 14:17
Цитата:
kubuntu-kde4-8.04.1-desktop-i386.iso
http://mirror.yandex.ru/ubuntu-cdimage/kubuntu-kde4/releases/8.04.1/release/
для начала скопируем с флеш чипа сетевой карты имеющуюся родную прошивку. впрочем она может и не иметься. флеш утилиту и прошивку можно найти на сайте производителя. для Intel Desktop 100M. она нужна чтобы сграбить из неё ID. но можно и без нее обойтись. это нужно делать под досом, загружал образ флоппи грубом. образ с 8 досом в архиве прилагается.
http://www.intel.com/support/network/sb/cs-008018.htm
http://downloadcenter.intel.com/Detail_Desc.aspx?lang=rus&changeLang=true&DwnldID=19186Цитата:
bootutil -E
……
[nicnumber]
……bootutil -saveimage -file=intel.rom -nic=[nicnumber]
теперь подготовим PLOP.ROM. http://www.plop.at/ подробное описание в архиве с плопом
Цитата:
plpbtrom -grabid intel.rom plpbtrom.bin plpbt.rom
Grabbing vendorid (0x8086) and deviceid (0x1229)
plpbt.rom createdможно взять исходный plpbt.bin изменить его настройки конфигурационной утилитой а потом так же обработать.
я переключил в другой режим экрана например. можно сразу загрузку с юсб выставить, но плоп добавляет возможность управлять различными установлеными системами, загружаясь напрямую с пбр раздела, так что по умолчанию нормально
Цитата:
@echo off
color 9F
plpcfgbt plpbt.bin
plpcfgbt vm=800×600 plpbt.bin
plpcfgbt plpbt.bin
pauseможно посоветовать сразу отключить появление надписи
Цитата:
plpbtrom -hidden -grabid INTEL.ROM plpbtrom.bin plpbt.rom
изменим размер полученной прошивки до 65536 байт дописав нулями, это можно сделать 16 ричным редактором или приложенный FileResizer-ом
теперь используя PCIUtils или Everest или подобную программу определим куда подсоединена сетевая карта
pciutils-3.1.7-DOSЦитата:
LSPCI
Everest
Bus 2, Device 11, Function 0 Intel 82557/82558/82559 EtherExpress PRO/100B Adapter
Шина 2, Устройство 11, Функция 0 Intel 82557/82558/82559 EtherExpress PRO/100B Adapter
в шестнадцатиричном виде для FlashRom-а будет 02:0b.0теперь загружаем кубунту. можно запустить ее с винта распаковав исошник прямо на нтфс раздел (напрмиер системный) грубом
Цитата:
find —set-root —ignore-floppies /casper/vmlinuz
kernel /casper/vmlinuz file=/preseed/kubuntu-kde4.seed boot=casper quiet splash —
initrd /casper/initrd.gzэти файлы: flashrom, libpci3_3.1.7-4ubuntu2_i386.deb, plpbt.rom нужно скопировать в HOME директорию
запускаем системную консоль
для гарантии сначала делаем копию. можно убедится что в ней не нули и флешром видит не только вашу карту но и умеет чиать ваш чип памяти. впрочем есть force режим и можно поробовать прошить неизвестный чип насильно указав режим похожего у них должны совпадать технические характеристики, напряжение может быть большее но главное должны сопадать ножки микросхемы — по функциям. чтоб узнать какой чип нужно достать сетевую карту из компа и посмотреть что на нем написаноЦитата:
sudo passwd root
……….
su [password]sudo dpkg -i ./libpci3_3.1.7-4ubuntu2_i386.deb
./flashrom -r intel.rom -p nicintel:pci=02:0B.0
./flashrom -w plpbt.bin -p nicintel:pci=02:0B.0или вот так короче:
Цитата:
sudo dpkg -i ./libpci3_3.1.7-4ubuntu2_i386.deb
sudo ./flashrom -r intel.rom -p nicintel:pci=02:ob.0
sudo ./flashrom -w plpbt.rom -p nicintel:pci=02:ob.0перегружаемся. в загрузочном меню биоса появляется пункт — PLOP BOOT MANAGER
чтоб получить список всех поддерживаемых PCI устройств и чипов памяти:
Цитата:
./flashrom -L
точно можно прошить REALTEK-овскую карту, если в ней поддерживаемый чип памяти. но они обычно идут без чипа, который можно докупить отдельно и вставить самому. список поддерживаемых устройств и чипов прилагается в архиве
ОСТОРОЖНО! ТОЛЬКО ЕСЛИ ВЫ ПОНИМАЕТЕ ЧТО ВЫ ДЕЛАЕТЕ!!!
flashrom.ziphttp://files.mail.ru/MCY9TN скрины
можно добавить что в последней 12 версии плопа косяк с загрузкой с СД рома. лучше взять 11.2
если когда нибудь загрузка по сети все таки понадобится, то это тоже не проблема вот надыбал в инете два образа флоппи дисков которые поддерживают большинство сетевых карт http://files.mail.ru/K514M3
В ПРИНЦИПЕ МОЖНО СТУПИТЬ И СТЕРЕТЬ ОСНОВНОЙ БИОС МАТПЛАТЫ ТАК ЧТО СКАЧАЙТЕ ПРОШИВКУ И ПОЛОЖЬТЕ ЕЕ КУДАНИТЬ — ЧТО ПОД КУБУНТОЙ ПРОПИСАТЬ НАЗАД ТУТ ЖЕ
за новыми версиями флешрома следим здесь. тут же на форуме можно найти runiflash она свои устройства поддерживает
http://www.rom.by/forum
Добавлено:
http://bomz-co.narod.ru/flashrom-0.9.4_0.zip
флоппи образ доса с последней версией флешрома. запускать грубом
Автор: uk12
Дата сообщения: 04.12.2011 01:43
bomzzz
Спасибо за инфу.
Поставил сетевуху 3Com 3C980C-TXM. Прошил туда PLOP вместо PXE, теперь при загрузке по F11 в загрузочном меню биоса есть PLOP BOOT MANAGER, но через его меню не грузится ни с одного устройства — тупо зависает PLOP.
Видимо где-то хомутнул с конфигурацией загрузчика. Хотя там вроде и негде!?
Прошивал по аналогии с http://etherboot.org/wiki/romburning , http://etherboot.org/wiki/romburning/3com
Бу копать далее.
Автор: bomzzz
Дата сообщения: 04.12.2011 07:10
uk12
ID сетевой карты в PLoP прошил? видимо прошил раз он появился.
потом еще можно попробовать старые версии. в последних какая то ошибка есть, не передается номер устройства. с сд груб не может диск найти — до 10 находит.
http://zalil.ru/32192452
тут гарантии никакой нету. других юсб драйверов в принципе нет
Добавлено:
uk12
погоди а ты чем прошивал? надо сторонней утилитой, флешром должен твою карту прошивать. может родной прошивальщик изменил прошивку
Добавлено:
а просто если плоп с другого устройства запустить работает?
Автор: uk12
Дата сообщения: 04.12.2011 12:15
bomzzz
Цитата:
ID сетевой карты в PLoP прошил?
так как ты и рекомендовал: plpbtrom -hidden -grabid DUMP.ROM plpbtrom.bin plpbt.rom
Цитата:
погоди а ты чем прошивал?
флешромом из под MINT
Цитата:
а просто если плоп с другого устройства запустить работает?
с дискеты идет, правда на дискете plpbt-5.0.10, а прошивал plpbt-5.0.13
Попробую завтра прошить plpbt-5.0.10
Автор: bomzzz
Дата сообщения: 04.12.2011 12:27
uk12
это не я рекомендовал, это в инструкции плопа написькана.
у меня тоже 10 версия прошита, потом СД с грубом конфликтует я не стал менять
Автор: uk12
Дата сообщения: 04.12.2011 12:40
bomzzz
Да я не в претензии, а даже наоборот. Спасибо за внимание.
Завтра буду шить plpbt-5.0.10
Автор: bomzzz
Дата сообщения: 04.12.2011 12:48
кроме меня и тебя этого еще никто не делал
Автор: uk12
Дата сообщения: 04.12.2011 13:00
bomzzz
да это я уже понял
Автор: RASSKAZOVO1
Дата сообщения: 04.12.2011 16:32
САЛЮТ, господа!!! помогите,пожалуйста, подобрать дрова.
AVA1F5OD IDE CONTROLLER
код экземпляра: ACPIPNPA0004&5D18F2DF&1
ДАЙТЕ,ПОЖАЛУЙСТА, для виндоус 7 и для ХР.
заранее благодарен
Автор: uk12
Дата сообщения: 04.12.2011 18:36
bomzzz
Прошил plpbt-5.0.10 — полет нормальный!!!
Вывод — plpbt-5.0.13 скажем так, недоделан.


Автор: bomzzz
Дата сообщения: 04.12.2011 20:32
uk12
ура! отпишись на форуме плопа. только автор не любит когда его плоп парафинят и меня забанил за такое — ты через проксю. может исправит когда нибудь.
Добавлено:
RASSKAZOVO1
тема есть для дров. там спроси быстрее помогут
Автор: RASSKAZOVO1
Дата сообщения: 04.12.2011 20:36
Realtek RTL8111D это сетевая плата от материнки GIGABYTE GA-P41T-D3
перекачал кучу,а никакая не подходит!!!
Добавлено:
Realtek RTL8111D это сетевая плата от материнки GIGABYTE GA-P41T-D3
перекачал кучу,а никакая не подходит!!!
Автор: komandor
Дата сообщения: 04.12.2011 20:44
Автор: bomzzz
Дата сообщения: 04.12.2011 20:50
наверно лучше в теме семерки спросить где дрова ищут. может универсальные есть
Добавлено:
uk12
я ему (автору плопа) сто раз объяснял и на картинках показывал, что (что ли я то откуда знаю) что номер устройства как то неправильно передается и при запуски СД привода плопом из биоса если загрузочный диск сделан на грубе, то получается что как бы груб не знает что он на СД диске. у тебя вищишь вообще ни одно не запустилось. а он все свой плоп нахваливает типа он его на 386 проце проверил. а толку то с 286 проца если он с современными ьиосами конфликтует.
Автор: uk12
Дата сообщения: 06.12.2011 11:06
bomzzz
Из груба акронисы, херенс, разл. версии люнекса (убунта, минт) и пр. загружается без проблем. А вот установка ХР или вин 7 не идет. Также не идут различные сборки основанные на ХР или вин 7.
Куда копать?
Автор: bomzzz
Дата сообщения: 06.12.2011 11:18
попробуй поварьировать тем чем можно — мбр, эммуляцией флешки как хд. установку не пробовал а так у меня все что надо запускается.
у меня такая проблема — PCItoUSB VIA контроллер он выдает USB 2.0 Low Speed только.
покупал специально на чипе NEC High Speed но зараза без ошибок только файлы до 10 мб читает.
на интеле PCI не бывает, на нем вроде лучше всего работает.
флешку на чипе ALCOR перепрограммировал в HD , мбр от винды NT 5.0 вроде нормально, кроме одного плоповского косяка, он не видит второй раздел. гыгы. вроде исправлено в 13 но она криво пашет.
Добавлено:
то есть первый видит. третий видит, а второй нет
Добавлено:
еще идея такая, что плопом лишь бы загрузится, а как только линукс или винда свои дрова юсб загрузят уже нормалек все становится. так что винду можно ставить через WINNT32. или под доса
Добавлено:
почти год бомбандировал VIA письмами и на форуме их гнобил — они отказываются делать для своего чипа отдельный биос модуль. с NEC не пробовал.
Автор: uk12
Дата сообщения: 07.12.2011 18:33
bomzzz
Все оказалось банально просто.
У меня в BIOS была просто включена функция указанная ниже.
А включал я ее согласно рекомендации:

Но рекомендация то была для встроенной в загрузочное меню BIOS загрузки с USB. При включении этого параметра моя мать поддерживала только FAT и FAT32 USB загрузку.
После отключения этой функции через PLOP прошитый в сетевую все идет на УРА!!!
Автор: bomzzz
Дата сообщения: 07.12.2011 21:16
а без плопа почему с юсб не грузится? а железо какой примерно отпишись
Добавлено:
у тебя кстати биос AWARD поэтому его MMTool не открывал. но это и к лучшему, мало ли чем бы кончилось перепрошивание
Добавлено:
плоп удобная штука в биосе, теперь тебе повреждения мбр не страшны — ты просто в пбр можешь загрузится любого.
а какой у тебя контролер юсб и какая скорость чтения с винта под плоповским драйвером?
Автор: uk12
Дата сообщения: 07.12.2011 22:58
Цитата:
а без плопа почему с юсб не грузится?
грузится только если флешка форматирована в фат или фат32, да и то убунта, минт и др. Т.е различные сборки на основе вин7 и хр не идут. Да и установка вин7 и хр тоже не идет.
Кстати с ДВД загрузка вин7 тоже не идет выдает — error occurs error code 5. В вин7 загрузчик 4 кб. Если его поменять (с помощью UltraISO) на вистовский загрузчик, а он 2 кб, то установка винды идет нормально.
Цитата:
железо какой примерно отпишись
мать 865PE Neo2 S (MS-6728), пень4 2.66, 4 гиг. оперативки.
Цитата:
у тебя кстати биос AWARD
В том-то и дело что AMI — см. мой пост выше (1-й скритношит)
Цитата:
а какой у тебя контролер юсб
Южный мост Intel® ICH5/ICH5R
— Высокоскоростной контроллер USB2.0, 480Мб/с, 8 портов.
— 2 порта Serial ATA/150.
— 2-канальный IDE контроллер Ultra ATA 100 с режимом Bus Master.
— PCI Master v2.3, I/O APIC.
— Поддерживаются режимы энергосбережения и ACPI и APM.
Цитата:
какая скорость чтения с винта под плоповским драйвером?
на глаз — явно выше
Автор: bomzzz
Дата сообщения: 07.12.2011 23:11
с интеловским контроллер плоп лучше всего работает, скорость выше должна быть
Добавлено:
не знаю зачем тебе нтфс сдался на флешке — запорешь ее
Страницы: 12
Предыдущая тема: Дрова на nVidia-nForce-6A61BE19C-00
Форум Ru-Board.club — поднят 15-09-2016 числа. Цель — сохранить наследие старого Ru-Board, истории становления российского интернета. Сделано для людей.
Init/Boot/Loader Codes
- PXE-E00: Could not find enough free base memory.
PXE BaseCode and UNDI runtime modules are copied from FLASH or upper memory into the top of free base memory between 480K (78000h) and 640K (A0000h). This memory must be zero-filled by the system BIOS. If this memory is not zero-filled, the relocation code in the PXE ROMs will assume that this memory is being used by the system BIOS or other boot ROMs.
- PXE-E01: PCI Vendor and Device IDs do not match!
This message should never be seen in a production BIOS. When the system BIOS initializes a PCI option ROM, it is supposed to pass the PCI bus/device/function numbers in the AX register. If the PCI device defined in the AX register does not match the UNDI device, this error is displayed.
- PXE-E04: Error reading PCI configuration space.
This message is displayed if any of the PCI BIOS calls made to read the PCI configuration space return an error code. This should not happen with a production BIOS and properly operating hardware.
- PXE-E05: EEPROM checksum error.
This message is displayed if the NIC EEPROM contents have been corrupted. This can happen if the system is reset or powered down when the NIC EEPROM is being reprogrammed. If this message is displayed the PXE ROM will not boot.
- PXE-E06: Option ROM requires DDIM support.
This message should not be seen in a production BIOS. PCI option ROMs must always be installed as DDIM option ROMs (they must be installed into read/write upper memory).
- PXE-E07: PCI BIOS calls not supported.
This message should not be seen in a production BIOS. PCI BIOS must have PCI BIOS services.
- PXE-E08: Unexpected API error. API: xxxxh Status: xxxxh
This message is displayed if a PXE API returns a status code that is not expected by the runtime loader.
- PXE-E09: Unexpected UNDI loader error. Status: xxxxh
This message is displayed if the UNDI runtime loader returns an unexpected status code.
ARP Codes
- PXE-E11: ARP timeout.
The PXE ROM will retry the ARP request four times. If it does not get any valid ARP replies, this message is displayed. This error can be caused by a number of network and service configuration errors. The most common are:
- Setting the DHCP Class Identifier (option 60) on the DHCP server and installing the proxyDHCP on a separate machine.
- Using routers that do not respond to ARP requests.
BIOS and BIS Codes
- PXE-E20: BIOS extended memory copy error. AH == nn
This message is displayed if the BIOS extended memory copy service returns an error. This should not happen on a production BIOS. The variable «nn» is the BIOS error code returned by the BIOS extended memory copy service (Int 15h, AH = 87h).
- PXE-E21: BIS integrity check failed.
This message is displayed if the BIS image in extended memory has been corrupted.
- PXE-E22: BIS image/credential validation failed.
The downloaded image and credential do not match the client key.
- PXE-E23: BIS initialization failed.
BIS could not be initialized. No more data is available.
- PXE-E24: BIS shutdown failed.
BIS could not be shutdown. No more data is available.
- PXE-E25: BIS get boot object authorization check flag failed.
Could not determine if BIS is enabled/disabled.
- PXE-E26: BIS free memory failed.
Could not release BIS allocated memory.
- PXE-E27: BIS get signature information failed.
Required BIS credential type information could not be determined.
- PXE-E28: BIS bad entry structure checksum.
BIS entry structure in the SM BIOS table is invalid.
TFTP/MTFTP Codes
- PXE-E32: TFTP open timeout.
TFTP open request was not acknowledged. Verify that the TFTP service is running.
- PXE-E35: TFTP read timeout.
Next TFTP data packet was not received.
- PXE-E36: Error received from TFTP server.
A TFTP error packet was received from the TFTP server.
- PXE-E38: TFTP cannot open connection.
A hardware error occurred when trying to send the TFTP open packet out.
- PXE-E39: TFTP cannot read from connection.
A hardware error occurred when trying to send a TFTP acknowledge packet out.
- PXE-E3A: TFTP too many packages.
This message can mean one of two things: PXE-E3B: TFTP error — File not found.
The requested file was not found on the TFTP server.
- PXE-E3C: TFTP error ? Access violation.
The request file was found on the TFTP server. The TFTP service does not have enough access rights to open/read the file.
- PXE-E3F: TFTP packet size is invalid.
The TFTP packet received is larger than 1456 bytes.
Using TFTP, you are trying to download a file that is larger than the allocated buffer.
Using MTFTP, you started downloading a file as a slave client, and the file increased in size when you became the master client.
BOOTP/DHCP Codes
- PXE-E51: No DHCP or proxyDHCP offers were received.
The client did not receive any valid DHCP, BOOTP, or proxyDHCP offers.
- PXE-E52: proxyDHCP offers were received. No DHCP offers were received.
The client did not receive any valid DHCP or BOOTP offers. The client did receive at least one valid proxyDHCP offer.
- PXE-E53: No boot filename received.
The client received at least one valid DHCP/BOOTP offer but does not have a boot filename to download.
- PXE-E55: proxyDHCP service did not reply to request on port 4011.
The client issued a proxyDHCP request to the DHCP server on port 4011 but did not receive a reply.
UNDI Codes
- PXE-E60: Invalid UNDI API function number.
An API being used by the BaseCode is not implemented in the UNDI ROM.
- PXE-E61: Media test failed, check cable.
Most likely the cable is not plugged in or connected. Could be a bad cable, NIC, or connection.
- PXE-E63: Error while initializing the NIC.
An error occurred while trying to initialize the NIC hardware. Try another NIC.
- PXE-E64: Error while initializing the PHY.
An error occurred while trying to initialize the PHY hardware. Try another NIC.
- PXE-E65: Error while reading the configuration data
An error occurred while reading the NIC configuration data. Try another NIC.
- PXE-E66: Error while reading the initialization data.
An error occurred while reading the NIC initialization data. Try another NIC.
- PXE-E67: Invalid MAC address.
The MAC address stored in this NIC is invalid. Try another NIC.
- PXE-E68: Invalid EEPROM checksum.
The EEPROM checksum is invalid. The contents of the EEPROM have been corrupted. Try another NIC.
- PXE-E69: Error while setting interrupt.
The interrupt hardware could not be configured. Try another NIC.
Bootstrap and Discovery Codes
- PXE-E74: Bad or missing PXE menu and/or prompt information.
PXE tags were detected, but the boot menu and/or boot prompt tags were not found/valid.
- PXE-E76: Bad or missing multicast discovery address.
Multicast discovery is enabled but the multicast discovery address tag is missing.
- PXE-E77: Bad or missing discovery server list.
Multicast and broadcast discovery are both disabled, or use server list is enabled, and the server list tag was not found/valid.
- PXE-E78: Could not locate boot server.
A valid boot server reply was not received by the client.
- PXE-E79: NBP is too big to fit in free base memory.
The NBP is larger than the amount of free base memory.
- PXE-E7A: Client could not locate a secure server.
This message is displayed when the client did not receive any security information from the boot server and BIS is enabled on the client.
- PXE-E7B: Missing MTFTP server IP address.
This message is displayed when the ROM did not receive any PXE discovery tags or proxyDHCP offers and the DHCP SIADDR field is set to 0.0.0.0.
APITest.0 and DOSUNDI.0 Codes
- PXE-E81: !PXE structure is invalid.
The !PXE structure is missing or has been corrupted.
- PXE-E82: PXENV+ structure is invalid.
The PXENV+ structure is missing or has been corrupted.
- PXE-E83: Invalid DHCP option format.
PXE discovery tags in the cached packets are not valid.
- PXE-E84: Could not get pointer to original packet storage.
The PXE ROM being used did not return pointers to its local cached packet storage. The API test bootstrap program will not work with this boot ROM.
- PXE-E85: Not enough extended memory.
The size of the RAMdisk image is larger that the available extended memory.
- PXE-E86: ENV RAMdisk image corrupted.
The bootstrap program was expecting a DOS diskette image. The first 512 bytes of the downloaded image did not contain a DOS boot signature.
- PXE-E87: Could not find selected boot item.
The cached discovery reply packet did not contain a PXE boot-item tag (PXE option 71).
- PXE-E88: Could not locate boot server.
The bootserver did not reply to the RAMdisk image discovery request. The RAMdisk image is not on the bootserver, or the bootserver service is not running.
- PXE-E89: Could not download boot image.
The RAMdisk image could not be downloaded. The RAMdisk image is not on the bootserver, or the TFTP service on the bootserver is not running.
Miscellaneous Codes
- PXE-EA0: Network boot canceled by keystroke.
User pressed ESC during DHCP/Discovery/TFTP.
BaseCode/UNDI Loader Codes
- PXE-EC1: BaseCode ROM ID structure was not found.
UNDI boot module could not find the BaseCode ROM ID structure. If there is a BaseCode ROM image in the system, it has probably been corrupted.
- PXE-EC3: BaseCode ROM ID structure is invalid.
The BaseCode ROM ID structure is invalid. The BaseCode ROM image has probably been corrupted.
- PXE-EC4: UNDI ROM ID structure was not found.
The BaseCode loader module could not locate the UNDI ROM ID structure.
- PXE-EC5: UNDI ROM ID structure is invalid.
The UNDI ROM image has probably been corrupted.
- PXE-EC6: UNDI driver image is invalid.
The UNDI ROM image has probably been corrupted.
- PXE-EC8: !PXE structure was not found in UNDI driver code segment.
The UNDI ROM image has probably been corrupted or has not been initialized by the BIOS. This error is most often caused by one of three things:
- A NIC image was programmed into a BIOS when a .LOM image should have been used.
- The memory allocated by the POST Memory Manager ($PMM) during PXE option ROM initialization has been corrupted or erased before PXE option ROM boot.
- The UNDI_Loader structure was not properly initialized during option ROM initialization.
- PXE-EC9: PXENV+ structure was not found in UNDI driver code segment.
The UNDI ROM image has probably been corrupted or has not been initialized by the BIOS. This error is most often caused by one of three things:
- A NIC image was programmed into a BIOS when a .LOM image should have been used.
- The memory allocated by the POST Memory Manager ($PMM) during PXE option ROM initialization has been corrupted or erased before PXE option ROM boot.
- The UNDI_Loader structure was not properly initialized during option ROM initialization.
 What Are The PXE Error Codes?

Article: 138

Applies to: All releases

Init/Boot/Loader Codes
• 	PXE-E00 Could not find enough free base memory. PXE BaseCode and UNDI runtime modules are copied from FLASH or upper memory into the top of free base memory between 480K (78000h) and 640K (A0000h). This memory must be zero filled by the system BIOS. If this memory is not zero filled, the relocation code in the PXE ROMs will assume that this memory is being used by the system BIOS or other boot ROMs.
• 	PXE-E01: PCI Vendor and Device IDs do not match! This message should never be seen in a production BIOS. When the system BIOS initializes a PCI option ROM, it is supposed to pass the PCI bus/device/function numbers in the AX register. If the PCI device defined in the AX register does not match the UNDI device, this error is displayed.
• 	PXE-E04: Error reading PCI configuration space. This message is displayed if any of the PCI BIOS calls made to read the PCI configuration space return an error code. This should not happen with a production BIOS and properly operating hardware.
• 	PXE-E05: EEPROM checksum error. This message is displayed if the NIC EEPROM contents have been corrupted. This can happen if the system is reset or powered down when the NIC EEPROM is being reprogrammed. If this message is displayed the PXE ROM will not boot.
• 	PXE-E06: Option ROM requires DDIM support. This message should not be seen in a production BIOS. PCI option ROMs must always be installed as DDIM option ROMs (they must be installed into read/write upper memory).
• 	PXE-E07: PCI BIOS calls not supported. This message should not be seen in a production BIOS. PCI BIOS must have PCI BIOS services.
• 	PXE-E08: Unexpected API error. API: xxxxh Status: xxxxh. This message is displayed if a PXE API returns a status code that is not expected by the runtime loader.
• 	PXE-E09: Unexpected UNDI loader error. Status: xxxxh. This message is displayed if the UNDI runtime loader returns an unexpected status code.

ARP Codes
• 	PXE-E11: ARP timeout. The PXE ROM will retry the ARP request four times, if it does not get any valid ARP replies, this message is displayed. There are several possible causes:
• 	Setting the DHCP Class Identifier (option 60) on the DHCP server and installing the proxyDHCP on a separate machine.
• 	Using routers that do not respond to ARP requests.
• 	A situation that may lead to this error is with ProLiant BL p-Class blade servers connected to a ProLiant BL p-Class GbE Interconnect Switch with Port Trunking (802.3ad) enabled uplinked to another switch where port trunking is not enabled, and perhaps instead, the customer inadvertently enabled VLAN trunking.

The GbE switch options are based on IEEE terminology which is sometimes different than Cisco terminology. The Port Trunking option on the GbE switch is meant for the bonding together of multiple ports (802.3ad) for faster throughput and reliability. The Cisco term for this is etherchannel. The term "trunking" on a Cisco switch means vlan tagging and is often confused with IEEE port trunking. The two are not the same and cannot be used on one switch without the same option being enabled on both switches.

To resolve this issue, correct the port trunk configuration on both switches.
• 	After certain deployment operations, the server's MAC address might be set to 0.

To resolve this issue, apply the SoftPaq for Network Adapter Boot Code and PXE Firmware refered to in the Knowledge Base article Minimum Firmware Requirements For Target Servers (Article 200).

BIOS and BIS Codes
• 	PXE-E20: BIOS extended memory copy error. AH == nn This message is displayed if the BIOS extended memory copy service returns an error. This should not happen on a production BIOS. nn is the BIOS error code returned by the BIOS extended memory copy service (Int 15h, AH = 87h).
• 	PXE-E21: BIS integrity check failed. This message is displayed if the BIS image in extended memory has been corrupted.
• 	PXE-E22: BIS image/credential validation failed. The downloaded image and credential do not match the client key.
• 	PXE-E23: BIS initialization failed. BIS could not be initialized. No more data is available.
• 	PXE-E24: BIS shutdown failed. BIS could not be shutdown. No more data is available.
• 	PXE-E25: BIS get boot object authorization check flag failed. Could not determine if BIS is enabled/disabled.
• 	PXE-E26: BIS free memory failed. Could not release BIS allocated memory.
• 	PXE-E27: BIS get signature information failed. Required BIS credential type information could not be determined.
• 	PXE-E28: BIS bad entry structure checksum. BIS entry structure in the SM BIOS table is invalid.

TFTP/MTFTP Codes
• 	PXE-E32: TFTP open timeout. The PXE client was able to get a DHCP address and a boot file name, but timed out when attempting to download the boot file using TFTP or MTFTP. To resolve this issue, check each of the following network configuration items:
• 	This message is sometimes displayed, and the operation is retried, allowing for a successful download of the boot image. The message Transferring control to DOS boot diskette image... indicates that the boot file was successfully downloaded and the PXE boot has succeeded. In this case, no action is needed to correct the problem.
• 	By default, the Altiris PXE server is configured to use multicast TFTP. If multicast is disabled by the switches in the environment, either enable multicast (ports 1758 and 1759) or change the configuration of the PXE server to use regular TFTP (port 69).
• 	Verify that the Altiris MTFTP Service is running on the Deployment Server.
• 	PXE-E35: TFTP read timeout. Next TFTP data packet was not received.
• 	PXE-E36: Error received from TFTP server. A TFTP error packet was received from the TFTP server.
• 	PXE-E38: TFTP cannot open connection. A hardware error occurred when trying to send the TFTP open packet out.
• 	PXE-E39: TFTP cannot read from connection. A hardware error occurred when trying to send a TFTP acknowledge packet out.
• 	PXE-E3A: TFTP too many packages. This message can mean one of two things:
• 	You are trying to download a file using TFTP that is larger than the allocated buffer.
• 	You started downloading a file as a slave client using MTFTP and the file increased in size when you became the master client.
• 	PXE-E3B: TFTP error - File not found. The requested file was not found on the TFTP server.
• 	PXE-E3C: TFTP error - Access violation. The request file was found on the TFTP server. The TFTP service does not have enough access rights to open/read the file.
• 	PXE-E3F: TFTP packet size is invalid. The TFTP packet received is larger than 1456 bytes.

BOOTP/DHCP Codes
• 	PXE-E51: No DHCP or proxyDHCP offers were received. The client did not receive any valid DHCP, BOOTP or proxyDHCP offers. To resolve this issue, check each of the following network configuration items:
• 	DHCP services are not available on the network to which the PXE-enabled NIC is connected.
• 	A DHCP proxy or IP helper address is not configured for the subnet on which the PXE client is connected.
• 	The switch port connected to the PXE NIC is running Spanning Tree Protocol, EtherChannel Protocol, or Port Aggregation Protocol and is thus not activated immediately when a link is detected. This forces the DHCP request from the PXE client to timeout.
• 	DHCP is available on the network, but PXE is not.
• 	The network cable is not attached to the PXE-enabled NIC on the target server.
• 	PXE-E52: proxyDHCP offers were received. No DHCP offers were received. The client did not receive any valid DHCP or BOOTP offers. The client did receive at least one valid proxyDHCP offer.
• 	PXE-E53: No boot filename received. The client received at least one valid DHCP/BOOTP offer, but does not have a boot filename to download. There are several possible causes:
• 	The DHCP Server and the PXE Server were located on the same server, but one of them was moved to a different server. This would result in an incorrect PXE Server configuration.

To resolve this issue, reinstall the PXE Server component of the Altiris Deployment Solution.
• 	The DHCP relay agent, either a Proxy DHCP Server or a switch configured with helper addresses, is not configured correctly. For example, if DHCP and PXE are on separate servers, the DHCP relay agent needs to have both addresses in its configuration.

To resolve this issue, correct the DHCP relay agent configuration.
• 	If the Microsoft DHCP service is installed on the PXE server, but is disabled or unconfigured, Altiris PXE Setup configures PXE to work with the local DHCP service (even if the DHCP service is disabled). This causes the PXE server to not respond to PXE clients that get a DHCP address from DHCP services running elsewhere on the network.

To resolve this issue, remove Microsoft DHCP services from the PXE server and reinstall the PXE Server component of the Altiris Deployment Solution.
• 	PXE-E55: proxyDHCP service did not reply to request on port 4011. The client issued a proxyDHCP request to the DHCP server on port 4011 and did not receive a reply.

UNDI Codes
• 	PXE-E60: Invalid UNDI API function number. An API being used by the BaseCode is not implemented in the UNDI ROM.
• 	PXE-E61: Media test failed, check cable. Most likely the cable is not plugged in or connected. Could be a bad cable, NIC or connection.
• 	PXE-E63: Error while initializing the NIC. An error occurred while trying to initialize the NIC hardware. Try another NIC.
• 	PXE-E64: Error while initializing the PHY. An error occurred while trying to initialize the PHY hardware. Try another NIC.
• 	PXE-E65: Error while reading the configuration data. An error occurred while reading the NIC configuration data. Try another NIC.
• 	PXE-E66: Error while reading the initialization data. An error occurred while reading the NIC initialization data. Try another NIC.
• 	PXE-E67: Invalid MAC address. The MAC address stored in this NIC is invalid. Try another NIC.
• 	PXE-E68: Invalid EEPROM checksum. The EEPROM checksum is invalid. The contents of the EEPROM have been corrupted. Try another NIC.
• 	PXE-E69: Error while setting interrupt. The interrupt hardware could not be configured. Try another NIC.

Bootstrap and Discovery Codes
• 	PXE-E74: Bad or missing PXE menu and/or prompt information. PXE tags were detected but the boot menu and/or boot prompt tags were not found/valid.
• 	PXE-E76: Bad or missing multicast discovery address. Multicast discovery is enabled but the multicast discovery address tag is missing.
• 	PXE-E77: Bad or missing discovery server list. Multicast and broadcast discovery are both disabled, or use server list is enabled, and the server list tag was not found/valid.
• 	PXE-E78: Could not locate boot server. A valid boot server reply was not received by the client. Several possible causes are
• 	The PXE image is not correct for the target because a job that contains a task that is to run in a specific automation environment cannot be run on the target.
• 	The Virtualization Technology BIOS option may not be set on an Intel-based server running VMware ESX and a Windows 64-bit guest is being deploying to one of its virtual machines.
• 	PXE-E79: NBP is too big to fit in free base memory. The NBP is larger than the amount of free base memory.
• 	PXE-E7A: Client could not locate a secure server. This message is displayed when the client did not receive any security information from the boot server and BIS is enabled on the client.
• 	PXE-E7B: Missing MTFTP server IP address. This message is displayed when the ROM did not receive any PXE discovery tags or proxyDHCP offers and the DHCP SIADDR field is set to 0.0.0.0.

Miscellaneous Codes
• 	PXE-EA0: Network boot canceled by keystroke. User pressed Esc or Ctrl-C during DHCP/Discovery/TFTP.

BaseCode/UNDI Loader Codes
• 	PXE-EC1: BaseCode ROM ID structure was not found. UNDI boot module could not find the BaseCode ROM ID structure. If there is a BaseCode ROM image in the system, it has probably been corrupted.
• 	PXE-EC3: BaseCode ROM ID structure is invalid. The BaseCode ROM ID structure is invalid. The BaseCode ROM image has probably been corrupted.
• 	PXE-EC4: UNDI ROM ID structure was not found. The BaseCode loader module could not locate the UNDI ROM ID structure.
• 	PXE-EC5: UNDI ROM ID structure is invalid. The UNDI ROM image has probably been corrupted.
• 	PXE-EC6: UNDI driver image is invalid. The UNDI ROM image has probably been corrupted.
• 	PXE-EC8: !PXE structure was not found in UNDI driver code segment. The UNDI ROM image has probably been corrupted, or has not been initialized by the BIOS. This error is most often caused by one of three things:
• 	A .NIC image was programmed into a BIOS when a .LOM image should have been used.
• 	The memory allocated by the POST Memory Manager ($PMM) during PXE option ROM initialization has been corrupted or erased before PXE option ROM boot.
• 	The UNDI_Loader structure was not properly initialized during option ROM initialization.
• 	PXE-EC9: PXENV+ structure was not found in UNDI driver code segment. The UNDI ROM image has probably been corrupted, or has not been initialized by the BIOS. This error is most often caused by one of three things:
• 	A .NIC image was programmed into a BIOS when a .LOM image should have been used.
• 	The memory allocated by the POST Memory Manager ($PMM) during PXE option ROM initialization has been corrupted or erased before PXE option ROM boot.
• 	The UNDI_Loader structure was not properly initialized during option ROM initialization.


page source: http://h18013.www1.hp.com/products/servers/management/rdp/knowledgebase/00000138.html
PCI configuration space could not be read. Machine is probably not PCI compliant. The Boot Agent
was unable to read one or more of the adapter’s PCI configuration registers. The adapter may be
misconfigured, or the wrong Boot Agent image may be installed on the adapter. The Boot Agent
returns control to the BIOS and not attempt to remote boot. Try to update the flash image. If this does
not solve the problem, contact your system administrator or HP Customer Support.
PXE-E05: The LAN adapter’s configuration is corrupted or has not been initialized. The Boot Agent
cannot continue.
The adapter’s EEPROM is corrupted. The Boot Agent determined that the adapter EEPROM checksum
is incorrect. The agent will return control to the BIOS and not attempt to remote boot. Try to update
the flash image. If this does not solve the problem, contact your system administrator or HP Customer
Support.
PXE-E06: Option ROM requires DDIM support.
The system BIOS does not support DDIM. The BIOS does not support the mapping of the PCI
expansion ROMs into upper memory as required by the PCI specification. The Boot Agent cannot
function in this system. The Boot Agent returns control to the BIOS and does not attempt to remote
boot. You may be able to resolve the problem by updating the BIOS on your system. If updating
your system’s BIOS does not solve the problem, contact your system administrator or HP customer
support to resolve the problem.
PXE-E07: PCI BIOS calls not supported.
BIOS-level PCI services not available. Machine is probably not PCI compliant.
PXE-E09: Unexpected UNDI loader error. Status == xx
The UNDI loader returned an unknown error status. xx is the status returned.
PXE-E20: BIOS extended memory copy error.
BIOS could not move the image into extended memory.
PXE-E20: BIOS extended memory copy error. AH == xx
Error occurred while trying to copy the image into extended memory. xx is the BIOS failure code.
PXE-E51: No DHCP or BOOTP offers received.
The Boot Agent did not receive any DHCP or BOOTP responses to its initial request. Be sure that
your DHCP server (and/or proxyDHCP server, if one is in use) is properly configured and has
sufficient IP addresses available for lease. If you are using BOOTP, be sure that the BOOTP service is
running and is properly configured.
PXE-E53: No boot filename received.
The Boot Agent received a DHCP or BOOTP offer, but has not received a valid filename to
download. If you are using PXE, please check your PXE and BINL configuration. If you are using
BOOTP, be sure that the TFTP service is running and that the specific path and filename are correct.
PXE-E61: Media test failure.
The adapter does not detect link. Be sure that the cable is good and is attached to a working hub or
switch. The link light visible from the back of the adapter should be lit.
PXE-EC1: Base-code ROM ID structure was not found.
No base code can be located. An incorrect flash image is installed or the image has become
corrupted. Try to update the flash image.
PXE-EC3: BC ROM ID structure is invalid.
Adapter configurations 76

Не так давно я уже опубликовал статью по звуковым ошибкам BIOS. Но кроме звука, ошибка может дублироваться на экране компьютера в виде текста. При условии, что видеокарта и монитор в исправном состоянии.
Как я уже писал, во время загрузки компьютера, BIOS производит процедуру самотестирования (Power-On Self Test – POST). В короткий промежуток времени, производится общая диагностика системы и если есть проблемы, система вас оповестит об этом. При удачном прохождении проверки, начнется загрузка операционной системы.
В прошлый раз я разобрал звуковые сигналы, символизирующие ошибку, но не у всех компьютеров есть динамик, который воспроизводит последовательность сигналов ошибки. Для таких случаев есть текстовое отображение сообщения об ошибке. Да и прочитать сообщение, что от вас хочет компьютер, наверное, проще, чем прислушиваться к сигналам.
У разных производителей сообщение об ошибке может различаться, поэтому я выбрал только самых популярных производителей. Все ошибки собраны в виде таблиц, сообщение на английском языке и перевод.
|
Сигнал |
Значение (расшифровка) |
|
Bad PnP Serial ID Checksum |
Неверное значение контрольной суммы карты Serial ID, удовлетворяющей спецификации Plug and Play |
|
HDD Controller Failure |
BIOS не может обнаружить контроллер жестких дисков (подключение жестких дисков) |
|
Keyboard Stuck Key Detected |
На клавиатуре залипла (нажата) клавиша |
|
CMOS checksum invalid |
После сохранения значений в памяти CMOS RAM для проверки наличия ошибок генерируется контрольная сумма. Получено неверное значение контрольной суммы |
|
Floppy Disk Controller Resource Conflict |
Контроллером гибких дисков был запрошен ресурс, используемый другим устройством |
|
NVRAM checksum Error, NVRAM cleared |
Из-за ошибки в памяти NVRAM данные ESCD (Extended System Configuration Data — данные расширенной конфигурации системы) были инициализированы заново. Очистите память CMOS и ESCD RAM, а затем перезагрузите компьютер |
|
NVRAM Cleared By Jumper |
Перемычка CMOS установлена в положение Clear. Память CMOS и ESCD RAM была очищена |
|
NVRAM Data invalid,NVRAM cleared |
B ESCD обнаружены неверные данные. Причиной этого может быть удаление или добавление в систему новых устройств. Появление этого сообщения означает, что данные текущей конфигурации в ESCD уже записаны |
|
Parallel Port Resource Conflict |
Параллельным портом был запрошен ресурс, используемый другим устройством |
|
PCI Error Log is Full |
Обнаружено 15 конфликтов шины PCI. Последующие ошибки PCI не будут регистрироваться |
|
PCI I/O Port Conflict |
Причиной конфликта является использование двумя устройствами одного и того же адреса ввода-вывода |
|
PCI IRQ Conflict |
Причиной конфликта является использование двумя устройствами одного и того же прерывания |
|
IRQ PCI Memory Conflict |
Причиной конфликта является использование двумя устройствами одного и того же ресурса памяти |
|
Primary Boot Device Not Found |
He удается найти первичное устройство загрузки (жесткий диск, дисковод гибких дисков или накопитель CD-ROM) |
|
Primary IDE Controller Resource Conflict |
Первичным контроллером IDE запрошен ресурс, уже использующийся другим устройством |
|
Primary input Device Not Found |
He удается найти (не подключено) основное устройство ввода (клавиатуру, мышь или другое устройство) |
|
Secondary IDE Controller Resource Conflict |
Вторичным контроллером IDE был запрошен ресурс, использующийся другим устройством |
|
CMOS Display Type Mismatch |
Указанный в CMOS тип видеоадаптера не соответствует типу видеоадаптера, обнаруженного BIOS. Запустите программу Setup BIOS |
|
Serial Port 1 Resource Conflict |
Последовательным портом 1 был запрошен ресурс, использующийся другим устройством |
|
Serial Port 2 Resource Conflict |
Последовательным портом 2 был запрошен ресурс, использующийся другим устройством |
|
Static Device Resource Conflict |
Платой ISA, не поддерживающей спецификацию Plug and Play, был запрошен ресурс, использующийся другим устройством |
|
Insert Bootable Media |
BIOS не может найти загрузочный диск. Вставьте загрузочную дискету или компакт-диск |
|
Run setup |
В CMOS не установлены параметры системы. Значения, хранящиеся в памяти CMOS повреждены или отсутствуют. Запустите программу Setup BIOS |
|
System Board Device Resource Conflict |
Платой ISA, не поддерживающей спецификацию Plug and Play, был запрошен ресурс, использующийся другим устройством |
|
А20 Error |
Канал А20 контроллера клавиатуры неисправен |
|
Diskette Boot Failure |
Системный диск, находящийся в дисководе А: поврежден и не может быть использован для загрузки компьютера. Используйте другой системный диск и следуйте указаниям, появляющимся на экране |
|
Address Line short! |
Неисправность в расположенной на системной плате схеме декодирования адресов |
|
CMOS Memory Size Mismatch |
Объем памяти на системной плате отличается от значения, указанного в CMOS. Запустите программу Setup BIOS |
|
CMOS Battery state Low |
Разрядилась батарея CMOS. Замените батарейку на материнской плате |
|
CMOS Time and Date Not Set |
Для того чтобы установить в CMOS время и дату, запустите программу Setup BIOS |
|
DMA Error |
Неисправен контроллер DMA |
|
DMA #1 Error |
Неисправен первый контроллер DMA |
|
DMA #2 Error |
Неисправен второй контроллер |
|
DMA FDD Controller Failure |
BIOS не может обнаружить контроллер гибких дисков. Проверьте соответствующие кабели и соединения |
|
INTR #1 Error |
При выполнении процедуры POST обнаружена неисправность первого контроллера прерываний |
|
INTR #2 Error |
При выполнении процедуры POST обнаружена неисправность второго контроллера прерываний |
|
Invalid Boot Diskette |
Диск, находящийся в дисководе А:, читается, но системные файлы загрузить не удается. Используйте другой системный диск |
|
KB/Interface Error |
Неисправен разъем для подключения клавиатуры |
|
Keyboard Error |
Возникла ошибка синхронизации клавиатуры |
|
Off Board Parity Error |
Обнаружена ошибка четности в памяти, расположенной на плате расширения. Сообщение имеет вид OFF BOARD PARITY ERROR ADDR (HEX) = (XXXX), где ХХХХ— шестнадцатеричный адрес памяти, по которому произошла ошибка |
|
On Board Parity Error |
Обнаружена ошибка четности в памяти, расположенной на системной плате. Сообщение имеет вид OFF BOARD PARITY ERROR ADDR (HEX) = (XXXX), где ХХХХ— шестнадцатеричный адрес памяти, по которому произошла ошибка |
|
Parity Error |
В памяти компьютера по неизвестному адресу обнаружена ошибка четности |
|
System Halted! |
Из-за случившейся ошибки произошла остановка компьютера |
|
Timer channel 2 Error |
Обнаружена ошибка таймера |
|
Uncorrectabie ЕСС Error |
Обнаружена неустранимая ошибка памяти ЕСС |
|
Undetermined NMI |
Обнаружено неопределенное немаскируемое прерывание |
|
Memory Parity Error at ххххх |
Вышла из строя память. Если адрес, по которому произошла ошибка, установить удалось, он будет выведен вместо ххххх. В противном случае сообщение будет иметь вид Memory Parity Error ххххх |
|
Вышла I/O Card Parity Error at ххххх |
Вышла из строя плата расширения. Если адрес, по которому произошла ошибка, установить удалось, он будет выведен вместо ххххх. В противном случае сообщение будет иметь вид i/o Card Parity Error ххххх |
Текстовые сообщения об ошибках
AWARD BIOS
|
Сигнал |
Значение (расшифровка) |
|
BIOS ROM checksum error — System halted |
Неверное значение контрольной суммы кода BIOS указывает на то, что программный код BIOS, возможно, поврежден |
|
CMOS battery failed |
Неисправна батарея CMOS |
|
CMOS checksum error — Defaults loaded |
Неверное значение контрольной суммы CMOS, из-за чего системой загружается конфигурация оборудования, используемая по умолчанию. Неверное значение контрольной суммы указывает на то, что CMOS повреждена. Причиной этого может быть разрядка батареи |
|
CMOS CHECKSUM ERROR |
Неверное значение контрольной суммы CMOS. Это указывает на то, что CMOS повреждена. Причиной этой ошибки может быть разрядка батареи |
|
DISK BOOT FAILURE, INSERT SYSTEM DISK AND PRESS ENTER |
Показывает текущую производительность процессора |
|
DISKETTE DRIVES OR TYPES MISMATCH ERROR — RUN SETUP |
Тип установленного в системе накопителя гибких дисков отличается от указанного в CMOS. Для того чтобы установить правильный тип накопителя, запустите программу Setup BIOS |
|
Display switch is set incorrectly |
Переключатель монитора на системной плате имеет два положения: монохромный или цветной. Это сообщение указывает на то, что положение переключателя не соответствует типу дисплея, указанному в параметрах BIOS. Определите правильное значение параметра и либо выключите компьютер и переставьте перемычку, либо запустите программу Setup BIOS и измените значение параметра VIDEO |
|
DISPLAY TYPE HAS CHANGED |
С момента последнего выключения компьютера был установлен другой адаптер дисплея. Необходимо сконфигурировать систему в соответствии с новым типом дисплея |
|
EISA Configuration Checksum Error |
Неверное значение контрольной суммы энергонезависимой памяти EISA RAM или некорректное считывание из разъема EISA. Это указывает на то, что энергонезависимая память EISA повреждена или неправильно сконфигурирован разъем. Также проверьте, плотно ли вставлена плата в разъем |
|
EISA Configuration is Not Complete |
Информация о конфигурации разъема, хранящаяся в энергонезависимой памяти EISA, неполная. |
|
ERROR ENCOUNTERED INITIALIZING HARD DRIVE |
He удается инициализировать жесткий диск. Убедитесь в правильности подключения устройства и проверьте, плотно ли вставлены все разъемы. Убедитесь также, что в BIOS выбран правильный тип жесткого диска |
|
ERROR INITIALIZING HARD DISK CONTROLLER |
He удается инициализировать контроллер жесткого диска. Убедитесь, что кабель установлен правильно. Проверьте, правильно ли выбран тип жесткого диска в BIOS. Проверьте также правильность установки перемычек на жестком диске |
|
FLOPPY DISK CNTRLR ERROR OR NO CNTRLR PRESENT |
He удается найти или инициализировать контроллер гибких дисков. Убедитесь, что кабель установлен правильно. Если в системе дисководов нет, убедитесь, что в BIOS для параметра Diskette Drive значение NONE |
|
Floppy disk(s) fail |
He удается найти или инициализировать контроллер гибких дисков или дисковод. Убедитесь, что контроллер установлен правильно. Если в системе дисководов нет, проверьте, установлено ли в BIOS для параметра Diskette Drive значение NONE или AUTO |
|
HARD DISK initializing |
Необходимо немного подождать. Для инициализации некоторых жестких дисков требуется дополнительное время |
|
HARD DISK INSTALL FAILURE |
He удается найти или инициализировать контроллер накопителя на жестких дисках. Убедитесь, что контроллер установлен правильно. Если в системе жестких дисков нет, убедитесь, что в BIOS для параметра Hard Drive установлено значение NONE |
|
Hard disk(s) diagnosis fail |
Система может осуществлять специальную диагностику жестких дисков. Это сообщение появляется, если во время диагностики на одном или нескольких дисках были обнаружены ошибки |
|
Invalid EISA configuration |
Энергонезависимая память, в которой хранится конфигурация EISA, содержит неверные данные или повреждена. Для того чтобы правильно запрограммировать память, запустите программу конфигурации EISA еще раз |
|
Keyboard error or no keyboard present |
He удается инициализировать клавиатуру. Убедитесь, что клавиатура подключена правильно и во время загрузки никакие клавиши не нажаты. Если вы намеренно конфигурируете систему без клавиатуры, установите значение HALT ON ALL, BUT KEYBOARD параметру Error halt condition |
|
Keyboard is locked out — Unlock the key |
Это сообщение обычно указывает, что во время тестирования клавиатуры была нажата одна или больше клавиш |
|
Memory Address Error at… |
Указывает на ошибку данного адреса памяти. С помощью этого адреса и карты памяти компьютера можно найти и заменить неисправные микросхемы памяти |
|
MEMORY SIZE HAS CHANGED SINCE LAST BOOT |
С момента последней загрузки были добавлены или демонтированы модули памяти. В режиме EISA для изменения конфигурации памяти используйте соответствующую программу конфигурации. В режиме ISA запустите программу Setup BIOS и в соответствующем поле укажите новый объем памяти |
|
Memory Test |
Это сообщение выводится при выполнении полного теста памяти с указанием тестируемой области памяти |
|
Memory test fail: |
Если во время POST-теста памяти была обнаружена ошибка, появится дополнительная информация о типе памяти и адрес, по которому произошла ошибка |
|
Memory verify Error at… |
Указывает на ошибку при контрольном считывании записанного в память значения. Определить неисправную микросхему памяти можно с помощью указанного адреса и карты памяти компьютера |
|
No boot device was found |
Это сообщение означает, что либо не обнаружен накопитель, с которого производится загрузка, либо в накопителе нет соответствующих загрузочных системных файлов. Вставьте в дисковод А: системный диск и нажмите клавишу . При загрузке системы с жесткого диска проверьте правильность подключения контроллера и всех кабелей, а также убедитесь, что диск отформатирован как загрузочный и перезагрузите компьютер |
|
OFFENDING ADDRESS NOT FOUND |
Это сообщение появляется вместе с сообщениями i /о CHANNEL CHECK И RAM PARITY ERROR В ТОМ случае, когда невозможно определить адрес памяти, по которому произошла ошибка |
|
OFFENDING SEGMENT: |
Это сообщение появляется вместе с сообщениями i/o CHANNEL CHECK И RAM PARITY ERROR, если адрес памяти, по которому произошла ошибка, установлен |
|
Override enabled. Defaults loaded |
Если загрузить компьютер с использованием текущей конфигурации CMOS не удается, будет произведена noпытка загрузить систему, используя параметры BIOS, которые устанавливаются по умолчанию и обеспечивают наиболее стабильную работу компьютера с минимальной производительностью |
|
PRESS A KEY то REBOOT |
Это сообщение появляется внизу экрана при возникновении ошибки, требующей перезагрузки компьютера. Для того чтобы перезагрузить систему, нажмите любую клавишу |
|
Press ESC to skip memory |
Для того чтобы пропустить полный тест памяти, можно нажать клавишу test |
|
Press TAB to show POST Screen |
Производители компьютеров вместо вида отображения Award BIOS POST могут использовать собственный вид. Это сообщение указывает на возможность переключения между видом производителя и видом POST, используемым по умолчанию |
|
Primary master hard disk fail |
При выполнении процедуры POST обнаружена неисправность жесткого диска, установленного как primary master ЮЕ |
|
Primary slave hard disk fail |
При выполнении процедуры POST обнаружена неисправность жесткого диска, установленного как primary slave ЮЕ |
|
RAM PARITY ERROR CHECKING FOR SEGMENT… |
Указывает на ошибку четности в оперативной памяти |
|
Secondary master hard disk fail |
При выполнении процедуры POST обнаружена неисправность жесткого диска, установленного как secondary master IDE |
|
Secondary slave hard disk fail |
При выполнении процедуры POST обнаружена неисправность жесткого диска, установленного как secondary slave IDE |
|
Should Be Empty But EISA Board Found |
В разъеме, который сконфигурирован как пустой, обнаружена плата |
|
Should Have EISA Board But Not Found |
Установленная плата не отвечает на запрос ID, или информация ID в указанном разъеме не найдена |
|
Slot Not Empty |
Указывает, что в разъем, который обозначен программой конфигурации EISA как пустой, установлена плата |
|
SYSTEM HALTED, (CTRL-ALT-DEL) то REBOOT… |
Указывает на то, что текущая попытка загрузки системы была прервана и компьютер необходимо перезагрузить. Нажмите комбинацию клавиш [Ctrl+Alt+Del] |
|
Wrong Board in Slot |
Идентификатор платы не соответствует значению ID, хранящемуся в энергонезависимой памяти EISA |
Текстовые сообщения об ошибках
Phoenix BIOS
|
Сигнал |
Значение (расшифровка) |
|
System battery is dead — Replace and run SETUP |
Батарея разряжена. Замените ее и заново сконфигурируйте систему с помощью программы Setup BIOS |
|
Diskette drive A error |
Дисковод А: обнаружен, однако возникает ошибка выполнения теста POST. Убедитесь, что в программе Setup BIOS выбран правильно тип дисковода. Проверьте также правильность установки устройства |
|
Real-time clock error |
Во время тестирования часов реального времени обнаружена ошибка. Возможно, требуется ремонт системной платы |
|
Incorrect Drive А type — run SETUP |
В BIOS неверно указан тип дисковода A: |
|
Extended RAM Failed at offset: nnnn |
Расширенная память по адресу nnnn вышла из строя либо неверно сконфигурирована |
|
Failing Bits: nnnn |
Шестнадцатеричное число nnnn указывает, по какому адресу во время теста произошел сбой. Каждая единица в карте памяти указывает на неисправный бит |
|
Operating system not found |
На диске А: или С: не удается обнаружить операционную систему. Запустите программу Setup BIOS и проверьте, правильно ли указаны типы дисковода А: и жесткого диска С: |
|
Fixed Disk 0 Failure |
Жесткий диск вышел из строя или неправильно сконфигурирован. Проверьте правильность установки жесткого диска. Запустите программу Setup BIOS и убедитесь, что тип жесткого диска выбран правильно |
|
Invalid NVRAM media type |
Возникла ошибка доступа к NVRAM (CMOS) |
|
Keyboard controller error |
При тестировании контроллера клавиатуры возникла ошибка. Попробуйте заменить клавиатуру |
|
Keyboard error |
He работает клавиатура |
|
Keyboard error nn |
BIOS обнаружена «залипшая» клавиша клавиатуры с кодом nn |
|
Keyboard locked — unlock key switch |
Для продолжения работы необходимо разблокировать систему |
|
Monitor type does not match CMOS — Run SETUP |
В BIOS неверно указан тип монитора |
|
System CMOS checksum bad — run SETUP |
Память CMOS RAM повреждена или некорректно модифицирована программой, изменяющей хранящиеся в CMOS данные. Запустите программу Setup BIOS и сконфигурируйте систему заново, установив значения необходимых параметров либо значения, используемые по умолчанию |
|
Press [FI] to resume, [F2] to Setup |
Это сообщение выводится после обнаружения любой исправимой ошибки. Для продолжения загрузки нажмите клавишу [F1]. Для того чтобы запустить программу Setup BIOS и изменить значение какого-либо параметра, нажмите клавишу [F2] |
|
Parity check 1 |
В системной шине обнаружена ошибка четности. Если адрес, по которому произошла ошибка, удалось установить, он будет отображен на экране. В противном случае будут отображены символы ххххх |
|
Parity check 2 |
В шине ввода-вывода обнаружена ошибка четности. Если адрес, по которому произошла ошибка, удалось установить, он будет отображен на экране. В противном случае будут отображены символы ххххх |
|
Shadow RAM Failed at offset: nnnn |
Во время тестирования затененной памяти в блоке памяти размером 64 Кбайт по адресу nnnn обнаружена неисправность |
|
System cache error — Cache disabled |
Во время тестирования кэш-памяти была обнаружена неисправность; кэш отключен |
|
System RAM Failed at offset: nnnn |
Во время тестирования оперативной памяти компьютера в блоке памяти размером 64 Кбайт по адресу nnnn обнаружена неисправность |
|
System timer error |
При тестировании таймера обнаружена неисправность. Требуется ремонт системной платы |
Всем удачи!
Сообщение Extended RAM Failed At Offset: XXXX отображается на мониторе в случае возникновения ошибки инициализации оперативной памяти в слоте ХХХ. Проверьте качество соединений. Проблему может также вызвать неисправность модуля памяти или слота.
Примечание 1. Оперативная память (Random Access Memory, RAM, системная память) – это энергозависимая компьютерная память, которая предназначена для временного хранения активных программ и данных, используемых процессором во время выполнения операций.
Более подробно о том, что такое оперативная память, Вы можете узнать здесь.
Примечание 2. Модуль оперативной памяти (оперативное запоминающее устройство, ОЗУ) – это печатная плата с контактами, на которой расположены чипы оперативной памяти, объединенные в единую логическую схему.
Примечание 3. Слот (разъём) – это щелевой разъём для установки платы.
Еще по настройке БИОС (БИОЗ) плат:
-

Появление сообщения Your computer case had been opened. Pres SPAC…
-
Появление сообщения Wrong Board In Slot на экране означает, что п…
-
Появление сообщения Warning! CPU has Been changed or Overclock fa…
-
Возможно, обнаружен вирус. Продолжить?
… -
Сообщение Unknown PCI Error отображается на мониторе в случае воз…