Midnight Rain
(22740)
![]()
0
![]()
0
18.08.2015, 13:39
Скорей всего проблема именно в APK-файле, который вы загрузили в программу. Дело в том, что русифицированные клиенты, нацеленные на русскоязычную аудиторию, автоматически показывают российский регион. Попробуйте переустановить игру, взяв другой APK игры.
#136812
Цитировать
Get into your Android games using our tested VPNs without geo-restrictions
by Milan Stanojevic
Milan has been enthusiastic about technology ever since his childhood days, and this led him to take interest in all PC-related technologies. He’s a PC enthusiast and he… read more
Updated on December 15, 2022
Fact checked by
Edgar Nicov

Since the dial-up Internet era, Edgar was interested in online resources. From forums to e-commerce websites, he started digging into how those resources could generate revenue. Today he… read more
- BlueStacks is the go-to service for emulating the Android OS on your PC.
- You can easily gain access to all geo-restricted content on the Play Store by using a VPN.
- However, not all VPNs are able to bypass geoblocking, and few of them are compatible with BlueStacks.
- If you want to find a trustworthy, BlueStacks-compatible VPN, check out our guide below.
BlueStacks App Player is designed to enable Android applications to run on PCs running Microsoft Windows.
As the largest mobile gaming platform for PC, BlueStacks enables you to run Android apps and games on your PC, with over 140 million users.
In addition, BlueStacks is the most popular software to play Android games directly on your PC. However, some apps particularly streaming apps may give errors when trying to access them from other parts of the world. This is called geo-blocking.
Hence, a VPN is useful since it simulates the correct IP address to the website and enables users to access this content anywhere in the world.
In the following section, we will be showing you the best VPN tools for BlueStacks Android gaming tool.
We tested the game using the following VPNs
Is BlueStacks using a VPN?
You are able to install a VPN on the BlueStacks platform and secure your games or unblock different region-blocked games.
Thus, it’s quite straightforward to use a VPN on this Android emulator. You can just download it from Google Play and log in to your account on the BlueStacks interface.
This way, you will hide your IP address and route Internet traffic to other remote server locations.
What are the best VPNs for BlueStacks?
Private Internet Access – Highest connection speed
Mobile gaming is a thriving market, with more developers looking towards it as an alternative to PC or consoles.
Even phone manufacturers have started putting gaming badges on their devices. Screens are getting more responsive, batteries are getting bigger and some phones even have advanced cooling solutions.
However, as a PC gamer rocking a high-end system with a top-of-the-line GPU, you might be less inclined to spend your upgrade money on a gaming phone.
This is where BlueStacks comes in to emulate the Android experience on your PC.
Whilst this is all well and good, you’re still limited to the apps and games available in your region. Private Internet Access removes the shackles of geo-restricted content and lets you loose on the world, free to enjoy content from anywhere with the click of a button.
Once you’ve installed PIA, all you’ll need to do is select the country you wish to connect to and you’re free to explore all that the Play Store has to offer.
Additionally, by using PIA you will protect all your data across all your devices. Just have a look at what you stand to gain:
- Use PIA on 10 devices simultaneously, including PC, Mac, and mobile
- Secure VPN tunneling to anywhere in the world
- Military-grade encryption for banking, online purchases, and browsing
- Block ads, trackers, and malware
- Multiple VPN gateways
- Unlimited bandwidth
Private Internet Access
Get instant access to geo-restricted apps, games, and web content with this VPN on BlueStacks.
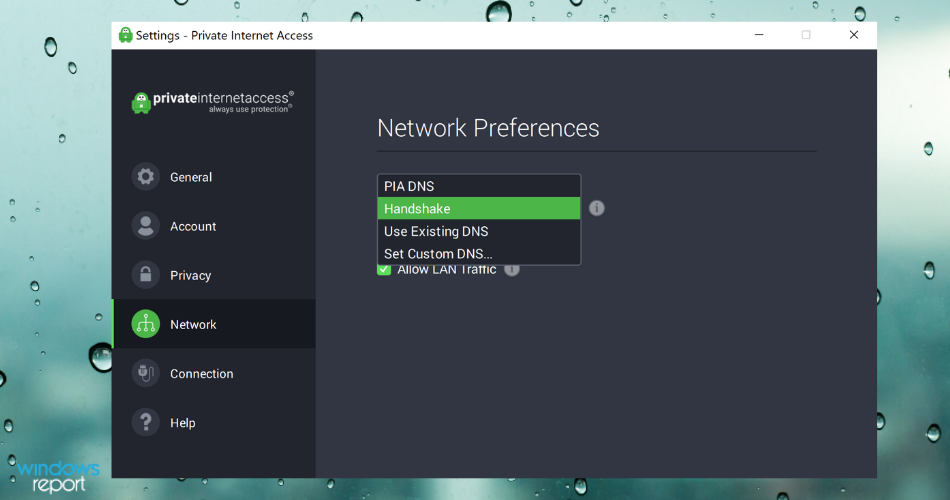
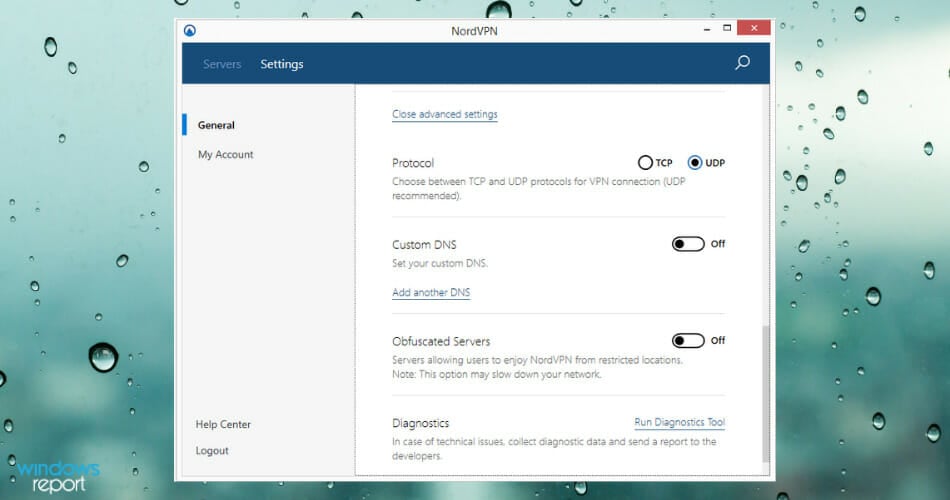
NordVPN – Greatest server coverage globally
This VPN protects your information from being intercepted and also keeps you from being served with phony websites.
With over 2000 servers across the world, with numerous features including ad-blocking, and robust, consistent service.
In terms of speed, NordVPN scores highly on domestic servers, but not as well on international connections, which is good because you’ll be using domestic servers to access the content that’s been restricted.
This is because using a VPN increases physical distance and other factors that limit your normal internet connection, which results in a slower experience, but with more latency.
This, considering that networks can change depending on your location of connection so the mileage will vary.
As one of the fastest VPNs for Windows 10, NordVPN scores well on increasing latency and reducing download and upload speeds.
Here are the additional benefits you stand to gain:
- 6 simultaneous device connections
- Dedicated IP address
- Advanced leak and threat protection
- Split tunneling support

NordVPN
NordVPN is an excellent VPN that works flawlessly, even with BlueStacks.
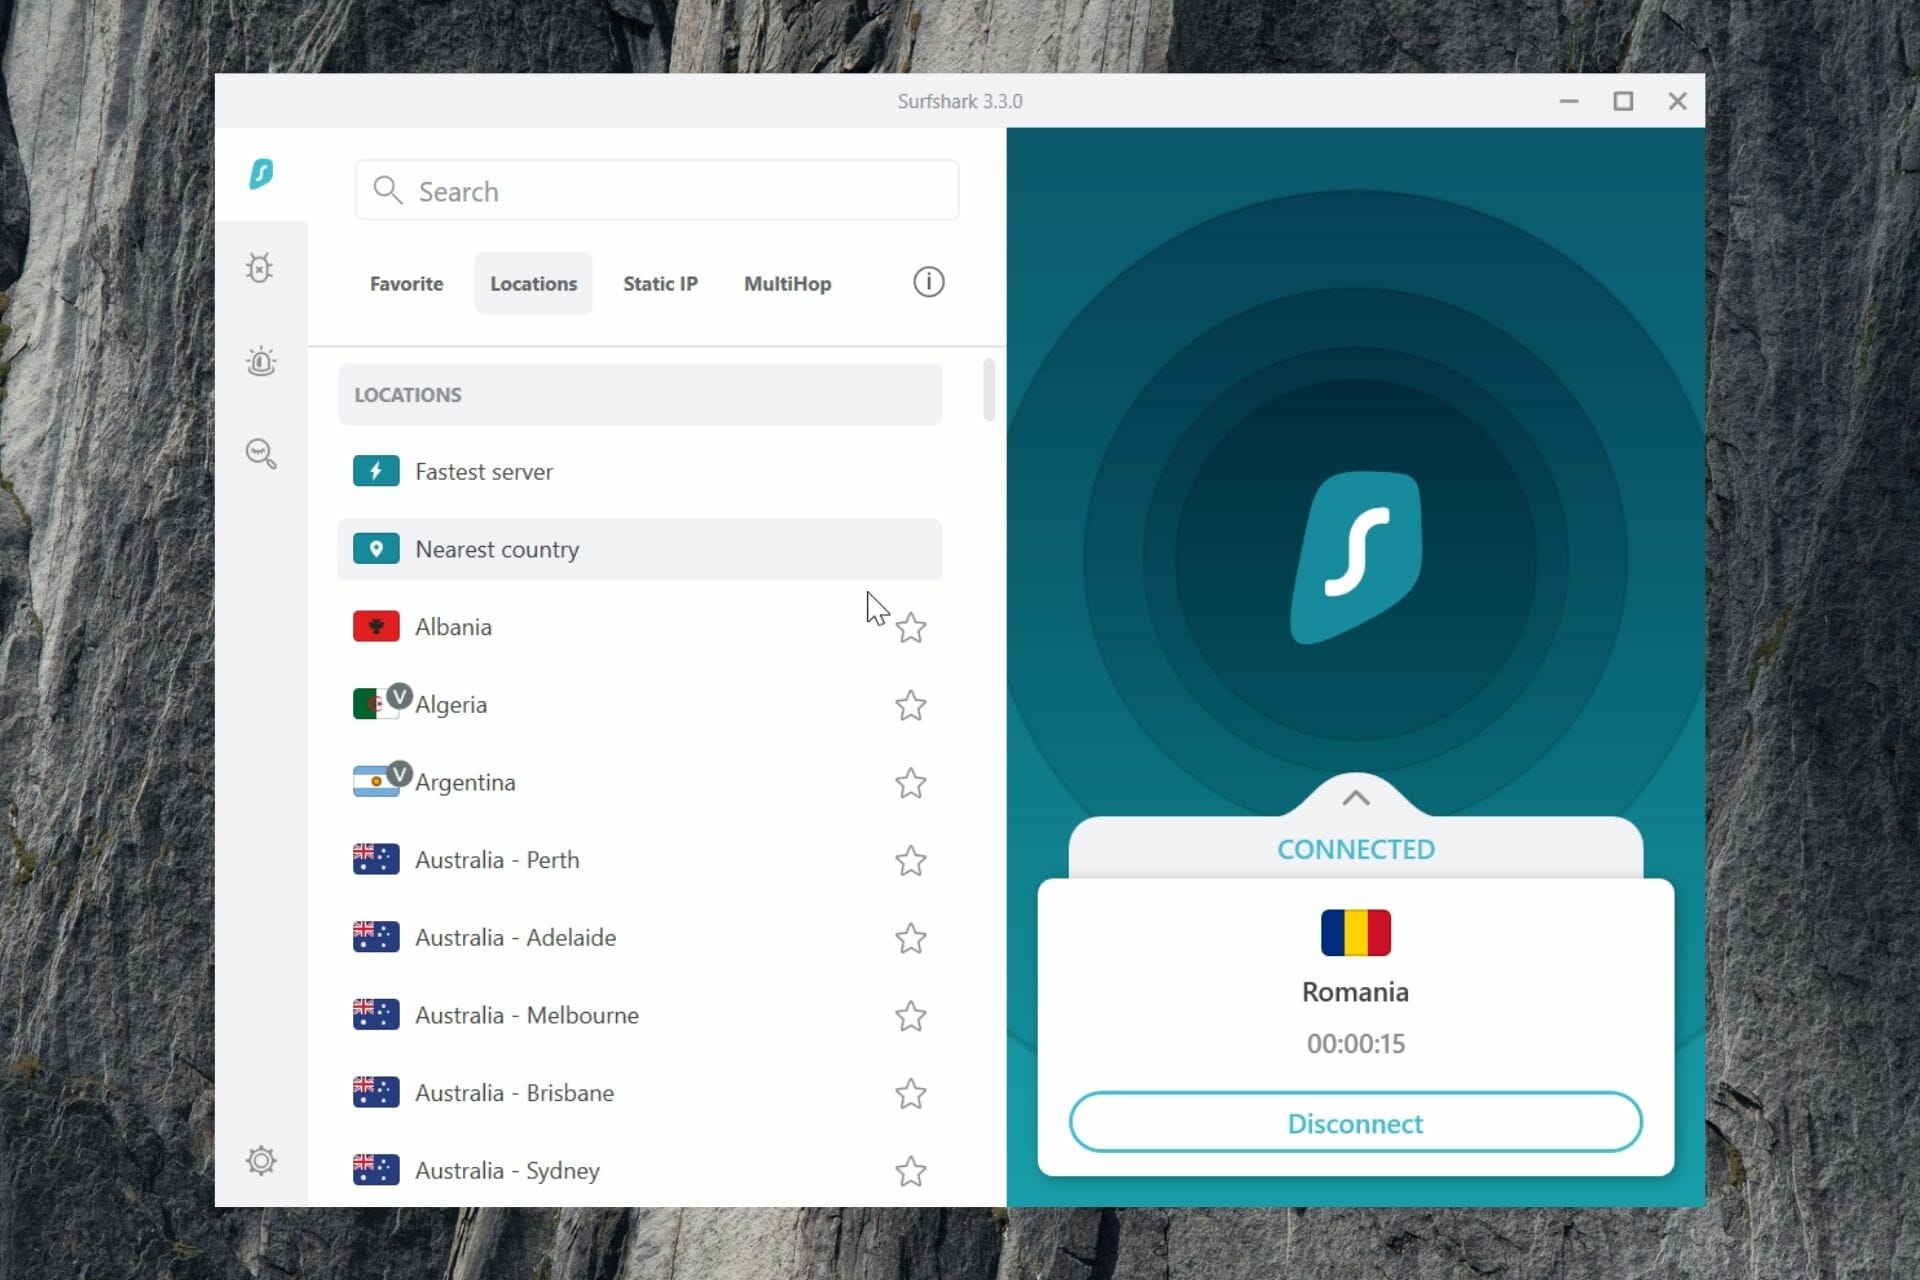
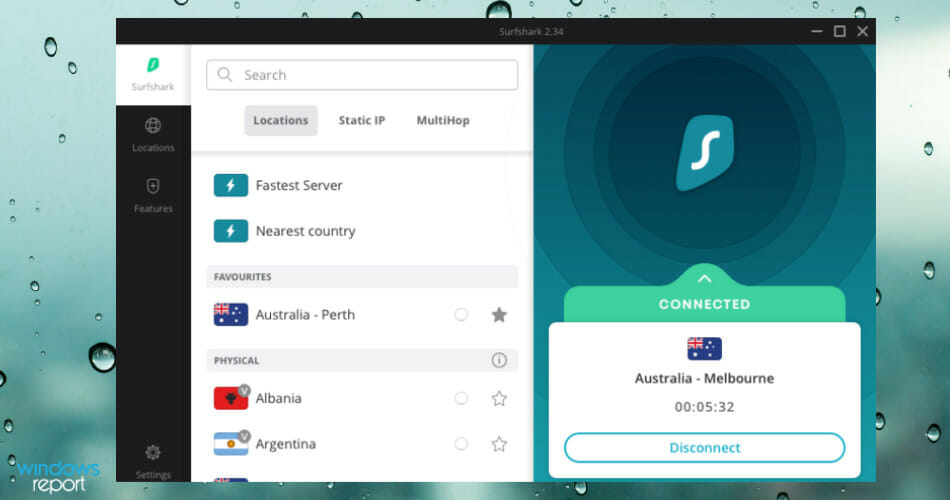
Surfshark – Advanced VPN encryption
Surfshark is a VPN provider that has a multitude of features. When you connect to their VPN network, you’ll be able to surf in complete privacy.
It’s possible to utilize torrents without any threat and take advantage of streaming sites that would otherwise be blocked due to your geolocation.
It’s a good choice if you want to have Android apps running on your PC and know that you’re connected to the web with a secure connection
This VPN is equipped with secure 256-bit encryption and the best technology when it comes to protocols as they use IKEv2 and OpenVPN.
You’ll also be protected when you’re surfing, playing a game, or watching your favorite show as your connection is always protected by an automatic kill switch.
Surfshark really stands out by allowing unlimited devices, which should suffice any household that has members who are into gaming or just browsing the web.
You’ll also discover that there’s a strict no-logs policy, which ensures that you’re the only one who has knowledge of your activity.
You should receive fast speeds when using this VPN service with Windows 10 as Surfshark has optimized its servers to provide this important feature.
With this service, you’ll have access to over 800 different servers that are scattered around 50 different countries.
Here are its main extras, in a nutshell:
- Unlimited device connections
- Ad & malware blocker
- Private DNS & leak protection
- NoBorder mode to use Surfshark wherever you are.

Surfshark
In need of a VPN that works great with BlueStacks? Why not try Surfshark for a change?
CyberGhost VPN – Unbeatable anonymity online
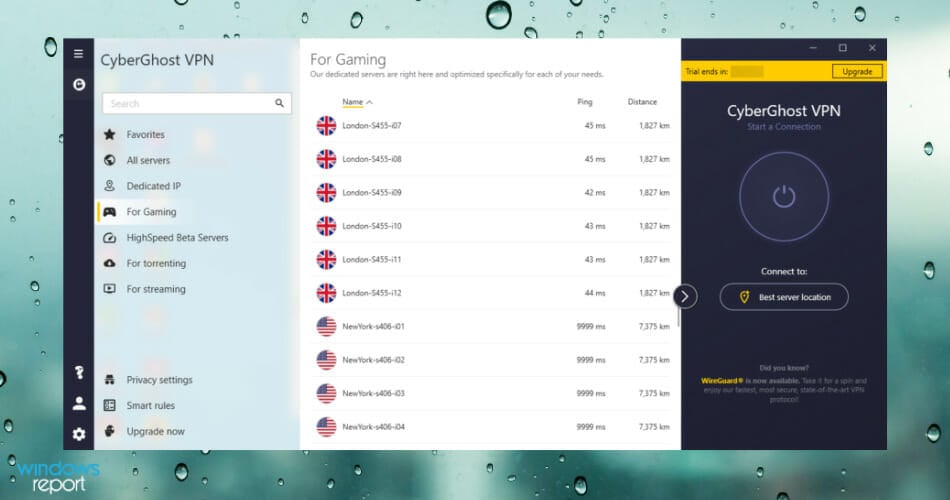
CyberGhost VPN is a freemium VPN that provides a variety of services: which includes surfing or torrenting anonymously, unblocking streaming and websites, and protecting one’s Internet connection from illicit hacks.
With the CyberGhost VPN, you have everything in place to use networks such as airport Wi-Fi, cafes, and hotels more securely, thus if you travel you can rest assured you are fully protected.
It has an automated Wi-Fi security function that protects your data even in public locations. This is made feasible through the use of encryption and the usage of suitable encryption keys. It is secured by AES-256-CBC encryption
There are times when the internet connection is lost after you log in to different accounts, including financial ones. This provides an excellent chance for hackers to steal your data and, as a result, your money.
However, the existence of an automated kill switch prevents such a circumstance from occurring. When the connection fails or is interrupted, CyberGhost VPN automatically terminates all open sessions.
CyberGhost VPN is one of the few all-in-one online privacy software, with a predefined and dedicated profile for any online VPN, need you may have. Users have access to Access over 1800 servers worldwide.
Additionally, you can benefit from the following features:
- 7 simultaneous device connections
- Streaming-optimized servers
- Split tunneling support
- Great leak prevention

CyberGhost VPN
Looking for the best VPN for BlueStacks? Check out CyberGhost VPN.
ExpressVPN – Extensive server locations
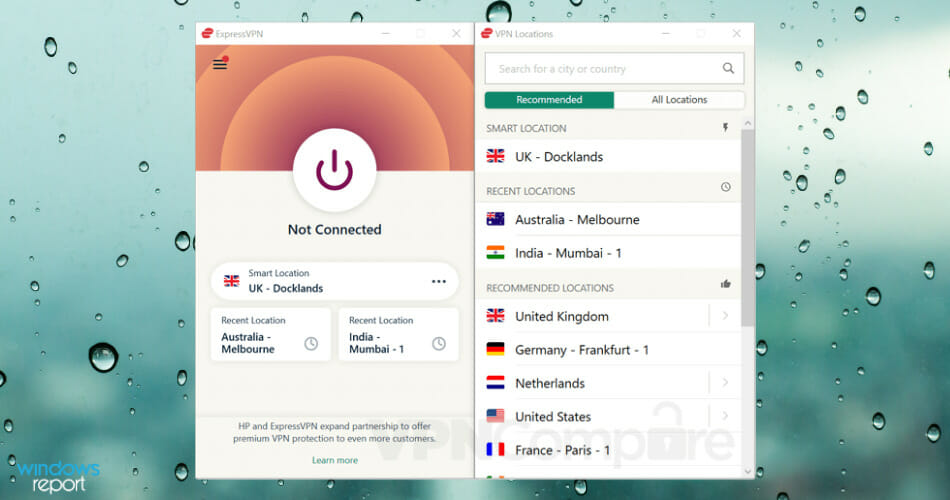
ExpressVPN is speedy, encrypted, and conforms to a rigorous no-logging policy, helping you to stay totally anonymous.
BlueStacks with ExpressVPN provides lightning-fast speeds without affecting security and allows you to install any geo-blocked Android app you can think of for the best gaming experience.
The software works great and is simple to use. Its significant differences can even be seen in the service’s reliability, with 24/7 customer care.
It has over 160 locations in 94 countries, is not part of any internet monitoring organizations, and takes credit cards and even cryptocurrencies as payment.
A single subscription can be used on up to five devices at the same time, whatever platform may be (including virtual machines).
ExpressVPN may be installed on an unlimited number of devices, but only five can be connected at the same time.
Moreover, you can take advantage of:
- Advanced leak prevention
- High-performing servers for gaming and streaming
- Split tunneling support
- Private DNS on every server
ExpressVPN
Stay completely anonymous and have access to a plethora of servers to safely stream or play any games!
Bullguard VPN – Best digital privacy
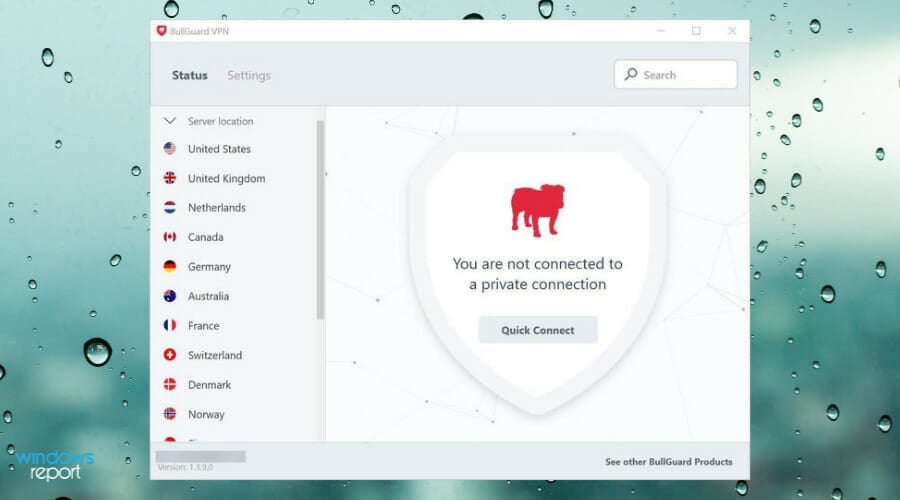
Bullguard VPN is proven to be a very fast VPN provider, regardless of the server location you pick.
Moreover, it is a very good choice as a VPN to use with BlueStacks. It has great encryption and a well-implement privacy policy.
Bullguard VPN hides your IP address which will help you keep your identity private when you connect to gaming platforms.
Along with that, it is important to note that Bullguard lets you secure up to six devices with a single account. It is compatible with all major operating systems, desktop, and mobile.
It has a killswitch that will keep you secure even if the connection drops. All traffic will be blocked and no third parties will be able to access your data.
Additionally, you can expect go get:
- 6 simulataneous device connections
- 256-bit AES encryption
- Great leak prevention
Bullguard is subscription-based with 4 major plans available.
⇒ Get Bullguard
- 13 Best Small Business Antivirus Software: High-Rated Picks
- 10 Easy Fixes to Apply if You Cannot Start BlueStacks (5)
How to use VPN on BlueStacks
It’s possible to set up your VPN to protect BlueStacks using different methods, most likely on the Android emulator. Hence, this is how you should perform it:
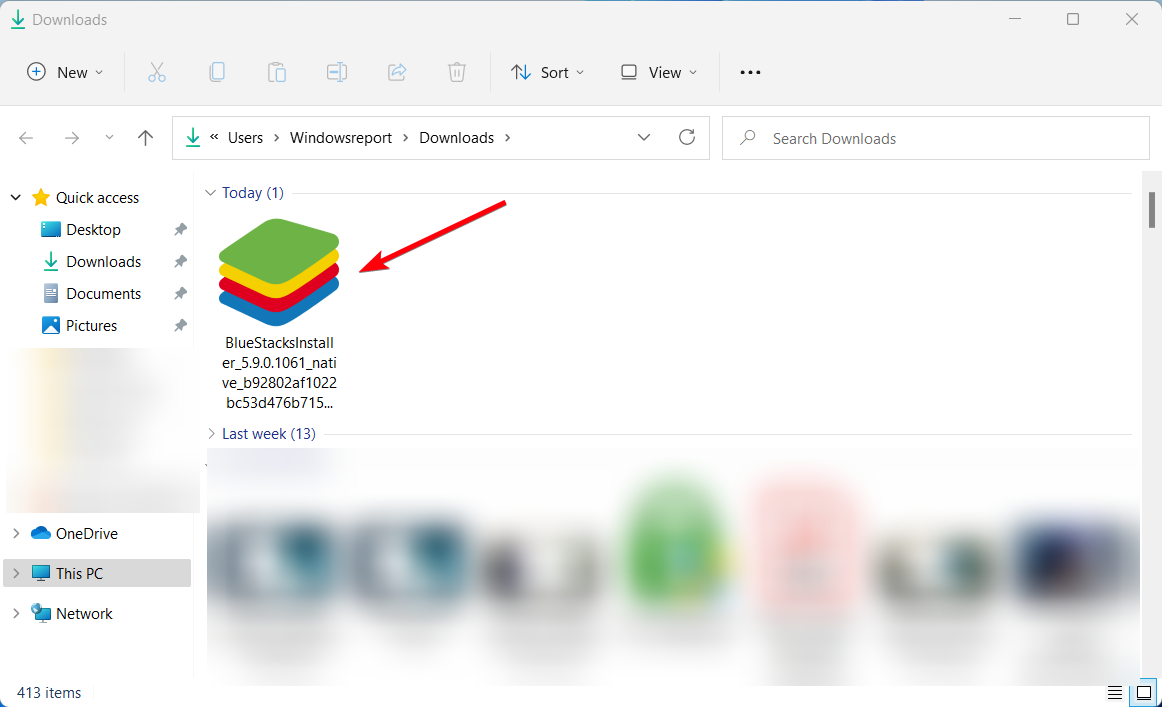
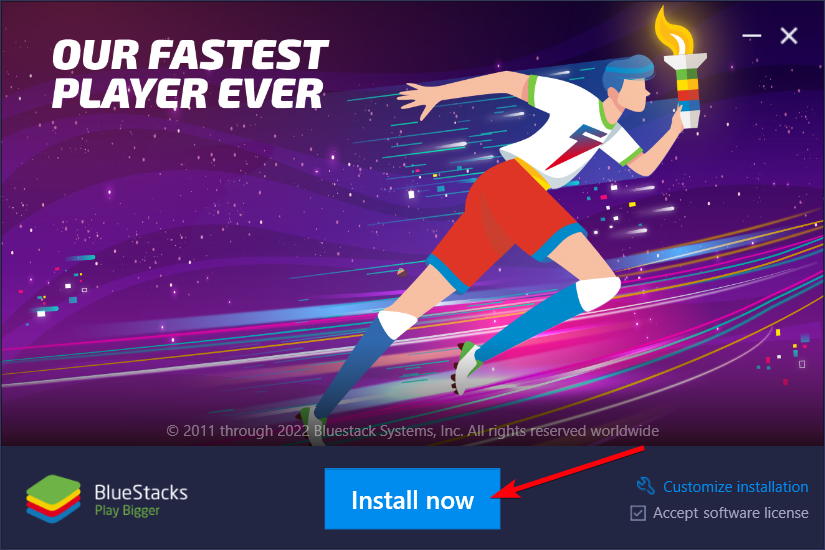
- Download the BlueStacks platform from their website.
- Install the desktop application on your PC.

- Click on the Install button.

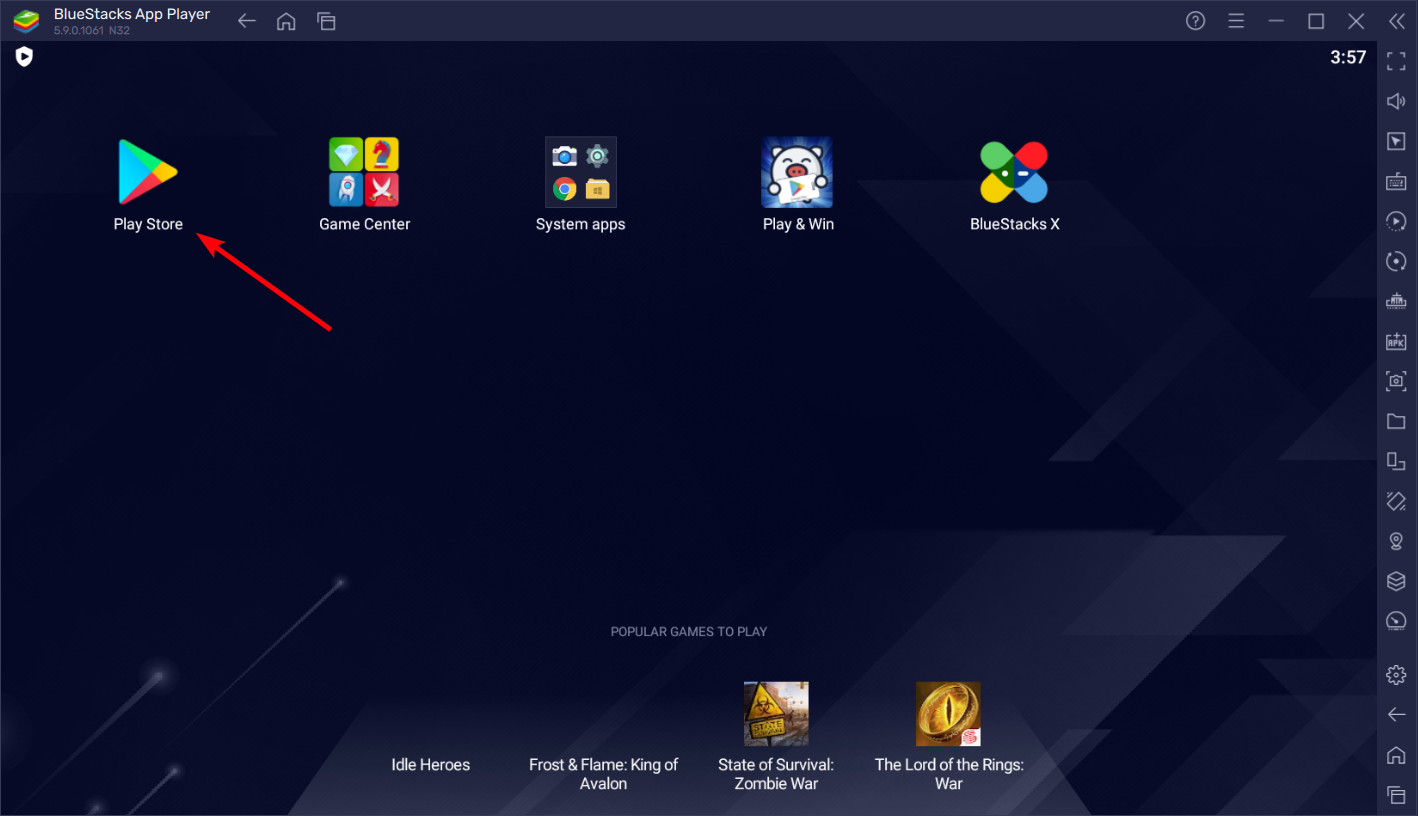
- After you installed it on your PC, Go to Play Store.

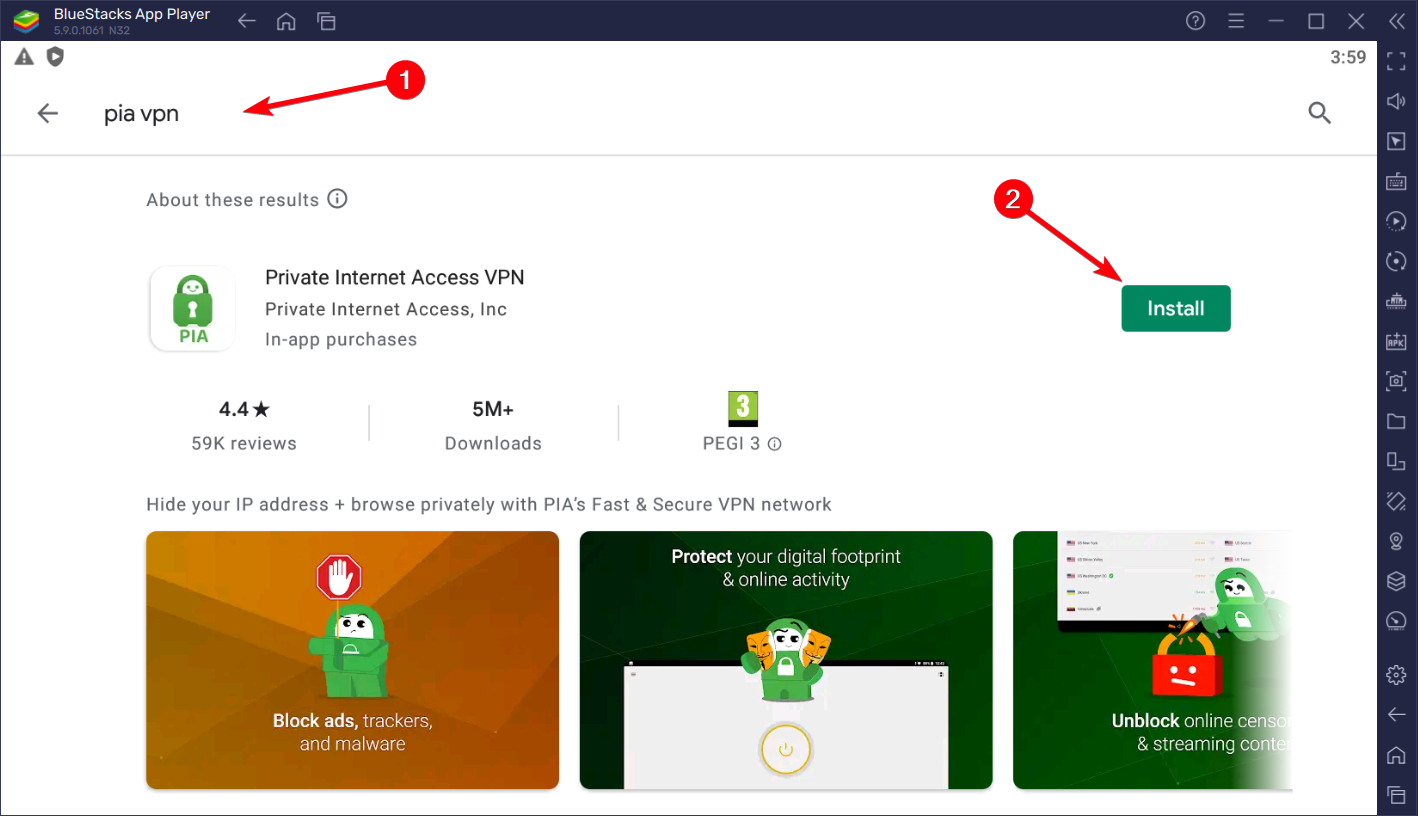
- Write PIA VPN and install the application on your PC.
- After the installation is complete, go to the homepage again.
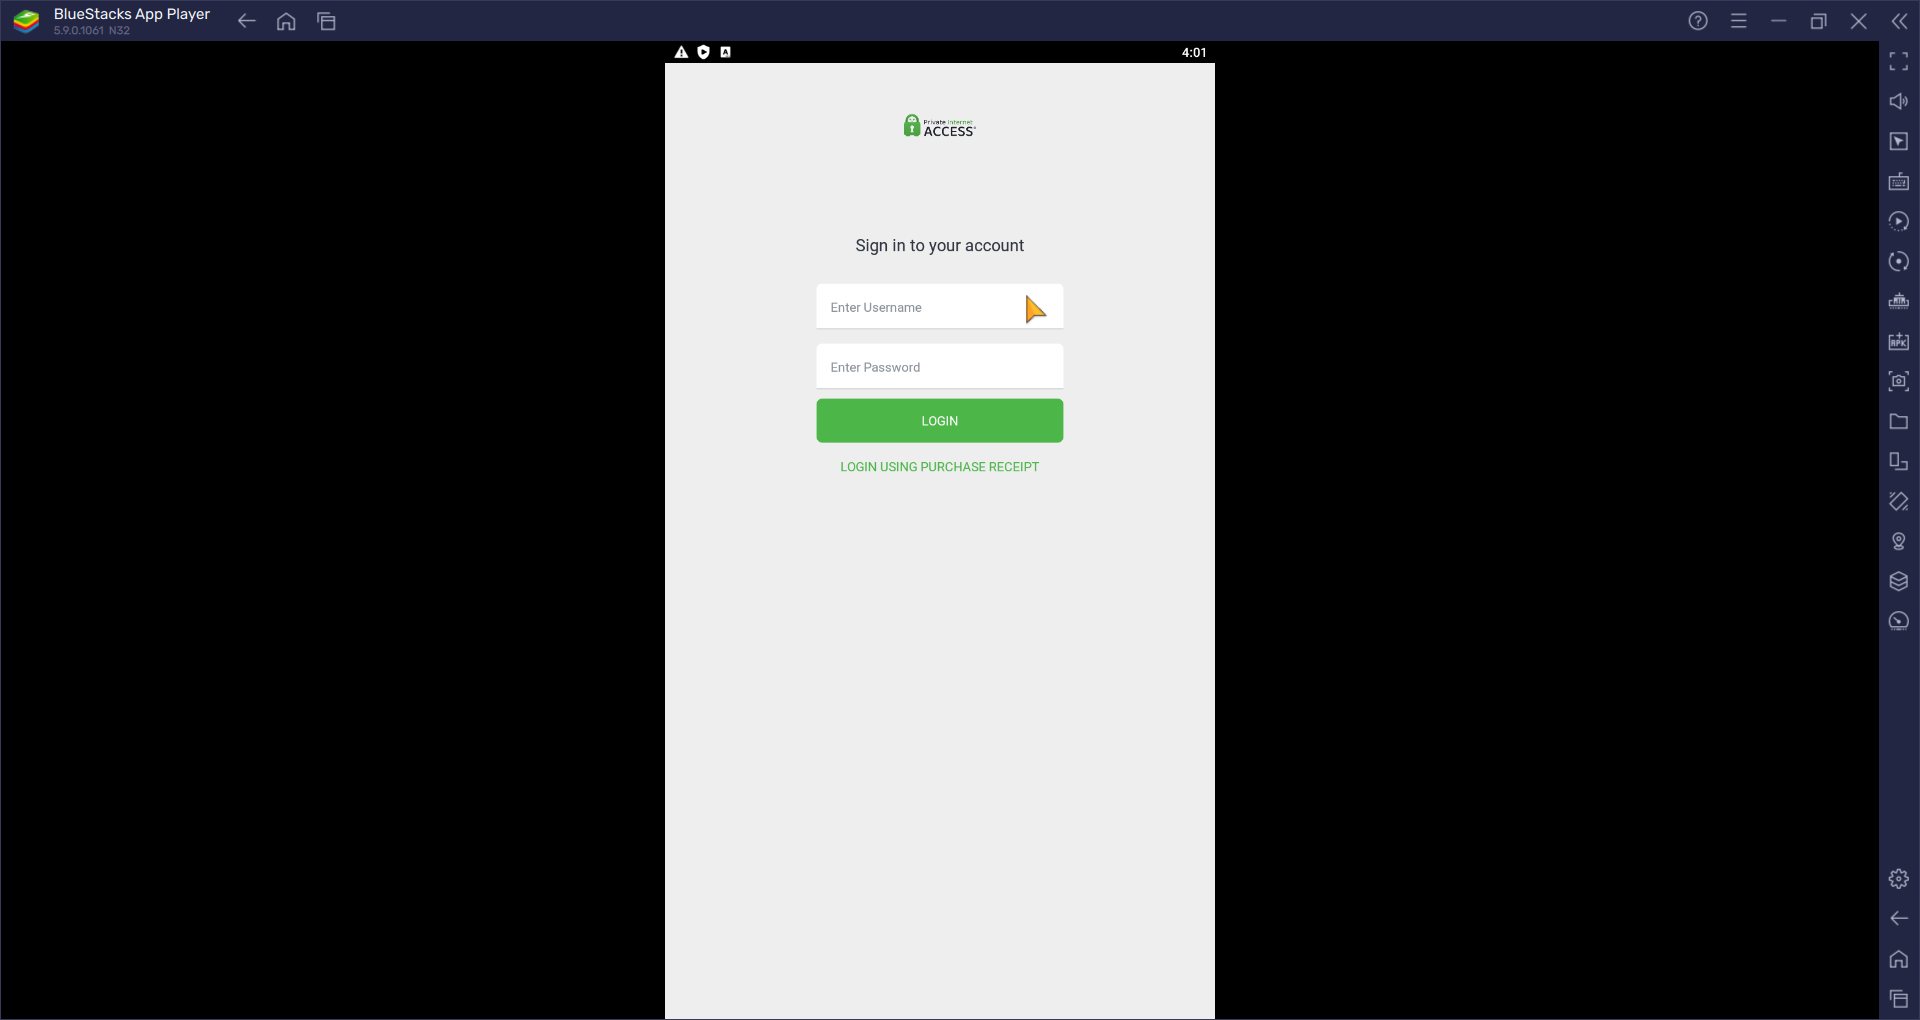
- Click on the PIA app and login into your account.

- Connect to high-speed servers and enjoy any Android games on your PC.
How can I change my BlueStacks IP?
You can simply change your IP address within the BlueStacks platform with the following steps:
- Go to Settings icon in BlueStacks.

- Click on Wireless and Network.
- Select WiFi, More, and then Advanced.
- Go for Use static IP address.
- Click on Change my IP address.
Either way, you can use your PC settings to change your IP address or simply utilize the VPN application to change your IP address every time you require it.
We hope this list makes it easier for you to choose the best VPN for BlueStacks to meet your needs.
Feel free to share with us your experience in using any of the VPN service providers we mentioned above by commenting below.
Your connection is not secure — websites you visit can find out your details:

- Your IP Address:
loading

Companies can sell this information, alongside your location and internet provider name, and profit from it by serving targeted ads or monitoring your data usage.
We recommend Private Internet Access, a VPN with a no-log policy, open source code, ad blocking and much more; now 79% off.
![]()
Newsletter
Get into your Android games using our tested VPNs without geo-restrictions
by Milan Stanojevic
Milan has been enthusiastic about technology ever since his childhood days, and this led him to take interest in all PC-related technologies. He’s a PC enthusiast and he… read more
Updated on December 15, 2022
Fact checked by
Edgar Nicov
Since the dial-up Internet era, Edgar was interested in online resources. From forums to e-commerce websites, he started digging into how those resources could generate revenue. Today he… read more
- BlueStacks is the go-to service for emulating the Android OS on your PC.
- You can easily gain access to all geo-restricted content on the Play Store by using a VPN.
- However, not all VPNs are able to bypass geoblocking, and few of them are compatible with BlueStacks.
- If you want to find a trustworthy, BlueStacks-compatible VPN, check out our guide below.
BlueStacks App Player is designed to enable Android applications to run on PCs running Microsoft Windows.
As the largest mobile gaming platform for PC, BlueStacks enables you to run Android apps and games on your PC, with over 140 million users.
In addition, BlueStacks is the most popular software to play Android games directly on your PC. However, some apps particularly streaming apps may give errors when trying to access them from other parts of the world. This is called geo-blocking.
Hence, a VPN is useful since it simulates the correct IP address to the website and enables users to access this content anywhere in the world.
In the following section, we will be showing you the best VPN tools for BlueStacks Android gaming tool.
We tested the game using the following VPNs
Is BlueStacks using a VPN?
You are able to install a VPN on the BlueStacks platform and secure your games or unblock different region-blocked games.
Thus, it’s quite straightforward to use a VPN on this Android emulator. You can just download it from Google Play and log in to your account on the BlueStacks interface.
This way, you will hide your IP address and route Internet traffic to other remote server locations.
What are the best VPNs for BlueStacks?
Private Internet Access – Highest connection speed
Mobile gaming is a thriving market, with more developers looking towards it as an alternative to PC or consoles.
Even phone manufacturers have started putting gaming badges on their devices. Screens are getting more responsive, batteries are getting bigger and some phones even have advanced cooling solutions.
However, as a PC gamer rocking a high-end system with a top-of-the-line GPU, you might be less inclined to spend your upgrade money on a gaming phone.
This is where BlueStacks comes in to emulate the Android experience on your PC.
Whilst this is all well and good, you’re still limited to the apps and games available in your region. Private Internet Access removes the shackles of geo-restricted content and lets you loose on the world, free to enjoy content from anywhere with the click of a button.
Once you’ve installed PIA, all you’ll need to do is select the country you wish to connect to and you’re free to explore all that the Play Store has to offer.
Additionally, by using PIA you will protect all your data across all your devices. Just have a look at what you stand to gain:
- Use PIA on 10 devices simultaneously, including PC, Mac, and mobile
- Secure VPN tunneling to anywhere in the world
- Military-grade encryption for banking, online purchases, and browsing
- Block ads, trackers, and malware
- Multiple VPN gateways
- Unlimited bandwidth
Private Internet Access
Get instant access to geo-restricted apps, games, and web content with this VPN on BlueStacks.
NordVPN – Greatest server coverage globally
This VPN protects your information from being intercepted and also keeps you from being served with phony websites.
With over 2000 servers across the world, with numerous features including ad-blocking, and robust, consistent service.
In terms of speed, NordVPN scores highly on domestic servers, but not as well on international connections, which is good because you’ll be using domestic servers to access the content that’s been restricted.
This is because using a VPN increases physical distance and other factors that limit your normal internet connection, which results in a slower experience, but with more latency.
This, considering that networks can change depending on your location of connection so the mileage will vary.
As one of the fastest VPNs for Windows 10, NordVPN scores well on increasing latency and reducing download and upload speeds.
Here are the additional benefits you stand to gain:
- 6 simultaneous device connections
- Dedicated IP address
- Advanced leak and threat protection
- Split tunneling support
NordVPN
NordVPN is an excellent VPN that works flawlessly, even with BlueStacks.
Surfshark – Advanced VPN encryption
Surfshark is a VPN provider that has a multitude of features. When you connect to their VPN network, you’ll be able to surf in complete privacy.
It’s possible to utilize torrents without any threat and take advantage of streaming sites that would otherwise be blocked due to your geolocation.
It’s a good choice if you want to have Android apps running on your PC and know that you’re connected to the web with a secure connection
This VPN is equipped with secure 256-bit encryption and the best technology when it comes to protocols as they use IKEv2 and OpenVPN.
You’ll also be protected when you’re surfing, playing a game, or watching your favorite show as your connection is always protected by an automatic kill switch.
Surfshark really stands out by allowing unlimited devices, which should suffice any household that has members who are into gaming or just browsing the web.
You’ll also discover that there’s a strict no-logs policy, which ensures that you’re the only one who has knowledge of your activity.
You should receive fast speeds when using this VPN service with Windows 10 as Surfshark has optimized its servers to provide this important feature.
With this service, you’ll have access to over 800 different servers that are scattered around 50 different countries.
Here are its main extras, in a nutshell:
- Unlimited device connections
- Ad & malware blocker
- Private DNS & leak protection
- NoBorder mode to use Surfshark wherever you are.
Surfshark
In need of a VPN that works great with BlueStacks? Why not try Surfshark for a change?
CyberGhost VPN – Unbeatable anonymity online
CyberGhost VPN is a freemium VPN that provides a variety of services: which includes surfing or torrenting anonymously, unblocking streaming and websites, and protecting one’s Internet connection from illicit hacks.
With the CyberGhost VPN, you have everything in place to use networks such as airport Wi-Fi, cafes, and hotels more securely, thus if you travel you can rest assured you are fully protected.
It has an automated Wi-Fi security function that protects your data even in public locations. This is made feasible through the use of encryption and the usage of suitable encryption keys. It is secured by AES-256-CBC encryption
There are times when the internet connection is lost after you log in to different accounts, including financial ones. This provides an excellent chance for hackers to steal your data and, as a result, your money.
However, the existence of an automated kill switch prevents such a circumstance from occurring. When the connection fails or is interrupted, CyberGhost VPN automatically terminates all open sessions.
CyberGhost VPN is one of the few all-in-one online privacy software, with a predefined and dedicated profile for any online VPN, need you may have. Users have access to Access over 1800 servers worldwide.
Additionally, you can benefit from the following features:
- 7 simultaneous device connections
- Streaming-optimized servers
- Split tunneling support
- Great leak prevention
CyberGhost VPN
Looking for the best VPN for BlueStacks? Check out CyberGhost VPN.
ExpressVPN – Extensive server locations
ExpressVPN is speedy, encrypted, and conforms to a rigorous no-logging policy, helping you to stay totally anonymous.
BlueStacks with ExpressVPN provides lightning-fast speeds without affecting security and allows you to install any geo-blocked Android app you can think of for the best gaming experience.
The software works great and is simple to use. Its significant differences can even be seen in the service’s reliability, with 24/7 customer care.
It has over 160 locations in 94 countries, is not part of any internet monitoring organizations, and takes credit cards and even cryptocurrencies as payment.
A single subscription can be used on up to five devices at the same time, whatever platform may be (including virtual machines).
ExpressVPN may be installed on an unlimited number of devices, but only five can be connected at the same time.
Moreover, you can take advantage of:
- Advanced leak prevention
- High-performing servers for gaming and streaming
- Split tunneling support
- Private DNS on every server
ExpressVPN
Stay completely anonymous and have access to a plethora of servers to safely stream or play any games!
Bullguard VPN – Best digital privacy
Bullguard VPN is proven to be a very fast VPN provider, regardless of the server location you pick.
Moreover, it is a very good choice as a VPN to use with BlueStacks. It has great encryption and a well-implement privacy policy.
Bullguard VPN hides your IP address which will help you keep your identity private when you connect to gaming platforms.
Along with that, it is important to note that Bullguard lets you secure up to six devices with a single account. It is compatible with all major operating systems, desktop, and mobile.
It has a killswitch that will keep you secure even if the connection drops. All traffic will be blocked and no third parties will be able to access your data.
Additionally, you can expect go get:
- 6 simulataneous device connections
- 256-bit AES encryption
- Great leak prevention
Bullguard is subscription-based with 4 major plans available.
⇒ Get Bullguard
- 13 Best Small Business Antivirus Software: High-Rated Picks
- 10 Easy Fixes to Apply if You Cannot Start BlueStacks (5)
- 5 Best Open Source Software For Enterprise Network Security
- 3 Best XDR and SIEM Software for Network Cybersecurity
- 5 Best Cyber-Security Tools For Complete Network Protection
How to use VPN on BlueStacks
It’s possible to set up your VPN to protect BlueStacks using different methods, most likely on the Android emulator. Hence, this is how you should perform it:
- Download the BlueStacks platform from their website.
- Install the desktop application on your PC.
- Click on the Install button.
- After you installed it on your PC, Go to Play Store.
- Write PIA VPN and install the application on your PC.
- After the installation is complete, go to the homepage again.
- Click on the PIA app and login into your account.
- Connect to high-speed servers and enjoy any Android games on your PC.
How can I change my BlueStacks IP?
You can simply change your IP address within the BlueStacks platform with the following steps:
- Go to Settings icon in BlueStacks.
- Click on Wireless and Network.
- Select WiFi, More, and then Advanced.
- Go for Use static IP address.
- Click on Change my IP address.
Either way, you can use your PC settings to change your IP address or simply utilize the VPN application to change your IP address every time you require it.
We hope this list makes it easier for you to choose the best VPN for BlueStacks to meet your needs.
Feel free to share with us your experience in using any of the VPN service providers we mentioned above by commenting below.
Your connection is not secure — websites you visit can find out your details:
-
- Your IP Address:
loading
Companies can sell this information, alongside your location and internet provider name, and profit from it by serving targeted ads or monitoring your data usage.
We recommend Private Internet Access, a VPN with a no-log policy, open source code, ad blocking and much more; now 79% off.
![]()
Newsletter
Перейти к контенту
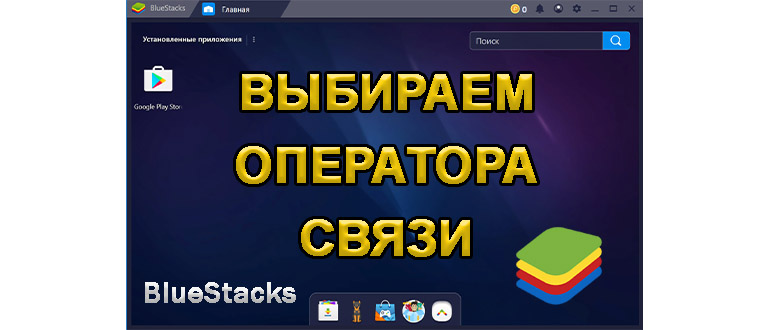
Если говорить о различных эмуляторах, то BlueStacks в своём сегменте заслуженно занимает первое место сразу по нескольким причинам. Как минимум, это тот продукт, с которым можно достигать любого результата. При желании реализовать настройки вы сможете сделать это за считанные минуты. К примеру, доступен выбор оператора связи в BlueStacks. Данная статья описывает полный алгоритм, вместе с которым вы гарантированно достигнете желаемого результата.
Процедура настройки
Чтобы добиться поставленной цели, вам достаточно лишь проследовать элементарной инструкции:
- Запустите Блюстакс на вашем ПК стандартным способом, используя ярлык на рабочем столе или меню «Пуск».
Обратите внимание! Данный эмулятор требователен к системе, поэтому при наличии слабого компьютера настоятельно рекомендуется предварительно закрывать все сторонние программы. В таком случае работа софта окажется более стабильной.
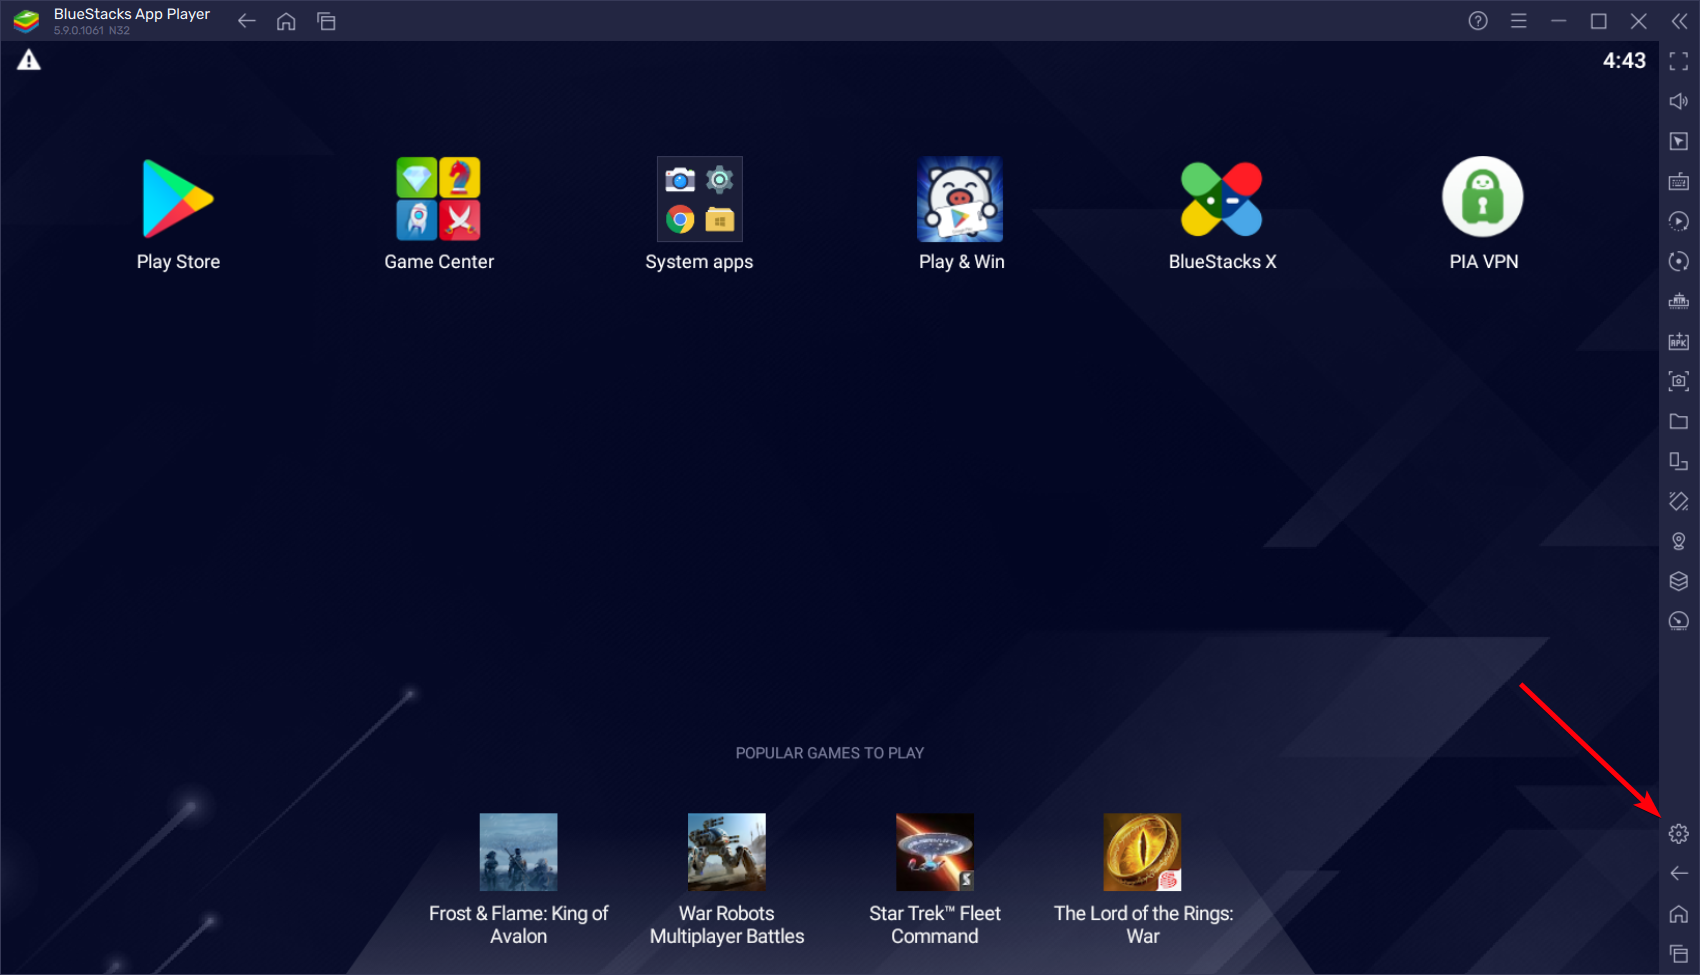
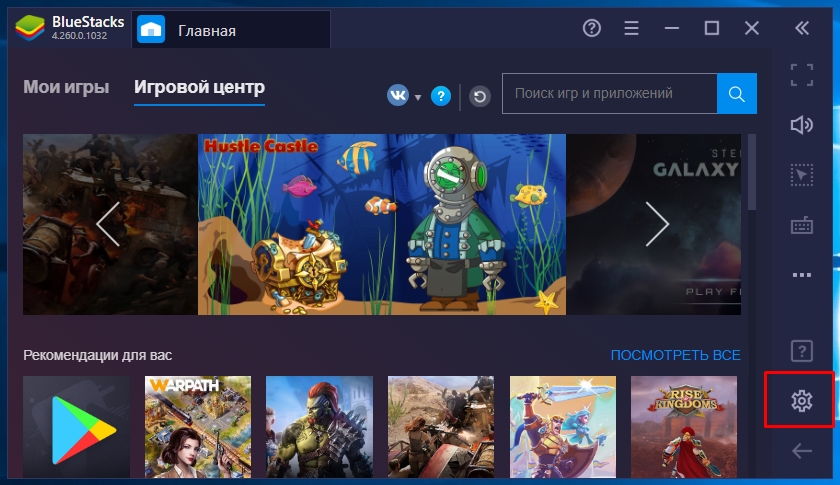
- Теперь, когда всё полностью прогрузится и будет готово к работе, вы должны обратить внимание на кнопку в виде шестерёнки, которая расположена в нижнем правом углу. Кликните по ней один раз ЛКМ для того, чтобы перейти к следующему этапу.
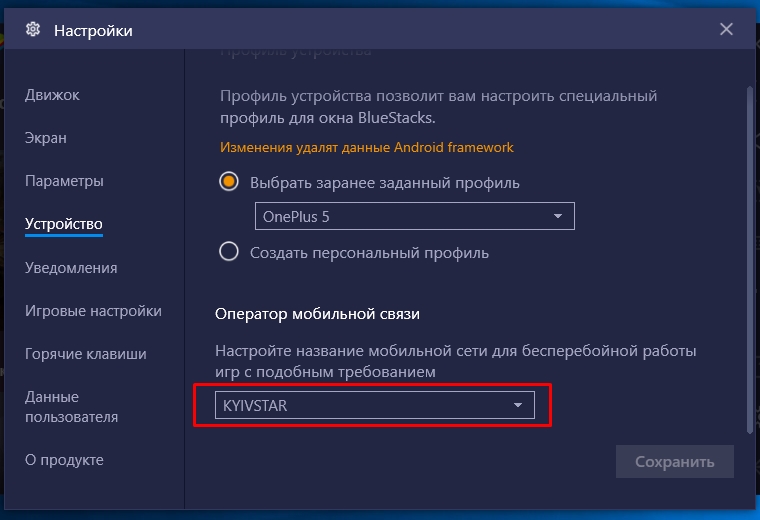
- Перед вами появится дополнительное окно с рядом различных настроек. В левой части находятся те или иные вкладки, между которыми вы можете переключаться. Выберите элемент под названием «Устройство».

- Теперь самый последний этап, так как именно сейчас вам предстоит выбрать оператора связи. Сделать это можно, пролистав содержимое правой части в самый низ. Там расположен соответствующий информационный блок, который можно настраивать. Кликните по названию текущего оператора, чтобы появился перечень из всех доступных вариантов. После этого можете указывать необходимый вам.
- Самый последний шаг – это сохранение прогресса. Не забудьте реализовать данное действие, так как в противном случае внесённые изменения не будут зафиксированы.
Как вы могли убедиться, работа с такой программой, как BlueStacks – это предельно просто, доступно и удобно. Всего лишь несколько действий и вы уже получаете нужный результат.
Заключение
Используйте представленную выше инструкцию, чтобы реализовать выбор оператора связи в BlueStacks. Будьте уверены, что перечисленная последовательность действий приведёт вас ровно к тому результату, который вы ожидаете увидеть.
Вы ищете способ защитить свою конфиденциальность при использовании BlueStacks? Если это так, у нас есть решение: использование виртуальной частной сети (VPN). Это не только повысит вашу конфиденциальность в Интернете, но также откроет доступ к закрытым приложениям и веб-сайтам.
< p>VPN — это отличный способ убедиться, что вы можете путешествовать по Интернету, и никто не отслеживает вашу активность. Если вы хотите узнать больше, вы обратились по адресу. В этой статье мы обсудим, как использовать VPN с BlueStacks на ПК или Mac, и объясним его многочисленные преимущества.
Как использовать VPN с BlueStacks на ПК с Windows?
BlueStacks превращает ваш ПК с Windows в концентратор Android и позволяет загружать приложения из Play Store. Если вы хотите защитить свою конфиденциальность или получить доступ к различным веб-сайтам, мы рекомендуем использовать ExpressVPN.
Ограниченное предложение: 3 месяца БЕСПЛАТНО! Получить ExpressVPN. Безопасный и удобный для потоковой передачи.
30-дневная гарантия возврата денег
ExpressVPN – это одна из самых популярных услуг VPN, которая гарантирует безопасность на всех ваших устройствах.
Настроить его легко, и вы можете сделать это двумя способами: установить его непосредственно на свой компьютер, чтобы применить его ко всему вашему трафику, или установить версию для Android в BlueStacks. Мы рекомендуем установить его на свой компьютер, потому что у вас будет более высокий уровень безопасности. Кроме того, вам будут доступны дополнительные функции, и вы сможете использовать службу VPN для других целей. Хотя установка ExpressVPN непосредственно на ПК является более безопасным вариантом, мы также рассмотрим шаги по установке на устройство Android.
Если вы хотите установить ExpressVPN через BlueStacks, выполните следующие действия:
Ограниченное предложение: 3 месяца БЕСПЛАТНО! Получить ExpressVPN. Безопасный и удобный для потоковой передачи.
30-дневная гарантия возврата денег
- Запустите BlueStacks на своем ПК.
- Посетите ExpressVPN и создайте учетную запись.
- Перейдите в Play Маркет.
- Найдите “ExpressVPN” и установите его.
- Поскольку вы уже создали аккаунт с помощью нашу скидку, нажмите “Войти” и введите свой адрес электронной почты и пароль.
- Когда на экране появится всплывающее сообщение с запросом разрешения на установку VPN-подключения, нажмите “Ok” для подтверждения.
- По умолчанию ExpressVPN подключит вас к оптимальному , «Умный» место нахождения. Вы можете изменить это, нажав три точки справа. Вы также можете выбрать рекомендуемые местоположения с лучшим подключением и скоростью или переключиться на опцию “Все местоположения” вкладка
- Нажмите значок питания, чтобы подключиться к VPN-серверу.


Теперь вы можете использовать BlueStacks с VPN. Помните, что если вы выполнили эти шаги, VPN будет доступна только в BlueStacks. Это хороший вариант, если вы хотите защитить свою конфиденциальность в приложении, но продолжать просматривать Интернет со своим IP-адресом.
Как уже упоминалось, другой способ — установить ExpressVPN на свой компьютер, а затем запустить BlueStacks. Вот как это сделать:
- Откройте браузер, перейдите на веб-сайт ExpressVPN и выберите “Мой аккаунт”
- Если у вас нет учетной записи, создайте ее и приобретите предпочтительную план подписки. Если у вас есть учетная запись, нажмите “Войти”
- Нажмите “Загрузить для Windows” и скопируйте код активации.
- Нажмите “Загрузить” Всплывающее сообщение спросит, хотите ли вы разрешить приложению вносить изменения в ваш компьютер. Нажмите “Да”
- После установки ExpressVPN вы увидите экран приветствия с краткими инструкциями. Нажмите «Продолжить». дважды, а затем нажмите “Настроить VPN”
- Когда приложение попросит разрешить приложению внести изменения в ваш компьютер, нажмите “Да” Используйте код активации и нажмите “Продолжить”
- Выберите хотите ли вы, чтобы ExpressVPN запускался каждый раз при включении компьютера. Вы также можете настроить эти параметры позже.
- В приложении есть “Умное местоположение” функции, которые выбирают оптимальное расположение для вашего компьютера по умолчанию. Если вы хотите изменить его, нажмите на три точки справа.
- Нажмите кнопку питания для подключения.


Если вы используете устройство Mac, вы можете легко преобразовать его в виртуальный концентратор Android с помощью BlueStacks. Использование VPN с BlueStacks гарантирует вашу конфиденциальность и не позволяет никому отслеживать ваши действия.
Ограниченное предложение: 3 месяца БЕСПЛАТНО! Получить ExpressVPN. Безопасный и удобный для потоковой передачи.
30-дневная гарантия возврата денег
Вы можете сначала запустить BlueStacks и установить VPN, например ExpressVPN для Android, через Play Store или установить ExpressVPN на свое устройство Mac. Выберите первый вариант, если вы хотите использовать VPN только для BlueStacks и продолжать использовать свой IP-адрес для других действий. Но имейте в виду, что вам будет доступно меньше функций, а уровень безопасности будет не таким высоким.
Вот как установить ExpressVPN в BlueStacks:
- Откройте BlueStacks на своем устройстве Mac.
- Перейдите в Play Маркет и загрузите приложение ExpressVPN.
- Нажмите “Войти” и введите свой адрес электронной почты и пароль, так как вы зарегистрировались, используя нашу скидку.
- Нажмите “ОК” чтобы разрешить настройку VPN-подключения.
- Вы будете автоматически подключены к «Умному местоположению». Чтобы изменить его, нажмите на три точки справа. Места в списке “Рекомендуемые” tab – это те, у которых лучшее соединение и скорость. Если вы имеете в виду конкретную область, нажмите “Все местоположения” и выберите его.
- После того, как вы настроите предпочтительное местоположение , нажмите значок питания, чтобы подключиться.


Установив ExpressVPN через BlueStacks, вы будете защищены только при использовании приложения .
Если вы хотите установить ExpressVPN прямо на свой Mac, вы сможете использовать его с BlueStacks и любым другим приложением, браузером или программой. У вас также будет более высокий уровень безопасности и больше возможностей на выбор, поэтому мы рекомендуем это.
Вот как установить ExpressVPN на вашем устройстве Mac:
- Запустите браузер и перейдите на веб-сайт ExpressVPN.
- Нажмите “Мой аккаунт”
< img src=»/wp-content/uploads/2022/04/771e02eb5c3e2c82e9f6d909c3458587.png» /> - Введите имя пользователя и пароль, если у вас есть учетная запись. Если у вас его нет, нажмите «Получить ExpressVPN». и выберите предпочтительный план подписки.
- Нажмите “Загрузить для Mac” и скопируйте код активации, поскольку он понадобится вам после установки приложения.
- Следуйте инструкциям на экране, чтобы завершить установку приложения.
- Используйте код активации, чтобы продолжить настройку ExpressVPN.
- Появится всплывающее сообщение с вопросом, хотите ли вы, чтобы ExpressVPN запускался каждый раз при запуске вашего Mac; нажмите “ОК” или “Нет, спасибо”
- Вы увидите ExpressVPN назначил местоположение по умолчанию. Вы можете изменить это, нажав на три точки справа и выбрав “Рекомендуемые местоположения” и “Все местоположения”
- Нажмите значок питания, чтобы подключиться.


Поскольку вы установили ExpressVPN на своем устройстве Mac, теперь вы можете запускать BlueStacks, и ваше подключение будет автоматически защищены.
BlueStacks еще лучше с VPN
Если вам интересно, как использовать VPN с BlueStacks, мы надеемся, что эта статья была вам полезна. Вы можете в любое время превратить свой ПК с Windows или устройство Mac в центр Android с помощью BlueStacks. Приложение позволяет устанавливать приложения для Android и запускать их на своем устройстве. ExpressVPN — это отличное дополнение, которое повышает вашу конфиденциальность и безопасность и открывает доступ к многочисленным приложениям, недоступным в вашем регионе.
Вы когда-нибудь использовали VPN с BlueStacks? Вы использовали ExpressVPN? Расскажите нам в разделе комментариев ниже.
