 The solution must work in all browsers.
Despite what people are saying here, you don’t need JavaScript at all, you don’t even need CSS!
It’s actually very doable and simple with HTML only.
You can even show a default image if an image doesn’t load. Here’s how…
This also works on all browsers, even as far back as IE8 (out of 250,000+ visitors to sites I hosted in September 2015, ZERO people used something worse than IE8, meaning this solution works for literally everything).
Step 1: Reference the image as an object instead of an img. When objects fail they don’t show broken icons; they just do nothing. Starting with IE8, you can use object and img tags interchangeably. You can resize and do all the glorious stuff you can with regular images too. Don’t be afraid of the object tag; it’s just a tag, nothing big and bulky gets loaded and it doesn’t slow down anything. You’ll just be using the img tag by another name. A speed test shows they are used identically.
Step 2: (Optional, but awesome) Stick a default image inside that object. If the image you want actually loads in the object, the default image won’t show. So for example you could show a list of user avatars, and if someone doesn’t have an image on the server yet, it could show the placeholder image… no JavaScript or CSS required at all, but you get the features of what takes most people JavaScript.
Here is the code…
<object data="avatar.jpg" type="image/jpeg">
    <img src="default.jpg" />
</object>
… Yes, it’s that simple.
If you want to implement default images with CSS, you can make it even simpler in your HTML like this…
<object class="avatar" data="user21.jpg" type="image/jpeg"></object>
…and just add the CSS from this answer -> https://stackoverflow.com/a/32928240/3196360
Broken images are ugly.

But they don’t always have to be. We can use CSS to apply styles to the <img> element to provide a better experience than the default.
Two Facts About The <img> Element
To understand how we can style broken images, there are two facts about the way the <img> element behaves that we need to understand first.
-
We can apply regular typography-related styling to the
<img>element. These styles will be applied to the alternative text, if it is displayed, and will not affect the working image. -
The
<img>element is a replaced element. This is an element “whose appearance and dimensions are defined by an external resource” (Sitepoint). Because the element is controlled by an external source, the:beforeand:afterpseudo-elements typically shouldn’t work with it. However, when the image is broken and not loaded, these pseudo-elements can appear.
Because of these two facts, we are able to apply styles to the <img> element that will only appear when the image is broken, and will leave a working image unaffected.
Putting It Into Practice
Using this information, here are some examples of how we can style broken images, using the following broken link —
<img src="http://bitsofco.de/broken.jpg" alt="Kanye Laughing">
Adding Helpful Information
One way we can handle broken images is to provide a message to the user saying that the image is broken. Using the attr() expression, we can even display the link to the broken image.

img {
  font-family: 'Helvetica';
  font-weight: 300;
  line-height: 2;
  text-align: center;

  width: 100%;
  height: auto;
  display: block;
  position: relative;
}

img:before {
  content: "We're sorry, the image below is broken :(";
  display: block;
  margin-bottom: 10px;
}

img:after {
  content: "(url: " attr(src) ")";
  display: block;
  font-size: 12px;
}
Replacing The Default Alternative Text
Alternatively, we can use the pseudo-elements to replace the default alt text that shows, by positioning the pseudo-element on top of the default text, hiding it from view.

img { /* Same as first example */ }

img:after {
  content: "f1c5" " " attr(alt);

  font-size: 16px;
  font-family: FontAwesome;
  color: rgb(100, 100, 100);

  display: block;
  position: absolute;
  z-index: 2;
  top: 0;
  left: 0;
  width: 100%;
  height: 100%;
  background-color: #fff;
}
In addition to (or instead of) displaying a custom message, we can use the pseudo-elements to apply more styling to the broken image.

img {
  /* Same as first example */
  min-height: 50px;
}

img:before {
  content: " ";
  display: block;

  position: absolute;
  top: -10px;
  left: 0;
  height: calc(100% + 10px);
  width: 100%;
  background-color: rgb(230, 230, 230);
  border: 2px dotted rgb(200, 200, 200);
  border-radius: 5px;
}

img:after {
  content: "f127" " Broken Image of " attr(alt);
  display: block;
  font-size: 16px;
  font-style: normal;
  font-family: FontAwesome;
  color: rgb(100, 100, 100);

  position: absolute;
  top: 5px;
  left: 0;
  width: 100%;
  text-align: center;
}
If the image is not broken, with all the same styles applied to the element, the image is displayed normally. The pseudo-elements are not generated at all.

Browser Compatibility
Unfortunately, not all browsers handle broken images in the same way. For some browsers, even though the image is not displayed, the pseudo-elements don’t show up at all.
Here’s what I’ve found from my tests —
| Browser | Alt Text | :before | :after |
|---|---|---|---|
| Chrome (Desktop and Android) | ✓ | ✓ | ✓ |
| Firefox (Desktop and Android) | ✓ | ✓ | ✓ |
| Opera (Desktop) | ✓ | ✓ | ✓ |
| Opera Mini | ✓ ** | ✗ | ✗ |
| Safari (Desktop and iOS) | ✓ * | ✗ | ✗ |
| iOS Webview (Chrome, Firefox, others) | ✓ * | ✗ | ✗ |
* The alt text will only show if the width of the image is large enough to accommodate it. If no width is specified for the img, the alt text may not be displayed at all
** Font styling not applied
For browsers that don’t support the pseudo-elements, the styles applied are ignored, so they don’t interfere in a breaking way. This means that we can still apply the styles and serve a more pleasant experience for users on a supporting browser.
![]()
Broken images are ugly, but we can style them to provide a better user experience.
Here’s what we’ll be creating today:
But before we begin let’s take a closer look at how images behave.
1. We can apply typography styles to images.
They will be applied to the alternative elements.
2. You can use pseudo-elements on broken images.
Typically ::before and ::after elements won’t work on images, however, when image is not loaded this elements can appear.
Let’s get to the interesting part.
Create an image tag and set a broken url and an alt attribute.
<img src="https://imag.unsplash.com/photo-1509021436665-8f07dbf5bf1d?ixlib=rb-1.2.1&ixid=MXwxMjA3fDB8MHxleHBsb3JlLWZlZWR8M3x8fGVufDB8fHw%3D&w=1000&q=80" alt="Good book">
Enter fullscreen mode
Exit fullscreen mode
This is what we get in the browser:
Apply styles for the image element itself.
img {
     display: inline-block;
     font-family: Arial, sans-serif;
     font-weight: 300;
     line-height: 2;
     text-align: center;

     min-width: 300px;
     min-height: 50px;
     position: relative;
}
Enter fullscreen mode
Exit fullscreen mode
Add ::before element to create a background for the broken image
img::before {
     content: '';
     width: 100%;
     height: calc(100% + 10px);
     background-color: #ccc;
     border-radius: 10px;
     position: absolute;
     top: 50%;
     left: -2px;
     transform: translateY(-50%);
 }
Enter fullscreen mode
Exit fullscreen mode
Here’s what browser renders

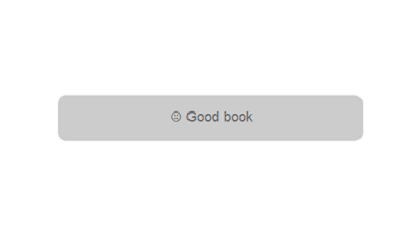
After this add ::after element to create text and icon.
img::after {
     content: "2639" " " attr(alt);

     font-size: 18px;
     color: rgb(100, 100, 100);

     display: block;
     position: absolute;
     z-index: 2;
     top: 5px;
     left: 0;
     width: 100%;
     height: 100%;
}
Enter fullscreen mode
Exit fullscreen mode
Final output

Also in order to use html symbols inside a pseudo-element you have to first get the symbol number and then convert it to Hexdecimal value. Here’s a nice tutorial on achieving this.
Improve Article
Save Article
Improve Article
Save Article
JavaScript and jQuery can be used to hide the “Image Not Found”icon when the image is not found. The basic idea is to set the display property of the image object to ‘hidden’ when an error arises. Let us consider the below HTML code which displays the GeeksforGeeks logo for demonstration purpose.
Example: In this example, we will not hide the icon of image not found.
html
<!DOCTYPE html>
<html>
<head>
</head>
<body>
<h2>
Example to hide the 'Image Not Found' icon i.e.
<img src="error.png" width="20px" />
</h2>
<img id="HideImg" src="geeksforgeeks-6.png" />
</body>
</html>
Output:
- When image is available:
- When the image is not found:
Methods to hide the image error icon:
- Using onerror() event: The onerror event is automatically called when the corresponding item raises an error. When the image is not found, the onerror event while call the hideImg() function which will set the visibility of the image to hidden.
Program:
html
<!DOCTYPE html>
<html>
<head>
</head>
<body>
<h2>
Example to hide the 'Image Not Found' icon i.e.
<img src="error.png" width="20px" />
</h2>
<img id="HideImg" src="geeksforgeeks-6.png"
onerror="hideImg()"/>
<script>
function hideImg() {
document.getElementById("HideImg")
.style.display = "none";
}
</script>
</body>
</html>
- Using short-hand notation: You can apply this short-hand notation for HTML events. This will set the visibility of the reference object to hidden.
Program:
html
<html>
<head>
</head>
<body>
<h2>
Example to hide the 'Image Not Found' icon i.e.
<img src="error.png" width="20px" />
</h2>
<img id="HideImg" src="geeksforgeeks-6.png"
onerror='this.style.display = "none"' />
</body>
</html>
- Using jQuery: Using the JQuery error handler function error(), we can catch the error and hide the object using hide() function.
Note: The error() function has been removed from jquery version 3.0. and later.
Program:
html
<!DOCTYPE html>
<html>
<head>
<script src=
</script>
</head>
<body>
<h2>
Example to hide the 'Image Not Found' icon i.e.
<img src="error.png" width="20px" />
</h2>
<img id="HideImg" src="geeksforgeeks-6.png" />
</body>
</html>
<script>
$(document).ready(function () {
$("#HideImg").error(function () {
$(this).hide();
});
});
</script>
Output: All the above codes give the same output.
Стиль «сломанных» изображений
12 мая 2017
Размещенные на сайте картинки, при загрузке которых происходит ошибка, могут нарушить композицию дизайна и негативно повлиять на расположение прочих элементов на условной сетке. Оставляет желать лучшего и стандартное браузерное оформление «сломанных» изображений. Вниманию читателя представляется простая CSS-техника, позволяющая добавить стили для «битых» картинок посредством псевдоэлементов.
Как браузеры работают с «битыми» картинками
Изображение, которое по каким бы то ни было причинам не загрузилось у пользователя, оставляет на своём месте стандартный браузерный шаблон. Как правило, это происходит из-за ошибки при загрузке источника элемента <img>, указанного в атрибуте src, или по причине отключения картинок самим пользователем в настройках браузера. Такие картинки можно условно называть сломанными или битыми. В англоязычной среде этот феномен называется broken image.

То, что в стандартном виде появляется на месте «сломанного» изображения, выглядит крайне непрезентабельно и может принести с собой ряд других проблем: например, на странице может нарушиться вертикальный ритм или произойдет смещение всего макета, если картинка играет роль «несущего» блока, от которого зависит позиционирование других. Это объясняется тем, что в большинстве браузеров атрибуты width и height или соответствующие им аналоги в CSS по умолчанию никак влияют на блоковую модель «битой» картинки: если у неё присутвует атрибут alt и установлен стандартный display: inline, габариты элемента будут вычисляться исходя из размеров альтернативного текста. Это поведение можно изменить, сменив для <img> значение display на отличное от строчного.
К области содержимого с альтернативным текстом, которая появляется на месте не загрузившегося элемента <img>, можно применить CSS. Аналогичным образом для «сломанной» картинки могут быть добавлены псевдоэлементы ::before и ::after, т.к. её отображение уже не зависит от внешнего ресурса. Таким образом, стили будут автоматически применены тогда, когда произошла ошибка загрузки. Это существенная особенность элемента <img>, благодаря которой можно манипулировать его внешним видом, не прибегая к JavaScript.
Хотя JS и обеспечивает более продвинутую работу над ошибками при загрузке картинок (для этих целей применяется событие onerror, с помощью которого можно сделать практически всё что угодно: добавить к «битому» изображению класс, заменить его источник на другой и т. д.), часть подразумеваемых в итоге «косметических» результатов этих действий можно реализовать средствами обычного CSS. Например, если требуется изменить путь src на другой, где содержится изображение, информирующее посетителя об ошибке загрузки, то в CSS для этого достаточно добавить background-image к самому элементу <img> (или псевдоэлементу внутри него).
Используя псевдоэлементы ::before и ::after, а также функцию attr(), которая выводит альтернативный текст и путь к источнику, можно создать собственное красивое и практичное оформление для «битых» изображений, соответствующее стилистике сайта. Данная техника работает только в современных браузерах.
В представленном коде у псевдоэлемента ::before есть правило font-size: 0, т.к. по непонятным причинам Firefox отображает в нём исключительно альтернативный текст вне зависимости от того, что указано в свойстве content разработчиком даже вместе с добавлением !important. Таким образом скрывается нежелательное дублирование alt.
В заключение
Стиль «сломанным» изображениям рекомендуется добавлять на сайтах, где используется большое количество картинок и есть риск, что они могут стать недоступны для загрузки, особенно если их источником служит внешний ресурс. При желании можно не ограничиваться одним лишь CSS: так, например, JavaScript позволяет создать форму для отправки сообщений, с помощью которой пользователь смог бы оперативно проинформировать администратора сайта о произошедшем недоразумении.