Form and field validation
Form validation happens when the data is cleaned. If you want to customize
this process, there are various places to make changes, each one serving a
different purpose. Three types of cleaning methods are run during form
processing. These are normally executed when you call the is_valid()
method on a form. There are other things that can also trigger cleaning and
validation (accessing the errors attribute or calling full_clean()
directly), but normally they won’t be needed.
In general, any cleaning method can raise ValidationError if there is a
problem with the data it is processing, passing the relevant information to
the ValidationError constructor. See below
for the best practice in raising ValidationError. If no ValidationError
is raised, the method should return the cleaned (normalized) data as a Python
object.
Most validation can be done using validators — helpers that can be reused.
Validators are functions (or callables) that take a single argument and raise
ValidationError on invalid input. Validators are run after the field’s
to_python and validate methods have been called.
Validation of a form is split into several steps, which can be customized or
overridden:
-
The
to_python()method on aFieldis the first step in every
validation. It coerces the value to a correct datatype and raises
ValidationErrorif that is not possible. This method accepts the raw
value from the widget and returns the converted value. For example, a
FloatFieldwill turn the data into a Pythonfloator raise a
ValidationError. -
The
validate()method on aFieldhandles field-specific validation
that is not suitable for a validator. It takes a value that has been
coerced to a correct datatype and raisesValidationErroron any error.
This method does not return anything and shouldn’t alter the value. You
should override it to handle validation logic that you can’t or don’t
want to put in a validator. -
The
run_validators()method on aFieldruns all of the field’s
validators and aggregates all the errors into a single
ValidationError. You shouldn’t need to override this method. -
The
clean()method on aFieldsubclass is responsible for running
to_python(),validate(), andrun_validators()in the correct
order and propagating their errors. If, at any time, any of the methods
raiseValidationError, the validation stops and that error is raised.
This method returns the clean data, which is then inserted into the
cleaned_datadictionary of the form. -
The
clean_<fieldname>()method is called on a form subclass – where
<fieldname>is replaced with the name of the form field attribute.
This method does any cleaning that is specific to that particular
attribute, unrelated to the type of field that it is. This method is not
passed any parameters. You will need to look up the value of the field
inself.cleaned_dataand remember that it will be a Python object
at this point, not the original string submitted in the form (it will be
incleaned_databecause the general fieldclean()method, above,
has already cleaned the data once).For example, if you wanted to validate that the contents of a
CharFieldcalledserialnumberwas unique,
clean_serialnumber()would be the right place to do this. You don’t
need a specific field (it’s aCharField), but you want a
formfield-specific piece of validation and, possibly, cleaning/normalizing
the data.The return value of this method replaces the existing value in
cleaned_data, so it must be the field’s value fromcleaned_data(even
if this method didn’t change it) or a new cleaned value. -
The form subclass’s
clean()method can perform validation that requires
access to multiple form fields. This is where you might put in checks such as
“if fieldAis supplied, fieldBmust contain a valid email address”.
This method can return a completely different dictionary if it wishes, which
will be used as thecleaned_data.Since the field validation methods have been run by the time
clean()is
called, you also have access to the form’serrorsattribute which
contains all the errors raised by cleaning of individual fields.Note that any errors raised by your
Form.clean()override will not
be associated with any field in particular. They go into a special
“field” (called__all__), which you can access via the
non_field_errors()method if you need to. If you
want to attach errors to a specific field in the form, you need to call
add_error().Also note that there are special considerations when overriding
theclean()method of aModelFormsubclass. (see the
ModelForm documentation for more information)
These methods are run in the order given above, one field at a time. That is,
for each field in the form (in the order they are declared in the form
definition), the Field.clean() method (or its override) is run, then
clean_<fieldname>(). Finally, once those two methods are run for every
field, the Form.clean() method, or its override, is executed whether
or not the previous methods have raised errors.
Examples of each of these methods are provided below.
As mentioned, any of these methods can raise a ValidationError. For any
field, if the Field.clean() method raises a ValidationError, any
field-specific cleaning method is not called. However, the cleaning methods
for all remaining fields are still executed.
Raising ValidationError
In order to make error messages flexible and easy to override, consider the
following guidelines:
-
Provide a descriptive error
codeto the constructor:# Good ValidationError(_('Invalid value'), code='invalid') # Bad ValidationError(_('Invalid value'))
-
Don’t coerce variables into the message; use placeholders and the
params
argument of the constructor:# Good ValidationError( _('Invalid value: %(value)s'), params={'value': '42'}, ) # Bad ValidationError(_('Invalid value: %s') % value)
-
Use mapping keys instead of positional formatting. This enables putting
the variables in any order or omitting them altogether when rewriting the
message:# Good ValidationError( _('Invalid value: %(value)s'), params={'value': '42'}, ) # Bad ValidationError( _('Invalid value: %s'), params=('42',), )
-
Wrap the message with
gettextto enable translation:# Good ValidationError(_('Invalid value')) # Bad ValidationError('Invalid value')
Putting it all together:
raise ValidationError(
    _('Invalid value: %(value)s'),
    code='invalid',
    params={'value': '42'},
)
Following these guidelines is particularly necessary if you write reusable
forms, form fields, and model fields.
While not recommended, if you are at the end of the validation chain
(i.e. your form clean() method) and you know you will never need
to override your error message you can still opt for the less verbose:
ValidationError(_('Invalid value: %s') % value)
The Form.errors.as_data() and
Form.errors.as_json() methods
greatly benefit from fully featured ValidationErrors (with a code name
and a params dictionary).
Raising multiple errors
If you detect multiple errors during a cleaning method and wish to signal all
of them to the form submitter, it is possible to pass a list of errors to the
ValidationError constructor.
As above, it is recommended to pass a list of ValidationError instances
with codes and params but a list of strings will also work:
# Good
raise ValidationError([
    ValidationError(_('Error 1'), code='error1'),
    ValidationError(_('Error 2'), code='error2'),
])

# Bad
raise ValidationError([
    _('Error 1'),
    _('Error 2'),
])
Using validation in practice
The previous sections explained how validation works in general for forms.
Since it can sometimes be easier to put things into place by seeing each
feature in use, here are a series of small examples that use each of the
previous features.
Using validators
Django’s form (and model) fields support use of utility functions and classes
known as validators. A validator is a callable object or function that takes a
value and returns nothing if the value is valid or raises a
ValidationError if not. These can be passed to a
field’s constructor, via the field’s validators argument, or defined on the
Field class itself with the default_validators
attribute.
Validators can be used to validate values inside the field, let’s have a look
at Django’s SlugField:
from django.core import validators
from django.forms import CharField

class SlugField(CharField):
    default_validators = [validators.validate_slug]
As you can see, SlugField is a CharField with a customized validator
that validates that submitted text obeys to some character rules. This can also
be done on field definition so:
is equivalent to:
slug = forms.CharField(validators=[validators.validate_slug])
Common cases such as validating against an email or a regular expression can be
handled using existing validator classes available in Django. For example,
validators.validate_slug is an instance of
a RegexValidator constructed with the first
argument being the pattern: ^[-a-zA-Z0-9_]+$. See the section on
writing validators to see a list of what is already
available and for an example of how to write a validator.
Form field default cleaning
Let’s first create a custom form field that validates its input is a string
containing comma-separated email addresses. The full class looks like this:
from django import forms
from django.core.validators import validate_email

class MultiEmailField(forms.Field):
    def to_python(self, value):
        """Normalize data to a list of strings."""
        # Return an empty list if no input was given.
        if not value:
            return []
        return value.split(',')

    def validate(self, value):
        """Check if value consists only of valid emails."""
        # Use the parent's handling of required fields, etc.
        super().validate(value)
        for email in value:
            validate_email(email)
Every form that uses this field will have these methods run before anything
else can be done with the field’s data. This is cleaning that is specific to
this type of field, regardless of how it is subsequently used.
Let’s create a ContactForm to demonstrate how you’d use this field:
class ContactForm(forms.Form):
    subject = forms.CharField(max_length=100)
    message = forms.CharField()
    sender = forms.EmailField()
    recipients = MultiEmailField()
    cc_myself = forms.BooleanField(required=False)
Use MultiEmailField like any other form field. When the is_valid()
method is called on the form, the MultiEmailField.clean() method will be
run as part of the cleaning process and it will, in turn, call the custom
to_python() and validate() methods.
Cleaning a specific field attribute
Continuing on from the previous example, suppose that in our ContactForm,
we want to make sure that the recipients field always contains the address
"fred@example.com". This is validation that is specific to our form, so we
don’t want to put it into the general MultiEmailField class. Instead, we
write a cleaning method that operates on the recipients field, like so:
from django import forms
from django.core.exceptions import ValidationError

class ContactForm(forms.Form):
    # Everything as before.
    ...

    def clean_recipients(self):
        data = self.cleaned_data['recipients']
        if "fred@example.com" not in data:
            raise ValidationError("You have forgotten about Fred!")

        # Always return a value to use as the new cleaned data, even if
        # this method didn't change it.
        return data
Cleaning and validating fields that depend on each other
Suppose we add another requirement to our contact form: if the cc_myself
field is True, the subject must contain the word "help". We are
performing validation on more than one field at a time, so the form’s
clean() method is a good spot to do this. Notice that we are
talking about the clean() method on the form here, whereas earlier we were
writing a clean() method on a field. It’s important to keep the field and
form difference clear when working out where to validate things. Fields are
single data points, forms are a collection of fields.
By the time the form’s clean() method is called, all the individual field
clean methods will have been run (the previous two sections), so
self.cleaned_data will be populated with any data that has survived so
far. So you also need to remember to allow for the fact that the fields you
are wanting to validate might not have survived the initial individual field
checks.
There are two ways to report any errors from this step. Probably the most
common method is to display the error at the top of the form. To create such
an error, you can raise a ValidationError from the clean() method. For
example:
from django import forms
from django.core.exceptions import ValidationError

class ContactForm(forms.Form):
    # Everything as before.
    ...

    def clean(self):
        cleaned_data = super().clean()
        cc_myself = cleaned_data.get("cc_myself")
        subject = cleaned_data.get("subject")

        if cc_myself and subject:
            # Only do something if both fields are valid so far.
            if "help" not in subject:
                raise ValidationError(
                    "Did not send for 'help' in the subject despite "
                    "CC'ing yourself."
                )
In this code, if the validation error is raised, the form will display an
error message at the top of the form (normally) describing the problem. Such
errors are non-field errors, which are displayed in the template with
{{ form.non_field_errors }}.
The call to super().clean() in the example code ensures that any validation
logic in parent classes is maintained. If your form inherits another that
doesn’t return a cleaned_data dictionary in its clean() method (doing
so is optional), then don’t assign cleaned_data to the result of the
super() call and use self.cleaned_data instead:
def clean(self):
    super().clean()
    cc_myself = self.cleaned_data.get("cc_myself")
    ...
The second approach for reporting validation errors might involve assigning the
error message to one of the fields. In this case, let’s assign an error message
to both the “subject” and “cc_myself” rows in the form display. Be careful when
doing this in practice, since it can lead to confusing form output. We’re
showing what is possible here and leaving it up to you and your designers to
work out what works effectively in your particular situation. Our new code
(replacing the previous sample) looks like this:
from django import forms

class ContactForm(forms.Form):
    # Everything as before.
    ...

    def clean(self):
        cleaned_data = super().clean()
        cc_myself = cleaned_data.get("cc_myself")
        subject = cleaned_data.get("subject")

        if cc_myself and subject and "help" not in subject:
            msg = "Must put 'help' in subject when cc'ing yourself."
            self.add_error('cc_myself', msg)
            self.add_error('subject', msg)
The second argument of add_error() can be a string, or preferably an
instance of ValidationError. See Raising ValidationError for more
details. Note that add_error() automatically removes the field from
cleaned_data.
You can override the validation errors on a per-field basis by setting the error_messages argument when initializing the field. You need to pass a dictionary with the key being the error message name, and the value being the custom text for the error message.
In your case, you are looking to implement two error messages: required and min_length. You may also need to override blank, which is triggering your current error, unless you set allow_blank=True on the field.
So with those changes, your serializer would become
class AccountSerializer(serializers.ModelSerializer):
    password = serializers.CharField(
        write_only=True,
        required=False,
        min_length=5,
        error_messages={
            "blank": "Password cannot be empty.",
            "min_length": "Password too short.",
        },
    )

    class Meta:
        model = Account
        fields = ('id', 'email', 'password', )
I’ve replaced your len check with the min_length argument on the password field.
This offloads all of your validation to Django REST framework, which should make upgrades easier in the future. You can still override validate_password if you need additional custom validation, but for now I’ve removed it since it would be empty.
In this tutorial, we will learn how to show custom validation exceptions on Django admin.
Understanding The Problem
Django admin site will raise exceptions when we try to save objects with non-acceptable values. Often we need to create our custom validators and raise custom exceptions depending on the needs of the project. Like if you want the phone number to be in a particular format or you want to make sure the first name starts with a capital letter.
There are a lot of ways to achieve this but if your goal is to ensure proper validation limited from the admin interface only, then this tutorial is for you.
Note: If creating validators that remain constant throughout the app is your goal, then you should check out this article — Creating Custom Model Validation In Django
Displaying Custom Validation Exception in Django Admin
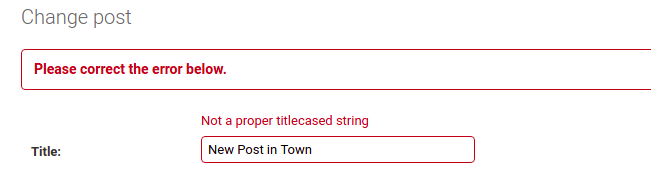
We will use the popular blog project for this tutorial. The goal is to ensure that the title of the post is in the proper title case.
Let’s have a look at our existing models.py and admin.py file.
models.py
class Post(models.Model):
    title = models.CharField(max_length=200, unique=True)
    slug = models.SlugField(max_length=200, unique=True)
    author = models.ForeignKey(
        User, on_delete=models.CASCADE, related_name="blog_posts")
    updated_on = models.DateTimeField(auto_now=True)
    content = models.TextField()
    created_on = models.DateTimeField(auto_now_add=True)
    status = models.IntegerField(choices=STATUS, default=0)
    summary = models.CharField(max_length=500, null=True, blank=True)

    class Meta:
        ordering = ["-created_on"]

    def __str__(self):
        return self.title
admin.py
@admin.register(Post)
class PostAdmin(SummernoteModelAdmin):
    list_display = ('title', 'slug', 'status', 'created_on')
    list_filter = ('status', 'created_on')
    search_fields = ['title', 'content']
    prepopulated_fields = {'slug': ('title',)}
Now to make custom validators for the admin site we need to create a custom form for our model. So in the same file or in a separate file create a form like this.
from django import forms

class PostForm(forms.ModelForm):
    def clean(self):
        title = self.cleaned_data['title']
        if not title.istitle():
            raise forms.ValidationError({'title': "Not a proper titlecased string"})
The model form comes with the clean() method that is responsible for performing validations.
Take the title value from the cleaned_data dictionary and run the validation through it, if it fails the raise the ValidationError with the exception message.
Finally. we need to link our form with the PostAdmin.
@admin.register(Post)
class PostAdmin(SummernoteModelAdmin):
    form = PostForm
    list_display = ('title', 'slug', 'status', 'created_on')
    list_filter = ('status', 'created_on')
    search_fields = ['title', 'content']
    prepopulated_fields = {'slug': ('title',)}
That’s it! Save the files run the server navigate to the admin and test the flow.
DJANGO
In this post we’ll learn to create user-defined functions, displaying validation errors in the template for Django Form Validations.
Table Of Contents
- Introduction
- Creating Form
- Rendering Form
- Saving Form
- Form Validation User-Defined Functions
- Conclusion
Introduction
The forms are a Django Module which deals with all form-related functions from binding POST data to form, Validating form and rendering HTML field in the template.
We’ll be using below models.py file as an example to demonstrate form validations.
from django.db import models
from django.contrib.auth.models import User
from datetime import datetime

class AuthUserProfile(models.Model):
    user_profile_id = models.AutoField(primary_key=True)
    user = models.OneToOneField(User, on_delete=models.CASCADE, related_name='auth_user_profile')
    dob =  models.DateField(blank=True, null=True)
    is_deleted = models.PositiveSmallIntegerField(default=0)
    created_at = models.DateTimeField(auto_now=datetime.now(), null=True)
    updated_at = models.DateTimeField(auto_now=datetime.now(), null=True)

    class Meta():
        db_table = 'auth_user_profile'
        verbose_name = 'User Profile'
        verbose_name_plural = 'User Profiles'

    def __str__(self):
        return self.user
Create a form which has these fields (first_name, last_name, username, password, email) from User models and field (dob) in AuthUserProfile Model and also will add custom field and non-field level validation.
Creating Form
In forms.py file import forms from Django. Inherit forms.Form to UserForm and add attributes to the field.
from django import forms
from datetime import datetime
from django.contrib.auth.models import User

class UserForm(forms.Form):
    first_name = forms.CharField(label="First Name*",widget=forms.TextInput(attrs={'required':True,'class':"form-control"}))
    last_name = forms.CharField(label="Last Name*",widget=forms.TextInput(attrs={'required':True,'class':"form-control"}))
    username = forms.CharField(label="User Name*",widget=forms.TextInput(attrs={'required':True,'class':"form-control"}))
    email = forms.CharField(label="Email",widget=forms.TextInput(attrs={'type':'email','required':False,'class':"form-control"}))
    date_of_birth = forms.CharField(label="Date of Birth",widget=forms.TextInput(attrs={'type':'date','required':True,'class':"form-control"}))
    password = forms.CharField(label="Password*",widget=forms.TextInput(attrs={'required':True,'class':"form-control", 'type' : "password"}))
    confirm_password = forms.CharField(label="Confirm Password*",widget=forms.TextInput(attrs={'required':True,'class':"form-control", 'type' : "password"}))

    def clean(self):
        # user age must be above 18 to register
        if self.cleaned_data.get('date_of_birth'):
            dob = datetime.strptime(self.cleaned_data.get('date_of_birth'),"%Y-%m-%d")
            now = datetime.now()
            diff = now.year-dob.year

            if diff < 18: msg="User must be atleast 18 years old" self.add_error(None, msg) #check if user name is unique username_count = User.objects.filter(username=self.cleaned_data.get('username')).count() if username_count>0:
            msg="Username '{}' has already been used.".format(self.cleaned_data.get('username'))
            self.add_error(None, msg)

    def clean_confirm_password(self):
        password = self.cleaned_data.get('password')
        confirm_password = self.cleaned_data.get('confirm_password')
        if confirm_password!=password:
            msg = "Password and Confirm Passwords must match."
            self.add_error('confirm_password', msg)
You may notice clean() and clean_confirm_password() methods in UserForm the form they are validation methods.
The clean() the method is form level validation this can also be used to perform field-level validation.
And the clean_confirm_password() is a field-level validation for confirm_password the field it checks if confirm_password!=password then adds error to a then particular field.
Rendering Form
Rendering of forms is an easy part we must pass the form object as an argument to render function.
In views.py create a function user_profile_create which will display rendered form.
from django.contrib.auth.models import User
from users.models import AuthUserProfile
from forms.forms import UserForm
from django.contrib.auth.hashers import make_password
from django.contrib import messages

def user_profile_create(request):
    form = UserForm()
    template="forms/user_profile_create_form.html"
    return render(request,template,{"form":form})
form = UserForm() creates form object of UserForm and is passed as an argument to the render() function.
In urls.py file add routes to view.
urlpatterns = [
    path('user/profile/create', views.user_profile_create, name='user-profile-create'),
]
Create an HTML file in your apps template folder naming user_profile_create_form.html.
<!DOCTYPE html>
<html lang="en">
    <head>
        <meta charset="UTF-8">
        <meta name="viewport" content="width=device-width, initial-scale=1.0">
        <title>Django Form Validation</title>
        <link rel="stylesheet" href="https://maxcdn.bootstrapcdn.com/bootstrap/3.4.0/css/bootstrap.min.css">
        <script src="https://ajax.googleapis.com/ajax/libs/jquery/3.4.1/jquery.min.js"></script>
        <script src="https://maxcdn.bootstrapcdn.com/bootstrap/3.4.0/js/bootstrap.min.js"></script>
        <style>
            .error{
                color:red;
            }
        </style>
    </head>
    <body>
        <div class="container">

            {% if messages %}
                {% for message in messages %}
                    {% if message.level == DEFAULT_MESSAGE_LEVELS.SUCCESS %}
                    <div class="alert alert-success"
                    role="alert">
                        <div id="primary-notification-div">
                            {{ message }}
                        </div>
                    </div>
                    {% endif %}
                {% endfor %}
            {% endif %}

            <h1>User Profile</h1>
            <form action="{% url 'forms:user-profile-save' %}" method="post">
                {% csrf_token %}

                {% if form.errors %}
                    {% for error in form.non_field_errors %}
                        <div class="alert alert-danger">
                            <strong>{{ error|escape }}</strong>
                        </div>
                    {% endfor %}

                {% endif %}


                <div class="row">
                    <div class="col-md-3">
                        {{form.first_name.label}}
                        {{form.first_name}}

                        {% if form.errors.first_name %}
                            <label for="" class="error">{{form.errors.first_name|striptags}}</label>
                        {% endif %}
                    </div>

                    <div class="col-md-3">
                        {{form.last_name.label}}
                        {{form.last_name}}
                        {% if form.errors.last_name %}
                            <label for="" class="error">{{form.errors.last_name|striptags}}</label>
                        {% endif %}
                    </div>

                    <div class="col-md-3">
                        {{form.username.label}}
                        {{form.username}}
                        {% if form.errors.username %}
                            <label for="" class="error">{{form.errors.username|striptags}}</label>
                        {% endif %}
                    </div>

                    <div class="col-md-3">
                        {{form.email.label}}
                        {{form.email}}
                        {% if form.errors.email %}
                            <label for="" class="error">{{form.errors.email|striptags}}</label>
                        {% endif %}
                    </div>

                    <div class="col-md-3">
                        {{form.date_of_birth.label}}
                        {{form.date_of_birth}}
                        {% if form.errors.date_of_birth %}
                            <label for="" class="error">{{form.errors.date_of_birth|striptags}}</label>
                        {% endif %}
                    </div>
                </div>

                <div class="row" style="margin-top: 25px;">
                    <div class="col-md-3">
                        {{form.password.label}}
                        {{form.password}}
                        {% if form.errors.password %}
                            <label for="" class="error">{{form.errors.password|striptags}}</label>
                        {% endif %}
                    </div>
                </div>

                <div class="row" style="margin-top: 25px;">

                    <div class="col-md-3">
                        {{form.confirm_password.label}}
                        {{form.confirm_password}}
                        {% if form.errors.confirm_password %}
                        <label for="" class="error">{{form.errors.confirm_password|striptags}}</label>
                        {% endif %}
                    </div>

                    <div class="col-md-12" style="margin-top: 25px;">
                        <input type="submit" class="btn btn-sm btn-primary" value="submit">
                    </div>
                </div>
            </form>
        </div>
    </body>
</html>
This is how our form will look when we go to route user/profile/create.

- The
messagedisplays success message oncemessages.add_message(request, messages.SUCCESS, ".....")is called it is just like the flash message. - The
form.errorsis called on validation has failed. - The
form.non_field_errorsdisplay errors on top of form this errors are not associated to a particular field. - The
form.errors.displays the error of the particular field.
This is how errors are displayed in the form.

Saving Form
In urls.py file add routes to save the form.
urlpatterns = [
    path('user/profile/save', views.user_profile_create, name='user-profile-save'),
]
In views.py file add function user_profile_save() to save form data.
def user_profile_save(request):

    form = UserForm(request.POST)

    if form.is_valid():

        query = {
            "first_name" : form.cleaned_data.get('first_name'),
            "last_name" : form.cleaned_data.get('last_name'),
            "username" : form.cleaned_data.get('username'),
            "password" : make_password(form.cleaned_data.get('password')),
            "email" : form.cleaned_data.get('email'),
            "is_superuser" : 0,
            "is_staff" : 1,
            "is_active" : 1,
        }

        user = User.objects.create(**query)

        query={
            "user_id" : user.id,
            "dob" : form.cleaned_data.get('dob'),
        }

        AuthUserProfile.objects.create(**query)

        messages.add_message(request, messages.SUCCESS, "User Profile created successfully.")

        return HttpResponseRedirect(reverse('forms:user-profile-create'))

    template="forms/user_profile_create_form.html"

    return render(request,template,{"form":form})
The request.POST is passed to UserForm(request.POST) this binds the submitted data to Form Class.
The form.is_valid() returns a Boolean value if True then the form is clean and if False then there may be validation error.
To view validation errors after .is_valid() method we can print form.errors to view validation errors.
Calling form.cleaned_data.get('') gives use of the sanitized value to that field. Inside .is_valid() we have called model methods to save form data.

Form Validation User-Defined functions
To defined a custom validation function in Form Class name function with prefix clean followed by underscore and field name which must be validated.
Example
def clean_first_name(self):
    pass #this validates field first_name

def clean_username(self):
    pass #this validates field username
If the value of the field is not as expected that you can raise validation error or add error by mentioning field name self.add_error('field_name', "Error Message").
If you want to raise non-field error than set the first argument of add_error() method None followed by the message you want to be displayed.
self.add_error(None, msg) #this creates a non-field error
Conclusion
We have come to the end of our post on Django Form Validation.
If you have any doubts or suggestions please mention in the comments section and we’ll reach you soon and we would also love to hear requests and your recommendations for new tutorials/posts.
Related Posts
- Python Django Forms | Creating, Rendering, Validating and Saving Forms
- Django – Multiple Files Validation and Uploads
Summary
Review Date
2020-06-15
Reviewed Item
Django Forms | Custom Form Validations
Author Rating
5
Software Name
Django Web Framework
Software Name
Windows Os, Mac Os, Ubuntu Os
Software Category
Web Development
In this article, we will learn about the Built-In Django Form Validation offered as well as the Django Custom Form Validations.
Prerequisites for Django Form Validation
Before moving forward with Form Validation, you will need to know what Django forms and how you implement them in Django.
If you are already familiar with Django Forms, then continue with the article or else do check out Django Forms article first.
Built-In Form Validations
Django framework provides a list of built-in form validators along with the Forms library. We will learn about each one of them here.
Setting up a Form and Using Built-in Validators
Field = forms.Field_Type(validator = value)
All of the built-in validators follow the above syntax.
The Form View used in this section
The following explanation codes are based on the following View in views.py
def EFormView(request):
    if request.method == 'POST':
        form = EForm(request.POST)
        if form.is_valid():
            form.save()
            return HttpResponse('Form saved')
    else:
        form = EForm()
        context = {
            'form':form,
        }
    return render(request, 'books_website/Form.html', context)
And the Template is a simple HTML file including the form attribute of HTML
<form method ='post'>
    {% csrf_token %}
    {{form.as_p}}
    <input type="submit" value = "Submit">
</form>
1. initial – Placeholder Text with the “Initial” Attribute
You might have seen many forms on the internet come with a pre-entered text like the one given below.
This is done using the initial attribute of Django Forms.
Therefore, if you need a pre-entered text in your form fields, we use the initial attribute.
The initial default value is empty.
class EForm(forms.Form):
    Name = forms.CharField(initial = "Enter Name")
2. label – Adding Labels to a Form Field
The label attribute gives a custom name to the form field. As a default, Django uses the form field name specified in forms.py itself as the field name. But using label we can change it to any other custom name.
class EForm(forms.Form):
    Name = forms.CharField(label = "Full Name")
3. max_length – Limit Maximum Length of Characters Entered
The max_length attribute ensures that the information entered in the field does not exceed more than the specified value.
class EForm(forms.Form):
    username = forms.CharField(max_length = 10)
Note that you wont be able to add more than 10 characters.
4. error_message – Add a Custom Error Message
The error_message attribute lets you add custom error messages to the fields. This attribute overrides the default error message and enables you to write your own.
The error message is passed as a dictionary, as shown:
class EForm(forms.Form):
    username = forms.CharField(error_message = {'required':'Please Enter your Name',})
5. disabled – Add Uneditable Values to Django Forms
In many forms, specific fields are uneditable by users like the company’s name on specific company forms.
The disabled attribute lets you do that. Using this, you can disable a particular field, thereby leaving it uneditable by the user.
class ITJobForm(forms.Form):
    Interview domain = forms.CharField(disabled = True, initial = 'Software Engineer')
    Name = forms.CharField(max_length = 80)
Note that you wont be able to change the value for the Interview domain field.
6. help_text – Suggest What Needs to be Entered in the Input
This attribute adds a help text beside the field to give more information about what has to be entered.
class EForm(forms.Form):
    Name = forms.CharField(help_text ='Please enter your name')
7. required – Ensure a Form Field has Data Before Submitting
In many forms, certain fields are compulsory, like the applicant’s name, number, etc. This is done with the required attribute.
Default value is False
class EForm(forms.Form):
    Name = forms.CharField(required = True)
8. widget – Set up Individual Form Fields for Predefined Purposes
Widget is Django’s representation of HTML input. Each field has its predefined field widget. For example, a Number Field will have a widget taking only number input, email field taking only the email input, etc.
We can override the default widgets and add our own as shown:
class EForm(forms.Form):
    Name = forms.CharField(widget = forms.Textarea)
Custom Form Validation using ValidationError attribute
As seen in the Django exception handling article, the Validation Error attribute is used to validate custom form information entered by the user.
The syntax for using Validation Error
ValidationError('text',params = {value : <value>})
Here, the value variable and the text depends on where we are calling the attribute and also on the condition for validation.
The full syntax for ValidationError is:
import django.core.exceptions
if cond:
    raise ValidationError('text')
Implementing of Custom Validations
Lets us create a form that allows username to be between 10 to 20 characters only. The form.py code will be:
class EForm(forms.Form):
    Name = forms.CharField(label = "Full Name")
Add the Form View Code as shown:
from django.core.exceptions import ValidationError
def FormView(request):
    if request.method == 'POST':
        form = EForm(request.POST)
        if form.is_valid():
            Name = form.cleaned_data['Name']
            if len(Name)< 10 or len(Name) > 20:
                raise ValidationError(f'Length of the name:{Name} is not between 10 -20 characters')
            return HttpResponse('Form saved')
    else:
        form = EForm()
        context ={
            'form':form
        }
    return render(request,'books_website/Form.html',context)
Notice how the Validation Error is raised. The template is the same as the one seen above.
Let’s run the server and enter a name with less than 10 characters. You can also try the same with more than 10 characters as it still voids our condition.
When you hit submit, you’ll get an error as shown below:
Now we will try for a name in between 10 to 20 characters
Hit submit and check
See how the form accepts only certain names. This is how a ValidationError works.
Conclusion
That’s it, guys !! This was all about form validation. Also, check out the official Django forms documentation for more information. Keep practicing!!
14.03.2012
Думаю, вы хотите, чтобы ваши сообщения об ошибках в заполняемых формах были на том же языке, что и сам сайт. Один из простых способов — это добавить следующий код в соответствующий forms.py. Затем формы надо будет наследовать не от forms.Form, а от MyForm (обратите внимание, ExampleForm, в примере ниже, наследуется от него).
class MyForm(forms.Form):
    def __init__(self, *args, **kwargs):
        super(MyForm, self).__init__(*args, **kwargs)
        for k, field in self.fields.items():
            if 'required' in field.error_messages:
                field.error_messages['required'] = u'Это поле обязательно!'

class ExampleForm(MyForm):
    title = forms.CharField(max_length=100, required=True, label=u'Название')
Полный список error_messages для различных типов полей можно увидеть, если просмотреть этот раздел: https://docs.djangoproject.com/en/1.3/ref/forms/fields/#built-in-field-classes
Вот что есть на данный момент:
required — показывается, если данное поле обязательно;
max_length — если превышено максимальное количество символов в символьном поле / в случае с файлами — длина имени файла;
min_length — если символов меньше, чем должно быть, в символьном поле;
invalid_choice — если выбран невозможный choice;
invalid — при неправильном email’е и прочем неправильном вводе данных;
max_value — если превышено числовое значение;
min_value — если значение меньше минимального числового ограничения;
max_digits — если превышено количество цифр в числе;
max_decimal_places — если превышено количество цифр после запятой;
max_whole_digits — если превышено количество цифр до запятой;
missing — если файл не найден;
empty — если файл пустой;
invalid_image — если изображение повреждено;
invalid_list — если неправильный список choice’ов;
invalid_link — для URLField — вызывается, если данного url не существует.
Основано на примере с http://stackoverflow.com/questions/1481771/django-override-default-form-error-messages
django
| source |
|---|
|
exceptions.py |
Exceptions… allow error handling to be organized cleanly in a central or high-level place within the program structure.
— Doug Hellmann, Python Exception Handling Techniques
Exception handling in REST framework views
REST framework’s views handle various exceptions, and deal with returning appropriate error responses.
The handled exceptions are:
- Subclasses of
APIExceptionraised inside REST framework. - Django’s
Http404exception. - Django’s
PermissionDeniedexception.
In each case, REST framework will return a response with an appropriate status code and content-type. The body of the response will include any additional details regarding the nature of the error.
Most error responses will include a key detail in the body of the response.
For example, the following request:
DELETE http://api.example.com/foo/bar HTTP/1.1
Accept: application/json
Might receive an error response indicating that the DELETE method is not allowed on that resource:
HTTP/1.1 405 Method Not Allowed
Content-Type: application/json
Content-Length: 42

{"detail": "Method 'DELETE' not allowed."}
Validation errors are handled slightly differently, and will include the field names as the keys in the response. If the validation error was not specific to a particular field then it will use the «non_field_errors» key, or whatever string value has been set for the NON_FIELD_ERRORS_KEY setting.
An example validation error might look like this:
HTTP/1.1 400 Bad Request
Content-Type: application/json
Content-Length: 94

{"amount": ["A valid integer is required."], "description": ["This field may not be blank."]}
Custom exception handling
You can implement custom exception handling by creating a handler function that converts exceptions raised in your API views into response objects. This allows you to control the style of error responses used by your API.
The function must take a pair of arguments, the first is the exception to be handled, and the second is a dictionary containing any extra context such as the view currently being handled. The exception handler function should either return a Response object, or return None if the exception cannot be handled. If the handler returns None then the exception will be re-raised and Django will return a standard HTTP 500 ‘server error’ response.
For example, you might want to ensure that all error responses include the HTTP status code in the body of the response, like so:
HTTP/1.1 405 Method Not Allowed
Content-Type: application/json
Content-Length: 62

{"status_code": 405, "detail": "Method 'DELETE' not allowed."}
In order to alter the style of the response, you could write the following custom exception handler:
from rest_framework.views import exception_handler

def custom_exception_handler(exc, context):
    # Call REST framework's default exception handler first,
    # to get the standard error response.
    response = exception_handler(exc, context)

    # Now add the HTTP status code to the response.
    if response is not None:
        response.data['status_code'] = response.status_code

    return response
The context argument is not used by the default handler, but can be useful if the exception handler needs further information such as the view currently being handled, which can be accessed as context['view'].
The exception handler must also be configured in your settings, using the EXCEPTION_HANDLER setting key. For example:
REST_FRAMEWORK = {
    'EXCEPTION_HANDLER': 'my_project.my_app.utils.custom_exception_handler'
}
If not specified, the 'EXCEPTION_HANDLER' setting defaults to the standard exception handler provided by REST framework:
REST_FRAMEWORK = {
    'EXCEPTION_HANDLER': 'rest_framework.views.exception_handler'
}
Note that the exception handler will only be called for responses generated by raised exceptions. It will not be used for any responses returned directly by the view, such as the HTTP_400_BAD_REQUEST responses that are returned by the generic views when serializer validation fails.
API Reference
APIException
Signature: APIException()
The base class for all exceptions raised inside an APIView class or @api_view.
To provide a custom exception, subclass APIException and set the .status_code, .default_detail, and default_code attributes on the class.
For example, if your API relies on a third party service that may sometimes be unreachable, you might want to implement an exception for the «503 Service Unavailable» HTTP response code. You could do this like so:
from rest_framework.exceptions import APIException

class ServiceUnavailable(APIException):
    status_code = 503
    default_detail = 'Service temporarily unavailable, try again later.'
    default_code = 'service_unavailable'
Inspecting API exceptions
There are a number of different properties available for inspecting the status
of an API exception. You can use these to build custom exception handling
for your project.
The available attributes and methods are:
.detail— Return the textual description of the error..get_codes()— Return the code identifier of the error..get_full_details()— Return both the textual description and the code identifier.
In most cases the error detail will be a simple item:
>>> print(exc.detail)
You do not have permission to perform this action.
>>> print(exc.get_codes())
permission_denied
>>> print(exc.get_full_details())
{'message':'You do not have permission to perform this action.','code':'permission_denied'}
In the case of validation errors the error detail will be either a list or
dictionary of items:
>>> print(exc.detail)
{"name":"This field is required.","age":"A valid integer is required."}
>>> print(exc.get_codes())
{"name":"required","age":"invalid"}
>>> print(exc.get_full_details())
{"name":{"message":"This field is required.","code":"required"},"age":{"message":"A valid integer is required.","code":"invalid"}}
ParseError
Signature: ParseError(detail=None, code=None)
Raised if the request contains malformed data when accessing request.data.
By default this exception results in a response with the HTTP status code «400 Bad Request».
AuthenticationFailed
Signature: AuthenticationFailed(detail=None, code=None)
Raised when an incoming request includes incorrect authentication.
By default this exception results in a response with the HTTP status code «401 Unauthenticated», but it may also result in a «403 Forbidden» response, depending on the authentication scheme in use. See the authentication documentation for more details.
NotAuthenticated
Signature: NotAuthenticated(detail=None, code=None)
Raised when an unauthenticated request fails the permission checks.
By default this exception results in a response with the HTTP status code «401 Unauthenticated», but it may also result in a «403 Forbidden» response, depending on the authentication scheme in use. See the authentication documentation for more details.
PermissionDenied
Signature: PermissionDenied(detail=None, code=None)
Raised when an authenticated request fails the permission checks.
By default this exception results in a response with the HTTP status code «403 Forbidden».
NotFound
Signature: NotFound(detail=None, code=None)
Raised when a resource does not exists at the given URL. This exception is equivalent to the standard Http404 Django exception.
By default this exception results in a response with the HTTP status code «404 Not Found».
MethodNotAllowed
Signature: MethodNotAllowed(method, detail=None, code=None)
Raised when an incoming request occurs that does not map to a handler method on the view.
By default this exception results in a response with the HTTP status code «405 Method Not Allowed».
NotAcceptable
Signature: NotAcceptable(detail=None, code=None)
Raised when an incoming request occurs with an Accept header that cannot be satisfied by any of the available renderers.
By default this exception results in a response with the HTTP status code «406 Not Acceptable».
UnsupportedMediaType
Signature: UnsupportedMediaType(media_type, detail=None, code=None)
Raised if there are no parsers that can handle the content type of the request data when accessing request.data.
By default this exception results in a response with the HTTP status code «415 Unsupported Media Type».
Throttled
Signature: Throttled(wait=None, detail=None, code=None)
Raised when an incoming request fails the throttling checks.
By default this exception results in a response with the HTTP status code «429 Too Many Requests».
ValidationError
Signature: ValidationError(detail=None, code=None)
The ValidationError exception is slightly different from the other APIException classes:
- The
detailargument may be a list or dictionary of error details, and may also be a nested data structure. By using a dictionary, you can specify field-level errors while performing object-level validation in thevalidate()method of a serializer. For example.raise serializers.ValidationError({'name': 'Please enter a valid name.'}) - By convention you should import the serializers module and use a fully qualified
ValidationErrorstyle, in order to differentiate it from Django’s built-in validation error. For example.raise serializers.ValidationError('This field must be an integer value.')
The ValidationError class should be used for serializer and field validation, and by validator classes. It is also raised when calling serializer.is_valid with the raise_exception keyword argument:
serializer.is_valid(raise_exception=True)
The generic views use the raise_exception=True flag, which means that you can override the style of validation error responses globally in your API. To do so, use a custom exception handler, as described above.
By default this exception results in a response with the HTTP status code «400 Bad Request».
Generic Error Views
Django REST Framework provides two error views suitable for providing generic JSON 500 Server Error and
400 Bad Request responses. (Django’s default error views provide HTML responses, which may not be appropriate for an
API-only application.)
Use these as per Django’s Customizing error views documentation.
rest_framework.exceptions.server_error
Returns a response with status code 500 and application/json content type.
Set as handler500:
handler500 = 'rest_framework.exceptions.server_error'
rest_framework.exceptions.bad_request
Returns a response with status code 400 and application/json content type.
Set as handler400:
handler400 = 'rest_framework.exceptions.bad_request'
Third party packages
The following third-party packages are also available.
DRF Standardized Errors
The drf-standardized-errors package provides an exception handler that generates the same format for all 4xx and 5xx responses. It is a drop-in replacement for the default exception handler and allows customizing the error response format without rewriting the whole exception handler. The standardized error response format is easier to document and easier to handle by API consumers.
why we use validators ?
- Validators are used to validate the data whether it is semantically valid or not.
- Validation simplifies the data processing
- Validation avoids the data redundancy
Custom Validation for serializer fields
Django REST supports both serializers and model serializers. Serializers provides basic validation for fields, In some cases we need to write custom validations for fields .
Let’s take an example for validation for serializer fields.
Case: A company want’s recruit for the position of «django developer». Company set age restriction on applicant that his/her age should be greater than twenty and less than thirty years.
Method-1:
from datetime import date
from rest_framework import serializers

def age_restriction(dob):
    today = date.today()
    age = today.year - dob.year - ((today.month, today.day) < (dob.month, dob.day))
    if (not(20 < age < 30)):
        raise serializers.ValidationError("You are no eligible for the job")
    return dob

class EligibilitySerializer(serializers.Serializer):
    email = serializers.EmailField()
    name = serializers.CharField(max_length=200)
    date_of_birth = serializers.DateField(validators=[age_restriction])
«serializers.Serializer» apply primary validations on the field when we call method «is_valid». Serializer converts the value of the field into python object. After it checks for the attribute «validate_<field_name>» if it has the attribute it will the attribute(method). After this validation it will check for «validators» attribute for the field. validators is list object. so, serializer takes the each validator from the validatiors list and applies it on the field value. After it will call method «validate» and executes validations init.
«validate_<field_name>» recieves field related value but, where as «validate» method recieves the all fields related data and raises «non field errors»
If any one of the validations[above mentioned validation methods] are failed then validation error will be raised otherwise the valid value will be returned.
Method — 2:
from datetime import date
from rest_framework import serializers

class EligibilitySerializer(serializers.Serializer):
    email = serializers.EmailField()
    name = serializers.CharField(max_length=200)
    date_of_birth = serializers.DateField()

    def validate_date_of_birth(self, dob):
        today = date.today()
        age = today.year - dob.year - ((today.month, today.day) < (dob.month, dob.day))
        if (not(20 < age < 30)):
            raise serializers.ValidationError("You are no eligible for the job")
        return dob
Test the above serializer with valid data and invalid data
# testing with valid data
data = {
    'date_of_birth': '1993-04-08',
    'email': 'hello@micropyramid.com',
    'name': 'Micropyramid'
}
s = EligibilitySerializer(data=data)
print(s.is_valid())
# Output: True
print(s.data)
# Output: ReturnDict([('email', 'hello@micropyramid.com'),
#            ('name', 'Micropyramid'),
#            ('date_of_birth', '1993-14-08')])

# testing with invalid data
data = {
    'date_of_birth': '1980-04-08',
    'email': 'hello@micropyramid.com',
    'name': 'Micropyramid'
}
print(s.is_valid())
# Output: False
print(s.errors)
# Output: ReturnDict([('date_of_birth', ['You are no eligible for the job'])])
when to use «validate_<field_name>» and «validators» for fields ?
- If we are applying a single validator on the field data we have to go for «validate_<field_name>».
- If we apply more than a single validator then we have to go for «validators».
To Know more about our Django CRM(Customer Relationship Management) Open Source Package. Check Code
About Micropyramid
Micropyramid is a software development and cloud consulting partner for enterprise businesses across the world. We work on python, Django, Salesforce, Angular, Reactjs, React Native, MySQL, PostgreSQL, Docker, Linux, Ansible, git, amazon web services. We are Amazon and salesforce consulting partner with 5 years of cloud architect experience. We develop e-commerce, retail, banking, machine learning, CMS, CRM web and mobile applications.
Need any Help in your Project?Let’s Talk
down
Subscribe To our news letter
Subscribe and Stay Updated about our Webinars, news and articles on Django, Python, Machine Learning, Amazon Web Services, DevOps, Salesforce, ReactJS, AngularJS, React Native.
* We don’t provide your email contact details to any third parties
serializers.py
Expanding the usefulness of the serializers is something that we would
like to address. However, it’s not a trivial problem, and it
will take some serious design work.— Russell Keith-Magee, Django users group
Serializers allow complex data such as querysets and model instances to be converted to native Python datatypes that can then be easily rendered into JSON, XML or other content types. Serializers also provide deserialization, allowing parsed data to be converted back into complex types, after first validating the incoming data.
The serializers in REST framework work very similarly to Django’s Form and ModelForm classes. We provide a Serializer class which gives you a powerful, generic way to control the output of your responses, as well as a ModelSerializer class which provides a useful shortcut for creating serializers that deal with model instances and querysets.
Declaring Serializers
Let’s start by creating a simple object we can use for example purposes:
from datetime import datetime

class Comment:
    def __init__(self, email, content, created=None):
        self.email = email
        self.content = content
        self.created = created or datetime.now()

comment = Comment(email='leila@example.com', content='foo bar')
We’ll declare a serializer that we can use to serialize and deserialize data that corresponds to Comment objects.
Declaring a serializer looks very similar to declaring a form:
from rest_framework import serializers

class CommentSerializer(serializers.Serializer):
    email = serializers.EmailField()
    content = serializers.CharField(max_length=200)
    created = serializers.DateTimeField()
Serializing objects
We can now use CommentSerializer to serialize a comment, or list of comments. Again, using the Serializer class looks a lot like using a Form class.
serializer = CommentSerializer(comment)
serializer.data
# {'email': 'leila@example.com', 'content': 'foo bar', 'created': '2016-01-27T15:17:10.375877'}
At this point we’ve translated the model instance into Python native datatypes. To finalise the serialization process we render the data into json.
from rest_framework.renderers import JSONRenderer

json = JSONRenderer().render(serializer.data)
json
# b'{"email":"leila@example.com","content":"foo bar","created":"2016-01-27T15:17:10.375877"}'
Deserializing objects
Deserialization is similar. First we parse a stream into Python native datatypes…
import io
from rest_framework.parsers import JSONParser

stream = io.BytesIO(json)
data = JSONParser().parse(stream)
…then we restore those native datatypes into a dictionary of validated data.
serializer = CommentSerializer(data=data)
serializer.is_valid()
# True
serializer.validated_data
# {'content': 'foo bar', 'email': 'leila@example.com', 'created': datetime.datetime(2012, 08, 22, 16, 20, 09, 822243)}
Saving instances
If we want to be able to return complete object instances based on the validated data we need to implement one or both of the .create() and .update() methods. For example:
class CommentSerializer(serializers.Serializer):
    email = serializers.EmailField()
    content = serializers.CharField(max_length=200)
    created = serializers.DateTimeField()

    def create(self, validated_data):
        return Comment(**validated_data)

    def update(self, instance, validated_data):
        instance.email = validated_data.get('email', instance.email)
        instance.content = validated_data.get('content', instance.content)
        instance.created = validated_data.get('created', instance.created)
        return instance
If your object instances correspond to Django models you’ll also want to ensure that these methods save the object to the database. For example, if Comment was a Django model, the methods might look like this:
    def create(self, validated_data):
        return Comment.objects.create(**validated_data)

    def update(self, instance, validated_data):
        instance.email = validated_data.get('email', instance.email)
        instance.content = validated_data.get('content', instance.content)
        instance.created = validated_data.get('created', instance.created)
        instance.save()
        return instance
Now when deserializing data, we can call .save() to return an object instance, based on the validated data.
comment = serializer.save()
Calling .save() will either create a new instance, or update an existing instance, depending on if an existing instance was passed when instantiating the serializer class:
# .save() will create a new instance.
serializer = CommentSerializer(data=data)

# .save() will update the existing `comment` instance.
serializer = CommentSerializer(comment, data=data)
Both the .create() and .update() methods are optional. You can implement either none, one, or both of them, depending on the use-case for your serializer class.
Passing additional attributes to .save()
Sometimes you’ll want your view code to be able to inject additional data at the point of saving the instance. This additional data might include information like the current user, the current time, or anything else that is not part of the request data.
You can do so by including additional keyword arguments when calling .save(). For example:
serializer.save(owner=request.user)
Any additional keyword arguments will be included in the validated_data argument when .create() or .update() are called.
Overriding .save() directly.
In some cases the .create() and .update() method names may not be meaningful. For example, in a contact form we may not be creating new instances, but instead sending an email or other message.
In these cases you might instead choose to override .save() directly, as being more readable and meaningful.
For example:
class ContactForm(serializers.Serializer):
    email = serializers.EmailField()
    message = serializers.CharField()

    def save(self):
        email = self.validated_data['email']
        message = self.validated_data['message']
        send_email(from=email, message=message)
Note that in the case above we’re now having to access the serializer .validated_data property directly.
Validation
When deserializing data, you always need to call is_valid() before attempting to access the validated data, or save an object instance. If any validation errors occur, the .errors property will contain a dictionary representing the resulting error messages. For example:
serializer = CommentSerializer(data={'email': 'foobar', 'content': 'baz'})
serializer.is_valid()
# False
serializer.errors
# {'email': ['Enter a valid e-mail address.'], 'created': ['This field is required.']}
Each key in the dictionary will be the field name, and the values will be lists of strings of any error messages corresponding to that field. The non_field_errors key may also be present, and will list any general validation errors. The name of the non_field_errors key may be customized using the NON_FIELD_ERRORS_KEY REST framework setting.
When deserializing a list of items, errors will be returned as a list of dictionaries representing each of the deserialized items.
Raising an exception on invalid data
The .is_valid() method takes an optional raise_exception flag that will cause it to raise a serializers.ValidationError exception if there are validation errors.
These exceptions are automatically dealt with by the default exception handler that REST framework provides, and will return HTTP 400 Bad Request responses by default.
# Return a 400 response if the data was invalid.
serializer.is_valid(raise_exception=True)
Field-level validation
You can specify custom field-level validation by adding .validate_<field_name> methods to your Serializer subclass. These are similar to the .clean_<field_name> methods on Django forms.
These methods take a single argument, which is the field value that requires validation.
Your validate_<field_name> methods should return the validated value or raise a serializers.ValidationError. For example:
from rest_framework import serializers

class BlogPostSerializer(serializers.Serializer):
    title = serializers.CharField(max_length=100)
    content = serializers.CharField()

    def validate_title(self, value):
        """
        Check that the blog post is about Django.
        """
        if 'django' not in value.lower():
            raise serializers.ValidationError("Blog post is not about Django")
        return value
Note: If your <field_name> is declared on your serializer with the parameter required=False then this validation step will not take place if the field is not included.
Object-level validation
To do any other validation that requires access to multiple fields, add a method called .validate() to your Serializer subclass. This method takes a single argument, which is a dictionary of field values. It should raise a serializers.ValidationError if necessary, or just return the validated values. For example:
from rest_framework import serializers

class EventSerializer(serializers.Serializer):
    description = serializers.CharField(max_length=100)
    start = serializers.DateTimeField()
    finish = serializers.DateTimeField()

    def validate(self, data):
        """
        Check that start is before finish.
        """
        if data['start'] > data['finish']:
            raise serializers.ValidationError("finish must occur after start")
        return data
Validators
Individual fields on a serializer can include validators, by declaring them on the field instance, for example:
def multiple_of_ten(value):
    if value % 10 != 0:
        raise serializers.ValidationError('Not a multiple of ten')

class GameRecord(serializers.Serializer):
    score = IntegerField(validators=[multiple_of_ten])
    ...
Serializer classes can also include reusable validators that are applied to the complete set of field data. These validators are included by declaring them on an inner Meta class, like so:
class EventSerializer(serializers.Serializer):
    name = serializers.CharField()
    room_number = serializers.IntegerField(choices=[101, 102, 103, 201])
    date = serializers.DateField()

    class Meta:
        # Each room only has one event per day.
        validators = [
            UniqueTogetherValidator(
                queryset=Event.objects.all(),
                fields=['room_number', 'date']
            )
        ]
For more information see the validators documentation.
Accessing the initial data and instance
When passing an initial object or queryset to a serializer instance, the object will be made available as .instance. If no initial object is passed then the .instance attribute will be None.
When passing data to a serializer instance, the unmodified data will be made available as .initial_data. If the data keyword argument is not passed then the .initial_data attribute will not exist.
Partial updates
By default, serializers must be passed values for all required fields or they will raise validation errors. You can use the partial argument in order to allow partial updates.
# Update `comment` with partial data
serializer = CommentSerializer(comment, data={'content': 'foo bar'}, partial=True)
Dealing with nested objects
The previous examples are fine for dealing with objects that only have simple datatypes, but sometimes we also need to be able to represent more complex objects, where some of the attributes of an object might not be simple datatypes such as strings, dates or integers.
The Serializer class is itself a type of Field, and can be used to represent relationships where one object type is nested inside another.
class UserSerializer(serializers.Serializer):
    email = serializers.EmailField()
    username = serializers.CharField(max_length=100)

class CommentSerializer(serializers.Serializer):
    user = UserSerializer()
    content = serializers.CharField(max_length=200)
    created = serializers.DateTimeField()
If a nested representation may optionally accept the None value you should pass the required=False flag to the nested serializer.
class CommentSerializer(serializers.Serializer):
    user = UserSerializer(required=False)  # May be an anonymous user.
    content = serializers.CharField(max_length=200)
    created = serializers.DateTimeField()
Similarly if a nested representation should be a list of items, you should pass the many=True flag to the nested serializer.
class CommentSerializer(serializers.Serializer):
    user = UserSerializer(required=False)
    edits = EditItemSerializer(many=True)  # A nested list of 'edit' items.
    content = serializers.CharField(max_length=200)
    created = serializers.DateTimeField()
Writable nested representations
When dealing with nested representations that support deserializing the data, any errors with nested objects will be nested under the field name of the nested object.
serializer = CommentSerializer(data={'user': {'email': 'foobar', 'username': 'doe'}, 'content': 'baz'})
serializer.is_valid()
# False
serializer.errors
# {'user': {'email': ['Enter a valid e-mail address.']}, 'created': ['This field is required.']}
Similarly, the .validated_data property will include nested data structures.
Writing .create() methods for nested representations
If you’re supporting writable nested representations you’ll need to write .create() or .update() methods that handle saving multiple objects.
The following example demonstrates how you might handle creating a user with a nested profile object.
class UserSerializer(serializers.ModelSerializer):
    profile = ProfileSerializer()

    class Meta:
        model = User
        fields = ['username', 'email', 'profile']

    def create(self, validated_data):
        profile_data = validated_data.pop('profile')
        user = User.objects.create(**validated_data)
        Profile.objects.create(user=user, **profile_data)
        return user
Writing .update() methods for nested representations
For updates you’ll want to think carefully about how to handle updates to relationships. For example if the data for the relationship is None, or not provided, which of the following should occur?
- Set the relationship to
NULLin the database. - Delete the associated instance.
- Ignore the data and leave the instance as it is.
- Raise a validation error.
Here’s an example for an .update() method on our previous UserSerializer class.
    def update(self, instance, validated_data):
        profile_data = validated_data.pop('profile')
        # Unless the application properly enforces that this field is
        # always set, the following could raise a `DoesNotExist`, which
        # would need to be handled.
        profile = instance.profile

        instance.username = validated_data.get('username', instance.username)
        instance.email = validated_data.get('email', instance.email)
        instance.save()

        profile.is_premium_member = profile_data.get(
            'is_premium_member',
            profile.is_premium_member
        )
        profile.has_support_contract = profile_data.get(
            'has_support_contract',
            profile.has_support_contract
         )
        profile.save()

        return instance
Because the behavior of nested creates and updates can be ambiguous, and may require complex dependencies between related models, REST framework 3 requires you to always write these methods explicitly. The default ModelSerializer .create() and .update() methods do not include support for writable nested representations.
There are however, third-party packages available such as DRF Writable Nested that support automatic writable nested representations.
Handling saving related instances in model manager classes
An alternative to saving multiple related instances in the serializer is to write custom model manager classes that handle creating the correct instances.
For example, suppose we wanted to ensure that User instances and Profile instances are always created together as a pair. We might write a custom manager class that looks something like this:
class UserManager(models.Manager):
    ...

    def create(self, username, email, is_premium_member=False, has_support_contract=False):
        user = User(username=username, email=email)
        user.save()
        profile = Profile(
            user=user,
            is_premium_member=is_premium_member,
            has_support_contract=has_support_contract
        )
        profile.save()
        return user
This manager class now more nicely encapsulates that user instances and profile instances are always created at the same time. Our .create() method on the serializer class can now be re-written to use the new manager method.
def create(self, validated_data):
    return User.objects.create(
        username=validated_data['username'],
        email=validated_data['email'],
        is_premium_member=validated_data['profile']['is_premium_member'],
        has_support_contract=validated_data['profile']['has_support_contract']
    )
For more details on this approach see the Django documentation on model managers, and this blogpost on using model and manager classes.
Dealing with multiple objects
The Serializer class can also handle serializing or deserializing lists of objects.
Serializing multiple objects
To serialize a queryset or list of objects instead of a single object instance, you should pass the many=True flag when instantiating the serializer. You can then pass a queryset or list of objects to be serialized.
queryset = Book.objects.all()
serializer = BookSerializer(queryset, many=True)
serializer.data
# [
#     {'id': 0, 'title': 'The electric kool-aid acid test', 'author': 'Tom Wolfe'},
#     {'id': 1, 'title': 'If this is a man', 'author': 'Primo Levi'},
#     {'id': 2, 'title': 'The wind-up bird chronicle', 'author': 'Haruki Murakami'}
# ]
Deserializing multiple objects
The default behavior for deserializing multiple objects is to support multiple object creation, but not support multiple object updates. For more information on how to support or customize either of these cases, see the ListSerializer documentation below.
There are some cases where you need to provide extra context to the serializer in addition to the object being serialized. One common case is if you’re using a serializer that includes hyperlinked relations, which requires the serializer to have access to the current request so that it can properly generate fully qualified URLs.
You can provide arbitrary additional context by passing a context argument when instantiating the serializer. For example:
serializer = AccountSerializer(account, context={'request': request})
serializer.data
# {'id': 6, 'owner': 'denvercoder9', 'created': datetime.datetime(2013, 2, 12, 09, 44, 56, 678870), 'details': 'http://example.com/accounts/6/details'}
The context dictionary can be used within any serializer field logic, such as a custom .to_representation() method, by accessing the self.context attribute.
ModelSerializer
Often you’ll want serializer classes that map closely to Django model definitions.
The ModelSerializer class provides a shortcut that lets you automatically create a Serializer class with fields that correspond to the Model fields.
The ModelSerializer class is the same as a regular Serializer class, except that:
- It will automatically generate a set of fields for you, based on the model.
- It will automatically generate validators for the serializer, such as unique_together validators.
- It includes simple default implementations of
.create()and.update().
Declaring a ModelSerializer looks like this:
class AccountSerializer(serializers.ModelSerializer):
    class Meta:
        model = Account
        fields = ['id', 'account_name', 'users', 'created']
By default, all the model fields on the class will be mapped to a corresponding serializer fields.
Any relationships such as foreign keys on the model will be mapped to PrimaryKeyRelatedField. Reverse relationships are not included by default unless explicitly included as specified in the serializer relations documentation.
Inspecting a ModelSerializer
Serializer classes generate helpful verbose representation strings, that allow you to fully inspect the state of their fields. This is particularly useful when working with ModelSerializers where you want to determine what set of fields and validators are being automatically created for you.
To do so, open the Django shell, using python manage.py shell, then import the serializer class, instantiate it, and print the object representation…
>>> from myapp.serializers import AccountSerializer
>>> serializer = AccountSerializer()
>>> print(repr(serializer))
AccountSerializer():
    id = IntegerField(label='ID', read_only=True)
    name = CharField(allow_blank=True, max_length=100, required=False)
    owner = PrimaryKeyRelatedField(queryset=User.objects.all())
Specifying which fields to include
If you only want a subset of the default fields to be used in a model serializer, you can do so using fields or exclude options, just as you would with a ModelForm. It is strongly recommended that you explicitly set all fields that should be serialized using the fields attribute. This will make it less likely to result in unintentionally exposing data when your models change.
For example:
class AccountSerializer(serializers.ModelSerializer):
    class Meta:
        model = Account
        fields = ['id', 'account_name', 'users', 'created']
You can also set the fields attribute to the special value '__all__' to indicate that all fields in the model should be used.
For example:
class AccountSerializer(serializers.ModelSerializer):
    class Meta:
        model = Account
        fields = '__all__'
You can set the exclude attribute to a list of fields to be excluded from the serializer.
For example:
class AccountSerializer(serializers.ModelSerializer):
    class Meta:
        model = Account
        exclude = ['users']
In the example above, if the Account model had 3 fields account_name, users, and created, this will result in the fields account_name and created to be serialized.
The names in the fields and exclude attributes will normally map to model fields on the model class.
Alternatively names in the fields options can map to properties or methods which take no arguments that exist on the model class.
Since version 3.3.0, it is mandatory to provide one of the attributes fields or exclude.
Specifying nested serialization
The default ModelSerializer uses primary keys for relationships, but you can also easily generate nested representations using the depth option:
class AccountSerializer(serializers.ModelSerializer):
    class Meta:
        model = Account
        fields = ['id', 'account_name', 'users', 'created']
        depth = 1
The depth option should be set to an integer value that indicates the depth of relationships that should be traversed before reverting to a flat representation.
If you want to customize the way the serialization is done you’ll need to define the field yourself.
Specifying fields explicitly
You can add extra fields to a ModelSerializer or override the default fields by declaring fields on the class, just as you would for a Serializer class.
class AccountSerializer(serializers.ModelSerializer):
    url = serializers.CharField(source='get_absolute_url', read_only=True)
    groups = serializers.PrimaryKeyRelatedField(many=True)

    class Meta:
        model = Account
        fields = ['url', 'groups']
Extra fields can correspond to any property or callable on the model.
Specifying read only fields
You may wish to specify multiple fields as read-only. Instead of adding each field explicitly with the read_only=True attribute, you may use the shortcut Meta option, read_only_fields.
This option should be a list or tuple of field names, and is declared as follows:
class AccountSerializer(serializers.ModelSerializer):
    class Meta:
        model = Account
        fields = ['id', 'account_name', 'users', 'created']
        read_only_fields = ['account_name']
Model fields which have editable=False set, and AutoField fields will be set to read-only by default, and do not need to be added to the read_only_fields option.
Note: There is a special-case where a read-only field is part of a unique_together constraint at the model level. In this case the field is required by the serializer class in order to validate the constraint, but should also not be editable by the user.
The right way to deal with this is to specify the field explicitly on the serializer, providing both the read_only=True and default=… keyword arguments.
One example of this is a read-only relation to the currently authenticated User which is unique_together with another identifier. In this case you would declare the user field like so:
user = serializers.PrimaryKeyRelatedField(read_only=True, default=serializers.CurrentUserDefault())
Please review the Validators Documentation for details on the UniqueTogetherValidator and CurrentUserDefault classes.
Additional keyword arguments
There is also a shortcut allowing you to specify arbitrary additional keyword arguments on fields, using the extra_kwargs option. As in the case of read_only_fields, this means you do not need to explicitly declare the field on the serializer.
This option is a dictionary, mapping field names to a dictionary of keyword arguments. For example:
class CreateUserSerializer(serializers.ModelSerializer):
    class Meta:
        model = User
        fields = ['email', 'username', 'password']
        extra_kwargs = {'password': {'write_only': True}}

    def create(self, validated_data):
        user = User(
            email=validated_data['email'],
            username=validated_data['username']
        )
        user.set_password(validated_data['password'])
        user.save()
        return user
Please keep in mind that, if the field has already been explicitly declared on the serializer class, then the extra_kwargs option will be ignored.
Relational fields
When serializing model instances, there are a number of different ways you might choose to represent relationships. The default representation for ModelSerializer is to use the primary keys of the related instances.
Alternative representations include serializing using hyperlinks, serializing complete nested representations, or serializing with a custom representation.
For full details see the serializer relations documentation.
Customizing field mappings
The ModelSerializer class also exposes an API that you can override in order to alter how serializer fields are automatically determined when instantiating the serializer.
Normally if a ModelSerializer does not generate the fields you need by default then you should either add them to the class explicitly, or simply use a regular Serializer class instead. However in some cases you may want to create a new base class that defines how the serializer fields are created for any given model.
.serializer_field_mapping
A mapping of Django model fields to REST framework serializer fields. You can override this mapping to alter the default serializer fields that should be used for each model field.
This property should be the serializer field class, that is used for relational fields by default.
For ModelSerializer this defaults to serializers.PrimaryKeyRelatedField.
For HyperlinkedModelSerializer this defaults to serializers.HyperlinkedRelatedField.
.serializer_url_field
The serializer field class that should be used for any url field on the serializer.
Defaults to serializers.HyperlinkedIdentityField
.serializer_choice_field
The serializer field class that should be used for any choice fields on the serializer.
Defaults to serializers.ChoiceField
The field_class and field_kwargs API
The following methods are called to determine the class and keyword arguments for each field that should be automatically included on the serializer. Each of these methods should return a two tuple of (field_class, field_kwargs).
.build_standard_field(self, field_name, model_field)
Called to generate a serializer field that maps to a standard model field.
The default implementation returns a serializer class based on the serializer_field_mapping attribute.
.build_relational_field(self, field_name, relation_info)
Called to generate a serializer field that maps to a relational model field.
The default implementation returns a serializer class based on the serializer_related_field attribute.
The relation_info argument is a named tuple, that contains model_field, related_model, to_many and has_through_model properties.
.build_nested_field(self, field_name, relation_info, nested_depth)
Called to generate a serializer field that maps to a relational model field, when the depth option has been set.
The default implementation dynamically creates a nested serializer class based on either ModelSerializer or HyperlinkedModelSerializer.
The nested_depth will be the value of the depth option, minus one.
The relation_info argument is a named tuple, that contains model_field, related_model, to_many and has_through_model properties.
.build_property_field(self, field_name, model_class)
Called to generate a serializer field that maps to a property or zero-argument method on the model class.
The default implementation returns a ReadOnlyField class.
.build_url_field(self, field_name, model_class)
Called to generate a serializer field for the serializer’s own url field. The default implementation returns a HyperlinkedIdentityField class.
.build_unknown_field(self, field_name, model_class)
Called when the field name did not map to any model field or model property.
The default implementation raises an error, although subclasses may customize this behavior.
HyperlinkedModelSerializer
The HyperlinkedModelSerializer class is similar to the ModelSerializer class except that it uses hyperlinks to represent relationships, rather than primary keys.
By default the serializer will include a url field instead of a primary key field.
The url field will be represented using a HyperlinkedIdentityField serializer field, and any relationships on the model will be represented using a HyperlinkedRelatedField serializer field.
You can explicitly include the primary key by adding it to the fields option, for example:
class AccountSerializer(serializers.HyperlinkedModelSerializer):
    class Meta:
        model = Account
        fields = ['url', 'id', 'account_name', 'users', 'created']
Absolute and relative URLs
When instantiating a HyperlinkedModelSerializer you must include the current
request in the serializer context, for example:
serializer = AccountSerializer(queryset, context={'request': request})
Doing so will ensure that the hyperlinks can include an appropriate hostname,
so that the resulting representation uses fully qualified URLs, such as:
http://api.example.com/accounts/1/
Rather than relative URLs, such as:
/accounts/1/
If you do want to use relative URLs, you should explicitly pass {'request': None}
in the serializer context.
How hyperlinked views are determined
There needs to be a way of determining which views should be used for hyperlinking to model instances.
By default hyperlinks are expected to correspond to a view name that matches the style '{model_name}-detail', and looks up the instance by a pk keyword argument.
You can override a URL field view name and lookup field by using either, or both of, the view_name and lookup_field options in the extra_kwargs setting, like so:
class AccountSerializer(serializers.HyperlinkedModelSerializer):
    class Meta:
        model = Account
        fields = ['account_url', 'account_name', 'users', 'created']
        extra_kwargs = {
            'url': {'view_name': 'accounts', 'lookup_field': 'account_name'},
            'users': {'lookup_field': 'username'}
        }
Alternatively you can set the fields on the serializer explicitly. For example:
class AccountSerializer(serializers.HyperlinkedModelSerializer):
    url = serializers.HyperlinkedIdentityField(
        view_name='accounts',
        lookup_field='slug'
    )
    users = serializers.HyperlinkedRelatedField(
        view_name='user-detail',
        lookup_field='username',
        many=True,
        read_only=True
    )

    class Meta:
        model = Account
        fields = ['url', 'account_name', 'users', 'created']
Tip: Properly matching together hyperlinked representations and your URL conf can sometimes be a bit fiddly. Printing the repr of a HyperlinkedModelSerializer instance is a particularly useful way to inspect exactly which view names and lookup fields the relationships are expected to map too.
Changing the URL field name
The name of the URL field defaults to ‘url’. You can override this globally, by using the URL_FIELD_NAME setting.
ListSerializer
The ListSerializer class provides the behavior for serializing and validating multiple objects at once. You won’t typically need to use ListSerializer directly, but should instead simply pass many=True when instantiating a serializer.
When a serializer is instantiated and many=True is passed, a ListSerializer instance will be created. The serializer class then becomes a child of the parent ListSerializer
The following argument can also be passed to a ListSerializer field or a serializer that is passed many=True:
allow_empty
This is True by default, but can be set to False if you want to disallow empty lists as valid input.
max_length
This is None by default, but can be set to a positive integer if you want to validates that the list contains no more than this number of elements.
min_length
This is None by default, but can be set to a positive integer if you want to validates that the list contains no fewer than this number of elements.
Customizing ListSerializer behavior
There are a few use cases when you might want to customize the ListSerializer behavior. For example:
- You want to provide particular validation of the lists, such as checking that one element does not conflict with another element in a list.
- You want to customize the create or update behavior of multiple objects.
For these cases you can modify the class that is used when many=True is passed, by using the list_serializer_class option on the serializer Meta class.
For example:
class CustomListSerializer(serializers.ListSerializer):
    ...

class CustomSerializer(serializers.Serializer):
    ...
    class Meta:
        list_serializer_class = CustomListSerializer
Customizing multiple create
The default implementation for multiple object creation is to simply call .create() for each item in the list. If you want to customize this behavior, you’ll need to customize the .create() method on ListSerializer class that is used when many=True is passed.
For example:
class BookListSerializer(serializers.ListSerializer):
    def create(self, validated_data):
        books = [Book(**item) for item in validated_data]
        return Book.objects.bulk_create(books)

class BookSerializer(serializers.Serializer):
    ...
    class Meta:
        list_serializer_class = BookListSerializer
Customizing multiple update
By default the ListSerializer class does not support multiple updates. This is because the behavior that should be expected for insertions and deletions is ambiguous.
To support multiple updates you’ll need to do so explicitly. When writing your multiple update code make sure to keep the following in mind:
- How do you determine which instance should be updated for each item in the list of data?
- How should insertions be handled? Are they invalid, or do they create new objects?
- How should removals be handled? Do they imply object deletion, or removing a relationship? Should they be silently ignored, or are they invalid?
- How should ordering be handled? Does changing the position of two items imply any state change or is it ignored?
You will need to add an explicit id field to the instance serializer. The default implicitly-generated id field is marked as read_only. This causes it to be removed on updates. Once you declare it explicitly, it will be available in the list serializer’s update method.
Here’s an example of how you might choose to implement multiple updates:
class BookListSerializer(serializers.ListSerializer):
    def update(self, instance, validated_data):
        # Maps for id->instance and id->data item.
        book_mapping = {book.id: book for book in instance}
        data_mapping = {item['id']: item for item in validated_data}

        # Perform creations and updates.
        ret = []
        for book_id, data in data_mapping.items():
            book = book_mapping.get(book_id, None)
            if book is None:
                ret.append(self.child.create(data))
            else:
                ret.append(self.child.update(book, data))

        # Perform deletions.
        for book_id, book in book_mapping.items():
            if book_id not in data_mapping:
                book.delete()

        return ret

class BookSerializer(serializers.Serializer):
    # We need to identify elements in the list using their primary key,
    # so use a writable field here, rather than the default which would be read-only.
    id = serializers.IntegerField()
    ...

    class Meta:
        list_serializer_class = BookListSerializer
It is possible that a third party package may be included alongside the 3.1 release that provides some automatic support for multiple update operations, similar to the allow_add_remove behavior that was present in REST framework 2.
Customizing ListSerializer initialization
When a serializer with many=True is instantiated, we need to determine which arguments and keyword arguments should be passed to the .__init__() method for both the child Serializer class, and for the parent ListSerializer class.
The default implementation is to pass all arguments to both classes, except for validators, and any custom keyword arguments, both of which are assumed to be intended for the child serializer class.
Occasionally you might need to explicitly specify how the child and parent classes should be instantiated when many=True is passed. You can do so by using the many_init class method.
    @classmethod
    def many_init(cls, *args, **kwargs):
        # Instantiate the child serializer.
        kwargs['child'] = cls()
        # Instantiate the parent list serializer.
        return CustomListSerializer(*args, **kwargs)
BaseSerializer
BaseSerializer class that can be used to easily support alternative serialization and deserialization styles.
This class implements the same basic API as the Serializer class:
.data— Returns the outgoing primitive representation..is_valid()— Deserializes and validates incoming data..validated_data— Returns the validated incoming data..errors— Returns any errors during validation..save()— Persists the validated data into an object instance.
There are four methods that can be overridden, depending on what functionality you want the serializer class to support:
.to_representation()— Override this to support serialization, for read operations..to_internal_value()— Override this to support deserialization, for write operations..create()and.update()— Override either or both of these to support saving instances.
Because this class provides the same interface as the Serializer class, you can use it with the existing generic class-based views exactly as you would for a regular Serializer or ModelSerializer.
The only difference you’ll notice when doing so is the BaseSerializer classes will not generate HTML forms in the browsable API. This is because the data they return does not include all the field information that would allow each field to be rendered into a suitable HTML input.
Read-only BaseSerializer classes
To implement a read-only serializer using the BaseSerializer class, we just need to override the .to_representation() method. Let’s take a look at an example using a simple Django model:
class HighScore(models.Model):
    created = models.DateTimeField(auto_now_add=True)
    player_name = models.CharField(max_length=10)
    score = models.IntegerField()
It’s simple to create a read-only serializer for converting HighScore instances into primitive data types.
class HighScoreSerializer(serializers.BaseSerializer):
    def to_representation(self, instance):
        return {
            'score': instance.score,
            'player_name': instance.player_name
        }
We can now use this class to serialize single HighScore instances:
@api_view(['GET'])
def high_score(request, pk):
    instance = HighScore.objects.get(pk=pk)
    serializer = HighScoreSerializer(instance)
    return Response(serializer.data)
Or use it to serialize multiple instances:
@api_view(['GET'])
def all_high_scores(request):
    queryset = HighScore.objects.order_by('-score')
    serializer = HighScoreSerializer(queryset, many=True)
    return Response(serializer.data)
Read-write BaseSerializer classes
To create a read-write serializer we first need to implement a .to_internal_value() method. This method returns the validated values that will be used to construct the object instance, and may raise a serializers.ValidationError if the supplied data is in an incorrect format.
Once you’ve implemented .to_internal_value(), the basic validation API will be available on the serializer, and you will be able to use .is_valid(), .validated_data and .errors.
If you want to also support .save() you’ll need to also implement either or both of the .create() and .update() methods.
Here’s a complete example of our previous HighScoreSerializer, that’s been updated to support both read and write operations.
class HighScoreSerializer(serializers.BaseSerializer):
    def to_internal_value(self, data):
        score = data.get('score')
        player_name = data.get('player_name')

        # Perform the data validation.
        if not score:
            raise serializers.ValidationError({
                'score': 'This field is required.'
            })
        if not player_name:
            raise serializers.ValidationError({
                'player_name': 'This field is required.'
            })
        if len(player_name) > 10:
            raise serializers.ValidationError({
                'player_name': 'May not be more than 10 characters.'
            })

        # Return the validated values. This will be available as
        # the `.validated_data` property.
        return {
            'score': int(score),
            'player_name': player_name
        }

    def to_representation(self, instance):
        return {
            'score': instance.score,
            'player_name': instance.player_name
        }

    def create(self, validated_data):
        return HighScore.objects.create(**validated_data)
Creating new base classes
The BaseSerializer class is also useful if you want to implement new generic serializer classes for dealing with particular serialization styles, or for integrating with alternative storage backends.
The following class is an example of a generic serializer that can handle coercing arbitrary complex objects into primitive representations.
class ObjectSerializer(serializers.BaseSerializer):
    """
    A read-only serializer that coerces arbitrary complex objects
    into primitive representations.
    """
    def to_representation(self, instance):
        output = {}
        for attribute_name in dir(instance):
            attribute = getattr(instance, attribute_name)
            if attribute_name.startswith('_'):
                # Ignore private attributes.
                pass
            elif hasattr(attribute, '__call__'):
                # Ignore methods and other callables.
                pass
            elif isinstance(attribute, (str, int, bool, float, type(None))):
                # Primitive types can be passed through unmodified.
                output[attribute_name] = attribute
            elif isinstance(attribute, list):
                # Recursively deal with items in lists.
                output[attribute_name] = [
                    self.to_representation(item) for item in attribute
                ]
            elif isinstance(attribute, dict):
                # Recursively deal with items in dictionaries.
                output[attribute_name] = {
                    str(key): self.to_representation(value)
                    for key, value in attribute.items()
                }
            else:
                # Force anything else to its string representation.
                output[attribute_name] = str(attribute)
        return output
Advanced serializer usage
Overriding serialization and deserialization behavior
If you need to alter the serialization or deserialization behavior of a serializer class, you can do so by overriding the .to_representation() or .to_internal_value() methods.
Some reasons this might be useful include…
- Adding new behavior for new serializer base classes.
- Modifying the behavior slightly for an existing class.
- Improving serialization performance for a frequently accessed API endpoint that returns lots of data.
The signatures for these methods are as follows:
.to_representation(self, instance)
Takes the object instance that requires serialization, and should return a primitive representation. Typically this means returning a structure of built-in Python datatypes. The exact types that can be handled will depend on the render classes you have configured for your API.
May be overridden in order to modify the representation style. For example:
def to_representation(self, instance):
    """Convert `username` to lowercase."""
    ret = super().to_representation(instance)
    ret['username'] = ret['username'].lower()
    return ret
.to_internal_value(self, data)
Takes the unvalidated incoming data as input and should return the validated data that will be made available as serializer.validated_data. The return value will also be passed to the .create() or .update() methods if .save() is called on the serializer class.
If any of the validation fails, then the method should raise a serializers.ValidationError(errors). The errors argument should be a dictionary mapping field names (or settings.NON_FIELD_ERRORS_KEY) to a list of error messages. If you don’t need to alter deserialization behavior and instead want to provide object-level validation, it’s recommended that you instead override the .validate() method.
The data argument passed to this method will normally be the value of request.data, so the datatype it provides will depend on the parser classes you have configured for your API.
Serializer Inheritance
Similar to Django forms, you can extend and reuse serializers through inheritance. This allows you to declare a common set of fields or methods on a parent class that can then be used in a number of serializers. For example,
class MyBaseSerializer(Serializer):
    my_field = serializers.CharField()

    def validate_my_field(self, value):
        ...

class MySerializer(MyBaseSerializer):
    ...
Like Django’s Model and ModelForm classes, the inner Meta class on serializers does not implicitly inherit from it’s parents’ inner Meta classes. If you want the Meta class to inherit from a parent class you must do so explicitly. For example:
class AccountSerializer(MyBaseSerializer):
    class Meta(MyBaseSerializer.Meta):
        model = Account
Typically we would recommend not using inheritance on inner Meta classes, but instead declaring all options explicitly.
Additionally, the following caveats apply to serializer inheritance:
- Normal Python name resolution rules apply. If you have multiple base classes that declare a
Metainner class, only the first one will be used. This means the child’sMeta, if it exists, otherwise theMetaof the first parent, etc. -
It’s possible to declaratively remove a
Fieldinherited from a parent class by setting the name to beNoneon the subclass.class MyBaseSerializer(ModelSerializer): my_field = serializers.CharField() class MySerializer(MyBaseSerializer): my_field = NoneHowever, you can only use this technique to opt out from a field defined declaratively by a parent class; it won’t prevent the
ModelSerializerfrom generating a default field. To opt-out from default fields, see Specifying which fields to include.
Dynamically modifying fields
Once a serializer has been initialized, the dictionary of fields that are set on the serializer may be accessed using the .fields attribute. Accessing and modifying this attribute allows you to dynamically modify the serializer.
Modifying the fields argument directly allows you to do interesting things such as changing the arguments on serializer fields at runtime, rather than at the point of declaring the serializer.
Example
For example, if you wanted to be able to set which fields should be used by a serializer at the point of initializing it, you could create a serializer class like so:
class DynamicFieldsModelSerializer(serializers.ModelSerializer):
    """
    A ModelSerializer that takes an additional `fields` argument that
    controls which fields should be displayed.
    """

    def __init__(self, *args, **kwargs):
        # Don't pass the 'fields' arg up to the superclass
        fields = kwargs.pop('fields', None)

        # Instantiate the superclass normally
        super().__init__(*args, **kwargs)

        if fields is not None:
            # Drop any fields that are not specified in the `fields` argument.
            allowed = set(fields)
            existing = set(self.fields)
            for field_name in existing - allowed:
                self.fields.pop(field_name)
This would then allow you to do the following:
>>> class UserSerializer(DynamicFieldsModelSerializer):
>>>     class Meta:
>>>         model = User
>>>         fields = ['id', 'username', 'email']
>>>
>>> print(UserSerializer(user))
{'id': 2, 'username': 'jonwatts', 'email': 'jon@example.com'}
>>>
>>> print(UserSerializer(user, fields=('id', 'email')))
{'id': 2, 'email': 'jon@example.com'}
Customizing the default fields
REST framework 2 provided an API to allow developers to override how a ModelSerializer class would automatically generate the default set of fields.
This API included the .get_field(), .get_pk_field() and other methods.
Because the serializers have been fundamentally redesigned with 3.0 this API no longer exists. You can still modify the fields that get created but you’ll need to refer to the source code, and be aware that if the changes you make are against private bits of API then they may be subject to change.
Third party packages
The following third party packages are also available.
Django REST marshmallow
The django-rest-marshmallow package provides an alternative implementation for serializers, using the python marshmallow library. It exposes the same API as the REST framework serializers, and can be used as a drop-in replacement in some use-cases.
Serpy
The serpy package is an alternative implementation for serializers that is built for speed. Serpy serializes complex datatypes to simple native types. The native types can be easily converted to JSON or any other format needed.
MongoengineModelSerializer
The django-rest-framework-mongoengine package provides a MongoEngineModelSerializer serializer class that supports using MongoDB as the storage layer for Django REST framework.
GeoFeatureModelSerializer
The django-rest-framework-gis package provides a GeoFeatureModelSerializer serializer class that supports GeoJSON both for read and write operations.
HStoreSerializer
The django-rest-framework-hstore package provides an HStoreSerializer to support django-hstore DictionaryField model field and its schema-mode feature.
Dynamic REST
The dynamic-rest package extends the ModelSerializer and ModelViewSet interfaces, adding API query parameters for filtering, sorting, and including / excluding all fields and relationships defined by your serializers.
Dynamic Fields Mixin
The drf-dynamic-fields package provides a mixin to dynamically limit the fields per serializer to a subset specified by an URL parameter.
DRF FlexFields
The drf-flex-fields package extends the ModelSerializer and ModelViewSet to provide commonly used functionality for dynamically setting fields and expanding primitive fields to nested models, both from URL parameters and your serializer class definitions.
Serializer Extensions
The django-rest-framework-serializer-extensions
package provides a collection of tools to DRY up your serializers, by allowing
fields to be defined on a per-view/request basis. Fields can be whitelisted,
blacklisted and child serializers can be optionally expanded.
HTML JSON Forms
The html-json-forms package provides an algorithm and serializer for processing <form> submissions per the (inactive) HTML JSON Form specification. The serializer facilitates processing of arbitrarily nested JSON structures within HTML. For example, <input name="items[0][id]" value="5"> will be interpreted as {"items": [{"id": "5"}]}.
DRF-Base64
DRF-Base64 provides a set of field and model serializers that handles the upload of base64-encoded files.
QueryFields
djangorestframework-queryfields allows API clients to specify which fields will be sent in the response via inclusion/exclusion query parameters.
DRF Writable Nested
The drf-writable-nested package provides writable nested model serializer which allows to create/update models with nested related data.
DRF Encrypt Content
The drf-encrypt-content package helps you encrypt your data, serialized through ModelSerializer. It also contains some helper functions. Which helps you to encrypt your data.