Содержание
- Ошибка VAC Authentication Error или Ваш компьютер блокрирует систему VAC
- Что же делать в этой ситуации?
- Disconnect vac authentication error disconnect vac authentication error
- Disconnect vac authentication error disconnect vac authentication error
- How to Fix the VAC Authentication Error
- What Cases the Valve Authentication Error
- Solution 1: Repair the Steam Service
- Solution 2: Enable DEP on Your Computer
- Solution 3: Check Your Time and Date Settings
- Solution 4: Delete the Steam Cache and Verify the Integrity of Game Files
- Solution 5: Run Steam as an Administrator and Make Sure the Steam Client Service is Started
- Solution 6: Install the Latest Internet Connection Drivers
- Solution 7: Change the Steam Server
Ошибка VAC Authentication Error или Ваш компьютер блокрирует систему VAC
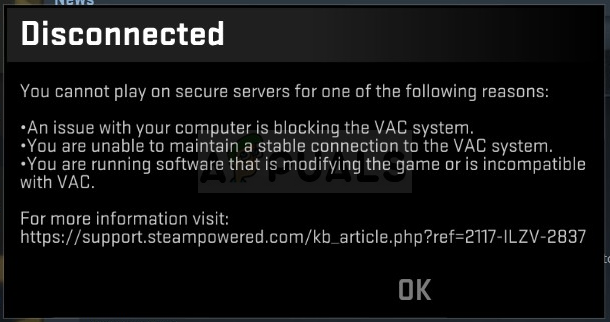
Иногда играете в соревновательный режим в CS GO и в какой-то момент у вас выскакивает ошибка “Ваш компьютер блокирует систему VAC.Вы не можете играть на защищенных серверах” и вы не можете переподключиться к серверу. Как следствие Вас банит за то что не смогли в течении короткого времени подключится.
Что же делать в этой ситуации?
Ответ прост как никогда. Главное все действия делать очень быстро, дабы не схватит временный бан в ММ. Для удобства добавьте эту страничку в избранное, чтобы не потерять. И так приступим.
- Закрываем Steam.
- Нажимаем пуск=>в поиск вводим “cmd”=>Правой кнопкой мыши щёлкаем по cmd выбираем запуск от имени администратора.

- Вводим в открывшимся окне, путём ПКМ>вставить, т.к. Ctrl+V не работает это “bcdedit.exe /set nx OptIn”
- Перезагружаем компьютер
- Запускаем игру
- Profit!


Таким простым образом избавляемся от этой ошибки.
Если вам не помогли данные манипуляции, тогда очистите содержимое папки cache, которая находится: SteamsteamappscommonCounter-Strike Global Offensivecsgocache
Источник
Disconnect vac authentication error disconnect vac authentication error
on my other account i got a 24 hour matchmaking ban because i got an error saying:
An issue with your computer is blocking the VAC system
and in console it says: Disconnect: VAC authentication error.
-what’s this?
-how do i fix it?

My friend has just been randomly kicked from the game we were playing together and it said «VAC authentication error». He’s never hacked or cheated in his life and couldn’t have been banned for hacking when he was going negative in that game. Because he was kicked from the game he tried to re-connect and it wouldn’t allow him. He tried many times until it got to the stage where the 5minutes were up. Because he didn’t join back within the 5minutes he ended up receiving a 7day ban. Cheers CSGO & Steam. Pile of wank. Ban someone for your problems when he’s never done anything wrong. Absolute joke, you should owe him for not allowing him to play for 1 week. He paid for your game and you ban him for no reason? He deserves some respect and a reward for your ♥♥♥♥♥♥♥♥.
Same problem here mate, cheers for your mate we have the same problem and it is really heart breaking for someone who’s been playing fair and got accused of something you didn’t do, seriously 7 days is a very long time who is only playing this game.
Much respect to you for standing up for your friend mate,
Источник
Disconnect vac authentication error disconnect vac authentication error
on my other account i got a 24 hour matchmaking ban because i got an error saying:
An issue with your computer is blocking the VAC system
and in console it says: Disconnect: VAC authentication error.
-what’s this?
-how do i fix it?

Best money ever spend m8’s. 7 day ban cause VAC wankes kicked me. Much week with no school. Very ban
THIS IS VAC:
VAC is an automated system, which scans your game to see if anything is injected that will be seen as a hack, or any non approved content is on your PC.
THIS IS WHY YOU GET KICKED WITH VAC AUTHENTICATION ERROR:
Your computer is blocking VAC from scanning your game, and if you think it is Steam’s fault, you are retarded.
This is your fault 100%. If you had the brain to have administrator priviliges and try to fix it the way a simple google search tells you to fix it, it would be gone.
this issue has been around for over a year . and yet valve is still happy to take our money , and do sweet FA about it , i have reinstalled steam twice now , and csgo atleast 7 times , all for a short period of no problemo . untill that nasty message pops up . derank here ewe go again . come on boys buy lots of skins spend big bucks and get banned YEA BRO WAY TO GO
THIS IS VAC:
VAC is an automated system, which scans your game to see if anything is injected that will be seen as a hack, or any non approved content is on your PC.
THIS IS WHY YOU GET KICKED WITH VAC AUTHENTICATION ERROR:
Your computer is blocking VAC from scanning your game, and if you think it is Steam’s fault, you are retarded.
This is your fault 100%. If you had the brain to have administrator priviliges and try to fix it the way a simple google search tells you to fix it, it would be gone.
GG boyzzz first of all i got some freaking bans for kicking me from games, got 24 h ban, after it went to play some mm and on ♥♥♥♥♥♥♥ start i got VAC ISSUE XD Repaired steam, but no!! You DIDN’T DO IT IN ♥♥♥♥♥♥♥ 3 MINUTES! GET SOME 1 WEEK BAN PRICK! AND DON’T WRITE TO STEAM, BCZ THEY DOn’T GIVE A ♥♥♥♥! .I. steam
THIS IS VAC:
VAC is an automated system, which scans your game to see if anything is injected that will be seen as a hack, or any non approved content is on your PC.
THIS IS WHY YOU GET KICKED WITH VAC AUTHENTICATION ERROR:
Your computer is blocking VAC from scanning your game, and if you think it is Steam’s fault, you are retarded.
This is your fault 100%. If you had the brain to have administrator priviliges and try to fix it the way a simple google search tells you to fix it, it would be gone.
Источник
How to Fix the VAC Authentication Error
Valve Anti-Cheat is a software used by Valve games to check your setup to see if you are using any hack or third-party program which might make your gaming experience easier or give you an unfair advantage over other players. However, sometimes it’s this software which disconnects you from Valve games simply because of an “authentication error”.
Plenty of users have had to deal with this problem and their gaming experience becomes pretty much ruined. The game will disconnect you and possibly ban you from servers because of this error so make sure you follow the article in order to solve the problem as soon as possible.
What Cases the Valve Authentication Error
There are many registered causes for the problem. Sometimes the error is caused by a broken or stopped Steam Client Service and the service either needs to be repaired or restarted. Also, your computer’s old network drivers may be preventing the VAC service from operating normally and you should consider updating them.
Other possible culprits include having disabled DEP (Data Execution Prevention) on your computer meaning you might need to enable it. Also, the problem is sometimes caused by Steam Download servers being down so consider switching to a new one.
Solution 1: Repair the Steam Service
Repairing the Steam service should help you solve this problem in the easiest way possible as it did for other users before you. Steam services are the core system behind various things related to Valve and the problem can be solved easily by running a command in Command Prompt which should repair the Steam service.
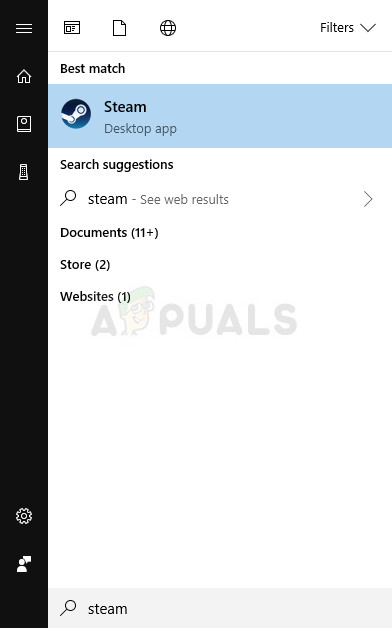
- Search for “Command Prompt” by typing this text either right in the Start menu or by pressing the search button right next to it. Right-click the first entry which will pop up from the search result and select the “Run as administrator” context menu entry.
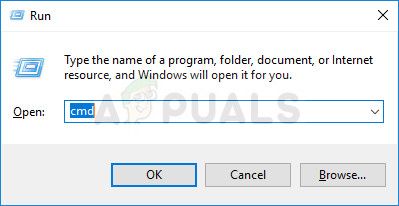
- Additionally, you can also use the Windows Logo Key + R key combination in order to bring up the Run dialog box. Type in “cmd” in the dialog box which appears and use the Ctrl + Shift + Enter key combination in order to run Command Prompt with admin privileges.
- Type in the following command in the CMD window and make sure you press Enter after typing it out correctly. Wait for the “Operation completed successfully” message or something similar to know that the method has worked and you haven’t made any mistakes.
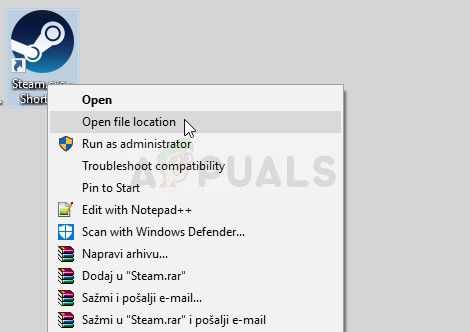
- Before you type command, you should also find out the root folder of your Steam installation which will be necessary to run the command. You can find a full path to the Steam installation folder by right-clicking its shortcut on the Desktop and choosing the Open file location option from the context menu.

- Click the address bar at the top of the folder which should display the path so use the Ctrl + C combination to copy it to the Clipboard. If you haven’t made any changes during the installation, the path should be “C:Program Files (x86)SteambinSteamService.exe”. Let’s use the default path to run the command. Make sure you replace it with your own path when running the command:
- Reopen the problematic game either by double-clicking its icon on your computer or by launching it via Steam and check to see if the VAC authentication error is gone.
Solution 2: Enable DEP on Your Computer
If you computer’s settings are not configured properly to run VAC, you may run into issues such as this one more often than you think, especially with Valve games. Unfortunately, the process of setting up your computer for these changes is not so easy and it even involved BIOS troubleshooting which people fear of the most. However, if you follow the steps below, you shouldn’t run into any problems.
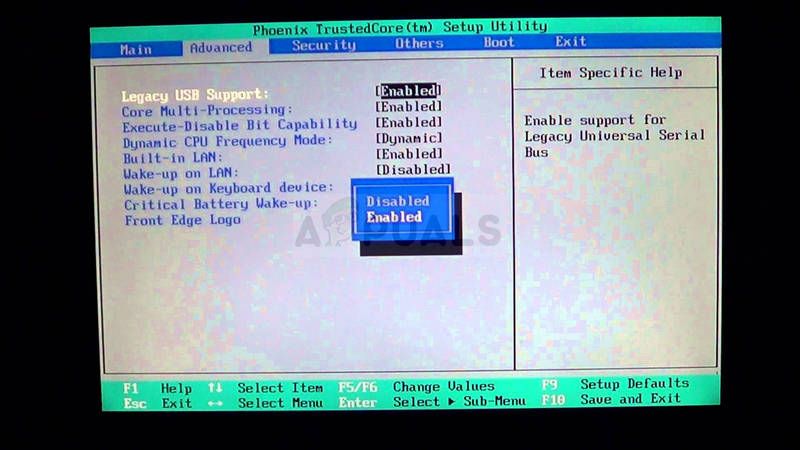
- Turn on your computer and immediately press the BIOS Setup key on your keyboard several times in a row, about once every second, until the Computer Setup Utility or BIOS settings opens. This key will be indicated on your screen as Press _ to run Setup.
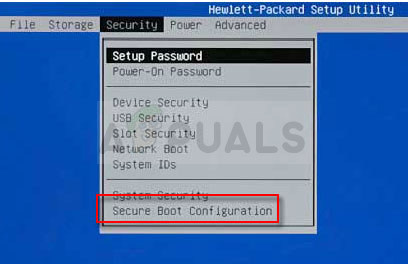
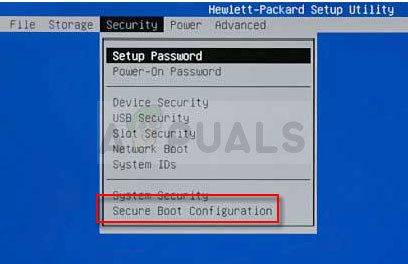
- Use the right arrow key to switch to the Security menu when the BIOS settings window opens, use the down arrow key to select the Secure Boot Configuration from the menu, and press Enter.
- Before you can use this option, a warning will appear. Press F10 to continue to the Secure Boot Configuration menu. Use the down arrow key to select Secure Boot and use the right arrow key to modify this setting to Disable.
- Use the down arrow key to select Legacy Support, and then use the right arrow key to switch it to Enable.

- Press F10 to save the changes. Use the left arrow key to navigate to the File menu, use the down arrow key to switch to Save Changes and Exit, then press Enter to select Yes.
- The Computer Setup Utility will now shut down and the computer should restart. When the computer has restarted, keep following the steps below to solve the VAC authentication error.
In order to solve the problem completely, you will now have to run a simple command in order to solve the problem properly. This command needs to be executed in an administrative Command Prompt window so make sure you are doing this using an account with admin privileges.
- Search for “Command Prompt” by typing this text either right in the Start menu or by pressing the search button right next to it. Right-click the first entry which will pop up from the search result and select the “Run as administrator” context menu entry.
- If you are running a version of Windows other than Windows 10, the Start menu search might or might not work properly but you can still navigate to C >> Windows >> System32, right-click on the “cmd.exe” entry and choose Run as administrator or type “cmd.exe” in a Run box and use the Ctrl + Shift + Enter key combo.
- Type in the following command in the CMD window and make sure you tap Enter after typing it out. Wait for the “Operation completed successfully” message or something similar to know that the method has worked and you haven’t made any mistakes.
- Either command should work properly. Make sure you restart your computer immediately and reopen the problematic game either by double-clicking its icon on your computer or by launching it via Steam. Check to see if the VAC authentication error is gone.
Note: If you are unsure whether the command above has worked and you don’t whether the command didn’t work or the method is simply not working for you, there is a way to check the current state of DEP on your computer. Use the following command in Command Prompt:
If you see that the result is 3, that means that DEP is enabled for all processes and that is the only number which is acceptable as a result.
Solution 3: Check Your Time and Date Settings
Improper time and date on your computer is not recommended at all and it’s not a thing anyone would do on purpose. However, some users restart BIOS or perform some changes which alter time and date and they forget to set it up properly again. This alone is enough to cause the issue so make sure you check to see if everything is okay.
- Open Date and Time settings on your computer by opening the Start menu, and opening the Settings app by clicking the gear icon above the Start menu button and the Power icon, choosing the Time & language option, and navigating to the Date & time tab.
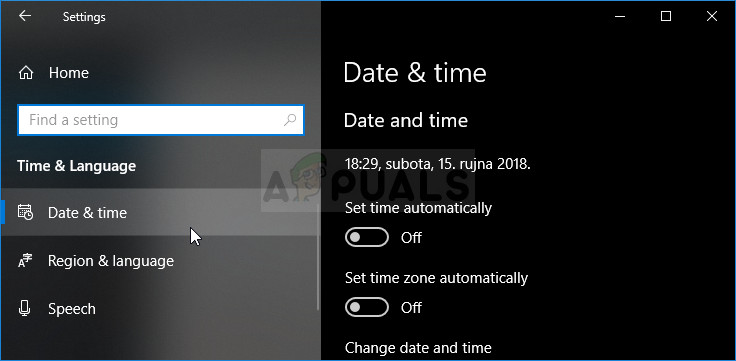
- In the Date and Time tab, make sure that your computer’s date and time settings are aligned with the location you are currently in. If the time is not correct, you can try turning the Set time automatically option on or off depending on previous settings.
- If the “Set time automatically” option is now off, choose the correct time zone from the dropdown list in order to finish the process. After you have finished, restart your computer and try opening Windows Store again.
Alternative: If this doesn’t work out for you or if you are using a version of Windows older than Windows 10, you can also use Control Panel to synchronize with an online time server to always have correct settings.
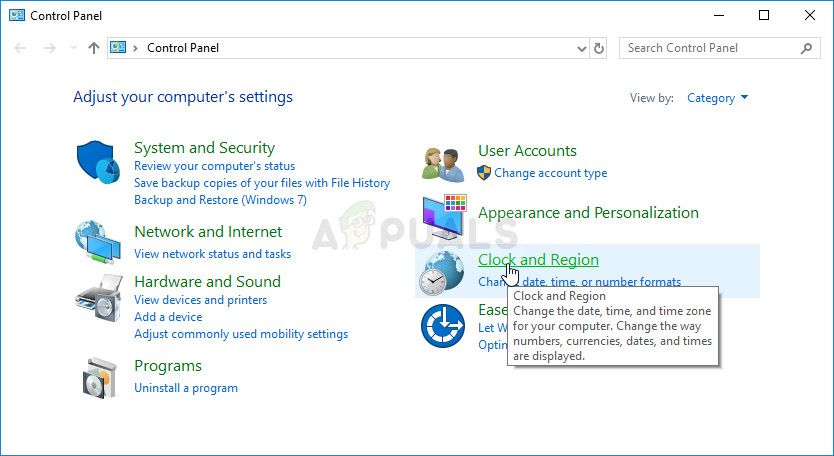
- Open Control Panel by searching for it in the Start menu or by using the Windows Key + R key combination, typing “control.exe” in the Run bar, and clicking OK in order to run Control Panel.
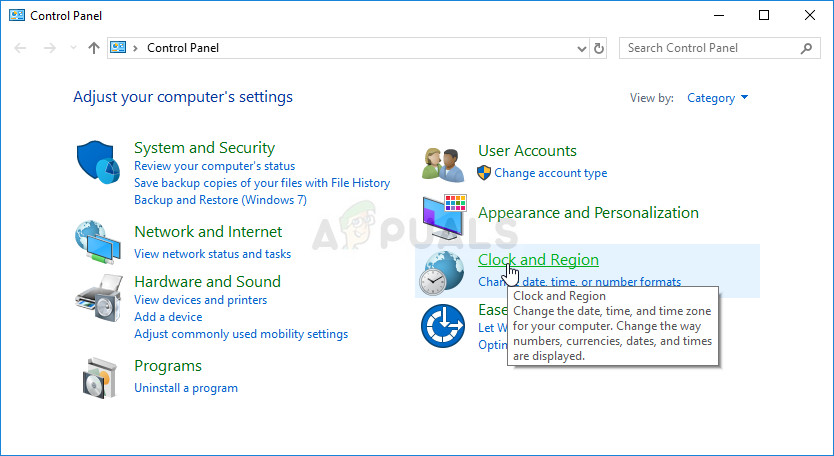
- In Control Panel, select to View as: Category at the top right corner and click on the Clock and Region button to open this section.
- Click on Set the time and date button under Date and Time in the Clock and Region section and navigate to the Internet Time tab immediately. Click the Change settings button.
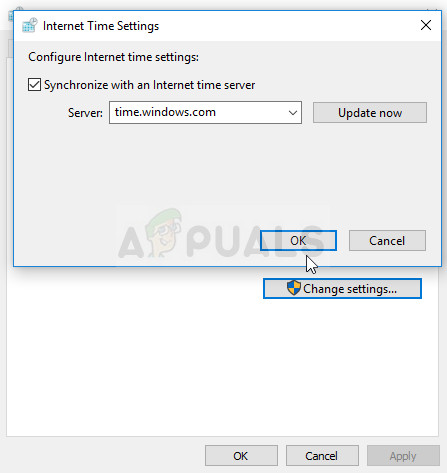
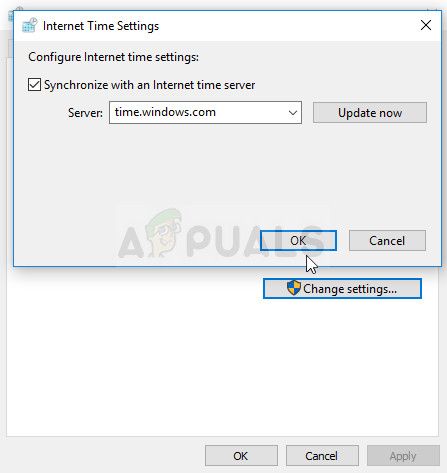
- Check the box next to the “Synchronize with an Internet time server” option and choose the “time.windows.com” server before clicking on Update.
- Click the OK button to apply the changes and try running the problematic game to see if the problem with VAC authentication error is gone.
Solution 4: Delete the Steam Cache and Verify the Integrity of Game Files
This method is quite self-explanatory and it’s one of the most basic fixes you should try out when troubleshooting a Steam game. The first part depends on where you have installed Steam but you should have found out that location by now if you followed the solutions above.
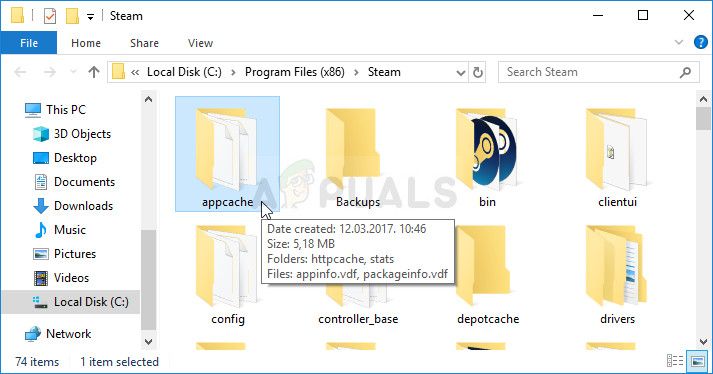
- Navigate to the Steam’s root folder in the File Explorer which can be accessed by opening a folder and clicking This PC or My Computer at the left side pane. Make sure the Steam client is closed completely.
- If you haven’t made any changes during the installation of the Steam client regarding the required installation folder, it should be Local Disk >> Program Files or Program Files (x86) depending on your OS.
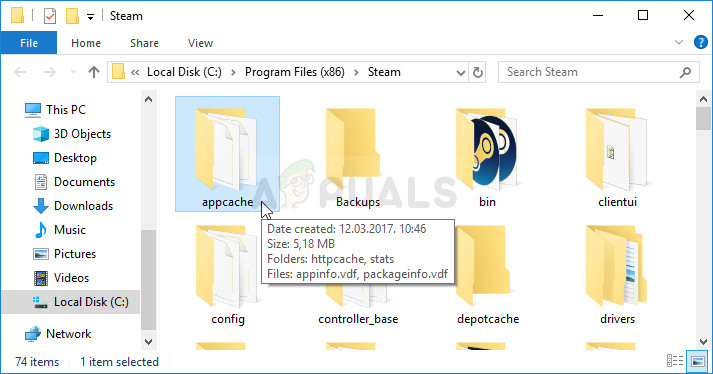
- The appcache folder should be available in this folder so make sure you right-click on it and choose the Delete option from the context menu. Confirm any dialogs and reopen Steam to proceed with the solution.
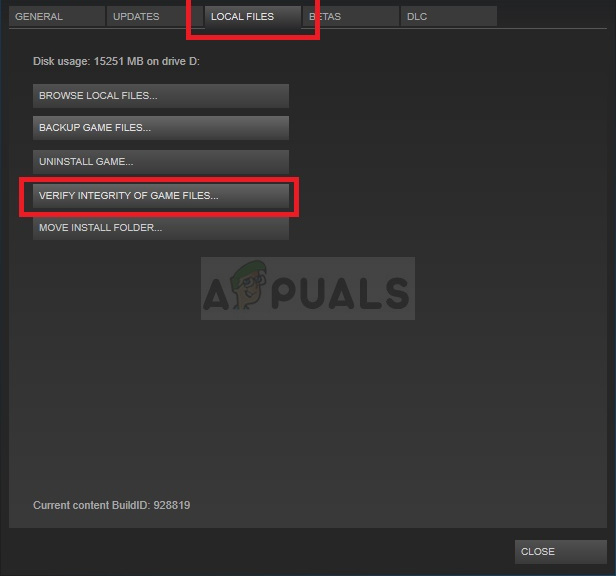
- After the Steam client opens, navigate to the Library tab, right-click the problematic game from your game list, and choose Properties from the menu. Navigate to the Local Files tab and click the Verify Integrity of Game Files button.
- Wait for the process to finish. It should download several missing files. Relaunch the game and check to see if you still receive the VAC authentication error.
Solution 5: Run Steam as an Administrator and Make Sure the Steam Client Service is Started
This method is a lengthy one and it’s composed from two different parts. However, then these parts are put together, you get a powerful method which can be used to solve this problem immediately. We will set Steam to run with administrator privileges and change the startup of the Steam Client Service to be running at all times.
- Locate the Steam shortcut or executable on your computer and open its properties it by right-clicking its entry either on the Desktop or the Start menu or the Search results window and choose Properties from the pop up context menu.
- Navigate to the Compatibility tab in the Properties window and check the box next to the Run this program as an administrator option before saving the changes by clicking OK or Apply.
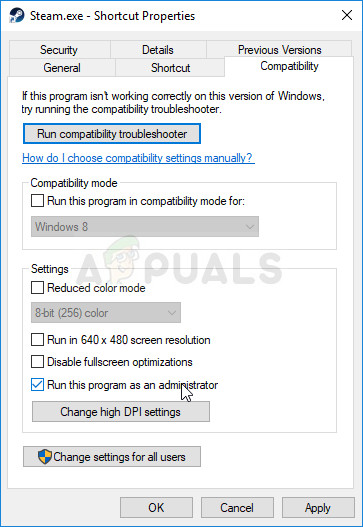
- Make sure you confirm any dialogs which may appear which should prompt you to confirm the choice with admin privileges and Steam should launch with admin privileges from the next startup. Open Steam by double-clicking its icon and try relaunching the game to see if the VAC authentication error still appears.
If this hasn’t resolved the problem, you may have issues with the Steam Client Service which also deals with when VAC should be launched. This can be solved by visiting this process in Services and configuring its startup type.
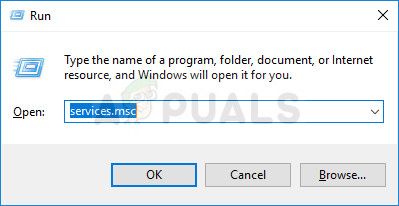
- Open the Run dialog box by tapping the Windows Key + R key combination on your keyboard. Type “services.msc” in the Run box without the quotation marks and click OK in order to open Services. You can also just search for Services in Start menu on Windows 10.

- Locate the Steam Client Service in the services list, right-click on it and select Properties from the context menu which will appear.
- If the service is started (you can check that just next to the Service status message), you should stop it by clicking the Stop button in the middle of the window. If it has already been stopped, leave it as it is (for now).
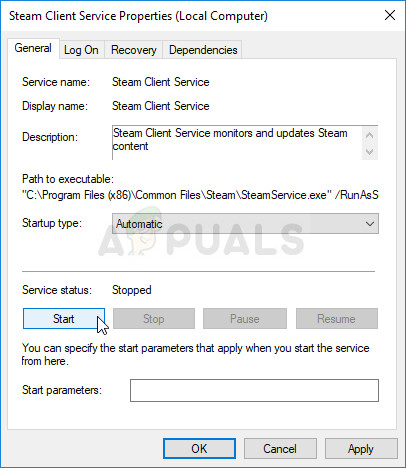
- Make sure that the option under the Startup type menu in the Steam Client Service’s properties is set to Automatic before you proceed with the instructions. Confirm any dialogue boxes which may appear when you set the startup type. Click on the Start button at the middle of the window before exiting.
You may receive the following error message when you click on Start:
“Windows could not start the Steam Client Service on Local Computer. Error 1079: The account specified for this service differs from the account specified for other services running in the same process.”
If this occurs, follow the instructions below to fix it.
- Follow the steps 1-3 from the instructions above in order to open Cryptographic Service’s properties. Navigate to the Log On tab and click on the Browse… button.

- Under the “Enter the object name to select” box, type in your account’s name, click on Check Names and wait for the name to become recognized.
- Click OK when you are finished and type in the password in the Password box when you are prompted with it, if you have setup a password. It should now start without issues!
Solution 6: Install the Latest Internet Connection Drivers
Even though most gaming problems are directly tied to the graphics card drivers, this is one of the problems which can be fixed by updating Network drivers on your computer. This can be done using a third-party tool or even better, using the built-in tool called Device Manager.
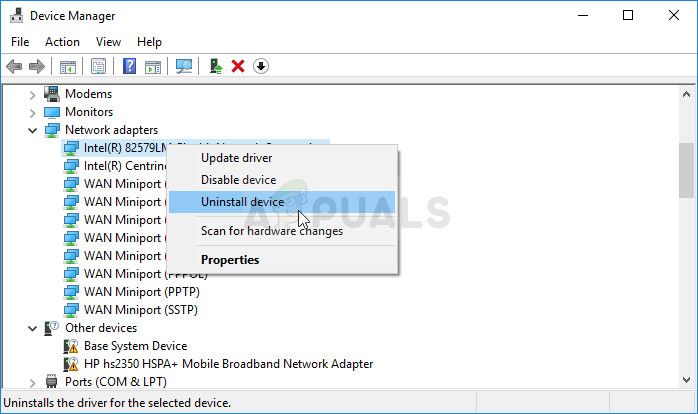
- First of all, you will need to uninstall the driver you currently have installed on your machine.
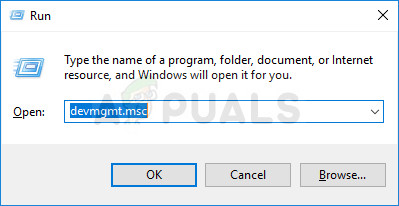
- Type “Device Manager” into the search field next to the Start menu button to open the device manager window. You can also use the Windows Key + R key combination in order to open the Run dialog box. Type devmgmt.msc in the box and click OK or Enter key.
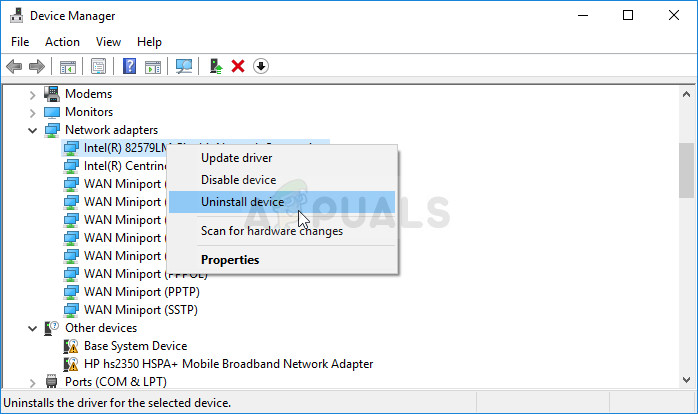
- Expand the “Network Adapters” section. This will display all network adapters that the machine has installed at the moment.
- Right click on the network adapter you want to uninstall and select “Uninstall device”. This will remove the adapter from the list and uninstall the networking device. Click “OK” when prompted to uninstall the device.
- Remove the adapter you are using from your computer and navigate to your manufacturer’s page in order to see the list of available drivers for your operating system. Choose the latest one, download it, and run it from the Downloads folder.
- Follow the instructions on-screen in order to install the driver. If the adapter is external such as a Wi-Fi dongle, make sure it stays disconnected until the wizard prompts you to reconnect it to your computer. Restart the computer and check to see if the problem has disappeared.
Solution 7: Change the Steam Server
If there are problems with the Steam servers at the moment, it might be impossible to solve the problem using any other method than by changing the Steam Download Region inside Steam Settings.
- Open your Steam PC client by double-clicking it on the Desktop or by searching for it in the Start menu and clicking on the first available result.
- After the Steam client opens, click the Steam button at the top right part of the window and choose Settings from the dropdown menu. Navigate to the Downloads tab in the Settings window and click the arrow next to the country under the Download Region section.
- Try several other server locations until you see that the error is resolved.
Источник
Иногда играете в соревновательный режим в CS GO и в какой-то момент у вас выскакивает ошибка “Ваш компьютер блокирует систему VAC.Вы не можете играть на защищенных серверах” и вы не можете переподключиться к серверу. Как следствие Вас банит за то что не смогли в течении короткого времени подключится.
Что же делать в этой ситуации?
Ответ прост как никогда. Главное все действия делать очень быстро, дабы не схватит временный бан в ММ. Для удобства добавьте эту страничку в избранное, чтобы не потерять. И так приступим.
- Закрываем Steam.
- Нажимаем пуск=>в поиск вводим “cmd”=>Правой кнопкой мыши щёлкаем по cmd выбираем запуск от имени администратора.

- Вводим в открывшимся окне, путём ПКМ>вставить, т.к. Ctrl+V не работает это “bcdedit.exe /set {current} nx OptIn”

- Перезагружаем компьютер
- Запускаем игру
- Profit!
Таким простым образом избавляемся от этой ошибки.
Если вам не помогли данные манипуляции, тогда очистите содержимое папки cache, которая находится: SteamsteamappscommonCounter-Strike Global Offensivecsgocache
Предыдущая
ошибки/баги CS:GOОткидывает назад в CS:GO
Следующая
ошибки/баги CS:GOБаг текстур, как видеть через дым в CS GO ч2
- csgo
- VAC
- ошибка
Содержание
- 1 Что вызывает ошибку аутентификации Valve
- 1.1 Решение 1: Ремонт Сервиса Steam
- 1.2 Решение 2. Включите DEP на вашем компьютере
- 1.3 Решение 3. Проверьте настройки времени и даты
- 1.4 Решение 4. Удалите Steam Cache и проверьте целостность игровых файлов.
- 1.5 Решение 5. Запустите Steam от имени администратора и убедитесь, что клиентская служба Steam запущена
- 1.6 Решение 6. Установите последние версии драйверов для подключения к Интернету.
- 1.7 Решение 7. Изменить сервер Steam
Valve Anti-Cheat — это программное обеспечение, используемое в играх Valve для проверки ваших настроек, чтобы определить, используете ли вы какую-либо хакерскую или стороннюю программу, которая может облегчить ваш игровой опыт или дать вам несправедливое преимущество перед другими игроками. Однако иногда это программное обеспечение отключает вас от игр Valve просто из-за «ошибки аутентификации».

Многим пользователям приходилось сталкиваться с этой проблемой, и их игровой опыт в значительной степени разрушен. Игра отключит вас и, возможно, забанит вас с серверов из-за этой ошибки, поэтому обязательно следуйте этой статье, чтобы решить проблему как можно скорее.
Что вызывает ошибку аутентификации Valve
Есть много зарегистрированных причин этой проблемы. Иногда ошибка вызвана сломанной или остановленной клиентской службой Steam, и ее необходимо отремонтировать или перезапустить. Кроме того, старые сетевые драйверы вашего компьютера могут препятствовать нормальной работе службы VAC, и вам следует рассмотреть возможность их обновления.
Другие возможные виновники включают в себя отключение DEP (Data Execution Prevention) на вашем компьютере, означающее, что вам может потребоваться включить его. Кроме того, проблема иногда вызвана отключением серверов загрузки Steam, поэтому подумайте о переходе на новый.
Решение 1: Ремонт Сервиса Steam
Восстановление сервиса Steam должно помочь вам решить эту проблему самым простым способом, как это делали другие пользователи до вас. Сервисы Steam являются основной системой, стоящей за различными вещами, связанными с Valve, и проблему можно легко решить, запустив в командной строке команду, которая должна восстановить сервис Steam.
- Найдите «Командную строку», введя этот текст либо прямо в меню «Пуск», либо нажав кнопку поиска рядом с ним. Щелкните правой кнопкой мыши первую запись, которая появится в результате поиска, и выберите пункт контекстного меню «Запуск от имени администратора».
- Кроме того, вы также можете использовать комбинацию клавиш Windows Logo Key + R для вызова диалогового окна Run. Введите «cmd» в появившемся диалоговом окне и используйте комбинацию клавиш Ctrl + Shift + Enter, чтобы запустить командную строку с правами администратора.
- Введите следующую команду в окне CMD и убедитесь, что вы нажимаете Enter после правильного ввода. Дождитесь сообщения «Операция успешно завершена» или чего-то подобного, чтобы узнать, что метод сработал, и вы не сделали никаких ошибок.
- Прежде чем вводить команду, вы также должны узнать корневую папку вашей установки Steam, которая будет необходима для запуска команды. Вы можете найти полный путь к папке установки Steam, щелкнув правой кнопкой мыши по ее ярлыку на рабочем столе и выбрав опцию Открыть файл в контекстном меню.
- Нажмите на адресную строку в верхней части папки, в которой должен отображаться путь, поэтому используйте комбинацию клавиш Ctrl + C, чтобы скопировать ее в буфер обмена. Если вы не внесли никаких изменений во время установки, путь должен быть «C: Program Files (x86) Steam bin SteamService.exe». Давайте использовать путь по умолчанию для запуска команды. Убедитесь, что вы заменили его собственным путем при запуске команды:
"C: Program Files (x86) Steam bin SteamService.exe" / repair
- Снова откройте проблемную игру, дважды щелкнув ее значок на компьютере или запустив ее через Steam, и проверьте, не прошла ли ошибка аутентификации VAC.
Решение 2. Включите DEP на вашем компьютере
Если настройки вашего компьютера не настроены должным образом для запуска VAC, вы можете столкнуться с такими проблемами чаще, чем вы думаете, особенно с играми Valve. К сожалению, процесс настройки вашего компьютера для этих изменений не так прост, и он даже включал в себя поиск и устранение неисправностей BIOS, которые люди боятся больше всего. Однако, если вы выполните следующие действия, у вас не должно возникнуть никаких проблем.
- Включите компьютер и сразу несколько раз подряд нажимайте клавишу BIOS Setup на клавиатуре, примерно раз в секунду, пока не откроется программа настройки компьютера или настройки BIOS. Эта клавиша будет отображаться на экране как «Нажмите _» для запуска программы установки.
- Используйте клавишу со стрелкой вправо, чтобы перейти в меню «Безопасность», когда откроется окно настроек BIOS, с помощью клавиши со стрелкой вниз выберите в меню «Безопасная конфигурация загрузки» и нажмите клавишу «Ввод».
- Прежде чем вы сможете использовать эту опцию, появится предупреждение. Нажмите F10, чтобы перейти к меню конфигурации безопасной загрузки. С помощью клавиши со стрелкой вниз выберите Безопасная загрузка и используйте клавишу со стрелкой вправо, чтобы изменить этот параметр на Отключить.
- Используйте клавишу со стрелкой вниз, чтобы выбрать Legacy Support, а затем используйте клавишу со стрелкой вправо, чтобы включить ее.
- Нажмите F10, чтобы сохранить изменения. С помощью клавиши со стрелкой влево перейдите в меню «Файл», с помощью клавиши со стрелкой вниз выберите «Сохранить изменения и выйти», затем нажмите клавишу «Ввод», чтобы выбрать «Да».
- Программа настройки компьютера завершит работу и компьютер должен перезагрузиться. После перезагрузки компьютера следуйте инструкциям ниже, чтобы устранить ошибку аутентификации VAC.
Чтобы полностью решить проблему, теперь вам нужно будет выполнить простую команду, чтобы решить проблему правильно. Эту команду необходимо выполнить в административном окне командной строки, поэтому убедитесь, что вы делаете это, используя учетную запись с правами администратора.
- Найдите «Командную строку», введя этот текст либо прямо в меню «Пуск», либо нажав кнопку поиска рядом с ним. Щелкните правой кнопкой мыши первую запись, которая появится в результате поиска, и выберите пункт контекстного меню «Запуск от имени администратора».
- Если вы используете версию Windows, отличную от Windows 10, поиск в меню «Пуск» может или не может работать должным образом, но вы все равно можете перейти к C >> Windows >> System32, щелкните правой кнопкой мыши на записи «cmd.exe» и выберите Запустите от имени администратора или введите «cmd.exe» в поле «Выполнить» и используйте комбинацию клавиш Ctrl + Shift + Enter.
- Введите следующую команду в окне CMD и убедитесь, что вы нажимаете Enter после ее ввода. Дождитесь сообщения «Операция успешно завершена» или чего-то подобного, чтобы узнать, что метод сработал, и вы не сделали никаких ошибок.
bcdedit / deletevalue nx
или же
bcdedit.exe / set {current} nx AlwaysOn
- Любая команда должна работать правильно. Обязательно немедленно перезагрузите компьютер и снова откройте проблемную игру, дважды щелкнув ее значок на компьютере или запустив ее через Steam. Проверьте, не прошла ли ошибка аутентификации VAC.
Заметка: Если вы не уверены, сработала ли указанная выше команда, и не знаете, не сработала ли эта команда или метод не работает для вас, есть способ проверить текущее состояние DEP на вашем компьютере. Используйте следующую команду в командной строке:
wmic OS Получить DataExecutionPrevention_SupportPolicy
Если вы видите, что результат равен 3, это означает, что DEP включен для всех процессов, и это единственное число, которое является приемлемым в результате.
Решение 3. Проверьте настройки времени и даты
Неправильное время и дата на вашем компьютере вообще не рекомендуются, и никто не будет делать это специально. Тем не менее, некоторые пользователи перезагружают BIOS или выполняют некоторые изменения, которые изменяют время и дату, и они забывают снова установить его правильно. Одного этого достаточно, чтобы вызвать проблему, поэтому не забудьте проверить, все ли в порядке.
- Откройте настройки даты и времени на своем компьютере, открыв меню «Пуск» и открыв приложение «Настройки», щелкнув значок шестеренки над кнопкой меню «Пуск» и значок питания, выбрав «Время». выбор языка и переход к дате табуляция времени

- На вкладке «Дата и время» убедитесь, что настройки даты и времени на вашем компьютере соответствуют местоположению, в котором вы находитесь. Если время не верно, вы можете попробовать включить или отключить параметр «Автоматически устанавливать время» в зависимости от предыдущих настроек.
- Если опция «Установить время автоматически» сейчас отключена, выберите правильный часовой пояс из раскрывающегося списка, чтобы завершить процесс. После завершения перезагрузите компьютер и попробуйте снова открыть Магазин Windows.
альтернатива: Если вам это не помогает или вы используете версию Windows, более раннюю, чем Windows 10, вы также можете использовать Панель управления для синхронизации с онлайн-сервером времени, чтобы всегда иметь правильные настройки.
- Откройте панель управления, выполнив поиск в меню «Пуск» или с помощью комбинации клавиш Windows + R, набрав «control.exe» на панели «Выполнить» и нажав «ОК», чтобы запустить панель управления.
- На панели управления выберите «Просмотреть как: категорию» в верхнем правом углу и нажмите кнопку «Часы и регион», чтобы открыть этот раздел.
- Нажмите кнопку «Установить время и дату» в разделе «Дата и время» в разделе «Часы и регион» и сразу перейдите на вкладку «Время Интернета». Нажмите кнопку Изменить настройки.
- Установите флажок рядом с опцией «Синхронизировать с сервером времени в Интернете» и выберите сервер «time.windows.com», прежде чем нажать «Обновить».
- Нажмите кнопку OK, чтобы применить изменения, и попробуйте запустить проблемную игру, чтобы проверить, не исчезла ли проблема с ошибкой аутентификации VAC.
Решение 4. Удалите Steam Cache и проверьте целостность игровых файлов.
Этот метод не требует пояснений и является одним из самых основных исправлений, которые вы должны попробовать при устранении неполадок в игре Steam. Первая часть зависит от того, где вы установили Steam, но вы уже должны были узнать это место, если вы следовали приведенным выше решениям.
- Перейдите в корневую папку Steam в File Explorer, к которой можно получить доступ, открыв папку и щелкнув This PC или My Computer на левой боковой панели. Убедитесь, что клиент Steam полностью закрыт.
- Если вы не внесли каких-либо изменений во время установки клиента Steam в отношении требуемой папки установки, это должно быть «Локальный диск»> «Программные файлы» или «Программные файлы» (x86) в зависимости от вашей ОС.
- Папка appcache должна быть доступна в этой папке, поэтому убедитесь, что вы щелкнули по ней правой кнопкой мыши и в контекстном меню выбрали опцию «Удалить». Подтвердите любые диалоги и снова откройте Steam, чтобы продолжить решение.
- После того, как откроется клиент Steam, перейдите на вкладку «Библиотека», щелкните правой кнопкой мыши проблемную игру в списке игр и выберите «Свойства» в меню. Перейдите на вкладку «Локальные файлы» и нажмите кнопку «Проверить целостность игровых файлов».
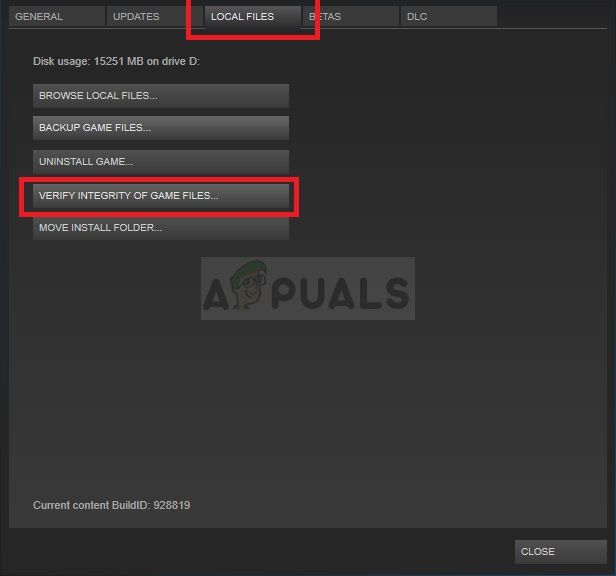
- Подождите, пока процесс закончится. Следует загрузить несколько отсутствующих файлов. Перезапустите игру и проверьте, по-прежнему ли вы получаете ошибку аутентификации VAC.
Решение 5. Запустите Steam от имени администратора и убедитесь, что клиентская служба Steam запущена
Этот метод длительный и состоит из двух разных частей. Однако, когда эти части собраны воедино, вы получаете мощный метод, который можно использовать для немедленного решения этой проблемы. Мы настроим Steam для работы с правами администратора и изменим запуск службы клиента Steam на постоянную работу.
- Найдите на своем компьютере ярлык Steam или исполняемый файл и откройте его свойства, щелкнув правой кнопкой мыши его запись на рабочем столе, в меню «Пуск» или в окне «Результаты поиска» и выберите «Свойства» во всплывающем контекстном меню.
- Перейдите на вкладку «Совместимость» в окне «Свойства» и установите флажок «Запустить эту программу от имени администратора», прежде чем сохранять изменения, нажав «ОК» или «Применить».
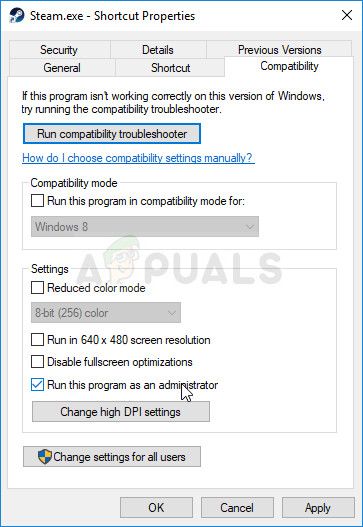
- Убедитесь, что вы подтверждаете любые диалоговые окна, которые могут появиться, которые должны предложить вам подтвердить выбор с правами администратора, и Steam должен запуститься с правами администратора при следующем запуске. Откройте Steam, дважды щелкнув его значок, и попробуйте перезапустить игру, чтобы увидеть, все ли еще появляется ошибка аутентификации VAC.
Если это не решило проблему, у вас могут возникнуть проблемы с клиентской службой Steam, которая также определяет, когда следует запускать VAC. Эту проблему можно решить, посетив этот процесс в Службах и настроив тип его запуска.
- Откройте диалоговое окно «Выполнить», нажав комбинацию клавиш Windows + R на клавиатуре. Введите «services.msc» в поле «Выполнить» без кавычек и нажмите OK, чтобы открыть Службы. Вы также можете просто искать службы в меню Пуск в Windows 10.
- Найдите клиентский сервис Steam в списке сервисов, щелкните его правой кнопкой мыши и выберите «Свойства» в появившемся контекстном меню.
- Если служба запущена (вы можете проверить это рядом с сообщением о состоянии службы), вы должны остановить ее, нажав кнопку «Стоп» в середине окна. Если он уже был остановлен, оставьте его как есть (пока).

- Убедитесь, что параметр в меню «Тип запуска» в свойствах службы клиента Steam установлен на «Автоматический», прежде чем продолжить выполнение инструкций. Подтвердите любые диалоговые окна, которые могут появиться при установке типа запуска. Нажмите кнопку «Пуск» в середине окна перед выходом.
При нажатии кнопки «Пуск» может появиться следующее сообщение об ошибке:
«Windows не удалось запустить клиентскую службу Steam на локальном компьютере. Ошибка 1079: учетная запись, указанная для этой службы, отличается от учетной записи, указанной для других служб, работающих в том же процессе ».
Если это произойдет, следуйте инструкциям ниже, чтобы исправить это.
- Выполните шаги 1-3 из приведенных выше инструкций, чтобы открыть свойства криптографической службы. Перейдите на вкладку «Вход в систему» и нажмите кнопку «Обзор…».
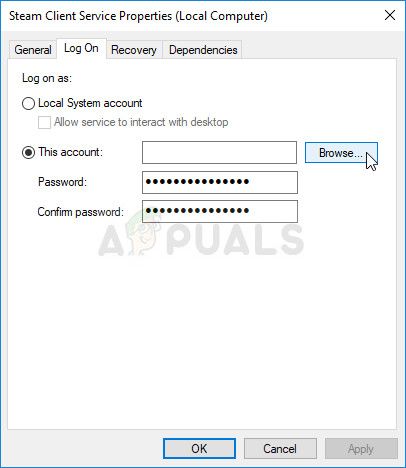
- В поле «Введите имя объекта для выбора» введите имя своей учетной записи, нажмите «Проверить имена» и подождите, пока имя не будет распознано.
- Нажмите OK, когда вы закончите, и введите пароль в поле Пароль, когда вам будет предложено ввести его, если вы установили пароль. Теперь должно начаться без проблем!
Решение 6. Установите последние версии драйверов для подключения к Интернету.
Несмотря на то, что большинство игровых проблем напрямую связано с драйверами видеокарты, это одна из проблем, которую можно исправить путем обновления сетевых драйверов на вашем компьютере. Это можно сделать с помощью стороннего инструмента или, что еще лучше, с помощью встроенного инструмента под названием «Диспетчер устройств».
- Прежде всего, вам нужно будет удалить драйвер, который вы в настоящее время установили на свой компьютер.
- Введите «Диспетчер устройств» в поле поиска рядом с кнопкой меню «Пуск», чтобы открыть окно диспетчера устройств. Вы также можете использовать комбинацию клавиш Windows Key + R, чтобы открыть диалоговое окно «Выполнить». Введите devmgmt.msc в поле и нажмите ОК или клавишу ввода.

- Разверните раздел «Сетевые адаптеры». При этом отобразятся все сетевые адаптеры, которые машина установила в данный момент.
- Щелкните правой кнопкой мыши сетевой адаптер, который вы хотите удалить, и выберите «Удалить устройство». Это приведет к удалению адаптера из списка и удалению сетевого устройства. Нажмите «ОК» при появлении запроса на удаление устройства.
- Снимите адаптер, который вы используете, с вашего компьютера и перейдите на страницу производителя, чтобы увидеть список доступных драйверов для вашей операционной системы. Выберите последнюю версию, загрузите ее и запустите из папки «Загрузки».
- Следуйте инструкциям на экране, чтобы установить драйвер. Если адаптер является внешним, например, адаптер Wi-Fi, убедитесь, что он остается отключенным, пока мастер не предложит подключить его к компьютеру. Перезагрузите компьютер и проверьте, исчезла ли проблема.
Решение 7. Изменить сервер Steam
Если в данный момент возникают проблемы с серверами Steam, решить проблему, возможно, другим способом, кроме изменения региона загрузки Steam в настройках Steam.
- Откройте клиент Steam для ПК, дважды щелкнув его на рабочем столе или выполнив поиск в меню «Пуск» и щелкнув по первому доступному результату.
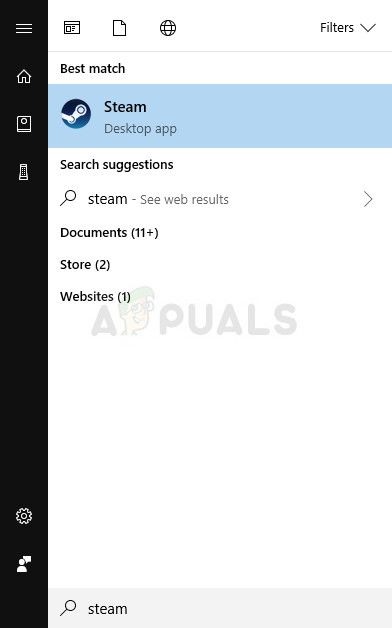
- После того, как откроется клиент Steam, нажмите кнопку Steam в верхней правой части окна и выберите «Настройки» в раскрывающемся меню. Перейдите на вкладку «Загрузки» в окне «Настройки» и щелкните стрелку рядом со страной в разделе «Регион загрузки».
- Попробуйте несколько других расположений сервера, пока не увидите, что ошибка устранена.
Valve Anti-Cheat is a software used by Valve games to check your setup to see if you are using any hack or third-party program which might make your gaming experience easier or give you an unfair advantage over other players. However, sometimes it’s this software which disconnects you from Valve games simply because of an “authentication error”.
Plenty of users have had to deal with this problem and their gaming experience becomes pretty much ruined. The game will disconnect you and possibly ban you from servers because of this error so make sure you follow the article in order to solve the problem as soon as possible.
What Cases the Valve Authentication Error
There are many registered causes for the problem. Sometimes the error is caused by a broken or stopped Steam Client Service and the service either needs to be repaired or restarted. Also, your computer’s old network drivers may be preventing the VAC service from operating normally and you should consider updating them.
Other possible culprits include having disabled DEP (Data Execution Prevention) on your computer meaning you might need to enable it. Also, the problem is sometimes caused by Steam Download servers being down so consider switching to a new one.
Solution 1: Repair the Steam Service
Repairing the Steam service should help you solve this problem in the easiest way possible as it did for other users before you. Steam services are the core system behind various things related to Valve and the problem can be solved easily by running a command in Command Prompt which should repair the Steam service.
- Search for “Command Prompt” by typing this text either right in the Start menu or by pressing the search button right next to it. Right-click the first entry which will pop up from the search result and select the “Run as administrator” context menu entry.
- Additionally, you can also use the Windows Logo Key + R key combination in order to bring up the Run dialog box. Type in “cmd” in the dialog box which appears and use the Ctrl + Shift + Enter key combination in order to run Command Prompt with admin privileges.
- Type in the following command in the CMD window and make sure you press Enter after typing it out correctly. Wait for the “Operation completed successfully” message or something similar to know that the method has worked and you haven’t made any mistakes.
- Before you type command, you should also find out the root folder of your Steam installation which will be necessary to run the command. You can find a full path to the Steam installation folder by right-clicking its shortcut on the Desktop and choosing the Open file location option from the context menu.
- Click the address bar at the top of the folder which should display the path so use the Ctrl + C combination to copy it to the Clipboard. If you haven’t made any changes during the installation, the path should be “C:Program Files (x86)SteambinSteamService.exe”. Let’s use the default path to run the command. Make sure you replace it with your own path when running the command:
"C:Program Files (x86)SteambinSteamService.exe" /repair
- Reopen the problematic game either by double-clicking its icon on your computer or by launching it via Steam and check to see if the VAC error is gone.
Solution 2: Enable DEP on Your Computer
If you computer’s settings are not configured properly to run VAC, you may run into issues such as this one more often than you think, especially with Valve games. Unfortunately, the process of setting up your computer for these changes is not so easy and it even involved BIOS troubleshooting which people fear of the most. However, if you follow the steps below, you shouldn’t run into any problems.
- Turn on your computer and immediately press the BIOS Setup key on your keyboard several times in a row, about once every second, until the Computer Setup Utility or BIOS settings opens. This key will be indicated on your screen as Press _ to run Setup.
- Use the right arrow key to switch to the Security menu when the BIOS settings window opens, use the down arrow key to select the Secure Boot Configuration from the menu, and press Enter.
- Before you can use this option, a warning will appear. Press F10 to continue to the Secure Boot Configuration menu. Use the down arrow key to select Secure Boot and use the right arrow key to modify this setting to Disable.
- Use the down arrow key to select Legacy Support, and then use the right arrow key to switch it to Enable.
- Press F10 to save the changes. Use the left arrow key to navigate to the File menu, use the down arrow key to switch to Save Changes and Exit, then press Enter to select Yes.
- The Computer Setup Utility will now shut down and the computer should restart. When the computer has restarted, keep following the steps below to solve the VAC authentication error.
In order to solve the problem completely, you will now have to run a simple command in order to solve the problem properly. This command needs to be executed in an administrative Command Prompt window so make sure you are doing this using an account with admin privileges.
- Search for “Command Prompt” by typing this text either right in the Start menu or by pressing the search button right next to it. Right-click the first entry which will pop up from the search result and select the “Run as administrator” context menu entry.
- If you are running a version of Windows other than Windows 10, the Start menu search might or might not work properly but you can still navigate to C >> Windows >> System32, right-click on the “cmd.exe” entry and choose Run as administrator or type “cmd.exe” in a Run box and use the Ctrl + Shift + Enter key combo.
- Type in the following command in the CMD window and make sure you tap Enter after typing it out. Wait for the “Operation completed successfully” message or something similar to know that the method has worked and you haven’t made any mistakes.
bcdedit /deletevalue nx
or
bcdedit.exe /set {current} nx AlwaysOn
- Either command should work properly. Make sure you restart your computer immediately and reopen the problematic game either by double-clicking its icon on your computer or by launching it via Steam. Check to see if the VAC authentication error is gone.
Note: If you are unsure whether the command above has worked and you don’t whether the command didn’t work or the method is simply not working for you, there is a way to check the current state of DEP on your computer. Use the following command in Command Prompt:
wmic OS Get DataExecutionPrevention_SupportPolicy
If you see that the result is 3, that means that DEP is enabled for all processes and that is the only number which is acceptable as a result.
Solution 3: Check Your Time and Date Settings
Improper time and date on your computer is not recommended at all and it’s not a thing anyone would do on purpose. However, some users restart BIOS or perform some changes which alter time and date and they forget to set it up properly again. This alone is enough to cause the issue so make sure you check to see if everything is okay.
- Open Date and Time settings on your computer by opening the Start menu, and opening the Settings app by clicking the gear icon above the Start menu button and the Power icon, choosing the Time & language option, and navigating to the Date & time tab.
- In the Date and Time tab, make sure that your computer’s date and time settings are aligned with the location you are currently in. If the time is not correct, you can try turning the Set time automatically option on or off depending on previous settings.
- If the “Set time automatically” option is now off, choose the correct time zone from the dropdown list in order to finish the process. After you have finished, restart your computer and try opening Windows Store again.
Alternative: If this doesn’t work out for you or if you are using a version of Windows older than Windows 10, you can also use Control Panel to synchronize with an online time server to always have correct settings.
- Open Control Panel by searching for it in the Start menu or by using the Windows Key + R key combination, typing “control.exe” in the Run bar, and clicking OK in order to run Control Panel.
- In Control Panel, select to View as: Category at the top right corner and click on the Clock and Region button to open this section.
- Click on Set the time and date button under Date and Time in the Clock and Region section and navigate to the Internet Time tab immediately. Click the Change settings button.
- Check the box next to the “Synchronize with an Internet time server” option and choose the “time.windows.com” server before clicking on Update.
- Click the OK button to apply the changes and try running the problematic game to see if the problem with VAC authentication error is gone.
Solution 4: Delete the Steam Cache and Verify the Integrity of Game Files
This method is quite self-explanatory and it’s one of the most basic fixes you should try out when troubleshooting a Steam game. The first part depends on where you have installed Steam but you should have found out that location by now if you followed the solutions above.
- Navigate to the Steam’s root folder in the File Explorer which can be accessed by opening a folder and clicking This PC or My Computer at the left side pane. Make sure the Steam client is closed completely.
- If you haven’t made any changes during the installation of the Steam client regarding the required installation folder, it should be Local Disk >> Program Files or Program Files (x86) depending on your OS.
- The appcache folder should be available in this folder so make sure you right-click on it and choose the Delete option from the context menu. Confirm any dialogs and reopen Steam to proceed with the solution.
- After the Steam client opens, navigate to the Library tab, right-click the problematic game from your game list, and choose Properties from the menu. Navigate to the Local Files tab and click the Verify Integrity of Game Files button.
- Wait for the process to finish. It should download several missing files. Relaunch the game and check to see if you still receive the VAC authentication error.
Solution 5: Run Steam as an Administrator and Make Sure the Steam Client Service is Started
This method is a lengthy one and it’s composed from two different parts. However, then these parts are put together, you get a powerful method which can be used to solve this problem immediately. We will set Steam to run with administrator privileges and change the startup of the Steam Client Service to be running at all times.
- Locate the Steam shortcut or executable on your computer and open its properties it by right-clicking its entry either on the Desktop or the Start menu or the Search results window and choose Properties from the pop up context menu.
- Navigate to the Compatibility tab in the Properties window and check the box next to the Run this program as an administrator option before saving the changes by clicking OK or Apply.
- Make sure you confirm any dialogs which may appear which should prompt you to confirm the choice with admin privileges and Steam should launch with admin privileges from the next startup. Open Steam by double-clicking its icon and try relaunching the game to see if the VAC authentication error still appears.
If this hasn’t resolved the problem, you may have issues with the Steam Client Service which also deals with when VAC should be launched. This can be solved by visiting this process in Services and configuring its startup type.
- Open the Run dialog box by tapping the Windows Key + R key combination on your keyboard. Type “services.msc” in the Run box without the quotation marks and click OK in order to open Services. You can also just search for Services in Start menu on Windows 10.
- Locate the Steam Client Service in the services list, right-click on it and select Properties from the context menu which will appear.
- If the service is started (you can check that just next to the Service status message), you should stop it by clicking the Stop button in the middle of the window. If it has already been stopped, leave it as it is (for now).
- Make sure that the option under the Startup type menu in the Steam Client Service’s properties is set to Automatic before you proceed with the instructions. Confirm any dialogue boxes which may appear when you set the startup type. Click on the Start button at the middle of the window before exiting.
You may receive the following error message when you click on Start:
“Windows could not start the Steam Client Service on Local Computer. Error 1079: The account specified for this service differs from the account specified for other services running in the same process.”
If this occurs, follow the instructions below to fix it.
- Follow the steps 1-3 from the instructions above in order to open Cryptographic Service’s properties. Navigate to the Log On tab and click on the Browse… button.
- Under the “Enter the object name to select” box, type in your account’s name, click on Check Names and wait for the name to become recognized.
- Click OK when you are finished and type in the password in the Password box when you are prompted with it, if you have setup a password. It should now start without issues!
Solution 6: Install the Latest Internet Connection Drivers
Even though most gaming problems are directly tied to the graphics card drivers, this is one of the problems which can be fixed by updating Network drivers on your computer. This can be done using a third-party tool or even better, using the built-in tool called Device Manager.
- First of all, you will need to uninstall the driver you currently have installed on your machine.
- Type “Device Manager” into the search field next to the Start menu button to open the device manager window. You can also use the Windows Key + R key combination in order to open the Run dialog box. Type devmgmt.msc in the box and click OK or Enter key.
- Expand the “Network Adapters” section. This will display all network adapters that the machine has installed at the moment.
- Right click on the network adapter you want to uninstall and select “Uninstall device”. This will remove the adapter from the list and uninstall the networking device. Click “OK” when prompted to uninstall the device.
- Remove the adapter you are using from your computer and navigate to your manufacturer’s page in order to see the list of available drivers for your operating system. Choose the latest one, download it, and run it from the Downloads folder.
- Follow the instructions on-screen in order to install the driver. If the adapter is external such as a Wi-Fi dongle, make sure it stays disconnected until the wizard prompts you to reconnect it to your computer. Restart the computer and check to see if the problem has disappeared.
Solution 7: Change the Steam Server
If there are problems with the Steam servers at the moment, it might be impossible to solve the problem using any other method than by changing the Steam Download Region inside Steam Settings.
- Open your Steam PC client by double-clicking it on the Desktop or by searching for it in the Start menu and clicking on the first available result.
- After the Steam client opens, click the Steam button at the top right part of the window and choose Settings from the dropdown menu. Navigate to the Downloads tab in the Settings window and click the arrow next to the country under the Download Region section.
- Try several other server locations until you see that the error is resolved.

Kevin Arrows
Kevin is a dynamic and self-motivated information technology professional, with a Thorough knowledge of all facets pertaining to network infrastructure design, implementation and administration. Superior record of delivering simultaneous large-scale mission critical projects on time and under budget.
Valve’s proprietary anti-cheat, VAC, isn’t meant to stop players from cheating so much as it’s designed to catch a cheater in the act. The program misses hackers all the time, but it almost never accidently bans someone, and it’s almost never wrong when it does. That’s why some users panic when they see the dreaded “VAC Authentication Error” pop up on their screens.
Thankfully, VAC authentication errors happen all the time to clean players. There are a couple of reasons why shows the error after it disconnects a player, but none of them mean the player has been banned. So here are the top fixes for Steam’s most dreaded error.
How to fix VAC authentication errors
Elimating the easy stuff means less guessing at the end. Players should make sure that it isn’t Steam’s beta client causing the VAC errors.
Fix 1: Turn off Steam Beta
It’s worth turning off the Steam Beta first before trying other fixes. It’s quick and simple fix that can save players time if it’s the problem.

With Valve using Steam Beta as a testing ground for new features, sometimes the developer puts a bit of code in the wrong place. As recently as this month, a Valve mishap awarded players Counter-Strike: Global Offensive players $1,000 per death after it left old code in the game’s config files. If Steam’s beta ever has a typo in the right spot or a mislabeled .dll file, VAC will not be happy.
Next up are the three things every Steam user has tried at least once. If not, now is a good time to learn them.
Classic Steam fixes could solve Steam’s VAC Authentication problems.
Trying these classic Steam fixes in the correct order is the trick here.
- Fix 1.1: Turn it off and back on again (Reboot)
- Fix 1.2: Start Steam as an administrator (“as Admin”)
- Fix 1.3: Verify game files for the game giving the VAC error

These are classic fixes for any computer, and it usually only takes one or two of the three to fix the VAC authentication error. They’re quick, too. But if find that they’re still stuck withVAC authentication errors after these three, continue on to fix number two.
What causes VAC Errors? It might be Windows 10
Problem: Windows Search could be bugging out Steam’s VAC anti-cheat. It’s frustrating, but getting a VAC authentication error is sometimes caused by Windows 10. Besides shutting down players’ PCs in the middle of games, the OS has a bad habit of running programs when VAC is trying to do its thing. If VAC happens to check on a game’s files while Microsoft is recording the file names for Windows search, players can be kicked to the main menu with the error.
- Fix 2: Fully power down the PC, down to the power cord.
Power down the PC, flip the switch located on the power supply, and unplug the computer. Players have to make sure their PC is completely disconnected from the wall or battery power and wait 10 minutes before booting back up. That’s enough time to make sure that Windows isn’t storing any hybrid or hibernate settings. Thanks to Windows’ default power setting, “Shut Down” really just means hibernate. If users don’t cut the power, the OS will pick up where it left off.
Can players stop VAC authentication errors before they happen?
If it’s caused by this bug, yes. Players can avoid this issue by adding Steam’s folder or even a specific game folder to Windows exclude lists for both real-time protection and search.

Elminate VAC errors with this networking command
One of the top reasons players are booted from VAC-secured maps comes down to their connection. If the server can’t talk to the VAC module on a player’s PC, then it takes the safe approach and kicks them just in case. This is often caused by built-in firewalls in home routers. But players should try fix number three by repairing Steam and asking the router or modem for a new IP address. It’s a simple three lines that could clear the issues right up.
Problem: VAC authentication failures can start with Steam’s cache and a stale IP
- Fix: Dump the Steam cache and start over with a new IP for Valve’s VAC checks
Exit Steam and head over to the search bar. Users are looking for the command prompt, which can be found by searching “cmd.” Once open, players can type the following three lines in order, making sure to press enter before each new line. Heads up, this will log players out of Steam if they haven’t exited already.
- start steam://flushconfig
- ipconfig /release
- ipconfig/renew

Problem: Network issues might mean that VAC and Valve’s servers can’t talk to each other. If that’s the case, users might need to dive into port forwarding.
- Fix 3: Forward Steam’s ports to your PC (and back again)
Port forwarding always sounds complicated, but it boils down to building a highway between a router and a computer. Players forward a port, or a “range” of ports, from their router to the computer’s network IP address. It allows Steam to talk directly to Valve’s servers without the traffic getting lost, at least not inside the player’s home.

Different parts of Steam use different ports for communicating with Valve’s network, allowing a certain amount of choice when forwarding. For example, Steam’s Remote Play uses a range of ports, but unless players actively use the Remote Play feature, there’s little reason to complicate the fix here. If a user’s connection isn’t dropping out, they might want to try port forwarding these ports specifically that are related to game traffic:
- Game Traffic
- UDP remote port 27000–27100
- UDP local port 27015
- Observing live matches, such as Dota 2’s DPC or a CSGO Major
- UDP local port 27015
- Peer-to-Peer Networking and Steam Voice
- UDP remote port 3478
- UDP remote port 4379
- UDP remote port 4380
Since the process is slightly different for every router, players should consult the router’s manual for exact instructions on how to port forward.
One more thing: if users are having trouble connecting to a dedicated server or are having other network connection issues, Valve has provided a complete list of ports used by Steam on support.steampowered.com to try.
The last tip for fixing Steam’s VAC errors is to simply walk away. VAC and Steam are famous for one second working before suddenly not working at all. After some plugging and unplugging of cables, these issues tend to fix themselves. It’s been happening to CSGO’s map editor, called Hammer, for years.
