When it comes to backing up your files on your Mac, one of the most popular and convenient options is the Time Machine. You can choose to back up your files to an external drive attached to your Mac or to a remote backup drive, such as Apple’s Time Capsule.
Time Machine is a great tool for creating backups because it works well with Macs. You need to set it up only once and you can forget about it because all the processes can be automated or scheduled. But it doesn’t mean that this built-in backup feature is not without flaws.
A common problem often encountered when using Time Machine is error 45. macOS is not so good at reporting errors so it is challenging to determine what the error is all about and what triggered it. So if you’re just like the other Mac users hit by this error and looking for the right solution, then this article is for you.
What is Error 45 in Time Machine?
Error 45 happens when Time Machine is not able to complete the backup process due to some issues. It usually appears when you’re trying to manually save your backup files, but it can also occur during scheduled backups.
What makes this error troublesome is that the error doesn’t seem to care where the files are being saved to. Mac users who are using physical and remote drives all fall victim to this error. This means that the error may not be related to the destination backup drive, especially when you look at the error messages that accompany this error, such as:
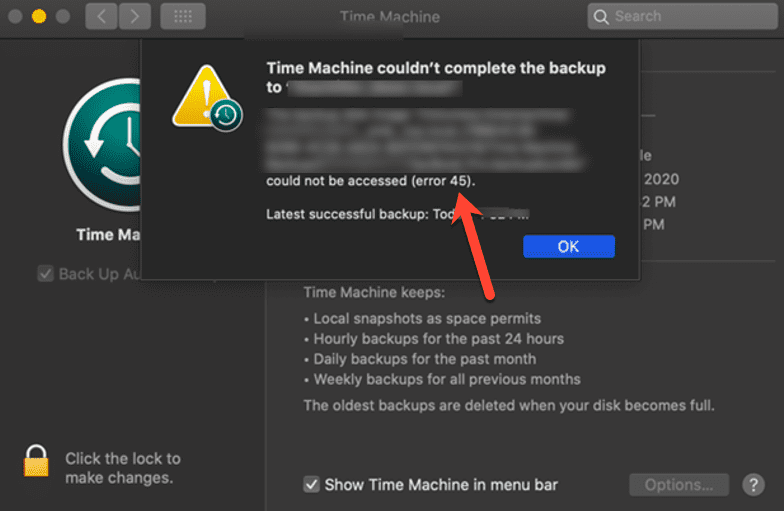
- Time Machine couldn’t complete the backup to “Volume.”
The backup disk image “/Volumes/.timemachine/XXXX’s AirPort Time Capsule._afpovertcp._tcp.local./0FC04105-0B94-4D2A-9BBF-B4E10A14D65C/Data/iMac-10DDB1B2FF81 (2).backupbundle” could not be accessed (error 45). - Time Machine could not complete the backup.
The backup disk image “/Volumes/backups/xxxx.sparsebundle” could not be created (error 45).
This error can pop up regardless of what macOS version the Mac is running on. However, the majority of the affected users only encountered this error after upgrading their Macs to macOS Catalina, suggesting that this error might be caused by the update.
Error 45 can cause a lot of inconveniences and is actually contrary to what Time Machine wants to achieve — which is a hassle-free backup process.
What Causes Error 45 in Time Machine?
If you’re using a backup drive located in the same network, such as Netgear’s Stora or Apple’s Time Capsule, then the problem is probably related to your network. Your Mac is not able to connect properly to the remote storage, hence the backup process could not proceed.
In cases where the backup process has been initiated but was stopped by error 45, the issue here might be triggered by unstable network connection, insufficient space on the backup drive, or a simple glitch in the backup process. In these instances, restarting Time Machine usually resolves the error pretty quickly.
For users who are using physical drives for their backup, it is possible that the drive is not properly connected to the Mac, making it impossible for the backup process to proceed. There are cases also when the error pops up when Time Machine is running a scheduled backup then the computer suddenly goes to sleep. Ideally, Time Machine should continue running in the background. But for some reason, the process gets interrupted when the machine goes to sleep.
Corrupted files, insufficient storage, and malware can also cause error 45 to occur when using Time Machine with an external drive.
If you encountered the error after upgrading to macOS Catalina, then the update probably broke something in the Time Machine backup process and you have no choice but to wait for the official fix from Apple. In the meantime, you can use other third-party backup solutions while Apple is sorting this error out.
How to Fix Error 45 in Time Machine on Mac
There are different ways to deal with this Time Machine error, depending on the type of backup storage you are using. But before we proceed to the specific solutions, let us look first into the basic troubleshooting steps you can apply when faced with error 45:
- Check your internet connection. Make sure you have a stable connection for the backup process to successfully complete. Switch to a wired connection, if possible, or find a spot with a strong Wi-Fi signal while the backup process is going on.
- Make sure you have enough storage space on the backup drive. This step is very important, particularly for those who are using networked drives connected to other Macs. You might not be aware of how much data is being saved from the other devices so you need to regularly check the available disk space. This also applies to Macs using external drives for backup. If you don’t have enough storage, clean up the drive using Mac repair app to make room for other backups.
- Scan for malware. Copying corrupted or infected files to your backup drive can be devastating because it will infect all your backups. To avoid this, make it a habit to run a scan before initiating the backup process.
If the above steps don’t work, you can try the solutions below depending on what type of backup you are using.
Time Machine via Physical Drive
For Mac users using Time Machine with physical drives, such as a USB or external drive, here are the things you can do:
- Disconnect the drive from your Mac, close Time Machine. Reconnect the drive to your Mac, then run Time Machine once again.
- Use a different USB port or cable if necessary.
- Use a different drive to check whether your drive is corrupted or damaged.
Time Machine via Networked Drive
If you’re using a drive connected to your network, here are the steps you can take:
- Make sure your storage is available on your network. If you’re using Apple’s Time Capsule, launch Airport Utility in the Utilities folder. Scan for available wireless devices. If you can’t find Time Capsule, turn it off then back on again.
- Reselect your Time Machine backup. Sign in to your Mac using an administrator account. Launch System Preferences from the Apple menu, then choose Time Machine. Turn Time Machine off, then click Select Disk. Look for your Time Capsule or NAS drive, set it as your Time Machine volume, then type in the correct password. Turn Time Machine back on. You should now be able to successfully perform backups.
Summary
Time Machine is set-and-forget backup tool for Macs, which ensures that your important files are saved, even without any further action from you. But if you encounter the error 45 when macOS performs backups, the above steps should help you fix the problem and allow you to complete your Time Machine backup tasks successfully.

Vic is a certified gadget freak who feels the need to surround himself with cutting-edge technology. And this passion has helped him a lot in creating content that informs and guides users on using and troubleshooting the latest technology. He is an avid researcher who is always hungry for the latest news and updates on the most cutting-edge technology.
Vic is the one in charge of keeping our website running smoothly and efficiently, to make sure that our readers have a wonderful experience while visiting the website. He’s good at troubleshooting errors and fixing Windows issues that come up either when playing games or working on the computer.
New issue
Have a question about this project? Sign up for a free GitHub account to open an issue and contact its maintainers and the community.
By clicking “Sign up for GitHub”, you agree to our terms of service and
privacy statement. We’ll occasionally send you account related emails.
Already on GitHub?
Sign in
to your account
Closed
Eyeless77 opened this issue
Aug 30, 2018
· 9 comments
Comments
![]()
Tried to modify this image to use with Raspberry Pi 3, changed the Dockerfile to use resin/armhf-alpine image and built it locally.
docker build --pull --rm --tag=timemachine .
Then ran the container.
docker run -d --net=host
            -v /media/tm:/timemachine/
            -e TM_USER=timemachine
            -e TM_PW=timemachine
            -e TM_SIZE=350000
            -e TM_ID=1000
            --name=timemachine timemachine
Container is starting and logs are following.
docker logs -f timemachine
Added user timemachine.
2018-08-30 07:43:18,625 CRIT Supervisor running as root (no user in config file)
2018-08-30 07:43:18,647 INFO supervisord started with pid 1
2018-08-30 07:43:19,655 INFO spawned: 'smbd' with pid 18
2018-08-30 07:43:19,664 INFO spawned: 'avahia' with pid 19
2018-08-30 07:43:20,690 INFO success: smbd entered RUNNING state, process has stayed up for > than 1 seconds (startsecs)
2018-08-30 07:43:20,691 INFO success: avahia entered RUNNING state, process has stayed up for > than 1 seconds (startsecs)
From this moment I can see the SMB share with Mac Pro icon, I can mount it manually with timemachine/timemachine, I have read/write permissions to this share, but I cannot use it as Time Machine destination.
sudo tmutil setdestination "/Volumes/TimeMachine"
/Volumes/TimeMachine: Disk does not support Time Machine backups. (error 45)
The backup destination could not be set.
I guess something is wrong with avahi-daemon as healthcheck is not working properly:
CONTAINER ID        IMAGE                                COMMAND                  CREATED             STATUS                      PORTS                                            NAMES
d0ec27d98c6c        timemachine                      "/tmp/setup.sh super…"   36 minutes ago      Up 36 minutes (unhealthy)                                                    timemachine
docker exec -it timemachine /bin/bash
bash-4.4# avahi-daemon -asd
avahi-daemon: unrecognized option: a
Could that issue be fixed with Dockerfile options or it depends on base image for ARM?
willtho89
added a commit
that referenced
this issue
Aug 30, 2018
![]()
![]()
The alpine image is supposed to support multiple architectures. I can start the container successfully and connect to the share. However I only have a small SD Card in my pi so I can’t test the time machine.
I’m not sure what ERROR 45 means. Maybe looking in the logs can help. Try something like
log show --predicate 'subsystem == "com.apple.TimeMachine"' --info | grep 'upd: (' | cut -c 1-19,140-999
I fixed the Healthcheck issue. «-asd» was a bogus command I used for testing…
![]()
Error 45 has the following description in GUI: «The network backup disk does not support the required capabilities».
Logs doesn’t show anything useful, only info about local snapshots.
2018-08-29 19:45:51Info] Starting age based thinning of Time Machine local snapshots on disk '/'
2018-08-29 19:45:51Info] Skipping age based thinning of Time Machine reference snapshot 'com.apple.TimeMachine.2018-07-29-184136' on disk '/'
2018-08-29 19:45:51Info] Starting space based thinning of purgeable local snapshots on disk '/' - current free space: 24,77 GB (24 770 166 784 bytes), target free space: 25 GB (25 000 000 000 bytes), initial free space: 24,77 GB (24 771 264 512 bytes), urgency: 0
2018-08-29 19:45:51Info] Space based thinning skipped Time Machine reference snapshot 'com.apple.TimeMachine.2018-07-29-184136' on disk '/'
2018-08-29 19:45:51Info] Completed thinning of snapshots on disk '/' in 1.1 seconds - current free space: 24,77 GB (24 770 166 784 bytes), target free space: 25 GB (25 000 000 000 bytes), initial free space: 24,77 GB (24 771 264 512 bytes), urgency: 0, remaining snapshots: (
2018-08-29 21:32:57Info] Thinning deleted Time Machine snapshot 'com.apple.TimeMachine.2018-07-29-184136' on disk '/ (because it is dataless but no longer a reference snapshot)
2018-08-29 21:32:57Info] Starting age based thinning of Time Machine local snapshots on disk '/'
2018-08-29 21:33:04Info] Starting space based thinning of purgeable local snapshots on disk '/' - current free space: 22,55 GB (22 550 433 792 bytes), target free space: 25 GB (25 000 000 000 bytes), initial free space: 24,71 GB (24 712 884 224 bytes), urgency: 0
2018-08-29 21:33:05Info] Completed thinning of snapshots on disk '/' in 60.3 seconds - current free space: 22,55 GB (22 550 433 792 bytes), target free space: 25 GB (25 000 000 000 bytes), initial free space: 24,71 GB (24 712 884 224 bytes), urgency: 0, remaining snapshots: (
2018-08-29 23:38:06Error] Backup failed with error 17: 17
Healthcheck is now ok, showing container as healthy. Are there any logs inside the container? /var/log/samba/cores/smbd/ is empty.
willtho89
added a commit
that referenced
this issue
Aug 30, 2018
![]()
![]()
the supervisor should now get everything printed to stdout/stderr. with docker logs <container_name> you can see whats happening.
To make the smb daemon more verbose you need to add log level = 3 to its config. You can do that with
docker exec -it <container_name> sed -i 's#1000#1000n log level = 3#' /etc/samba/smb.conf
EDIT: you need to restart the container after you changed the smb.conf
![]()
Verbose log output:
Allowed connection from 192.168.100.114 (192.168.100.114)
init_oplocks: initializing messages.
Allowed connection from 192.168.100.114 (192.168.100.114)
Server exit (failed to receive smb request)
init_oplocks: initializing messages.
Transaction 0 of length 73 (0 toread)
switch message SMBnegprot (pid 28) conn 0x0
Requested protocol [NT LM 0.12]
Requested protocol [SMB 2.002]
Requested protocol [SMB 2.???]
Selected protocol SMB2_FF
GENSEC backend 'gssapi_spnego' registered
GENSEC backend 'gssapi_krb5' registered
GENSEC backend 'gssapi_krb5_sasl' registered
GENSEC backend 'spnego' registered
GENSEC backend 'schannel' registered
GENSEC backend 'naclrpc_as_system' registered
GENSEC backend 'sasl-EXTERNAL' registered
GENSEC backend 'ntlmssp' registered
GENSEC backend 'ntlmssp_resume_ccache' registered
GENSEC backend 'http_basic' registered
GENSEC backend 'http_ntlm' registered
Selected protocol SMB 2.???
Selected protocol SMB3_02
pid_to_procid: messaging_dgm_get_unique failed: No such file or directory
Got NTLMSSP neg_flags=0x62888215
Got user=[pi] domain=[PI-HOME] workstation=[MACBOOKPRO-B382] len1=24 len2=190
lp_load_ex: refreshing parameters
Initialising global parameters
Processing section "[global]"
Processing section "[TimeMachine]"
adding IPC service
check_ntlm_password:  Checking password for unmapped user [PI-HOME][pi]@[MACBOOKPRO-B382] with the new password interface
check_ntlm_password:  mapped user is: [PI-HOME][pi]@[MACBOOKPRO-B382]
Forcing Primary Group to 'Domain Users' for pi
auth_check_ntlm_password: sam_ignoredomain authentication for user [pi] succeeded
Auth: [SMB2,(null)] user [PI-HOME][pi] at [Thu, 30 Aug 2018 20:45:15.179122 UTC] with [NTLMv2] status [NT_STATUS_OK] workstation [MACBOOKPRO-B382] remote host [ipv4:192.168.100.114:50586] became [PI-HOME][pi] [S-1-5-21-3686025140-1538077124-701887698-1000]. local host [ipv4:192.168.100.121:445]
log_no_json: JSON auth logs not available unless compiled with jansson
check_ntlm_password:  authentication for user [pi] -> [pi] -> [pi] succeeded
Failed to fetch domain sid for WORKGROUP
Failed to fetch domain sid for WORKGROUP
NTLMSSP Sign/Seal - Initialising with flags:
Got NTLMSSP neg_flags=0x62088215
NTLMSSP Sign/Seal - Initialising with flags:
Got NTLMSSP neg_flags=0x62088215
Failed to fetch domain sid for WORKGROUP
Failed to fetch domain sid for WORKGROUP
Adding homes service for user 'pi' using home directory: '/home/pi'
Allowed connection from 192.168.100.114 (192.168.100.114)
string_to_sid: SID pi is not in a valid format
Forcing Primary Group to 'Domain Users' for pi
Connect path is '/timemachine' for service [TimeMachine]
string_to_sid: SID pi is not in a valid format
Forcing Primary Group to 'Domain Users' for pi
Initialising default vfs hooks
Initialising custom vfs hooks from [/[Default VFS]/]
Initialising custom vfs hooks from [streams_xattr]
load_module_absolute_path: Module '/usr/lib/samba/vfs/streams_xattr.so' loaded
Initialising custom vfs hooks from [fruit]
load_module_absolute_path: Module '/usr/lib/samba/vfs/fruit.so' loaded
Initialising custom vfs hooks from [catia]
load_module_absolute_path: Module '/usr/lib/samba/vfs/catia.so' loaded
string_to_sid: SID pi is not in a valid format
Forcing Primary Group to 'Domain Users' for pi
macbookpro-b382 (ipv4:192.168.100.114:50586) connect to service TimeMachine initially as user pi (uid=1000, gid=1000) (pid 28)
Allowed connection from 192.168.100.114 (192.168.100.114)
Connect path is '/tmp' for service [IPC$]
Initialising default vfs hooks
Initialising custom vfs hooks from [/[Default VFS]/]
macbookpro-b382 (ipv4:192.168.100.114:50586) connect to service IPC$ initially as user pi (uid=1000, gid=1000) (pid 28)
api_pipe_bind_req: lsarpc -> lsarpc rpc service
check_bind_req for lsarpc context_id=0
check_bind_req: lsarpc -> lsarpc rpc service
api_rpcTNP: rpc command: LSA_GETUSERNAME
api_rpcTNP: rpc command: LSA_OPENPOLICY2
api_rpcTNP: rpc command: LSA_LOOKUPNAMES
Forcing Primary Group to 'Domain Users' for pi
api_rpcTNP: rpc command: LSA_CLOSE
macbookpro-b382 (ipv4:192.168.100.114:50586) closed connection to service IPC$
smbd_do_qfsinfo: level = 1003
smbd_do_qfsinfo: level = 1005
smbd_smb2_request_error_ex: smbd_smb2_request_error_ex: idx[5] status[NT_STATUS_INTERNAL_ERROR] || at ../source3/smbd/smb2_server.c:1410
smbd_do_qfsinfo: level = 1003
smbd_smb2_request_error_ex: smbd_smb2_request_error_ex: idx[1] status[NT_STATUS_FILE_CLOSED] || at ../source3/smbd/smb2_server.c:2553
smbd_smb2_request_error_ex: smbd_smb2_request_error_ex: idx[1] status[NT_STATUS_OBJECT_NAME_NOT_FOUND] || at ../source3/smbd/smb2_create.c:293
smbd_smb2_request_error_ex: smbd_smb2_request_error_ex: idx[5] status[NT_STATUS_FILE_CLOSED] || at ../source3/smbd/smb2_server.c:2553
smbd_smb2_request_error_ex: smbd_smb2_request_error_ex: idx[9] status[NT_STATUS_FILE_CLOSED] || at ../source3/smbd/smb2_server.c:2553
pi opened file .com.apple.timemachine.supported read=Yes write=No (numopen=1)
pi closed file .com.apple.timemachine.supported (numopen=0) NT_STATUS_OK
creating new dirptr 0 for path ., expect_close = 0
smbd_smb2_request_error_ex: smbd_smb2_request_error_ex: idx[5] status[NT_STATUS_NO_SUCH_FILE] || at ../source3/smbd/smb2_query_directory.c:155
creating new dirptr 0 for path ., expect_close = 0
smbd_smb2_request_error_ex: smbd_smb2_request_error_ex: idx[5] status[NT_STATUS_NO_SUCH_FILE] || at ../source3/smbd/smb2_query_directory.c:155
creating new dirptr 0 for path ., expect_close = 0
smbd_smb2_request_error_ex: smbd_smb2_request_error_ex: idx[5] status[NT_STATUS_NO_SUCH_FILE] || at ../source3/smbd/smb2_query_directory.c:155
creating new dirptr 0 for path ., expect_close = 0
smbd_smb2_request_error_ex: smbd_smb2_request_error_ex: idx[5] status[NT_STATUS_NO_SUCH_FILE] || at ../source3/smbd/smb2_query_directory.c:155
creating new dirptr 0 for path ., expect_close = 0
smbd_smb2_request_error_ex: smbd_smb2_request_error_ex: idx[5] status[NT_STATUS_NO_SUCH_FILE] || at ../source3/smbd/smb2_query_directory.c:155
creating new dirptr 0 for path ., expect_close = 0
smbd_dirptr_get_entry mask=[.DS_Store] found .DS_Store fname=.DS_Store (.DS_Store)
Allowed connection from 192.168.100.114 (192.168.100.114)
Connect path is '/tmp' for service [IPC$]
Initialising default vfs hooks
Initialising custom vfs hooks from [/[Default VFS]/]
macbookpro-b382 (ipv4:192.168.100.114:50586) connect to service IPC$ initially as user pi (uid=1000, gid=1000) (pid 28)
pi opened file .DS_Store read=No write=No (numopen=1)
fruit_streaminfo_meta_netatalk: Unexpected AFPINFO_STREAM on [.DS_Store]
pi closed file .DS_Store (numopen=0) NT_STATUS_OK
Allowed connection from 192.168.100.114 (192.168.100.114)
Connect path is '/tmp' for service [IPC$]
Initialising default vfs hooks
Initialising custom vfs hooks from [/[Default VFS]/]
macbookpro-b382 (ipv4:192.168.100.114:50586) connect to service IPC$ initially as user pi (uid=1000, gid=1000) (pid 28)
pi opened file .DS_Store read=Yes write=No (numopen=1)
smbd_smb2_request_error_ex: smbd_smb2_request_error_ex: idx[1] status[NT_STATUS_OBJECT_NAME_NOT_FOUND] || at ../source3/smbd/smb2_create.c:293
smbd_smb2_read: fnum 2626414500, file .DS_Store, length=8196 offset=0 read=8196
macbookpro-b382 (ipv4:192.168.100.114:50586) closed connection to service IPC$
pi closed file .DS_Store (numopen=0) NT_STATUS_OK
api_pipe_bind_req: srvsvc -> srvsvc rpc service
check_bind_req for srvsvc context_id=0
check_bind_req: srvsvc -> srvsvc rpc service
api_rpcTNP: rpc command: SRVSVC_NETSHAREENUMALL
macbookpro-b382 (ipv4:192.168.100.114:50586) closed connection to service IPC$
smbd_smb2_request_error_ex: smbd_smb2_request_error_ex: idx[1] status[NT_STATUS_FILE_CLOSED] || at ../source3/smbd/smb2_server.c:2553
smbd_smb2_request_error_ex: smbd_smb2_request_error_ex: idx[1] status[NT_STATUS_FILE_CLOSED] || at ../source3/smbd/smb2_server.c:2553
smbd_smb2_request_error_ex: smbd_smb2_request_error_ex: idx[1] status[NT_STATUS_FILE_CLOSED] || at ../source3/smbd/smb2_server.c:2553
smbd_smb2_request_error_ex: smbd_smb2_request_error_ex: idx[1] status[NT_STATUS_FILE_CLOSED] || at ../source3/smbd/smb2_server.c:2553
![]()
Seems like it wants to access .DS_Store files which MacOS automatically creates. I’m not sure why smbd crashes on those.
Try disabling it with
defaults write com.apple.desktopservices DSDontWriteNetworkStores -bool true
then restart finder and try again
![]()
Same issue there
Closing idle connection
got a SHUTDOWN message
Server exit (normal exit)
pid_to_procid: messaging_dgm_get_unique failed: No such file or directory
Allowed connection from 192.168.100.114 (192.168.100.114)
init_oplocks: initializing messages.
Server exit (failed to receive smb request)
Allowed connection from 192.168.100.114 (192.168.100.114)
init_oplocks: initializing messages.
Transaction 0 of length 73 (0 toread)
switch message SMBnegprot (pid 69) conn 0x0
Requested protocol [NT LM 0.12]
Requested protocol [SMB 2.002]
Requested protocol [SMB 2.???]
Selected protocol SMB2_FF
GENSEC backend 'gssapi_spnego' registered
GENSEC backend 'gssapi_krb5' registered
GENSEC backend 'gssapi_krb5_sasl' registered
GENSEC backend 'spnego' registered
GENSEC backend 'schannel' registered
GENSEC backend 'naclrpc_as_system' registered
GENSEC backend 'sasl-EXTERNAL' registered
GENSEC backend 'ntlmssp' registered
GENSEC backend 'ntlmssp_resume_ccache' registered
GENSEC backend 'http_basic' registered
GENSEC backend 'http_ntlm' registered
Selected protocol SMB 2.???
Selected protocol SMB3_02
pid_to_procid: messaging_dgm_get_unique failed: No such file or directory
Got NTLMSSP neg_flags=0x62888215
Got user=[pi] domain=[PI-HOME] workstation=[MACBOOKPRO-B382] len1=24 len2=212
lp_load_ex: refreshing parameters
Initialising global parameters
Processing section "[global]"
Processing section "[TimeMachine]"
adding IPC service
check_ntlm_password:  Checking password for unmapped user [PI-HOME][pi]@[MACBOOKPRO-B382] with the new password interface
check_ntlm_password:  mapped user is: [PI-HOME][pi]@[MACBOOKPRO-B382]
Forcing Primary Group to 'Domain Users' for pi
auth_check_ntlm_password: sam_ignoredomain authentication for user [pi] succeeded
Auth: [SMB2,(null)] user [PI-HOME][pi] at [Thu, 30 Aug 2018 21:01:48.477165 UTC] with [NTLMv2] status [NT_STATUS_OK] workstation [MACBOOKPRO-B382] remote host [ipv4:192.168.100.114:51152] became [PI-HOME][pi] [S-1-5-21-3686025140-1538077124-701887698-1000]. local host [ipv4:192.168.100.121:445]
log_no_json: JSON auth logs not available unless compiled with jansson
check_ntlm_password:  authentication for user [pi] -> [pi] -> [pi] succeeded
Failed to fetch domain sid for WORKGROUP
Failed to fetch domain sid for WORKGROUP
NTLMSSP Sign/Seal - Initialising with flags:
Got NTLMSSP neg_flags=0x62088215
NTLMSSP Sign/Seal - Initialising with flags:
Got NTLMSSP neg_flags=0x62088215
Failed to fetch domain sid for WORKGROUP
Failed to fetch domain sid for WORKGROUP
Adding homes service for user 'pi' using home directory: '/home/pi'
Allowed connection from 192.168.100.114 (192.168.100.114)
string_to_sid: SID pi is not in a valid format
Forcing Primary Group to 'Domain Users' for pi
Connect path is '/timemachine' for service [TimeMachine]
string_to_sid: SID pi is not in a valid format
Forcing Primary Group to 'Domain Users' for pi
Initialising default vfs hooks
Initialising custom vfs hooks from [/[Default VFS]/]
Initialising custom vfs hooks from [streams_xattr]
load_module_absolute_path: Module '/usr/lib/samba/vfs/streams_xattr.so' loaded
Initialising custom vfs hooks from [fruit]
load_module_absolute_path: Module '/usr/lib/samba/vfs/fruit.so' loaded
Initialising custom vfs hooks from [catia]
load_module_absolute_path: Module '/usr/lib/samba/vfs/catia.so' loaded
string_to_sid: SID pi is not in a valid format
Forcing Primary Group to 'Domain Users' for pi
macbookpro-b382 (ipv4:192.168.100.114:51152) connect to service TimeMachine initially as user pi (uid=1000, gid=1000) (pid 69)
Allowed connection from 192.168.100.114 (192.168.100.114)
Connect path is '/tmp' for service [IPC$]
Initialising default vfs hooks
Initialising custom vfs hooks from [/[Default VFS]/]
macbookpro-b382 (ipv4:192.168.100.114:51152) connect to service IPC$ initially as user pi (uid=1000, gid=1000) (pid 69)
api_pipe_bind_req: lsarpc -> lsarpc rpc service
check_bind_req for lsarpc context_id=0
check_bind_req: lsarpc -> lsarpc rpc service
api_rpcTNP: rpc command: LSA_GETUSERNAME
api_rpcTNP: rpc command: LSA_OPENPOLICY2
api_rpcTNP: rpc command: LSA_LOOKUPNAMES
Forcing Primary Group to 'Domain Users' for pi
api_rpcTNP: rpc command: LSA_CLOSE
macbookpro-b382 (ipv4:192.168.100.114:51152) closed connection to service IPC$
smbd_do_qfsinfo: level = 1003
smbd_do_qfsinfo: level = 1005
smbd_smb2_request_error_ex: smbd_smb2_request_error_ex: idx[5] status[NT_STATUS_INTERNAL_ERROR] || at ../source3/smbd/smb2_server.c:1410
smbd_smb2_request_error_ex: smbd_smb2_request_error_ex: idx[1] status[NT_STATUS_FILE_CLOSED] || at ../source3/smbd/smb2_server.c:2553
smbd_do_qfsinfo: level = 1003
smbd_smb2_request_error_ex: smbd_smb2_request_error_ex: idx[1] status[NT_STATUS_OBJECT_NAME_NOT_FOUND] || at ../source3/smbd/smb2_create.c:293
smbd_smb2_request_error_ex: smbd_smb2_request_error_ex: idx[5] status[NT_STATUS_FILE_CLOSED] || at ../source3/smbd/smb2_server.c:2553
smbd_smb2_request_error_ex: smbd_smb2_request_error_ex: idx[9] status[NT_STATUS_FILE_CLOSED] || at ../source3/smbd/smb2_server.c:2553
pi opened file .com.apple.timemachine.supported read=Yes write=No (numopen=1)
pi closed file .com.apple.timemachine.supported (numopen=0) NT_STATUS_OK
creating new dirptr 0 for path ., expect_close = 0
smbd_smb2_request_error_ex: smbd_smb2_request_error_ex: idx[5] status[NT_STATUS_NO_SUCH_FILE] || at ../source3/smbd/smb2_query_directory.c:155
creating new dirptr 0 for path ., expect_close = 0
smbd_smb2_request_error_ex: smbd_smb2_request_error_ex: idx[5] status[NT_STATUS_NO_SUCH_FILE] || at ../source3/smbd/smb2_query_directory.c:155
creating new dirptr 0 for path ., expect_close = 0
smbd_smb2_request_error_ex: smbd_smb2_request_error_ex: idx[5] status[NT_STATUS_NO_SUCH_FILE] || at ../source3/smbd/smb2_query_directory.c:155
creating new dirptr 0 for path ., expect_close = 0
smbd_smb2_request_error_ex: smbd_smb2_request_error_ex: idx[5] status[NT_STATUS_NO_SUCH_FILE] || at ../source3/smbd/smb2_query_directory.c:155
creating new dirptr 0 for path ., expect_close = 0
smbd_smb2_request_error_ex: smbd_smb2_request_error_ex: idx[5] status[NT_STATUS_NO_SUCH_FILE] || at ../source3/smbd/smb2_query_directory.c:155
Allowed connection from 192.168.100.114 (192.168.100.114)
Connect path is '/tmp' for service [IPC$]
Initialising default vfs hooks
Initialising custom vfs hooks from [/[Default VFS]/]
macbookpro-b382 (ipv4:192.168.100.114:51152) connect to service IPC$ initially as user pi (uid=1000, gid=1000) (pid 69)
smbd_smb2_request_error_ex: smbd_smb2_request_error_ex: idx[1] status[NT_STATUS_OBJECT_NAME_NOT_FOUND] || at ../source3/smbd/smb2_create.c:293
macbookpro-b382 (ipv4:192.168.100.114:51152) closed connection to service IPC$
Allowed connection from 192.168.100.114 (192.168.100.114)
Connect path is '/tmp' for service [IPC$]
Initialising default vfs hooks
Initialising custom vfs hooks from [/[Default VFS]/]
macbookpro-b382 (ipv4:192.168.100.114:51152) connect to service IPC$ initially as user pi (uid=1000, gid=1000) (pid 69)
api_pipe_bind_req: srvsvc -> srvsvc rpc service
check_bind_req for srvsvc context_id=0
check_bind_req: srvsvc -> srvsvc rpc service
api_rpcTNP: rpc command: SRVSVC_NETSHAREENUMALL
macbookpro-b382 (ipv4:192.168.100.114:51152) closed connection to service IPC$
smbd_smb2_request_error_ex: smbd_smb2_request_error_ex: idx[1] status[NT_STATUS_FILE_CLOSED] || at ../source3/smbd/smb2_server.c:2553
smbd_smb2_request_error_ex: smbd_smb2_request_error_ex: idx[1] status[NT_STATUS_FILE_CLOSED] || at ../source3/smbd/smb2_server.c:2553
smbd_smb2_request_error_ex: smbd_smb2_request_error_ex: idx[1] status[NT_STATUS_FILE_CLOSED] || at ../source3/smbd/smb2_server.c:2553
![]()
I can’t see the problem, as I’m no expert with the smbd output. It looks similar to my log output with the same request errors…
The only things I can think of:
- are you on the latest MacOS High Sierra
- try creating a backup through GUI
- clean up existing .*.sparsebundle on the share
![]()
![]()
I’ve found the reason. The base image I used resin/armhf-alpine had alpine version 3.6 as latest so during samba installation it used samba-server version 4.7. Changed base image to alpine 3.8 and everything worked like a charm. Thank you for your assistance!
2 participants
![]()
![]()
Summary: Error 45 in Time Machine is a common problem faced by Mac users using either a network or a connected drive. Since macOS doesn’t report errors properly, you might not be able to know more about the error and its causes.
Let’s learn how to fix Time Machine error 45 on your Mac running on macOS Ventura, Monterey, Big Sur, Catalina, or earlier.
But before you proceed, download this free data recovery software to recover deleted or lost data from your Mac when Time Machine backup is inaccessible or corrupt.

“Hello friends, I was trying to back up my Mac running on macOS Ventura by using Time Machine. But I got the error 45 from the Time Machine application that restricted me to perform the backup task on my network drive. Please help me to fix the error. Thank you.”
Error 45 in Time Machine
Error 45 occurs when Time Machine couldn’t finish the backup task due to some impediments. When you observe the error 45 messages, you’ll find Time Machine couldn’t access the “.backupbundle” or couldn’t create the “.sparsebundle” backup disk image.
Reasons for Error 45 in Time Machine
The error 45 in Time Machine mostly appears when you manually perform the backup to a connected Time Machine backup drive, but it can also occur during automated backups.
Common reasons for the error are:
- Time Machine backup drive is not connected correctly to your Mac.
- Time Machine backup drive has insufficient free storage space.
- Your Mac goes to sleep during the scheduled backup process.
- macOS can’t connect with your network backup storage device.
- The backup process terminates due to an unstable network connection.
- Virus or malware has damaged your backup file, or the backup drive is corrupt.
Also Read: Fix Time Machine Not Working after Mojave Update?
Methods to Fix Error 45 in Time Machine
You can perform the following troubleshooting methods to fix Error 45 in Time Machine:
- Check the connection of your Time Machine backup drive. You can connect the drive to a different USB port on your Mac or use a different USB cable. Restart your Time Machine.
- Check the free space left on your Time Machine backup drive. In case the drive is running out of free space, clean up the backup drive, or use a drive with massive storage space.
- Increase the sleep time of your Mac to allow Time Machine to run in the background during scheduled backups.
- For network drive, check the Internet connection. Find a spot with a strong Wi-Fi signal to complete the backup process without any error.
- Backup your Mac only when there is a stable connection or use a wired connection to fix the network connectivity issue altogether.
- Scan your Mac for virus and malware before manually performing the backup task. This precaution can help you avoid infecting your Time Machine backup drive.
- When the error 45 in Time Machine occurs due to backup file or drive corruption, you must erase the backup medium and backup your Mac once again.
Mac Data Recovery after Time Machine Failure
In case your Time Machine backup drive is inaccessible, or the backup file is damaged, you can use a Mac data recovery software. Stellar Data Recovery Free Edition for Mac can help you recover any lost or deleted data from your MacBook, Mac mini, or iMac.
Watch the following video to learn how to use the software and avoid data loss due to error 45:
Conclusion
Yes, you can fix Time Machine error 45 on macOS that restricts you to back up your Mac. Check the USB or network connection of your backup drive, verify its free storage space, and increase the sleep time of your Mac when it is low to perform the scheduled backup without any error.
But if your backup file or backup device is corrupt and you lost data from your Mac, you can’t restore your lost data from your Time Machine due to error 45. In such a case, leverage Stellar Data Recovery Free Edition for Mac to retrieve lost data from your Mac storage drive.
About The Author
Vishal
Your friendly neighbourhood data recovery expert for macOS. Further, you can check out the available Stellar Data Recovery for Mac options by yourself.
Refer to the tutorial on the Web and use disk Tools to create a “sparse Disk image” in the Shared folder, then use the command to set it to the target disk of the TimeMachine.
sudo tmutil setdestination -a /Volumes/SMBTimeMachine
But the error:
/Volumes/SMBTimeMachine: Disk does not support Time Machine backups. (error 45)
The backup destination could not be added.
For a long time, Google did not find a solution, but finally found a solution sharing method with Apple’s help, and finally solved it smoothly:
1, use the command line tool to create a “sparse binding disk image”, not “Disk Tools”, I tried using “Disk Tools” still does not work, there is no problem with the command line.
sudo hdiutil create -size 260g -type SPARSEBUNDLE -nospotlight -volname "SMBTimeMachine" -fs "Case-sensitive Journaled HFS+" -verbose /Volumes/yanghl/HaiLong_Mac_TimeMachine.sparsebundle
“SMBTimeMachine” is the label of the newly created disk image, followed by the path saved to the disk image file, “-size 260g” is the size of the disk image, these parameters can be changed.
command run output reference:
Initializing...
Creating...
DIDiskImageCreatorProbe: interface  1, score     1000, CSparseBundleDiskImage
DIDiskImageCreatorProbe: interface  2, score    -1000, CSparseDiskImage
DIDiskImageCreatorProbe: interface  3, score    -1000, CRawDiskImage
DIDiskImageCreatorProbe: interface  7, score    -1000, CWOUDIFDiskImage
DIDiskImageCreatorProbe: interface  9, score    -1000, CCFPlugInDiskImage
DIDiskImageCreateWithCFURL: CSparseBundleDiskImage
CBSDBackingStore::createProbe directory, not a valid image file.
DIBackingStoreCreatorProbe: interface  0, score    -1000, CBSDBackingStore
DIBackingStoreCreatorProbe: interface  1, score     1000, CBundleBackingStore
DIBackingStoreCreatorProbe: interface  2, score        0, CRAMBackingStore
DIBackingStoreCreatorProbe: interface  3, score      100, CCarbonBackingStore
DIBackingStoreCreatorProbe: interface  5, score     -100, CCURLBackingStore
DIBackingStoreCreateWithCFURL: CBundleBackingStore
DIFileEncodingCreatorProbe: interface  2, score    -1000, CEncryptedEncoding
DIBackingStoreCreatorProbe: interface  0, score      100, CBSDBackingStore
DIBackingStoreCreatorProbe: interface  1, score    -1000, CBundleBackingStore
DIBackingStoreCreatorProbe: interface  2, score        0, CRAMBackingStore
DIBackingStoreCreatorProbe: interface  3, score      100, CCarbonBackingStore
DIBackingStoreCreatorProbe: interface  5, score     -100, CCURLBackingStore
DIBackingStoreCreateWithCFURL: CBSDBackingStore
DIBackingStoreCreateWithCFURL: creator returned 0
DIBackingStoreCreateWithCFURL: creator returned 0
DIDiskImageCreateWithCFURL: creator returned 0
DI_kextWaitQuiet: about to call IOServiceWaitQuiet...
DI_kextWaitQuiet: IOServiceWaitQuiet took 0.000007 seconds
Formatting...
near completion...
created: /Volumes/yanghl/HaiLong_Mac_TimeMachine.sparsebundle
hdiutil: create: returning 0
2. When finished, find the disk image file in the Finder and double-click to load it. Then use the command:
sudo tmutil setdestination -a /Volumes/SMBTimeMachine/
3. The command was successfully executed without any output. Go to system Settings -& GT; “TimeMachine”, you can see that “SMBTimeMachine” has been set as the target disk.
This should allow the TimeMachine to proceed normally.
Note: It is currently found that this method must be backed up all at once. If the backup is interrupted, the SparseBundle disk image, once unmounted, can no longer be loaded because the file is incomplete and cannot be reloaded without a backup
The article published at the same time in my Jane books: https://www.jianshu.com/p/9f56587af82c
Quote from macOS Sierra: Disks you can use with Time Machine
If your backup disk is on a network, the network server can use Server
Message Block (SMB) file sharing. Your Mac must be connected to the
SMB server when you set up Time Machine. After you select the network
disk in Time Machine preferences, Time Machine automatically connects
to the disk when it’s time to back up or restore your data.
> sudo tmutil setdestination "/Volumes/$NAME/"
Password:
/Volumes/$NAME: Disk does not support Time Machine backups. (error 45)
The backup destination could not be set.
I use QNAP TS-251 with latest firmware. The SMB share is working fine with Finder.
Any idea? I don’t wish to use AFP.
I followed the instructions How do I set up Time Machine backups between my Mac and NAS on a domain via the SMB protocol?. When mounted as SMB it doesn’t work, but with AFP it works.
asked Jan 28, 2017 at 8:17
![]()
SybilSybil
3,59311 gold badges43 silver badges70 bronze badges
3
QNAP says it is not supported!
answered Mar 21, 2017 at 11:42
![]()
1
You must log in to answer this question.
Not the answer you’re looking for? Browse other questions tagged
.
Not the answer you’re looking for? Browse other questions tagged
.
Quote from macOS Sierra: Disks you can use with Time Machine
If your backup disk is on a network, the network server can use Server
Message Block (SMB) file sharing. Your Mac must be connected to the
SMB server when you set up Time Machine. After you select the network
disk in Time Machine preferences, Time Machine automatically connects
to the disk when it’s time to back up or restore your data.
> sudo tmutil setdestination "/Volumes/$NAME/"
Password:
/Volumes/$NAME: Disk does not support Time Machine backups. (error 45)
The backup destination could not be set.
I use QNAP TS-251 with latest firmware. The SMB share is working fine with Finder.
Any idea? I don’t wish to use AFP.
I followed the instructions How do I set up Time Machine backups between my Mac and NAS on a domain via the SMB protocol?. When mounted as SMB it doesn’t work, but with AFP it works.
I struggled big time to get Time Machine to work correctly with my new Stora/Snow Leopard/Wifi combination. I kept getting the following error message:
«Time Machine could not complete the backup. The backup disk image could not be created (error 45)»
This is how to fix it and get your backups working (follow carefully and in order and you’ll have it up and running in no time):
The basic concept is Time Machine needs to create a sparsebundle image to save the backups to. The key here is creating your own, BUT knowing where to save it on the Stora and knowing where to point Time Machine to using it.
1) Firstly, be sure to enable the ‘Computer Backups’ feature in the Stora Preferences (through the landing page), and assign a password (I found it worked best for me to use the same password that i used for the main admin user of the Stora).
2) Go to System Preferences on your Mac > Sharing and make sure you have a computer name, no more than 8 characters. For instance i use: mymac. Remember this name, you will need it later!
3) Open Utilities > Terminal and type in:
ifconfig en0 | grep ether
This will display your ethernet address. You will get something similar to 00:1f:f3:46:61:04. Keep this window open, you will need it later!
4) Open Utilities > Disk Utility
a) Select the «New Image» option to create you new disk image and save it to your Desktop.
b) Start at the bottom with changing the Image Format to «sparse bundle disk image».
c) Change «Partitions» selection to «No partition map.»
d) Leave «Encryption» as is, set to «None».
e) Change «Volume Format» to «Mac OS Extended (Case-sensitive, Journaled)».
f) Change «Volume Size» to «Custom» and enter a volume size that suits your needs. I chose GB (Gigabyte) instead of MB (Megabyte) and set it to 300, effectively reserving a maximum 300GB backup size for Time Machine.
g) Change «Volume Name» to something like «My Backup» (can be anything you like).
h) Make sure «Where» is set to «Desktop». There is a known issue where if you try to create the sparse bundle disk image on a network drive, it will fail.
i) Here is where you need your Computer Name that you set earlier and the Ethernet Address that you found in Termnial.
Choose «Save As» name as the «ComputerName_EthernetAddress.sparesebundle», in my case I entered «mymac_001ff3466104».
j) Click on «Create» to finish the process.
5) After the sparsebundle disk image is created, exit out of the Disk Utility application.
6) Mount your Netgear Stora by pressing ⌘K (or going to Go > Connect to Server).
Type in the smb:// and the server address (IP) that your stora is using, for me it was smb://192.168.2.4
Then, crucially choose MyComputers from the list to mount that folder (your sparsebundle must be saved here for Time Machine to work)
7) Move the .sparsebundle disk image file you created on your desktop to the MyComputers folder you have just mounted.
 Open up the Time Machine preferences, and click on «Choose Backup Disk».
9) Select ‘MyComputers’ and then click on «Use for Backup».
10) Enter you Stora username and password as a «Registered User»
11) Thats it! Your backups should now start and complete successfully.
Hope this helps!
http://www.somelifeblog.com/2009/02/fixed-time-machine-backup-to-network.html for some of this information. I have just edited and customised this original resource to suit the use of Time Machine with the Netgear Stora>