-
Getting Help
-
el
-
es
-
fr
-
id
-
it
-
ja
-
ko
-
pl
-
pt-br
-
zh-hans
- Language: en
-
1.8
-
1.10
-
1.11
-
2.0
-
2.1
-
2.2
-
3.0
-
3.1
-
3.2
-
4.0
-
4.2
-
dev
-
Documentation version:
4.1
How to manage error reporting
When you’re running a public site you should always turn off the
DEBUG setting. That will make your server run much faster, and will
also prevent malicious users from seeing details of your application that can be
revealed by the error pages.
However, running with DEBUG set to False means you’ll never see
errors generated by your site – everyone will instead see your public error
pages. You need to keep track of errors that occur in deployed sites, so Django
can be configured to create reports with details about those errors.
Email reports
Server errors
When DEBUG is False, Django will email the users listed in the
ADMINS setting whenever your code raises an unhandled exception and
results in an internal server error (strictly speaking, for any response with
an HTTP status code of 500 or greater). This gives the administrators immediate
notification of any errors. The ADMINS will get a description of the
error, a complete Python traceback, and details about the HTTP request that
caused the error.
Note
In order to send email, Django requires a few settings telling it
how to connect to your mail server. At the very least, you’ll need
to specify EMAIL_HOST and possibly
EMAIL_HOST_USER and EMAIL_HOST_PASSWORD,
though other settings may be also required depending on your mail
server’s configuration. Consult the Django settings
documentation for a full list of email-related
settings.
By default, Django will send email from root@localhost. However, some mail
providers reject all email from this address. To use a different sender
address, modify the SERVER_EMAIL setting.
To activate this behavior, put the email addresses of the recipients in the
ADMINS setting.
404 errors
Django can also be configured to email errors about broken links (404 “page
not found” errors). Django sends emails about 404 errors when:
DEBUGisFalse;- Your
MIDDLEWAREsetting includes
django.middleware.common.BrokenLinkEmailsMiddleware.
If those conditions are met, Django will email the users listed in the
MANAGERS setting whenever your code raises a 404 and the request has
a referer. It doesn’t bother to email for 404s that don’t have a referer –
those are usually people typing in broken URLs or broken web bots. It also
ignores 404s when the referer is equal to the requested URL, since this
behavior is from broken web bots too.
You can tell Django to stop reporting particular 404s by tweaking the
IGNORABLE_404_URLS setting. It should be a list of compiled
regular expression objects. For example:
import re
IGNORABLE_404_URLS = [
    re.compile(r'.(php|cgi)$'),
    re.compile(r'^/phpmyadmin/'),
]
In this example, a 404 to any URL ending with .php or .cgi will not be
reported. Neither will any URL starting with /phpmyadmin/.
The following example shows how to exclude some conventional URLs that browsers and
crawlers often request:
import re
IGNORABLE_404_URLS = [
    re.compile(r'^/apple-touch-icon.*.png$'),
    re.compile(r'^/favicon.ico$'),
    re.compile(r'^/robots.txt$'),
]
(Note that these are regular expressions, so we put a backslash in front of
periods to escape them.)
If you’d like to customize the behavior of
django.middleware.common.BrokenLinkEmailsMiddleware further (for
example to ignore requests coming from web crawlers), you should subclass it
and override its methods.
See also
404 errors are logged using the logging framework. By default, these log
records are ignored, but you can use them for error reporting by writing a
handler and configuring logging appropriately.
Filtering error reports
Warning
Filtering sensitive data is a hard problem, and it’s nearly impossible to
guarantee that sensitive data won’t leak into an error report. Therefore,
error reports should only be available to trusted team members and you
should avoid transmitting error reports unencrypted over the internet
(such as through email).
Filtering sensitive information
Error reports are really helpful for debugging errors, so it is generally
useful to record as much relevant information about those errors as possible.
For example, by default Django records the full traceback for the
exception raised, each traceback frame’s local variables, and the
HttpRequest’s attributes.
However, sometimes certain types of information may be too sensitive and thus
may not be appropriate to be kept track of, for example a user’s password or
credit card number. So in addition to filtering out settings that appear to be
sensitive as described in the DEBUG documentation, Django offers a
set of function decorators to help you control which information should be
filtered out of error reports in a production environment (that is, where
DEBUG is set to False): sensitive_variables() and
sensitive_post_parameters().
-
sensitive_variables(*variables)¶ -
If a function (either a view or any regular callback) in your code uses
local variables susceptible to contain sensitive information, you may
prevent the values of those variables from being included in error reports
using thesensitive_variablesdecorator:from django.views.decorators.debug import sensitive_variables @sensitive_variables('user', 'pw', 'cc') def process_info(user): pw = user.pass_word cc = user.credit_card_number name = user.name ...
In the above example, the values for the
user,pwandcc
variables will be hidden and replaced with stars (**********)
in the error reports, whereas the value of thenamevariable will be
disclosed.To systematically hide all local variables of a function from error logs,
do not provide any argument to thesensitive_variablesdecorator:@sensitive_variables() def my_function(): ...
When using multiple decorators
If the variable you want to hide is also a function argument (e.g.
‘user’ in the following example), and if the decorated function has
multiple decorators, then make sure to place@sensitive_variables
at the top of the decorator chain. This way it will also hide the
function argument as it gets passed through the other decorators:@sensitive_variables('user', 'pw', 'cc') @some_decorator @another_decorator def process_info(user): ...
-
sensitive_post_parameters(*parameters)¶ -
If one of your views receives an
HttpRequestobject
withPOST parameterssusceptible to
contain sensitive information, you may prevent the values of those
parameters from being included in the error reports using the
sensitive_post_parametersdecorator:from django.views.decorators.debug import sensitive_post_parameters @sensitive_post_parameters('pass_word', 'credit_card_number') def record_user_profile(request): UserProfile.create( user=request.user, password=request.POST['pass_word'], credit_card=request.POST['credit_card_number'], name=request.POST['name'], ) ...
In the above example, the values for the
pass_wordand
credit_card_numberPOST parameters will be hidden and replaced with
stars (**********) in the request’s representation inside the
error reports, whereas the value of thenameparameter will be
disclosed.To systematically hide all POST parameters of a request in error reports,
do not provide any argument to thesensitive_post_parametersdecorator:@sensitive_post_parameters() def my_view(request): ...
All POST parameters are systematically filtered out of error reports for
certaindjango.contrib.auth.viewsviews (login,
password_reset_confirm,password_change, andadd_viewand
user_change_passwordin theauthadmin) to prevent the leaking of
sensitive information such as user passwords.
Custom error reports
All sensitive_variables() and sensitive_post_parameters() do is,
respectively, annotate the decorated function with the names of sensitive
variables and annotate the HttpRequest object with the names of sensitive
POST parameters, so that this sensitive information can later be filtered out
of reports when an error occurs. The actual filtering is done by Django’s
default error reporter filter:
django.views.debug.SafeExceptionReporterFilter. This filter uses the
decorators’ annotations to replace the corresponding values with stars
(**********) when the error reports are produced. If you wish to
override or customize this default behavior for your entire site, you need to
define your own filter class and tell Django to use it via the
DEFAULT_EXCEPTION_REPORTER_FILTER setting:
DEFAULT_EXCEPTION_REPORTER_FILTER = 'path.to.your.CustomExceptionReporterFilter'
You may also control in a more granular way which filter to use within any
given view by setting the HttpRequest’s exception_reporter_filter
attribute:
def my_view(request):
    if request.user.is_authenticated:
        request.exception_reporter_filter = CustomExceptionReporterFilter()
    ...
Your custom filter class needs to inherit from
django.views.debug.SafeExceptionReporterFilter and may override the
following attributes and methods:
-
class
SafeExceptionReporterFilter¶ -
-
cleansed_substitute¶ -
The string value to replace sensitive value with. By default it
replaces the values of sensitive variables with stars
(**********).
-
hidden_settings¶ -
A compiled regular expression object used to match settings and
request.METAvalues considered as sensitive. By default equivalent
to:import re re.compile(r'API|TOKEN|KEY|SECRET|PASS|SIGNATURE', flags=re.IGNORECASE)
-
is_active(request)¶ -
Returns
Trueto activate the filtering in
get_post_parameters()andget_traceback_frame_variables().
By default the filter is active ifDEBUGisFalse. Note
that sensitiverequest.METAvalues are always filtered along with
sensitive setting values, as described in theDEBUG
documentation.
-
get_post_parameters(request)¶ -
Returns the filtered dictionary of POST parameters. Sensitive values
are replaced withcleansed_substitute.
-
get_traceback_frame_variables(request, tb_frame)¶ -
Returns the filtered dictionary of local variables for the given
traceback frame. Sensitive values are replaced with
cleansed_substitute.
-
If you need to customize error reports beyond filtering you may specify a
custom error reporter class by defining the
DEFAULT_EXCEPTION_REPORTER setting:
DEFAULT_EXCEPTION_REPORTER = 'path.to.your.CustomExceptionReporter'
The exception reporter is responsible for compiling the exception report data,
and formatting it as text or HTML appropriately. (The exception reporter uses
DEFAULT_EXCEPTION_REPORTER_FILTER when preparing the exception
report data.)
Your custom reporter class needs to inherit from
django.views.debug.ExceptionReporter.
-
class
ExceptionReporter¶ -
-
html_template_path¶ -
Property that returns a
pathlib.Pathrepresenting the absolute
filesystem path to a template for rendering the HTML representation of
the exception. Defaults to the Django provided template.
-
text_template_path¶ -
Property that returns a
pathlib.Pathrepresenting the absolute
filesystem path to a template for rendering the plain-text
representation of the exception. Defaults to the Django provided
template.
-
get_traceback_data()¶ -
Return a dictionary containing traceback information.
This is the main extension point for customizing exception reports, for
example:from django.views.debug import ExceptionReporter class CustomExceptionReporter(ExceptionReporter): def get_traceback_data(self): data = super().get_traceback_data() # ... remove/add something here ... return data
-
get_traceback_html()¶ -
Return HTML version of exception report.
Used for HTML version of debug 500 HTTP error page.
-
get_traceback_text()¶ -
Return plain text version of exception report.
Used for plain text version of debug 500 HTTP error page and email
reports.
-
As with the filter class, you may control which exception reporter class to use
within any given view by setting the HttpRequest’s
exception_reporter_class attribute:
def my_view(request):
    if request.user.is_authenticated:
        request.exception_reporter_class = CustomExceptionReporter()
    ...
See also
You can also set up custom error reporting by writing a custom piece of
exception middleware. If you do write custom
error handling, it’s a good idea to emulate Django’s built-in error handling
and only report/log errors if DEBUG is False.
Back to Top
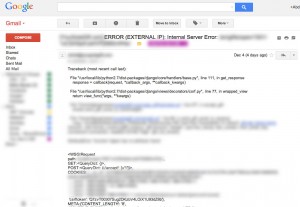
Django error reporting handles uncaught exceptions by sending an email, and (optionally) shows user a nice 500 error page.
This works very well, but in a few instances I’d like to allow users to continue with their business uninterrupted, but still have Django send me the email error report about the exception.
So basically: can I manually send email error report even if I catch the exception?
Of course, I’d like to avoid manually generating the error report email.
asked Apr 1, 2015 at 13:37
![]()
0
You can use the following code to send manually an email about a request and an exception e:
import sys
import traceback
from django.core import mail
from django.views.debug import ExceptionReporter

def send_manually_exception_email(request, e):
    exc_info = sys.exc_info()
    reporter = ExceptionReporter(request, is_email=True, *exc_info)
    subject = e.message.replace('n', '\n').replace('r', '\r')[:989]
    message = "%snn%s" % (
        'n'.join(traceback.format_exception(*exc_info)),
        reporter.filter.get_request_repr(request)
    )
    mail.mail_admins(
        subject, message, fail_silently=True,
        html_message=reporter.get_traceback_html()
    )
You can test it in a view like this:
def test_view(request):
    try:
        raise Exception
    except Exception as e:
        send_manually_exception_email(request, e)
answered Apr 26, 2015 at 13:54
![]()
JuniorCompressorJuniorCompressor
19.4k4 gold badges30 silver badges57 bronze badges
4
Just setup a simple log handler in your settings.
LOGGING = {
    'version': 1,
    'disable_existing_loggers': False,
    'filters': {
        'require_debug_false': {
            '()': 'django.utils.log.RequireDebugFalse'
        }
    },
    'handlers': {
        'mail_admins': {
            'level': 'ERROR',
            'filters': ['require_debug_false'],
            'class': 'django.utils.log.AdminEmailHandler'
        },
        'app': {
            'level': 'ERROR',
            'filters': ['require_debug_false'],
            'class': 'django.utils.log.AdminEmailHandler'
        },
    },
    'loggers': {
        'django.request': {
            'handlers': ['mail_admins'],
            'level': 'ERROR',
            'propagate': True,
        },
    }
}
and then in your view, you can do anything
 import logging
 logger = logging.getLogger('app')

 def some_view(request):
     try:
         # something
         if something_wnet_wrong:
             logger.error('Something went wrong!')
         return some_http_response
     except:
         #something else
         logger.error(sys.exc_info(), request)
         return some_other_response
If you want detailed error report, you can try something like this.
You also need to take care of sensitive information.
![]()
answered Apr 23, 2015 at 9:42
![]()
Chillar AnandChillar Anand
27k8 gold badges115 silver badges130 bronze badges
Yes you can manually send email error report even if you catch the exception.
There are several ways you can go about this.
- You can use the existing default logger configuration (and its associated handler configuration, documented here) for django.request which sends all error messages to the mail_admins handler, which sends the anything logged with log.error from django.request when debug is false as email using AdminEmailHandler, whose existing call point is in handle_uncaught_exception.
- You can add additional logger configuration which uses the same handler, to catch your exception earlier than django.request and call log.error earlier.
- You can subclass django.request, specifically handle_uncaught_exception.
- You can use a custom middleware ( for example StandardExceptionMiddleware) or ExceptionMiddleware
- You can manually call the contents of emit in
AdminEmailHandleror mail.mail_admins directly.
Of these options, Option 4 seems to be the most commonly done.
Based on the additional information in your comment a code example of 2 is below.
First the code that would be added to view
from django.http import HttpResponse
import logging
logger = logging.getLogger(__name__)

def my_view(request):

    try:
        result = do_something()
        return HttpResponse('<h1>Page was found' + result + '</h1>')
    except Exception:
         # Can have whatever status_code and title you like, but I was just matching the existing call.
         logger.error('Internal Server Error: %s', request.path,
            exc_info=sys.exc_info(),
            extra={
            'status_code': 500,
            'request': request
            }
         )
         return HttpResponse('<h1>Page was found, and exception was mailed to admins.</h1>')
This is based of Django documentation for view writing and and introduction to Django logging, but hasn’t been tested.
Then the additional logger configuration is add to the to the loggers entry (as per here)
'nameofdjangoapplicationgoeshere': {
            'handlers': ['mail_admins'],
            'level': 'ERROR',
            'propagate': False,
        },
answered Apr 23, 2015 at 4:12
![]()
Appleman1234Appleman1234
15.8k45 silver badges67 bronze badges
1
I mostly use this pattern with the standard error reporting.
import logging
logger = logging.getLogger('django.request')

#code block in view
try:
    #code that can raise exception
except:
    logger.exception('Information')
#continue as nothing happend
It will trigger the built in error reporting and
logger.exception will catch the stack frame. https://docs.djangoproject.com/en/1.8/topics/logging/#making-logging-calls
edit:
I noticed some information was missing in the email and to get an exact traceback as the built in the following can be used instead:
logger.exception('Internal Server Error: %s', request.path,
                 extra={'status_code': 500, 'request': request})
More info found here:
How to send django exception log manually?
![]()
answered Apr 29, 2015 at 22:14
![]()
Daniel BackmanDaniel Backman
5,0611 gold badge32 silver badges37 bronze badges
Building on @JuniorCompressor’s answer, this is the code that I use:
import sys
from django.core import mail
from django.views.debug import ExceptionReporter

def send_exception_email(request, exception, subject_prefix=''):

    exc_info = sys.exc_info()
    reporter = ExceptionReporter(request, *exc_info, is_email=True)

    def exception_name():
        if exc_info[0]:
            return exc_info[0].__name__
        return 'Exception'

    def subject_suffix():
        if request:
            return '{} at {}'.format(
                exception_name(),
                request.path_info
            )
        return exception_name()

    def subject():
        return '{}{}'.format(
            subject_prefix,
            subject_suffix()
        )

    mail.mail_admins(
        subject=subject(),
        message=reporter.get_traceback_text(),
        fail_silently=True,
        html_message=reporter.get_traceback_html()
    )
answered Dec 4, 2018 at 12:40
![]()
gitaarikgitaarik
40.2k11 gold badges96 silver badges103 bronze badges
Here is a trimmed down version of @gitaarik’s solution, adapted to Python 3:
import sys

from django.core import mail
from django.views.debug import ExceptionReporter

def send_exception_email(request, exception, subject_prefix=''):
    exc_info = sys.exc_info()

    exception_name = exc_info[0].__name__ if exc_info[0] else 'Exception'
    request_path = f" at {request.path_info}" if request else ''

    reporter = ExceptionReporter(request, *exc_info, is_email=True)

    mail.mail_admins(
        subject=f"{subject_prefix}{exception_name}{request_path}",
        message=reporter.get_traceback_text(),
        fail_silently=True,
        html_message=reporter.get_traceback_html(),
    )
answered Dec 15, 2020 at 15:20
![]()
caramcaram
1,33610 silver badges20 bronze badges
I usually use django’s custom management commands to do different tasks on the web application, most of the times with a cron job running those commands. The problem is that when you’re using a cron job, you won’t get the beautiful django error email when something goes wrong.
You can of course log all the commands you run and the cron jobs you have in files, but the problem is that sometimes you need to be notified instantly via your email, so here’s how to make django management commands send you the errors email.
Understanding how django’s error email works
If you check django’s logging documentation you will find that it has a built-in handler called AdminEmailHandler this handler sends an email to the site admins for each log message it receives.
So basically all you need to do is to tell your django commands to log the errors using a logger with that handler, and you’ll receive the emails.
To do so define a logger in your settings.py:
LOGGING = {
    #OTHER OPTIONS
    'filters': {
        #OTHER FILTERS
        'require_debug_false': {
            '()': 'django.utils.log.RequireDebugFalse'
        }
    },
    'handlers': {
        #OTHER HANDLERS
        'mail_admins': {
            'level': 'ERROR',
            'filters': ['require_debug_false'],
            'class': 'django.utils.log.AdminEmailHandler',
            'include_html': True
        }
    },
    'loggers': {
        #OTHER LOGGERS
        'management_commands': {
            'handlers': ['mail_admins'],
            'level': 'ERROR',
            'propagate': True,
        },
    }
}
And after that in your custom commands log the errors you face using the logger you defined:
from django.utils.log import getLogger
from django.core.management.base import BaseCommand
import sys

logger = getLogger('management_commands')

class Command(BaseCommand):
    def handle(self, *args, **options):
        try:
            #DO YOUR STUFF HERE
        except Exception as e:
            logger.error('Admin Command Error: %s', ' '.join(sys.argv), exc_info=sys.exc_info())
            #Raise the exception again so it gets logged in standard error also.
            raise e
Enabling the logger to all commands in one configuration
You can also make all the commands (custom or not) send the error by email by editing manage.py almost the same way as we edited the command file above:
from django.utils.log import getLogger
import sys

logger = getLogger('management_commands')

#Wrap this line with a try-catch execute_from_command_line(sys.argv)
    try:
        execute_from_command_line(sys.argv)
    except Exception as e:
        logger.error('Admin Command Error: %s', ' '.join(sys.argv), exc_info=sys.exc_info())
        raise e
This way all the commands will send the error by email also to django admins.
Enjoy it!
Отправка электронной почты
Хотя Python предоставляет интерфейс отправки почты через модуль smtplib, Django предоставляет пару легких оберток для него. Эти обёртки предоставляются для того, чтобы сделать отправку электронной почты более быстрой, чтобы помочь протестировать отправку электронной почты во время разработки, и чтобы обеспечить поддержку платформ, которые не могут использовать SMTP.
Код находится в модуле django.core.mail.
Быстрый пример
В двух строках:
from django.core.mail import send_mail

send_mail(
    'Subject here',
    'Here is the message.',
    'from@example.com',
    ['to@example.com'],
    fail_silently=False,
)
Почта отправляется с использованием SMTP-хоста и порта, указанных в настройках EMAIL_HOST и EMAIL_PORT. Параметры EMAIL_HOST_USER и EMAIL_HOST_PASSWORD, если установлены, используются для аутентификации на SMTP-сервере, а параметры EMAIL_USE_TLS и EMAIL_USE_SSL управляют использованием безопасного соединения.
Примечание
Набор символов электронной почты, отправленной с помощью django.core.mail, будет соответствовать значению вашей настройки DEFAULT_CHARSET.
send_mail()
-
send_mail(subject, message, from_email, recipient_list, fail_silently=False, auth_user=None, auth_password=None, connection=None, html_message=None)[исходный код]
В большинстве случаев вы можете отправить электронную почту, используя django.core.mail.send_mail().
Требуются параметры subject, message, from_email и recipient_list.
subject: Строка.message: Строка.from_email: Строка. ЕслиNone, Django будет использовать значение параметраDEFAULT_FROM_EMAIL.recipient_list: Список строк, каждая из которых является адресом электронной почты. Каждый членrecipient_listбудет видеть других получателей в поле «Кому:» электронного сообщения.fail_silently: Булево число. Когда этоFalse,send_mail()вызоветsmtplib.SMTPException, если произойдет ошибка. Список возможных исключений см. в документацииsmtplib, все они являются подклассамиSMTPException.auth_user: Необязательное имя пользователя, которое будет использоваться для аутентификации на SMTP-сервере. Если оно не указано, Django будет использовать значение параметраEMAIL_HOST_USER.auth_password: Необязательный пароль для аутентификации на SMTP-сервере. Если он не указан, Django будет использовать значение параметраEMAIL_HOST_PASSWORD.connection: Дополнительный бэкенд электронной почты, который будет использоваться для отправки письма. Если не указано, будет использоваться экземпляр бэкенда по умолчанию. Более подробную информацию см. в документации по Email backends.html_message: Если указаноhtml_message, результирующее письмо будет multipart/alternative письмом сmessageв качестве text/plain типа содержимого иhtml_messageв качестве text/html типа содержимого.
Возвращаемым значением будет количество успешно доставленных сообщений (которое может быть 0 или 1, поскольку может быть отправлено только одно сообщение).
send_mass_mail()
-
send_mass_mail(datatuple, fail_silently=False, auth_user=None, auth_password=None, connection=None)[исходный код]
django.core.mail.send_mass_mail() предназначен для обработки массовой рассылки электронной почты.
datatuple — это кортеж, в котором каждый элемент имеет такой формат:
(subject, message, from_email, recipient_list)
fail_silently, auth_user и auth_password имеют те же функции, что и в send_mail().
Каждый отдельный элемент datatuple приводит к созданию отдельного сообщения электронной почты. Как и в send_mail(), получатели одного и того же recipient_list будут видеть другие адреса в поле «Кому:» почтовых сообщений.
Например, следующий код отправит два разных сообщения двум разным наборам получателей; однако будет открыто только одно соединение с почтовым сервером:
message1 = ('Subject here', 'Here is the message', 'from@example.com', ['first@example.com', 'other@example.com'])
message2 = ('Another Subject', 'Here is another message', 'from@example.com', ['second@test.com'])
send_mass_mail((message1, message2), fail_silently=False)
Возвращаемым значением будет количество успешно доставленных сообщений.
send_mass_mail() против send_mail()
Основное различие между send_mass_mail() и send_mail() заключается в том, что send_mail() при каждом выполнении открывает соединение с почтовым сервером, в то время как send_mass_mail() использует одно соединение для всех своих сообщений. Это делает send_mass_mail() немного более эффективной.
mail_admins()
-
mail_admins(subject, message, fail_silently=False, connection=None, html_message=None)[исходный код]
django.core.mail.mail_admins() — это ярлык для отправки электронного письма администраторам сайта, как определено в настройке ADMINS.
mail_admins() префикс субъекта со значением параметра EMAIL_SUBJECT_PREFIX, который по умолчанию равен "[Django] ".
В заголовке «From:» письма будет значение параметра SERVER_EMAIL.
Этот метод существует для удобства и читабельности.
Если указано html_message, результирующее письмо будет представлять собой письмо multipart/alternative с message в качестве text/plain типа содержимого и html_message в качестве text/html типа содержимого.
mail_managers()
-
mail_managers(subject, message, fail_silently=False, connection=None, html_message=None)[исходный код]
django.core.mail.mail_managers() работает так же, как mail_admins(), за исключением того, что отправляет письмо менеджерам сайта, как определено в настройке MANAGERS.
Примеры
Это отправляет одно письмо на адреса john@example.com и jane@example.com, причем они оба появляются в поле «Кому:»:
send_mail(
    'Subject',
    'Message.',
    'from@example.com',
    ['john@example.com', 'jane@example.com'],
)
Это отправляет сообщение на адреса john@example.com и jane@example.com, причем они оба получают отдельное письмо:
datatuple = (
    ('Subject', 'Message.', 'from@example.com', ['john@example.com']),
    ('Subject', 'Message.', 'from@example.com', ['jane@example.com']),
)
send_mass_mail(datatuple)
Класс EmailMessage
Функции Django send_mail() и send_mass_mail() на самом деле являются тонкими обертками, использующими класс EmailMessage.
Не все возможности класса EmailMessage доступны через send_mail() и связанные с ним функции-обертки. Если вы хотите использовать расширенные возможности, такие как BCC’ed получателей, вложения файлов или многокомпонентные письма, вам необходимо создать экземпляры EmailMessage напрямую.
Примечание
Это особенность дизайна. send_mail() и связанные с ним функции изначально были единственным интерфейсом, который предоставлял Django. Однако со временем список принимаемых ими параметров постепенно увеличивался. Имело смысл перейти к более объектно-ориентированному дизайну для почтовых сообщений и сохранить первоначальные функции только для обратной совместимости.
EmailMessage отвечает за создание самого сообщения электронной почты. Затем email backend отвечает за отправку сообщения.
Для удобства EmailMessage предоставляет метод send() для отправки одного письма. Если вам нужно отправить несколько сообщений, используйте API бэкенда электронной почты provides an alternative.
EmailMessage Объекты
-
class
EmailMessage[исходный код]
Класс EmailMessage инициализируется следующими параметрами (в указанном порядке, если используются позиционные аргументы). Все параметры являются необязательными и могут быть установлены в любое время до вызова метода send().
subject: Тема письма.body: Основной текст. Это должно быть обычное текстовое сообщение.from_email: Адрес отправителя. Обе формыfred@example.comи"Fred" <fred@example.com>являются законными. Если опущено, то используется параметрDEFAULT_FROM_EMAIL.to: Список или кортеж адресов получателей.bcc: Список или кортеж адресов, используемых в заголовке «Bcc» при отправке письма.connection: Экземпляр бэкенда электронной почты. Используйте этот параметр, если вы хотите использовать одно и то же соединение для нескольких сообщений. Если параметр опущен, то при вызовеsend()создается новое соединение.attachments: Список вложений, которые следует поместить в сообщение. Это могут быть либоMIMEBaseэкземпляры, либо(filename, content, mimetype)тройки.headers: Словарь дополнительных заголовков для размещения в сообщении. Ключи — это имена заголовков, значения — это значения заголовков. Вызывающая сторона должна убедиться, что имена и значения заголовков имеют правильный формат для сообщения электронной почты. Соответствующим атрибутом являетсяextra_headers.cc: Список или кортеж адресов получателей, используемых в заголовке «Cc» при отправке письма.reply_to: Список или кортеж адресов получателей, используемых в заголовке «Reply-To» при отправке электронной почты.
Например:
from django.core.mail import EmailMessage

email = EmailMessage(
    'Hello',
    'Body goes here',
    'from@example.com',
    ['to1@example.com', 'to2@example.com'],
    ['bcc@example.com'],
    reply_to=['another@example.com'],
    headers={'Message-ID': 'foo'},
)
Класс имеет следующие методы:
-
send(fail_silently=False)отправляет сообщение. Если при создании письма было указано соединение, будет использовано это соединение. В противном случае будет создан и использован экземпляр бэкенда по умолчанию. Если аргумент ключевого словаfail_silentlyравенTrue, исключения, возникшие при отправке сообщения, будут устранены. Пустой список получателей не вызовет исключения. Будет возвращено1, если сообщение было отправлено успешно, иначе0. -
message()создает объектdjango.core.mail.SafeMIMEText(подкласс класса PythonMIMEText) или объектdjango.core.mail.SafeMIMEMultipart, содержащий сообщение для отправки. Если вам когда-нибудь понадобится расширить классEmailMessage, вы, вероятно, захотите переопределить этот метод, чтобы поместить нужное вам содержимое в объект MIME. -
recipients()возвращает список всех получателей сообщения, независимо от того, записаны ли они в атрибутахto,ccилиbcc. Это еще один метод, который вам, возможно, придется переопределить при создании подкласса, поскольку SMTP-серверу необходимо сообщить полный список получателей при отправке сообщения. Если в своем классе вы добавите другой способ указания получателей, они также должны быть возвращены из этого метода. -
attach()создает новое вложение файла и добавляет его к сообщению. Существует два способа вызоваattach():-
Вы можете передать ему единственный аргумент, который является экземпляром
MIMEBase. Он будет вставлен непосредственно в результирующее сообщение. -
В качестве альтернативы вы можете передать
attach()три аргумента:filename,contentиmimetype.filename— это имя вложения файла, которое будет отображаться в письме,content— это данные, которые будут содержаться во вложении, аmimetype— это необязательный MIME тип для вложения. Если вы опуститеmimetype, тип содержимого MIME будет определяться по имени файла вложения.Например:
message.attach('design.png', img_data, 'image/png')
Если вы укажете
mimetypeиз message/rfc822, он также приметdjango.core.mail.EmailMessageиemail.message.Message.Для
mimetype, начинающегося с text/, ожидается, что содержимое будет строкой. Двоичные данные будут декодированы с помощью UTF-8, и если это не удастся, MIME-тип будет изменен на application/octet-stream, а данные будут присоединены без изменений.Кроме того, вложения message/rfc822 больше не будут кодироваться base64 в нарушение RFC 2046#section-5.2.1, что может вызвать проблемы с отображением вложений в Evolution и Thunderbird.
-
-
attach_file()создает новое вложение, используя файл из вашей файловой системы. Вызовите эту команду, указав путь к файлу, который нужно прикрепить, и, по желанию, MIME-тип, который нужно использовать для вложения. Если MIME-тип не указан, он будет определен из имени файла. Вы можете использовать его следующим образом:message.attach_file('/images/weather_map.png')
Для типов MIME, начинающихся с text/, двоичные данные обрабатываются как в
attach().
Отправка альтернативных типов содержимого
Бывает полезно включить в письмо несколько версий содержимого; классический пример — отправить текстовую и HTML-версию сообщения. В библиотеке электронной почты Django вы можете сделать это с помощью класса EmailMultiAlternatives. Этот подкласс класса EmailMessage имеет метод attach_alternative() для включения в письмо дополнительных версий тела сообщения. Все остальные методы (включая инициализацию класса) наследуются непосредственно от EmailMessage.
Чтобы отправить комбинацию текста и HTML, вы можете написать:
from django.core.mail import EmailMultiAlternatives

subject, from_email, to = 'hello', 'from@example.com', 'to@example.com'
text_content = 'This is an important message.'
html_content = '<p>This is an <strong>important</strong> message.</p>'
msg = EmailMultiAlternatives(subject, text_content, from_email, [to])
msg.attach_alternative(html_content, "text/html")
msg.send()
По умолчанию MIME-типом параметра body в EmailMessage является "text/plain". Это хорошая практика, так как это гарантирует, что любой получатель сможет прочитать письмо, независимо от его почтового клиента. Однако если вы уверены, что ваши получатели могут работать с альтернативным типом содержимого, вы можете использовать атрибут content_subtype в классе EmailMessage для изменения основного типа содержимого. Основной тип всегда будет "text", но вы можете изменить подтип. Например:
msg = EmailMessage(subject, html_content, from_email, [to])
msg.content_subtype = "html"  # Main content is now text/html
msg.send()
Бэкенды электронной почты
Фактическая отправка электронного письма осуществляется бэкендом электронной почты.
Класс email backend имеет следующие методы:
open()создает долгоживущее соединение для отправки электронной почты.close()закрывает текущее соединение для отправки электронной почты.send_messages(email_messages)отправляет список объектовEmailMessage. Если соединение не открыто, этот вызов неявно откроет соединение, а затем закроет его. Если соединение уже открыто, оно будет оставлено открытым после отправки почты.
Его также можно использовать в качестве менеджера контекста, который будет автоматически вызывать open() и close() по мере необходимости:
from django.core import mail

with mail.get_connection() as connection:
    mail.EmailMessage(
        subject1, body1, from1, [to1],
        connection=connection,
    ).send()
    mail.EmailMessage(
        subject2, body2, from2, [to2],
        connection=connection,
    ).send()
Получение экземпляра бэкенда электронной почты
Функция get_connection() в django.core.mail возвращает экземпляр почтового бэкенда, который вы можете использовать.
-
get_connection(backend=None, fail_silently=False, *args, **kwargs)[исходный код]
По умолчанию вызов get_connection() возвращает экземпляр почтового бэкенда, указанного в EMAIL_BACKEND. Если вы укажете аргумент backend, будет инстанцирован экземпляр этого бэкенда.
Аргумент fail_silently управляет тем, как бэкенд должен обрабатывать ошибки. Если fail_silently равен True, то исключения в процессе отправки письма будут молча игнорироваться.
Все остальные аргументы передаются непосредственно в конструктор почтового бэкенда.
Django поставляется с несколькими бэкендами для отправки электронной почты. За исключением бэкенда SMTP (который используется по умолчанию), эти бэкенды полезны только во время тестирования и разработки. Если у вас есть особые требования к отправке электронной почты, вы можете write your own email backend.
Бэкэнд SMTP
-
class
backends.smtp.EmailBackend(host=None, port=None, username=None, password=None, use_tls=None, fail_silently=False, use_ssl=None, timeout=None, ssl_keyfile=None, ssl_certfile=None, **kwargs)¶ -
Это бэкэнд по умолчанию. Электронная почта будет отправляться через SMTP-сервер.
Значение для каждого аргумента извлекается из соответствующей настройки, если аргумент
None:host:EMAIL_HOSTport:EMAIL_PORTusername:EMAIL_HOST_USERpassword:EMAIL_HOST_PASSWORDuse_tls:EMAIL_USE_TLSuse_ssl:EMAIL_USE_SSLtimeout:EMAIL_TIMEOUTssl_keyfile:EMAIL_SSL_KEYFILEssl_certfile:EMAIL_SSL_CERTFILE
Бэкенд SMTP — это конфигурация по умолчанию, унаследованная Django. Если вы хотите указать его явно, поместите в настройки следующее:
EMAIL_BACKEND = 'django.core.mail.backends.smtp.EmailBackend'
Если не указано, то по умолчанию
timeoutбудет использоватьсяsocket.getdefaulttimeout(), который по умолчанию равенNone(без таймаута).
Бэкэнд консоли
Вместо отправки реальных писем консольный бэкенд просто записывает письма, которые будут отправлены на стандартный вывод. По умолчанию консольный бэкенд пишет в stdout. Вы можете использовать другой потокоподобный объект, указав аргумент stream при создании соединения.
Чтобы указать этот бэкенд, поместите в настройки следующее:
EMAIL_BACKEND = 'django.core.mail.backends.console.EmailBackend'
Этот бэкенд не предназначен для использования в производстве — он предоставляется в качестве удобства, которое может быть использовано во время разработки.
Файловый бэкенд
Файловый бэкэнд записывает электронные письма в файл. Новый файл создается для каждой новой сессии, открытой на этом бэкенде. Каталог, в который записываются файлы, берется либо из настройки EMAIL_FILE_PATH, либо из ключевого слова file_path при создании соединения с помощью get_connection().
Чтобы указать этот бэкенд, поместите в настройки следующее:
EMAIL_BACKEND = 'django.core.mail.backends.filebased.EmailBackend'
EMAIL_FILE_PATH = '/tmp/app-messages' # change this to a proper location
Этот бэкенд не предназначен для использования в производстве — он предоставляется в качестве удобства, которое может быть использовано во время разработки.
Бэкэнд с памятью
Бэкэнд 'locmem' хранит сообщения в специальном атрибуте модуля django.core.mail. Атрибут outbox создается при отправке первого сообщения. Он представляет собой список с экземпляром EmailMessage для каждого отправляемого сообщения.
Чтобы указать этот бэкенд, поместите в настройки следующее:
EMAIL_BACKEND = 'django.core.mail.backends.locmem.EmailBackend'
Этот бэкенд не предназначен для использования в производстве — он предоставляется в качестве удобства, которое можно использовать во время разработки и тестирования.
Бегунок для тестирования Django automatically uses this backend for testing.
Фиктивный бэкэнд
Как следует из названия, фиктивный бэкенд ничего не делает с вашими сообщениями. Чтобы указать этот бэкенд, пропишите в настройках следующее:
EMAIL_BACKEND = 'django.core.mail.backends.dummy.EmailBackend'
Этот бэкенд не предназначен для использования в производстве — он предоставляется в качестве удобства, которое может быть использовано во время разработки.
Определение пользовательского бэкенда электронной почты
Если вам нужно изменить способ отправки писем, вы можете написать свой собственный почтовый бэкенд. Параметр EMAIL_BACKEND в вашем файле настроек — это путь импорта Python для вашего класса бэкенда.
Пользовательские почтовые бэкенды должны иметь подкласс BaseEmailBackend, который находится в модуле django.core.mail.backends.base. Пользовательский почтовый бэкенд должен реализовать метод send_messages(email_messages). Этот метод получает список экземпляров EmailMessage и возвращает количество успешно доставленных сообщений. Если ваш бэкенд имеет какое-либо понятие о постоянном сеансе или соединении, вы также должны реализовать методы open() и close(). Эталонная реализация приведена в разделе smtp.EmailBackend.
Отправка нескольких электронных писем
Создание и закрытие SMTP-соединения (или любого другого сетевого соединения, если на то пошло) — дорогостоящий процесс. Если вам нужно отправить много писем, имеет смысл повторно использовать SMTP-соединение, а не создавать и уничтожать соединение каждый раз, когда вы хотите отправить письмо.
Есть два способа указать бэкенду электронной почты на повторное использование соединения.
Во-первых, вы можете использовать метод send_messages(). send_messages() принимает список экземпляров EmailMessage (или подклассов) и отправляет их все, используя одно соединение.
Например, если у вас есть функция get_notification_email(), которая возвращает список объектов EmailMessage, представляющих некоторые периодические электронные письма, которые вы хотите разослать, вы можете отправить эти письма с помощью одного вызова send_messages:
from django.core import mail
connection = mail.get_connection()   # Use default email connection
messages = get_notification_email()
connection.send_messages(messages)
В этом примере вызов send_messages() открывает соединение на бэкенде, отправляет список сообщений, а затем снова закрывает соединение.
Второй подход заключается в использовании методов open() и close() на бэкенде электронной почты для ручного управления соединением. send_messages() не будет вручную открывать или закрывать соединение, если оно уже открыто, поэтому если вы вручную открываете соединение, вы можете контролировать, когда оно будет закрыто. Например:
from django.core import mail
connection = mail.get_connection()

# Manually open the connection
connection.open()

# Construct an email message that uses the connection
email1 = mail.EmailMessage(
    'Hello',
    'Body goes here',
    'from@example.com',
    ['to1@example.com'],
    connection=connection,
)
email1.send() # Send the email

# Construct two more messages
email2 = mail.EmailMessage(
    'Hello',
    'Body goes here',
    'from@example.com',
    ['to2@example.com'],
)
email3 = mail.EmailMessage(
    'Hello',
    'Body goes here',
    'from@example.com',
    ['to3@example.com'],
)

# Send the two emails in a single call -
connection.send_messages([email2, email3])
# The connection was already open so send_messages() doesn't close it.
# We need to manually close the connection.
connection.close()
Настройка электронной почты для разработки
Бывают случаи, когда вы не хотите, чтобы Django отправлял электронные письма вообще. Например, при разработке веб-сайта вы, вероятно, не захотите рассылать тысячи писем — но вы можете захотеть проверить, что письма будут отправлены нужным людям при правильных условиях, и что эти письма будут содержать правильное содержание.
Самый простой способ настроить электронную почту для локальной разработки — использовать почтовый бэкенд console. Этот бэкенд перенаправляет всю почту на stdout, позволяя вам просматривать содержимое писем.
Бэкенд электронной почты file также может быть полезен во время разработки — этот бэкенд сбрасывает содержимое каждого SMTP-соединения в файл, который можно просмотреть на досуге.
Другой подход заключается в использовании «тупого» SMTP-сервера, который получает электронные письма локально и отображает их на терминале, но фактически ничего не отправляет. Пакет aiosmtpd предоставляет способ достижения этой цели:
python -m pip install aiosmtpd

python -m aiosmtpd -n -l localhost:8025
Эта команда запустит минимальный SMTP-сервер, слушающий порт 8025 на localhost. Этот сервер выводит на стандартный вывод все заголовки и тело письма. Вам останется только установить параметры EMAIL_HOST и EMAIL_PORT соответственно. Для более подробного обсуждения опций SMTP-сервера обратитесь к документации модуля aiosmtpd.
Информацию о модульном тестировании отправки электронной почты в вашем приложении см. в разделе Услуги электронной почты документации по тестированию.