Параметры и разделы файла dosbox.conf
Естественно, для каждой игры лучше всего настраивать конфигурацию DOSBox’а отдельно. Оптимальным решением будет использование отдельного .conf файла для каждой игры (с максимально подходящими для неё настройками). Для удобства можно запускать DOSBox с помощью ярлыков (shortcut) следующим образом:
"DOSBox.exe -conf "DOSbox-GameName.conf"
При создании данного руководства использовалась информация из [1].
[sdl]
Этот раздел содержит все низкоуровневые настройки, с помощью которых DosBox взаимодействует с вашим реальным железом. Вы можете настроить разрешения, которые будут эмулироваться, как DosBox будет вести себя при возникновении ошибок и как он будет реагировать на действия, произведённые с помощью вашей мыши, клавиатуры и джойстика. Вы можете достигнуть высокого уровня оптимизации, изменяя эти настройки, однако в большинстве случаев стандартные настройки являются лучшим решением. Эти настройки изменяют параметры библиотеки SDL, которая на низком уровне работает с входными данными, а также позволяют изменить приоритет DOSBox’а.
- fullscreen = true | false (полный экран = истинно | ложно)
- Запускать DOSBox в полноэкранном режиме.
- По умолчанию false (ложно).
- (Актуально для версии: 0.73)
- fulldouble = true | false (полный двойная = истинно | ложно)
- Использовать двойную буферизацию в полноэкранном режиме. Смотрите [1]
- По умолчанию false (ложно).
- (Актуально для версии: 0.73)
- fullresolution = width x height | original | desktop (полноэкранное разрешение = ширина х высота | исходное | рабочий стол)
- Изменение размеров приложения (в полноэкранном режиме) до указанного размера (любые методы вывода изображения, за исключением метода surface и, для ряда игр, overlay).
- Original (исходное) — разрешение игры по умолчанию либо выбранное (с помощью Setup.exe или через игровое меню) разрешение. Если исходное разрешение меньше, чем разрешение рабочего стола, DOSBox постарается переключиться на разрешение, максимально близкое к требуемому игрой или приложением. Например, если игра, запущенная с помощью DOSBox’а, требует разрешение 320×240, в то время как на вашем рабочем столе установлено разрешение 1920×1200, DOSBox переключится на 320×240 либо следующее максимальное разрешение, поддерживаемое драйверами вашей видеокарты (скажем, 800×600, если исходное разрешение недоступно).
- Desktop (недокументированный параметр) — устанавливает полноэкранное разрешение на разрешение рабочего стола в Windows. Соответственно растягивается картинка на весь экран. Используйте настройку aspect=true, в том случае если полученная картинка внезапно потеряет первоначальное соотношение сторон. Предупреждает «скакание» иконок по рабочему столу Windows. Рекомендуется в сочетании с scaler отличным от none
- Разрешение многих игр ниже минимального поддерживаемого на современных видеокартах разрешения, поэтому DOSBox отмасштабирует разрешение, используемое игрой, до поддерживаемого минимума.
- Примечание: настройка scaler (преобразователь масштаба) в разделе [render] также способна увеличить до определённого уровня масштаб исходного разрешения. Эти настройки инициируются перед дополнительным масштабированием, осуществляемым настройкой fullresolution (полноэкранное разрешение).
- Настройка по умолчанию: original (исходное).
- (Актуально для версий: с 0.62 до 0.73)
- windowresolution = width x height | original (разрешение в оконном представлении = ширина х высота | исходное разрешение)
- Изменение размеров окна до указанного размера, если устройство вывода изображения поддерживает аппаратное масштабирование (hardware scaling) (то есть любые методы вывода изображения, за исключением метода surface и, для ряда игр, overlay).
- Original (исходное разрешение) — разрешение игры по умолчанию либо выбранное (с помощью Setup.exe или через игровое меню) разрешение.
- Примечание: настройка scaler в разделе [render] также способна увеличить до определённого уровня масштаб исходного разрешения. Эти настройки инициируются перед дополнительным масштабированием, осуществляемым настройкой windowresolution (разрешение в оконном представлении).
- Настройка по умолчанию: original.
- (Актуально для версий: с 0.62 до 0.73)
- output = surface | overlay | opengl | openglnb | ddraw )
- Какой режим использовать для вывода изображения.
- Surface — не поддерживает масштабирование при увеличении разрешения с помощью настроек fullresolution и windowresolution
- overlay — не поддерживает масштабирование в играх с high color палитрой при увеличении разрешения с помощью настроек fullresolution и windowresolution
- Настройка по умолчанию: surface.
- (Актуально для версии: 0.73)
- autolock = true | false (захват мыши = истинно | ложно)
- Мышь будет автоматически захвачена после того, как вы щёлкните в окне DOSBox’а.
- Настройка по умолчанию: true (истинно).
- (Актуально для версии: 0.73)
- sensitivity = 1..1000 (чувствительность = 1..1000)
- Чувствительность мыши.
- Настройка по умолчанию: 100.
- (Актуально для версии: 0.73)
- waitonerror = true | false (ждать после возникновения ошибки = истинно | ложно)
- Не завершать работу DOSBox’а, если произошла ошибка.
- Настройка по умолчанию: true (истинно).
- (Актуально для версии: 0.73)
- priority = when-focused,when-minimzed (приоритет = когда-развёрнуто, когда-свёрнуто)
- Степень приоритета DOSBox’а. Второй параметр (после запятой) используется, когда окно DOSBox-а свёрнуто. Возможные значения: lowerest (низший), lower (низкий), normal (нормальный), higher (высокий), highest (высший) и pause (пауза).
- Настройка по умолчанию: higher, normal.
- (Актуально для версии: 0.73)
- mapperfile = path-to-mapper-file (файл раскладки = путь к файлу раскладки)
- Файл для изменения раскладки (mappings) кнопок/событий.
- Настройка по умолчанию: mapper.txt.
- (Актуально для версии: 0.73)
- usescancodes = true | false
- Избегайте использования комбинаций с клавишей SYM (symkeys на мобильных устройствах), они могут не заработать на всех операционных системах.
- Настройка по умолчанию: true.
- (Актуально для версии: 0.73)
Устаревшие (не рекомендованные к изменению) параметры.
- fullfixed = true | false (полноэкранное фиксирование = истинно | ложно)
- В новых версиях заменено на параметр fullresolution.
- (Актуально для версий: ранее 0.65)
- fullwidth = width (полноэкранная ширина = ширина)
- В новых версиях заменено на параметр fullresolution.
- (Актуально для версии: 0.61)
- fullheight = height (полноэкранная высота = высота)
- В новых версиях заменено на параметр fullresolution.
- (Актуально для версии: 0.61)
[dosbox]
Раздел [dosbox] содержит настройки, которые не подходят ни под один другой раздел (такие, как выбор языка, используемого в внутренней справке DOSBox’а, где хранить скриншоты и. т. д.).
- language = path-to-language-file (язык = путь к файлу языка)
- Выбрать другой языковой файл.
- Стандартная настройка: пусто (language= ).
- (Актуально для версии: 0.73)
- memsize = nn (размер памяти = двузначное число)
- Размер доступной программам верхней памяти (в мегабайтах).
- Примечание: DOSBox всегда располагает 1 Мегабайтом низкой памяти, поэтому общее количество памяти равно одному мегабайту низкой памяти плюс значению параметра memsize.
- Стандартное значение: 16 (memsize=16).
- (Актуально для версии: 0.73)
- machine = hercules | cga | tandy | pcjr | ega | vgaonly | svga_s3 | svga_et3000 | svga_et4000 | svga_paradise | vesa_nolfb | vesa_oldvbe
- (Актуально для версии: 0.73)
- (В прошлых версиях: machine = hercules | cga | tandy | vga)
- Тип графического адаптера, который пытается эмулировать DOSBox.
- Настройка по умолчанию: svga_s3 (machine=svga_s3) (в прошлых версиях было: vga)
- Значения переменных:
-
- vgaonly (в прошлых версиях vga) — VGA (Video Graphics Array): Графическая система компании IBM, вышедшая вместе с PS/2. Истинное VGA поддерживает 16 цветов при разрешении 640х480 либо 256 цветов при разрешении 320х200. VGA-цвета выбираются из палитры 262 144 цветов (не 16.7 миллиона), потому что VGA использует 6 битов для определения каждого цвета вместо 8 по сегодняшним стандартам.
- Tandy: Графические режимы, доступные на Tandy 1000 или PCjr, которые включают в себя: 160x100x16, 160x200x16, 320x200x16 и 640x200x4. В серию Tandy RL/SL/TL также добавлен режим 640x200x16.
- CGA (Color Graphics Adapter): CGA поддерживает несколько различных режимов; максимальное качество текстового режима — 85х25 символов с палитрой 16 цветов. Графические режимы начинаются от 640x200x2 (монохромный) до 16 цветов при разрешении 160х200. Самым распространённым режимом для игр был 320х200х4. Однако эти четыре цвета не могли свободно использовать 16-цветную палитру CGA. Были только две официальные палитры для этого режима:
- Пурпурный, голубой (magenta, cyan), белый и цвет фона (чёрный по умолчанию). Они больше всего подходили для игр.
- Красный, зелёный, коричневый и цвет фона (чёрный по умолчанию). Иногда есть возможность выбора этого режима в некоторых играх.
-
-
- Примечание: VGA поддерживает большинство CGA-режимов, поэтому вы можете оставить DOSBox в режиме VGA для игры в большинство CGA-игр. Тем не менее, в ряде случаев этот режим необходим для корректного отображения графики.
-
-
- Hercules: Hercules — альтернатива CGA — был придуман для поддержки высоких разрешений в монохромном режиме — как для текста, так и графики. Разрешение в этом режиме — 720x348x2 (один цвет + цвет фона).
-
- (Актуально для версии: 0.73)
- captures = path-to-capture-directory (захваты = путь к директории захвата)
- Директория (папка), куда складывается захваченная информация (музыка — wave и midi, скриншоты) после нажатия кнопок CTRL+F5 и CTRL+F6. Скриншоты будут захвачены и сохранены в качестве (PNG) файлов с разрешением самой игры (а не с разрешением окна DOSBox).
- Примечание: Начиная с версии 0.73, она создается автоматически после первого использования. В ранних версиях, папку для захвата требовалось предварительно создать.
- Стандартное значение: capture (captures=capture).
- (Актуально для версий: с 0.62 до 0.73).
[render]
- Методы, которые использует DOSBox для увеличения скорости и качества отображаемой на экране графики. Например, он может пропустить каждый третий кадр (что сбережёт время), либо попробует сгладить грубое изображение низкого разрешения, которое использовалось на старых мониторах, но плохо выглядит на современных мониторах в высоком разрешении.
- frameskip = nnn (пропуск кадров = целое число)
- Сколько кадров пропустит DOSBox, прежде, чем нарисует один.
- Настройка по умолчанию: 0.
- aspect = true | false(пропорции = истинно | ложно)
- Делать ли коррекцию пропорций. Настройка действует только на режимы, где используются неквадратные пиксели, например VGA Mode 13h, разрешение которого 320×200 и используется многими DOS-играми. Рекомендуется для тех игр, которые были рассчитаны на 4:3 мониторы, но без коррекции пропорций будут заметны искажения, которые не были предусмотрены разработчиками.
- Настройка по умолчанию: false.
- scaler = none | normal2x | normal3x | tv2x | tv3x | rgb2x | rgb3x | scan2x | scan3x | advmame2x | advmame3x | advinterp2x | advinterp3x | 2xsai | super2xsai | supereagle | hq2x | hq3x
- Определяет, какой scaler будет использоваться для увеличения и улучшения режимов с низким разрешением, ПЕРЕД какими-либо дополнительными операциями с помощью настроек fullresolution и windowresolution в разделе [sdl].
- Доступные scaler’ы:
-
- none: scaling не используется.
- normal: nearest-neighbour scaling (большие, квадратные пиксели).
- scan: Работает так же, как и ‘normal’, но с горизонтальными чёрными линиями.
- tv: Работает так же, как и ‘scan’, но с затенённым вариантом соседних пикселей, вместо чёрных линий.
- rgb: Симулирует фосфоры на dot trio CRT(ЭЛТ).
- advmame: Сглаживает углы и зазубрины с диагональных линий.
- advinterp: Идентично ‘advmame’.
- sai: Идентично ‘advmame’, но с гораздо более мягкими цветовыми переходами и краями.
- supersai: Идентично ‘sai’ но чётче.
- hq: ‘high quality'(высокое качество) scaler который выдаёт более чистое и чёткое изображение, чем ‘advmame’ или ‘sai’ scaler-ы.
-
- Настройка по умолчанию: normal2x.
- Поддерживаемые scaler-ы, для которых требуется описание: supereagle
[cpu]
Раздел CPU управляет методом эмуляции ЦП (центрального процессора) с помощью DOSBox’а, насколько быстрой должна быть эмуляция и её настройки.
DOSBox поддерживает несколько различных методов эмуляции:
- core = simple | normal| dynamic | auto(ядро = простое | нормальное | динамическое | автоматическое).
- Используемое в эмуляции ядро ЦП (центрального процессора). Выбор изменяет эффективность DOSBox’а и в очень редких случаях влияет на стабильность.
- normal — Программа интерпретируется как инструкция за инструкцией. Этот метод гораздо более требователен к ресурсам ЦП, чем dynamic, но производит гораздо более точную эмуляцию и требуется для платформ, для которых у DOSBox’а нет настройки dinamic.
- simple — Примерно то же самое, что и normal, но оптимизированное для real-mode игр. В случае запуска protected-mode игр DOSBox автоматически переключается в режим ядра normal.
- dynamic — Программные инструкции находятся в блоках, которые переводятся в инструкции, понятные центральному процессору, и выполняются напрямую. В большинстве случаев этот подход более эффективен, чем интерпретация, за исключением тех программ, которые содержат слишком много самомодифицируемого кода. Эта настройка присутствует не на всех платформах.
- auto — Real-mode-программы запускаются с настройкой normal. Для protected-mode-программ DOSBox переключается на настройку dynamic, если она доступна.
- full — не рекомендована.
- Настройка по умолчанию: auto.
- cputype = auto | 386 | 386_slow | 486_slow | pentium_slow | 386_prefetch (тип ЦП)
- Тип ЦП, используемый во время эмуляции. Настройка «auto» — быстрейший выбор.
- Настройка по умолчанию: auto.
- (Начиная с версии: 0.73)
- cycles = fixed nnnn | max [default%] [limit «cycle limit»] | auto [realmode default] [protected mode default%] [limit «cycle limit»]
- Количество инструкций, которые DOSBox пытается эмулировать каждую миллисекунду.
- Поставьте настройку на max, чтобы автоматически увеличить количество циклов (cycles) на максимально возможное. Настройка auto переключается на max, когда это необходимо.
-
-
- fixed nnnn (фиксированное число) — ставит скорость эмулируемого ЦП на фиксированное количество циклов (nnnn). Значение 3000 означает 3 MIPS. Если это значение слишком велико, некоторые игры будут работать слишком быстро либо аварийно завершаться. Максимальное значение зависит от мощности вашего ЦП. Если значение будет превосходить возможности вашего ЦП, эмуляция будет идти медленно и появятся прерывания звука.
- max (максимальное) — автоматически ставит количество циклов, приближенное к default% процентам вашего физического центрального процессора. Если значение default% не определено, оно приравнивается к 100%. Дополнительный параметр limit ограничивает максимальную скорость до указанного значения.
- auto (автоматический) — для real-mode-игр этот параметр переключается на значение параметра «realmode default», либо на 3000 циклов, если значение не определено. Когда идёт переключение в protected-mode, параметр cycles автоматически переключается в режим max, используя остальные дополнительные параметры.
-
- Значение по умолчанию: auto.
Примеры:
cycles=fixed 5000, cycles=5000
Все игры, которые вы начнёте, будут работать с фиксированной скоростью ~5 MIPS. Полезно для чувствительных к скорости игр или игр, для которых требуется постоянная скорость ЦП. Вы можете изменять текущее значение с помощью комбинаций клавиш Ctrl+F11 и Ctrl+F12 во время работы DOSBox’а.
cycles=max
Все игры, которые вы начнёте, будут работать на максимально доступной вашему ЦП скорости. Используйте Ctrl+F11 и Ctrl+F12 для изменения процента использования мощности вашего ЦП.
cycles=max limit 50000
Все игры, которые вы начнёте, будут работать со скоростью до 50000 циклов — в зависимости от мощности вашего ЦП.
cycles=max 50%
Будет использовано около 50% мощности вашего ЦП.
cycles=auto
Real-mode-игры будут работать на скорости 3000 циклов. Protected-mode-игры будут работать на настройке cycles=max.
cycles=auto 5000 50% limit 50000
Real-mode-игры будут работать на фиксированной скорости 5000 циклов, protected-mode-игры — на настройке cycles=max 50% limit 50000.
- cycleup = nnn (увеличить количество циклов = число)
- Количество увеличиваемых с помощью комбинации клавиш циклов.
- Значение по умолчанию: 10. Значения меньше 100 будут изменять процентное соотношение текущего значения.
- cycledown = nnn (уменьшить количество циклов = число)
- Количество уменьшаемых с помощью комбинации клавиш циклов.
- Значение по умолчанию: 20. Значения меньше 100 будут изменять процентное соотношение текущего значения.
[mixer]
Здесь вы можете определять качество эмулируемого аудио.
- nosound=true|false
- Включить/выключить общий звук. Позволяет выключать громкость, не отключая эмуляцию звука.
- Стандартная настройка: false.
- rate
- Частота микширования звука. Для наилучшего качества должна совпадать с частотами эмулируемых звуковых устройств.
- Возможные значения: 44100, 48000, 32000, 22050, 16000, 11025, 8000, 49716.
- Стандартная настройка: 44100.
- blocksize
- Размер блока микширования звука. Бóльшие блоки могут устранить запинание звука, но возникнет запаздывание.
- Возможные значения: 1024, 2048, 4096, 8192, 512, 256.
- Стандартная настройка: 1024.[2]
- prebuffer
- Размер буфера для вывода звука в миллисекундах. Звук всегда будет отставать на эту величину.
- Стандартная настройка: 20.[2]
[midi]
Здесь вы можете определять настройки MIDI. Термин MIDI часто используется для определения фоновой музыки в старых играх, но в данном случае он означает аудио-синтезатор (который направлен напрямую от эмулируемых игр к современному железу).
- mpu401 = intelligent | uart | none
- Определяет, какой тип MIDI Processing Unit эмулировать.
-
-
- intelligent (умный): (информация из Википедии) MPU-401 может работать в двух режимах: в нормальном режиме и режиме UART (Универсальный Асинхронный Приёмопередатчик). «Нормальный режим» использует 8-канальный секвенсер, MIDI clock, SYNC 24, Tape Sync и метроном; благодаря этим возможностям этот режим часто называют «умным режимом» (intelligent mode).
- uart (Универсальный Асинхронный Приёмопередатчик): этот режим просто эмулирует режим UART, то есть ретранслирует в-/исходящие MIDI-байты данных.
- none: MIDI не эмулируется.
-
- mididevice = default | win32 | alsa | oss | coreaudio | coremidi | none
- Немного сбивающее с толку название настройки, потому что она определяет не столько то, какое MIDI-устройство использовать, сколько то, какой MIDI-интерфейс использовать. Так как на данный момент DOSBox не эмулирует MIDI, он вместо этого пропускает его через интерфейс, который поддерживает воспроизведение MIDI. Эта настройка объясняет DOSBox’у, через какой MIDI интерфейс пропускать данные.
-
-
- default: Для воспроизведения используется стандартное воспроизводящее MIDI устройство.
- win32: Используется Win32 MIDI-устройство воспроизведения.
- alsa: Используется Linux-овский интерфейс воспроизведения Advanced Linux Sound Architecture.
- oss: Используется Linux-овский интерфейс воспроизведения Open Sound System.
- coreaudio: Оболочка MacOS X для обработки музыки через встроенный в OS X синтезатор.
- coremidi: Оболочка MacOS X для направления MIDI-команд на устройство, которое было настроено в Audio MIDI Setup.
- none: MIDI отключено.
-
- midiconfig = идентификационный номер устройства MIDI
- Используется описанным ранее MIDI-интерфейсом. Эта настройка определяет идентификационный номер (ID) устройства для воспроизведения MIDI. Может быть определено под Windows с помощью команды DOSBox MIXER /LISTMIDI, либо под Linux — pmidi -l. Вводить нужно в консоли DOSBox.
[sblaster]
Настройки эмуляции Sound Blaster.
- sbtype=sb1,sb2,sbpro1,sbpro2,sb16,none.
- Выбор эмулируемой карты Sound Blaster. Возможны следующие варианты:
-
- sb1: эмуляция Sound Blaster 1.0, битность устройства — 8, максимальная частота дискретизации звука — 22 kHz, стереорежим — отсутствует, синтез звука — CMS / OPL-2
- sb2: эмуляция Sound Blaster 2.0, битность устройства — 8, максимальная частота дискретизации звука — 44.1 kHz, стереорежим — отсутствует, синтез звука — OPL-2
- sbpro1: эмуляция Sound Blaster Pro 1.0, битность устройства — 8, максимальная частота дискретизации звука — 44.1 kHz (в стерео только 22 kHz), стереорежим — есть, синтез звука — Двойной OPL-2
- sbpro2: эмуляция Sound Blaster Pro 2.0, битность устройства — 8, максимальная частота дискретизации звука — 44.1 kHz, стереорежим — есть, синтез звука — OPL-3
- sb16: эмуляция Sound Blaster 16, битность устройства — 16, максимальная частота дискретизации звука — 44.1 kHz, стереорежим — есть, синтез звука — OPL-3
- none: откючить эмуляцию Sound Blaster; для полного отключения эмуляции платы может требоваться и отключение её FM-синтеза (oplmode=none), иначе порты могут удерживаться
- sbbase= значение порта ввода-вывода.
- Значение порта ввода-вывода для Sound Blaster.
- Стандартная настройка: 220
- irq= значение IRQ.
- Значение IRQ для Sound Blaster.
- Стандартная настройка: 7
- dma= значение DMA.
- Значение DMA для Sound Blaster.
- Стандартная настройка: 1
- hdma= значение 16-битного DMA.
- Значение 16-битного DMA для Sound Blaster. Требуется для Sound Blaster 16.
- Стандартная настройка: 5
- mixer= true|false
- Будет ли Sound Blaster mixer менять настройки DOSBox mixer.
- Стандартная настройка: true
- oplmode= auto,cms,opl2,dualopl2,opl3,none
- Карты Sound Blaster поддерживают FM-синтез, обычно используемый для музыки, и эмулируют AdLib. Стандарт MPU-401 ими не поддерживается. Вы можете выбрать:
- auto: выбрать в зависимости от настройки sbtype, но только AdLib-совместимые!
- cms: эмуляция Creative Music System / GameBlaster. Поддерживает стерео, в отличие от AdLib, но имеет меньше каналов и хуже качество звука. Обратите внимание, что эта карта не AdLib-совместима, поэтому при выборе этой настройки AdLib музыка в играх не будет работать! Число каналов — 6, стерео режим — есть.
- opl2: эмуляция AdLib / OPL-2 / Yamaha 3812. Долгие годы оставался наиболее популярным стандартом синтеза звука. Число каналов — 9, стерео режим — нет.
- dualopl2: эмуляция Sound Blaster Pro 1.0, реализовавшего стерео через две OPL-2 карты. Число каналов — 9, стерео режим — есть.
- opl3: AdLib Gold / OPL-3 / Yamaha YMF262. Стандарт, поддерживающийся картами Sound Blaster 16. Число каналов — 18, стерео режим — есть.
- none: отключить эмуляцию FM-синтеза; может требоваться для полного отключения эмуляции Sound Blaster.
- Стандартная настройка: auto
- oplrate= частота дискретизации звука.
- Частота дискретизации звука для эмулятора AdLib, которая реализуется через эмуляцию Sound Blaster.
- Это основной параметр ОЧЕНЬ ресурсоёмкого процесса эмуляции FM синтеза, поэтому для слабых PC лучше не использовать FM вообще в настройках игры и установить параметр oplrate равным 8000.
- Должна совпадать с частотой микшера DOSBox.
- Стандартная настройка: 44100
[gus]
Настройки эмуляции Gravis Ultrasound.
- gus=true|false
- Включить/выключить эмуляцию Gravis Ultrasound.
- Стандартная настройка: false.
- gusrate
- Частота звука для эмулятора GUS. Чем выше, тем лучше звук, но требует больше ресурсов. Должна совпадать с частотой микшера DOSBox.
- Стандартная настройка: 44100
- gusbase
Основной порт ввода-вывода GUS.
- Стандартная настройка: 240
- gusirq
Номер аппаратного прерывания для GUS.
- Стандартная настройка: 5
- gusdma
Номер канала доступа к памяти DMA для GUS.
- Стандартная настройка: 3
- ultradir
Папка смонтированного в DOSBox’е диска, куда установлен софт и набор звуковых патчей для GUS.
- Стандартная настройка: ultradir=C:ULTRASND
[speaker]
Настройки эмуляции встроенного в материнскую плату динамика (PC Speaker). DOSBox эмулирует PC Speaker, перенаправляя его на звуковую карту.
- pcspeaker=true|false
- Включить/выключить эмуляцию PC Speaker.
- Стандартная настройка: true.
- pcrate
- Частота звука для PC Speaker. Чем выше, тем лучше звук, но требует больше ресурсов. Должна совпадать с частотой микшера DOSBox.
- Стандартная настройка: 44100
- tandy=off|on|auto
- Включить эмуляцию Tandy Sound System. В режиме auto эмуляция будет включена, только если выбрана machine=tandy.
- Стандартная настройка: auto
- tandyrate
- Частота звука Tandy Sound System.
- Стандартная настройка: 44100
- disney=true|false
- Включить эмуляцию Disney Sound Source. Эта карта совместима с Covox Voice Master и Speech Thing. Особенностью этой карты является то, что у нее нет настроек порта, IRQ или DMA или частоты дискретизации, так как оно подключалось к параллельному порту. Поэтому не стоит включать его в программах, работающих с принтером — они могут подвиснуть.
- Стандартная настройка: true
[joystick]
Настройки джойстика.
[serial]
- serialX = device [parameter:value]
- device может быть: dummy | modem | nullmodem | directserial
- parameter (параметр): irq
- value (значение):
-
- Для directserial: realport (обязательно), rxdelay (дополнительно).
- Для modem: listenport (дополнительно).
- Для nullmodem: server, rxdelay, txdelay, telnet, usedtr, transparent, port, inhsocket (все дополнительны).
- Значения по умолчанию:
- serial1=dummy
- serial2=dummy
- serial3=disabled
- serial4=disabled
Пример настройки реальной serial port для использования I/O:
serial1=directserial realport:com1
[dos]
- xms=true/false
- Включить или выключить поддержку дополнительной памяти (см. XMS).
- Значение по умолчанию: «true»
- ems=true/false
- Включить или выключить поддержку расширенной памяти (см. EMS). Почти для всех игр ее поддержка либо нужна, либо ничего плохого не сделает, однако существуют капризные экземпляры, которым нужно отключить данную опцию.
- Значение по умолчанию: «true»
- umb=true/false
- Аналог команды DOS dos=umb, позволяет загружать драйвера и резидентные программы в верхнюю память, освобождая драгоценные байты основной памяти. Стоит оставлять данную опцию в режиме true, тогда проблем с нехваткой основной памяти у вас не будет.
- Значение по умолчанию: «true»
- keyboardlayout=auto/none/XY
- Для включения кириллической кодовой страницы напишите keyboardlayout=ru. Этого же можно добиться, используя внутреннюю команду DOSBox’а — keyb. Для включения русской кодовой страницы с помощью keyb напишите
keyb ru 866
- Значение none выбирает американскую кодовую страницу (US), тогда как auto должна под ОС Windows выбирать раскладку, выбранную в Windows, но на деле получается, что всё равно американскую.
- Значение по умолчанию: «auto»
- (Начиная с версии: 0.73. В прошлых версиях: «none»),
[ipx]
- ipx=true/false
- Значение по умолчанию: «false»
- Смотрите раздел Connectivity для подробностей использования IPX, когда он включён.
[autoexec]
Здесь вы можете определить содержимое файла AUTOEXEC.BAT (которые выполняются сразу после запуска DOSBox’а). Таким образом, каждый раз при запуске DOSBox’а будут выполняться команды из этого раздела.
См. также
DOSBox
Примечания
- ↑ http://www.dosbox.com/wiki/Dosbox.conf
- ↑ 2,0 2,1 Оптимальные значения зависят от скорости машины. Например, у многих неплохо работают blocksize=512, prebuffer=50.

Указатель
- Что такое DosBox?
- Установка DOSBox
- Настройка DOSBox
- Конфигурация по умолчанию
- Готовые конфигурации
- Режимы видео
- Такты
- Autoexec
- Установка игры
- Запуск игры
- Команды DOS
- Пример запуска игры
- Игра!
- Горячие клавиши
- Поиск и исправление ошибок
Что такое DosBox?
 |
DOSBox — эмулятор MS-DOS для PC, создающий DOS-окружение, необходимое для запуска старых программ и игр. |
Это позволяет запускать DOS игры в операционных системах, не поддерживающих или не полностью поддерживающих DOS-программы, в том числе на современных компьютерах, на которых старые программы могут не работать или работают с ошибками.
Эмулятор имеет открытый исходный код и доступен для Linux, FreeBSD, Windows, OS X, iOS, OS/2, BeOS, KolibriOS, Symbian OS, QNX, Android. Также Windows-версия при помощи HX DOS Extender запускается под чистым DOS — таким образом, DOS эмулируется под DOS.
Версия 0.74-3 поддерживает 1139 игр. Распространяется бесплатно под лицензией GNU General Public License.
DOSBox — Википедия (wikipedia.org)
Установка DOSBox
Скачайте DOSBox для своей операционной системы. Далее приведена инструкция для установки DOSBox версии 0.74-3 в операционной системе Windows 11.
Запустите инсталлятор DOSBox0.74-3-win32-installer.exe и следуйте инструкциям мастера установки.
Next.

Next.
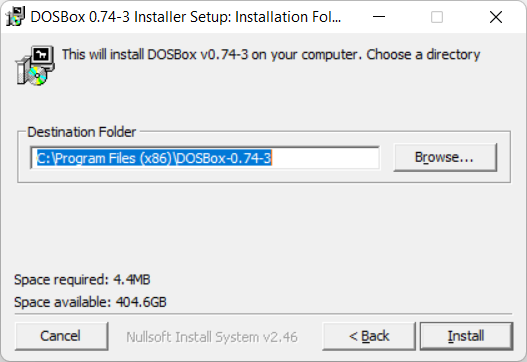
Инсталлятор предлагает выполнить установку в директорию:
C:Program Files (x86)DOSBox-0.74-3
Install.
Close. Установка завершена.
Настройка DOSBox
Без настроек DOSBox прекрасно запускается и работает со множеством игр. Однако, начальные настройки могут вам по какой-то причине не подойти. В этом случае настройки можно «подкрутить».
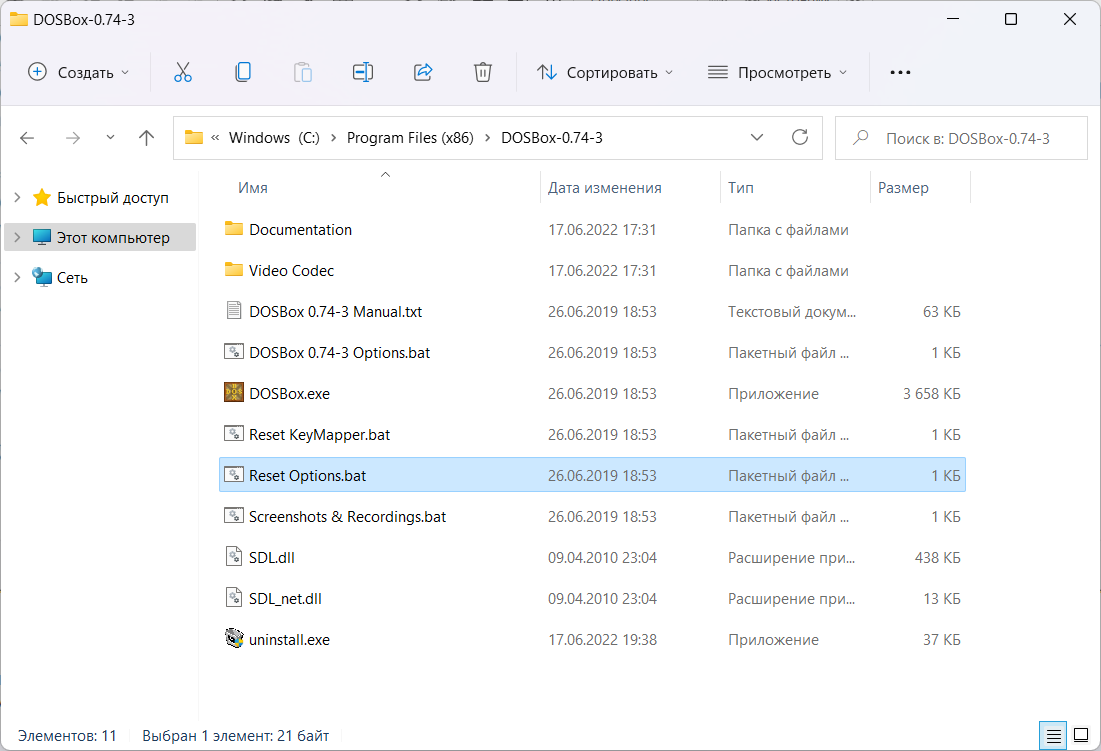
Заходим в каталог с установкой.
C:Program Files (x86)DOSBox-0.74-3
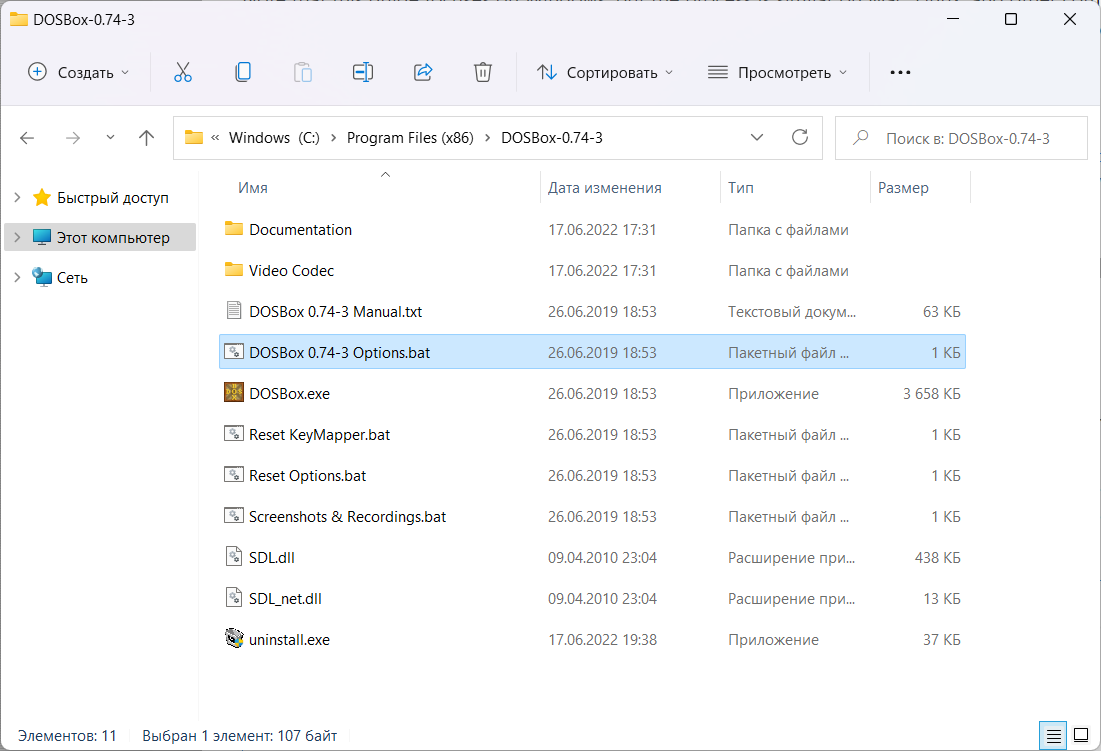
Для создания файла конфигурации DOSBox запускаем DOSBox 0.74-3 Options.bat. Скрипт создаст файл конфигурации и откроет его в блокноте. Файл конфигурации доступен по адресу:
C:Users%username%AppDataLocalDOSBoxdosbox-0.74-3.conf
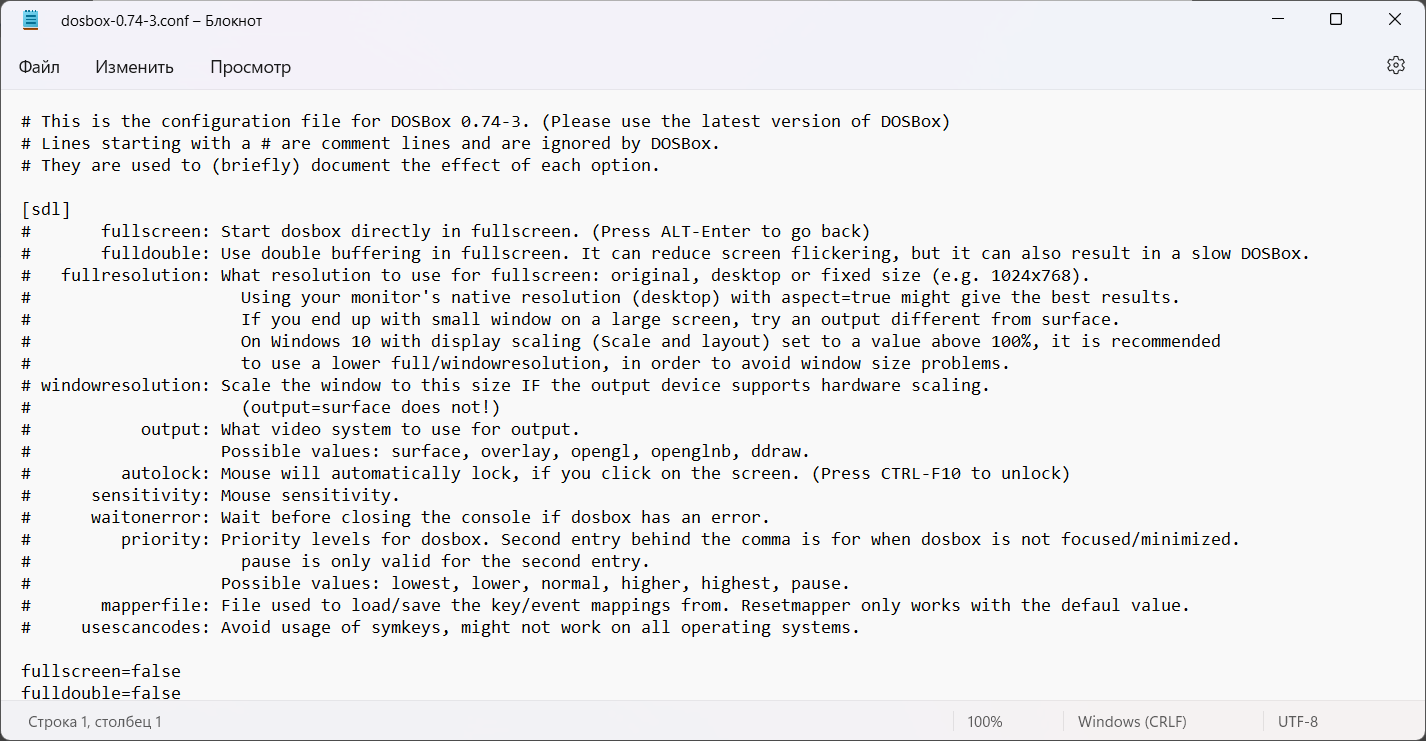
Конфигурация по умолчанию
Если файла конфигурации нет, то при первом запуске DOSBox или скрипта настроек он создастся. Поэтому, если вы что-то напортачили в конфигурации, то можно просто удалить файл и DOSBox заново его создаст. Для сброса настроек конфигурации можно выполнить команду:
DOSBox.exe -resetconfИли запустить скрипт Reset Options.bat.
Готовые конфигурации
Вы можете воспользоваться одной из готовых конфигурации DOSBox. Запустите DOSBox 0.74-3 Options.bat и внесите изменения в конфигурацию:
Режимы видео
Для переключения между полноэкранным и оконным режимом используйте комбинацию клавиш Atl+Enter.
Полноэкранный режим по умолчанию
Чтобы DOSBox запускался по умолчанию на полный экран, используйте настройки конфигурации:
fullscreen=true
output=surface
Пример секции [sdl] для полноэкранного режима:
fullscreen=true
fulldouble=false
fullresolution=original
windowresolution=1280x800
output=surface
autolock=true
sensitivity=100
waitonerror=true
priority=higher,normal
mapperfile=mapper-0.74.map
usescancodes=true
Оконный режим по умолчанию
Современные мониторы обладают большим разрешением. Поэтому DOSBox по умолчанию увеличивает разрешение DOS игры в два раза. Из 320×200 получается 640×400. Этого может быть недостаточно. Сначала установите оконный режим.
Пример секции [sdl] для оконного режима.
fullscreen=false
fulldouble=false
fullresolution=original
fullresolution=1280x800
windowresolution=1280x800
output=openglnb
#output=surface
autolock=true
sensitivity=100
waitonerror=true
priority=higher,normal
mapperfile=mapper-0.74.map
usescancodes=true
Затем настройте трёхкратное масштабирование.
Пример секции [render] для оконного режима с трёхкратным увеличением начального разрешения:
frameskip=0
aspect=false
scaler=normal3
Эти настройки позволят запускать DOSBox в оконном режиме с разрешением 960×600.
Такты
Такты или Cycles — это количество наборов инструкций, которые DOSBox пытается эмулировать каждую миллисекунду. Чем больше тактов, тем быстрее работает DOS игра. Чем быстрее работает ваш процессор, тем сильнее нужно снизить такты, чтобы добиться нормальной скорости работы игры.
- Ctrl+F11 — замедлить игру
- Ctrl+F12 — ускорить игру
Задать такты можно в командной строке:
cycles value
Где value:
- auto — DOSBox сам определит оптимальное значение
- max — ускорить до максимума
- # — сами установите своё значение
Если игра слишком быстрая, установите такты поменьше, к примеру:
cycles 300
Если игра слишком быстрая, установите такты побольше, к примеру:
cycles 20000
Когда вы определите оптимальное для себя значение тактов, укажите его в файле конфигурации:
cycles=500
Autoexec
Autoexec — секция в самом конце конфигурационного файла, названная в честь файла autoexec.bat. Команды в этой секции будут выполняться при старте DOSBox. Самое нужное место, для того чтобы прописать здесь команды для монтирования ваших папок с играми.
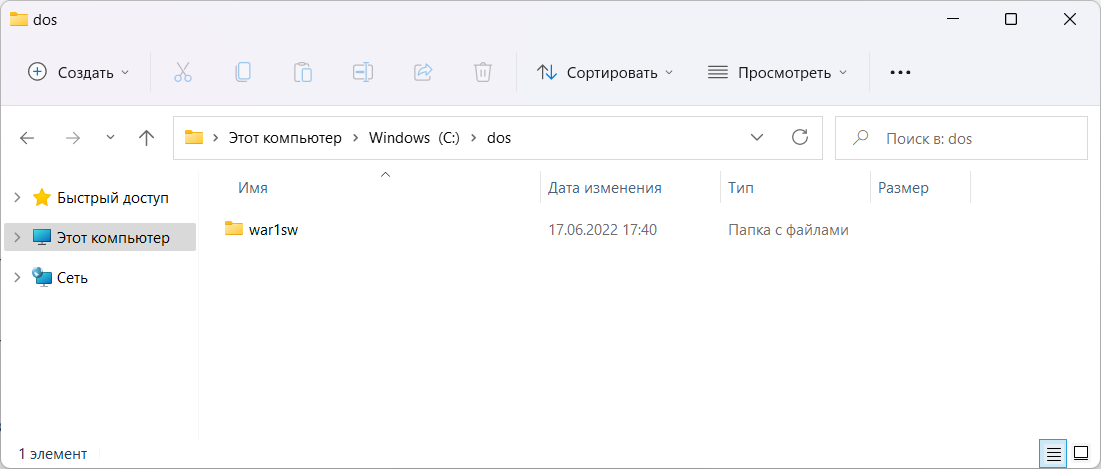
Создадим на компьютере папку:
C:dos
Разместим в ней папки с DOS играми:
Пример секции [autoexec]:
mount c c:dos
c:
Первая строка монтирует папку C:dos в качестве DOS диска C: в DOSBox. Если ваши игры находятся в другой папке, укажите свою. Вторая команда устанавливает диск C:.
Не монтируйте системный диск C: в качестве папки с DOS играми, это может быть небезопасно!
Можно прописать запуск при старте DOSBox своей любимой игры.
Установка игры
Некоторые игры перед запуском требуют установки или настройки. Скачиваемые с этого сайта архивы игр не требуют установки и готовы к запуску, но я мог что-то упустить. Некоторые игры могут потребовать запуск отдельной программы установки перед началом игры. Поищите файл установки или настройки, если игра не хочет нормально запускаться или работает без звука.
- SETUP.EXE
- CONFIG.EXE
- SETSOUND.EXE
- и другие
При настройке звука в DOSBox по умолчанию используются:
- SoundBlaster или SoundBlaster 2.0
- Address: 220
- Interrupt: 7
- DMA: 1
Запуск игры
Запускаем DOSBox.
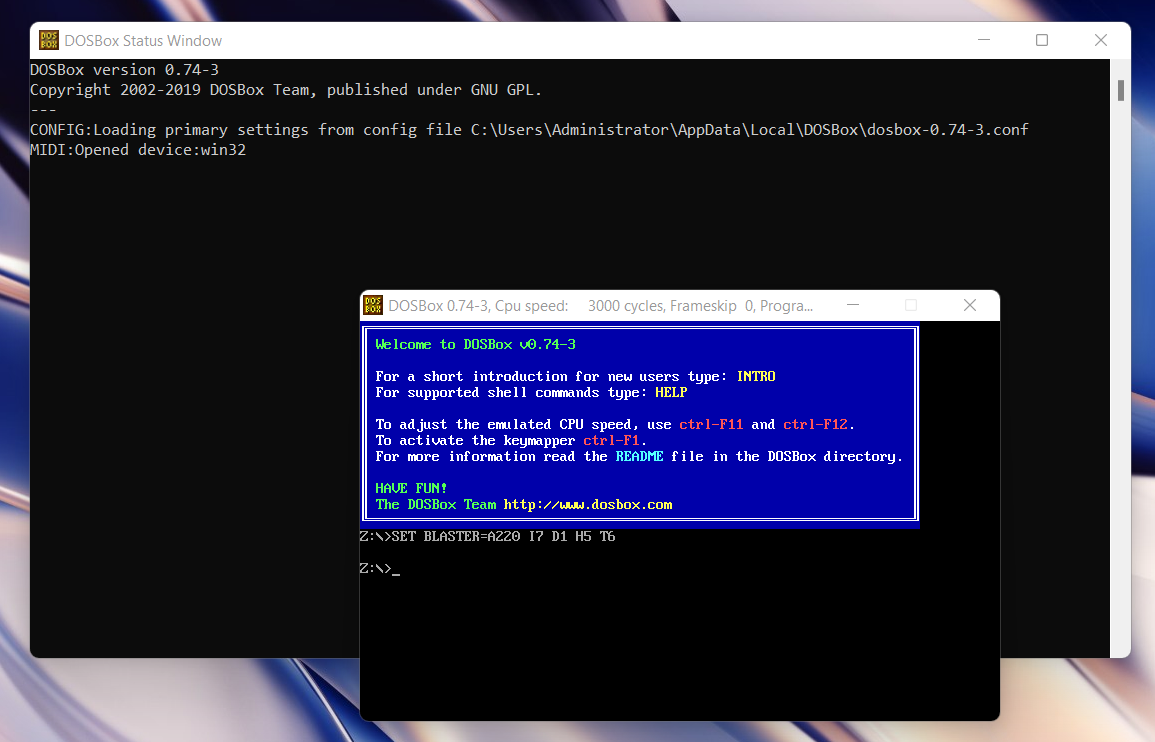
Открываются два окна:
- DOSBox Status Window — консольное окно
- DOSBox — Окно с DOS
Я запустил DOSBox с начальными настройками, поэтому буду монтировать диск с играми самостоятельно.
Монтирую папку с играми и перехожу к диску C:
mount c c:dos
c: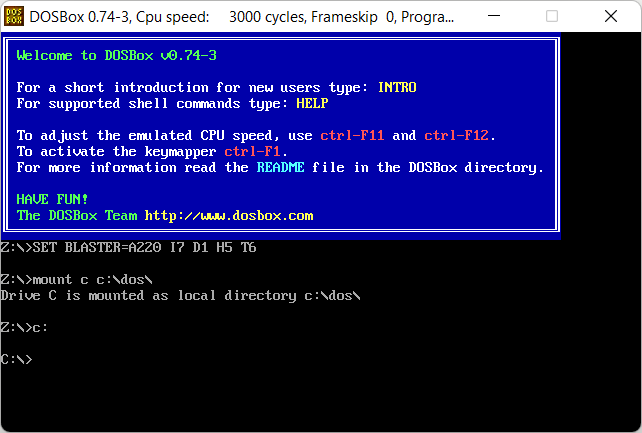
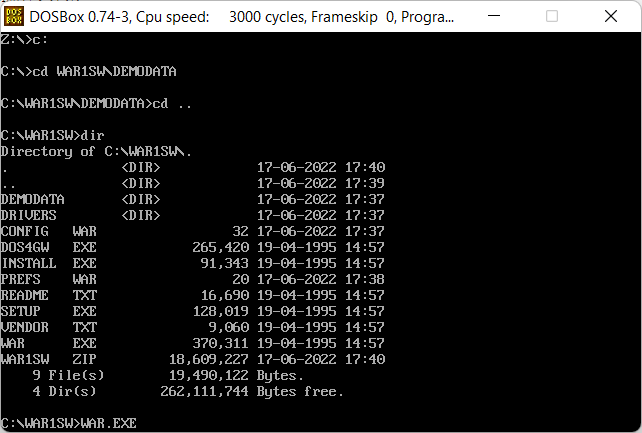
Команды DOS
Давайте вспомним базовые команды DOS, которые нам могут пригодиться для запуска игр.
- [диск]: — смена диска
Если у вас примонтированы несколько дисков, то можно переключаться между ними:
c:
d:
x:
- cd [путь] — change directory, сменить директорию
c:
cd WAR1SWDEMODATA
Вы можете начать писать название директории и нажать TAB, DOSBox допишет.
- cd .. — на уровень вверх
cd ..
- dir — содержимое директории
dir
- FILE.EXT — выполнить файл
WAR.EXE
Пример запуска игры
c:
cd WAR1SW
dir
WAR.EXE
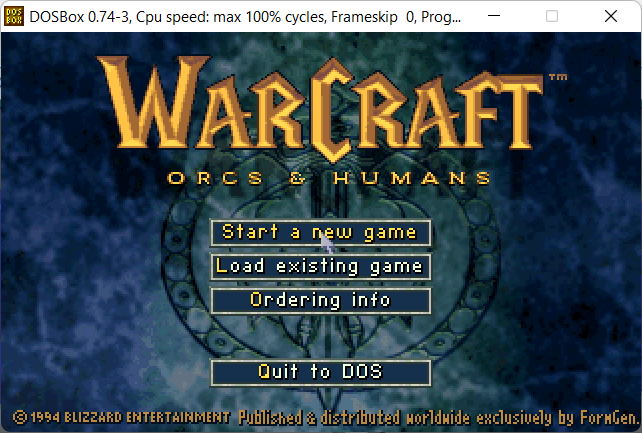
Игра!
Игра запустится.
Горячие клавиши
Во время игры можно использовать горячие клавиши.
- Alt+Enter — переключение между оконным и полноэкранным режимом
- Alt+Pause — пауза (Alt+F16 в OSX)
- Ctrl+F1 — биндинг клавиш
- Ctrl+F4 — обновить кэш смонтированных директорий
- Ctrl+F5 — снимок экрана
- Ctrl+Alt+F5 — Start/Stop записи AVI видео
- Ctrl+F6 — Start/Stop записи WAV звука
- Ctrl+Alt+F7 — Start/Stop записи OPL команд
- Ctrl+Alt+F8 — Start/Stop записи MIDI команд
- Ctrl+F7 — уменьшить пропуск кадров
- Ctrl+F8 — увеличить пропуск кадров
- Ctrl+F9 — kill (закрыть) DOSBox
- Ctrl+F10 — разблокировать мышь
- Ctrl+F11 — замедлить игру
- Ctrl+F12 — ускорить игру
- Alt+F12 — TURBO
- Ctrl+Alt+F2 — смена раскладки
- Left_Alt+Right_Shift — активация двойной раскладки (GK codepage 869 и RU codepage 808)
- Left_Alt+Left_Shift — деактивация двойной раскладки
Папку со скриншотами и видео можно открыть, выполнив Screenshots & Recordings.bat, или открыть папку:
C:Users%username%AppDataLocalDOSBoxcapture
Поиск и исправление ошибок
Что делать, если игра не запускается?
Проверьте, есть ли игра в списке совместимости DOSBox. Некоторые игры пока не запускаются в DOSBox.
Читайте DOSBox FAQ.
Читать форумы:
https://www.vogons.org/viewforum.php?f=31
https://dosgames.com/forum/forum-3.html
И Wiki:
https://www.old-games.ru/wiki/DOSBox_в_вопросах_и_ответах
Инструкция на английском:
DOSBox Guide — How to play DOS games in DOSBox
======
NOTE:
======
While we are hoping that one day DOSBox will run all programs ever made for the PC, we are not there yet.
At present, DOSBox running on a high-end machine will roughly be
the equivalent of a Pentium I PC. DOSBox can be configured to run a wide range of DOS games, from CGA/Tandy/PCjr
classics up to games from the Quake era.
=======
INDEX:
=======
- Quickstart
- Start (FAQ)
- Command Line Parameters
- Internal Programs
- Special Keys
- Joystick/Gamepad
- KeyMapper
- Keyboard Layout
- Serial Multiplayer feature
- How to speed up/slow down DOSBox
- Troubleshooting
- DOSBox Status Window
- The configuration (options) file
- The language file
- Building your own version of DOSBox
- Special thanks
- Contact
==============
1. Quickstart:
==============
Type INTRO in DOSBox for a quick tour.
It is essential that you get familiar with the idea of mounting, DOSBox does not automatically make any drive (or a part of it) accessible to the emulation. See the FAQ entry
«How to start?» as well as the description of the MOUNT command (section 4: «Internal Programs»). If you have your game on a cdrom you may try this guide:
https://www.vogons.org/viewtopic.php?t=8933
===============
2. Start (FAQ):
===============
| START: | How to start? |
| AUTOMATION: | Do I always have to type these «mount» commands? |
| FULLSCREEN: | How do I change to fullscreen? |
| FULLSCREEN: | My fullscreen is too large. |
| CD-ROM: | My CD-ROM doesn’t work. |
| CD-ROM: | The game/application can’t find its CD-ROM. |
| MOUSE: | The mouse doesn’t work. |
| SOUND: | There is no sound. |
| SOUND: | What sound hardware does DOSBox presently emulate? |
| SOUND: | The sound stutters or sounds stretched/weird. |
| KEYBOARD: | I can’t type or : in DOSBox. |
| KEYBOARD: | Right Shift and «» doesn’t work in DOSBox. (Windows only) |
| KEYBOARD: | The keyboard lags. |
| CONTROL: | The character/cursor/mouse pointer always moves into one direction! |
| SPEED: | The game/application runs much too slow/too fast! |
| CRASH: | The game/application does not run at all/crashes! |
| CRASH: | DOSBox crashes on startup! |
| GAME: | My Build game(Duke3D/Blood/Shadow Warrior) has problems. |
| SAFETY: | Can DOSBox harm my computer? |
| OPTIONS: | I would like to change DOSBox’s options. |
| HELP: |
Great Manual, but I still don’t get it. |
START: How to start?
At the beginning you’ve got a Z:> instead of a C:> at the prompt. You have to make your directories available as drives in DOSBox by using the «mount»
command. For example, in Windows «mount C D:GAMES» will give you a C drive in DOSBox which points to your Windows D:GAMES directory (that was created before).
In Linux, «mount c /home/username» will give you a C drive in DOSBox which points to /home/username in Linux. To change to the drive mounted like above, type «C:».
If everything went fine, DOSBox will display the prompt «C:>».
AUTOMATION: Do I always have to type these commands?
In the DOSBox configuration file is an [autoexec] section. The commands present there are run when DOSBox starts, so you can use this section for the mounting. Look at
Section 13: The configuration (options) file
FULLSCREEN: How do I change to fullscreen?
Press alt-enter. Alternatively: Edit the configuration file of DOSBox and change the option fullscreen=false to fullscreen=true. If fullscreen looks wrong in your opinion:
Play with the options: fullresolution, output and aspect in the configuration file of DOSBox. To get back from fullscreen mode: Press alt-enter again.
FULLSCREEN: My fullscreen is too large.
This is can be a problem on Windows 10, if you have display scaling
set to a value above 100%. Windows in that case will resize the screen
on top of dosbox resizing the screen, which can happen for the output:
ddraw, opengl, openglnb, overlay. You can disable this Windows behaviour
by enabling a specific compatibility setting:
— Right-click the DOSBox icon and select «Properties».
— Go to the «Compatibility» tab.
— Click on «Change high DPI settings».
— Tick «Override high DPI scaling behaviour» and set it to «Application».
— Apply the changes by clicking on «OK».
Unfortunately, this compatibility option causes some side effects in
windowed mode, and in this case you will need to change the resolution
in the config/Options file for windowresolution (e.g. 1024×768).
Alternatively, you can disable the display scaling and or use a lower
fullresolution value.
CD-ROM: My CD-ROM doesn’t work.
To mount your CD-ROM in DOSBox you have to specify some additional options when mounting the CD-ROM.
To enable CD-ROM support (includes MSCDEX) in Windows:— mount d f: -t cdrom
in Linux:
— mount d /media/cdrom -t cdrom
In some cases you might want to use a different CD-ROM interface, for example if CD audio does not work:
To enable SDL-support (does not include low-level CD access!):
— mount d f: -t cdrom -usecd 0 -noioctl
To enable ioctl access using digital audio extraction for CD audio (windows-only, useful for Vista):
— mount d f: -t cdrom -ioctl_dx
To enable ioctl access using MCI for CD audio (windows-only):
— mount d f: -t cdrom -ioctl_mci
To force ioctl-only access (windows-only):
— mount d f: -t cdrom -ioctl_dio
To enable low-level aspi-support (win98 with aspi-layer installed):
— mount d f: -t cdrom -aspi
explanation:
— d driveletter you will get in DOSBox (d is the best, don’t change it!)
— f: location of CD-ROM on your PC. In most cases it will be d: or e:
— 0 The number of the CD-ROM drive, reported by «mount -cd»(note that this value is only needed when using SDL for CD audio,
otherwise it is ignored)
See also the next question: The game/application can’t find its CD-ROM.
CD-ROM: The game/application can’t find its CD-ROM
Be sure to mount the CD-ROM with -t cdrom switch, this will enable the MSCDEX interface required by DOS games to interface with CD-ROMs. Also try adding the correct label
(-label LABEL) to the mount command, where LABEL is the CD-label (volume ID) of the CD-ROM. Under Windows you can specify -ioctl, -aspi or -noioctl. Look at the description
of the mount command in Section 4: «Internal programs» for their meaning and the additional audio-CD related options -ioctl_dx, -ioctl_mci, -ioctl_dio. Try creating
a CD-ROM image (preferably CUE/BIN pair) and use the DOSBox’s internal IMGMOUNT tool to mount the image (the CUE sheet). This enables very good low-level
CD-ROM support on any operating system.
MOUSE: The mouse doesn’t work.
Usually, DOSBox detects when a game uses mouse control. When you click on the screen it should get locked (confined to the DOSBox window) and work. With certain games,
the DOSBox mouse detection doesn’t work. In that case you will have to lock the mouse manually by pressing CTRL-F10.
SOUND: There is no sound
Be sure that the sound is correctly configured in the game. This might be done during the installation or with a setup/setsound utility that accompanies the game. First
see if an autodetection option is provided. If there is none try selecting Soundblaster or Soundblaster 16 with the default settings being «address=220 irq=7 dma=1»
(sometimes highdma=5). You might also want to select Sound Canvas/SCC/MPU-401/General MIDI/Wave Blaster at «address=330 IRQ=2» as music device. The parameters
of the emulated sound cards can be changed in the DOSBox configuration file.If you still don’t get any sound set the core to normal in DOSBox configuration and use some lower fixed cycles value (like cycles=2000). Also
assure that your host operating sound does provide sound. In certain cases it might be useful to use a different emulated sound device
like a soundblaster pro (sbtype=sbpro1 in the DOSBox configuration file) or the gravis ultrasound (gus=true).
SOUND: What sound hardware does DOSBox presently emulate?
DOSBox emulates several legacy sound devices:
- Internal PC speaker/Buzzer
This emulation includes both the tone generator and several forms of
digital sound output through the internal speaker. - Creative CMS/Gameblaster
The is the first card released by Creative Labs(R). The default configuration places it on address 220. It is disabled as default. - Tandy 3 voice
The emulation of this sound hardware is complete with the exception of the noise channel. The noise channel is not very well documented and as such is only a best guess
as to the sound’s accuracy. It is disabled as default. - Tandy DAC
Some games may require turning off sound blaster emulation (sbtype=none) for better tandy DAC sound support. Don’t forget to set the sbtype back to sb16 if you don’t use
tandy sound. - Adlib
This emulation is almost perfect and includes the Adlib’s ability to almost play digitized sound. Placed at address 220 (also on 388). - SoundBlaster 16 / SoundBlaster Pro I & II / SoundBlaster I & II
By default DOSBox provides Soundblaster 16 level 16-bit stereo sound. You can select a different SoundBlaster version in the configuration of DOSBox. AWE32 music is not
emulated as you can use MPU-401 instead (see below). - Disney Sound Source and Covox Speech Thing
Using the printer port, this sound device outputs digital sound only. Placed at LPT1 - Gravis Ultrasound
The emulation of this hardware is nearly complete, though the MIDI capabilities have been left out, since an MPU-401 has been emulated in other code. For Gravis music you
also have to install Gravis drivers inside DOSBox. It is disabled as default. - MPU-401
A MIDI passthrough interface is also emulated. This method of sound output will only work when used with external device/emulator. Every Windows XP/Vista/7 and MAC OS has
got a default emulator compatible with: Sound Canvas/SCC/General Standard/General MIDI/Wave Blaster. A different device/emulator is needed for Roland LAPC/CM-32L/MT-32 compatibility.
SOUND: The sound stutters or sounds stretched/weird.
You may be using too much CPU power to keep DOSBox running at the current speed. You can lower the cycles, skip frames, reduce the sampling rate of the respective sound device,
increase the prebuffer. See section 13: «The configuration (options) file»
If you are using cycles=max or =auto, then make sure that there is no background processes interfering! (especially if they access the harddisk) Also look at Section 10. «How
to speed up/slow down DOSBox»
KEYBOARD: I can’t type or : in DOSBox.
This can happen in various cases, like your host keyboard layout does not have a matching DOS layout representation (or it was not correctly detected), or the key mapping
is wrong.
Some possible fixes:
- Use / instead, or ALT-58 for : and ALT-92 for .
- Change the DOS keyboard layout (see Section 8: Keyboard Layout).
- Add the commands you want to execute to the [autoexec] section of the DOSBox configuration file.
- Open the DOSBox configuration file and change the usescancodes entry.
- Switch the keyboard layout of your operating system.
Note that if the host layout can not be identified, or keyboardlayout is set to none in the DOSBox configuration file, the standard US layout is used. In this configuration
try the keys around «enter» for the key (backslash), and for the key : (colon) use shift and the keys between «enter» and «L».
KEYBOARD: Right Shift and «» doesn’t work in DOSBox. (Windows only)
This may happen if Windows thinks that you have more than one keyboard connected to your PC when you use some remote control devices. To verity this problem run cmd.exe,
navigate to DOSBox program folder and type:set sdl_videodriver=windib
dosbox.execheck whether keyboard started to work properly. As windib is slower it is best to use one of the two solutions provided here: https://www.vogons.org/viewtopic.php?t=24072
KEYBOARD: The keyboard lags
Lower the priority setting in the DOSBox configuration file, for example set «priority=normal,normal». You might also want to try lowering the cycles (use a fixed
cycle amount to start with, like cycles=10000).
CONTROL: The character/cursor/mouse pointer always moves into one direction!
See if it still happens if you disable the joystick emulation, set joysticktype=none in the [joystick] section of your DOSBox configuration file. Maybe also try unplugging
any joystick/gamepad. If you want to use the joystick in the game, try setting timed=false and be sure to calibrate the joystick (both in your OS as well as in the game
or the game’s setup program).
SPEED: The game/application runs much too slow/too fast!
Look at Section 10: «How to speed up/slow down DOSBox» for more information.
CRASH: The game/application does not run at all/crashes!
Look at Section 11: Troubleshooting
CRASH: DOSBox crashes on startup!
Look at Section 11: Troubleshooting
GAME: My Build game(Duke3D/Blood/Shadow Warrior) has problems
First of all, try to find a port of the game. Those will offer a better experience. To fix the graphics problem that occurs in DOSBox on higher resolutions: Open the configuration
file of DOSBox and search for:machine=svga_s3. Change svga_s3 to vesa_nolfb
Change memsize=16 to memsize=63
SAFETY: Can DOSBox harm my computer?
DOSBox can not harm your computer more than any other resource demanding program. Increasing the cycles does not overclock your real CPU. Setting the cycles too high has
a negative performance effect on the software running inside DOSBox.
OPTIONS: I would like to change DOSBox’s options.
Look at Section 13. «The configuration (options) file»
HELP: Great Manual, but I still don’t get it
For more questions read the rest of this Manual. You may also look at:
- The DOSBox Guides: https://www.vogons.org/viewforum.php?f=39
- The DOSBox Wiki: https://www.dosbox.com/wiki/
- The DOSBox Site: https://www.dosbox.com
- The DOSBox Forum: https://www.vogons.org/viewforum.php?f=53
===========================
3. Command Line Parameters:
===========================
An overview of the command line options you can give to DOSBox. Although in most cases it is easier to use DOSBox’s configuration file instead. See: Section 13. «The
configuration (options) file»
To be able to use Command Line Parameters:
(Windows) open cmd.exe or command.com or edit the shortcut to dosbox.exe
(Linux) use console
(MAC OS X) start terminal.app and navigate to:
/applications/dosbox.app/contents/macos/dosbox
The options are valid for all operating systems unless noted in the option description:
dosbox [name] [-exit] [-c command] [-fullscreen] [-userconf]
[-conf congfigfilelocation] [-lang languagefilelocation]
[-machine machine type] [-noconsole] [-startmapper] [-noautoexec]
[-securemode] [-scaler scaler | -forcescaler scaler] [-version]
[-socket socket]
dosbox -version
dosbox -editconf program
dosbox -opencaptures program
dosbox -printconf
dosbox -eraseconf
dosbox -erasemapper
name
If «name» is a directory it will mount that as the C: drive.
If «name» is an executable it will mount the directory of «name»
as the C: drive and execute «name».
-exit
DOSBox will close itself when the DOS application «name» ends.
-c command
Runs the specified command before running «name». Multiple commands can be specified. Each command should start with «-c» though. A command can be:
an Internal Program, a DOS command or an executable on a mounted drive.
-fullscreen
Starts DOSBox in fullscreen mode.
-userconf
Start DOSBox with the users specific configuration file. Can be used together with multiple -conf parameters, but -userconf will always be loaded before them.
-conf configfilelocation
Start DOSBox with the options specified in «configfilelocation». Multiple -conf options may be present. See Section 13 for more details.
-lang languagefilelocation
Start DOSBox using the language specified in «languagefilelocation». See Section 14 for more details.
-machine machinetype
Setup DOSBox to emulate a specific type of machine. Valid choices are:
hercules, cga, ega, pcjr, tandy, svga_s3 (default) as well as the additional svga chipsets listed in the DOSBox configuration file.
svga_s3 enables vesa emulation as well.
For some special vga effects the machinetype vgaonly can be used, note that this disables svga capabilities and might be slower due to the higher emulation precision.
The machinetype affects the video card and the available sound cards.
-noconsole (Windows Only)
Start DOSBox without showing DOSBox Status Window (console). Output will be redirected to stdout.txt and stderr.txt
-startmapper
Enter the keymapper directly on startup. Useful for people with keyboard problems.
-noautoexec
Skips the [autoexec] section of the loaded configuration file.
-securemode
Same as -noautoexec, but adds config.com -securemode at the bottom of AUTOEXEC.BAT (which in turn disables any changes to how the drives are mounted inside DOSBox).
-scaler scaler
Uses the scaler specified by «scaler». See the DOSBox configuration file for the available scalers.
-forcescaler scaler
Similar to the -scaler parameter, but tries to force usage of the specified scaler even if it might not fit.
-version
output version information and exit. Useful for frontends.
-editconf program
calls program with as first parameter the configuration file. You can specify this command more than once. In this case it will move to second program if the first one
fails to start.
-opencaptures program
calls program with as first parameter the location of the captures folder.
-printconf
prints the location of the default configuration file.
-resetconf
removes the default configuration file.
-resetmapper
removes the mapperfile used by the default clean configuration file.
-socket
passes the socket number to the nullmodem emulation. See Section 9: «Serial Multiplayer feature.»
Note:
If a name/command/configfilelocation/languagefilelocation contains a space, put the whole name/command/configfilelocation/languagefilelocation between quotes («command
or file name»). If you need to use quotes within quotes (most likely with -c and mount):
Windows and OS/2 users can use single quotes inside the double quotes.
Other people should be able to use escaped double quotes inside the double quotes.
Windows: -c «mount c ‘c:My folder with DOS games'»
Linux: -c «mount c «/tmp/name with space»»
A rather unusual example, just to demonstrate what you can do (Windows): dosbox D:folderfile.exe -c «MOUNT Y H:MyFolder» This mounts D:folder as C: and runs
file.exe. Before it does that, it will first mount H:MyFolder as the Y drive. In Windows, you can also drag directories/files onto the DOSBox executable.
=====================
4. Internal Programs:
=====================
DOSBox supports most of the DOS commands found in command.com. To get a list of the internal commands type «HELP» at the prompt.
In addition, the following commands are available:
MOUNT «Emulated Drive letter» «Real Drive or Directory»
[-t type] [-aspi] [-ioctl] [-noioctl] [-usecd number] [-size drivesize]
[-label drivelabel] [-freesize size_in_mb]
[-freesize size_in_kb (floppies)]
MOUNT -cd
MOUNT -u «Emulated Drive letter»
Program to mount local directories as drives inside DOSBox.
«Emulated Drive letter»
The driveletter inside DOSBox (for example C).
«Real Drive letter (usually for CD-ROMs in Windows) or Directory»
The local directory you want accessible inside DOSBox.-t type
Type of the mounted directory. Supported are: dir (default), floppy, cdrom.
-size drivesize
(experts only)
Sets the size of the drive, where drivesize is of the form «bps,spc,tcl,fcl»:bps: bytes per sector, by default 512 for regular drives and 2048 for CD-ROM drives
spc: sectors per cluster, usually between 1 and 127
tcl: total clusters, between 1 and 65534
fcl: total free clusters, between 1 and tcl-freesize size_in_mb | size_in_kb
Sets the amount of free space available on a drive in megabytes (regular drives) or kilobytes (floppy drives). This is a simpler version of -size.
-label drivelabel
Sets the name of the drive to «drivelabel». Needed on some systems if the CD-ROM label isn’t read correctly (useful when a program can’t find its CD-ROM). If
you don’t specify a label and no lowlevel support is selected (that is omitting the -usecd # and/or -aspi parameters, or specifying -noioctl):For Windows: label is extracted from «Real Drive».
For Linux: label is set to NO_LABEL.If you do specify a label, this label will be kept as long as the drive is mounted. It will not be updated !!
-aspi
Forces use of the aspi layer. Only valid if mounting a CD-ROM under Windows systems with an ASPI-Layer.
-ioctl (automatic selection of the CD audio interface)
-ioctl_dx (digital audio extraction used for CD audio)
-ioctl_dio (ioctl calls used for CD audio)
-ioctl_mci (MCI used for CD audio)Forces use of ioctl commands. Only valid if mounting a CD-ROM under a Windows OS which support them (Win2000/XP/NT). The various choices only differ in the way CD audio
is handled, preferably -ioctl_dio is used (lowest workload), but this might not work on all systems, so -ioctl_dx (or -ioctl_mci) can be used.-noioctl
Forces use of the SDL CD-ROM layer. Valid on all systems.
-usecd number
Valid on all systems, under windows the -noioctl switch has to be present to make use of the -usecd switch. Enables to select the drive that should be used by SDL. Use
this if the wrong or no CD-ROM drive is mounted while using the SDL CD-ROM interface. «number» can be found by «MOUNT -cd».-cd
Displays all CD-ROM drives detected by SDL, and their numbers.
See the information at the -usecd entry above.-u
Removes the mount. Doesn’t work for Z:.
Note: It’s possible to mount a local directory as CD-ROM drive, but hardware support is then missing.
Basically MOUNT allows you to connect real hardware to DOSBox’s emulated PC. So MOUNT C C:GAMES tells DOSBox to use your C:GAMES directory as drive C: in DOSBox. MOUNT
C E:SomeFolder tells DOSBox to use your E:SomeFolder directory as drive C: in DOSBox.Mounting your entire C drive with MOUNT C C: is NOT recommended! The same is true for mounting the root of any other drive, except for CD-ROMs
(due to their read-only nature). Otherwise if you or DOSBox make a mistake you may lose all your files. Also never mount a «Windows» or «Program Files»
folders or their subfolders in Windows Vista/7 as DOSBox may not work correctly, or will stop working correctly later. It is recommended to keep all your dos applications/games
in a simple folder (for example c:dosgames) and mount that.You should always install your game inside DOSBox. So if you have the game on CD you always (even after installation!) have to mount both: folder as a harddisk drive and
a CD-ROM.
HardDisk should always be mounted as c
CD-ROM should always be mounted as d
Floppy should always be mounted as a (or b)Basic MOUNT Examples for normal usage (Windows):
- To mount a folder as a harddisk drive:
mount c d:dosgames- To mount your CD-ROM drive E as CD-ROM drive D in DOSBox:
mount d e: -t cdrom- To mount your drive a: as a floppy:
mount a a: -t floppyAdvanced MOUNT examples (Windows):
- To mount a hard disk drive with ~870 mb free diskspace (simple version):
mount c d:dosgames -freesize 870- To mount a drive with ~870 mb free diskspace (experts only, full control):
mount c d:dosgames -size 512,127,16513,13500- To mount c:dosgamesfloppy as a floppy:
mount a c:dosgamesfloppy -t floppyOther MOUNT examples:
- To mount system CD-ROM drive at mountpoint /media/cdrom as CD-ROM drive D in DOSBox:
mount d /media/cdrom -t cdrom -usecd 0- To mount /home/user/dosgames as drive C in DOSBox:
mount c /home/user/dosgames- To mount the directory where DOSBox was started as C in DOSBox:
mount c .
(note the . which represents the directory where DOSBox was started, on Windows Vista/7 don’t use this if you installed DOSBox to your «Program Files» folder)If you want to mount a CD image or floppy image, check IMGMOUNT.
MOUNT also works with images but only if you use external program, for example (both are free):
- Daemon Tools Lite (for CD images)
- Virtual Floppy Drive (for floppy images)
Although IMGMOUNT can give better compatibility.
MEM
Program to display the amount and type of free memory.
VER
VER set major_version [minor_version]
Display the current DOSBox version and reported DOS version (parameterless usage). Change the reported DOS version with the «set» parameter, for example: «VER
set 6 22» to have DOSBox report DOS 6.22 as version number.
CONFIG -writeconf filelocation
CONFIG -writelang filelocation
CONFIG -securemode
CONFIG -set «section property=value»
CONFIG -get «section property»
CONFIG can be used to change or query various settings of DOSBox during runtime. It can save the current settings and language strings to disk. Information about all possible
sections and properties can be found in Section 13: «The configuration (options) file».
-writeconf filelocation
Write the current configuration settings to a file in a specified location. «filelocation» is located on the local drive, not a mounted drive in DOSBox. The
configuration file controls various settings of DOSBox: the amount of emulated memory, the emulated sound cards and many more things. It allows access to AUTOEXEC.BAT
as well. See Section 13: «The configuration (options) file» for more information.-writelang filelocation
Write the current language settings to a file in a specified location. «filelocation» is located on the local drive, not a mounted drive in DOSBox. The language
file controls all visible output of the internal commands and the internal DOS. See Section 14: «The Language File» for more information.-securemode
Switches DOSBox to a more secure mode. In this mode the internal commands MOUNT, IMGMOUNT and BOOT won’t work. It’s not possible either to create a new configfile or
languagefile in this mode. (Warning: you can only undo this mode by restarting DOSBox.)-set «section property=value»
CONFIG will attempt to set the property to new value. Currently CONFIG can not report whether the command succeeded or not.
-get «section property»
The current value of the property is reported and stored in the environment variable %CONFIG%. This can be used to store the value when using batch files.
Both «-set» and «-get» work from batch files and can be used to set up your own preferences for each game. Although it may be easier to use separate DOSBox’s
configuration files for each game instead.Examples:
- To create a configuration file in your c:dosgames directory:
config -writeconf c:dosgamesdosbox.conf- To set the cpu cycles to 10000:
config -set «cpu cycles=10000»- To turn ems memory emulation off:
config -set «dos ems=off»- To check which cpu core is being used.
config -get «cpu core»
LOADFIX [-size] [program] [program-parameters]
LOADFIX -f
Program to reduce the amount of available conventional memory. Useful for old programs which don’t expect much memory to be free.
-size
number of kilobytes to «eat up», default = 64kb
-f
frees all previously allocated memory
Examples:
- To start mm2.exe and allocate 64kb memory
(mm2 will have 64 kb less available):
loadfix mm2- To start mm2.exe and allocate 32kb memory:
loadfix -32 mm2- To free previous allocated memory:
loadfix -f
RESCAN
Make DOSBox reread the directory structure. Useful if you changed something on a mounted drive outside of DOSBox. (CTRL — F4 does this as well!)
MIXER
Makes DOSBox display its current volume settings. Here’s how you can change them:
mixer channel left:right [/NOSHOW] [/LISTMIDI]
channel
Can be one of the following: MASTER, DISNEY, SPKR, GUS, SB, FM [, CDAUDIO].
CDAUDIO is only available if a CD-ROM interface with volume control is enabled (CD image, ioctl_dx).left:right
The volume levels in percentages. If you put a D in front it will be in decibel (Example: mixer gus d-10).
/NOSHOW
Prevents DOSBox from showing the result if you set one of the volume levels.
/LISTMIDI
In Windows lists the available midi devices on your PC. To select a device other than the Windows default midi-mapper, change the line ‘midiconfig=’ in the [midi] section
of the configuration file to ‘midiconfig=id’, where ‘id’ is the number for the device as listed by LISTMIDI. eg. midiconfig=2In Linux this option doesn’t work, but you get similar results by using ‘pmidi -l’ in console. Then change the line ‘midiconfig=’ to ‘midiconfig=port’, where ‘port’
is the port for the device as listed by ‘pmidi -l’. eg. midiconfig=128:0
IMGMOUNT
A utility to mount disk images and CD-ROM images in DOSBox.
IMGMOUNT DRIVE [imagefile] -t [image_type] -fs [image_format]
-size [sectorsbytesize, sectorsperhead, heads, cylinders]
IMGMOUNT DRIVE [imagefile1 imagefile2 .. imagefileN] -t cdrom -fs iso
imagefile
Location of the image file to mount in DOSBox. The location can be on a mounted drive inside DOSBox, or on your real disk. It is possible to mount CD-ROM images (ISOs
or CUE/BIN or CUE/IMG) too. If you need CD swapping capabilities, specify all images in succession (see the next entry).
CUE/BIN pairs and cue/img are the preferred CD-ROM image types as they can store audio tracks compared to ISOs (which are data-only). For the CUE/BIN mounting always specify
the CUE sheet.imagefile1 imagefile2 .. imagefileN
Location of the image files to mount in DOSBox. Specifying a number
of image files is only allowed for CD-ROM images.
The CD’s can be swapped with CTRL-F4 at any time.
This is required for games which use multiple CD-ROMs and require the CD
to be switched during the gameplay at some point.-t
The following are valid image types:
floppy:
Specifies a floppy image. DOSBox will automatically identify the disk geometry (360K, 1.2MB, 720K, 1.44MB, etc).
cdrom:
Specifies a CD-ROM image. The geometry is automatic and set for this size. This can be an iso or a cue/bin pair or a cue/img pair.
hdd:
Specifies a harddrive image. The proper CHS geometry must be set for this to work.
-fs
The following are valid file system formats:
iso: Specifies the ISO 9660 CD-ROM format.
fat: Specifies that the image uses the FAT file system. DOSBox will attempt to mount this image as a drive in DOSBox and make the files available from inside
DOSBox.
none: DOSBox will make no attempt to read the file system on the disk. This is useful if you need to format it or if you want to boot the disk using the BOOT
command. When using the «none» filesystem, you must specify the drive number (2 or 3, where 2 = master, 3 = slave) rather than a drive letter.
For example, to mount a 70MB image as the slave drive device, you would type (without the quotes):«imgmount 3 d:test.img -size 512,63,16,142 -fs none»
Compare this with a mount to be able to access the drive
within DOSBox, which would read as:
«imgmount e: d:test.img -size 512,63,16,142»-size
The Cylinders, Heads and Sectors of the drive. Required to mount hard drive images.An example how to mount CD-ROM images (in Linux):
- imgmount d /tmp/cdimage1.cue /tmp/cdimage2.cue -t cdrom
or (which also works):
- mount c /tmp
- imgmount d c:cdimage1.cue c:cdimage2.cue -t cdrom
(in Windows):
imgmount d f:imgCD1.cue f:imgCD2.cue f:imgCD3.cue -t cdrom
imgmount d «g:img7th Guest CD1.cue» «g:img7th Guest CD2.cue» -t cdromDon’t forget that you can also use MOUNT with images, but only if you use external program, for example (both are free):
- Daemon Tools Lite (for CD images)
- Virtual Floppy Drive (for floppy images)
Although IMGMOUNT can give better compatibility.
BOOT
Boot will start floppy images or hard disk images independent of the operating system emulation offered by DOSBox. This will allow you to play booter floppies or boot other
operating systems inside DOSBox. If the target emulated system is PCjr (machine=pcjr) the boot command can be used to load PCjr cartridges (.jrc).
BOOT [diskimg1.img diskimg2.img .. diskimgN.img] [-l driveletter]
BOOT [cart.jrc] (PCjr only)diskimg1.img diskimg2.img .. diskimgN.img
This can be any number of floppy disk images one wants mounted after
DOSBox boots the specified drive letter.
To swap between images, hit CTRL-F4 to change from the current disk
to the next disk in the list. The list will loop back from the last
disk image to the beginning.[-l driveletter]
This parameter allows you to specify the drive to boot from. The default is the A drive, the floppy drive. You can also boot a hard drive image mounted as master by specifying
«-l C» without the quotes, or the drive as slave by specifying «-l D»cart.jrc (PCjr only)
When emulation of a PCjr is enabled, cartridges can be loaded with the BOOT command. Support is still limited.
IPX
You need to enable IPX networking in the configuration file of DOSBox.
All of the IPX networking is managed through the internal DOSBox program IPXNET. For help on the IPX networking from inside DOSBox, type «IPXNET HELP» (without
quotes) and the program will list the commands and relevant documentation.With regard to actually setting up a network, one system needs to be the server. To set this up, type «IPXNET STARTSERVER» (without the quotes) in a DOSBox session.
The server DOSBox session will automatically add itself to the virtual IPX network. For every additional computer that should be part of the virtual IPX network, you’ll
need to type «IPXNET CONNECT <computer host name or IP>».
For example, if your server is at bob.dosbox.com, you would type «IPXNET CONNECT bob.dosbox.com» on every non-server system.To play games that need Netbios a file named NETBIOS.EXE from Novell is needed. Establish the IPX connection as explained above, then run «netbios.exe».
The following is an IPXNET command reference:
IPXNET CONNECT
IPXNET CONNECT opens a connection to an IPX tunneling server running on another DOSBox session. The «address» parameter specifies the IP address or host name
of the server computer. You can also specify the UDP port to use. By default IPXNET uses port 213 — the assigned IANA port for IPX tunneling — for its connection.The syntax for IPXNET CONNECT is:
IPXNET CONNECT address <port>IPXNET DISCONNECT
IPXNET DISCONNECT closes the connection to the IPX tunneling server.
The syntax for IPXNET DISCONNECT is:
IPXNET DISCONNECTIPXNET STARTSERVER
IPXNET STARTSERVER starts an IPX tunneling server on this DOSBox session. By default, the server will accept connections on UDP port 213, though this can be changed.
Once the server is started, DOSBox will automatically start a client connection to the IPX tunneling server.The syntax for IPXNET STARTSERVER is:
IPXNET STARTSERVER <port>If the server is behind a router, UDP port <port> needs to be forwarded to that computer.On Linux/Unix-based systems port numbers smaller than 1023 can only be
used with root privileges. Use ports greater than 1023 on those systems.IPXNET STOPSERVER
IPXNET STOPSERVER stops the IPX tunneling server running on this DOSBox session. Care should be taken to ensure that all other connections have terminated as well, since
stopping the server may cause lockups on other machines that are still using the IPX tunneling server.The syntax for IPXNET STOPSERVER is:
IPXNET STOPSERVERIPXNET PING
IPXNET PING broadcasts a ping request through the IPX tunneled network.
In response, all other connected computers will respond to the ping
and report the time it took to receive and send the ping message.The syntax for IPXNET PING is:
IPXNET PINGIPXNET STATUS
IPXNET STATUS reports the current state of this DOSBox session’s IPX tunneling network. For a list of all computers connected to the network use the IPXNET PING command.
The syntax for IPXNET STATUS is:
IPXNET STATUS
KEYB [keyboardlayoutcode [codepage [codepagefile]]]
Change the keyboard layout. For detailed information about keyboard layouts please see Section 8: «Keyboard Layout»
[keyboardlayoutcode] is a string consisting of five or less characters, examples are PL214 (Polish typists) or PL457 (Polish programmers). It specifies the keyboard layout
to be used.
The list of all layouts built into DOSBox is here:
https://www.vogons.org/viewtopic.php?t=21824[codepage] is the number of the codepage to be used. The keyboard layout has to provide support for the specified codepage, otherwise the layout loading will fail. If
no codepage is specified, an appropriate codepage for the requested layout is chosen automatically.[codepagefile] can be used to load codepages that are yet not compiled into DOSBox. This is only needed when DOSBox does not find the codepage. If no codepagefile is specified,
but you place all ten ega.cpx files (from FreeDOS) in the DOSBox program folder, an appropriate codepagefile for the requested layout/codepage is chosen automatically.Examples:
- To load the polish typist keys layout (automatically uses codepage 852):
keyb pl214- To load one of russian keyboard layouts with codepage 866:
keyb ru441 866
In order to type russian characters press ALT+RIGHT-SHIFT.- To load one of french keyboard layouts with codepage 850 (where the
codepage is defined in EGACPI.DAT):
keyb fr189 850 EGACPI.DAT- To load codepage 858 (without a keyboard layout):
keyb none 858
This can be used to change the codepage for the FreeDOS keyb2 utility.- To display the current codepage and, if loaded, the keyboard layout:
keyb
For more information use the /? command line switch with the programs.
================
5. Special Keys:
================
| ALT-ENTER | Switch to full screen and back. |
| ALT-PAUSE | Pause emulation (hit ALT-PAUSE again to continue). |
| CTRL-F1 | Start the keymapper. |
| CTRL-F4 | Change between mounted floppy/CD images. Update directory cache for all drives. |
| CTRL-ALT-F5 | Start/Stop creating a movie of the screen. (avi video capturing) |
| CTRL-F5 | Save a screenshot. (PNG format) |
| CTRL-F6 | Start/Stop recording sound output to a wave file. |
| CTRL-ALT-F7 | Start/Stop recording of OPL commands. (DRO format) |
| CTRL-ALT-F8 | Start/Stop the recording of raw MIDI commands. |
| CTRL-F7 | Decrease frameskip. |
| CTRL-F8 | Increase frameskip. |
| CTRL-F9 | Kill DOSBox. |
| CTRL-F10 | Capture/Release the mouse. |
| CTRL-F11 | Slow down emulation (Decrease DOSBox Cycles). |
| CTRL-F12 | Speed up emulation (Increase DOSBox Cycles)*. |
| ALT-F12 | Unlock speed (turbo button/fast forward)**. |
| F11, ALT-F11 | (machine=cga) change tint in NTSC output modes*** |
| F11 | (machine=hercules) cycle through amber, green, white colouring*** |
*NOTE: Once you increase your DOSBox cycles beyond your computer CPU resources, it will produce the same effect as slowing down the emulation. This maximum will vary
from computer to computer.
**NOTE: You need free CPU resources for this (the more you have, the faster it goes), so it won’t work at all with cycles=max or a too high amount of fixed
cycles. You have to keep the keys pressed for it to work!
***NOTE: These keys won’t work if you saved a mapper file earlier with a different machine type. So either reassign them or reset the mapper.
These are the default keybindings. They can be changed in the keymapper (see Section 7: KeyMapper).
In MAC OS you can try using cmd(applekey) together with Ctrl if the key doesn’t work eg. cmd-ctrl-F1, but some keys may still need remapping (in Linux too).
Saved/recorded files can be found in:
(Windows) «Start/WinLogo Menu»->»All Programs»->DOSBox-0.74-3->Extras
(Linux) ~/.dosbox/capture
(MAC OS X) «~/Library/Preferences/capture»
This can be changed in the DOSBox configuration file.
====================
6. Joystick/Gamepad:
====================
The standard joystick port in DOS supports a maximum of 4 axes and 4 buttons. For more, different modifications of that configuration were used.
To force DOSBox to use a different type of emulated joystick/gamepad, the entry «joysticktype» in the [joystick] section of the DOSBox configuration file can be
used.
| none — | disables controller support. |
| auto — |
(default) autodetects whether you have one or two controllers connected:
|
| 2axis — | If you have two controllers connected, each will emulate a joystick with 2 axes and 2 buttons. If you have only one controller connected, it will emulate a joystick with only 2 axis and 2 buttons. |
| 4axis — | supports only first controller, emulates a joystick with 4 axis and 4 buttons or a gamepad with 2axis and 6 buttons. |
| 4axis_2 — | supports only second controller. |
| fcs — | supports only first controller, emulates ThrustMaster Flight Control System, with 3-axes, 4 buttons and 1 hat. |
| ch — | supports only first controller, emulates CH Flightstick, with 4-axes, 6 buttons and 1 hat, but you cannot press more than one button at the same time. |
You also have to configure controller properly inside the game.
It is important to remember that if you saved the mapperfile without joystick connected, or with a different joystick setting, your new setting will not work properly, or
not work at all, until you reset DOSBox’s mapperfile.
If controller is working properly outside DOSBox, but doesn’t calibrate properly inside DOSBox, try different ‘timed’ setting in DOSBox’s configuration file.
=============
7. KeyMapper:
=============
You start the DOSBox mapper either with CTRL-F1 (see section 5. Special Keys) or -startmapper (see Section 3. Command Line Parameters). You are presented with a virtual keyboard
and a virtual joystick.
These virtual devices correspond to the keys and events DOSBox will report to the DOS applications. If you click on a button with your mouse, you can see in the lower left
corner with which event it is associated (EVENT) and to what events it is currently bound.
Event: EVENT
BIND: BIND (the real key/button/axis you push with your finger/hand)

                                                     Add    Del
mod1  hold                                               Next
mod2
mod3
EVENT
The key or joystick axis/button/hat DOSBox will report to DOS applications. (the event that will happen during the game, (eg. shooting/jumping/walking)
BIND
The key on your real keyboard or the axis/button/hat on your real joystick(s) (as reported by SDL), which is connected to the EVENT.
mod1,2,3
Modifiers. These are keys you need to have to be pressed while pressing BIND. mod1 = CTRL and mod2 = ALT. These are generally only used when you want to change the special
keys of DOSBox.
Add
Add a new BIND to this EVENT. Basically add a key from your keyboard or an event from the joystick (button press, axis/hat movement) which will produce the EVENT in DOSBox.
Del
Delete the BIND to this EVENT. If an EVENT has no BINDS, then it is not possible to trigger this event in DOSBox (that is there’s no way to type the key or use the respective
action of the joystick).
Next
Go through the list of bindings which map to this EVENT.
Example:
Q1. You want to have the X on your keyboard to type a Z in DOSBox.
A. Click on the Z on the keyboard mapper. Click «Add». Now press the X key on your keyboard.
Q2. If you click «Next» a couple of times, you will notice that the Z on your keyboard also produces an Z in DOSBox.
A. Therefore select the Z again, and click «Next» until you have the Z on
your keyboard. Now click «Del».
Q3. If you try it out in DOSBox, you will notice that pressing X makes ZX appear.
A. The X on your keyboard is still mapped to the X as well! Click on the X in the keyboard mapper and search with «Next» until you find the mapped key
X. Click «Del».
Examples about remapping the joystick:
You have a joystick attached, it is working fine under DOSBox and you want to play some keyboard-only game with the joystick (it is assumed that the game is controlled by
the arrows on the keyboard):
- Start the mapper, then click on one of the left keyboard arrow. EVENT should be key_left. Now click on Add and move your joystick in the respective direction, this should
add an event to the BIND. - Repeat the above for the missing three directions, additionally the buttons of the joystick can be remapped as well (fire/jump).
- Click on Save, then on Exit and test it with some game.
You want to swap the y-axis of the joystick because some flightsim uses the up/down joystick movement in a way you don’t like, and it is not configurable in the game itself:
- Start the mapper and click on Y- in the first joystick field. EVENT should be jaxis_0_1-.
- Click on Del to remove the current binding, then click Add and move your joystick downwards. A new bind should be created.
- Repeat this for Y+, save the layout and finally test it with some game.
If you want to remap anything to your d-pad/hat you will have to change ‘joysticktype=auto’ to ‘joysticktype=fcs’ in configuration file. Maybe this will be improved in the
next dosbox version.
If you change the default mapping, you can save your changes by clicking on «Save». DOSBox will save the mapping to a location specified in the configuration file
(the mapperfile= entry). At startup, DOSBox will load your mapperfile, if it is present in the DOSBox configuration file.
===================
8. Keyboard Layout:
===================
To switch to a different keyboard layout, either the entry «keyboardlayout» in the [dos] section of the DOSBox configuration file can be used, or the internal DOSBox
program keyb.com (Section 4: Internal Programs) Both accept DOS conforming language codes (see below), but only by using keyb.com a custom codepage can be specified.
The default keyboardlayout=auto currently works under windows only. The language is chosen according to the OS language, but the keyboard layout is not detected.
Layout switching
DOSBox supports a number of keyboard layouts and codepages by default, in this case just the layout identifier needs to be specified (like keyboardlayout=PL214 in the DOSBox
configuration file, or using «keyb PL214» at the DOSBox command prompt). The list of all layouts built into DOSBox is here: https://www.vogons.org/viewtopic.php?t=21824Some keyboard layouts (for example layout GK319 codepage 869 and layout RU441 codepage 808) have support for dual layouts that can be accessed by pressing LeftALT+RrightSHIFT
for one layout and LeftALT+LeftSHIFT for the other. Some keyboard layouts (for example layout LT456 codepage 771) have support for three layouts, third can be accessed by
pressing LeftALT+LeftCTRL
Supported external files
The FreeDOS .kl files are supported (FreeDOS keyb2 keyboard layoutfiles) as well as the FreeDOS keyboard.sys/keybrd2.sys/keybrd3.sys libraries which consist of all available
.kl files. See http://www.freedos.org/ for precompiled keyboard layouts if the DOSBox-integrated layouts don’t work for
some reason, or if updated or new layouts become available.
Both .CPI (MS-DOS and compatible codepage files) and .CPX (FreeDOS UPX-compressed codepage files) can be used. Some codepages are compiled into DOSBox, so it is mostly not
needed to care about external codepage files. If you need a different (or custom) codepage file, copy it into the directory of the DOSBox so it is accessible for DOSBox. If
you place all ten ega.cpx files (from FreeDOS) in DOSBox folder, an appropriate codepagefile for the requested layout/codepage is chosen automatically.
Additional layouts can be added by copying the corresponding .kl file into the directory of the DOSBox configuration file and using the first part of the filename as language
code.
Example: For the file UZ.KL (keyboard layout for Uzbekistan) specify «keyboardlayout=uz» in the DOSBox configuration file.
The integration of keyboard layout packages (like keybrd2.sys) works similar.
Note that the keyboard layout allows foreign characters to be entered, but there is NO support for them in filenames. Try to avoid them both inside DOSBox as well as in files
on your host operating system that are accessible by DOSBox.
==============================
9. Serial Multiplayer feature:
==============================
DOSBox can emulate a serial nullmodem cable over network and internet. It can be configured through the [serialports] section in the DOSBox configuration file.
To create a nullmodem connection, one side needs to act as the server and one as the client.
The server needs to be set up in the DOSBox configuration file like this:
serial1=nullmodem
The client:
serial1=nullmodem server:<IP or name of the server>
Now start your game and choose nullmodem / serial cable / already connected as multiplayer method on COM1. Set the same baudrate on both computers.
Furthermore, additional parameters can be specified to control the behavior of the nullmodem connection. These are all parameters:
| * port: | — | TCP port number. Default: 23 |
| * rxdelay: | — | how long (milliseconds) to delay received data if the interface is not ready. Increase this value if you encounter overrun errors in the DOSBox Status Window. Default: 100 |
| * txdelay: | — | how long to gather data before sending a packet. Default: 12 (reduces Network overhead) |
| * server: | — | This nullmodem will be a client connecting to the specified server. (No server argument: be a server.) |
| * transparent:1 | — | Only send the serial data, no RTS/DTR handshake. Use this when connecting to anything other than a nullmodem. |
| * telnet:1 | — | Interpret Telnet data from the remote site. Automatically sets transparent. |
| * usedtr:1 | — | The connection will not be established until DTR is switched on by the DOS program. Useful for modem terminals. Automatically sets transparent. |
| * inhsocket:1 | — | Use a socket passed to DOSBox by command line. Automatically sets transparent. (Socket Inheritance: It is used for playing old DOS door games on new BBS software.) |
Example: Be a server listening on TCP port 5000.
serial1=nullmodem server:<IP or name of the server> port:5000 rxdelay:1000
=====================================
10. How to speed up/slow down DOSBox:
=====================================
DOSBox emulates the CPU, the sound and graphic cards, and other peripherals of a PC, all at the same time. The speed of an emulated DOS application depends on how many instructions
can be emulated, which is adjustable (number of cycles).
CPU Cycles (speed up/slow down)
By default (cycles=auto) DOSBox tries to detect whether a game needs to be run with as many instructions emulated per time interval as possible (cycles=max, sometimes this
results in game working too fast or unstable), or whether to use fixed amount of cycles (cycles=3000, sometimes this results in game working too slow or too fast). But you
can always manually force a different setting in the DOSBox’s configuration file.You can force the slow or fast behavior by setting a fixed amount of cycles in the DOSBox’s configuration file. If you for example set cycles=10000, then DOSBox window
will display a line «Cpu Speed: fixed 10000 cycles» at the top. In this mode you can reduce the amount of cycles even more by hitting CTRL-F11 (you can go as low
as you want) or raise it by hitting CTRL-F12 as much as you want, but you will be limited by the power of one core of your computer’s CPU. You can see how much free time
your real CPU’s cores have by looking at the Task Manager in Windows 2000/XP/Vista/7 and the System Monitor in Windows 95/98/ME. Once 100% of the power of your computer’s
real CPU’s one core is used, there is no further way to speed up DOSBox (it will actually start to slow down), unless you reduce the load generated by the non-CPU parts
of DOSBox. DOSBox can use only one core of your CPU, so If you have for example a CPU with 4 cores, DOSBox will not be able to use the power of three other cores.You can also force the fast behavior by setting cycles=max in the DOSBox configuration file. The DOSBox window will display a line «Cpu Speed: max 100% cycles»
at the top then. This time you won’t have to care how much free time your real CPU’s cores have, because DOSBox will always use 100% of your real CPU’s one core. In this
mode you can reduce the amount of your real CPU’s core usage by CTRL-F11 or raise it with CTRL-F12.
CPU Core (speed up)
On x86 architectures you can try to force the usage of a dynamically recompiling core (set core=dynamic in the DOSBox configuration file). This usually gives better results
if the auto detection (core=auto) fails. It is best accompanied by cycles=max. But you may also try using it with high amounts of cycles (for example 20000 or more). Note
that there might be games that work worse/crash with the dynamic core (so save your game often), or do not work at all!
Graphics emulation (speed up)
VGA emulation is a demanding part of DOSBox in terms of actual CPU usage. Increase the number of frames skipped (in increments of one) by pressing CTRL-F8. Your CPU usage
should decrease when using a fixed cycle setting, and you will be able to increase cycles with CTRL-F12. You can repeat this until the game runs fast enough for you. Please
note that this is a trade-off: you lose in fluidity of video what you gain in speed.
Sound emulation (speed up)
You can also try to disable the sound through the setup utility of the game to reduce load on your CPU further. Setting nosound=true in DOSBox’s configuration does NOT
disable the emulation of sound devices, just the output of sound will be disabled.
Also try to close every program but DOSBox to reserve as much resources as possible for DOSBox.
Advanced cycles configuration:
The cycles=auto and cycles=max settings can be parameterized to have different startup defaults. The syntax is
cycles=auto [«realmode default»] [«protected mode default»%] [limit «cycle limit»]
cycles=max [«protected mode default»%] [limit «cycle limit»]
Example:
cycles=auto 5000 80% limit 20000
will use cycles=5000 for real mode games, 80% CPU throttling for protected mode games along with a hard cycle limit of 20000
====================
11. Troubleshooting:
====================
General tip:
Check messages in DOSBox Status Window. See section 12. «DOSBox Status Window»
DOSBox crashes right after starting it:
- use different values for the output= entry in your DOSBox configuration file
- try to update your graphics card driver and DirectX
- (Linux) set the environment variable SDL_AUDIODRIVER to alsa or oss.
Running a certain game closes DOSBox, crashes with some message or hangs:
- see if it works with a default DOSBox installation (unmodified configuration file) try it with sound disabled (use the sound configuration program that comes with the
game, additionally you can set sbtype=none and gus=false in the DOSBox configuration file) - change some entries of the DOSBox configuration file, especially try:
core=normal
fixed cycles (for example cycles=10000)
ems=false
xms=false
or combinations of the above settings, similar the machine settings that control the emulated chipset and functionality:
machine=vesa_nolfb
or
machine=vgaonly - use loadfix before starting the game
The game exits to the DOSBox prompt with some error message:
- read the error message closely and try to locate the error
- try the hints at the above sections
- mount differently as some games are picky about the locations, for example if you used «mount d d:oldgamesgame» try «mount c d:oldgamesgame» and
«mount c d:oldgames» - if the game requires a CD-ROM be sure you used «-t cdrom» when mounting and try different additional parameters (the ioctl, usecd and label switches, see the
appropriate section) - check the file permissions of the game files (remove read-only attributes, add write permissions etc.)
- try reinstalling the game within DOSBox
=========================
12. DOSBox Status Window:
=========================
DOSBox’s Staus window contains many useful information about your currant configuration, your actions in DOSBox, errors that happened and more. Whenever you have any problem
with DOSBox check these messages.
To start DOSBox Status Window:
(Windows) Status Window is being started together with main DOSBox window.
(Linux) You may have to start DOSBox from a console to see Status Window.
(MAC OS X) Right click on DOSBox.app, choose «Show Package Contents»->enter «Contents»->enter «MacOS»->run «DOSBox»
=====================================
13. The configuration (options) file:
=====================================
The configuration file is automatically created the first time you run DOSBox. The file can be found in:
(Windows) «Start/WinLogo Menu»->»All Programs»->DOSBox-0.74-3->Options
(Linux) ~/.dosbox/dosbox-0.74-3.conf
(MAC OS X) «~/Library/Preferences/DOSBox 0.74-3 Preferences»
The file is divided into several sections. Each section starts with a [section name] line. The settings are the property=value lines where value can be altered to customize
DOSBox.
# and % indicate comment-lines.
An extra configuration file can be generated by CONFIG.COM, which can be found on the internal DOSBox Z: drive when you start up DOSBox. Look in the Section
4: «Internal programs» for usage of CONFIG.COM. You can start DOSBox with the -conf switch to load the generated file and use its settings.
DOSBox will load configuration files that are specified with -conf. If none were specified, it will try to load «dosbox.conf» from the local directory. If there
is none, DOSBox will load the user configuration file. This file will be created if it doesn’t exist.
Important!: In Windows Vista/7 the configuration file won’t work correctly if it is located in «Windows» or «Program Files» folder or their subfolders,
or directly on c:, so the best place for storing extra configuration files is for example: C:oldgames
======================
14. The Language File:
======================
A language file can be generated by CONFIG.COM, which can be found on the internal DOSBox Z: drive when you start up DOSBox. Look in the Section 4: «Internal programs»
for usage of CONFIG.COM.
Read the language file, and you will hopefully understand how to change it. Start DOSBox with the -lang switch to use your new language file. Alternatively, you can setup
the filename in the configuration file in the [dosbox] section. There’s a language= entry that can be changed with the filelocation.
========================================
15. Building your own version of DOSBox:
========================================
Download the source.
Check the INSTALL in the source distribution.
===================
16. Special thanks:
===================
See the THANKS file.
============
17. Contact:
============
See the site:
https://www.dosbox.com
for an email address (The Crew-page). ![]()


0 / 0 / 0
Регистрация: 04.10.2015
Сообщений: 15
1
19.12.2017, 16:44. Показов 814. Ответов 5

Программа для ввода цифры от 0 до 9 и вывод его из переменной. Выдает ошибку Runtime overlay error, если запускаю из консоли DosBox, но через turbo debugger завершается корректно. Объясните, пожалуйста, что не так.
| Assembler | ||
|
__________________
Помощь в написании контрольных, курсовых и дипломных работ, диссертаций здесь
0
Настройка DOSBox — файл dosbox.conf.
Практически настройка DOSBox производятся внесением изменений в текстовый файл dosbox.conf. При стандартной установке этот файл не создаётся. В рабочей директории профиля пользователя (в нашем случае — C:UsersUser-1AppDataLocalDOSBox, где User-1 — это имя пользователя) при запуске DOSBox.exe генерируется файл следующего названия: «dosbox-ПолноеНазваниеВерсии.conf». В нашем случае — это dosbox-0.74-2.conf (мы установили версию DOSBox 0.74-2). Если мы удалим dosbox-0.74-2.conf, при очередном запуске DOSBox он появиться снова. Так будет происходить, пока мы не создадим конфигурационный файл dosbox.conf и не разместим его в директорию с установленным DOSBox — то есть файл DOSBox.exe и dosbox.conf должны быть в одной директории.
Отрывок стандартного файла конфигурации DOSBox.
Алгоритм работы DOSBox.
Рассмотрим краткий алгоритм запуска эмулятора DOS версии 0.74-2. Он включает следующие шаги:
- Обработка параметров командной строки.
- Обработка файла конфигурации, согласно параметра командной строки, либо dosbox.conf (если файл присутствует в директории программы).
При запуске DOSBox с параметром -conf загрузятся установки файла настроек, указанного в командной строке. Если файл настроек не указан в качестве параметра командной строки, DOSBox попытается загрузить файл «dosbox.conf» в текущей директории. Если такого файла нет, то будет обрабатываться dosbox-0.74-2.conf (смотрим следующий — 3 шаг). Например, строка «DOSBox.exe -conf my_dosbox.conf» запустит DOSBox с настройками, согласно файла my_dosbox.conf. Такая возможность организована с использованием программы CONFIG.COM (является внутренней программой эмулятора — расположена на монтированном по умолчанию виртуальном диске Z:).
- Обработка dosbox-0.74-2.conf (в случае отсутствия dosbox.conf ). DOSBox загрузит файл из профиля пользователя (dosbox-0.74-2.conf). Если такого файла нет, то он будет создан.
При запуске DOSBox.exe сначала обрабатываются параметры командной строки. Именно на этом основана работа т.н. батников (файлы с расширением *.bat), входящих в стандартный набор файлов: DOSBox 0.74-2 Options.bat, Reset KeyMapper.bat, Reset Options.bat, Screenshots & Recordings.bat. Если интересно, то их содержание просмотрите с помощью любого текстового редактора (notepad.exe). Предназначение указанных батников понятно из смысловых названий.
Параметры командной строки можно задать через ярлык: создаём ярлык файла DOSBox.exe и добавляем в строку запуска -noconsole, как это показано на картинке. Теперь, при запуске программы через ярлык, DOSBox Status Window (дополнительное консольное окошко — т.н. «Окно состояния DOSBox «) не будет отображаться. Возможные ошибки и дополнительная информация будет выводиться через файлы stderr.txt, stdout.txt, генерирующий при запуске DOSBox.
Запуск DOSBox в одном окне:
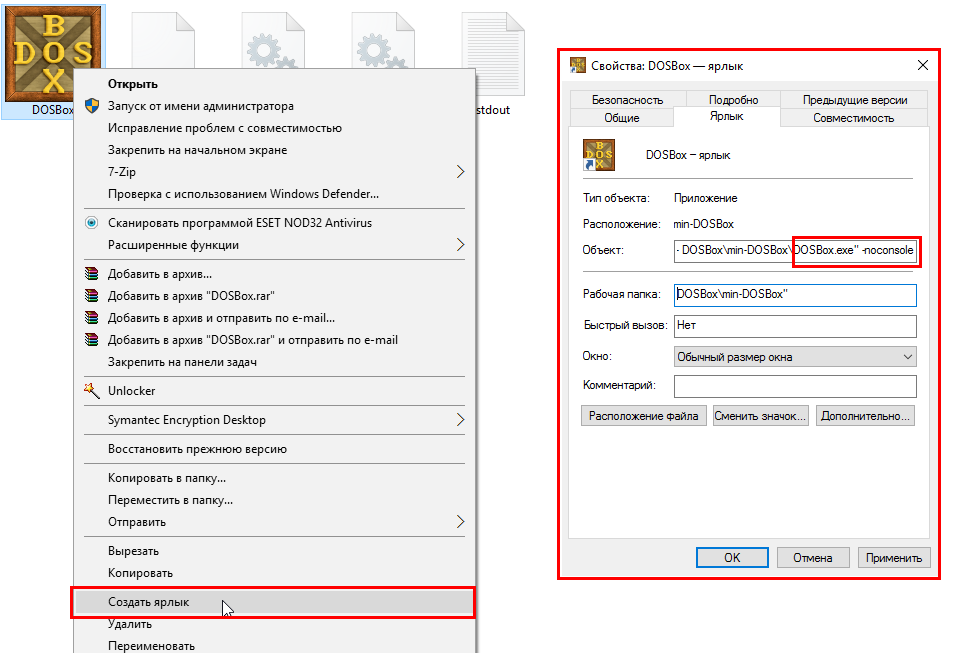
Запуск DOSBox с параметром: DOSBox.exe -noconsole .
DOSBox.exe -conf dosbox.conf -noconsole
Как уже было сказано, файл конфигурации можно задать параметром командной строки -conf (например: «DOSBox.exe -conf my_dosbox.conf«). При отсутствии параметра -conf, DOSBox.exe обрабатывает другие параметры.
После обработки всех параметров командной строки (при отсутствии параметра -conf), DOSBox пытается обработать файл dosbox.conf. Ещё раз повторимся, dosbox.conf должен быть в директории, куда установлен эмулятор — в одной директории с DOSBox.exe. Содержание его основано на файле dosbox-0.74-2.conf . Поэтому запускаем DOSBox.exe и находим его в рабочей директории профиля пользователя (в нашем случае — C:UsersUser-1AppDataLocalDOSBox, где User-1 — это имя пользователя) . Копируем файл в директорию с установленным DOSBox и переименовываем в dosbox.conf. Настройка DOSBox будет производиться внесением изменений в указанный файл.
Если DOSBox не находит dosbox.conf , создаётся файл dosbox-0.74-2.conf (вы уже знаете, где его найти) и последующие настройки изменяются, внесением записей в этот конфигурационный файл. Для упрощения открытия dosbox-0.74-2.conf в текстовом редакторе по умолчанию можно воспользоваться батником DOSBox 0.74-2 Options.bat.
Структура dosbox.conf.
Файл конфигурации (мы будем рассматривать dosbox.conf, как наиболее часто используемый вариант) представляет собой текстовый файл. Файл состоит из строк следующего вида:
- Строки комментария — не выполняются программой, служат для любых пояснений. Строка комментария должна начинаться символом «#».
# This is the configuration file for DOSBox 0.74-2. (Please use the latest version of DOSBox)
# Lines starting with a # are comment lines and are ignored by DOSBox. - Названия секций. Представляют собой краткие смысловые названия, заключённые в квадратные скобки : […..] .
[sdl]
…..
[dosbox]
…..
[render]
….. - Параметры настройки DOSBox, которым присвоены определённые значения — одно или несколько, через запятую, или не присвоено никакого значения. Значение следует за знаком равенства : =.
[sdl]
fullscreen=false
fulldouble=false
fullresolution=original
windowresolution=original
output=surface
autolock=true
sensitivity=100
waitonerror=true
priority=higher,normal
mapperfile=mapper-0.74-2.map
usescancodes=true
Подробная информация о параметрах настройки — в русскоязычном хелпе в архиве, который можно скачать с нашего сайта: DOSBoxConfManualRus.rar (закладка «Эмуляторы операционных систем, видеокарт и т.п.»). В архиве среди прочего — русскоязычное readme.txt (russian.txt) и мануалка в PDF формате (DOSBox_0.74.pdf) очень удобная и объёмная, стоит прочитать. Из полезняшек, например — некоторые сочетания горячих клавиш, выполняющие такие же функции, как строки в конфигурационном файле. В
Как переключится на полный экран? Нажмите alt-enter. Альтернатива: Отредактируйте настроечный файл DOSBox, поменяв опцию fullscreen=false на fullscreen=true. Если «полный экран» на ваш взгляд выглядит неверно, используйте опции fullresolution, output и aspect в настроечном файле DOSBox. Чтобы вернутся из полноэкранного режима: Нажмите снова alt-enter.
Настройка DOSBox в альтернативных сборках.
Хочется отметить, что DOSBox умеет эмулировать 3dfx. То есть мы сможем запустить игры с реальным 3D видеоускорением! Стандартная версия эмулятора для этого не подойдёт, нужна одна из альтернативных сборок: DOSBox SVN Daum builds (бывший Ykhwong) или Gulikoza’s build. Для включения эмуляции в конфигурационный файл (точно такой же, как и стандартный файл конфигурации) вносится несколько строк. Об этом — в отдельной статье. Уже созданные конфигурационные файлы, если необходимо, вы найдете в архиве DOSBox-GAMES-1.rar .
В этой инструкции вы найдете несколько простых шагов по установке и настройке DOSBox — эмулятора ПК под управлением старенькой операционной системы MS DOS. Обычно DOSBox включен в комплект поставки игры при её покупке в Steam или GOG. Но если у вас остались старые игры, которые хочется запустить, а сделать это в Windows 10 уже не получается, то настройте эмулятор самостоятельно.
Примечание. Эта инструкция предназначена для пользователей Windows.
Шаг 1. Установка DOSBox
1. Заходим на сайт www.dosbox.com, переходим в раздел Download, находим версию для Windows (Win32 installer), скачиваем её. Скачивание происходит через сервис SourceForge, на котором располагаются многие проекты с открытым исходным кодом.
Примечание: На момент написания обзора актуальная версия эмулятора — 0.74-3. Номер версии меньше единицы не означает, что эмулятор — не законченный проект. DOSBox уже давно работает стабильно и используется, в том числе, для запуска старых игр в Steam и других онлайн-магазинах.
Но ничто не бывает идеальным, и разработчики находят и исправляют ошибки в приложении, так что время от времени следует обновлять DOSBox на своем ПК. Просто установите новую версию эмулятора поверх старой. При необходимости измените файл конфигурации (шаг 3, пункт 7).
2. Запускаем инсталлятор, устанавливаем эмулятор. Инсталлятор создает иконку на рабочем столе, а также добавляет DOSBox в меню «Пуск». Если вы запустите DOSBox сразу после установки, то увидите командную строку.
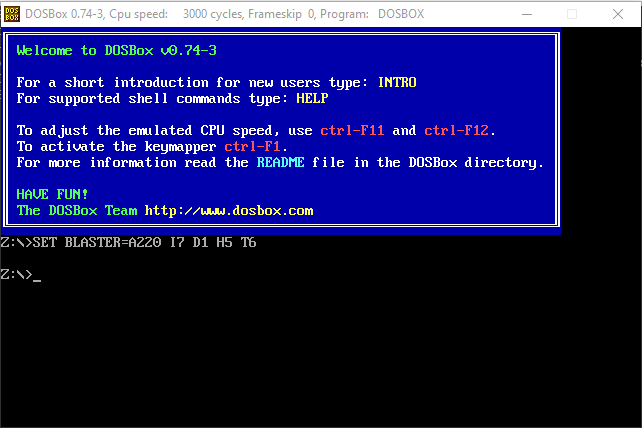
3. Закройте эмулятор, если вы его запустили. Всю настройку будем производить в Windows.
Шаг 2. Дополнительные инструменты
1. На странице DOSBox размещены также ссылки на различные графические оболочки для эмулятора. Вы можете воспользоваться одной из них. В этом случае читать этот гайд вам не потребуется, но, возможно, придется искать гайд по выбранному вами приложению. Мы предлагаем воспользоваться другим способом работы с DOSBox.
2. Так как планируется самостоятельная установка игр и приложений для MS-DOS, а также их дальнейшая настройка, лучше всего будет «вернуться» в 90-е и создать программную среду, максимально схожую с той, что была в те времена. Драйвера мыши, дополнительной памяти, привода компакт дисков и т. п. нам не потребуются. Все это включено в состав эмулятора. Но для комфортной работы в DOS потребуется файловый менеджер.
3. В качестве файлового менеджера лучше всего воспользоваться известным DOS Navigator, разработанного компанией RitLabs. Версию 1.51 можно скачать с сайта компании, или воспользоваться OpenSource версией, которая доступна на сайте www.dnosp.com (версия DOS/Real Mode).
4. Если у вас отсутствует физический привод компакт-дисков, то DOSBox может подключать их образы без использования сторонних программ (в форматах iso и cue). Или можно воспользоваться любым другим эмулятором приводов CD, в том числе встроенного в Windows 10.
Примечание. При использовании сторонних программ, образы дисков в виртуальном приводе придется менять только при выключенном DOSBox.
Шаг 3. Предварительная настройка
1. Теперь нужно настроить структуру каталогов на жестком диске. В любом удобном месте с помощью проводника Windows необходимо создать каталог DOS (вы можете назвать его иначе, но в этом случае не забудьте изменить команды, которые будете прописывать в конфигурационные файлы). Проще всего его создать в корневом каталоге диска C.
C:DOS
2. В каталоге DOS создайте подкаталоги DN, GAMES, IMAGES.
C:DOSDN
C:DOSGAMES
C:DOSIMAGES
3. В каталог DN распакуйте из архива DOS Navigator.
4. В каталоге IMAGES разместите снятые образы дисков приобретенных игр. Если игры не требуют установки, то просто скопируйте их файлы в свой каталог в папке GAMES.
5. Самое время настроить DOSBox. Откройте меню «Пуск» и в группе DOSBox запустите DOSBox Options. В Блокноте Windows откроется текстовый конфигурационный файл, и туда нужно будет внести некоторые изменения.
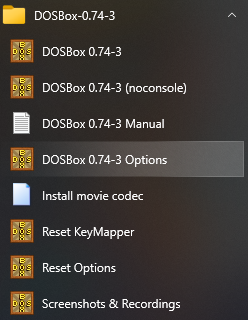
6. Настройки по умолчанию адекватны большинству конфигураций ПК, так что трогать их не стоит. Разве что можно включить полноэкранный режим при запуске. Для этого нужно поменять строку
fullscreen=false
на
fullscreen=true
Но лучше включать полноэкранный режим после запуска кнопками Alt+Enter.
7. В конце файла конфигурации найдите раздел
[autoexec]
и скопируйте под эту строку этот код:
mount C C:DOS
# Указан путь к физическому или виртуальному приводу CD имеющий в Windows обозначение D:
# Замените путь к приводу, если он имеет другое обозначение
mount D D: -t cdrom
C:
cls
C:DNdn.com
exit
Если вы меняли пути расположения каталога DOS, то измените путь на правильный в первой строчке.
Если вы не используете эмулятор привода компакт-дисков, а предпочитаете пользоваться встроенными средствами DOSBox, то строчку
mount D D: -t cdrom
замените на такую:
imgmount D C:DOSIMAGESdisk1.iso C:DOSIMAGESdisk2.iso ... -t cdrom
где C:DOSIMAGES — путь в Windows, где хранятся ваши образы дисков, а disk1.iso, disk2.iso и т. д. — имена файлов образов, которые вы хотите подключить к виртуальной машине. Переключение между дисками в DOSBox осуществляется клавишами Ctrl+F4.
Примечание. Будьте внимательнее при написании имен файлов и путей. Особое внимание обращайте на расширение файлов iso или img. Ошибка в написании приведет к тому, что команда при запуске DOSBox выполнена не будет, и ни один из образов не будет подключен.
Закройте Блокнот, сохраните файл.
Шаг 4. Устанавливаем, играем
1. Смонтируйте на виртуальный привод нужный вам образ диска или вставьте диск в дисковод, если не используете средства DOSBox и если это требуется для установки или самой игры.
2. Запустите DOSBox. Вы попадете в DOS Navigator. Если вы не знакомы с двухпанельными файловыми менеджерами 90-х, то это не беда.
- Alt+F1 и Alt+F2 — выбор диска на левой и правой панели, соответственно.
- Tab — переключение между панелями.
- Кнопки со стрелками на клавиатуре — перемещение курсора.
- Enter — войти в каталог или запустить приложение. DOS Navigator подсвечивает исполняемые файлы и выводит их в начале списка.
- Alt+X — выйти из приложения (автоматически закроется DOSBox).
- Alt+F9 — играть в лучший тетрис на ПК.
3. Если игра требует установки, то установите её с диска D. В DOS установочная программа, как правило, имеет название файла INSTALL.EXE, в отличие от SETUP.EXE в Windows. Установку производите в каталог C:GAMES виртуальной DOS-машины.
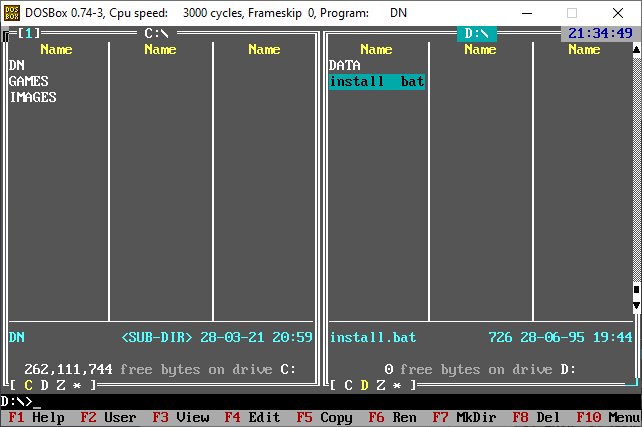
4. После установки нужно настроить звук. Обычно установочная программа предложит это сделать сразу после копирования файлов. Если это не произошло, перейдите в каталог установленной игры, и запустите программу настройки звука (обычно она имеет название SETUP.EXE или SETSOUND.EXE). Настройки необходимо выбрать для драйвера digital audio и драйвера midi audio.
5. DOSBox эмулирует звуковую карту Sound Blaster 16, поэтому при выборе звуковой карты выбирайте эту модель. Если её в списке нет, то можно выбрать обычный Sound Blaster или Pro. Как правило, программы настройки автоматически подбирают правильные параметры карты. Если этого не произошло, их можно ввести в программе настройки вручную:
I/O ADRESS=220
IRQ=7
DMA=1
Эти параметры прописаны в файле конфигурации DOSBox.
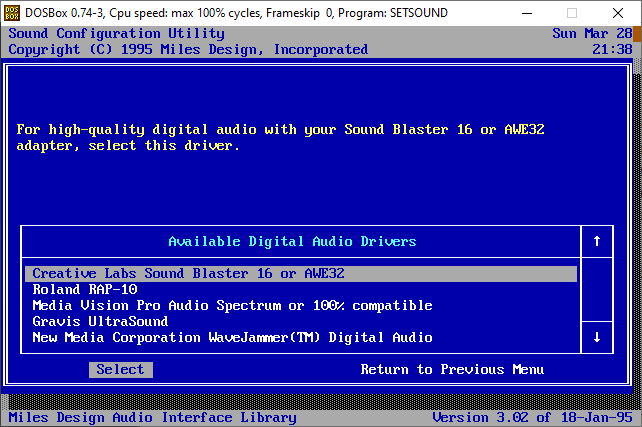
6. Найдите в интернете патч с последней версией. При необходимости, обновите игру до последней версии.
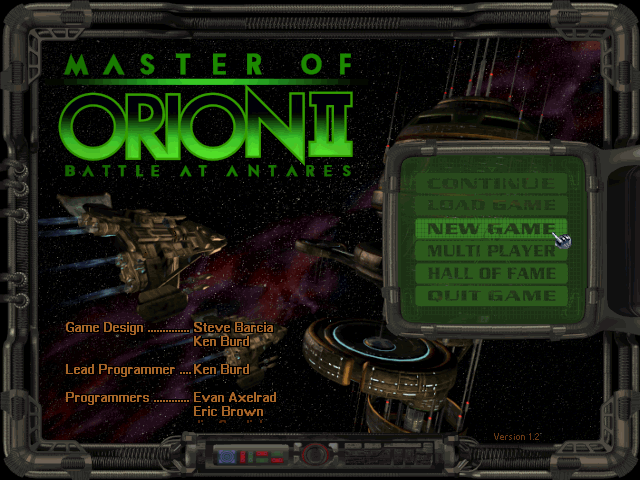
7. Все готово! Добро пожаловать в 90-е! Запускайте.