Tell me please.
With the help of a duplicator free made a site archive.
I could successfully install the site on the test domain.
– exemple1.com
Everything worked!
At the new hosting and other domain examle2.com, the installation ends with an error – 500.
The archive is the same.
The hoster even gave me more resources at the time of installation, but an error still appears – 500.
Nothing happens to do anything.
In the site directory according to the file manual: readme.html, I manually prescribed the name of the new hosting database. Username and password.
The installation continues, but interrupts the Server Code: 200
Unauthorized Access: Please provide a password!
FILE:/home/domainname/public_html/dup-installer/classes/class.logging.php[200]
TRACE:
#0 /home/domainname/public_html/dup-installer/main.installer.php(229): DUPX_Log::error(‘Unauthorized Ac…’)
#1 {main}
What other password does he need?
I entered the database password.
Thanks for the help.
-
This topic was modified 1 year, 1 month ago by
 weiuffu.
Management
Installing
How to install/remove/update/upgrade the plugin?
Install
How to install the plugin?
SHOW ALL SOLUTIONS
Auto Install
Duplicator Lite
- Go to: WordPress Admin ❯ Plugins ❯ Click «Add New»
- Search for «Duplicator» ❯ click «Install Now» ❯ click «Activate»
Duplicator Pro
- Download the plugin from one of the following locations:
- The link in the purchase receipt email you received when you purchased the product
- The Snap Creek dashboard at https://snapcreek.com/dashboard
- Login to the WordPress Admin ❯ Plugins ❯ Add New ❯ Click «Upload Plugin»
- Click «Choose File» ❯ select the .zip file you downloaded ❯ click «Install Now» ❯ click «Activate»
Manual Install
- Download the Pro/Lite plugin zip file to a temporary location on your local computer.
- For Pro login to your Snap Creek dashboard then click on the «Downloads» tab.
- For Lite go to the Duplicator Page at wordpress.org and click the blue download button.
- On your local computer extract the Pro/Lite plugin zip file to a temporary directory (e.g. C:tempduplicator).
- Open an FTP Client -OR- go to your host’s control panel (cPanel) file manager.
-
Create a new directory in your sites WordPress plugins directory via sample examples below.
Contact your hosting provider or server admin for the exact path if you are unable to locate it.- /public_html/my_site/wp-content/plugins/duplicator/
- /public_html/my_site/wp-content/plugins/duplicator-pro/
-
Copy the extracted contents of the zip file from step 2 to the new plugin directory just created.
Note: The files duplicator.php and duplicator-pro.php and the other plugin zip content should be at the root of the directories in Step 4. -
Open your WordPress Admin ❯ Plugins ❯ Activate Duplicator Pro/Lite
The manual install process should be completed.
Remove
How to remove the plugin?
SHOW ALL SOLUTIONS
Auto Remove
-
Go to Plugins ❯ Duplicator Lite/Pro ❯ click Deactivate
Note: Be sure the plugin does not have any active schedules or builds running when trying to remove - After the plugin is deactivated click Delete
Manual Remove
- Open a FTP Client — OR — go to to your hosts control panel (cPanel) file manager.
-
Navigate to the sites plugins directory. It might look something like this:
/public_html/my_site/wp-content/plugins/duplicator/ Duplicator Lite
/public_html/my_site/wp-content/plugins/duplicator-pro/ Duplicator Pro -
Select the «duplicator-pro» folder and remove it and all of its contents
Note: Be sure the plugin does not have any active schedules or builds running when trying to remove
Update
How to update the plugin?
SHOW ALL SOLUTIONS
Auto Update
Auto updates will automatically update the plugin to the next version when it is released. To enable auto updates follow these instructions:
Goto: WordPress Admin ❯ Plugins ❯ Click Enable auto-updates
This feature is available in Duplicator Pro since 4.5.3
For more details see Configuring Automatic Background Updates
Manual Updates
Manual updates require users to login to their WordPress Admin and manually update the plugin. To manually update the plugin follow these instructions:
Goto: WordPress Admin ❯ Plugins ❯ Click «update now» link by the plugin to update
WP-CLI
How to use the command line to install Duplicator?
SHOW ALL SOLUTIONS
Overview
Both Duplicator Lite & Pro can be installed from the WP-CLI. Below are some key resources
for getting started with the WordPress command line tool.
- Full WP-CLI Guide
- Installing WP-CLI
- XAMPP WP-CLI Setup
Duplicator Lite
Setup
Follow these steps for WP-CLI:
- Open a command line (Windows/Mac/Linux).
-
Navigate to the root of the WordPress site to install to for example:
cd /public_html/mywordpresssite/ -
From the command line type:
wp plugin install duplicator --activate
Duplicator Pro
Setup
Follow these steps for WP-CLI:
- Open a command line (Windows/Mac/Linux).
-
Navigate to the root of the WordPress site to install to for example:
cd /public_html/mywordpresssite/ - From the command line type:
Single Sitewp plugin install http://[URL_YOUR_COMPUTER_CAN_REACH]/duplicator-pro-4-5-0.zip --activate
MultiSitewp plugin install http://[URL_YOUR_COMPUTER_CAN_REACH]/duplicator-pro-4-5-0.zip --activate-network
Permissions
Users that run into permissions issues may need to consider the following workflow. For example if the user has superuser access, given the site’s owner is «www-data».
This allows the superuser to run the command as «www-data» (or site owner).
sudo -u www-data wp plugin activate http://[URL_YOUR_COMPUTER_CAN_REACH]/duplicator-pro-4-5-0.zip
Upgrade Pro
How to upgrade Duplicator Pro plugin?
SHOW ALL SOLUTIONS
Upgrade Duplicator Lite to Pro
The Duplicator Lite plugin is NOT upgradable since Duplicator Pro is a separate plugin with a separate code base. When you purchase Duplicator Pro you will be sent a link to
download Pro after you purchase it. From there you just download the plugin, then upload and activate it on your site. Instructions for how to do this are included in the first email
you receive after purchase or can be found in the Install section above.
Upgrade Duplicator Pro
Duplicator Pro supports 3 separate products: Personal, Freelancer and Business/Gold. To upgrade your product you can either login to your
Snapcreek Dashboard and upgrade or send us a help ticket and we will send you an upgrade link.
How to handle install/update issues with the plugin?
Issue A
On install/update of plugin this message shows:
«Uploaded file exceeds the upload_max_filesize directive in php.ini»
SHOW ALL SOLUTIONS
Solution 1
Install the Upload Larger Plugins plugin and activate that first. Afterward, upload the Duplicator Pro plugin. In some cases this plugin may not work and return and error such as Error: the server sent us a response (JSON) which we did not understand. In these cases please see the other solutions.
Solution 2
- Change the file upload limit to 5MB or greater, by following these instructions.
- Restart your web server for the changes to take place
- To make sure the value has been updated and taken affect follow these steps:
- Install the PHP Info plugin and activate.
- Go to Settings ❯ PHP Info and then search for «upload_max_filesize»
- Check to make sure the value is set to 8M
- Alternatively: Contact your host and ask them to: «Change the php.ini setting for upload_max_filesize to 5MB»
Solution 3
If #1 doesn’t work and your host won’t do #2 (which is very uncommon) perform the following:
a) Extract the plugin .zip into a temporary directory on your local machine
b) FTP the duplicator-pro directory on your local machine to /wp-content/plugins/duplicator-pro
c) At that point the plugin will show up in your plugins list and you can activate from there.
Issue B
On install/update of plugin this message shows:
PCLZIP_ERR_BAD_FORMAT (-10) : Unable to find End of Central Dir Record signature
SHOW ALL SOLUTIONS
Solution 1
This error can pop up when PHP does not have the cURL module installed. Enabling the module could be as simple as editing your php.ini file or it may be more involved. Talk to your host if you are unsure.
Solution 2
If Solution 1 didn’t help, then manually install the new version of the plugin by doing the following:
- Download the latest version of the plugin from snapcreek.com/dashboard
- On Plugins screen ❯ disable and delete the old version of Duplicator Pro
- On Plugins screen ❯ click ‘Add New’ and upload the new version of Duplicator Pro & activate
Issue C
On install/update of plugin this message shows:
«Unauthorized Access» -OR- the «Add New» button is not showing in the plugins screen.
SHOW ALL SOLUTIONS
Solution 1
An unauthorized error normally means the your license has not been activated or has expired. Do the following:
- Go to Settings ❯ Licensing
- Add your license key in the box
- Click the Activate button
- Go to the Plugins screen and update the plugin
Solution 2
If you are unable to add/edit a plugin check your wp-config.php file and comment out or remove these lines:
			define('DISALLOW_FILE_EDIT', true);

			define('DISALLOW_FILE_MODS', true);
Issue D
On install/update of plugin this message shows:
The uploaded file could not be moved to wp-content/uploads.
SHOW ALL SOLUTIONS
Solution 1
Disable FTP Components in wp-config. For a full rundown of this process see
this link.
Solution 2
Change your systems permissions to fix the issue.
Note: This option is a bit technical so contact your host if you don’t want to mess with it.
Issue E
How to manually update the plugin?
The change-log shows a new version, but the WordPress Admin shows no update notice.
SHOW ALL SOLUTIONS
Solution 1
Normally the notification should show on your plugins page like other plugins. If you aren’t seeing that you can upgrade manually by doing the following:
- Download the latest version of the plugin from snapcreek.com/dashboard
- On your WordPress admin, go to Duplicator Pro ❯ Settings and make sure the uninstall options «Delete plugin settings» and «Delete entire storage directory» are UNCHECKED
- Go to your website’s plugin list & Disable and then delete the old version of Duplicator Pro
- On the plugins screen, click Add New and upload the new version of Duplicator Pro and Activate
Issue F
For issues involving path length restrictions on Windows consider the following options.
SHOW ALL SOLUTIONS
Option 1
- Download the latest version of Duplicator Pro from the Snap Creek Dashboard
- On your WordPress Admin, go to Duplicator Pro ❯ Settings
- Ensure «Delete Plugin Settings» and «Delete Entire Storage Directory» are both unchecked
- Uninstall the old version of Duplicator Pro
- On the plugins screen, click Add New and upload the new version of Duplicator Pro
- Activate the new version
Licensing Pro
How do site licenses work?
Activation
When you purchase a product, it comes with one license key that can be activated on 3, 15, or unlimited WordPress websites at a time, depending on the product
(Personal 3 | Freelancer 15 | Business/Gold unlimited).
Personal Example:
If you bought the Personal product with 3 licenses, then you can use the plugin on 3 WordPress websites at a time. If you uninstall the plugin from one site you can easily install it on
another and still retain your license count.
Freelancer Example:
If you purchase the Freelancer plan, you can install the plugin on 15 sites. If you want to install a 16th site you can uninstall on one of your existing sites and move
the license to another or upgrade to a higher level plan before installing on the new site.
Business/Gold:
Licenses for Duplicator Pro Business and Gold are unlimited. Please note that these licenses are assigned in increments 500 at a time. For more details see the section below
«Unlimited Overview».
Multisite Example:
If you have a WordPress multisite, then the entire site including
all subsites
will consume only 1 license. For example, if you have a multisite with 100 subsites then only 1 license
key is needed for that entire multisite — subsites do not require a key. Please note that only the Business/Gold products have
extended multisite support.
Deactivation
- In Plugin: You can easily deactivate a license by going to WordPress Admin ❯ Duplicator Pro ❯ Settings ❯ Licensing tab ❯ «Deactivate» button.
- Delete Plugin: When a user deactivates and deletes the plugin then the license will also be deactivated from the Snapcreek server.
-
Dashboard: In the event you purge a site before deactivating the license or deleting the plugin you can login to the
snapcreek.com dashboard and deactivate the license that way as well.
Unlimited Overview
Users that purchase either Business or Gold versions of Duplicator Pro have access to unlimited licenses. In order to make sure licenses are not abused
or present problems were they to get «into the wild», we increment them in batches of 500. If you happen to reach your limit please reach out to us via a
help ticket and we will increase your lot size.
Upgrading
You can upgrade to the Freelancer, Business or Gold package via the snapcreek.com/dashboard to get more licenses.
Upgrades can happen at anytime and are a separate process from renewing. Please visit the upgrade & renewal
section for more details.
Also See:
» Terms and Conditions
» How do license upgrades and renewals work?
How to resolve license activation issues?
Setup
Activate License
How to find my license key & activate it?
SHOW DETAILS
LOCATING YOUR KEY
When you purchase a product (Personal, Freelancer, Business, Gold) you will receive an email with your license key. Be sure to check your spam folder if you don’t receive an email within a few minutes of purchase.
You can also get your license key(s) by logging into your snapcreek.com dashboard.
The user-name will be the e-mail you used to purchase the product. If your unable to retrieve your password at login please
submit a help ticket
Accounts: Snapcreek accounts are automatically created for you during your first purchase and are associated with your email. First time
users will need to reset their password. Goto the Snapcreek Dashboard and click
on the «Recover Password» link at the bottom of the page to login for the first time.
ACTIVATING YOUR KEY
Activation is very simple.
- Download, install and activate the plugin from your purchase email link or from your snapcreek.com dashboard.
- Goto: Duplicator Pro ❯ Settings ❯ Licensing ❯ Enter your key and click activate.
Issue A
Not Activating
How to solve license activation issues?
SHOW ALL SOLUTIONS
Solution 1
Validation: Log in to your Snap Creek Dashboard and check the license key number and validate your license count.
If your key is valid and you have the proper count then proceed to the next step. If your license has expired then you will need to
renew it. If you have maxed out your license count then you will need to remove a registered URL or
upgrade your product to support additional licenses.
Solution 2
Activation: Activation requires a connection to the snapcreek.com servers, in some cases cache plugins or even web server caches can cause issues. In these cases try the following
options:
- Try to deactivate and reactivate your license a few times, waiting a minute or two between tries.
- Deactivate & reactivate the plugin from the WordPress admin plugins screen then try the key activation again.
Solution 3
Networking: Check with your host to see if their servers can reach https://snapcreek.com
-
Contact Host: Contact your host or server admin and ask them to monitor what is happening when you click the license activate button. Specifically, ask if communication
is getting blocked between your server and snapcreek.com. If they observe nothing getting blocked on their side then proceed to the step below. -
IP Checks: Gather the following IP addresses by going to WordPress Admin ❯ Duplicator Pro ❯ Tools ❯ General Tab ❯ Server Settings ❯ «Server IP», «Outbound IP», «Client IP».
If any are blank then contact your host or system network administrator as its located at the router layer, and we must have all of them in order to properly diagnose
the issue from our end. Note: If you on are a localhost server its possible you may see «::1» for «Server IP» and «Client IP». If this is the case for localhost then provide
the «Outbound IP».Once you have all the IPs submit a ticket or reply to an existing ticket with all IP addresses. We will then check
to see if they are being blocked on the snapcreek.com end. This is typically very rare although it can happen if your server’s IP has been placed on a blacklist of some kind.
Issue B
Free Up License
How can I free up a license?
SHOW ALL SOLUTIONS
If you no longer want the product installed on a WordPress site use one of the following methods to free up it’s license:
Option 1
Remove Plugin
From within plugin ❯ Uninstall the plugin
Option 2
Plugin Settings
From within plugin ❯ Duplicator Pro ❯ Settings/Licensing Tab ❯ click Deactivate button.
Option 3
Snapcreek.com Dashboard
Remove a registered URL via your snapcreek.com/dashboard
Never used the dashboard? Click the recover password link or submit a help ticket
and we can get you access.
Steps to manage site URLs:
- Login to your dashboard
- Click View Licenses Link ❯ Manage Sites Link
- Add/remove URLs that you need to manage licenses on
Issue C
Invalid Message
How to resolve «Invalid or Rejected» notices on all my WordPress admin pages?
SHOW ALL SOLUTIONS
Solution 1
This occurs when Duplicator Pro has been running on a machine for more than 30 days in an unlicensed fashion. To remove this message, go to Duplicator Pro ❯ Settings ❯ Licensing,
enter your license key and then click “Activate”. The message will disappear at this point.
How do license upgrades and renewals work?
Overview
Renewals and Upgrades are two separate operations. Users can renew or upgrade their license at any time. If renewing and upgrading together its best to renew first then upgrade
for the best price.
Renewals
Renewals are required to keep using the software.
Your license key is valid for one year from the purchase date. An active license key is needed for continued access to updates, security patches,
bug fixes, new features and support. Below are some key points for renewals.
- Emails will only ever be sent out one month before expiration & one day before expiration.
-
Upon purchase or renewal your license expiration date will be extended for another year.
Upgrades
License upgrades are seamless and easy to apply. The cost of upgrade is equal to the price of the new license minus the price of your existing license.
For example: if you bought Duplicator Pro Personal for $69 and want to upgrade to Freelancer $89 then your upgrade cast would be $20.
SHOW UPGRADE STEPS…
Upgrade Steps
To upgrade, follow these steps:
- Login to your snapcreek.com dashboard
- Goto: Purchases tab ❯ ‘View Licenses’ ❯ ‘View Upgrades’
- Choose the upgrade level and checkout.
Note: When upgrading to a different version the billing will automatically get handled for you. -
In your WordPress Admin: Go to Duplicator Pro ❯ Settings ❯ Licensing. This will retrieve the license level from our server so you should see information that
describes the level which you just upgraded to.
Upgrade Prices
| Current Product | Upgrade Price |
|---|---|
| Personal ❯ Freelancer | $20 |
| Personal ❯ Business | $80 |
| Personal ❯ Gold | $530 |
| Freelancer ❯ Business | $60 |
| Freelancer ❯ Gold | $510 |
| Business ❯ Gold | $450 |
Upgrade & Renew Together
At the moment, our shopping cart does not handle renewals and upgrades in the same transaction, therefore if you want to do both an upgrade and renewal, you will have
to execute it in two orders.
Sales Pro
How to get invoice/receipt of purchase?
There are two ways to easily get your invoice.
1. Emailed Receipt
- After you purchase a product you will receive an email
- In the email under «Tax Receipts and Invoices» click the link «tax receipt or invoice»
- Fill out the «Invoice» page and click the «Save Billing Details & Generate Invoice» button
2. Online Dashboard
- Login to the Snapcreek Dashboard
- Click «Generate Invoice» link
- Fill out and click the «Save Billing Details & Generate Invoice» button
- Click the «Print» button at the bottom
Accounts: Snapcreek accounts are automatically created for you during your first purchase and are associated with your email. First time
users will need to reset their password. Goto the Snapcreek Dashboard and click
on the «Recover Password» link at the bottom of the page to login for the first time.
Save As PDF
If the print button has any issues you can manually save the page as a PDF (Chrome example):
- Right click on the Invoice page and choose «Print…»
- Click the «Change…» button and choose «Save as PDF»
-
Click the «Save» button to save as PDF.
Instructions for other browsers:
FireFox |
Microsoft Edge |
Brave Browser
How are refunds and support issues handled?
Refunds
How are Duplicator Pro refunds handled?
SHOW DETAILS
We firmly believe in and stand behind our product 100%, but we understand that it cannot work perfectly for everyone all of the time. If you are unhappy with your purchase,
or you have an issue that we are unable to resolve that makes the system unusable, we are more than happy to provide a complete refund within 14 days of your original purchase.
What is the quickest way to get refund?
The quickest way to get a refund is to contact us directly. We can issue the refund directly through the merchant services gateway and provide your refund much faster if you
contact snapcreek.com directly vs trying to contact the merchant provider. Please Open a Ticket Request for a much quicker refund process.
A few conditions:
- If you run into technical issues please allow us to adequately try and assist you. If we are unable to resolve the issue, we will promptly provide a refund. Please open a support
ticket before requesting a refund for a technical issue. - Refunds may only be issued within 14 days of the purchase date. After 14 days refunds cannot easily be processed. Please be sure to test and use the plugin upon purchase.
Support
How are support issues handled?
SHOW DETAILS
DUPLICATOR PRO
Yes! We offer professional customer support and we understand the lifetime value of a customer. We will do our very best to resolve any issues
you encounter via our ticket system. The ticket support system is monitored during US daytime hours
Monday thru Friday and we typically get back to people within 24 hours. Please Note: We currently we do not offer phone support.
DUPLICATOR LITE
For Duplicator Lite we offer limited ticket support which is always prioritized behind Pro users. Response times can vary from 1-5 business days for Lite.
If you need immediate support for Duplicator Lite we recommend checking out our Duplicator Lite support section.
How to handle my subscription renewals (auto-renewal)?
Issue A
Cancelling
How do I cancel my subscription?
SHOW ALL SOLUTIONS
Option 1
The quickest way to see if you are setup for subscriptions is to login to your snapcreek dashboard
and check the subscriptions tab. If the tab is empty then you do not have any subscriptions (auto-renewals) setup. If you do have them then you can click
the cancel link next to each subscription(s) to cancel it from auto-renewing.
Option 2
Depending on the merchant type cancelling a subscription has a few different paths. Please choose the payment type below that was used to purchase the product.
If your not sure please contact us and we can cancel the subscription for you.
- PayPal: See PayPals step-by-step instructions.
- Stripe/Other: For other payment types submit a ticket and we will cancel it.
How to handle snapcreek.com dashboard/account issues?
Issue A
Create Account
How do I create a snapcreek.com account?
SHOW ALL SOLUTIONS
Accounts are only created for purchased products such as Duplicator Pro. When you purchase a product and checkout you will be sent an email informing you of a new login which
you can use to reset the password, after that you can login to the dashboard for the invoice or manage license information. You can also click on the lost password link to
reset your password.
Issue B
Forgot Login
How to resolve forgotten username or passwords?
SHOW ALL SOLUTIONS
If you are unable to login to the dashboard or you forgot your password please follow these instructions.
Username
- Use the help ticket system
- Provide your license key, first and last name of the purchaser of the product
- Submit your ticket and we will get back with you
Password
- Click on the Account link in the upper right corner
- Click on the «Lost Password?» link at the bottom of the login form.
-
Enter the username/email used when purchasing the product and click the button.
If the username/email is not found then the form will not submit; see «Forgot Username» above. -
An email will arrive shortly with a link that will let you reset your password.
Be sure to double check your SPAM folder if you don’t receive an email from snapcreek within 5-10 minutes. - Click on the link in the email. This will take you to a form where you can reset the password.
- Enter in any password you like, this includes a previous password you may have used.
- Now enter in your username/email with the password you just updated into the login form.
The number one reason for having issues with getting your password reset deal with emails that is sent to your SPAM folder. Please monitor
your SPAM folder as well when looking for you password reset link.
What are some common pre-sales questions most asked?
Question 1
Build Interrupt
How does Duplicator Pro resolve «Build Interrupt» errors found in the Lite version?
SHOW ALL SOLUTIONS
In many cases the answer is yes,
however
it really depends on your servers capabilities and the overall size of your package.
If your trying to backup a 10GB site on a budget host the chances will be much lower that the servers specs can handle it, without adding directory
exclusion filters.
However if your using a higher end server or VPS where you have more flexibility and control of the servers settings
then we have seen large packages over 8GB build without issues.
Remember we do have a full 14 day money-back guarantee should the product not meet your needs.
Question 2
WP Config Settings
How does Duplicator Pro change WP-Config settings?
SHOW ALL SOLUTIONS
The Duplicator Pro Installer allows you to set the following in the destination site’s wp-config.php file:
Posts / Pages
- Theme Editor Enable/Disable
- Autosave Interval
- Post Revisions
Security
- SSL Enforce on Admin
- Generate New Unique SALTS and Authentication Keys
- Core Auto-Update Control
System / General
- Cache Control
- WP Debug Enable/Disable
- WP Debug Log Enable/Disable
- WP Debug Display Enable/Disable
- Script Debug Enable/Disable
- Save Database Queries Enable/Disable
- Cookie Domain
- Memory Limit
- Max Memory Limit
Check out the Duplicator Pro homepage for a description of all the features of Duplicator Pro.
Create Backups
Pre-Build
Before the build process starts
Setup
How to resolve dependency checks?
Issue A
Requirements Checks
How to resolve requirement checks that show up on step 1 of the build process?
SHOW ALL SOLUTIONS
Before you create a new package a requirements check will show you the status of your system.
The following are system checks that are performed before package creation can take place.
PHP Support
- Duplicator requires PHP 5.3.8+ or higher. Contact your host to upgrade to a stable secure version of a PHP Release
-
To create a zip file the plugin requires ZipArchive extension -OR-
shell_exec for PHP with zip support enabled. Contact your host
to enable. Alternatively you can also use the DupArchive format found on the Duplicator ❯ Settings ❯ Packages Tab ❯ Archive Engine.
Permissions
-
Paths that are listed in this section should have permissions of 755 for directories and 644 for files. On some hosts the permission set requires 777.
Setting items to 777 is a security issue and should only be set temporarily. Please avoid any hosting company that requires this kind of setup. -
Also be sure to check the Owner/Group settings and validate they are correct and match other successful directories/files that are accessible.
For more details contact your host or visit their help pages for more information on how they implement permissions and group settings.
Server Support
-
WEB SERVER:
The Duplicator currently works with these web servers: Apache, LiteSpeed, Nginx, Lighttpd, IIS, WebServerX. However the best success we have seen with Apache -
DATABASE SERVER:
In order to complete an install the mysqli extension for PHP is required. If you are on a hosted server please contact your host and request
that mysqli extension be enabled. For more information visit: http://php.net/manual/en/mysqli.installation.php
Installation Files
If this check fails then a reserved file was found in the WordPress root directory. See the following FAQ to resolve this issue:
Which files need to be removed after an install?
Issue B
Dependencies
How to resolve dependencies for certain features in Duplicator?
SHOW ALL SOLUTIONS
Duplicator requires certain PHP and server level dependencies in order to work.
MySQLDump
In order to generate the database SQL script with MySQLDump, PHP functions such as shell_exec are required. Below is a list of ways to enable disabled functions on your host.
- Contact your host and ask them to enable the PHP function in question.
-
Some hosts have an interface that will allow you to disable/enable features through a control panel
such as this. - Open your php.ini file and look for disable_functions and remove the function you want enabled.
How to migrate a large site on a limited host?
Build Issues
DupArchive Format:
Some budget hosts may prevent larger sites from building a package using zip. Snap Creek has a special format DupArchive (daf) designed specifically for restricted hosts. To enable this format
see the settings below.
-
Duplicator Lite: Settings ❯ Packages ❯ Archive Engine = DupArchive
Note: The maximum size of DupArchive packages built with lite is 500MB. - Duplicator Pro: Settings ❯ Packages ❯ Basic Settings ❯ Archive Engine = DupArchive
Two Part Install: For
Duplicator Lite use the Two Part Install technique on hosts that show a «Build Interrupt».
If you’re on a budget host using Duplicator Pro and your site is over 2GB then you may also have to use the Two Part Install method,
it will just depend on the quality of your hosts performance and any throttle limitations.
Upload Limits
If you’re on a budget host that has a size upload limit then there are a few ways to get around this constraint.
-
File Filters: Add any large files to the file filter creating a package to get your package down to your hosts limit. Then manually move those
filtered files over via FTP. On most sites the easiest process is to filter your wp-content/uploads/ folder (typically your images) then manually move
those files over. - Two-Part-Install: This process has you simply move your files then it quickly runs the database part of the install finalizing your setup. For
a full overview see the Two Part Install technique
Also see:
What can I try for timeout Issues?
How do I run the installer in Database Only Mode?
What if I see warnings or errors during the ‘Scan Process’?
Recommended hosting providers for Duplicator?
How to work with the different Zip engines?
Issue A
Zip Engines
How do «Shell Zip», «ZipArchive» and «DupArchive» engines differ?
SHOW ALL SOLUTIONS
Shell Zip
Shell Zip uses PHP shell_exec to call out to your servers
‘zip’ executable to create the package using a zip format. This is generally a faster and
more robust solution than using PHP ZipArchive code. We recommend you choose this
option if it’s available on your system and you do not experience any issues when using.
ZipArchive
The PHP ZipArchive engine uses PHP logic to create the zip package. This method is generally slower than the Shell Zip option and can
have problems capturing files with non-western filenames. In some cases it will be better to use the ZipArchive, however generally speaking you should try
to use the Shell Zip if its available.
DupArchive
DupArchive is a file format that creates an archive.daf file. This format is specific to Duplicator Pro. This format
is designed around performance and scalability. Many budget hosting providers have very strict timeouts, cpu and i/o constraints that they configure into
their servers. With DupArchive, the format was designed to help get around these server constraints so that users can build larger packages.
Issue B
PHP ZipArchive
How to manage & work with PHP ZipArchive.
SHOW ALL SOLUTIONS
When creating archives Duplicator
requires
the ZipArchive class to be installed. For installing a package it is not required.
Below are instructions for getting the ZipArchive working in your environment if it is not already setup.
You can easily validate the installation of ZipArchive by checking with
phpinfo. These settings can be viewed by going to Duplicator ❯ Tools ❯ General ❯ PHPinfo.
Within the phpinfo output search for «Configure Command» within the results of this command look for «—enable-zip». If that is not present then
talk with your hosting provider.
Hosted Server
Just contact your hosting provider and tell them you want PHP with Zip support so that the «ZipArchive Class» will work. This is a very common feature and is available
on almost all shared hosting environments.
Duplicator says the Zip Archive extension fails, but my host says it’s enabled. What should I do?
Be sure your host is looking at the same thing as there are several versions of doing Zip compression in PHP.
Have your host visit this link for instructions on how to enable the
Zip Archive class. This extension is enabled on almost all major hosting platforms by default.
Your Computer
On your own computer you will to to make sure the Zip extensions are enabled for PHP. Check your php.ini file for the following:
On Windows: extension=php_zip.dll
On Mac and Linux: extension=zip.so
PHP 7+ Linux
When upgrading to PHP 7, make sure to install the PHP 7 versions of you libraries as well. On some linux distributions PHP 7 also provides a php7.0-zip package.
You can install it with:
sudo apt-get install php7.0-zip
To see additional PHP 7 libraries that are available, run:
sudo apt-cache search php7.0-*
Additional Resources
PC (XAMPP, WampServer, ect…) resources:
PHP manual |
XAMPP Forums |
WampServer Forums |
Google Search
Mac (MAMP) resources:
PHP manual |
MAMP Forums |
Article 1 |
Article 2 |
Thread 1
Thread 2
Also see: How do I do a ‘Manual Extraction’ or run installer without Zip enabled?
How to resolve Duplicator Plugin user interface (UI) issues?
Issue A
UI Issues
How to resolve plugin UI issues that are not working correctly?
SHOW ALL SOLUTIONS
Option 1
The most common reason why the plugin UI is not working is that other plugins or themes are having conflicts with Duplicator. To turn off other plugin hooks when using Duplicator go to ❯ Settings ❯ General Tab ❯ Advanced then check both boxes for:
- Foreign JavaScript — OR — «Other Plugins/Themes JS»
- Foreign CSS — OR — «Other Plugins/Themes CSS»
Then try to reload the page/view you were having issues with.
Option 2
If option 1 does not work, consider deactivating your plugins or trying another theme temporarily. Then try to reload the page/view that was having issues.
Option 3
If option 1 and 2 still provide no solution then follow these steps to find the JavaScript error that may be occurring.
-
Open your browser console, how-to instructions here:
https://balsamiq.com/support/faqs/browserconsole/ - Retry the action that was causing issues.
- Copy any error messages that show up in the browser console and create a help ticket. An image screen-shot capture is preferred.
Issue B
AJAX on Settings
How to handle AJAX error when resetting packages on the Settings page.
SHOW ALL SOLUTIONS
Option 1
Possible Cause: A third-party plugin is corrupting the AJAX response
Resolution: Deactivate all other plugins except Duplicator and then try to reset packages.
Option 2
Possible Cause: A third-party theme is corrupting the Ajax call response
Resolution: Activate the default WordPress theme for example «Twenty Twenty» and then try to reset packages.
Option 3
Possible Cause: The server is running out of memory or time to process the reset.
Resolution: Increase value max_execution_time and memory_limit variable in php.ini. If this is beyond your abilities or you don’t have permissions to
do this then contact your hosting provider.
Issue C
Missing Menus
How to resolve Duplicator/Packages menu missing from my admin menu?
SHOW ALL SOLUTIONS
Option 1
To view the packages menu the current role of the logged in user must have the
‘export capability’. This means the user your logged in as should have a role of
‘Administrator’. Go to ❯ Users ❯ ‘Select User’ ❯ ‘Role’ setting ❯ set to ‘Administrator’, then logout and login. If this
option still does not work consider these options below.
Option 2
-
Try User Role Editor Plugin:
Install plugin, then enable the ‘export’ capability on the current role (most commonly Administrator).
Note: When editing Administrator you must enable «Show Administrator role at the User Role Editor» in the Settings ❯
User Role Editor menu. -
Edit functions.php
Add the following to your functions.php
				$admin_role = get_role( 'administrator' );

				$admin_role->add_cap( 'export', true );
Also see:
WordPress Form: Menu Tools — Export Missing
WordPress Codex: Roles and Capabilities
Scanner
How to resolve scanner warnings/errors and timeout issues?
Issue A
File Structure
How to resolve scan issues related to my servers file structure?
SHOW ALL SOLUTIONS
Solution 1
SYMBOLIC LINKS
Links that point to themselves can cause a recursive loop. Check the file system for directory links that link to itself. For example if /public_html/mydir points back to
public_html/ then that might create a recursive loop for PHP in which case you would need to filter public_html/mydir/.
To check for symbolic links go to Duplicator ❯ Tools ❯ General ❯ Scan Validator ❯ «Run Scan Integrity Validation». This will find sym-links and unreadable files. When the scan is
complete add the full path(s) of the «Symbolic Links» to the directory filter list on Step 1 of the package creation process.
If the scan validator does not pick up files then go into your host’s file manager and look for anything that would cause this (for instance that may look like /dir1 and if you go
into /dir1 it would contain the contents of / which would mean it would also include /dir1 etc). For these type of directories/links enable file filters and add the full directory paths
to the directories box when you are creating a package.
Note: If this process seems too technical then simply contact your host and ask them if there are any symbolic or recursive links in your WordPress
directory structure. There are some instances where the scan validator might not pick a symbolic link on your server.
Solution 2
LARGE FILE COUNTS
For some budget host setup with timeouts enabled; large file counts might cause the scan to timeout. If PHP or Apache timeouts are set to low and your trying to scan 250k+ files
then the process may not be able to scan all the files.
To resolve goto Packages ❯ Create New ❯ Step 1 ❯ Archive Directory filters and add a filter to the directory with the large file count. The recommend approach is to increase your PHP and
Web Server timeouts so the scan is allowed time to finish.
Solution 3
UNREADABLE FILES
On some systems certain utf8 characters can cause the scan to have issues. This is a very uncommon issue and typically more prevalent on Windows
operating systems running lower version of PHP.
To check for unreadable files from within the plugin go to Duplicator ❯ Tools ❯ General ❯ Scan Validator ❯ «Run Scan Integrity Validation»
This will run a scan check that will look for unreadable files. When the scan is complete add the path(s) of the «Unreadable Files» to the directory filter list on Step 1 of the
package creation process.
Solution 4
NO FILES FOUND
If you run a scan and the results show up with no files being found. In your server could be configured with «server separation». You will need to contact
your hosting provider for more details however this can be an issue on some systems. Possible options in Domain Configuration window are:
- No forwarding
- Forward to subfolder without service separation
- Forward to subfolder with service separation
- Forward to IP/Host/URL
Switching temporarily to #2 will allow the Duplicator to run without issues for both the package and installer.
Issue B
403 Forbidden
How to handle 403 server forbidden issues with the scanner?
SHOW ALL SOLUTIONS
Issue C
500 Errors
How to handle 500/502/503/504 gateway issues with the scanner?
SHOW ALL SOLUTIONS
Most 500 web server errors can be difficult to track-down as they are being thrown from the web server and not PHP. Below are
several options you can try for 504 and 502 errors.
Solution 1
Config Update
Consider the following updates to the .htaccess file.
Option 1: Change the dynamic value for ajax calls
			<IfModule mod_timeout.c>

			<Files ~ ".php">

				SetEnvIf Request_URI "admin-ajax" DynamicTimeout=240

			</Files>

			</IfModule>
Option 2: Update the .htaccess file from the file manager interface(Path: public_html/.htaccess) and also increased the max_execution_time limit from 300 to 3000
from the Select PHP version interface provided in cPanel.
			<IfModule Litespeed>

			RewriteEngine On

			RewriteRule .* - [E=noabort:1, E=noconntimeout:1]

			</IfModule>
Solution 2
Cloudflare
If you’re using Cloudflare the below settings may help
- Log in to Cloudflare
- From Overview Page click «Advanced» ❯ Click «Pause»
- Run installer deployment
- Turn Cloudflare back on
Solution 3
Contact Hosting Provider
Connect with your hosting provider and let them know your getting a 500 error. Many times your host will have access to the web server logs
which can help isolate what is triggering the error on their server configurations. In some cases the host may be able to provide enough
information to give you a status as to why the 500 error is being thrown, this information in some cases can help us try different configurations in
the hosts environment.
Upgrade: Ask your host if they are running the latest version of a web server software such as
Apache or nginx.
Many times hosts will run very outdated version of software which will have patches and fixes for the issue you’re experiencing.
Solution 4
General Troubleshooting
There are several troubleshooting protocols you can implement to try and validate if the issue is indeed a networking issue between your browser and the
server. If you have the ability to try from a different computer or even different browser that can sometimes isolate the issue. For a full
run-down of various ways to fix this issue please see this article on
Understanding and Fixing 502 Bad Gateway Errors
Also see:
What can I try for 502/503/504 Gateway issues during the install?
Recommended hosting providers for Duplicator?
Issue D
JSON Service
How to handle ‘Unable to read JSON from service’ messages?
SHOW ALL SOLUTIONS
To resolve this issue please do the following:
- Go to: WordPress-Admin ❯ Duplicator Pro ❯ Settings ❯ Packages Tab ❯ Advanced Settings
- Change Thread Lock Type to «SQL»
- Change JSON to «Custom»
- Retry building a package
Troubleshoot
Try the following options below to see where the scanner fails.
SHOW ALL SOLUTIONS
Solution 1
Go to Packages ❯ Create New ❯ Check the «Archive Only the Database» checkbox. This will build only the database and let you know if there
is an issue with a specific file or directory. If the scanner completes then there is an issue with one of the files in your system. In this case you can follow these steps:
- Go back to step one «1-Setup» and click the [root path] quick link to add the WordPress root directory as a filter then run the scanner.
- If this works then continue adding and removing directories until you can locate the problem area. Start with the top-most directories and work your way down if not
then see «Test 2» below.
Solution 2
If you try all the other options Issue A thru D above and it still fails then check your PHP error log and contact your hosting provider.
How to handle scanner notices after the scan has ran?
After the scan has ran you will see a report status of either «Good» or «Notice». Scan checks with a «Notice» will not prevent the build from running, however if you do run into any
package build issues then its possible the «Notice» should be investigated. If you receive a notice and you are not sure how to proceed, we recommend proceeding with the notice
and see if the package builds. Below is a list of the scanner sections with details on how to proceed.
SETUP
The Setup section show various data about the server and WordPress environments.
-
System:
The System area consists of various test for your Web Server, PHP and hosting environment. If you run into an issue in this section, there should be details how how to properly
proceed with each notice. -
WordPress:
This section tests for various WordPress setup issues and alerts you if anything is found.
ARCHIVE
-
SIZE CHECKS
If the scanner shows warnings for larger files/databases you might have issues if you’re on a shared budget host. Having access to your own
server or VPS you should be able to easily follow the instructions for timeouts and get Duplicator running
without any issues. With Duplicator Pro multi-threaded support for larger sites can help improve the overall build process.Budget Hosts:
Its possible that you may run into timeout issues more so with Duplicator Lite on a budget host as it has a single threaded process. If the host kills the PHP
process in the middle of trying to zip up your files then it will not be able to archive the file. Duplicator Pro has a mutli-threaded process that allows for
larger sites but can still run into issues with sites above 2GB depending on your hosting provider and their limitations on PHP processes. -
NAME/READ CHECKS
If you receive a ‘Notice’ status on the [Archive > Files > Invalid Names] line and the full path to the file is below 256 characters you should be good.
A warning is shown at 250 characters to bring attention to the issue and warn users that their might be an issue if the path continues to grow.Basically is what happens with zip programs like winrar/winzip and even the PHP library used to extract the files is that they work fine to package up the files,
however when they are extracted on some operating systems such as windows they run into a path limit. One way to validate if the zip file is corrupt or unusable
when extracted to its new destination, is to try and extract it with a program like winrar/winzip and it will throw errors about file length issues if they are present.
The best advice with this setup is to first just try to run the build. Running a build is safe and if the process is killed you will simply just see a
timeout error message. In some cases your host may be configured to handle backing up that much data; it just depends on your provider. We have seen some
shared hosts backup sites upto 4GB with the Lite version and timeout with a 100MB on others. It simply boils down to the constraints imposed by your
hosting provider.
If you run into timeout issues when building a package see the FAQ question
What can I try for Timeout Issues? there are several work-a-rounds that will allow you to successfully
build a package no matter how large your site is. To quickly get going skip down to the section «MANUAL TIMEOUTS WORKAROUNDS» or the FAQ item above
titled What can I do for issues with migrating a large site?.
Also see:
What can I do for issues with migrating a large site?
Recommended hosting providers for Duplicator?
Build-Runtime
While the build process runs
How to resolve build issues on my host/server platform?
Build Issues
Problem
The build process continues to fail or is having issues completing.
Option 1
Check Percentage: If build process is stuck and a certain percentage 5%, 20%, 40% this indicates that it is hung up at a certain phase. Please see the FAQ items below this one that addresses each of the percentages.
Option 2
Check Disk Usage: Check your disk usage and make sure you have enough space on your host/server to build a package. Typically you will need double the size of your archive file. So if on the build scan phase your archive size is around 200MB, then except for your server to have at least 400MB available. Most hosting platforms allow you to quickly check your available disk usage. Contact your host for exact instructions on how to check your available disk quota.
Option 3
Try DupArchive: The I/O and CPU constraints set up by the host may be causing the server to kill the zip process using the core PHP library functions. If this is the case try the DupArchive (.daf) engine format for packages. It has been specifically designed for large packages and/or tight budget host constraints. To use DupArchive:
- Update to the latest version of the plugin
- Go to Settings ❯ General and click the «Reset All» (Duplicator Pro) and «Reset Packages» (Duplicator Lite) buttons.
- Go to Settings ❯ Packages ❯ Archive Engine ❯ select «DupArchive» for the Engine and Save.
- Build the package
Option 4
Try Filters: If you continue to still have build issues with Option 2 above we recommend that you also perform the following:
- Create new package ❯ Expand ‘Archive’ ❯ Enable File Filters ❯ click the ‘[wp-content]’ link by ‘Directories’
- Build the package ❯ Install at the new location
- FTP the files from the source server’s wp-content to the destination server’s wp-content directory.
Option 5
Try Two-Part-Install: If none of the options above work, we recommend doing a two-part install process. While this process takes a little bit longer it does stream-line the build process and solves 99% of most build issues.
General Troubleshooting
In order to find the root cause of the build issue open the log file associated with the package you tried to create and look for some key items.
- Goto: WordPress Admin ❯ Duplicator/Pro ❯ Tools ❯ General ❯ Package Logs
- Look for for warnings or errors or items that indicate a problem occurred.
- Look for the text ‘DONE PROCESSING’ at the very end of the log file this indicates the package processed fully otherwise it failed somewhere along the way.
Turn off all cache plugins: Many of the popular cache plugins have been known to create issues when you go to create a package and re-install your system.
It is highly recommended that you turn off all caching plugins while creating your package and add the cache directory to the directory filter list.
How to resolve builds getting stuck at a certain % point?
Issue A
Why does the build percent get stuck at 5% or pending?
SHOW ALL SOLUTIONS
Try each option starting with Option 1 first and move through in order.
Option 1
The Plugin is configured for the wrong admin-ajax protocol.
If the wp-admin URL is «https» vs «http», then switching protocols may solve the problem (only switch if wp-admin is https).
- Go to Settings ❯ Packages ❯ Advanced Settings
- Change the AJAX setting to ‘https’ ❯ save settings ❯ retry build
Option 2
The host is blocking localhost traffic to admin-ajax.php.
Some hosts prevent the server from calling back to itself (localhost). The Fail2Ban service may also be responsible.
- Go to Settings ❯ Packages ❯ Advanced Settings
- Enable «Client-Side kickoff» ❯ save settings ❯ retry build
Option 3
Basic authentication is protecting the WordPress admin area.
When accessing the wp-admin area a popup login window shows, then basic authentication enabled.
- Go to Settings ❯ Packages ❯ Advanced Settings
- Set «Basic Auth» to the credentials you normally enter in the popup ❯ Save settings ❯ retry build
Option 4
A security plugin is blocking admin-ajax.
It’s possible you have a security plugin running that’s blocking things.
- Disable any security plugins ❯ Run a package build
- If build works, turn back on plugins and isolate the setting preventing the build
Option 5
The host is blocking admin-ajax.php
Some hosts have rules that block calls to admin-ajax.php. If you suspect this to be the case submit a support ticket.
Pending State:
A package in the pending state often indicates that a package created by a schedule can’t be processed due to an AJAX communication failure.
Do the following:
- Manually build a package (as opposed to using a schedule)
- If that package gets stuck at 5% that indicates something is blocking AJAX communication.
See Why is the package build stuck at 5%?
for details on how to resolve.
Issue B
Why does the build percent get stuck around 20%?
SHOW ALL SOLUTIONS
DB Script Engine
The 20% mark usually indicates there is a problem capturing the database. Go into Settings ❯ Packages and change the Database setting from PHP ❯ mySQL or vice-versa.
Optimize Tables
If you continue to get stuck around the 20% mark consider optimizing your database with a plugin like wp-sweep. Use this plugin to optimize your tables and get rid of unnessary data. Also look for tables that may have un-useful data when migrated. For example if you have a table that logs statistics/security logs in most cases that data will not need to be used after migration. Consider removing any extra data from your database.
Filter Table
If you have a very large table that your host will not allow for the plugin to process then you can filter it out on the archive database tab and then manually
move the table over.
Issue C
Why does the build percent keep going back to 40%?
SHOW ALL SOLUTIONS
This can happen on lower-end budget hosts. The zip process is getting killed by the server, due to limited resources. Below are some steps to follow
to get around these constraints:
Filter Files: Try filtering out larger files/directories using the file/directory filter option and retry the build, both in ‘Shell Exec’ mode and ‘ZipArchive’ mode to get a
package to complete. This will help you to identify if the issue is purely related to site size. And let you know which archive engine works best on your server.
Switch to DupArchive
- Go to Settings ❯ Packages ❯ Basic Settings
- Change ‘Archive Engine’ to ‘DupArchive’
Switch to ZipArchive If you’re building with the «Shell Exec» Zip Engine switching to the older ZipArchive engine can occasionally resolve the issue.
- Go to Settings ❯ Packages ❯ Basic Settings
- Change ‘Archive Engine’ to ‘ZipArchive’
ZipArchive Settings: For ZipArchive use the Legacy setting. Set the «Max Worker Time» to the Recommended Max (see subtext). If your PHP
max_execution_time was set
to 300 then this value would be 210 seconds. Next adjust the ZipArchive Buffer Size. For every 2 seconds of Max Worker Time you can get around 1MB of data.
So if your Max Worker is set to 210 then you should be able to set the Buffer to around 105MB. These rules are a general guidelines, if you find out that
the build is working with the 2 seconds to 1MB ratio then it should be safe to slowly increment the buffer size by 10MB increments.
Also see:
What can I do for issues with migrating a large site?
Recommended hosting providers for Duplicator?
How to resolve File IO related build issues?
Problem
If the build fails with file/folder count mismatch or the result size is a negative size value (i.e. SIZE: -1724710633B) then its possible you are running a PHP 32 version. These types of errors indicate that the server is running 32-bit PHP and the site is over 2.1GB. Unfortunately, 32-bit PHP can only process/create archive files less than 2.1GB.
Common Error Messages
— Hash mismatch on DupArchive file entry
— Number of files expected (xxxxx) doesn’t equal number written
— Number of directories expected (xxxxx) doesn’t equal number written
To validate if your system is running 32-bit PHP goto Duplicator Pro ❯ Tools ❯ Server Settings ❯ PHP and see what value is in the «Architecture» setting. If you are running 32-bit PHP and the site is large greater than 2.1GB then you have a couple options:
Option 1
Ask your host to upgrade PHP to a 64 bit PHP version. Almost all hosts support 64 bit PHP these days.
Option 2
Filter out unneeded files/folders using the filters on Packages ❯ Step — 1 Setup to get the size below 2.1GB.
Option 3
Perform a 2-step migration which minimizes the package size. This technique is described here.
How to resolve Database related build issues?
Issue A
A general error or warning is generated during the database build process.
SHOW ALL SOLUTIONS
Option 1
Repair the database tables in question.
For a full overview see this article.
Option 2
Switch database build Engines
By default the process used to build the database is MySQLDump. On most hosting platforms
this process works without issues. In the event you run into issues with MySqlDump consider switching to PHP mode. Go to: WordPress Admin ❯ Duplicator Lite/Pro ❯ Settings ❯
Packages Tab ❯ SQL Mode ❯ PHP Code
Issue B
During the build a log message indicates a table does not exist in the database.
SHOW ALL SOLUTIONS
Common Error Messages
— Runtime error in database dump
— QUERY ERROR: Table ‘databasename.wp_sometable’ doesn’t exist in engine
Option 1
Repair the database tables in question.
For a full overview see this article.
Option 2
Enable a Table Filter
If you can identify the source of the issues such as a plugin then try to filter out all the plugin tables and also filter out the plugin directory when you build the package.
This will typically be located at {your root}/wp-content/plugins/plugin_name/. Then on the destination system just install the plugin again. If this is not desirable you might
contact the plugin author and ask them how to repair or reinitialize the table that is showing issues.
How to resolve Zip format related build issues?
Issue A
How to resolve ‘Zip warning: No such file or directory’ issues?
SHOW ALL SOLUTIONS
Option 1
Check for plugin conflicts
This can be related to security or other backup plugins that are changing files while Duplicator is trying to back them up.
- Determine what plugin is actively writing or removing files on your site.
- Deactivate that plugin temporarily ❯ Build the package ❯ Reactivate plugin.
Option 2
Filter Cache directory
If you can’t determine which plugin is causing the problem, add the cache directory to the file filter:
- Click Enable File Filters
- Click the cache link above the Directory box.
Issue B
How to resolve ZipArchive close failures?
SHOW ALL SOLUTIONS
Option 1
Switch to the Duplicator Archive Format (daf)
The DupArchive format is a good alternative to ZipArchive on many hosts. DupArchive is a robust archive format developed by Snap Creek specifically to work better on
budget hosts or in restricted environments. To enable DupArchive, go to Settings ❯ Packages ❯ and set «Archive Engine» to «DupArchive».
Note: in Duplicator Lite DupArchive only supports packages upto 500MB.
Option 2
Filter Files
If you prefer to stick with ZipArchive (.zip format), then filtering non-required files may be an option. On the scan phase of the build, check if files are showing up in the
«Size Checks» list and determine if there are any files/directories that can be safely excluded. Typically this would be backups created by other backup programs or even
nested WordPress sites.
Option 3
Check Disk Space
ZipArchive close problems can also be caused by lack of space on your account. Log in to your host panel and observe how much space you have left. If the amount of space left
is less than 2x your site size, go through your account and look to eliminate unneeded files. If this is not an option, talk to your host about increasing your disk quota.
Note: If you have Duplicator installed on the same site be sure that no other backup plugins are running at the same time this can lead to close failures.
Option 4
Custom Options
-
Lite Only: Go to Settings ❯ Package Tab and turn off «Archive Flush». This setting forces a ZipArchive close response after so many files have been loaded. This process
can help with FCGI setups. If your package is not building with this setting it is recommended to turn it off. - Pro Only: Go to Settings ❯ Packages Tab ❯ Archive Engine ❯ «Shell Exec» if available and then retry the build.
Option 5
Two Part Install
Some hosts are configured in such a way as to limit resources available which can lead to ZipArchive close failures. One way around this is to do a «Two-Part» install.
The process for doing is described here: How to do a Two-Part Install.
Also see: How do «Shell Zip», «ZipArchive» and «DupArchive» engines differ?
Post-Build
After the build process completes
Schedules
How to resolve schedule build failures?
Issue A
Why did my scheduled build get canceled yet manual builds work fine?
SHOW ALL SOLUTIONS
Overview
Scheduled builds getting canceled when manual builds work fine can be due to the amount of traffic the site is receiving. WordPress does not have an active thread running so in order
for a scheduled package to build it has to be kicked off and run when visitors are hitting your site. The simplified version is:
- Visitor hits your site
- As part of WordPress page processing, Duplicator Pro determines package needs to build
- Package starts building
Option 1
Sometimes the “ClientSlide kickoff” option can be turned on when it doesn’t need to be. A side effect of this option is that it causes builds to run slower and timeout.
To determine its state and if it does not need to be on:
- Go to Duplicator Pro > Packages > Advanced and see if “Client Side Kickoff” is enabled.
- If it is enabled, uncheck it.
- If it is NOT enabled, then skip the rest of these steps and go to option #2 client Side Kickoff is not a problem
- Go to Duplicator Pro > Schedules, hover over your schedule and click “Run Now”
- Observe if the package builds or gets stuck at a certain percentage.
- If the package builds then you are good and the package should not time out.
- If the package gets stuck/doesn’t build, re-enable Client Side Kickoff and proceed to the next option below.
Option 2
Consider setting up a remote cron schedule that will generate consistent traffic to your site. For full details to this process see
How to make my scheduled build run on time?
Option 3
If there is very light traffic occurring when the schedule is supposed to run, the package build can actually time out. To resolve this, do the following:
- In Duplicator Pro ❯ Settings ❯ Packages set Server Throttle to Off or Low at the most
- In Duplicator Pro ❯ Settings ❯ Packages set Max Build Time to at least 270 Minutes
- Set your schedule build time to a time when you will be getting a decent amount of traffic
Also, since you are setting the start time to occur during a period when you get more traffic we recommend Server Throttle be turned on — this will ensure your visitors are minimally
impacted by the processing of the backup.
Issue B
Why do multiple Duplicator plugins schedules on same server run for long periods of time and then just fail?
SHOW ALL SOLUTIONS
Option 1
When running multiple Duplicator plugin instances on the same server (on some hosts), the PHP process (depending on architecture) might have conflicting overlaps. Since each site builds
the package file independently, they may interfere with one another. Some web servers are setup in such a way as to only handle the activity on one site at a time (this is not common
on most hosting platforms).
A quick fix for this is to switch your schedule start time on each site. Make sure each site has a unique daily start time so if all of your sites are set to run at 1am, then try to
offset each one by X minutes depending on the size of the site, with your smallest sites running first. For example:
- Site-1 [Size 250MB]: Starts @ 1:00am
- Site-2 [Size 500MB]: Starts @ 1:02am (2 minute offset for Site 1)
- Site-3 [Size 1.0GB]: Starts @ 1:06am (4 minute offset for Site 2)
- Site-4 [Size 3.0GB]: Starts @ 1:14am (8 minute offset for Site 3)
The offset will depend on the quality of server you are running the schedules on. If you are on a budget host with shared/throttled resources then consider increasing the offset from
two minutes to 5 minutes and so on.
How to make my scheduled build run on time?
Overview
The plugin uses a mechanism similar to WordPress’ standard cron scheduling which requires someone to visit the site for an action to occur. This means if you don’t have any visitors at the scheduled time, the package won’t build until a visitor requests a page. It’s designed this way because the web server only reacts to visits and doesn’t have any active threads running.
To make scheduled builds more accurate:
- Move the scheduled time to a time when your site normally has visitors.
- To avoid bogging down your site during a busy time go to Settings/Packages and set «Host Throttling» to Low or Medium. This lessens the impact to site responsiveness but slows the backup a bit.
Schedule Accuracy
To guarantee a schedule runs on the time a user sets up the schedule; users can use a third party service to help. This can also be especially helpful in the event the «Client Side Kickoff» setting has been enabled. This process involves setting up an entry in cron-job.org so you do not need to have visitors always hitting your site. To use this service please follow these steps:
- Goto cron-job.org and create account.
- Login ❯ Click «Cronjobs» ❯ Click Create cronjob button
- In the cronjob, set the title, then set the address to:
https://YOUR_SITE.COM/wp-admin/admin-ajax.php?action=duplicator_pro_process_worker - Ensure the cronjob is set for once a minute & save
This will cause the cron-job.com site to hit your site every minute so when the package is to be built this traffic will cause the build to proceed. Even though the request will be coming in
every minute even when no build job is running, it would require very little processing so the simple request will not impact your site performance.
Custom Crons: Plugin users should not use custom WP-Crons or plugins like WP Control Cron Manager to
setup custom cron jobs because they are all limited by the same thing that Duplicator is limited by. Since WordPress has no active threads it requires traffic to start the execution of
any logic, which is why the remote request is the best route to take.
General
How to resolve package file download issues / 404.3 / corrupted files?
Issue A
Package Downloads
How to resolve package files (archive or installer) that will not download or show errors?
SHOW ALL SOLUTIONS
Solution 1
URL Download: In some cases when using https (SSL) in WordPress [WordPress ❯ Settings ❯ General ❯ WordPress/Site Address URLs].
The browser may block requests to non SSL assets based on server mime types. To get around this issue goto:
Duplicator ❯ Packages ❯ Package Details ❯ General Section ❯ Share Button and copy the archive URL into a new browser window for a file download prompt.
FTP Download: Download the package files via FTP or cpanel by going to your builds directory at the following paths:
- Duplicator Pro: See path: /your_site/wordpress_root/wp-content/backups-dup-pro (or the new storage path you setup) on your web-server.
- Duplicator Lite: The path will be in only one of the following:
- Content Path: ‘/public_html/wp-content/backups-dup-lite/’
- Legacy Path: ‘/public_html/wp-snapshots/’ folder (from your WP root)
Solution 2
Contact Host Provider:
If trying to download the archive or installer is persistent, then we recommend you check with your hosting provider to see if they have any
constraints or rules setup that might prevent certain file types such as .zip, .daf or .php files from downloading.
Solution 3
Disable .htaccess:
On some systems the .htaccess file inside the storage directory can cause issues with downloads. To find out if this is the case on your system go to:
- Duplicator Pro: Settings ❯ Storage and check the box «Disable .htaccess File in Storage Directory» & save.
- Duplicator Lite: Settings ❯ General and check the box «Disable .htaccess File in Storage Directory» & save.
Then try to download the installer or archive file from the main menu or the package details screen.
Solution 4
Adjust Mime-Type: If you have issues downloading the these file types .sql, .log, .zip, and .daf it is likely the web server does not have the correct mime
types setup. Check with your server administrator on how to make sure the correct MIME types are configured for download.
A quick setting for Apache web servers is to create or edit the .htaccess file following these instructions. Add the following text to your .htaccess
AddType application/octet-stream .zip .log .sql .daf
This tells the web server to treat the extensions files as download-able. Other web servers will have similar configurations. Please check with your
server administrator for your proper setup. If you can not download the installer.php file then you will need to follow the directions
below and get the file off of the server via FTP.
Solution 5
Browser Settings: Check your browser settings to make sure that the save as dialog is designed to pop up for the the following mime types
.php, .zip, .daf. For example in FireFox settings
Under Options ❯ General ❯ Applications see under applications set zip files to «Always Ask». Also consider switching browsers for any kind of download issue, even if
you are only getting a partial download.
Solution 6
WordPress URL Settings:
On some servers trying to access https (port 443) when you are on http (port 80) or vice versa can cause issues. To fix this issue we recommend using
SSL on all parts of your site. To do this you will need to update the WordPress URLs. Before making this change please read through all the steps in
order to be aware of how to back-out of the change if needed. We recommend that you test these steps in a staging environment before trying on a production one.
- Goto: WordPress Admin ❯ Settings ❯ WordPress Address (URL) & Site Address (URL)
- Change the values from http to https. If the values are disabled you can update by changing your admin URL to https://mysiste.com/wp-admin/options.php
- Try to download the installer or archive file from the main menu or the package details screen.
- For a full overview on how to change these values back see this article
Issue B
Installer Downloads
How to resolve installer download issues?
SHOW ALL SOLUTIONS
Solution 1
Backup Installer:
In the event you can download the archive but not the installer, you can always obtain a copy of the installer from within the archive.zip/daf file.
Inside of the archive file at the root is a backup copy of the installer named installer-backup.php or for a secure installer [hash]_installer-backup.php.
If you need to extract an archive.daf file details can be found here.
Solution 2
Rename Installer:
Some hosting providers (very few) will not allow php files to be downloaded or created directly from their servers. In this case you can rename the installer file that is
created during the build process. Goto: Duplicator Pro ❯ Settings ❯ Packages Tab ❯ Advanced Settings Tab ❯ Local Installer Name and rename it to something like installer.txt.
When the installer file is created it will create it as «installer.txt». This will allow you to download the file, but it will need to then be changed to installer.php.
Issue C
Corrupt Installer
After downloading the installer the file it looks corrupted or is not working.
SHOW ALL SOLUTIONS
If the package build is slow, how can I speed it up?
There are several common reasons for a slow build:
Unnecessarily Files: Look for large file warnings during the scan report step. Go through the list and determine if you need to backup that file. Go back to the package creation screen and add the full path of any large unnecessary files to the ignored file list. Backups created by other backup plugins should not be backed up. Also look for larger log files and data that is not needed for a proper restore.
Note: If you have a larger database (over 20MB) consider using the mysqldump option also found in the Settings area. Be sure that your
database has been properly optimized and consider using a free plugin such as wp-optimize to help clean up unnecessary data and optimize it for better performance.
System Zip: The zip routine built into the operating system is much faster in most cases then trying to use PHP. Go to the Settings/General page. Ensure «Archive Engine» is set to «Shell Exec» instead of «ZipArchive».
«Shell Exec» results in much faster builds but some budget hosts don’t support it unfortunately. If your host does not support it you can ask them to enable shell_exec for PHP or consider using a recommended host that does.
Slow Server: If you’ve tried the options above but your builds are still slow, chances are if you’re on a budget host then the server is currently overloaded. Please contact your host’s support and ask to move servers or have the slowdown investigated. If you have access to your on server or VPS consider increasing the PHP memory_limit.
Also see:
What can I do for issues with migrating a large site?
Recommended hosting providers for Duplicator?
How to resolve «Malformed UTF-8 characters, possibly incorrectly encoded» issues?
Problem
When creating a package or exporting plugin settings the results of malformed utf-8 characters notice is present.
Option 1
Package Creation:
To resolve this issue go to Settings ❯ Packages ❯ Advanced Settings and set JSON to «Custom». After that, rebuild the package to see if the issue goes away.
Note: This setting is only available in Duplicator Pro.
Option 2
Setting Migration:
If you are using the settings migration export tool and see this error then data stored in the settings, templates, storage or schedule area has become corrupted. Check the data in the
failed area to make sure the data is correct. If the data looks correct consider re-saving the data in that respective area. If the problem persists consider removing the items one by
one to isolate the setting that is causing the issue.
Install Backup
Pre-Install
Before the install process starts
Getting Started
How to get started with the install process?
Install Options
Setup A
Install Modes
How to install/import a package to a new location?
SHOW ALL SOLUTIONS
After successfully creating the package files (installer.php & archive.zip/daf) you would like to redeploy them to a new location. The following options can be used to
re-install/redeploy your archived site.
Import Install
This Duplicator Pro only feature is the easiest way to install a packaged Duplicator archive. Users can either Drag-n-Drop or Link an archive file for rapid installs.
This feature will import
both
Duplicator Lite & Pro archive files. For step-by-step instructions see
File & Link Imports section of the the Quick Start guide.
Overwrite Install
This process is very similar to the «Classic Install» except that it depends on an existing WordPress site content to be present vs and empty directory. This option can be used with
both
Duplicator Lite &
Duplicator Pro. This process requires that you upload both the installer and archive files to the destination server with WordPress already installed. For full step-by-step instructions see
Overwrite Install section of the the Quick Start guide.
Classic Install
This feature differs from the Import Install since it does not require WordPress to be installed. This option can be used with
both
Duplicator Lite & Pro.
The «Classic Install» process requires that both the installer and archive files are uploaded to the destination host in an
empty
directory. For step-by-step instructions see the
Classic Install section of the the Quick Start guide.
Database Only Install
Running the installer in «Database Only Mode» is useful when you only have database changes or a large site where all the files were moved manually.
The full details of the Database Only Install can be found in the quick start guide.
Setup B
Package File Placement
How to place the archive.zip & installer.php files for either «Classic» or «Overwrite» install modes.
SHOW ALL SOLUTIONS
Solution 1
Self Discovery: You can easily find the domain to server path location by simply following these easy steps:
- Create a file called test.txt on your local computer with the text «Hello World» and save it.
- FTP the test.txt file to your server and observe the path you place it in.
- Open a web browser and browse to http://www.yoursite.com/test.txt you will get one of two results:
- A message that says something like 404 file not found
- The results of the text file with show «Hello World», meaning you found the correct path.
- Keep moving the file around in the various directories on your server until you can locate the test.txt file
- Additional details for control panels that use the cPanel software can be found here.
Solution 2
Contact Host: This is by far the fastest way to locate the proper path. The physical path on a web server will map to a domain name and inside of your hosts control panel will be various
ways to manage this process. Since there are so many hosts that do mappings differently and use different software its best to contact your host and ask them where «http://www.yoursite.com»
maps to the physical folder structure on the server such as /public_html/yoursite/. Simply send the question below to your host:
Dear YOUR_HOST,
I would like to install a WordPress site on my domain «http://YOUR_DOMAIN_NAME_HERE.com», however I’m not 100% sure where this domain name maps to on the servers file structure.
Could you please point me to the full path for where this domain name points to on the server?Thanks
Once you have received the path from the host, place the installer and archive in the path they have provided. Next open up a web browser and browse out to the installer
file such as http://your_domain_name.com/installer.php
Migration Workflows
Workflow A
Configuration Files
How does Duplicator manage configuration files (wp-config.php, .htaccess, web.config)?
SHOW ALL SOLUTIONS
.htaccess
.htaccess Workflow
The Apache .htaccess file is very robust and can provide a multitude of settings for the web server, PHP, WordPress and more. In order to properly install/migrate your
site this file needs to be reset to a very basic state in order to prevent install issues.
When working across multiple hosts, PHP, MySQL, Apache and WordPress versions, the possible combinations of configuration settings is almost unlimited. With this many options Duplicator
has chosen to keep the process simple and allow users to safely update their own configuration files vs trying to parse millions of different combinations. Below is a quick outline for
how .htaccess files are managed during the install process.
-
Build Process: When an archive.zip/daf is created the .htaccess file is added in a hashed format .htaccess_[secure-hash]
example: .htaccess_048063d-14160036. - Installer Step 1: When archive file is extracted in Step 1 it will extract the file in this .htaccess_[secure-hash] format.
- This is by design so that the .htaccess file from the old system is not executed by the server with parameters that do not correlate to the new environment.
- Trying to run the .htaccess file from the original server can and does cause issues on the new server in many cases. So a .htaccess file is only made available till the install is completed in step 4.
- The .htaccess_[original-hashed] will be temporarily available until step 4 is ran. This allows for the advanced options in step 1 to considered if needed.
- Installer Step 4: After step 3 is ran either the .htaccess_[original-hashed] will be used if you enabled the option in step 1 or a new basic one will be created.
- If the advanced option is chosen then the .htaccess_[original-hashed] file will be renamed to .htaccess at the end of Step 3 and start of Step 4
- If no option is chosen then the default mode of creating a new streamlined .htaccess file is performed and the .htaccess_[original-hashed] is removed.
- Existing .htaccess: If you have a .htaccess file in the directory with the archive.zip/daf file before step 1 is ran then that file will be backed up and look something like: .htaccess-200314160148-5e6cffec5ff52-duplicator.bak
wp-config.php
.wp-config.php Workflow
-
Build Process: When an archive.zip/daf is created the wp-config.php file is renamed and placed in a special directory in the archive
dup-installeroriginal_files_[secure-hash]source_site_wpconfig
example: dup-installeroriginal_files_048063d-14160036source_site_wpconfig. - Installer Step 1: When the installer extracts the archive.zip/daf file in Step 1 it will extract this directory with the renamed wp-config.php file.
- Installer Step 3: In step 3 on the options WP-Config file tab there are optional parameters to add to the wp-config.php file.
- Installer Step 4: This process will generate the wp-config.php based on the new environment settings and additional settings from step 3
Workflow B
Database Data
How does Duplicator redeploy my database data?
SHOW ALL SOLUTIONS
Workflow
Database Workflow
Below is an overview of the database workflow that takes place when a database is created and then re-deployed to its new location. The below outline covers the installer
when used in advanced mode which contains four steps vs the two steps found in basic mode.
-
Build Process: When an archive.zip/daf is created it will build a complete copy of your database into one single file in a hashed format named
dup-database___[original-hashed].sql example: dup-database__4ae9c8c-14214644.sql. The .sql file can be built in two separate SQL modes «Mysqldump» and «PHP Code».- Mysqldump: This format uses a program called mysqldump to generate your SQL File.
- PHP Code: This format uses PHP code to generate SQL statements that contain your entire database.
- Installer Step 1: When the installer extracts the archive.zip/daf file in Step 1 it will lay-down the SQL file (dup-database___[original-hashed].sql) on disk.
- Installer Step 2: The process will execute the SQL data file and install an exact copy of how it was built into the specified database choose in the installer (step 1)
-
Installer Step 3: This step is where the database data is updated to support its new environment. The update engine runs through every cell in the database looking for
the old URL of the source site (old site) replacing it with the destination site (new site).
Emails
When you migrate a site to a new domain, by default the emails associated with the source domain are not touched. For example if a.com migrates to b.com then a@a.com, b@a.com, etc.
will remain on b.com. There is an option that lets you change this behavior, so the email domain is switched as well. To enable this option in advanced mode see step 3 of the installer.
Workflow C
Old Domain
How does Duplicator handle the old domain where I created the archive?
SHOW ALL SOLUTIONS
Workflow
When installing the archive to a new location, nothing should happen to the old domain where the archive was created. Duplicator is designed to be self-contained, meaning
that if you create a package on Site A then run the installer and package at a new location on Site B, it has no knowledge/dependencies/hooks on Site A.
However there can be a few scenarios that play out that make users feel like the old domain was updated.
- If your on the same server and setting up the database for Site B you accidentally connected it to Site A database.
- A WordPress redirect plugin (if you have one installed) may have not properly gotten updated during the install and is pointing to the URL on Site A.
-
A web server configuration file such as a .htaccess or .htconfig setting is causing conflicts on the server. This option is really rare but its always a good idea to double
check the files.
This is an uncommon scenario but can happen if you’re moving sites on the same server and do not pay attention to the database or even
the location where you’re installing the archive.zip file. Please be sure you know the
exact
name of the database and the
exact
location of were you place the archive and installer
files
Forum Thread:
Below is a forum thread that lays out this issue with several different users, and should address most of these scenarios.
What is happening to the site on the old domain?
How to create a new database and database user for install?
During the Classic Install process on Step 1 (Pro) and Step 2 (Lite) of the installer you will need
to connect to a database. You have several options when it comes to setting up the database:
Option 1
Hosts Control Panel: Create a database and user with your host’s control panel. Then assign the user full rights to the database. Here are the basic steps:
- Login to your hosts control panel and find the section to create a new database
- Create the new database and copy down the database name
- Create a new or assign an existing database user to the database and write down the database user name
- Open the Duplicator installer.php file and test the connection to the new database and proceed with install
Option 2
Overwrite Mode: Overwrite mode is when you place the installer.php and the archive.zip/daf file into an existing directory where WordPress exists. This mode will allow you to overwrite
an existing site and reuse that site’s database and existing wp-config.php file. During this process you will be notified of the existing database and database user of the site you are about
to overwrite. Check the values and click «apply» and the existing database settings will be used.
Note: This option will wipe out your current site and database data.
Option 3
Duplicator Pro ❯ cPanel: This option uses the cPanel API (requires cPanel) to create the database. Follow these steps:
- Browse to the installer and goto Duplicator Pro ❯ Advanced ❯ cPanel
- The cPanel option will present the database and user within drop down boxes automatically.
Option 4
Change the install process to use the Import Install Mode. This process will use the
database settings of the currently installed WordPress site where the import is taking place.
Option 5
Within Duplicator
- Open the the installer step 1 (Pro) or step 2 (Lite)
- From the database action drop-down choose the ‘Create New Database’ option
- In the Database input type the name of the database you want to create
- Type in the name of an existing database user. Duplicator does not create a new user.
On most hosting providers the database action option to ‘Create New Database’ is not supported, this is a restriction of your host not Duplicator.
How to get the original installer that came with the archive?
In the event you no longer have a copy of the installer.php file (lost installer) you should always be able to get a backup of the installer from within the archive.zip/daf file.
Follow these steps to get the installer file.
-
Download the archive.zip/daf file to your local computer
- Extract the archive.zip to a temporary location or simply open the zip viewer to the root of the archive.zip
- If your using the archive.daf format see this link to extract files.
- Inside of the archive will be an exact copy of the original installer file in the root of the archive file.
- The file is named in the format ‘[name]_[hash]_[date]_installer-backup.php’ or ‘installer-backup.php’
- Copy the installer-backup.php and archive to the location where you would like to install the WordPress site
How to handle various install scenarios?
Scenario A
Manual Extraction
How to do a ‘Manual Extraction’ or run installer without Zip enabled?
SHOW ALL SOLUTIONS
The ‘Manual Extraction’ option in the installer allows users to manually extract the archive file vs having the installer extract it. This can be helpful
if you are experiencing timeouts, slowness or general extraction issues.
Solution 1
ZIP ARCHIVE
-
On your local computer see «LOCALHOST» steps. On a host/remote server see «REMOTE-HOST» steps.
Note: Local computer setups require software such as
XAMPP, MAMP, WAMP, Flywheel or similar applicationsLOCALHOST
- Place installer.php & {archive}.zip files in an empty directory where you want to install your site.
-
Open your computers file browser ❯ navigate to the {archive}.zip ❯ extract zip file.
Note: Make sure archive contents are not extracted into their own subdirectory
REMOTE-HOST
- Open your hosts file browser utility (cpanel) or FTP ❯ to an empty directory where you want your site.
- Transfer both the installer.php & {archive}.zip files to your desired directory.
-
Extract the zip contents directly into the same
directory as the {archive}.zip file
Note: Make sure archive contents are not extracted into their own subdirectory
- Open a web browser and browse to the http(s)://your_site_location/installer.php file.
- Goto Step 1 ❯ Advanced Mode ❯ Options Section ❯ Advanced Tab ❯ Extraction Mode ❯ ‘Manual Archive Extraction’
- Complete the install process. This mode will simply skip the installers extraction process.
Solution 2
DAF ARCHIVE
-
On your local computer see «LOCALHOST» steps. On a host/remote server see «REMOTE-HOST» steps.
Note: Local computer setups require software such as
XAMPP, MAMP, WAMP, Flywheel or similar applicationsLOCAL-HOST
- On you local computer place the {archive}.daf in an empty directory where you wish to install your site.
- Extract the daf contents directly into the same directory as the {archive}.daf file
REMOTE-HOST
- On you local computer place the {archive}.daf in an empty on your computer.
- Extract the daf contents of {archive}.daf file
- FTP the files to your remote server including the installer.php file but not the {archive}.daf file.
- Open a web browser and browse to the http(s)://yoursite/installer.php file.
- Goto Step 1 ❯ Advanced Mode ❯ Options Section ❯ Advanced Tab ❯ Extraction Mode ❯ ‘Manual Archive Extraction’
- Complete the install process. This mode will simply skip the installers extraction process.
Note: The DAF format rarely has issues with extraction so it is rare that you will need to perform these steps
Also See:
Video: How to extract zip file on cPanel
Scenario B
Zero Downtime
How to do a zero downtime migration (install site to new host while old site is still up)?
SHOW ALL SOLUTIONS
Solution 1
It’s highly desirable to have little to no downtime when moving a site — but how exactly can you install the new site while the DNS is still pointing to the old site?
In short, you trick the machine running your browser into thinking the DNS has already been changed by editing its hosts file and then install to perform this process do the following:
- Change your hosts file* to make your domain name point to the new location
- Browse to the installer.php and install the site
- Test to ensure everything is working
- On your domain registrar, switch to your new host’s DNS servers
- After you are confident the DNS changes have propagated remove the entry in your hosts file
*This site explains how to edit the hosts file on different operating systems.
Pre-Install Issues
How to handle import install upload/launch issues?
Archive Upload Issues
Issue A
Import Link
How to resolve import links not properly pulling down the archive?
SHOW ALL SOLUTIONS
Currently not every url will work with the import feature. Below is a table of what is currently supported.
| Status | Source | Notes |
|---|---|---|
| Generic Host |
Most hosts that allow .zip or .daf files to be downloaded directly should work. If issues arise with a specific host try the download directly from your browser and if issues arise then contact your host. |
|
| Dropbox | Dropbox is currently supported. | |
| Google Drive | Google Drive is currently supported Starting in 4.5.9 | |
| AWS | This is currently not supported. | |
| OneDrive | This is currently not supported. |
Issue B
Import File
How to resolve import file (drag-n-drop) archives not uploading?
SHOW ALL SOLUTIONS
Common Error Messages
AJAX ERROR! STATUS:403 Forbidden
Solution 1
AJAX 403 Forbidden
In the event you receive a «AJAX ERROR! STATUS:403 Forbidden» message consider checking to make sure you do not have Imunify360 enabled. For more details see the FAQ item
How to fix installer validation checks (Issue A)?.
If Imunify360 is not installed
its possible you might have a .htaccess file that is preventing requests to access the proper server paths. In this case we recommend letting your host know or just
trying Solution 2 or 5.
Solution 2
Manual Upload
If the file or link upload of the archive.zip/daf file is having issues simply FTP the archive file upto the server which will allow it to show in the import list. In order to manually upload
a Duplicator archive follow these instructions:
- Open an FTP Client -OR- go to your host’s control panel (cPanel) file manager.
-
Copy the archive.zip/daf file to the WordPress root -OR- to wp-contentbackups-dup-proimports directory.
Note: The WordPress root is normally where your wp-config.php is located allow with the wp-admin and wp-content folders. - Browse to Duplicator Pro ❯ Import screen and look for the uploaded archive file in the archive list.
Installer Launch Issues
Issue C
Installer Start
How to resolve import installer launch issues?
SHOW ALL SOLUTIONS
Common Error Messages
Duplicator cannot launch Import because on this Server it isn’t possible to execute PHP scripts in folders:
— /var/www/htdocs/wp-content/backups-dup-pro/imports
— /var/www/htdocs/
cURL error 7: Failed to connect to localhost port 8080: Connection refused»
Solution 1
Server Permissions
If you see a permission error in the log consider visiting this FAQ for solving various permission issues.
I get an error/warning about file permissions what should I do?
Solution 2
PHP Execution
There are several items you check if the location where the import installer file is trying to run does not allow PHP execution.
-
htaccess File:
A block via htaccess file. For example an .htaccess files placed in the wp-content folder that prevented execution might look like this:<Files *.php>
Order Deny,Allow
Deny from all
</Files>The presence of an .htaccess file in wp-content does not necessarily prevent execution. Solution: Temporarily rename the htaccess file
-
Security Plugin: Some plugins like Wordfence «might» try to block the request. If this is the case try to temporarily disable
the plugin to see if it resolves the issue. -
Host or Software
If the hosting has set the block via server setting the only solution is to ask the hosting to deactivate the block or change hosting
On other systems software like Secure 360 have the ability to prevent the execution of PHP files via cPanel settings.
Solution 3
Install Modes
In the event your host does not allow for PHP execution in the directories where Duplicator is trying to run the import then you may need to switch to a different
Install Mode. For example you could try an overwrite install mode by copying both the installer and archive to
the root directory, browse to https://{domain}/installer.php, then click ‘apply’ to reuse the database of the site you are overwriting. After that, just proceed with the install.
Solution 4
Docker Container
If you are using Docker and running into curl errors consider changing how the port are setup. Modify the Apache2 conf inside the container so that Apache will respond inside on the
outside port.
See /etc/apache2/ports.conf
			Listen 80

			Listen 8080
/etc/apache2/sites-available/000-default.conf
<VirtualHost *:*>
For more details
to this solution see stack overflow.
How to handle recovery install setup/launch issues?
Issue A
I need to restore my site from a crash or other major issue.
SHOW ALL SOLUTIONS
You need to restore your site from a previous backup. Before doing so consider that purpose of your restore. For example if your site has been hacked, has crashed or something has gone wrong, what are your options?
Solution 1
Recovery Point Restore
This option which is only available in Duplicator Pro and allows users to restore from a specific recovery point or simply a URL link. For full details on
this process please visit the following article
How to Quickly Restore Your WordPress Site using a “Recovery Point”.
Solution 2
Manual Restore
If you choose to restore a site here are some recommended steps to take. We recommend cleaning out the directory and starting with a brand new database, this way you can be sure
the issue you where having before will not show back up due to a corrupted file or database table. Starting with a clean environment always helps to lower your risk for issues.
Follow these steps to restore a site.
-
Clean out Directory: Delete all the exiting files of your WordPress site. If your not sure contact your host.
Its not required but having your host backup all the current files and database is a good idea. - Copy Package: Place the archive.zip/daf file and the installer.php file inside of the directory you just cleaned out.
- Run Installer: Open a web browser and browse to http://yoursite/installer.php and run through the setup.
Solution 3
Professional Restore
Depending on the severity of your site going down there are alternatives you can take before trying to restoring a previous backup. It is recommended to take these approaches
first because you won’t loose any data that may have been added to your site since the previous backup. In some cases if you do restore of a previous backup that may not fix
the issue permanently.
For example in the case of a hacked site if the security patch was not applied to the back up you want to restore then the security
breach can easily happen after the site is restored if the threat is not properly identified. Below are some options to consider before trying to restore a site.
- Hire a professional developer to troubleshoot your issue.
- Have your site cleaned by a service like WordFence
- If your in a hurry or not familiar with Duplicator, consider hiring a professional developer.
Issue B
How to handle a notice or error message when running the recovery restore mode.
SHOW ALL SOLUTIONS
Common Error Messages
Duplicator cannot set Recovery Point because on this Server it isn’t possible to execute PHP scripts in folder:
— /var/www/htdocs/wp-content/backups-dup-pro/recover
Option 1
Server Permissions
If you see a permission error in the log consider visiting this FAQ for solving various permission issues.
I get an error/warning about file permissions what should I do?
Option 2
Security Plugins
Many security plugins including iThemes Security, Securi, WordFence along with several others can create hardening rules that lay down .htaccess files which prevents execution of php
files in the wp-content directory. This has the effect of blocking the creation/execution of recovery points. If you know this to be the case then check the settings in your
security plugin and temporarily disable it or rename the .htaccess temporarily while you perform the action that is generating the warning/error.
Option 3
Host Admins
In general if you cannot run a PHP file it is always a good thing to ask your host. If it is not possible to solve the situation there then the standard install modes
are still available. Remember that if the package you try to install was created in the same place where you install it, the
backup restore installation is activated by default, which is practically identical to the recovery point.
How to fix a blank/white installer or 403/404/405/500 issues?
Issue A
403 Forbidden
When browsing to the installer.php file you get a 403 Forbidden message.
SHOW ALL SOLUTIONS
Issue B
404 Not Found
When browsing to the installer.php file you get a 404 or page not found message.
SHOW ALL SOLUTIONS
Solution 1
Contact Host: This error indicates that your web server is not setup to serve up web pages. If your not familiar with setting up web servers such as Apache, then the
quickest way to fix this issue is to work with your hosting provider and tell them you get a 404 at «XYZ» URL. They should be able to get you up and running in minutes.
This is not something the plugin will be able to handle or fix as its a web server configuration issue.
Solution 2
Apache Setup: When setting up the web server (typically Apache) one of the common overlooked setup parameters is the
<Directory> directive. The following configuration will work on most setups but check with
your server admin to be sure on their server:
			<Directory />

				Options Indexes FollowSymLinks Includes ExecCGI

				AllowOverride All

				Require all granted

				Allow from all

			</Directory>
Solution 3
Troubleshoot: To troubleshoot this issue place two files called test.html and test.php in the same directory as the installer.php file. Then try to browse out to both of them via a web browser. If neither work then your site is not setup to server from the location at which they are placed. If only the test.html file works then PHP may not be properly enabled on your web server. If your not sure about how to configure your web server to server from the proper path or serve up PHP files then
contact your hosting admin
as these are not issues the plugin will be able to fix.
Issue C
405 Not Allowed
When browsing to the installer.php file you get a 405 not allowed message.
SHOW ALL SOLUTIONS
Option 1
Contact Host: The 405 Method Not Allowed is an HTTP response status code indicating that the specified request HTTP method was received and recognized by the server but the server
has rejected that particular method for the requested resource. The bulk of 405 responses have to do with how the web server is configured.
The fastest way to resolve this issue is to work with the hosting companies technical support team. Typically what needs to be adjusted is how the web server excepts requests.
The server error log on your hosts platform should help the system admin locate the specific request and adjust the server accordingly.
Option 2
Troubleshoot Server If you are familiar with troubleshooting web server issues you might have a look at this detailed
405 troubleshooting guide.
Issue D
Blank/White or 500
If the installer is not showing up at all then there are a series of tests that you can try.
SHOW ALL SOLUTIONS
Options
- Web Server: Check to make sure the web server is setup properly. Create a new file named test.php in the same location as the installer.php file. Inside the test.php file place the following code:
<?php phpinfo(); ?>If this works and you see the text «PHP Version» at the top followed by other PHP settings info then continue to the other options below, if not then something is wrong with the web-server setup and you will need to contact your host or server administrator.
- Server Logs: Examine the server error log as explained here. Also you may access all server error logs by going to cPanel > Statistics > Error Logs or using your host-specific control panel. If you don’t have direct access to the server logs ask your host support to look for any errors in the logs for you.
- Permissions: Check the permissions on installer.php file and its parent directory. On most hosts it should be 755 and files should be 644. Be sure to double check with your hosting provider or server admin as to how they want permissions setup on their servers.
- Change Browsers: Open another web browser and check for the white screen. If it works in the new browser then it may be a browser cache issue. You can usually fix this by holding down ctrl+F5 or manually deleting your browser cache.
- Config Files: Backup and remove hidden configuration files such as .htaccess, web.config and .user.ini files (Apache, Microsoft IIS, WordFence). These files
under certain circumstances have have configurations that prevent the installer from running. Simply remove them from the same directory that the installer.php file
is in and try to again. If the problem persist try and backup and remove the files from your root web directory, in most cases public_html. -
Installer.php Some hosts and security software will automatically block requests to files named «installer.php». In this case try to rename the file to something else.
Using the ‘installer.php’ file name on a public server is not recommended and users should consider using the hashed installer by going to Duplicator ❯ Settings ❯ Packages Tab
❯ Installer settings ❯ Set to [name]_[hash]_[date]_installer.php - Reverse Proxy: When running behind a reverse proxy, the value of the original hostname called is in HTTP_X_FORWARDED_HOST. To get around this setup add the following
to the top of the installer.php and dup-installermain-installer.php as such:$_SERVER[‘HTTP_X_ORIGINAL_HOST’] = $_SERVER[‘HTTP_X_FORWARDED_HOST’];
Also See:
How to handle «Internal Server 500» messages?
How to fix installer security protection issues?
Issue A
Lost Password
When loading the installer there is a password or archive file input that you don’t know or have lost.
SHOW ALL SOLUTIONS
The following rules apply to the password types found here:
Pro ❯ Packages ❯ Step 1 ❯ Archive ❯ Setup Tab ❯ Security Mode: Installer Password & Archive Encryption
Lite ❯ Packages ❯ Step 1 ❯ Installer ❯ Security (Installer password)
Solution 1
Installer password
Go back to the server where the package was created and goto Duplicator ❯ Packages ❯ Details ❯ Installer Section and toggle the password to see
the password that was assigned to the package. For the archive file name see the General section.
Solution 2
Archive Encryption
Passwords are case-sensitive and if lost cannot be recovered. Please keep passwords in a safe place!
If this password is lost then a new archive file will need to be created.
Issue B
Security Check
The installer has built in security that helps to prevent user from accessing the installer after it has been initialized. In rare cases users
may get a security notice even though they initialized the installer. In these cases try the following options below.
Common Error Messages
DUPLICATOR: SECURITY CHECK or SECURITY ISSUE
An invalid request was made.
Message: Invalid token validation
SHOW ALL SOLUTIONS
Solution 1
Installer Location: The installer.php has to be in the same location as the archive.zip/daf file. So if you place the archive file at the following location
/public_html/my-wp-site/archive.zip the the installer will also need to be located at the same location /public_html/my-wp-site/installer.php.
Solution 2
Browser Restarts: These quick solutions can resolve most issues with this notice:
- Close your browser and browse to the installer.php again.
- Clear your browser’s cache and cookies restart the browser and try to browse to the installer again.
- Try a different browser
- An attempt was made to access the main-installer.php file directly without using the installer.php file. Be sure to always start the install wizard by first
going to the installer.php file in your browser.
How to fix general installer UI & bootstrap/archive issues?
Issue A
Archive Not Found
When a package is created a unique installer.php file is created for each unique archive.zip/daf file and if not matched correctly then an error message will show.
SHOW ALL SOLUTIONS
Common Error Messages
— Archive not found!
— Installer and archive mismatch detected
Solution 1
LOCATE ARCHIVE NAME
Double check the name of the archive file name. Goto the package that you downloaded and get the full name which will be in the format [full-unique-name]_archive.zip.
- Duplicator Pro ❯ Packages ❯ Expand Package Overview ❯ Click «View Details» button ❯ Expand General Section ❯ Copy Full Name of «Archive» link
- Duplicator Lite ❯ Packages ❯ Package Details Button ❯ Expand General Section ❯ Copy Full Name of «Archive» link
Solution 2
EXTRACT BACKUP
To quickly fix, exact the installer-backup.php from the archive.zip file; which is an exact copy of the installer file. Be sure to look for a file labeled {HASH}_installer-backup.php.
Once extracted you can browse to the installer-backup.php file.
Note: You can rename this file to whatever you want but be sure to delete it after the install process is completed.
Instructions on how to manually extract a DAF file can be found here.
Solution 3
VALIDATE DOWNLOADS
Make sure that when you download the installer, that you download the archive that goes with the installer. Also, make sure the archive has been fully downloaded and then uploaded.
The size of the archive on your local machine needs to match the size of the archive shown on the packages screen — if it doesn’t try to re-download.
Solution 4
SECONDARY BROWSER
In more rare cases you might try the install on a different browser without any extensions enabled. If you are running your sites behind a proxy consider temporarily turning off the proxy
then flush your dns cache. If you are running a VPN or firewall software, consider turning off those features temporarily to see if that resolves the issue.
Issue B
Javascript Errors
When trying to use the installer.php file the installer UI is having issues and/or
Javascript is showing errors.
SHOW ALL SOLUTIONS
Option 1
On some web servers the server auto-inserts an .htaccess file in the dup-installer directory or even one of its sub-folders. Go into /dup-installer directory and remove the
.htaccess file if it is present (you may need to enable viewing of hidden files in your FTP client or File Manager). After doing that browse to the installer.php again and see if it works.
In some cases you may need to clear your web browsers cache.
Issue C
Safari/Macintosh
How to handle file download or install issues on Mac?
SHOW ALL SOLUTIONS
Solution 1
In Mac OS systems running Safari files may be set to automatically unzip upon download. This will cause issues with the Duplicator because the installer
looks for a .zip or .daf archive file. To turn this feature please follow these steps:
- Open Safari Browser
- Go to: Preferences > General > Open Safe files after downloading — leave this box unchecked.
- Attempt to download the plugin again — it should come down as a single file.
Archive Integrity: If during the install process you notice that the archive is extracted with a directory named the exact same as the archive, and in
some cases a folder named ‘__MACOSX’ exist then the archive file as been modified. The archive should have files such wp-config.php, index.php,
wp-login.php and directories such as wp-admin, wp-includes etc.
at the root
of the archive.zip file, not inside a nested folder.
To get a raw copy of the archive.zip/daf file check the following locations:
- Duplicator Pro: See path: /your_site/wordpress_root/wp-content/backups-dup-pro (or the new storage path you setup) on your web-server.
- Duplicator Lite: The path will be in only one of the following:
- Content Path: ‘/public_html/wp-content/backups-dup-lite/’
- Legacy Path: ‘/public_html/wp-snapshots/’ folder (from your WP root)
RE-ARCHIVE
To repair an archive that has been reconfigured by your operating system or some other process follow these steps:
- Extract the archive file onto your local computer and navigate to the installer-backup.php file.
- Select all the files/folders and re-create the archive.zip so that installer-backup.php is at the root of the archive.
- In some cases you may need to rename the archive created in step 2 to the same one extracted in step 1
- Place the newly re-organized archive file in the same location as the installer.php file and try again.
IMPORTANT: Even though a re-archive will work in most cases, the key to solving the issue is to prevent your browser/operating system or external program from changing
the structure of the archive file when its downloaded to your computer.
Issue D
Invalid Installer
How to fix corrupted installer PHP/binary code or a download prompt issues?
SHOW ALL SOLUTIONS
When opening a web browser and browsing to the installer.php (i.e http://yourserver/installer.php) you are asking the web server to process the PHP file.
If you see a bunch of text and code then the web server you placed the installer file on is not setup correctly or the installer file was corrupted when the
web server served it up as part of the download process. Below outlines a few different scenarios you might run into when trying to run the installer.php file.
Solution 1
Plain Text:
For plain text/code on the screen edit the httpd.conf or .htaccess file and add the following lines:
			AddType application/x-httpd-php .php .htm .html

			AddHandler x-httpd-php .php .htm .html
It will be different on your setup so Google whatever platform your using XAMPP/MAMP/SUSE etc. along with the term AddType php
and there should be some posts that explain exactly how to set it up. For example a similar question using MAMP was
found here.
In order to run WordPress you will need a web server such as Apache, PHP and a database like MySQL.
For instruction on how to setup your own WordPress server see this article.
There may be others issues you run into. Below are various suggestions/fixes for this possible scenarios.
Solution 2
Binary Text:
If you are just seeing binary text/code on the screen such as:
			1f8b 0800 0000 0000 0003 ecfd 7b57 1bb9

			d228 0eff 9dbd d6fe 0e8d 7706 ecd0 3636

			09b9 d8e9 7813 7012 26dc 8221 2401 86a7...
- OR -
Warning: Unexpected character in input: '?' (ASCII=17) state=0
Then the web server may have some issues with pushing the file down to your computer. The easiest way
to get a good copy of the installer is to try the following:
-
Direct FTP Download:
- When transferring the package files from your FTP client be sure it is in binary mode since ASCII mode can/will corrupt the zip file.
-
In Duplicator Pro FTP to ‘/public_html/wp-content/backups-dup-pro’.
In Duplicator Lite FTP to:- Legacy Path: ‘/public_html/wp-snapshots/’ folder (from your WP root)
- Content Path: ‘/public_html/wp-content/backups-dup-lite/’
- Find the installer file name associated with the correct package and download it.
- Open in an text editor such as Notepad++. The file at this point should
be a normal PHP file.
-
Use backup installer: Another option is to open the archive.zip file and find the installer-backup.php file it will be an exact copy
of the original installer.php file. - Contact Host: Let your host know that the download of files needs to be set in binary mode not ASCII.
Solution 3
Download Prompts:
If you browse to the installer and get a download prompt then you may have a .htaccess file that is corrupt or not configured to work correctly. To validate this simply create a blank file called test.php and place it at the same location as the installer.php file. If you also get download prompt when browsing to it via
a web browser then your web configuration setup is not correct. Here are a few options:
- Non-Technical Route: If your not technical or just don’t have time to mess around with server setups contact your host and tell them your site is not properly processing PHP files. They should be able to get you going quickly.
-
Technical Route:
Try to explicitly set PHP5 in your .htaccess file:AddHandler x-httpd-php5 .php
or with CGI
AddHandler x-httpd-php5-cgi .phpConsider these handlers for your version of PHP.
Solution 4
Parse Errors:
If you see an error such as:
Parse error: syntax error, unexpected $end, expecting T_VARIABLE or T_DOLLAR_OPEN_CURLY_BRACES or T_CURLY_OPEN in … installer.php on line 1300
Then the encoding on your file is not being accepted by your web server correctly. Below area few options:
-
In many cases the transfer of the file from one server to another can cause the installer to get corrupted. To solve this issue see the section above titled
«BINARY TEXT». In many cases changing the FTP mode from ASCII to binary can fix this issue. -
If the first option does not solve the issue then open a program like Notepad++ and play around
with the «Encoding» setting found in the top toolbar. Change from ANSI to UTF-8 try to convert from one format to the other and then save the file and then re-upload the installer
file to the server to see which version works.
Additional Search Links:
Stackoverflow |
Google Search
Also see:
Why can’t I download files / get a corrupted installer / see a 404.3 message?
Install-Time
While the install wizard is being ran
Step 1 & 2
How to fix installer web-server 500/502/503/504 issues?
The 502/503/504 are HTTP status codes that a server can send back when it was unable
to complete a request. There can be several different causes for the error. Below are some common fixes when using Duplicator.
Issue A
General 500 Errors
During the install process you receive a more general error with a 500/502/503/504 status.
SHOW ALL SOLUTIONS
Solution 1
ModSec
Check to make sure your host does not have a mod_security (ModSec) rule that gets tripped. On some servers running allot of database commands or even unzipping a file can
trigger a mod_security black list rule. This simply means the host your on is blocking your IP from doing certain operations. This can easily be solved by contacting
your host and making sure they don’t have a mod_security rule that is blocking you from accessing the installer properly.
Solution 2
3rd Party Services
There are a few issues around WordFence and Cloudflare that can cause these codes. See the FAQ below for details:
- What can I try for 502/503/504 Gateway issues during the build?
Solution 3
DYI
During the install process it is possible that your host might automatically lay-down a .htaccess file. Typically Duplicator works best if no .htaccess files are present
durning the install process as some of the directives in the file can cause conflicts. If your wanting to try and resolve the issue your-self without your hosts assistance then
check out the article below:
- How to Fix 504 Gateway Timeout Error in WordPress
Solution 4
Permissions
A 500 error in Step 1 processing on Duplicator Lite can sometimes be due to a timeout during zip extraction or on Duplicator Lite or Pro when file permissions are being set.
To get around this, first do a Manual Extraction then uncheck the Files and Directory
permissions boxes on Step 1 of the installer.
Solution 5
Cloudflare
If you’re using Cloudflare the below settings may help
- Log in to Cloudflare
- From Overview Page click «Advanced» ❯ Click «Pause»
- Run installer deployment
- Turn Cloudflare back on
Issue B
AJAX 503
During the install process you receive an error titled » AJAX ERROR! STATUS:503 Service Unavailable»
SHOW ALL SOLUTIONS
Solution 1
In the event the host you are on has issues with AJAX callbacks the best solution is run a manual install. For a step by step run of this process
see the FAQ item How do I do a ‘Manual Extraction’ or run installer without Zip enabled?.
Notice: The quickest way to isolate this error is contact your hosting provider or server admin. They will be able to monitor the web server logs for clues much quicker
that our support staff can with logs only generated by PHP.
How to fix installer archive extraction issues?
Issue A
Extraction Issues
During archive extraction the process fails or does not work.
Common Error Messages
— Can’t extract installer directory
— Archive config not found error
— ‘ZipArchive’ not found
SHOW ALL SOLUTIONS
Option 1
Validate Archive
The process of moving the archive.zip/daf files across servers can corrupt the files. To quickly determine if the archive is valid try to extract it on your
local computer a program such as winzip, winrar, 7zip etc. If the client program errors during extraction then the archive.zip file has become corrupted either during the download
or the creation process. Proceed to option #2 if the client side program also errors. If the client side program works without issues then proceed to option #3.
Option 2
Validate Download Process
-
FTP Downloads
If you transferred via FTP make sure that the FTP client is in binary mode when transferring down to your local box and then also when it’s transferring back up to
your host or destination server. If you downloaded straight from the plugin interface then try the download one more time to make sure that the http transfer is clean. -
Web Server Downloads
Check Web Server Configuration
These problems usually indicate the web server it not allowing files to be written to the directory. A common solution is to edit the Apache virtual hosts file
and include the «AllowOverride All» instruction.
Example:
					<VirtualHost *:80>

					{various instructions}...

					<Directory /var/www/html>

					AllowOverride All

					</Directory>

					</VirtualHost>
Option 3
Change Archive Engine
On Step 1 of the installer under «Options» you can change the engine which tries to extract the archive. On some hosting providers you will have the ability
to use multiple extraction engines. By default almost every server will support «ZipArchive», however some hosts also support «Shell Exec Unzip». If you run into issues
during the extraction process try to switch the archive engine from one format to the other.
Option 4
Manual Extraction
If for some reason the client side program works fine (see step #1) and neither of the archive engines work from step #3 then you may want to try a
manual extraction of the archive file.
Option 5
Imunify360
If your server or host runs Imunify350 then its possible the software might cause issues with the extraction process. If so consider checking out this FAQ titled
How to fix installer validation checks? and See Problem-A.
Issue B
Partial Extraction Issues
Only some of the files from the archive.zip/daf are not extracting correctly?
SHOW ALL SOLUTIONS
Option 1
This behavior should NOT happen and is usually caused by either a corrupted zip file or a zip file that was created with filenames that are too long. Below is a list
of items/plugins that create file names that are too long.
WP-Minify Plugin
- Path: pluginsbwp-minifycache
- Fix: Flush the cache in the plugin settings or remove all files from cache directory
WP-Super Cache Plugin &
W3 Total Cache Plugin
- Path: wp-contentcache
- Fix 1: Exclude the directory with the «Exclusion Filter» in the options dialog.
- Fix 2: Flush the cache in the plugin settings or remove all files from cache directory.
- Fix 3: Temporarily remove and delete the plugin then create a new package set from the Duplicator
To validate files are not correctly extracting. Download the package to your desktop and try to manually extract with a desktop program like
winrar, winzip or any other zip extracting software. During extraction you will receive and error message if there is a corrupt file in the archive.
How to fix installer validation checks?
Overview
On step 1 of the installer a set of validation routines are ran to help discover any possible issues that might arise. Validation is broken down into the following sections:
General, File System, PHP config and Database. The following statues will show based on the state of the issue, with the various color codes.
| Status | Details |
|---|---|
| Pass | The check passed and there are no issues detected |
| Notice | An issue has been detected however the risk is very low. Continue with the install process and if you run into issues then consider getting the notice fixed. |
| Warn | An issue has been detected and the risk of install issues is high. You may continue with the install, however it is recommended that you address the issue if possible. |
| Fail | A critical issue has been detected and the install will be halted, until the issue is resolved |
General
All checks in this section are detailed in the installer, no additional information is currently needed from the FAQ.
File System
This section covers all checks related to the file system.
Issue A
Permissions: General ❯ Imunify360
During the archive extraction process you receive one of the following warning, typically related Imunify360. If you continue with the install process you may
see one of the items listed below in the logs.
Common Error Messages
— FILE CORE EXTRACTION ERROR: wp-includes/class-oembed.php (or similar file path)
— Failed to write to wp-includes/theme-compat/footer-embed.php. Error: Error opening (or similar file path)
— MSG:touch(): Unable to create file /some_path/ No such file or directory
— Invalid glob header marker OR Invalid header marker
SHOW ALL SOLUTIONS
Option 1
This issue may happen if a product called «Imunify360» is installed on your hosting provider.
Imunify360 has a feature called «Proactive Defense» which is set to «Kill» by default — it incorrectly views an installer file as malicious so Imunify ends
up trashing package installations.
To get around this issue:
- Go to cPanel/Host Panel
- Click on the Imunify360 app
- Select Proactive Defense
- Switch Mode Settings to Disabled or Log Only.
After this you should be able to install without an issue. If you want Proactive Defense on your website after the install, you can re-enable after
installation is complete. For additional instructions on how to control this service see this article
Disable Imunify360 cPanel.
Note: In the event you don’t see an option for Imunify on your host panel please contact your host support and ask them to at least temporarily
disable the Proactive Defense part of Imunify360.
PHP Config & Database
All checks in this section are detailed in the installer, no additional information is currently needed from the FAQ.
How to fix general uncommon installer issues?
Issue A
Blank Screen with Date/Time
How to fix the installer when it shows an empty/blank page with a date/time at the top?
SHOW ALL SOLUTIONS
Option 1
Wordfence
This behavior is often related to the Wordfence plugin in either the current site or a site above the site being installing to. For example if installing
to /public_html/mysite and WordFence is installed on another WordPress site at /public_html then the location of either plugin can cause issues.
To Resolve:
-
While you install, temporarily disable WordFence. Additionally you may also need to temporarily comment out the line that begins
with ‘auto_prepend_file’ in .htaccess and .user.ini files in the parent site’s directory. -
Alternatively go to your web sites control cPanel ❯ file manage ❯ public_html ❯ show hidden files. Edit the user.ini file and make sure the path shows
the correct path, if it shows the path from the original account path. Once that is changed the site should work.
Issue B
PHP Version Changes
Why does the PHP version change after clicking next on step 1?
SHOW ALL SOLUTIONS
Option 1
During step 1 of the installer if a .htaccess file is found in the directory where the installer and archive are placed then that file will be
renamed and backed up. A new .htaccess that is blank will be laid down. This behavior can be skipped by check the option to skip config file updates
under Step 1 options section or you can follow these steps:
You can try to do this:
- Perform a manual extraction. https://snapcreek.com/duplicator/docs/faqs-tech/#faq-installer-015
-
Once extracted the zip make sure that the htaccess file exists with the following setting
					---

					# Use PHP7 Single php.ini as default

					AddHandler application / x-httpd-php70s .php

					---
-
Start the installation program and in step 1 Select ❯ Extraction: Manual Archive Extraction ❯ Config Files: Ignore all In this way, the htaccess
should not be touched. - At the end of the installation, check the wp-config.php and .htaccess configuration files and manually edit what is needed.
How to fix database connection issues?
If database connection or timeout issues occur during the install process consider the solutions below.
Issue A
Validation Fails
On Step 1 (Pro) and Step 2 (Lite) of the installer you click «Test Database» and get a fail status.
SHOW ALL SOLUTIONS
Solution 1
Validation Checklist: Double/triple check your user-name and password, this is often overlooked. Make sure the database user has the correct permissions.
For example: a read only privilege can’t add data to the database. Check the following list to validate permissions.
- Be sure the database and database user have been created
- Be sure the password matches the database user being used
- Be sure the database user is assigned to the database with the correct permissions
- Temporarly change the database user password to ‘test123’ to validate character input
- Contact your hosting provider for the exact required parameters
Solution 2
Hostname Validation: The host input ‘localhost’ works in most cases however it may not on your host so double check with your hosting provider for the
exact settings
.
Often it’s something like mysql.yourname.com or mysql.hostingcompany.com. Sometimes it may even have a port number like «mysql.hostingcompany.com:1400»
If you ask your hosting provider they can point you in the right direction. Please see
this site for other various combinations.
If the error message contains something such as «Can’t connect to local MySQL server through socket ‘/var/lib/mysql/mysql.sock’ (2)» then it is most likely that
you don’t have the hostname correct. Please see this forum thread
for an example of how to locate the correct hostname.
Quickest Fix:
If you’re on a hosted server contact your provider to make sure your using the
exact credentials
they need for their servers. Many hosting providers
have different ways for how to connect to their databases. Here are the help files to some of the major providers:
Solution 3
For issues related to «Error reading database variables» its possible the server is running on a MySQL instance that has «ANSI_QUOTES» enabled by default in their sql mode.
When using that SQL mode, MySQL interprets anything in double-quotes as identifiers rather than strings, which most likely causes the issue.
To overcome the issue, please remove the ANSI_QUOTES SQL mode.
Common Error Messages
— Unknown column ‘wp_table’ in ‘where clause’
Issue B
Access Denied
How to fix «Access denied for user ‘myuser’@’localhost’ (using password: YES)» when testing the database connection.
SHOW ALL SOLUTIONS
Common Error Messages
— Error: ‘Access denied; you need (at least one of) the PROCESS privilege …
— The database user for this WordPress site does NOT have sufficient permissions to write stored procedures to…
Solution 1
In order for the database connection to properly take place a database user but be
assigned
to the database and
granted
‘full privileges’ to
the database. Below are some resources that cover this process:
- The quickest way to validate full level of permissions is to contact your hosting provider.
- This codex covers creating a Database and User.
- For a cPanel demo follow along in this Step-By-Step Video.
MySQL 8+:
On some MySQL 8+ systems the following is required to get full including procedures.
GRANT SHOW_ROUTINE ON *.* TO <USER>@<LOCATION>
Solution 2
If solution 1 still does not work then try and create a new database user granting full permissions and assigning it to the database. This process can sometimes alleviate
any cache issues stored on the database. If the problem still persists contact your host and have them perform the «Basic Troubleshooting» section below to find out
why the hosting environment is having issues with database user permissions through PHP.
Solution 3
When moving a site from one mysql server to another the destination server may not have the correct privileges enabled. In other cases when moving across
different versions of mysql/mariadb one version may not support the directives of the other version where the database package was built. In those cases you might
see a message like this:
sql=mysqldump: Error: 'Access denied; you need (at least one of) the PROCESS privile ...
To work-a-round these issues you have a few options:
- Build in PHP Mode: To avoid any directives that mysqldump generates you can change the build mode to PHP which uses the minimal amount of
mysql/mariadb directives. Simply goto Settings ❯ Packages Tab ❯ SQL Script ❯ «PHP Code». Then rebuild the package and re-install. - Modify SQL Script: Advanced In a web browser browse to the installer.php. Then check the file system (via FTP, cPanel, Explorer etc.) a directory named «dup-installer» should be present. Open the database.sql file found inside the dup-installer directory and modify this file so that the directives support the new mysql/mariadb server your on. To do this typically you can remove settings that look like the code block below.
Typically its best to only remove the line where you are seeing the errors.
					...

					/*!40111 SET @OLD_SQL_NOTES=@@SQL_NOTES, SQL_NOTES=0 */;

					/*!40101 SET @saved_cs_client = @@character_set_client */;

					/*!40101 SET character_set_client = utf8 */;
So in the event the installer reported an error such as:
'Variable 'character_set_client' can't be set to the value of 'NULL'' - [sql=/*!40101 SET character_set_client = @saved_cs_client */;...]
Then you might simply try to remove the last line, save the dup-database_[hash].sql file and run the installer again. If the issue persists check
the errors till the version of msyql/marida is satisfied with the directives set. If the database engine versions are too far apart then it would
be recommend to work with your host or server admin to bring the version closer together.
Issue C
Database Timeouts
To get around the SQL connection timing out or memory/5xx errors on step 2, you have a couple options when using Duplicator. Currently timeout issues for large
database on Duplicator Lite are not supported.
SHOW ALL SOLUTIONS
Solution 1
Database Chunking
This is a multi-thread process that runs query the database install process over multiple HTTP requests.
- Rebrowse to the installer Step 1 ❯ Advance
- Check Options ❯ Database Tab ❯ Processing ❯ «Chunking Mode».
- Continue with the install.
- If Option 1 does not work or the SQL chunking option is not available then try option 2.
Solution 2
Skip Database Extraction
This process allows users to skip the database table creation process, but still run the database update (step 3) process. This solution requires
that users to follow the «Quick Steps» or «Advanced Steps» listed below.
- Extract the database.sql from the zipped archive.
- Go to phpAdmin or the equivalent.
- Remove existing database tables. The phpMyAdmin procedure is described here
- Import the database.sql into the chosen database. The phpMyAdmin import procedure is
described here - Browse to the installer fill in values, choose «Skip Database Extraction» in advanced options and run
Do a Manual insert of the database data as follows:
-
Build a full package with no database table filters (capture all tables)
- Download the package to your local PC
- Extract the file /dup-installer/dup-installer-data__{hash}.sql from the package
- Compress the dup-installer-data__{hash}.sql file into its own zip file
-
Go to your host’s phpMyAdmin or equivalent database management tool (or give to your host to create)
-
Delete all tables from the database you have been using on the destination to ensure no duplicate data is found in the next step.
For details see
this article. -
Import the zipped database file from step 1.
For details see this article.
-
Delete all tables from the database you have been using on the destination to ensure no duplicate data is found in the next step.
- Clean out the installer directory other than the installer.php and archive.zip
- Browse to installer.php Step 1 ❯ Action Drop-down ❯ «Skip Database Extraction»
- Continue with the install
Solution 3
Duplicator Lite Only
Version 1.4.7.2 or earlier
Typically most budget hosts will work with databases under 100MB. Some shared hosts can support databases upto 200MB+. The Lite version only supports a single concurrent
thread when trying to create the database. If your host throttles requests or you’re on a shared server that is being heavily utilized by other sites then they might be draining your resources. If step 2 is having issues on Lite we recommend trying some of these options.
- Try running the installer at different times of the day if your on a host that is currently being heavily utilized.
- Change Build Mode: WordPress Admin ❯ Duplicator ❯ Settings ❯ Packages ❯ SQL Script. Some hosts work better with a PHP built SQL Script and others mysqldump.
- Contact your host to see if you can increase their PHP/Web Server timeout limits
- Consider upgrading to Duplicator Pro and trying the SQL file chunk option
Common Error Messages
— MySQL Server has gone away, out of memory, or 500 Error
Troubleshoot
In the even you are unable to isloate a connection issue then troubleshooting with common PHP code can many times isolate the issue. If you are not familiar with coding,
provide this solutin to your server admin or hosting provider.
SHOW ALL SOLUTIONS
Solution 1
The installer uses a very simple PHP function called mysqli_connect to talk to your database. If you believe all the parameters your
entering in the installer are correct, you can validate them by creating a simple file in the same directory as the installer called db-test.php. Then place the
following code in the file and fill out the parameters in the mysqli_connect section. This will help isolate if your params are in-deed correct, if you’re unsure of
how to use the script send it to your host and ask them for help.
<?php
// Update the 4 parameters to match your server requirements

// Create connection
$conn = new mysqli($servername, $username, $password, $dbname);

// Check connection
if ($conn->connect_error) {
    die("Connection failed: " . $conn->connect_error);
}
echo "Success: A proper connection to MySQL was made! The my_db database is ready to use ." . PHP_EOL;
echo "Host information: " . mysqli_get_host_info($conn) . PHP_EOL;
?>
* Note: This script is also available in the Duplicator Pro tools directory /plugins/duplicator-pro/tools/db-test.php
How to fix database write issues?
Issue A
Write Errors
If the destination server is on MySQL 5.7+ and the Duplicator log shows errors such as: **ERROR** database error write ‘…’
then you may have issues when running on MySQL in strict mode. If this is the case try the following options:
SHOW ALL SOLUTIONS
Common Error Messages
— DB ERROR: Could not get the CREATE query for the table wp_XYZ. Incorrect information in file: ‘./database_store/wp_XYZ.frm’
— DATABASE ERROR: This function has none of DETERMINISTIC, NO SQL, or READS SQL DATA in its declaration and binary logging…
— Tablespace for table xxx exists. Please DISCARD the tablespace before IMPORT
Solution 1
For general write errors there are a few options to consider. Try these in the order they are presented.
The quickest solution is OPTION A, however for the option to be permanent on the server consider OPTION B.
-
Duplicator Lite
Installer Step 2 ❯ Options Section ❯ Mode ❯ Custom ❯ enter NO_ENGINE_SUBSTITUTION in the text box.
Duplicator Pro
Installer Step 1 ❯ Advanced Mode ❯ Options ❯ Database ❯ Mode ❯ Custom ❯ Add NO_ENGINE_SUBSTITUTION. - Continue with and complete the install process.
- If this does not work see OPTION 2
If OPTION A does not work try the following:
- Open this file in notepad: C:wamp64binmysqlmysql5.7.9my.ini
- Add the final line to the file:
							[mysqld]

							port = 3306

							sql_mode=NO_ENGINE_SUBSTITUTION
- Restart the MySQL Server (budget hosts may need to contact hosting provider)
If OPTIONS A/B do not work, do the following:
- SSH into your server as root and create the file /etc/mysql/conf.d/disable_strict_mode.cnf
-
Open the file and enter these two lines:
							[mysqld]

							sql_mode=IGNORE_SPACE, NO_ZERO_IN_DATE, NO_ZERO_DATE, ERROR_FOR_DIVISION_BY_ZERO, NO_AUTO_CREATE_USER, NO_ENGINE_SUBSTITUTION
- Restart MySQL by executing: :$ sudo service mysql restart
The above procedure is from serverpilot.io
Solution 2
Resolve write issues for create queries related to the following error message:
EXCEPTION message: DB ERROR: Could not get the CREATE query for the table wp_XYZ. Incorrect information in file: './database_store/wp_XYZ.frm'
- Run a database repair on your current WordPress site.
- On Installer Step 2 ❯ Tables Tab ❯ Uncheck the Import flag for the table generating the issue
- Alternatively When creating a package on Step 1 exclude the table in question from being added
Solution 3
Resolve write issues for functions related to the following error message:
			DATABASE ERROR: This function has none of DETERMINISTIC, NO SQL, or READS SQL DATA in its declaration and binary logging is enabled (you *might* want to use the less

			safe log_bin_trust_function_creators variable)
Execute the following in the MySQL console OR add the following to the mysql.ini configuration file:
SET GLOBAL log_bin_trust_function_creators = 1;
log_bin_trust_function_creators = 1
The setting relaxes the checking for non-deterministic functions. Non-deterministic functions are functions that modify data (i.e. have update, insert or delete statement(s)).
For more info, see here. For complete details see
this article.
If your hosting provider does not allow the settings above then contact them directly or consider working with the developer who wrote the Functions and have them re-evaluated.
to work properly with the database engines requirements.
Solution 4
During an install if you receive a message such as the one shown below, its likely you may need to delete one of the tablename.ibd files, that did not properly get deleted
during the database table removal process.
Tablespace for table xxx exists. Please DISCARD the tablespace before IMPORT
For a full run-down of all the possible solutions for this issue see
this stack-overflow article.
Issue B
Database Creation Failure
A message such as «Unable to create database…» is recevied with trying to use the create database action.
SHOW ALL SOLUTIONS
Solution 1
«Unable to create database…» typically means your host does not support creating databases through PHP code. In this case you will need to create a database through the tools they provide.
On most hosts you can do this through the cpanel. Please contact your host for how to create a new database. Duplicator Pro users should be able to use the cPanel connection tab to
login to there cPanel accounts and create the database through the cPanel installer interface. Alternatively you can use the Import or Overwrite modes.
Issue C
Compatibility Issues
In order to avoid database incompatibility issues make sure the database versions between the build and installer servers are as close as possible. If the package was created on a newer database version than where it is being installed then you might run into issues.
SHOW ALL SOLUTIONS
It is best to make sure the server where the installer is running has the same or higher version number than where it was built. If the major and minor version are the
same or close for example [5.7 to 5.6], then the migration should work without issues. A version pair of [5.7 to 5.1] is more likely to cause issues unless you have a
very simple setup. If the versions are too far apart work with your hosting provider to upgrade the MySQL engine on this server.
Solution 1
UTF8MB4 FORMAT:
If the current MySQL server version detected is below 5.5.3 (release on April 8th 2010) then support for utf8mb4 tables will not work. The utf8mb4 format is only supported
in MySQL server 5.5.3+. It is highly recommended to upgrade your version of MySQL server on this server to be more compatible with recent releases of WordPress and avoid issues
with install errors.
Solution 2
UTF8 INPUTS:
If non ASCII characters are detected as part of the database connection string and MySQL
server is not configured correctly then you will not be able to connect. This issue can be resolved by updating the MySQL my.ini configuration.
Add the setting ‘character_set_server=utf8’ under [mysqld] and restart the database server. This value may just need to be uncommented.
Solution 3
MARIA-DB SETUPS:
If a version of 10.N.N shows then the database distribution is a MariaDB flavor of MySQL. While the distributions are very close there are some subtle differences.
Some operating systems will report the version such as «5.5.5-10.1.21-MariaDB» showing the correlation of both. Please visit the online
MariaDB versus MySQL — Compatibility page for more details.
Please note some messages are simply notices. It is highly recommended to continue with the install process and closely monitor the installer-log.txt file
along with the install report found on step 3 of the installer. Be sure to look for any notices/warnings/errors in these locations to validate the install process
did not detect any errors. If any issues are found please visit the FAQ pages and see the question
How to resolve database errors or general warnings on the install report?
Solution 4
CREATE TABLES:
Creating tables across MySQL and MariaDB are very close however there are some small differences that can sometimes (not common) cause issues. To visit the different between each
see the two sets of documentation here:
- MySQL Create Table
- MariaDB Create Table
As you can see they are not a one-to-one match (MariaDB has options that MySQL does not), so when you try to run a CREATE query that worked on MariaDB, but has some table option that
MySQL does not support, it may fail. The current fix is to remove the offending table options from the DB dump by doing a manual search-and-replace on the file.
Issue D
Table Collation Issues
How to resolve compatibility mode & ‘Unknown collation’ errors?
SHOW ALL SOLUTIONS
There are 4 ways to solve this issue. Option 1 is the quickest, easiest and safest way to resolve this issue
Unknown Collation Overview:
An ‘Unknown collation’ error means the MySQL server being installed on (target server) is older than the MySQL engine you
created the package on. An error message such as:
**ERROR** database error write ‘Unknown collation: ‘utf8mb4_unicode_ci’
will be triggered because the MySQL version being used does not support this table format. You can view the MySQL server version comparison by clicking on the ‘Test Connection’
button in the installer or by viewing the installer-log.txt file. The output will look something like:
MYSQL VERSION: This Server: 5.4.22 — Build Server: 5.7.10
Option 1
Update Database Software
The cleanest and safest way to fix ‘Unknown Collation’ issue is to update your
target MySQL server
to the same or newer version than where the
package was built. The most common format errors include:
- utf8mb4_unicode_ci: Mysql server 5.5.3+ is required.
- utf8mb4_unicode_520_ci: Mysql server 5.6+ is required.
Best Fix:
The best and easiest way to solve this issue is to ask you’re host to
move
your account to a MySQL server that supports the collation type you
need (see example above). Simply give them the error message your getting and they can help move you to the correct server.
Most host will not upgrade the current server your site is on, however they should be able to easily move your account to a newer server.
This is a very common practice and a good host should be able to help out pretty easily.
If you’re running any version lower than 5.5.3 then your using a very outdated version of MySQL server. 5.5.3 was released in 2010 which means the version of MySQL server you’re using is even older. We strongly encourage users to work with their hosts to use up-to-date software for improved security and performance and to stay in compliance with updates from WordPress core. Don’t let a crappy host use outdated software on your site.
Option 2
Enable Legacy Check
On the installer in step 2 under options is a setting titled «Legacy» and labeled «Apply legacy collation fall-back support for unknown collations types».
Check this check box to apply a fall back legacy collation and continue with the install.
When creating a database table, the Mysql version being used may not support the collation type of the Mysql version where the table was created.
In this scenario, the installer will fall-back to a legacy collation type to try and create the table. This value should only be checked if you receive an
error when installing the database.
For example, if the package was built on MySQL 5.7 with a table collation type of ‘utf8mb4_unicode_520_ci’ and your runing the installer
on an older MySQL 5.5 engine that does not support that type then an error will be thrown. If this option is checked then the legacy setting will try to
use ‘utf8mb4_unicode_520’, then ‘utf8mb4’, then ‘utf8’ and so on until it runs out of options. While this option does work on most setups, option 1 above
is still the recommended and safest option.
Option 3
Run Compatibility Mode
Mysqldump Compatibility mode helps produce a database sql script output that is more compatible with other database systems or with older MySQL servers.
The Duplicator supports several compatibility modes
all of which are only available when mysqldump mode is enabled in the plugin. Compatibility mode can be enabled when building a package using the
mysqldump option.
The Duplicator will only allow compatibility mode during the creation process. It is not allowed when creating templates or with schedules.
The reason for this setup is to discourage using these settings and fix the real issue which is to update your database server.
Database Upgrades:
Compatibility Mode should only be used as an last resort. The recommended approach to fixing database issues is to make
sure that both database servers are up-to date and very close in version numbers (see OPTION 1). For example if the database server where you
create the package (database) is 5.7.5 then the database server where you install the package should be at least in the 5.7.N range.
Ask your host or server admin to upgrade the mysql server to a newer version if possible. If your host will not upgrade to a recent upgrade
ask them to upgrade to as high of a version as possible.
Data Preservation:
While there are several work-a-rounds on the internet (Option 4) explaining how you can modify the current SQL file or use mysql dump compatibility mode, the main
underlying issue is that you stored data in one format and are now going to convert it. These techniques can lead to data loss and incompatibility issues
later down the road. The correct approach is to upgrade the MySQL software.
Consider trying both Modes:
Duplicator currently supports two different modes. Mysqldump and PHP Mode. See Settings > Packages option. If you are running into character issues and running out of options
you may consider trying to build the database in both modes to see if one or the other solves the issues.
Option 4
Manual Configurations
These options are for advanced users and should be performed with caution. The options require updating the database.sql script or
updating the source database table collation types. Below are three different approaches but only one option is required to address the issue.
Update database.sql:
For ‘unknown collation’ issues you can try the follow the steps below:
- Extract the archive zip file manually
-
Open the database.sql file with notepad and Search & Replace on the collations for example you might :
- replace: ‘utf8mb4’ with ‘utf8’
- replace: ‘utf8_unicode_520_ci’ with ‘utf8_general_ci’
- Always try these options in a sandbox first and never on a production site until your content with the results
- Then browse to the installer.php file on the server and choose Advanced & check ‘Manual Extract’
- This can also be attempted with other collations i.e. replace ‘collation_type_1’ with ‘collation_type_2’
Update Source Database with Code:
This options requires that you really understand your system and have made backups ahead of time. The script will allow you to alter the collation
on the build server so that it can be supported by the target server. The full script can be seen on stackoverflow at:
http://stackoverflow.com/a/29939906/2808424
Update Source Database with IDE:
If you don’t feel comfortable running the code above you can also use an IDE or GUI tool that will allow you to manually change the tables collation
either with SQL statements or through and interface. Again these options requires that you really understand your system and have made backups ahead of time.
Below are some easy to follow step by step for updating the collations via an IDE such as phpmyadmin:
- phpmyadmin
- SQL statements
- MySQL Workbench
Also see:
Recommended hosting providers for Duplicator?
http://dev.mysql.com/downloads/mysql
https://make.wordpress.org/core/2015/04/02/the-utf8mb4-upgrade
Step 3 & 4
How to resolve 403/500/timeout issues on step 3?
While these issues are not common, they can occur on budget hosts or hosts that may not be properly configured for the installer to run.
Below is a list of «QUICK OPTIONS» and «ERROR RESPONSES» and recommendations for each. For error codes please jump directly to that code number.
QUICK OPTIONS
Timeout Issues
The web server is not configured to run long enough to extract the archive and install the database.
- The quick & easy workaround is to perform a manual extraction.
- Its also recommended to use mysqldump for larger databases and shell_exec for large archives if possible and your host supports them.
Disable Plugins
If you have security or caching plugins installed its recommended to temporarily disable them to avoid conflicts at install time. Some security
plugins can reach outside of a WordPress and monitor external folders, while others once enabled in a new environment need additional configuration.
- During Build: This can be done by creating your package with all cache and security plugins temporarily disabled and add all cache paths to the directory filters list.
- Before Install:
If you’re already too far into the install process and don’t want to create a new package you can always
perform a manual extraction and temporarily remove or rename the plugin folder of the plugin you
suspect to be causing issues. Finish up the install process and then restore the plugin. -
During Install: On Step 3 of the installer under options is a select box where you can disable plugins. Check the option to disable all plugins and continue with the install.
Once you have the site installed you can then re-activate all the plugins.
Wordfence Plugin
Wordfence is an excellent plugin, but moving a WP site with it enabled can cause issues when initially trying to get the site re-deployed.
-
The quickest fix is to disable the plugins firewall
temporarily until you get your site deployed. -
Wordfence has a firewall feature that filters php code. So when running the installer.php, it could be blocked by Wordfence.
This is more relevant for users with multiple WordPress installations. For example if you’re attempting to duplicate a WordPress install while another
WordPress site existed in another directory, then you may get an «403 Access Denied» error since Wordfence works across multiple directories.
Below are some the steps to whitelist the installer:- Go to your Wordfence Live Traffic page.
- Look for a red highlighted section saying installer.php was blocked. Click the «Whitelist param from Firewall» button and see if the installer.php works.
- After installation if you remove the rule, but be sure to white list it again when you go to run the installer.
Check .htaccess file
Improper web server configurations can cause issues such as:
- Missing directory Index: To fix add
DirectoryIndex index.html index.phpto .htaccess -
Check with your host for mod_security rules for example the following rule on Siteground hosting will lift
a server security rule for the installer to properly:
				<IfModule mod_security.c>

				SecFilterRemove 001838

				</IfModule>
ERROR RESPONSES
-
500 Internal Server Error
If you get this error from any log or response please see:
«How do I handle ‘Internal Server 500’ messages?» -
403 Forbidden/Access Denied
If you get this response it can be related to permissions, below are a few options:-
Give your root WordPress folder permissions (such as 755)
Note: Step 1 Advanced options will allow you to recursively set permissions on directories or files - Contact your host with the error and ask them about any firewall rules they enforce.
- Check the .htaccess file see «Check .htaccess file» above…
- Temporarily disable any firewall/security plugin see «Disable Plugins & Wordfence Plugin» above…
-
Give your root WordPress folder permissions (such as 755)
Also See:
How do I handle «Internal Server 500» messages?
Wordfence documentation
ModSecurity Site | ModSecurity Reference
Recommended hosting providers for Duplicator?
How to fix database errors or general warnings on the install report?
Problem
Install errors (SQL errors) are related to data that was written to the installer-data.sql data dump file, and had issues getting inserted into the new database.
These errors are generated during the database install phase and are important because missing data from the original database may have not been copied properly to the new database.
Option 1
Write Error: Queries that error during the deploy process are logged to the install-log.txt file. To view the error result open the log file
and find the section titled ‘DATABASE RESULTS’. If errors are present they will be marked with ‘**ERROR**’. There are a few reasons why these errors
are generated:
-
Database Versions: If the MySQL Database versions are different across servers then you can run into issues. The further apart they are
the more chances of having issues. Be sure that the destination server MySQL version is close to the build server version or higher. -
MySQL Mode: The MySQL Mode can have an impact on how the
MySQL engine runs. Applying NO_ENGINE_SUBSTITUTION and other MySQL modes is built into the installer. We recommend first just trying to
apply NO_ENGINE_SUBSTITUTION if you are seeing large amounts of database errors. To do this simply follow these steps:- On Step 2 of the installer under Advanced options locate the «MySQL Mode» setting
- Check the ‘Custom’ radio button and enter in NO_ENGINE_SUBSTITUTION
- Continue with the install
- When install is done, check the installer log for errors (link in upper right-hand corner of installer)
You may have to try various combinations to get it to work specifically on your server. Once you find a series of settings that work you can work
with your host or server admin to set the values indefinitely in the my.ini. A quick example of the process can be found here.Important:Seeing the text «database error write ‘Invalid default value..» in installer-log.txt is an indication you need to set the MySQL mode to NO_ENGINE_SUBSTITUTION.
Option 2
Query Size Limit: If you see errors with ‘Query size limit’ you will need to manually post the values or update your mysql server with the
max_allowed_packet setting to handle larger payloads. If you’re on a hosted server you will need to contact the server admin, for more details
see the MySQL packet size docs.
To fix the item on your own you will have to edit the my.cnf configuration file and either add/update the setting max_allowed_package_size=2M or if max_allowed_package_size already exists double the value it is currently set to. Restart the mysql server after doing this.
INSTALLER REPORT
The install report section on the final step is designed to show were there
might
be issues with the installation. Please note that in some cases you will receive errors/notices however they may not effect the overall functionality of your site. If you have done a good overview of your newly installed site with no observable issues and the Deploy/Update results count is low (under 10); then you can typically ignore any errors/notices provided by the report.
There are 3 types of update error/notices:
- Update Errors: This is a basic query statements that had issues running on the new server. It can be caused by data integrity issues and incompatibilities between database engine versions. If you get an error in this portion then you will need to inspect the query and debug why it may have issues with migration.
- Table Key Notices: These issues are basically tables where the new URL value was found but can not be updated because their is no table key to update from. These values will need to be located manually and updated.
-
Serialization Notices: PHP serialization can have issues when one of
its internal values are update. Duplicator will repair these updated strings, however in some rare cases they don’t get updated correctly. Serialization errors can happen for a number of reasons and can be looked at by running the provide query from the report. See the section below for how to manually fix a serialized string.How to repair a serialized string:
- Locate the string that was unrepairable by using the provided install report query.
- Visit this page: http://unserialize.onlinephpfunctions.com/
-
On URL above you should see this sample serialized string: a:1:{s:4:»Test»;s:17:»unserialize here!»;}. Take a piece of it— s:4:»Test»;.
That means «string», 4 characters, then the actual string. Then change «Test» to «Tes», for example and press the Execute button.
This will generate an error. This is basically what happens to most string values. The numeric character count to gets out of sync with the string.What you need to do it get those character counts to match your new strings count. This will fix the serialized string. This is pending it was not
corrupted by any of other type encoding. If that is the case then encoding issues will need to be evaluated.
Quick Check: If you do receive any errors on the install report follow these steps:
- Check your site for any possible issues. If your site is solid and stable and the error counts are low then in most cases you have nothing to worry about.
You may have to just resave the settings for a particular theme/plugin/widget. - If you’re still concerned about the error. Run the SQL queries provided by the install report and check the error log to evaluate the queries that had issues running.
Also you can perform the checks yourself by using phpmyAdmin.
Also see:
How to fix database write issues?
How to fix database connection issues?
Recommended hosting providers for Duplicator?
Do I need to do anything after step 4 is completed?
Yes. After install, be sure to do the following:
- Test the site. If you observe problems, review the Post-Install section for possible resolutions.
- Clean up all installer files to ensure the site is secure. See Which files need to be purged after an install? for instructions on how to do this.
Which files need to be removed after an install?
It’s critical you remove the installer files after an install to ensure your site is secure. Removing the plugin does not remove the installer files nor do you need to remove the plugin after the install unless you want to.
Post-install file cleanup can be done by one of three ways:
Option 1
Log into the newly installed site admin and click «Remove Installation Files Now!» link at the top.
Option 2
From the wp-admin, go to Duplicator ❯ Tools ❯ Stored Data ❯ «Remove Installation Files» button
Option 3
Delete the files shown below using either FTP, SFTP, or your host’s file manager.
The following files below should be removed after install. The location of these files will reside at the root of the wp site
normally where the wp-config.php file exists or folders like wp-includes and wp-amdin.
PRO and LITE 1.3+
- dup-installer (directory)
- installer.php
- installer-backup.php
- installer-bootlog_[HASH].txt
- [HASH]_archive.zip/daf
LITE 1.2 (older versions)
- installer.php
- installer-backup.php
- dup-installer-data_[HASH].sql
- dup-installer-log_[HASH].txt
- dup-database_[HASH].sql
- [HASH]_archive.zip/daf
- In older version the file names may have been named installer-data.sql, database.sql, installer-log.txt
NOTE: Even though the installer has a password word protection feature, it should only be used for the short term. All installer files should and must be removed
after the install is completed.
Post-Install
After the install process completes
Access/Login & Display Issues
How to resolve «Access/Login/Redirect» issues?
Issue A
403 Access Denied
How to resolve 403 Access Denied message?
SHOW ALL SOLUTIONS
After the install is complete a «403 Forbidden» or «403 Access Denied» message shows for either the site or admin.
A 403 error means the web server has restricted access to a specific path. This directive is controlled by the web server and Duplicator has no control
or ability to fix this issue directly from the plugin. The fixes for this issue are below:
Solution 1
Contact Host
If your not technical or used to working with web server config files then contact your host or server admin and they can usually fix this issue
for you in a few minutes. Just give them the URL where you are seeing the message.
Solution 2
Edit Config
Edit the web server config file and add the following to the httpd.conf or httpd-ssl.conf if running SSL.
			# The Directory path below should match your server the following is a SAMPLE

			<Directory /var/www/html/example.com/public_html>

			    Options Indexes FollowSymLinks

			    AllowOverride All

			    Require all granted

			</Directory>
Solution 3
Additional Resources
For a full detailed troublshooting overview on this issue please visit this URL:
WPBegginer: How to Fix the 403 Forbidden Error in WordPress.
Also See:
WPBegginer: How to Fix the 403 Forbidden Error in WordPress.
How to fix a blank/white installer or 403/404/405/500 issues?
Issue B
404 & Redirects
How to resolve a 404, redirected, path issues or unable to log in after installing?
SHOW ALL SOLUTIONS
Solution 1
Redirect Issues
This can be caused by a redirect on your server. Here are several places a redirect can be triggered from:
- Mis-configured config file such as: wp-config.php, .htaccess or themes/functions.php
- A redirect plugin that maybe installed. Disabling the plugin at install time see Option 3 below.
- Inside an html file via a meta refresh tag or a JavaScript redirect
- Check your cpanels for redirects or contact your host
- Follow these steps for fixing perma links
- Check the installer-log.txt file for warnings or errors.
- Try to remove your .htaccess file and start with a fresh one
URL Trace
There are a many tools online
to test URL redirects, just Google for it. If you’re testing on a localhost you can find tools online that will help.
A Mac/MAMP solution
1) open terminal and type defaults write com.apple.Finder AppleShowAllFiles YES
2) open the folder where the site is and look for a hidden htaccess file and delete it
3) test and check your site (apache restart maybe required)
Solution 2
Path Issues
To prevent the index.php appearing in the address bar or attached to each request the following can be added/changed in your httpd.conf file.
To allow permalinks on Apache you need to instruct Apache to allow individual sites to update the .htaccess file, by adding
the following options to the Directory section in your hosts Apache httpd.conf configuration file:
-
Add the following to the httpd.conf
					# The Directory path below should match your server the following is a SAMPLE

					<Directory /var/www/html/example.com/public_html>

					    Options Indexes FollowSymLinks

					    AllowOverride All

					    Require all granted

					</Directory>
- Restart Apache
- If you’re on a budget host with no access to the httpd.conf file you will need to send this FAQ item to your host
Solution 3
Plugin/Theme Issues:
Sometimes plugins or even themes can cause redirect issues. Below is an option to help isolate the issue with plugins and themes. If the issue still persists after
trying the options below consider investigating your themes functions.php to make sure there is not custom code causing a redirect. Also consider looking at some of the
options in this FAQ.
Safe Mode:
To quickly isolate common issues with your site try the settings below:
- Installer: Step 1 ❯ Options ❯ Advanced ❯ Safe Mode.
- Basic Mode: This option will disable all plugins at install time.
- Advanced Mode: Runs «Basic Mode» and re-saves theme settings during wp-admin login.
- Installer: Step 3 ❯ Options ❯ Active Plugins to disable individual plugins one-by-one.
Note: Its recommended to first try «Basic» and then the «Advanced» option if the issue persists. If you suspect the plugin(s) causing the issue then just
disable those specific plugins on step 3. After logging into your wp-admin re-enable each plugin one-by-one and resave any settings if applicable till the
problem is isolated.
Solution 4
Browser Cache
Google Chrome and other browsers will cache your 301 redirects. To get around this, and to keep the tabs open, you’ll just need to clear your browser cache.
Chrome Menu Chrome Menu ❯ Settings ❯ Search for «history» ❯ See option «Clear browsing data». Whatever else you select, make sure «Cached images and files» is a checked option. Then click Clear browsing data and you should be able to retest again. If you’ve just followed the redirect, you only need to delete data from the past hour. Alternatively, test and develop in incognito mode. There the cache is flushed after the browser is closed.
Also See:
How can I fix my site when the home page shows but no sub-pages work?
Why are some of my plugins/images/links/styles not updating?
WordPress.org Forums: 404 Errors on all pages but home page?
Issue C
Admin Login
How to resolve not being able to login to the WordPress admin?
SHOW ALL SOLUTIONS
Option 1
Add Admin User
Typically the quickest way to login to the WordPress admin is to add a new admin user from the installer. This can be done with the following settings:
See Installer (Advanced mode) ❯ Step 3 ❯ Options ❯ create a new Admin account and use that to login.
Option 2
Validate/Reset Login
If you lost the admin password or logging in is not working consider these options.
- Try to login a few times and try having the password emailed to you
- Pay attention to the «User Mode» used on Step 1 ❯ Options ❯ General.
- See Installer (Advanced mode) ❯ Step 3 ❯ Options ❯ disable all plugins in-case you have a plugin conflict
- You may have to reset the password by following these instructions
- If all other options fail you can use the emergency password reset script
Option 3
Redirect Issues
If you are trying to login to the WordPress admin dashboard, but keep getting redirected back to the login without any notice of invalid username/password.
Then the URL link might be messed up. Try changing the URL address in your browser to either of the following addresses and then try to login:
- https://yoursiteurl.com/wp-admin
- https://yoursiteurl.com/wp-login.php
Option 4
User Mode
If you are performing a single site install then you will need to pay attention to the «User Mode» setting in the installer wizard step 1 advanced options (default is overwrite).
This mode will control which users are overwritten, kept or merged. For example if you wanted to keep the users from both the source and target sites then you would follow these steps:
- Switch to «Advanced Mode» in the upper right corner of the installer on step 1
- Under «Options» ❯ «General» for the option «Users Mode:» select the «Merge» option
- Choosing this option will result in details listed below for Merge
User Mode Overview:
Overwrite: Overwrites users is the classic mode, users from the source site will be installed and those from the target site will be discarded.
Keep: Keeps all users of the target site by discarding users of the source site.
All content on the source site will be assigned to the
content author
selected user.
Merge: Merges users from the target site with users from the source site.
The target site users will be unchanged and the source site users will be added by remapping ids and logins if duplicated.
Issue D
wp-config.php
How to resolve errors after an import that trace to issues in the wp-config.php?
SHOW ALL SOLUTIONS
The plugin migrates all defined constants from your wp-config.php, due to some complexity on how the defined constants can be initialized in PHP, it could happen in rare and exceptional
cases that the replication of your previous wp-config.php silently fails or with an error. Some examples are:
- A defined constant is initialized with a flow check
- A dynamic variables concatenated to your plan value
- Backslashes or other custom settings
In such circumstances it could happen that you might see the following in your logs:
			PHP ERROR: Unexpected end of file

			PHP WARNING: Use of undefined constant
Solution 1
Inspect wp-config
We would advise to check your wp-config.php for missing macros. Check to fix any macros for broken values in case of complex initialization with flow checks,
dynamic variables, backslashes, etc…
Solution 2
Reset wp-config
Recreate the wp-config.php manually from scratch or grab a fresh one from wordpress.org
How to fix home page and/or sub-pages not showing?
Issue A
Your home page works but nothing else works including the various sub-pages and posts.
SHOW ALL SOLUTIONS
Solution 1
In some cases simply re-saving the permalinks will fix the issue. In your WordPress admin Go to Settings ❯ Permalinks, and click on save changes button. Check a
sub-page to see if the issues is fixed.
Solution 2
Another common cause is that the ‘mod-rewrite’ module has not being enabled. To enable mod_rewrite or its equivalent see the instructions below.
Apache 2.x on Linux
In a terminal, execute:
			a2enmod rewrite

			/etc/init.d/apache2 restart
WAMP Instructions here |
IIS Instructions here
All Other Systems
Google for how to enable mod-rewrite or permalinks on your particular system.
Solution 3
If solution 1 or 2 do not work you may also need to adjust the «AllowOverride» setting (Apache Only). If your not sure what the value should be for your
hosts environment, then please contact your hosting provider to be sure. The full run-down for how to work with this setting can be found here.
Solution 4
In some cases plugins and/or themes can cause initial issues with the install process. Installing your site in «Safe mode» can sometimes help to quickly isolate and solve site issues.
To run the installer in safe mode follow these steps:
Safe Mode:
To quickly isolate common issues with your site try the settings below:
- Installer: Step 1 ❯ Options ❯ Advanced ❯ Safe Mode.
- Basic Mode: This option will disable all plugins at install time.
- Advanced Mode: Runs «Basic Mode» and re-saves theme settings during wp-admin login.
- Installer: Step 3 ❯ Options ❯ Active Plugins to disable individual plugins one-by-one.
Note: Its recommended to first try «Basic» and then the «Advanced» option if the issue persists. If you suspect the plugin(s) causing the issue then just
disable those specific plugins on step 3. After logging into your wp-admin re-enable each plugin one-by-one and resave any settings if applicable till the
problem is isolated.
If the issue still persists after trying the options below consider investigating your themes functions.php file to make sure there is not custom code causing issues with how your pages
are being severed up.
Issue B
Your home page does not work or is showing your hosts default page.
SHOW ALL SOLUTIONS
Solution 1
Check to make sure you do not have a default.html or index.html in the root directory that is overriding the WordPress index.php file.
Solution 2
In some cases plugins and/or themes can cause initial issues with the install process. Installing your site in «Safe mode» can sometimes help to quickly isolate and solve site issues.
To run the installer in safe mode follow these steps:
Safe Mode:
To quickly isolate common issues with your site try the settings below:
- Installer: Step 1 ❯ Options ❯ Advanced ❯ Safe Mode.
- Basic Mode: This option will disable all plugins at install time.
- Advanced Mode: Runs «Basic Mode» and re-saves theme settings during wp-admin login.
- Installer: Step 3 ❯ Options ❯ Active Plugins to disable individual plugins one-by-one.
Note: Its recommended to first try «Basic» and then the «Advanced» option if the issue persists. If you suspect the plugin(s) causing the issue then just
disable those specific plugins on step 3. After logging into your wp-admin re-enable each plugin one-by-one and resave any settings if applicable till the
problem is isolated.
Also See:
Issue B
Why are some of my plugins/images/links/styles are not updating?
Why do I get a blank/white screen on my site?
WPBegginer: How to Fix WordPress Posts Returning 404 Error.
Why do I get a blank/white screen on my site?
With millions of possible configurations it can be difficult for the Duplicator to catch every setup configuration during a migration. If you see a blank screen it may be
related to some of the issues below. Also it’s important to isolate the area that you’re seeing the blank screen on and do a bit of research to see what might be
causing the issue. For example if your WordPress administrator comes up blank then it will be best to do a quick Google of the issue.
Searching for something like «wp-admin comes up blank» will help point you in the right direction and get
you a quick answer.
Safe Mode:
To quickly isolate common issues with your site try the settings below:
- Installer: Step 1 ❯ Options ❯ Advanced ❯ Safe Mode.
- Basic Mode: This option will disable all plugins at install time.
- Advanced Mode: Runs «Basic Mode» and re-saves theme settings during wp-admin login.
- Installer: Step 3 ❯ Options ❯ Active Plugins to disable individual plugins one-by-one.
Note: Its recommended to first try «Basic» and then the «Advanced» option if the issue persists. If you suspect the plugin(s) causing the issue then just
disable those specific plugins on step 3. After logging into your wp-admin re-enable each plugin one-by-one and resave any settings if applicable till the
problem is isolated.
Please consider trying these options:
- WP-CONFIG: Make sure your wp-config.php file is correct and view the wp-config.php codex
- SERVER LOGS: Examine the WordPress error log as explained here. Also you may access all server error logs by going to cPanel ❯ Statistics ❯ Error Logs or using your host-specific control panel. If you don’t have direct access to the server logs ask your host support to look for any errors in the logs.
- BROWSER CONSOLE: Detect JavaScript errors by viewing your browser’s console while refreshing the page.
- VALIDATE PLUGINS: Disable all other plugins temporarily and see if the issue persists. If so then enable each plugin till you see where the plugin conflict occurs.
- PERMISSIONS: Check the permissions on plugins files. Directories should be 755 and files should be 644. You may need to reinstall and enable Advanced ❯ Permissions Files (644) and Directories (755).
- CHANGE BROWSER: Open another web browser and check for the white screen. If it works in the new browser then it may be a browser cache issue. You can usually fix this by holding down ctrl+F5 or manually deleting your browser cache.
- CHECK THEME: Change to a new theme temporarily to validate a conflict may be theme specific.
- LOGIN/LOGOUT: Try to login or out of your admin to check and see if your session maybe got messed up.
- CACHE PLUGINS: Clear all your cache plugins. Sometimes they can cause issues.
- TROUBLESHOOT: Check the WordPress Troubleshoot Codex
Also see:
Why can’t I download files / get a corrupted installer / see a 404.3 message?
How can I fix my site when the home page shows but no sub-pages work?
Why are some of my plugins/images/links/styles not working?
Option 1: Plugin/Theme Issues
With over 100k+ plugins/themes available for WordPress it is difficult to know how they store data. Minor modification may need to be made
after you have ran the installer. If your site is not working correctly its best to try and disable plugins and themes and re-save the settings if
applicable.
If you’re unsure of the plugin that may be causing the issue try and run the installer again and disable the plugins at install time. This can be done on step 1 or
step 3 of the installer (see below). After the install is complete you can login to your wp-admin and individually enable each one to find out which plugin is causing
the particular issue.
Safe Mode:
To quickly isolate common issues with your site try the settings below:
- Installer: Step 1 ❯ Options ❯ Advanced ❯ Safe Mode.
- Basic Mode: This option will disable all plugins at install time.
- Advanced Mode: Runs «Basic Mode» and re-saves theme settings during wp-admin login.
- Installer: Step 3 ❯ Options ❯ Active Plugins to disable individual plugins one-by-one.
Note: Its recommended to first try «Basic» and then the «Advanced» option if the issue persists. If you suspect the plugin(s) causing the issue then just
disable those specific plugins on step 3. After logging into your wp-admin re-enable each plugin one-by-one and resave any settings if applicable till the
problem is isolated.
Option 2: Install Setup
Validate the install URL:
On step 3 of the installer you are asked to enter a new URL. This step is very important as it will define the replace logic used to update all of your links.
The ‘Old URL’ (see advanced options on step 3) is replaced with the ‘New URL’. This replace is an
exact match
.
If you find that a link did not get updated correctly, you will need to validate that the link was exactly the same as the ‘Old URL’ found in step two of the installer,
if for any reason it was different then you will need to manually update that data for that link.
Also pay close attention to the report in step 3 of the installer as it will help show you errors or
warnings in data that may have issues. Here are some checks you can make:
Additional Checks
- WP-config file: Check the wp-config.php for additional logic which points to an old URL
- Installer Report: Check install report on last step for no errors/warnings.
- Functions File: Check the themes functions.php file for any hard-coded values or altered for custom work.
-
Apache .htaccess: Check to make sure no .htaccess rules are over-riding the URL rewrite.
Also check the the /wp-content/uploads folder for improperly configured .htaccess files
Less Common Scenarios
- Custom Plugins: Check for any plugins installed that mess with how your URLs work such as a redirect plugin.
- Permalinks:Check out the write up on permalinks at WordPress.org.
- Hot linking:Temporarily disable any hot-linking
restrictions. For cpanel users here is a quick rundown. -
Search & Replace: For Duplicator Pro check to make sure custom search/replace terms.
If after using this feature you run into issues, try the install without search and replace to see if the issue persists
If an individual theme or plugin is missing data you will be able to resolve your issue much faster by contacting the theme author or plugin author.
Explain to them that you just migrated a website and the settings to their theme or plugin is not working correctly. They will be able to much better
assist you with the issue and help you isolate how to fix their theme or plugin than we can. However we are still here to help if you need us…
Also See:
How can I fix my site when the home page shows but no sub-pages work?
Data/Setup Issues
How to resolve filename & config file migration issues?
Issue A
Filename Characters
How to resolve utf8 characters renamed in a filename?
SHOW ALL SOLUTIONS
Solution 1
Depending on the source web server configuration, non-English characters in filenames can occasionally be stored incorrectly within the .zip archive. The resolution to this
varies depending on how the characters were changed.
If filename characters have been replaced with a hash sign, ‘U’ and number (e.g. file_ü.txt => file#U00fc.txt):
- Using FTP or your host’s File Manager copy wp-content/plugins/duplicator-pro/tools/file-renamer.php to the destination web site’s root directory.
- Browse to the tool (I.e. http://mydomain.com/file-renamer.php)
- Use tool to rename the files.
Issue B
.htaccess Setups
How to manage .htaccess files during the install and what are my options?
SHOW ALL SOLUTIONS
By default Duplicator resets the .htaccess file to a simple baseline setup. This is needed in the vast majority of cases because most .htaccess files can grow to be very complex
and when migrated to a new environment/server the current directives can cause issues. With millions of directives and settings to account for its impossible for Duplicator
to determine if the directive will work in the new location.
Customized Settings
For advanced users there are still options for users to retain the original settings. In order to keep the original .htaccess file or prevent Duplicator from doing anything with the
.htaccess files, see the available options below:
- Duplicator Lite Installer ❯ Step 1 ❯ Options ❯ Advanced Tab ❯ Config Files.
- Duplicator Pro Installer ❯ Step 1 ❯ Advanced ❯ Options ❯ Advanced Tab ❯ Configuration Files
Please note: That the solutions above could have issues so you will need to manually open your .htaccess file and update all the settings to match your new server.
3rd Party Plugins
In the even you use a plugin that updates the .htaccess file you can easily get those settings back. In the vast majority of these situations you can simply deactivate and reactivate
the plugin in question. If you are not sure, just contact the plugin author.
Also See:
How does Duplicator handle data/file migration?
How to resolve WordPress migration issues?
Issue A
WordPress Installer
Why is the WordPress installer showing up after I install?
SHOW ALL SOLUTIONS
This behavior should not happen and is usually caused by a corrupted database or data that was not transferred properly.
Here are a few things you can perform if you see this issue:
Option 1
Re-run the installer
— Running the installer again can help validate if the issue is persistent.
— Be sure that ONLY the archive and installer.php files are present in the install directory.
— Clear your browser cache and re-run the install process
— Pay close attention to the install report and look for any possible errors or notices
— If the WordPress installer screen shows up a second time consider looking into options 2 & 3 below.
Option 2
Check log file
— After completing step 3 in the installer check the installer-log.txt
— Look for lines with **ERROR**. This indicates that data was not properly transfered to the new/existing database
— The installers MySQL server may not fully support the SQL script from the MySQL server where it was built
— See the following question for more details:
How to resolve database write issues?
Option 3
Repair DB
— Run a repair and optimize on your database.
— Create a new package again
— Start over with a new install
Issue B
During the archive extraction process the time taken to extract files is very slow.
SHOW ALL SOLUTIONS
Option 1
Try a different «Extraction Mode». See: Step 1 ❯ Advanced Mode ❯ Options ❯ «Extraction Mode». If your system supports a different extraction mode then try the other options.
If the issue persists then try «Option 2» directly below.
Option 2
Manually extracting the archive before attempting an install will solve any slow or problematic extraction issues. For a full overview of this process see the link below:
- How to do a «Manual Extraction» or run installer without zip enabled?
Issue C
During the login tests you receive any of the following messages:
Error Messages
— Class ‘Memcached’ not found
— Memcached is not installed
SHOW ALL SOLUTIONS
Option 1
Try removing the files «object-cache.php» in the wp-content directory on the newly installed machine.
How to keep Duplicator settings when migrating to a different location?
Issue A
When migrating a site to a new location both the storage and schedules are lost.
Solution
- Browse to the installer
- Switch the installer to «Advanced» mode (Upper right hand corner of step 1)
- Proceed to step 3 of the installer
- On step 3 go to Options ❯ Scan Options and uncheck Cleanup/Remove schedules and storage endpoints ❯ Continue with the install
After the install your original data will be in place. It is highly recommended you change your storage paths since having more than one WordPress
site store to the exact same location will cause interference and you’ll end up having machines purging each others packages. For instance if you have 2 machines set to store
daily to Dropbox with a Max Packages of 10 you’ll end up only having 5 packages from each machine in that location since the plugins on each box will purge when they see a total of 10.
Troubleshooting
Log Files & System Access
Package Data
How do I read the package build log?
The package build log shows every step of the package creation process. Follow these steps to see a package log file:
Options 1: Existing Package
-
Duplicator Lite: From «Packages All» screen click the «Details Button»
Duplicator Pro: From «Packages All» screen click «Expander Button» then click «View Details» button. -
From the Package Details screen in the General section under Files area click the «Build Log» link
- Copy all of the contents of this log and save it to a .txt file
- ATTACH the package build log file to your ticket
- If your log file is accessible via the internet you can use the [ Share File Links] button and copy just the URL.
Options 2: No Packages
-
Duplicator Lite: From Tools ❯ General Tab ❯ Logs
Duplicator Pro: From Tools ❯ General Tab ❯ Duplicator Logs - Copy the text area data to a build-log.txt file and ATTACH to your ticket
Help Tickets: Please DO NOT post any log data on public support forums such as WordPress.org unless you remove/mask out all meta-data that is secure
as it contains sensitive data. If you are not sure of what data to mask out then do not post it; just use the private secure help ticket system.
How do I read the package trace log?
The package trace log shows a detailed real-time overflow of Duplicator. Follow these steps to get a package trace log file.
Duplicator Lite
- Upgrade to the latest version of Duplicator
- Go to Duplicator ❯ Settings ❯ Debug ❯ Set Trace Log to «Enabled»
- Re-run the build or the process having issues and wait for it to error
- Immediately go back to Duplicator ❯ Settings ❯ Debug ❯ & click «Download Trace Log» button
- Save the .zip file to your local machine and turn off tracing
- ATTACH the .zip file to your help ticket
Duplicator Pro
- Upgrade to the latest version of Duplicator Pro
- Go to Duplicator Pro ❯ Settings ❯ Set Trace Log to «On»
- Re-run the build and wait for it to fail
- Immediately click «Download Log» button in the lower right hand corner
- Save the .zip file to your local machine and turn off tracing
- ATTACH the .zip file to your help ticket
How do I share system access for package build issues?
For «Package Build» issues follow these instructions:
1. «Copy to Clipboard» the data in the green box below.
2. Paste copied data from clipboard into the help ticket and update values in green
Copy to Clipboard
=========== SENSITIVE INFORMATION START ===========
WORDPRESS ADMIN (NETWORK ADMIN FOR MULTISITE)
url: http://full-url-to-yoursite/wp-admin
user: [temporary wp-admin account]
pass: [temporary wp-admin password]
FTP ACCESS* -or- Your Hosting Control Panel
url: domain-or-ip-address.com
user: [temporary ftp/control panel account account]
pass: [temporary ftp/control panel account password]
=========== SENSITIVE INFORMATION END ===========
* Please make sure FTP account has visibility of and write access to WordPress directory.
We recommend setting up a temporary account if possible. FTP is preferred over control panel account (cpanel)
VERY IMPORTANT! Please read all instructions to help diagnose your issue quickly.
Copy and paste the text from the box below into your help ticket using the
exact format
.
Test Logins:
Please test ALL usernames and passwords and make sure you can login to the specific system yourself. This will help avoid having to resending the data.
Accounts: Create temporary admin level WordPress account and control panel account (cPanel) or FTP accounts. If you can’t create a temporary account then temporarily change the password while we diagnose your system. You can easily change your password back once we are complete. Do not send your current password!
Recommended: If you prefer to not create or modify your WordPress users then install the plugin Temporary Login Without Password» and replace the text below the section «WORDPRESS ADMIN (NETWORK ADMIN FOR MULTISITE)» with just the URL generated by the plugin. Be sure the Role of the temporary login is «Administrator».
How do I share my package file?
When support needs to validate a package file please choose
only one
of these options:
-
Share Button: Goto Packages ❯ Details ❯ «Share» Button ❯ «Select & Copy».
then paste links into your ticket. Note: Personal computers (localhost) or sites that are not internet accessible will not work. -
Wetransfer: This free service allows secure file sharing from any browser.
- Browse to wetransfer.com
- Drop your package.zip/daf file to the screen
- Click «Get a Link» button & wait for upload
- Click the «Copy Link» button and paste it into your help ticket
-
Other Cloud Service: Use Dropbox, Google Drive or other services by following these steps:
- Upload the archive.zip to a shareable location on your cloud service.
- Copy the shared link provided by your service into the ticket
- After we have responded to ticket please remove your files
In order to avoid any delay with your ticket please be sure you are also able to download from the link provided when using the «Cloud Service» option.
Installer Data
How do I read the installer log?
Get Installer Log File
Steps to create the installer log file:
-
Run the installer.php file as far as possible until you run into an issue.
When running an Import Install just follow the wizard screens until you run into an issue. - Click on the installer-log.txt link in the upper right corner of the install wizard to open the install log screen.
-
ATTACH the dup-installer-log__[hash].txt log file to your ticket
Note: If there is no dup-installer-log__[hash].txt please attach the dup-installer-bootlog__[hash].txt file
Click the download link in the installer to download the installer file

Installer Log Locations:
Before Cleaned Runs:
- Classic Installer: http(s)://yoursite/dup-installer/dup-installer-log__[hash].txt
- Import Installer: http(s)://yoursite/wp-content/backups-dup-pro/imports/dup-installer-[hash]/dup-installer-log__[hash].txt
After Cleanup Runs:
Note: Cleanup runs after an install is completed and the user logs into the WordPress Admin
-
Duplicator Pro: /your_site/wordpress_root/wp-content/backups-dup-pro/installer/
Note: Alternatively the log could be at the new storage path you setup on your web-server . - Duplicator Lite: The path will be in only one of the following:
- Content Path: ‘/public_html/wp-content/backups-dup-lite/installer/’
- Legacy Path: ‘/public_html/wp-snapshots/installer/’ folder (from your WP root)
Help Tickets: Please DO NOT post any log data on public support forums such as WordPress.org unless you remove/mask out all meta-data that is secure as it contains sensitive data.
If you are not sure of what data to mask out then do not post it; just use the private secure help ticket system. All Pro users will get first round priority support. If you’re a free user,
support questions will be answered upto availability.
How do I share system access for (classic) installation issues?
For problems with «Installing» a package follow these instructions:
1. «Copy to Clipboard» the data in the green box below
2. Paste copied data from clipboard into the help ticket and update values in green
Copy to Clipboard
=========== SENSITIVE INFORMATION START ===========
WORDPRESS ADMIN:
This is where package was created. This section is OPTIONAL.
url: https://my_url/wp-admin
user: [temporary_wpadmin_account]
pass: [temporary_wpadmin_password]
INSTALLER INFORMATION:
SETTINGS:
url: https://my_url/path_to_installer.php
path: [/public_html/path_to_my_site/installer.php]
FTP SERVER -or- Your Hosting Control Panel:
(Where installer.php is located)
url: [domain-or-ip-address.com]
user: [temporary_ftp_or_cpanel_user]
pass: [temporary_ftp_or_cpanel_password]
NEW DATABASE SETTINGS:
(values used in installer.php setup)
host: [localhost_or_hosts_requirements]
database: [database_name]
user: [database_user]
pass: [database_password]
validate: Yes I followed the <Install Preparations> below
=========== SENSITIVE INFORMATION END ===========
VERY IMPORTANT! Please read all instructions to diagnose your issue quickly.
Copy and paste the text from the box above into your help ticket using the
exact format
.
Accounts: Create a temporary account or change the password while we diagnose your system. Do not send current password! Please test ALL usernames and passwords to
help avoid having to resending the data.
Recommended: To skip WordPress user setup, install the plugin
Temporary Login Without Password and replace the text above
«WORDPRESS ADMIN (NETWORK ADMIN FOR MULTISITE)» with the URL generated by the plugin. Be sure the Role of the temporary login is «Administrator».
<Install Preparations>
Please make sure these items are
completed before sending
your information
-
The installer.php and package.zip file are in a web directory that can be browsed to via «http»;
If you have other files in the directory then the extraction process WILL overwrite those files/folders. - Be sure you can connect to the database, via the ‘Test Connection’ button, with the credentials you sent.
- I have tested all usernames/password and can login via FTP/Control Panel with the credentials above.
Caution: The database settings provided will be use to populate the database. If this database already contains important information
then it WILL be overwritten with the new package data. Double check the credentials you send us as we will not be responsible for lost data.
We strongly recommend you have a backup of all databases and important files ahead of time.
How do I share system access for import installation issues?
For problems with «Importing» a package follow these instructions:
1. «Copy to Clipboard» the data in the green box below
2. Paste copied data from clipboard into the help ticket and update values in green
Copy to Clipboard
=========== SENSITIVE INFORMATION START ===========
SOURCE: Import Archive File
URL: https://full_url_to_daf_or_zip_archive_file_used_for_importing
				To get the URL follow these steps:

				1. Login to your SOURCE WordPress Admin where the archive.zip/daf file was created.

				2. Goto ❯ Duplicator ❯ Package Row ❯ Details ❯ General ❯ Share File Links ❯ Copy/Paste Archive URL

				-OR-

				Supply a link to the archive.zip/daf file to use for IMPORT.

				This could be a link from Google Drive, Dropbox, etc.
DESTINATION: WordPress Admin
URL: https://yoursite/wp-admin
USER: [wp_admin_user]
PASS: [wp_admin_password]
This is where you want the package installed - THIS SITE WILL BE OVERWRITTEN!
DESTINATION: FTP Server -or- Hosting Control Panel
URL: domain-or-ip-address.com
USER: [temporary_ftp_or_cpanel_user]
PASS: [temporary_ftp_or_cpanel_password]
The FTP server where the import will run. This is optional, but recommended to recover site in the event of a critical failure.
=========== SENSITIVE INFORMATION END ===========
VERY IMPORTANT! Please read all instructions to diagnose your issue quickly.
Copy and paste the text from the box above into your help ticket using the
exact format
.
Accounts: Create a temporary account or change the password while we diagnose your system. Do not send current password! Please test ALL usernames and passwords to
help avoid having to resending the data.
Recommended: To skip WordPress user setup, install the plugin
Temporary Login Without Password and replace the text above
«WORDPRESS ADMIN (NETWORK ADMIN FOR MULTISITE)» with the URL generated by the plugin. Be sure the Role of the temporary login is «Administrator».
<Import Install Preparations>
Please make sure these items are
completed before sending
your information
- I have tested all usernames/password and can login via FTP/Control Panel with the credentials above.
- I agree that I have the proper backups in place in the event issues arise with this install process.
Caution: Be advised that some database tables and files can be overwritten. The following scenarios may apply.
| Import Type | Data Status |
|---|---|
| Single Site Overwrite | All Tables/Files Replaced |
| Full Multisite Overwrite | All Tables/Files Replaced |
| Add A Multisite-Subsite | New Tables/Files Added |
| Replace A Multisite-Subsite | Subsite Tables/Files Replaced |
General Issues
How to read & fix various HTTP status codes?
HTTP Codes
HTTP Error Status Code
What is the meaning of the given HTTP error response code?
SHOW DETAILS
When running different functionalities in the plugin or in the installer, a request could fail and you could get a status code in the (ajax) error message.
HTTP response status codes indicate whether a specific HTTP request has been successfully completed. Responses are grouped in five classes.
Click here to load HTTP error codes
Page will reload…
Issue A
500 Codes
How to handle «Internal Server 500» messages?
SHOW ALL SOLUTIONS
Solution 1
500 errors are generic in nature and can be difficult to isolate. These errors can be related to file permissions, ownership rights, firewall/proxy configuration
constraints or a server that is not configured correctly. Below is a list of starting points to isolate the issue:
ERROR LOGS:
In many cases error logs are critical with 500 errors. The best place to start is by checking to see if there are any clues in the error logs.
-
WordPress Error Log: Occasionally there are incompatibilities with the new web server and the site itself (PHP version changes for instance).
To track down the problem capture an WordPress error log while you refresh the page causing the error.
See this article for how to capture the WordPress error log. - cPanel Error Log: If your host is running cPanel, click on the «Errors» icon to review the latest errors experienced on the server.
-
Web Server Logs: These include the PHP error log and your web server error log such as Apache or Nginx. To find these files consult your
hosts documentation. To find the latest errors match the correct time stamp in the error log with the time for which you were attempting to
use the Duplicator. Sometimes error log messages can be vague and a quick Google search for the actual error message many times will lead
to a quick resolution, especially if you include your hosting providers name.
WHERE DO YOU SEE THE 500 ERROR?:
A 500 error can be experienced either during the package build process, during the install process or post-install. Below are some helpful tips depending on where you experience
a 500 error.
-
During Package Build:
-
Disable Plugins: In some cases certain plugins (especially security and caching) will prevent certain actions from happening.
If you have a security or caching plugin installed its recommended to temporarily disable it to make sure its not conflicting with anything. - Create Filter: Sometimes creating a root directory filter will allow the package to skip any files or directories that are problematic
to how PHP is able to process and read them. This test step can help you isolate which directory (if any) might be triggering a 500 error. -
open_basedir: The php.ini setting can cause all kinds of issues if not properly configured. See question:
What is PHP Open Base Dir or «open_basedir restriction in effect»?
-
Disable Plugins: In some cases certain plugins (especially security and caching) will prevent certain actions from happening.
-
During Install:
-
Disable Plugins: If the 500 error is present on the installer side then its recommend to create your package with
all cache and security plugins disabled and add all cache paths to the directory filters list.
Note: The directories filter has a quick add link for cached WordPress data. -
If you receive a 500 error during the installation process see the FAQ item below:
How to resolve 403/500/timeout issues on step 3?
-
Disable Plugins: If the 500 error is present on the installer side then its recommend to create your package with
-
Post-Install:
-
If you experience a 500 error or blank screen when loading a site after installation, please review one of the logs mentioned in the «ERROR LOGS» section above.
A good hosting provider can usually better help pin-point or isolate what is causing the issue because they usually have elevated access to logs and monitors
that general users can not view. In many cases these issues will need to be worked-out with your hosting provider. Make sure they are helping you to
pin-point the issue. If you’re on a budget host you may have to try several different techs.
If one technician can’t help you then ask to speak to another, there can be a wide range of skill level between each technicians and their willingness to
help you out. We will try our best to help you resolve the issue, however 500 errors tend to be on the web server and normally are not issues we
can solve through adding code to the plugin.
Also See:
How to resolve 403/500/timeout issues on step 3?
How to Fix the 500 Internal Server Error on Your WordPress Website
Recommended hosting providers for Duplicator?
How to manage server resources (cpu/memory/disk)?
Issue A
PHP Memory
How to fix PHP «Allowed Memory Exhausted» error message?
SHOW ALL SOLUTIONS
Increase Memory
Some hosting providers limit PHPs ability to use additional memory or cap the limit very small. This issue tends to be more common on
low-end budget hosts. The options below can help you increase PHP memory.
Common Error Messages
— Fatal error: Out of memory (allocated 301989888) (tried to allocate 921600 bytes) in /somepath/ on line 100
Option 1
1. If the memory error occurs when creating a package then edit your wp-config.php file and add this:
define('WP_MEMORY_LIMIT', '500M');
2. Edit your .htaccess file in your WordPress root
			<IfModule mod_php5.c>


			php_value memory_limit 500M

			</IfModule>
3. Edit the php.ini and set:
memory_limit = 500MB
Bitnami users click here
For Bitnami users follow these steps:
- Open the httpd-app.conf file in the apps/wordpress/conf folder
- Change the value of «php value memory_limit’
- Restart Apache web server by going to the Bitnami App > Manage Servers tab.
Option 3
Contact your host with the memory error and have them increase PHP memory for you.
Validating Memory
After updating any of the options above be sure to make check that the setting are updated. You can do this by going to: Duplicator/Pro ❯
Tools ❯ General ❯ Server Settings ❯ PHP Section ❯ «Memory Limit» and make sure the value matches the value in one of the above options.
On some system the web server will have to be restarted.
Its recommend to set the value 50% above the memory setting before any updates were made. For example if your memory setting was at 250MB before the memory error
then the new settings would be 375-400MB. If that doesn’t work try 100% of the allocated warning which would be 500MB.
Package Builds
When building a package try to use the following settings if available on your host:
- Duplicator: Settings ❯ Packages ❯ SQL Script ❯ Mysqldump
-
Duplicator Pro:
- Settings ❯ Packages-Basic ❯ SQL Script ❯ Mysqldump
-
Settings ❯ Packages-Basic ❯ Archive Engine ❯ Enable «DupArchive» or «ShellZip»
These engine options consume much less memory than ZipArchive -
Settings ❯ Packages-Basic ❯ Server Throttle ❯
This prevent resource complaints on budget hosts. The higher the value the slower the backup
Running Installer
If running into memory issues on the installer, Pro users you can also use the ‘Manual SQL Execution’
option by following these steps:
-
Have your host or server administrator run the database.sql file for you. In some cases you may be able to use phpmyAdmin if the memory
options to run it are different than how your web server is setup. - After the database has been installed go to step 1 of the installer and choose ‘Manual SQL Execution’ from the Action drop-down.
- Continue to finish out the installer as you normally would.
Also see:
What can I try for timeout issues?
What can I do for issues with migrating a large site?
Recommended hosting providers for Duplicator?
Issue B
Disk Quota
How to resolve and discover disk quota issues?
SHOW ALL SOLUTIONS
When creating or installing a package a notice about disk space issues is logged.
Common Error Messages
— MSG:ZipArchive::close(): Write error: No space left on device
Overview
If you’re not sure about your Disk Quota contact your host. Some hosts will advertise that you get «unlimited space», however the truth is a quota is
placed on every account according the the Terms and Conditions of the account. Many hosting control panels or cPanel accounts give you an unlimited number of domains you can setup.
With each domain they create a new directory and hosting control panels or cPanel silo for that domain which usually has a quota on how much space you can allocate to that directory
see the link above.
Most web hosts control panels will have a progress bar on the main dashboard that shows how much space you have for the specified domain. If you’re not using a cPanel setup
ask your host where you can find out your disk quota. So in short try to get a real answer from your host and if they still give you a canned response then try to upload
a file which should be 5 times the size of your ‘Pre-Scanned’ site size. So if the pre-scan shows 50MB then try to upload a file that 250MB add see if it allows the file to upload.
If it does not then you definitely have a disk quota issue.
How to locate space allocation
Check your disk quota on some of these popular systems
[GoDaddy]
[BlueHost]
[cPanel Systems]
Solution
How to free up-space
- Remove unused files and folders
- Cleanup older backup files from plugins or system processes
- Cleanup your databases with phpmyadmin
- Cleanup your databases with a plugin
Issue C
Throttle Server
How to throttle server resources on budget hosts?
SHOW ALL SOLUTIONS
If you are running into build issues or notices about hight resources here are some tips you can consider.
Adjust Settings
Pro
- Go to: Duplicator Pro ❯ Settings ❯ Packages
- Check «Client-side Kickoff»
- Set Server throttling to «low» or «medium»
Adjust Backups
- Create file filters to keep your overall package size smaller
- For scheduled backups consider only backing up the database daily and the full site on a weekly basis.
If you have control over the hosting package and you’re using the lowest/cheapest package consider upgrading to a more
performant level or switching to a better host overall. While its rare and very few hosts will mention resource issues, some lower end ones will keep track and
notify users of issues.
Also see:
What can I do for issues with migrating a large site?
Recommended hosting providers for Duplicator?
How to fix unicode and character encoding issues?
Issue A
Characters/Symbols
How can I fix strange character, unicode symbols, emoji icons?
SHOW ALL SOLUTIONS
Strange characters such as » � » or «????» are a sign of encoding issues when you move from one server to another. If the database version changes
across servers then scripts may not work as expected. By default WordPress sets your character encoding to UTF-8 or UTF8MB4.
Adjusting the database charset and collation can help clear up these issues on some servers. Here are some items you can try:
Solution 1
wpconfig.php:
Online Overview See: DB_CHARSET,
DB_COLLATE
			define("DB_CHARSET", "utf8");

			define("DB_COLLATE", "");
			define("DB_CHARSET","");

			define("DB_COLLATE","");

			//define("DB_CHARSET", "some_value");

			//define("DB_COLLATE", "some_value");
Try various options UTF8MB4 to UTF8
define("DB_CHARSET", "utf8mb4");
define("DB_CHARSET", "utf8");
Solution 2
Installer
- On step 2 of installer under options
- Set charset: utf8mb4
- Set collation: utf8mb4_unicode_ci
Solution 3
General Issues
Update Meta Tag:
This is usually something you can do in your header.php file.The server is not sending the charset in the Content-Type header and the HTML meta fallback is broken:
<meta http-equiv=»Content-Type» content=»text/html; charset=UTF-8?>
Note the invalid curly quotes instead of straight quotes. That means there’s no valid declaration for what encoding the page is in and hence the browser takes a guess.
Some browsers guess wrong.
Fix Database: Encoding issues can get complex and if the above solutions don’t work then you may need to perform
a deeper dive into fixing the issue.
Consider an Upgrade:
In some cases we have seen that updating to PHP 7+ along with a the latest MySQL server can solve some of these character encoding issues.
After updating to these new and improved platforms be sure to re-build a new package.
Issue B
Unicode
How can I fix international characters issues?
SHOW ALL SOLUTIONS
Solution 1
Support for international character can vary across systems. The process of converting/retaining a character set when moving across different operating
systems, web servers & database servers has many complexities, especially when the various versions are different across the build location and install
location. If you run into character conversion/encoding issues below is a list of things you can try:
DATABASE ISSUES
- Check wp-config.php
Look for the DB_CHARSET and
DB_COLLATE constants, these values can affect how
WordPress handles your character encoding. If DB_COLLATE and DB_CHARSET do not exist in your wp-config.php file, try adding/editing either definition
to your wp-config.php file. Please be sure to read the following article to better understand
Converting Database Character Sets. - Advanced Options
In step one of the installer under advanced options there are two character values that you can try to enable which are
«MySQL Charset» and «MySQL Collation» indirectly these values work with
mysqli_set_charset. These values may not work on all systems. - Database.sql File
Open the database.sql file in Notepad++ and selected «Encode in UTF-8»
from the Encoding menu, without changing the contents at all. In some situations this can be more important than changing the
DEFAULT CHARACTERSET, as it determines how the file is read by the operating system.
FILE SYSTEM
On some operating systems and version of PHP there are known issues with working with international characters. This is a limitation with the underlying PHP ZipArchive and json_encode logic used in both Lite and Pro.
-
Filter Files
A common work-a-round at this point is to filter the international files and then manually move them later. The scanner process will help you to spot
these files. -
Shell Zip
In Duplicator Pro there is a new process option called shell_exec which is
supported by most hosts. This process can on most systems better handle international characters in file names. Please use this option in Pro if you’re running into file/directory names with unicode characters. -
PHP 7+
PHP 7+ has been improved to better handle unicode issues. If you can migrate or get your host to upgrade to the improved/faster performing version of
PHP 7 this can solve the issue for internal characters issues at many levels.
Please note if you do run into an issue please feel free to submit a ticket and we will do our best to help you work through any know fixes.
However if the process involves upgrading your database or performing data conversion migration scripts then we recommend you work with a
qualified developer to help research and diagnose your particular issue.
Duplicator only moves, it does not have the ability to repair and convert data when moving to a different server setup that does not support
the environment it was created on. Please checkout the Duplicator Partner Page for
a list of resources that specialize in data conversion.
How to work with DAF files and the DupArchive extraction tool?
Problem
You need to extract the archive.daf file, how do you go about doing this?
Solution 1
Use installer.php: Just use the installer.php like you normally would with the archive.zip file. The process is exactly the same as a .zip file except the installer
uses a custom engine to extract the archive.
Solution 2
Windows/Mac/Linux Client Tool: Should there ever be a case where the installer.php is having an issue with extracting a ‘.daf’ then you can use the DupArchive extractor tool instead.
Below are the steps for running the tool.
OPTION 1
Extract all files and perform a manual extract install
- Download the DupArchive Extractor program [Windows] [Mac] [Linux].
- Put .daf file in same directory as DupArchive Extractor.
- Double click on the DupArchiveExtract executable to proceed with the extract.
OPTION 2
Extract just the backup installer and perform a standard install
- Perform the same steps as option 1 above to download the DupArchive Extractor but execute «DupArchiveExtract -i» from the commandline instead.
- Grab the installer file just extracted and use it to exact the archive as in Solution 1 above.
System Issues
How to fix call to undefined function errors?
Problem
If during any point when using the Duplicator plugin you receive a message that says «Uncaught Error: Call to undefined function», then your
host is running an uncommon version of PHP. To fix this issue see the solutions below.
Common Error Messages
— Uncaught Error: Call to undefined function
— ERR_EMPTY_RESPONSE
Solution 1
Contact Host: The vast majority of these errors can easily be fixed by forwarding your host the message in question. For example if your log shows a message such as:
INSTALLER ERROR:
[PHP ERR][FATAL] MSG:Uncaught Error: Call to undefined function token_get_all() in /var/www/localhost/htdocs/wordpress/duplicator/dup-installer/lib/config/class.wp.config.tranformer.php:387
Then simply send the message to your host or server admin and they can typically enable the undefined function call.
Solution 2
Plugin/Theme Updates: When moving to a new hosting environment its common that the host has custom configuration it uses to protect its setup, that can be difficult
to isolate. If you get an «undefined function» message try deactivating all your plugins and then trying the action that caused issue again. If the problem persists then try switching
themes temporarily and see if that helps.
Solution 3
Manual Update: If you choose to fix the issue your-self then here are a few items you will want to check:
- Check to make sure you are using an up to day version of PHP. WordPress recommends using PHP 7+ or better.
- Check your php.ini file for disable_functions = settings.
Related 1
Post/Page updates: Other related issues that may present a «undefined function» error is when a host tries to limit the line length. Some users have had success when adding the following
to their .htaccess file.
		# BEGIN Line too long fix

		<IfModule mod_substitute.c>

		SubstituteMaxLineLength 10M

		</IfModule>

		# END Line too long fix
Also see:
- Dev Answers: https://devanswers.co/php-fatal-error-uncaught-error-call-undefined-function-curl_init/
- StackOverlow: https://stackoverflow.com/questions/1096916/imap-enabled-but-functions-undefined
How to handle security/malware threat detection?
Problem A
A notice from a virus scanner indicates something in the plugin is a possible threat. How can you handle this?
SHOW ALL SOLUTIONS
Solution 1
VirusTotal Check: If you do receive a virus scan that reports as true be sure to validate the integrity against other scanners. In the vast majority of most cases we are quite
confident there is nothing to worry about for a few reasons:
-
For example if you receive a threat from a virus scan be sure to check the virustotal site.
Check the total virus scan counts. If the count is say 50 virus scanners on all files and Duplicator passed 49 of them with nothing detected and only 1 or 2
of them showing a «possible» threat, then the chances are very low there is a possible corruption or hack of the plugin on your site.
Note: You can update the full plugin zip file or just the file in question to the virus-total portal. -
Virus signatures can be tricky and it is not uncommon for certain byte or code patterns to set them off. The virus-total site is also aware of false
positives and addresses these types of issues on their website. - If the file does indeed show a threat across more than 2+ zones feel free to contact us with the file in question and we can do a compare against the base to determine if
the file(s) have been compromised on your system. Our recommendation in all cases will be to remove the plugin and install a fresh clean copy. If the problem persists
then there is a wider hole in your site and you will probably need a security analysis done on your site by a company that deals with these issues, like WordFence and the like.
Solution 2
Contact Provider: A warning by a Malware scanner may not provide you with the details needed to pin-point a possible threat. The scanner should report why it thinks the
file is a risk and what it thinks the issue might be. Be sure your scanner does more than just say XYZ file is a threat. It needs to give details and say
exactly what line(s) of code are an issue and why. For example «Heuristic logic has detected something unsafe…» is entirely to general to determine if a file
is a threat.
The base install of the Duplicator is known to be safe and continually scanned by third party security companies. You can be assured that the original install of
the plugin is safe and if any items are reported that a patch will be applied promptly. However because WordPress systems can and do become compromised it is
your responsibly to evaluate any type of possible compromise to your system.
In the case you want more information about the scan result we recommend you contact the virus scan company that reported the result and ask them for a full
detail of the virus/malware threat. The Duplicator has been on the WordPress forums years with over 25+ million downloads. We work very closely with the WordPress team and other
third party companies to make sure the plugin stays safe for the community.
False Flags Example:
In the world of malware detection it is common for companies to release scanners that do in fact report a false positive. This has happened on several occasions
with Duplicator and in some cases the companies are quick to respond with an update to their software and it other cases they are not. Below is an example
of a company who was very quick to respond to let users know it was a false flag.
From the wordpress.org forums
…
My name is Jelmer Verkleij, CTO at Patchman. This issue was brought to our attention about 30 minutes ago and after some quick research we noted that
these detections are the result of an error in our definition development process. All detections of the installer/build/assets/inc.libs.js.php file
in the duplicator plugin folder seem to be false positives at this point. My sincere apologies for the confusion — this should of course not have
happened and naturally we have immediately started looking into how and why this went wrong, and what needs to be done to prevent this from happening
again in the future.In the meantime, we have deployed a definition update to all our Patchman customers that rolls back any automated quarantine actions that took
place for these files, and retracts the associated detections. This should automatically restore all websites to their original state without problems.Once again, I sincerely apologize for this inconvenience, and I would like to reiterate that we are taking this matter very seriously. If you have any
further questions or comments you have regarding this incident, please don’t hesitate to let me know here or by sending an e-mail to support@patchman.co.
I will make sure to address each response as soon as possible.Best regards,
Jelmer Verkleij
Patchman B.V.
Problem B
WordFence Notices
WordFence can trigger false positive results. If the WordFence scanner is in High sensitivity mode then users might might see warnings about the installer.
SHOW ALL SOLUTIONS
Solution 1
To mitigate these results users can do the following:
- Disable High sensitivity scanning and return to recommended settings.
- If you don’t want to disable High sensitivity scans, you can click ignore on the individual results and they won’t be bothered by them again (until one of the file hashes changes at least)
- Under their scanner’s Advanced settings, they can exclude any specific filepath or a wildcard path from being scanned (See https://www.wordfence.com/help/scan/options/#exclude-files for some detail).
The Duplicator currently includes several large minimized JavaScript libraries that have been detected as a false
positives on some system scanners. In most cases these notices can be ignored, however if other plugins or portions of your site also show positive readings
for Malware then you should probe deeper into the issue.
How to handle popular plugin conflicts?
Overview
Plugins can cause issues with processes that access file system or modify web server configurations. Below is a list of common issues with other popular WordPress
plugins and work-arounds. Many companies work together to solve cross plugin issues. These issues can be easily resolved by having the most recent version of the plugin and WordPress.
Common Fixes
Solution 1
Update the plugin, Duplicator, theme and WordPress to the latest versions. Also deactivate and reactivate the plugin, Duplicator and the theme.
Solution 2
If the plugin/theme is a commercial product and requires a valid license key contact the plugin/theme authors to see if it can work on other domains. It might be as easy as extending the
license to the new site you are migrating to.
Elementor
Problem
After an install you notice that your Elementor Pages/Posts are not working/looking correct.
Solution 1
If corruption is observed go to Elementor ❯ Tools ❯ General and click «Regenerate Files» for the «Regenerate CSS» option
Ninja Firewall
Problem
You are using NinjaFirewall and running into issues durning the install.
Solution 1
Consider the steps in this wordpress.org thread.
Oxygen Builder
Problem
The Oxygen Builder formatting on some pages is not working properly or is lost.
Solution 1
After migrating a site you have to re-sign the oxygen shortcodes. To do this follow these steps:
- Goto: Oxygen > Settings > Security
- Check «Check Oxygen’s shortcodes for a valid signature before executing» option and save
- Click on the link «Sign All Shortcodes», check and Save
- Next check the checkbox «I have made a complete backup of my site» & click button to save shortcodes.
WordFence
Problem
An error shows as Fatal error: Unknown: Failed opening required ‘/some_path/wordfence-waf.php’ (include_path=’… in Unknown …
Solution 1
Check your .htaccess and remove the following or anything with # Wordfence WAF:
php_value auto_prepend_file "/path_to_file/wordfence-waf.php"
Check your php.ini or user.ini and remove the following:
auto_prepend_file = '/home/username/website.com/wordfence-waf.php
Solution 2
Contact WordFence or Online Resources
- Check the WordFence Documentation for this issue.
- Visit the WordFence Docs here
- Ask the WordFence Team
- WordFence/Duplicator and MAMP
Also See:
How to resolve 403/500/timeout issues on step 3?
How to handle server timeout issues?
Overview
System overview for how to deal with host build interrupt issues?
SHOW ALL SOLUTIONS
Timeout issues are prone on shared budget hosts that limit the time a PHP/Web-Server/Database process can run. Timeouts are spotted by Duplicator log files (package or installer)
that do not finish. Completed logs have text with ‘DONE PROCESSING’ or ‘COMPLETE’. Incomplete logs indicate the host has restrictions on process run-times. Some hosts allow for increases
in process runtime beyond the default. For a list of approved hosting providers see the Duplicator hosting
resources page.
SETUP OVERVIEW
The build process for Duplicator Lite is a single threaded design that runs as a continuous process until the site is archived. While the Lite version can build packages upto 4GB it will
depend on the host. Duplicator Lite typically does best with sites under 500MB on most budget hosts. If you’re running into timeout or build issues and need help we suggest the following:
-
Server Upgrade: Budget host may run into constraints with larger complex sites. Upgrading to a
managed VPS/dedicated server can help in most scenarios.
These systems allow for better control and come with excellent support from the hosting company. -
Duplicator Pro: The Pro Version uses a multi-threaded architecture to better handle larger data sets.
It also comes with dozens of other great features that help to enhance your full WordPress backup/migration strategies. - Adjust Settings: Directly below are several strategy options for your current host and with-in the plugin.
Strategy A
Plugin Settings
How to resolve timeout issues from within the plugin?
SHOW ALL SOLUTIONS
Solution 1
Duplicator Lite Only
-
Try Again: Try more than once with the ‘Try Again’ button. The first pass on a build request is very slow as it has
to cache the IO scan. The second pass is much faster as on some servers the IO seek is cached. -
Archive Flush: On some web servers if the server doesn’t flush a response after a specific amount of time then the process will be killed
even if the timeout was increased. In the Settings menu check the ‘Archive Flush’ option. This will try and keep your connection open via a flush response.
Solution 2
Duplicator Lite & Pro
Duplicator Pro is designed to run on large sites. However on some budget hosts tweaks to the Duplicator Lite & Pro settings might be needed.
- Toggle SQL Mode: Consider trying a different database build process. First try «Mysqldump» then try «PHP Code». See Settings ❯ Packages Tab ❯ SQL Mode.
-
Enable Filters: Many times you can get a package to finish building simply by creating multiple directory filterS on a large data source such as your
wp-content/uploads folder which contains larger files such as images/movies/pdf etc. For details see the section below titled «MANUAL TIMEOUTS WORKAROUNDS». - Enable DupArchive:
A new format known as DupArchive has been Developed by Snap Creek to overcome problems experienced on large sites and restricted host environments. Using DupArchive
greatly diminishes the changes you will experience a timeout on package builds. When using DupArchive on Duplicator Lite there is a 500MB limit for the size of you package.To use new format set:
Duplicator Lite > Settings > Packages > Archive Engine = DupArchive
Duplicator Pro > Settings > Packages > Basic Settings > Archive Engine = DupArchive
Large Databases: If you have a large database consider optimizing
it or filtering out larger unused tables.
Strategy B
Web-server Configuration
How to resolve timeout issues with web server configuration updates?
SHOW ALL SOLUTIONS
SERVER WORKAROUNDS
All of the options below can help solve timeout issues on both Duplicator Lite and Pro. The settings will help with both package creation and package
installation. Timeouts can be controlled at three different layers so you will need to visit each one and work with your server administrator to validate them.
Solution 1
PHP TIMEOUTS:
The PHP processor will time your script and then kill the connection after a specific time (normally 30 seconds). This value can be changed if
your hosting provider allows it. The Duplicator will try to adjust this value if it has privileges to do so, if not then you will need
to
work with your host
to resolve the issue. We would love to help but this level of control is outside of our control.
The quickest way to resolve a possible PHP timeout on your server is to contact your hosting provider and see if they offer a way for the PHP
processes to run longer than the default timeout of 30 seconds. Many hosts offer a way to make this happen and you will need to consult
their documentation. On some hosts you can place the following inside a .htaccess file in your web sites root folder or inside the plugins/duplicator
folder.
php_value max_execution_time 0
0 means no limit
Because every hosting provider is different, you
must
contact your hosting provider to find out how to adjust this value properly on
their systems. If they do not provide you with a solution then in most cases you will not be able to fix timeout issues on that server.
In this case you may have to upgrade to a package on their system which gives you more processing power such as a VPS. Otherwise you can try
working with filters as described below, to get the overall size of your package lower.
Also note that if your hosting provider tells you that there is no PHP timeout limits set or they have adjusted it to a very high number,
yet you continue to experience timeout issues (your log file continues to still get cut off) then the hosting provider may have timeouts set
at the web server level. Please see the section Web Server below…
Solution 2
WEB SERVER TIMEOUTS:
The web server can also place a timer on your script and then kill the connection based on a specific time. This value can only be changed by your hosting provider or server administrator. Please contact your host to find out if this is true for their setup. Please do not email or submit a request for this issue as there is nothing we can do to fix the restriction.
Some web servers allow timeouts to be updated by the end user without the help of a server administrator.
The following
might work
on your Apache or Litespeed server.
The key for this is workaround is RewriteRule ^$ — [E=noabort:1]
EXAMPLE 1
# Example .htaccess file Inserted By Customer Control Panel
SetENV PHPRC /home/username/public_html
# BEGIN WordPress
<IfModule mod_rewrite.c>
   RewriteEngine On
   RewriteBase /
   RewriteRule ^$ - [E=noabort:1]
   ...
</IfModule>
# END WordPress
EXAMPLE 2 fcgi setup
<IfModule mod_fcgid.c>
   AddHandler fcgid-script .fcgi
   FcgidIOTimeout 900
   ProcessLifeTime 7200
   IPCConnectTimeout 180
   IPCCommTimeout 7200
</IfModule>
EXAMPLE 3 litespeed setup
<IfModule litespeed>
   RewriteRule .* - [E=noabort:1]
</IfModule>

OR

<IfModule Litespeed> RewriteEngine On
   RewriteRule .* - [E=noconntimeout:1]
   SetEnv noabort 1
</IfModule>
Solution 3
DATABASE TIMEOUTS
If you are trying to create a package and the package log suddenly stops on a table and you see something like:
…
02:55:06 done: wp_posts
02:55:06 start: wp_stats (1435897)
followed by no additional logging, then the SQL generation has failed.
There are few things you can try:
Database Workarounds
Option 1:
Install a plugin like wp-sweep and be sure to clean out all unused data
and run the repair and optimize settings. You can also run a repair and optimize
on the database, from a tool like phpmyadmin.
Option 2:
If your hosting provider supports ‘mysqldump’; then this option will improve the overall package creation time and installer time for the database.
Under the settings menu look for the ‘Database Build’ option and check the box that says ‘Use mysqldump’ this option works great for larger databases.
This option applies only to the build phase and not the installer phase.
Option 3:
Most tables that we see fail are logging and statistical data with records into the millions. We strongly recommend to use free tools like Google
Analytics vs. a stats plugin. Custom plugins tend to slow your site down with additional requests and don’t offer the same reporting capabilities
of tools like Analytics which has almost no performance impact on your site.
Option 4:
Temporarily backup the larger tables and exclude them from the build process (see step 1 when building a package). Then manually re-import the table(s) if the
data is needed, in many cases log table data doesn’t even need to be migrated and can be removed.
Option 5:
Work with your host to increase the timeout or script processing for Apache, PHP and MySQL. We highly recommend these
approved hosts which will allow your scripts to finish running in most cases.
Also be aware that you can also run out of disk space on your server, which can also show itself as a timeout issue. Be sure that you have plenty
of space to create your archive.zip file when creating a package.
Solution 4
CLOUD-FLARE
If Duplicator is having issues with Cloudflare active and kepts getting server timeouts. It could be related to the time out on Cloudflares
Railgun. See the feature here: https://support.cloudflare.com/hc/en-us/articles/200171926-Error-524-A-timeout-occurred.
Try turning off this feature temporarily to see if Duplicator works. Also consider these steps:
1. Log in to Cloudflare
2. On the Overview page, click «Advanced»
3. Click «Pause»
4. Run installer deployment
5. Turn Cloudflare back on
Strategy C
Manual Setups
How to work with manual time work-a-rounds?
SHOW ALL SOLUTIONS
Package Timeouts
If the log indicates that you made it past the database script process then you may experience timeouts with backing up all your files. Below are a few
items you try to if you run into issues with backing up all your files:
- Try to exclude large files such as movies, large images or other backup files (like .zips or .tar files) from the file filters section
-
Exclude your wp-content/uploads folder by adding it to the directory filters option. Then after the install is complete at the new location
you can manually copy/FTP those files back over. - Perform a Two-Part Install
Installer Step 1 Timeouts
- If possible try to rebuild a smaller package by excluding larger files/directories that can be moved over manually see «Package Timeouts» above.
-
On Step 1 under options try the «Manual Extraction» step. For a step by step of how to perform a Manual extraction see these steps:
Also see How to do a ‘Manual Extraction’ or run installer without Zip enabled?.
Installer Step 2 Timeouts
- If your database is too large for your servers configuration see the steps/options above for «Database Timeouts».
- Pro Users Only enable Options > Chunking > multi-threaded requests to chunk SQL file.
- Pro Only Users enable Setup > Action > Manual SQL Execution (advanced) option. This requires that you have manually imported the
database ahead of time. This can be done by your host or a tool like phpMyAdmin if it supports larger sites.
Also see:
What can I do for issues with migrating a large site?
How to run the installer in Database Only Mode?
Recommended hosting providers for Duplicator?
How to resolve SSL issues?
Issue A
SSL Checklist
How to resolve SSL issues checklist?
SHOW ALL SOLUTIONS
Solution 1
If your moving from https to http or vice versa and run into issues below is a check-list of possible work-a-rounds:
-
Check Plugins: If you have an SSL plugin installed that controls SSL links on your site, try to deactivate/reactivate or temporarily remove the
plugin to see if the issue persists. Plugins can be deactivated on step 3 of the installer under the options section. - WP-Config: Check the wp-config.php file for the FORCE_SSL_ADMIN constant and try to toggle it true/false.
- Codex: Check the codex on Administration Over SSL to see if your site complies with the
recommendations.
Solution 2
On some systems editing the apache ssl.config to include the following lines can resolve SSL issues. If you are not sure how to make these changes ask your hosting provider to help you.
			RequestHeader set X-Forwarded-Proto "https"

			RequestHeader set X-Forwarded-Port "443"
Permissions
How to fix file permissions issues?
General Tips
- Full Perms: Temporarily set your permissions to 777 on the path in question to see if this resolves the issue.
- Owner/Group: Check the owner/group (chown command) of the PHP process for the correct permissions.
-
Suhosin extension:
Check if the suhosin extension is enabled by checking the following areas:- WordPress Admin ❯ Duplicator ❯ Tools ❯ General ❯ Server Settings ❯ PHP ❯ Sushosin Extension
- When running the installer see the installer-log.txt file
If the extension is loaded contact your host or server admin and let them know you’re having permissions issues and you believe it might be related to the
suhosin extension. See if they can help you adjust the settings of the extension or turn it off. -
SELinux: If Security Enhanced Linux is running on your server it may be possible that it is preventing even a 777 set from working. If changing the
permission and owner still has no effect then contact your host or server admin about the issue. -
Help Videos:
How to change your file permissions in cPanel
How to change file and folder permissions using FileZilla
Root Folders
Some hosts prevent PHP from writing to the root folder of public_html directory. In this case you have a few options:
- Contact your host and see if this is a restriction for PHP to write to your web servers root and if they allow a work-a-round. Some hosts will provide you with a custom directive specific to their environments. Some will allow you to change owner (chown) on the root via ssh. Check with your host to be sure.
- If the root is off-limits then you will need to create sub-directory off of your root directory and place the installer and archive file in the sub-directory and run them from there.
Installer Tips
When the plugin archives a file from «System A» to «System B» it can retain the permissions such as «644» from «System A» to «System B». If you want
to change the permissions on «System B» at install time them follow these instructions:
Duplicator Pro
- Browse to the installer.php «Step 1 of 4: Extract Archive»
- Under «Advanced Options» find the sections «Permissions»
- Set the Directories/Files to the permission sequence such as «644» and check the checkbox
- Click «Run Deployment» this will recursively set the permissions for Directories and Files
- For individual directories/files login via FTP/SSH/cPanel and manually change the files.
Duplicator Lite
- Open an FTP client such as Filezilla
- On the folder where the installer.php is placed set all directories to «755»
- Then set the files to the permission sequence such as «644»
- Be sure to choose the recursive option
Note: If you still have issues temporarily try 777 on both files and directories, then be sure to change back. If 777 does not work then you
will need to change the owner (chown) of the directory where the installer files are and the installer and archive files as well.
Windows Permissions
- Open Windows Explorer and locate the root folder that WordPress is installed in.
- Right click this folder, select Properties and click the Security tab.
- Choose Edit then Add. The following users must be added and given FULL ACCESS permissions: IUSR & IIS_IUSRS.
- After completion change FULLACCESS back to standard configuration of IUSR & IIS_IUSRS for security
Permissions can be difficult to understand how a particular host or personal web server might need to be configured. The best way to alleviate
permission issues is to have a general grasp of how permissions work. Check out this article
for a full rundown on how permissions can be set up in WordPress and then consult your hosting company or personal web servers documentation.
Please contact your hosting provider for more details on this issue if you’re not familiar with the concepts.
There is no additional code that can be added or changed to get permission to work in your environment should you receive a permission error. The plugin uses standard PHP calls for accessing the file system. If the PHP process that runs under your web server is unable to access a file or folder it’s because PHP does not have enough privileges.
You will need to modify your permission setting to get the plugin to work. Because there are so many different possible configurations,
web-servers and operating systems you will need to consult the documentation of your hosting provider or your personal web server you’re using. One of the most helpful places to check is the forums for these particular services and software as permission issues is what they are used to dealing with.
Popular Host Docs:
[HostGator]
[GoDaddy]
[HostMonster]
[BlueHost]
Also see:
Permissions set to 777 and file still
not writeableHow to change file Permissions with FTP clients like Filezilla
How to fix database permission errors?
Problem
If using Duplicator during any phase you receive a message about database access issue then consider these solutions:
Common Error Messages
— SELECT command denied to user ‘some-user’@’localhost’ for table ‘user’
SHOW ALL SOLUTIONS
How to fix various permission related issues?
Issue A
WordPress FTP
How can I resolve WordPress asking for FTP credentials message?
SHOW ALL SOLUTIONS
Issue B
open_basedir
How to fix PHP Open Base Dir or «open_basedir restriction in effect»?
SHOW ALL SOLUTIONS
Solution 1
The php.ini setting open_basedir limits file access for PHP scripts to designated directories.
A limited number of hosting providers feel that without this setting your site is less secure, while this can easily be disputed it’s still a fact that some hosts will not disable it.
Below are two options that you can work with your hosting provider on to get around this security setup configuration:
-
Disable: Work with your host to see if they can disable or temporarily disable this option on your account, to see if its
conflicting with Duplicator. -
Configure: Work with your host to add all the ‘concerned folder path’ where open_basedir is restricting access this should include all files
and the root folder where your WordPress install is located; for example:
open_basedir = /public_html/mysite/
The package process may still work if this check fails, however because this setting tends to introduce other possible side effects it’s desired to have it disabled.
Also See:
How can I configure PHP open_basedir?
How can I relax PHP’s open_basedir restriction?
Issue C
Installer Password
How to recover the installer password if lost?
SHOW ALL SOLUTIONS
The following password types are available in Duplicator
- Installer password:
The archive is NOT encrypted. When the installer starts, it will prompt for a password to prevent anyone from running the installer. - Archive encryption:Pro
The archive IS encrypted with a password, and the installer will ask for a password when started. This option is the recommended maximum level of security.
Solution 1
Archive Encryption
Passwords are case-sensitive and if lost cannot be recovered with Archive encryption. Please keep passwords in a safe place!
If this password is lost then a new archive file will need to be created. Support cannot help recover a lost archive encrypted password.
Solution 2
Installer Password
-
When creating a package, users have the option to set a password on the installer. This password can be easily recovered by just going to Duplicator ❯ Packages ❯ click the
package details button ❯ Installer Section and look for ‘Password Protection’ label. -
In the event you no longer have the package details and you forgot your password below are the manual steps to override the installer password.
- Browse to installer file via a web browser. The password screen will show.
- On remote server ❯ Open FTP connection to location of installer file, for localhost open a file browser.
- Navigate to the following file: dup-installerclassesclass.password.php
- Edit the function CheckPassword and
							Replace: return $hash === $stored_hash;

							With: return true;
Need a little help? Check out our Partners at Codeable - On the installer password screen enter anything in the password field (e.g. ‘test’) and click submit.
- This should place you at step 1 of the installer ❯ Continue with installation
Multisite Network Pro
How does Duplicator handle Multisite support?
Duplicator Lite: Does not support Multisite.
Duplicator Pro: Includes the following Multisite duplication modes.
Multisite Basic
1. Full Network Duplication Since 2.0 | Requires «Duplicator Pro Personal» or above
This allows users to copy/move your entire Multisite installation, rather than backing up or moving individual subsites within the network. For example, if you had a 10 subsite
multisite setup, all 10 sites could be moved and restored as a new Multisite installation in one shot to a new location.
[User Guide]
Multisite Plus
2. Subsite ❯ Standalone Since 3.0 | Requires «Duplicator Pro Business or Gold»
This allows users to install an individual subsite within a Multisite network as a standalone site. For example, if you had a 10 subsite WordPress multisite, you can select just one of those
sites to restore to be a new standalone site. This process could optionally be repeated 9 more times on different sites to create a total of 10 individual websites from the single
Multisite install.
[User Guide]
3. Standalone ❯ Subsite Since 4.0.5 | Requires «Duplicator Pro Business or Gold»
This allows users to take a full standalone WordPress site and integrate it into a Multisite network. For example you may have dozens of WordPress
sites that you manage and you want to pull them all together into one Multisite network for easier management.
[User Guide]
4. Subsite ❯ Subsite [Different Network] Since 4.0.5 | Requires «Duplicator Pro Business or Gold»
This allows users to take a Multi-site subsite and add it into a different Multisite network as a subsite. For example you may have several subsites of a Multisite network
that you to move into a separate Multisite network but only want to move specific subsites.
[User Guide]
5. Subsite ❯ Subsite [Same Network] Since 4.0.5 | Requires «Duplicator Pro Business or Gold»
This allows users to take a Multi-site subsite and add it into a different Multisite network as a subsite. For example you may have several subsites of a Multisite network
that you to move into a separate Multisite network but only want to move specific subsites.
[User Guide]
Menu Setup: Upon install you’ll observe that the Duplicator Pro menu appears at the Network level rather than the Admin level as is the case when installing on a standalone site.
Subsite Installs:
Currently adding a subsite requires the install process to be run for each subsite. So if you currently have 20 subsites you want to move into another multisite network the
installer will need to be run 20 separate times. In future version we plan to have this process narrowed down to just one installer run.
Duplicator Pro currently supports the scenarios above for Multisite, however we are continually working to improve the product. For a list of upcoming features
and possible time-lines please visit the Duplicator Pro Roadmap which discusses additional Multisite features.
How to resolve general Multisite issues?
Duplicator Lite
Does Duplicator Lite support the migration of Multisite networks?
SHOW ALL SOLUTIONS
Solution 1
Duplicator Lite does
not offically provide support with Multisite issues
do to the complexities involved. Duplicator Lite is designed to be fast
and lightweight with minimal processing for single small WordPress sites. If you use Duplicator Lite to move an Multisite site you will be own your own. In the event you understand
the needs of a Multisite network and wouldlike to try and move it with the free version you may find
this article helpful.
Solution 2
To streamline your process with Multisite and perform many advanced features consider upgrading to Duplicator Pro.
For a full run-down of what Duplicator Pro supports and how to use the Multisite features check out these links:
- How does Duplicator handle Multisite support?
- Duplicator Pro Multisite User Guide
Issue A
Plugin Location
How to access the Duplicator Pro plugin from the main menu?
SHOW ALL SOLUTIONS
Solution 1
The Duplicator Pro plugin is only accessible from the main administrator dashboard. You cannot access the plugin from a subsite menu.
To access the plugin options goto WordPress Admin ❯ My Sites (top left corner) ❯ Network Admin ❯ Dashboard ❯ Duplicator Pro (main menu).
Issue B
Redirect Loop
How to resolve redirection loops the may occur when moving a Multisite?
SHOW ALL SOLUTIONS
Solution 1
The quick answer is to check the variable below and make sure it matches your database entry:
define( ‘DOMAIN_CURRENT_SITE’, ‘www.example.com’ );
For more details visit this forum thread.
How to perform step-by-step instructions for Multisite migrations?
The user guide provides step-by-step instructions for the currently supported Multisite features:
-
General Setups
- Full Multisite Migration or Backup
- Standalone ❯ Multisite-Subsite
- Multisite ❯ Setup as Subdomain
-
Subsite Setups
- Multisite-Subsite ❯ Standalone
- Multisite-Subsite ❯ Multisite-Subsite — Different Network
- Multisite-Subsite ❯ Multisite-Subsite — Same Network
Note: All MU features apart from full site migration require Duplicator Business or Gold editions.
How to resolve issues with large Multisite networks?
Overview:
Below are various solutions that may help when working with large network sites.
Issue A
Filters
Filtering large sets of tables are not working properly. Not all of the tables are being filtered.
SHOW ALL SOLUTIONS
Option 1
This issue is typically related to max_inputs_vars configuration in the php.ini file.
This parameter defaults to 1000 but with high number of tables it needs to be increased. We suggest you to increase it to a number larger than your table count. You can also create a template
with the general tables you want to exclude and then when you create the package use this template as a starting point to create the export of the standalone site.
Issue B
Users
How can I export only users with roles for current website?
The table wp_users is exported and users have to manually be removed
SHOW ALL SOLUTIONS
Option 1
Duplicator does not filter users when exporting. You can however run a manual query to enable the removed inactive option in the installer’s advanced settings.
This option removes all plugins/themes and inactive users in the Standalone installation.
Option 2
The second solution involves following these steps:
- Filter the user table and use_meta when creating the package
- Export users and usermeta with a specific query
- Import users and usermeta tables into new database manually
- Run the installation and select as database action «Connect and Do Nothing (Advanced)».
Remote Storage Pro
How do I fix issues with Amazon S3 or S3-compatible storage types?
Problem
When running a build (typically through a schedule) the upload process to Amazon S3 fails.
Note: This also applies to Wasabi, DigitalOcean and other platforms that run on AWS
Option 1
Upload Size: This can be related to a temporary network condition. Consider the following option:
Settings ❯ Storage ❯ Storage Types ❯ Amazon S3 and set «Upload Size» to 1000kb.
This will decrease the amount of data Duplicator sends and should help to stabilize intermittent network problems.
How do I fix issues with Dropbox storage types?
Problem
When running a build (typically through a schedule) the upload process to Dropbox fails.
Option 1
Upload Size: This can be related to a temporary network condition. Consider the following option:
Settings ❯ Storage ❯ Storage Types ❯ Dropbox and set «Upload Size» to 1000kb.
This will decrease the amount of data Duplicator sends and should help to stabilize intermittent network problems.
How do I fix issues with Google Drive storage types?
Problem A
When running a build (typically through a schedule) the upload process to Google Drive fails.
SHOW ALL SOLUTIONS
Option 1
Upload Size: This can be related to a temporary network condition. In the event you experience the problem update this option:
Settings ❯ Storage ❯ Storage Types ❯ Google Drive and set «Upload Size» to 1000kb.
This will decrease the amount of data Duplicator sends to Google Drive and should help to stabilize various intermittent network problems.
Option 2
Common Account: If you have many copies of Duplicator Pro connected to the same Google Drive account, you may be running out of connections — Google only permits
around 20 connections per App per account. Per the Google documentation you can get around this limitation by using different accounts or by using a GSuite account
with different admin users.
From the Google documentation:
If you need to authorize multiple programs, machines, or devices, one workaround is to limit the number of clients that you authorize per user account to 15 or 20.
If you are a G Suite admin, you can create additional admin users and use them to authorize some of the clients.
Problem B
Google Drive connection initially works but is then periodically invalidating/resetting every few days because Securi is set to change the secret keys in the wp-config.php.
Duplicator uses these keys to encrypt the Google Drive information.
SHOW ALL SOLUTIONS
Option 1
Go to Securi Security ❯ Settings ❯ Hardening and click «Revert Hardening» for «Activate Automatic Secret Keys Updater».
Option 2
Go to Duplicator Pro ❯ Settings ❯ General and uncheck «Enable settings encryption». In some cases you may need to reauthenticate with Google Drive after making this change.
Either of these options should keep your Google Drive connection stable from now on.
How do I fix issues with OneDrive storage types?
Issue A
When running a build (typically through a schedule) the upload process to OneDrive fails.
SHOW ALL SOLUTIONS
Solution 1
Upload Size: This can be related to a temporary network condition. Consider the following option:
Settings ❯ Storage ❯ Storage Types ❯ OneDrive and set «Upload Size» to 1000kb.
This will decrease the amount of data Duplicator sends and should help to stabilize intermittent network problems.
Issue B
How to handle connection errors on a new OneDrive storage endpoint when trying to connect?
SHOW ALL SOLUTIONS
Solution 1
Common Error Messages
— The refresh token is not set or no permissions for ‘wl.offline_access’ was given to renew the token
Option 1
Try creating another storage endpoint but this time enable the option «All folders read write permission».
Issue C
Is there a way to customize the path used for OneDrive storage, currently it has to be in the /App/ directory?
SHOW ALL SOLUTIONS
Solution 1
The OneDrive option is restricted to the Apps folder for security reasons and, at least right now, users can not set the path outside of that folder.
Issue D
How to resovle issues with M365 and security plugin changing keys in wp-config.php?
SHOW ALL SOLUTIONS
Solution 1
Due to slightly different settings on some OneDrive accounts (we see this occasionally, mostly on accounts from Germany), users may experience issues.
To resolve try the following: When setting up your OneDrive configuration, check the option «All folders read write permissions» then click save.
Issue E
How to remove OneDrive authorization from a site that you no longer have access to?
SHOW ALL SOLUTIONS
Solution 1
Invoke OneDrive API
(recommended)
The following process describes how to revoke all refresh tokens. Useful when you want to prevent a machine that is no longer under your control from using your OneDrive account.
For a full overview of this process call the
revokeSignInSessions API.
Solution 2
Periodic Site Removal
Periodically remove the folder that is being stored to within the OneDrive /Apps folder. So if the machine is storing to /Apps/oldsite.com then once every X days remove oldsite.com so it
is not consuming space on your OneDrive.
Solution 3
Revoke Entire Application
To revoke access for all your Duplicator Pro sessions to OneDrive follow
these instructions.
Note: This process is only recommended if you have only ever setup one or just a few Duplicator Pro OneDrive storage accounts. Revoking the entire app will remove all
OneDrive connections that Duplictor Pro — OneDrive was created with. This means none of the other machines would be allowed to use it ever again,
unless new sessions were created.
How do I fix issues with SFTP/FTP storage types?
For full step-by-step details visit each guide below:
- User guide for FTP storage
- User guide for SFTP storage
CONNECTION FAILED:
Problem
When clicking the ‘Test FTP Connection’ button from plugins Storage ❯ Mode: FTP; the response continues to produce a FTP file test failed message.
Solution 1
Double check all settings and test in a client side FTP client like: Filezilla,
Cyberduck, CuteFTP to make sure
you can also login from another source. If neither client or Duplicator Pro work then contact your server admin for the FTP endpoint to make sure all credentials are setup correctly. If the client side connection works see Solution 2 recommendation.
Solution 2
If you are able to successfully connect to the FTP endpoint from a client side client application and the credentials match
exactly
those of what your using in
Duplicator Pro, then a networking issue is most likely causing the issue. If possible try to create the Duplicator Pro Storage FTP item on the same computer that your
FTP client is on. This will help pin-point the issue down to a network level.
Since the hosted server your uses different firewalls/routes than your local computer it is possible that your hosted server is not able to properly connect to the FTP endpoint. If the Duplicator Pro Storage FTP works on your local computer then contact your hosting provider and let them know their is a network level issue where their servers are unable to connect to your FTP endpoint.
Host Specific
A — K
1&1 — 1and1.com
Duplicator Pro
Build Processing Settings:
- Goto Duplicator ❯ Settings ❯ Packages
- Change Archive Engine to ZipArchive, Change Max Worker Time to 10
- Rebuild package and filter out any unnecessary large files/directories such as backups from other plugins.
Duplicator Lite
What can I try for Timeout Issues?
Azure Microsoft — microsoft.com
Duplicator Pro
Database Setup
The main issues that arise when working with Azure servers is their support for storage engines and other minor settings. For more details visit
the post titled Limitations in Azure Database for MySQL.
Storage Engine Setup
Users that want to migrate a site to Azure can follow these steps:
- Create a backup of your Database in the event issues occur with the INNODB conversion & a revert is needed.
-
Convert the tables from MyISAM to INNODB in the source site. You can execute the query below on all MyISAM tables with PhpMyAdmin or any Mysql query tool.
«ALTER TABLE table_name ENGINE=InnoDB;»
For more information you can read this post titled Converting Tables from MyISAM to InnoDB - After the update is made be sure to fully test all areas and aspects of your site for issues.
- Create a Duplicator Package that can now be used in an Azure environment.
Duplicator Lite
Same Database Setup issues listed in Duplicator Pro above
Cloudways — cloudways.com
Duplicator Pro
Import Install:
When trying to run an import install users get either a 403 or general error message. To resolve this issue enable the direct PHP file access
for the application you are working on. Details for this process can be
found here.
Cloudways Resources
Website |
Knowledge-Base
Crocweb — crocweb.com
Duplicator Pro
Build Processing Settings:
- Goto Duplicator ❯ Settings ❯ Packages
- Check the ZipArchive options as it appears to have reported as working better (Shell Exec however is available). Throttling should be active
or it will peg the CPU on shared hosts and they will kill the process.
Duplicator Lite
What can I try for Timeout Issues?
Digital Ocean — digitalocean.com
DreamHost — dreamhost.com
Gridpane — gridpane.com
Duplicator Pro
No known issues
Duplicator Lite
When using Lite you may experiance install issues with the wp-config.php. For more details visit this link
GoDaddy — godaddy.com
Issue A
ZipArchive Issues
A requirement message for ZipArchive is showing in the installer or plugin admin.
SHOW ALL SOLUTIONS
Solution 1
If upgrading PHP versions on GoDaddy gives you issues with ZipArchive then check a box to
enable ZipArchive support.
If you don’t see that please talk to GoDaddy support and ask them to enable the ZipArchive PHP module.
Duplicator Pro
Package Build Issues:
GoDaddy may be the most resource-constrained of all the major web hosts. Because of this, if your site is over 150MB you may have to switch from the zip format to the DupArchive format which was developed to work on restricted hosts.
To build a package using DupArchive:
- Go to Duplicator ❯ Settings ❯ Packages
- Set Archive Engine to DupArchive.
- Set the «Max Build Time to 270 if your site is over 1GB.
- Attempt to build.
- If still encounter an error set the following values in Settings > Packages and rebuild:
- Server Throttle: Medium
- Client-side Kickoff: Enabled
- If you still have problems:
- Increase your GoDaddy plan’s resource level to level 3. By default, All GoDaddy shared plans start at level 1 or 2, even Ultimate. Resource levels are described on GoDaddy’s resource page.
Installer Timeout Issues:
When installing to GoDaddy you may experience a timeout. To avoid a timeout perform a manual extraction install as described in the answer to FAQ question How do I do a Manual Extraction?
Duplicator Lite
What can I try for Timeout Issues?
Issue B
PHP Execution limits
Managed WordPress plans do not allow direct PHP code execution outside of WordPress.
SHOW ALL SOLUTIONS
Solution 1
GoDaddy has implemented a new block recently for managed hosting where it is
not possible to run an arbitrary php file inside wp-content and in the main path. The only possible solution is to run the installer in a subfolder.
In the meantime, to work around the problem, you should do the following:
- Creates a temp folder in the root path or location where you want to install for example dup_temp
-
Upload the installer and archive files into the dup_temp folder and browse to the installer http://mydomain/dup_temp/installer.php.
Note: This starts a classic installation so the pre-set values will not enabled like they are for an import install.
By default the installer considers the current folder as root path but this can be changed in the advanced installation
- On step 1 choose «Advanced Mode» and remove dup_temp path from the ‘New Site URL’ & ‘New Path’ inputs
- Click validate without filling in the other fields<
Now the validation fails because you didn’t enter the database connection data but the GoDaddy wp-config is detected so you are prompted with
the correct db connection data that you need to apply.
-
Next set all the ‘Configuration Files’ to ‘Do nothing’
Now you can continue with the installation and it should work. We are working to streamline this process.
HostGator — hostgator.com
Duplicator Pro
Build Processing Settings:
- Goto Duplicator ❯ Settings ❯ Packages
- Host Gator shared hosting is incredibly sensitive to CPU usage. If you are on this host be sure to turn on ‘Server Throttle’ on the General Settings page.
Ask host to whitelist these ModSecurity rules (rarely required):
- Rule 340464 (affects admin.php)
- Rule 340465 (affects admin.php)
Duplicator Lite
What can I try for Timeout Issues?
InstantWP — instantwp.com
How to Install a Package:
- On the UI click Themes Folder (opens a Web UI)
- On the left side of the UI click the wordpress folder
- Click the upload files icon a the top and upload both the installer and the archive
- Launch the installer by browsing to http://127.0.0.1:10080/wordpress/installer.php
- Proceed to step 2 of the install and click apply to overwrite the database
- Continue with the install
L — Z
Linode — linode.com
Duplicator Pro
Build Processing Settings:
- Goto Duplicator ❯ Settings ❯ Packages
- Make sure you set «Thread Lock» to «SQL» on the settings page. The default setting of «File» doesn’t work with Linode hosting.
Local by FlyWheel — local.getflywheel.com
Duplicator Pro
Build Processing Settings:
- Goto Duplicator ❯ Settings ❯ Packages ❯ Advanced Settings
- Make sure you set «Thread Lock» to «SQL» on the settings page. The default setting of «File» doesn’t work with Local by Flywheel.
Overwrite a local site using a DupArchive or Zip Package:
- On ‘Local by Flywheel’ UI, right click the local site you wish to overwrite
- Click Show folder
- Go to {site name}/app/public in your file browser
- Copy the installer.php and archive to that location
- Browse to {site name}.local/installer.php and proceed with install. On step 2 click apply to use existing database parameters.
Media Temple — mediatemple.com
Duplicator Pro
Build Processing Settings:
- Goto Duplicator ❯ Settings ❯ Packages
- Make sure you set «Thread Lock» to «SQL» on the settings page. The default setting of «File» doesn’t work with media template hosting.
One.com — one.com
Duplicator Pro
The message ‘Blocked’ is displayed on newly installed site:
One.com has a special policy to reduce spam on WordPress websites which can interfere with migrated sites.
To get around this, add the following to your .htaccess file:
RewriteEngine On
RewriteCond %{REQUEST_URI} ^/
RewriteRule .* - [CO=wordpress_test_cookie:WP+Cookie+check:%    {HTTP_HOST}:1440:/]
Reference: Guide on One.com
OVH — ovh.com
Duplicator Pro
Build Problems:
- Go to Duplicator ❯ Settings ❯ Packages ❯ Advanced
- Set «Thread Lock» to «SQL». The default setting of «File» doesn’t work with OVH hosting.
- PHP 32 Bit is enabled. See this FAQ Why does the build fail with various IO file operations?
License Activation Problems:
- Talk to OVH host support about configuring mod_security firewall to allow https traffic to communicate to snapcreek.com
Package Transfer to Cloud:
OVH has been known to automatically enable a firewall which blocks package cloud transfers (Google, Dropbox, etc..)
- Talk to OVH host support about configuring the firewall to allow https traffic to communicate to the cloud destinations.
PCextreme — pcextreme.nl
Duplicator Pro
Build Processing Settings:
- Go to Duplicator ❯ Settings ❯ Packages
- ZipArchive Single Thread mode, 18 seconds, SQL Lock
SiteGround — siteground.com
Issue A
Scan Issues
If you are having issues with the scan process, consider the option below.
SHOW ALL SOLUTIONS
Option 1
If you have an SSL certificate setup you may encounter a Scan timeout error. This is due to two symbolic links SiteGround creates in the root of the site
that point back to the site directory and cause a recursive loop.
To resolve this problem do the following:
- On the Packages screen, click the Create New button
- Click «Enable File Filters» ❯ Above the Directories box ❯ click the root path quick link.
- Append ‘/www’ to that path. For instance if the root path is /home/myhome/public_html the path should be /home/myhome/public_html/www
-
Perform the same ‘root’ quick path procedure shown above but this time append the name of your domain (for instance if your domain is mydomain.com
append /mydomain so it would be /home/mydomain
Note: To find the proper paths to filter, load the SiteGround file-manager and observe the symbolic link paths. If you continue to have the problem, please talk to
SiteGround support. If you do not need SSL for subdomains they should be able to remove the symlink without affecting the operation of your website.
Issue B
Drag & Drop Import
If you are having issues with the drag and drop import, on SiteGround consider the option below.
SHOW ALL SOLUTIONS
Option 1
This issue can be related to the SiteGround Security plugin. The issue is caused by a .htaccess file inside the uploaded .zip/daf archive file. Removing the .htaccess
file from the wp-content folder of the archive should resolve any 403 errors and allow the import process to complete.
Issue C
Build Issues
Failed to Create a Backup File Larger than 8GB on Siteground Hosting.
Common Error Messages
— Failed to generate backup file: We cannot proceed as we could not write files to disk…
SHOW ALL SOLUTIONS
Option 1
Contact SiteGround:
In these cases it is best to reach out to the SiteGround support team, and they should be able to raise this limit to 20GB or sometimes 60GB according to your site’s size.
Issue D
Installer Issues
If you are having issues during the install process, check to see if these options are related.
Common Error Messages
— failed to open dir: Too many open files
— failed to open stream: Too many open files
SHOW ALL SOLUTIONS
Option 1
Enable Shell Zip: If your host/server supports shell zip you can enable this feature on the installer. To enable on the installer Step 1 set the mode to Advanced
❯ Options ❯ Advanced Extraction ❯ Shell Unzip.
Option 2
Manual Extraction: During step 1 of the archive extraction process you get an error saying:
Warning: opendir(/somepath/on/your/server/: failed to open dir: Too many open files in /somepath/
This issue can be solved by performing a «Manual Extraction»
Option 3
Build with DupArchive: In the event you can easily rebuild the package, you can switch the build mode to DupArchive and create a archive.daf file.
To perform this simply goto Duplicator ❯ Settings > Packages Tab ❯ Archive Engine ❯ DupArchive. Rebuild that package and re-run the installer
Strato — strato.com
Duplicator Pro/Lite
Problem
When trying to build a large package, the package build process fails. Strato has limitation that prevents a file from exceeding 1 or 2 GB. To get around this issue try the following:
Option 1
Contact Strato support and ask them to remove this setting on your server. Once they do this you should be able to build the package.
Option 2
Add non-essential directories or files to the file filter on the first build step, then manually move over those filtered files to the new location.
Option 3
Perform a 2-part install as explained here: https://snapcreek.com/duplicator/docs/quick-start#quick-060-q
TSOHost — tsohost.com
Duplicator Pro
Build Processing Settings:
- Goto Duplicator ❯ Settings ❯ Packages
- Make sure you set «Thread Lock» to «SQL» on the settings page. The default setting of «File» doesn’t work with Tsohost’s cloud hosting.
Licensing Activation Problems:
License activation from TSOHost may not work for you. TSOHost has a many spam sites running off of some of their shared IP addresses so those IP addresses have gotten added to black lists which our provider blocks.
Important:Even though your product will not be activated it will still fully function (licensing just controls auto-update).
To minimize this impact:
1) Enter your license key in the license key area and click activate — the plugin won’t activate but it will save the license key in that spot — this will prevent a very large nag bar at the top from popping up in 30 days (right now you’ll get the smaller one that tells you to activate a license)
2) Periodically check https://snapcreek.com/dashboard for a new copy of the plugin — once a month is adequate. If/when you see a new copy download it, uninstall the old one and install the new one.
Connectivity with TSOHost is an ongoing problem with our and other providers who monitor misbehaving sites. If you have an account with TSOHost we recommend you talk to them about removing these bad-apple sites since they impact all of TSOHost’s customers.
WordPress — wordpress.com
Duplicator Pro/Lite
Support Settings:
In order to use Duplicator Lite or Pro with wordpress.com make sure you have the business plan hosting level that allows you to
install 3rd party plugins. For more details check-out the wordpress.com third-party plugin page.
WPEngine — wpengine.com
Duplicator Pro
Issue A
Build Processing Settings
When trying to build a package WP engine returns errors or notices.
SHOW ALL SOLUTIONS
Solution
- Go to Duplicator ❯ Settings ❯ Packages.
- Set «Archive Engine» to «DupArchive»
- Go to Duplicator ❯ Settings ❯ Packages ❯ Advanced.
- Set «Lock Type» to «SQL».
-
Set «Installer Name» to «installer.ph1». The default setting of «Installer.php» doesn’t work because WPEngine prevents creation of PHP files.
When you install, be sure to rename the Installer.ph1 file to Installer.php before browsing to the installer.
Issue B
Installer Download
When trying to download the installer file WPEngine has issues.
SHOW ALL SOLUTIONS
Solution
Be sure to change the name of the installer file to «installer.ph1». See Settings ❯ Packages ❯ Advanced ❯ Installer Name = installer.ph1
Duplicator Lite
WP-Engine currently does not support Duplicator Lite. Let them know this is a product you like and ask them to help support the product.
Resources
General
How should I get help for each Duplicator Product?
Issue
I’m having some issues with Duplicator Pro/Lite where is the best place to get started.
Solution 1
Get started with Duplicator Lite:
- Search the WordPress Forums for answers to already asked questions.
- If the question is basic then ask in the the WordPress Forums.
- If it requires server analysis then we suggest you submit a help ticket.
- We also recommend our Knowledge-base which has all the links for help.
Solution 2
Get started with Duplicator Pro:
- For any issues with Duplicator Pro submit a help ticket and you will get top priority in our ticket queue.
- We also recommend our Knowledge-base which has all the links for help.
Please Note: Duplicator Lite tickets will not get answered right away as Pro tickets take precedence. Pro tickets are usually answered within 8 hours while Lite can be anywhere from 1-2 business days depending on ticket load.
Does Duplicator (Snapcreek) offer custom services?
Custom Services:
While our support staff is very helpful and can solve 99% of most issues. There are some situations in which custom services are needed to full-fill the migration needs when using the product. Snapcreek currently does not contract out for custom services but we have partnered with Codeable which has helped over 8,000 businesses of all sizes and they have excellent track record. After you post a project, it usually takes 10 minutes for responses to arrive.

Full Service Migrations: If your looking for a developer to use Duplicator to perform a «Hands off Migration» for your site please visit Codeable.com. All of the developers on Codeable will be able to use the Duplicator to migrate your site. These scenarios might be useful for:
- For users of the plugin who want the guarantee of a developer to validate the work-flow
- For newer users who don’t have time to learn the plugin.
- For advanced WordPress users who just want the process done for them.
Complex-Migrations: Issues that might require custom services are:
- Large or Complex WordPress sites
- Complex Database collation issues that have to be manually supported
- Older WordPress sites
- Complex server setups or hosts that don’t follow traditional standards
How can I help contribute to the plugin?
There are a few ways to help out with the progress of the plugin which are listed below:
Developers: Help fix/improve things by checking out the plugin on Github.
Localizers: The Lite version of the plugin has been localized and any support with various languages can help the entire community. To learn more
about localizing WordPress plugins check out the translation page.
Users: By purchasing a copy of the Professional version you help continue in the effort of maintaining and supporting the lite version, which is has been
downloaded millions of times by users all over the world.
Integration
Does Duplicator work with other Software?
What host providers are recommended for Duplicator?
Duplicator and Duplicator Pro both require a decent amount of CPU and memory to run smoothly. The larger your site the more resources it will take to
backup that site. If your using a budget host to manage a large complex site, we recommend upgrading to a provider or plan that will more smoothly handle
your site.
Shared & Dedicated Hosting
Please see our WordPress Hosting Page for a full overview and recommendation table for
choosing a solid, reliable host that will work properly for your site.
Personal Computer
ServerPress
WordPress on your local computer made easy.
Video Demo Using ServerPress: ServerPress to install Duplicator packages.
MAMP
MAMP is a free, local server environment for macOS and Windows. MAMP provides all the tools to run WordPress on a desktop PC for testing or development purposes. Use either Apache or Nginx in addition to MySQL with PHP, Python, Perl or Ruby.
XAMPP
XAMPP is a completely free, easy to install Apache distribution containing MariaDB, PHP, and Perl. The XAMPP open source package has been set up to be incredibly easy to install and to use.
WAMPSERVER
WampServer is a Windows web development environment. It allows you to create web applications with Apache2, PHP and a MySQL database. Alongside, PhpMyAdmin allows you to manage easily your databases.
Local
Local: By flywheel is the #1 local WordPress development tool. A fuss-free way to develop WordPress locally.
Also see: Snapcreek recommended WordPress Hosting
What services and products complement the Duplicator?
Duplicator Lite is uniquely designed for smaller WordPress migrations. This has been the primary function of its success. Duplicator Pro takes the Lite version
several steps forward with a suite of tools to help the professional better manage and migrate WordPress sites. Duplicator Lite may not work with every scenario or provide
the exact features you’re needing, this is why we have partnered with similar products to cover more scenarios.
Migration
Duplicator Pro:
A commercial version of Duplicator, with new features such as: scheduling, cloud support (FTP, Dropbox. Google Drive, Amazon S3), multisite, large site support and more. Duplicator Lite vs Pro Comparison
Synchronization
WP Migrate DB:
A free database sync plugin with pull/push data syncing.
Service Solutions
Developer Help:
Check out Codeable for help with moving a site.
Hosting:
Check out our recommend hosts Bluehost and Siteground.
MainWP:
A free self-hosted management tool for maintaining all your WordPress sites.
Training & How To’s
External Training Resources
Resource A
Articles
External Articles Resources
SHOW ALL RESOURCES
Resource B
Videos
External Video Resources
SHOW ALL RESOURCES
Various strategies for data migration.
While Duplicator does an extremely good job of moving your entire site and various sub-sections. There are some use cases where custom work-a-rounds are needed.
In this section we try to cover those various options.
General Scenarios
Scenario 1-A
Parts of Site
How to move only part of a website?
Show All Options
A WordPress site consist of two primary assets «Files» & «Database Tables». By excluding these assets with filters you can create any version of a site you want.
The installer (Pro Only) has features to re-deploy a package and exclude specific data from an existing package. Below are workflows that will allow you to filter/exclude data for you package.
Package
Package Process
File Management: When creating a new package you can exclude any files/folder, file extensions or database table you want. With Archive Filters
(Packages ❯ Create New ❯ Archive ❯ File filters) along with Overwrite or
Import install modes users have the flexibility to move portions of there site. To move just a
portion of your site exclude all the files that do not need to be moved. For file filters enter the
full path
of the directory(s) you want to exclude. You can separate additional
exclusion paths with a semicolon. This process can be useful if you have large files such as images or videos that you don’t want to package.
Database Management:
Table filters (Packages ❯ Create New ❯ Archive ❯ Database Tab ❯ Table filters) will allow you to exclude any table from being added to the database.sql file which contains the data
needed to restore your database.
Installer
Install Process
At install time you can then perform the Overwrite or Import Install process which allows you to move only the files you have in the archive. Another key feature of the installer
the «Skip Files» option (Pro Only) on step 1 of the installer (Installer ❯ Step 1 ❯ Options ❯ Skip Files). These options include the following:
- Extract all files: Extract all files from the package archive. This option is selected by default.
- Skip extraction of WP core files: Extract all files except WordPress core files. Choose this option to extract only the wp-content folder and other non-core files and directories.
- Extract only media files and new plugins and themes: Extract all media files, new plugins, and new themes. The installer will not extract plugins and themes that already exist on the destination site.
Warning: Moving portions of your site requires a deep understanding of the assets you are trying to move. When moving small portions of your website into an existing
website it is strongly encouraged to perform these operations in a staging environment beforehand. Do not perform these type of migrations on a production server without knowing
the end results from a test run!
Scenario 1-B
Large Sites
How can I more quickly move larger sites/packages?
Show All Options
Option 1
In the event you have a very large site that you need to continually move around and have issues with upload/download speeds you can quickly improve this workflow by using the
«Classic Overwrite Install» method.
Prerequisites
- You have two sites i.e. a Development and Staging site
- The sites files are identical except for their physical location.
- The sites databases are the same except for locations which could be the same or different servers.
Work-Flow
-
Create a new package on the Development site and exclude/filter the wp-contentuploads directory.
This can also be other locations that might have large files. - Download the package files locally then transfer them to your Staging site in the WordPress root
- Browse to the installer.php file on the staging site and exact the archive.
- Upon completion that Staging site should have all the updates of the Development site minus the filters from step 1.
- Since the sites were identical initially the wp-contentuploads should still be functional on the Stage site.
Notes: This process typically becomes more impactful the larger your site, it also requires that you have a good understanding of the files you are
filtering and moving. The basis of the workflow is that you don’t always have to bundle your complete site with every migration as long as you are aware
of the structure of your data.
Option 2
The Duplicator import install mode can rapidly improve your workflow.
Scenario 1-C
Sync Dev to Prod
How to sync a staging/development site with a large production site?
Show All Options
- Install Duplicator Pro on both sites
- On the main site set the engine to DupArchive (Settings > Packages > Archive Engine = DupArchive)
- Build a package on your main site
-
Perform an import URL install as described here
Import Link tab
After doing the above your staging site will match the original site. After the upgrade you can then perform the reverse procedure. Note that the database gets fully replaced
when a package is installed (so if you have any customer payments or other records coming in on the main site while you are working on the staging site then those would get erased
were you to install the staging site back onto the main site)
Database Specific Scenarios
Scenario 2-A
Custom SQL
How can I manually execute my own custom SQL file?
Show All Options
In the event you need to execute custom SQL code instead of what is placed in the archive via that database.sql file. This process can be done by following these instructions:
- In a new browser tab, go to phpAdmin or the equivalent on your destination machine.
- Remove existing database tables from your the destination database.
-
Import your own custom script (this should represent a copy of your site in most cases).
This can be done via the phpMyAdmin import procedure. - Launch the Duplicator Pro installer.php in a browser tab
-
Switch to Advance Mode ❯ Choose «Manual SQL Execution» from the database option.
this will prevent the installer from using the .sql within the archive and skip past the data insertion step all-together. - Finish the install process
Scenario 2-B
Existing Tables
How to prevent existing database tables from being changed during a migration?
Show All Options
Option 1
There may be situations where you need to keep an existing table on a particular site. For example say you have development site (dev site) and a staging site. On the staging site
you do NOT want to overwrite any of the sites current posts from the wp_posts table. In order to retain the table follow these steps.
- Login to your development site and goto Duplicator Pro ❯ Packages screen ❯ «Create New» button
-
Archive ❯ Database Tab ❯ Check «Enable Database Table Filters» ❯ check «wp_posts» table & build package
Note: This will exclude/ignore the «wp_posts» table from being created in the database.sql script - On staging site open the installer.php and location the «Setup» area on Step 1.
-
Choose Action «Overwrite existing tables» ❯ Click the «Validate» button
Note: This will keep all the existing tables in the database and overwrite those with the same name. -
Validate the «wp_posts» table is NOT in the removal list
See: Validate tables Validate ❯ Database ❯ «Tables Flagged for Removal or Backup» - Continue with the install process & upon completion the «wp_posts» table should remain unchanged
Un-Supported Scenarios
Question A
Is there a setting for incremental or differential backups?
Show All Options
Option 1
At the moment Duplicator does not support differential or incremental backups. Many people use filters to cut back on backup size, though — for instance you could do a full backup with
all files every week or x days and then a database only backup every x hours or every day, based on your needs.
Question B
How can I copy ONLY the blog posts (with images, comments, categories, tags, etc.)?
Show All Options
Option 1
Duplicator does not currently migrate individual items such as just blog posts, however the WordPress import/export tool combined with FTP transfer of files should allow users to do this process.
More details about this process can be found here.
How to host multiple sites on one server?
In the event you want to host multiple WordPress sites on one hosting account a little bit of planning and setup is needed. This outlines how the majority of most hosts work. If
the setup does not match your hosts options, its recommended to contact your host for the exact instructions.
STEP 1: Web Root Directory: Locate your hosts web root directory either through your hosts cPanel or FTP. On most hosts this is named «public_html«. Make sure it is empty of any Core WordPress Files files such as «wp-admin», «wp-content», «wp-config.php» etc. It is ok if you see files like 404.html or .htaccess just be on the lookout for an existing WordPress setups. If any core WordPress files do exist back them up and remove them.
STEP 2: Create Site Directories: Each WordPress site you setup will need to have its own directory off of the Web Root Directory. Typically this is representative of a separate directory for each domain name you own, but is not always the case. Below is an example of how you might create the directories.
    /public_html/mysite1/(wp files)

    /public_html/mysite2/(wp files)

    /public_html/mysite3/(wp files)
STEP 3: Create Databases Each site will needs is own database. Typically
the best practice is to name the database similar to the directory (which is most cases is the domain name).
STEP 4: Create Add-on Domain The bulk of most major hosts will have a feature called «Add-On Domain». This simply lets you map a domain name you own to a specific directory in your «Web Root Directory» created in step 1. A simple search on your hosts web-site will show you how to enable this. The process for most hosts is typically very straight forward. For a list of approved Duplicator hosts click here.
STEP 5: Install Duplicator Package Once you have the directory and database created and mapped. You are ready to run install a Duplicator package to the new location. For a quick start on this process click here.
How to work with URL IP addresses for staging/development site?
Problem
You have a situation where you need to use an IP Address as the main URL for your site, how to properly handle this?
Option 1
Snapcreek recommends that user use a «hosts file» technique instead of using the
IP address directly. This will allow you to use the domain name before the DNS record change so no special replacement after the fact is necessary. This technique
is described in steps 6-8 of the article «How to move a WordPress site».
During the install process, users are given the option to enter in the URL of the web site to be installed. This option can technically use an IP address, however
in the event the site needs to eventually become a valid URL address, then the installer would need to be re-ran on the site to update the IP address to a valid URL.
If you know ahead of time what the address will eventually be, then we recommend using it during the first install with a valid hosts file entry on your local computer.
How to fix common issues with WAMP, XAMPP, MAMP and CPanel?
If you are new to setting up a web server locally such as XAMPP or the like we ask that you go through the online documents of those products. While we will try
our best to point you in the right direct our support does not include time training users on other systems. If you have general setup questions for
other software out-side of Duplicator specific questions they will be moved to the bottom of the priority queue.
Below are some resources that will get you started. If you’re having trouble getting your local environment setups please use the general WordPress forums to
ask your question(s). If you receive errors from the Duplicator on your local development box please contact support and we will get looking at you’re issued right away.
XAMPP Resources
WAMP Resources
MAMP Resources
— View the Website
— Ask a question on the Forums
— Ask Paal
Paal is a contributor to the WordPress Duplicator and a very experienced Mac user.
CPANEL Resources
Good afternoon! It’s my first time here in the forum, and I’m here because I have a question related to the migration of my website made in WordPress.
First, for you to be aware, I built the website hosted on Hostinger, but in a temporary area, only for testing. http://www.sitepf.esy.es
In this area the site opens and functions normally. However, when trying to transfer the site to my main domain http://www.piscinafacil.com.br , it displays the following error: 500 — Internal Server Error.
My main area is in the same test site account Hostinger as an additional domain.
For migrating the site to another domain, I made up the old site and the mysql database, then sent the site via ftp, created a new mysql database, imported the file «sql.gz» via phpMyAdmin and then changed the database settings in wp-config.php.
Also checked in phpMyAdmin the siteurl field would be pointing to the desired address (piscinafacil.com.br), all OK.
When trying to enter the piscinafacil.com.br address, shows the error 500 — Internal server error.
What could be going wrong?
Thank you for your help
EDIT:
My php log error:
[27-Sep-2016 17:54:17 UTC] PHP Warning:  file_exists(): open_basedir restriction in effect. File(/home/u588888949/public_html/wp-content/uploads/2016/09) is not within the allowed path(s): (/home/u113554601:/tmp:/var/tmp:/opt/php-5.5/pear:/usr/local/bin:/etc/pki/tls/certs) in /home/u113554601/public_html/wp-includes/functions.php on line 1611
[27-Sep-2016 17:54:17 UTC] PHP Warning:  is_dir(): open_basedir restriction in effect. File(/home/u588888949/public_html/wp-content/uploads/2016) is not within the allowed path(s): (/home/u113554601:/tmp:/var/tmp:/opt/php-5.5/pear:/usr/local/bin:/etc/pki/tls/certs) in /home/u113554601/public_html/wp-includes/functions.php on line 1616
[27-Sep-2016 17:54:17 UTC] PHP Warning:  is_dir(): open_basedir restriction in effect. File(/home/u588888949/public_html/wp-content/uploads) is not within the allowed path(s): (/home/u113554601:/tmp:/var/tmp:/opt/php-5.5/pear:/usr/local/bin:/etc/pki/tls/certs) in /home/u113554601/public_html/wp-includes/functions.php on line 1616
[27-Sep-2016 17:54:17 UTC] PHP Warning:  is_dir(): open_basedir restriction in effect. File(/home/u588888949/public_html/wp-content) is not within the allowed path(s): (/home/u113554601:/tmp:/var/tmp:/opt/php-5.5/pear:/usr/local/bin:/etc/pki/tls/certs) in /home/u113554601/public_html/wp-includes/functions.php on line 1616
[27-Sep-2016 17:54:17 UTC] PHP Warning:  is_dir(): open_basedir restriction in effect. File(/home/u588888949/public_html) is not within the allowed path(s): (/home/u113554601:/tmp:/var/tmp:/opt/php-5.5/pear:/usr/local/bin:/etc/pki/tls/certs) in /home/u113554601/public_html/wp-includes/functions.php on line 1616
[27-Sep-2016 17:54:17 UTC] PHP Warning:  is_dir(): open_basedir restriction in effect. File(/home/u588888949) is not within the allowed path(s): (/home/u113554601:/tmp:/var/tmp:/opt/php-5.5/pear:/usr/local/bin:/etc/pki/tls/certs) in /home/u113554601/public_html/wp-includes/functions.php on line 1616
[27-Sep-2016 17:54:17 UTC] PHP Warning:  is_dir(): open_basedir restriction in effect. File(/home) is not within the allowed path(s): (/home/u113554601:/tmp:/var/tmp:/opt/php-5.5/pear:/usr/local/bin:/etc/pki/tls/certs) in /home/u113554601/public_html/wp-includes/functions.php on line 1616
[27-Sep-2016 17:54:17 UTC] PHP Warning:  is_dir(): open_basedir restriction in effect. File(/) is not within the allowed path(s): (/home/u113554601:/tmp:/var/tmp:/opt/php-5.5/pear:/usr/local/bin:/etc/pki/tls/certs) in /home/u113554601/public_html/wp-includes/functions.php on line 1616
Большинству из нас, будь то разработчики, дизайнеры или даже конечные пользователи, приходилось хотя бы раз в жизни пережить. То есть болезненный процесс получения внутренней ошибки сервера и попытки ее исправить. Многие люди не хотят знать больше – они просто хотят это исправить. Но если вы не попытаетесь хотя бы понять это, вам придется чаще страдать от этой участи. Ошибка внутреннего сервера 500 очень важна, поскольку она полностью останавливает все процессы и может вывести из строя весь ваш сайт. Так что, если мы когда-нибудь захотим от него избавиться, нам нужно сначала лучше понять, что это значит.
В этой статье я расскажу, что означает эта ошибка, как определить проблему и, конечно же, как ее исправить. Но прежде чем начать, я хочу провести вас через различные существующие ошибки http (сайта) и то, что они потенциально могут означать. Если хотите, можете сразу перейти к тому, как исправить ошибку WordPress 500.
Общие коды состояния и ошибок HTTP
Перво-наперво – я собираюсь объяснить, что на самом деле означают эти ошибки. В настоящее время существует список состояний и ошибок для HTTP, к которым можно получить доступ, чтобы лучше устранить проблему. Эти ошибки обычно делят по типам. Итак, чтобы сократить этот вопрос, мы рассмотрим наиболее важные ошибки и информационные коды состояния, которые вы найдете при работе со своим сайтом WordPress.
100x ответ (статус)
Этот тип ответа предоставляется непосредственно веб-сервером. В зависимости от вашей хостинговой компании ответ может быть предоставлен Apache, nginx или любым другим веб-сервером, который использует компания. Этот тип ответа не связан с ошибками. Обычно они используются, чтобы указать, что соединение установлено. Это коды состояния ответа на соединения.
200x ответ (успех)
Я называю их успешными. Такой ответ всегда свидетельствует об успехе. Это означает, что либо сервер успешно подключился к вам, что запрашиваемые ресурсы были предоставлены правильно, либо было установлено прокси-соединение.
Самый распространенный успешный код известен как 200 OK. Вы можете увидеть примеры этого, если используете инструмент тестирования скорости WordPress, скажем, в Pingdom Tools, и пытаетесь узнать FTTB (первый раз в байтах). Ответ 200 OK всегда выдается на первый сделанный запрос.
300x ответ (перенаправления)
Ребята перенаправления. Эти коды всегда передаются, если данная ссылка переадресовывается. 300 кодов состояния указывают на успешное перенаправление и также не считаются ошибкой.
Предположим, у вас есть сайт SSL (HTTPS), и у вас также есть прямой доступ к HTTP (незащищенный), и вы хотите перенаправить всех на HTTPS-версию своего сайта. Вы можете создать перенаправление для всех запросов, поступающих с HTTP, на HTTPS. Если вы случайно попытаетесь зайти на свой сайт по HTTP, ваш браузер получит ответ 300, указывающий на перенаправление на версию HTTPS.
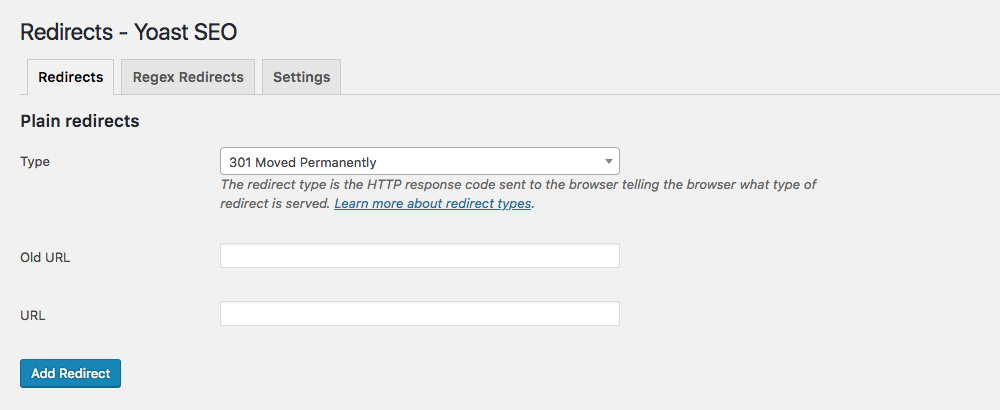
Другой распространенный пример, с которым вы, возможно, знакомы, – это локальные перенаправления для SEO. Возможно, вы удалили старые сообщения или страницы. С помощью такого плагина, как Yoast SEO, вы можете 301 перенаправить их на новые, более релевантные страницы. Или используйте временное перенаправление 307, если вы работаете над обновлением и хотите ненадолго перенаправить пользователей на другую страницу.
Ответ 400x (ошибки клиента)
Известные клиентские ошибки. Эти типы ошибок связаны с проблемами в вашем браузере. Как правило, не удается загрузить определенный актив (наиболее известной является ошибка 404). Это коды ошибок, которые не считаются серьезными.
Та же ошибка может появиться, если вы попытаетесь получить доступ к несуществующему изображению на вашем сайте. Например, вы можете использовать перенаправление 410, чтобы сообщить поисковым системам, что контент был окончательно удален, или 451, если вы сделали страницу недоступной по юридическим причинам (например, по запросу DMCA).
Ответ 500x (ошибки сервера)
И вот мы подошли к нашему главному герою. 500 ошибок. Как видите, это важные ошибки, которые всегда связаны с самим сервером. Ошибки сервера важны, потому что они могут привести к сбою вашего сайта. Из этих ошибок наиболее важными являются:
- Услуга A 503 недоступна
- Ошибка 502 неверного шлюза
- Внутренняя ошибка сервера 500
Давайте рассмотрим 3 из них в порядке важности.
сервис 503 недоступен
Наименее серьезным является недоступность службы 503. Если эта ошибка появляется, у вас проблема с ресурсами на веб-сервере. Почти всегда это появляется, когда ваш сервер перегружен. Проще говоря, если вы видите эту ошибку, знайте, что она временная и напрямую связана со слишком большим объемом трафика, и это приводит к перегрузке процессора. Когда ЦП и сам веб-сервер не могут обрабатывать больше входящих подключений, потому что он достиг 100% загрузки ЦП, вы увидите это всплывающее окно с ошибкой.
Вы можете исправить это, либо переключившись на лучший веб-сервер (например, с Apache на Nginx), либо внедрив плагин кэширования WordPress на свой сайт.
502 Неверный шлюз
Это то, что я назвал ошибкой неправильной конфигурации. Эта ошибка не появляется без причины. Если у вас когда-либо возникала эта ошибка, скорее всего, причина в том, что вы что-то сделали, но сделали это неправильно. Обычно это происходит, когда люди пытаются настроить Apache и конфигурацию PHP или при попытке оптимизировать nginx. Плохой шлюз – это ошибка, которая почти всегда возникает, когда PHP FPM (Fast Process Manager) теряет соединение. Либо из-за неправильной настройки, либо из-за сбоя процесса. Это приводит к тому, что веб-сервер отвечает неверным шлюзом.
Самый простой способ исправить эту ошибку – дважды проверить конфигурацию PHP-FPM, поскольку это наиболее вероятная причина этой ошибки. Это происходит чаще на стороне Nginx, чем на Apache, и почти никогда не происходит на службах хостинга, предоставляемых cPanel или Plesk. На последних двух панелях предусмотрены меры предосторожности для предотвращения ошибки неправильной конфигурации. Но это происходит очень часто при управлении собственным VPS.
Нужна дополнительная помощь с этим? Следуйте нашему руководству о том, как исправить ошибку 502 неверного шлюза.
500 – внутренняя ошибка сервера
Большой плохой мальчик ошибок. Внутренняя ошибка сервера 500 – худшая из них, прежде всего потому, что это такая общая ошибка. Если у вас нет достаточных знаний о том, как с этим бороться, это может стать настоящей болью, поскольку может вывести из строя весь ваш сайт. Ошибка 502 неверного шлюза также вызывает сбой вашего сайта, но ее легче диагностировать и исправить. Как уже упоминалось, это почти всегда связано с конфигурацией FPM.
Причины 500 внутренних ошибок сервера и способы их устранения
Первое, что нужно понять об ошибке 500, – это то, что она может быть вызвана рядом различных факторов, которые почти всегда связаны с сбоями в выполнении кода. Вместо того, чтобы пытаться диагностировать все сразу, я дам вам список ошибок по типу проблемы и тому, что вы делали.
- Путем переноса старого сайта на новый хостинг
- Ошибка в .htaccess в конфигурации apache
- Ошибка выполнения PHP-кода
Существуют и другие, менее распространенные случаи, которые могут вызвать внутреннюю ошибку сервера 500, но для простоты и удобства использования этой статьи я сосредоточусь на этих трех.
1 Перенос старого сайта на новый хостинг
Эта ошибка может появиться несколькими способами, но почти всегда кажется, что это связано с версией PHP, привязанной к вашему веб-серверу. Более новые версии PHP могут немедленно вызвать внутреннюю ошибку сервера 500, если текущий сайт или плагины не поддерживают текущую версию.
Эта ошибка является классической, например, когда вы переносите свой сайт с посредственного хостинга со старой версией PHP на более новый хостинг, который принимает только более новые версии (7.0 и выше). Если ваш сайт не обновлялся в последнее время, возможно, проблема связана со старым плагином. Я называю это «внутренней ошибкой сервера миграции», потому что это почти всегда происходит при миграции сайта.
Решение
Лучший способ исправить эту ужасную ошибку, когда вы так сильно пытаетесь перенести свой сайт WordPress на новый хостинг, – это сделать полную копию ваших плагинов и темы вашего сайта. После этого удалите все плагины со своего сайта и попробуйте еще раз. Если ошибка исчезнет, почти гарантировано, что ошибка была сгенерирована более новой версией PHP на вашем хостинге, которая просто отказывается выполнять код в вашем более старом плагине. Повторно загружая один плагин за раз, вы можете легко узнать, какой из них вызвал проблему.
Эти ошибки почти всегда проявляются при переносе старых сайтов, работающих на PHP 5.4 и 5.6, на новый хостинг с PHP 7.0, 7.1 или 7.2.
То же самое относится и к вашей теме. Поскольку темы могут реализовывать и реализуют дополнительный PHP-код в файлах functions.php, single и page.php. Скорее всего, более старая тема без обновлений может сломать ваш сайт после переноса на хостинг с более новой версией PHP. Эта ситуация прискорбна, поскольку единственный способ исправить это – изменить тему и перестроить ваш сайт. Это наихудший сценарий.
2 Ошибка конфигурации .htaccess Apache
Допустим, вы настраивали плагин, и вдруг все вылетает. Если вы получаете внутреннюю ошибку сервера 500 при настройке, например, плагина кэширования или любого плагина, связанного с оптимизацией, вам необходимо проверить, добавил ли плагин дополнительный код в ваш файл .htaccess.
Поскольку apache можно изменять в реальном времени, настраивая функции в файле .htaccess (который почти всегда скрыт), неправильная конфигурация может нарушить работу вашего сайта.
Решение
Чтобы исправить это, либо войдите в свой сайт через FTP и измените файл .htaccess, либо путем прямого редактирования, например, с помощью проводника файлов на cPanel или Plesk.
Если вы не знаете, как отменить то, что сделал плагин, и вам снова нужен ваш сайт, сделайте копию существующего содержимого в виде текстового файла. Сохраните это как резервную копию. Затем замените весь .htaccess следующим кодом:
# BEGIN WordPress
<IfModule mod_rewrite.c>
RewriteEngine On
RewriteBase /
RewriteRule ^index.php$ - [L]
RewriteCond %{REQUEST_FILENAME} !-f
RewriteCond %{REQUEST_FILENAME} !-d
RewriteRule. /index.php [L]
</IfModule>
# END WordPress
Это файл .htaccess WordPress по умолчанию. Он должен работать с любым сайтом. Итак, если вы в отчаянии и не знаете, какую часть удалить, просто удалите все и вставьте этот код. Он мгновенно вас спасет. Позже вы можете удалить плагин или попробовать настроить его снова. Теперь вы знаете, как спасти вас от этой катастрофической ошибки. По крайней мере, если это связано с .htaccess.
Если вы не знаете, связана ли это с .htaccess, или эта ошибка начала появляться, даже если вы не касались каких-либо плагинов, не рискуйте. Просто скопируйте содержимое вашего .htaccess и скопируйте приведенный выше код, чтобы попытаться диагностировать. Если это не помогло, оставьте .htaccess как есть, а затем попробуйте следующее предложение.
3 Ошибка выполнения кода PHP.
Ошибки такого типа встречаются чаще, чем вы думаете, и обычно они возникают, если плагин выполняет недопустимый код. Самый распространенный способ выполнения недопустимого кода – это попытка выполнить устаревшие инструкции. Возможно, вы пытаетесь запустить старый плагин, который был разработан для работы только с PHP 5.4 или 5.6 с PHP 7.0 или более новыми версиями. Устаревшие и недопустимые функции вызовут внутреннюю ошибку сервера, которую можно диагностировать только путем включения режима отладки WP.
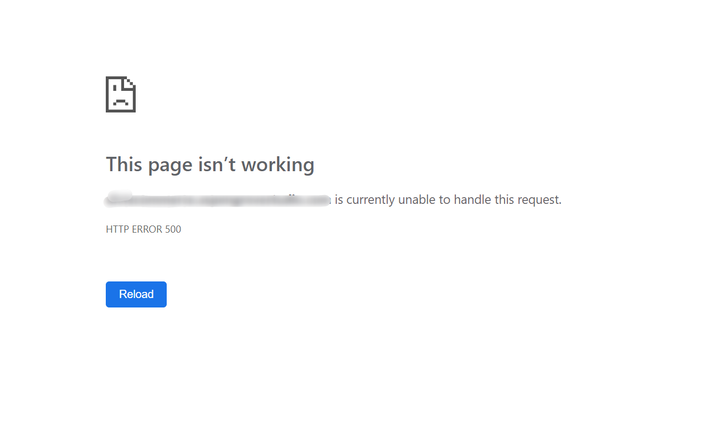
Включить wp_debug
Режим отладки WordPress предоставит вам подробную информацию об ошибке, которая остановила выполнение. Мы включаем его, изменяя значение с «false» на «true» в wp_debug внутри файла wp-config.php в корневой папке вашего сайта.
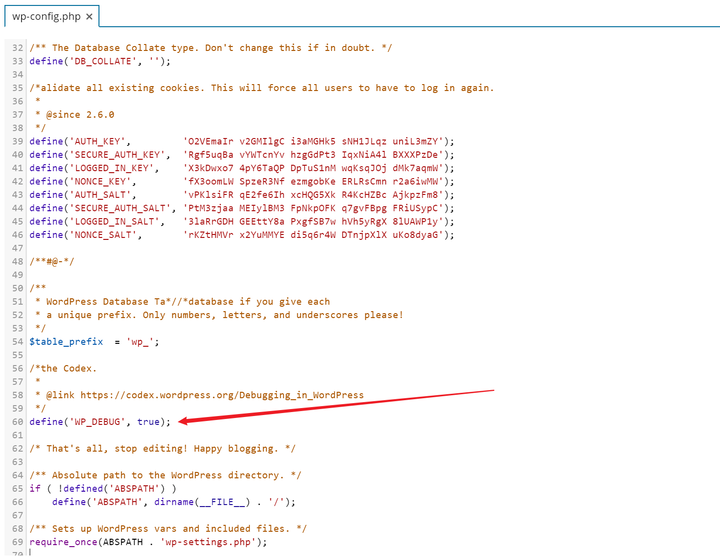
Если вы используете Plesk или cPanel, вы можете сделать это, просто изменив это значение с помощью проводника и отредактировав wp-config.php. Вы также можете следовать этому руководству по отладке от Blogvault, чтобы получить более подробные инструкции.
Как только файл будет отредактирован, вы сможете увидеть фактическую ошибку, которая остановила выполнение. В ошибке также будет указан путь и файл, в котором это произошло, поэтому легко догадаться, какой плагин вызвал ее. При отключении его можно пропустить ошибку, а затем обновить плагин или удалить его, в зависимости от ситуации.
Решение
Подавляющее большинство случаев внутренней ошибки сервера 500 связано с более старыми версиями тем или плагинами. Переключив вашу тему на любую стандартную тему WP, вы сможете восстановить доступ к своему сайту. Отключение конфликтующих плагинов также вернет вам доступ к панели управления. Если вы столкнулись с ситуацией, когда ваша тема является ответственной за нарушение работы сайта, лучший способ исправить это – создать zip-файл указанной темы из папки темы wp-content / themes / yourtheme, а затем удалить его из твой сайт. Это устранит ошибку, и вы сможете восстановить доступ к своему сайту. Затем вы можете повторно загрузить его и обновить, не активируя. То же самое можно сделать и с плагинами.
Наиболее частые ситуации для 500 внутренних ошибок сервера можно исправить обновлением. В случаях, когда для указанного плагина / темы нет доступных обновлений, вы можете попробовать переключиться на более старую версию PHP. Но знайте, что это временное решение. Новые версии PHP становятся стабильными, а старые версии регулярно объявляются устаревшими. Рано или поздно ваш сайт точно перестанет работать. Лучшим подходом всегда будет обновить или удалить / заменить соответствующие плагины.
Всегда помните, что лучше предотвратить и обновить, чем пытаться устранить повреждения позже.
Завершение нашего руководства по внутренним ошибкам сервера WordPress 500
Внутренняя ошибка сервера WordPress 500 может стать настоящей проблемой. Но в большинстве случаев их можно легко диагностировать и исправить, просто удалив / обновив конфликтующие части вашего сайта. Хотя могут быть ситуации, когда эти ошибки выходят за рамки нормы (например, при разработке плагина), это выходит за рамки цели данной статьи.
Для подавляющего большинства людей приведенный выше совет должен решить вашу проблему. Помните, что wp-debug – ваш лучший друг, и всегда внимательно следуйте инструкциям. Ваш сайт будет снова в сети в кратчайшие сроки.
Остались вопросы? Или советы по устранению внутренней ошибки сервера WordPress 500? Дай мне знать!
Источник записи: https://www.wpexplorer.com
|
19 / 19 / 6 Регистрация: 22.12.2012 Сообщений: 2,261 |
|
|
1 |
|
|
16.10.2015, 17:19. Показов 3521. Ответов 6
При попытке переноса сайта на хост плагином Duplicator, выдает следующее: The server didn’t respond in time.
__________________
0 |

|
Programming Эксперт 94731 / 64177 / 26122 Регистрация: 12.04.2006 Сообщений: 116,782 |
16.10.2015, 17:19 |
|
6 |
|
163 / 164 / 78 Регистрация: 06.09.2015 Сообщений: 632 |
|
|
16.10.2015, 19:07 |
2 |
|
morda77, время ожидания истекло Я обычно переношу плагином Wp Clone By Academy (если сайт не мультисайт)
0 |
|
19 / 19 / 6 Регистрация: 22.12.2012 Сообщений: 2,261 |
|
|
16.10.2015, 20:27 [ТС] |
3 |
|
shevan, для этого, насколько я понимаю, на новом хосте должен быть уже установлен WP?
0 |
|
163 / 164 / 78 Регистрация: 06.09.2015 Сообщений: 632 |
|
|
16.10.2015, 20:33 |
4 |
|
morda77, да, нужна базовая установка как правило, многие хосты предлагают установку в 1 клик, затем плагин, и импортируемый url
0 |
|
19 / 19 / 6 Регистрация: 22.12.2012 Сообщений: 2,261 |
|
|
16.10.2015, 21:07 [ТС] |
5 |
|
shevan, поставил на хост WP, но при попытке сделать рестор по ссылке с локального хоста, выдает: Что не так?
0 |
|
163 / 164 / 78 Регистрация: 06.09.2015 Сообщений: 632 |
|
|
16.10.2015, 21:26 |
6 |
|
morda77, да, потому что твой локальный хост не доступен из интернета скачай zip файл на компьютер, переименуй его, скажем, wp-restore.zip, загрузи на хост в папку ‘wp-content/uploads/wp-clone’ уж да, проще было скопировать вручную, как советовали здесь Как перенести сайт на хостинг?
0 |
")
|
19 / 19 / 6 Регистрация: 22.12.2012 Сообщений: 2,261 |
|
|
16.10.2015, 21:49 [ТС] |
7 |
|
shevan, сделал, как ты написал. Все равно: Temporary files created in /home/alex4493643/public_html/site.com/wp-content/wpclone-temp will be deleted.
0 |
|
IT_Exp Эксперт 87844 / 49110 / 22898 Регистрация: 17.06.2006 Сообщений: 92,604 |
16.10.2015, 21:49 |
|
7 |
WordPress 500 Internal Server Error 🤬 DAMM YOU !!!
If someone gave you $500 for doing nothing, you would be so happy. But is if you saw a WordPress 500 Internal Server Error you would not be so happy. If you are dealing with a WordPress 500 Internal Server Error oh, you are probably a little stressed out right now because that means that certain areas of your website or perhaps the entire website is not loading or functioning as it should.

The good news is that this specific issue is very easy to fix once your identify the cause of the problem. We want to run you through 5 things to isolate the WordPress 500 Internal Server Error and then the steps you can take after to fix it FAST!.
👉🏻 #1 MAKE SURE YOUR HOSTING IS NOT THE PROBLEM
So if your host tells you that the server is fine, you can take their word for it but we suggest you verify that statement. It is so simple to do so too. First we need to rule out the hosting environment being an issue causing the WordPress 500 internal error. To do this we need to upload a non-WordPress PHP file and then try to load it on the server.
Using either FTP access or your web hosting file manager, you want to upload the file at THIS LINK. Make sure you unzip this file before you upload it. This will be uploaded to the root folder of your server and once that is completed, you will visit YOUR_DOMAIN.com/info.php.
If the server is working as it should, this address should load and you will see some server info. If you still get a 500 Internal Server Error on WordPress, the server is not working and you can go back to the host and provide them this URL stating it should load as it is only a 1 line file that does not depend on anything related to your WordPress installation to load.
👉🏻 #2 CHECK .HTACCESS FILE FOR ERRORS
This file is the soul of your server configuration and 1 simple wrong character in this file can quickly crash your site and cause a WordPress 500 Internal Server Error. A very quick and easy way to see if this is the issue is to connect to your site’s files using either FTP or your web hosting control panel and rename the file.
If the site loads after that and the WordPress 500 Internal Server Error is gone, then you found the root cause. Simply login to your site and re-save your permalinks by going to SETTINGS > PERMALINKS and hit save. This will re-generate your .htaccess file. Happy days now!!!
Below is a detailed article outlining and understanding how the word pressed. htaccess file Works within your WordPress installation and can be extremely helpful in resolving any issues within this file that could results in a WordPress 500 internal server error.
https://www.dreamhost.com/wordpress/guide-to-wp-and-htaccess/
👉🏻 #3 RULE OUT WORDPRESS CORE AS AN ISSUE
Sometimes for many different reasons, your core WordPress installation may have an issue. This could be files missing, changed or corrupted. You want to make sure that your core WordPress installation is fresh and new to rule out this being the cause of your server WordPress 500 Internal Server Error.
Take a look below to see how you can manually remove and re-install WordPress core files.
⚡️ Get the latest WordPress zip (or tar.gz) file.
⚡️ Unpack the zip file that you downloaded.
⚡️ Deactivate plugins.
⚡️ Delete the old wp-includes and wp-admin directories on your web host (through your FTP or shell access).
⚡️ Using FTP or your shell access, upload the new wp-includes and wp-admin directories to your web host, in place of the previously deleted directories.
⚡️ Upload the individual files from the new wp-content folder to your existing wp-content folder, overwriting existing files. Do NOT delete your existing wp-content folder. Do NOT delete any files or folders in your existing wp-content directory (except for the one being overwritten by new files).
⚡️ Upload all new loose files from the root directory of the new version to your existing wordpress root directory.
NOTE – you should replace all the old WordPress files with the new ones in the wp-includes and wp-admin directories and sub-directories, and in the root directory (such as index.php, wp-login.php and so on). Don’t worry – your wp-config.php will be safe.
Be careful when you come to copying the wp-content directory. You should make sure that you only copy the files from inside this directory, rather than replacing your entire wp-content directory. This is where your themes and plugins live, so you will want to keep them.
If you have customized the default or classic themes without renaming them, make sure not to overwrite those files, otherwise you will lose your changes. (Though you might want to compare them for new features or fixes..)
Lastly you should take a look at the wp-config-sample.php file, to see if any new settings have been introduced that you might want to add to your own wp-config.php.
👉🏻 #4 CHECK YOUR PLUGINS OR ACTIVE THEME
Now if all the above does not isolate the cause of your WordPress 500 internal server error, you can check to see if it is a plugin or your active theme making this hair pulling issue happen. For this you will need either FTP access or access to your web hosting control panel file manager area. What we will do here is navigate to our plugins folder which will have a path of WP-CONTENT > PLUGINS. All you need to do now is rename the PLUGINS folder to something like PLUGINS_OFF.
Now try to reload your site. If it loads up with an error, you know for sure it is a plugin. Login and visit your plugins page. Doing this will turn them all off. Now go back and revert the folder name back to its original folder name PLUGINS.
Now go reload the plugins page inside your admin area and turn them on 1 at a time until you find the one that causes the WordPress 500 internal server error.
If the WordPress 500 internal server error is being caused by your active theme, we can know this for certain by navigating to your themes folder which will have a path of WP-CONTENT > THEMES. Now rename the THEMES folder to something like THEMES_OFF. Reload the site and if it loads, you know 100% that the theme is the issue.
CONCLUSION – WordPress 500 Internal Server Error
We really hope this was helpful if isolating the cause of your WordPress 500 internal server error. If you are stuck or have any questions about any of this, please comment below.