Содержание
- F A Q
- ▶ HOW DO I GET STARTED, ARE THERE ANY TUTORIALS?
- ▶ HOW SHOULD I ADD MORE KEYFRAMES?
- ▶ HOW DO I BLEND MULTIPLE KEYFRAMES?
- ▶ HOW DO I CREATE A VIDEO FROM THE OUTPUT?
- ▶ CAN EBSYNTH WORK WITH ALPHA CHANNEL?
- ▶ I’M WORKING ON A BIG PROJECT, ANY RECOMMENDATION FOR THE FILMING?
- ▶ WHAT SHOULD I DO ABOUT ERRORS OR CRASHES?
- ▶ MY OUTPUT IS BLACK OR EMPTY, HOW DO I FIX IT?
- EbSynth — инструмент для создания рисованной анимации на основе картинки Статьи редакции
- jamriska / ebsynth Goto Github PK
- ebsynth’s Introduction
- jamriska / ebsynth Goto Github PK
- ebsynth’s Introduction
F A Q
▶ HOW DO I GET STARTED, ARE THERE ANY TUTORIALS?
MAPPING:
Higher mapping encourages the output strokes to appear at the same location as in the keyframe. If the mapping is lower, EbSynth is allowed to rearrange the input features to appear at different places in the output. Good values are between 5 to 50.
DE-FLICKER:
De-flicker suppresses texture flickering between subsequent frames. Good values are between 0.3 to 2.0. If you set it to zero, the output sequence will flicker as if every frame was painted independently. The spaner the de-flicker is the more temporally coherent the output will be.
Here’s a video tutorial with more information and examples of the de-flicker influence.
DIVERSITY:
Diversity controls to what extent the visual richness of the style is preserved in the output sequence. Good values are between 1000 to 20 000. If you set the diversity too low, you might notice some repetitive patterns in your output, similar to the artifacts caused by a clone brush.
▶ HOW SHOULD I ADD MORE KEYFRAMES?
▶ HOW DO I BLEND MULTIPLE KEYFRAMES?
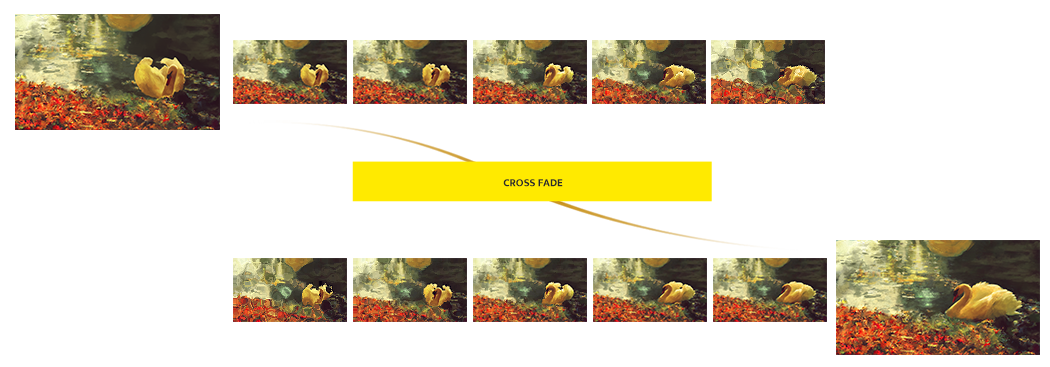
After the synthesis is done, you can hit the „export to AE“ button and your project will be loaded into After Effects as a new composition. It will be already composed and blended.
If you don’t have After Effects, no worries! You’ll just have to blend your output sequences manually in any video editing software that supports crossfades. You should have a sequence of output images generated from each keyframe in a range specified in the time interval boxes in EbSynth GUI. By default, these sequences overlap and it is up to you to set a cross fade transition during this overlapping interval.
▶ HOW DO I CREATE A VIDEO FROM THE OUTPUT?
EbSynth Beta exports png sequences. You can use video-editing software to convert them into a video.
▶ CAN EBSYNTH WORK WITH ALPHA CHANNEL?
▶ I’M WORKING ON A BIG PROJECT, ANY RECOMMENDATION FOR THE FILMING?
LIGHTING
EbSynth tracks the visual data in the video and calculates the optical flow. If the image is overexposed or underexposed, the tracking will fail due to the lack of data. Also, avoid any hard moving shadows as it might confuse the tracking. Diffuse lighting works best for EbSynth. 
COSTUMES
As mentioned above, EbSynth tracks the visual data. To help the tracking, try using costumes with a visually rich print. Avoid any flat textures and monochromatic fabrics. Reflective material and moirГ©-prone repetitive patterns are also problematic.
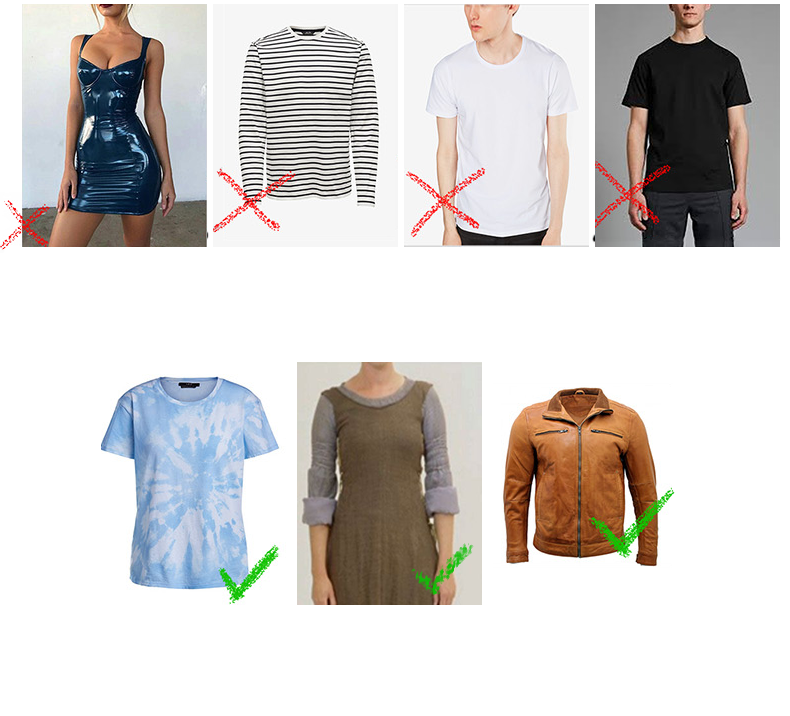
We recommend wearing clothes of distinct colors. It’ll help EbSynth synthesize a better result. 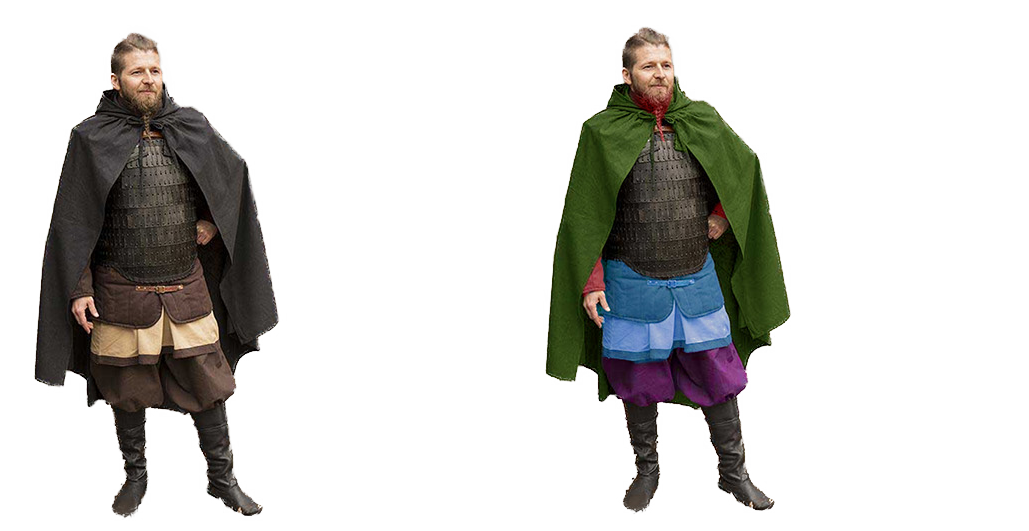
FORMAT
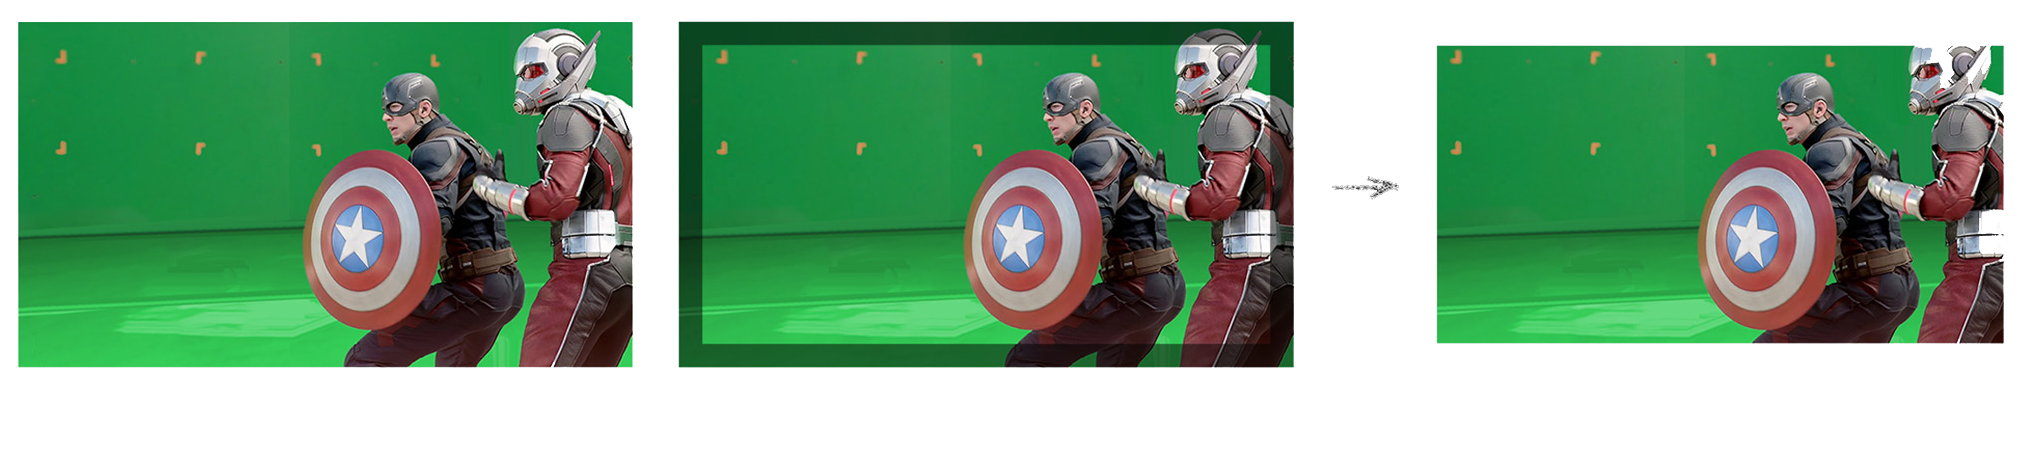
Your result can suffer from artefacts on the edges of the frames. Keep that in mind and leave some space around the edges to be cropped out later.
LAYERS
If the shot gets too complicated and you have actors overlapping each other in the frame, it is better to film them individually in separate takes. This will save you a lot of pain later, when you get to the stylization part of the pipeline.
▶ WHAT SHOULD I DO ABOUT ERRORS OR CRASHES?
EbSynth crashes unexpectadly
Check your input file names. Make sure that the numbers contained in the names have 9 digits tops.
If that doesn’t help, please shoot us an e-mail with the recorded process, we might be able to find another bug and fix it.
Error: Resolutions don’t match
In order for EbSynth to work, your video images need to have the exact same resolution as your keyframe images.
For example: if your video is 1920×1080 pixels then your keyframe must be exactly 1920×1080 pixels as well.
Error: Missing file
Either your file is truly missing or this error is really confusing and we’re sorry about that.
The thing is that EbSynth only takes image sequences as the video input. Misleading, we know. EbSynth 1.0. will surely accept video files such as .mp4, .avi, .mov etc. However, if you’re trying to feed video files to EbSynth Beta, it will pop up the «Missing file» error.
You need to convert your videos to image sequences (png or jpg) first.
Here are some tips how to do that:
- After Effects: video
- Blender (free): video
- VLC (free): video
- Online converter (free): link
- Other ways: link
▶ MY OUTPUT IS BLACK OR EMPTY, HOW DO I FIX IT?
Black output usually indicates that the GPU has run out of memory.
Try smaller resolution or disable GPU acceleration in the ‘Advanced’ tab.
Empty output folder can mean that your antivirus prevented EbSynth from saving images on the drive.
We will get Windows and Mac certification for EbSynth 1.0., in the mean time, consider adding an exception to your antivirus.
Источник
EbSynth — инструмент для создания рисованной анимации на основе картинки Статьи редакции
Программа может в разы сократить время работы аниматоров.
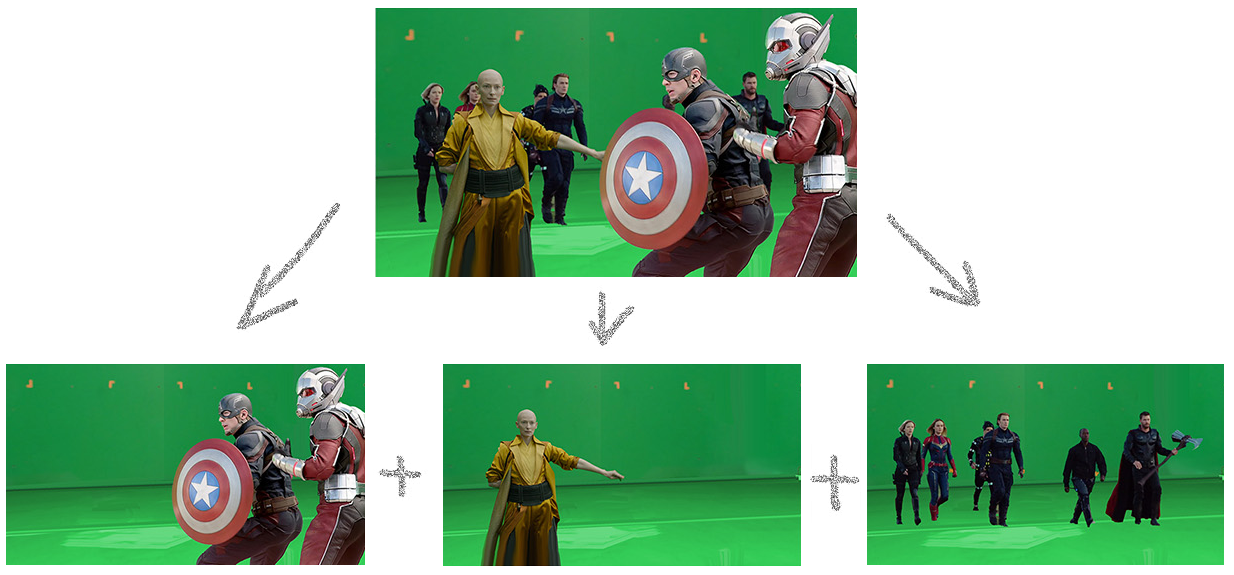
Разработчики из Secret Weapons выпустили программу EbSynth, которая накладывает рисунок на видео, и таким образом создает рисованную анимацию.
Для того что бы получить такой результат, нужно иметь исходный ролик и детальный рисунок ключевого кадра — остальное программа сделает самостоятельно, посредством заполнения недостающих фрагментов между ключевыми рисованными кадрами.
Судя по туториалу, анимацию можно делать не только на основе рисунка, но и по абсолютно любому изображению, созданному в графическом редакторе.
Разработчики программы отметили, что обычно на создание минутных роликов с анимацией уходят часы работы, в то время как с EbSynth достаточно снять натурное видео и нарисовать ключевой кадр. Программа может в разы ускорить работу над анимационным видео.
EbSynth доступна бесплатно на официальном сайте.
выглядит не очень, полноценные фильмы с такой обработкой я бы смотреть не стал
Думаю это будет использоваться для грубого наброска и доводиться дальше классическим способом, примерно как с motion capture.
Я уверен что «Помутнение» было нарисовано похожим способом.
Там был довольно трудоёмкий ротоскоп, насколько я помню.
Есть фильм «Помутнение» с Киану Ривзом, похож по стилю анимации. Можете посмотреть и решить для себя, смотрибельно или нет)
Нет, не смотрибельно. Он выполнен лучше, чем эта машинная штука, потому что вручную обрабатывался, но состарился плохо, а кроме внешнего вида там ничего такого и нет.
да вполне и сейчас смотрится не хуже чем раньше, и до сих пор остаётся лучшей экранизацией Ф.Дика
Есть фильм «Ван Гог. С любовью, Винсент». Отлично смотрится.
С этой технологией можно было бы выпустить офигенный римейкремастер игры The Last Express, если исходное видео сохранилось.
Пойдя наперекор авторской задумке. Отлично.
Авторская задумка вряд ли подразумевала чудовищное слайд-шоу, возникшее в итоге по причине нехватки бюджета, при том что отдельные анимации сделаны очень плавными. А с этой технологией Мехнер смог был сделать всё именно так, как задумывал изначально.
Как раз слайдшоу и было задумкой
Почему тогда эту «задумку» столько раз нарушают в самой игре, делая плавные анимации и увеличивая из-за них бюджет?!
А я откуда знаю почему? Знаю, что слайдшоу задумка только. Может это нарушается в задуманные моменты специально для нужного эффекта.
Меня больше дискретной передвижение обескураживает в этой игре.
Ну вот, у тебя нет никакого вменяемого объяснения — а то, что Мехнер изначально пытался сделать всё плавным, но у него тупо не хватило на это денег и поэтому большая часть игры является вырвиглазным слайд-шоу, прекрасно всё объясняет. Это же Мехнер, ради всего святого, человек сделавший себе имя на плавной реалистичной анимации.
А теперь объединить это с нейросеткой Ostagram
Так, я забил идею создания карточной игры с анимашками на этой проге
Что-то, мне кажется, ты опоздал, и CDPR в Гвинте давно на ней фигачат анимацию))
CDPR сперва рисует, потом в 3D карты анимирует
Источник
jamriska / ebsynth Goto Github PK
Fast Example-based Image Synthesis and Style Transfer
ebsynth’s Introduction
Ebsynth: A Fast Example-based Image Synthesizer
ebsynth is a versatile tool for by-example synthesis of images. It can be used for a variety of image synthesis tasks, including guided texture synthesis, artistic style transfer, content-aware inpainting and super-resolution.
The focus of ebsynth is on preserving the fidelity of the source material. Unlike other recent approaches, ebsynth doesn’t rely on neural networks. Instead, it uses a state-of-the-art implementation of non-parametric texture synthesis algorithms. Thanks to its patch-based nature, ebsynth produces crisp results, which preserve all the fine detail present in the original image.
Pre-built Windows binary can be downloaded from here: http://jamriska.cz/ebsynth/ebsynth-win64.zip.
The first example shows how to perform a basic guided texture synthesis with ebsynth . This use-case was first proposed in the original Image Analogies paper [1], where they called it ‘texture-by-numbers’. We start with a photograph of a natural scene together with its segmentation (e.g., rock is painted green, sky with blue):

Next, we paint a target segmentation by hand, and we ask ebsynth to produce a new ‘photograph’ that would match it. In the language of style transfer: we want to transfer the style of the source photograph onto the target segmentation in a way that would respect the individual segments. The segmentation acts as a guide for the synthesis.
StyLit: Illumination-Guided Stylization of 3D Renderings

This example shows how to achieve a non-photorealistic rendering with ebsynth . It is based on the work of Fišer et al. [7]. The goal is to render a 3D model like an artist would do. Specifically, we want to capture the way how an artist conveys the different illumination effects, like highlights, contact shadows, and indirect bounces. To that end, we set up a simple reference scene with an illuminated ball, and let the artist draw it in her/his style. We use an off-the-shelf path tracer to produce the separate render passes, e.g., full global illumination, just the direct diffuse component, just the indirect bounce, etc. Next, we render the same set of passes for the target 3D model and use them as guides for ebsynth .

Compared to texture-by-numbers, the main difference here is we now have multiple guiding channels. Note the guides always come in pairs: source guide first, target guide second. For better results, we might want to boost the contribution of guides relative to the style. In the example above, the style has a default weight of 1.0, while the guide channels have weight of 0.66 each. In sum, the total guide weight is 2.0, resulting in 2:1 guide-to-style ratio.
FaceStyle: Example-based Stylization of Face Portraits

This example demonstrates how one can use ebsynth to transfer the style of a portrait painting onto another person’s photograph. It is based on the work of Fišer et al. [8]. The goal is to reproduce the fine nuances of the source painting, while preserving the identity of the target person. I.e., we want the person to still be recognizable after the synthesis.
Unlike with StyLit, in this setting we don’t have the reference 3D geometry to use as a guide. However, we can exploit the fact that both the source painting and the target photo contain a human face, which has a well-defined structure. We will use this structure to infer the necessary guiding information.

Specifically, we detect the facial landmarks in both the target and source images, and use them to produce a soft segmentation guide Gseg , and a positional guide Gpos , which is essentially a dense warp field that maps every target pixel to its corresponding position in source. To preserve the person’s identity, we use the appearance guide Gapp , which is a grayscale version of the target photo that was equalized to match the luminance of the source painting.
The code is released into the public domain. You can do anything you want with it.
However, you should be aware that the code implements the PatchMatch algorithm, which is patented by Adobe (U.S. Patent 8,861,869). Other techniques might be patented as well. It is your responsibility to make sure you’re not infringing any patent holders’ rights by using this code.
If you find this code useful for your research, please cite:
Источник
Программа может в разы сократить время работы аниматоров.
Разработчики из Secret Weapons выпустили программу EbSynth, которая накладывает рисунок на видео, и таким образом создает рисованную анимацию.
Для того что бы получить такой результат, нужно иметь исходный ролик и детальный рисунок ключевого кадра — остальное программа сделает самостоятельно, посредством заполнения недостающих фрагментов между ключевыми рисованными кадрами.
Судя по туториалу, анимацию можно делать не только на основе рисунка, но и по абсолютно любому изображению, созданному в графическом редакторе.
Разработчики программы отметили, что обычно на создание минутных роликов с анимацией уходят часы работы, в то время как с EbSynth достаточно снять натурное видео и нарисовать ключевой кадр. Программа может в разы ускорить работу над анимационным видео.
EbSynth доступна бесплатно на официальном сайте.
#Руководства
- 7 дек 2021
-

0
Рассказываем, как при помощи бесплатного плагина превратить видео в эффектный мультик.
Иллюстрация: Катя Павловская для Skillbox Media
Автор статей по дизайну. В веб-дизайн пришёл в 2013 году, осознанно начал заниматься с 2015 года. Параллельно освоил вёрстку. Время от времени публикую переводы на Habr.
Дизайнерские задачи бывают разные. Иногда требуется что-то необычное — чтобы ролик выглядел не снятым на камеру, а, например, нарисованным от руки карандашом или мелом, в акварельном стиле или гуашью. Но как получить такой эффект? Отрисовывать вручную каждый кадр? Это долго и затруднительно, особенно если нет навыка. На помощь придёт довольно простой плагин для After Effects. Он по одному или нескольким ключевым кадрам в заданном стиле обрабатывает остальные кадры видео, затем импортирует их в After Effects и собирает в виде анимации.
Таким образом можно быстро и без особых усилий создавать эффектные анимационные рисованные ролики, стилизованные под мультфильм в практически любой из техник.
Мы разберём, как с помощью плагина EbSynth для After Effects и простого приложения для стилизации фотографий превратить обычное видео в рисованное.
Основные этапы работы:
- выбираем нужное видео,
- делаем секвенцию,
- выбираем стиль будущего мультфильма,
- применяем эффект к видео.
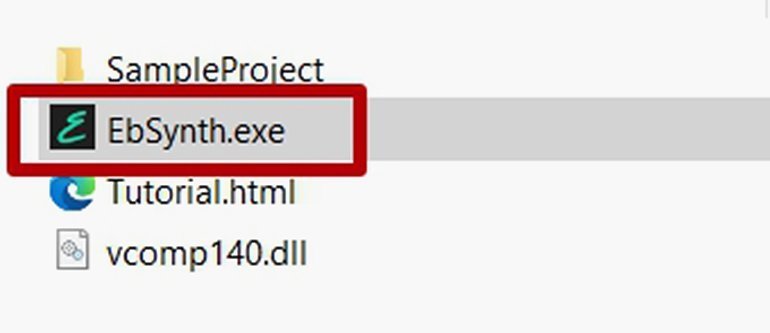
Зайдите на официальный сайт плагина ebsynth.com и нажмите кнопку Download. В появившемся окне кликните по еле заметной строчке No thanks, just start the download и сохраните архив. Распаковав его, запустите вот этот файл:
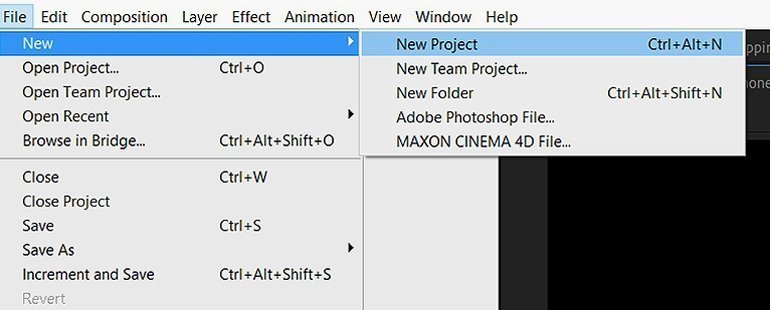
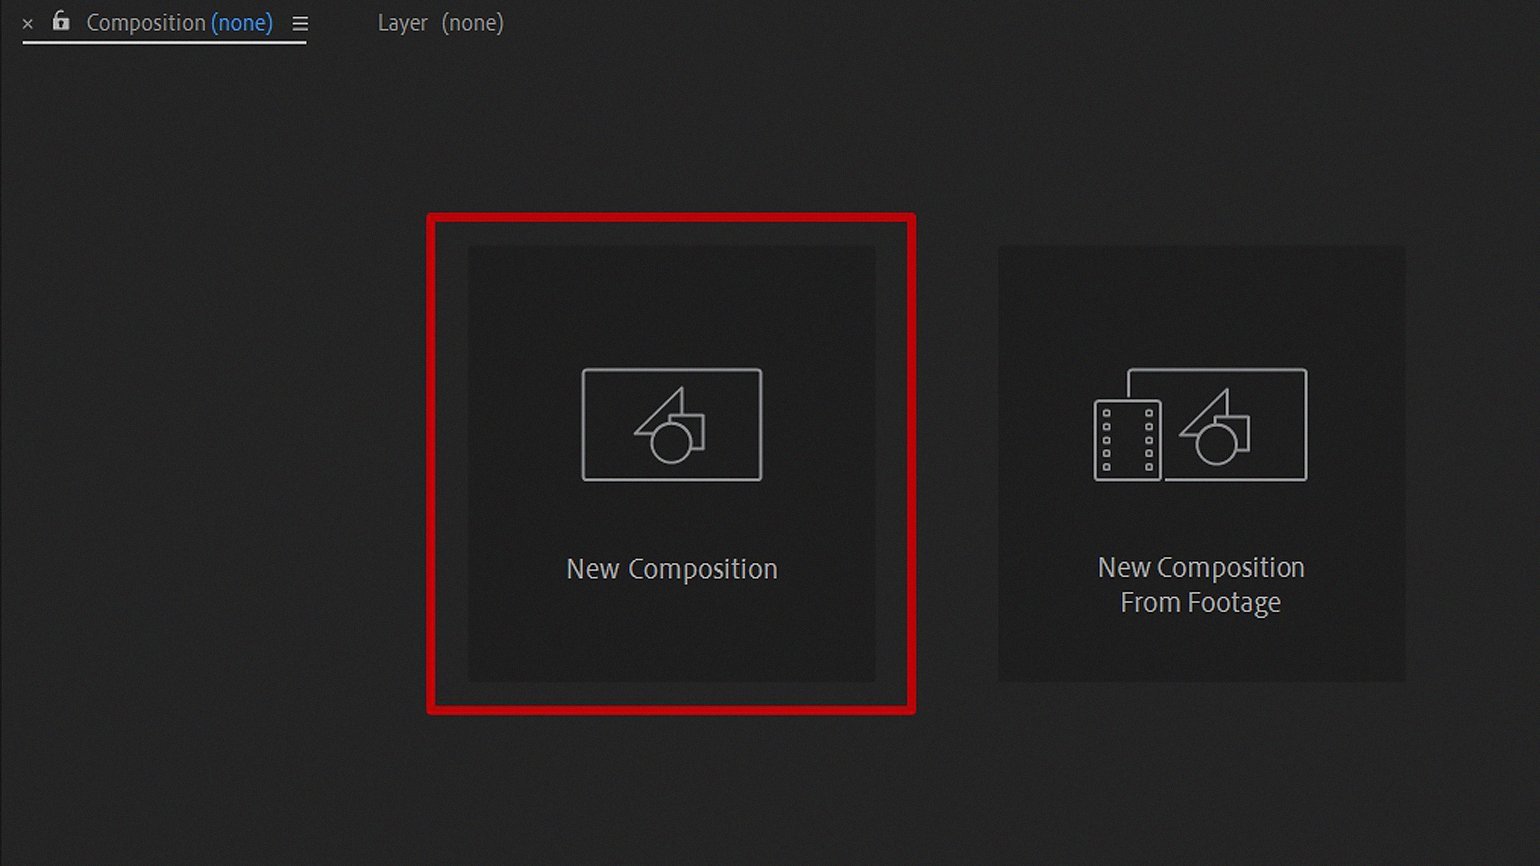
Откройте After Effects и создайте новый проект: File → New → New Project («Файл» → «Новый» → «Новый проект»). В новом проекте нужно создать композицию: выберите New Composition («Новая композиция»).
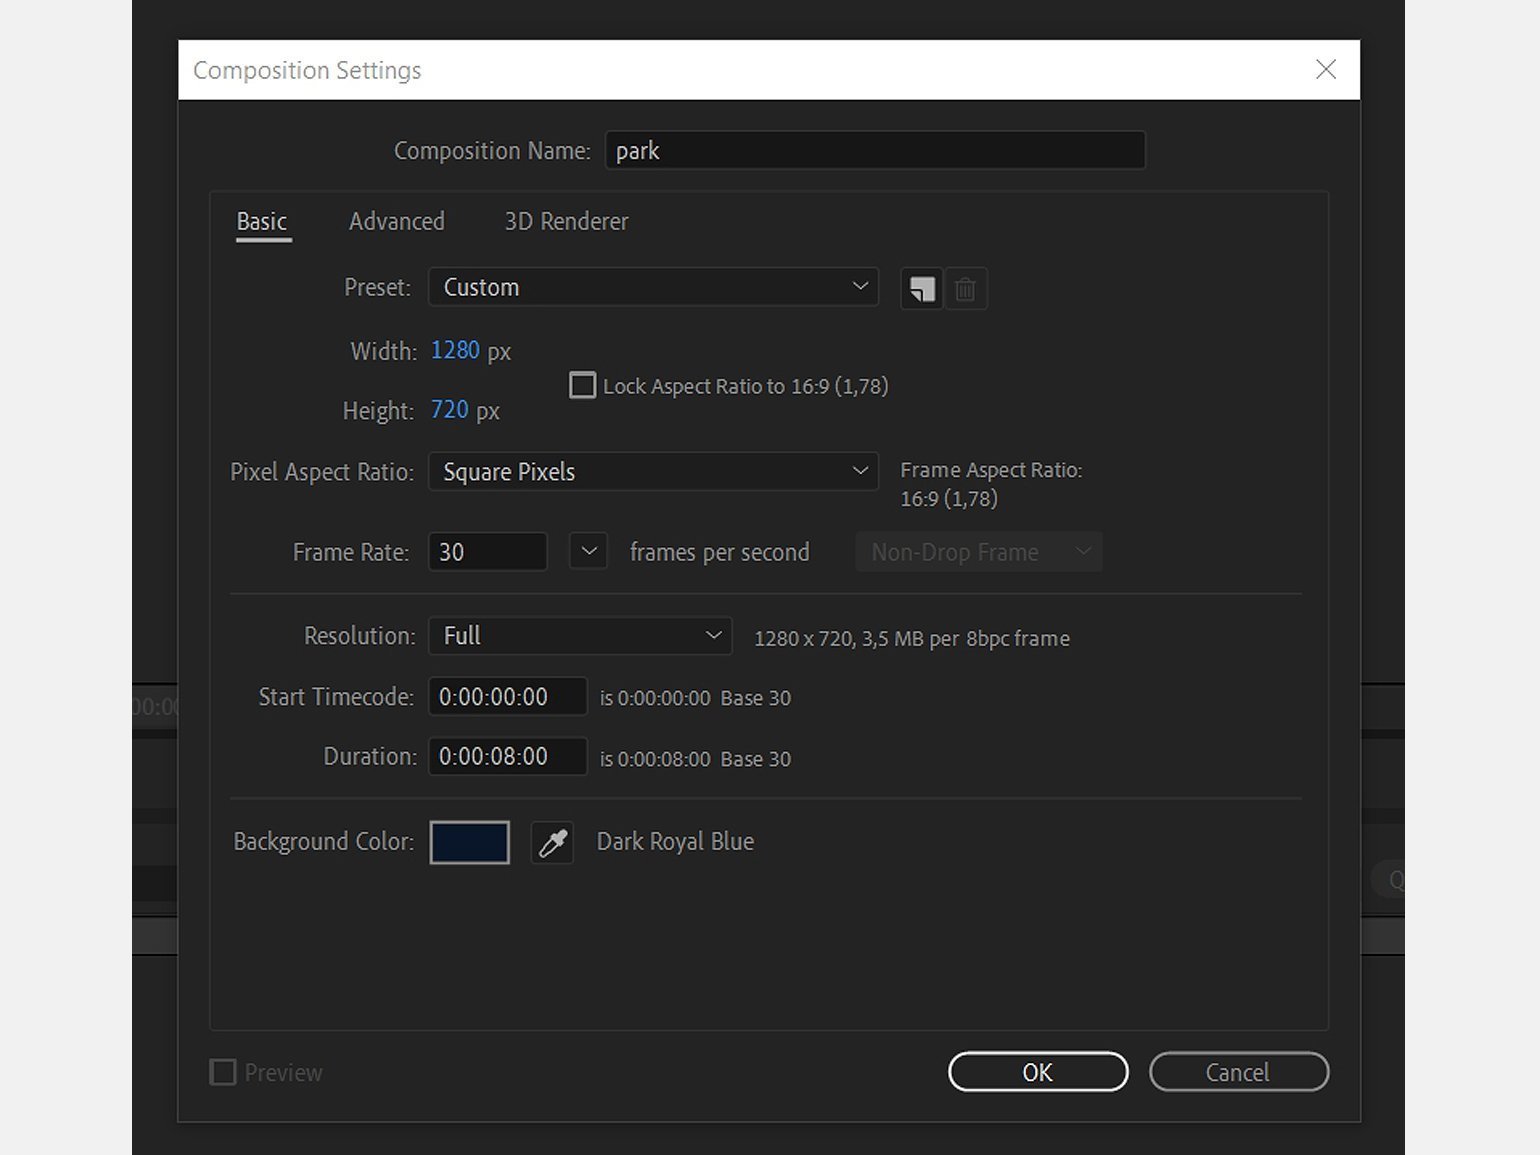
В окне настроек композиции укажите параметры, как показано ниже. Частоту кадров выставите 30. Назовите композицию park.
Для начала нужно подобрать исходное видео для проекта. Потребуется один короткий ролик
Для поиска нужного исходника мы воспользовались бесплатным онлайн-сервисом Pexels. Наиболее эффектно плагин работает с роликами со статичным фоном, поэтому наш выбор пал на видео с человеком, идущим через парк, — съёмку вели со штатива. Мы использовали вот этот фрагмент:
Просто перетяните из окна проводника на панель слоёв нужное видео.

Если вы хотите оставить общий тайминг, то можно ничего не менять. Но в конце ролика ничего не происходит, а камера начинает дрожать, поэтому лучше сделать видео короче. Заодно сократим и начало.
Передвиньте ползунок, например, на седьмую секунду и выберите пункт Trim Comp to Work Area («Обрезать композицию до рабочей области»), как показано ниже. Теперь композиция занимает семь секунд.

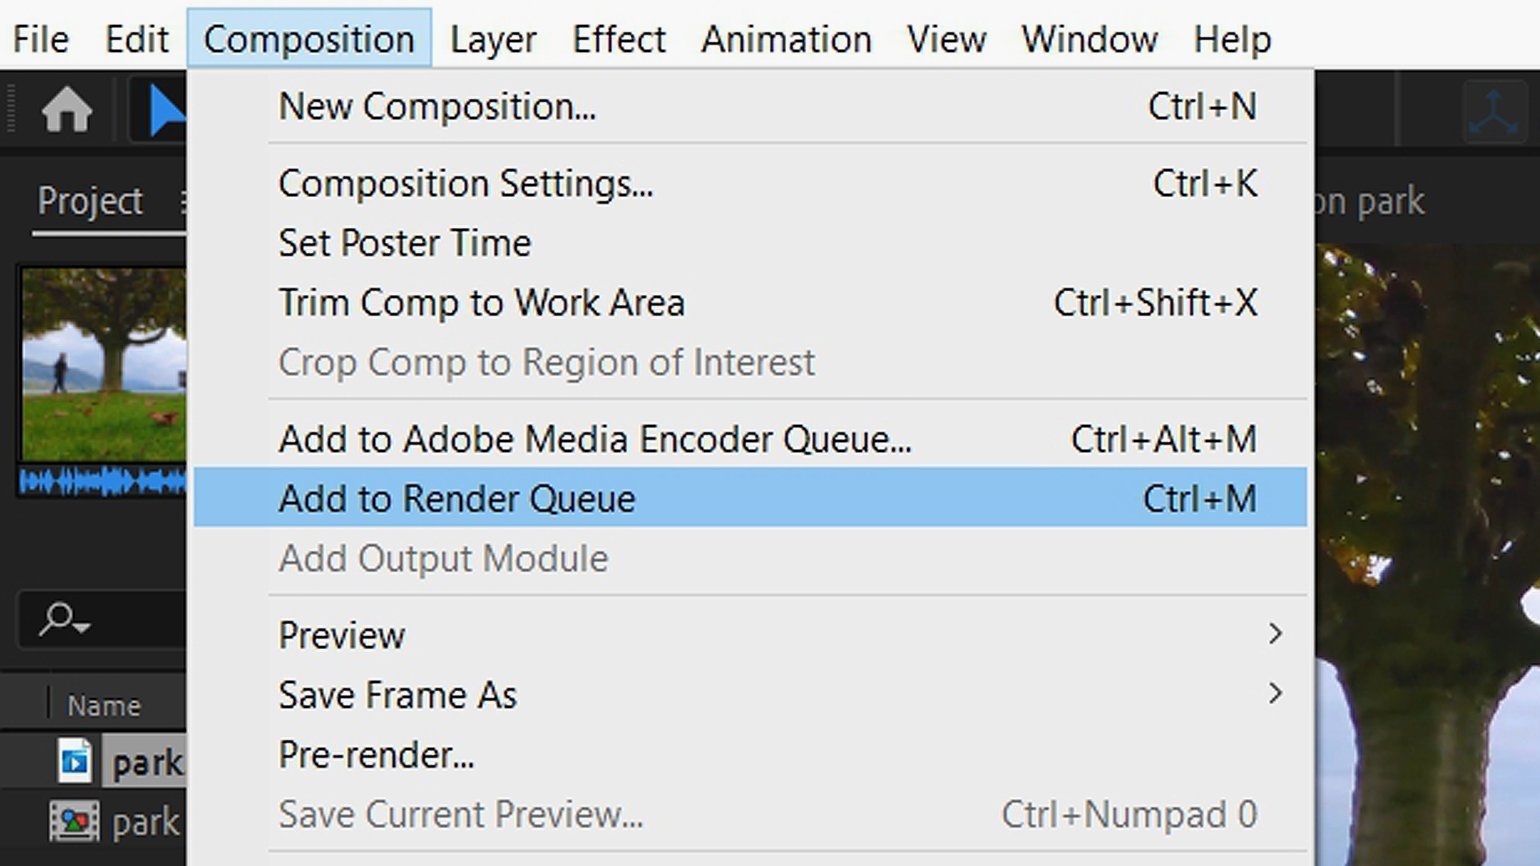
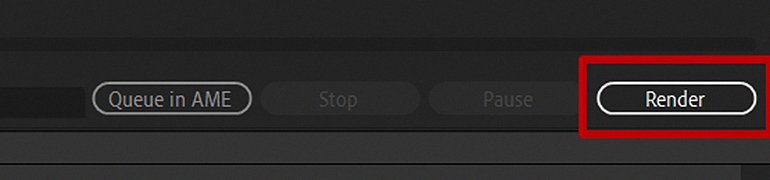
Далее нужно сделать секвенцию видео — сохранить его в виде картинок. Выберите пункт Composition → Add to Render Queue («Композиция» → «Добавить в очередь рендеринга»).
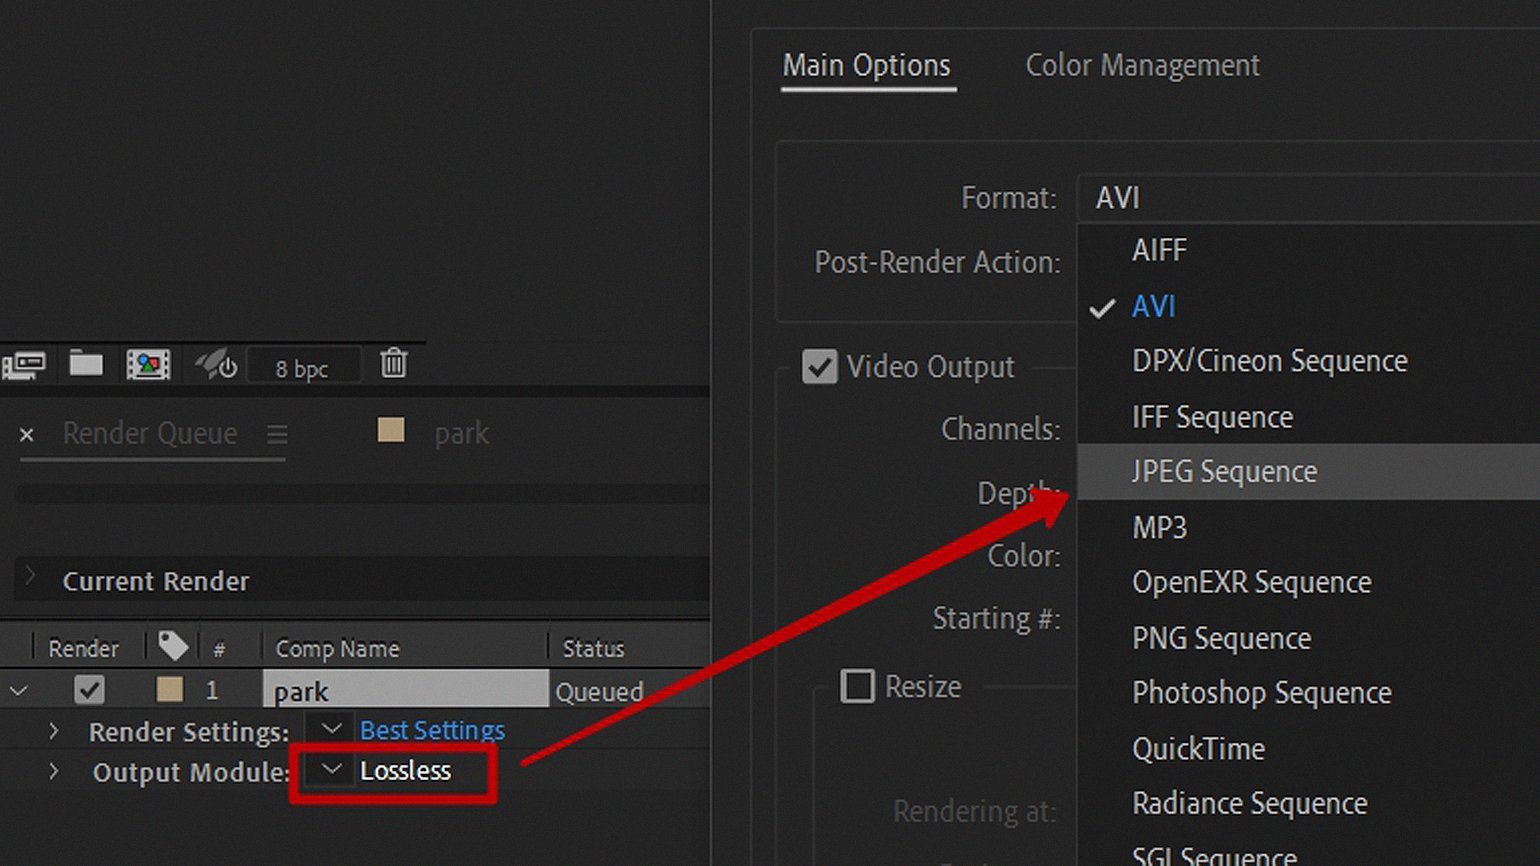
Нажмите на пункт Lossless («Без потерь») и выберите JPEG Sequence («JPEG секвенция»).
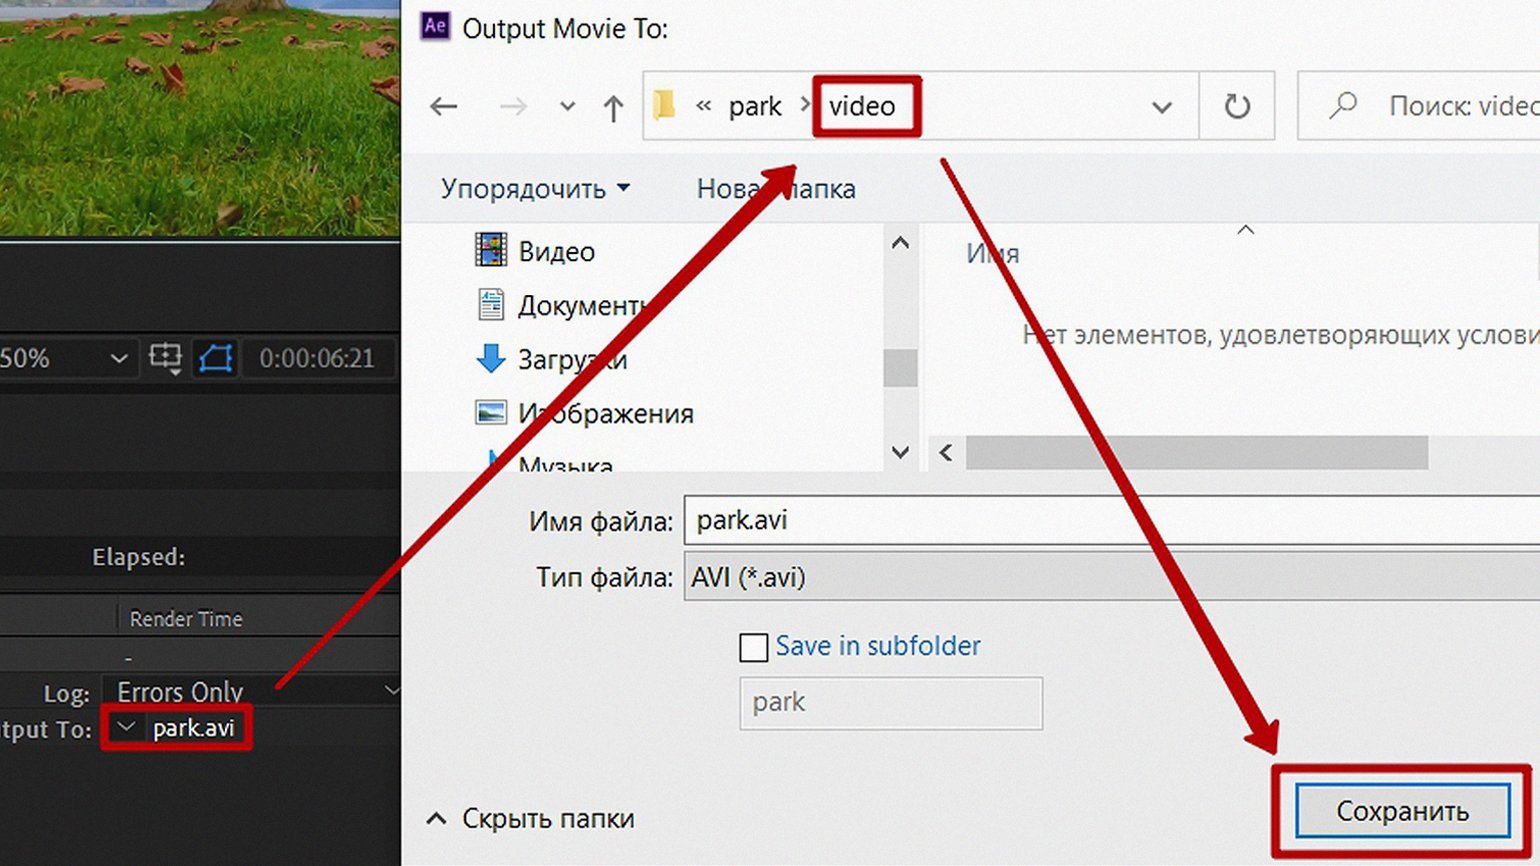
Выберите папку для сохранения файлов, кликнув по названию файла рядом с Output To («Вывод в»), назовите её video.
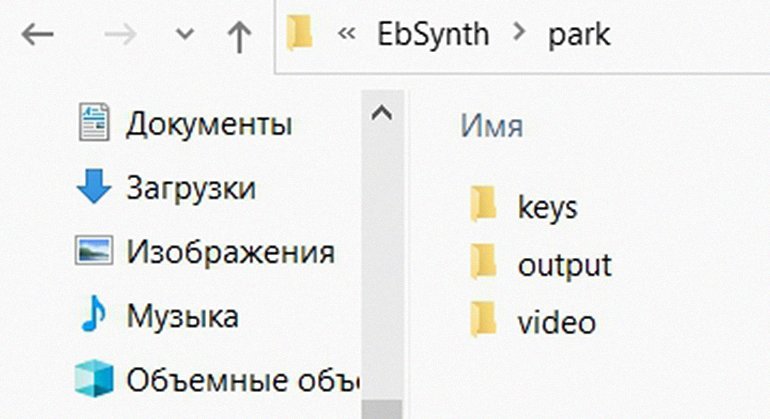
Чтобы не было путаницы, при работе с плагином придерживайтесь такой структуры папок в проекте:
Нажмите кнопку Render, чтобы запустить процесс сохранения файлов в выбранную папку.
После завершения процесса убедитесь, что файлы сохранены и каждому присвоен номер. Порядковые номера файлов соответствуют порядку кадров в видео.

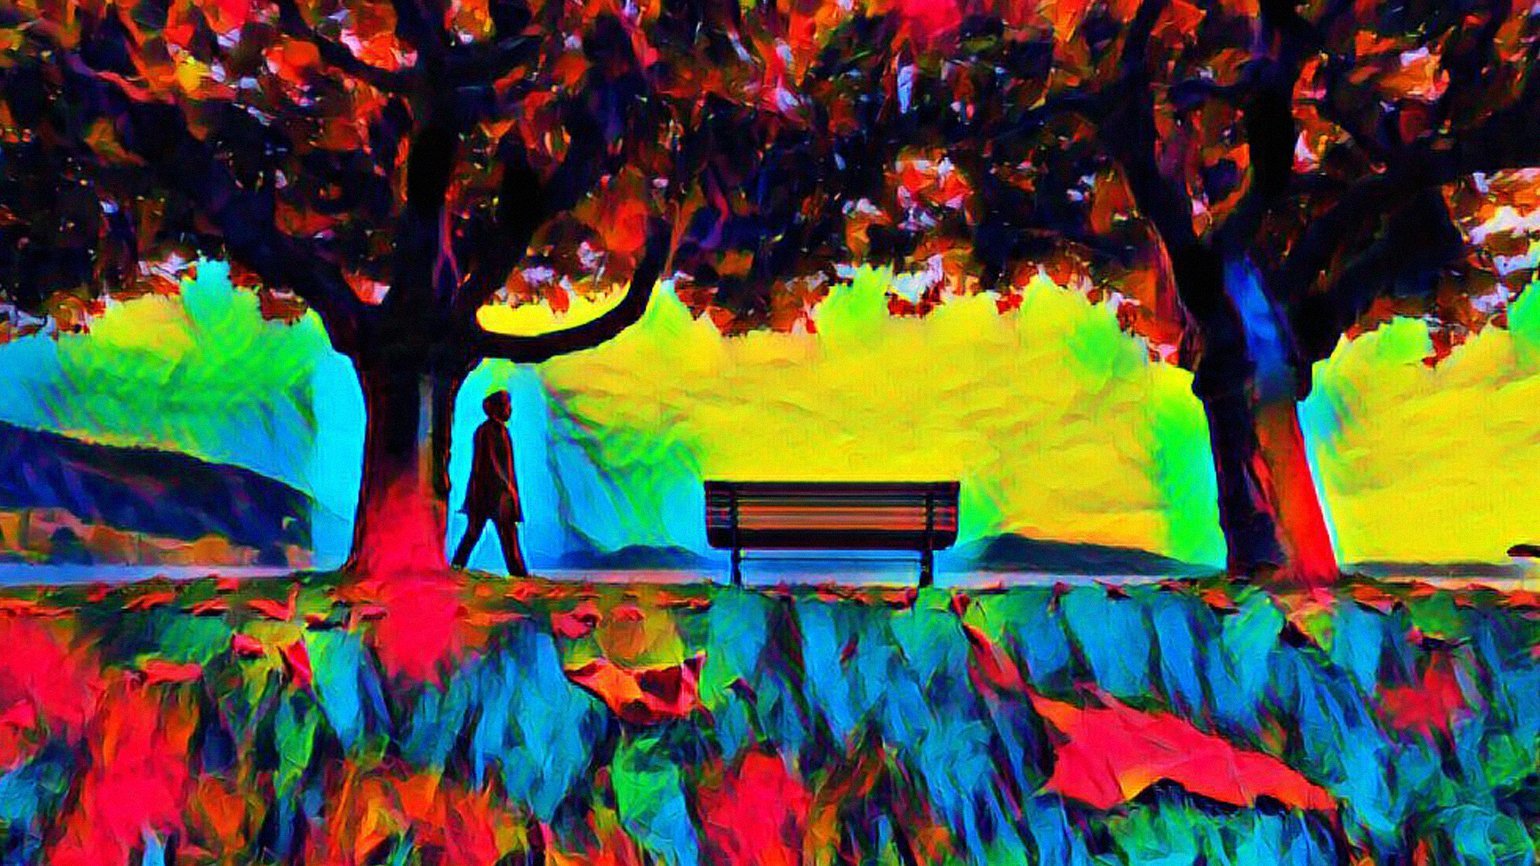
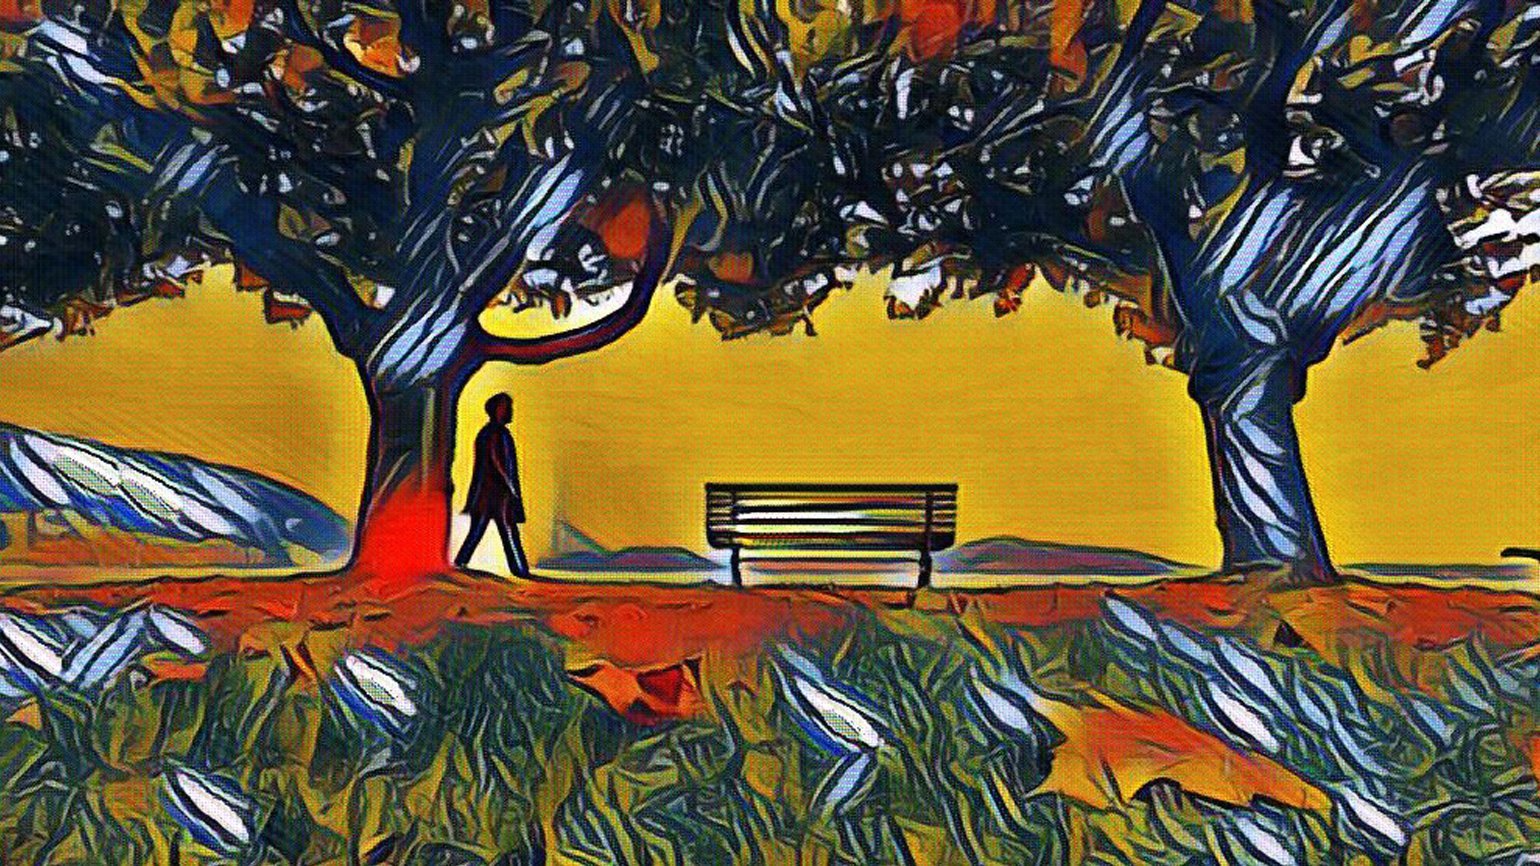
Отлично — для нашего ролика мы получили 211 картинок (у вас это количество может отличаться, но также будет порядка двухсот). Теперь нужно выбрать одно изображение, на котором есть все элементы из ролика — деревья, трава, листья, горы, море, лавка и человек. Человек в кадре нужен обязательно, потому что иначе плагин не сможет получить графическую информацию о нём и соберёт нечто среднее «на свой вкус».
Теперь примените к выбранной картинке какой-нибудь интересный рисованный эффект. Поскольку популярный редактор Prisma Labs работает только через мобильное приложение, мы воспользовались его аналогом — онлайн-сервисом Loonapix.
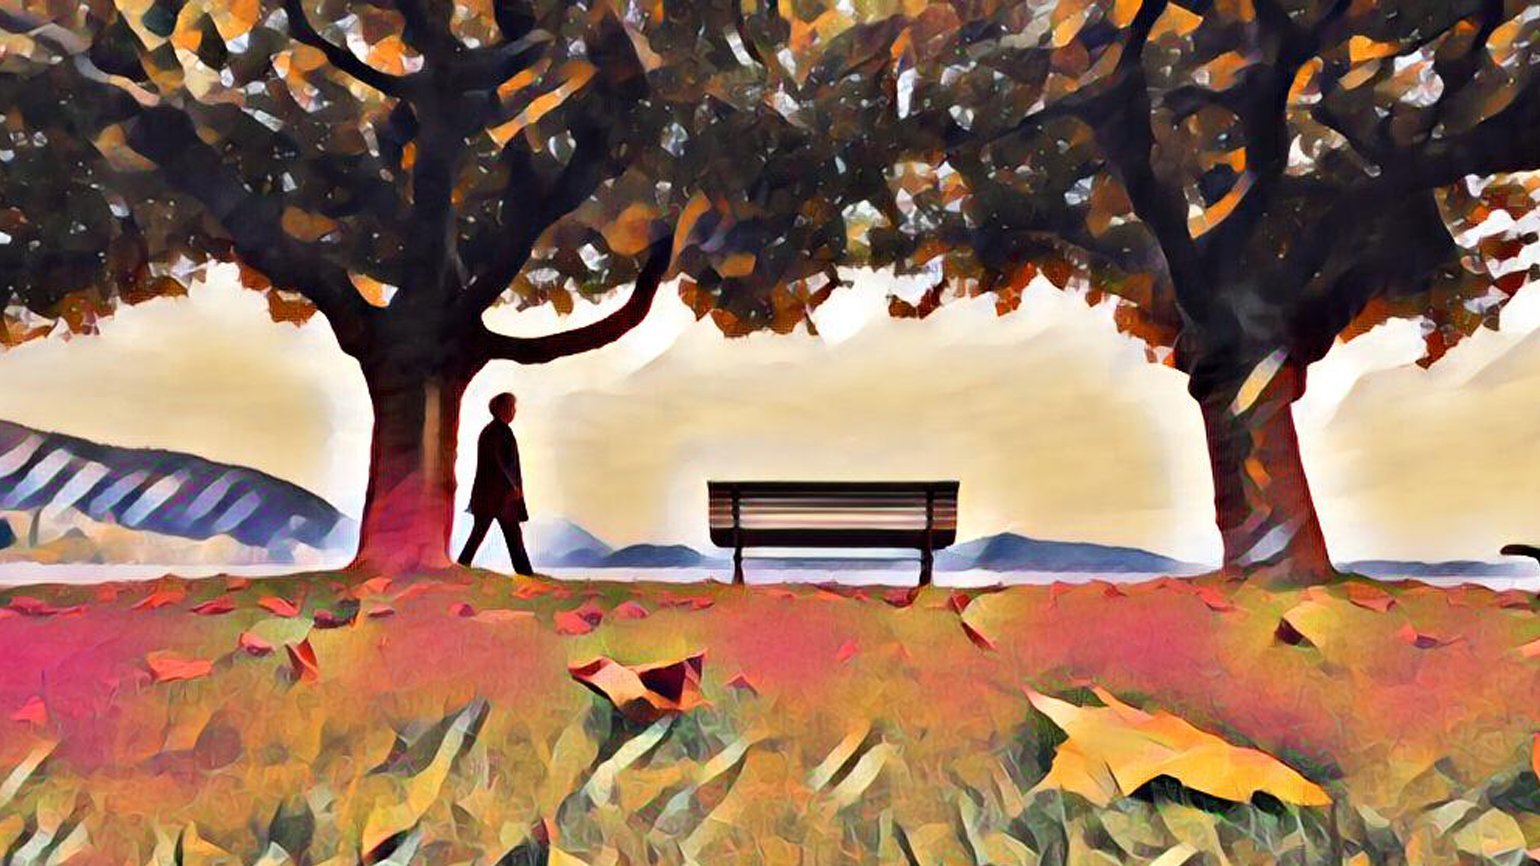
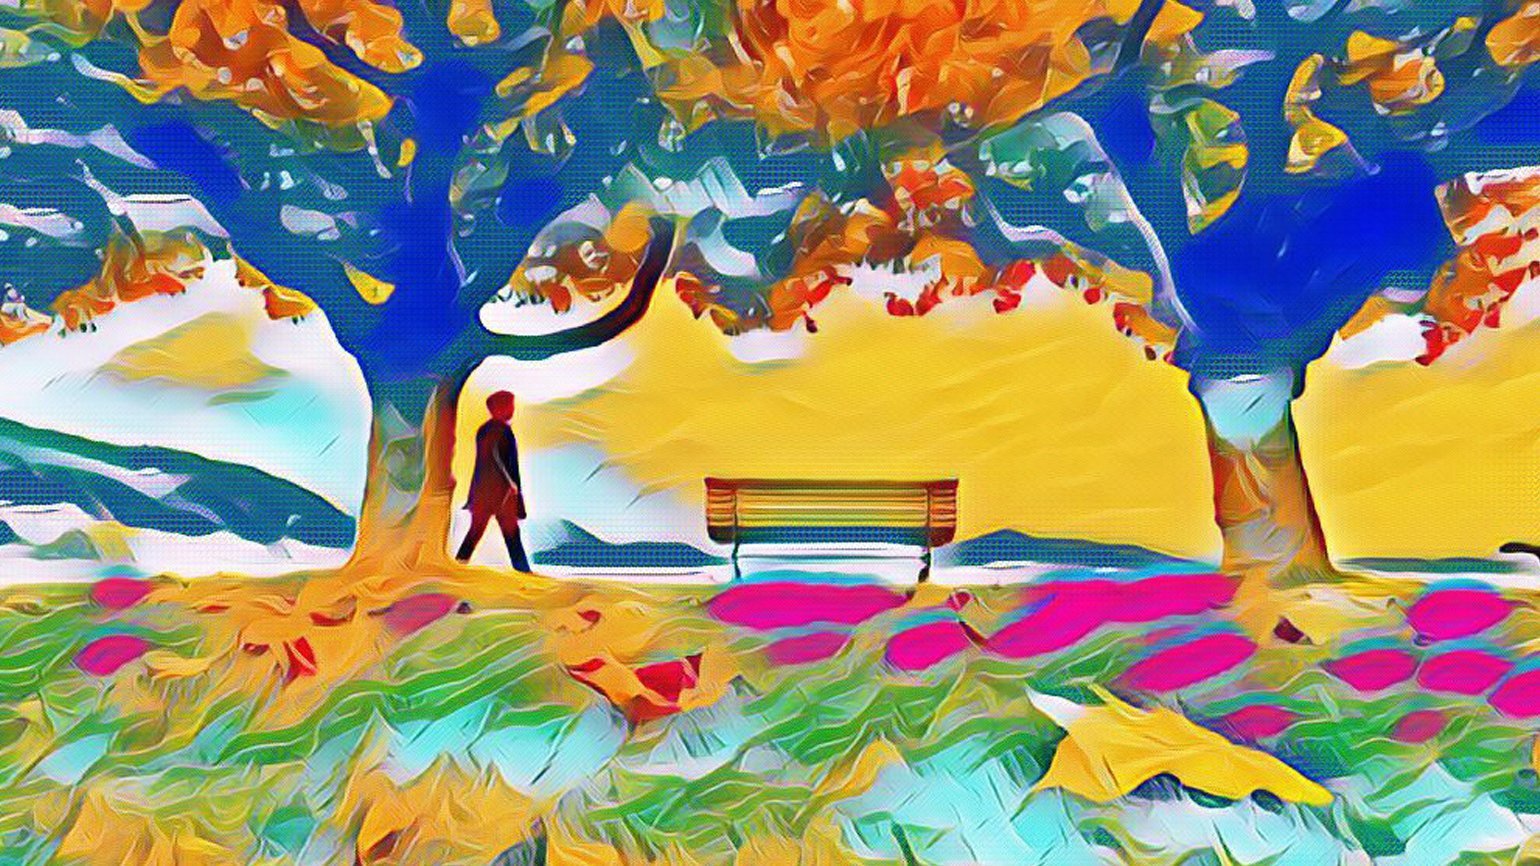
Нам понравился такой вариант стилизации:
Но выбор действительно велик:
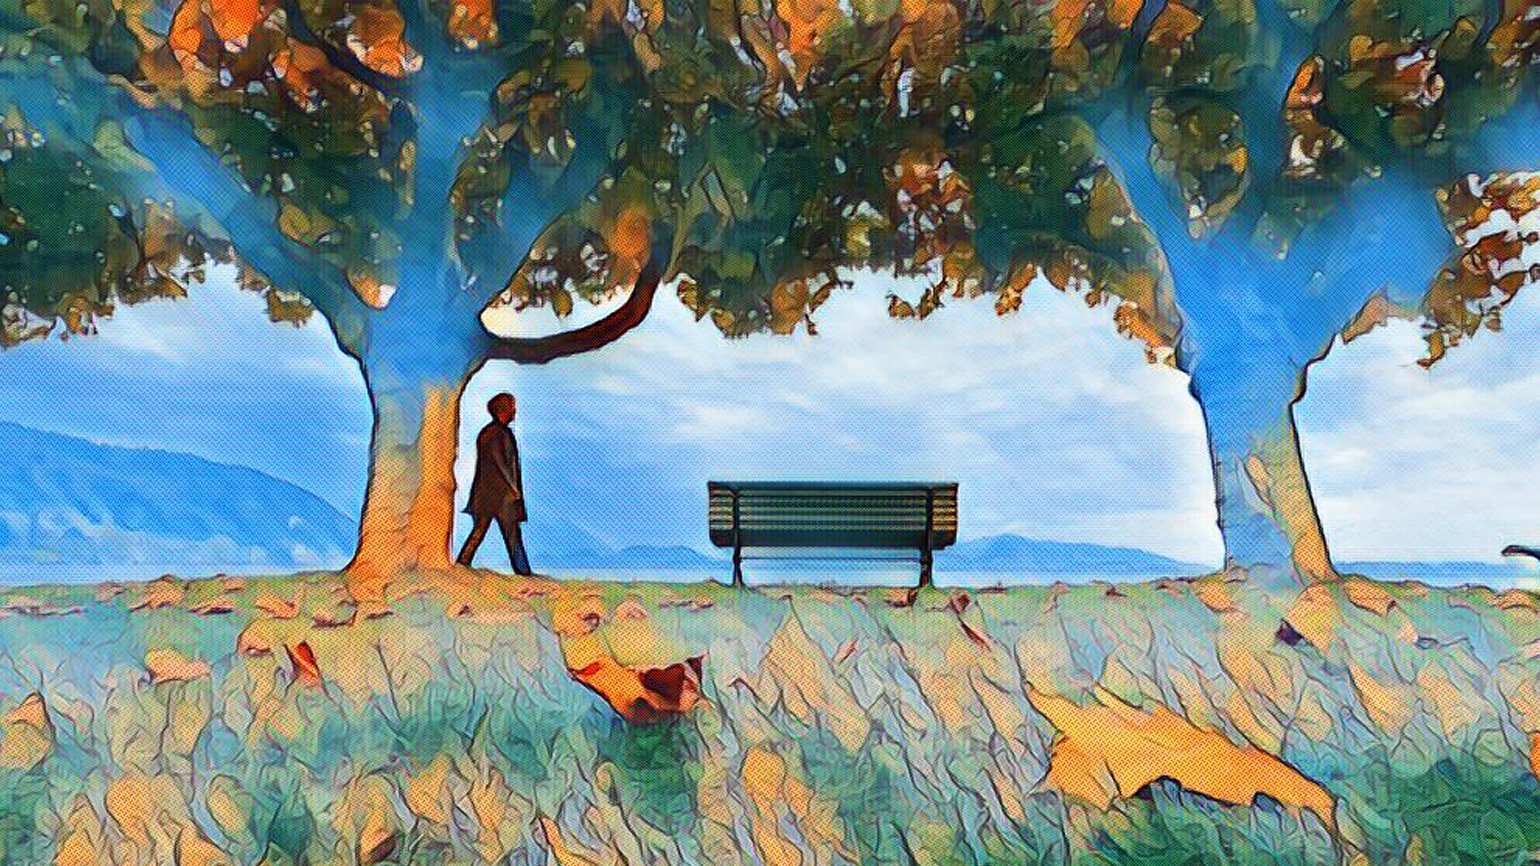
Сохраните понравившееся изображение в папке keys и откройте плагин EbSynth:
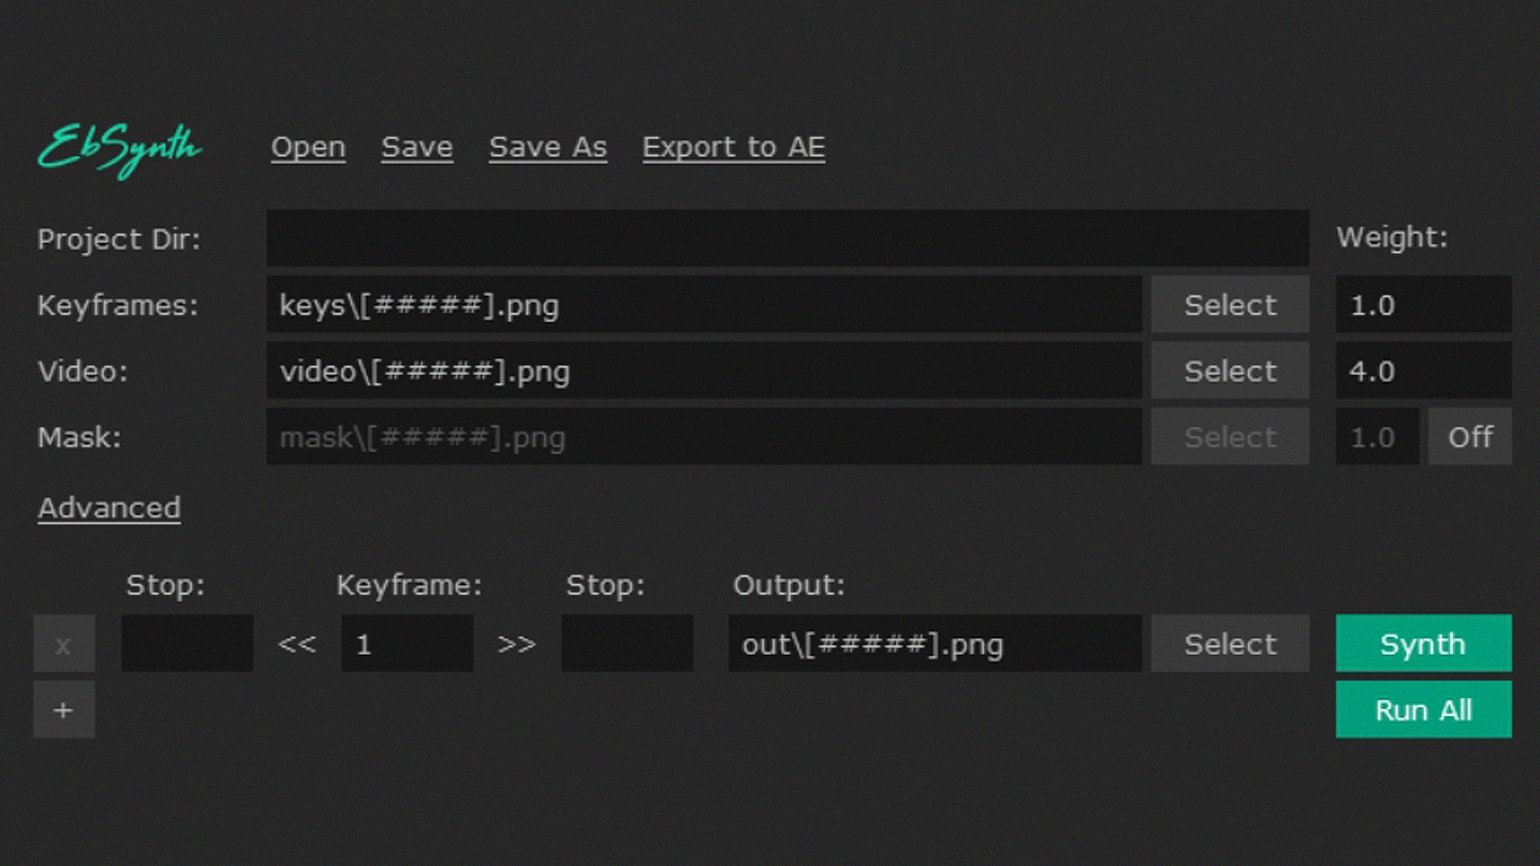
Выберите изображение из папки keys, кликнув по Select рядом с полем Keyframes, а для поля Video — первый файл из папки video. Элемент [####] в названии файла — переменная, которая означает, что будет использоваться последовательность кадров.
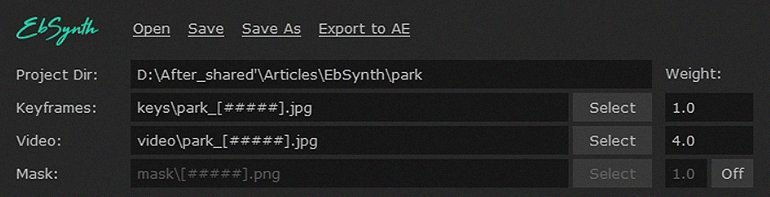
Внизу укажите папку вывода обработанных файлов — output.

Нажмите на кнопку Synth и дождитесь окончания процесса обработки изображений. Это займёт время — плагину нужно отрисовать каждый кадр оригинала из папки video в соответствии с ключевым кадром из папки keys и сохранить его в папке output. Чем длиннее видео, тем больше изображений, тем дольше обработка.
После завершения обработки нажмите на кнопку Export to AE.

Появится окошко, в котором можно указать необходимое количество кадров, — ничего не меняйте, просто нажмите Export, и вас автоматически перекинет в After Effects.

Output («Вывод») — это слой, который объединил все изображения, обработанные плагином.

Нажмите на пробел и посмотрите, что получилось. Проверьте, чтобы не было артефактов — например, мыльности в деталях, — и, если всё устраивает, сохраняйте проект!

Учись бесплатно:
вебинары по программированию, маркетингу и дизайну.
Участвовать
Научитесь: After Effects с нуля до PRO
Узнать больше