Thingiverse Groups
Anet A8 Prusa i3
General
«EEPROM Version Error, Initialze EEProm,[Ingnore] Rebot»
Please Login to Comment
![]()
LostAgain
Dec 4, 2021
Trying to do a first startup of an Anet a8. The above message appears on the screen. I had to downloaded Marlin 2.09.2 the Anet furnished firmware would not work. Did I miss a setting in the config.h file?
Flag

hede3D
— in reply to
LostAgain
Dec 4, 2021
https://reprap.org/forum/read.php?415,869818
This may Help you.
Flag
![]()
LostAgain
— in reply to
hede3D
Dec 5, 2021
Thank you, I updated my eeprom and it solved the problem,
Flag
![]()
Just did the update from v 2.0.3 to 2.0.5.3 on an arduino mega and am now getting this message on the LCD
err:EEPROM Version
anybody know what this means?
no problems with compile and upload.
going back to 2.0.3 until I can solve this.
Thanks,
When you update the firmware you have to update the content of the eeprom also or it complains that you have the wrong eeprom version.
This is just a warning that you still have the old eeprom settings.
Send the machine a M502 then M500 to write the current setting in firmware to the eeprom.
Great, Thanks that worked.
thanks too Dust, you helped me a lot  )
)
Edited 1 time(s). Last edit at 04/07/2020 04:40PM by oikos.
Hey guys. I recentely replaced the mainboard for my new Anet A8 Plus printer. It came with no bootloader so I had to install it and then uploaded Marlin 2.0 bugfix via visual studio. The LCD screen displays Marlin 2.0 then says «EEPROM version error». I then get a message message saying IGNORE or RESET. No matter which choice i select, the process just keeps repeating itself. How do I fix this? Thanks.
Hello,
I decided to switch from the Marlin firmware to the MK4Duo v4.3.6 for my Anet A8 with the 5-key keyboard, since I saw that now there is the possibility to activate SLIM_LCD_MENUS that allows you to insert new features given the little space in the motherboard Anet.
I have configured, compiled and uploaded but I have problems:
the 5 keys are very sensitive and makes it impossible to move around in the menu, also sometimes the down key performs the operations that make the central key.
I set also #define ENCODER_PULSES_PER_STEP 1
#define ENCODER_STEPS_PER_MENU_ITEM 1 but without success.
The second problem is that the eeprom is not initialized, sent M502 but nothing happens as well as M500, at every start it tells me «WARNING EEPROM Changed …».
I tried version 4.3.4, with basic firmware with more features disabled due to the little space, same problem with the keys but the eeprom works.
This is my v4.3.6 configuration file
Configuration_Overall.zip
My setup
Anet A8 Bowden
Anet stock motherboard
Autolevel 3dTouch
Thank you, I await your reply.
fantik22

Загрузка
08.09.2019
2761
Всем привет, не могу прошить ANET A8 под marlin. Делал всё по инструкции с этого поста https://3dtoday.ru/blogs/andybig/marlin-116-on-anet-a8-a6/, но при загрузке скетча у меня выбивает ошибку  В чём может быть проблема? Или мне прислали бракованную плату?
Ответы на вопросы
Популярные вопросы
Задолбали пробки при печати PETG
Zheka1980
Загрузка
16.01.2023
832
Попробовал недавно этот пластик. Классный.
Но большую модель напечатать не получается, в течение максимум часа печати образуетс…
Блок питания от светодиодной ленты
PolVik
Загрузка
25.01.2023
469
Уважаемое сообщество, у кого-нибудь есть опыт применения или соображения по поводу блока питания от светодиодной ленты в качестве БП для принтера? Вот…
Кубик, Simplify3D и мосты
ZhenyaKa
Загрузка
01.12.2016
14789
slic3r перед тем, как выкладывать верхние слои, кладет мосты, а прекрасный Simpli3D этого не делает 
То есть вот это зелено…
Читайте в блогах
Содержание
- EEprom version mismatch, how to fix? #12860
- Comments
- Err: EEPROM VERSION #17219
- Comments
- Footer
- Troubleshooting Tips
- Graphical LCD Artifacts
- Hanging LCD?
- No LCD / SD on ReARM?
- G29 Probing Failed!
- One Side High, One Side Low
- Heating Failed!
- FTDI USB Bandwidth
- Long Beep on Boot
- Random Halting
- EEPROM Errors
- Sanity Check Errors
- Build Too Large
- Delta Height, Z Probe Offset, and G33
- Trinamic Stepper Drivers
- Babystep Double-click ignored
- False Endstop Triggering
- BLTouch Pin Drop / Blinking
- [BUG] EEPROM version mismatch (EEPROM=? Marlin=V81) #346
- Comments
- Description
- Steps to reproduce
- Additional Information
EEprom version mismatch, how to fix? #12860
How is it that we change the eeprom version number?
i did the usual M502 and M500 then M501, but the mismatch in version number is still there
i think its because i tried the a copy of marlin 4 days ago but it has a «bug» that prevents me from controlling a 2nd part cooling fan, so i had to go back to a copy from 5/11 that works
i read that people with radds/due used to flash repetier and then back to marlin to solve it, but that is not an option here, plus the printer is in another room and onboard sd-card of the REARM is hard to get to as wires pass close by, i can do it but i want to limit the amount of walking back and forth and taking the sd card in and out
The text was updated successfully, but these errors were encountered:
hmm. would it make sense to reword the title to make this a feature request and request an option that allows to spec that the version number gets updated when doing the M500 like: M500 V to update version in eeprom to what is in firmware? but i will try what you suggest when time etc allows
I think that normally M502 and M500 then M501 would work, but you may have hit problems that existed in the eeprom emualtion code in that older version that means it does not update things correctly (There was a bug with memory alignment in the LPC1768 code), that bug has since been fixed. You may be able to fix it by downloading a current version of persistent_store_flash.cpp:
https://github.com/MarlinFirmware/Marlin/blob/bugfix-2.0.x/Marlin/src/HAL/HAL_LPC1768/persistent_store_flash.cpp
and replacing that file in your 5/11 build.
will give it a go later in the day, but i that much that the problem is only due to that eeprom now have a newer version number than the firmware does
changing the version number just throws a crc error
but the version error was gone so i tried to hit init eeprom from the display as i did no not know the code to send over serial. will try and change version back and do an init from display again
As I said above M502 and M500 then M501 is normally enough to clear the eeprom and write a new version of everything including the version number. But the old version of the code that you are trying to use has a bug that means that nothing will be written to eeprom in some circumstances (the buffer used to store the eeprom data is not correctly aligned) which means that the M502 and M500 then M501 will not clear and fix the version number. You just end up using whatever is already in there. To fix the version number you need to have code that can write to eeprom and at the moment you don’t have that.
I don’t think messing around with the version number is going to help you fix the basic problem you have. It may look like it has (because you may get lucky and change the memory alignment of things so that the write works), but the problem will likely as not come back if you change anything else.
i would have just upgraded to the latest copy but with that i loose control of the extra large bed cooling fan i use after print is done, i have a seperate issue on that but with my limited skills i cant figure that even thou i try answering the best i can when others reply to that issue: its this issue #12831
just replaced persistent_store_flash.cpp and building, will report back later
so think i will close this one again unless it can serve a usefull purpose like being the basis for a feature or something like it
Источник
Err: EEPROM VERSION #17219
Hi, i’v been install the new marlin 2.0.5.1 today.
I don’t know if i have do an error during the codage, but i have an error when i start my 3D printer !
The message is visible in the same place of a thermistance error.
I think it’s not annoying for print but i haven’t tested.
I want to know if i’l alone to have this problem !
The text was updated successfully, but these errors were encountered:
Try with M502 & M500
3D printers 101: They only do what you tell them to do. The language they use is called g-code.
see https://marlinfw.org/meta/gcode/ where you can look up what the gcodes M500 and M502
You send the printer these gcodes and it does very basic things, move, home, heatup save settings etc
Hello @iMeeHz3D ,
I just made the update too and get the same behavior than you.
Did someone know why my printer is complaining and how to solve this without doing any m502 & M500.
The structure of the stored data changed between versions. You cannot solve it without doing an M502/M500.
If you have the .bin file for the old version, you can try flashing back to the old version, then restart and if you don’t have the error, run M503 and copy those settings somewhere. Then flash the new firmware, run M502/M500 and then M503 and compare the results with what you saved before and change whatever you need to change.
Thanks you for the explaination, it’s clear and all good 🙂
I’ve just patched bugfix-2.0.x EEPROM error handling in a way that (hopefully) improves it.
This issue has been automatically locked since there has not been any recent activity after it was closed. Please open a new issue for related bugs.
© 2023 GitHub, Inc.
You can’t perform that action at this time.
You signed in with another tab or window. Reload to refresh your session. You signed out in another tab or window. Reload to refresh your session.
Источник
Troubleshooting Tips
This page needs more content for completeness. Please contribute!
Graphical LCD Artifacts
 After a new install of Marlin your graphical LCD shows glitches or is blank. This is caused by bad timing in the LCD data transmission.
Solution: Define custom delays. Add the following lines to Configuration.h as your starting-point and adjust values upward until the display works reliably. You should keep testing to find the lowest values that produce a reliable display because the LCD update steals time from the main loop.
Alternative Solutions
- For AVR boards open ultralcd_st7920_u8glib_rrd_AVR.h and remove #pragma GCC optimize (3) to reduce code optimization.
- Add 4.7k pullup resistors to the SPI lines if they are not commonly used for SPI.
Hanging LCD?
Try doubling BLOCK_BUFFER_SIZE to see if the problem goes away.
No LCD / SD on ReARM?
As seen in this Chris’s Basement video, the RRD display doesn’t always work on first install. It didn’t even light up. A custom adapter is needed with the ReARM. See this issue, and this issue, and this page.
G29 Probing Failed!
Marlin uses the Z_PROBE_LOW_POINT value to prevent the probe from pressing too hard against the bed and getting damaged. A value of -2 works well for a flat and level bed, but if the bed isn’t trammed yet, the probe may exceed the low point and trigger a “Probing Failed” error. To prevent this from happening, change the setting to something like -10 during initial setup, and then you can change it back after the bed is perfectly trammed.
One Side High, One Side Low
- Problem: Bed probe done, leveling compensation enabled, and the first layer comes out out too squished on the right side, or too high on the left side, or vice-versa.
- Solution: Make sure the probe is always perpendicular to the bed as the carriage moves. If the wires or Bowden tube are pulling on the carriage, or if the X gantry is even slightly twisted, the probe will not remain perpendicular and its readings will be garbaggio. There is a feature called MECHANICAL_GANTRY_CALIBRATION that can be used to compensate, but it is always best to tackle any mechanical issues first.
Heating Failed!
Thermal Runaway is a constant concern with heaters, so Marlin watches heaters for some common runaway conditions:
- Thermistor shorted or broken (MINTEMP/MAXTEMP).
- Heating Failed: Temperature is rising too slowly (while below target).
- Thermal Runaway: Temperature is too far from target range for too long (after settling). NOTE: Thermal Runaway can be caused by a fan blowing too close to the hotend.
During a first-time setup or firmware upgrade, we recommend leaving Thermal Protection enabled but relaxing the settings. To do this, set WATCH_TEMP_PERIOD and WATCH_BED_TEMP_PERIOD to longer intervals, such as 40 or 60 seconds. You can increase the HYSTERESIS settings to makes thermal protection more tolerant of an untuned PID. You should run M303 on the hotend and bed as soon as possible, and it will help to loosen up thermal protection until all the PID is well tuned.
Depending on your setup, you may get more stable heating using MPCTEMP instead of PIDTEMP .
FTDI USB Bandwidth
At 115K baud use 167 latency, 192 USB block request. As one goes up the other goes down.
Long Beep on Boot
This is a hardware issue due to the connected beeper pin being HIGH when the board is first powered. Marlin turns off the BEEPER pin as soon as it possibly can. A new bootloader for your board might fix the issue in the future.
Random Halting
An under-powered PSU combined with heaters and high speed moves can lead to a frozen board. No kill, no watchdog, heaters stuck on. See #17202. To test for this:
- To test for this, enable the bed and extruder heaters and print at high speed to see if a hard freeze occurs. Try disabling heaters and/or slower printing to see if the problem goes away.
- Read the input voltage from PSU with a meter during fast moves. If you see a drop too far below your expected voltage (e.g., 12V or 24V) this indicates a problem.
EEPROM Errors
After flashing a new version of Marlin, the existing EEPROM contents may no longer conform to the updated EEPROM layout. As a result, you may see an error like one of these:
Troubleshooting Procedure
If using Octoprint, turn off the option to disconnect on “Error” messages before proceeding.
Do M502 and M500 and then reboot the machine. This procedure will initialize the EEPROM to your configured “factory” settings.
If you continue to get error messages, use DEBUG_EEPROM_READWRITE to run a check for mismatched fields during M501 (read) and M500 (write). A mismatched field is a bug, so please report these errors to the Marlin project. To do this check, add the following option to your Configuration.h , flash, and reboot:
Sanity Check Errors
Marlin’s SanityCheck.h files exist to check the validity of settings and make sure obsolete settings get updated for the newest Marlin. Be sure to read and follow all directions provided by these checks.
Build Too Large
A Marlin build can range in size from under 60K to over 200K with a generous complement of features enabled. All features try to use as little SRAM as possible, but some have a higher SRAM cost. As a guide and starting-point, be sure to use the example configuration included with Marlin that best matches your specific machine model.
Delta Height, Z Probe Offset, and G33
Since Marlin 1.1 “Delta Height” is defined as the distance between Z Home Position and the Z-MIN trigger point (so it remains constant). The Z Probe Offset is added to that distance in order to go to the height of the first printed layer and as such is independent from Delta Height. (Printers without a probe have no Z Probe Offset. Instead, the Z-MIN trigger-point comes from the paper test height, aka Z0.)
Trinamic Stepper Drivers
These tips are collected from various reports we have received. See Trinamic troubleshooting for additional guidance.
- Some SilentStepSticks with variable 3-5V logic voltage (VIO) might get damaged if only powered over USB.
- SPI conflict with the SD card? Solutions vary.
- E Stepper won’t move when using Linear Advance with TMC drivers?
- “I ended up using the drivers in legacy mode and setting them to SpreadCycle using the OTP (One Time Programmer). Unfortunately trying to set individual drivers to SpreadCycle via UART by enabling HybridThreshhold and setting the threshold to 0 for the respective axes did not work.” See #11825.
- Loud / grinding TMC2208? Increase the current to
1500mA and lower the Hybrid Threshold.
- Unreliable printing, shifting layers? Make sure the ‘rsense’ value is configured according to recommendations. See #9368.
- TMC2208 uses SoftwareSerial, and this conflicts with Endstop Interrupts. Disable Endstop Interrupts to proceed.
- Should I use SOFTWARE_DRIVER_ENABLE ? Not unless required by the hardware. See #13326.
Babystep Double-click ignored
- Increase the DOUBLECLICK_MAX_INTERVAL value
False Endstop Triggering
- Enable and set ENDSTOP_NOISE_THRESHOLD to filter the endstop signals.
BLTouch Pin Drop / Blinking
- Servo voltage / signals may be unstable due to heater signal lines being too close to servo traces.
- Solution: Disconnect the servo signal line after the print starts.
Brought to you with lack of and lots of .
The contents of this website are © 2023 under the terms of the GPLv3 License.
Источник
[BUG] EEPROM version mismatch (EEPROM=? Marlin=V81) #346
Description
Ender 3 — Skr mini e3 v2: I can not save to EEPROM from marlin or terminal. When I flash new firmware (bugfix 30/7-20) I do M502, M500 and get: echo:Error writing to EEPROM!
echo:Error writing to EEPROM!
echo:Error writing to EEPROM!
echo:Error writing to EEPROM!
echo:Error writing to EEPROM!
echo:Error writing to EEPROM!
echo:Error writing to EEPROM!
echo:Error writing to EEPROM!
echo:Error writing to EEPROM!
echo:Error writing to EEPROM!
echo:Error writing to EEPROM!
echo:Error writing to EEPROM!
echo:Error writing to EEPROM!
echo:Error writing to EEPROM!
echo:Error writing to EEPROM!
echo:Error writing to EEPROM!
echo:Error writing to EEPROM!
echo:Error writing to EEPROM!
echo:Error writing to EEPROM!
echo:Settings Stored (4 bytes; crc 7439)
Error:EEPROM datasize error.
Error:EEPROM datasize error.
When I run m504 I get:
SENDING:M504
echo:EEPROM version mismatch (EEPROM=? Marlin=V81)
In configuration_adv.h I have tried with: #define I2C_EEPROM
#define MARLIN_EEPROM_SIZE (4*1024)
I get same error.
Only this makes EEPROM work:
#define FLASH_EEPROM_EMULATION
#define EEPROM_PAGE_SIZE (0x800U)
#define EEPROM_START_ADDRESS (0x8000000UL + (STM32_FLASH_SIZE) * 1024UL — (EEPROM_PAGE_SIZE) * 2UL)
#define MARLIN_EEPROM_SIZE EEPROM_PAGE_SIZE
Steps to reproduce
- Initialize EEPROM
- Flash new bugfix firmware from Marlin github and BBT github
- Run M502 and M500
- Reboot
Expected behavior
Save settings to internal EEPROM
Actual behavior
Will not save settings to internal EEPROM
Additional Information
The text was updated successfully, but these errors were encountered:
Источник
In this guide, I show you how to install Marlin 2.0 firmware on the Anet A8 or the Anet A8 plus.
Read the full transcript below if you prefer a written version.
Hello, my name is Daniel, welcome to the CrossLink channel. I would like to help you being more successful with 3d printing and if you’re here for the first time, subscribe and hit the bell notification icon so you don’t miss anything.
So why you should upgrade your firmware to Marlin 2.0?
First of all, enabling thermal runaway protection should be your main concern regarding safety features. Many printer manufacturers, still forget to activate this by default.
But you will also be able to unlock new features for your printer like mesh bed leveling for better first layer results or power loss recovery to resume failed prints or support for bed leveling sensors or linear advance for better print quality, just to name a few.
And in general with affordable 3D printers, it’s like with affordable Android phones. Once they are released, it’s very unlikely that the manufacturer will ever release a firmware upgrade and mostly the printers will ship with firmware that is already outdated when you buy it.
If you wanna learn more about the pros and cons of uprading to Marlin 2.0 vs. staying with an older version, watch this video here, where I elaborate in depth about this topic and more important things to know.
So, let’s talk about the prerequisites for flashing Marlin 2.0 to this printer.
You will need to have a bootloader installed on your Anet mainboard.
Preferrably the optiboot bootloader that allows you to have more available program memory so you can flash larger firmware files that have more features enabled.
How Do I know, if I have a bootloader?
This question is really important because having a bootloader is a prerequisite to be able to flash firmware to your printer using just a USB cable connected directly between your computer and your printer.
So how can you know if your printer mainboard has a bootloader on it? — Actually you can’t. It’s not possible to tell unless you just try it out using the USB cable.
But the good thing is — you can’t break anything physically by just trying it out.
I have made several videos to explain how you can flash a bootloader to one of these Anet boards. One method is explained in THIS video, which is how to do it with an Arduino UNO.
THIS other video explains, how to flash the bootloader using a cheap programmer device that you can get for under 10 USD with the required adapter.
I have linked all videos, I am mentioning here in the description of this video.
If you find out that you’re not able to flash firmware using a USB cable, go and install a bootloader first and then come back to this video and continue from here.
Ok, with this out of the way, let’s continue with the setup.
You need to download the Marlin Firmware from github to your computer, either on a Mac or PC. The github link is in the description of this video.
On the Marlin github page, first click on the Branch button and then select the bugfix-2.0.x version. We wanna make sure, we get the latest version with all the latest bugfixes.
Then, click on the «Clone or download» button and select to download a zip file.
After that’s done unpack the downloaded zip file into a folder on your computer.
Now there is one major thing that has changed since January 2020.
The printer specific configuration files that we need as a starting point — they used to be in this config folder of the Marlin repository — but they have been moved to another location — another github repository.
So what does it mean for you?
It means you have to go to this second github page, which is the Configurations repository.
Now, this is really important, don’t just download a zip file from there without this next step.
Klick on the Branch button and select the bugfix-2.0.x version from that list.
Now, click on the «Clone or download button» and select to get a zip file from there.
Inside of this second repository — once you unzipped it to a different folder on your computer — you will find the configuration files that you’re looking for.
Navigate to the examples->Anet->A8 subfolder or the A8plus subfolder depending on the printer model that you have.
Copy all files from this folder into the Marlin folder that is located inside the Marlin repository. Make sure you confirm to overwrite all existing files.
In the previous guides to flash Marlin firmware, I have used the Arduino IDE for compiling and flashing Marlin firmware and this is still possible but the recommended way for the future is to use Visual Studio Code with PlatformIO, which I will show you in this video.
So, let’s first make sure to install visual studio code from www.visualstudio.com.
Make sure you don’t accidently select the full blown visualstudio for pc or visualstudio for mac if you’re a mac user. Visual Studio Code is the thing that we need and that works.
After installing visual studio code, you need to launch it for the first time and open the extensions tab on the left hand side of the window.
In the search field, enter «platformio» and then select «PlatformIO IDE» from the results list.
Now, click the «Install» button and wait until the installation process is finished. Don’t launch any other installation at the same time and make sure, you don’t close visual studio code until it’s done installing.
There might be a message saying «Please restart VSCode» after the installation. If you see this, please close Visual Studio Code and launch it again.
After the installation is finished, click on the extensions tab of visual studio code again and search for the extension «auto build marlin».
Install this extension by clicking «install».
Now, we are ready to do the final touches to our Marlin configuration before we will upload it to the mainboard.
First, open the Marlin folder in visual studio code by clicking the folder icon in the left menu bar and then clicking «Open Folder».
Navigate to the folder, where you have unzipped the Marlin files into, don’t navgate further into any subfolder there and click «select folder» to open it.
Now, you can already test, if everything is set up correctly and your’re able to build the firmware.
Go to the left menu bar again and click the large «M» button. This takes you to the Auto Build Marlin extension.
Here, hit the build button in the header of the upper section that is named «Build…». The buttons will show as soon as you move your mouse cursor into the section and will be hidden otherwise, so don’t be confused if you don’t seen them right away.
The build will then start in the terminal tab and depending on your computer’s performance can take up to a few minutes. Especially in the first run, it will need to install several software packages from the internet, so please make sure you are connected.
After the build has finished, you will see a list of results. Please scroll up a little bit until you see the amount of program memory used by this build.
This will tell you how much memory you can still use for other features and the default configuration shows already, that there is not much room left, so we might have to address this later if we enable more functionalities than the available program memory can take.
For the starters, please at this point don’t enable any additional features yet. I am stressing this in pretty much every video about firmware flashing because I like to test things individually and enable one feature at a time to be sure, I know what change in the configuration caused a particular problem during the build or upload process. So unless you already have some experience, keep the default configuration at this point and let’s continue with that.
Now it’s time to flash the firmware to your printer.
Turn your printer on and connect it to your computer using the USB cable.
Now, in visual studio code, in the Auto Build Marlin Tab, click the «Upload» button.
After the build has been finished, the firmware will be uploaded to your printer and you will see that it is finished in the terminal tab.
Also, Your printer will be rebooting after the firmware has been flashed successfully.
Great, this is already a very important milestone. Now, we did not yet make any adjustments to the configuration. We will start doing this right now.
Navigate to the folder menu in visualstudio.
Expand the Marlin subfolder. You should see the Configuration.h and Configuration_adv.h files.
Open the Configuration.h file by clicking it.
I would suggest to enable a feature, which I use all the time on printers that don’t have a bed leveling probe and that is Mesh Bed Leveling.
However, this guide will not explain how to use mesh bed leveling. I already published another video about this, it’s linked in the info card up here.
Let’s first start with enabling the MESH_BED_LEVELING feature around Line 1215 of Configuration.h.
By the way, if you can’t find the option that I am referring to, because the line numbers might have changed in the meanwhile, try the search option using the Edit→Find Menu or the corresponding Keyboard shortcut. Enter the term you are looking for in the popup, so for example MESH_BED_LEVELING and use the arrow keys to navigate around, if there is multiple hits for that search term. And there you are.
Right below that in line 1221, enable RESTORE_LEVELING_AFTER_G28. This will make sure, that every time a print starts, your mesh bed leveling configuration is activated automatically, so it loads all the points that you have calibrated and uses them for the upcoming print.
Then jump to line 1333 and enable LCD_BED_LEVELING.
This will add a menu item to your printer’s menu to be able to actually control and configure bed leveling using the printer menu.
Good, now save your changes to this configuration file by using the File->Save menu item or the corresponding shortcut. You will see that once you have unsaved changes in a file, there will be a white dot nearby the file name in the open tabs. As soon as the file is saved, this dot will disappear.
Let’s try to upload this new version of Marlin firmware to the printer by using the Auto Build Marlin menu again.
This was successful, so from here you could already start to print, however there might be situations where you run in to memory size issues, where all the features that you would like to enable will cause the firmware to grow to such an extent that it will not fit anymore into the available program memory.
This can happen for example when you like to install a bltouch probe with auto bed leveling and probably another better display.
I have written a blog post, that I’ve linked in the description of this video, where I break down all the potential features that you might at some point want to enable in Marlin 2.0 and what other features you could potentially disable to free up enough memory to be able to compile the firmware.
So if you encounter an error that tells you The program size is greater than maximum allowed, refer back to that blogpost for more information how to fix it.
If you like this video, please do me a favor. I appreciate if you hit the like button or subscribe to my channel — BUT — the real way, how you can support me is — Go watch some of my other videos that I have linked here in these two cards. Thanks for watching, see you next time.
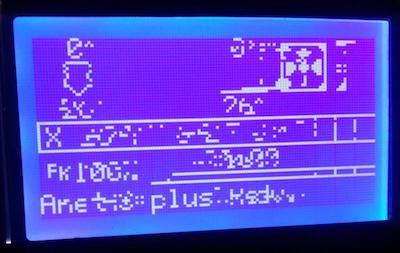
You might see that after the reboot you get an error message on your printer’s display saying «Err: EEPROM Version».
This happens when you upgrade from an older version of Marlin firmware to 2.0 and you can resolve it quickly by entering the printer menu, then going to the configuration menu and finally entering the Advanced Settings menu. Scroll down to the bottom until you select the «Initialize EEPROM item». You then have to highlight the Init item, using the up-down buttons and finally click the middle button to confirm it. There will be no visual confirmation unfortunately.
Power off your printer and power back on to see whether this was successful. Now you should get «Anet A8 ready» instead of the error message.
If you run into issues like this one saying that the port has been detected but there is still a not in sync problem, this is an indication that your bootloader needs to be re-installed. Please install the optiboot bootloader using one of the instruction videos, I have linked in the video description.
хм … имеет ли смысл перефразировать название, чтобы сделать это запросом функции и запросить опцию, которая позволяет указать, что номер версии обновляется при выполнении M500, например: M500 V для обновления версии в eeprom до того, что находится в прошивке ? но я попробую то, что вы предлагаете, когда позволит время и т. д.
попробую позже в тот же день, но я настолько сильно, что проблема связана только с тем, что eeprom теперь имеет более новый номер версии, чем прошивка
изменение номера версии просто вызывает ошибку CRC
но ошибка версии исчезла, поэтому я попытался нажать init eeprom с дисплея, так как я не знал кода для отправки через последовательный порт. попытается изменить версию и снова выполнить инициализацию с дисплея
Как я сказал выше, M502 и M500, тогда M501 обычно достаточно для очистки EEPROM и записи новой версии всего, включая номер версии. Но в старой версии кода, который вы пытаетесь использовать, есть ошибка, которая означает, что в некоторых случаях ничего не будет записано в eeprom (буфер, используемый для хранения данных eeprom, неправильно выровнен), что означает, что M502 и M500 затем M501 не очистит и не исправит номер версии. Вы просто используете то, что уже есть. Чтобы исправить номер версии, вам нужен код, который может писать в eeprom, а на данный момент у вас его нет.
Я не думаю, что использование номера версии поможет вам решить основную проблему. Может показаться, что это так (потому что вам может повезти и вы измените выравнивание памяти, чтобы запись работала), но проблема, скорее всего, не вернется, если вы измените что-то еще.
я бы просто обновился до последней копии, но с этим я теряю контроль над очень большим вентилятором охлаждения кровати, который я использую после того, как печать будет сделана, у меня есть отдельная проблема, но с моими ограниченными навыками я не могу понять, что даже ты пытаешься ответить лучшее, что я могу, когда другие ответят на эту проблему: это проблема https://github.com/MarlinFirmware/Marlin/issues/12831
только что заменил persistent_store_flash.cpp и построил, сообщу позже
работал нормально
так что подумайте, что я закрою это снова, если он не может служить полезной цели, например, быть основой для функции или чего-то в этом роде
У меня возникла эта проблема при переходе с Marlin 1.1.9 на Marlin 2.0.x
Я исправил эту проблему, следуя инструкциям из проблемы 11415. Установка ВСЕХ значений EEPROM на 0, а затем установка новой прошивки на плату исправляет ее.
не забудьте запустить M502, чтобы восстановить EEPROM прошивки по умолчанию
Выполнение M502, за которым следует M500, должно устранить любое несоответствие версии EEPROM …
Данные вашей сетки для выравнивания кровати будут сохранены. Но любые другие изменения значений вашей конфигурации будут сброшены.
Добавлю к тому, что прокомментировал @ Roxy-3D, и добавлю перезагрузку.
Я только что столкнулся с этим с 2.0.4.4 на моем LPC1768, и после перезагрузки все стало ясно!
M502> M500> перезапуск платы
Добавлю к тому, что прокомментировал @ Roxy-3D, и добавлю перезагрузку.
Я только что столкнулся с этим с 2.0.4.4 на моем LPC1768, и после перезагрузки все стало ясно!M502> M500> перезапуск платы
То же самое здесь … Ender 5, 2.0.3 -> 2.0.4.4 ‘ERR: EEPROM Version’ отображается внизу экрана запуска
M502 M500, Ребут избавился от него …
пришлось удалить PIDBed, поскольку загрузка 2.0.4.4 была больше 172 байта … (Примечание для себя … получите 32-битную плату!)
FYI, есть опция EEPROM_AUTO_INIT, чтобы сделать это за вас, когда это необходимо …
FYI, есть опция EEPROM_AUTO_INIT, чтобы сделать это за вас, когда это необходимо …
Я не реализовал это в 2.0.3 ..
Я собирался спросить … «Сколько места это займет, если я включу эту настройку …», так как я не смог добавить PID_Bed, не переходя дальше … Но я подумал, что лучше не лениться и проверить себя …
Кажется, если раскомментировать, у меня еще осталось 800 байт … посмотрим, что будет, когда я закачу!
А
Изменить: пришлось ждать завершения печати … раскомментировал EEPROM_AUTO_INIT и загрузил … нет сообщения об ошибке … спасибо (и он все еще подходит … просто!)
Эта проблема была автоматически заблокирована, поскольку после ее закрытия в последнее время не было никаких действий. Пожалуйста, откройте новую проблему для связанных ошибок.
Была ли эта страница полезной?
0 / 5 — 0 рейтинги