|
|
Ремонт частотных преобразователей Emotron
 Ремонт частотного преобразователя Emotron, впрочем, как и ремонт частотников других производителей имеет ряд особенностей в силу своего конструктива. Частотные преобразователи, точнее их начинка делятся на две части:
- Аппаратная часть,
- Программная часть.
Частотники данного производителя не являются исключением из правил, именно поэтому ремонт частотного преобразователя Emotron имеет точно такой же ряд особенностей, как и у других преобразователей.
Диагностировать ту или иную неисправность помогают коды ошибок частотного преобразователя, которые отображаются на небольшом дисплее, расположенном на лицевой панели привода. Коды ошибок частотного преобразователя Emotron в зависимости от серии описаны в инструкции пользователя которые можно скачать с нашего сайта.
Ремонт частотных преобразователей Emotron, как и любых других преобразователей, выпущенных под другими брендами, всегда начинается с аппаратной части, после успешного ремонта аппаратной части наступает очередь программной.
Настройка частотного преобразователя Emotron также прописана в инструкции завода производителя, для каждой серии частотных преобразователей настройка будет индивидуальной, так как каждая линейка преобразователей решает свои собственные задачи, этим обусловливается широкая номенклатура данного промышленного оборудования.
Ремонт частотных преобразователей Emotron в сервисном центре
 Компания «Кернел» производит ремонт частотных преобразователей Emotron с 2002 года. За время существования компании наши сотрудники накопили колоссальный опыт в ремонте преобразователей частоты такого известного производителя как Emotron. Ремонт подобного промышленного оборудования ответственное и сложное занятие, требующие максимальной отдачи, профессионализма и максимально полной материальной базе.
Специалисты нашего сервисного центра максимальное внимание уделяют качеству исполнения ремонта, программирования и настройке промышленных преобразователей частоты, не зависимо от производителя данного промышленного оборудования. Именно поэтому мы смело даем гарантию на все выполненные работы шесть месяцев.
Ремонт частотных преобразователей Emotron производится исключительно с использованием оригинальных запасных частей, на компонентном уровне с применением высокотехнологичного диагностического оборудования, квалифицированным персоналом с инженерным образованием.
В случае выхода из строя преобразователя частоты на вашем производстве либо появились проблемы с приводом, которые вы не можете решить самостоятельно, мы всегда рады вам помочь. Специалисты нашего сервисного центра в минимальные сроки проведут глубокую диагностику с последующим ремонтом частотного преобразователя Emotron.
Инженеры сервисного центра выполняют качественный ремонт частотных преобразователей Emotron всех серий, когда-либо выпускаемых компанией.
|
&Emotron VFX |
vfx48-025-20ce, vfx48-025-20ceb, vfx48-030-20ce, vfx48-030-20ceb, vfx48-036-20ce, vfx48-036-20ceb, vfx48-045-20ce, vfx48-045-20ceb, vfx48-060-20ce, vfx48-060-20ceb, vfx48-072-20ce, vfx48-074-20ceb, vfx48-088-20ce, vfx48-088-20ceb, vfx48-106-20ce, vfx48-106-20ceb, vfx48-142-20ce, vfx48-142-20ceb, vfx48-171-20ce, vfx48-171-20ceb, vfx48y205-20ce, vfx48y205-20ceb, vfx48-244-20ce, vfx48-244-20ceb, vfx48-003-54ceb, vfx48-004-54ceb, vfx48-006-54ceb, vfx48-008-54ceb, vfx48-010-54ceb, vfx48-013-54ceb, vfx48-018-54ceb, vfx48-026-54ceb, vfx48-031-54ceb, vfx48-037-54ceb, vfx48-046-54ceb, vfx48-061-54ce, vfx48-061-54ceb, vfx48-074-54ce, vfx48-074-54ceb, vfx48-090-54ce, vfx48-090-54ceb, vfx48-109-54ce, vfx48-109-54ceb, vfx48-146-54ce, vfx48-146-54ceb, vfx48-175-54ce, vfx48-175-54ceb, vfx48-210-54ce, vfx48-210-54ceb, vfx48-250-54ce, vfx48-250-54ceb |
|
Emotron FDU |
fdu48-003-54ce, fdu48-003-54ceb, fdu48-004-54ce, fdu48-004-54ceb, fdu48-006-54ce, fdu48-006-54ceb, fdu48-008-54ce, fdu48-008-54ceb, fdu48-010-54ce, fdu48-010-54ceb, fdu48-013-54ce, fdu48-013-54ceb, fdu48-018-54ce, fdu48-018-54ceb, fdu48-026-54ce, fdu48-026-54ceb, fdu48-031-54ce, fdu48-031-54ceb, fdu48-037-54ce, fdu48-037-54ceb, fdu48-046-54ce, fdu48-046-54ceb, fdu48-061-54ce, fdu48-061-54ceb, fdu48-074-54ce, fdu48-074-54ceb, fdu48-090-54ce, fdu48-090-54ceb, fdu48-109-54ce, fdu48-109-54ceb, fdu48-146-54ce, fdu48-146-54ceb, fdu48-175-54ce, fdu48-175-54ceb, fdu48-210-54c, fdu48-210-54ceb, fdu48-250-54ce, fdu48-250-54ceb, fdu48-025-20ce, fdu48-030-20ce, fdu48036y20ce, fdu48y045y20ce, fdu48y060y20ce, fdu48y072y20ce, fdu48y088y20ce, fdu48y106y20ce, fdu48y142y20ce, fdu48y171y20ce, fdu48y205y20ce, fdu48y244y20ce, fdu48-300-20ce, fdu48-300-20ceв, fdu48-375-20ce, fdu48-375-20ceв, fdu48-430-20ce, fdu48-430-20ceв, fdu48-500-20ce, fdu48-500-20ceв, fdu48-600-20ce, fdu48-600-20ceв, fdu48-650-20ce, fdu48-650-20ceв, fdu48-750-20ce, fdu48-750-20ceв, fdu48-860-20ce, fdu48-860-20ceв, fdu48-1000-20ce, fdu48-1000-20ceв |
|
Emotron VSA |
vsa23-01, vsa23-03, vsa23-04, vsa23-07, vsa23-10, vsa48-002, vsa48-004, vsa48-005 |
|
Emotron VSS |
sс48-009, vsс48-013, vsс48-018 |
|
Emotron PFD |
pfd55-402, pfd55-404, pfd55-405, pfd50-409, pfd50-413, pfd50-418, pfd50-424 |
|
Emotron TSA |
tsa-016, tsa-022, tsa-030, tsa-036, tsa-042, tsa-056, tsa-070, tsa-085, tsa-100, tsa-140, tsa-170, tsa-200, tsa-240, tsa-300, tsa-360, tsa-450 |
|
Emotron MSF 2.0 |
msf-017, msf-030, msf-045, msf-060, msf-075, msf-085, msf-110, msf-145, msf-170, msf-210, msf-250, msf-310, msf-370, msf-450, msf-570, msf-710, msf-835, msf-1000, msf-1400 |
|
Emotron MSF |
msf-017, msf-030, msf-045, msf-060, msf-072, msf-085, msf-110, msf-145, msf-170, msf-210, msf-250, msf-310, msf-370, msf-450, msf-570 |
В данной таблице присутствуют далеко не все частотники Emotron ремонт которых предлагает наш сервисный центр.
Настройка частотного преобразователя Emotron, программирование
 Настройка частотных преобразователей Emotron (программирование) происходит в рамках установленных производителем правил, существует общий алгоритм по программированию (настройке частотных преобразователей), относящийся ко всем производителям данного промышленного оборудования. Ниже представлена пошаговая инструкция по настройке частотных преобразователей Emotron.
- Выбор режима управления приводом Emotron (управление по показанию датчиков, дистанционное управление, дистанционное управление).
- В случае использования отдельного (выносного) монитора, настраивается вывод на него технической информации.
- Далее определяем конфигурацию подключения серводвигателя. На данной стадии задаются такие параметры как- возможность применения обратной связи либо без ее применения, а в память блока заносятся данные по: величине крутящего момента, мощности потребителей, номинальное значения частоты, напряжение, ток и скорости вращения ротора.
- Программируется минимально допустимая величина напряжения и частоты, а также время ускорения ротора от ноля до номинального значения.
- И в завершении, в программу управления частотным преобразователем Emotron вносятся функциональные данные со значениями отдельных клемм и особенностями сигналов. Отмечаются действия оборудования, выполняющиеся автоматически при отсутствии информации поступающей в оперативном режиме с датчика.
В некоторых частотниках существует пункт наличия/отсутствия фильтра в цепи питания двигателя. Этот пункт отвечает за подключение различных видов нагрузок, в том случае, когда возможно выбрать нормальное или инверсное изменение частоты при повышении уровня сигнала обратной связи.
Все настройки частотных преобразователей Emotron приведены в технической документации ниже в удобном формате (PDF) который можно скачать на свой компьютер, распечатать или просто открыть на нашем сайте.
Коды ошибок частотного преобразователя Emotron VFX
 В процессе работы выходит из строя даже самое надежное промышленное оборудование. В данной статье мы приведем ошибки частотного преобразователя Emotron, а точнее Emotron VFX. Частотники в наше время нашли широкое применения в абсолютно всех сферах промышленности управляя как мини моторами в оргтехнике, так и гигантскими двигателями в горнодобывающей промышленности.
Для простоты общения со столь сложной электроникой все частотные преобразователи оснащены небольшими дисплеями с помощью которых выводятся информационные сообщения с кодами ошибок, расшифровав которые можно сразу же узнать причину ее возникновения. Если учесть распространенность данной промышленной электроники, то появляется острая нужда в расшифровке кодов ошибок частотных преобразователей. В этой статье мы рассмотрим одного из самых известных производителей промышленной электроники имеющему уважение во всем мире, Emotron.
Существует несколько видов ошибок, некоторые из них можно устранить автоматически, а некоторые возможно исправить только, обратившись в специализированный сервисный центр. В таблицах ниже приведены коды ошибок частотного преобразователя Emotron и их расшифровка.
Индикация- статусная панель, устранение неисправностей с помощью статусной панели.
|
Коды ошибок и предупреждений |
Варианты выбора |
Авария (обычная/ мягкая) |
Индикато ры предупре ждений (поле C) |
|
Дв-ль I2t |
Авария/Выкл/ Ограничение |
Обычная/ мягкая |
I2t |
|
PTC |
Авария/Выкл |
Обычная/ мягкая |
|
|
Датчик двига- теля PTC |
Вкл |
Обычная |
|
|
PT100 |
Авария/Выкл |
Обычная/ мягкая |
|
|
Потеря дв-ля |
Авария/Выкл |
Обычная |
|
|
Блок ротора |
Авария/Выкл |
Обычная |
|
|
Внеш ошибка |
Через ЦфВх |
Обычная/ мягкая |
|
|
Bнш пepeг дв |
Через ЦфВх |
Обычная/ мягкая |
|
|
Перегрузка |
Авария/Выкл/ Внимание |
Обычная/ мягкая |
|
|
Недогрузка |
Авария/Выкл/ Внимание |
Обычная/ мягкая |
|
|
Ошибка связи |
Авария/Выкл/ Внимание |
Обычная/ мягкая |
|
|
Отклонение |
Через опцию |
Обычная |
|
|
Энкодер |
Авария/Выкл |
Обычная |
|
|
Насос управл |
Через опцию |
Обычная |
|
|
Перегрев ПЧ |
Вкл |
Обычная |
ПР |
|
Прев тока Б |
Вкл |
Обычная |
|
|
Перенапр Т |
Вкл |
Обычная |
|
|
Перенапр Г |
Вкл |
Обычная |
|
|
Перенапр |
Вкл |
Обычная |
|
|
Превыш скор |
Вкл |
Обычная |
|
|
Пониж напряж |
Вкл |
Обычная |
НН |
|
ЖдOxл Уpв |
Авария/Выкл/ Внимание через ЦифBx |
Обычная/ мягкая |
LCL |
|
Десат ### * |
Вкл |
Обычная |
|
|
Авария ЦПТ |
Вкл |
Обычная |
|
|
Выход авария BA #### * |
Вкл |
Обычная |
|
|
Сеть ПЧ Выкл |
Вкл |
Обычная |
|
|
Перенапряжен |
Предупрежде- ние |
НО |
|
|
Останов мягк |
Предупрежде- ние |
МСТ |
|
|
Тормоз |
Авария/Выкл/ Внимание |
Обычная |
|
|
Опция |
Вкл |
Обычная |
Преобразователь частоты разработан таким образом, что он пытается избежать аварийных отключений путем ограничения момента, перенапряжения и т.п. Появление сбоев при вводе в эксплуатацию или вскоре после него обычно свидетельствует о неверной настройке или неправильном подключении. Возникновение неисправностей или проблем после
длительного режима бесперебойной работы обычно происходит по причине изменений в системе или ее окружении (например, в результате износа).
|
Ошибка |
Возможная причина |
Устранение |
|
Дв-ль I2t “I2t” |
|
|
|
TC |
Перегрев двигателя (PTC) максимальный уровень. ПРИМЕЧАНИЕ. Действительно только для платы расширений |
|
|
Датчик двига- теля PTC |
Температура термистора двигателя (PTC) превышает максимальный уровень. ПРИМЕЧАНИЕ. Действительно только при задействованном [237]. |
|
|
Температура элемента PT100 превышает допустимый уровень. ПРИМЕЧАНИЕ. Действительно только при использовании платы расширений PTC/PT100. |
|
|
|
Потеря дв-ля |
Обрыв фазы или слишком большой дисба- ланс фаз двигателя |
|
|
Блок ротора |
Ограничение момента при заклиненном роторе.
|
|
|
Внеш ошибка |
Активен внешний сигнал аварии на одном из входов ЦфВх 1-8.
|
|
|
Bнш пepeг дв |
Активен внешний сигнал аварии на одном из входов ЦфВх 1-8.
|
|
|
Перегрузка |
Достигнут уровень основного сигнала перегрузки. |
|
|
Недогрузка |
Достигнут уровень основного сигнала недогрузки. |
|
|
Ошибка связи |
Ошибка последовательной связи (дополнительное устройство) |
|
Полный список всех возможных ошибок частотных преобразователей Emotron можно посмотреть и скачать в файлах ниже.
Сброс ошибок частотных преобразователей Emotron
 Компания «Кернел» производит ремонт частотных преобразователей Emotron в с 2002 года. За это время мы накопили колоссальный опыт в том числе опыт в ремонте частотных преобразователей Emotron. Ремонт подобной промышленной электроники ответственное и сложное занятие, требующие максимальной отдачи, профессионализма и максимально полной материальной базе.
Специалисты нашего сервисного центра уделяют максимальное внимание к качеству исполнения ремонта, программирования и настройке промышленного преобразователя частоты, не зависимо от производителя данного промышленного оборудования. Именно поэтому мы смело даем гарантию на ремонт частотных преобразователей Emotron шесть месяцев.
Ремонт частотных преобразователей Emotron в производится исключительно с использованием оригинальных запасных частей, на компонентном уровне с применением высокотехнологичного оборудования, квалифицированным персоналом с инженерным образованием.
Если на вашем производстве появились проблемы с частотным преобразователем, которые вы не можете решить самостоятельно, мы всегда рады вам помочь. Обращайтесь в сервисный центр «Кернел». Специалисты нашей компании в минимальные сроки проведут глубокую диагностику и последующий ремонт частотного преобразователя Emotron. Оставьте заказ на ремонт оборудования используя форму на сайте, либо свяжетесь с нашими менеджерами, сделать это очень просто.
Частотный преобразователь Emotron, скачать инструкции по эксплуатации
Ниже вы можете скачать руководства по эксплуатации частотных преобразователей Emotron
|
Частотный преобразователь Emotron VS10 и VS30 инструкция |
|
|
Частотный преобразователь Emotron VFX инструкция |
|
|
Частотный преобразователь Emotron VSA инструкция |
|
|
Частотный преобразователь Emotron VSX, VSM, VSR, VSE, VSS инструкция |
|
|
Частотный преобразователь Emotron FDU инструкция |
|
|
Частотный преобразователь Emotron AFE инструкция |
|
|
Частотный преобразователь Emotron CDU инструкция |
|
|
Частотный преобразователь Emotron CDX инструкция |
|
|
Частотный преобразователь Emotron DSV-15, DSV-35 инструкция |
|
 Скачать PDF
Схемы подключения частотного преобразователя Emotron
Схемы подключений частотных преобразователей Emotron могут отличатся друг от друга даже если эти преобразователи относятся ко одной линейке. Схема подключения преобразователя зависит от многих факторов таких как потребляемая частотным преобразователем нагрузка или питающая сеть к которой подключается частотник 200V – 380V и конечно же зависит от CPU в паре, с которым предполагается работа преобразователя.
Ниже приведены схемы подключения частотных преобразователей Emotron:
|
Схема подключения частотного преобразователя Emotron VFX |
Схема подключения частотного преобразователя Emotron VSA |
|
|

|
|
Схема подключения частотного преобразователя Emotron FDU |
Схема подключения частотного преобразователя Emotron CDU |
|
|

|
|
Схема подключения частотного преобразователя Emotron DSV |
Схема подключения частотного преобразователя Emotron VSX, VSM, VSR, VSE, VSS |
|
|

|


Оставьте заявку на ремонт промышленного оборудования используя форму на сайте, либо свяжетесь с нашими менеджерами, сделать это очень просто.
Оставить заявку на ремонт частотных преобразователей Emotron
У вас вышел из строя частотник? Вам необходим срочный ремонт частотных преобразователей Emotron в ? Оставьте заявку на ремонт нажав на одноименную кнопку в верхней правой части экрана либо свяжитесь с нашими менеджерами. Связаться с ними можно несколькими способами:

- Заказав обратный звонок (кнопка в правом нижнем углу сайта)
- Посредством чата (кнопка расположена с левой стороны сайта)
- Позвонив по номеру телефона: +7(8482) 79-78-54; +7(917) 121-53-01
- Написав на электронную почту: 89171215301@mail.ru
Далеко не полный список производителей промышленной электроники и оборудования, ремонтируемой в нашей компании.

-
Contents
-
Table of Contents
-
Troubleshooting
-
Bookmarks
Quick Links
Emotron TSA
Softstarter
Instruction manual
English
Valid from Software version 1.27
Related Manuals for CG emotron TSA Series
Summary of Contents for CG emotron TSA Series
-
Page 1
Emotron TSA Softstarter Instruction manual English Valid from Software version 1.27… -
Page 3
Date of release: 28-01-2017 © Copyright CG Drives & Automation Sweden AB 2013-2017 CG Drives & Automation Sweden AB retains the right to change specifications and illustrations in the text, without prior notification. The contents of this document may not be copied without the explicit… -
Page 5: Safety Instructions
Safety instructions Phase compensation capacitor Congratulations for choosing a product from CG Drives & Automation! If a phase compensation capacitor is to be used, it must be Before you begin with the installation, commissioning or connected at the inlet of the softstarter, not between the powering up the unit for the first time it is very important motor and the softstarter.
-
Page 6
CG Drives & Automation 01-5980-01r2… -
Page 7: Table Of Contents
4.4.13 Other control voltage ……….37 8.1.1 1st Line [110]…………69 8.1.2 2nd Line [120] …………69 Getting started……….39 Main Setup [200]………… 69 Check list …………..39 8.2.1 Operation setup [210] ……….69 Mains and motor connection ……… 39 CG Drives & Automation 01-5980-01r2…
-
Page 8
Process value …………140 Description of the EInt formats ……141 Softstarter theory ……..143 10.1 Background theory……….143 10.2 Reduced voltage starting……..145 10.3 Other starting methods……… 147 10.4 Use of softstarters with torque control ….148 CG Drives & Automation 01-5980-01r2… -
Page 9: Introduction
The Quick Start Guide can be put in a cabinet so that it is always easy to access in case of an emergency. — =Standard (Grounded Supply type net) I=IT-net (EMC not fulfilled) Brand label A=Standard Software A=Standard software — =CE approved Standard U=UL/cUL approved CG Drives & Automation 01-5980-01r2 Introduction…
-
Page 10: Standards
The recycling of materials will help to conserve natural resources. For more detailed information about recycling this product, please contact the local distributor of the product. Introduction CG Drives & Automation 01-5980-01r2…
-
Page 11: Glossary
——————————————— — lb ft UInt Communication format (Unsigned Integer) n mot Communication format (Integer) Long Communication format (Integer Long) SELV Safety Extra Low Voltage The function cannot be changed in run mode CG Drives & Automation 01-5980-01r2 Introduction…
-
Page 12
Introduction CG Drives & Automation 01-5980-01r2… -
Page 13: Mounting
Minimum free space WARNING! Never operate the softstarter with the front Minimum free space cover removed. mm (in) Frame size above* below at side (3.9) (3.9) *) Above: Cabinet roof to softstarter or softstarter to softstarter CG Drives & Automation 01-5980-01r2 Mounting…
-
Page 14: Mechanical Specifications And Drawings
H3 = Total height including Cable covers. Emotron TSA frame size 1 — 2 Fig. 3 Dimensions for Emotron TSA frame size 1 and 2, bottom view. Fig. 2 Dimensions for Emotron TSA frame size 1 and 2. Mounting CG Drives & Automation 01-5980-01r2…
-
Page 15
Emotron TSA frame size 3 196 (7.7) 235 (9.3) Fig. 4 Dimensions for Emotron TSA frame size 3. Fig. 5 Dimensions for Emotron TSA frame size 3, bottom view. CG Drives & Automation 01-5980-01r2 Mounting… -
Page 16
Emotron TSA frame size 4 254 (10) 260 (10.3) Fig. 6 Dimensions for Emotron TSA frame size 4 . Fig. 7 Dimensions for Emotron TSA frame size 4, bottom view. Mounting CG Drives & Automation 01-5980-01r2… -
Page 17: Mounting Schemes
On our websites www.cgglobal.com and www.emotron.com Ø 13 it is possible to download a full-size template for positioning of the fixing holes. Ø 7 (x 4) Fig. 9 Hole pattern for Emotron TSA frame size 3. CG Drives & Automation 01-5980-01r2 Mounting…
-
Page 18
Mounting CG Drives & Automation 01-5980-01r2… -
Page 19: Connections
Fig. 11 Mains, motor and control supply voltage connection NOTE: The Emotron TSA control-board is equipped with a ground plane to which shielded cables can be connected (see Fig. 17 on page 21). NOTE: For UL-approval use 75°C copper wire only. CG Drives & Automation 01-5980-01r2 Connections…
-
Page 20
Full voltage can be detected if no motor is connected. Table 7 Tightening torque for bolts [Nm (Lb-in)]. Tightening torque for bolts [Nm (Lb-in)] Frame size Motor or mains PE cable cables 8 (70) 5 (44) 8 (70) 5(44) Connections CG Drives & Automation 01-5980-01r2… -
Page 21
Full voltage can be detected if no motor is connected. Table 8 Tightening torque for bolts [Nm (Lb-in)]. Tightening torque for bolts [Nm (Lb-in)] Frame size Motor or mains PE cable cables 20 (177) 12 (106) CG Drives & Automation 01-5980-01r2 Connections… -
Page 22
Full voltage can be detected if no motor is connected. Table 9 Tightening torque for bolts [[Nm (Lb-in)]. Tightening torque for bolts [Nm (Lb-in)] Frame size Motor or mains PE cable cables 50 (442) 12 (106) Connections CG Drives & Automation 01-5980-01r2… -
Page 23: Busbar Distances On Emotron Tsa Softatarter
44 (0.9) 83 (3.27) 83 (3.27) 3.1.2 Cable covers When the Mains and motor cables are connected, mount the cable covers according to Fig. 16. Fig. 16 How to mount the cable covers general drawing. CG Drives & Automation 01-5980-01r2 Connections…
-
Page 24: Board Layout And Connectors
WARNING! For softstarters rated higher than 525 VAC, it is mandatory to have at least basic insulation from the temperature sensor towards live voltage. Connections CG Drives & Automation 01-5980-01r2…
-
Page 25
Solid: 2.5 (27) 8. Terminals for DigIn/AnIn/AnOut signals (control board) * When using Ferrules, suitable Ferrule length is 10-12 mm/ 0.39 — 0.47 in. 9. Terminals for relay output signals and PTC connection (power board) CG Drives & Automation 01-5980-01r2 Connections… -
Page 26: Control Signal Connections
Analogue output. Factory setting is “Current”. 0-20 mA and 4-20 mA; max load impedance 500 Ω +24 VDC ±5%. Max. current from +24 VDC = 50 mA. Control signal supply 2, voltage to digital input. Short circuit-proof and overload-proof. Connections CG Drives & Automation 01-5980-01r2…
-
Page 27: Wiring Examples
• If required, connect relay R1 (terminals 21 and 22) to the contactor – the softstarter then controls the mains contactor (for factory configuration of R1 see menu [551]). Always ensure the installation complies with the appropriate local regulations. CG Drives & Automation 01-5980-01r2 Connections…
-
Page 28
Relay 2 Relay 3 Run FWD Stop DigIn 1 DigIn 2 +10 V AnIn DigIn 3 DigIn 4 +24 V AnOut +24 V Fig. 20 Separate Start- Stop-signals ( 3-wire connection) wir- ing example. Connections CG Drives & Automation 01-5980-01r2… -
Page 29
Relay 2 Relay 3 Stop Run FWD DigIn 1 DigIn 2 +10 V AnIn DigIn 3 DigIn 4 +24 V AnOut +24 V Fig. 21 Common Start- Stop-signals ( 2-wire connection) wir- ing example. CG Drives & Automation 01-5980-01r2 Connections… -
Page 30
Relay 2 Relay 3 Run FWD DigIn 1 DigIn 2 +10 V AnIn DigIn 3 DigIn 4 +24 V AnOut +24 V Fig. 22 Common Start- Stop-signals ( 2-wire connection) wir- ing example, Level control. Connections CG Drives & Automation 01-5980-01r2… -
Page 31
+24 V Reset Run FWD Pressure 0 — 10 bar Current 0 — I 4 — 20 mA 4 — 20 mA Fig. 23 Extended wiring example, using digital and analogue inputs and outputs. CG Drives & Automation 01-5980-01r2 Connections… -
Page 32
Relay 1 Relay 2 Relay 3 DigIn 1 DigIn 2 +10 V AnIn DigIn 3 DigIn 4 +24 V AnOut +24 V Run FWD Stop Fig. 24 Reverse current brake wiring example. Connections CG Drives & Automation 01-5980-01r2… -
Page 33
Relay 2 OperationREV avoided. Relay 1 Relay 2 DigIn 1 DigIn 2 +10 V AnIn DigIn 3 DigIn 4 +24 V AnOut +24 V Run FWD Stop Run REV Fig. 25 Connection for start forward/reverse. CG Drives & Automation 01-5980-01r2 Connections… -
Page 34
If both DigIn 1 “RunFWD” and DigIn 3 “RunREV” are closed at the same time, a stop is performed according to the stop settings in menu group [340]. In this case no start will be allowed. Connections CG Drives & Automation 01-5980-01r2… -
Page 35: Application Guidelines
70 A with a start current ratio of 3.0 x FLC (210 A) for 30 seconds, and with a 330 seconds (5.5 minutes) interval between starts (current via bypass contactors). CG Drives & Automation 01-5980-01r2 Application guidelines…
-
Page 36
Bandsaw Chipper Circular saw Lumber & Wood Debarker Planer Sander Ball mill Centrifuge Petrochemical Extruder Screw conveyor Ball mill Grinder Material conveyor Palletiser Transport & Machine Press Roller mill Rotary table Trolley Escalator Application guidelines CG Drives & Automation 01-5980-01r2… -
Page 37: The Application Functions List
This column guides you to the menu, menu group, or manual section where you find a description of the settings for the function. For instance «331=Sqr Torq Ctr», means: set menu [331] to “Sqr Torq Ctr.” CG Drives & Automation 01-5980-01r2 Application guidelines…
-
Page 38
344=Rev Curr Brk Conveyor speed set from planer shaft High speed lines power analogue output. Worn out tool Use load monitor maximum alarm Broken coupling Use load monitor minimum alarm Application guidelines CG Drives & Automation 01-5980-01r2… -
Page 39
Torque boost in beginning of ramp. Jamming Use load monitor maximum alarm HAMMER MILL Reverse current brake with reversing 341=Brake Fast stop contactor for heavy loads. 344=Rev Curr Brk Motor blocked Locked rotor function CG Drives & Automation 01-5980-01r2 Application guidelines… -
Page 40: Special Conditions
For instance, the start ramp can only be set for an average starting ramp for all the connected motors. This means that the start time may differ from motor to motor. Similarly, the load monitor alarm levels/margins are applied for the Application guidelines CG Drives & Automation 01-5980-01r2…
-
Page 41: Earthing System
Emotron TSA should be configured for IT-net supply type. The unit will then not fulfil the EMC requirements. If you have a softstarter without IT net supply type, the softstarter can be rebuilt. Contact your local CG Drives & Automation service partner. 4.4.12 Earth fault relay It is possible to use an earth fault relay to protect motor and cables.
-
Page 42
Application guidelines CG Drives & Automation 01-5980-01r2… -
Page 43: Getting Started
73). • Check / Set real time clock (menu [740], section 8.7.4, page 134) • Select keyboard control (menu [2151], section 7.1.1, page 49). • Perform a test run from the control panel. CG Drives & Automation 01-5980-01r2 Getting started…
-
Page 44: Default Toggle Loop
Chapter 6. page 43. Menu [100], “Preferred View” is displayed at start. 1. Press to display menu [211] “Language”. NQE1 Select Language using the keys. Confirm with Getting started CG Drives & Automation 01-5980-01r2…
-
Page 45: Control Panel Operation
To stop the motor, press the key on the control panel. NOTE: For selection of other stop method than the default “Coast”, see section 7.1.2, page 35 and menu [341]. CG Drives & Automation 01-5980-01r2 Getting started…
-
Page 46
Getting started CG Drives & Automation 01-5980-01r2… -
Page 47: Operation Via The Control Panel
Shows the setting or selection in the active Area F: menu (empty at 1st level and 2nd level menus). Shows warnings and alarm messages. CG Drives & Automation, 01-5980-01r2 Operation via the control panel…
-
Page 48: Led Indicators
Table 18 Control key commands. Start with reversed (left) rotation. START REVERSE RUN (Requires reversing contactor). Stop motor. STOP/RESET Reset softstarter (after a trip). Start with forward START FORWARD RUN (right) rotation. Operation via the control panel CG Drives & Automation, 01-5980-01r2…
-
Page 49: Function Keys
To activate the jog key function, see instructions in “Jog functions” on page 50. To deactivate the jog key function, unlock the keyboard in menu [218]. CG Drives & Automation, 01-5980-01r2 Operation via the control panel…
-
Page 50: Toggle And Loc/Rem Key
1. Press the Toggle key and keep it pressed while pressing the ESC key. 2. The message “Clear Loop?” is shown. 3. Confirm with ENTER to delete the menus in the loop. Operation via the control panel CG Drives & Automation, 01-5980-01r2…
-
Page 51: Loc/Rem Function
Relays [550]. When the softstarter is set to “LOCAL”, the signal on the relay will be active/high. In “REMOTE” the signal will be inactive/low. 3rd level 4th level Fig. 33 Menu structure CG Drives & Automation, 01-5980-01r2 Operation via the control panel…
-
Page 52: The Main Menu
View Trip Log Here you can see the last 9 trips in the trip memory. System Data This menu contains information on softstarter model and software version. Operation via the control panel CG Drives & Automation, 01-5980-01r2…
-
Page 53: Main Features
[520], see section 8.5.2, page 108. Spinbrake can only be activated when the TSA is non-operational, i.e that Stp is shown in the display. Fig. 35 Run/Stop decision tree CG Drives & Automation, 01-5980-01r2 Main features…
-
Page 54: Jog Functions
Jog speed level in menu “[353] Jog Ramp Rate” to achieve smooth Jog start. There are also a couple of examples on how to apply time settings for jog by using logic functions, see page 63. Main features CG Drives & Automation, 01-5980-01r2…
-
Page 55: Working With Parameter Sets
DigIn running in automatic control mode (i.e. control signals from 3 [523] is set to “Set Ctrl 1” and DigIn 4 [524] is set to “Set PLC, e.g. via fieldbus). Ctrl 2”. CG Drives & Automation, 01-5980-01r2 Main features…
-
Page 56: Configuration Of Parameter Sets
2. Select motor M1 in menu [212]. 3. Enter motor data and settings for other parameters. 4. Select parameter set B in menu [241]. 5. Select M2 in menu [212]. 6. Enter motor data and settings for other parameters. Main features CG Drives & Automation, 01-5980-01r2…
-
Page 57
1 to the internal control board of TSA unit 2, using menu [245]. Fig. 38 Copy and load parameters between two Emotron TSA units via the control panel. WARNING! Switch off all power connections before opening the front cover. CG Drives & Automation, 01-5980-01r2 Main features… -
Page 58
Fig. 39 Copy and load parameters between two Emotron TSA units using an external control panel (optional). NOTE: Another solution for copying settings and data between different softstarter units is via PC, using the EmoSoftCom PC tool (option). See section 12.2, page 155. Main features CG Drives & Automation, 01-5980-01r2… -
Page 59: Applying Limitations, Alarms And Autoreset
• The Trip LED indicator (red triangle) is lit. • The “TRP” status indication is displayed (area D of the display). • The Trip relay or output is active (if selected function in menu [551], [552] or [553]). CG Drives & Automation, 01-5980-01r2 Main features…
-
Page 60: Load Monitor Function
[223] (being 100%). However, the way to set the levels differs between the two methods: NOTE: When using the load monitor, check that the nominal motor power is set properly in menu [223]. Main features CG Drives & Automation, 01-5980-01r2…
-
Page 61
(menu [223]). The actual shaft 4112 MaxAlarmLev power is displayed in brackets together with the Alarm Level (104%) 116% value to facilitate setting. See example on the right. Fig. 40 Manually set load monitor alarm levels. CG Drives & Automation, 01-5980-01r2 Main features… -
Page 62
Every time a new “Autoset Alarm” command is executed, the actual shaft power value will be updated as the “Normal Load” value, with the alarm levels following this. Fig. 41 Autoset load monitor alarm margins. Main features CG Drives & Automation, 01-5980-01r2… -
Page 63
C. The maximum alarm level is exceeded. D. When the set maximum alarm delay time (3 seconds) has passed, the set maximum alarm action is executed, in this case a Hard trip, as set in menu [4111]. CG Drives & Automation, 01-5980-01r2 Main features… -
Page 64: Reset And Autoreset
“Autoreset Attempts [251]” on page 83. activated by selecting one of the keyboard alternatives (enabled as default). If controlled by digital input [520], or by virtual I/O [560], this is set by selecting “Reset” signal. Main features CG Drives & Automation, 01-5980-01r2…
-
Page 65: Programmable I/O
• No digital outputs are available. • 3 relays [550], with the possibility for up to 6 extra relays if extended I/O option boards (max 2) are fitted. • There are also 8 virtual I/Os [560] CG Drives & Automation, 01-5980-01r2 Main features…
-
Page 66: Enable And Stop Functions
Fig. 44, page 61. Fig. 45 gives an example of a possible RunFWD and RunREV inputs are active, then the sequence. softstarter stops according to the selected stop method in menu [341]. Fig. 46 gives an example of a possible sequence. Main features CG Drives & Automation, 01-5980-01r2…
-
Page 67: Logical Functions
WARNING! Fig. 46 Input and output status for level control Motor may start instantly! Please verify that parameter settings and I/O connections are according to desired function before switching on mains supply. CG Drives & Automation, 01-5980-01r2 Main features…
-
Page 68
Number of pulses with Jog speed before run 6521 C2 trig DigIn 2 Pulse input 6522 C2 Reset Counter 2 is blocked until end of deceleration. 6523 C2 Trip Val Number of pulses with Jog speed after run Main features CG Drives & Automation, 01-5980-01r2… -
Page 69
Reset Flip Flop 1 and stop the motor 6323 Timer2 Dly 5,0 s Jog time before stop 6411 F1 mode Edge 6412 F1 set Negative flank of “Dec” 6413 F1 reset Reset when “Jog speed after run” has ended CG Drives & Automation, 01-5980-01r2 Main features… -
Page 70
Main features CG Drives & Automation, 01-5980-01r2… -
Page 71: Functionality
Emotron TSA model, software and hardware version. Service System data 8.9, page 136 information. WARNING! Motor may start instantly! Please verify that parameter settings and I/O connections are according to desired function before switching on mains supply. CG Drives & Automation, 01-5980-01r2 Functionality…
-
Page 72
For bus communication, the integer value 0 is used to select “Off ” in the example. Integer 1 represents “REV”. To change selection by bus communication refer to the description in Chapter 9. page 139. Functionality CG Drives & Automation, 01-5980-01r2… -
Page 73: Preferred View [100]
Sets the content of the lower row in the menu [100] “Preferred View”. Same selection as in menu [110]. Default: 120 2nd Line Motor Data [220] is connected to Current selected motor. Default: Current CG Drives & Automation, 01-5980-01r2 Functionality…
-
Page 74
Jog command via digital input or Virtual I/O. Int+Ext Jog command via internal or external keyb control panel. Jog command via serial communication. Int keyb Jog command via internal control panel. Ext keyb Jog command via external control panel. Functionality CG Drives & Automation, 01-5980-01r2… -
Page 75
Local start/stop command via serial keyboard and the keys are activated. (it is possible to select communication. e.g. Start REV to be Off or REV in menu [2175] above). 218 Lock Code? Default: Range: 0–9999 CG Drives & Automation, 01-5980-01r2 Functionality… -
Page 76: Remote Signal Level/Edge [21A]
NOTE: Edge controlled inputs can comply with the Machine Directive (see Chapter 1.5.1 page 6) if the inputs are directly used to start and stop the machine. Functionality CG Drives & Automation, 01-5980-01r2…
-
Page 77: Motor Data [220]
For explanation of the different abbreviations used in this 1 US-units chapter, see Chapter 1.7.2 page 7 WARNING! When the “Units” setting is changed, this will also affect the factory settings of the motor. CG Drives & Automation, 01-5980-01r2 Functionality…
-
Page 78
. It must be set within the range 25 — 400% of n_soft the softstarter power Pn_soft. If parallel motors, set the sum 221 Motor Volts of the motor power. See nominal data for CG motors in Ta- 400V ble 27. 400 V for SI-units… -
Page 79
226 Motor Poles Default: Range: 2-144 Nominal Motor Cos φ [227] Set the nominal Motor cosphi (power factor). 227 Motor Cosφ 0.86 0.86 Default: (see Note 2, page 73) Range: 0.50 — 1.00 CG Drives & Automation, 01-5980-01r2 Functionality… -
Page 80: Motor Protection [230]
[2311] is performed. The alarm remains active until the I²t value is below 95% before allowing a reset or an autoreset (see more detailed description in menu [2521]). Functionality CG Drives & Automation, 01-5980-01r2…
-
Page 81
Using motor overload trip class 10 Current: 5 x In_mot Overload trip time (max start time): 20 sec 60 s 20 s Current (x I n_mot 500% x I 300% x I n_mot n_mot Fig. 50 The thermal curve CG Drives & Automation, 01-5980-01r2 Functionality… -
Page 82
PTC Alarm Action [2331] B 120 ° F 140 F Nema 2331 PTC AA ° No action H 165°C Default: No action No action Hard Trip For a definition, see Table 23, page 55. Soft Trip Warning Functionality CG Drives & Automation, 01-5980-01r2… -
Page 83
Counts down from set value in menu [2343]. 2341 StartLim AA No action 2344 TimTNxtStrt Read only Default: No action No action Unit minutes Hard Trip For a definition, see Table 23, page 55 Resolution: 1 min Warning CG Drives & Automation, 01-5980-01r2 Functionality… -
Page 84: Parameter Set Handling [240]
NOTE: The parameter set cannot be changed No action during run if the parameter set includes change of the motor set (M1-M4). Hard Trip For a definition, see Table 23, page 55. Soft Trip Warning Functionality CG Drives & Automation, 01-5980-01r2…
-
Page 85
NOTE: The control panel will be temporarily locked while copying or loading data to the internal control panel. If the on-board RS-232 port is connected to a PC or to an external control panel this will also be temporarily locked. CG Drives & Automation, 01-5980-01r2 Functionality… -
Page 86
Data from motor 4 is loaded. M1M2M3 Data from motor 1, 2, 3 and 4 are loaded. All data is loaded from the control panel. NOTE: Loading or copying will not affect the value in menus for viewing. Functionality CG Drives & Automation, 01-5980-01r2… -
Page 87: Autoreset [250]
• Number of allowed autoreset attempts [2511]= 5. • Within 10 minutes 6 trips occur. 1–3600 1–3600 1–3,600 s • At the 6th trip there is no autoreset, because the autoreset counter allows only 5 attempts to autoreset a trip. CG Drives & Automation, 01-5980-01r2 Functionality…
-
Page 88
When the delay time has [2541] elapsed, the alarm will be reset. The delay counter starts counting immediately. 2524 LockedRotor 2541 MaxAlarm Default: Default: 1–3600 1–3600 1–3,600 s 1–3600 1–3600 1–3,600 s Functionality CG Drives & Automation, 01-5980-01r2… -
Page 89
External Alarm 1 autoreset [2549] Default: The delay counter starts counting as soon as the relevant external alarm input is inactive. 1–3600 1–3600 1–3,600 s 2549 Ext Alarm 1 Default: 1–3600 1–3600 1–3,600 s CG Drives & Automation, 01-5980-01r2 Functionality… -
Page 90: Serial Communication [260]
In this menu the delay time for an autoreset of an Fieldbus module. undervoltage alarm [433] is set. The delay time starts counting when the fault is removed. The undervoltage *) EtherCAT and Bluetooth are future options. Functionality CG Drives & Automation, 01-5980-01r2…
-
Page 91
Select “RW” in normal Set up the parameters for fieldbus communication. cases to control inverter. 263 Fieldbus Additional Process Values [2634] Define the number of additional process values sent in cyclic messages. 2634 AddPrValues Default: Range: CG Drives & Automation, 01-5980-01r2 Functionality… -
Page 92
Communication Fault Time [2642] Gateway [2654] Defines the delay time for the trip/warning. 2654 Gateway 2642 ComFlt Time 0.000.000.000 0.5s Default: 0.0.0.0 Default: 0.5 s Range: 0.1-15 s DHCP [2655] 2655 DHCP Default: Selection: On/Off Functionality CG Drives & Automation, 01-5980-01r2… -
Page 93: Process [300]
321 Proc Source Default: No process source selected. F(AnIn) Function of analogue input. F(Bus) Function of communication value. NOTE: If F (Bus) is chosen in menu [321], see section 9.5 Process value, page 140. CG Drives & Automation, 01-5980-01r2 Functionality…
-
Page 94
Confirm the character by moving the cursor to the next position by pressing the NEXT key. No. for serial No. for serial Character Character comm. comm. ° í Space 0–9 1–10 ñ ó ô ü Functionality CG Drives & Automation, 01-5980-01r2… -
Page 95: Start Setting [330]
Voltage control is selected when a linear voltage ramp is desired. The thyristor switch on time will be ramped up linearly, from “Initial Voltage”, menu [334], up to full mains voltage. See Fig. 52. CG Drives & Automation, 01-5980-01r2 Functionality…
-
Page 96
The motor voltage is controlled according torque ramp reactivated. The ramp slope will increase above Voltage Ctr to a linear voltage ramp, menu [334]. Direct online Functionality CG Drives & Automation, 01-5980-01r2… -
Page 97
As “Voltage ramp with Current limit” but with fixed ramp 336 Start Time time of 6 seconds. Default: 10 s Range: 1 — 60 s Current limit Ramp time (6 seconds) Fig. 55 Direct on-line start in combination with current limit at start. CG Drives & Automation, 01-5980-01r2 Functionality… -
Page 98: Stop Setting [340]
Braking may be used in applications where the motor needs to be stopped quickly. When this selection is made, the braking method (“Dynamic Vector Brake” or “Reverse Current Brake”) can be activated in menu [344]. Functionality CG Drives & Automation, 01-5980-01r2…
-
Page 99
The DC brake will automatically be deactivated when the Stop time motor has stopped or when the stop time has expired. Time Optionally an external rotation sensor can be connected via Fig. 58 Step down voltage at stop. CG Drives & Automation, 01-5980-01r2 Functionality… -
Page 100
The strength of the DC brake is set here, the value expressed Range: 0 – 120s as a percentage of the maximum available DC braking power. 348 DCB Strength Default: 30 % Range: 20 – 80% Functionality CG Drives & Automation, 01-5980-01r2… -
Page 101: Jog [350]
[rpm] Jog speed t [s] t [s] Jog command Fig. 59 Jog command Jog Speed Forward [351] 351 JogSpd FWD Default: Range: 1- 30% of nominal motor speed [225] CG Drives & Automation, 01-5980-01r2 Functionality…
-
Page 102: Load Monitor And Process Protection [400]
Setting of the wanted alarm behaviour when a “Maximum Alarm” has been detected. 4111 MaxAlarmAct No Action Default: No Action No Action Hard Trip For a definition, see Table 23, page 55. Soft Trip Warning Functionality CG Drives & Automation, 01-5980-01r2…
-
Page 103
0.5 s period longer than the set “Max Pre-Alarm Delay” time, the Range: 0.1 — 90 s selected “Maximum Pre-Alarm Action” in menu [4121] is activated. 4123 MaxPreAlDel 0.5s Default: 0.5 s Range: 0.1–90 s CG Drives & Automation, 01-5980-01r2 Functionality… -
Page 104
“Autoset”. See nominal motor power, the alarm delay timer starts counting further information in Fig. 40, page 57. down. 4142 MinAlarmLev shaft Default: Range: 0 — 200% of nominal motor power [223] Functionality CG Drives & Automation, 01-5980-01r2… -
Page 105
[4142] MinAlarmLev [4174] MinAlarmMar nominal motor power [223]. NOTE: Changing any alarm margin without performing 4172 MaxPreAlMar Autoset will NOT affect the alarm levels. Default: Range: 0 — of nominal motor power [223] CG Drives & Automation, 01-5980-01r2 Functionality… -
Page 106
[417] Autoset. A new autoset command will overwrite previously used alarm levels. Autoset can also be triggered by a remote signal, setting the function of any digital input to “Autoset”. Note that this signal is edge-triggered. Functionality CG Drives & Automation, 01-5980-01r2… -
Page 107: Process Protection [420]
Hard Trip 4223 LockRotCurr For a definition, see Table 23, page 55. 480% Soft Trip Warning Default: 480% (4.8 x I n_mot Range: 100% — 1000% (1.0 x I — 10.0 x I n_mot n_mot CG Drives & Automation, 01-5980-01r2 Functionality…
-
Page 108: Mains Protection [430]
Voltage Unbalance Alarm Delay [4313] Default: In this menu the response delay for the voltage unbalance Range: 1 — 90 s alarm, as set in [4311] and [4312], is selected. 4313 VoltUnbDel Default: Range: 1 — 90 s Functionality CG Drives & Automation, 01-5980-01r2…
-
Page 109
L123 and L321 Under-Voltage Alarm Delay [4333] In this menu the response delay for the voltage unbalance alarm, as set in [4431] and [4432], is selected 4333 UnderV Del Default: Range: 1 — 90 s CG Drives & Automation, 01-5980-01r2 Functionality… -
Page 110: I/O [500]
S1. When the jumper is in voltage mode only the voltage menu items are selectable. With the jumper in Default: Min (0 V/4.00 mA) current mode only the current menu items are 0.00–20.00 mA selectable. Range: 0–10.00 V Functionality CG Drives & Automation, 01-5980-01r2…
-
Page 111
With “AnIn Function Max” the physical maximum value is scaled to selected process unit. The default scaling is dependent of the selected function of AnIn [511]. 5136 AnIn FcMax Default: Min value Max value User-defined 2 Define user value in menu [5137] CG Drives & Automation, 01-5980-01r2 Functionality… -
Page 112: Digital Inputs [520]
Activates other parameter set. See Table Set Ctrl 1 29 for selection possibilities. Activates other parameter set. See Table Set Ctrl 2 29 for selection possibilities. Loc/Rem 10 Activates local mode defined in [2173]. Functionality CG Drives & Automation, 01-5980-01r2…
-
Page 113: Analogue Output [530]
AnIn Mirror of received signal value on AnIn. Line Voltage 14 Mains supply NOTE: To activate the parameter set selection, menu 241 must be set to DigIn. Used Th Cap 15 Used thermal capacity CG Drives & Automation, 01-5980-01r2 Functionality…
-
Page 114
[531]. Table 30 AnOut Min Value Max Value Function Process Value Process Min [324] Process Max [325] Shaft Power Motor Power [223] Current Motor Current [224] Functionality CG Drives & Automation, 01-5980-01r2… -
Page 115
Min value Max value User defined 2 Define user value in menu [5337 ] NOTE: It is possible to set AnOut up as an inverted output signal by setting “AnOut Min” > “AnOut Max”. CG Drives & Automation, 01-5980-01r2 Functionality… -
Page 116: Relays [550]
Max pre-alarm condition active (trip or Flip-flop output 4. Max PreAlarm warning). Flip-flop output 4 inverted. Min alarm condition active (trip or Min Alarm CTR1 Counter output 1. warning). !CTR1 Counter output 1 inverted. Functionality CG Drives & Automation, 01-5980-01r2…
-
Page 117
Fig. 63 Relay function example for start and braking cycle. is active (trip) PTC Alarm 103 PTC alarm active (trip or warning) PT100 Alarm 104 PT100 alarm active (trip or warning) 105 I t alarm active (trip or warning) CG Drives & Automation, 01-5980-01r2 Functionality… -
Page 118
I/O option board on the option mounting plate. The functions and selections are the same as for “Relay 1” [551]. Default settings are “Off ”. NOTE: Visible only if optional board is detected or if any input/output is activated. Functionality CG Drives & Automation, 01-5980-01r2… -
Page 119: Virtual I/Os [560]
“OR logic”. See section 8.5.2, page 108 (Digital Input) for descriptions of the different selections. 561 VIO 1 Dest Default: Same selections as in menu Digital Input 1 Selection: [521], page 108. CG Drives & Automation, 01-5980-01r2 Functionality…
-
Page 120: Logical Functions And Timers [600]
CA1 Level LO [6113] Digital Comparator Setup [615] — [618] There are also 4 digital comparators that compare any Fig. 65 Analogue comparator type “Window” available digital signals. Functionality CG Drives & Automation, 01-5980-01r2…
-
Page 121
CA1 Value AnIn 6112 CA1 Level HI 60% (12 mA/20 mA x 100%) 6113 CA1 Level LO 40% (8 mA/20 mA x 100%) 6114 CA1 Type Hysteresis VIO 1 Dest Run FWD VIO 1 Source CG Drives & Automation, 01-5980-01r2 Functionality… -
Page 122
The reference signal passes the Level LO Hysteresis/ value from above (negative edge), the window band 40°C comparator CA1 is reset, output is set low. CA1 Level LO CA1 output Hysteresis High Window High Functionality CG Drives & Automation, 01-5980-01r2… -
Page 123
The reference signal passes the Level LO value from above (signal outside Window band), the comparator CA1 is reset, output is set low. Set delay Reset delay Fig. 68 Set/reset delay of output signal. CG Drives & Automation, 01-5980-01r2 Functionality… -
Page 124
“Trip”, and for CD4 [6181] the default is “Ready”. Operation Default: Operation Same selection as in menu Relay 1 Selection: [551], page 112. Input signal for CD1 [6151] Digital comparator 1 Fig. 69 Digital comparator. Functionality CG Drives & Automation, 01-5980-01r2… -
Page 125: Logic Outputs [620]
Default: ((1.2).3).4 ((1&1)+1)&0 Default execution order, see which is equal to 0. ((1.2).3).4 explanation below. With the alternative execution order for the L1 Expression Alternative execution order, see (1.2).(3.4) explanation below. this is representing: CG Drives & Automation, 01-5980-01r2 Functionality…
-
Page 126
Logic output 1 inverted. +=OR Not used for Logic 1. ^=EXOR Logic output 2. Not used for Logic 2. Logic output 2 inverted. Not used for Logic 2. Logic output 3. Not used for Logic 3. Functionality CG Drives & Automation, 01-5980-01r2… -
Page 127
The reset of the output signal for the Logic 1 function is delayed with the set value in this menu. Compare to Fig. 68, page 119. 621A L1 Res Dly 0:00:00.0 Default: 0:00:00.0 (hours:minutes:seconds) Range: 0:00:00.0–9:59:59.9 CG Drives & Automation, 01-5980-01r2 Functionality… -
Page 128: Timers [630]
The function of the “On-time” mode is to extend an Prolongs the activation of the output On-time activated (high) timer output signal in comparison to the signal according to menu [6314]. trigger signal. See Fig. 72. Functionality CG Drives & Automation, 01-5980-01r2…
-
Page 129: Sr Flip-Flops [640]
RESET This menu shows the actual value of the timer. 6316 Timer1 Val Read-only 0:00:00.0 Fig. 73 Programmable flip-flop modes. Timer 2 — 4 [632] — [634] Refer to the descriptions for Timer 1. CG Drives & Automation, 01-5980-01r2 Functionality…
-
Page 130
Table 35 Truth table for Edge control without priority 6414 F1 Set Dly 0:00:00.0 RESET Default: 0:00:00.0 (hours:minutes:seconds) — (no change) Range: 0:00:00.0–9:59:59.9 1 (set) 0 (reset) No change Functionality CG Drives & Automation, 01-5980-01r2… -
Page 131: Counters [650]
Counter 1 is incremented by 1 on every positive edge of the trigger signal. NOTE: Maximum counting frequency is 8 Hz. 6511 C1 Trig Default: Same selections as in menu Relay 1 [551], Selection: page 112. CG Drives & Automation, 01-5980-01r2 Functionality…
-
Page 132: Clock Logic [660]
Date when the clock output signal (CLK1) is deactivated. Note that if “Clk1DateOff ” is set to an earlier date than “Clk1DateOn”, the result will be that the clock is not deactivated at the set date. Functionality CG Drives & Automation, 01-5980-01r2…
-
Page 133: Operation/Status [700]
6615 Clk1Weekday — — — — — SS VIO 1 Dest Run FWD 716 Shaft Power Read-only VIO 1 Source Clk1 Clock 2 [662] Unit: Resolution: Refer to the description for Clock 1 [661]. CG Drives & Automation, 01-5980-01r2 Functionality…
-
Page 134
3. See menu PT100 Inputs [2323], page 78. Used Thermal Capacity [71K] 71B PT100B1 123 This menu displays the used thermal capacity. Read-only Unit: °C 71K Used Th Cap Read-only Resolution: 1°C Unit: Resolution: Functionality CG Drives & Automation, 01-5980-01r2… -
Page 135: Status [720]
4 — 2 1=Thyristor driven motor 2=Bypass driven motor Source of Run/Stop command, where: 0=Rem, 1=Keyboard (internal + external), 2=Com, 7 — 5 3=Spare, 4=VIO, 5=Internal keyboard, 6=External keyboard. 15 — 8 Reserved for future use. CG Drives & Automation, 01-5980-01r2 Functionality…
-
Page 136
Fig. 78 indicates that AnIn is active and has a 65% input Volt Unbal (voltage unbalance) value. NOTE: The shown percentage is an absolute value based on the maximum value of the in- or output; so related to either to 10 V or 20 mA. Functionality CG Drives & Automation, 01-5980-01r2… -
Page 137
This menu indicates the active digital comparators (CD1 — CD4). 72B CD1-4 Read-only 0000 Logic function status 1 — 4 [72C] This menu indicates the active logic outputs (L1 — L4). 72C Logic 1-4 Read-only 0000 CG Drives & Automation, 01-5980-01r2 Functionality… -
Page 138: Stored Values [730]
00: 00: 00–262143: 59: 59 Energy [733] This menu displays the total energy consumption since the last energy reset [7331] took place. 733 Energy Read-only Unit: Wh (shows Wh, kWh, MWh or GWh) Range: 0 Wh–999,999 GWh Functionality CG Drives & Automation, 01-5980-01r2…
-
Page 139: View Trip Log [800]
Analogue comparator 1 — 4 132 (menu [722]). 812A Digital comparator 1 — 4 812B Logic function status 1-4 812C Timer status 1-4 812D Flip-flop status 1-4 812E Counter status 1-2 812F Time to next start CG Drives & Automation, 01-5980-01r2 Functionality…
-
Page 140: Trip Messages [820] — [890]
0: V, release version 15–14 1: P, pre-release version β , Beta version α , Alpha version Table 39 Information for Modbus and Profibus number, option version Example Description 7–0 Minor option version 15–8 Major option version Functionality CG Drives & Automation, 01-5980-01r2…
-
Page 141
12 characters. Press the + / — keys to enter graphic symbols from the same list as for User-defined Unit [323], page 90. See also «Editing parameter values», page 45. 923 Unit Name Default: No characters shown CG Drives & Automation, 01-5980-01r2 Functionality… -
Page 142
Functionality CG Drives & Automation, 01-5980-01r2… -
Page 143: Serial Communication
The on-board RS232 connection is not galvanically option boards. isolated. Modbus RTU The RS485 and USB option boards from CG Drives & Automation are galvanically isolated. There is an asynchronous unisolated RS232 serial communication interface on top of the Emotron TSA unit.
-
Page 144: Motor Data
Requires that menu [2151] Run/Stop Control is set to “Com”. Modbus/DeviceNet Function Instance number 42901 Reset Run, active together with either 42902 Run FWD or Run REV to perform start. (1=Run, 0=Stop) 42903 Run FWD (1=Active) 42904 Run REV (1=Active) Serial communication CG Drives & Automation 0-5980-01r2…
-
Page 145: Description Of The Eint Formats
4-bit signed exponent. Gives a value range: -8..+7 (binary 1000 .. 0111) Where bit 15 indicates that we are using the fixed point m10-m0 11-bit signed mantissa. Gives a format (F=0). value range: -1024..+1023 (binary 10000000000..01111111111) CG Drives & Automation 01-5980-01r2 Serial communication…
-
Page 146
// make signed Rreturn (*(unsigned short int *)&etmp); //————————————————————————— float eint16_to_float(unsigned short int value) float f; eint16 evalue; evalue=*(eint16 *)&value; if (evalue.f) if (evalue.e>=0) f=(int)evalue.m*pow10(evalue.e); else f=(int)evalue.m/pow10(abs(evalue.e)); else f=value; return f; //————————————————————————— Serial communication CG Drives & Automation 0-5980-01r2… -
Page 147: Softstarter Theory
The dashed line indicates the nominal motors’ torque characteristic is added to the diagram. values. Torque Torque Fig. 85 Typical load torque characteristics Fig. 83 Typical torque characteristics for the DOL start CG Drives & Automation 01-5980-01r2 Softstarter theory…
-
Page 148
This means when the motor current is decreased by a factor of two by means of reducing the supply voltage, the torque delivered by the motor will be decreased by a factor of four (approximately). Softstarter theory CG Drives & Automation 01-5980-01r2… -
Page 149: Reduced Voltage Starting
On the other hand for low load applications further savings of starting current are impossible even though a big torque reserve is available. Moreover, the resulting abrupt rise of torque first at start and CG Drives & Automation 01-5980-01r2 Softstarter theory…
-
Page 150
This means, the lowest possible starting current is determined by the combination of motor and load characteristics. Softstarter theory CG Drives & Automation 01-5980-01r2… -
Page 151: Other Starting Methods
However, it is always possible to use a frequency inverter instead. The following illustration shows how the torque and current characteristics are affected when the stator frequency is changed. CG Drives & Automation 01-5980-01r2 Softstarter theory…
-
Page 152: Use Of Softstarters With Torque Control
(linear, square or constant load, need of initial release torque) must be known. In this case a proper torque control method (linear or square) can be chosen and torque boost can be enabled if needed. Softstarter theory CG Drives & Automation 01-5980-01r2…
-
Page 153: Troubleshooting, Diagnoses And Maintenance
For more information on maintenance, please contact your this instruction manual, it is absolutely necessary to CG Drives & Automation service partner. read and follow the safety instructions in the manual. Precautions to take with a connected motor…
-
Page 154: Troubleshooting List
Change the Motor I t Current setting in menu [2312]. (Area D: I Soft trip to the prog-rammed I t settings. Check setting of menu [228] Motor Vent, which affects I Warning behaviour. Troubleshooting, Diagnoses and Maintenance CG Drives & Automation 01-5980-01r2…
-
Page 155
Mains voltage dip due to starting Soft trip limits set in menu group [433]. other major power consuming Warning Use other mains supply lines if dip is caused by other machines on the same line. machinery. CG Drives & Automation 01-5980-01r2 Troubleshooting, Diagnoses and Maintenance… -
Page 156
Possible cause Remedy /Menu (and indicator) No action Hard trip Check 3-phase mains supply. Volt unbalance 4311 Mains supply voltage unbalance. Soft trip Check settings in menu [4312] and [4313]. Warning Troubleshooting, Diagnoses and Maintenance CG Drives & Automation 01-5980-01r2… -
Page 157
The alarm can only be reset if the The alarm can not alarm condition is removed. be reset. E.g. PTC, PT100 or over temperature alarm can only be reset after the temperature is decreased. CG Drives & Automation 01-5980-01r2 Troubleshooting, Diagnoses and Maintenance… -
Page 158
Troubleshooting, Diagnoses and Maintenance CG Drives & Automation 01-5980-01r2… -
Page 159: Options
PC for backup and printing. options are described in a separate manual. Recording can be made in oscilloscope mode. Please contact CG Drives & Automation sales for further information. CG Drives & Automation 01-5980-01r2 Options…
-
Page 160
Options CG Drives & Automation 01-5980-01r2… -
Page 161: Technical Data
Heavy duty: Start current = 5 x I , Start time = 15 s (Size 1) or 30 s (Size 2- 4), 10 starts/hour. n_soft Fuse data for Semi-conductor fuses, see Table 48. H1=Height of enclosure, H2= Total height. CG Drives & Automation 01-5980-01r2 Technical data…
-
Page 162
Heavy duty: Start current = 5 x I , Start time = 15 s (Size 1) or 30 s (Size 2-4), 10 starts/hour. n_soft Fuse data for Semi-conductor fuses, see Table 48. H1=Height of enclosure, H2= Total height. Technical data CG Drives & Automation 01-5980-01r2… -
Page 163
Heavy duty: Start current = 5 x I , Start time = 15 s (Size 1) or 30 s (Size 2-4), 10 starts/hour. n_soft Fuse data for Semi-conductor fuses, see Table 48. H1=Height of enclosure, H2= Total height. CG Drives & Automation 01-5980-01r2 Technical data… -
Page 164: General Electrical Specifications
42 000 -085 55 000 -100 99 000 -140 160 000 -170 222 000 -200 332 000 -240 433 000 -300 1000 950 000 -360 1200 1 470 000 -450 1400 1 890 000 Technical data CG Drives & Automation 01-5980-01r2…
-
Page 165: Environmental Conditions
85 A nominal current: 85 A — (20% x 85 A) = 68 A, which is lower than the required 70 A. An even higher rated model is checked, TSA52-100, rated for 100 A nominal current: CG Drives & Automation 01-5980-01r2 Technical data…
-
Page 166: Derating At High Altitude
56 A — (11% x 56 A) = 49.8 A, which is well above the required 42 A, and therefore TSA52-056 could be selected in this case. Technical data CG Drives & Automation 01-5980-01r2…
-
Page 167: Control Power- And I/O Signal Connectors
24 VDC or max 250 VAC) must be used for all three output relays (terminals 21-33). Do not mix AC and DC voltage. Make sure to use the same voltage level within this terminal section, otherwise the softstarter may be damaged. CG Drives & Automation 01-5980-01r2 Technical data…
-
Page 168
Technical data CG Drives & Automation 01-5980-01r2… -
Page 169: Index
LOC/REM key ……. 46 Emergency ………1 Clock settings ……..134 Local control ……..71 EN60204-1 ……..6 Coast ……….94 Logic ……..116, 121 EN61800-3 ……..6 Com Type ……..86 Status ……..133 EN61800-5-1 ……..6 Comparator Low Voltage Directive ……. 6 CG Drives & Automation 01-5980-01r2…
-
Page 170
Phase compensation capacitor ….1 Status ……….131 Phase loss ………79 Status indications ……43 Phase reversal ………105 Step-up transformer for high Phase sequence …….105, 130 voltage motor ……..36 Planer ……….34 Stop command …….108 Power- and signal connectors ..163 CG Drives & Automation 01-5980-01r2… -
Page 171: Appendix 1: Menu List
Appendix 1: Menu List This is a list of the Emotron TSA menu parameters and their factory settings, along with communication settings for the most important bus formats. Complete lists with communication data and parameter set information could be downloaded from www. cgglobal.com or www.emotron.com. Customer settings Modbus Inst.
-
Page 172
Customer settings Modbus Inst. Fieldbus Modbus Menu Parameters Default settings Notes DeviceNet no. format format Motor Power [Motor] W 43043 Long, 1=1W EInt Motor Curr [Motor] A 43044 Long, 1=0.1A EInt Motor Speed [Motor] rpm 43045 UInt, 1=1rpm UInt Motor Poles [Motor] 43046 Long, 1=1… -
Page 173
Customer settings Modbus Inst. Fieldbus Modbus Menu Parameters Default settings Notes DeviceNet no. format format Copy Set A>B 43021 UInt UInt Default>Set 43023 UInt UInt Copy to CP No Copy 43024 UInt UInt Load from CP No Copy 43025 UInt UInt Autoreset page 83… -
Page 174
Customer settings Modbus Inst. Fieldbus Modbus Menu Parameters Default settings Notes DeviceNet no. format format 2563 OverVolt 43077 Long, 1=1s EInt 2564 Undervolt 43088 Long, 1=1s EInt Serial Com page 86 Com Type RS232 43031 UInt UInt Modbus RTU 2621 Baudrate 9600 43032 UInt… -
Page 175
Customer settings Modbus Inst. Fieldbus Modbus Menu Parameters Default settings Notes DeviceNet no. format format 2653 Subnet Mask 0.0.0.0 42711 UInt, 1=1 UInt 0.0.0.0 42712 UInt, 1=1 UInt 0.0.0.0 42713 UInt, 1=1 UInt 0.0.0.0 42714 UInt, 1=1 UInt 2654 Gateway 0.0.0.0 42715 UInt, 1=1… -
Page 176
Customer settings Modbus Inst. Fieldbus Modbus Menu Parameters Default settings Notes DeviceNet no. format format FB Status page 89 2691 Board Type 31081 UInt, 1=1 UInt 2692 SUP-bit 31082 UInt, 1=1 UInt 2693 State FB 31083 UInt, 1=1 UInt 2694 Serial Nbr 31084 UInt, 1=1 UInt… -
Page 177
Customer settings Modbus Inst. Fieldbus Modbus Menu Parameters Default settings Notes DeviceNet no. format format StartSetting page 91 Start Method Lin Torq Ctr 43701 UInt, 1=1 UInt Init Torque 43702 UInt, 1=1% UInt EndTorqueSt 150% 43703 UInt, 1=1% UInt Init Volt 43704 UInt, 1=1% UInt… -
Page 178
Customer settings Modbus Inst. Fieldbus Modbus Menu Parameters Default settings Notes DeviceNet no. format format 4111 MaxAlarmAct No action 43775 UInt UInt 4112 MaxAlarmLev 116% 43776 Long, 1=1% EInt 4113 MaxAlarmDel 0,5s 43330 Long, 1=0.1s EInt MaxPreAlarm page 99 4121 MaxPreAlAct No action 43777 UInt… -
Page 179
Customer settings Modbus Inst. Fieldbus Modbus Menu Parameters Default settings Notes DeviceNet no. format format 4221 LockRot AA No action 43362 UInt UInt 4222 LockRotTime 5,0s 43757 UInt, 1=0.1s UInt 4223 LockRotCurr 480% 43759 UInt, 1=1% UInt Mains Prot page 104 Volt Unbal 4311 VoltUnbalAA No action… -
Page 180
Customer settings Modbus Inst. Fieldbus Modbus Menu Parameters Default settings Notes DeviceNet no. format format AnIn Advan 5131 AnIn Min 43203 Long, 1=0.01 EInt 5132 AnIn Max 20mA 43204 Long, 1=0.01 EInt 5134 AnIn FcMin 43206 UInt UInt Long, 1= see 1=0.001, 1rpm, 1%, 1°C, 0.001 5135 AnIn VaMin 43541… -
Page 181
Customer settings Modbus Inst. Fieldbus Modbus Menu Parameters Default settings Notes DeviceNet no. format format 5334 AnOutFcMin 43256 UInt UInt Long, 1= see 1W, 0.1Hz, 0.1A, 0.1V, 1rpm, 1% 5335 AnOutVaMin 43545 EInt Notes or 0.001 as set in [322] 5336 AnOutFcMax 43257 UInt… -
Page 182
Customer settings Modbus Inst. Fieldbus Modbus Menu Parameters Default settings Notes DeviceNet no. format format VIO 2 Dest 43283 UInt UInt VIO 2 Source 43284 UInt UInt VIO 3 Dest 43285 UInt UInt VIO 3 Source 43286 UInt UInt VIO 4 Dest 43287 UInt UInt… -
Page 183
Customer settings Modbus Inst. Fieldbus Modbus Menu Parameters Default settings Notes DeviceNet no. format format 6117 CA1 Res Dly 00:00:00 43408 UInt, 1=1h UInt 43409 UInt, 1=1m UInt 43410 UInt, 1=0.1s UInt 6118 CA1 Tmr Val 00:00:00 42600 UInt, 1=1h UInt 42601 UInt, 1=1m… -
Page 184
Customer settings Modbus Inst. Fieldbus Modbus Menu Parameters Default settings Notes DeviceNet no. format format 1W, 0.1Hz, 0.1A, 0.1V, 1rpm, 1%, Long, 1= see 6133 CA3 LevelLO 43424 EInt 0.1°C, 1kWh, 1h or 0.001 as set Notes in [322] 6134 CA3 Type Hysteresis 43425 UInt… -
Page 185
Customer settings Modbus Inst. Fieldbus Modbus Menu Parameters Default settings Notes DeviceNet no. format format 42611 UInt, 1=0.1s UInt CD1 Setup page 120 6151 CD1 Operation 43444 UInt UInt 6152 CD1 Set Dly 00:00:00 43445 UInt, 1=1h UInt 43446 UInt, 1=1m UInt 43447 UInt, 1=0.1s… -
Page 186
Customer settings Modbus Inst. Fieldbus Modbus Menu Parameters Default settings Notes DeviceNet no. format format 6173 CD3 Res Dly 00:00:00 43462 UInt, 1=1h UInt 43463 UInt, 1=1m UInt 43464 UInt, 1=0.1s UInt 6174 CD3 Tmr Val 00:00:00 42618 UInt, 1=1h UInt 42619 UInt, 1=1m… -
Page 187
Customer settings Modbus Inst. Fieldbus Modbus Menu Parameters Default settings Notes DeviceNet no. format format 6219 L1 Set Dly 00:00:00 43480 UInt, 1=1h UInt 00:00:00 43481 UInt, 1=1m UInt 00:00:00 43482 UInt, 1=0.1s UInt 621A L1 Res Dly 43483 UInt, 1=1h UInt 43484 UInt, 1=1m… -
Page 188
Customer settings Modbus Inst. Fieldbus Modbus Menu Parameters Default settings Notes DeviceNet no. format format Logic 3 page 124 6231 L3 Expr ((1.2).3).4 43780 UInt UInt 6232 L3 Input 1 43781 UInt UInt 6233 L3 Op 1 & 43782 UInt UInt 6234 L3 Input 2 43783… -
Page 189
Customer settings Modbus Inst. Fieldbus Modbus Menu Parameters Default settings Notes DeviceNet no. format format 6249 L4 Set Dly 00:00:00 43802 UInt, 1=1h UInt 43803 UInt, 1=1m UInt 43804 UInt, 1=0.1s UInt 624A L4 Res Dly 00:00:00 43805 UInt, 1=1h UInt 43806 UInt, 1=1m… -
Page 190
Customer settings Modbus Inst. Fieldbus Modbus Menu Parameters Default settings Notes DeviceNet no. format format 6323 Timer2 Dly 00:00:00 43821 UInt, 1=1h UInt 43822 UInt, 1=1m UInt 43823 UInt, 1=0.1s UInt 6324 Timer2 T1 00:00:00 43824 UInt, 1=1h UInt 43825 UInt, 1=1m UInt 43826… -
Page 191
Customer settings Modbus Inst. Fieldbus Modbus Menu Parameters Default settings Notes DeviceNet no. format format Timer4 page 125 6341 Timer4 Trig 43841 UInt UInt 6342 Timer4 Mode Delay 43842 UInt UInt 6343 Timer4 Dly 00:00:00 43843 UInt, 1=1h UInt 43844 UInt, 1=1m UInt 43845… -
Page 192
Customer settings Modbus Inst. Fieldbus Modbus Menu Parameters Default settings Notes DeviceNet no. format format 6416 F1 Tmr Val 00:00:00 42648 UInt, 1=1h UInt 42649 UInt, 1=1m UInt 42650 UInt, 1=0.1s UInt Flip flop 2 page 127 6421 F2 mode Reset 43861 UInt… -
Page 193
Customer settings Modbus Inst. Fieldbus Modbus Menu Parameters Default settings Notes DeviceNet no. format format 6436 F3 Tmr Val 00:00:00 42654 UInt, 1=1h UInt 42655 UInt, 1=1m UInt 42656 UInt, 1=0.1s UInt Flip flop 4 page 127 6441 F4 mode Edge 43879 UInt… -
Page 194
Customer settings Modbus Inst. Fieldbus Modbus Menu Parameters Default settings Notes DeviceNet no. format format Clock logic page 128 Clock 1 6611 Clk1TimeON 00:00:00 43600 Long, 1=1h EInt 43601 Long, 1=1m EInt 43602 Long, 1=1s EInt 6612 Clk1TimeOff 00:00:00 43603 Long, 1=1h EInt 43604… -
Page 195
Customer settings Modbus Inst. Fieldbus Modbus Menu Parameters Default settings Notes DeviceNet no. format format Shaft Power 31006 UInt, 1=1% UInt El Power 31007 Long, 1=1W EInt RMS Current 31008 Long, 1=0.1A EInt L main volt 31009 Long, 1=0.1V EInt Heatsnk Tmp 31010 Long, 1=0.1°C EInt… -
Page 196
Customer settings Modbus Inst. Fieldbus Modbus Menu Parameters Default settings Notes DeviceNet no. format format CA1-4 31050 UInt, 1=1 UInt CD1-4 31051 UInt, 1=1 UInt Logic 1-4 31052 UInt, 1=1 UInt Timer 1-4 31053 UInt, 1=1 UInt FlipFlop1-4 31072 UInt, 1=1 UInt Counter 1-2 31073… -
Page 197
Customer settings Modbus Inst. Fieldbus Modbus Menu Parameters Default settings Notes DeviceNet no. format format Long, 1= see 1rpm, 1%, 1°C, 0.001 as set in 8111 Process Val 31102 EInt Notes [322] 8113 Torque 31104 Long, 1=0.1Nm EInt 8114 Torque 31105 Long, 1=1% EInt… -
Page 198
Customer settings Modbus Inst. Fieldbus Modbus Menu Parameters Default settings Notes DeviceNet no. format format 8124 AnalogueIn 31129 Long, 1=1% EInt 8125 AnalogueOut 31130 Long, 1=1% EInt 8126 IO StatusB1 31131 UInt, 1=1 UInt 8127 IO StatusB2 31132 UInt, 1=1 UInt 8129 CA1-4 31134… -
Page 199
Customer settings Modbus Inst. Fieldbus Modbus Menu Parameters Default settings Notes DeviceNet no. format format (Trip log list 2) page 136 (Trip log list 3) (Trip log list 4) Same parameters as for menu group 810 (Trip (Trip log list 5) log list 1). -
Page 200
Customer settings Modbus Inst. Fieldbus Modbus Menu Parameters Default settings Notes DeviceNet no. format format 42307 UInt UInt 42308 UInt UInt 42309 UInt UInt 42310 UInt UInt 42311 UInt UInt 42312 UInt UInt… -
Page 201: Appendix 2: Trip Message Communication Data
Appendix 2: Trip message communication data Trip log list 31101-31154 31201-31254 31301-31354 Modbus Instance no/ 31401-31454 DeviceNet no: 31501-31554 31601-31654 31701-31754 31801-31854 31901-31954 Trip log list 121/245-122/43 122/90-122/143 122/190-122/243 123/35-123/88 Profibus slot/index 123/135—123/188 123/235-124/33 124/80-124/133 124/180-124/233 125/25-125/78 Trip log list 1101-1154 1201-1254 1301-1354…
-
Page 204
CG Drives & Automation Sweden AB Mörsaregatan 12 Box 222 25 SE-250 24 Helsingborg Sweden T +46 42 16 99 00 F +46 42 16 99 49 www.emotron.com/www.cgglobal.com…
-
Contents
-
Table of Contents
-
Troubleshooting
-
Bookmarks
Quick Links
Emotron TSA
Softstarter
Instruction manual
English
Valid from Software version 1.27
Related Manuals for CG emotron TSA Series
Summary of Contents for CG emotron TSA Series
-
Page 1
Emotron TSA Softstarter Instruction manual English Valid from Software version 1.27… -
Page 3
Date of release: 28-01-2017 © Copyright CG Drives & Automation Sweden AB 2013-2017 CG Drives & Automation Sweden AB retains the right to change specifications and illustrations in the text, without prior notification. The contents of this document may not be copied without the explicit… -
Page 5: Safety Instructions
Safety instructions Phase compensation capacitor Congratulations for choosing a product from CG Drives & Automation! If a phase compensation capacitor is to be used, it must be Before you begin with the installation, commissioning or connected at the inlet of the softstarter, not between the powering up the unit for the first time it is very important motor and the softstarter.
-
Page 6
CG Drives & Automation 01-5980-01r2… -
Page 7: Table Of Contents
4.4.13 Other control voltage ……….37 8.1.1 1st Line [110]…………69 8.1.2 2nd Line [120] …………69 Getting started……….39 Main Setup [200]………… 69 Check list …………..39 8.2.1 Operation setup [210] ……….69 Mains and motor connection ……… 39 CG Drives & Automation 01-5980-01r2…
-
Page 8
Process value …………140 Description of the EInt formats ……141 Softstarter theory ……..143 10.1 Background theory……….143 10.2 Reduced voltage starting……..145 10.3 Other starting methods……… 147 10.4 Use of softstarters with torque control ….148 CG Drives & Automation 01-5980-01r2… -
Page 9: Introduction
The Quick Start Guide can be put in a cabinet so that it is always easy to access in case of an emergency. — =Standard (Grounded Supply type net) I=IT-net (EMC not fulfilled) Brand label A=Standard Software A=Standard software — =CE approved Standard U=UL/cUL approved CG Drives & Automation 01-5980-01r2 Introduction…
-
Page 10: Standards
The recycling of materials will help to conserve natural resources. For more detailed information about recycling this product, please contact the local distributor of the product. Introduction CG Drives & Automation 01-5980-01r2…
-
Page 11: Glossary
——————————————— — lb ft UInt Communication format (Unsigned Integer) n mot Communication format (Integer) Long Communication format (Integer Long) SELV Safety Extra Low Voltage The function cannot be changed in run mode CG Drives & Automation 01-5980-01r2 Introduction…
-
Page 12
Introduction CG Drives & Automation 01-5980-01r2… -
Page 13: Mounting
Minimum free space WARNING! Never operate the softstarter with the front Minimum free space cover removed. mm (in) Frame size above* below at side (3.9) (3.9) *) Above: Cabinet roof to softstarter or softstarter to softstarter CG Drives & Automation 01-5980-01r2 Mounting…
-
Page 14: Mechanical Specifications And Drawings
H3 = Total height including Cable covers. Emotron TSA frame size 1 — 2 Fig. 3 Dimensions for Emotron TSA frame size 1 and 2, bottom view. Fig. 2 Dimensions for Emotron TSA frame size 1 and 2. Mounting CG Drives & Automation 01-5980-01r2…
-
Page 15
Emotron TSA frame size 3 196 (7.7) 235 (9.3) Fig. 4 Dimensions for Emotron TSA frame size 3. Fig. 5 Dimensions for Emotron TSA frame size 3, bottom view. CG Drives & Automation 01-5980-01r2 Mounting… -
Page 16
Emotron TSA frame size 4 254 (10) 260 (10.3) Fig. 6 Dimensions for Emotron TSA frame size 4 . Fig. 7 Dimensions for Emotron TSA frame size 4, bottom view. Mounting CG Drives & Automation 01-5980-01r2… -
Page 17: Mounting Schemes
On our websites www.cgglobal.com and www.emotron.com Ø 13 it is possible to download a full-size template for positioning of the fixing holes. Ø 7 (x 4) Fig. 9 Hole pattern for Emotron TSA frame size 3. CG Drives & Automation 01-5980-01r2 Mounting…
-
Page 18
Mounting CG Drives & Automation 01-5980-01r2… -
Page 19: Connections
Fig. 11 Mains, motor and control supply voltage connection NOTE: The Emotron TSA control-board is equipped with a ground plane to which shielded cables can be connected (see Fig. 17 on page 21). NOTE: For UL-approval use 75°C copper wire only. CG Drives & Automation 01-5980-01r2 Connections…
-
Page 20
Full voltage can be detected if no motor is connected. Table 7 Tightening torque for bolts [Nm (Lb-in)]. Tightening torque for bolts [Nm (Lb-in)] Frame size Motor or mains PE cable cables 8 (70) 5 (44) 8 (70) 5(44) Connections CG Drives & Automation 01-5980-01r2… -
Page 21
Full voltage can be detected if no motor is connected. Table 8 Tightening torque for bolts [Nm (Lb-in)]. Tightening torque for bolts [Nm (Lb-in)] Frame size Motor or mains PE cable cables 20 (177) 12 (106) CG Drives & Automation 01-5980-01r2 Connections… -
Page 22
Full voltage can be detected if no motor is connected. Table 9 Tightening torque for bolts [[Nm (Lb-in)]. Tightening torque for bolts [Nm (Lb-in)] Frame size Motor or mains PE cable cables 50 (442) 12 (106) Connections CG Drives & Automation 01-5980-01r2… -
Page 23: Busbar Distances On Emotron Tsa Softatarter
44 (0.9) 83 (3.27) 83 (3.27) 3.1.2 Cable covers When the Mains and motor cables are connected, mount the cable covers according to Fig. 16. Fig. 16 How to mount the cable covers general drawing. CG Drives & Automation 01-5980-01r2 Connections…
-
Page 24: Board Layout And Connectors
WARNING! For softstarters rated higher than 525 VAC, it is mandatory to have at least basic insulation from the temperature sensor towards live voltage. Connections CG Drives & Automation 01-5980-01r2…
-
Page 25
Solid: 2.5 (27) 8. Terminals for DigIn/AnIn/AnOut signals (control board) * When using Ferrules, suitable Ferrule length is 10-12 mm/ 0.39 — 0.47 in. 9. Terminals for relay output signals and PTC connection (power board) CG Drives & Automation 01-5980-01r2 Connections… -
Page 26: Control Signal Connections
Analogue output. Factory setting is “Current”. 0-20 mA and 4-20 mA; max load impedance 500 Ω +24 VDC ±5%. Max. current from +24 VDC = 50 mA. Control signal supply 2, voltage to digital input. Short circuit-proof and overload-proof. Connections CG Drives & Automation 01-5980-01r2…
-
Page 27: Wiring Examples
• If required, connect relay R1 (terminals 21 and 22) to the contactor – the softstarter then controls the mains contactor (for factory configuration of R1 see menu [551]). Always ensure the installation complies with the appropriate local regulations. CG Drives & Automation 01-5980-01r2 Connections…
-
Page 28
Relay 2 Relay 3 Run FWD Stop DigIn 1 DigIn 2 +10 V AnIn DigIn 3 DigIn 4 +24 V AnOut +24 V Fig. 20 Separate Start- Stop-signals ( 3-wire connection) wir- ing example. Connections CG Drives & Automation 01-5980-01r2… -
Page 29
Relay 2 Relay 3 Stop Run FWD DigIn 1 DigIn 2 +10 V AnIn DigIn 3 DigIn 4 +24 V AnOut +24 V Fig. 21 Common Start- Stop-signals ( 2-wire connection) wir- ing example. CG Drives & Automation 01-5980-01r2 Connections… -
Page 30
Relay 2 Relay 3 Run FWD DigIn 1 DigIn 2 +10 V AnIn DigIn 3 DigIn 4 +24 V AnOut +24 V Fig. 22 Common Start- Stop-signals ( 2-wire connection) wir- ing example, Level control. Connections CG Drives & Automation 01-5980-01r2… -
Page 31
+24 V Reset Run FWD Pressure 0 — 10 bar Current 0 — I 4 — 20 mA 4 — 20 mA Fig. 23 Extended wiring example, using digital and analogue inputs and outputs. CG Drives & Automation 01-5980-01r2 Connections… -
Page 32
Relay 1 Relay 2 Relay 3 DigIn 1 DigIn 2 +10 V AnIn DigIn 3 DigIn 4 +24 V AnOut +24 V Run FWD Stop Fig. 24 Reverse current brake wiring example. Connections CG Drives & Automation 01-5980-01r2… -
Page 33
Relay 2 OperationREV avoided. Relay 1 Relay 2 DigIn 1 DigIn 2 +10 V AnIn DigIn 3 DigIn 4 +24 V AnOut +24 V Run FWD Stop Run REV Fig. 25 Connection for start forward/reverse. CG Drives & Automation 01-5980-01r2 Connections… -
Page 34
If both DigIn 1 “RunFWD” and DigIn 3 “RunREV” are closed at the same time, a stop is performed according to the stop settings in menu group [340]. In this case no start will be allowed. Connections CG Drives & Automation 01-5980-01r2… -
Page 35: Application Guidelines
70 A with a start current ratio of 3.0 x FLC (210 A) for 30 seconds, and with a 330 seconds (5.5 minutes) interval between starts (current via bypass contactors). CG Drives & Automation 01-5980-01r2 Application guidelines…
-
Page 36
Bandsaw Chipper Circular saw Lumber & Wood Debarker Planer Sander Ball mill Centrifuge Petrochemical Extruder Screw conveyor Ball mill Grinder Material conveyor Palletiser Transport & Machine Press Roller mill Rotary table Trolley Escalator Application guidelines CG Drives & Automation 01-5980-01r2… -
Page 37: The Application Functions List
This column guides you to the menu, menu group, or manual section where you find a description of the settings for the function. For instance «331=Sqr Torq Ctr», means: set menu [331] to “Sqr Torq Ctr.” CG Drives & Automation 01-5980-01r2 Application guidelines…
-
Page 38
344=Rev Curr Brk Conveyor speed set from planer shaft High speed lines power analogue output. Worn out tool Use load monitor maximum alarm Broken coupling Use load monitor minimum alarm Application guidelines CG Drives & Automation 01-5980-01r2… -
Page 39
Torque boost in beginning of ramp. Jamming Use load monitor maximum alarm HAMMER MILL Reverse current brake with reversing 341=Brake Fast stop contactor for heavy loads. 344=Rev Curr Brk Motor blocked Locked rotor function CG Drives & Automation 01-5980-01r2 Application guidelines… -
Page 40: Special Conditions
For instance, the start ramp can only be set for an average starting ramp for all the connected motors. This means that the start time may differ from motor to motor. Similarly, the load monitor alarm levels/margins are applied for the Application guidelines CG Drives & Automation 01-5980-01r2…
-
Page 41: Earthing System
Emotron TSA should be configured for IT-net supply type. The unit will then not fulfil the EMC requirements. If you have a softstarter without IT net supply type, the softstarter can be rebuilt. Contact your local CG Drives & Automation service partner. 4.4.12 Earth fault relay It is possible to use an earth fault relay to protect motor and cables.
-
Page 42
Application guidelines CG Drives & Automation 01-5980-01r2… -
Page 43: Getting Started
73). • Check / Set real time clock (menu [740], section 8.7.4, page 134) • Select keyboard control (menu [2151], section 7.1.1, page 49). • Perform a test run from the control panel. CG Drives & Automation 01-5980-01r2 Getting started…
-
Page 44: Default Toggle Loop
Chapter 6. page 43. Menu [100], “Preferred View” is displayed at start. 1. Press to display menu [211] “Language”. NQE1 Select Language using the keys. Confirm with Getting started CG Drives & Automation 01-5980-01r2…
-
Page 45: Control Panel Operation
To stop the motor, press the key on the control panel. NOTE: For selection of other stop method than the default “Coast”, see section 7.1.2, page 35 and menu [341]. CG Drives & Automation 01-5980-01r2 Getting started…
-
Page 46
Getting started CG Drives & Automation 01-5980-01r2… -
Page 47: Operation Via The Control Panel
Shows the setting or selection in the active Area F: menu (empty at 1st level and 2nd level menus). Shows warnings and alarm messages. CG Drives & Automation, 01-5980-01r2 Operation via the control panel…
-
Page 48: Led Indicators
Table 18 Control key commands. Start with reversed (left) rotation. START REVERSE RUN (Requires reversing contactor). Stop motor. STOP/RESET Reset softstarter (after a trip). Start with forward START FORWARD RUN (right) rotation. Operation via the control panel CG Drives & Automation, 01-5980-01r2…
-
Page 49: Function Keys
To activate the jog key function, see instructions in “Jog functions” on page 50. To deactivate the jog key function, unlock the keyboard in menu [218]. CG Drives & Automation, 01-5980-01r2 Operation via the control panel…
-
Page 50: Toggle And Loc/Rem Key
1. Press the Toggle key and keep it pressed while pressing the ESC key. 2. The message “Clear Loop?” is shown. 3. Confirm with ENTER to delete the menus in the loop. Operation via the control panel CG Drives & Automation, 01-5980-01r2…
-
Page 51: Loc/Rem Function
Relays [550]. When the softstarter is set to “LOCAL”, the signal on the relay will be active/high. In “REMOTE” the signal will be inactive/low. 3rd level 4th level Fig. 33 Menu structure CG Drives & Automation, 01-5980-01r2 Operation via the control panel…
-
Page 52: The Main Menu
View Trip Log Here you can see the last 9 trips in the trip memory. System Data This menu contains information on softstarter model and software version. Operation via the control panel CG Drives & Automation, 01-5980-01r2…
-
Page 53: Main Features
[520], see section 8.5.2, page 108. Spinbrake can only be activated when the TSA is non-operational, i.e that Stp is shown in the display. Fig. 35 Run/Stop decision tree CG Drives & Automation, 01-5980-01r2 Main features…
-
Page 54: Jog Functions
Jog speed level in menu “[353] Jog Ramp Rate” to achieve smooth Jog start. There are also a couple of examples on how to apply time settings for jog by using logic functions, see page 63. Main features CG Drives & Automation, 01-5980-01r2…
-
Page 55: Working With Parameter Sets
DigIn running in automatic control mode (i.e. control signals from 3 [523] is set to “Set Ctrl 1” and DigIn 4 [524] is set to “Set PLC, e.g. via fieldbus). Ctrl 2”. CG Drives & Automation, 01-5980-01r2 Main features…
-
Page 56: Configuration Of Parameter Sets
2. Select motor M1 in menu [212]. 3. Enter motor data and settings for other parameters. 4. Select parameter set B in menu [241]. 5. Select M2 in menu [212]. 6. Enter motor data and settings for other parameters. Main features CG Drives & Automation, 01-5980-01r2…
-
Page 57
1 to the internal control board of TSA unit 2, using menu [245]. Fig. 38 Copy and load parameters between two Emotron TSA units via the control panel. WARNING! Switch off all power connections before opening the front cover. CG Drives & Automation, 01-5980-01r2 Main features… -
Page 58
Fig. 39 Copy and load parameters between two Emotron TSA units using an external control panel (optional). NOTE: Another solution for copying settings and data between different softstarter units is via PC, using the EmoSoftCom PC tool (option). See section 12.2, page 155. Main features CG Drives & Automation, 01-5980-01r2… -
Page 59: Applying Limitations, Alarms And Autoreset
• The Trip LED indicator (red triangle) is lit. • The “TRP” status indication is displayed (area D of the display). • The Trip relay or output is active (if selected function in menu [551], [552] or [553]). CG Drives & Automation, 01-5980-01r2 Main features…
-
Page 60: Load Monitor Function
[223] (being 100%). However, the way to set the levels differs between the two methods: NOTE: When using the load monitor, check that the nominal motor power is set properly in menu [223]. Main features CG Drives & Automation, 01-5980-01r2…
-
Page 61
(menu [223]). The actual shaft 4112 MaxAlarmLev power is displayed in brackets together with the Alarm Level (104%) 116% value to facilitate setting. See example on the right. Fig. 40 Manually set load monitor alarm levels. CG Drives & Automation, 01-5980-01r2 Main features… -
Page 62
Every time a new “Autoset Alarm” command is executed, the actual shaft power value will be updated as the “Normal Load” value, with the alarm levels following this. Fig. 41 Autoset load monitor alarm margins. Main features CG Drives & Automation, 01-5980-01r2… -
Page 63
C. The maximum alarm level is exceeded. D. When the set maximum alarm delay time (3 seconds) has passed, the set maximum alarm action is executed, in this case a Hard trip, as set in menu [4111]. CG Drives & Automation, 01-5980-01r2 Main features… -
Page 64: Reset And Autoreset
“Autoreset Attempts [251]” on page 83. activated by selecting one of the keyboard alternatives (enabled as default). If controlled by digital input [520], or by virtual I/O [560], this is set by selecting “Reset” signal. Main features CG Drives & Automation, 01-5980-01r2…
-
Page 65: Programmable I/O
• No digital outputs are available. • 3 relays [550], with the possibility for up to 6 extra relays if extended I/O option boards (max 2) are fitted. • There are also 8 virtual I/Os [560] CG Drives & Automation, 01-5980-01r2 Main features…
-
Page 66: Enable And Stop Functions
Fig. 44, page 61. Fig. 45 gives an example of a possible RunFWD and RunREV inputs are active, then the sequence. softstarter stops according to the selected stop method in menu [341]. Fig. 46 gives an example of a possible sequence. Main features CG Drives & Automation, 01-5980-01r2…
-
Page 67: Logical Functions
WARNING! Fig. 46 Input and output status for level control Motor may start instantly! Please verify that parameter settings and I/O connections are according to desired function before switching on mains supply. CG Drives & Automation, 01-5980-01r2 Main features…
-
Page 68
Number of pulses with Jog speed before run 6521 C2 trig DigIn 2 Pulse input 6522 C2 Reset Counter 2 is blocked until end of deceleration. 6523 C2 Trip Val Number of pulses with Jog speed after run Main features CG Drives & Automation, 01-5980-01r2… -
Page 69
Reset Flip Flop 1 and stop the motor 6323 Timer2 Dly 5,0 s Jog time before stop 6411 F1 mode Edge 6412 F1 set Negative flank of “Dec” 6413 F1 reset Reset when “Jog speed after run” has ended CG Drives & Automation, 01-5980-01r2 Main features… -
Page 70
Main features CG Drives & Automation, 01-5980-01r2… -
Page 71: Functionality
Emotron TSA model, software and hardware version. Service System data 8.9, page 136 information. WARNING! Motor may start instantly! Please verify that parameter settings and I/O connections are according to desired function before switching on mains supply. CG Drives & Automation, 01-5980-01r2 Functionality…
-
Page 72
For bus communication, the integer value 0 is used to select “Off ” in the example. Integer 1 represents “REV”. To change selection by bus communication refer to the description in Chapter 9. page 139. Functionality CG Drives & Automation, 01-5980-01r2… -
Page 73: Preferred View [100]
Sets the content of the lower row in the menu [100] “Preferred View”. Same selection as in menu [110]. Default: 120 2nd Line Motor Data [220] is connected to Current selected motor. Default: Current CG Drives & Automation, 01-5980-01r2 Functionality…
-
Page 74
Jog command via digital input or Virtual I/O. Int+Ext Jog command via internal or external keyb control panel. Jog command via serial communication. Int keyb Jog command via internal control panel. Ext keyb Jog command via external control panel. Functionality CG Drives & Automation, 01-5980-01r2… -
Page 75
Local start/stop command via serial keyboard and the keys are activated. (it is possible to select communication. e.g. Start REV to be Off or REV in menu [2175] above). 218 Lock Code? Default: Range: 0–9999 CG Drives & Automation, 01-5980-01r2 Functionality… -
Page 76: Remote Signal Level/Edge [21A]
NOTE: Edge controlled inputs can comply with the Machine Directive (see Chapter 1.5.1 page 6) if the inputs are directly used to start and stop the machine. Functionality CG Drives & Automation, 01-5980-01r2…
-
Page 77: Motor Data [220]
For explanation of the different abbreviations used in this 1 US-units chapter, see Chapter 1.7.2 page 7 WARNING! When the “Units” setting is changed, this will also affect the factory settings of the motor. CG Drives & Automation, 01-5980-01r2 Functionality…
-
Page 78
. It must be set within the range 25 — 400% of n_soft the softstarter power Pn_soft. If parallel motors, set the sum 221 Motor Volts of the motor power. See nominal data for CG motors in Ta- 400V ble 27. 400 V for SI-units… -
Page 79
226 Motor Poles Default: Range: 2-144 Nominal Motor Cos φ [227] Set the nominal Motor cosphi (power factor). 227 Motor Cosφ 0.86 0.86 Default: (see Note 2, page 73) Range: 0.50 — 1.00 CG Drives & Automation, 01-5980-01r2 Functionality… -
Page 80: Motor Protection [230]
[2311] is performed. The alarm remains active until the I²t value is below 95% before allowing a reset or an autoreset (see more detailed description in menu [2521]). Functionality CG Drives & Automation, 01-5980-01r2…
-
Page 81
Using motor overload trip class 10 Current: 5 x In_mot Overload trip time (max start time): 20 sec 60 s 20 s Current (x I n_mot 500% x I 300% x I n_mot n_mot Fig. 50 The thermal curve CG Drives & Automation, 01-5980-01r2 Functionality… -
Page 82
PTC Alarm Action [2331] B 120 ° F 140 F Nema 2331 PTC AA ° No action H 165°C Default: No action No action Hard Trip For a definition, see Table 23, page 55. Soft Trip Warning Functionality CG Drives & Automation, 01-5980-01r2… -
Page 83
Counts down from set value in menu [2343]. 2341 StartLim AA No action 2344 TimTNxtStrt Read only Default: No action No action Unit minutes Hard Trip For a definition, see Table 23, page 55 Resolution: 1 min Warning CG Drives & Automation, 01-5980-01r2 Functionality… -
Page 84: Parameter Set Handling [240]
NOTE: The parameter set cannot be changed No action during run if the parameter set includes change of the motor set (M1-M4). Hard Trip For a definition, see Table 23, page 55. Soft Trip Warning Functionality CG Drives & Automation, 01-5980-01r2…
-
Page 85
NOTE: The control panel will be temporarily locked while copying or loading data to the internal control panel. If the on-board RS-232 port is connected to a PC or to an external control panel this will also be temporarily locked. CG Drives & Automation, 01-5980-01r2 Functionality… -
Page 86
Data from motor 4 is loaded. M1M2M3 Data from motor 1, 2, 3 and 4 are loaded. All data is loaded from the control panel. NOTE: Loading or copying will not affect the value in menus for viewing. Functionality CG Drives & Automation, 01-5980-01r2… -
Page 87: Autoreset [250]
• Number of allowed autoreset attempts [2511]= 5. • Within 10 minutes 6 trips occur. 1–3600 1–3600 1–3,600 s • At the 6th trip there is no autoreset, because the autoreset counter allows only 5 attempts to autoreset a trip. CG Drives & Automation, 01-5980-01r2 Functionality…
-
Page 88
When the delay time has [2541] elapsed, the alarm will be reset. The delay counter starts counting immediately. 2524 LockedRotor 2541 MaxAlarm Default: Default: 1–3600 1–3600 1–3,600 s 1–3600 1–3600 1–3,600 s Functionality CG Drives & Automation, 01-5980-01r2… -
Page 89
External Alarm 1 autoreset [2549] Default: The delay counter starts counting as soon as the relevant external alarm input is inactive. 1–3600 1–3600 1–3,600 s 2549 Ext Alarm 1 Default: 1–3600 1–3600 1–3,600 s CG Drives & Automation, 01-5980-01r2 Functionality… -
Page 90: Serial Communication [260]
In this menu the delay time for an autoreset of an Fieldbus module. undervoltage alarm [433] is set. The delay time starts counting when the fault is removed. The undervoltage *) EtherCAT and Bluetooth are future options. Functionality CG Drives & Automation, 01-5980-01r2…
-
Page 91
Select “RW” in normal Set up the parameters for fieldbus communication. cases to control inverter. 263 Fieldbus Additional Process Values [2634] Define the number of additional process values sent in cyclic messages. 2634 AddPrValues Default: Range: CG Drives & Automation, 01-5980-01r2 Functionality… -
Page 92
Communication Fault Time [2642] Gateway [2654] Defines the delay time for the trip/warning. 2654 Gateway 2642 ComFlt Time 0.000.000.000 0.5s Default: 0.0.0.0 Default: 0.5 s Range: 0.1-15 s DHCP [2655] 2655 DHCP Default: Selection: On/Off Functionality CG Drives & Automation, 01-5980-01r2… -
Page 93: Process [300]
321 Proc Source Default: No process source selected. F(AnIn) Function of analogue input. F(Bus) Function of communication value. NOTE: If F (Bus) is chosen in menu [321], see section 9.5 Process value, page 140. CG Drives & Automation, 01-5980-01r2 Functionality…
-
Page 94
Confirm the character by moving the cursor to the next position by pressing the NEXT key. No. for serial No. for serial Character Character comm. comm. ° í Space 0–9 1–10 ñ ó ô ü Functionality CG Drives & Automation, 01-5980-01r2… -
Page 95: Start Setting [330]
Voltage control is selected when a linear voltage ramp is desired. The thyristor switch on time will be ramped up linearly, from “Initial Voltage”, menu [334], up to full mains voltage. See Fig. 52. CG Drives & Automation, 01-5980-01r2 Functionality…
-
Page 96
The motor voltage is controlled according torque ramp reactivated. The ramp slope will increase above Voltage Ctr to a linear voltage ramp, menu [334]. Direct online Functionality CG Drives & Automation, 01-5980-01r2… -
Page 97
As “Voltage ramp with Current limit” but with fixed ramp 336 Start Time time of 6 seconds. Default: 10 s Range: 1 — 60 s Current limit Ramp time (6 seconds) Fig. 55 Direct on-line start in combination with current limit at start. CG Drives & Automation, 01-5980-01r2 Functionality… -
Page 98: Stop Setting [340]
Braking may be used in applications where the motor needs to be stopped quickly. When this selection is made, the braking method (“Dynamic Vector Brake” or “Reverse Current Brake”) can be activated in menu [344]. Functionality CG Drives & Automation, 01-5980-01r2…
-
Page 99
The DC brake will automatically be deactivated when the Stop time motor has stopped or when the stop time has expired. Time Optionally an external rotation sensor can be connected via Fig. 58 Step down voltage at stop. CG Drives & Automation, 01-5980-01r2 Functionality… -
Page 100
The strength of the DC brake is set here, the value expressed Range: 0 – 120s as a percentage of the maximum available DC braking power. 348 DCB Strength Default: 30 % Range: 20 – 80% Functionality CG Drives & Automation, 01-5980-01r2… -
Page 101: Jog [350]
[rpm] Jog speed t [s] t [s] Jog command Fig. 59 Jog command Jog Speed Forward [351] 351 JogSpd FWD Default: Range: 1- 30% of nominal motor speed [225] CG Drives & Automation, 01-5980-01r2 Functionality…
-
Page 102: Load Monitor And Process Protection [400]
Setting of the wanted alarm behaviour when a “Maximum Alarm” has been detected. 4111 MaxAlarmAct No Action Default: No Action No Action Hard Trip For a definition, see Table 23, page 55. Soft Trip Warning Functionality CG Drives & Automation, 01-5980-01r2…
-
Page 103
0.5 s period longer than the set “Max Pre-Alarm Delay” time, the Range: 0.1 — 90 s selected “Maximum Pre-Alarm Action” in menu [4121] is activated. 4123 MaxPreAlDel 0.5s Default: 0.5 s Range: 0.1–90 s CG Drives & Automation, 01-5980-01r2 Functionality… -
Page 104
“Autoset”. See nominal motor power, the alarm delay timer starts counting further information in Fig. 40, page 57. down. 4142 MinAlarmLev shaft Default: Range: 0 — 200% of nominal motor power [223] Functionality CG Drives & Automation, 01-5980-01r2… -
Page 105
[4142] MinAlarmLev [4174] MinAlarmMar nominal motor power [223]. NOTE: Changing any alarm margin without performing 4172 MaxPreAlMar Autoset will NOT affect the alarm levels. Default: Range: 0 — of nominal motor power [223] CG Drives & Automation, 01-5980-01r2 Functionality… -
Page 106
[417] Autoset. A new autoset command will overwrite previously used alarm levels. Autoset can also be triggered by a remote signal, setting the function of any digital input to “Autoset”. Note that this signal is edge-triggered. Functionality CG Drives & Automation, 01-5980-01r2… -
Page 107: Process Protection [420]
Hard Trip 4223 LockRotCurr For a definition, see Table 23, page 55. 480% Soft Trip Warning Default: 480% (4.8 x I n_mot Range: 100% — 1000% (1.0 x I — 10.0 x I n_mot n_mot CG Drives & Automation, 01-5980-01r2 Functionality…
-
Page 108: Mains Protection [430]
Voltage Unbalance Alarm Delay [4313] Default: In this menu the response delay for the voltage unbalance Range: 1 — 90 s alarm, as set in [4311] and [4312], is selected. 4313 VoltUnbDel Default: Range: 1 — 90 s Functionality CG Drives & Automation, 01-5980-01r2…
-
Page 109
L123 and L321 Under-Voltage Alarm Delay [4333] In this menu the response delay for the voltage unbalance alarm, as set in [4431] and [4432], is selected 4333 UnderV Del Default: Range: 1 — 90 s CG Drives & Automation, 01-5980-01r2 Functionality… -
Page 110: I/O [500]
S1. When the jumper is in voltage mode only the voltage menu items are selectable. With the jumper in Default: Min (0 V/4.00 mA) current mode only the current menu items are 0.00–20.00 mA selectable. Range: 0–10.00 V Functionality CG Drives & Automation, 01-5980-01r2…
-
Page 111
With “AnIn Function Max” the physical maximum value is scaled to selected process unit. The default scaling is dependent of the selected function of AnIn [511]. 5136 AnIn FcMax Default: Min value Max value User-defined 2 Define user value in menu [5137] CG Drives & Automation, 01-5980-01r2 Functionality… -
Page 112: Digital Inputs [520]
Activates other parameter set. See Table Set Ctrl 1 29 for selection possibilities. Activates other parameter set. See Table Set Ctrl 2 29 for selection possibilities. Loc/Rem 10 Activates local mode defined in [2173]. Functionality CG Drives & Automation, 01-5980-01r2…
-
Page 113: Analogue Output [530]
AnIn Mirror of received signal value on AnIn. Line Voltage 14 Mains supply NOTE: To activate the parameter set selection, menu 241 must be set to DigIn. Used Th Cap 15 Used thermal capacity CG Drives & Automation, 01-5980-01r2 Functionality…
-
Page 114
[531]. Table 30 AnOut Min Value Max Value Function Process Value Process Min [324] Process Max [325] Shaft Power Motor Power [223] Current Motor Current [224] Functionality CG Drives & Automation, 01-5980-01r2… -
Page 115
Min value Max value User defined 2 Define user value in menu [5337 ] NOTE: It is possible to set AnOut up as an inverted output signal by setting “AnOut Min” > “AnOut Max”. CG Drives & Automation, 01-5980-01r2 Functionality… -
Page 116: Relays [550]
Max pre-alarm condition active (trip or Flip-flop output 4. Max PreAlarm warning). Flip-flop output 4 inverted. Min alarm condition active (trip or Min Alarm CTR1 Counter output 1. warning). !CTR1 Counter output 1 inverted. Functionality CG Drives & Automation, 01-5980-01r2…
-
Page 117
Fig. 63 Relay function example for start and braking cycle. is active (trip) PTC Alarm 103 PTC alarm active (trip or warning) PT100 Alarm 104 PT100 alarm active (trip or warning) 105 I t alarm active (trip or warning) CG Drives & Automation, 01-5980-01r2 Functionality… -
Page 118
I/O option board on the option mounting plate. The functions and selections are the same as for “Relay 1” [551]. Default settings are “Off ”. NOTE: Visible only if optional board is detected or if any input/output is activated. Functionality CG Drives & Automation, 01-5980-01r2… -
Page 119: Virtual I/Os [560]
“OR logic”. See section 8.5.2, page 108 (Digital Input) for descriptions of the different selections. 561 VIO 1 Dest Default: Same selections as in menu Digital Input 1 Selection: [521], page 108. CG Drives & Automation, 01-5980-01r2 Functionality…
-
Page 120: Logical Functions And Timers [600]
CA1 Level LO [6113] Digital Comparator Setup [615] — [618] There are also 4 digital comparators that compare any Fig. 65 Analogue comparator type “Window” available digital signals. Functionality CG Drives & Automation, 01-5980-01r2…
-
Page 121
CA1 Value AnIn 6112 CA1 Level HI 60% (12 mA/20 mA x 100%) 6113 CA1 Level LO 40% (8 mA/20 mA x 100%) 6114 CA1 Type Hysteresis VIO 1 Dest Run FWD VIO 1 Source CG Drives & Automation, 01-5980-01r2 Functionality… -
Page 122
The reference signal passes the Level LO Hysteresis/ value from above (negative edge), the window band 40°C comparator CA1 is reset, output is set low. CA1 Level LO CA1 output Hysteresis High Window High Functionality CG Drives & Automation, 01-5980-01r2… -
Page 123
The reference signal passes the Level LO value from above (signal outside Window band), the comparator CA1 is reset, output is set low. Set delay Reset delay Fig. 68 Set/reset delay of output signal. CG Drives & Automation, 01-5980-01r2 Functionality… -
Page 124
“Trip”, and for CD4 [6181] the default is “Ready”. Operation Default: Operation Same selection as in menu Relay 1 Selection: [551], page 112. Input signal for CD1 [6151] Digital comparator 1 Fig. 69 Digital comparator. Functionality CG Drives & Automation, 01-5980-01r2… -
Page 125: Logic Outputs [620]
Default: ((1.2).3).4 ((1&1)+1)&0 Default execution order, see which is equal to 0. ((1.2).3).4 explanation below. With the alternative execution order for the L1 Expression Alternative execution order, see (1.2).(3.4) explanation below. this is representing: CG Drives & Automation, 01-5980-01r2 Functionality…
-
Page 126
Logic output 1 inverted. +=OR Not used for Logic 1. ^=EXOR Logic output 2. Not used for Logic 2. Logic output 2 inverted. Not used for Logic 2. Logic output 3. Not used for Logic 3. Functionality CG Drives & Automation, 01-5980-01r2… -
Page 127
The reset of the output signal for the Logic 1 function is delayed with the set value in this menu. Compare to Fig. 68, page 119. 621A L1 Res Dly 0:00:00.0 Default: 0:00:00.0 (hours:minutes:seconds) Range: 0:00:00.0–9:59:59.9 CG Drives & Automation, 01-5980-01r2 Functionality… -
Page 128: Timers [630]
The function of the “On-time” mode is to extend an Prolongs the activation of the output On-time activated (high) timer output signal in comparison to the signal according to menu [6314]. trigger signal. See Fig. 72. Functionality CG Drives & Automation, 01-5980-01r2…
-
Page 129: Sr Flip-Flops [640]
RESET This menu shows the actual value of the timer. 6316 Timer1 Val Read-only 0:00:00.0 Fig. 73 Programmable flip-flop modes. Timer 2 — 4 [632] — [634] Refer to the descriptions for Timer 1. CG Drives & Automation, 01-5980-01r2 Functionality…
-
Page 130
Table 35 Truth table for Edge control without priority 6414 F1 Set Dly 0:00:00.0 RESET Default: 0:00:00.0 (hours:minutes:seconds) — (no change) Range: 0:00:00.0–9:59:59.9 1 (set) 0 (reset) No change Functionality CG Drives & Automation, 01-5980-01r2… -
Page 131: Counters [650]
Counter 1 is incremented by 1 on every positive edge of the trigger signal. NOTE: Maximum counting frequency is 8 Hz. 6511 C1 Trig Default: Same selections as in menu Relay 1 [551], Selection: page 112. CG Drives & Automation, 01-5980-01r2 Functionality…
-
Page 132: Clock Logic [660]
Date when the clock output signal (CLK1) is deactivated. Note that if “Clk1DateOff ” is set to an earlier date than “Clk1DateOn”, the result will be that the clock is not deactivated at the set date. Functionality CG Drives & Automation, 01-5980-01r2…
-
Page 133: Operation/Status [700]
6615 Clk1Weekday — — — — — SS VIO 1 Dest Run FWD 716 Shaft Power Read-only VIO 1 Source Clk1 Clock 2 [662] Unit: Resolution: Refer to the description for Clock 1 [661]. CG Drives & Automation, 01-5980-01r2 Functionality…
-
Page 134
3. See menu PT100 Inputs [2323], page 78. Used Thermal Capacity [71K] 71B PT100B1 123 This menu displays the used thermal capacity. Read-only Unit: °C 71K Used Th Cap Read-only Resolution: 1°C Unit: Resolution: Functionality CG Drives & Automation, 01-5980-01r2… -
Page 135: Status [720]
4 — 2 1=Thyristor driven motor 2=Bypass driven motor Source of Run/Stop command, where: 0=Rem, 1=Keyboard (internal + external), 2=Com, 7 — 5 3=Spare, 4=VIO, 5=Internal keyboard, 6=External keyboard. 15 — 8 Reserved for future use. CG Drives & Automation, 01-5980-01r2 Functionality…
-
Page 136
Fig. 78 indicates that AnIn is active and has a 65% input Volt Unbal (voltage unbalance) value. NOTE: The shown percentage is an absolute value based on the maximum value of the in- or output; so related to either to 10 V or 20 mA. Functionality CG Drives & Automation, 01-5980-01r2… -
Page 137
This menu indicates the active digital comparators (CD1 — CD4). 72B CD1-4 Read-only 0000 Logic function status 1 — 4 [72C] This menu indicates the active logic outputs (L1 — L4). 72C Logic 1-4 Read-only 0000 CG Drives & Automation, 01-5980-01r2 Functionality… -
Page 138: Stored Values [730]
00: 00: 00–262143: 59: 59 Energy [733] This menu displays the total energy consumption since the last energy reset [7331] took place. 733 Energy Read-only Unit: Wh (shows Wh, kWh, MWh or GWh) Range: 0 Wh–999,999 GWh Functionality CG Drives & Automation, 01-5980-01r2…
-
Page 139: View Trip Log [800]
Analogue comparator 1 — 4 132 (menu [722]). 812A Digital comparator 1 — 4 812B Logic function status 1-4 812C Timer status 1-4 812D Flip-flop status 1-4 812E Counter status 1-2 812F Time to next start CG Drives & Automation, 01-5980-01r2 Functionality…
-
Page 140: Trip Messages [820] — [890]
0: V, release version 15–14 1: P, pre-release version β , Beta version α , Alpha version Table 39 Information for Modbus and Profibus number, option version Example Description 7–0 Minor option version 15–8 Major option version Functionality CG Drives & Automation, 01-5980-01r2…
-
Page 141
12 characters. Press the + / — keys to enter graphic symbols from the same list as for User-defined Unit [323], page 90. See also «Editing parameter values», page 45. 923 Unit Name Default: No characters shown CG Drives & Automation, 01-5980-01r2 Functionality… -
Page 142
Functionality CG Drives & Automation, 01-5980-01r2… -
Page 143: Serial Communication
The on-board RS232 connection is not galvanically option boards. isolated. Modbus RTU The RS485 and USB option boards from CG Drives & Automation are galvanically isolated. There is an asynchronous unisolated RS232 serial communication interface on top of the Emotron TSA unit.
-
Page 144: Motor Data
Requires that menu [2151] Run/Stop Control is set to “Com”. Modbus/DeviceNet Function Instance number 42901 Reset Run, active together with either 42902 Run FWD or Run REV to perform start. (1=Run, 0=Stop) 42903 Run FWD (1=Active) 42904 Run REV (1=Active) Serial communication CG Drives & Automation 0-5980-01r2…
-
Page 145: Description Of The Eint Formats
4-bit signed exponent. Gives a value range: -8..+7 (binary 1000 .. 0111) Where bit 15 indicates that we are using the fixed point m10-m0 11-bit signed mantissa. Gives a format (F=0). value range: -1024..+1023 (binary 10000000000..01111111111) CG Drives & Automation 01-5980-01r2 Serial communication…
-
Page 146
// make signed Rreturn (*(unsigned short int *)&etmp); //————————————————————————— float eint16_to_float(unsigned short int value) float f; eint16 evalue; evalue=*(eint16 *)&value; if (evalue.f) if (evalue.e>=0) f=(int)evalue.m*pow10(evalue.e); else f=(int)evalue.m/pow10(abs(evalue.e)); else f=value; return f; //————————————————————————— Serial communication CG Drives & Automation 0-5980-01r2… -
Page 147: Softstarter Theory
The dashed line indicates the nominal motors’ torque characteristic is added to the diagram. values. Torque Torque Fig. 85 Typical load torque characteristics Fig. 83 Typical torque characteristics for the DOL start CG Drives & Automation 01-5980-01r2 Softstarter theory…
-
Page 148
This means when the motor current is decreased by a factor of two by means of reducing the supply voltage, the torque delivered by the motor will be decreased by a factor of four (approximately). Softstarter theory CG Drives & Automation 01-5980-01r2… -
Page 149: Reduced Voltage Starting
On the other hand for low load applications further savings of starting current are impossible even though a big torque reserve is available. Moreover, the resulting abrupt rise of torque first at start and CG Drives & Automation 01-5980-01r2 Softstarter theory…
-
Page 150
This means, the lowest possible starting current is determined by the combination of motor and load characteristics. Softstarter theory CG Drives & Automation 01-5980-01r2… -
Page 151: Other Starting Methods
However, it is always possible to use a frequency inverter instead. The following illustration shows how the torque and current characteristics are affected when the stator frequency is changed. CG Drives & Automation 01-5980-01r2 Softstarter theory…
-
Page 152: Use Of Softstarters With Torque Control
(linear, square or constant load, need of initial release torque) must be known. In this case a proper torque control method (linear or square) can be chosen and torque boost can be enabled if needed. Softstarter theory CG Drives & Automation 01-5980-01r2…
-
Page 153: Troubleshooting, Diagnoses And Maintenance
For more information on maintenance, please contact your this instruction manual, it is absolutely necessary to CG Drives & Automation service partner. read and follow the safety instructions in the manual. Precautions to take with a connected motor…
-
Page 154: Troubleshooting List
Change the Motor I t Current setting in menu [2312]. (Area D: I Soft trip to the prog-rammed I t settings. Check setting of menu [228] Motor Vent, which affects I Warning behaviour. Troubleshooting, Diagnoses and Maintenance CG Drives & Automation 01-5980-01r2…
-
Page 155
Mains voltage dip due to starting Soft trip limits set in menu group [433]. other major power consuming Warning Use other mains supply lines if dip is caused by other machines on the same line. machinery. CG Drives & Automation 01-5980-01r2 Troubleshooting, Diagnoses and Maintenance… -
Page 156
Possible cause Remedy /Menu (and indicator) No action Hard trip Check 3-phase mains supply. Volt unbalance 4311 Mains supply voltage unbalance. Soft trip Check settings in menu [4312] and [4313]. Warning Troubleshooting, Diagnoses and Maintenance CG Drives & Automation 01-5980-01r2… -
Page 157
The alarm can only be reset if the The alarm can not alarm condition is removed. be reset. E.g. PTC, PT100 or over temperature alarm can only be reset after the temperature is decreased. CG Drives & Automation 01-5980-01r2 Troubleshooting, Diagnoses and Maintenance… -
Page 158
Troubleshooting, Diagnoses and Maintenance CG Drives & Automation 01-5980-01r2… -
Page 159: Options
PC for backup and printing. options are described in a separate manual. Recording can be made in oscilloscope mode. Please contact CG Drives & Automation sales for further information. CG Drives & Automation 01-5980-01r2 Options…
-
Page 160
Options CG Drives & Automation 01-5980-01r2… -
Page 161: Technical Data
Heavy duty: Start current = 5 x I , Start time = 15 s (Size 1) or 30 s (Size 2- 4), 10 starts/hour. n_soft Fuse data for Semi-conductor fuses, see Table 48. H1=Height of enclosure, H2= Total height. CG Drives & Automation 01-5980-01r2 Technical data…
-
Page 162
Heavy duty: Start current = 5 x I , Start time = 15 s (Size 1) or 30 s (Size 2-4), 10 starts/hour. n_soft Fuse data for Semi-conductor fuses, see Table 48. H1=Height of enclosure, H2= Total height. Technical data CG Drives & Automation 01-5980-01r2… -
Page 163
Heavy duty: Start current = 5 x I , Start time = 15 s (Size 1) or 30 s (Size 2-4), 10 starts/hour. n_soft Fuse data for Semi-conductor fuses, see Table 48. H1=Height of enclosure, H2= Total height. CG Drives & Automation 01-5980-01r2 Technical data… -
Page 164: General Electrical Specifications
42 000 -085 55 000 -100 99 000 -140 160 000 -170 222 000 -200 332 000 -240 433 000 -300 1000 950 000 -360 1200 1 470 000 -450 1400 1 890 000 Technical data CG Drives & Automation 01-5980-01r2…
-
Page 165: Environmental Conditions
85 A nominal current: 85 A — (20% x 85 A) = 68 A, which is lower than the required 70 A. An even higher rated model is checked, TSA52-100, rated for 100 A nominal current: CG Drives & Automation 01-5980-01r2 Technical data…
-
Page 166: Derating At High Altitude
56 A — (11% x 56 A) = 49.8 A, which is well above the required 42 A, and therefore TSA52-056 could be selected in this case. Technical data CG Drives & Automation 01-5980-01r2…
-
Page 167: Control Power- And I/O Signal Connectors
24 VDC or max 250 VAC) must be used for all three output relays (terminals 21-33). Do not mix AC and DC voltage. Make sure to use the same voltage level within this terminal section, otherwise the softstarter may be damaged. CG Drives & Automation 01-5980-01r2 Technical data…
-
Page 168
Technical data CG Drives & Automation 01-5980-01r2… -
Page 169: Index
LOC/REM key ……. 46 Emergency ………1 Clock settings ……..134 Local control ……..71 EN60204-1 ……..6 Coast ……….94 Logic ……..116, 121 EN61800-3 ……..6 Com Type ……..86 Status ……..133 EN61800-5-1 ……..6 Comparator Low Voltage Directive ……. 6 CG Drives & Automation 01-5980-01r2…
-
Page 170
Phase compensation capacitor ….1 Status ……….131 Phase loss ………79 Status indications ……43 Phase reversal ………105 Step-up transformer for high Phase sequence …….105, 130 voltage motor ……..36 Planer ……….34 Stop command …….108 Power- and signal connectors ..163 CG Drives & Automation 01-5980-01r2… -
Page 171: Appendix 1: Menu List
Appendix 1: Menu List This is a list of the Emotron TSA menu parameters and their factory settings, along with communication settings for the most important bus formats. Complete lists with communication data and parameter set information could be downloaded from www. cgglobal.com or www.emotron.com. Customer settings Modbus Inst.
-
Page 172
Customer settings Modbus Inst. Fieldbus Modbus Menu Parameters Default settings Notes DeviceNet no. format format Motor Power [Motor] W 43043 Long, 1=1W EInt Motor Curr [Motor] A 43044 Long, 1=0.1A EInt Motor Speed [Motor] rpm 43045 UInt, 1=1rpm UInt Motor Poles [Motor] 43046 Long, 1=1… -
Page 173
Customer settings Modbus Inst. Fieldbus Modbus Menu Parameters Default settings Notes DeviceNet no. format format Copy Set A>B 43021 UInt UInt Default>Set 43023 UInt UInt Copy to CP No Copy 43024 UInt UInt Load from CP No Copy 43025 UInt UInt Autoreset page 83… -
Page 174
Customer settings Modbus Inst. Fieldbus Modbus Menu Parameters Default settings Notes DeviceNet no. format format 2563 OverVolt 43077 Long, 1=1s EInt 2564 Undervolt 43088 Long, 1=1s EInt Serial Com page 86 Com Type RS232 43031 UInt UInt Modbus RTU 2621 Baudrate 9600 43032 UInt… -
Page 175
Customer settings Modbus Inst. Fieldbus Modbus Menu Parameters Default settings Notes DeviceNet no. format format 2653 Subnet Mask 0.0.0.0 42711 UInt, 1=1 UInt 0.0.0.0 42712 UInt, 1=1 UInt 0.0.0.0 42713 UInt, 1=1 UInt 0.0.0.0 42714 UInt, 1=1 UInt 2654 Gateway 0.0.0.0 42715 UInt, 1=1… -
Page 176
Customer settings Modbus Inst. Fieldbus Modbus Menu Parameters Default settings Notes DeviceNet no. format format FB Status page 89 2691 Board Type 31081 UInt, 1=1 UInt 2692 SUP-bit 31082 UInt, 1=1 UInt 2693 State FB 31083 UInt, 1=1 UInt 2694 Serial Nbr 31084 UInt, 1=1 UInt… -
Page 177
Customer settings Modbus Inst. Fieldbus Modbus Menu Parameters Default settings Notes DeviceNet no. format format StartSetting page 91 Start Method Lin Torq Ctr 43701 UInt, 1=1 UInt Init Torque 43702 UInt, 1=1% UInt EndTorqueSt 150% 43703 UInt, 1=1% UInt Init Volt 43704 UInt, 1=1% UInt… -
Page 178
Customer settings Modbus Inst. Fieldbus Modbus Menu Parameters Default settings Notes DeviceNet no. format format 4111 MaxAlarmAct No action 43775 UInt UInt 4112 MaxAlarmLev 116% 43776 Long, 1=1% EInt 4113 MaxAlarmDel 0,5s 43330 Long, 1=0.1s EInt MaxPreAlarm page 99 4121 MaxPreAlAct No action 43777 UInt… -
Page 179
Customer settings Modbus Inst. Fieldbus Modbus Menu Parameters Default settings Notes DeviceNet no. format format 4221 LockRot AA No action 43362 UInt UInt 4222 LockRotTime 5,0s 43757 UInt, 1=0.1s UInt 4223 LockRotCurr 480% 43759 UInt, 1=1% UInt Mains Prot page 104 Volt Unbal 4311 VoltUnbalAA No action… -
Page 180
Customer settings Modbus Inst. Fieldbus Modbus Menu Parameters Default settings Notes DeviceNet no. format format AnIn Advan 5131 AnIn Min 43203 Long, 1=0.01 EInt 5132 AnIn Max 20mA 43204 Long, 1=0.01 EInt 5134 AnIn FcMin 43206 UInt UInt Long, 1= see 1=0.001, 1rpm, 1%, 1°C, 0.001 5135 AnIn VaMin 43541… -
Page 181
Customer settings Modbus Inst. Fieldbus Modbus Menu Parameters Default settings Notes DeviceNet no. format format 5334 AnOutFcMin 43256 UInt UInt Long, 1= see 1W, 0.1Hz, 0.1A, 0.1V, 1rpm, 1% 5335 AnOutVaMin 43545 EInt Notes or 0.001 as set in [322] 5336 AnOutFcMax 43257 UInt… -
Page 182
Customer settings Modbus Inst. Fieldbus Modbus Menu Parameters Default settings Notes DeviceNet no. format format VIO 2 Dest 43283 UInt UInt VIO 2 Source 43284 UInt UInt VIO 3 Dest 43285 UInt UInt VIO 3 Source 43286 UInt UInt VIO 4 Dest 43287 UInt UInt… -
Page 183
Customer settings Modbus Inst. Fieldbus Modbus Menu Parameters Default settings Notes DeviceNet no. format format 6117 CA1 Res Dly 00:00:00 43408 UInt, 1=1h UInt 43409 UInt, 1=1m UInt 43410 UInt, 1=0.1s UInt 6118 CA1 Tmr Val 00:00:00 42600 UInt, 1=1h UInt 42601 UInt, 1=1m… -
Page 184
Customer settings Modbus Inst. Fieldbus Modbus Menu Parameters Default settings Notes DeviceNet no. format format 1W, 0.1Hz, 0.1A, 0.1V, 1rpm, 1%, Long, 1= see 6133 CA3 LevelLO 43424 EInt 0.1°C, 1kWh, 1h or 0.001 as set Notes in [322] 6134 CA3 Type Hysteresis 43425 UInt… -
Page 185
Customer settings Modbus Inst. Fieldbus Modbus Menu Parameters Default settings Notes DeviceNet no. format format 42611 UInt, 1=0.1s UInt CD1 Setup page 120 6151 CD1 Operation 43444 UInt UInt 6152 CD1 Set Dly 00:00:00 43445 UInt, 1=1h UInt 43446 UInt, 1=1m UInt 43447 UInt, 1=0.1s… -
Page 186
Customer settings Modbus Inst. Fieldbus Modbus Menu Parameters Default settings Notes DeviceNet no. format format 6173 CD3 Res Dly 00:00:00 43462 UInt, 1=1h UInt 43463 UInt, 1=1m UInt 43464 UInt, 1=0.1s UInt 6174 CD3 Tmr Val 00:00:00 42618 UInt, 1=1h UInt 42619 UInt, 1=1m… -
Page 187
Customer settings Modbus Inst. Fieldbus Modbus Menu Parameters Default settings Notes DeviceNet no. format format 6219 L1 Set Dly 00:00:00 43480 UInt, 1=1h UInt 00:00:00 43481 UInt, 1=1m UInt 00:00:00 43482 UInt, 1=0.1s UInt 621A L1 Res Dly 43483 UInt, 1=1h UInt 43484 UInt, 1=1m… -
Page 188
Customer settings Modbus Inst. Fieldbus Modbus Menu Parameters Default settings Notes DeviceNet no. format format Logic 3 page 124 6231 L3 Expr ((1.2).3).4 43780 UInt UInt 6232 L3 Input 1 43781 UInt UInt 6233 L3 Op 1 & 43782 UInt UInt 6234 L3 Input 2 43783… -
Page 189
Customer settings Modbus Inst. Fieldbus Modbus Menu Parameters Default settings Notes DeviceNet no. format format 6249 L4 Set Dly 00:00:00 43802 UInt, 1=1h UInt 43803 UInt, 1=1m UInt 43804 UInt, 1=0.1s UInt 624A L4 Res Dly 00:00:00 43805 UInt, 1=1h UInt 43806 UInt, 1=1m… -
Page 190
Customer settings Modbus Inst. Fieldbus Modbus Menu Parameters Default settings Notes DeviceNet no. format format 6323 Timer2 Dly 00:00:00 43821 UInt, 1=1h UInt 43822 UInt, 1=1m UInt 43823 UInt, 1=0.1s UInt 6324 Timer2 T1 00:00:00 43824 UInt, 1=1h UInt 43825 UInt, 1=1m UInt 43826… -
Page 191
Customer settings Modbus Inst. Fieldbus Modbus Menu Parameters Default settings Notes DeviceNet no. format format Timer4 page 125 6341 Timer4 Trig 43841 UInt UInt 6342 Timer4 Mode Delay 43842 UInt UInt 6343 Timer4 Dly 00:00:00 43843 UInt, 1=1h UInt 43844 UInt, 1=1m UInt 43845… -
Page 192
Customer settings Modbus Inst. Fieldbus Modbus Menu Parameters Default settings Notes DeviceNet no. format format 6416 F1 Tmr Val 00:00:00 42648 UInt, 1=1h UInt 42649 UInt, 1=1m UInt 42650 UInt, 1=0.1s UInt Flip flop 2 page 127 6421 F2 mode Reset 43861 UInt… -
Page 193
Customer settings Modbus Inst. Fieldbus Modbus Menu Parameters Default settings Notes DeviceNet no. format format 6436 F3 Tmr Val 00:00:00 42654 UInt, 1=1h UInt 42655 UInt, 1=1m UInt 42656 UInt, 1=0.1s UInt Flip flop 4 page 127 6441 F4 mode Edge 43879 UInt… -
Page 194
Customer settings Modbus Inst. Fieldbus Modbus Menu Parameters Default settings Notes DeviceNet no. format format Clock logic page 128 Clock 1 6611 Clk1TimeON 00:00:00 43600 Long, 1=1h EInt 43601 Long, 1=1m EInt 43602 Long, 1=1s EInt 6612 Clk1TimeOff 00:00:00 43603 Long, 1=1h EInt 43604… -
Page 195
Customer settings Modbus Inst. Fieldbus Modbus Menu Parameters Default settings Notes DeviceNet no. format format Shaft Power 31006 UInt, 1=1% UInt El Power 31007 Long, 1=1W EInt RMS Current 31008 Long, 1=0.1A EInt L main volt 31009 Long, 1=0.1V EInt Heatsnk Tmp 31010 Long, 1=0.1°C EInt… -
Page 196
Customer settings Modbus Inst. Fieldbus Modbus Menu Parameters Default settings Notes DeviceNet no. format format CA1-4 31050 UInt, 1=1 UInt CD1-4 31051 UInt, 1=1 UInt Logic 1-4 31052 UInt, 1=1 UInt Timer 1-4 31053 UInt, 1=1 UInt FlipFlop1-4 31072 UInt, 1=1 UInt Counter 1-2 31073… -
Page 197
Customer settings Modbus Inst. Fieldbus Modbus Menu Parameters Default settings Notes DeviceNet no. format format Long, 1= see 1rpm, 1%, 1°C, 0.001 as set in 8111 Process Val 31102 EInt Notes [322] 8113 Torque 31104 Long, 1=0.1Nm EInt 8114 Torque 31105 Long, 1=1% EInt… -
Page 198
Customer settings Modbus Inst. Fieldbus Modbus Menu Parameters Default settings Notes DeviceNet no. format format 8124 AnalogueIn 31129 Long, 1=1% EInt 8125 AnalogueOut 31130 Long, 1=1% EInt 8126 IO StatusB1 31131 UInt, 1=1 UInt 8127 IO StatusB2 31132 UInt, 1=1 UInt 8129 CA1-4 31134… -
Page 199
Customer settings Modbus Inst. Fieldbus Modbus Menu Parameters Default settings Notes DeviceNet no. format format (Trip log list 2) page 136 (Trip log list 3) (Trip log list 4) Same parameters as for menu group 810 (Trip (Trip log list 5) log list 1). -
Page 200
Customer settings Modbus Inst. Fieldbus Modbus Menu Parameters Default settings Notes DeviceNet no. format format 42307 UInt UInt 42308 UInt UInt 42309 UInt UInt 42310 UInt UInt 42311 UInt UInt 42312 UInt UInt… -
Page 201: Appendix 2: Trip Message Communication Data
Appendix 2: Trip message communication data Trip log list 31101-31154 31201-31254 31301-31354 Modbus Instance no/ 31401-31454 DeviceNet no: 31501-31554 31601-31654 31701-31754 31801-31854 31901-31954 Trip log list 121/245-122/43 122/90-122/143 122/190-122/243 123/35-123/88 Profibus slot/index 123/135—123/188 123/235-124/33 124/80-124/133 124/180-124/233 125/25-125/78 Trip log list 1101-1154 1201-1254 1301-1354…
-
Page 204
CG Drives & Automation Sweden AB Mörsaregatan 12 Box 222 25 SE-250 24 Helsingborg Sweden T +46 42 16 99 00 F +46 42 16 99 49 www.emotron.com/www.cgglobal.com…
- Печать
Страницы: 1 … 10 11 [12] 13 14 … 17 Вниз

Тема: EMOTRON (Прочитано 66782 раз)
0 Пользователей и 1 Гость просматривают эту тему.
Добрый вечер, подскажите , лифт встал окончательно по ошибке Power faul, чп emotron 4.0,станция шулр, чп не выдаёт 132-615 не наключается тормоз,реле в чп проверено рабочая, при старте сразу ошибка Power faul, если принудительно наключить реле тормоза лифт начинает движение
« Последнее редактирование: Август 02, 2018, 00:19:12 от Lift-2014 »

Записан
EMOTRON, лифт ШУЛМ. Частотник не проходит начальный тест по включению, постоянно висит на тестировании. При отключении от лифта полностью всё тоже самое. До этого работал нормально.
Записан
Самое первое проверить напряжение на выходе импульсного источника питания ПЧ, его электролитические конденсаторы в цепях ШИМ и выпрямителей.
Записан

Коллеги,кто запускал ЩЛЗ с Emotron DSV35-40? Лифт 1м/с,двигатель 5,2кВт.Непонятны манипуляции с автонатройкой.Вот описание по мануалу:
1.Выбирается режим «с клавиатуры»
2.Вбиваются параметры двигателя
3.Выбирается «тест двигателя сокращённый»
4.Принудительно зажимается контактор ГП и нажимается»Пуск» на ПЧ
5.После проведения автонастройки требуется вбить параметры мотора из прилагаемой таблицы (моего мотора там нет): сопротивление статора,сопротивление ротора,индуктивность двигателя,ток намагничивания и ПИД-коэффициенты.Вопрос:нахера тогда делать автотюнинг?Решил,для эксперимента не вбивать,а с полученными значениями попробовать.Лифт не поехал.Со значениями из таблицы(взял 5кВт) поехал,но при движении вниз при переходе на малую останавливается и стоит.
Записан
А чем еще может заниматься мужчина в расцвете лет в свободное от школьных уроков время?
Посмотри файловый архив (ИМКИ.656367.003 И1 2019), может что нибудь подскажет тебе эта документация.
Записан
спасибо
Что то вы по моему слишком много читаете, забил с таблички двигателя провёл тест и поехал. штук 15 таких уже запускал, без каких либо таблиц. Тут главное сохранять параметры….
Записан
Жень,у меня 5,2кВт.Тоже забил с таблички.И он не поехал))) Мне просто непонятно,зачем делать тюнинг,если потом нужно указывать совершенно другие данные.
Записан
А чем еще может заниматься мужчина в расцвете лет в свободное от школьных уроков время?
Доброго время суток всем Господа форумчане! Прошу помочь разобраться неучам с создавшейся проблемой. Суть проблемы заключается в следующем, частотный преобразователь при попытки включить лифт в работу выдает ошибку 810, на станции ШУЛМ, показывает ошибку 96. Двигатель 8,5 кВт/ 1500об/мин прозвонили, целый. Пробовали с частотника сделать тест двигателя, пишет «не сделано». Опыта работы с частотниками у нас нет, т.к лифты у нас в основном у нас еще совдеповские. Помогите разобраться в чем проблема?
Записан
« Последнее редактирование: Декабрь 02, 2019, 08:40:49 от Мишаня »
Записан
Ленивые всё делают быстро. Чтобы поскорее отделаться от работы.
И делают качественно. Чтобы потом не переделывать.
Записан
Кз по выходам
Прозвонить. Если ничего не найдется, попробовать откинуть выходные фазы от частотника. Если снова выдаст аналогично, то к частотнику пришел северный пушной зверек…
Записан
Николай-Аша, посмотри файловый архив-VFX, FDU Диагностика.
Записан
спасибо
Схема выходного каскада частотнка примерно следующая:

Обесточь частотник, отключи силовые провода с выхода частотника, тормозного резистора и минут через 10, когда разрядится кандер, прозвони все диоды. Если какой-то диод пробит или в обрыве, частотнику кирдык.
Записан
Спасибо всем за поддержку,завтра будем прозванивать.
Записан
Добрый день.
Если выдает «Десат», то скорее всего ПЧ кирдык. У нас уже штук 5-6 с таким сообщением накрылись.
Записан
- Печать
Страницы: 1 … 10 11 [12] 13 14 … 17 Вверх
Start & Stop/Démarrer & Arrêter/Marcha y Paro/Avvio & Arresto/Пуск и Oстанов
A.
B.
C.
Menu
Description
Setting
21A
Level/Edge
Level
522
Digital Input 2
Off
Meny
Beskrivning
Inst.
21A
Nivå/Flank
Nivå
522
Digital Ingång 2
Från
Menü
Beschreibung
Einst.
21A
Niveau/Flank
Niveau
522
Digitaleingang 2
Aus
Menu
Beschrijving
Instelling
21A
Niveau/Flank
Niveau
522
Digitale Ingang 2
Uit
Default/Standard/Standaard/Défaut/Defecto/Predefinito/По умолчанию:
START:
STOP:
Linear torque control
Coast
Linjär momentreglering
Utrullning
Lineaire koppelbesturing
Uitlopen
Lineare Drehmomentregelung
Auslaufen
Réglage du couple linéaire
Inertie
Control de par lineal
Inercia
Controllo della coppia lineare
Inerzia
Линейное управление моментом
Торможение
выбегом
Settings/Inställningar/Instellingen/Einstellungen/Paramètres/Ajustes/Impostazioni/Настройки
Menu
Description
Réglage
21A
Niveau/Front
Niveau
522
Entrée dig 2
Non
Menú
Descripción
Ajuste
21A
Nivel/Flanco
Nivel
522
Entrada Digital 2
Desactivado
Menú
Descrizione
Imposta.
21A
Livello/Sogl.
Livello
522
Digital Input 2
No
Меню
Описание
Настройка
21A
Уров/Фронт
Уров
522
Цифровой вход 2
Выкл.
CG Drives & Automation Sweden AB
8.3.3
8.3.4
Box 222 25
SE- 250 24 Helsingborg
Sweden
www.cgglobal.com / www.emotron.com
Emotron TSA Softstarter
Quick Start Guide
This guide provides brief instructions on how to get the softstarter and
motor up and running. For more detailed instructions, engineering
EN
guidelines, technical data, and complete safety instructions, see the
Emotron TSA Softstarter Instruction manual.
Denna guide instruerar kortfattat hur du får igång mjukstartaren och
motorn. För mer detaljerade instruktioner, tekniska data och riktlinjer,
SV
samt kompletta säkerhetsanvisningar, se Emotron TSA Mjukstartare
Bruksanvisning.
Deze gids laat in het kort zien hoe de softstarter met motor in bedrijf
wordt genomen. Voor meer gedetailleerde instructies, technische
NL
gegevens en richtlijnen, en volledige veiligheidsinstructies, zie de
Emotron TSA Softstarter Gebruiksaanwijzing.
Diese Kurzanleitung erklärt die Inbetriebnahme von Softstarter und
Motor. Ausführlichere Anweisungen, technische Richtlinien und Daten
DE
sowie vollständige Sicherheitshinweise finden Sie in der
Emotron TSA Softstarter Bedienungsanleitung.
Ce guide indique brièvement comment faire fonctionner le démarreur
progressif et le moteur. Pour des instructions plus détaillées, des
FR
directives et données techniques, et les instructions de sécurité
complètes, reportez-vous au Mode d’emploi du démarreur progressif
Emotron TSA.
Esta guía indica brevemente cómo poner en funcionamiento el
arrancador progresivo y el motor. Para obtener instrucciones más
ES
detalladas, directrices de ingeniería, datos técnicos e instrucciones
de seguridad completas, consulte el manual de instrucciones del
arrancador progresivo de Emotron TSA.
Questa guida mostra brevemente come mettere in funzione il
softstarter e il motore. Per istruzioni più dettagliate, le linee guida
IT
di progettazione, i dati tecnici e le istruzioni di sicurezza complete,
consultare il Manuale di istruzioni Emotron TSA Softstarter.
Краткое руководство по применению мягкого пускателя для
двигателя. Для получения подробного описания, технической
RU
справки, просмотра технических характеристик и инструкций по
технике безопасности см. Emotron TSA МЯГКИЙ ПУСКАТЕЛЬ
Руководство по эксплуатации.
WARNING!
Hazardous voltage.
Will cause physical injury or death.
Disconnect all power supplies before
working on equipment.
VARNING!
Farlig spänning.
Kan medföra personskador och dödsfall.
Koppla bort alla strömkällor innan arbete
på utrustning.
WAARSCHUWING!
Gevaarlijke spanning. Zal leiden tot
lichamelijk letsel of de dood. Schakel
alle voedingsspanningen uit alvorens aan
de apparatuur te gaan werken.
WARNHINWEIS!
Gefährliche Spannung.
Kann zu Verletzungen oder zum Tode
führen.
Vor Arbeiten am Gerät unbedingt vom
Netz trennen!
ATTENTION !
Tension dangereuse.
Peut causer des blessures graves,
voire mortelles. Débranchez toutes les
alimentations avant de travailler sur le
matériel.
¡ADVERTENCIA!
Tensión peligrosa. Puede causar lesiones
físicas o la muerte. Desconecte todas
las fuentes de alimentación antes de
trabajar en el equipo.
ATTENZIONE!
Tensione pericolosa.
Può provocare lesioni fisiche o morte.
Scollegare l’alimentazione prima di
lavorare sulle apparecchiature.
ВНИМАНИЕ!
Опасное напряжение.
Угроза серьезной травмы или
смерти. Отключите все источники
питания перед началом работы с
оборудованием.
- Manuals
- Brands
- CG Manuals
- Controller
- emotron TSA Series
Manuals and User Guides for CG emotron TSA Series. We have 1 CG emotron TSA Series manual available for free PDF download: Instruction Manual
Go to emotron TSA Series Specifications
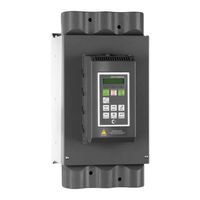
CG emotron TSA Series Instruction Manual (204 pages)
Brand: CG
|
Category: Controller
|
Size: 7.77 MB
Table of Contents
-
Safety Instructions
5
-
Table of Contents
7
-
Contents
7
-
1 Introduction
9
-
Delivery and Unpacking
9
-
Using of the Instruction Manual
9
-
Warranty
9
-
Type Code Number
9
-
Standards
10
-
Product Standard for EMC
10
-
Dismantling and Scrapping
10
-
Disposal of Old Electrical and Electronic Equipment
10
-
Glossary
11
-
Abbreviations and Symbols
11
-
Definitions
11
-
-
2 Mounting
13
-
Installation in a Cabinet
13
-
Cooling
13
-
Mechanical Specifications and Drawings
14
-
Mounting Schemes
17
-
-
3 Connections
19
-
Mains and Motor Connections
19
-
Busbar Distances on Emotron TSA Softatarter
23
-
Cable Covers
23
-
Board Layout and Connectors
24
-
Control Signal Connections
26
-
Wiring Examples
27
-
-
4 Application Guidelines
35
-
Softstarter Dimensioning According to AC-53B
35
-
Applications Rating
35
-
The Application Functions List
37
-
Special Conditions
40
-
Small Motor or Low Load
40
-
Ambient Temperature below 0°C (32°F)
40
-
Pump Control with Softstarter and AC Drive Together
40
-
Starting with Counter-Clockwise (Reverse) Rotating Loads
40
-
Running Motors Connected in Parallel
40
-
Running Motors Linked Together
40
-
Heat Dissipation in Cabinets
40
-
Insulation Test on Motor
40
-
Operation above 1,000 M (3280 Ft)
40
-
Earthing System
41
-
Earth Fault Relay
41
-
Other Control Voltage
41
-
-
5 Getting Started
43
-
Check List
43
-
Mains and Motor Connection
43
-
Connect the Mains Cables
43
-
Connect the Motor Cables
43
-
Connect the Control Supply Voltage
43
-
Default Toggle Loop
44
-
Remote I/O Operation
44
-
Control Panel Operation
45
-
-
6 Operation Via the Control Panel
47
-
Display
47
-
LED Indicators
48
-
Control Keys
48
-
Function Keys
49
-
Key Function
49
-
Jog Key Function
49
-
Toggle and Loc/Rem Key
50
-
Toggle Function
50
-
Loc/Rem Function
51
-
The Menu Structure
51
-
The Main Menu
52
-
-
7 Main Features
53
-
Setting Start, Stop and Run Functions
53
-
Start and Stop Control
53
-
Start and Stop Methods
53
-
Jog Functions
54
-
Start/Stop Signal Priority
54
-
Setting Motor Data
54
-
Process Information
54
-
Working with Parameter Sets
55
-
Selection of Parameter Sets
55
-
Configuration of Parameter Sets
56
-
Handling Motor Data in Parameter Sets
56
-
Using the Control Panel Memory
56
-
Applying Limitations, Alarms and Autoreset
59
-
Alarm Types and Actions
59
-
Alarm Settings
59
-
Alarm Indications
59
-
Load Monitor Function
60
-
Reset and Autoreset
64
-
Programmable I/O
65
-
Remote Control Functions
65
-
Default Settings of the Run/Stop/Reset Functions
65
-
Enable and Stop Functions
66
-
Level / Edge Operation after Reset
66
-
Logical Functions
67
-
Jog Speed at Start and /Or Stop
67
-
-
8 Functionality
71
-
Preferred View [100]
73
-
1St Line [110]
73
-
2Nd Line [120]
73
-
Main Setup [200]
73
-
Operation Setup [210]
73
-
Remote Signal Level/Edge [21A]
76
-
Motor Data [220]
77
-
Motor Protection [230]
80
-
Parameter Set Handling [240]
84
-
Autoreset [250]
87
-
Serial Communication [260]
90
-
Process [300]
93
-
View Process Value [310]
93
-
Process Settings [320]
93
-
Start Setting [330]
95
-
Stop Setting [340]
98
-
Jog [350]
101
-
Load Monitor and Process Protection [400]
102
-
Load Monitor [410]
102
-
Process Protection [420]
107
-
Mains Protection [430]
108
-
I/O [500]
110
-
Analogue Input [510]
110
-
Digital Inputs [520]
112
-
Analogue Output [530]
113
-
Relays [550]
116
-
Virtual I/Os [560]
119
-
Logical Functions and Timers [600]
120
-
Comparators [610]
120
-
Logic Outputs [620]
125
-
Timers [630]
128
-
SR Flip-Flops [640]
129
-
Counters [650]
131
-
Clock Logic [660]
132
-
Operation/Status [700]
133
-
Operation Values [710]
133
-
Status [720]
135
-
Stored Values [730]
138
-
Real Time Clock Settings [740]
138
-
View Trip Log [800]
139
-
Trip Message Log [810]
139
-
Trip Messages [820] — [890]
140
-
Reset Trip Log [8A0]
140
-
System Data [900]
140
-
TSA Data [920]
140
-
-
9 Serial Communication
143
-
Modbus RTU
143
-
Parameter Sets
143
-
Motor Data
144
-
Start and Stop Commands
144
-
Process Value
144
-
Description of the Eint Formats
145
-
-
10 Softstarter Theory
147
-
Background Theory
147
-
Reduced Voltage Starting
149
-
Other Starting Methods
151
-
Use of Softstarters with Torque Control
152
-
-
11 Troubleshooting, Diagnoses and Maintenance
153
-
Trip Conditions, Causes and Remedial Action
153
-
Technically Qualified Personnel
153
-
Opening the Softstarter
153
-
Maintenance
153
-
Troubleshooting List
154
-
-
12 Options
159
-
External Control Panel
159
-
Emosoftcom
159
-
I/O Board
159
-
Ptc/Pt100
159
-
Serial Communication and Fieldbus
159
-
-
13 Technical Data
161
-
General Electrical Specifications
164
-
Semi-Conductor Fuses
164
-
Environmental Conditions
165
-
Derating at High Temperature
165
-
Derating at High Altitude
166
-
Control Power- and I/O Signal Connectors
167
-
Index
169
-
-
Appendix 1: Menu List
171
-
Appendix 2: Trip Message Communication Data
201
-
Advertisement
Advertisement
Related Products
-
CG Emotron CDN Series
-
CG Emotron VFX Series
-
CG ELV
-
CG Emotron VS Series
-
CG CDN40-012-65
-
CG CDN40-016-65
-
CG CDN40-2P2-65
-
CG CDN40-3P8-65
-
CG CDN40-4P8-65
-
CG CDN40-7P0-65
CG Categories
DC Drives
Controller
Control Panel
Automobile Accessories
Automobile Electronics
More CG Manuals
- Manuals
- Brands
- CG Manuals
- Controller
- emotron TSA Series
Manuals and User Guides for CG emotron TSA Series. We have 1 CG emotron TSA Series manual available for free PDF download: Instruction Manual
Go to emotron TSA Series Specifications
CG emotron TSA Series Instruction Manual (204 pages)
Brand: CG
|
Category: Controller
|
Size: 7.77 MB
Table of Contents
-
Safety Instructions
5
-
Table of Contents
7
-
Contents
7
-
1 Introduction
9
-
Delivery and Unpacking
9
-
Using of the Instruction Manual
9
-
Warranty
9
-
Type Code Number
9
-
Standards
10
-
Product Standard for EMC
10
-
Dismantling and Scrapping
10
-
Disposal of Old Electrical and Electronic Equipment
10
-
Glossary
11
-
Abbreviations and Symbols
11
-
Definitions
11
-
-
2 Mounting
13
-
Installation in a Cabinet
13
-
Cooling
13
-
Mechanical Specifications and Drawings
14
-
Mounting Schemes
17
-
-
3 Connections
19
-
Mains and Motor Connections
19
-
Busbar Distances on Emotron TSA Softatarter
23
-
Cable Covers
23
-
Board Layout and Connectors
24
-
Control Signal Connections
26
-
Wiring Examples
27
-
-
4 Application Guidelines
35
-
Softstarter Dimensioning According to AC-53B
35
-
Applications Rating
35
-
The Application Functions List
37
-
Special Conditions
40
-
Small Motor or Low Load
40
-
Ambient Temperature below 0°C (32°F)
40
-
Pump Control with Softstarter and AC Drive Together
40
-
Starting with Counter-Clockwise (Reverse) Rotating Loads
40
-
Running Motors Connected in Parallel
40
-
Running Motors Linked Together
40
-
Heat Dissipation in Cabinets
40
-
Insulation Test on Motor
40
-
Operation above 1,000 M (3280 Ft)
40
-
Earthing System
41
-
Earth Fault Relay
41
-
Other Control Voltage
41
-
-
5 Getting Started
43
-
Check List
43
-
Mains and Motor Connection
43
-
Connect the Mains Cables
43
-
Connect the Motor Cables
43
-
Connect the Control Supply Voltage
43
-
Default Toggle Loop
44
-
Remote I/O Operation
44
-
Control Panel Operation
45
-
-
6 Operation Via the Control Panel
47
-
Display
47
-
LED Indicators
48
-
Control Keys
48
-
Function Keys
49
-
Key Function
49
-
Jog Key Function
49
-
Toggle and Loc/Rem Key
50
-
Toggle Function
50
-
Loc/Rem Function
51
-
The Menu Structure
51
-
The Main Menu
52
-
-
7 Main Features
53
-
Setting Start, Stop and Run Functions
53
-
Start and Stop Control
53
-
Start and Stop Methods
53
-
Jog Functions
54
-
Start/Stop Signal Priority
54
-
Setting Motor Data
54
-
Process Information
54
-
Working with Parameter Sets
55
-
Selection of Parameter Sets
55
-
Configuration of Parameter Sets
56
-
Handling Motor Data in Parameter Sets
56
-
Using the Control Panel Memory
56
-
Applying Limitations, Alarms and Autoreset
59
-
Alarm Types and Actions
59
-
Alarm Settings
59
-
Alarm Indications
59
-
Load Monitor Function
60
-
Reset and Autoreset
64
-
Programmable I/O
65
-
Remote Control Functions
65
-
Default Settings of the Run/Stop/Reset Functions
65
-
Enable and Stop Functions
66
-
Level / Edge Operation after Reset
66
-
Logical Functions
67
-
Jog Speed at Start and /Or Stop
67
-
-
8 Functionality
71
-
Preferred View [100]
73
-
1St Line [110]
73
-
2Nd Line [120]
73
-
Main Setup [200]
73
-
Operation Setup [210]
73
-
Remote Signal Level/Edge [21A]
76
-
Motor Data [220]
77
-
Motor Protection [230]
80
-
Parameter Set Handling [240]
84
-
Autoreset [250]
87
-
Serial Communication [260]
90
-
Process [300]
93
-
View Process Value [310]
93
-
Process Settings [320]
93
-
Start Setting [330]
95
-
Stop Setting [340]
98
-
Jog [350]
101
-
Load Monitor and Process Protection [400]
102
-
Load Monitor [410]
102
-
Process Protection [420]
107
-
Mains Protection [430]
108
-
I/O [500]
110
-
Analogue Input [510]
110
-
Digital Inputs [520]
112
-
Analogue Output [530]
113
-
Relays [550]
116
-
Virtual I/Os [560]
119
-
Logical Functions and Timers [600]
120
-
Comparators [610]
120
-
Logic Outputs [620]
125
-
Timers [630]
128
-
SR Flip-Flops [640]
129
-
Counters [650]
131
-
Clock Logic [660]
132
-
Operation/Status [700]
133
-
Operation Values [710]
133
-
Status [720]
135
-
Stored Values [730]
138
-
Real Time Clock Settings [740]
138
-
View Trip Log [800]
139
-
Trip Message Log [810]
139
-
Trip Messages [820] — [890]
140
-
Reset Trip Log [8A0]
140
-
System Data [900]
140
-
TSA Data [920]
140
-
-
9 Serial Communication
143
-
Modbus RTU
143
-
Parameter Sets
143
-
Motor Data
144
-
Start and Stop Commands
144
-
Process Value
144
-
Description of the Eint Formats
145
-
-
10 Softstarter Theory
147
-
Background Theory
147
-
Reduced Voltage Starting
149
-
Other Starting Methods
151
-
Use of Softstarters with Torque Control
152
-
-
11 Troubleshooting, Diagnoses and Maintenance
153
-
Trip Conditions, Causes and Remedial Action
153
-
Technically Qualified Personnel
153
-
Opening the Softstarter
153
-
Maintenance
153
-
Troubleshooting List
154
-
-
12 Options
159
-
External Control Panel
159
-
Emosoftcom
159
-
I/O Board
159
-
Ptc/Pt100
159
-
Serial Communication and Fieldbus
159
-
-
13 Technical Data
161
-
General Electrical Specifications
164
-
Semi-Conductor Fuses
164
-
Environmental Conditions
165
-
Derating at High Temperature
165
-
Derating at High Altitude
166
-
Control Power- and I/O Signal Connectors
167
-
Index
169
-
-
Appendix 1: Menu List
171
-
Appendix 2: Trip Message Communication Data
201
-
Advertisement
Advertisement
Related Products
-
CG Emotron CDN Series
-
CG Emotron VFX Series
-
CG ELV
-
CG Emotron VS Series
-
CG CDN40-012-65
-
CG CDN40-016-65
-
CG CDN40-2P2-65
-
CG CDN40-3P8-65
-
CG CDN40-4P8-65
-
CG CDN40-7P0-65
CG Categories
DC Drives
Controller
Automobile Accessories
Automobile Electronics
Network Hardware
More CG Manuals