Модератор: vetal


 Добрый день!
Столкнулся с проблемой, как на видео. Что делать? Куда копать? В мануалах, вроде бы, указывается на то, что это ошибка памяти, т.е. нужно менять плату. Но, возможно, есть ещё проблемы, которые вызывают эту ошибку? Что можно проверить?
Заранее спасибо за ответы.
-

Kuzansky
- Осматривается
-

- Персональный альбом

![]()
![]() Goldwater » Ср дек 12, 2018 8:12 pm
Goldwater » Ср дек 12, 2018 8:12 pm
Kuzansky писал(а):Если бы вы внимательно прочитали моё первое сообщение, то заметили бы, что я перевёл «их мигания в человеческие слова». И, собственно, задал вопрос — может ли быть проблема вызвана чем-либо ещё, кроме памяти. На этот вопрос, вы, к сожалению, ответить так и не смогли.
Подробно для совсем малахольных.
1. Ролик на ютубе НЕ ваш. В связи с этим есть сильное сомнение в том, что индикация ТОЧНО совпадает с вашим случаем. Но вы НЕ желаете давать СВОЕ описание. В таком случае решайте проблему сами.
2. Ошибок, соответствующих индикации в видеоролике, у данного аппарата НЕТ. Можете убедиться, изучив сами сервис-мануал.
3. На какие ваши эро-фантазии тут еще осталось отвечать?
-

Goldwater
- Избран тонером
-

![]()
![]() Kuzansky » Чт дек 13, 2018 2:30 pm
Kuzansky » Чт дек 13, 2018 2:30 pm
Хочу дополнить описание проблемы и произошедшие изменения.
При включении принтера двигатель не крутится. После загрузки сразу вылетает в ошибку памяти (или ещё чего, в общем, как на видео). Без картриджа ситуация не меняется. На нажатие кнопок не реагирует. ПК аппарат определяет.
На плате форматера микросхема памяти (24c64wp) стояла неправильно. Поставил как надо, теперь ошибка памяти сменилась на ошибку бумаги. Двигатель по прежнему молчит. Может дело в прошивке или принтер заблокировался? Кто-нибудь сталкивался? Что посоветуете? Буду благодарен за помощь.
-
Kuzansky
- Осматривается
-
- Персональный альбом
![]()
![]() Kuzansky » Чт дек 13, 2018 7:56 pm
Kuzansky » Чт дек 13, 2018 7:56 pm
24с64 — не память, а EEPROM.
«Ошибки бумаги»(aka «paper error») — у этого аппарата НЕТ. Индикацию — в студию! Или не мешайте работать своими фантазиями.
Прошивку? Себе сначала поменяйте.
Надеюсь, что никаких политических или технических причин для того, чтобы не смотреть приложенные фото у тебя нет.
Ты сам себе враг. Хочешь работать — не заходи на форум.
Индикаторы моргают поочерёдно, сначала, как на первом фото, потом, как на втором.
- Вложения
-
 Просмотров: 3712")
-
-
Kuzansky
- Осматривается
-
- Персональный альбом
![]()
![]() ALIEN777 » Пт янв 11, 2019 11:23 am
ALIEN777 » Пт янв 11, 2019 11:23 am
Kuzansky писал(а):Хочу дополнить описание проблемы и произошедшие изменения.
На плате форматера микросхема памяти (24c64wp) стояла неправильно. Поставил как надо, теперь ошибка памяти сменилась на ошибку бумаги.
А как именно процесс поставки микросхемы происходил, перепаяли или что то другое?
-
ALIEN777
- Заправил чернильницу
-
- Персональный альбом
![]()
Вернуться в Принтеры, МФУ, факсы, копиры формата A4
Кто сейчас на форуме
Сейчас этот форум просматривают: Роман Андреев, Raziel, Иван Лоскутов и гости: 79
Server OS
Windows 2000
*
Windows XP
Windows XP x64, Server 2003, or
*
Server 2003 x64
Windows Vista, Vista x64
*
The additional driver for Windows XP x64 and Server 2003 x64 can be used on Windows XP Service Pack 2, Windows
2003 Service Pack 1, or later.
You can check the printer status from combinations and patterns of the error lights on the control
panel. For information on the location of the lights, see «Control panel» on page 22.
Note:
You can check the printer status and error easily on the computer by using EPSON Status Monitor. For
details about EPSON Status Monitor, for Windows see «Using EPSON Status Monitor» on page 114, for
Macintosh see «Using EPSON Status Monitor» on page 135.
The status of the lights are illustrated below.
light on
blink rapidly (every 0.3 seconds)
blink slowly (every 0.6 seconds)
blink very slowly (turn on for 0.6 seconds, off for 2.4 seconds)
Light off
Note:
How the lights change depends on an error type. Ignore this mark.
Client OS
Windows XP or 2000 clients
Windows XP or 2000 clients
Windows XP x64 clients
Windows XP or 2000 clients
Windows XP x64 clients
Windows Vista, XP, 2000 or Server
2003 clients
Windows Vista x64, XP x64 or Server
2003 x64 clients
Additional Driver
Intel Windows 2000
Intel Windows 2000 or XP
x64 Windows XP
x86 Windows 2000, Windows XP
and Windows Server 2003
x64 Windows XP and Windows
Server 2003
x86 Type 3 — User Mode
x64 Type 3 — User Mode
Troubleshooting
100
Надежные принтеры и МФУ Epson, как и любая иная техника, со временем может начать сбоить в работе. К счастью, печатающие устройства данного производителя оснащены системой самодиагностики, которая позволяет определить неисправность по специальному коду ошибки принтера Epson.
Код появляется в виде небольшого сообщения на дисплее печатающего аппарата либо во всплывающем окне персонального компьютера (при наличии активного соединения принтера с ПК). Также о появлении ошибки сигнализируют мигающие светодиоды на панели управления принтера (так же, как коды ошибки Canon). В этой статье мы расскажем Вам, какие бывают коды ошибок Epson, значение кода ошибки Epson, а также причины появления и варианты сброса ошибки Epson.
Определение ошибки Epson по горящим/мигающим индикаторам
Стоит начать с того, что не все многофункциональные печатающие устройства Epson имеют встроенный дисплей или активное соединение с ПК. Поэтому самый явный способ определения возникшей неисправности принтера – это горящие/мигающие индикаторы ярко-оранжевым (желтым, красным) цветом на панели управления принтера. Если Вы заметили нечто подобное, тогда Вам необходимо обратить внимание на то, какой светодиод сигнализирует об ошибке и как он это делает. Следующая таблица гарантированно поможет Вам определить причину неисправности принтера:
|
Индикация ошибки |
Причина появления |
Рекомендации по решению |
|
Горит диод питания (зеленым) и бумаги (оранжевым). |
|
Устраните замятие и проверьте ролик захвата бумаги. Если все в порядке установите бумагу или лоток для печати на дисках. После нажмите на кнопку «Бумага» и продолжайте печать. |
|
Горит диод питания (зеленым), а бумаги медленно мигает (оранжевым). |
|
Устраните замятие, либо посредством разборки принтера, найдите и изымите посторонний предмет (часто попадаю скрепки, скобы и прочие канцелярские принадлежности). Аккуратно вытащите лоток для CD/DVD-дисков. Для продолжения печати нажмите кнопку «Бумага». |
|
Горит диод питания (зеленым) и капли (оранжевым). |
|
Нужно купить картридж для принтера Epson и установить его на место неработающего картриджа. Можно перезаправить картридж, если он еще не исчерпал свой ресурс. Также проблема может быть в засыхании дюз печатающей головки, загрязнении контактов и перекосе картриджа. |
|
Горит диод питания (зеленым), а капли медленно мигает (оранжевым). |
|
Если при мигающем индикаторе капли принтер продолжает работать в нормальном режиме, значит все хорошо, нужно лишь дозаправить картридж или поменять его. В других случаях, придется искать проблему методом перебора. Для начала следует скачать драйвер принтера Epson и заново его установить на ПК. Если не поможет, то следует промыть всю систему печати и почистить контакты. Сбросить ошибку уровня чернила программным способом и надеяться, что принтер заработает. Самое последнее, что может помочь – это прошивка принтера Epson. |
|
Горит диод питания (зеленым), а капли и бумаги быстро мигают (оранжевым). |
|
Закройте все крышки, которые должны быть закрыты во время печати. Кроме того, переустановить все съемные лотки. Если проблема осталась, тогда несите принтер в ремонт. Скорее всего, у него критическая ошибка, связанная с работой датчиков или главной платы. |
|
Диоды капли и бумаги мигают быстро (оранжевым). |
|
Устраните замятие и посторонние предметы из принтера. Передвиньте каретку в крайнее левое положение, а после запаркуйте обратно. Отсоедините принтер от электросети и подождите не менее 30 минут. После подключите и посмотрите на реакцию устройства. Если это не помогло, тогда можно попробовать промыть систему печати или прошить плату управления принтера. |
|
Диоды капли и бумаги мигают медленно (оранжевым). |
|
Если Вы не являетесь мастером, тогда выход только один – обращение в сервисный центр по обслуживанию оргтехники. |
Обратите внимание: В таблице указаны лишь те проблемы, которые можно устранить в домашних условиях, не имея особого опыта в обслуживании печатающих устройств. На деле их может быть куда больше, при наличии одной и той же индикации. Поэтому, если стандартные способы не помогли сбросить ошибку принтера Epson, то обратитесь за помощью в сервисный центр.
Общие коды ошибок принтеров Epson
Ошибки из этого списка обычно отображаются в сообщении на дисплее принтера. Иногда такой код увидеть во всплывающем окне персонального компьютера, если печатающее устройство подключено к нему. В частности, речь идет о следующих кодах Epson:
|
Код ошибки |
Причина появления |
Рекомендации по решению |
|
E-01 – несерьезная ошибка в функционировании принтера. |
|
Отключите питание принтера на 10-15 минут. Включите и дождитесь выхода в готовность печатающего аппарата. Пока принтер отключен, не будет лишним проверить его на замятие и наличие посторонних предметов. Как вариант, переустановите драйвер принтера Epson и прочее сопутствующее ПО. |
|
E-02 – нарушения в работе сканера МФУ Epson. |
|
Если банальное отключение принтера от сети, а также переустановка драйверов не помогли исключить проблему, тогда следует обратиться в СЦ. В случае появления ошибки сканера Epson, при попытке сканирования по сети, проверьте соответствующие настройки. |
|
E-05 – ошибка подключения принтера по Wi-Fi. |
|
Самое простое решение сброса ошибки сети принтера Epson, это сменить канал шифрования данных в веб-интерфейсе роутера. Обычно, это WPA или WPA2. Еще не помешает убедиться в том, что роутер работает нормально. Как бы забавно это не звучало, но иногда следует настраивать подключение принтера к беспроводной сети вблизи с Wi-Fi-роутером. |
|
E-06 – блокировка принтера по MAC-адресу. |
|
Самое оптимальное решение, это открыть веб-интерфейс роутера и очистить фильтрацию. Также не будет лишним отключить фильтрацию по MAC-адресу. Кроме того, можно поискать МАС принтера в черном списке роутера и удалить его. Проверьте количество активных подключений к роутеру. Возможно, их слишком много. |
|
E-11 – заполнен счетчик абсорбера (памперса) принтера или переполнен сама абсорбирующая губка. |
|
При E-11, первое, что стоит попытаться сделать, это программным способом сбросить ошибку памперса принтера Epson. Однако если это уже делали ранее, то помимо сброса ошибки, нужно разобрать принтер и промыть всю систему печати, начиная с картриджей, заканчивая абсорбером принтера. Если это не помогло, тогда придется прошить принтер Epson. |
|
W-01 – замятие бумаги в принтере Epson. |
|
Нужно аккуратно устранить замятие или изъять посторонний предмет из принтера. Если не помогло, ищите оптопару, отвечающую за протяжку бумаги. Возможно, она загрязнена или вовсе «отвалилась». Кроме того, обратите внимание на ролики протяжки бумаги. Часто случается такое, что они не подхватывают бумагу из лотка или механический дефект подминает лист, что приводит к замятию. |
|
W-11 – срок эксплуатации абсорбера (памперса) принтера подходит к концу. |
|
Действия по устранению проблемы такие же, как и для ошибки E-11, только начинать лучше сразу с промывки памперса, помпы, парковки, капы, печатающей головки и прочих элементов системы печати принтера. |
|
W-12 – принтер не видит картридж. |
|
Вытащите картридж из принтера, протрите контакты и установите расходник обратно. Во время установки картриджа в принтер, убедитесь, чтобы расходник идеально встал на свое место. Проверьте установленные картриджи на соответствие цветам (иногда потребители случайно устанавливают картридж с желтыми чернилами, на место расходника с голубой краской). |
|
W-13 – в принтер установлены не оригинальные картриджи. |
|
Решение самое простое – нужно купить оригинальный картридж для принтера Epson. Либо использовать совместимые расходники от проверенных производителей. Иногда помогает использование самообнуляющих чипов. Также можно попытаться сбросить счетчик чернила, что должно привести к разблокировке картриджей принтера. |
Внимание: Если простыми способами не удается сбросить ошибку Epson, тогда можно попытаться перепрошить принтер. Тем не менее, прошивка принтера Epson – это достаточно сложный процесс, который при неправильном исполнении может полностью вывести из строя Ваше печатающее устройство. Поэтому мы не рекомендуем его применять на практике, особенно если у Вас нет опыта в этой сфере деятельности.
Коды ошибок Epson, возникающие при подключении принтера к Wi-Fi по WPS
|
Код ошибки |
Причина появления |
Рекомендации по решению |
|
E-1 – отсутствует соединение по локальной сети. |
|
Проверьте, включен ли источник связи, а также его работоспособность. Проверьте кабель подключения к роутеру. Возможно, он отсоединился или сломался. Также не будет лишним проверить настройки локальной сети. Сбросить их и все параметры установить заново. |
|
E-2, E-3, E-7 – ошибка параметров беспроводного подключения. |
|
Проверьте работу Wi-Fi-роутера или заново перенастройте подключение принтера для работы в локальной сети. |
|
E-5 – ошибка поддержки метода шифрования данных. |
|
Самый простой способ сброса ошибки E-5 – это в настройках роутера попробовать сменить способ шифрования данных. Установить можно один из следующих: WEP 64, WEP 128, WPA, WPA2, WPA PSK (Personal), WPA2 PSK (Personal). |
|
E-6 – MAC-адрес принтера заблокирован. |
|
Увеличьте количество подключаемых устройств к роутеру или уберите те, которые больше не требуются. Уберите фильтрацию по MAC-адресу, а также удалите принтер из списка заблокированных устройств. При подключении с использованием режима шифрования WEP убедитесь, что ключ и индекс соответствуют верным значениям. |
|
E-8 – принтер не подключен к сети. |
|
Нужно перепроверить параметры и настроить их правильным образом. Если проблема не была устранена, тогда следует проверить состояние роутера и принтера. |
|
E-9 – отсутствует подключение принтера к Интернету. |
|
Включить роутер, если он был отключен или дождаться, пока появится Интернет (если проблема в провайдере). |
|
E-10 – нет доступа к сети. |
|
Перенастройте подключение принтера к локальной сети. Особенно обратите внимание на подключенный протокол. Если установлен DHCP, то в настройках принтера выставите автоматическое получение ИП-адреса. |
|
E-11 – невозможно определить адрес шлюза. |
|
В режиме ручной настройки принтера нужно выбрать протокол TCP/IP. Включить устройство связи и проверить его на работоспособность. |
|
E-12 – недоступен сетевой адрес устройства. |
|
Проверьте правильность сетевых параметров и выполните их повторную настройку. Проверьте правильность подключения принтера к сети. |
|
E-13 – ошибка протокола сети. |
|
Если протокол TCP/IP на принтере настроен автоматически, а в сети стоят ручные настройки, то они будут отличаться, из-за чего и появится ошибка E-13 принтера Epson. |
|
I-22 – ошибка подключения принтера к Wi-Fi. |
|
Нужно проверить роутер и Интернет на работоспособность. Если все хорошо, тогда возможно проблема в подключении по WPS. Нужно выполнить ручное подключение к беспроводной сети. |
|
I-23 – невозможно подключиться к сети. |
|
Нужно попытаться переподключится. Если не помогло, отключите роутер на 10 минут и попытайтесь снова. В случае с отсутствием поддержки WPS, выполните подключение вручную. |
|
I-31 – не найдено программное обеспечение. |
|
Переустановите драйвер принтера Epson или установите все необходимое программное оборудование для печати по беспроводной сети. Проверьте работу роутера/ Интернета, а также правильность настроек сети. |
|
I-41 – печать невозможна (актуально только для печати через AirPrint с устройств под управлением системы iOS). |
|
Правильно настройте параметры печати в программе AirPrint. Переустановите AirPrint. |
Обратите внимание: Фактически все проблемы с подключением к беспроводной сети устраняются настройкой/перенастройкой Wi-Fi-модуля или параметров принтера.
Критические коды ошибок принтеров Epson
|
Код ошибки |
Расшифровка ошибки |
Причина появления |
|
01H, 0x01 |
Перегрузка позиционирования каретки принтера |
Проблема в неисправности мотора (перебрать, почистить, заменить), перегруженном приводе каретки (устранить замятие или посторонний предмет, смазать, заменить), отсутствии контакта в каком-либо узле (проверить шлейфы, почистить контакты), отсоединении крышек или лотков (проверить надежность крепления), а также сбои в работе форматера принтера (прошивка, замена). |
|
02H, 0x02 |
Ошибка скорости движения каретки принтера |
Проблема в энкодере (почистить, заменить), датчике каретки (почистить, заменить) или главной плате принтера (прошивка, замена). |
|
03H, 0x03 |
Ошибка обратного движения каретки |
Проблема в энкодере (почистить, заменить), датчике каретки (почистить, заменить), наличии посторонних предметов (устранить) или главной плате принтера (прошивка, замена). |
|
04H, 0x04 |
Движение каретки заблокировано |
Проблема в энкодере (почистить, заменить), датчике каретки (почистить, заменить), наличии посторонних предметов (устранить) или главной плате принтера (прошивка, замена). |
|
08H, 0x08 |
Нарушение корректности размещения каретки на обратном ходу |
Проблема в энкодере (почистить, заменить), датчике каретки (почистить, заменить), наличии посторонних предметов (устранить) или главной плате принтера (прошивка, замена). |
|
09H, 0x09 |
Нарушение движения каретки перед ее парковкой |
Проблема в энкодере (почистить, заменить), датчике каретки (почистить, заменить), наличии посторонних предметов (устранить) или главной плате принтера (прошивка, замена). |
|
0AH, 0xA |
Избыточная нагрузка позиционирования каретки |
Проблема в неисправности мотора (перебрать, почистить, заменить), перегруженном приводе каретки (устранить замятие или посторонний предмет, смазать, заменить), отсутствии контакта в каком-либо узле (проверить шлейфы, почистить контакты), а также сбои в работе форматера принтера (прошивка, замена). |
|
10H, 0x10 |
Начальное положение каретки сканера не определено |
Проблема с модулем сканирования (проверить крышки, стойки, шлейф), приводом сканера (разобрать, смазать, заменить) или форматером принтера (прошить, заменить). |
|
14H, 0x14 |
Ошибка сканирования |
Проблема в загруженности привода сканера (проверить, заменить), отсутствии смазки (почистить, смазать), шестеренках привода (заменить) или постороннем предмете (устранить). |
|
20H, 0x20 |
Проблема светодиода подсветки линейки сканера |
Проблема с модулем сканирования (проверить крышки, стойки, шлейф), стеклом сканера (почистить, устранить посторонний предмет) или форматером принтера (прошить, заменить). |
|
29H, 0x29 |
Ошибка подачи/протяжки бумаги |
Проблема в механизме протяжки бумаги (проверить, заменить), энкодере (прочистка, замена) или главной плате (прошить, заменить). |
|
40H, 0x40 |
Ошибка определения температуры транзистора |
Проблема в форматере принтера (прошить, перепаять, заменить). |
|
41H, 0x41 |
Ошибка, вызвана перегревом или замыканием печатающей головки принтера Epson, во время печати |
Проблема в печатающей головке (промыть, просушить, заменить), контактах (переподключить, заменить), СНПЧ/картриджах (заправить, прокачать чернила) или форматере принтера (заменить). |
|
42H, 0x42 |
Ошибка, вызвана перегревом или замыканием печатающей головки принтера Epson, после промывки |
Проблема в СНПЧ/картриджах (заправить, прокачать чернила), печатающей головке (заменить), контактах (заменить) или форматере принтера (заменить). |
|
43H, 0x43 |
Перегрев печатающей головки принтера Epson |
Проблема в СНПЧ/картриджах (промыть, заправить, прокачать), печатающей головке (промыть, заменить), контактах (заменить) или форматере принтера (прошить, заменить). |
|
50H, 0x50 |
Не определяется положение каретки |
Проблема может быть в направляющих (поправить, заменить), постороннем предмете (устранить), приводе каретки (ремонт, замена) или главной плате принтера (прошивка, замена). |
|
51H, 0x51 |
Каретка не может разблокироваться |
Проблема в направляющих (поправить, заменить), постороннем предмете (устранить), капе/парковке (почистить, заменить), контактах (почистить, заменить) или главной плате принтера (прошить, заменить). |
|
52H, 0x52 |
Каретка не может заблокироваться |
Проблема в направляющих (поправить, заменить), постороннем предмете (устранить), капе/парковке (почистить, заменить), контактах (почистить, заменить) или главной плате принтера (прошить, заменить). |
|
53H, 0x53; 54H, 0x54; 55H, 0x55 |
Фатальная ошибка работы сканера |
Проблема в блоке сканера (поиск и устранение дефекта, замена блока). |
|
56H, 0x56 |
Ошибка соединения контактов картриджей и принтера |
Проблема в контактной площадке (почистить, заменить), чипе картриджа (почистить, заменить), чипе принтера (почистить, заменить) или форматере (прошить, заменить). |
|
5BH, 05B |
Принтер не может автоматически определить причину возникновения ошибки замятия бумаги |
Может быть все что угодно, начиная от мелкого постороннего предмета, заканчивая сбоем в работе форматера. |
|
60H, 0x60 |
Слабый сигнал PW-датчика |
Проблема в датчике, определения ширины бумаги (почистить, заменить) или в форматере принтера (прошить, заменить). |
|
61H, 0x61 |
Чрезмерный сигнал PW-датчика |
Проблема в датчике (заменить), питании (проверить) или главной плате (прошить, заменить). |
|
62H, 0x62 |
Ошибка датчика бумаги |
Проблема в оптопаре/датчике (почистить, заменить), механизме протяжки бумаги (найти дефект, почистить, заменить), наличии замятия (устранить) или рычажке датчика бумаги (заменить). |
|
63H, 0x63 |
Выключение принтера из-за невозможности определить чип картриджа |
Проблема в чипе картриджа (почистить, заменить чип, купить оригинальный картридж), питании (проверить), постороннем предмете (устранить) или форматере (прошить, заменить). |
|
64H, 0x64 |
Проблема автоматического сбрасывания ошибки замятия бумаги |
Проблема в замятии или наличии постороннего предмета (устранить), датчике бумаги (почистить, заменить), механизме протяжки бумаги (прочистить, устранить дефект, заменить), главной плате (перепрошить, заменить). |
|
69H, 0x69 |
Ошибка контакта подключения узла обслуживания системы печати |
Проблема в контакте (очистить, заменить), наличии посторонних предметов (выявить и убрать), чипе картриджей (почистить, поправить картриджи, заменить чип или картридж) или форматере (прошить, заменить). |
|
70H, 0x70 |
Ошибка ведущего вала мотора |
Проблема в двигателе (переборка, замена деталей или изделия в целом), датчике (чистка, замена) или шлейфе (переподключение, чистка, замена). |
|
71H, 0x71 |
Ошибка позиционирования вала мотора |
Проблема в двигателе (переборка, замена деталей или изделия в целом), датчике (чистка, замена) или шлейфе (переподключение, чистка, замена). |
|
72H, 0x72 |
Ошибка работы мотора принтера |
Проблема в двигателе (переборка, замена деталей или изделия в целом), датчике (чистка, замена) или шлейфе (переподключение, чистка, замена). |
|
80H, 0x80 |
Ошибка предохранителя F1 материнской платы |
Проблема в печатающей головке (замена) или главной плате (прошивка, замена). |
|
81H, 0x81; 83H, 0x83; 84H, 0x84; 87H, 0x87; 88H, 0x88; 89H, 0x89 |
Ошибка сенсора PIS |
Проблема в рефлекторе под кареткой (чистка, заклейка отверстий, замена), сенсоре (чистка, замена) или материнской плате (прошивка, замена). |
|
82H, 0x82 |
Ошибка рефлектора каретки |
Проблема в рефлекторе под кареткой (чистка, заклейка отверстий, замена), сенсоре (чистка, замена) или материнской плате (прошивка, замена). |
|
A0H, 0xA0 |
Ошибка счетчика абсорбера (памперса) принтера Epson |
Проблема в заполнении памперса отработкой (разобрать принтер, почистить, заменить губку) или в счетчике/датчике отработки (сбросить счетчик памперса принтера, заменить). |
|
EAH, 0xEA |
Перегрузка печатающей головки во время ее позиционирования |
Проблема в посторонних предметах (устранить), контактах ПГ (почистить, заменить), микросхеме ПГ (заменить головку) или материнской плате (прошить, заменить). |
|
97H, 0x97 |
Увеличенное напряжение на чипе печатающей головки |
Проблема в печатающей головке (промыть, заменить), материнской плате (прошить, заменить) или шлейфе (прочистить контакты, заменить). |
|
D1H, 0xD1 |
Ошибка запарковывания каретки |
Проблема в наличии посторонних предметов (убрать), парковке и капе (почистить, установить капу на место, заменить). |
|
D2H, 0xD2 |
Несоответствие времени движения каретки |
Проблема в энкодере (почистить, заменить), датчике каретки (почистить, заменить), приводе каретки (осмотреть, заменить) или главной плате принтера (прошивка, замена). |
|
D3H, 0xD3 |
Несоответствие времени подачи бумаги |
Проблема в механизме протяжки (найти и исправить дефект, заменить) или форматере принтера (прошить, заменить). |
|
D4H, 0xD4 |
Несоответствие времени протяжки бумаги |
Проблема в механизме протяжки (найти и исправить дефект, заменить), шлейфе (переподключить, заменить) или форматере принтера (прошить, заменить). |
|
F1H, 0xF1 |
Избыточная нагрузка при подаче бумаги |
Проблема в механизме подачи бумаги (проверить, заменить), энкодере (прочистка, замена) или главной плате (прошить, заменить). |
|
F2H, 0xF2 |
Высокая скорость протяжки бумаги |
Проблема в механизме протяжки бумаги (проверить, заменить), энкодере (прочистка, замена) или главной плате (прошить, заменить). |
|
F3H, 0xF3 |
Ошибка датчика обратного хода податчика бумаги |
Проблема в механизме подачи бумаги (проверить, заменить), энкодере (прочистка, замена), шлейфе (подсоединить, заменить) или главной плате (прошить, заменить). |
|
F4H, 0xF4 |
Блокировка податчика бумаги |
Проблема в механизме подачи бумаги (проверить, заменить), энкодере (прочистка, замена) или главной плате (прошить, заменить). |
|
F8H, 0xF8 |
Ошибка обратного хода податчика бумаги |
Проблема в механизме подачи бумаги (проверить, заменить), энкодере (прочистка, замена), шлейфе (подсоединить, заменить) или главной плате (прошить, заменить). |
|
F9H, 0xF9 |
Высокая скорость подачи бумаги |
Проблема в механизме протяжки бумаги (проверить, заменить), энкодере (прочистка, замена) или главной плате (прошить, заменить). |
|
FAH, 0xFA |
Избыточная нагрузка при подаче бумаги |
Проблема в механизме протяжки бумаги (проверить, заменить), энкодере (прочистка, замена) или главной плате (прошить, заменить). |
|
FCH, 0xFC |
Ошибка позиционирования податчика бумаги |
Проблема в механизме протяжки бумаги (проверить, заменить), энкодере (прочистка, замена) или главной плате (прошить, заменить). |
Внимание: Фактически все ошибки относятся к категории трудно устранимых. Поэтому, если не имеете опыта в сервисном обслуживании печатающего устройства, не рискуйте, лучше сразу обратитесь к специалисту. После проведения диагностики, он сможет определить, возможно ли починить принтер или лучше сдать его на утилизацию.
Альтернативные варианты обозначения некоторых кодов ошибок Epson
|
Код ошибки |
Расшифровка ошибки |
Причина появления |
|
000031 |
Ошибка позиционирования каретки |
Проблема в неисправности мотора (перебрать, почистить, заменить), перегруженном приводе каретки (устранить замятие или посторонний предмет, смазать, заменить), отсутствии контакта в каком-либо узле (проверить шлейфы, почистить контакты), отсоединении крышек или лотков (проверить надежность крепления), а также сбои в работе форматера принтера (прошивка, замена). |
|
000033 |
Ошибка замятия бумаги |
Проблема может быть во многом. Первое, на что стоит обратить внимание, это на наличие реального замятия или постороннего предмета (устранить). Если не помогло, переходим к разборке принтера и выявления поломки. Смотрим податчик и механизм протяжки бумаги. Если все хорошо ищем проблему в каретке или форматере принтера. |
|
000041 |
Ошибка подачи/протяжки бумаги |
Проблема в механизме протяжки/подачи бумаги (проверить, заменить), энкодере (прочистка, замена) или главной плате (прошить, заменить). |
|
033001 |
Ошибка печатающей головки (предохранителя) |
Проблема в печатающей головке (промыть, заменить), контактах (почистить, заменить) или форматере (прошить, заменить). |
|
033007 |
Ошибка считывания чипа картриджа |
Проблема в чипе картриджа или принтера (почистить, заменить чип или картридж) или главной плате (прошить, заменить). |
|
033503 |
Ошибка счетчика уровня чернила |
Проблема в датчике считывания количества отпечатков (протереть, заменить), картриджах (установлен неоригинальный картридж или перезаправленный) или материнской плате принтера (прошить, заменить). Ошибку уровня чернила можно сбросить программным способом. |
Обратите внимание: Список не полный. Здесь представлены лишь те коды ошибок, которые часто встречаются на принтерах Epson. Если Вы не нашли нужный код в списке, то можете оставить свой комментарий внизу этой статьи. Наши эксперты в самое краткое время обработают информацию и постараются решить Вашу проблему.

Руководство пользователя
Индикаторы ошибок
Индикаторы ошибок
Сообщения об ошибках на панели управления
Этот раздел описывает значение сообщений, появляющихся на ЖК-дисплее.
Сообщения об ошибках Решения
Замятие бумаги
Удалите застрявшую бумагу.
Нажмите кнопку OK. Если ошибка не устранена, удали-
& «Замятие бумаги» на стр. 92
те бумагу вручную.
Замялась бумага в ADF. Удалите замятую бумагу.
Ошибка связи. Убедитесь в том, что кабель подклю-
Убедитесь, что компьютер подключен правильно. Если сооб-
чен, и попытайтесь снова.
щение об ошибке по-прежнему появляется, убедитесь, что
на компьютере установлено ПО для сканирования и что па-
раметры ПО верные.
Ошибка печати
Выключите, а затем снова включите устройство. Убедитесь,
Застревание бумаги. Откройте сканер и извлеките бу-
что в устройстве больше нет застрявшей бумаги. Если сооб—
магу, затем выключите принтер. См. документацию.
щение по-прежнему появляется, обратитесь в службу под-
держки пользователей Epson.
Ошибка ADF.
Удалите из ADF все объекты или документы. Выключи-
те питание. См. документацию.
Ошибка печати
См. документацию и при необходимости обратитесь в
сервис-центр.
Ошибка сканера
Выключите, а затем снова включите устройство. Если сообще-
См. документацию и при необходимости обратитесь в
ние по-прежнему появляется, обратитесь в службу поддерж—
сервис-центр.
ки пользователей Epson.
Срок службы впитывающей чернила прокладки прин-
Нажмите кнопку OK для возобновления печати. Сообщение
тера завершается. Обратитесь в службу технической
будет отображаться до тех пор, пока впитывающая чернила
поддержки Epson.
прокладка не будет заменена.
Обратитесь в поддержку пользователей Epson для замены
впитывающей чернила прокладки до истечения ее срока
службы. Когда впитывающие чернила прокладки будет запол-
нены, устройство прекратит печать, и потребуется сервис-
ное обслуживание Epson, чтобы ее продолжить.
Срок службы впитывающей чернила прокладки прин-
Свяжитесь со службой поддержки Epson для замены впиты-
тера истек. Обратитесь в службу технической под-
вающей чернила прокладки.
держки Epson.
Recovery Mode Обновление встроенного ПО не удалось. Необходимо повто-
рить обновление встроенного ПО. Подготовьте USB-кабель и
посетите региональный web-сайт Epson, где вы найдете даль-
нейшие инструкции.
89
В работе принтеров и МФУ Epson иногда возникают ошибки, приводящие к ошибкам в печати. Некоторые сбои могут быть устранены путем сброса настроек. Однако под «сбросом принтера» подразумевается не только установка заводских значений программной конфигурации, но и обнуление картриджей и памперса. Рассмотрим, зачем и как это делается.
Все современные принтеры и МФУ семейства Epason являются технически сложными печатающими машинами. Устройства имеют множество функциональных возможностей, в числе которых и функция самодиагностики. При возникновении каких-либо неисправностей встроенное программное обеспечение самостоятельно обнаруживает их и сообщает пользователю в виде сообщений на LCD-экране и/или путем включения индикаторов на лицевой панели. Дальнейшая часть статьи будет посвящена причинам мигания светодиодных лампочек, изображенных в виде капельки или молнии.
Почему на принтере мигает красная лампочка
Если на принтере начинает гореть красная лампочка, это может быть связано с различными проблемами в работе устройства. Чтобы разобраться и выяснить точную причину, понадобится обследовать его. Кнопка горит как от банального отсутствия бумаги, так и от более серьезных неполадок, требующих разборки. Поэтому при самостоятельном поиске поломок потребуется обращать внимание на различные детали.
- 1 Назначение индикаторов на принтере
- 2 Алгоритм поиска и устранение проблемы
- 3 Горит лампочка на EPSON3.1 Светодиод мигает «капля»3.2 Постоянное горение светодиода3.3 Мигает светодиод со значком молния
- 3.1 Светодиод мигает «капля»
- 3.2 Постоянное горение светодиода
- 3.3 Мигает светодиод со значком молния
- 4 Решение для принтеров Samsung
- 5 Что делать с принтером Brother
- 6 Заключение
Мигает индикатор «капелька»
Данный индикатор в принтерах Epson показывает состояние картриджей. В зависимости от конкретной модели устройства, непрерывное горение или мигание индикатора «капелька» одно из двух:
- Мигание — в одном из картриджей заканчиваются чернила;
- Непрерывное горение — чернильницы пусты либо имеют место их аппаратные/программные неисправности.
Рассмотрим оба состояния индикатора.
Мигание
При мигании индикатора «капелька» достаточно заправить картридж чернилами или просто заменить его (если есть такая возможность). Если после дозаправки лампочка продолжает мигать, возможно, принтер «не понял», что пользователь залил чернила. Первым делом нужно попробовать перезагрузить устройство путем его выключения и последующего включения через 15-20 секунд.
Операционная система принтера должна будет произвести автоматическую диагностику состояния картриджей, проверив и уровень залитых в них чернил. Если этого не произошло, и лампочка продолжает мигать, можно попробовать запустить данную функцию вручную с компьютера. Делается это следующим образом:
- Сначала нужно запустить на компьютере драйвер принтера. Сделать это можно прямо из той программы, откуда осуществляется печать (например, из Microsoft Word). Здесь достаточно нажать комбинацию клавиш «Ctrl+P» (окно программы должно быть в фокусе), а затем нажать на кнопку «Свойства», которая расположена напротив названия (производитель и модель) принтера.
- Во вновь открывшемся окне отобразятся несколько вкладок. Нужно найти среди них — «Maintenance»/»Сервис» и перейти в нее.
- Утилита автоматически проверит уровень чернил в принтере, а затем отобразит информацию в виде изображений с картриджами. Если все чернильницы отобразятся заполненными — задача выполнена, можно продолжить печать.

Однако и это не всегда помогает. Если в окне драйвера картриджи отображаются пустыми и индикатор «капелька» продолжает мигать, остается только вручную сбросить счетчик уровня чернил. Таким образом, принтер «будет считать», что в него были помещены новые картриджи. Для сброса счетчика можно воспользоваться следующим способом:
- Сразу после запуска программа автоматически найдет все подключенные к компьютеру принтеры и отобразит их в виде значка с названием модели оборудования. Здесь достаточно выбрать (выделить кликом мыши) нужный принтер.
- В верхней правой части программы нужно найти кнопку «Сброс уровня чернил» и кликнуть по ней. На экран будет выведено диалоговое окно, в котором следует нажать «ОК».
- Уровень чернил будет сброшен. Остается только перезагрузить принтер, а затем проверить состояние картриджей в окне драйвера вышеупомянутым способом.
Если и после этого индикатор продолжит мигать либо будет гореть беспрерывно, переходим к следующей части статьи.
Непрерывное горение
Подобное состояние индикатора может означать одно из двух:
- Картридж установлен неправильно либо имеет аппаратно-технические неисправности.
- Вновь установленные картриджи не поддерживаются конкретной моделью принтера либо они не являются оригинальным продуктом Epson.
При неправильной установке чернильниц их достаточно извлечь из принтера, а затем установить обратно до щелчка — он будет означать, что картридж зафиксирован на месте. Также следует проследить, чтобы в отсеке для установки чернильниц не было никаких посторонних предметов. После этого с принтером можно проделать все, что было сказано в предыдущей главе.

Если же картриджи имеют аппаратные неисправности, то их следует заменить. Ремонтом этих устройств не занимается большинство (если не все) сервисных центров, да и стоят они недорого. Единственное, что здесь можно попробовать — попытаться прочистить чернильницы в том месте, где расположены сопла. Если сопла забиты высохшей краской, они не смогут нормально функционировать, что также приводит к миганию или горению индикатора «капелька». Прочистка производится следующим образом:
- На дно неглубокой тары уложить несколько слоев салфеток, марли, ватных дисков или другого материала.
- Налить немного (чуть выше уложенного на дно тары материала) воды, а лучше — специальной жидкости для очистки чернильниц.
- Поставить картридж на дно тары соплами вниз.
- Подождать несколько часов (можно и сутки, если пары часов было недостаточно).
- Протереть сопла сухой салфеткой, ватой и т.д.
- Установить в принтер и пробовать печатать.
Если прочистка не дала никакого эффекта, останется только заменить картриджи.
Сброс настроек
Принтеры или МФУ состоят не только из простых электромеханических компонентов, но и компьютеризированных модулей. В принтерах и МФУ также присутствует управляющая (материнская) плата со встроенным микропроцессором, запоминающие устройства — оперативная и постоянная память, интерфейсы для обмена данными между внешними устройствами (USB, LAN порты, Wi-Fi-адаптеры и т. Разумеется, управление всем этим оборудованием осуществляется при помощи бортовой операционной системой (прошивкой).
Как и в случае с любым компьютером, принтер позволяет изменять настройки некоторых из своих функциональных модулей. Устройство также может хранить всевозможные пользовательские и системные данные, вести отчеты и так далее.

Но в то же самое время современные принтеры и МФУ (от любого производителя) имеют один недостаток, который присутствует у всей цифровой техники — вероятность прекращения нормального функционирования по вине программных сбоев. Последние могут возникать по различным причинам: переполнение памяти, непредвиденные логические ошибки, кратковременный сбой и так далее. Для устранения многих программных неполадок помогает специальная функция, запуск которой позволяет очистить всю накопленную принтером информацию и вернуть его настройки к заводским значениям.
Алгоритм поиска и устранение проблемы
Возможные причины мигания индикатора «предупреждение» весьма разнообразны. Но все же можно искать неполадки в определенной последовательности действий. Алгоритм поиска и решения проблем следующий.
- Первоначально необходимо проверить наличие листов и картриджа, а при их отсутствии – вложить листы или вставить до щелчка новый картридж.
- Если листы присутствовали, то следует проверить механизм их подачи и при наличии застрявшей бумаги – достать ее, предварительно вытащив картридж.
- Когда с бумагой все в порядке, лучше сразу проверить подключение принтера к ПК, если оно отсутствует – соединить устройства usb-шнуром.
- Если это не помогает, и картридж установлен, то следует проверить правильность его вставки, а также плотность закрытия крышки. Для этого достают картридж из принтера и вставляют заново до щелчка.
- Во время манипуляций с бумагой и картриджем требуется обратить внимание на наличие остатков упаковочного материала: если такой присутствует – удалить его.
- После проделанных действий в большинстве случаев мигание пропадает, но если оно осталось, то возможно проблема кроется в датчиках контроля бумаги и закрытия крышки, программном сбое. Чтобы решить ее, потребуется перезагрузка устройства, а в крайнем случае – замена его элементов.
Может наблюдаться такое состояние печатающей техники, когда одновременно светятся или мигают два индикатора — красный и зеленый. Действуют в этих случаях так.

- Когда «предупреждение» и «готовность» регулярно включаются-выключаются, то это свидетельствует об инициализации устройства, либо отмене очереди печати.
- Если красный мигает, а зеленый постоянно горит, при этом принтер не работает, то это показывает, что бумажные листы застряли, заклинил механизм подачи. Решение проблемы – извлечение застрявшей бумаги.
Когда после проведения всех предложенных действий принтер все равно не печатает, и сигнализируют его индикаторы, тогда можно попробовать напечатать отчет. Это делают следующим способом: нажимают большую кнопку на принтере и в течение нескольких секунд удерживают ее. Появившаяся распечатка может указать на отсутствие тонера либо необходимость «перепрошивки» устройства. Тогда краску следует добавить, или сбросить счетчик, воспользовавшись специальной программой.
Если проблему не удалось устранить самостоятельно, то лучше обратиться в сервисный центр за помощью специалистов или вызвать мастера на дом.
Ниже рассмотрим, почему горит красная лампочка на примере принтеров популярных брендов, и как это устранить.
Что делать с принтером Brother
Причина мигания красного светодиода на принтере Brother аналогична Samsung – девайс вынуждает купить новый картридж, но дорогостоящей покупки можно избежать, если сбросить счетчик и заново заправить картридж.
Для сброса требуется следующее:
- включите принтер;
- достаньте картридж и отделите фотобарабан;
- уберите листы из лотка для бумаги;
- закройте крышку принтера удерживая рычаг на фотобарабане;
- после включения двигателя рычаг необходимо отпустить на несколько секунд и вновь нажать;
- рычаг следует оставлять нажатым до окончания работы двигателя;
- после этого картридж и фотобарабан соединяются друг с другом и устанавливаются на место.

Рычаг для сброса счетчика
Чтобы сбросить счетчик фотобарабана, необходимо сделать следующее:
- на дисплее принтера открываем «меню»;
- среди доступных действий выбираем «сброс фотобарабана»;
- 5 секунд жмем на кнопку «ОК»;
- жмем «вверх»;
- далее вновь входим в «меню»;
- выбираем «информация об устройстве»;
- «установки пользователя»;
- «ОК» и «СТАРТ».
После этого красный светодиод перестанет мигать.
Если зеленый и красный светодиод мигают попеременно или вместе, то это сигнал об одном из состояний устройства. Чтобы понять, что это значит, достаточно обратиться к инструкции, где разъяснены все возможные комбинации.
Индикатор «Капля»
Один индикатор может указывать на несколько проблем. Примером может служить индикатор «Drip» на панелях управления принтеров Epson. Его активация указывает на ненормальное состояние картриджа, о чем свидетельствует мигающий или постоянный индикатор.
Если на мониторе помимо мигающего индикатора появляется уведомление об ошибке, его можно устранить, выключив монитор состояния принтера.
Мигание «Blink» не указывает на серьезную неисправность. Если оборудование работает, сигнал тревоги информирует пользователя о том, что картриджи пусты и печать без них невозможна. Однако мигание может указывать на более серьезную неисправность самого оборудования или программного обеспечения.

Быстрое решение
Обычно проблема решается заменой картриджей. После установки новых оригинальных картриджей принтер продолжает работать в обычном режиме без дополнительных действий. Неисправности объясняются неисправными самозаправляющимися картриджами.
Если не помогло
Когда обновление картриджей не удается, причина кроется в самом оборудовании. Тест начинается с перезагрузки. Принтер выключается и перезапускается через 15-20 секунд. При запуске операционная система сканирует состояние и заправку картриджей.
Проверка программой драйвера
Если результат отрицательный, функция запускается вручную с компьютера:
- На компьютере активируется соответствующий драйвер. Для этого используется программное обеспечение, поддерживаемое принтером (Microsoft Word и другие). Сфокусировав окно программы, нажмите «Ctrl+P», а затем щелкните окно «Свойства», которое открывается напротив обозначения плохого принтера.
- В открывшемся окне есть несколько вкладок, из которых выбирается раздел «Обслуживание»/»Сервис».
- При входе в выбранную папку активируется элемент «EPSON Status Monitor 3» (он расположен в верхней части списка).

После того как инструмент автоматически проверит уровень чернил, информация отобразится в виде картриджей. Если они отображаются как полные, принтер готов к печати.
Сброс уровня чернил
Следующим шагом в устранении мигающего «пятна» является ручной сброс показаний измерителя уровня чернил. После этой манипуляции датчики принтера в любом случае укажут, что устройство оснащено новыми картриджами. Процедура выполняется следующим образом:
- На компьютер устанавливается бесплатное программное обеспечение ‘Resetters’. Хотя представители Epson не одобряют такой подход, приложение абсолютно безопасно, эффективно и было неоднократно протестировано.
- Программа автоматически определяет подключенные к компьютеру печатающие устройства и сообщает пользователю их модели.
- После выбора неисправного устройства курсор будет перемещен в правый верхний угол, где расположено окно «Сброс уровня чернил». Когда появится запрос, нажмите «OK».

Это завершает процесс перезапуска принтера, после чего следует проверка состояния картриджей, как описано выше.
Постоянно горит капля
Такое состояние светодиода может указывать на одно из двух условий:
- Картридж установлен неправильно или произошла аппаратная ошибка.
- Вновь установленные картриджи не поддерживаются моделью принтера или не являются подлинной продукцией Epson.
Если картриджи установлены неправильно, просто выньте их из принтера, а затем вставьте обратно, пока не услышите щелчок, это означает, что картридж зафиксирован на месте. Также убедитесь, что в камере чернильного картриджа нет посторонних предметов. После этого с принтером можно обращаться, как описано в предыдущем разделе.
Если картриджи имеют аппаратный дефект, их следует заменить. Большинство (если не все) сервисных центров не ремонтируют эти устройства, а стоят они недешево. Единственное, что вы можете попробовать здесь, это попытаться прочистить чернильницы, где расположены сопла. Если сопла забиты засохшими чернилами, они не будут функционировать должным образом, что также приводит к миганию или загоранию индикатора «капля». Очистка производится следующим образом:
- Положите несколько слоев ткани, марли, ватных дисков или другого материала на дно неглубокой емкости.
- Налейте немного (чуть выше материала на дне емкости) воды, а еще лучше — специального средства для чистки чернильниц.
- Поместите картридж на дно контейнера соплами вниз.
- Подождите несколько часов (24 часа, если нескольких часов недостаточно).
- Протрите форсунки сухой тканью, ватой и т.д.
- Поместите в принтер и попробуйте напечатать.
Если очистка не дала никакого эффекта, остается только заменить картриджи.
Мигает светодиод со значком молния
Такой светодиод есть только у мобильных принтеров EPSON, т. у принтеров, которые могут работать от аккумулятора, а не только напрямую от сети. Светодиод не всегда присутствует на панели управления и может отображаться на экране принтера. Таким образом, его индикация является сигналом о том, что происходит зарядка. Он может реагировать не только на подключение к розетке, но и к USB-порту компьютера.

Мобильный принтер Epson
Однако если индикатор мигает сам по себе, причина заключается либо в сбое программного обеспечения (принтер вышел из строя), либо в неисправности батареи. В первом случае просто перезагрузите устройство, попробуйте разрядить аккумулятор или извлеките и замените аккумулятор. Во втором случае вам придется обратиться в сервисный центр.
Устранение причин
Проблемы с переполнением чернилами напрямую связаны с количеством раз очистки печатающей головки. Производитель устанавливает максимальное количество промывок в программном счетчике промывок, после превышения которого принтер перестает работать. Необходимо заменить впитывающий картридж, который находится в специальном контейнере.

Для замены впитывающей прокладки необходимо разобрать принтер.
В зависимости от марки и модели принтера поддон для сбора отработанных чернил имеет разную емкость, поэтому количество допустимых чисток головки может быть разным. Многие пользователи предпочитают самостоятельно выполнять промывку или замену переполненных «памперсов» при возгорании капли чернил в принтере epson 210 или другом принтере.
При использовании системы непрерывной подачи чернил (СНПЧ) переполнение происходит гораздо быстрее.
Иногда используется программный метод сброса счетчика или метод выбора определенных комбинаций клавиш управления. Это устранит горение значка капли, но не устранит проблему переполнения. Лучшим вариантом восстановления принтера (принтеров) будет замена картриджей-поглотителей в сервисном центре.

Сменный поглотитель чернил
Проблемы с чернильными картриджами могут возникать по ряду причин. Если в чипе обнаружено недостаточное количество чернил, принтер временно отключится. Работу можно продолжить, заправив чернильный картридж, а затем сбросив уровень чернил в отдельном картридже или во всем принтере. Несоблюдение этого требования может привести к повреждению печатающих головок. На принтерах Epson сброс можно выполнить с помощью дополнительного программного обеспечения или с помощью опции ID Code Replacement.

Другая причина, по которой постоянно горит значок капли, заключается в том, что вновь установленный картридж не соответствует оригинальным моделям Epson. Если установлены оригинальные модели картриджей Epson, может возникнуть ситуация, когда принтер не видит установленное оборудование.

Шарик по-прежнему светится. Если принтер не обнаруживает все установленные картриджи, проблема, скорее всего, заключается в самом принтере. Если он просто не видит вновь установленное оборудование, проблема заключается в установленном картридже.
Назначение индикаторов на принтере
Принтер – это устройство, предназначенное для распечатывания информации с электронных носителей на бумаге. Световые индикаторы разных цветов — зеленого («готовность») и красного («предупреждение») — обязательно присутствуют на данной аппаратуре. Они предназначены для сообщения о состоянии работоспособности.

На изменение состояния техники индикаторы отвечают по-разному: светятся периодически или постоянно, а иногда вообще находятся в выключенном состоянии.
Если красная кнопка мигает на лазерных принтерах Epson, HP, Samsung, Xerox, то причины этого могут быть следующие:


- остался упаковочный материал на деталях устройства;
- не полностью прижата крышка, закрывающая доступ к картриджу;
- неправильная работа датчиков контроля бумаги, закрытия крышки корпуса;
- отсутствует подключение либо связь с персональным компьютером или ноутбуком, другим устройством, с которого распечатываются данные;
- программный сбой;
- мало тонера или он отсутствует вообще.

Из приведенного перечня наиболее распространенными проблемами являются замятие или отсутствие бумаги, неполадки с картриджем.
Горит лампочка на EPSON
На принтере EPSON светодиод с символом «капля» сигнализирует о работе картриджей. У него есть два состояния, которые расскажут о разных проблемах.
- светодиод мигает – один из картриджей скоро закончится;
- непрерывно светится – либо чернильница пуста, либо есть программная/аппаратная неисправность.
Что делать в обеих ситуациях, рассказано ниже.

Светодиод в форме капли на Epson горит красным
Светодиод мигает «капля»
Если «капля» начинает мигать, то один из картриджей заканчивается. Если есть возможность, то его следует заправить, если такая функция не предусмотрена, то картридж стоит поменять. Если это не помогло, то, вероятно, девайс не понял, что чернильница была заправлена. В таком случае его следует перезагрузить – для этого достаточно кратковременного выключения устройства.
Если после этого индикатор все еще продолжает мигать, то стоит сделать следующее.
- На ПК необходимо запустить службу, которая отвечает за работу принтера. Если печать осуществляется из Microsoft World, то прямо в программе можно нажать комбинацию «ctrl+P»и в появившемся окне напротив названия принтера нужно нажать на «свойства».
- Теперь необходимо найти вкладку «Сервис».
- Следующий шаг – поиск кнопки «EPSON Status Monitor 3».
- После нажатия на кнопку принтер автоматически проверит уровень заправки чернил, и если их достаточно, то выдаст, что можно продолжить работу, а светодиод перестанет мигать.

Проверка уровня чернил в EPSON Status Monitor
Если же автоматическая проверка не помогла, но пользователь уверен, что все картриджи заправлены, то придется вручную сбросить счетчик, который отображает уровень наполненности чернильниц. Чтобы это сделать, потребуется выполнить следующее.
- Установить на ПК утилиту «Resetters», разработанную группой энтузиастов специально для техники EPSON. Так как программа неофициальная, то в случае некорректной работы после ее использования компания не несет ответственность, но, судя по многочисленным отзывам, проблем не возникает.
- После запуска утилиты в ее основном окне появятся все подключенные принтеры. Нужно выбрать тот, с которым есть проблема.
- После выбора принтера следует нажать на кнопку «сброс чернил» и подтвердить действие в диалоговом окне.
- Показатели сбросятся, теперь следует перезагрузить устройство и убедиться, что светодиод перестал мигать.
Постоянное горение светодиода
Если светодиод горит постоянно, то вариантов сбоя может быть два:
- картридж установлен неправильно или неисправен;
- картриджи неоригинальные или не подходят к данной модели.
Если картриджи установлены неверно, то достаточно их снять и заново поставить – при корректной установке раздастся щелчок. Также стоит убедиться, что в каретку не попали посторонние предметы, которые могут препятствовать правильному положению картриджа.

Картриджи следует вставлять до щелчка
Если это не помогло, и проблема в неисправных чернильницах, то их следует поменять. Порой причина мигания светодиода в том, что сопла засорились. В такой ситуации картридж извлекается и помещается соплами вниз в емкость с залитой в нее водой, а лучше специальным средством для чистки. Через несколько часов картридж следует вытереть и поставить на место.
Подобный индикатор есть только у мобильных принтеров компании EPSON, то есть тех, которые могут работать от аккумулятора, а не только напрямую от сети. Светодиод не всегда есть на панели управления и может отображаться на экране принтера. Соответственно, его индикация – это сигнал о том, что происходит зарядка. Он может отреагировать не только на подключение к розетке, но и к USB разъему ПК.
Если же индикатор мигает сам по себе, то причина либо в сбое ПО (принтер завис), либо в том, что аккумулятор пришел в негодность. В первом случае достаточно перезагрузить устройство, попробовать разрядить АКБ или извлечь и поставить его на место. Во втором придется отправиться в сервисный центр.
Сброс картриджей и памперса
Самый простой способ сброса датчиков уровней чернил в картриджах и заполненности памперса в любых принтерах — использование специальных сервисных утилит. В работе с печатающими машинами производства Epson хорошо зарекомендовали себя программы SSC Service Utility и PrintHelp. Приведем инструкции по использованию обеих утилит.
Для сброса уровня чернил и памперса при помощи утилиты SSC Service Utility:
- Установите и запустите программу.
- В окне утилиты откройте вкладку «Настройки».
- В верхнем выпадающем меню «Установленные принтеры» должно присутствовать название подключенного к компьютеру принтера Epson. Если оно отсутствует, выберите модель печатающей машины в меню «Модель принтера».
- Сверните приложение в трей, нажав на крестик в правом верхнем углу окна.
- В трее возле часов отобразится иконка программы. Кликните по ней правой кнопкой мыши.
- Для сброса картриджей выберите пункт «Сброс счетчиков». Программа предоставляет возможность обнуления счетчика всех чернильниц одновременно либо только определенного цвета. Выберите нужный вариант.
- Для сброса памперса выберите пункт «Счетчик отработки», затем — «Сбросить счетчик отработки».
- Задача выполнена.

Работа с утилитой PrintHelp:
- Установите и запустите приложение.
- Сразу же после запуска в левой части окна выберите название подключенного к компьютеру принтера.
- Для сброса чернил во вкладке «Управление» нажмите на кнопку «Сброс уровней чернил».
- Для сброса счетчика памперса выберите «Сбросить отработку».
- Процедура завершена.
Следует иметь в виду, что для сброса памперса через приложение PrintHelp для некоторых моделей принтеров Epson понадобится специальный ключ. Его придется приобрести на сайте разработчика утилиты либо найти бесплатный экземпляр в интернете на одном из многочисленных форумов.
Сброс памперса
Памперсом в профессиональных кругах называется впитывающая подкладка (абсорбент), в задачу которой входит поглощение неизрасходованных чернил. Она присутствует в каждом современном принтере. По завершению печати печатающая головка принтера направляется в специальный отсек, где она проходит процедуру очистки. В ходе очистки с поверхности каретки удаляется оставшаяся краска, которая затем впитывается абсорбирующим материалом — памперсом. Гораздо больший объем чернил поступает во впитывающую подкладку при выполнении процедуры очистки печатающей головки. В этом случае вся забираемая в ходе очистки краска из картриджей сразу же направляется в абсорбирующую камеру.
Уровень заполнения памперса чернилами, как и в случае с чернильницами, измеряется специальным датчиком. Система работает по тому же принципу. Если показания датчика достигают какого-то определенного значения, автоматически срабатывает блокировка принтера. На лицевую панель или экран монитора выводится сообщение об окончании срока службы впитывающей подкладки. Однако, в отличие от картриджей, памперс заменить непросто — для этого потребуется разобрать весь принтер, потому данная процедура должна выполняться специалистами.

Блокировку работы печатающей машины по причине переполнения впитывающей подкладки также можно обойти. Для этого предусмотрена функция сброса показаний датчика заполненности памперса чернилами. Работает она по той же схеме, что и в случае с обнулением картриджей.
Технически, сброс уровня чернил может осуществляться бесконечно. В случае с впитывающей подкладкой — это можно делать лишь пару раз (если она не заменяется). Сброс счетчика никак не отражается на фактической заполненности памперсами чернилами. уже через несколько циклов печати краска может попросту начать вытекать из принтера. Именно поэтому данную процедуру рекомендуется выполнять не более 2-х раз, а в идеале — всего 1 раз. При следующем возникновении ошибки печати по причине истечения срока службы подкладки, ее лучше заменить.
Процедуры сброса настроек, картриджей и памперса выполняются по-разному. Подробная инструкция есть на нашем сайте. Здесь рассмотрим наиболее простые способы.
Мигает индикатор «молния»
Данный индикатор присутствует только у мобильных (со встроенным аккумулятором) моделей принтеров Epson. Лампочка «молния» может отсутствовать на лицевой панели устройства, однако в меню LCD-экрана ее всегда можно найти в виде значка поверх пиктограммы с изображением аккумулятора (батареи).
Мигание или непрерывное горение данного индикатора в принтерах Epson может значить только одно — выполняется зарядка аккумуляторной батареи. Причем зарядка может выполняться не только при подключении к принтеру зарядного устройства, но и при подключении его самого к USB-порту компьютера. Именно в последнем случае у рядового пользователя может возникнуть вопрос или даже опасения по поводу загоревшегося индикатора «молния». Однако это не страшно, просто выполняется зарядка батареи.
Другое дело, если индикатор загорается или мигает без подключения к компьютеру зарядного устройства или USB-кабеля от компьютера. Этому может быть два объяснения — либо операционная система устройства подвисла или дала сбой, либо имеются аппаратные неисправности блока питания принтера или аккумулятора. В первом случае может помочь простая перезагрузка печатающей машины, во втором — извлечение и установка батареи на место. Также можно попробовать посадить аккумулятор до конца (до полного отключения устройства), выполняя печать. Если ни один из способов не помогает, принтер придется везти в сервисный центр, т. , возможно, у него присутствуют серьезные аппаратные и/или программные неисправности.
Принтер для дома: лазерный или струйный — что лучше
Решаем большинство проблем с зарядкой айфона
Вечный памперс — делаем внешний отстойник для отработанных чернил принтера
Хром всё забыл — как лишиться всех данных в google chrome за один клик
Инструкция по заправке контейнеров чернилами и сбросу блокировки принтера при снижении уровня чернил.
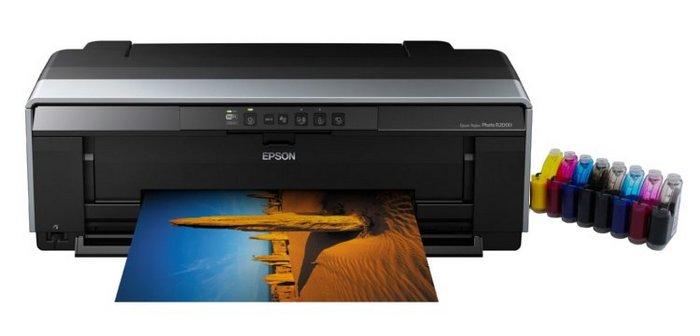
В очередной раз Epson нас порадовал своей лояльностью. В новоых принтерах L — серии, а именно — L110, L210, L300, L350, L355, L550, L555 — НЕТ защиты от применения НЕоригинальных чернил. Нет никаких чипов и не нужно вводить никакие коды. Наливай да печатай!
ТО, о чем мечтали пользователи струйников — сбылось! СНПЧ — на борту! Никаких ограничений в применениии различных чернил нет! Вся ответственность — риск пользователя (современный автомобиль тоже можно бензином А80 вместо А92, НО — недолго).
Небольшое визуальное пособие о том как сбросить уровень чернил в принтерах L110, L210, L300, L350, L355, L550, L555. Это можно найти и в документации к принтеру, но ее, как правило, никто не читает.
После того, как один из чернильных контейнеров опустошится более, чем наполовину — начнет мигать кнопка «Капля». Ничего страшного — принтер будет печатать еще достаточно долго. После того, как «Капля» загорится постоянно — принтер заблокируется для того, чтобы Вы пополнили контейнерами любыми чернилами, а главное — сбросили ошибку окончания чернил. Вот как это все нужно сделать:
Как видим, требование сводится к проверке физического уровня чернил в контейнере визуально! А теперь вспомните требование в других привычных нам моделях принтеров с картриджами! Там требуют заменить! картридж. И по-другому — никак. Но почему Epson не требует посмотреть реальное количество оставшихся чернил в картридже? Не догадываетесь? 🙂 Ладно, лирику в сторону. Идем дальше (это же всего навсего инструкция).

Интересно, что «использование принтера можно продолжить, даже если НЕТ новых бутылок с чернилами» 🙂 Далее.


Вот и все! Никаких чипов. Никаких картриджей. Никаких блокировок. Вобщем Epson сделал невообразимое — машинку для печатания. Раньше они выпускали машинки для «печатания денег» для себя, а сейчас «разрешили» юзать любые чернила без ограничений (кроме гарантии). Правда принтеры L серии стоят гораздо дороже предыдущих серий примерно в 5 раз. Так что у них все продумано. Ну а для людей с нашим менталитетом — главное чтоб можно было юзать НЕ оригиналы. Это очень спорный вопрос и достаточно большое количество пользователей сейчас склоняются к оригинальным чернилам по собственному желанию, а не принуждению со стороны Epson. И это правильно! И честно!
Одна блокировка все-таки осталась. Но это не корысти ради, а блага юзера для. Если переполнится памперс и польется на стол — это не есть хорошо, поэтому на программном уровне (а не визуальном:-)) Epson оставил блокировку принтера при большом количестве отработанных чернил.
Надеемся, в скором времени принтеры будут поставляться со , которую можно будет контролировать визуально , как это уже можно делать с уровнем чернил!
Вы рекомендуете этот продукт?
Этот продукт рекомендуют5 из 7 участников
Добавьте свою проблему с МФУ Epson L210
– и наши эксперты помогут вам найти её решение
добавлено за сутки
были на сайте за сутки
Не можете починить?
доска объявлений сломаннойтехники и запчастей
Для сброса настроек обычно используется программное обеспечение принтера, устанавливаемое на компьютере. Во всех драйверах печатающих машин Epson присутствует специальная функция возврата программных настроек устройства к заводским значениям. Однако многие ошибки в работе с принтером могут возникнуть из-за неполадок в самом программном обеспечении, потому самым оптимальным вариантом является переустановка драйверов, что позволит не только сбросить настройки, но и устранить проблемы с ПО.
Сначала удалите установленное ПО на имеющийся принтер Epson из системы:
- Последовательно откройте на компьютере: «Панель управления», «Оборудование и звук», «Устройства и принтеры».
- Найдите среди представленных пиктограмм значок принтера Epson, подключенного к компьютеру.
- Кликните по значку правой кнопкой мыши, затем выберите «Удалить устройство». Драйвер принтера будет удален из системы.
- Также рекомендуется удалить с компьютера все сервисные утилиты, относящиеся к принтеру, например — Epson Easy Photo Print, Epson Event Manager и подобные.
- Для удаления приложений перейдите из «Панели управления» в раздел «Программы и компоненты», затем — «Удаление программы».
- В представленном списке найдите приложения, в названии которых присутствует фирма-изготовитель принтера — «Epson».
- Кликните мышкой два раза по названию утилиты. Следуйте инструкциям на экране для удаления программы.


При мигании индикатора «капелька» достаточно заправить картридж чернилами или просто заменить его (если есть такая возможность). Если после дозаправки лампочка продолжает мигать, возможно, принтер «не понял», что пользователь залил чернила. Первым делом нужно попробовать перезагрузить устройство путем его выключения и последующего включения через 15-20 секунд.
В конструкции всех современных печатающих машин предусмотрен специальный модуль, в задачу которого входит определение уровня оставшегося в картриджах чернил. Этот модуль оснащен специальными датчиками, передающими на принтер соответствующую информацию. Получаемые от датчика данные постоянно хранятся в памяти устройства. По достижению определенного значения уровня чернил работа принтера автоматически блокируется системой, о чем на встроенный ЖК-дисплей, светодиодные индикаторы и/или монитор компьютера выводится соответствующее сообщение.
Для продолжения работы печатающей машины пользователю придется заменить чернильницы либо заправить их (если заправка поддерживается). После этого датчик вновь определит уровень чернил в картриджах. Если все прошло успешно, принтер сможет продолжить свою работу.
Однако нередки ситуации, когда после замены или дозаправки картриджей принтер Epson по-прежнему «считает» их пустыми, и ее дальнейшая работа блокируется. Это может происходить по различным причинам, включая возникновение логических ошибок, кратковременных сбоев при передаче информации с датчика на плату управления и т.
Именно в таких ситуациях исправить положение помогает функция сброса картриджей. В разных источниках данная процедура также может именоваться как «сброс счетчика», «сброс уровня чернил», «обнуление картриджей» и т. Как бы ни называлась данная процедура, ее выполнение приводит к удалению (обнулению) из памяти принтера данных об оставшемся уровне чернил в чернильницах.
Функцию сброса следует запускать только в случае, если в картриджах чернила присутствуют фактически. Печать без тонера в чернильницах может сказаться на работоспособности печатающей головки — вплоть до ее полного выхода из строя.
Не далее, чем вчера верный принтер Epson R270 прекратил печатать и стал перемигиваться лампочками на кнопках «капля» и «бумага». Я уже знал, что это памперс. В определённый момент каждый струйный принтер отказывается работать по этой причине, даже при использовании оригинальных картриджей. Если вы используете СНПЧ, то получите такую ошибку быстрее. Если используете обычные картриджи, получите чуть позже. Но если существует памперс (а он существует), то когда-нибудь он переполнится. Можно отнести принтер в сервис, заплатить денег (наверное, немало) и его починят.
Можно вернуть принтер к жизни самостоятельно.
Теперь немного теории. В каждом струйном принтере существует специальный отстойник для отработанных чернил, которые появляются при прочистке печатающих головок. Конструктивно этот отстойник представляет собой специальный контейнер, заполненный впитывающим материалом типа ваты. В народе этот контейнер неофициально называют памперсом, потому что его предназначение примерно такое же, как у обычного детского подгузника. Ёмкость этого отстойника небесконечна, поэтому в принтере существует специальный программный счётчик, который подсчитывает количество прочисток и называется счётчик отработки. Как только значение счётчика совпадёт со значением, заданным производителем, принтер откажется печатать, начнёт мигать всеми лампочками и потребует немедленно обратиться в сервис.
Производители принтеров очень осторожные ребята. Они не хотят, чтобы домашний принтер наделал под собой лужу из отработанных чернил, поэтому устанавливают максимальное значение счётчика отработки с запасом. То есть памперс ещё может служить, но принтер требует сервиса.

Слив отработанных чернил в памперс — изображение с сайта printer-online
В сервисном центре специалисты заменят памперс (либо целиком, либо напихают новый наполнитель), сбросят счётчик и вернут владельцу. Но можно воспользоваться специальной программой, которая просто сбрасывает значение этого счётчика. Для некоторых моделей принтеров существуют специальные «секретные» коды, которые позволяют сбросить счётчик нажатием кнопок принтера в определённой последовательности. И программы и последовательности легко можно найти в интернете.
Алярм! Несмотря на то, что счётчик будет обнулён, памперс будет всё так же переполнен. Так что пользоваться этим методом стоит только в том случае, если печатать надо СРОЧНО и если вы в ближайшее время:
- обратитесь в сервисный центр по поводу замены памперса
- замените наполнитель самостоятельно (что довольно сложно сделать на некоторых моделях)
- выведете катетер в специальную банку
Про последний пункт: к памперсу подходит специальная трубка, по которой в него и поступают отработанные чернила. Активные пользователи СНПЧ отрезают эту трубку от памперса, наращивают её с помощью капельницы и выводят конец за пределы корпуса принтера. Такая трубка (по всё той же аналогии) называется в народе катетер и опускается в обычную банку, которую нужно время от времени сливать. Маловероятно, что вы отважитесь на такое действо с обычным домашним принтером, которым пользуетесь пару раз в месяц, поскольку здесь потребуется разобрать принтер.

Вывод катетера отработки чернил в банку. Изображение с сайта ink-market
Теперь про сам сброс. Программа, которая обнуляет показания счётчика отработки называется ресеттер (т. «сбрасывальщик»). Это неофициальная программа и производитель принтера наверняка лишит вас гарантии за её использование, хотя обычно памперс переполняется уже после окончания гарантийного срока — года через два-три. Для того, чтобы найти такую программу, просто вбейте в поиск марку и модель вашего принтера и добавьте про сброс памперса. В моём случае это было «Epson R270 сброс памперса».

Памперс может быть любой формы. В больших принтерах формата A3 памперс крупнее, в домашних — маленькой ёмкости.
Если вы используете СНПЧ, то лучше вывести катетер в банку. Если вы редко (2-3 раза в месяц) печатаете фотографии и документы, то можете смело сбрасывать счётчик раза 2-3 без замены памперса, потому что чернила в нём со временем подсыхают. В любом случае, вы можете один раз точно сбросить счётчик памперса без каких-либо последствий. Но помните, памперс может переполниться по настоящему и залить не только стол, но и электронику принтера, что непременно испортит принтер.
На принтере EPSON светодиод с символом «blob» указывает на работу картриджей. У него есть два состояния, которые рассказывают о разных проблемах.
- Светодиод мигает — один из картриджей скоро закончится;
- горит постоянно — либо чернильный картридж пуст, либо имеется программная/аппаратная неисправность.
Что делать в обеих ситуациях, объясняется ниже.
Каплевидный светодиод на Epson загорается красным цветом
Если «шарик» начинает мигать, значит, один из картриджей на исходе. Если он есть, заправьте его, если нет, замените картридж. Если это не помогло, устройство, вероятно, не поняло, что чернильный картридж был заправлен. В этом случае необходимо перезагрузить устройство, что можно сделать, кратковременно выключив его.
Если после выполнения этих действий светодиод продолжает мигать, выполните следующие действия.
- На компьютере должна быть запущена служба, отвечающая за работу принтера. Если вы печатаете из Microsoft World, вы можете нажать «ctrl+P» прямо в программе и в открывшемся окне нажать «свойства».
- Теперь вам нужно найти вкладку «Инструменты» .
- На следующем этапе найдите кнопку «EPSON Status Monitor 3».
- Когда вы нажмете на кнопку, принтер автоматически проверит уровень чернил, и если чернил достаточно, он подаст сигнал, что можно продолжать, а светодиод перестанет мигать.
Проверка уровня чернил с помощью EPSON Status Monitor
Если автоматическая проверка не помогает и вы уверены, что все картриджи заправлены, вы можете вручную сбросить счетчик, показывающий уровень чернил. Для этого выполните следующие действия.
- Установите на компьютер инструмент «Resetters», который был разработан группой энтузиастов специально для оборудования EPSON. Поскольку программа является неофициальной, компания не несет ответственности за неполадки после ее использования, но, судя по многочисленным отзывам, проблем не возникает.
- Когда вы запускаете инструмент, в его главном окне отображаются все подключенные принтеры. Вам необходимо выбрать тот, с которым у вас возникли проблемы.
- Выбрав принтер, нажмите кнопку «сбросить чернила» и подтвердите действие в диалоговом окне.
- Это приведет к сбросу настроек принтера, его перезагрузке и проверке того, что светодиод перестал мигать.
Если светодиод горит непрерывно, возможны два источника ошибки
- Картридж вставлен неправильно или поврежден;
- Картриджи не являются оригинальными или не соответствуют модели.
Если картриджи установлены неправильно, просто выньте и снова вставьте их — вы услышите щелчок, когда они будут установлены правильно. Также следует убедиться, что в каретку картриджа не попали посторонние предметы, которые могут помешать правильной установке картриджа.
Картриджи следует вставлять до щелчка.
Если это не помогло и проблема заключается в неисправных картриджах, замените их. Иногда причиной мигающего светодиода является засорение форсунок. В этом случае извлеките картридж и поместите его соплами вниз в емкость, наполненную водой или, лучше всего, специальным чистящим средством. Через несколько часов картридж следует протереть и поставить на место.
Epson L355
Начала мигать капелька на l355, заправила чернила, прокачала и все равно мигает. Что не так?
Ответы 9
Удерживала кнопку треугольника с кругом, индикатор стал гореть и перестал мигать, потом еще раз нажала и удерживала. Отключился.
Оставляла на нгочь отключенным от сети, нажимала треугольник с кругом, делала прокачку — бесполезнео. Подняла на несколько минут крышку со стеклом сканера и капля отключилась и началась автоматическая прокачка. Ура.
Решение для принтеров Samsung
Если принтер Samsung не печатает, и лампа на корпусе горит красным, то в первую очередь стоит заново заправить картридж и обнулить счетчик. Чтобы это сделать, требуется выполнить следующие команды:
- не извлекая картридж и не открывая крышку на девайсе, по очереди нажимаются кнопки: «+», «+», «СТОП», «-», «-», «СТОП», «СТОП»;
- если все сделано верно, то на экране появится надпись «UC»;
- нажатием на кнопки плюс или минус выбираем надпись «FC»;
- жмем «старт», ждем появления «07» и повторно жмем «старт»;
- ожидаем окончания сброса, который сопровождается выключением девайса.
После включения светодиод должен погаснуть.
Если предложенная выше рекомендация не помогла, то возможно следующее:
- застряла бумага;
- некорректно установлен картридж;
- заканчивается тонер;
- физическая поломка.
Заключение
Большинство рассмотренных причин того, почему на принтере горит красная лампочка, можно устранить собственноручно, не прибегая к посторонним услугам. Бумагу следует вставлять аккуратно, не превышая допустимого для используемой модели количества листов. Оптимальным вариантом действий будет ознакомление с эксплуатационной инструкцией во время покупки, а не при возникновении проблемы. Соблюдение правил пользования – вот гарантия долгой и безотказной работы техники.
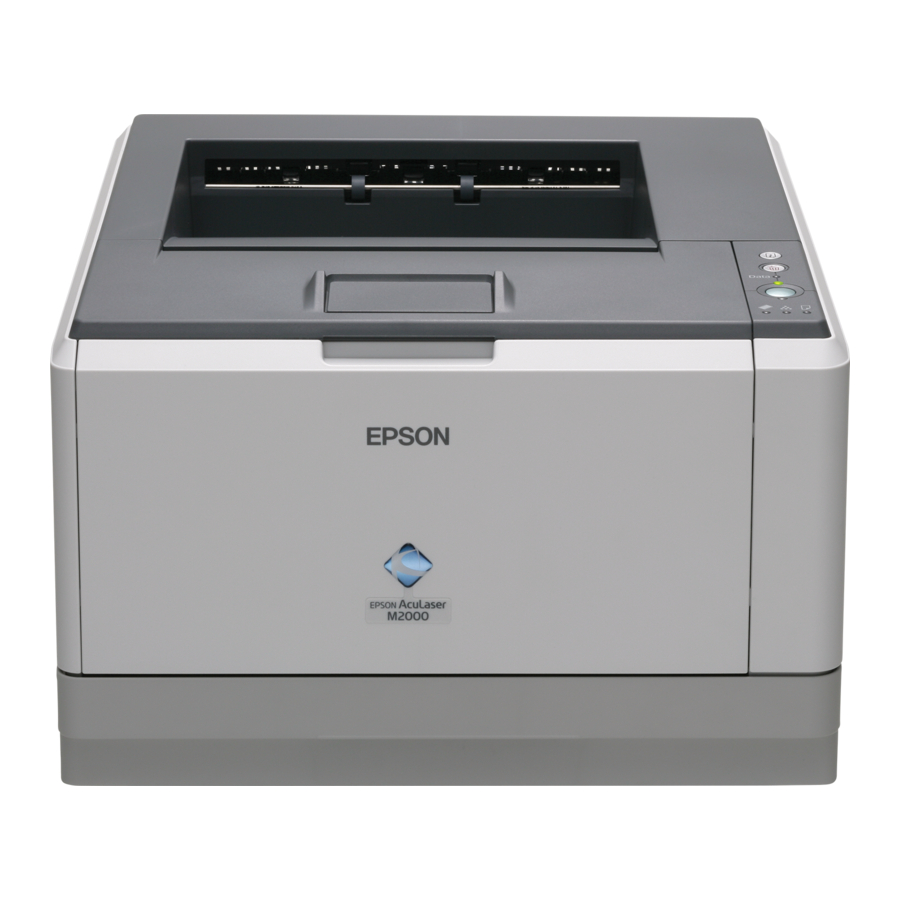
-
Contents
-
Table of Contents
-
Troubleshooting
-
Bookmarks
Quick Links
Related Manuals for Epson Aculaser M2000 series
Summary of Contents for Epson Aculaser M2000 series
-
Page 1
User’s Guide NPD3240-00… -
Page 2: Table Of Contents
Contents Copyright and Trademarks Operating System Versions Safety Instructions Safety …………….12 Warnings, Cautions, and Notes.
-
Page 3
Custom paper size …………32 Cancelling a Print Job. -
Page 4
For short distances …………75 Chapter 6 Troubleshooting Clearing Jammed Paper. -
Page 5
Accessing EPSON Status Monitor…….. -
Page 6
Accessing EPSON Status Monitor…….. -
Page 7
Before Contacting Epson …….. -
Page 8
Help for Users in Vietnam ……….. 162 Help for Users in Indonesia . -
Page 9: Copyright And Trademarks
Seiko Epson Corporation and its affiliates shall not be liable against any damages or problems arising from the use of any options or any consumable products other than those designated as Original Epson Products or Epson Approved Products by Seiko Epson Corporation.
-
Page 10
General Notice: Other product names used herein are for identification purposes only and may be trademarks of their respective owners. Epson disclaims any and all rights in those marks. Copyright © 2008 Seiko Epson Corporation. All rights reserved. Copyright and Trademarks… -
Page 11: Operating System Versions
Operating System Versions In this manual, the following abbreviations are used. Windows refers to Windows Vista, XP, Vista x64, XP x64, 2000, Server 2003, and Server 2003 x64. ❏ Windows Vista refers to Windows Vista Ultimate Edition, Windows Vista Home Premium Edition, Windows Vista Home Basic Edition, Windows Vista Enterprise Edition and Windows Vista Business Edition.
-
Page 12: Safety Instructions
Safety Instructions Safety Warnings, Cautions, and Notes Warnings must be followed carefully to avoid bodily injury. Cautions must be observed to avoid damage to your equipment. Notes contain important information and useful tips on the operation of your printer. Safety precautions Be sure to follow the precautions carefully to ensure safe, efficient operation: ❏…
-
Page 13
❏ Be careful not to touch the fuser, which is marked CAUTION HOT SURFACE or the surrounding areas. If the printer has been in use, the fuser and the surrounding areas may be very hot. If you must touch one of these areas, wait 30 minutes to allow the heat to subside before doing so. -
Page 14: Important Safety Instructions
❏ Be careful not to scratch the surface of the drum. When you remove the photoconductor unit from the printer, always place it on a clean, smooth surface. Avoid touching the drum, since oil from your skin can permanently damage its surface and affect print quality. ❏…
-
Page 15
❏ When connecting this product to a computer or other device with a cable, ensure the correct orientation of the connectors. Each connector has only one correct orientation. Inserting a connector in the wrong orientation may damage both devices connected by the cable. ❏… -
Page 16: Safety Information
Safety Information Power cord Caution: ❏ Be sure the AC power cord meets the relevant local safety standards. Use only the power cord that comes with this product. Use of the another cord may result in fire or electric shock. This product’s power cord is for use with this product only.
-
Page 17: Power On/Off Cautions
The recommended exposure limit for ozone is 0.1 parts per million (ppm) expressed as an average time-weighted concentration over an eight (8) hour period. The Epson laser printer generates less than 0.1 ppm for eight (8) hours of continuous printing. Minimize the risk To minimize the risk of exposure to ozone, you should avoid the following conditions: ❏…
-
Page 18: Chapter 1 Getting To Know Your Printer
Chapter 1 Getting to Know Your Printer Where to Find Information Setup Guide Provides you with information on assembling the printer and installing the printer software. User’s Guide (this manual) Provides you with detailed information on the printer’s functions, optional products, maintenance, troubleshooting, and technical specifications.
-
Page 19: Printer Parts
Printer Parts Front view a. top cover (cover A) b. control panel c. standard lower paper cassette d. MP tray (Multi-Purpose tray) e. subtray f. stopper Rear view D model Getting to Know Your Printer…
-
Page 20
DN model a. rear cover b. AC inlet c. power switch d. option cover e. parallel interface connector (only for the D model) f. USB interface connector g. network interface connector (only for the DN model) Note: This manual uses D model as an example of the rear view illustrations. Getting to Know Your Printer… -
Page 21: Inside The Printer
Inside the printer a. fuser unit b. photoconductor unit c. toner cartridge d. developer unit Getting to Know Your Printer…
-
Page 22: Control Panel
Control panel Information button Prints status sheets when the Error light is off and no warning is indicated. Prints a status sheet when pressed once. If your printer is a DN model, pressing this button for more than two seconds prints a network status sheet.
-
Page 23: Options And Consumable Products
DN models) by adding one additional 64, 128 or 256MB 90 pin SDRAM DIMM. Note: Make sure that the DIMM you purchase is compatible with EPSON products. For details, contact the store where you purchased this printer or an EPSON qualified service representative.
-
Page 24
❏ Return toner cartridges are not sold in some areas. Getting to Know Your Printer… -
Page 25: Chapter 2 Printing Tasks
Chapter 2 Printing Tasks Loading Paper into Your Printer This section describes how to load paper. If you use special media such as transparencies or envelopes, see also “Selecting and Using Print Media” on page 29. For specifications or details about the paper types and sizes, see “Paper”…
-
Page 26
2. Slide the paper guides outward to accommodate the paper you are loading. 3. Load a stack of the desired paper on the center of the paper tray with the printable surface facing up. Then adjust the paper guide to the size of the paper. Note: ❏… -
Page 27: Lower Paper Cassette Unit
a. limit tab 4. Raise the stopper. Note: When you use the paper that is longer than A4 size, do not raise the stopper. To prevent printouts from being stacked and pushed out of the output tray, every time the printer ejects a couple of the printouts, remove them from the tray.
-
Page 28
2. Pinch the tab and slide the paper guides to the size of paper. 3. Load a stack of the desired paper on the center of the paper cassette with the printable surface facing down. Note: ❏ Make sure that you do not load paper beyond the limit mark. a. -
Page 29: Selecting And Using Print Media
4. Insert the loaded paper cassette back into the unit. 5. Raise the stopper. Note: When you use the paper that is longer than A4 size, do not raise the stopper. To prevent printouts from being stacked and pushed out of the output tray, every time the printer ejects a couple of the printouts, remove them from the tray.
-
Page 30: Labels
Since the quality of any particular brand or type of media may be changed by the manufacturer at any time, EPSON cannot guarantee the quality of any type of media. Always test samples of media stock before purchasing large quantities or printing large jobs.
-
Page 31: Thick Paper
Available paper source: ❏ MP tray Printer driver settings: Paper Size: MON, C10, DL, C5, C6, IB5 Paper Source: MP tray Note: ❏ Set the envelope with the printable surface facing up. ❏ Depending on the quality of envelopes, the printing environment, or the printing procedure, envelopes might be wrinkled.
-
Page 32: Semi-Thick Paper
Semi-thick paper Available paper source: ❏ MP tray ❏ Standard lower paper cassette ❏ Optional paper cassette Printer driver settings: Paper Size: A4, A5, B5, LT, EXE Paper Source: Auto Selection Paper Type: Semi-Thick (91 to 120 g/m² paper) Transparencies Available paper source: ❏…
-
Page 33: Cancelling A Print Job
Paper Size: User Defined Size Paper Source: MP tray Paper Type: Normal, Semi-Thick, or Thick Note: Depending on the quality of the non-standard size paper, the printing environment, or the printing procedure, the paper might skew. Make a trial print run before you print on a lot of non-standard size paper. Note: ❏…
-
Page 34: From The Computer
From the computer For Windows users Double-click your printer’s icon on the taskbar. Select the job in the list, then click Cancel from the Document menu. For Mac OS X users Open Printer Setup Utility (for Mac OS X 10.3 and 10.4) or Print Center (for Mac OS X 10.2) and double-click your printer from the print queue.
-
Page 35
2. Select Automatic, then choose desired printing quality. 3. Click OK. For Mac OS X users 1. Open the Print dialog box. 2. Select Printer Settings from the drop-down list, and select the Basic Settings tab. Printing Tasks… -
Page 36: Using The Advanced Setting
3. Select Automatic, then choose the resolution from the drop-down list. Using the Advanced setting For Windows users 1. Click the Basic Settings tab. Printing Tasks…
-
Page 37
2. Select Advanced. Then select the most appropriate setting from the list according to the type of document or image you want to print. When you choose a predefined setting, other settings such as Print Quality and Screen are set automatically. -
Page 38: Customizing Print Settings
3. Select Advanced, then click More Settings. 4. Set the appropriate setting in the Advanced dialog box. When you choose a predefined setting, other settings such as Print Quality and Screen are set automatically. Changes are shown in the Summary drop-down list in the Print dialog box. Customizing print settings If you need to change detailed settings, make the settings manually.
-
Page 39
2. Select Printer Settings from the drop-down list, and select Basic Settings tab. 3. Select Advanced, then click More Settings. 4. Make appropriate settings. For details about each setting, click the button. 5. Click OK. Saving your settings You can save your custom settings. Note: ❏… -
Page 40: Toner Save Mode
2. Click Save or Save As in the Presets. 3. Type a name for your custom settings in the Name box, then click OK. Your settings will appear in the Presets drop-down list. Note: ❏ To delete a custom setting, select the setting, then select Delete in the presets drop-down list. ❏…
-
Page 41
2. Select the Duplex check box, then select Left, Top, or Right as the binding position. 3. If you want to make detailed settings, click Duplex Settings to open the Duplex Settings dialog box. 4. Make appropriate settings. For details about each setting, see online help. 5. -
Page 42: Modifying The Print Layout
3. Select the Duplex check box, then select Left, Top, or Right as the binding position. 4. If you want to make detailed settings, click Duplex Settings to open the Duplex Settings dialog box. 5. Make appropriate settings. For details about each setting, see online help. 6.
-
Page 43
3. If you want to make detailed settings, click More Settings. The Print Layout Settings dialog box appears. 4. Make appropriate settings. For details about each setting, see online help. 5. Click OK. For Mac OS X users 1. Open the Print dialog box. 2. -
Page 44: Resizing Printouts
4. Click Print. Note: The Layout settings are a standard feature of Mac OS X. Resizing printouts This function allows you to enlarge or reduce your document. For Windows users 1. Click the Advanced Layout tab. 2. Select the Zoom Options check box. 3.
-
Page 45: Printing Watermarks
5. Click OK. For Mac OS X users Note: ❏ The enlarging or reducing rate is automatically specified according to the paper size you select. ❏ This function is not available with Mac OS X 10.2 and 10.3. 1. Open the Print dialog box. 2.
-
Page 46
2. Select a watermark that you want to use from the Watermark drop-down list. 3. If you want to make detailed settings, click Watermark Settings, and make appropriate settings. For details about each setting, see online help. 4. Click OK. For Mac OS X users 1. -
Page 47
3. Click Stamp Function. 4. Select the Watermark check box, then click Watermark Settings. 5. Select a watermark from the Watermark drop-down list. 6. Make appropriate settings. For details about each setting, see online help. 7. Click OK. Making a new watermark For Windows users 1. -
Page 48
❏ To remove the saved watermark, select it from the List box, then click Delete. After removing it, be sure to click OK to close the dialog box. 7. Click OK. Note: ❏ You can register up to 10 custom watermarks. ❏… -
Page 49: Printing Headers And Footers
7. If you select Add Text, type the watermark text, select the Font and Style, then click OK on the Edit Text dialog box. If you select Add Image, select an image file (PDF, PNG, or JPG), then click Open. Note: To type the watermark text, open the Text Input dialog box by clicking the text box.
-
Page 50
2. Select the Header/Footer check box, then click Header/Footer Settings. 3. Select the items from the drop-down list. Note: If you select Collate Number, the number of copies is printed. 4. Click OK. For Mac OS X users 1. Open the Print dialog box. 2. -
Page 51: Printing With An Overlay
3. Click Stamp Function. 4. Select the Header/Footer check box, then click Header/Footer Settings. 5. Select the items from the drop-down list. Note: If you select Collate Number, the number of copies is printed. 6. Click OK. Printing with an overlay This function allows you to print a standard form or letterhead onto the original document.
-
Page 52
3. Click the Advanced Layout tab. 4. Select the Form Overlay check box. 5. Select Create Overlay Data, then click More Settings. The Create Form dialog box appears. 6. Type the form name in the Form Name box and its description in the Description box. 7. -
Page 53
Printing an overlaid document You can select the registered form data from the Paper Source drop-down list on the Basic Settings tab. For registering form data in the Paper Source, see step 8 in “Creating an overlay” on page 51. If overlay form data is not registered in the Paper Source or if you want to make detailed settings, follow the steps below. -
Page 54: Printing Web Pages To Fit Your Paper Size
Printing Web Pages to Fit Your Paper Size This function allows you to make Web pages fit to your paper size when printing. Install EPSON Web-To-Page from the printer software CD-ROM. Note: This software is for Windows only. After you install EPSON Web-To-Page, the menu bar is displayed on the Microsoft Internet Explorer Toolbar.
-
Page 55: Chapter 3 Installing Options
Chapter 3 Installing Options Optional Paper Cassette Unit For details about the paper types and sizes that you can use with the optional paper cassette unit, see “Lower Paper Cassette Unit” on page 27. For specifications, see “Optional paper cassette unit” on page 158.
-
Page 56
D model DN model * OFF Caution: Make sure to unplug the power cord from the printer to prevent getting an electrical shock. 2. Carefully remove the optional paper cassette unit from its carton and place it where you intend to set up the printer. -
Page 57
3. Carefully, grasp the printer at the position indicated below and lift it carefully. 4. Align the corners of the printer and the unit, then lower the printer gently onto the unit so that the connector and two pins on the top of the unit fit into the terminal and the holes on the bottom of the printer respectively. -
Page 58
5. Pull the paper cassette out from the unit. 6. Turn the lever to the position as shown below to lock the optional paper cassette unit. 7. Insert the paper cassette back into the unit. 8. Reconnect all the interface cables and the power cord. Installing Options… -
Page 59: Removing The Optional Paper Cassette Unit
To confirm that the option is installed correctly, print a Status Sheet. See “Printing a Status Sheet” on page 90. Note for Windows users: If EPSON Status Monitor is not installed, you have to make settings manually in the printer driver. See “Making Optional Settings” on page 113. Note for Macintosh users: When you have attached or removed printer options, you need to delete the printer using Print Setup Utility (for Mac OS X 10.3 and 10.4) or Print Center (for Mac OS X 10.2), and then re-register the printer.
-
Page 60
1. Turn the printer off and unplug the power cord. * OFF Caution: Make sure to unplug the power cord from the printer to prevent getting an electrical shock. 2. Remove the screw on the option cover on the back of the printer using the screw driver. Installing Options… -
Page 61
3. Remove the option cover. 4. Identify the memory slot. The position is shown below. a. memory slot 5. Push a white stopper until it stops. Installing Options… -
Page 62
6. Insert the memory module into the memory slot until it stops. 7. Slide the white stopper back toward you to lock the memory module. Caution: ❏ Do not apply too much force. ❏ Be sure to insert the memory facing the correct way. ❏… -
Page 63: Removing A Memory Module
Note for Windows users: If EPSON Status Monitor is not installed, you have to make settings manually in the printer driver. See “Making Optional Settings” on page 113. Note for Macintosh users: When you have attached or removed printer options, you need to delete the printer using Print Setup Utility (for Mac OS X 10.3 and 10.4), Print Center (for Mac OS X 10.2), and then re-register the printer.
-
Page 64: Chapter 4 Replacing Consumable Products
When the Toner light and the Error light are on, the printer has run out of toner. If the indicator lights light up in this manner, or if a message is displayed on the EPSON Status Monitor screen, replace the toner cartridge.
-
Page 65
❏ The toner cartridge is not an independent unit that you install directly into the printer. The cartridge needs to be inserted into the developer unit’s casing and then installed into the printer. Warning: ❏ Do not touch the toner. Always keep toner away from your eyes. If toner gets on your skin or clothes, wash it off with soap and water immediately. -
Page 66
Caution: ❏ You must completely open the printer cover when replacing the toner cartridge; otherwise, you may damage the printer. ❏ Never touch the developing roller that is exposed after removing the protective cover; otherwise, print quality may decline. ❏ When you replace the toner cartridge, wipe paper dust and marks from the metal roller inside the printer with a dry and soft cloth as shown below. -
Page 67: Chapter 5 Cleaning And Transporting The Printer
Chapter 5 Cleaning and Transporting the Printer Cleaning the Printer The printer needs only minimal cleaning. If the printer’s outer case is dirty or dusty, turn off the printer and clean it with a soft, clean cloth moistened with a mild detergent. Caution: Never use alcohol or paint thinner to clean the printer cover.
-
Page 68
2. Pull the paper cassette unit out and remove the papers. 3. Gently wipe the rubber parts of the pickup roller inside the printer with a well-wrung wet cloth. 4. Load the papers back on the paper cassette unit and reinstall the cassette. Cleaning and Transporting the Printer… -
Page 69: Cleaning Inside The Printer
Cleaning inside the printer 1. Open the top cover and MP tray. 2. Remove the developer unit containing the toner cartridge. 3. Put your finger into the hole of the outer green knob on each side of the photoconductor unit. Then, pull the photoconductor unit towards you.
-
Page 70
Warning: Be careful not to touch the fuser, which is marked CAUTION HOT SURFACE, or the surrounding areas. If the printer has been in use, the fuser and the surrounding areas may be very hot. If you must touch one of these areas, wait 30 minutes to allow the heat to subside before doing Caution: ❏… -
Page 71
4. Wipe paper dust and marks from the metal roller inside the printer with a dry and soft cloth as shown below. * metal roller 5. Move the green cleaning lever of the photoconductor wire back and forth slowly several times from one end to the other. -
Page 72
6. Insert the photoconductor unit slowly all the way in. 7. Insert the developer unit containing the toner cartridge slowly all the way in. 8. Close the top cover and MP tray. Cleaning and Transporting the Printer… -
Page 73: Transporting The Printer
Transporting the Printer Finding a place for the printer When relocating the printer, always choose a location that has adequate space for easy operation and maintenance. Use the following illustration as a guide for the amount of space required around the printer to ensure smooth operation.
-
Page 74: For Long Distances
❏ Keep the entire computer and printer system away from potential sources of interference, such as loudspeakers or the base units of cordless telephones. ❏ Avoid using an electrical outlet that is controlled by wall switches or automatic timers. Accidental disruption of power can erase valuable information in your computer’s and printer’s memory.
-
Page 75: For Short Distances
For short distances Always pay attention to the following handling precautions when you need to move the printer for short distances. 1. Turn off the printer and remove the following items: ❏ Power cord ❏ Interface cables ❏ Loaded Paper ❏…
-
Page 76: Chapter 6 Troubleshooting
Chapter 6 Troubleshooting Clearing Jammed Paper If paper becomes jammed in the printer, the EPSON Status Monitor provides alert messages. Precautions for clearing jammed paper Be sure to observe the following points when you clear jammed paper. ❏ Do not remove jammed paper by force. Torn paper can be difficult to remove and might cause other paper jams.
-
Page 77: Paper Jam Around The Standard Lower Cassette
Paper Jam around the standard lower cassette 1. Remove the standard paper cassette, gently pull any sheets of paper out, and reinstall the paper cassette. Paper Jam around the 250-sheet Paper Cassette Unit 1. Remove the optional paper cassette, gently pull any sheets of paper out, and reinstall the paper cassette.
-
Page 78: Paper Jam In The 250-Sheet Paper Cassette Unit
2. Remove the standard paper cassette, gently pull any sheets of paper out, and reinstall the paper cassette. Paper Jam in the 250-sheet Paper Cassette Unit 1. Remove the optional paper cassettes from the bottom one, then gently pull any sheets of paper out.
-
Page 79: Paper Jam Inside The Printer
2. Reinstall the paper cassettes. Paper Jam inside the printer 1. Open the top cover and MP tray. 2. Remove the developer unit containing the toner cartridge. Troubleshooting…
-
Page 80
3. Put your finger into the hole of the outer green knob on each side of the photoconductor unit. Then, pull the photoconductor unit towards you. Warning: Be careful not to touch the fuser, which is marked CAUTION HOT SURFACE, or the surrounding areas. -
Page 81
Caution: ❏ Never touch the developing roller that is exposed after removing the protecting cover; otherwise, print quality may decline. ❏ Do not expose the photoconductor unit to room light any longer than necessary. ❏ Never touch the photoconductor unit’s light-sensitive drum; otherwise, print quality may decline. -
Page 82
5. Insert the photoconductor unit slowly all the way in. 6. Insert the developer unit containing the toner cartridge slowly all the way in. Note: If you cannot insert the developer unit all the way in, remove and insert the photoconductor unit, then insert the developer unit again. -
Page 83: Paper Jam Around The Mp Tray
Paper Jam around the MP tray 1. Remove the paper on the subtray, then bring the subtray back into the MP tray. Caution: Even if you see any jammed paper when you perform this step, do not pull it out. Otherwise, the printer may be damaged.
-
Page 84
3. Remove the developer unit containing the toner cartridge. 4. Put your finger into the hole of the outer green knob on each side of the photoconductor unit. Then, pull the photoconductor unit towards you. Warning: Be careful not to touch the fuser, which is marked CAUTION HOT SURFACE, or the surrounding areas. -
Page 85
Caution: ❏ Never touch the developing roller that is exposed after removing the protecting cover; otherwise, print quality may decline. ❏ Do not expose the photoconductor unit to room light any longer than necessary. ❏ Never touch the photoconductor unit’s light-sensitive drum; otherwise, print quality may decline. -
Page 86
6. Insert the photoconductor unit slowly all the way in. 7. Insert the developer unit containing the toner cartridge slowly all the way in. Note: If you cannot insert the developer unit all the way in, remove and insert the photoconductor unit, then insert the developer unit again. -
Page 87: Paper Jam Around The Rear Cover
Note: For details about loading papers, see “MP tray” on page 25. Paper Jam around the rear cover 1. Open the rear cover. 2. Pull the green labeled lever down and gently pull any sheets of paper out. Troubleshooting…
-
Page 88: Paper Jam Around The Dm Tray
3. Close the rear cover. 4. Open and close the top cover. Paper Jam around the DM tray 1. Remove the standard paper cassette. Troubleshooting…
-
Page 89
2. From the rear view, push the DM tray and gently pull any sheets of paper out. Note: Do not touch any metal part except the green lever on the DM tray. 3. From the front view, push the DM tray and gently pull any sheets of paper out. 4. -
Page 90: Printing A Status Sheet
Printing a Status Sheet To confirm the current status of the printer, and that the options are installed correctly, print a status sheet using the printer’s control panel or the printer driver. To print a status sheet from the printer’s control panel, see “Control panel” on page 22. To print a status sheet from the printer driver, for Windows, see “Printing a status sheet”…
-
Page 91: The Optional Product Is Not Available
113. For Macintosh users: When you have attached or removed options from the printer, you need to start EPSON Status Monitor, or delete and re-register the printer. To delete the printer, use Print Setup Utility (for Mac OS X 10.3 and 10.4) or Print Center (for Mac OS X 10.2).
-
Page 92: Printout Is Garbled
For Windows users, you may use the printer fonts In the printer driver, choose the Print TrueType fonts as bitmap substituted for specified TrueType fonts. check box in the Extended Settings dialog box. The selected font is not supported by your printer. Make sure that you have installed the correct font.
-
Page 93: Print Quality Problems
Do not store paper in a humid or damp environment. The toner cartridge may be near the end of its service If the message in EPSON Status Monitor indicates that the life. toner cartridge is near the end of its service life, replace it. See “Precautions for Replacing the Toner Cartridge”…
-
Page 94: Toner Smudges
Toner smudges Cause What to do Your paper may be moist or damp. Do not store your paper in a humid or damp environment. You may not be using the correct type of paper for Smooth, high-quality copier paper is recommended for best your printer.
-
Page 95: The Printed Image Is Light Or Faint
The toner cartridge may be near the end of its service If the message in EPSON Status Monitor indicates that the life. toner cartridge is near the end of its service life, replace it. See “Precautions for Replacing the Toner Cartridge” on page 64.
-
Page 96: Memory Problems
Memory Problems Insufficient memory for current task Cause What to do The printer has insufficient memory for current task. Add more memory for a permanent solution or lower print quality temporarily in the printer driver. Insufficient memory to print all copies Cause What to do The printer does not have sufficient memory to…
-
Page 97: Problems Using Options
“Making Optional Settings” on page 113. For Macintosh users: When you have attached or removed options from the printer, you need to start EPSON Status Monitor, or delete and re-register the printer. To delete the printer, use Print Setup Utility (for Mac OS X 10.3 and 10.4) or Print Center (for Mac OS X 10.2).
-
Page 98: Usb Connections
USB connections USB cables or connections can sometimes be the source of USB problems. For best results, you should connect the printer directly to the computer’s USB port. If you must use multiple USB hubs, we recommend that you connect the printer to the first-tier hub. Windows operating system Your computer must be a model pre-installed with Windows Vista, Vista x64, XP, XP x64, 2000, Server 2003, or Server 2003 x64, or a model that was pre-installed with Windows 2000, Server 2003,…
-
Page 99: Network Connection Problems (Only For The Dn Model)
Note: For Windows 2000, if the Digital Signature Not Found dialog box appears during the installation process, click Yes. If you click No, you will have to install the printer software again. For Windows Vista, Vista x64, XP, XP x64, Server 2003, or Server 2003 x64, if the Software Installation dialog box appears during the installation process, click Continue Anyway.
-
Page 100: Status And Error Lights
For information on the location of the lights, see “Control panel” on page 22. Note: You can check the printer status and error easily on the computer by using EPSON Status Monitor. For details about EPSON Status Monitor, for Windows see “Using EPSON Status Monitor” on page 114, for Macintosh see “Using EPSON Status Monitor”…
-
Page 101: Troubleshooting
Reset Explanation: The printer’s current interface has been reset and the buffer has been cleared. However, other interfaces are still active and retain their settings and data. Form Feed Explanation: The printer is ejecting paper due to a user request. This warning appears when pressing the Start/Stop button once to make the printer offline, then holding down the Start/Stop button for more than 2 seconds in order not to receive form feed command.
-
Page 102
Cover Open Explanation: The cover on the printer is open. Close the cover. Print Data Error Explanation: The print data is deleted because it is incorrect. Make sure the appropriate printer driver are used. Insufficient Memory to Print All Copies Explanation: Printing by the specified number of copies is no longer possible due to insufficient memory (RAM). -
Page 103
The installed toner cartridge is not a genuine EPSON product. Installing a genuine toner cartridge is recommended. Using a non-genuine toner cartridge may affect print quality. EPSON shall not be liable for any damages or problems arising from the use of consumable products not manufactured or approved by EPSON. -
Page 104
The installed toner cartridge is not a genuine EPSON product. Installing a genuine toner cartridge is recommended. Using a non-genuine toner cartridge may affect print quality. EPSON shall not be liable for any damages or problems arising from the use of consumable products not manufactured or approved by EPSON. -
Page 105
Toner Cartridge Memory Error Explanation: A memory read/write error has occurred. Reset the toner cartridge or replace it to a new one. See “Precautions for Replacing the Toner Cartridge” on page 64 for instructions. If this does not resolve the problem, turn the power off and then on again. -
Page 106: Canceling Printing
Paper Jam Explanation: A paper jam occurs. Clear the paper jam. See “Clearing Jammed Paper” on page 76 for instructions. Reset All Explanation: All printer settings have been reset to the default configuration, or to the last settings that were saved.
-
Page 107: The Printer Does Not Print Correctly In The Postscript Mode
The printer does not print correctly in the PostScript mode Cause What to do The printer’s emulation mode setting is incorrect. The printer is set to the Auto mode by default, so that it can automatically determine the encoding used in the received print job data and select the appropriate emulation mode.
-
Page 108: The Font On The Printout Is Different From That On The Screen
The AppleTalk zone setting is incorrect. Open the Printer Setup Utility (Mac OS 10.3.x and 10.4.x) or Print Center (Mac OS 10.2), then select the AppleTalk zone that the printer is connected to. The font on the printout is different from that on the screen Cause What to do The PostScript screen fonts are not installed.
-
Page 109: The Printer Does Not Print Normally Via The Network Interface (Only For The Dn Model)109
For Windows users only The printer cannot print binary data when it is connected to the computer via the USB interface. Make sure that the Data The Data Format setting in the printer’s Properties is Format setting, which is accessed by clicking Advanced on the not set to ASCII or TBCP.
-
Page 110: An Undefined Error Occurs (Macintosh Only)
An undefined error occurs (Macintosh only) Cause What to do The version of the Mac OS that you are using is This printer’s driver can only be used on Macintosh computers unsupported. running Mac OS X version 10.2.8 or later. Printing in the PCL6/PCL5 Mode Problems The problems listed in this section are those that you may encounter when printing in the PCL6 mode.
-
Page 111: The Edges Of Texts And/Or Images Are Not Smooth
The EPSON Screen Fonts are not installed. The screen fonts must be installed on the computer that you are using. Otherwise, the font that you select is substituted by some other font for display on the screen. The edges of texts and/or images are not smooth…
-
Page 112: Chapter 7 About The Printer Software For Windows
Chapter 7 About the Printer Software for Windows Using the Printer Driver The printer driver is the software that allows you to adjust printer settings to get the best results. Note: The printer driver’s online help provides details on printer driver settings. Note for Windows Vista users: Do not press the power button or put your computer to standby or hibernate mode manually during printing.
-
Page 113: Printing A Status Sheet
Note: ❏ This function is available only when EPSON Status Monitor is installed. ❏ This information might be different from the information displayed in EPSON Status Monitor. Use EPSON Status Monitor to get more detailed information about consumables. About the Printer Software for Windows…
-
Page 114: Ordering Consumables
❏ If the genuine EPSON toner cartridge is not used, the level indicator and the alert icon showing the remaining service life are not displayed. Ordering Consumables Click the Order Online button on the Basic Settings tab. See “Order Online” on page 122 for details.
-
Page 115
❏ See the Network Guide for information on installing EPSON Status Monitor on a network. ❏ If you want to use the printer via the print server, you have to install EPSON Status Monitor from the CD-ROM with administrator privileges in each client. -
Page 116: Accessing Epson Status Monitor
Note: ❏ You can also access EPSON Status Monitor by clicking the Simple Status button on the Optional Settings tab on the printer driver. ❏ The Order Online dialog box also appears by clicking the Order Online button on the Basic Settings tab in the printer driver.
-
Page 117: Detailed Status
Note for Windows XP users: EPSON Status Monitor is not available when printing from a Remote Desktop connection. Note for Netware users: When monitoring NetWare printers, a Novell Client that corresponds to your operating system must be used. Operation is confirmed for the versions below: ❏…
-
Page 118: Consumables Information
Clicking this button enables you to order consumables online. See “Order button: Online” on page 122 for details. Note: The remaining service life of the toner cartridge is displayed only if the genuine EPSON toner cartridge is used. About the Printer Software for Windows…
-
Page 119: Job Information
Job Information Job Name: Displays the user’s print job names. Other user’s print jobs are displayed as ———. Status: Waiting: Indicates the print job is waiting to be printed. Spooling: Indicates the print job is being spooled on your computer. Deleting: Indicates the print job is being deleted.
-
Page 120
The Job Information tab is available when the following connections are used: Server and Client Environments: ❏ When using the shared Windows 2000, Server 2003, or Server 2003 x64 LPR connection with Windows Vista, Vista x64, XP, XP x64, or 2000 clients. ❏… -
Page 121: Notice Settings
Notice Settings Monitor the printer status When this check box is selected, EPSON Status Monitor check box: monitors the printer status during a print job is processed. More Settings button: Opens the More Settings dialog box to set how to display the tray icon.
-
Page 122: Order Online
When Allow monitoring of the shared printers check box is selected, the User Account Control dialog box will appear. Then click Continue to make the settings. Note: When sharing the printer, be sure to set EPSON Status Monitor so that the shared printer can be monitored on the print server. Order Online Text box: Displays the consumables and codes.
-
Page 123: Uninstalling The Printer Software
Note: If you do not register the URL when you install Epson Status monitor, you cannot order online. If necessary, uninstall Epson Status Monitor once, then register the URL when you reinstall it. Uninstalling the Printer Software Note: The illustrations in this section show Windows XP screens.
-
Page 124: Sharing The Printer On A Network
7. Click OK. Note: You can uninstall EPSON Network Utility. When the utility is uninstalled, you cannot display the printer status from EPSON Status Monitor of other printers. 8. Follow the on-screen instructions. Sharing the Printer on a Network Sharing the printer This section describes how to share the printer on a standard Windows network.
-
Page 125: Using An Additional Driver
See “With Windows Vista, Vista x64, XP, XP x64, or 2000” on page 129. Note: ❏ When sharing the printer, be sure to set EPSON Status Monitor so that the shared printer can be monitored on the print server. See “Notice Settings” on page 121.
-
Page 126
3. For a Windows Vista, Vista x64, XP, XP x64, Server 2003, or Server 2003 x64 print server, select Share this printer, then type the name in the Share name box. Note: Do not use spaces or hyphens for the Share name, or an error may occur. For a Windows 2000 print server, select Shared as, then type the name in the Share Name box. -
Page 127
On the Windows XP, XP x64, 2000, Server 2003, or Server 2003 x64 print server Click Additional Drivers. Select Windows being used for clients, then click OK. About the Printer Software for Windows… -
Page 128
Server Name Client OS Driver Windows 2000 Windows XP or 2000 clients Intel Windows 2000 Windows XP Windows XP or 2000 clients Intel Windows 2000 or XP Windows XP x64 clients x64 Windows XP Windows XP x64, Server Windows XP or 2000 clients x86 Windows 2000, Windows XP 2003, or Server 2003 x64 and Windows Server 2003… -
Page 129: Setting Up Clients
❏ You cannot use the additional driver on the server system OS. ❏ When you want to use EPSON Status Monitor at a client, you have to install EPSON Status Monitor from the CD-ROM with administrator privileges in each client.
-
Page 130
2. For Windows 2000, double-click the Add Printer icon, then click Next. For Windows XP or XP x64 click Add a printer in the Printer Tasks menu. For Windows Vista or Vista x64, click Add a printer in the menu bar. 3. -
Page 131
For Windows XP or XP x64, select Browse for a printer. For Windows Vista or Vista x64, click Select a shared printer by name in the dialog box that appears, then click Next. 5. For Windows XP, XP x64, 2000, Server 2003, Server 2003 x64, click the icon of the computer or server that is connected to the shared printer, and the name of the shared printer, then click Next. -
Page 132: Installing The Printer Driver From The Cd-Rom
❏ If the printer driver is installed in the client beforehand, you need to select either the new printer driver or the current printer driver. When the prompt to select the printer driver appears, select the printer driver according to the message. ❏…
-
Page 133
2. Insert the CD-ROM, type the appropriate drive and folder names in which the printer driver for clients is located, then click OK. When installing drivers, “Digital Signature is not found.” may appear. Click Yes (for Windows 2000) or Continue Anyway (for Windows Vista, Vista x64, XP, XP x64, Server 2003, or Server 2003 x64) and continue installing. -
Page 134: Chapter 8 About The Printer Software For Macintosh
Chapter 8 About the Printer Software for Macintosh Using the Printer Driver The printer driver is the software that allows you to adjust printer settings to get the best results. Note: ❏ The printer driver’s online help provides details on printer driver settings. ❏…
-
Page 135: Using Epson Status Monitor
For Mac OS X users Note: After installing the EPSON Status Monitor and before doing the procedure below, you need to open the Print dialog box so the EPSON Status Monitor can display the current status of the printer. 1. Open the Applications folder on your hard disk drive, then open the Utilities folder.
-
Page 136: Detailed Status
You can check print job information. See “Job Information” on page 137. Notice Settings You can make specific monitoring settings. Access EPSON Status Monitor and select Notice Settings from the file menu. See “Notice Settings” on page 138. You can also access any of the menus by clicking the appropriate tab on each information window.
-
Page 137: Consumables Information
Note: The remaining service life of the toner cartridge is displayed only if the genuine EPSON toner cartridge is used. Job Information…
-
Page 138: Notice Settings
Job Name: Displays the user’s print job names. Other user’s print jobs are displayed as ———. Status: Waiting: Indicates the print job is waiting to be printed. Spooling: Indicates the print job is being spooled on your computer. Deleting: Indicates the print job is being deleted. Printing: Indicates the print job is printed currently.
-
Page 139: Uninstalling The Printer Software
Uninstalling the Printer Software For Mac OS X users 1. Quit all applications on the computer. 2. Insert the EPSON printer software CD-ROM in your Macintosh. 3. Double-click the Mac OS X folder. 4. Double-click the Printer Driver folder. 5. Double-click your printer’s icon.
-
Page 140: Sharing The Printer On A Network
Sharing the Printer on a Network Sharing the Printer This section describes how to share the printer on an AppleTalk network. The computers on the network can share the printer that is directly connected to one of them. The computer that is directly connected to the printer is the print server, and the other computers are the clients which need permission to share the printer with the print server.
-
Page 141: Chapter 9 About The Postscript Printer Driver
Chapter 9 About the PostScript Printer Driver System Requirements Printer hardware requirements Recommended Memory Standard + 64 MB (for duplex printing of image data at Maximum) Note: Add more memory modules into your printer if the amount of memory currently installed does not meet your printing needs.
-
Page 142: Using The Postscript Printer Driver With Windows
Note: To use binary data, Epson recommends that you use AppleTalk for the printer’s network connection. If you use a protocol other than AppleTalk for the network connection, you need to set Binary to On in the PS3 Menu on the control panel. For details about setting, see the Network Guide. If you use the printer with a local connection, you cannot use binary data.
-
Page 143: Installing The Postscript Printer Driver For The Usb Interface
9. When installation is done, click Finish. Installing the PostScript printer driver for the USB interface Caution: Never use EPSON Status Monitor and PostScript 3 driver at the same time when the printer is connected via a USB port. It may damage the system. Note: ❏…
-
Page 144: Installing The Postscript Printer Driver For The Network Interface
6. Select USB as the port the printer is connected to, then click Next. 7. Click Have Disk and specify the following path for the CD-ROM. If your CD-ROM drive is D:, the path will be D:ADOBEPSENGLISHPS_SETUP. Then click OK. Note: Change the drive letter as needed for your system.
-
Page 145: Accessing The Postscript Printer Driver
9. Click Have Disk in the Add Printer Wizard and specify the following path for the CD-ROM. If your CD-ROM drive is D:, the path will be D:ADOBEPSENGLISHPS_SETUP. Then click OK. Note: Change the drive letter as needed for your system. 10.
-
Page 146: Selecting The Printer
For Mac OS X users Note: ❏ Although EPSON FireWire appears in the interface pop-up list, you cannot use FireWire for printer connection in the PostScript 3 mode. ❏ You need to make the settings for your installed options manually when the printer is connected using USB, IP printing, or Bonjour (Rendezvous).
-
Page 147
PostScript 3 printer driver. Note for IP Printing users: ❏ Make sure to select IP Printing. Do not select EPSON TCP/IP, because it cannot be used with the PostScript 3 printer driver. ❏ After selecting IP Printing, enter the IP address for the printer, then make sure to select the Use default queue on server check box. -
Page 148: Accessing The Postscript Printer Driver
Note for IP Printing users, USB or Bonjour (Rendezvous) users: Select your printer from the Printer list, then select Show Info from the Printers menu. The Printer Info dialog box appears. Select Installable Options from the pop-up list, then make the necessary settings. 6.
-
Page 149: Chapter 10 About The Pcl6/Pcl5 Printer Driver
Chapter 10 About the PCL6/PCL5 Printer Driver About the PCL Mode Hardware requirements Your printer must meet the following hardware requirements to be able to use the PCL6/PCL5 printer driver. Memory requirements for using the PCL6/PCL5 printer driver are shown below. Install optional memory modules into your printer if the amount of memory currently installed does not meet your printing needs.
-
Page 150: Using The Pcl6/Pcl5 Printer Driver
To print in the PCL mode, you will have to install the printer driver. Consult the customer support in your region regarding how to get the printer driver. Note: The PCL6/PCL5 printer driver and EPSON Status Monitor cannot be used at the same time. About the PCL6/PCL5 Printer Driver…
-
Page 151: Installing The Pcl6 Printer Driver
❏ When uninstalling the printer driver, select EPSON Monochrome Laser P6 in the uninstallation program. If you select EPSON Printer Software, the uninstallation may not be completed successfully.
-
Page 152: Accessing The Pcl6 Printer Driver
Note: If you want to change the settings, you can access the PCL6 printer driver by clicking Document Default. Accessing the PCL6 printer driver You can change the PCL6 printer settings in the PCL6 printer driver. To access the printer driver, see “Accessing the printer driver”…
-
Page 153: Appendix A Technical Specifications
Since the quality of any particular brand or type of paper may be changed by the manufacturer at any time, Epson cannot guarantee the quality of any type of paper. Always test samples of paper stock before purchasing large quantities or printing large jobs.
-
Page 154: Printable Area
❏ Labels that peel easily or labels that do not cover the backing sheet completely ❏ Coated paper or special surface-colored paper ❏ Paper that has binder holes or is perforated ❏ Paper that has glue, staples, paper clips, or tape on it ❏…
-
Page 155: Printer
Printer General Printing method: Laser beam scanning and dry electrophotographic process 600 × 600 dpi, 1200 × 1200 dpi Resolution: Continuous printing speed Up to 28 pages per minute at 600 dpi on A4 size paper Up to 14 pages per minute at 1200 dpi on A4 size paper Paper feed: Automatic or manual feed Paper feed alignment:…
-
Page 156: Environmental
Environmental Temperature: In use: 10 to 32.5 °C (50 to 90.5 °F) Not in use: 0 to 35 °C (32 to 95 °F) Humidity: In use: 15 to 80 % RH Not in use: 5 to 85 % RH Altitude: 2500 meters (8200 feet) maximum The recommended environment is 15 to 28 °C (59 to 82 °F) and 20 to 70 % RH.
-
Page 157: Interfaces
Low Voltage Directive 2006/95/EC EN 60950-1 EMC Directive 2004/108/EC EN 55022 Class B EN 55024 EN 61000-3-2 EN 61000-3-3 Australian model: AS/NZS CISPR22 Class B Interfaces USB interface USB 2.0 High Speed mode Note: ❏ Only computers equipped with a USB connector and running Mac OS X and Windows Vista, Vista x64, XP, XP x64, 2000, Server 2003, or Server 2003 x64, support the USB interface.
-
Page 158: Options And Consumable Products
* This product conforms to CE marking requirements in accordance with EC Directive 2004/108/EC. Memory modules Make sure that DIMM you purchase is compatible with EPSON products. For details, contact the store where you purchased this printer or the EPSON sales company.
-
Page 159: Toner Cartridge
Toner cartridge Product code/model High Capacity Toner Cartridge 0435/0439 Standard Capacity Toner Cartridge 0436/0440 Return High Capacity Toner Cartridge 0437/0441 Return Standard Capacity Toner Cartridge 0438/0442 Storage temperature: 0 to 35 °C (32 to 95 °F) Storage humidity: 15 to 80 % RH This product conforms to CE marking requirements in accordance with EC Directive 2004/108/EC.
-
Page 160: Appendix B Customer Support
Check your Pan-European Warranty Document for information on how to contact EPSON Customer support. Help for Users in Australia Epson Australia wishes to provide you with a high level of customer service. In addition to your product documentation, we provide the following sources for obtaining information: Customer Support…
-
Page 161: Help For Users In Singapore
(e-mail). Epson Helpdesk Epson Helpdesk is provided as a final backup to make sure our clients have access to advice. Operators on the Helpdesk can aid you in installing, configuring and operating your Epson product. Our Pre-sales Helpdesk staff can provide literature on new Epson products and advise where the nearest dealer or service agent is located.
-
Page 162: Help For Users In Thailand
❏ Enquiries on repair service and warranty Help for Users in Thailand Contact for information, support, and services are: New :For all products World Wide Web (http://www.epson.co.th) Information on product specifications, drivers for download, Frequently Asked Questions (FAQ), and e-mail are available. Epson Hotline (Phone: (66)2685-9899) Our Hotline team can help you with the following over the phone: ❏…
-
Page 163
Epson Hotline ❏ Sales enquiries and product information ❏ Technical support Phone (62) 21-572 4350 (62) 21-572 4357 Epson Service Center Jakarta Mangga Dua Mall 3rd floor No 3A/B Jl. Arteri Mangga Dua, Jakarta Phone/Fax: (62) 21-62301104 Bandung Lippo Center 8th floor Jl. -
Page 164: Help For Users In Hong Kong
To obtain technical support as well as other after-sales services, users are welcome to contact Epson Hong Kong Limited. Internet Home Page Epson Hong Kong has established a local home page in both Chinese and English on the Internet to provide users with the following information: ❏ Product information ❏…
-
Page 165: Help For Users In India
603-56288333 Help for Users in India Contacts for information, support, and services are: World Wide Web (http://www.epson.co.in) Information on product specifications, drivers for download, and products enquiry are available. Epson India Head Office — Bangalore Phone: 080-30515000 Fax: 30515005 Epson India Regional Offices:…
-
Page 166: Help For Users In The Philippines
For Service (CDMA & Mobile Users) — 3900 1600 (9AM — 6PM) Prefix local STD code Help for Users in the Philippines To obtain technical support as well as other after sales services, users are welcome to contact the Epson Philippines Corporation at the telephone and fax numbers and e-mail address below: Phone: (63) 2-813-6567…
-
Page 167
Installing EPSON Status Monitor (Windows) printer Job Information (Windows) printer (inside of the printer) Job Information Tab (Macintosh) printer (pickup roller) Monitoring Your Printer Using EPSON Status Monitor Memory module (Macintosh) how to install Notice Settings (Windows) how to remove… -
Page 168
Print layout about the PCL Mode Modifying the print layout (Windows) hardware requirements Problems, solving system requirements contacting Epson PostScript printer driver Accessing the PostScript printer driver (Macintosh) Accessing the PostScript printer driver (Windows) hardware requirements Relocating the printer Installing the PostScript printer driver for Mac OS X… -
Page 169
operational problems options paper handling problems PCL6/PCL5 mode PostScript 3 mode print quality problems USB problems Unavailable paper Watermark how to make how to use Index…
-
Contents
-
Table of Contents
-
Troubleshooting
-
Bookmarks
Quick Links
Related Manuals for Epson Aculaser M2000 series
Summary of Contents for Epson Aculaser M2000 series
-
Page 1
User’s Guide NPD3240-00… -
Page 2: Table Of Contents
Contents Copyright and Trademarks Operating System Versions Safety Instructions Safety …………….12 Warnings, Cautions, and Notes.
-
Page 3
Custom paper size …………32 Cancelling a Print Job. -
Page 4
For short distances …………75 Chapter 6 Troubleshooting Clearing Jammed Paper. -
Page 5
Accessing EPSON Status Monitor…….. -
Page 6
Accessing EPSON Status Monitor…….. -
Page 7
Before Contacting Epson …….. -
Page 8
Help for Users in Vietnam ……….. 162 Help for Users in Indonesia . -
Page 9: Copyright And Trademarks
Seiko Epson Corporation and its affiliates shall not be liable against any damages or problems arising from the use of any options or any consumable products other than those designated as Original Epson Products or Epson Approved Products by Seiko Epson Corporation.
-
Page 10
General Notice: Other product names used herein are for identification purposes only and may be trademarks of their respective owners. Epson disclaims any and all rights in those marks. Copyright © 2008 Seiko Epson Corporation. All rights reserved. Copyright and Trademarks… -
Page 11: Operating System Versions
Operating System Versions In this manual, the following abbreviations are used. Windows refers to Windows Vista, XP, Vista x64, XP x64, 2000, Server 2003, and Server 2003 x64. ❏ Windows Vista refers to Windows Vista Ultimate Edition, Windows Vista Home Premium Edition, Windows Vista Home Basic Edition, Windows Vista Enterprise Edition and Windows Vista Business Edition.
-
Page 12: Safety Instructions
Safety Instructions Safety Warnings, Cautions, and Notes Warnings must be followed carefully to avoid bodily injury. Cautions must be observed to avoid damage to your equipment. Notes contain important information and useful tips on the operation of your printer. Safety precautions Be sure to follow the precautions carefully to ensure safe, efficient operation: ❏…
-
Page 13
❏ Be careful not to touch the fuser, which is marked CAUTION HOT SURFACE or the surrounding areas. If the printer has been in use, the fuser and the surrounding areas may be very hot. If you must touch one of these areas, wait 30 minutes to allow the heat to subside before doing so. -
Page 14: Important Safety Instructions
❏ Be careful not to scratch the surface of the drum. When you remove the photoconductor unit from the printer, always place it on a clean, smooth surface. Avoid touching the drum, since oil from your skin can permanently damage its surface and affect print quality. ❏…
-
Page 15
❏ When connecting this product to a computer or other device with a cable, ensure the correct orientation of the connectors. Each connector has only one correct orientation. Inserting a connector in the wrong orientation may damage both devices connected by the cable. ❏… -
Page 16: Safety Information
Safety Information Power cord Caution: ❏ Be sure the AC power cord meets the relevant local safety standards. Use only the power cord that comes with this product. Use of the another cord may result in fire or electric shock. This product’s power cord is for use with this product only.
-
Page 17: Power On/Off Cautions
The recommended exposure limit for ozone is 0.1 parts per million (ppm) expressed as an average time-weighted concentration over an eight (8) hour period. The Epson laser printer generates less than 0.1 ppm for eight (8) hours of continuous printing. Minimize the risk To minimize the risk of exposure to ozone, you should avoid the following conditions: ❏…
-
Page 18: Chapter 1 Getting To Know Your Printer
Chapter 1 Getting to Know Your Printer Where to Find Information Setup Guide Provides you with information on assembling the printer and installing the printer software. User’s Guide (this manual) Provides you with detailed information on the printer’s functions, optional products, maintenance, troubleshooting, and technical specifications.
-
Page 19: Printer Parts
Printer Parts Front view a. top cover (cover A) b. control panel c. standard lower paper cassette d. MP tray (Multi-Purpose tray) e. subtray f. stopper Rear view D model Getting to Know Your Printer…
-
Page 20
DN model a. rear cover b. AC inlet c. power switch d. option cover e. parallel interface connector (only for the D model) f. USB interface connector g. network interface connector (only for the DN model) Note: This manual uses D model as an example of the rear view illustrations. Getting to Know Your Printer… -
Page 21: Inside The Printer
Inside the printer a. fuser unit b. photoconductor unit c. toner cartridge d. developer unit Getting to Know Your Printer…
-
Page 22: Control Panel
Control panel Information button Prints status sheets when the Error light is off and no warning is indicated. Prints a status sheet when pressed once. If your printer is a DN model, pressing this button for more than two seconds prints a network status sheet.
-
Page 23: Options And Consumable Products
DN models) by adding one additional 64, 128 or 256MB 90 pin SDRAM DIMM. Note: Make sure that the DIMM you purchase is compatible with EPSON products. For details, contact the store where you purchased this printer or an EPSON qualified service representative.
-
Page 24
❏ Return toner cartridges are not sold in some areas. Getting to Know Your Printer… -
Page 25: Chapter 2 Printing Tasks
Chapter 2 Printing Tasks Loading Paper into Your Printer This section describes how to load paper. If you use special media such as transparencies or envelopes, see also “Selecting and Using Print Media” on page 29. For specifications or details about the paper types and sizes, see “Paper”…
-
Page 26
2. Slide the paper guides outward to accommodate the paper you are loading. 3. Load a stack of the desired paper on the center of the paper tray with the printable surface facing up. Then adjust the paper guide to the size of the paper. Note: ❏… -
Page 27: Lower Paper Cassette Unit
a. limit tab 4. Raise the stopper. Note: When you use the paper that is longer than A4 size, do not raise the stopper. To prevent printouts from being stacked and pushed out of the output tray, every time the printer ejects a couple of the printouts, remove them from the tray.
-
Page 28
2. Pinch the tab and slide the paper guides to the size of paper. 3. Load a stack of the desired paper on the center of the paper cassette with the printable surface facing down. Note: ❏ Make sure that you do not load paper beyond the limit mark. a. -
Page 29: Selecting And Using Print Media
4. Insert the loaded paper cassette back into the unit. 5. Raise the stopper. Note: When you use the paper that is longer than A4 size, do not raise the stopper. To prevent printouts from being stacked and pushed out of the output tray, every time the printer ejects a couple of the printouts, remove them from the tray.
-
Page 30: Labels
Since the quality of any particular brand or type of media may be changed by the manufacturer at any time, EPSON cannot guarantee the quality of any type of media. Always test samples of media stock before purchasing large quantities or printing large jobs.
-
Page 31: Thick Paper
Available paper source: ❏ MP tray Printer driver settings: Paper Size: MON, C10, DL, C5, C6, IB5 Paper Source: MP tray Note: ❏ Set the envelope with the printable surface facing up. ❏ Depending on the quality of envelopes, the printing environment, or the printing procedure, envelopes might be wrinkled.
-
Page 32: Semi-Thick Paper
Semi-thick paper Available paper source: ❏ MP tray ❏ Standard lower paper cassette ❏ Optional paper cassette Printer driver settings: Paper Size: A4, A5, B5, LT, EXE Paper Source: Auto Selection Paper Type: Semi-Thick (91 to 120 g/m² paper) Transparencies Available paper source: ❏…
-
Page 33: Cancelling A Print Job
Paper Size: User Defined Size Paper Source: MP tray Paper Type: Normal, Semi-Thick, or Thick Note: Depending on the quality of the non-standard size paper, the printing environment, or the printing procedure, the paper might skew. Make a trial print run before you print on a lot of non-standard size paper. Note: ❏…
-
Page 34: From The Computer
From the computer For Windows users Double-click your printer’s icon on the taskbar. Select the job in the list, then click Cancel from the Document menu. For Mac OS X users Open Printer Setup Utility (for Mac OS X 10.3 and 10.4) or Print Center (for Mac OS X 10.2) and double-click your printer from the print queue.
-
Page 35
2. Select Automatic, then choose desired printing quality. 3. Click OK. For Mac OS X users 1. Open the Print dialog box. 2. Select Printer Settings from the drop-down list, and select the Basic Settings tab. Printing Tasks… -
Page 36: Using The Advanced Setting
3. Select Automatic, then choose the resolution from the drop-down list. Using the Advanced setting For Windows users 1. Click the Basic Settings tab. Printing Tasks…
-
Page 37
2. Select Advanced. Then select the most appropriate setting from the list according to the type of document or image you want to print. When you choose a predefined setting, other settings such as Print Quality and Screen are set automatically. -
Page 38: Customizing Print Settings
3. Select Advanced, then click More Settings. 4. Set the appropriate setting in the Advanced dialog box. When you choose a predefined setting, other settings such as Print Quality and Screen are set automatically. Changes are shown in the Summary drop-down list in the Print dialog box. Customizing print settings If you need to change detailed settings, make the settings manually.
-
Page 39
2. Select Printer Settings from the drop-down list, and select Basic Settings tab. 3. Select Advanced, then click More Settings. 4. Make appropriate settings. For details about each setting, click the button. 5. Click OK. Saving your settings You can save your custom settings. Note: ❏… -
Page 40: Toner Save Mode
2. Click Save or Save As in the Presets. 3. Type a name for your custom settings in the Name box, then click OK. Your settings will appear in the Presets drop-down list. Note: ❏ To delete a custom setting, select the setting, then select Delete in the presets drop-down list. ❏…
-
Page 41
2. Select the Duplex check box, then select Left, Top, or Right as the binding position. 3. If you want to make detailed settings, click Duplex Settings to open the Duplex Settings dialog box. 4. Make appropriate settings. For details about each setting, see online help. 5. -
Page 42: Modifying The Print Layout
3. Select the Duplex check box, then select Left, Top, or Right as the binding position. 4. If you want to make detailed settings, click Duplex Settings to open the Duplex Settings dialog box. 5. Make appropriate settings. For details about each setting, see online help. 6.
-
Page 43
3. If you want to make detailed settings, click More Settings. The Print Layout Settings dialog box appears. 4. Make appropriate settings. For details about each setting, see online help. 5. Click OK. For Mac OS X users 1. Open the Print dialog box. 2. -
Page 44: Resizing Printouts
4. Click Print. Note: The Layout settings are a standard feature of Mac OS X. Resizing printouts This function allows you to enlarge or reduce your document. For Windows users 1. Click the Advanced Layout tab. 2. Select the Zoom Options check box. 3.
-
Page 45: Printing Watermarks
5. Click OK. For Mac OS X users Note: ❏ The enlarging or reducing rate is automatically specified according to the paper size you select. ❏ This function is not available with Mac OS X 10.2 and 10.3. 1. Open the Print dialog box. 2.
-
Page 46
2. Select a watermark that you want to use from the Watermark drop-down list. 3. If you want to make detailed settings, click Watermark Settings, and make appropriate settings. For details about each setting, see online help. 4. Click OK. For Mac OS X users 1. -
Page 47
3. Click Stamp Function. 4. Select the Watermark check box, then click Watermark Settings. 5. Select a watermark from the Watermark drop-down list. 6. Make appropriate settings. For details about each setting, see online help. 7. Click OK. Making a new watermark For Windows users 1. -
Page 48
❏ To remove the saved watermark, select it from the List box, then click Delete. After removing it, be sure to click OK to close the dialog box. 7. Click OK. Note: ❏ You can register up to 10 custom watermarks. ❏… -
Page 49: Printing Headers And Footers
7. If you select Add Text, type the watermark text, select the Font and Style, then click OK on the Edit Text dialog box. If you select Add Image, select an image file (PDF, PNG, or JPG), then click Open. Note: To type the watermark text, open the Text Input dialog box by clicking the text box.
-
Page 50
2. Select the Header/Footer check box, then click Header/Footer Settings. 3. Select the items from the drop-down list. Note: If you select Collate Number, the number of copies is printed. 4. Click OK. For Mac OS X users 1. Open the Print dialog box. 2. -
Page 51: Printing With An Overlay
3. Click Stamp Function. 4. Select the Header/Footer check box, then click Header/Footer Settings. 5. Select the items from the drop-down list. Note: If you select Collate Number, the number of copies is printed. 6. Click OK. Printing with an overlay This function allows you to print a standard form or letterhead onto the original document.
-
Page 52
3. Click the Advanced Layout tab. 4. Select the Form Overlay check box. 5. Select Create Overlay Data, then click More Settings. The Create Form dialog box appears. 6. Type the form name in the Form Name box and its description in the Description box. 7. -
Page 53
Printing an overlaid document You can select the registered form data from the Paper Source drop-down list on the Basic Settings tab. For registering form data in the Paper Source, see step 8 in “Creating an overlay” on page 51. If overlay form data is not registered in the Paper Source or if you want to make detailed settings, follow the steps below. -
Page 54: Printing Web Pages To Fit Your Paper Size
Printing Web Pages to Fit Your Paper Size This function allows you to make Web pages fit to your paper size when printing. Install EPSON Web-To-Page from the printer software CD-ROM. Note: This software is for Windows only. After you install EPSON Web-To-Page, the menu bar is displayed on the Microsoft Internet Explorer Toolbar.
-
Page 55: Chapter 3 Installing Options
Chapter 3 Installing Options Optional Paper Cassette Unit For details about the paper types and sizes that you can use with the optional paper cassette unit, see “Lower Paper Cassette Unit” on page 27. For specifications, see “Optional paper cassette unit” on page 158.
-
Page 56
D model DN model * OFF Caution: Make sure to unplug the power cord from the printer to prevent getting an electrical shock. 2. Carefully remove the optional paper cassette unit from its carton and place it where you intend to set up the printer. -
Page 57
3. Carefully, grasp the printer at the position indicated below and lift it carefully. 4. Align the corners of the printer and the unit, then lower the printer gently onto the unit so that the connector and two pins on the top of the unit fit into the terminal and the holes on the bottom of the printer respectively. -
Page 58
5. Pull the paper cassette out from the unit. 6. Turn the lever to the position as shown below to lock the optional paper cassette unit. 7. Insert the paper cassette back into the unit. 8. Reconnect all the interface cables and the power cord. Installing Options… -
Page 59: Removing The Optional Paper Cassette Unit
To confirm that the option is installed correctly, print a Status Sheet. See “Printing a Status Sheet” on page 90. Note for Windows users: If EPSON Status Monitor is not installed, you have to make settings manually in the printer driver. See “Making Optional Settings” on page 113. Note for Macintosh users: When you have attached or removed printer options, you need to delete the printer using Print Setup Utility (for Mac OS X 10.3 and 10.4) or Print Center (for Mac OS X 10.2), and then re-register the printer.
-
Page 60
1. Turn the printer off and unplug the power cord. * OFF Caution: Make sure to unplug the power cord from the printer to prevent getting an electrical shock. 2. Remove the screw on the option cover on the back of the printer using the screw driver. Installing Options… -
Page 61
3. Remove the option cover. 4. Identify the memory slot. The position is shown below. a. memory slot 5. Push a white stopper until it stops. Installing Options… -
Page 62
6. Insert the memory module into the memory slot until it stops. 7. Slide the white stopper back toward you to lock the memory module. Caution: ❏ Do not apply too much force. ❏ Be sure to insert the memory facing the correct way. ❏… -
Page 63: Removing A Memory Module
Note for Windows users: If EPSON Status Monitor is not installed, you have to make settings manually in the printer driver. See “Making Optional Settings” on page 113. Note for Macintosh users: When you have attached or removed printer options, you need to delete the printer using Print Setup Utility (for Mac OS X 10.3 and 10.4), Print Center (for Mac OS X 10.2), and then re-register the printer.
-
Page 64: Chapter 4 Replacing Consumable Products
When the Toner light and the Error light are on, the printer has run out of toner. If the indicator lights light up in this manner, or if a message is displayed on the EPSON Status Monitor screen, replace the toner cartridge.
-
Page 65
❏ The toner cartridge is not an independent unit that you install directly into the printer. The cartridge needs to be inserted into the developer unit’s casing and then installed into the printer. Warning: ❏ Do not touch the toner. Always keep toner away from your eyes. If toner gets on your skin or clothes, wash it off with soap and water immediately. -
Page 66
Caution: ❏ You must completely open the printer cover when replacing the toner cartridge; otherwise, you may damage the printer. ❏ Never touch the developing roller that is exposed after removing the protective cover; otherwise, print quality may decline. ❏ When you replace the toner cartridge, wipe paper dust and marks from the metal roller inside the printer with a dry and soft cloth as shown below. -
Page 67: Chapter 5 Cleaning And Transporting The Printer
Chapter 5 Cleaning and Transporting the Printer Cleaning the Printer The printer needs only minimal cleaning. If the printer’s outer case is dirty or dusty, turn off the printer and clean it with a soft, clean cloth moistened with a mild detergent. Caution: Never use alcohol or paint thinner to clean the printer cover.
-
Page 68
2. Pull the paper cassette unit out and remove the papers. 3. Gently wipe the rubber parts of the pickup roller inside the printer with a well-wrung wet cloth. 4. Load the papers back on the paper cassette unit and reinstall the cassette. Cleaning and Transporting the Printer… -
Page 69: Cleaning Inside The Printer
Cleaning inside the printer 1. Open the top cover and MP tray. 2. Remove the developer unit containing the toner cartridge. 3. Put your finger into the hole of the outer green knob on each side of the photoconductor unit. Then, pull the photoconductor unit towards you.
-
Page 70
Warning: Be careful not to touch the fuser, which is marked CAUTION HOT SURFACE, or the surrounding areas. If the printer has been in use, the fuser and the surrounding areas may be very hot. If you must touch one of these areas, wait 30 minutes to allow the heat to subside before doing Caution: ❏… -
Page 71
4. Wipe paper dust and marks from the metal roller inside the printer with a dry and soft cloth as shown below. * metal roller 5. Move the green cleaning lever of the photoconductor wire back and forth slowly several times from one end to the other. -
Page 72
6. Insert the photoconductor unit slowly all the way in. 7. Insert the developer unit containing the toner cartridge slowly all the way in. 8. Close the top cover and MP tray. Cleaning and Transporting the Printer… -
Page 73: Transporting The Printer
Transporting the Printer Finding a place for the printer When relocating the printer, always choose a location that has adequate space for easy operation and maintenance. Use the following illustration as a guide for the amount of space required around the printer to ensure smooth operation.
-
Page 74: For Long Distances
❏ Keep the entire computer and printer system away from potential sources of interference, such as loudspeakers or the base units of cordless telephones. ❏ Avoid using an electrical outlet that is controlled by wall switches or automatic timers. Accidental disruption of power can erase valuable information in your computer’s and printer’s memory.
-
Page 75: For Short Distances
For short distances Always pay attention to the following handling precautions when you need to move the printer for short distances. 1. Turn off the printer and remove the following items: ❏ Power cord ❏ Interface cables ❏ Loaded Paper ❏…
-
Page 76: Chapter 6 Troubleshooting
Chapter 6 Troubleshooting Clearing Jammed Paper If paper becomes jammed in the printer, the EPSON Status Monitor provides alert messages. Precautions for clearing jammed paper Be sure to observe the following points when you clear jammed paper. ❏ Do not remove jammed paper by force. Torn paper can be difficult to remove and might cause other paper jams.
-
Page 77: Paper Jam Around The Standard Lower Cassette
Paper Jam around the standard lower cassette 1. Remove the standard paper cassette, gently pull any sheets of paper out, and reinstall the paper cassette. Paper Jam around the 250-sheet Paper Cassette Unit 1. Remove the optional paper cassette, gently pull any sheets of paper out, and reinstall the paper cassette.
-
Page 78: Paper Jam In The 250-Sheet Paper Cassette Unit
2. Remove the standard paper cassette, gently pull any sheets of paper out, and reinstall the paper cassette. Paper Jam in the 250-sheet Paper Cassette Unit 1. Remove the optional paper cassettes from the bottom one, then gently pull any sheets of paper out.
-
Page 79: Paper Jam Inside The Printer
2. Reinstall the paper cassettes. Paper Jam inside the printer 1. Open the top cover and MP tray. 2. Remove the developer unit containing the toner cartridge. Troubleshooting…
-
Page 80
3. Put your finger into the hole of the outer green knob on each side of the photoconductor unit. Then, pull the photoconductor unit towards you. Warning: Be careful not to touch the fuser, which is marked CAUTION HOT SURFACE, or the surrounding areas. -
Page 81
Caution: ❏ Never touch the developing roller that is exposed after removing the protecting cover; otherwise, print quality may decline. ❏ Do not expose the photoconductor unit to room light any longer than necessary. ❏ Never touch the photoconductor unit’s light-sensitive drum; otherwise, print quality may decline. -
Page 82
5. Insert the photoconductor unit slowly all the way in. 6. Insert the developer unit containing the toner cartridge slowly all the way in. Note: If you cannot insert the developer unit all the way in, remove and insert the photoconductor unit, then insert the developer unit again. -
Page 83: Paper Jam Around The Mp Tray
Paper Jam around the MP tray 1. Remove the paper on the subtray, then bring the subtray back into the MP tray. Caution: Even if you see any jammed paper when you perform this step, do not pull it out. Otherwise, the printer may be damaged.
-
Page 84
3. Remove the developer unit containing the toner cartridge. 4. Put your finger into the hole of the outer green knob on each side of the photoconductor unit. Then, pull the photoconductor unit towards you. Warning: Be careful not to touch the fuser, which is marked CAUTION HOT SURFACE, or the surrounding areas. -
Page 85
Caution: ❏ Never touch the developing roller that is exposed after removing the protecting cover; otherwise, print quality may decline. ❏ Do not expose the photoconductor unit to room light any longer than necessary. ❏ Never touch the photoconductor unit’s light-sensitive drum; otherwise, print quality may decline. -
Page 86
6. Insert the photoconductor unit slowly all the way in. 7. Insert the developer unit containing the toner cartridge slowly all the way in. Note: If you cannot insert the developer unit all the way in, remove and insert the photoconductor unit, then insert the developer unit again. -
Page 87: Paper Jam Around The Rear Cover
Note: For details about loading papers, see “MP tray” on page 25. Paper Jam around the rear cover 1. Open the rear cover. 2. Pull the green labeled lever down and gently pull any sheets of paper out. Troubleshooting…
-
Page 88: Paper Jam Around The Dm Tray
3. Close the rear cover. 4. Open and close the top cover. Paper Jam around the DM tray 1. Remove the standard paper cassette. Troubleshooting…
-
Page 89
2. From the rear view, push the DM tray and gently pull any sheets of paper out. Note: Do not touch any metal part except the green lever on the DM tray. 3. From the front view, push the DM tray and gently pull any sheets of paper out. 4. -
Page 90: Printing A Status Sheet
Printing a Status Sheet To confirm the current status of the printer, and that the options are installed correctly, print a status sheet using the printer’s control panel or the printer driver. To print a status sheet from the printer’s control panel, see “Control panel” on page 22. To print a status sheet from the printer driver, for Windows, see “Printing a status sheet”…
-
Page 91: The Optional Product Is Not Available
113. For Macintosh users: When you have attached or removed options from the printer, you need to start EPSON Status Monitor, or delete and re-register the printer. To delete the printer, use Print Setup Utility (for Mac OS X 10.3 and 10.4) or Print Center (for Mac OS X 10.2).
-
Page 92: Printout Is Garbled
For Windows users, you may use the printer fonts In the printer driver, choose the Print TrueType fonts as bitmap substituted for specified TrueType fonts. check box in the Extended Settings dialog box. The selected font is not supported by your printer. Make sure that you have installed the correct font.
-
Page 93: Print Quality Problems
Do not store paper in a humid or damp environment. The toner cartridge may be near the end of its service If the message in EPSON Status Monitor indicates that the life. toner cartridge is near the end of its service life, replace it. See “Precautions for Replacing the Toner Cartridge”…
-
Page 94: Toner Smudges
Toner smudges Cause What to do Your paper may be moist or damp. Do not store your paper in a humid or damp environment. You may not be using the correct type of paper for Smooth, high-quality copier paper is recommended for best your printer.
-
Page 95: The Printed Image Is Light Or Faint
The toner cartridge may be near the end of its service If the message in EPSON Status Monitor indicates that the life. toner cartridge is near the end of its service life, replace it. See “Precautions for Replacing the Toner Cartridge” on page 64.
-
Page 96: Memory Problems
Memory Problems Insufficient memory for current task Cause What to do The printer has insufficient memory for current task. Add more memory for a permanent solution or lower print quality temporarily in the printer driver. Insufficient memory to print all copies Cause What to do The printer does not have sufficient memory to…
-
Page 97: Problems Using Options
“Making Optional Settings” on page 113. For Macintosh users: When you have attached or removed options from the printer, you need to start EPSON Status Monitor, or delete and re-register the printer. To delete the printer, use Print Setup Utility (for Mac OS X 10.3 and 10.4) or Print Center (for Mac OS X 10.2).
-
Page 98: Usb Connections
USB connections USB cables or connections can sometimes be the source of USB problems. For best results, you should connect the printer directly to the computer’s USB port. If you must use multiple USB hubs, we recommend that you connect the printer to the first-tier hub. Windows operating system Your computer must be a model pre-installed with Windows Vista, Vista x64, XP, XP x64, 2000, Server 2003, or Server 2003 x64, or a model that was pre-installed with Windows 2000, Server 2003,…
-
Page 99: Network Connection Problems (Only For The Dn Model)
Note: For Windows 2000, if the Digital Signature Not Found dialog box appears during the installation process, click Yes. If you click No, you will have to install the printer software again. For Windows Vista, Vista x64, XP, XP x64, Server 2003, or Server 2003 x64, if the Software Installation dialog box appears during the installation process, click Continue Anyway.
-
Page 100: Status And Error Lights
For information on the location of the lights, see “Control panel” on page 22. Note: You can check the printer status and error easily on the computer by using EPSON Status Monitor. For details about EPSON Status Monitor, for Windows see “Using EPSON Status Monitor” on page 114, for Macintosh see “Using EPSON Status Monitor”…
-
Page 101: Troubleshooting
Reset Explanation: The printer’s current interface has been reset and the buffer has been cleared. However, other interfaces are still active and retain their settings and data. Form Feed Explanation: The printer is ejecting paper due to a user request. This warning appears when pressing the Start/Stop button once to make the printer offline, then holding down the Start/Stop button for more than 2 seconds in order not to receive form feed command.
-
Page 102
Cover Open Explanation: The cover on the printer is open. Close the cover. Print Data Error Explanation: The print data is deleted because it is incorrect. Make sure the appropriate printer driver are used. Insufficient Memory to Print All Copies Explanation: Printing by the specified number of copies is no longer possible due to insufficient memory (RAM). -
Page 103
The installed toner cartridge is not a genuine EPSON product. Installing a genuine toner cartridge is recommended. Using a non-genuine toner cartridge may affect print quality. EPSON shall not be liable for any damages or problems arising from the use of consumable products not manufactured or approved by EPSON. -
Page 104
The installed toner cartridge is not a genuine EPSON product. Installing a genuine toner cartridge is recommended. Using a non-genuine toner cartridge may affect print quality. EPSON shall not be liable for any damages or problems arising from the use of consumable products not manufactured or approved by EPSON. -
Page 105
Toner Cartridge Memory Error Explanation: A memory read/write error has occurred. Reset the toner cartridge or replace it to a new one. See “Precautions for Replacing the Toner Cartridge” on page 64 for instructions. If this does not resolve the problem, turn the power off and then on again. -
Page 106: Canceling Printing
Paper Jam Explanation: A paper jam occurs. Clear the paper jam. See “Clearing Jammed Paper” on page 76 for instructions. Reset All Explanation: All printer settings have been reset to the default configuration, or to the last settings that were saved.
-
Page 107: The Printer Does Not Print Correctly In The Postscript Mode
The printer does not print correctly in the PostScript mode Cause What to do The printer’s emulation mode setting is incorrect. The printer is set to the Auto mode by default, so that it can automatically determine the encoding used in the received print job data and select the appropriate emulation mode.
-
Page 108: The Font On The Printout Is Different From That On The Screen
The AppleTalk zone setting is incorrect. Open the Printer Setup Utility (Mac OS 10.3.x and 10.4.x) or Print Center (Mac OS 10.2), then select the AppleTalk zone that the printer is connected to. The font on the printout is different from that on the screen Cause What to do The PostScript screen fonts are not installed.
-
Page 109: The Printer Does Not Print Normally Via The Network Interface (Only For The Dn Model)109
For Windows users only The printer cannot print binary data when it is connected to the computer via the USB interface. Make sure that the Data The Data Format setting in the printer’s Properties is Format setting, which is accessed by clicking Advanced on the not set to ASCII or TBCP.
-
Page 110: An Undefined Error Occurs (Macintosh Only)
An undefined error occurs (Macintosh only) Cause What to do The version of the Mac OS that you are using is This printer’s driver can only be used on Macintosh computers unsupported. running Mac OS X version 10.2.8 or later. Printing in the PCL6/PCL5 Mode Problems The problems listed in this section are those that you may encounter when printing in the PCL6 mode.
-
Page 111: The Edges Of Texts And/Or Images Are Not Smooth
The EPSON Screen Fonts are not installed. The screen fonts must be installed on the computer that you are using. Otherwise, the font that you select is substituted by some other font for display on the screen. The edges of texts and/or images are not smooth…
-
Page 112: Chapter 7 About The Printer Software For Windows
Chapter 7 About the Printer Software for Windows Using the Printer Driver The printer driver is the software that allows you to adjust printer settings to get the best results. Note: The printer driver’s online help provides details on printer driver settings. Note for Windows Vista users: Do not press the power button or put your computer to standby or hibernate mode manually during printing.
-
Page 113: Printing A Status Sheet
Note: ❏ This function is available only when EPSON Status Monitor is installed. ❏ This information might be different from the information displayed in EPSON Status Monitor. Use EPSON Status Monitor to get more detailed information about consumables. About the Printer Software for Windows…
-
Page 114: Ordering Consumables
❏ If the genuine EPSON toner cartridge is not used, the level indicator and the alert icon showing the remaining service life are not displayed. Ordering Consumables Click the Order Online button on the Basic Settings tab. See “Order Online” on page 122 for details.
-
Page 115
❏ See the Network Guide for information on installing EPSON Status Monitor on a network. ❏ If you want to use the printer via the print server, you have to install EPSON Status Monitor from the CD-ROM with administrator privileges in each client. -
Page 116: Accessing Epson Status Monitor
Note: ❏ You can also access EPSON Status Monitor by clicking the Simple Status button on the Optional Settings tab on the printer driver. ❏ The Order Online dialog box also appears by clicking the Order Online button on the Basic Settings tab in the printer driver.
-
Page 117: Detailed Status
Note for Windows XP users: EPSON Status Monitor is not available when printing from a Remote Desktop connection. Note for Netware users: When monitoring NetWare printers, a Novell Client that corresponds to your operating system must be used. Operation is confirmed for the versions below: ❏…
-
Page 118: Consumables Information
Clicking this button enables you to order consumables online. See “Order button: Online” on page 122 for details. Note: The remaining service life of the toner cartridge is displayed only if the genuine EPSON toner cartridge is used. About the Printer Software for Windows…
-
Page 119: Job Information
Job Information Job Name: Displays the user’s print job names. Other user’s print jobs are displayed as ———. Status: Waiting: Indicates the print job is waiting to be printed. Spooling: Indicates the print job is being spooled on your computer. Deleting: Indicates the print job is being deleted.
-
Page 120
The Job Information tab is available when the following connections are used: Server and Client Environments: ❏ When using the shared Windows 2000, Server 2003, or Server 2003 x64 LPR connection with Windows Vista, Vista x64, XP, XP x64, or 2000 clients. ❏… -
Page 121: Notice Settings
Notice Settings Monitor the printer status When this check box is selected, EPSON Status Monitor check box: monitors the printer status during a print job is processed. More Settings button: Opens the More Settings dialog box to set how to display the tray icon.
-
Page 122: Order Online
When Allow monitoring of the shared printers check box is selected, the User Account Control dialog box will appear. Then click Continue to make the settings. Note: When sharing the printer, be sure to set EPSON Status Monitor so that the shared printer can be monitored on the print server. Order Online Text box: Displays the consumables and codes.
-
Page 123: Uninstalling The Printer Software
Note: If you do not register the URL when you install Epson Status monitor, you cannot order online. If necessary, uninstall Epson Status Monitor once, then register the URL when you reinstall it. Uninstalling the Printer Software Note: The illustrations in this section show Windows XP screens.
-
Page 124: Sharing The Printer On A Network
7. Click OK. Note: You can uninstall EPSON Network Utility. When the utility is uninstalled, you cannot display the printer status from EPSON Status Monitor of other printers. 8. Follow the on-screen instructions. Sharing the Printer on a Network Sharing the printer This section describes how to share the printer on a standard Windows network.
-
Page 125: Using An Additional Driver
See “With Windows Vista, Vista x64, XP, XP x64, or 2000” on page 129. Note: ❏ When sharing the printer, be sure to set EPSON Status Monitor so that the shared printer can be monitored on the print server. See “Notice Settings” on page 121.
-
Page 126
3. For a Windows Vista, Vista x64, XP, XP x64, Server 2003, or Server 2003 x64 print server, select Share this printer, then type the name in the Share name box. Note: Do not use spaces or hyphens for the Share name, or an error may occur. For a Windows 2000 print server, select Shared as, then type the name in the Share Name box. -
Page 127
On the Windows XP, XP x64, 2000, Server 2003, or Server 2003 x64 print server Click Additional Drivers. Select Windows being used for clients, then click OK. About the Printer Software for Windows… -
Page 128
Server Name Client OS Driver Windows 2000 Windows XP or 2000 clients Intel Windows 2000 Windows XP Windows XP or 2000 clients Intel Windows 2000 or XP Windows XP x64 clients x64 Windows XP Windows XP x64, Server Windows XP or 2000 clients x86 Windows 2000, Windows XP 2003, or Server 2003 x64 and Windows Server 2003… -
Page 129: Setting Up Clients
❏ You cannot use the additional driver on the server system OS. ❏ When you want to use EPSON Status Monitor at a client, you have to install EPSON Status Monitor from the CD-ROM with administrator privileges in each client.
-
Page 130
2. For Windows 2000, double-click the Add Printer icon, then click Next. For Windows XP or XP x64 click Add a printer in the Printer Tasks menu. For Windows Vista or Vista x64, click Add a printer in the menu bar. 3. -
Page 131
For Windows XP or XP x64, select Browse for a printer. For Windows Vista or Vista x64, click Select a shared printer by name in the dialog box that appears, then click Next. 5. For Windows XP, XP x64, 2000, Server 2003, Server 2003 x64, click the icon of the computer or server that is connected to the shared printer, and the name of the shared printer, then click Next. -
Page 132: Installing The Printer Driver From The Cd-Rom
❏ If the printer driver is installed in the client beforehand, you need to select either the new printer driver or the current printer driver. When the prompt to select the printer driver appears, select the printer driver according to the message. ❏…
-
Page 133
2. Insert the CD-ROM, type the appropriate drive and folder names in which the printer driver for clients is located, then click OK. When installing drivers, “Digital Signature is not found.” may appear. Click Yes (for Windows 2000) or Continue Anyway (for Windows Vista, Vista x64, XP, XP x64, Server 2003, or Server 2003 x64) and continue installing. -
Page 134: Chapter 8 About The Printer Software For Macintosh
Chapter 8 About the Printer Software for Macintosh Using the Printer Driver The printer driver is the software that allows you to adjust printer settings to get the best results. Note: ❏ The printer driver’s online help provides details on printer driver settings. ❏…
-
Page 135: Using Epson Status Monitor
For Mac OS X users Note: After installing the EPSON Status Monitor and before doing the procedure below, you need to open the Print dialog box so the EPSON Status Monitor can display the current status of the printer. 1. Open the Applications folder on your hard disk drive, then open the Utilities folder.
-
Page 136: Detailed Status
You can check print job information. See “Job Information” on page 137. Notice Settings You can make specific monitoring settings. Access EPSON Status Monitor and select Notice Settings from the file menu. See “Notice Settings” on page 138. You can also access any of the menus by clicking the appropriate tab on each information window.
-
Page 137: Consumables Information
Note: The remaining service life of the toner cartridge is displayed only if the genuine EPSON toner cartridge is used. Job Information…
-
Page 138: Notice Settings
Job Name: Displays the user’s print job names. Other user’s print jobs are displayed as ———. Status: Waiting: Indicates the print job is waiting to be printed. Spooling: Indicates the print job is being spooled on your computer. Deleting: Indicates the print job is being deleted. Printing: Indicates the print job is printed currently.
-
Page 139: Uninstalling The Printer Software
Uninstalling the Printer Software For Mac OS X users 1. Quit all applications on the computer. 2. Insert the EPSON printer software CD-ROM in your Macintosh. 3. Double-click the Mac OS X folder. 4. Double-click the Printer Driver folder. 5. Double-click your printer’s icon.
-
Page 140: Sharing The Printer On A Network
Sharing the Printer on a Network Sharing the Printer This section describes how to share the printer on an AppleTalk network. The computers on the network can share the printer that is directly connected to one of them. The computer that is directly connected to the printer is the print server, and the other computers are the clients which need permission to share the printer with the print server.
-
Page 141: Chapter 9 About The Postscript Printer Driver
Chapter 9 About the PostScript Printer Driver System Requirements Printer hardware requirements Recommended Memory Standard + 64 MB (for duplex printing of image data at Maximum) Note: Add more memory modules into your printer if the amount of memory currently installed does not meet your printing needs.
-
Page 142: Using The Postscript Printer Driver With Windows
Note: To use binary data, Epson recommends that you use AppleTalk for the printer’s network connection. If you use a protocol other than AppleTalk for the network connection, you need to set Binary to On in the PS3 Menu on the control panel. For details about setting, see the Network Guide. If you use the printer with a local connection, you cannot use binary data.
-
Page 143: Installing The Postscript Printer Driver For The Usb Interface
9. When installation is done, click Finish. Installing the PostScript printer driver for the USB interface Caution: Never use EPSON Status Monitor and PostScript 3 driver at the same time when the printer is connected via a USB port. It may damage the system. Note: ❏…
-
Page 144: Installing The Postscript Printer Driver For The Network Interface
6. Select USB as the port the printer is connected to, then click Next. 7. Click Have Disk and specify the following path for the CD-ROM. If your CD-ROM drive is D:, the path will be D:ADOBEPSENGLISHPS_SETUP. Then click OK. Note: Change the drive letter as needed for your system.
-
Page 145: Accessing The Postscript Printer Driver
9. Click Have Disk in the Add Printer Wizard and specify the following path for the CD-ROM. If your CD-ROM drive is D:, the path will be D:ADOBEPSENGLISHPS_SETUP. Then click OK. Note: Change the drive letter as needed for your system. 10.
-
Page 146: Selecting The Printer
For Mac OS X users Note: ❏ Although EPSON FireWire appears in the interface pop-up list, you cannot use FireWire for printer connection in the PostScript 3 mode. ❏ You need to make the settings for your installed options manually when the printer is connected using USB, IP printing, or Bonjour (Rendezvous).
-
Page 147
PostScript 3 printer driver. Note for IP Printing users: ❏ Make sure to select IP Printing. Do not select EPSON TCP/IP, because it cannot be used with the PostScript 3 printer driver. ❏ After selecting IP Printing, enter the IP address for the printer, then make sure to select the Use default queue on server check box. -
Page 148: Accessing The Postscript Printer Driver
Note for IP Printing users, USB or Bonjour (Rendezvous) users: Select your printer from the Printer list, then select Show Info from the Printers menu. The Printer Info dialog box appears. Select Installable Options from the pop-up list, then make the necessary settings. 6.
-
Page 149: Chapter 10 About The Pcl6/Pcl5 Printer Driver
Chapter 10 About the PCL6/PCL5 Printer Driver About the PCL Mode Hardware requirements Your printer must meet the following hardware requirements to be able to use the PCL6/PCL5 printer driver. Memory requirements for using the PCL6/PCL5 printer driver are shown below. Install optional memory modules into your printer if the amount of memory currently installed does not meet your printing needs.
-
Page 150: Using The Pcl6/Pcl5 Printer Driver
To print in the PCL mode, you will have to install the printer driver. Consult the customer support in your region regarding how to get the printer driver. Note: The PCL6/PCL5 printer driver and EPSON Status Monitor cannot be used at the same time. About the PCL6/PCL5 Printer Driver…
-
Page 151: Installing The Pcl6 Printer Driver
❏ When uninstalling the printer driver, select EPSON Monochrome Laser P6 in the uninstallation program. If you select EPSON Printer Software, the uninstallation may not be completed successfully.
-
Page 152: Accessing The Pcl6 Printer Driver
Note: If you want to change the settings, you can access the PCL6 printer driver by clicking Document Default. Accessing the PCL6 printer driver You can change the PCL6 printer settings in the PCL6 printer driver. To access the printer driver, see “Accessing the printer driver”…
-
Page 153: Appendix A Technical Specifications
Since the quality of any particular brand or type of paper may be changed by the manufacturer at any time, Epson cannot guarantee the quality of any type of paper. Always test samples of paper stock before purchasing large quantities or printing large jobs.
-
Page 154: Printable Area
❏ Labels that peel easily or labels that do not cover the backing sheet completely ❏ Coated paper or special surface-colored paper ❏ Paper that has binder holes or is perforated ❏ Paper that has glue, staples, paper clips, or tape on it ❏…
-
Page 155: Printer
Printer General Printing method: Laser beam scanning and dry electrophotographic process 600 × 600 dpi, 1200 × 1200 dpi Resolution: Continuous printing speed Up to 28 pages per minute at 600 dpi on A4 size paper Up to 14 pages per minute at 1200 dpi on A4 size paper Paper feed: Automatic or manual feed Paper feed alignment:…
-
Page 156: Environmental
Environmental Temperature: In use: 10 to 32.5 °C (50 to 90.5 °F) Not in use: 0 to 35 °C (32 to 95 °F) Humidity: In use: 15 to 80 % RH Not in use: 5 to 85 % RH Altitude: 2500 meters (8200 feet) maximum The recommended environment is 15 to 28 °C (59 to 82 °F) and 20 to 70 % RH.
-
Page 157: Interfaces
Low Voltage Directive 2006/95/EC EN 60950-1 EMC Directive 2004/108/EC EN 55022 Class B EN 55024 EN 61000-3-2 EN 61000-3-3 Australian model: AS/NZS CISPR22 Class B Interfaces USB interface USB 2.0 High Speed mode Note: ❏ Only computers equipped with a USB connector and running Mac OS X and Windows Vista, Vista x64, XP, XP x64, 2000, Server 2003, or Server 2003 x64, support the USB interface.
-
Page 158: Options And Consumable Products
* This product conforms to CE marking requirements in accordance with EC Directive 2004/108/EC. Memory modules Make sure that DIMM you purchase is compatible with EPSON products. For details, contact the store where you purchased this printer or the EPSON sales company.
-
Page 159: Toner Cartridge
Toner cartridge Product code/model High Capacity Toner Cartridge 0435/0439 Standard Capacity Toner Cartridge 0436/0440 Return High Capacity Toner Cartridge 0437/0441 Return Standard Capacity Toner Cartridge 0438/0442 Storage temperature: 0 to 35 °C (32 to 95 °F) Storage humidity: 15 to 80 % RH This product conforms to CE marking requirements in accordance with EC Directive 2004/108/EC.
-
Page 160: Appendix B Customer Support
Check your Pan-European Warranty Document for information on how to contact EPSON Customer support. Help for Users in Australia Epson Australia wishes to provide you with a high level of customer service. In addition to your product documentation, we provide the following sources for obtaining information: Customer Support…
-
Page 161: Help For Users In Singapore
(e-mail). Epson Helpdesk Epson Helpdesk is provided as a final backup to make sure our clients have access to advice. Operators on the Helpdesk can aid you in installing, configuring and operating your Epson product. Our Pre-sales Helpdesk staff can provide literature on new Epson products and advise where the nearest dealer or service agent is located.
-
Page 162: Help For Users In Thailand
❏ Enquiries on repair service and warranty Help for Users in Thailand Contact for information, support, and services are: New :For all products World Wide Web (http://www.epson.co.th) Information on product specifications, drivers for download, Frequently Asked Questions (FAQ), and e-mail are available. Epson Hotline (Phone: (66)2685-9899) Our Hotline team can help you with the following over the phone: ❏…
-
Page 163
Epson Hotline ❏ Sales enquiries and product information ❏ Technical support Phone (62) 21-572 4350 (62) 21-572 4357 Epson Service Center Jakarta Mangga Dua Mall 3rd floor No 3A/B Jl. Arteri Mangga Dua, Jakarta Phone/Fax: (62) 21-62301104 Bandung Lippo Center 8th floor Jl. -
Page 164: Help For Users In Hong Kong
To obtain technical support as well as other after-sales services, users are welcome to contact Epson Hong Kong Limited. Internet Home Page Epson Hong Kong has established a local home page in both Chinese and English on the Internet to provide users with the following information: ❏ Product information ❏…
-
Page 165: Help For Users In India
603-56288333 Help for Users in India Contacts for information, support, and services are: World Wide Web (http://www.epson.co.in) Information on product specifications, drivers for download, and products enquiry are available. Epson India Head Office — Bangalore Phone: 080-30515000 Fax: 30515005 Epson India Regional Offices:…
-
Page 166: Help For Users In The Philippines
For Service (CDMA & Mobile Users) — 3900 1600 (9AM — 6PM) Prefix local STD code Help for Users in the Philippines To obtain technical support as well as other after sales services, users are welcome to contact the Epson Philippines Corporation at the telephone and fax numbers and e-mail address below: Phone: (63) 2-813-6567…
-
Page 167
Installing EPSON Status Monitor (Windows) printer Job Information (Windows) printer (inside of the printer) Job Information Tab (Macintosh) printer (pickup roller) Monitoring Your Printer Using EPSON Status Monitor Memory module (Macintosh) how to install Notice Settings (Windows) how to remove… -
Page 168
Print layout about the PCL Mode Modifying the print layout (Windows) hardware requirements Problems, solving system requirements contacting Epson PostScript printer driver Accessing the PostScript printer driver (Macintosh) Accessing the PostScript printer driver (Windows) hardware requirements Relocating the printer Installing the PostScript printer driver for Mac OS X… -
Page 169
operational problems options paper handling problems PCL6/PCL5 mode PostScript 3 mode print quality problems USB problems Unavailable paper Watermark how to make how to use Index…