I’m trying to secure my website using Spring Security following the guides on the web.
So on my server side I have the following classes.
My WebSecurityConfigurerAdapter:
@Configuration
@EnableWebSecurity
public class WebSecurityConfig extends WebSecurityConfigurerAdapter implements ApplicationContextAware {

    @Override
    protected void registerAuthentication(AuthenticationManagerBuilde rauthManagerBuilder) throws Exception {
        authManagerBuilder.inMemoryAuthentication().withUser("user").password("password").roles("ADMIN");
    }
}
My controller:
@Controller
//@RequestMapping("/course")
public class CourseController implements ApplicationContextAware {

    @RequestMapping(value="/course", method = RequestMethod.GET, produces="application/json")
    public @ResponseBody List<Course> get(  // The criterion used to find.
        @RequestParam(value = "what", required = true) String what,
        @RequestParam(value = "value", required = true) String value) {
        //.....
    }

    @RequestMapping(value = "/course", method = RequestMethod.POST, produces = "application/json")
    public List<Course> upload(@RequestBody Course[] cs) {

    }
}
What confused me very much is the server does not respond to the POST/DELETE method, while the GET method works fine. BTW, I’m using RestTemplate on the client side.
Exceptions are:
Exception in thread "main" org.springframework.web.client.HttpClientErrorException: 403 Forbidden
    at org.springframework.web.client.DefaultResponseErrorHandler.handleError(DefaultResponseErrorHandler.java:91)
    at org.springframework.web.client.RestTemplate.handleResponseError(RestTemplate.java:574)
    at org.springframework.web.client.RestTemplate.doExecute(RestTemplate.java:530)
    at org.springframework.web.client.RestTemplate.execute(RestTemplate.java:487)
    at org.springframework.web.client.RestTemplate.delete(RestTemplate.java:385)
    at hello.Application.createRestTemplate(Application.java:149)
    at hello.Application.main(Application.java:99)
I’ve searched the internet for days. Still don’t have a clue. Please help. Thanks so much
I just announced the new Learn Spring Security course, including the full material focused on the new OAuth2 stack in Spring Security 5:
>> CHECK OUT THE COURSE
1. Introduction
In this article, we will show how to customize the access denied page in a Spring Security project.
This can be achieved either through the Spring Security configuration or web application configuration in the web.xml file.
In the remaining sections, we will take a more in-depth look at each of these options.
2. Custom JSP
Whenever a user attempts to access a page that is restricted to roles they do not have, the application will return a status code of 403, which means Access Denied.
In order to replace the Spring 403 status response page with a custom one, let’s first create a JSP file called accessDenied.jsp:
<body>
<h2>Sorry, you do not have permission to view this page.</h2>

Click <a href="<c:url value="/homepage.html" /> ">here</a>
to go back to the Homepage.
</body>
3. Spring Security Configuration
By default, Spring Security has an ExceptionTranslationFilter defined which handles exceptions of type AuthenticationException and AccessDeniedException. The latter is done through a property called accessDeniedHandler, which uses the AccessDeniedHandlerImpl class.
In order to customize this behavior to use our own page that we created above, we need to override the properties of the ExceptionTranslationFilter class. This can be done through either Java configuration or XML configuration.
3.1. Access Denied Page
Using Java, we can customize the 403 error handling process by using the accessDeniedPage() or accessDeniedHandler() methods while configuring the HttpSecurity element.
Let’s create an authentication configuration that restricts the “/admin/**” URLs to the ADMIN role and sets the access denied page to our custom accessDenied.jsp page:
@Override
protected void configure(final HttpSecurity http) throws Exception {
    http
      // ...
      .and()
      .exceptionHandling().accessDeniedPage("/accessDenied.jsp");
}
Let’s take a look at the equivalent XML configuration for the access denied page:
<http use-expressions="true">
    <access-denied-handler error-page="/accessDenied"/>
 </http>
3.2. Access Denied Handler
Using an access denied handler instead of a page has the advantage that we can define custom logic to be executed before redirecting to the 403 page. For this, we need to create a class that implements the AccessDeniedHandler interface and overrides the handle() method.
Let’s create a custom AccessDeniedHandler class that logs a warning message for every access denied attempt containing the user that made the attempt and the protected URL they were trying to access:
public class CustomAccessDeniedHandler implements AccessDeniedHandler {

    public static final Logger LOG
      = Logger.getLogger(CustomAccessDeniedHandler.class);

    @Override
    public void handle(
      HttpServletRequest request,
      HttpServletResponse response,
      AccessDeniedException exc) throws IOException, ServletException {

        Authentication auth
          = SecurityContextHolder.getContext().getAuthentication();
        if (auth != null) {
            LOG.warn("User: " + auth.getName()
              + " attempted to access the protected URL: "
              + request.getRequestURI());
        }

        response.sendRedirect(request.getContextPath() + "/accessDenied");
    }
}
In the security configuration, we’ll define the bean and set the custom AccessDeniedHandler:
@Bean
public AccessDeniedHandler accessDeniedHandler(){
    return new CustomAccessDeniedHandler();
}

//...
.exceptionHandling().accessDeniedHandler(accessDeniedHandler());
If we want to configure the CustomAccessDeniedHandler class defined above using XML, the configuration will look slightly different:
<bean name="customAccessDeniedHandler"
  class="com.baeldung.security.CustomAccessDeniedHandler" />

<http use-expressions="true">
    <access-denied-handler ref="customAccessDeniedHandler"/>
</http>
4. Application Configuration
Handling the access denied error can be done through the web.xml file of a web application, by defining an error-page tag. This contains two subtags called error-code, which specifies the status code to be intercepted, and location, which signifies the URL to which the user will be redirected in case the error code is encountered:
<error-page>
    <error-code>403</error-code>
    <location>/accessDenied</location>
</error-page>
If an application does not have a web.xml file, as is the case with Spring Boot, the Spring annotations do not currently provide an exact alternative to the error-page tag. According to the Spring documentation, in this case, the recommended approach is to use the methods accessDeniedPage() and accessDeniedHandler() presented in section 3.
5. Conclusion
In this quick article, we have detailed the various ways that an access denied error can be handled using a custom 403 page.
The complete source code of the article can be found in the GitHub project.
I just announced the new Learn Spring Security course, including the full material focused on the new OAuth2 stack in Spring Security 5:
>> CHECK OUT THE COURSE
New issue
Have a question about this project? Sign up for a free GitHub account to open an issue and contact its maintainers and the community.
By clicking “Sign up for GitHub”, you agree to our terms of service and
privacy statement. We’ll occasionally send you account related emails.
Already on GitHub?
Sign in
to your account
Assignees
![]()
Comments
![]()
Summary
When I try to POST to a resource requiring authentication, I am redirected to a login page (as expected). Upon entering the username and password, I get a 403 access denied error. This works fine if I do a GET to the exact same resource. It’s only for a POST.
Actual Behavior
Receive 403 after successful authentication if authentication trigger is a POST to a protected resource.
Expected Behavior
Resource call should execute same as a GET.
Configuration
@OverRide
protected void configure(HttpSecurity http) throws Exception {
http.authorizeRequests()
.antMatchers(«//action/«).access(«isFullyAuthenticated()»)
.and().formLogin()
.and().csrf().disable();
Version
Tried 5.0.4 and 4.2.4
Sample
![]()
@bleepbleepbleep, the behavior you specify is already supported:
@SpringBootApplication
public class DemoApplication {

	@Controller
	public static class ActionController {
		@GetMapping("/action")
		@ResponseBody
		String getOk() {
			return "<form action='/action' method='post'><button type='submit'>Go</button></form>";
		}

		@PostMapping("/action")
		@ResponseBody
		String postOk() {
			return "ok";
		}
	}

	@EnableWebSecurity
	public static class SecurityConfig extends WebSecurityConfigurerAdapter {
		@Override
		protected void configure(HttpSecurity http) throws Exception {
			http.authorizeRequests()
				.antMatchers("/action/**")
					.access("isFullyAuthenticated()")
					.and()
				.formLogin()
					.and()
				.csrf().disable();
		}

		@Bean
		@Override
		public UserDetailsService userDetailsService() {
			UserDetails user = User.withDefaultPasswordEncoder()
								.username("user")
								.password("password")
								.roles("USER")
								.build()

			return new InMemoryUserDetailsManager(user);
		}
	}

	public static void main(String[] args) {
		SpringApplication.run(DemoApplication.class, args);
	}
}
In the above code, both GET /action and POST /action return a 200 OK once the user is authenticated.
Note the ant syntax for /action, which is where I think I could be misunderstanding your use case. Would you mind clarifying if you feel I’ve misunderstood? Otherwise, I’ll close this issue and recommend that you make a post to StackOverflow for further troubleshooting support.
![]()
@bleepbleepbleep From your statement GET works well and POST throws 403 error, I suspect that CSRF protect is enabled and the post request doesn’t include a valid csrf token.
But your sample code states that csrf is disabled, can you confirm the same from your application configuration to make sure that csrf is disabled?
![]()
this is something I am facing right now with spring security 5.1.5
![]()
@charlie39 would you be able to provide a sample project that reproduces the issue you are experiencing?
![]()
If you would like us to look at this issue, please provide the requested information. If the information is not provided within the next 7 days this issue will be closed.
![]()
Closing due to lack of requested feedback. If you would like us to look at this issue, please provide the requested information and we will re-open the issue.
![]()
Has anyone fixed this error?
I’m facing this issue when I trigger a POST request with couple of fields.
{
«timestamp»: «2020-02-06T19:58:23.636+0000»,
«status»: 403,
«error»: «Forbidden»,
«message»: «Access Denied»,
«path»: «/csor/security/greet»
}
I have CSRF disabled in security config as below:
@OverRide
public void configure(HttpSecurity http) throws Exception {
http
.headers().frameOptions().disable()
.and().sessionManagement().sessionCreationPolicy(SessionCreationPolicy.STATELESS)
.and()
.authorizeRequests()
// .antMatchers(«csor/security/authenticate/»).permitAll()
.antMatchers(«/v2/api-docs»,
«/swagger-resources/«,
«/swagger-ui.html»,
«/webjars/«
).permitAll()
// .anyRequest().authenticated()
.and()
.csrf().disable();
//.and()
//.addFilter(new JwtAuthenticationFilter(authenticationManager()))
//.addFilter(new JwtAuthorizationFilter(authenticationManager()));
}
![]()
I’ve been experiencing this issue for the past 1 week now. I disabled csrf but I still get the same error. Any little help would be appreciated.
![]()
Im having the same issue.
![]()
even i am facing this issue, how to resolve 403 error for POST api
Содержание
- 403 after successful authentication on pre-authentication POST #5222
- Comments
- Summary
- Actual Behavior
- Expected Behavior
- Configuration
- Version
- Sample
- Footer
- Spring Security : Customize 403 access denied page
- 1. Spring Security Configuration
- 2. Solution – Customize 403 Page
- 3. AccessDeniedHandler
- 4. Demo
- Download Source Code
- References
- Comments
- Spring Security Custom 403 Access Denied Page
- Spring Security Custom 403 Access Denied Page
- 1. Application Setup
- 2. Custom Access Denied Page
- 3. Spring Security Configuration
- 3.1 Access Denied Handler
- 3.2. Access Denied Controller.
- 3.3. Configuring the Custom Access Denied Handler.
- 4. Testing Application
- Summary
- Error handling for Spring Security Resource Server
- Configuring Error Handling in Spring Security
- Status Code and Header for Authentication and Authorization failure
- Implementing the CustomOAuth2AuthenticationEntryPoint
- Implementing the WWWAuthenticateHeaderBuilder
- Implementing the CustomOAuth2AccessDeniedHandler
- Testing the error handling
403 after successful authentication on pre-authentication POST #5222
Summary
When I try to POST to a resource requiring authentication, I am redirected to a login page (as expected). Upon entering the username and password, I get a 403 access denied error. This works fine if I do a GET to the exact same resource. It’s only for a POST.
Actual Behavior
Receive 403 after successful authentication if authentication trigger is a POST to a protected resource.
Expected Behavior
Resource call should execute same as a GET.
Configuration
@OverRide
protected void configure(HttpSecurity http) throws Exception <
http.authorizeRequests()
.antMatchers(«//action/«).access(«isFullyAuthenticated()»)
.and().formLogin()
.and().csrf().disable();
Version
Tried 5.0.4 and 4.2.4
Sample
The text was updated successfully, but these errors were encountered:
@bleepbleepbleep, the behavior you specify is already supported:
In the above code, both GET /action and POST /action return a 200 OK once the user is authenticated.
Note the ant syntax for /action , which is where I think I could be misunderstanding your use case. Would you mind clarifying if you feel I’ve misunderstood? Otherwise, I’ll close this issue and recommend that you make a post to StackOverflow for further troubleshooting support.
@bleepbleepbleep From your statement GET works well and POST throws 403 error, I suspect that CSRF protect is enabled and the post request doesn’t include a valid csrf token.
But your sample code states that csrf is disabled, can you confirm the same from your application configuration to make sure that csrf is disabled?
this is something I am facing right now with spring security 5.1.5
@charlie39 would you be able to provide a sample project that reproduces the issue you are experiencing?
If you would like us to look at this issue, please provide the requested information. If the information is not provided within the next 7 days this issue will be closed.
Closing due to lack of requested feedback. If you would like us to look at this issue, please provide the requested information and we will re-open the issue.
Has anyone fixed this error?
I’m facing this issue when I trigger a POST request with couple of fields.
<
«timestamp»: «2020-02-06T19:58:23.636+0000»,
«status»: 403,
«error»: «Forbidden»,
«message»: «Access Denied»,
«path»: «/csor/security/greet»
>
I have CSRF disabled in security config as below:
@OverRide
public void configure(HttpSecurity http) throws Exception <
http
.headers().frameOptions().disable()
.and().sessionManagement().sessionCreationPolicy(SessionCreationPolicy.STATELESS)
.and()
.authorizeRequests()
// .antMatchers(«csor/security/authenticate/»).permitAll()
.antMatchers(«/v2/api-docs»,
«/swagger-resources/«,
«/swagger-ui.html»,
«/webjars/»
).permitAll()
// .anyRequest().authenticated()
.and()
.csrf().disable();
//.and()
//.addFilter(new JwtAuthenticationFilter(authenticationManager()))
//.addFilter(new JwtAuthorizationFilter(authenticationManager()));
>
I’ve been experiencing this issue for the past 1 week now. I disabled csrf but I still get the same error. Any little help would be appreciated.
Im having the same issue.
even i am facing this issue, how to resolve 403 error for POST api
© 2023 GitHub, Inc.
You can’t perform that action at this time.
You signed in with another tab or window. Reload to refresh your session. You signed out in another tab or window. Reload to refresh your session.
Источник
Spring Security : Customize 403 access denied page
By mkyong | Last updated: April 24, 2014
Viewed: 206,308 (+27 pv/w)
In Spring Security, if non authorized user try to access a protected page, a default “http 403 access denied” will be displayed :
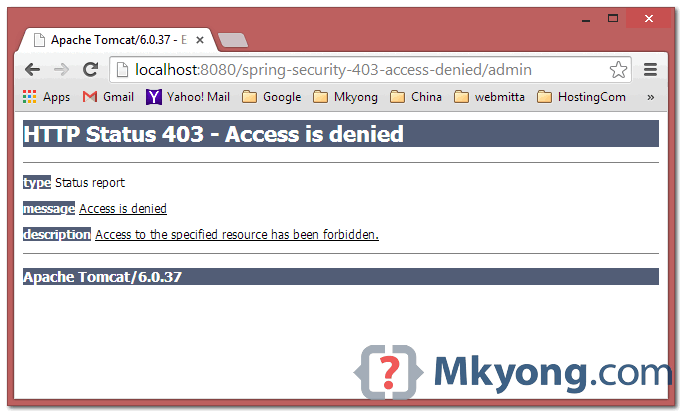
In this tutorial, we will show you how to customize 403 access denied page in Spring Security.
1. Spring Security Configuration
Review a configuration, if “alex” try to access /admin page, above 403 access denied page will be displayed.
2. Solution – Customize 403 Page
2.1 Create a new 403 page.
2.2. To display above page, add a error-page like the following :
2.3 In a controller class, add a mapping for “/403” url :
For annotation users, use this .exceptionHandling().accessDeniedPage(«/403») .
3. AccessDeniedHandler
In additional, you can create a custom AccessDeniedHandler to perform some business logics before pass the URL to /403 mapping.
Add a ref to http tag.
4. Demo
When “alex” try to access /admin page, above customizing 403 access denied page will be displayed.
4.1 If using error-page , url will be displayed like this :
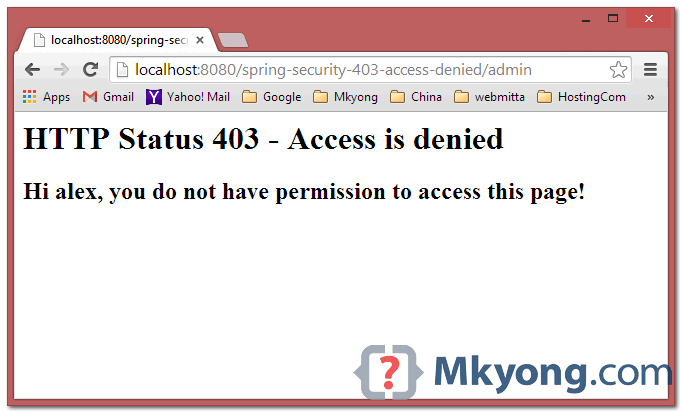
4.2 If using custom access denied handler ref , url will be displayed like this :

Download Source Code
References
mkyong
Founder of Mkyong.com, love Java and open source stuff. Follow him on Twitter. If you like my tutorials, consider make a donation to these charities.
I used the same exceptionhandling.accessDeniedPage() method but it doesn’t work. When I try to access a 403 page, I get redirected to the login page, I think it might be because I called the formlogin() method? Do you have any idea on how to solve this?
Is there any way to get requested Controller in AccessDeniedHandler. I need this because I need different action for different Controller.
This is exactly the kind of HOW NOT TO tutorial. Downloaded the project, doesn’t work. The author just copy pastes some code, doesn’t explain anything and when the user tries to run the demo, he has no idea where the problem is.
May I know what is not working?
How solver the follow? If you send a null credential, spring security reconize that like valid (because is not void) but in some place is going to crash!
How about the “return url”? How to pass the url of the resource that I want to access in the firts place once the auth process is done correctly?
thanks for your article, i want to display the access denied page when there is an access denied in method security level(by using the preauthorize annotation), but your method doesn’t work, could you help me find out the answer? thank you
Thanks for the article, our team is having the same problem with preauthorize, can @mkyong:disqus you please help?
I changed it to
It works well, so I think whether it’s a error? Any One know?
Sorry for the typo, Article is updated, please get the latest source code to test. Thanks.

[…] http://www.mkyong.com/spring-security/customize-http-403-access-denied-page-in-spring-security/ access denied page using spring security not working How to redirect to access-denied-page with spring security […]
[…] http://www.mkyong.com/spring-security/customize-http-403-access-denied-page-in-spring-security/ access denied page using spring security not working How to redirect to access-denied-page with spring security […]
I don’t think creating handler and implementing it is good way.
You can just simply declare access deniedpage and your work done. …
Thanks,
Radhe
Agreed, error-page should be enough.
Code snippet was removed. So, adding it.
First you wrote:
The easiest way is uses “access-denied-handler†tag, and put your 403 page in “error-page” attribute :
but after that you mentioned 404 (a mistake?):
and correct it is:
Please, could you review attached zip file? I thing that many beginners like me have read this article they will a little disapoitmented.
Источник
Spring Security Custom 403 Access Denied Page
In this article of spring security tutorial, we will see how to create a Spring Security custom 403 access denied page. we will take a look at the steps for spring security custom 403 page.
Spring Security Custom 403 Access Denied Page
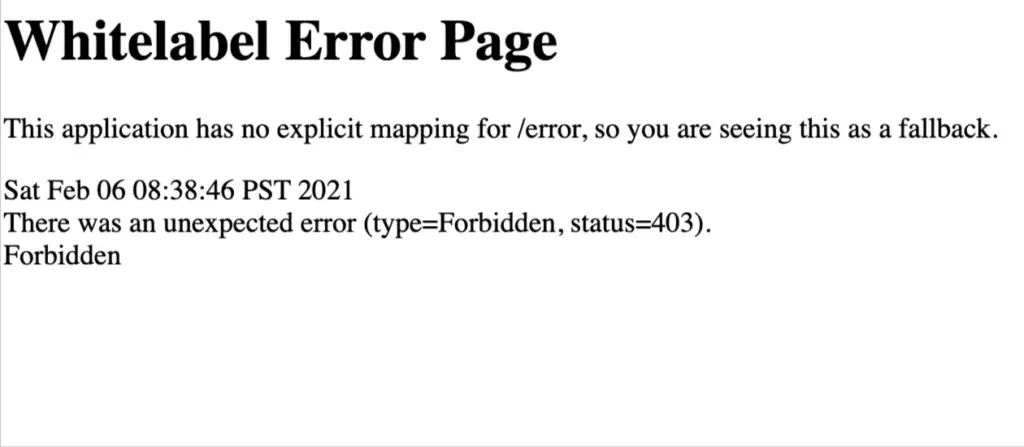
In Spring security, when an unauthorized user will try to access the secure/ protected page, spring security will throw an access denied exception. There is a default 403 access denied page available with spring security, or if we are using spring boot, it will show the infamous whitelabel error page. Spring security flexible architecture provides the option to customize the 403 access denied page.
1. Application Setup
Before we create spring security custom 403 access denied page, let’s look at our pom.xml file containing the required dependencies.
Our pom.xml file contains only required dependencies, and you may need more based on your use case. Also, if you are not using spring boot, the above file is not relevant to you but will give you the idea for the required dependencies.
2. Custom Access Denied Page
To replace the Spring Security custom access denied page, we need to create a custom HTML page for our application. I am using Thymeleaf to build the HTML page, but you can use any other templating engine of your choice. Here is our custom access denied page.
Below HTML is just a sample HTML. You may need different HTML for your production app.
3. Spring Security Configuration
We have the custom HTML in place. The next step is to configure the Spring Security custom 403 access denied page. To customize this page, Spring security provides the following options while configuring the HttpSecurity element.
- Configure access denied page using the accessDeniedPage() .
- Use accessDeniedHandler() method.
The accessDeniedHandler() method provides more flexibility and control while customizing the access denied page in spring security, and we will use this option for this article.
3.1 Access Denied Handler
Spring security access denied handler provides us the flexibility and power to run the custom logic before redirecting user to the 403 page.To create a custom access denied handler with spring security, create a class by extending the AccessDeniedHandler interface.
The custom handler is only logging the information and redirecting user to the “ access-denied ” controller. If you look closely, at this point we have access to the request, response, exception and the authentication object. We can build any custom logic based on this information.
3.2. Access Denied Controller.
Next is to create a custom controller to handle the redirect and send use to the access denied page. This is a simple Spring MVC controller, but we have the flexibility to perform any additional logic before showing the page to the customer.
3.3. Configuring the Custom Access Denied Handler.
We have created the following components for our custom access denied page:
- Custom HTML page.
- Custom access denied handler.
- Spring MVC controller.
The last part of the setup is to let Spring security know about our custom handler. It will do this as part of configuring spring security through the HttpSecurity component. Here is a simplified version of our Spring security configuration (You can check complete configuration on our GitHub Repository)
There are few important things in the above configuration.
- We are only allowing ADMIN authority to access the /account/** . This means any other user with different authority will get the 403 access denied exception.
- Since this is an exception handling, we are using the Spring security .excepTionHandling() method and telling that we like to handle the access denied use case by passing custom access denied handler to the accessDeniedHandler() method ( .exceptionHandling().accessDeniedHandler(accessDeniedHandler() ).
- Last part defines our custom handler as a spring managed bean.
4. Testing Application
Our setup is complete, let’s start our application and try to access the page. In the first screen shot (without custom access denied configuration), our application will show the default page.
Once we active the configurations for spring security custom 403 access denied page. Let’s try to access the unauthorized section again by simply login to the system, this time, we will be greeted by our custom access denied page.
Summary
In this article, we saw how to create a Spring Security custom 403 access denied page. We took a deep dive in to the different components to required to customize the access denied page for spring security application. As always, the source code for our Spring Security Course is available on the GitHub.
Источник
Error handling for Spring Security Resource Server
In this post, we’ll discuss how to customize error handling for a REST API protected with OAuth 2 using Spring Security Resource Server. We’ll use the approach described in the post Error handling for a Spring-based REST API.
Configuring Error Handling in Spring Security
Spring Security’s Configuration DSL to configure HttpSecurity exposes APIs to customize
- an AuthenticationEntryPoint to handle authentication failures, and
- an AccessDeniedHandler to handle authorization failures.
In the case of Spring Security Resource Server, the BearerTokenAuthenticationEntryPoint and BearerTokenAccessDeniedHandler are the default implementations. You can override them by custom implementations, say CustomOAuth2AuthenticationEntryPoint and CustomOAuth2AccessDeniedHandler , using the configuration DSL as follows.
Status Code and Header for Authentication and Authorization failure
In case of an authentication failure, we should respond with a 401 Unauthorized status code. Similarly, in the case of authorization failure, we should return a 403 Forbidden status code.
Besides the status code, it is also customary to send a WWW-Authenticate header. This header provides the reasoning behind the failure and a method to gain access to the requested resource.
Apart from this, we want the error response in a custom JSON format described in the post Error handling for a Spring-based REST API. To achieve this, let’s implement the CustomOAuth2AuthenticationEntryPoint and CustomOAuth2AccessDeniedHandler by dutifully reusing (read: copying) the code from the BearerTokenAuthenticationEntryPoint and BearerTokenAccessDeniedHandler classes to suit our needs.
Implementing the CustomOAuth2AuthenticationEntryPoint
In this implementation, we’ll return a custom response in JSON format along with a 401 Unauthorized status code and WWW-Authenticate header.
In this implementation, we’re
- logging the error using a logger
- initializing the default status code status and error message errorMessage
- initializing a map of parameters parameters to generate the WWW-Authenticate header later
- putting the realmName if it is available in the parameters map
- putting some error-related fields on the parameters map if the exception occurs due to an OAuth2 mishap
- creating a custom response JSON message , and
- finally returning the message with the WWW-Authenticate header.
You would notice that computeWWWAuthenticateHeaderValue is a static method that generates the value of the WWW-Authenticate header. Let’s implement it now, in a utility class, say WWWAuthenticateHeaderBuilder .
The MDN documentation describes the following syntax for the value of the WWW-Authenticate header.
- is the authentication scheme. In our case, it is Bearer .
- realm= is a description of where the authentication and authorization take place. This can be a description of the environment, url of the token provider, or the hostname of the server.
- charset= is the preferred encoding scheme for a client to provide credentials.
- error= is a standard error code corresponding to the status codes (e.g., invalid_token in case of an invalid token along with a 401 Unauthorized status code)
- error_description= is a detailed message describing the nature of error.
- error_uri= is a link to the reference documentation of the error.
You’d notice that we’ve collected these parameters in a map in the CustomOAuth2AuthenticationEntryPoint implementation. Using this map, we can construct the WWW-Authenticate header as follows.
Implementing the CustomOAuth2AccessDeniedHandler
Similarly, we can implement the CustomOAuth2AccessDeniedHandler class with the difference that we now set the appropriate status code and the corresponding error code and description for authorization failure.
Testing the error handling
Launch the application and access the /private endpoint with no token and subsequently, with an invalid token.
Источник
По умолчанию в Spring Security определенExceptionTranslationFilter, который обрабатывает исключения типаAuthenticationException иAccessDeniedException. Последнее осуществляется с помощью свойстваaccessDeniedHandler,, которое использует классAccessDeniedHandlerImpl.
Чтобы настроить это поведение для использования нашей собственной страницы, которую мы создали выше, нам нужно переопределить свойства классаExceptionTranslationFilter. Это можно сделать с помощью конфигурации Java или конфигурации XML.
3.1. Доступ запрещен к странице
Используя Java,we can customize the 403 error handling process by using the accessDeniedPage() or accessDeniedHandler() methods при настройке элементаHttpSecurity.
Давайте создадим конфигурацию аутентификации, которая ограничивает URL-адреса“/admin/** рольюADMIN и устанавливает страницу отказа в доступе на нашу пользовательскую страницуaccessDenied.jsp:
@Override
protected void configure(final HttpSecurity http) throws Exception {
    http
      // ...
      .and()
      .exceptionHandling().accessDeniedPage("/accessDenied.jsp");
}
Давайте посмотрим на эквивалентную конфигурацию XML для страницы с отказом в доступе:
3.2. Обработчик отказа в доступе
Использование обработчика отказа в доступе вместо страницы имеет то преимущество, что мы можем определить пользовательскую логику, которая будет выполняться перед перенаправлением на страницу 403. Для этогоwe need to create a class that implements the AccessDeniedHandler interface и отменяет методhandle().
Давайте создадим собственный классAccessDeniedHandler, который будет регистрировать предупреждающее сообщение для каждой попытки отказа в доступе с указанием пользователя, который сделал попытку, и защищенного URL, к которому он пытался получить доступ:
public class CustomAccessDeniedHandler implements AccessDeniedHandler {

    public static final Logger LOG
      = Logger.getLogger(CustomAccessDeniedHandler.class);

    @Override
    public void handle(
      HttpServletRequest request,
      HttpServletResponse response,
      AccessDeniedException exc) throws IOException, ServletException {

        Authentication auth
          = SecurityContextHolder.getContext().getAuthentication();
        if (auth != null) {
            LOG.warn("User: " + auth.getName()
              + " attempted to access the protected URL: "
              + request.getRequestURI());
        }

        response.sendRedirect(request.getContextPath() + "/accessDenied");
    }
}
В конфигурации безопасностиwe’ll define the bean and set the custom AccessDeniedHandler:
@Bean
public AccessDeniedHandler accessDeniedHandler(){
    return new CustomAccessDeniedHandler();
}

//...
.exceptionHandling().accessDeniedHandler(accessDeniedHandler());
Если мы хотим настроить классCustomAccessDeniedHandler, определенный выше, с использованием XML, конфигурация будет выглядеть немного иначе:
java.lang.Object
org.springframework.security.web.authentication.Http403ForbiddenEntryPoint
- All Implemented Interfaces:
AuthenticationEntryPoint
In the pre-authenticated authentication case (unlike CAS, for example) the user will
already have been identified through some external mechanism and a secure context
established by the time the security-enforcement filter is invoked.
Therefore this class isn’t actually responsible for the commencement of authentication,
as it is in the case of other providers. It will be called if the user is rejected by
the AbstractPreAuthenticatedProcessingFilter, resulting in a null authentication.
The commence method will always return an
HttpServletResponse.SC_FORBIDDEN (403 error).
- Since:
- 2.0
- See Also:
-
ExceptionTranslationFilter
-
Constructor Summary
Constructors
-
Method Summary
voidcommence(jakarta.servlet.http.HttpServletRequest request,
jakarta.servlet.http.HttpServletResponse response,
AuthenticationException arg2)Always returns a 403 error code to the client.
Methods inherited from class java.lang.Object
clone, equals, finalize, getClass, hashCode, notify, notifyAll, toString, wait, wait, wait
-
Constructor Details
-
Http403ForbiddenEntryPoint
public Http403ForbiddenEntryPoint()
-
-
Method Details
-
commence
public void commence(jakarta.servlet.http.HttpServletRequest request,
jakarta.servlet.http.HttpServletResponse response,
AuthenticationException arg2)
throws IOExceptionAlways returns a 403 error code to the client.
- Specified by:
commencein interfaceAuthenticationEntryPoint- Parameters:
request— that resulted in anAuthenticationExceptionresponse— so that the user agent can begin authenticationarg2— that caused the invocation- Throws:
IOException
-
In this article of spring security tutorial, we will see how to create a Spring Security custom 403 access denied page. we will take a look at the steps for spring security custom 403 page.
In Spring security, when an unauthorized user will try to access the secure/ protected page, spring security will throw an access denied exception. There is a default 403 access denied page available with spring security, or if we are using spring boot, it will show the infamous whitelabel error page. Spring security flexible architecture provides the option to customize the 403 access denied page.
1. Application Setup
Before we create spring security custom 403 access denied page, let’s look at our pom.xml file containing the required dependencies.
<?xml version="1.0" encoding="UTF-8"?>
<project xmlns="http://maven.apache.org/POM/4.0.0" xmlns:xsi="http://www.w3.org/2001/XMLSchema-instance" xsi:schemaLocation="http://maven.apache.org/POM/4.0.0 https://maven.apache.org/xsd/maven-4.0.0.xsd">
   <modelVersion>4.0.0</modelVersion>
   <parent>
      <groupId>org.springframework.boot</groupId>
      <artifactId>spring-boot-starter-parent</artifactId>
      <version>2.3.1.RELEASE</version>
      <relativePath />
      <!-- lookup parent from repository -->
   </parent>
   <groupId>com.javadevjournal</groupId>
   <artifactId>spring-security-series</artifactId>
   <version>0.0.1-SNAPSHOT</version>
   <name>Spring Security Tutorial Series</name>
   <description>Series to explain the core Spring security concepts.</description>
   <properties>
      <java.version>1.8</java.version>
   </properties>
   <dependencies>
      <dependency>
         <groupId>org.springframework.boot</groupId>
         <artifactId>spring-boot-starter</artifactId>
      </dependency>
      <dependency>
         <groupId>org.springframework.boot</groupId>
         <artifactId>spring-boot-starter-security</artifactId>
      </dependency>
      <dependency>
         <groupId>org.springframework.boot</groupId>
         <artifactId>spring-boot-starter-web</artifactId>
      </dependency>
      <dependency>
         <groupId>org.springframework.boot</groupId>
         <artifactId>spring-boot-starter-thymeleaf</artifactId>
      </dependency>
      <dependency>
         <groupId>org.springframework.boot</groupId>
         <artifactId>spring-boot-starter-data-jpa</artifactId>
      </dependency>
      <dependency>
         <groupId>org.thymeleaf.extras</groupId>
         <artifactId>thymeleaf-extras-springsecurity5</artifactId>
         <version>3.0.4.RELEASE</version>
      </dependency>
      <dependency>
         <groupId>org.springframework.boot</groupId>
         <artifactId>spring-boot-starter-test</artifactId>
         <scope>test</scope>
         <exclusions>
            <exclusion>
               <groupId>org.junit.vintage</groupId>
               <artifactId>junit-vintage-engine</artifactId>
            </exclusion>
         </exclusions>
      </dependency>
   </dependencies>
   <build>
      <plugins>
         <plugin>
            <groupId>org.springframework.boot</groupId>
            <artifactId>spring-boot-maven-plugin</artifactId>
         </plugin>
      </plugins>
   </build>
</project>
Our pom.xml file contains only required dependencies, and you may need more based on your use case. Also, if you are not using spring boot, the above file is not relevant to you but will give you the idea for the required dependencies.
2. Custom Access Denied Page
To replace the Spring Security custom access denied page, we need to create a custom HTML page for our application. I am using Thymeleaf to build the HTML page, but you can use any other templating engine of your choice. Here is our custom access denied page.
Below HTML is just a sample HTML. You may need different HTML for your production app.
<!DOCTYPE html>
<html xmlns:th="http://www.thymeleaf.org" lang="en">
    <head>
        <meta charset="UTF-8" />
        <meta name="viewport" content="width=device-width, initial-scale=1.0" />
        <meta http-equiv="X-UA-Compatible" content="ie=edge" />
        <link href="https://fonts.googleapis.com/css?family=Raleway:500,800" rel="stylesheet" />
        <title>Access Denied</title>
    </head>
    <body>
        <use>
            <svg version="1.1" xmlns="http://www.w3.org/2000/svg" xmlns:xlink="http://www.w3.org/1999/xlink" x="0px" y="0px" viewBox="0 0 1000 1000" enable-background="new 0 0 1000 1000" xml:space="preserve" class="whistle">
                <metadata></metadata>
                <g>
                    <g transform="translate(0.000000,511.000000) scale(0.100000,-0.100000)">
                        <path
                            d="M4295.8,3963.2c-113-57.4-122.5-107.2-116.8-622.3l5.7-461.4l63.2-55.5c72.8-65.1,178.1-74.7,250.8-24.9c86.2,61.3,97.6,128.3,97.6,584c0,474.8-11.5,526.5-124.5,580.1C4393.4,4001.5,4372.4,4001.5,4295.8,3963.2z"
                        />
                        <path
                            d="M3053.1,3134.2c-68.9-42.1-111-143.6-93.8-216.4c7.7-26.8,216.4-250.8,476.8-509.3c417.4-417.4,469.1-463.4,526.5-463.4c128.3,0,212.5,88.1,212.5,224c0,67-26.8,97.6-434.6,509.3c-241.2,241.2-459.5,449.9-488.2,465.3C3181.4,3180.1,3124,3178.2,3053.1,3134.2z"
                        />
                        <path
                            d="M2653,1529.7C1644,1445.4,765.1,850,345.8-32.7C62.4-628.2,22.2-1317.4,234.8-1960.8C451.1-2621.3,947-3186.2,1584.6-3500.2c1018.6-501.6,2228.7-296.8,3040.5,515.1c317.8,317.8,561,723.7,670.1,1120.1c101.5,369.5,158.9,455.7,360,553.3c114.9,57.4,170.4,65.1,1487.7,229.8c752.5,93.8,1392,181.9,1420.7,193.4C8628.7-857.9,9900,1250.1,9900,1328.6c0,84.3-67,172.3-147.4,195.3c-51.7,15.3-790.8,19.1-2558,15.3l-2487.2-5.7l-55.5-63.2l-55.5-61.3v-344.6V719.8h-411.7h-411.7v325.5c0,509.3,11.5,499.7-616.5,494C2921,1537.3,2695.1,1533.5,2653,1529.7z"
                        />
                    </g>
                </g>
            </svg>
        </use>
        <h1>403</h1>
        <h2>Not this time, access forbidden!</h2>
    </body>
</html>
3. Spring Security Configuration
We have the custom HTML in place. The next step is to configure the Spring Security custom 403 access denied page. To customize this page, Spring security provides the following options while configuring the HttpSecurity element.
- Configure access denied page using the
accessDeniedPage(). - Use
accessDeniedHandler()method.
The accessDeniedHandler() method provides more flexibility and control while customizing the access denied page in spring security, and we will use this option for this article.
3.1 Access Denied Handler
Spring security access denied handler provides us the flexibility and power to run the custom logic before redirecting user to the 403 page.To create a custom access denied handler with spring security, create a class by extending the <a aria-label="AccessDeniedHandler (opens in a new tab)" href="https://docs.spring.io/spring-security/site/docs/current/api/org/springframework/security/web/access/AccessDeniedHandler.html" target="_blank" rel="noreferrer noopener" class="rank-math-link">AccessDeniedHandler</a> interface.
package com.javadevjournal.core.security.handlers;

import org.slf4j.Logger;
import org.slf4j.LoggerFactory;
import org.springframework.security.access.AccessDeniedException;
import org.springframework.security.core.Authentication;
import org.springframework.security.core.context.SecurityContextHolder;
import org.springframework.security.web.access.AccessDeniedHandler;

import javax.servlet.ServletException;
import javax.servlet.http.HttpServletRequest;
import javax.servlet.http.HttpServletResponse;
import java.io.IOException;

public class CustomAccessDeniedHandler implements AccessDeniedHandler {

    private static final Logger LOG = LoggerFactory.getLogger(CustomAccessDeniedHandler.class);

    @Override
    public void handle(HttpServletRequest request, HttpServletResponse response, AccessDeniedException accessDeniedException) throws IOException, ServletException {

        Authentication authentication = SecurityContextHolder.getContext().getAuthentication();
        if (authentication != null) {

            LOG.info("User '" + authentication.getName() +
                "' attempted to access the URL: " +
                request.getRequestURI());
        }
        response.sendRedirect(request.getContextPath() + "/access-denied");
    }
}
The custom handler is only logging the information and redirecting user to the “access-denied” controller. If you look closely, at this point we have access to the request, response, exception and the authentication object. We can build any custom logic based on this information.
3.2. Access Denied Controller.
Next is to create a custom controller to handle the redirect and send use to the access denied page. This is a simple Spring MVC controller, but we have the flexibility to perform any additional logic before showing the page to the customer.
package com.javadevjournal.web.controller.error;

import org.springframework.stereotype.Controller;
import org.springframework.web.bind.annotation.GetMapping;

@Controller
public class AccessDeniedController {

    @GetMapping("/access-denied")
    public String getAccessDenied() {
        return "/error/accessDenied";
    }
}
3.3. Configuring the Custom Access Denied Handler.
We have created the following components for our custom access denied page:
- Custom HTML page.
- Custom access denied handler.
- Spring MVC controller.
The last part of the setup is to let Spring security know about our custom handler. It will do this as part of configuring spring security through the HttpSecurity component. Here is a simplified version of our Spring security configuration (You can check complete configuration on our GitHub Repository)
@EnableWebSecurity
public class AppSecurityConfig extends WebSecurityConfigurerAdapter {

    @Override
    protected void configure(HttpSecurity http) throws Exception {
        http.authorizeRequests()
            .antMatchers("/login", "/register", "/home")
            .permitAll()
            .antMatchers("/account/**").hasAuthority("ADMIN")
            .and()
            .exceptionHandling().accessDeniedHandler(accessDeniedHandler())
            .and()
            ...
    }

    @Bean
    public AccessDeniedHandler accessDeniedHandler() {
        return new CustomAccessDeniedHandler();
    }

}
There are few important things in the above configuration.
- We are only allowing
ADMINauthority to access the/account/**. This means any other user with different authority will get the 403 access denied exception. - Since this is an exception handling, we are using the Spring security
.excepTionHandling()method and telling that we like to handle the access denied use case by passing custom access denied handler to theaccessDeniedHandler()method (.exceptionHandling().accessDeniedHandler(accessDeniedHandler()). - Last part defines our custom handler as a spring managed bean.
4. Testing Application
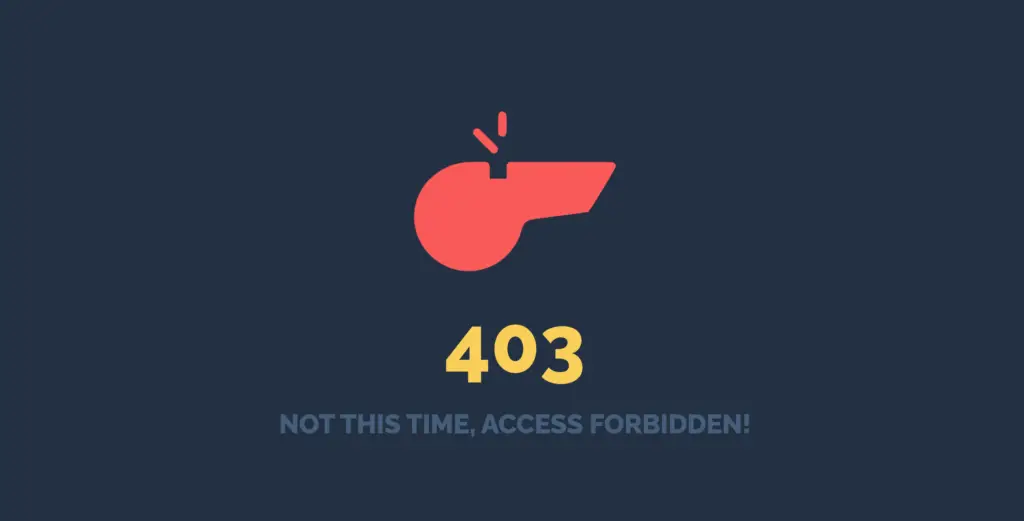
Our setup is complete, let’s start our application and try to access the page. In the first screen shot (without custom access denied configuration), our application will show the default page.
Once we active the configurations for spring security custom 403 access denied page. Let’s try to access the unauthorized section again by simply login to the system, this time, we will be greeted by our custom access denied page.
Summary
In this article, we saw how to create a Spring Security custom 403 access denied page. We took a deep dive in to the different components to required to customize the access denied page for spring security application. As always, the source code for our Spring Security Course is available on the GitHub.