-
Rahman
Mimaki JV33-160 Датчик не видит носителя (Error 50)
Доброго всем дня, датчик не обнаруживает носитель
выходит «Error 50». В инструкции это значит что- Датчик не обнаруживает носитель
(носитель установлен неправильно либо установлен носитель недо-пустимого типа).
В чем может быть проблемка? Бумаги те же что и раньше. Помогите кто чем может.
-
Sokell
- Старожил

- Сообщения: 6703
- Зарегистрирован: 20 июл 2010 13:33
- Последний визит: 08 фев 2023 09:52
- Изменить репутацию:
Репутация:
Голосов: 165 - Откуда: Рязань

Сообщение Sokell » 07 фев 2014 14:08
Rahman
Внизу под «носителем» есть, утопленная в канавке черная «полоска» по ширине всего стала…
Убедитесь что она есть, не повреждена… Протрите ее… И убедитесь что датчик с левой стороны головы (не красный световой) подключен и не выскочил с своей позиции…
Спаси меня господь от тех кому я верю,
от тех кому не – верю уберегусь я сам
-

@natol
- Завсегдатай
- Сообщения: 515
- Зарегистрирован: 20 окт 2011 17:27
- Последний визит: 09 дек 2022 10:21
- Изменить репутацию:
Репутация:
Голосов: 17 - Откуда: Воронеж


Сообщение @natol » 07 фев 2014 15:18
В Mimaki есть тестовый режим, там можно откалибровать датчик.
-
Александр Яковлевич
- Активный участник
- Сообщения: 467
- Зарегистрирован: 20 мар 2009 10:46
- Последний визит: 04 авг 2022 16:14
- Изменить репутацию:
Репутация:
Голосов: 17 - Откуда: Москва

Сообщение Александр Яковлевич » 08 фев 2014 21:38
Rahman
Протри датчик спиртом (или в крайнем случае водкой) — должно помочь. Ну и край материала не должен быть очень близко к краю стола.
Тщательней надо, братцы, тщательней…, но без фанатизма!
-
vovka.ru
- Участник
- Сообщения: 99
- Зарегистрирован: 10 дек 2012 15:13
- Последний визит: 12 июл 2020 20:46
- Изменить репутацию:
Репутация:
Голосов: 2 - Откуда: Ярославль

Сообщение vovka.ru » 09 фев 2014 22:24
Александр Яковлевич верно написал У него глазок забило протри его только не водкой а изопропиловым спиртом
-
Goodymaster_1
- Завсегдатай
- Сообщения: 699
- Зарегистрирован: 21 ноя 2013 23:03
- Последний визит: 11 сен 2022 20:38
- Изменить репутацию:
Репутация:
Голосов: 15 - Откуда: Москва
Сообщение Goodymaster_1 » 10 фев 2014 12:29
Еще бывает темно в помещении ![]() Можно фонариком подсветить в место замера.
Можно фонариком подсветить в место замера.
-

Немец
- Старожил
- Сообщения: 1732
- Зарегистрирован: 24 фев 2010 13:22
- Последний визит: 21 ноя 2022 16:30
- Изменить репутацию:
Репутация:
Голосов: 40 - Откуда: Волга
Сообщение Немец » 10 фев 2014 13:32
Rahman
Помогла ли вам помощь печатного сообщества ?
(в нашем случае пришлось когда то менять датчик)
Вернуться в «Принтеры MIMAKI»
Кто сейчас на конференции
Сейчас этот форум просматривают: нет зарегистрированных пользователей и 1 гость
Chapter 6 Troubleshooting
When an error message is displayed, eliminate the error according to the chart below.
If the same error message appears again, contact your dealer or an office of MIMAKI to call for service.
Message
ERROR 122
CHECK:SDRAM
ERROR 128
HDC FIFO OVER
ERROR 128
HDC FIFO UNDER
ERROR 129
BATTERY EXCHANGE
ERROR 130
HD DATA SEQ
ERROR 146
E-LOG SEQ
ERROR 151
Main PCB V1R2
ERROR 152
Main PCB V2R5
ERROR 153
Main PCB V3R3
ERROR 154
Main PCB V05
ERROR 157
Main PCB VTT
ERROR 16e
Main PCB V3R3B
ERROR 15f
HEAD DRIVE HOT
ERROR 171
NEW HEAD CONNECT
ERROR 186
HDC OVERFLOW
ERROR 186
HDC UNDERFLOW
ERROR 187
HDC SLEW RATE
ERROR 188
HDC MEMORY
ERROR 18a
Main PCB V_CORE
6-8
Cause
SDRAM is defective.
Head control circuit board is defective.
The battery life end of the internal clock
is detected.
Head data transferring sequence error
occurred.
Sequential number abnormality of the
event log occurred.
An error occurred in the main PCB .
COM driver becomes the high tempera-
ture.
New Print Head was recognized.
An error is detected on the waveform
printed on.
An error occurred in the main PCB .
Solution
• Turn off the power to the machine and turn it
on after a while.
• If the same error message appears again,
contact your local distributor to call for ser-
vice.
• Contact your local distributor to call for ser-
vice.
• Turn off the power to the machine and turn it
on after a while.
• If the same error message appears again,
contact your local distributor to call for ser-
vice.
Mimaki SWJ 320 -S4 — Проблема с шагом.
Mimaki SWJ 320 -S4 — Проблема с шагом.
Сообщение Granovskiy » 06 дек 2013 22:56
Имеется у нас в наличии 2 плоттера фирмы mimaki, jv33-160 и недавно приобрели Mimaki SWJ-S4. Так вот если на jv33 с шагом все просто, будь то рулон пленки 100,126,160 см. заправленный в станок или огрызок найденный в коробке с отходами, шаг постоянно одинаковый. А вот на SWJ-320, почему-то разный шаг на каждую ширину материала, будь то пленка или баннер. А про печать цвето пробы на огрызке, я вообще молчу ! Так например шаг на пленке шириной 100см равен нулю, а на 126см уже ша (МИНУС 215), на 160см. -535.
Подскажите пожалуйста, это нормально ? Или может мы материал как-то не правильно заправляем, а или секрет какой есть ))) С баннером такая же проблема.
Сообщение Алексей Береговой » 09 дек 2013 17:11
Granovskiy
Попробуйте обратиться к поставщику этого принтера.
Так же посмотрите на ссылочку: http://www.youtube.com/watch?v=AziSc40DDqg
Еще одно примечание — рулоны нужно позиционировать строго по центру зоны печати.
Добавлено спустя 4 минуты 1 секунду:
На JV33 на разных материалах шаг тоже разный. Просто это не сильно заметно
Сообщение kireyev » 11 дек 2013 13:43
Шаг — это имеется ввиду «коррекция скорости подачи носителя» (по англ. MEDIA COMP.)?
Если да, то в режиме LOCAL.X(1,2,3,4) заходите MENU->FUNCTION->SETUP->MEDIA COMP и там выставляете 0 (чтобы пропустить тестовую печать нажмите стрелку вправо). Далее делаете тестовый принт и регулируете на текущий материал.
Правда я скорее всего не правильно понял про шаг, так как у Вас уже 2 мимаки и про такую регулировку Вы наверное знаете.
Сообщение uosega » 08 янв 2014 14:32

Сообщение Евгений Жариков » 28 янв 2014 15:21
Источник
Mimaki SWJ 320 -S4 — Проблема с шагом.
Mimaki SWJ 320 -S4 — Проблема с шагом.
Сообщение Granovskiy » 06 дек 2013 22:56
Имеется у нас в наличии 2 плоттера фирмы mimaki, jv33-160 и недавно приобрели Mimaki SWJ-S4. Так вот если на jv33 с шагом все просто, будь то рулон пленки 100,126,160 см. заправленный в станок или огрызок найденный в коробке с отходами, шаг постоянно одинаковый. А вот на SWJ-320, почему-то разный шаг на каждую ширину материала, будь то пленка или баннер. А про печать цвето пробы на огрызке, я вообще молчу ! Так например шаг на пленке шириной 100см равен нулю, а на 126см уже ша (МИНУС 215), на 160см. -535.
Подскажите пожалуйста, это нормально ? Или может мы материал как-то не правильно заправляем, а или секрет какой есть ))) С баннером такая же проблема.
Сообщение Алексей Береговой » 09 дек 2013 17:11
Granovskiy
Попробуйте обратиться к поставщику этого принтера.
Так же посмотрите на ссылочку: http://www.youtube.com/watch?v=AziSc40DDqg
Еще одно примечание — рулоны нужно позиционировать строго по центру зоны печати.
Добавлено спустя 4 минуты 1 секунду:
На JV33 на разных материалах шаг тоже разный. Просто это не сильно заметно
Сообщение kireyev » 11 дек 2013 13:43
Шаг — это имеется ввиду «коррекция скорости подачи носителя» (по англ. MEDIA COMP.)?
Если да, то в режиме LOCAL.X(1,2,3,4) заходите MENU->FUNCTION->SETUP->MEDIA COMP и там выставляете 0 (чтобы пропустить тестовую печать нажмите стрелку вправо). Далее делаете тестовый принт и регулируете на текущий материал.
Правда я скорее всего не правильно понял про шаг, так как у Вас уже 2 мимаки и про такую регулировку Вы наверное знаете.
Сообщение uosega » 08 янв 2014 14:32
Сообщение Евгений Жариков » 28 янв 2014 15:21
Источник
Clamp up mimaki error 504
Answer: This error is displayed when the obstacle sensor detects an obstacle that can collide with the head.
Check that the setting value of “MEDIA THICKNESS” or “HEAD GAP” is appropriate against the actual thickness of the media. In addition, check on the followings.
・Dust or garbage is not sticking to the surface of table or media
・When the media is fixed with tape, the tape is not lifted
・The media is not rolled back
1. Required action against “ERROR505 !WORK High”
(1) Press the [ENTER] key while the error is displayed. The machine returns to mode.
(2) If [DATA REMAIN] is displayed, press the [DATACLEAR] key and then press the [ENTER] key.
(3) Press the [FUNCTION] key, and then press the [WORK SET] -> [ENTER] key. The Y bar moves backward, and the table moves down to the lowest point.
(4) Reset the media.
(5) Press the [REMOTE] key. The Y bar moves from the backside to the front when the machine enters mode. It is possible to start printing if no error is displayed until the Y bar stops at the front.
* Note that the head gap may be wider than the setting value even though it is set to 1.5mm in [Head Gap], if the value in [MEDIA THICKNESS] is larger than the thickness of the actual media.
2. Difference in action by setting
[FUNCTION] -> [HEAD HEIGHT] -> [GAP CHECK] is added to UJF-3042 firmware version 1.30. UJF-3042FX and UJF-3042HG have the [GAP CHECK] function regardless of firmware version.
・[GAP CHECK] is set as [OFF]:
When the obstacle sensor reacts, “ERROR505! WORK High” is displayed and the operation stops.
・[GAP CHECK] is set as [ON]:
When the obstacle sensor reacts, “ERROR505! WORK High” is not displayed, and the table moves down to the point that the obstacle sensor does not react.
* Because the table continues to move down until the obstacle sensor does not react even though [HEAD GAP] is set to 1.5mm, the actual head gap may not be 1.5mm. Note that movement of the head gap may cause a degraded drawing quality or ink mist if the obstacle sensor reacts during printing.
If the problem still remains, please contact us.
Источник
Что означает ошибка сервера 504 Gateway Time Out и как ее исправить

Иногда при посещении отдельных страниц сайта мы сталкиваемся с тем, что на экране вместо желаемого контента появляется сообщение об ошибке с цифровым кодом. Для «непосвященного» пользователя это просто набор цифр, но на самом деле в этих цифрах заложена определенная информация. Все они группируются по видам причин возникновения сбоя.
Сообщения, кодирующиеся в формате 5хх, говорят о проблеме на стороне сервера, например, когда невозможно выполнить запрос из-за нарушения связи между несколькими серверами. Ошибка 504 Gateway Time Out не является распространенной, но это не значит, что на нее не стоит обращать внимания, особенно владельцу сайта. Рассмотрим некоторые причины возникновения данной ошибки и способы ее устранения как на стороне обычного посетителя, так и администратором веб-ресурса.
Ошибка 504 Gateway Time Out – это код состояния HTTP, который появляется, когда в течение заданного периода времени один сервер не получает своевременный ответ от другого сервера, который действует как шлюз или прокси.
Описания ошибки могут иметь различную форму:
- 504 Gateway Timeout nginx
- Gateway Timeout Error
- HTTP Error 504
- 504 Gateway Time-out – The server didn’t respond in time
- HTTP Error 504 – Gateway Timeout
Наличие дополнительного словесного описания помогает конкретизировать причину возникновения сбоя.
Производительный хостинг в подарок при заказе лицензии 1С-Битрикс
Выбирайте надежную CMS с регулярными обновлениями системы и профессиональной поддержкой. А мы подарим вам год хостинга – специально для сайтов на 1С-Битрикс.
Что делать посетителю сайта при возникновении ошибки 504
Итак, вы столкнулись с появлением на экране сообщения «error 504». Не спешите уходить с сайта, ведь возникновение сбоя может говорить о неправильной работе вашего браузера или даже наличии более серьезных проблем на уровне пользовательского софта. Попробуйте произвести довольно простые действия, чтобы убедиться, что с вашим программным обеспечением и настройками все в порядке.
- Перезагрузите проблемную страницу или текущий браузер. Если проблема устранилась и не повторяется вновь, особенно при посещении других сайтов, о ней можно просто забыть. При регулярном возникновении однотипных ошибок во время посещения разных ресурсов стоит покопаться в настройках собственного ПО поглубже.
- Зайдите на тот же самый сайт, где возникла ошибка сервера 504, используя альтернативный браузер. В случае, когда страница во время тестирования открылась корректно, обновите браузер, в котором случился сбой, до последней версии.
- Проверьте, как открываются страницы этого же сайта с другого компьютера или смартфона. Это позволит вам понять, не связано ли появление ошибки 504 с ПО конкретного устройства.
- При регулярном появлении HTTP ошибок, в т.ч. с кодом 504, очистите кэш браузера, удалите файлы cookies. Со временем в любом браузере накапливается много «мусора». Произведя очистку, вы поможете программе работать более корректно и даже быстрее.
- Произведите сброс настроек роутера или модема, отключив оборудование на некоторое время от сети. Данная операция вряд ли приведет к устранению ошибки 504, но может улучшить качество интернет-соединения. Провайдеры регулярно вносят изменения в настройки собственного софта, обновляют его. Иногда это приводит к конфликту в корректном взаимодействии пользовательского оборудования и серверов оператора. Перезагрузка устройства по питанию в большинстве случаев решает такие проблемы.
- Очистите кэш DNS. Данная операция кажется сложной для обычного пользователя, но на деле выполнить ее достаточно легко. Способ очистки зависит от вашей операционной системы, найдите соответствующий мануал в интернете.
- Для опытных пользователей подойдет рекомендация временно переключить DNS-сервер на Google Public DNS , что как минимум поможет определить, возник ли ошибочный код состояния HTTP по причине DNS проблемы.
Если после проведения всех вышеозначенных рекомендаций любая ошибка, в т.ч. 504 Gateway Time Out, продолжает возникать регулярно, обратитесь в техподдержку проблемного интернет-ресурса.
Решение проблем с появлением ошибки сервера 504 администратором веб-ресурса
Некорректная работа сайта чаще всего просто раздражает посетителя и приводит к тому, что пользователь находит альтернативный ресурс. Для владельца сайта такие сбои могут носить более глобальные последствия. Поэтому очень важно своевременно обнаруживать баги и максимально быстро устранять их. Для раннего мониторинга стоит использовать все возможные инструменты:
- проводить регулярную симуляцию пользовательского поведения на сайте;
- настроить автоматизированный мониторинг работоспособности ресурса как встроенными инструментами администрирования, так и с использованием специальных скриптов;
- обеспечить качественную работу службы технической поддержки сайта, своевременную обработку всех поступающих сообщений, особенно связанных с информацией о появлении разного рода ошибок на стороне пользователя.
Соблюдение последнего правила не только позволит практически без дополнительных затрат отслеживать все возможные проблемы, которые возникают при посещении сайта. Своевременная обработка пользовательских запросов, быстрый ответ, выдача рекомендаций и публичное обсуждение повышают лояльность и создают дополнительный PR-эффект.
Почти все ошибки с кодом 5хх, возникающие из-за невозможности обработки определенного количества запросов, поступающих на сервер, решаются методом апгрейда железа (использованием высокопроизводительного хостинга) либо оптимизацией работы программного обеспечения. Второй способ зависит от вида движка, на котором создан конкретный сайт. При использовании условно-бесплатных программ (WordPress, OpeneCart и других) все проблемы придется решать на уровне администрирования, с привлечением конкретного веб-программиста, разработавшего данный сайт. Если баги возникают на платных платформах (1С-Битрикс, UMI.CMS, NetCat CMS), напишите об ошибке 504 Gateway Time Out в техподдержку разработчика. Отправить сообщение о проблеме следует и разработчикам платных скриптов, если они установлены на вашем сайте, и вы считаете, что сбои возникают по причине их некорректного исполнения.
Вот некоторые причины, приводящие к возникновению ошибки 504 Gateway Time Out
- Резкий скачок нагрузки на сайт вследствие поступления большого количества внешних запросов, вызванного DDoS-атаками или действиями вирусного ПО, пиковым посещением сайта, например, в момент проведения различных акций в интернет-магазине, или единовременной загрузкой на сайт большого объема контента (импорт информации из CSV- или XML-файлов).
- Некорректная работа скриптов, плагинов и дополнений, конфликтующих как между собой, так и внутри.
- Превышение лимита доступных ресурсов при использовании виртуального хостинга.
Еще одна возможная причина возникновения ошибки 504 – исполняемый скрипт не укладывается в отведенный лимит времени. Это бывает, когда скрипт обращается к другим сайтам либо просто выполняет тяжелую операцию, например, строит поисковый индекс.
Рекомендации по устранению ошибки 504 Gateway Time Out методами администрирования сайта
Ошибка 504 Gateway Time Out может быть вызвана недавними изменениями или обновлениями на сайте. Если после отката к состоянию, предшествующему изменениям, баг исчез, следует найти конкретное действие, повлекшее возникновение ошибки. Для этого необходимо проверить журнал ошибок соответствующей CMS. Пользователи WordPress могут включить журналирование ошибок в файле wp-config.php добавлением следующих строк:
Все возникающие варианты ошибок будут записаны в файле wp-contents/debug.log.
Для проверки работоспособности плагинов и расширений попробуйте отключить те, которые вызывают подозрение как источники возникновения ошибки 504. В первую очередь это касается устаревших скриптов, но причиной могут оказаться и обновления. Если проблема исчезла, далее следует найти некорректный плагин или дополнение и устранить или исправить его. Один из способов улучшения работы исполняемого скрипта – увеличить значение параметра PHP max_execution_time или облегчить скрипт.
При использовании CDN для более быстрого получения контента, в частности CloudFlare, который работает как CDN и как сервис предотвращения негативных последствий от DDoS, вы можете столкнуться с двумя типами ошибок 504. В случае возникновения проблемы на стороне CloudFlare лучшим решением будет связаться с поддержкой CloudFlare или отключить его. Второй вариант – когда сбой возникает на стороне хостинг-провайдера. В этой ситуации также необходимо обратиться в службу поддержки хостера.
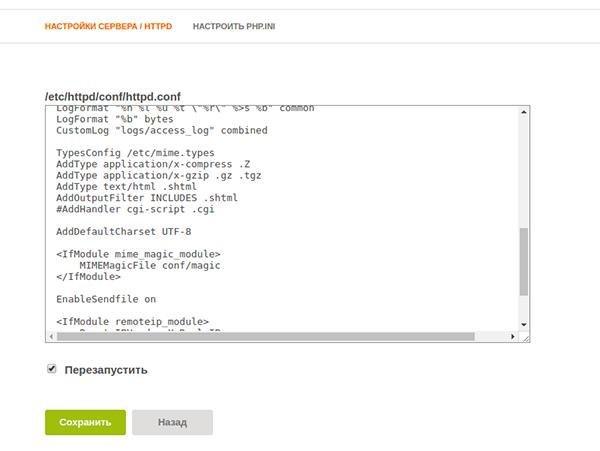
Часто ошибку 504 можно видеть на серверах, где используется VPS-хостинг и установлен Nginx в качестве фронтенда и Apache в качестве бэкенда. Для устранения проблемы в Apache можно увеличить значение timeout по умолчанию в файле httpd.conf:
Также увеличить лимит в max_execution_time в php.ini:
После внесения изменений следует перезапустить Apache. Ошибка 504 Gateway Time Out должна исчезнуть.
Аналогичным образом проблема с появлением ошибки HTTP 504 решается пользователями Nginx. Попробуйте увеличить такие параметры в файле /etc/nginx/conf.d/timeout.conf:
Также рекомендуется увеличить max_execution_time в php.ini:
Далее перезапустите Nginx и откройте сайт.
Более простым решением устранения данной проблемы является использование панели управления сервером.
Данный способ позволяет администрировать настройки веб-сервера без использования консоли, один раз настроить их под ваш проект и больше не подключаться к серверу без острой необходимости.
Например, в бесплатной панели управления Vesta Control Panel достаточно внести изменения в раздел «Сервер» и навсегда забыть о возможности возникновения ошибок на сайте.
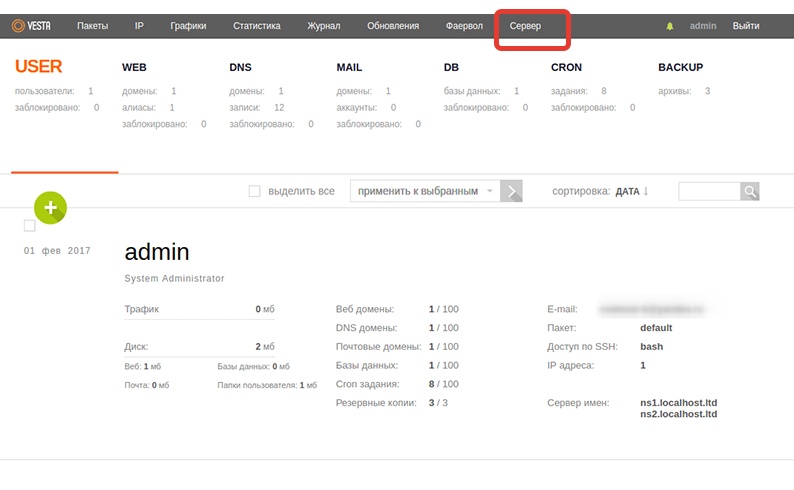 И далее внести соответствующие изменения.

Аналогичным способом проблема устраняется и при использовании альтернативных панелей управления хостингом – Ajenti, CentOS Web Panel, ISPmanager и других.
Если вы считаете, что появление 504 Gateway Timeout вызвано превышением лимита использования ресурсов серверного железа, оптимальным решением будет аренда выделенного сервера или VPS. Когда ваш сайт уже размещен на виртуальном хостинге, но ни одна из рекомендаций не привела к исправлению error 504, обратитесь к хостинг-провайдеру. В этом случае подробно опишите причины, которые, как вы полагаете, привели к появлению сбоя.
Заключение
В данной статье мы рассмотрели основные причины возникновения ошибки HTTP 504 Gateway Timeout и популярные способы устранения неполадки. Уверен, некоторые администраторы веб-ресурсов сталкивались с подобными проблемами, выходящими за рамки приведенных примеров и рекомендаций.
Буду благодарен, если вы поделитесь своим опытом в комментариях.
Источник
MIMAKI ENGINEERING CO., LTD.
URL: https://mimaki.com/
You can also download the latest manual from our website.
D203176-23
Original instructions
UV INKJET Printer Cutter
i
CAUTION ........................................................................................vi
CAUTION ............................................................................................ vi
Requests ............................................................................................. vi
FCC Statement (USA) ......................................................................... vi
Interference to televisions and radios .................................................. vi
Foreword ........................................................................................vii
On This Operation manual ..................................................................vii
Safety Precautions .........................................................................vii
Symbols ...............................................................................................vii
Safety interlock .................................................................................... xi
Warning labels ...............................................................................xii
Chapter 1 Before Use
Moving This Machine ..................................................................... 1-2
Where to Install This Machine ...........................................................1-2
Working Environmental Temperature ................................................1-2
Moving This Machine ........................................................................1-2
Names of Parts and Functions ...................................................... 1-3
Front Side of the Machine .................................................................1-3
Rear Side and Right Side of the Machine .........................................1-4
Carriage .............................................................................................1-5
Operation Panel ................................................................................1-6
Media Sensor ....................................................................................1-8
Carriage .............................................................................................1-8
Cutter Blade and Cutting Slot ............................................................1-8
Capping Station .................................................................................1-8
Pinch Rollers and Grit Rollers ...........................................................1-8
Connecting Cables ........................................................................1-9
Connecting USB 2.0 Interface Cable ................................................1-9
Connecting a LAN Cable ...................................................................1-9
Connecting the Power Cable ...........................................................1-10
Ink Bottles .................................................................................... 1-11
Types of Inks You Can Use with the Machine .................................1-11
Precautions on Using the Ink Bottles ..............................................1-11
Installing the Ink Bottles ............................................................... 1-12
Media ........................................................................................... 1-17
The Size of Media That Can Be Used with This Machine ...............1-17
Precautions on Handling the Media ................................................1-17
Menu Mode ................................................................................. 1-18
Chapter 2 Basic Operations
Printing Procedure ......................................................................... 2-2
Turning the Power On/Off .............................................................. 2-3
Turning the Power On .......................................................................2-3
Turning the Power Off .......................................................................2-3
Table of Contents
ii
Setting Media .................................................................................2-4
Adjusting the Head Height .................................................................2-4
Adjusting the Positions of the Pinch Rollers to Suit the Media ..........2-5
Maximum Print/Cut Area .................................................................2-10
Precautions on Setting the Media ...................................................2-10
Setting a Roll Media ........................................................................2-11
Setting the Pinch Roller Pressure ...................................................2-13
Take-up Device ...............................................................................2-14
Setting Leaf Media ..........................................................................2-15
Changing the printing origin ............................................................2-16
Test Printing .................................................................................2-17
Test Printing ....................................................................................2-17
Perform test printing with the normal test pattern ............................2-18
Perform test printing with the test pattern for checking white ink ....2-18
Head Cleaning .............................................................................2-19
About Head Cleaning ......................................................................2-19
Perform head cleaning depending on the test printing result ..........2-19
Setting Media Correction .............................................................2-19
Setting of Media Correction .............................................................2-19
If the Positions of Dots Shift... ......................................................2-20
Printing Data ................................................................................2-20
Starting a Printing Operation ...........................................................2-20
Cancel printing (Data Clear) ............................................................2-21
Cutting Media ...............................................................................2-21
Workflow of cutting ......................................................................2-22
Installing Tools .............................................................................2-23
When a Cutter Is Used ....................................................................2-23
How to Install a Ballpoint Pen ..........................................................2-24
Setting the Cutting Conditions .....................................................2-26
About the Cut Conditions ................................................................2-26
Select the Tool Condition ................................................................2-27
Set the Cut Conditions ....................................................................2-27
Test Cutting .................................................................................2-28
Cutting Data .................................................................................2-29
Setting the Origin .............................................................................2-29
Start Cutting ....................................................................................2-29
Stopping a Cutting Operation (Data Clear) .....................................2-29
Removing the Cutter Unit Temporarily ............................................2-29
Cutting Media ...............................................................................2-30
Chapter 3 Setup
About SETUP MENU .....................................................................3-2
SETUP MENU table ..........................................................................3-3
Register the Optimal Print Conditions to Match the Use ...................3-4
Setting of Media Correction ...............................................................3-5
If the Positions of Dots Shift... ...........................................................3-6
Setting of Logical Seek ......................................................................3-7
Setting of Overprint ...........................................................................3-7
Setting of Drying Time .......................................................................3-7
Setting of Left and Right Margins ......................................................3-8
Setting of Vacuum Fan ......................................................................3-8
iii
Setting of Feed Speed .......................................................................3-8
Setting of MAPS ................................................................................3-9
Setting of Auto Cleaning ....................................................................3-9
Setting of Interval Wiping ................................................................3-10
Setting of the UV Mode ...................................................................3-10
Setting Ionizer (option) ....................................................................3-10
Setting of LT mode ..........................................................................3-11
About MACHINE SETUP MENU .................................................3-12
MACHINE SETUP MENUs table .....................................................3-13
Setting of AUTO Power-off ..............................................................3-14
Setting of Take-up Unit ....................................................................3-14
Setting of the Display of Media Residual .........................................3-15
Setting of Media Detection ..............................................................3-15
Setting of a LANGUAGE .................................................................3-16
Setting of Time ................................................................................3-16
Setting of Unit (Temperature/ Length) .............................................3-16
Setting of a KEY BUZZER ...............................................................3-16
Setting of the CONFIRM. FEED ......................................................3-17
Setting of the SPACE FEED MODE ................................................3-17
Setting of the Network .....................................................................3-17
Setting of Event Mail Function .........................................................3-18
Initializing the Settings .....................................................................3-22
About NOZZLE CHECK MENU ................................................... 3-23
INFORMATION MENU table ...........................................................3-23
Printing Check Flow ........................................................................3-24
Printing Operations at "Nozzle Missing" Judgment and Error
Occurrence ......................................................................................3-24
Setting of the Printing Check ...........................................................3-25
Setting of the NOZZLE RECOVERY ...............................................3-25
Setting of the Judgment Condition ..................................................3-25
About INFORMATION MENU ..................................................... 3-26
INFORMATION MENU table ...........................................................3-27
Displaying the Information ...............................................................3-27
Displaying the machine's information (LOCAL guidance) ...............3-28
Chapter 4 Cutting Function
Cut Out Data with Register Mark ................................................... 4-2
The Flow of Cutting out the Registered Data ....................................4-2
Enter register mark detection mode ..................................................4-2
Precautions for inputting data with register marks ............................4-2
Settings for Detecting register marks ................................................4-5
ID Cut ................................................................................................4-6
About CUTTING MENU ............................................................... 4-11
Cutting MENU table .........................................................................4-12
Setting the CUT MODE ...............................................................4-13
Perform Multiple Cuttings (Copy function) ................................... 4-13
SETUP SUB MENU ..................................................................... 4-14
Make the media without uncut area (OVER CUT function) .............4-15
Other SETUP SUB MENU ..............................................................4-15
SETUP RESET ...............................................................................4-16
iv
Maintenance Function .................................................................4-17
Maintenance of Mark Sensor ..........................................................4-17
Perform SAMPLE CUT to Find out the Cause of Cutting Error. ......4-19
Cutting a Medium into Multiple Pieces with a Certain Length .........4-19
Cutting out Data without Register Marks (PC ORIGIN OFFSET) ....4-20
Setting the Scale Adjust ..................................................................4-21
Chapter 5 Maintenance
Maintenance ..................................................................................5-2
When the Machine Is Not Used for a Long Time ..............................5-2
Precautions for Maintenance .............................................................5-2
Cleaning the Exterior Surfaces ..........................................................5-2
Cleaning the Platen ...........................................................................5-2
Cleaning the Media Sensor ...............................................................5-3
Cleaning the Media Press .................................................................5-3
About MAINTENANCE MENU .......................................................5-4
MAINTENANCE MENUs table ..........................................................5-5
Maintaining the Capping Station ....................................................5-6
Cleaning the Wiper and Cap .............................................................5-6
Cleaning the mist filter....................................................................... 5-7
Clean the NCU .................................................................................. 5-8
Washing the Head Nozzle .................................................................5-9
Cleaning of ink discharge passage ...................................................5-9
When the Machine Is Not Used for a Long Time ............................5-10
Cleaning the Ink Head and the Area around It ............................5-12
Nozzle Recovery Function ...........................................................5-13
Reset the set value ..........................................................................5-14
Eliminate Ink Over Flow .............................................................5-14
Automatic Maintenance Function ................................................5-15
Setting the Refreshing Intervals ......................................................5-15
Setting the Cleaning Intervals and Type .........................................5-15
INK FILLING ................................................................................5-16
AIR PURGE .....................................................................................5-16
Replacing consumables ...............................................................5-18
Replacing the wiper .........................................................................5-18
Replacing the mist filter ................................................................... 5-18
If a Waste Ink Tank Confirmation Message Appears ......................5-19
Replace the waste ink tank with another .........................................5-19
Replacing the waste ink tank before the waste ink tank confirmation
message is displayed ......................................................................5-20
Replacing the Cutter Blade .............................................................5-20
Replacing and Adjusting the Cutter Blade ...................................5-21
Replacing the cutter ........................................................................5-21
Adjusting the Cutter Blade ...............................................................5-22
Replacing cutters other than supplied one ......................................5-22
Adjusting blade edge of cutters other than supplied one ................5-22
v
Chapter 6 Troubleshooting
Troubleshooting ............................................................................. 6-2
Power does not turn on .....................................................................6-2
The machine does not start printing ..................................................6-2
Media get jammed / media is soiled ..................................................6-2
Image quality is poor .........................................................................6-3
Nozzle is clogged ..............................................................................6-3
An error occurred in the ink bottle .....................................................6-3
When the ink leakage occurs ............................................................6-3
Warning / Error Messages .............................................................6-4
Warning messages ............................................................................6-4
Error messages .................................................................................6-7
Chapter 7 Appendix
Specification .................................................................................. 7-2
Printer Section Specifications ............................................................7-2
Cutter Section Specifications ............................................................7-3
Common Specifications .....................................................................7-4
Ink specifications ...............................................................................7-6
Ink bottle installation order .............................................................7-7
Sheet for inquiry ............................................................................ 7-8
vi
1
2
2
2
2
2
1
CAUTION
CAUTION
CAUTION
THIS LIMITED WARRANTY OF MIMAKI SHALL BE THE
SOLE AND EXCLUSIVE WARRANTY AND IS IN LIEU
OF ALL OTHER WARRANTIES, EXPRESS OR
IMPLIED, INCLUDING, BUT NOT LIMITED TO, ANY
IMPLIED WARRANTY OF MERCHANTABILITY OR
FITNESS, AND MIMAKI NEITHER ASSUMES NOR
AUTHORIZES DEALER TO ASSUME FOR IT ANY
OTHER OBLIGATION OR LIABILITY OR MAKE ANY
OTHER WARRANTY OR MAKE ANY OTHER
WARRANTY IN CONNECTION WITH ANY PRODUCT
WITHOUT MIMAKI’S PRIOR WRITTEN CONSENT.
IN NO EVENT SHALL MIMAKI BE LIABLE FOR
SPECIAL, INCIDENTAL OR CONSEQUENTIAL
DAMAGES OR FOR LOSS OF PROFITS OF DEALER
OR CUSTOMERS OF ANY PRODUCT.
Requests
• This Operation manual has been carefully prepared for
your easy understanding.However, please do not
hesitate to contact a distributor in your district or our
office if you have any inquiry.
• Description contained in this Operation manual are
subject to change without notice for improvement.
FCC Statement (USA)
This equipment has been tested and found to comply with
the limits for a Class A digital device, pursuant to Part 15
of the FCC Rules. These limits are designed to provide
reasonable protection against harmful interference when
the equipment is operated in a commercial environment.
This equipment generates, uses and can radiate radio
frequency energy and, if not installed and used in
accordance with the Operation manual, may cause
harmful interference to radio communications.
Operation of this equipment in a residential area is likely
to cause harmful interference in which case the user will
be required to correct the interference at his own
expense.
In the case where MIMAKI-recommended cable is not
used for connection of this machine, limits provided by
FCC rules can be exceeded.
To prevent this, use of MIMAKI-recommended cable is
essential for the connection of this machine.
Interference to televisions and radios
The machine described in this manual generates high
frequency when operating. The machine can interfere with
radios and televisions if set up or commissioned under
improper conditions. The product is not guaranteed
against any damage to specific-purpose radio and
televisions.
The machine’s interference with your radio or television
will be checked by turning on/off the power switch of the
machine. In the event that the product is the cause of
interference, try to eliminate it by taking one of the
following corrective measures or taking some of them in
combination.
• Change the orientation of the antenna of the television
set or radio to find a position without reception difficulty.
• Separate the television set or radio from this product.
• Plug the power cord of this product into an outlet which
is isolated from power circuits connected to the
television set or radio.
vii
Foreword
Foreword
Congratulations on your purchase of MIMAKI UV ink jet
printer "UCJV300Series/150Series".
UV Inkjet Printer UCJV300Series/150Series uses
ultraviolet ray curing ink (UV ink).
Read this Operation Manual carefully and make the most
effective use of your printer.
On This Operation manual
• This Operation Manual is describing the operations
and maintenance of "UV inkjet printer UCJV300Series/
150Series" (hereinafter referred to as the machine).
• Read this Operation Manual carefully and understand
them thoroughly to use. It is also necessary to keep
this Operation Manual on hand.
• Make arrangements to deliver this Operation Manual to
the person in charge of the operation of this machine.
• This Operation Manual has been carefully prepared for
your easy understanding, however, please do not
hesitate to contact a distributor in your district or our
office if you have any inquiry.
• Descriptions contained in this Operation Manual are
subject to change without any notice for improvement.
• In the case when this Operation Manual should be
illegible due to destruction or lost by fire or breakage,
purchase another copy of the Operation Manual from
our office.
• You can also download the latest manual from our
website.
Reproduction of this manual is strictly prohibited.
© 2017 MIMAKI ENGINEERING Co., Ltd.
Safety Precautions
Symbols
Symbols are used in this Operation Manual for safe
operation and for prevention of damage to the machine.
The indicated sign is different depending on the content of
caution. Symbols and their meanings are given below.
Please follow these instructions as you read this manual.
Examples of symbols
Meaning
Failure to observe the instructions given
with this symbol can result in death or
serious injuries to personnel. Be sure to
read it carefully and use it properly.
Failure to observe the instructions given
with this symbol can result in injuries to
personnel or damage to property.
Important notes in use of this machine are
given with this symbol. Understand the
notes thoroughly to operate the machine
properly.
Important notes in use of this machine are
given with this symbol. Understand the
notes thoroughly to operate the machine
properly.
Indicates the reference page for related
contents.
The symbol " " indicates that the
instructions must be observed as strictly as
the CAUTION instructions (including
DANGER and WARNING instructions). A
sign representing a precaution (the sign
shown at left warns of hazardous voltage) is
shown in the triangle.
The symbol " " indicates that the action
shown is prohibited. A sign representing a
prohibited action (the sign shown at left
prohibits disassembly) is shown in or
around the circle.
The symbol " " indicates that the action
shown must be taken without fail or the
instructions must be observed without fail. A
sign representing a particular instruction
(the sign shown at left instructs to unplug
the cable from the wall outlet) is shown in
the circle.
viii
1
2
2
2
2
2
1
Safety Precautions
Warning for Use Never do the following
WARNING
• The set of power cables provided with this machine
is for use with this machine only, and cannot be
used with other electrical devices. Do not use any
power cables other than the ones provided with the
machine. Failure to observe those instructions may
result in fire or electric shocks.
• Do not use this machine in an environment where
humidity is high or the machine may get wet.
Using the machine under such environment may
result in fire or electric shock, or cause malfunction.
• Use of the machine under an abnormal condition
where it produces smoke or strange smell can
result in fire or electric shocks. If such an
abnormality is found, be sure to turn off the power
switch immediately and unplug the cable from the
wall outlet. Check first that the machine no longer
produces smoke, and contact your distributor or a
sales office of MIMAKI for repair. Never repair your
machine by yourself since it is very dangerous for
you to do so.
• Never disassemble or remodel the main unit
of the machine or the ink bottle. Disassembly
or remodeling can result in an electric shock
or breakdown of the machine.
• Do not use extension cords. Doing so may result in
fire or electric shocks.
• Keep the power plug prong clear of any foreign
object such as a piece of metal. Failure to do so
may result in a fire or electric shocks.
• Do not plug too many leads into a single socket.
Doing so may result in fire or electric shocks.
• Do not use the machine if the power cord or plug is
damaged. Using the machine with damaged power
cord may result in fire or electric shocks. Contact
your service representative for replacement cord.
• Do not handle the power plug with wet hands.
Doing so may result in electric shocks.
• Grasp by holding the plug itself when removing the
power plug from wall outlet, and never hold by the
cord. Holding and pulling the cord may damage the
cord, leading to fire or electric shocks.
• When setting the roll media, be sure to do so with
at least one other person.
• In case of ink leakage, please turn off the main
power, unplug the power cable and contact our
service office or distributor.
• Do not use a flammable spray or solvent inside or
around the machine. Doing so may result in fire or
electric shocks.
• Do not place a vase, flower pot, water glass,
container with liquid such as water or chemicals
inside, or small metallic object near or on top of this
machine. Liquid or foreign object may get inside
the machine, leading to fire or electric shocks.
• Do not use this machine in an area where children
might be present.
• The ink used for this machine falls into the
category of UN No.3082 and UN Class 9. Since the
ink is flammable, never use fire when using the
machine.
WARNING
Do not disassemble or remodel the machine
• Never disassemble or remodel the main unit of
the machine or the ink bottles. Disassembly or
remodeling can result in an electric shock or
breakdown of the machine.
Power supply and voltage
• Use this machine with the indicated power
specifications. Be sure to connect the power
cable plug to a grounded outlet. Failure to do
so may result in fire or electric shocks.
• Never look at the illuminated LED UV with
your naked eyes. Doing so could cause pain in
your eyes or visual impairment. Be sure to
wear safety glasses.
• Do not expose your skin directly to ultraviolet
(UV) light. Doing so could cause skin irritation.
• To prevent electrical shock, be sure to turn off
the main power circuit breaker and disconnect
the power plug before carrying out
maintenance. For some units, it may take one
minute for the capacitors to discharge.
Therefore, wait three minutes after turning off
the main power circuit breaker and
disconnecting the power plug before starting
maintenance work.
• Although rare, LED UV units can become
damaged. We recommend replacing the LED
UV unit when it has reached its rated
operation life, or earlier.
• The main power circuit breaker should be
turned on only by personnel with sufficient
knowledge about the operation of this
machine.
• The LED UV unit is hot while it is on and
immediately after it has been turned off. Do
not touch it with your bare hands. Doing so
could result in burns.
Do not use this machine in damp places
• Do not use this machine in an environment
with high humidity or where the machine could
get wet. Using the machine under such
environment may result in fire or electric
shock, or cause malfunction.
Handling ink bottles
• Some of the ingredients (UV curing initiator)
are toxic to aquatic life. Avoid any leaks into
water systems or sewage systems.
• Store ink bottles and waste ink bottles in a
place that is out of the reach of children.
• If you get ink on your skin or clothing,
immediately wash it off with detergent or
water. If you get ink in your eyes, immediately
wash your eyes with a lot of clean water, and
then consult a doctor as soon as possible.
• Dispose of waste ink according to the local
regulations of the area where the machine
isused.
ix
Safety Precautions
Notes on maintenance
• When handling ink and cleaning solution, pay
close attention to ventilation and be sure to
wear the included safety glasses and gloves.
• The gloves supplied with the machine are
disposable. When all the gloves are
expended, purchase an equivalent product on
the market.
• Before using ink and cleaning solution, be
sure to read the Safety Data Sheet (SDS).
• Keep ink away from an open flame. Also keep
the room well ventilated when you use or
handle ink.
• If you get ink in your eyes, immediately wash
your eyes thoroughly with a lot of clean water
for at least 15 minutes. Then, consult a doctor
as soon as possible.
• If anyone drinks ink by mistake, keep him or
her quiet and see a doctor immediately. Do not
allow him or her to swallow the vomit. Then
contact the emergency number written on the
SDS.
• If you inhale a great deal of vapor and feel ill,
immediately move to a location with plenty of
fresh air, and keep yourself warm and quiet.
Consult a doctor as soon as possible.
• If the ink adheres to your skin, use a large
amount of water and soap or special detergent
for skin to remove the ink.
Periodic replacement parts
• Some parts of this machine must be replaced with new ones
periodically by service personnel. Be sure to make a
contract with your distributor or dealer for After sale service
to ensure a long life of your machine.
Protection of media from dust
• Store media in a bag. Wiping off dust accumulated on media
will adversely affect the media due to static electricity.
• When leaving the workshop after the working hours, do not
leave any media on the roll hanger. If any media is left on the
roll hanger, it can get dusty.
Clump lever
• Never raise the lever during printing. Raising the lever will
abort printing.
Notes on maintenance
• It is strongly recommended to use the machine in a room
that is not dusty.
• Dust in the heads can also cause drops of ink to fall
suddenly down on the media during printing. In such a case,
be sure to clean up the heads.
• Perform wiping (removal of dust and paper powder) of the
capping station and wiper frequently.
WARNING
Handling ink bottles
• The safety evaluation of this machine assumes that the ink
recommended by this company is used. For safe usage of
this machine, use the ink recommend by this company.
• Never refill the ink bottles with ink. Refilled ink cartridge can
cause a trouble. Remember that MIMAKI assumes no
responsibility for any damage caused by the use of the ink
cartridge replenished with ink.
• If an ink bottle is moved from a cold place to a warm place,
leave it at room temperature for at least three hours before
using it.
• Open the ink bottle just before installing it in the machine. If it
is opened and left for an extended period of time, normal
printing performance of the machine may not be ensured.
• Make sure to store ink bottles in a cool and dark place.
• Store ink bottles and waste ink bottles in a place that is out
of the reach of children.
• Once an ink bottle is opened, be sure to thoroughly
consume the ink within three months. If an extended period
of time has passed away after opening the cartridge tank,
printing quality would be poor.
• Do not pound ink bottles or shake them violently. Doing so
could cause the ink to leak.
• Consult with your sales or service representative regarding
the proper disposal of ink bottles and waste ink. When you
dispose them by yourself, follow the regulations stipulated
by the industrial waste disposer or the country or region you
live in.
Handling of media
• Use media recommended by MIMAKI to ensure reliable,
high-quality printing.
• Pay attention to the expansion and contraction of the media.
Do not use media immediately after unpacking. The media
can be affected by the room temperature and humidity, and
thus it may expand and contract. The media have to be left
in the atmosphere in which they are to be used for 30
minutes or more after unpacked.
• Do not use curled media.
The use of curled media can not only cause a media jam but
also affect print quality.
Straighten the sheet of media, if significantly curled, before
using it for printing. If a regular-sized coated sheet of media
is rolled and stored, the coated side has to face outside.
Disposition of this machine
• Consult your sales or service representative for proper
disposal of this machine. Otherwise, commission an
industrial waste disposal company.
WARNING
x
1
2
2
2
2
2
1
Safety Precautions
Precautions in Use
Cautions on Installation
CAUTION
Handling of the power cable
• Connect to a socket-outlet with determinate
polarity.
• For PLUGGABLE EQUIPMENT, the socket-
outlet shall be installed near the equipment
and shall be easily accessible.
• Unplug the cord from the wall outlet and
remove dust from the power plug periodically,
at least once a year. Failure to do so may
result in fire or electric shocks.
• Do not use the machine unless it is connected
to a power supply that satisfies the displayed
voltage condition.
• Check the voltage of the wall outlet and the
capacity of the circuit breaker before you plug
the power cords. Plug each power cord to
different outlet that has independent circuit
breaker If you plug more than one power cord
to wall outlets that share the same circuit
breaker, the power may be cut off by the
breaker.
Power supply
• Leave the breaker turned ON.
• Do not turn off the main power switch on the
right side of this machine.
Ultraviolet (UV) light
• Some leakage of ultraviolet light occurs
around the LED UV unit. Exposing skin and
eyes to ultraviolet light could cause
inflammation and skin cancer. Even if weak
ultraviolet light does not cause inflammation,
chronic disorders could develop due to
repeated exposure. Avoid exposing your skin
and eyes to ultraviolet light.
• Visual impairments that can occur as a result
of exposure to ultraviolet light include acute
disorders such as pain or excess tearing in
response to foreign matter, and chronic
disorders such as cataracts. When using this
machine, be sure to wear gloves, long-sleeved
clothing, a visor over your face, and the
shaded glasses that are included with the
machine.
Notes on the LED UV unit
• When handling the glass on the bottom of the
LED UV unit, be sure to wear the included
gloves. Never touch the glass with your bare
hands. Otherwise, the UV ink curing level may
drop significantly. If the glass becomes dirty,
wipe it with clean gauze moistened with
alcohol. (Do not use alcohol for cleaning the
exterior cover, or the paint will peel off.)
• The LED UV performance and service life are
significantly affected by the UV irradiation and
UV power supply units that are used. Only use
UV devices that are recommended by
Mimaki.Mimaki shall bear no responsibility for
any trouble due to the use of UV devices other
than those that are recommended.
Be careful with the movable parts
• Do not touch the rolling grit roller. Otherwise,
you could hurt your fingers or tear off your
finger nails.
• Keep your head and hands away from any
moving parts during cutting (plotting)
operation. Otherwise, your hair could become
caught in the machine. Wear proper clothes.
(Do not wear loose-fit clothes or accessories).
Bind a long hair.
Caution with cutters
• The cutter blades are very sharp. Do not touch
them.
• Do not shake or swing the cutter holder.
Otherwise, the blade may come off.
Hot parts
• The LED UV unit is very hot. Before
performing maintenance work, wait until the
temperature has dropped sufficiently after the
LED UV unit has been turned off.
• If touching hot parts is unavoidable, be sure to
wear heat-insulating gloves to protect your
hands.
CAUTION
A place exposed to direct
sunlight
On an inclined surface
A place that vibrates
A place exposed to direct
air flow from an air
conditioner
A place where the
temperature or humidity
varies significantly
Around a place where fire
is used
• Use the
machine under
the following
environmental
conditions:
• Operating
environment:
20 to 30 °C
(68 to 86 °F)
35 to 65 % (Rh)
CAUTION
Safety Precautions
xi
Safety interlock
For your safety, this machine is equipped with interlocks to stop all operations if a cover is opened while the machine is
printing.
(parts circled in red in the figure below)
Warning labels
xii
1
2
2
2
2
2
1
Warning labels
Warning labels are attached to the machine. Be sure to fully understand the warning given on the labels.
If a warning label is illegible due to stains or has come off, purchase a new one from a distributor or our sales office.
3
4
7
5
2
2
3
6
1
1
8
Around the carriage
When the maintenance cover is open
Warning labels
xiii
No. Reorder Label
1
M910931
2
M907833
3
M903330
4
M903405
5
M907935
6
M905811
7
M913419
8
M905935
This chapter
tells you what you should know before using this machine, including the name of each
part and the installation procedures.
Moving This Machine .................................... 1-2
Where to Install This Machine ..................... 1-2
Working Environmental Temperature ......... 1-2
Moving This Machine .................................. 1-2
Names of Parts and Functions...................... 1-3
Front Side of the Machine ........................... 1-3
Rear Side and Right Side of the Machine ... 1-4
Carriage ...................................................... 1-5
Operation Panel .......................................... 1-6
Media Sensor .............................................. 1-8
Carriage ...................................................... 1-8
Cutter Blade and Cutting Slot ...................... 1-8
Capping Station ........................................... 1-8
Pinch Rollers and Grit Rollers ..................... 1-8
Connecting Cables........................................ 1-9
Connecting USB 2.0 Interface Cable ...........1-9
Connecting a LAN Cable .............................1-9
Connecting the Power Cable .....................1-10
Ink Bottles ................................................... 1-11
Types of Inks You Can Use with the
Machine .....................................................1-11
Precautions on Using the Ink Bottles .........1-11
Installing the Ink Bottles .............................. 1-12
Media .......................................................... 1-17
The Size of Media That Can Be Used with
This Machine .............................................1-17
Precautions on Handling the Media ...........1-17
Menu Mode ................................................. 1-18
Chapter 1
Before Use
Chapter 1 Before Use
1-2
Moving This Machine
Where to Install This Machine
Secure a suitable installation space before assembling
this machine.
The place of installation must have enough space for not
only this machine itself but also for the printing operation.
Working Environmental Temperature
Use this machine in an environment of 20 to 30°C to
ensure reliable printing.
Moving This Machine
Follow the procedure described below when you have to
move this machine to a different place within the same
floor that does not have any steps.
1
Remove the caster blocks.
2
Move this machine as shown in the figure.
• This machine must be moved by at least 4
people. This work shall be performed in
accordance with the regulations of each country
and region.
• Do not push the cover to move this machine
because doing so can cause the cover to crack.
3
Put the caster blocks back in place.
Model Width Depth Height
Gross
weight
UCJV300-160
2900mm
(114.2 in)
776mm
(30.6 in)
1475mm
(5801 in)
188kg
(414.5 lb)
UCJV300-130
2650mm
(104.3ln)
776mm
(30.6 in)
1475mm
(5801 in)
177kg
(390.2lb)
UCJV300-107
2380mm
(93.7in)
776mm
(30.6 in)
1475mm
(5801 in)
161kg
(354.9lb)
UCJV300-75
2090mm
(82.3in)
776mm
(30.6 in)
1475mm
(5801 in)
144kg
(317.5lb)
UCJV150-160
2900mm
(114.2 in)
776mm
(30.6 in)
1475mm
(5801 in)
183kg
(410.1 lb)
• If you need to move the machine to any other
places, contact your distributor or our service
office.
Moving the machine by yourself may cause failure
or damage to the machine.
Be sure to request your distributor or our service
office to move this machine.
• When moving this machine, take care not to sub-
ject it to excessive shocks.
• Be sure to lock the casters after moving this
machine.
500 mm (19.7 in)
minimum
3900
m
m (
15
3
.5 i
n)
m
i
ni
mum (
1
60Mod
el
)
3
650 mm
(
143
.7 i
n)
m
i
n
i
m
um (
1
3
0Mod
el
)
3
380 mm
(
133.
0
i
n)
mi
ni
m
um (
10
7Mode
l
)
30
90 mm
(
121.
7 i
n)
mi
ni
m
u
m (
75
Mo
del
)
2
7
7
6
m
m
(
1
0
9
.
3
i
n
)
500 mm (19.7 in)
minimum
1
0
0
0
m
m
(
3
9
.
3
i
n
)
m
i
n
i
mu
m
1
0
0
0
mm
(
3
9
.
3
i
n
)
m
i
n
i
m
u
m
1-3
Chapter 1 Before Use
1
2
2
2
2
Names of Parts and Functions
Front Side of the Machine
Operation panel
This panel has the operation keys
required for operating the machine and
the LCDs for displaying setting items,
etc.
Clamp lever (front)
Moves the pinch rollers up and down to hold or
release the media.
Waste ink tank
Waste ink gathers in this tank.
Stand
Supports the main body of the machine. It is
provided with casters that are used to move
this machine.
After cover
The printed media is output
along the after cover.
Ink supply unit
The ink bottles are inserted here. ( P.1-12)
Take-up device
Automatically winds up the printed roll media.
Carriage
The print head moves from side to side.
Maintenance cover
Open these covers only when you have to perform
maintenance. Normally, keep all covers closed even
when the power switch is off,
Platen
Area where media is flattened
and printed.
1-4
Chapter 1 Before Use
Rear Side and Right Side of the Machine
AC inlet
Connect the power cable to the AC inlet.
Clamp lever (rear)
Interlocks with the clamp lever in
the font of this machine.
USB connector
This is a USB 2.0 interface connector.
Main power switch (INLET 1)
Turns on/off the main power for this machine. Leave
the main power turned on to prevent ink clogging.
Vent filter box
Vents the ink mist
generated during printing.
Roll holder
Grabs the roll media by the ends of
its paper core to hold the media in
place. It supports 2-inch and 3-inch
paper cores.
LAN connector
Use this connector when you use network functions.
Chapter 1 Before Use
1-5
1
2
2
2
2
Carriage
The carriage is equipped with a print head and an LED-
UV unit for printing.
• Do not look into the light emitted from the LED-UV
unit directly with the naked eye, regardless of
whether the front cover is placed on top of it. The
emitted light can be extremely bright under some
printing conditions.
• Remember to wear the UV protective glasses sup-
plied with the machine.
UV light
Front cover
1-6
Chapter 1 Before Use
Operation Panel
Use the operation panel to specify print settings or to operate this machine.
*1: Ink status
The display shows icons indicating the status (remaining ink, error, etc.) of ink bottles.
The following table describes each icon:
Icon Meaning
The ink bottle icons are arranged in the same order as the actual ink bottles are arranged in the ink supply unit. For
each ink bottle icon, the remaining ink is indicated in nine levels.
The following icons are arranged in descending order of remaining ink level:
This icon is displayed at ink end or ink near end.
Be aware that the ink is running low.
Indicates that the cartridge cannot be used due to ink end or ink error (remaining ink 0, cartridge not attached, etc.).
Indicates that ink has expired or that one month has passed since the expiration date. Please replace the ink bottle
as soon as possible. After two months from the expiration date, the ink bottle can no longer be used.
width:1340mm
REMOTEMENU
TEST PRINT
CLEANING
LOCAL
Status indicator lamp
Indicates the machine's status (printing, an error has occurred, etc).
Lamp state Machine state
Off
The machine is in LOCAL mode, which means that there is no
incoming print data or error occurring on the machine.
Solid light blue The machine is in REMOTE mode.
Blinking light
blue
The machine is currently printing data.
The machine is performing a test print or other similar
operation (that is, the machine is printing the patterns stored in
it).
Solid blue There is remaining print data in the machine.
Blinking red An error has occurred.
Solid red An error (SYSTEM HALT) has occurred.
Display
The display shows the following
information:
• Status of the machine
• Width of the set media
•Ink status
*1
• Functions assigned to [FUNC1],
[FUNC2] and [FUNC3]
*2
button
Press this button to select a function to
be assigned to each function button
([FUNC1], [FUNC2] and [FUNC3]).
//
buttons
Press one of these buttons to set a
function or to perform test printing. With
each pressing of the [SEL] button, you
can change the function assigned to the
selected function button.
JOG button
Use these buttons to move the head or
media during LOCAL mode or to select
a setting.
button
Use this button to cancel the entered
setting or to go back to the previous
level of the setting menu. You can also
use this button to turn the power on or
off. (Give it a long press to turn the
power off.)
button
• When the power is turned on using the [END/POWER] key, the [ENTER] key lights up blue and turns off when the
power switch is turned off. While the main power switch ( P.1-4) is on, the ink clogging prevention function is peri-
odically operated even when the power is turned off using the [END/POWER] key.
Ink full
Approximatel
y 1/8
consumed
Approximatel
y 1/4
consumed
Approximatel
y 3/8
consumed
Approximatel
y 1/2
consumed
Approximatel
y 5/8
consumed
Approximatel
y 3/4
consumed
Approximatel
y 7/8
consumed
Near end
1-7
Chapter 1 Before Use
1
2
2
2
2
*2: Functions assigned to [FUNC1], [FUNC2], and [FUNC3]
The following table describes the functions assigned to [FUNC1], [FUNC2], and [FUNC3], respectively:
Icon Meaning
Displays a menu for setting functions.
Displays maintenance functions such as test print, cleaning, etc.
Exits LOCAL mode and enters REMOTE mode to start printing.
Displays adjustment functions such as FEED COMP, DROP.POScorrect, etc.
Clears data.
Suspends printing in REMOTE mode and enters LOCAL mode.
Cuts the media.
Moves to the previous page when multiple items are displayed on a screen (for example, on the MENU screen).
Moves to the next page when multiple items are displayed on a screen (for example, on the MENU screen).
Used for confirmation of a displayed message (for example, a warning message).
Used to turn off or disable a function.
Indicates that some setting or function has been assigned here. Use the assigned setting or function by
following the instructions provided for it.
Enables or disables the operation specified for the selected items (applicable when multiple items are selected,
for example, when multiple heads are selected for cleaning).
Sets cutting conditions.
Confirms or sets cutting-related functions, including test cutting.
Sets the pressure of the pinch rollers.
• The color of the icons changes according to the state of the printer.
When the icon is green: The machine is in REMOTE mode.
When the icon is dark blue: The machine is in LOCAL mode.
When the icon is yellow: A warning has been issued.
When the icon is red: An error has occurred.
Chapter 1 Before Use
1-8
Media Sensor
The media sensor detects the presence of the media and
the media length.
This machine has one media sensor on the platen (in the
rear).
Carriage
The carriage consists of the printer unit and the cutter
unit.
Printer unit
Cutter unit
Cutter Blade and Cutting Slot
The cutter unit is equipped with a cutter blade for cutting
the media.
The cutter cuts off the sheet of media along the cutting
slot on the platen.
Capping Station
The capping station consists of the ink caps, the wiper for
cleaning the heads, etc.
The ink caps prevent the nozzles in the ink heads from
drying up.
The wiper cleans the nozzles in the heads.
The wiper is a consumable. If the wiper becomes
deformed or the media gets stained, replace the wiper
with a new one.
Pinch Rollers and Grit Rollers
The pinch rollers and grit rollers hold the media in place.
• When setting media, be sure to cover the media
sensor located on the rear of the platen. The
media cannot be detected unless it is placed over
the sensor.
Media sensor
Printer unit
Cutter unit
• Remember to wear the protective safety glasses
supplied with the machine when cleaning the
inside of the capping station. This precaution is
necessary to prevent ink from getting in your eyes.
• Keep the pinch rollers lifted up when this machine
is not in use. Leaving the pinch rollers lowered for
an extended period of time can cause them to
become deformed and thus unable to securely
hold the media in place.
Cutter
Cutting slot
Grit roller Pinch roller
Chapter 1 Before Use
1-9
1
2
2
2
2
Connecting Cables
Connecting USB 2.0 Interface Cable
Connect your computer and this machine with the USB
2.0 interface cable.
Notes on the USB 2.0 interface
When connecting more than one
UCJV300Series/150Series machine to your
computer
When more than one UCJV300Series/150Series machine
is connected to your computer, the computer might not be
able to properly recognize the connected machines.
If your computer has more than one USB port, try
connecting the machine that your computer previously
failed to recognize to another USB port to see if your
computer can then recognize the machine. If your
computer still fails to recognize the machine, use a
commercially available USB 2.0 repeater cable.
Peripheral devices that run in USB high-speed
mode
If you use a UCJV300Series/150Series machine with
peripheral devices that run in USB high-speed mode
(USB stick, USB-HDD, etc.), your computer might not be
able to recognize the USB devices.
Also, when connecting the UCJV300 series or UCJV150
series to the computer which is connected to the external
USB hard disk drive and so on, the data output speed to
the UCJV300 series or UCJV150 series may decrease.
This may cause the print head to stop at the right edge or
left edge while printing.
Removing the USB stick
If a USB stick is inserted to the computer to which a
UCJV300Series/150Series machine is connected, select
"Safely Remove Hardware" and then "Stop" to remove the
USB stick.
Failure to observe this causes [ERROR 10 COMMAND
ERROR].
Connecting a LAN Cable
When connecting a LAN cable, observe the following
precautions:
Printing data via a network
If you are printing data via a network, you must configure
a network in an environment described below.
Configuring a network in an inappropriate environment
can cause printing to stop prematurely.
・Use a category 6 or higher LAN cable.
・Use a computer and a switching hub that support
1000BASE-T.
• Your RIP must be compatible with the USB 2.0
interface.
• If your computer does not have a USB 2.0 inter-
face, contact a RIP manufacturer near your loca-
tion or our office for assistance.
• Your RIP must be compatible with USB 2.0.
USB cable
• Insert the LAN cable until it clicks into place.
• Do not remove and then reinsert the LAN cable
during data transfer.
• The computer to which to send printed data and
the printer must use the same network.
• Connection via a router is not supported.
Connecting the computer directly to the
printer
Chapter 1 Before Use
1-10
If the computer or device connected to the printer uses a
network other than 1000BASE-T, printing is not possible.
After connecting the computer or device with the printer,
check the following:
(1) Check the information displayed on the screen on
the printer.
• From the local screen or media detection screen, press
the [Enter] key several times until the information screen
appears.
• Confirm that "1000Mbps" is displayed as the LAN status.
(2) Check the LAN connector's green lamp.
• After the main unit starts up, the LAN connector's lamp
can indicate one of the following states:
Connecting the Power Cable
1
Insert the power cable into the inlet on the
machine.
2
Secure a cable band.
• Secure the cable with the cable band attached to
this machine.
3
Insert the power plug into a plug socket.
• If [100Mbps], [10Mbps], or [Not connected] is dis-
played as the LAN status, you cannot print data
via a LAN.
• If [100Mbps] or [10Mbps] is displayed as the LAN
status, event messages will be available
( Chapter 3 Setting of Event Mail Function).
Color State State
Green
Solid
Connected via 1000BASE-T
Off
Connected via a network other
than 1000BASE-T
Yellow
Solid
Link-up
Blinking Data reception in progress
Off Link-down
• When only the yellow lamp is solidly lit or blinking,
the network is not running at 1000 Mbps. Check
the specifications of the computer, devices, and
cables.
Switching hub
Connecting the computer to the printers via a
switching hub
INFORMATION
LAN Status 1000Mbps
• Use only the power cable supplied with the
machine.
• Be sure to connect the power cable to the outlet
near this machine, and make sure that the power
cable can be easily removed.
• Connect the power cable to the grounded outlet.
Failure to observe this could lead to electric
shocks or fire.
Inlet
Power cable
Cable band
Power plug
Socket
Chapter 1 Before Use
1-11
1
2
2
2
2
Ink Bottles
Insert each ink bottle into the ink supply unit for use.
You will find eight (or four in the case of UCJV150 Series)
ink bottles on the left of the machine.
Types of Inks You Can Use with the
Machine
Colors are indicated as follows on the display:
Notes on installing the ink bottles
Observe the following precautions when installing the ink
bottles:
Precautions on Using the Ink Bottles
Ink type Color
UV ink
Magenta
Cyan
Yellow
Black
White (UCJV300Series only)
Clear (UCJV300Series only)
Light cyan (UCJV300Series only)
Light magenta (UCJV300Series only)
Cleaning liquid bottle
*1
*1. Used for head cleaning.
Display Color Display Color
M Magenta WWhite
CCyanCL Clear
YYellow Lc Light cyan
KBlackLm Light magenta
• Check the ink slot number and insert an ink bottle
of the correct color into the ink supply unit.
• Insert each ink bottle all the way into the slot. Do
not use excessive force when inserting or pulling
out ink bottles.
• Insert an IC chip into the slot on the ink supply
unit.
• If you get ink in your eyes, immediately and thor-
oughly flush your eyes with plenty of running water
for at least 15 minutes, with eyelids held open.
Seek medical attention as soon as possible.
• Use genuine ink bottles for this machine. This
machine functions by recognizing the genuine ink
bottles. Our limited warranty does not cover dam-
age resulting from modification of ink bottles or
other parts of the machine.
• Store the ink bottles in a location no more than 1 m
from the floor surface. If the ink bottles are
dropped from a height of more than 1 m onto a
floor surface, the impact of the fall can cause the
caps on the ink bottles to come off, causing the ink
inside to spill out.
• If the ink bottles are moved from a cold place to a
warm place, leave it in the room temperature for
three hours or more before using it.
• Store the ink bottles in a cold and dark place.
• Keep the ink bottles out of reach of children.
• The ink contains an ingredient that is toxic to
aquatic organisms (photopolymerization initiator).
Take all measures necessary to prevent it from
leaking into natural water sources and sewage
systems.
• Read the Safety Data Sheet (SDS) before using
the ink bottles.
• Ask an industrial waste disposal company to dis-
pose of waste ink bottles.
• Do not shake the ink bottles violently. Shaking the
ink bottles violently can cause ink to leak out of the
bottles.
• Never refill the ink bottles with ink. Doing so may
result in a failure. MIMAKI will not bear any
responsibility for any damage caused by using ink
bottles that have been refilled with ink.
• Do not touch or stain the part where the IC chip
comes into contact with the printed circuit board.
Doing so can cause damage to the printed circuit
board.
• The ink bottles can get dented in the middle, as
shown in the figure to the right, even when they
are inserted into the machine. This, however, does
not affect the performance of this machine.
Chapter 1 Before Use
1-12
Installing the Ink Bot-
tles
1
Take out an ink bottle and gently shake it
from side to side at least 20 times.
• While wearing gloves, hold the cap of the ink
bottle tightly with a paper towel or a similar object,
and then gently shake the bottle from side to side
at least 20 times to let the ink flow inside the
bottle.
2
Remove the cap from the bottle.
3
Screw the special cap onto the ink bottle.
(1) Screw the special cap onto the bottle.
• Confirm that the cap is firmly closed, and then
gently shake the bottle.
• Remember to shake the bottle gently. Shaking the
bottle violently can cause the ink to leak out.
• When the remaining ink is low, tilt the ink bottle all
the way to the right and left until the bottle is in the
upright position to ensure that the ink inside the
bottle is thoroughly mixed.
Hold the cap of the ink bottle tightly with a paper
towel, and gently shake the ink bottle.
Repeat
• If, after removing the cap from the bottle, you find
that the bottle opening has a seal attached to it,
use a cutter to open the seal. Cut the seal as
shown in the figure below so that the seal is
divided into eight parts, and then bend the cut seal
toward the inside of the bottle.
• Make sure that the cut seal is bent securely toward
the inside of the bottle. If the cut seal is not bent
securely, an ink supply shortage can occur.
•
Cut the seal as shown in the figure to
the left so that the seal is divided into
eight parts, and then bend the cut
seal toward the inside of the bottle.
Special cap
Cap B
Chapter 1 Before Use
1-13
1
2
2
2
2
(2) Tighten the special cap securely onto the
bottle by using the tightening jig.
(3) Turn the bottle upside down to confirm that
no ink leaks out.
4
Insert the ink bottle into the tank.
• Slide the lever on the tank all the way to the right,
and then insert the ink bottle into the tank.
5
Slide the lever on the tank from right to
left.
6
Insert an IC chip into the slot.
• Insert an IC chip into the slot, with the metal part
facing upward. Incorrectly inserting the IC chip
can lead to failure or cause the IC chip to break.
• Do not touch the metal part of the IC chip. Doing
so can cause damage to the IC chip due to static
electricity or lead to reading failure due to stains
or scratches.
• For details about how to install the ink bottles, see
P. 7- 7 「Ink bottle installation order」.
• Turn the tightening jig until the arrow mark on the
tightening jig is aligned with the arrow mark on the
special cap.
• Do not close the special cap too tightly. Doing so
can cause damage.
• Do not leave ink bottles with the special cap
attached in a place exposed to light for a pro-
longed period of time. Doing so can cause the ink
inside to harden.
Turn the tightening jig
until on the tightening
jig is aligned with the
arrow mark on the
special cap.
Tightening jig
• Never turn the ink bottle after inserting it into the
tank, Doing so can cause ink to leak out.
Lever
IC chip
Chapter 1 Before Use
1-14
Replacing the ink bottles
When [INK END] or [INK NEAR END] shows up on the
display, follow the steps described below.
When [INK END] is displayed
1
Slide the lever on the tank all the way to
the right.
2
Lift the ink bottle straight up.
IC chip
• The IC chip contains information
regarding the color, remaining
level, and expiration date of the
ink.
When installing an ink bottle,
insert the IC chip that comes
with the ink bottle into the IC
chip slot on the ink cover.
• Inserting a wrong IC chip (that
is, an IC chip other than the one
that comes with the ink bottle)
into the slot can cause poor
image quality or other problems.
• The IC chip has a marking applied to it to provide
color information.
IC chip
Marking is
provided here.
Ink color and the corresponding marking
Ink color Marking
Black (One black circle)
Cyan (One blue circle)
Magenta (One red circle)
Yellow (One yellow circle)
White (One white circle)
Clear (Two white circle)
Light cyan (Two blue circles)
Light magenta (Two red circles)
• Remember to wear protective glasses.
• Do not turn the ink bottle.
Doing so can cause ink to leak out.
• After removing the ink bottle from the tank, confirm
that the light-blocking cover is closed.
If the lid is open, close it by hand. Leaving the
light-blocking cover open causes the ink to
harden.
• Be careful not to spill any ink from the bottle.
Light-blocking
cover
Chapter 1 Before Use
1-15
1
2
2
2
2
3
Wipe off the ink with the wiper filter.
4
Wipe off the ink attached to the cap.
• Hold the bottle with the cap facing upward and
wipe off the ink attached to the cap with a paper
towel or a similar object.
5
Remove the cap from the used ink bottle.
• If you have difficulty removing the cap, use the
tightening jig to remove the cap.
6
Install a new ink bottle by referring to P.1-
12"Installing the Ink Bottles".
When [INK NEAR END] is displayed
The remaining ink level is low. Although you can continue
printing, the machine may run out of ink while printing. We
therefore recommend that you replace the ink bottle as
soon as possible.
If you press the key in LOCAL mode, you can
view a local guidance that provides information regarding
the bottle that requires replacement.
( P.3-27)
You can also check the ink bottle lamp to find the bottle to
replace.(P.1-16)
If the light-blocking cover comes off
If the light-blocking cover comes off, the inside of the tank
is exposed to light, which causes the ink to harden.
If the light-blocking cover comes off, attach it to the tank
as follows:
1
Insert one of the lugs on the light-blocking
cover into one of the receiving holes on
the tank.
2
While pressing the light-blocking cover
against the receiving hole into which you
have just inserted the lug, insert the other
lug into the remaining hole on the tank.
• Do not leave ink bottles with the special cap
attached in a place exposed to light for a pro-
longed period of time. Doing so can cause the ink
inside to harden.
Wiper filter
Chapter 1 Before Use
1-16
Expiration date of the ink
The ink bottle has an expiration date.
Although you can continue using the ink bottle until two
months after the expiration date specified on the ink
bottle, when three months elapses from the expiration
date, the ink bottle becomes unusable.
A warning message appears when an ink bottle becomes
unusable. When this message appears, replace the
applicable ink bottle.
Example: If April 2018 is specified as the expiration date:
May: Usable
June: Usable (solid yellow LED)
July: Unusable (blinking red LED)
Ink end and ink near end
A warning message appears at ink near end (when the
remaining ink level is low). When this message appears,
we recommend that you replace the applicable ink bottle
as soon as possible.
A warning message appears at ink end (when the ink is
empty). When this message appears, replace the
applicable ink bottle.
Ink bottle lamps
The lamps located above the ink bottles tell you the status
of the installed ink bottles.
Lamp status Description
Solid blue Normal (ink is being supplied)
Off Normal
Solid yellow
or blinking
yellow
One of the following errors has occurred:
• Ink near end
• One month past the expiration date
Blinking red Two months past the expiration date
Solid red
One of the following errors has occurred:
•Ink end
• No ink IC chip inserted
• Other ink errors ( P.6-6)
Ink bottle lamps
1-17
Chapter 1 Before Use
1
2
2
2
2
Media
This section describes the size of media that can be used with this machine and how to handle it.
The Size of Media That Can Be Used with This Machine
Precautions on Handling the Media
Observe the following precautions for handling the media:
Model UCJV300/150-160 UCJV300-130 UCJV300-107 UCJV300-75
Type of recommended media
Label stock (paper-based) / PVC sheet (including laminated sheet, 0.25 mm thick maximum) /
reflective sheet (excluding high-luminance reflective sheet) / heat transfer rubber sheet
Maximum width 1620mm (63.8in) 1371mm (54.0in) 1100mm (43.3in) 810mm (31.9in)
Minimum width 210mm (8.3in)
Maximum print width 1610mm (63.4in)
*1
*1. When the MARGIN(RIGHT/LEFT) setting has been set to the minimum (-10 mm).
1361mm (53.6in)
*1
1090mm (42.9in)
*1
800mm (31.5in)
*1
Roll media
Thickness 1.0 mm (0.04in) maximum
Roll outside diameter
Paper media: Φ250mm (9.8in) maximum
Other media: Φ210mm (8.3in) maximum
Roll weight 40 kg (88.2lb) maximum
Roll inside diameter 2 or 3 inches
The side to be printed Inside/outside
Roll end treatment The roll end is gently fixed to the core with weak-adhesive tape or weak glue for easy removal.
• Use the recommended media.
Use the media recommended by MIMAKI to ensure reliable, high-quality printing.
• Note that the media can shrink or stretch.
Do not use media immediately after unpacking. The media can shrink or stretch due to room temperature and humidity.
After unpacking the media, leave it in the place where the media is to be used for at least 30 minutes before installing it in
the machine.
• Do not use curled media.
Using curled media can cause paper jamming. When rolling regular-sized coated media for storage, make sure that the
coated side is facing outward.
• Dust may be accumulated on the edge of the media.
Depending on the roll you are using, the dust inside the package may be gathered on the edge surface of the roll. Using
dusty media can cause nozzle missing or ink drops that can lead to degraded printing quality. Remember to remove the
dust on the edge surface of the roll before installing it on the machine.
1-18
Chapter 1 Before Use
Menu Mode
This machine has four modes. Each menu mode is described below.
NOT-READY mode
The machine is in this mode before the detection of the media.
LOCAL mode
In this mode, the machine is getting ready for printing.
All the keys are effective.
Although the machine can receive data from the computer, it does not perform printing yet.
During LOCAL mode, you can perform the following operations:
• Press the JOG keys to set a print origin and a print width.
• You can check the remaining ink levels, cartridge error details, model name, firmware version, and so on
by pressing the [Enter] key.
MENU mode
The MENU mode is activated if you press the [FUNC1] button during LOCAL mode. During MENU mode, you can set
various functions.
REMOTE mode
In this mode, the machine prints the received data.
width:1340mm
REMOTEMENU
PRE PRINT
TEST PRINT
CLEANING
LO CA L
Screen display during LOCAL mode
The detected media width is
displayed.
The detected ink levels
(approximate) are displayed.
Function buttons
The functions assigned to
[FUNC1], [FUNC2], and
[FUNC3] are displayed.
[SEL] key [FUNC1], [FUNC2], and [FUNC3]
You can change functions by pressing the [SEL] button.
This chapter
describes procedures and setting methods for ink and media preparation, and printing.
Printing Procedure ........................................2-2
Turning the Power On/Off .............................2-3
Turning the Power On ................................. 2-3
Turning the Power Off ................................. 2-3
Setting Media ................................................2-4
Adjusting the Head Height .......................... 2-4
Adjusting the Positions of the Pinch Rollers to
Suit the Media ............................................. 2-5
Maximum Print/Cut Area ........................... 2-10
Precautions on Setting the Media ............. 2-10
Setting a Roll Media .................................. 2-11
Setting the Pinch Roller Pressure ............. 2-13
Take-up Device ......................................... 2-14
Setting Leaf Media .................................... 2-15
Changing the printing origin ...................... 2-16
Test Printing ................................................2-17
Test Printing .............................................. 2-17
Perform test printing with the normal test
pattern ....................................................... 2-18
Perform test printing with the test pattern for
checking white ink ..................................... 2-18
Head Cleaning ............................................2-19
About Head Cleaning ................................ 2-19
Perform head cleaning depending on the test
printing result ............................................. 2-19
Setting Media Correction .............................2-19
Setting of Media Correction .......................2-19
If the Positions of Dots Shift... .....................2-20
Printing Data ...............................................2-20
Starting a Printing Operation .....................2-20
Cancel printing (Data Clear) ......................2-21
Cutting Media ..............................................2-21
Workflow of cutting ......................................2-22
Installing Tools ............................................2-23
When a Cutter Is Used ..............................2-23
How to Install a Ballpoint Pen ....................2-24
Setting the Cutting Conditions .....................2-26
About the Cut Conditions ...........................2-26
Select the Tool Condition ...........................2-27
Set the Cut Conditions ...............................2-27
Test Cutting .................................................2-28
Cutting Data ................................................2-29
Setting the Origin .......................................2-29
Start Cutting ...............................................2-29
Stopping a Cutting Operation
(Data Clear) ...............................................2-29
Removing the Cutter Unit Temporarily ......2-29
Cutting Media ..............................................2-30
Chapter 2
Basic Operations
Chapter 2 Basic Operation
2-2
Printing Procedure
Turning the Power On/Off
See "Turning the Power On/Off" ( P.2-3).
Setting Media
See "Setting Media" ( P.2-4).
Test Printing
See "Test Printing" ( P.2-17).
Head Cleaning
See "Head Cleaning" ( P.2-19).
Printing Data
See "Printing Data" ( P.2-20).
2-3
2
2
2
2
2
Chapter 2 Basic Operation
Turning the Power On/
Off
Turning the Power On
This machine has two power switches.
Main power switch:
This switch is located on the side of the machine. This
switch must always be on.
[END/POWER] button:
Normally, use this button to turn the power on or off. As
long as the main power switch is on, the machine
periodically turns on to activate the function that
prevents ink sedimentation, even when the [END/
POWER] button is turned off.
1
Turn the main power switch on.
• Press the main power switch located on the side
of the machine to the "I" position.
• The firmware version is displayed when the power
is turned on, and the initial operation begins.
2
Press the button to turn the
power on.
• The machine enters LOCAL mode.
3
Turn on the computer connected with the
machine.
Turning the Power Off
After using the printer, press the [END/POWER] key to
turn off the power.
Before turning the power off, confirm the following:
• If the machine is receiving data from the computer or if
there is any data that has not been output yet
• If the head has returned to the capping station
• If any error has occurred ( P.6-7Error messages
)
1
Turn off the computer connected with the
machine.
2
Hold down the button to turn
the power off.
• Do not turn off the main power switch on the side
of the machine.
• The next time you use this machine, just press the
[END/POWER] button.
Precautions on turning the power off
Do not turn the main power switch off.
As long as the main power switch is on, the machine
periodically turns on to activate the function that
prevents ink sedimentation.
When the main power switch is off, this function does
not work, which can cause nozzle clogging.
Keep the front cover and the maintenance
cover closed.
When these covers are open, the function that
prevents ink sedimentation does not work.
Check the position of the head, and then turn
the power off.
If you turn the power off without the head returned to
the capping station, the ink head dries up, causing the
nozzles to become clogged.
Thus, if you have turned the power off without the
head returned to the capping station, turn the power
on again, confirm that the head has returned to the
capping station, and then turn the power off.
Do not turn the power off during printing or
cutting.
If you do so, the head might not return to the capping
station.
Press the [END/POWER] button to turn off the
power, and then turn the main power switch
off.
If you have to turn the main power switch off to move
the machine or to resolve an error that has occurred
on the machine, first hold down the [END/POWER]
button on the front of the machine, confirm that the
display on the operation panel has turned off, and then
turn the main power switch off.
• Close the front cover and the maintenance cover
before turning the power on.
• Leaving the machine with the main power switch
turned off for a prolonged period of time can cause
the head nozzles to clog.
Main power
switch
[END/POWER]
button
[END/POWER]
button
2-4
Chapter 2 Basic Operation
Setting Media
You can use roll media and leaf media with this machine.
For details about the media you can use with the
machine, see P.1-17 "「The Size of Media That Can Be
Used with This Machine」".
Adjusting the Head Height
Adjust the head height to suit the thickness of the media
you are using.
• The range of the initial head height can be adjusted by
3 levels according to the purpose of use.
• The printing height varies from L range (2 mm) to H
range (3 mm). (The print height is set to L range (2
mm) at shipment.)
1
Move the carriage to the platen.
• Execute [ST.MAINTENANCE - CARRIAGE OUT]
(maintenance function) ( P.5-6, steps 1 and
2).
2
Adjust the height-adjusting lever to suit
the media.
• Adjust the position of the lever by referring to
"Adjusting lever and range".
• Be sure to set the height adjustment lever so that
the desired height display is at the top. If the lever
is in the middle, a printing error will occur.
3
Return the carriage to the station.
Adjusting lever and range
• When you set roll media on the machine, be care-
ful not to drop the media on your feet or other part
of the body. The media is heavy and can cause
bodily injury.
• At least two people must work together to set roll
media on the machine, Working alone can cause
injury to the back due to the weight of the roll
media.
• Adjust the head height before setting the media on
the machine. Adjusting the head height after set-
ting the media on the machine may result in jam-
ming, deterioration of the print quality or head
damage.
Carriage
Range Head height
L range
2mm
(Factory default position)
M range 2.5mm
H range 3mm
Height-adjusting lever
It becomes the height
of this display position.
2-5
2
2
2
2
2
Chapter 2 Basic Operation
Adjusting the Positions of the Pinch Rollers to Suit the Media
Adjust the positions of the pinch rollers to suit the width of the media to be set.
This machine feeds the media with the pinch rollers and grit rollers for printing and cutting. The pinch rollers should be
located above the grit rollers.
How to adjust the pinch roller
Move the pinch roller unit to adjust the position of the pinch roller.
Use the pinch roller guide mark for positioning.
• When you set the media, make sure that the pinch rollers lying outside the media do not lie on top of the grit rollers below
them.
Displace the pinch rollers lying outside the media slightly from their normal positions, as shown in illustration "X" under
"How to adjust the pinch roller". Operating the machine with the media not gripped between the pinch rollers and the grit
rollers could wear the pinch roller out.
Pinch roller
Grit roller
Pinch roller guide mark
To adjust the pinch roller
from the front side:
To adjust the pinch roller
from the rear side:
Pinch roller unit (top view)
Adjust the pinch roller so that the triangle mark comes between the pinch roller guide
marks.
Pinch roller unit (rear side)
2-6
Chapter 2 Basic Operation
Media size and grit rollers (UCJV300/150-160)
The grit rollers to be used vary depending on the size of the media.
• To feed the media smoothly, select the appropriate grid roller positions so that the media can be held at equally spaced
intervals.
• When the grid rollers to be used are determined, adjust the pinch roller unit by referring to “P.2-5 「How to adjust the pinch
roller」".
• You can use any number of pinch roller units from 2 to 7.
• The pinch rollers at the left and right ends of the media must be located within 10 cm and 2 cm of the ends of the media,
respectively. If they are positioned further from the ends of the media, some part of the media remains uncut.
1577 ~ 1620mm1577 ~ 1620mm
1446 ~ 1514mm1446 ~ 1514mm
1212 ~ 1272mm1212 ~ 1272mm
1032 ~ 1092mm1032 ~ 1092mm
732 ~ 792mm732 ~ 792mm
576 ~ 644mm576 ~ 644mm
364 ~ 424mm364 ~ 424mm
241 ~ 301mm241 ~ 301mm
1501 ~ 1561mm1501 ~ 1561mm
1370 ~ 1438mm1370 ~ 1438mm
1136 ~ 1196mm1136 ~ 1196mm
956 ~ 1016mm956 ~ 1016mm
656 ~ 716mm656 ~ 716mm
500 ~ 568mm500 ~ 568mm
288 ~ 348mm288 ~ 348mm
165 ~ 225mm165 ~ 225mm
1413 ~ 1473mm1413 ~ 1473mm
1284 ~ 1350mm1284 ~ 1350mm
1048 ~ 1108mm1048 ~ 1108mm
868 ~ 928mm868 ~ 928mm
568 ~ 628mm568 ~ 628mm
414 ~ 480mm414 ~ 480mm
200 ~ 260mm200 ~ 260mm
85 ~ 137mm85 ~ 137mm
GR1GR1
GR2GR2GR4GR4
GR3GR3
GR11GR11 GR10GR10 GR5GR5GR6GR6GR7GR7GR8GR8GR9GR9
Determine the grid rollers to be used according to the
size of the media.
The right end of the media
should come within this
range.
GR: Grit roller
2-7
2
2
2
2
2
Chapter 2 Basic Operation
Media size and grit rollers (UCJV300-130)
The grit rollers to be used vary depending on the size of the media.
• To feed the media smoothly, select the appropriate grid roller positions so that the media can be held at equally spaced
intervals.
• When the grid rollers to be used are determined, adjust the pinch roller unit by referring to “P.2-5 「How to adjust the pinch
roller」".
• You can use any number of pinch roller units from 2 to 6.
• The pinch rollers at the left and right ends of the media must be located within 10 cm and 2 cm of the ends of the media,
respectively. If they are positioned further from the ends of the media, some part of the media remains uncut.
1328 ~ 1371mm1328 ~ 1371mm
1212 ~ 1272mm1212 ~ 1272mm
1032 ~ 1092mm1032 ~ 1092mm
732 ~ 792mm732 ~ 792mm
576 ~ 644mm576 ~ 644mm
362 ~ 422mm362 ~ 422mm
241 ~ 301mm241 ~ 301mm
1252 ~ 1312mm1252 ~ 1312mm
1136 ~ 1196mm1136 ~ 1196mm
956 ~ 1016mm956 ~ 1016mm
656 ~ 716mm656 ~ 716mm
500 ~ 568mm500 ~ 568mm
286 ~ 346mm286 ~ 346mm
165 ~ 225mm165 ~ 225mm
1164 ~ 1224mm1164 ~ 1224mm
1048 ~ 1108mm1048 ~ 1108mm
868 ~ 928mm868 ~ 928mm
568 ~ 628mm568 ~ 628mm
414 ~ 480mm414 ~ 480mm
198 ~ 258mm198 ~ 258mm
85 ~ 137mm85 ~ 137mm
GR1GR1
GR2GR2GR4GR4
GR3GR3
GR10GR10 GR5GR5GR6GR6GR7GR7GR8GR8GR9GR9
Determine the grid rollers to be used according to
the size of the media.
The right end of the media should
come within this range.
GR: Grit roller
2-8
Chapter 2 Basic Operation
Media size and grit rollers (UCJV300-107)
The grit rollers to be used vary depending on the size of the media.
• To feed the media smoothly, select the appropriate grid roller positions so that the media can be held at equally spaced
intervals.
• When the grid rollers to be used are determined, adjust the pinch roller unit by referring to “P.2-5 「How to adjust the pinch
roller」".
• You can use any number of pinch roller units from 2 to 5.
• The pinch rollers at the left and right ends of the media must be located within 10 cm and 2 cm of the ends of the media,
respectively. If they are positioned further from the ends of the media, some part of the media remains uncut.
1043 ~ 1100mm
900 ~ 960mm
732 ~ 792mm
576 ~ 644mm
362 ~ 422mm
241 ~ 301mm
967 ~ 1027mm
824 ~ 884mm
656 ~ 716mm
500 ~ 568mm
288 ~ 348mm
165 ~ 225mm
879 ~ 939mm
736 ~ 796mm
568 ~ 628mm
414 ~ 480mm
200 ~ 260mm
85 ~ 137mm
1043 ~ 1100mm
900 ~ 960mm
732 ~ 792mm
576 ~ 644mm
362 ~ 422mm
241 ~ 301mm
967 ~ 1027mm
824 ~ 884mm
656 ~ 716mm
500 ~ 568mm
288 ~ 348mm
165 ~ 225mm
879 ~ 939mm
736 ~ 796mm
568 ~ 628mm
414 ~ 480mm
200 ~ 260mm
85 ~ 137mm
GR1GR1
GR2GR2GR4GR4
GR3GR3
GR5GR5GR6GR6GR7GR7GR8GR8GR9GR9
Determine the grid rollers to be used
according to the size of the media.
The right end of the media should come
within this range.
GR: Grit roller
2-9
2
2
2
2
2
Chapter 2 Basic Operation
Media size and grit rollers (UCJV300-75)
The grit rollers to be used vary depending on the size of the media.
• To feed the media smoothly, select the appropriate grid roller positions so that the media can be held at equally spaced
intervals.
• When the grid rollers to be used are determined, adjust the pinch roller unit by referring to “P.2-5 「How to adjust the pinch
roller」".
• You can use any number of pinch roller units from 2 to 4.
• The pinch rollers at the left and right ends of the media must be located within 10 cm and 2 cm of the ends of the media,
respectively. If they are positioned further from the ends of the media, some part of the media remains uncut.
777 ~ 810mm
962 ~ 752mm
578~ 638mm
364 ~ 424mm
241 ~ 301mm
691 ~ 751mm
616 ~ 676mm
502 ~ 582mm
288 ~ 348mm
165 ~ 225mm
603 ~ 663mm
528 ~ 588mm
414 ~ 474mm
200 ~ 260mm
86 ~ 137mm
777 ~ 810mm
962 ~ 752mm
578~ 638mm
364 ~ 424mm
241 ~ 301mm
691 ~ 751mm
616 ~ 676mm
502 ~ 582mm
288 ~ 348mm
165 ~ 225mm
603 ~ 663mm
528 ~ 588mm
414 ~ 474mm
200 ~ 260mm
86 ~ 137mm
GR1GR1
GR2GR2GR4GR4
GR3GR3
GR5GR5GR6GR6
GR7GR7
GR8GR8
Determine the grid rollers
to be used according to
the size of the media.
The right end of the media should come
within this range.
GR: Grit roller
2-10
Chapter 2 Basic Operation
Maximum Print/Cut Area
The maximum printable area or cut area varies, depending on the position of the media width ( P.2-6) and the origin
position ( P.2-16).
The area other than that is the dead space that cannot be printed/cut.
Precautions on Setting the Media
Setting position of the media
Set the media such that the right end of the media lies within the area shown in the following figure:
The end of the media should not lie beyond the slit line on the platen.
UCJV300/150-160 UCJV300-130 UCJV300-107 UCJV300-75
Maximum printing/cut width 1610mm (63.4in) 1361mm (53.6in) 1090mm (41.7in) 800mm (31.5in)
Set the media such that the right end of the media lies within the
area indicated by the arrows (within the first three grit rollers
from the right end on the front of the machine).
Media
Media press
Slit line
2-11
2
2
2
2
2
Chapter 2 Basic Operation
Setting a Roll Media
Attach a roll media to the roll media hanger located on the
back of the machine.
1
Confirm that the clamp lever is lowered.
2
Move the left roll holder to the roll setting
position.
• Loosen the roll holder fixing screw and move the
roll holder.
• Check the size of the media and where to set the
media by referring to the section applicable to
your machine (P.2-6).
3
Tighten the roll holder fixing screw on the
left side.
• Recheck steps 1 and 2.
4
Push the core of the roll media into the left
side of the roll holder.
• Push the roll media all the way into the roll holder
until it is held steady.
5
Loosen the screw at the right side of the
roll holder and insert the holder into the
core of the roll media.
6
Pull up the clamp lever located on the back
of the machine.
7
Insert the roll media into the machine.
• Slightly tilt the media so that it can be smoothly
inserted into the machine without catching on
anything.
(1) Pull the media all the way out to the front end
of the platen.
(2) Insert the media between the platen and the
pinch rollers.
• Pull the media out of the roll so that the
media can be grasped from the front of the
machine.
(3) Push down the clamp lever located on the
back of the machine.
• This holds the media in place.
• Be careful not to drop the media on your feet or
other part of your body while attaching it to the roll
media hanger. The media is heavy and can cause
bodily injury.
Roll holder side (the back of the machine)
This is where the end of the set
media should be when the media
has a 2-inch core.
This is where the end of the set media
should be when the media has a 3-inch core.
The reference position of the roll holder
must come between the pinch roller
guide marks.
• Set up the pinch roller unit such that the media is
held in place by equally-spaced pinch rollers. If the
pinch rollers holding the media in place are not
equally spaced, start over from step 1.
• Provide a dead space of at least 5 mm at both
ends of the media.
2-12
Chapter 2 Basic Operation
8
Pull out the roll media.
(1) Open the front cover.
(2) Pull up the clamp lever from the front of the
machine.
(3) Gently pull out the roll media until you feel
slight resistance.
9
Confirm that the roll media is evenly pulled
out, and then lower the clamp lever.
• Pulling several positions of the media lightly,
lower the clamp lever after confirming that the
amount of the roll media pulled out is almost
even.
10
Hold the media with the media press
gently.
• When using thick media, remove the media press
from the media before printing.
• You do not have to use the media press to cut the
media.
11
Set an empty core of the roll media on the
take-up device.
12
Press and then select "ROLL".
• The media width is detected.
• When [MEDIA DETECT] (one of the machine
settings) is set to "MANUAL" ( P.3-15), media
width will not be automatically detected. Enter the
media width by referring to P.2-13 "Setting the
manual media width".
13
When the media width detection is
complete, use to enter the
number of the pinch rollers you are using.
• When the pinch roller number in "MEDIA
DETECT" of the machine setup is set to OFF
( P.3-15), the screen to enter the number of
pinch rollers is not displayed. Proceed to the Step
16.
14
Press the key.
• When [MEDIA RESIDUAL] (one of the machine
settings) is set to "ON” ( P.3-15), you can
display the remaining media entry screen by
pressing the [Enter] key. ( P.2-13)
Media press
• When installing the media, make sure that the
right edge of the media is placed on the left side
with respect to the slit line on the platen. Placing
the media rightward of the slit line will make it rise
up if it moves obliquely, and this could cause dam-
age to the head.
• If a media is misaligned to the right of the standard
position, an error message “MEDIA SET POSI-
TION R” is displayed after detecting the media.
Set the media again.
Media
Media
press
Slit line
Core
Take-up
device
2-13
2
2
2
2
2
Chapter 2 Basic Operation
15
Fix the media to the take-up device.
(1) By pressing [], feed the media until it
reaches the core of the take-up device.
(2) Fix the middle of the media with adhesive
tape.
(3) In the same manner, fix the left side and right
side of the media.
• Make sure that the there is no slack or
wrinkle on the media in such condition that
the roll media is pulled to right and left evenly,
and stick the tape.
(4) Press the [ENTER] key
Setting the Pinch Roller Pressure
After setting the media in place, set the pressure to be
applied to the pinch rollers that retain the media.
Setting an inappropriate pressure for the pinch rollers can
cause not only the media to become skewed during
printing or cutting but also the pinch rollers to leave traces
on the media.
The set pressure must be appropriate to the media set on
the machine.
You can set the following items in pinch roller pressure
settings:
1
Press twice in LOCAL, and then
press the (PR) key
2
Press to select a setting item,
and then press the key.
3
Press to select a setting.
4
Press .
5
Press to finish.
Entering the media remaining amount
When [MEDIA REMAIN] of the machine setting is set
to “ON”
( P.3-15), the screen for entering the media
length is displayed after detecting the media width.
1
The input media length screen is
displayed.
2
Press to enter the media
remaining amount.
3
Press the key.
Setting the manual media width
When [MEDIA DETECT] of the machine setup is
"MANUAL" ( P.3-15), set the media width with the
following method.
1
The right edge position screen is
displayed.
2
Press to enter the right edge
position of the media.
3
Press the key.
• Next, the screen to enter the left edge position of
the media is displayed.
4
Press to enter the left edge
position of the media.
5
Press the key.
Item Setting Description
NUMBER
FOR USE
1 ~ 7
Set the number of the pinch
rollers you are using.
This number differs depending
on the model you are using.
PRINT
LOW/ MID/
HIGH
Set the pinch roller pressure for
printing.
CUT: ENDS
LOW/ MID/
HIGH
Set the pressure of the edge
pinch rollers (left and right
edges) used when cutting the
media.
CUT: INNER
OFF/ LOW/
MID/ HIGH
Set the pressure of the pinch
rollers except for the edge pinch
rollers used when cutting the
media.
CHANGE
EXECUTION
PRINT/ CUT
Switch between the setting for
printing and cutting.
50.0m
LENGTH
PRINT
INPUT MEDIA LENGTH
***.*0.0
PRINT
RIGHT EDGE POSITION
30°/35°
***.*0.0
PRINT
LEFT EDGE POSITION
2-14
Chapter 2 Basic Operation
About the media residual print
When [MEDIA RESIDUAL] of the maintenance function is
"ON" ( P.3-15), you can print the current date and
media remaining amount.
1
In LOCAL mode, press .
• The machine enters the origin setting mode.
2
Press the key.
• Appear the confirmation screen of media
remaining print.
3
Press the key.
• Media residual print starts.
Take-up Device
With the switch of the narrow take-up device, select the
take-up direction of the media or others.
Setting the torque limiter
The take-up device is provided with a torque limiter. The
take-up torque can be adjusted with the torque limiter.
(The torque limiter is set to "media" at delivery.)
If the tension is too strong to use thin media, lower the
take-up torque.
Clockwise turn: Increases torque (For a heavy
and thicker media such as
tarpaulin or the like)
Counterclockwise turn: Decreases torque (For light
media)
When not using taking-up device
• Be careful not to set the position beyond the media
range, as doing so may cause printing or cutting
outside the media.
Direction selector
switch
UP
(REVERSE)
The take-up device winds the
media with the printed side
facing in.
DOWN
(FORWARD)
The take-up device winds the
media with the printed side
facing out.
ON/OFF button
This button enables or
disables take-up operation. (If
you press this button and
enable take-up operation, the
operation continues until you
press the button again.)
*1
*1. You can also change the setting so that the taking-up operation only
lasts while the ON/OFF button is being pressed. For details, refer to
"Setting of Take-up Unit" ( P.3-14).
ON/OFF button
Direction selector switch
• When performing printing or cutting of 700 mm or
more without using the taking-up device, evacuate
the taking-up device to right and left. The quality of
the print and cut may become low because of the
impact when the front end of the media touches
the taking-up device.
50% of the maximum
torque
100% of the maximum
torque
Scale of the torque
Adjustment nut
2-15
2
2
2
2
2
Chapter 2 Basic Operation
Setting Leaf Media
Unlike roll media, leaf media does not need to be retained
with the roll holders.
1
Raise the clamp lever.
2
Insert the leaf media between the platen
and the pinch rollers.
3
To print, hold the media with the media
press gently.
• When using thick media, remove the media press
from the media before printing.
• You do not have to use the media press to cut the
media.
4
Push down the clamp lever.
• Set the media straight.
5
Press the key.
6
Press and select "LEAF".
7
The media detection is started.
(1) The media width is detected.
(2) The media is fed then the rear end of media
is detected.
(3) It returns to the Local when the detection is
completed.
• Set up the pinch rollers such that the media is held
in place by equally-spaced pinch rollers. If the
pinch rollers holding the media in place are not
equally spaced, start over from step 2.
• Provide a dead space of at least 5 mm at both
ends of the media.
Clamp lever
Pinch roller
Media press
• The media must lie on the black part of the "after
cover", with at least 40 mm of the media lying off
the edge of the black part. If it is shorter than that,
it may not be able to perform the media detection.
• After setting the media in place, set the pinch roller
pressure, referring to P.2-13 "Setting the Pinch
Roller Pressure".
Media
Approximately 40 mm
After Cover
2-16
Chapter 2 Basic Operation
Notes when using media press
Changing the printing origin
The position of the printing origin can be changed.
Move the LED pointer to the changing position and
deciding the position.
1
In LOCAL mode, press .
• It enters into the origin setting mode.
2
By pressing , align the
light spot of the LED pointer with the new
printing origin you want to set.
•Use [][][][] to move the carriage and the
media and select a new printing origin.
3
After determining the origin, press the
key.
• The printing origin is changed.
Typical setting position of printing origin
The printing origin in the depth direction (X') is positioned
at about 75 mm rearward from the slot for cutting on the
platen.
The printing origin in the scanning direction (Y') is
positioned at 15 mm from the right end of the media. The
value in the scanning direction (Y') can be changed using
[MARGIN] in FUNCTION mode ( P.3-8). This can be
changed by using the Jog key.
• When installing the media, make sure that the
right edge of the media is placed on the left side
with respect to the slit line on the platen. Placing
the media rightward of the slit line will make it rise
up if it moves obliquely, and this could cause dam-
age to the head.
• If a media is misaligned to the right of the standard
position, an error message “MEDIA SET POSI-
TION R” is displayed.
Media
Media
press
Slit line
X
0.0
Y
0.0
SET ORIGIN
Cutting slot
approx. 75 mm (X’)
15 mm
(Y’)
2-17
2
2
2
2
2
Chapter 2 Basic Operation
Test Printing
Print a test pattern to check that there are no discharging
defects such as nozzle clogging (slight touching of ink or
nozzle missing).
Relationship between head row and test
pattern
The relations between head row and test pattern print
position are as follow.
About test patterns
This machine provides you two test patterns.
Normal test pattern (when using ink other than
white ink)
When you use ink that you can check by printing a test
pattern on a white media, print this test pattern.
Test pattern for checking white ink
When you use a white media and wish to check
discharging status of white ink, print this test pattern.
Note on test printing
Test Printing
Print a test pattern to check that there are no discharging
defects such as nozzle clogging (slight touching of ink or
nozzle missing).
In addition, you can select the orientation of the test
pattern to print from two types in order to perform test
printing repeatedly. Select one depending on your use.
• When using leaf media, set a media of more than
A3 size put horizontally. If a media with narrow
width is set, printing will only be conducted to mid-
way.
• When using a roll media, rewind the media by
hand before printing so that it is not loose. When
the roll media has not been rewound tightly, it may
cause image quality to deteriorate.
Media feed direction
Test pattern
Head
Check before test printing.
• If media has been set P.2-4
• If the origin position has been set
• If the head gap has been adjusted P.2-4
Media-feeding direction
: When the set value is "FEED DIR."
: When the set value is "SCAN DIR."
2-18
Chapter 2 Basic Operation
Perform test printing with the normal
test pattern
1
In LOCAL mode, press
(TEST
PRINT/CLEANING)
, and then the
key.
• The test print menu appears.
• You can change the orientation of the test pattern
by pressing [][]. The orientation you set here
will also be applied the next time you perform
printing.
• When performing test printing after having
changed the orientation from "SCAN DIR." to
"FEED DIR.", the line is fed to the position of the
first test printing, and then printed.
2
Press the key.
• Test printing starts.
3
Check the printed test pattern.
• When the result is normal, end the operation.
• When the result is abnormal, perform head
cleaning. ( P.2-19)
Perform test printing with the test
pattern for checking white ink
It makes easier to check if print the background to the
white ink locations in the pattern.
1
In LOCAL mode, press
(TEST
PRINT/CLEANING)
, and then the
key.
• The test print menu appears.
2
Press and select "SpotColor
Check".
3
Press the key.
• Print a test pattern in the following orders.
(1) Print the pattern daubed with black.
(2) Return the media automatically and print the
test pattern.
4
Check the printed test pattern.
• When the result is normal, end the operation.
• When the result is abnormal, perform head
cleaning. ( P.2-19)
Abnormal pattern
Clogged with ink
Normal pattern
Nozzles are dirty
Abnormal pattern
Clogged with ink
Normal pattern
Nozzles are dirty
2-19
2
2
2
2
2
Chapter 2 Basic Operation
Head Cleaning
About Head Cleaning
Check the printed test pattern result and perform cleaning
depending on the status.
Select one from the four types below:
NORMAL: When any line is missing
SOFT : When only head wiping is needed (when lines
are bent)
HARD : When poor image quality cannot be improved
even by NORMAL or SOFT cleaning
ULTRA : When poor image quality cannot be improved
even by HARD cleaning, or when the color
does not improve.
Perform head cleaning depending on
the test printing result
There are four types of head cleaning. Use appropriate
one for the test result.
1
In LOCAL mode, press
(TEST
PRINT/CLEANING)
.
• The cleaning menu appears.
2
Press to select a cleaning type.
3
Press the key.
4
Press to select the head to be
cleaned, and then press
()
.
• After selecting the head, press the [FUNC2] key
and put a check in the check box.
The head whose box has been checked will be
cleaned.
• To have both head 1 and head 2 cleaned, put a
check in both their check boxes.
5
Press the key.
6
Perform test printing again, and check the
result.
• Repeat the cleaning and the test printing until the
printing result becomes normal.
Setting Media Correc-
tion
Correct the media feed amount to match the type of
media you are using.
If the correction value is not appropriate, stripes may
appear on the printed image, thus resulting in a poor
printing.
Setting of Media Correction
A pattern for media correction is printed and a media-
feeding rate is corrected.
1
Set the media on the machine. ( P.2-4)
2
In LOCAL mode, press the key,
and then press
(ADJUST)
.
• The adjustment menu appears.
3
Press the key twice to print a
correction pattern.
4
Check the correction pattern and enter a
correction value.
• A screen for entering the correction value will be
displayed.
• Enter a correction value in "+":
The boundary between the two bands is widened.
• Enter a correction value in "-":
The boundary between the two bands is
narrowed.
• When you change the correction value by "30",
the width of the boundary changes by about 0.1
mm.
When the image quality is not improved after the
head cleaning.
• Clean the wiper and ink cap. ( P.5-6)
• Wash the head nozzle. ( P.5-9)
• On completion of [MEDIA COMP.] during use of
roll media, the media returns to the printing origin.
Then the roll media in the rear of this machine will
slacken.
Before printing, take up the slack in the roll media
by hand; loose roll media can result in an inferior
image quality.
• When printing with a take-up device, set the media
first and perform media correction.
• Two bands are printed in the correction pattern.
• Make adjustment so that an even color density is
obtained in the boundary between the two bands.
Second band
First band
Media feed direction
2-20
Chapter 2 Basic Operation
If the Positions of Dots
Shift...
When the condition for printing (media thickness/ink type/
etc.) has been changed, perform the following operation
to correct the ink drop position for bi-directional (Bi)
printing and obtain the proper printing result.
Example of a printed pattern
1
In LOCAL mode, press the key,
and then press
(ADJUST)
.
• The adjustment menu appears.
2
Press and then the key.
• "DROP.POScorrect" will be selected.
3
Press the key.
• Printing of the Drop position correct printed
pattern will start.
• Multiple test patterns are printed. (The printed
patterns are called Pattern 1, Pattern 2, Pattern
3... in the order of printing.)
4
Press to enter a correction value
of Pattern 1, and press the key.
• Corrected feeding rate: -40 to 40
• Check the test patterns. The position where an
outward feeding line and a return feeding line
become one straight line is the correction value.
• When the correction value in not between -40 and
40, adjust the height of the printing heads and
perform the operations in Step 2 and later.
5
In the same way as in Step 4, enter a
correction value of Pattern 2 and later, and
press the key.
6
Press the key several times to
end the setting.
Printing Data
Starting a Printing Operation
1
Set the media on the machine. ( P.2-4)
2
Press the (REMOTE) key in LOCAL.
• The screen changes to REMOTE, and data can
be received from the PC.
3
Transmit data to be printed from the PC.
• For the method of data transmission, see the
instruction manual for the RIP software.
4
Start printing.
• The printing speed may change, depending on
the width of the set media or the position of the
print origin even when the same data is printed.
This is because of a difference in resolution.
• When using leaf media, set a media of more than
A3 size put horizontally. If a media with narrow
width is set, printing will be only conducted to mid-
way.
The dots at the fourth position
counted from the zero position in
the positive direction form a straight
line.
In this case, the dot position
correction value is 4.0.
Output
• When using a roll media, rewind the media by
hand before printing so that it is not loose. When
the roll media has not been rewound tightly, it may
cause image quality to deteriorate.
0.0m
600x600 16p / Bi / Hi / Vd
PRINT
REMOTE
30°/35°
Resolution
300/600/900/1200 DPI
Number of passes
The length of media printed
Scan direction
Uni: Unidirectional
Bi: Bidirectional
Scanning speed
Std: Standard speed
Hi: Double speed
Data type
Vd:
Variable data
Nd: Normal data
2-21
2
2
2
2
2
Chapter 2 Basic Operation
Pause printing
Perform the following operation when pausing printing.
1
Press
(LOCAL)
during printing.
• Pause the printing operation
• Interrupt data sending at the PC side during the
data is sent from the PC.
• Press the [REMOTE] key to resume printing.
Cancel printing (Data Clear)
If you want to cancel printing the received data, select
DATA CLEAR.
1
In LOCAL mode, press the key,
Press
(DATA CLEAR)
.
2
Press the key.
• The received data is erased then it returns to the
Local.
Cutting Media
By using the keys on the operation panel, you can cut the
media at any position.
1
In LOCAL mode, press .
• It enters into the origin setting mode.
• By pressing [], feed the media to the cutting
position.
2
Press the key.
• The media is cut.
• When the cutting has been completed, the current
mode returns to LOCAL.
• Do not perform data clear during data transmis-
sion.
• Received data is stored in the receiving buffer
even after data clear.
X
0.0
Y
0.0
SET ORIGIN
2-22
Chapter 2 Basic Operation
Workflow of cutting
Turning the Power On/Off
See "Turning the Power On/Off" ( P.2-3).
Setting Media
See "Setting Media" ( P.2-4).
Installing Tools
See "Installing Tools" ( P.2-23).
Setting the Cutting Conditions
See "Setting the Cutting Conditions" ( P.2-
26).
Test Cutting
See "Test Cutting" ( P.2-28).
Cutting Data
See "Cutting Data" ( P.2-29).
2-23
2
2
2
2
2
Chapter 2 Basic Operation
Installing Tools
You can use the following tools with this machine:
Cutter:
This tool is selected when an image printed on a media
is cut or when letters are cut with a cutting media.
Pen (water-based ballpoint pen):
This tool is used to perform "test printing" for checking
how images or letters are actually cut.
When a Cutter Is Used
How to install a cutter
1
Remove the cap located at the edge by
rotating it, and replace the cutter with a
new one using tweezers or the like.
2
Turn the adjusting knob to adjust the
protruding amount of the cutter.
• Turn the adjusting knob in the direction indicated
by the arrow in the figure below to bring out the
cutter blade. (With each turn of the adjusting
knob, the cutter blade advances 0.5 mm.)
Adjusting the protrusion of the cutter
blade
Adjust the cutter blade according to the types of the
cutters and the sheet for use.
After adjusting the blade edge, set the cut condition and
perform test cut to check whether cutting is performed
well.
For the cutter supplied with the unit, the protruding
amount of the blade can be adjusted with the cutter
attached to the tool holder.
1
Turn the adjusting knob to adjust the
protruding amount of the cutter blade.
• You can bring out the cutter blade by turning the
adjusting knob clockwise.
(With each turn of the adjusting knob, the cutter
blade advances 0.5 mm.)
• Do not touch the cutter with your fingers.
Sharp cutter tip may injure you.
• Do not shake the tool after having set the cut-
ter.
Otherwise, the blade edge may pop out, causing
you to get injured.
• Keep the cutter out of reach of children. Dispose of
the used cutter blade in compliance with the appli-
cable regulations.
Cutter holder
Cutter
Cap
Cutter
Adjusting knob
• Take care not to protrude the blade too much. If
the cutter is used with its blade excessively pro-
truded, the cutter can cut out the base paper, thus
damaging the machine.
• If you are using a cutter other than the one sup-
plied with the machine, refer to
P.5-22 "Adjusting
blade edge of cutters other than supplied one"
for information about how to adjust the cutter
blade.
2-24
Chapter 2 Basic Operation
Protruding amount of the cutter blade
How to install the cutter holder
1
In LOCAL mode, press
(MENU)
(>>)
.
• The cutting menu appears.
2
Press , select "TOOL REPLACE",
and then press the key.
• The cutter unit moves to the left end of the
machine.
3
Rotate the knob to loosen the holder
presser.
4
Insert the cutter holder into the tool holder.
• Push the brim of the cutter holder against the tool
holder.
• Press the brim of the cutter holder with the holder
presser.
5
Fix the cutter holder.
• Turn the knob of the tool holder clockwise, and fix
it securely.
6
Press the key.
How to Install a Ballpoint Pen
1
Put the cap on the pen adapter.
• Use the cap to adjust the pen height.
• Install the cutter holder to the tool holder of the
carriage.Be sure to insert the cutter holder all the
way in the tool holder.
Amount of cutting=
For reference: the protruding amount of the cutter blade =
0.2 to 0.5 mm
(Replace the blade when it is blunt.)
• Adjust the blade pressure so that the cutter may
leave a little bit of cutter track on the sheet.
• In case the sheet thickness is thinner than the film
thickness, which may not provide correct cutting
quality, change the protruding amount of the blade
and you may get a better result.
Protruding amount
of the cutter blade
Amount of cutting
Film
Base paper
(Film thickness + Base paper
thickness)
2
• However, When Filem is thinner than
Base Paper
Holder presser
Knob
• Fix the cutter holder firmly. If not, accurate and
high-quality cutting will not be achieved.
• When you want to use a commercially available
ballpoint pen, you must use the pen of 8mm to
9mm in diameter. Image quality may depend on
the pen.
(Recommended ballpoint pen: the one available
from Pentel Co., Ltd. with the product No.: K105-
A, K105-GA)
• Regarding such ballpoint pens as shown below,
the pen inclines to touch the cover when held by
the pen adapter. (A pen that has a contoured body
or a pen that has a lug or uneven surface)
Brim
Holder presser
Knob
A pen that has a contoured
body
A pen that has a lug or
uneven surface
2-25
2
2
2
2
2
Chapter 2 Basic Operation
2
Insert the pen into the pen adapter.
• Insert the pen until the tip of the pen reaches the
cap.
3
Fix the tip of the pen.
• Tighten the fixing screw clockwise.
• Be careful not to over-tighten the fixing screw for
the pen adapter. If tightened too much, the ball-
point pen may crack.
4
Remove the cap.
5
In LOCAL mode, press
(MENU)
(>>)
.
• The cutting menu appears.
6
Press to select "TOOL
REPLACE", and then press the
key.
• The cutter unit moves to the left end of the
machine.
7
Rotate the knob to loosen the holder
presser.
8
Insert the pen adapter with the pen into the
tool holder.
• Make sure that the brim of the pen adapter is
rested on the tool holder.
• Set the adapter in such a way that the fixing screw
will not obstruct operation.
• Press the brim of the pen adapter with the holder
presser.
9
Turn the knob clockwise to fix the tool.
• Turn the knob of the tool holder clockwise, and fix
it securely.
10
Press the key.
Pen
Pen adapter
Fixing screw
Cap
Holder presser
Knob
• Instead of the ballpoint pen, you can attach the
refill that comes with it.
Follow the procedure below to attach the ballpoint
pen refill to the pen adapter, then put it into the tool
holder in the same way as in step 6.
(1) Insert a spring into the pen tip.
(2) While pressing the cap onto the spring,
attach it on the pen adapter.
• Rotate the cap to the direction indicated
with an arrow and attach it on the pen
adapter.
• When you replace the ballpoint pen (SPB-0726),
contact a distributor in your district or our office to
call for service
Insert until it is rested
Brim
Holder presser
2-26
Chapter 2 Basic Operation
Setting the Cutting
Conditions
You can register the cutting speed and the pressure
depending on the sheet or the tool type to be used. (Cut
condition)
About the Cut Conditions
Items you can set here
About Selecting Cutting Condition
1
Press the key twice to display
"TOOL"
2
Press to display the cut condition.
• The three items shown in the following screen are
not displayed unless the half-cut is set to ON.
About half cutting
You can cut on the dotted line, not to cut sheet out. (Half
cut)
When you set half cut to valid (ON), you can use the half
cut function.
Tool condition
You can select the cutting condition No. (1
to 7) or plotting condition (PEN).
Cut speed Setting of the speed of cutting.
Cutting
pressure
Setting of the pressure (g) required for
cutting.
Offset
*1
*1. You cannot set this when "PEN" is selected in the tool condition,
Setting of the distance from the center of
the cutter holder to the cutter blade.
Half cut
*2
*2. The three items in the lower level are available when the half-cut is
set to ON.
Setting of enabling (ON)/disabling (OFF)
the half-cut function.
Half cut
press
Setting of the pressure of left part. (g)
H-leng
Setting of the length to be left (not to be
cut). (mm)
C-leng Setting of the length to be cut. (mm)
width:1340mm
PRTOOL
TEST CUT
LOCAL
• The illustration above is the image. The shape of
cut surface differs depending on the cutting condi-
tions.
CUT CONDITION
HALF CUT PRESSURE
80g
2.0mm
H・LENG
20mm
C・LENG
>><<
CUT CONDITION
TOOL
CUT1
30cm/s
SPEED
60g
PRESSURE
OFFSET
0.30mm
ON
HALF CUT
>><<
Cutter
Set the length to be
left (not to be cut).
Sheet
Set the length
to be cut.
Set the
cutting
pressure
2-27
2
2
2
2
2
Chapter 2 Basic Operation
Select the Tool Condition
Before cutting (plotting), select the tool condition
depending on the sheet and the tool type to be used.
1
Press the key twice to display the
"TOOL" menu.
2
Press the (TOOL).
3
Press the key.
4
Press to select a tool condition
to be used.
• Each time you press [][], the tool condition is
switched as follows.
5
Cutting. ( P.2-29)
Set the Cut Conditions
Set the condition to cut or to plot with a pen.
Setting contents of cutting condition (CUT1 to 7):
Cut speed (SPEED)/ cut pressure (PRESS)/ OFFSET
value/ Half cut
Setting contents of plotting condition (PEN):
Plotting speed (SPEED)/ pen pressure (PRESS)
1
Press the key twice to display the
"TOOL" menu.
2
Press the (TOOL).
3
Press the key, Select a tool
condition to be used by using ,
and then press the key.
4
Press to move the cursor to cutting
speed, and press the key.
5
Press to set the cutting speed,
and press the key.
• Set the moving speed of the tool for cutting or pen
plotting.
• Setting values: 1 to 10 cm/s (settable by 1cm/s
step)
15 to 30 cm/s (settable by 5cm/s
step)
6
Press to move the cursor to cutting
pressure,and press the key.
7
Press to set the cutting pressure,
and press the key.
• Set the pressure that the tool presses the sheet
for cutting or pen plotting.
• Setting values: 10 to 20 g (settable by 2 g step)
25 to 100 g (settable by 5 g step)
110 to 450 g (settable by 10 g
step)
8
Press to move the cursor to OFFSET,
and press the key.
9
Press to set the offset value, and
press the key.
• When you set the cutting condition (CUT1 to 7),
set the distance between the center of the cutter
holder and the blade tip.
• Setting values: to 250 (0.00 to 2.50 mm)
(settable by 0.05 mm step)
10
Press to move the cursor to half cut,
and press the key.
11
Press to set ON/OFF, and press
the key.
• When you perform half cut, select ON and
proceed to the Step 11.
• When you are not performing half cut, select
"OFF" and proceed to Step 18.
12
Press to move the cursor to pressure
setting of left part (not to be cut), and
press the key.
13
Press to set pressure, and press
the key.
• Set the pressure of the left part (not to be cut)
when performing half cut.
• Setting values: 0 to 300 g (settable by 5 g step)
14
Press to move the cursor to the
setting of length to be left, and press the
key.
15
Press to move the cursor to the
setting of length to be left, and press the
key.
• Set the length to be left not to be cut when
performing half cut.
• Setting values: 0.1 to 5 mm (settable by 0.1 mm
step)
CUT1 ~ 3
PEN
CUT4 ~ 7
• When the cutting (plotting) pressure setting is
completed, proceed to the setting of the OFFSET
value. When you set the plotting condition (PEN),
you cannot set the OFFSET value and half cut.
Proceed to the Step 16.
• The maximum pressure at selecting PEN is 150 g.
Cutter
holder
OFFSET
Blade
2-28
Chapter 2 Basic Operation
16
Press to move the cursor to the
setting of cut length, and press the
key.
17
Press to set the cut length, and
press the key.
• Set the length to be cut when performing half cut.
• Setting values: 5 to 150 mm
(5 to 20 mm: 1 mm step, 20 to
150 mm: 5 mm step)
18
Press the key to register the
set contents.
• Return to the local.
Test Cutting
Execute test cutting to confirm the tool
conditions.
In the test cutting, the machine cuts two
squares.
1
Press the key twice to display the
"TEST CUT" menu.
2
Press (TEST CUT).
3
Press the key.
• Test cutting is performed.
Change the settings of the cut conditions according to the
test cutting results.
• The set value is retained even when the power is
turned "OFF".
• When the cutter blade is worn and dull, you can
use it temporarily by enhancing the value of
PRESSURE.
(Remember that this is just a temporary mea-
sure. To maintain satisfactory cutting quality,
we recommend that you replace the cutter
blade with a new one.)
When the tool conditions are proper, the results
of test cutting are as follows:
• The two squares are cut perfectly.
• The base media remains uncut.
• No corner of the squares is rounded.
• No corner of the squares is curled-up.
Cut
Condition
Cause Solution
Some parts
uncut.
The blade is lifted
above the media
because of a too
high cutting
speed.
Lower the speed .
(P.2-27)
Tighten up the knob for the
tool holder. ( P.2-24)
The base
media has
been cut.
Too high
pressure.
Lower the pressure.
(P.2-27)
Too large
protrusion of the
cutter blade.
Adjust the protrusion of the
cutter blade. ( P.2-24)
Any of the
square
corners
rounded.
Improper
OFFSET value.
Adjust the OFFSET value
so that it suits the cutter
blade in use. ( P.2-27)
Any of the
square
corners
curled-up.
Too large
protrusion of the
cutter blade.
The cutting
pressure is higher.
The
[COMPENSATIO
N PRESSURE
OFFSET value] is
large.
More than two out
of the above fall
under this
category.
Adjust the protrusion of the
cutter blade. ( P.2-24)
Adjust the cutting pressure.
(P.2-27)
Adjust the ADJ-PRS OFS
value. ( P.4-15)
2-29
2
2
2
2
2
Chapter 2 Basic Operation
Cutting Data
You can start cutting after completion of setting up a tool,
a media and the tool conditions.
Setting the Origin
The origin is a reference point for the cutting data.
Set the origin again before starting cutting.
1
Move the carriage to a point at which the
new origin is to be set.
•[]: Moves the carriage to the right.
[]: Moves the carriage to the left.
[]: Feeds the media to the rear of the machine.
[]: Feeds the media to the front of the machine.
2
Press the key to register the
origin.
• The tool condition is displayed.
Start Cutting
1
After completion of setting the origin,
press (REMOTE).
• The screen changes to REMOTE, and data can
be received from the PC.
2
Transmit data to be cut from the PC.
• While cutting the received data, the machine
displays the remaining amount of data.
Bringing the cutting to a halt
To temporarily stop the machine during cutting, press the
[FUNC3] (REMOTE) key once. Another press of the key
will make the machine resume cutting.
Stopping a Cutting Operation (Data
Clear)
If you want to stop a cutting operation of the received
data, clear the data.
1
In LOCAL mode, press the key,
Press
(DATA CLEAR)
.
2
Press the key.
• The reception buffer is cleared, and the present
mode returns to LOCAL
Removing the Cutter Unit Temporar-
ily
When cutting or printing-with-a-pen job is finished, the
cutter unit is on the platen.
To check the result of cutting (printing-with-a-pen) or to
set a new medium, follow the steps below to remove the
cutter unit from the platen temporarily.
1
Press the key to display the "TEST
CUT" menu.
2
Press (TEST CUT).
3
Press to select the "CUTTER
HEAD MOVE/RETRACT", and press the
key.
• The cutter unit moves from on the platen to the
left end of the machine.
• When the coupling unit is connected to the printer
unit, switch the destination to the cutter unit, and
move to move it to the origin position. (Moving the
cutter unit)
• Change the origin before cutting the next data;
otherwise, cutting will be performed over the previ-
ous data.
• In case the media has slipped off the machine
during cutting operation, turn off the power imme-
diately; otherwise, the main unit may be damaged.
• You cannot use the functions that include opera-
tions while pausing. In this case, let the machine
complete the cutting for the remaining portion of
the data or discontinue the cutting by executing
data clearing ( P.2-29).
New origin
• When clearing the data, the process will not restart
even if you press the [FUNC3] (REMOTE) key.
• After clearing the data, switching to the remote
mode and receiving another data, new data will be
cut.
• Do not perform the data clearance during the data
transmitting.
• Even after performing the data clearance, the
received data is stored in the reception buffer.
2-30
Chapter 2 Basic Operation
Cutting Media
By using the keys on the operation panel, you can cut the
media at any position.
1
In LOCAL mode, press .
• It enters into the origin setting mode.
• By pressing [], feed the media to the cutting
position.
2
Press the key.
• The media is cut.
• When the cutting has been completed, the current
mode returns to LOCAL.
X
0.0
Y
0.0
SET ORIGIN
This chapter
describes various settings of this machine.
About SETUP MENU ....................................3-2
SETUP MENU table .................................... 3-3
Register the Optimal Print Conditions to Match
the Use ........................................................3-4
Setting of Media Correction ......................... 3-5
If the Positions of Dots Shift... ..................... 3-6
Setting of Logical Seek ............................... 3-7
Setting of Overprint ..................................... 3-7
Setting of Drying Time ................................. 3-7
Setting of Left and Right Margins ................ 3-8
Setting of Vacuum Fan ................................ 3-8
Setting of Feed Speed ................................ 3-8
Setting of MAPS .......................................... 3-9
Setting of Auto Cleaning ............................. 3-9
Setting of Interval Wiping .......................... 3-10
Setting of the UV Mode ............................. 3-10
Setting Ionizer (option) .............................. 3-10
Setting of LT mode .................................... 3-11
About MACHINE SETUP MENU ................3-12
MACHINE SETUP MENUs table .............. 3-13
Setting of AUTO Power-off ........................ 3-14
Setting of Take-up Unit ............................. 3-14
Setting of the Display of Media Residual .. 3-15
Setting of Media Detection .........................3-15
Setting of a LANGUAGE ............................3-16
Setting of Time ...........................................3-16
Setting of Unit (Temperature/ Length) .......3-16
Setting of a KEY BUZZER .........................3-16
Setting of the CONFIRM. FEED ................3-17
Setting of the SPACE FEED MODE ..........3-17
Setting of the Network ...............................3-17
Setting of Event Mail Function ...................3-18
Initializing the Settings ...............................3-22
About NOZZLE CHECK MENU ..................3-23
INFORMATION MENU table .....................3-23
Printing Check Flow ...................................3-24
Printing Operations at "Nozzle Missing"
Judgment and Error Occurrence ...............3-24
Setting of the Printing Check .....................3-25
Setting of the NOZZLE RECOVERY .........3-25
Setting of the Judgment Condition .............3-25
About INFORMATION MENU .....................3-26
INFORMATION MENU table .....................3-27
Displaying the Information .........................3-27
Displaying the machine's information
(LOCAL guidance) .....................................3-28
Chapter 3
Setup
3-2
Chapter3 Setup
About SETUP MENU
On SETUP MENU, you can set the print conditions to match the media you usually use.
width:1340mm
REMOTEMENU
TEST PRINT
CLEANING
LOCAL
width:1340mm
REMOTEMENU
TEST PRINT
CLEANING
LOCAL
SETUP1 1/3
FEED COMP.
>
>
DROP.POScorrect
OFF
HOST
LOGICAL SEEK
OVER PRINT
>
DRYING TIME
>><<
MARGIN/LEFT
HOST
HOST
MARGIN/RIGHT
HOST
VACUUM FAN
100%
>
FEED SPEED
AUTO CLEANING
>><<
SETUP1 2/3
MENU
SETUP
>
>
MAINTENANCE
>
INFORMATION
>
NOZZLE CHECK
>
MACHINE SETUP
SETUP
●SETUP1
>
>
○SETUP2
>
○Temporary
>
○SETUP4
>
○SETUP3
Select SETUP 1 to 3 or Tempotary
and then press the key
MAPS4
AUTO
UV MODE
OFF
LT mode
OFF
RESET SETTIG
>
SETUP1 3/3
INTERVAL WIPING
OFF
>><<
Press this to select SETUP
MENU, or to switch to the
previous screen.
SETUP MENUs at-a-glance
Press this to switch to the
next screen.
Use these to select a
setting item.
Press this to confirm a
setting, etc.
3-3
3
2
2
2
Chapter3 Setup
SETUP MENU table
• For each setting item below, you can set it so that the machine may operate according to the value specified when you
printed from your RIP software in the connected host PC.
• When you operate the machine according to the contents specified with the RIP software, set each item to "Host" when
registering this machine type. When you set it other than "Host", the machine operates according to the machine setting.
• For the specifying method with the RIP software, refer to the operation manual of the RIP software.
Function name Set Value
*1
*1. The underlined values above represent the default settings.
When no
instruction
from RIP
exists
*2
*2. This is the setting value to be used for printing when setting value is not specified at the RIP software (host) side, or, you give priority to the setting value at the
machine side.
Description
FEED COMP. ( P.3-5) -9999 to 0 to 9999
Used to print a pattern for correcting a media-
feeding rate and correct it.
DROP.POScorrect ( P.3-6) -40.0 to 0
to 40.0
Used to adjust the dot position in go and return
printing.
LOGICAL SEEK ( P.3-7) HOST
/ON / OFF OFF Sets the scan movable area during printing.
OVER PRINT ( P.3-7) HOST
/ 1~9 times 1 time Set the number of times of overprinting of ink.
DRYING TIME
(P.3-7)
SCAN HOST/0.0 to 9.9 sec 0 sec Sets the time to wait for ink drying.
PRINT END HOST
/0 to 120 min 0 min Sets the ink drying time after printing.
MARGIN/LEFT ( P.3-8)
HOST
/-10 to 85 mm
0 mm
Sets a non-printing area along the right and left
edges of the media.
MARGIN/RIGHT ( P.3-8 0 mm
VACUUM FAN ( P.3-8)
HOST
/ WEAK/ STANDARD/
STRONG
STRONG Sets the absorbability of the media.
FEED SPEED
*3
(P.3-8)
*3. When you set this to "100%" or more, required time for completion of printing will be shortened. However, enough drying time cannot be ensured and it may
affect the image quality.
*4. Displayed when the optional ionizer is connected.
HOST/10 to 100 to 200%
100 % Changes the media feeding speed in printing.
AUTO
CLEANING
(P.3-9)
OFF, FILE,
LENGTH, TIME
Sets the automatic cleaning operation for the
head performed before printing or during printing.
FILE
INTERVAL 1 to 1000
TYPE NORMAL/ SOFT/ HARD
LENGTH
INTERVAL 0.1 to 100.0 m
TYPE NORMAL/ SOFT/ HARD
TIME
INTERVAL 10 to 120 min
TYPE NORMAL/ SOFT/ HARD
Cleaning Check ON/ OFF
Sets whether to perform a nozzle check after
automatic cleaning.
INTERVAL WIPING ( P.3-10) 3 to 255 min, OFF
Sets the wiping operation performed during
printing.
MAPS
(P.3-9)
AUTO
Change the effect of "MAPS".
MANUAL
Smoothing
level
0 to 100%
Speed
50 to 100%
Expansion
ON/ OFF
UV mode ( P.3-10) ON / OFF / No printing ON Specify UV irradiation during printing.
Ionizer
*4
( P.3-10) ON / OFF Set the operation of the ionizer (option).
LT mode ( P.3-11) ON / OFF OFF
Set LT mode when you need more flexibility than
the default UV mode print.
RESET SETTING ( P.3-5) The configuration in the settings 1-4 can be reset individually.
3-4
Chapter3 Setup
Register the Optimal Print Conditions
to Match the Use
In this machine, you will be able to register print
conditions, SETUP 1 to 4 individually to match the media
in advance.
For example, after print on different types of media, return
to the media always use. In such case you can set the
optimum printing conditions by simply selecting the
registered SETUP 1 to 4.
Register the print conditions to SETUP 1
to 4
1
Press the
(MENU)
key in
LOCAL.
2
Press to select SETUP 1 to 4,
and press the key.
• The item selected indicates ● and others show
○ .
• The setup menu appears.
3
Press to select each item in the
setup menu list.
• Please see the reference page in the setup menu
list for detailed configuration procedure.
How to use [Temporary]
[Temporary] is not only to set the print condition to be
used only once, but also can be used for partial change of
the registered SETUP "1 to 4", or for reflecting the print
conditions set by the [Temporary] to SETUP 1 to 4.
Register the print conditions in [Temporary]
Registration of the print conditions to [Temporary] can
be done as the same method as to SETUP 1 to 4.
1
Press the
(MENU)
key in
LOCAL.
2
Press to select "Temporary",
and press the key.
• The setup menu appears.
3
Press to select each item in the
setup menu list.
• Please see the reference page in the setup menu
list for detailed configuration procedure.
Copy the contents of SETUP 1 to 4 to
[Temporary].
You can use it with changing the part of registration
contents of SETUP 1 to 4.
Select "RESET SETTING" then "COPY" from the
registration screen of [Temporary], and specify the
copy source (SETUP 1 to 4).
1
Press the
(MENU)
key in
LOCAL.
2
Press to select "Temporary",
and press the key.
• The setup menu appears.
3
Press (<<).
4
Press to select "RESET
SETTING", and press the key.
5
Press to select "COPY", and
press the key.
• A screen appears, from which you can select the
source from which to copy settings.
6
Press to select the copy source
(SETUP 1 to 4) and press the key.
• A confirmation screen appears on the display,
asking for confirmation to copy the settings.
7
Press the key.
• Settings selected in Step 5 are copied to
Temporary.
8
Press to select the setting item
to be changed, and press the key.
• Please see the reference page in the setup menu
list for detailed configuration procedure.
Reflect the content set in [Temporary] to SETUP 1
to 4
1
Press the
(MENU)
key in
LOCAL.
2
Press to select "Temporary",
and press the key.
• The setup menu appears.
3
Press to select each item in the
setup menu list.
• Please see the reference page in the setup menu
list for detailed configuration procedure.
4
Display the last page of Temporary and
select "SAVE SETTING", and press the
key.
• A screen appears, from which you can select the
location to which to save settings.
• Print conditions that can be pre-registered with the
machine are the four types, "SETUP 1" to "SETUP
4".
• If you print with the print condition which do not
often use, you will be able to set the print condi-
tions by selecting "Temporary".
If turn on the power again, settings in "Temporary"
will return to the original state when it was pur-
chased.
Also if turn on the power again in "Temporary"
state, it will be the state in selecting "SETUP 1".
3-5
3
2
2
2
Chapter3 Setup
5
Press to select the location
selected SETUP 1 to 4), and press the
key.
• A confirmation screen appears on the display,
asking for confirmation to save the settings.
6
Press the key.
• Settings of Temporary will be saved to the
location selected in step 5.
7
Press the key several times to
end the setting.
Reset the registered contents
Reset the contents registered to SETUP 1 to 4.
1
Press the
(MENU)
key in
LOCAL.
2
Press to select SETUP 1 to 4 to
be reset and press the key.
• The setup menu appears.
3
Press (<<).
4
Press to select "RESET
SETTING", and press the key.
• After the check screen for SETUP RESET is
displayed, press the [ENTER] key to execute.
5
Press the key to execute
6
Press the key several times to
end the setting.
Setting of Media Correction
Correct the media feed amount to match the type of
media you are using.
If the correction value is not appropriate, stripes may
appear on the printed image, thus resulting in a poor
printing.
A pattern for media correction is printed and a media-
feeding rate is corrected.
1
Set a media on the machine. ( P.2-4)
2
Press the
(MENU)
key in
LOCAL.
3
Press to select SETUP 1 to 4,
and press the key.
4
Press to select "FEED COMP",
and press the key.
5
Press the key once to print a
correction pattern.
6
Check the correction pattern and enter a
correction value.
• A screen for entering the correction value will be
displayed.
• Enter a correction value in "+":
The boundary between the two bands is widened.
• Enter a correction value in "-":
The boundary between the two bands is
narrowed.
• When you change the correction value by "30",
the width of the boundary changes by about 0.1
mm.
7
Press the key.
• Print a correction pattern again and check it.
• When media correction is needed, perform the
operation in Step 6 to make correction.
• On completion of [MEDIA COMP.] during use of a
roll media, the media returns to the printing origin.
Then the roll media in the rear of this machine will
slacken.
Before printing, take up the slack in the roll media
by hand; a loose roll media can result in an inferior
image quality.
• When printing with a take-up device, set the media
first and perform media correction.
• Two bands are printed in the correction pattern.
• Make adjustment so that an even color density is
obtained in the boundary between the two bands.
Second band
First band
Media feed direction
3-6
Chapter3 Setup
8
Press the key several times to
end the setting.
Correcting media-feeding during
printing
A media-feeding rate can be corrected even in the remote
mode or when image data is printed.
1
Press the
(ADJUST)
key in
remote mode.
2
Press , and then enter a media-
feeding rate.
• Corrected feeding rate: -9999 to 9999
• The value entered here is reflected in the
corrected feeding rate soon.
3
Press the key twice.
• The changed value is registered.
If the Positions of Dots Shift...
When the condition for printing (media thickness/ink type/
etc.) has been changed, perform the following operation
to correct the ink drop position for bidirectional (Bi)
printing and obtain the proper printing result.
Example of a printed pattern
1
Set a media on the machine. ( P.2-4)
• In order to print a pattern, media that is at least
500 mm wide is necessary.
2
Press the
(MENU)
key in
LOCAL.
3
Press to select SETUP 1 to 4, and
press the key.
• The setup menu appears.
4
Press to select
"DROP.POScorrect", and press the
key.
5
Press the key.
• Printing of the Drop position correct printed
pattern will start.
• Multiple test patterns are printed. (The printed
patterns are called Pattern 1, Pattern 2, Pattern
3... in the order of printing.)
6
Press to enter a correction value
of Pattern 1, and press the key.
• Corrected feeding rate: -40 to 40
• Check the test patterns. The position where an
outward feeding line and a return feeding line
become one straight line is the correction value.
• When the correction value in not between -40 and
40, adjust the height of the printing heads and
perform the operations in Step 2 and later.
7
In the same way as in Step 4, enter a
correction value of Pattern 2 and later, and
press the key.
8
Press the key several times to
end the setting.
The dots at the fourth position
counted from the zero position in
the positive direction form a
straight line.
Output
3-7
3
2
2
2
Chapter3 Setup
Setting of Logical Seek
The head's operation varies depending on the LOGICAL
SEEK settings, as shown in the figure below.
1
Press the
(MENU)
key in
LOCAL.
2
Press to select SETUP 1 to 4, and
press the key.
• The setup menu appears.
3
Press to select "LOGICAL
SEEK", and press the key.
4
Press to select a set value, and
press the key.
• Set value: HOST/ON/OFF
5
Press the key several times to
end the setting.
Setting of Overprint
Sets the number of layers in which ink is to be applied.
1
Press the
(MENU)
key in
LOCAL.
2
Press to select SETUP 1 to 4,
and press the key.
• Setup menu appears.
3
Press to select "Overprint", and
press the key.
4
Press to set number of
Overprint, and press the key.
• Setting value : Host/ 1 to 9 times
5
Press the key several times to
end the setting.
Setting of Drying Time
In the drying time setting, the following items for ink drying
time are set.
• SCAN: Ink drying time for each scanning is set. (During
bidirectional printing, the machine stops for a
certain period of time specified for each of the
outward and return scanning.)
• PRINT END: Ink drying time for after printing is set.
1
Press the
(MENU)
key in
LOCAL.
2
Press to select SETUP 1 to 4, and
press the key.
• The setup menu appears.
3
Press to select "DRYING TIME",
and press the key.
4
Press to set drying
time, and press the key.
• Set the drying time for scanning and after printing
is completed.
• Scanning setting value: Host or 0.0 to 9.9 sec.
• Print end setting value: Host or 0 to 120 min.
• Item selecting: by the [][] keys
• Time setting: by the [][] keys
5
Press the key several times to
end the setting.
UNI-DIRECTIONAL BI-DIRECTIONAL
Movement of heads when LOGICAL seek is OFF
Movement of heads when LOGICAL seek is ON
UNI-DIRECTIONAL BI-DIRECTIONAL
Media
Red arrow:
Movement of head
Print area
Red arrow:
Movement of head
Print area
Media
Media Media
3-8
Chapter3 Setup
Setting of Left and Right Margins
Set a non-printing area along the left and right edges of
the media.
The offset value against the standard margin 15 mm is set
hereupon.
1
Press the
(MENU)
key in
LOCAL.
2
Press to select SETUP 1 to 4, and
press the key.
• The setup menu appears.
3
Press
(>>)
.
4
Press to select "Margin/L" or
"Margin/R", and press the key.
5
Press to select a set value, and
press the key.
• Set value: HOST/-10 to 85 mm
6
Press the key several times to
end the setting.
Setting of Vacuum Fan
Sets the absorbability of the media.
By setting the absorption power to match the media, you
can prevent print errors due to media rise-up.
1
Press the
(MENU)
key in
LOCAL.
2
Press to select SETUP 1 to 4,
and press the key.
• The setup menu appears.
3
Press
(>>)
.
4
Press to select "VACUUM FAN",
and press the key.
5
Press to select a set value, and
press the key.
• Set value: HOST/WEAK/STANDARD/STRONG
6
Press the key several times to
end the setting.
Setting of Feed Speed
Changes the media feeding speed in printing.
1
Press the
(MENU)
key in
LOCAL.
2
Press to select SETUP 1 to 4, and
press the key.
• The setup menu appears.
3
Press
(>>)
.
4
Press to select "FEED SPEED",
and press the key.
5
Press to select a set value, and
press the key.
• Set value: HOST/10% to 200%
6
Press the key several times to
end the setting.
• When you give priority to the setting at the RIP
software side, make the setting value "Host".
• You cannot specify the margins at the attached
RIP software (RasterLink). When you use the Ras-
terLink, if you set this machine to "Host", printing
will be performed in "Margins for right and left off
set value= 0 mm" status.
• The margin setting is reflected when the media
width is detected.
• Pay attention to that printing may start on the
media press if a right and left margin is set to 5
mm or less when the media press is used in print-
ing.
• Depending on the print conditions, some settings
might not be applied (that is, the feeding speed
might remain the same).
3-9
3
2
2
2
Chapter3 Setup
Setting of MAPS
The MAPS (Mimaki Advanced PassSystem) function
disperses the pass boundary to make the feeding stripes
less visible.
With this function, the degree of application of MAPS can
be changed.
Setting the MAPS function
1
Press the (MENU) keys
in LOCAL
2
Press to select SETUP 1 to 4, and
press the key
• Setup menu is displayed.
3
Press (<<)
4
Press to select "MAPS4", and
then press the key.
5
Press to select a set value, and
press the key.
• Set value: AUTO/MANUAL
• If you select “MANUAL,” proceed to Step 6, and if
you select another, proceed to Step 8.
6
Press to select "Smoothing
Level", and then press the key
7
Press to change the set value for
"Smoothing Level", and then press the
key
Smoothing
• Set Value: 0 to 100% (set in units of 5%)
• The MAPS4 effect increases as you increase the
set value. The MAPS4 effect decreases as you
decrease the set value.
• When using white ink, make setting for Smoothing
Level for both color ink and white ink.
Speed
• Setting value: 50 to 100% (set in units of 10%)
• Decreasing the speed increases the effect of
MAPS 4, making stripes less noticeable.
But, printing speed will be reduced.
Expansion
• Setting value: ON / OFF
• Setting the expansion to "ON" may reduce light
fringes.
But, the graininess may increase.
8
Press the key several times to
end the setting
Setting of Auto Cleaning
You can set the machine so that it counts the number of
printed files or the length or time after printing has been
completed, and performs cleaning automatically if
required.
You can select the auto cleaning setting from four types
below:
• PAGE: Set the cleaning intervals by the number of
printed files.
• LENGTH: Set the cleaning intervals by the printed
length.
• TIME: Set the cleaning intervals by the printed
time.
• OFF: Select this value to disable AUTO CLEANING
Automatic nozzle check after auto cleaning can be set.
(Cleaning Check function)
The machine can perform a stable printing operation with
its heads always kept clean.
1
Press the
(MENU)
key in
LOCAL.
2
Press to select SETUP 1 to 4, and
press the key.
• The setup menu appears.
3
Press
(>>)
.
4
Press to select "AUTO
CLEANING", and press the key.
5
Press the key and press
to select the type of auto cleaning.
• There are “FILE”, “LENGTH”, “TIME”, and "OFF"
for auto cleaning types.
• FILE: When the set number of prints has been
completed, the machine performs head cleaning
automatically.
• LENGTH: When the set length has passed, the
machine performs head cleaning automatically.
• TIME: When the set time has passed, the
machine performs head cleaning automatically.
• OFF: If you do not want to set auto cleaning,
select "OFF" and proceed to the Step 7.
6
Press the key, and then use
to set cleaning intervals.
• Depending on the auto cleaning type selected in
the Step 3, the setting value differs.
• For FILE: 1 to 1000 files
• For LENGTH: 0.1 to 100.0 m (in 0.1 m increment)
• For TIME: 10 to 120 min (in 10 min increment)
7
Press the key, and then use
to select a cleaning type.
• Set Value: NORMAL/SOFT/HARD
8
Press the key, and then use
to select "Cleaning Check".
9
Press the key, and then use
to select a setting.
• Set Value: ON/ OFF
• MAPS provides two setting options: "AUTO" and
"MANUAL". MAPS applies the one most suitable
for your printing conditions, so please normally
use "AUTO" (default value).
• Changing the MAPS settings may change the
color tone. Check the effects before use.
• MAPS may not be effective depending on image to
be printed. Use it after checking effect in advance.
3-10
Chapter3 Setup
10
Press the key.
11
Press the key several times to
end the setting.
Setting of Interval Wiping
When the set time has passed, nozzle face of the head is
cleaned automatically to remove ink droplets on the
nozzle face.
In case that deflection, nozzle missing, or symptom which
ink droplets fall down occurred, set the interval between
each operation shorter.
1
Press the
(MENU)
key in
LOCAL.
2
Press to select "Setting" and
press the key.
3
Press to select SETUP 1 to 4, and
press the key.
• The setup menu appears.
4
Press
(<<)
.
5
Press to select "INTERVAL
WIPING", and press the key.
6
Press to set intervals.
• Set Value: 3 to 255 minutes, OFF
• When [OFF] is set, periodical wiping is not
executed.
7
Press the key.
8
Press the key several times to
end the setting.
Setting of the UV Mode
You can select the mode for the LED UV device from 3
types.
By setting the UV mode, you can turn off LED UV light
when, for example, you are using media that is sensitive
to heat or you are going to perform test cutting while
cleaning.
1
In LOCAL mode, press the
(MENU)
key.
2
Press to select "Setting" and
press the key.
3
Press to select SETUP 1 to 4,
and then press the key.
• The setup menu appears.
4
Press to select "UV Mode", and
then press the key.
5
Press to select a mode, and then
press the key.
• Available settings: ON/OFF/No printing
6
When you are finished setting the UV
mode, press the key several
times.
Setting Ionizer (option)
Connect the ionizer and set it on when removing static
electricity.
1
Press the
(MENU)
key in local.
2
Press to select "Setting" and
press the key.
• The setting menu is displayed.
3
Press to select "Ionizer" and
press the key.
4
Press to select the setting
value, then press the key.
• Setting value: ON / OFF
• Depending on the state of the heads, etc., the
image quality deterioration may not be improved
even with this function performed. In this case,
contact our service office or the distributor in your
region.
ON Turns on LED UV light.
OFF Turns off LED UV light while printing.
No
printing
Turns on LED UV light without performing printing.
This mode is useful when, for example, you did
not turn on LED UV light during printing but later
on decide to cure the ink. (This mode is usually
not set.)
• For safety, please refer to "UCJV Series Ionizer
Operation Manual".
• Displayed when the ionizer is connected.
3-11
3
2
2
2
Chapter3 Setup
5
Press the key several times
to end.
Setting of LT mode
1
Press the
(MENU)
key in
LOCAL.
2
Press to select "Setting" and
press the key.
3
Press
(>>)
.
4
Press to select "LT mode", and
press the key.
5
Press to select set value, and
press the key.
• Set Value: ON / OFF
6
Press the key several times
to end.
• Since UV light intensity adjustment is performed,
check the print performance (stickiness, odor etc.)
before using the LT mode.
• Effective condition
Ink type Ink set Resolution Pass Media
LUS170
4C
300×900 6 pass
PVC
Tarp a u l i n
600×600 8 pass
PVC
Tarp a u l i n
6C
300×900 12 pass
PVC
Tarp a u l i n
600×600 16 pass
PVC
Tarp a u l i n
3-12
Chapter 3 Machine Setting
About MACHINE SETUP MENU
The MACHINE SETUP MENU provides the various settings that allow you to use this machine comfortably.
The following items can be set in Machine settings.
MACHINE SETUP
AUTO POWER OFF
30min
TAKE-UP UNIT
>
OFF
MEDIA REMAIN
>><<
MACHINE SETUP
TIME
>
℃
UNIT/TEMP.
mm
UNIT/LENGTH
MEDIA DETECT
>
LANGAGE
>
>><<
Two
times
MACHINE SETUP
KEY BUZZER
EVENT MAIL
ON
CONFIRM. FEED
ON
SPACE FEED MODE
>
NETWORK
>
>
>><<
RESET
>
width:1340mm
REMOTEMENU
TEST PRINT
CLEANING
LOCAL
MENU
SETUP
>
>
MAINTENANCE
>
MACHINE SETUP
NOZZLE CHECK
>
>
INFORMATION
width:1340mm
REMOTEMENU
TEST PRINT
CLEANING
LOCAL
Press this to confirm a
setting, etc.
MACHINE SETUP MENUs at-a-glance
Press this to select
MACHINE SETUP MENU,
or to switch to the previous
screen.
Press this to switch to the
next screen.
Use these to select a
setting item.
3-13
3
2
2
2
Chapter 3 Machine Setting
MACHINE SETUP MENUs table
Function name Set value Default Meaning
AUTO Power-off ( P.3-14) NONE/10 to 600 min 30min
When no operation has been performed for the set
time, the power supply is automatically turned "OFF".
TAKE-UP UNIT
(P.3-14)
TAKE-UP UNIT ON/ OFF ON
For setting whether the take-up unit is used or not
used.
TAKE-UP SW Continuance/ Temporary
Continua
nce
Set the operation method when press the ON / OFF
button on the take-up unit.
MEDIA REMAIN ( P.3-15) ON/ OFF OFF You can control the remaining amount of media.
MEDIA DETECT
(P.3-15)
DETECTION
TYPE
AUTO/MANUAL AUTO Set the media detection method.
USE PR
NUMBER
QUERY
ON / OFF ON
Set whether or not to enter the number of the pinch
rollers you are using during media detection.
LANGUAGE( P.3-16)
English /Japanese/Chinese/
Turkish
English Displayed language is changed.
TIME ( P.3-16) +4 h to -20 h
Japan
time
Time difference is corrected.
UNIT/ TEMP. ( P.3-16) C (Celsius)/F (Fahrenheit) C A unit for displaying temperature is set.
UNIT/ LENGTH ( P.3-16) mm / inch mm A unit for displaying length and area is set.
KEY BUZZER ( P.3-16) ON / OFF ON A buzzer sound when keys are pressed is set.
CONFIRM. FEED ( P.3-17) ON / OFF ON
Set whether media feeding is performed for
checking the result of the test printing etc. or not.
SPACE FEED MODE ( P.3-17)
INTERMITTENT /
CONTINUOUS
INTERMI
TTENT
Change the feed mode of the margin included in the
image data.
NETWORK
(P.3-17)
Set the network.
Check IP Addr. The IP address currently used by this machine is displayed.
Check MAC
Addr.
The IP address currently used by this machine is displayed.
DHCP ON/ OFF
When it is ON, the IP address given by the DHCP
server is used.
AutoIP ON/ OFF
When it is ON, the IP address is determined by the
AutoIP protocol. However, DHCP is ON, DHCP has
priority.
IP Address
*1
Set the IP address used by this machine.
Default
Gateway
*1
Set the default gateway used by this machine.
DNS
Address
*1
Set the DNS server address used by this machine.
SubNet
Mask
*1
Set the digit number of the subnet mask used by this machine.
EVENT MAIL
Mail Delivery
(P.3-18)
ON / OFF OFF
Set whether you send/ do not send the e-mail when
the set event occurs.
Select
Event
(P.3-18)
Print Start
Event
ON / OFF OFF
Set whether you send/ do not send the e-mail at the
start of printing.
Print End
Event
ON / OFF OFF
Set whether you send/ do not send the e-mail at the
end of printing.
Plot Start
Event
ON / OFF OFF
Select whether an e-mail is sent or not when cutting
starts.
Plot End
Event
ON / OFF OFF
Select whether an e-mail is sent or not when cutting
ends.
Error Event ON / OFF OFF
Set whether you send/do not send the e-mail when
an error occurs.
Warning
Event
ON / OFF OFF
Set whether you send/do not send the e-mail when
a warning occurs.
Other Event ON / OFF OFF
Set whether you send/ do not send the e-mail when
an event other than the above occurs.
Mail Address
(P.3-19)
Set the e-mail address to
which you send the event
mail.
Alphanumeric characters and symbols (within 96 characters)
3-14
Chapter 3 Machine Setting
Setting of AUTO Power-off
When no operation has been performed for the set
time, the power supply is automatically turned "OFF".
1
In LOCAL mode, press
(MENU)
(twice
).
• The MACHINE SETUP MENU appears.
2
Press to select "AUTO POWER
OFF", and press the key.
3
Press to select a setting, and
press the key.
• Set Value: none, 10 to 600 min
4
Press the key several times to
end the setting.
Setting of Take-up Unit
Set the operation method when press the ON / OFF
button on the take-up unit.
1
In LOCAL mode, press
(MENU)
(twice
).
• The MACHINE SETUP MENU appears.
2
Press to select "TAKE-UP UNIT",
and press the key.
3
Press to select a setting, and
press the key.
• Set Value: ON/ OFF
4
Press to select
"TAKE-UP SW",
and press the key.
5
Press to select a setting,
and press the key.
• Set Value: Continuance/ Temporary
Continuance:Switching ON / OFF the winding
operation when pressing the switch
each time. (Take-up unit in
operation does not stop until press
again ON / OFF switch.)
Temporary: Do the winding operation only while
holding down the switch. (When
release the switch, winding
operation is stopped. )
6
Press the key several times to
end the setting.
EVENT MAIL
Message
Subject
(P.3-19)
Set the characters to write in
the subject of the event mail.
Alphanumeric characters and symbols (within 8 characters)
Server Setup
(P.3-19)
SMTP Address Set the SMTP server.
SMTP Port No. Set an SMTP port number.
SENDER ADDRESS Set the e-mail address to be used as the sender mail address.
Authentication
OFF
Set the SMTP server authentication method (SMTP
authentication).
POP before
SMTP
SMTP
Authentication
User Name
*2
Set the user name used for the authentication.
Password
*2
Set the password used for the authentication.
POP3 Address
*3
Set the POP server.
APOP
*3
Set ON/ OFF of APOP.
Transmit Test
(P.3-21)
Send the test e-mail.
RESET ( P.3-22) All setting values are returned to the status default.
*1. Settable when both of DHCP and AutoIP are [OFF]
*2. Settable only when Auth. is not OFF
*3. Settable only when Auth. is POP before SMTP
Function name Set value Default Meaning
3-15
3
2
2
2
Chapter 3 Machine Setting
Setting of the Display of Media Resid-
ual
Whether the screen displays the remaining amount of a
media is set.
1
In LOCAL mode, press
(MENU)
(twice
).
• The MACHINE SETUP MENU appears.
2
Press to select "MEDIA
REMAIN", and press the key.
3
Press to select a set value, and
press the key.
• Set Value: ON/OFF
4
Press the key.
5
Press the key several times to
end the setting.
Setting of Media Detection
Set the following two items in media detection settings.
1
Press
(MENU) (twice
)
.
• The MACHINE SETUP MENU appears.
2
Press to select "MEDIA
DETECT", and press the key.
3
Press to select AUTO/MANUAL.
4
Press the key.
5
Press to select "USE PR
NUMBER QUERY", and press the
key.
6
Press to select ON/OFF.
7
Press the key.
8
Press the key several times to
end the setting.
When the media
remaining amount
display is turned to
"ON"
The remaining amount of the media is
displayed during REMOTE mode.
(If you are using leaf media, the printed
length is displayed instead.)
When the media
remaining amount
display is turned to
"OFF"
The remaining amount of a media is not
displayed during REMOTE mode.
• The amount of a media that has been fed by the
printing and jog keys is reflected in the remaining
amount of a media.
• The length of the media (initial value of the remain-
ing amount) is entered when roll media is
detected. ( P.2-13)
• The setting configured here does not become
effective unless media detection is performed after
the setting has been complete.
Setting of Media
Detection
When loading the media, set whether
to detect the media width automatically
(AUTO) or decide the print (or cut)
range manually (MANUAL).
USE PR NUMBER
QUERY
Set whether or not to enter the number
of the pinch rollers you are using during
media detection.
• When using the media that cannot be detected by
the sensor, such as black cutting sheets, set the
media detection setting to "MANUAL".
When using the attached RIP software
(RasterLink)
• If you set the input of the number of pinch rollers
"OFF" in Step 8, the pinch roller pressure and the
number of use, that has been set in RasterLink,
may not match in some cases.
Set to "OFF" only when performing set of pinch
roller pressure ( P.2-13) in this machine.
3-16
Chapter 3 Machine Setting
Setting of a LANGUAGE
You can change the displayed language.
1
In LOCAL mode, press
(MENU)
(twice
).
• The MACHINE SETUP MENU appears.
2
Press to select "LANGUAGE",
and press the key.
3
Press to select a language, and
press the key.
4
Press the key several times to
end the setting.
Setting of Time
You can set time of your country (time difference).
1
In LOCAL mode, press
(MENU)
(twice
).
• The MACHINE SETUP MENU appears.
2
Press
(>>)
.
3
Press to select "TIME", and press
the key.
4
Press to enter time, and
press the key.
• Year/Month/Day/Time selecting: by the [][]
keys
• Year/Month/Day/Time inputting: by the [][]
keys
5
Press the key several times to
end the setting.
Setting of Unit (Temperature/ Length)
Units used by this machine are set.
1
In LOCAL mode, press
(MENU)
(twice
) .
• The MACHINE SETUP MENU appears.
2
Press
(>>)
.
3
Press to select "UNIT/TEMP." or
"UNIT/LENGTH", and press the
key.
4
Press to select a setting, and
press the key.
• Temperature setting: °C/°F
• Length setting: mm/inch
5
Press the key several times to
end the setting.
Setting of a KEY BUZZER
You can turn off the buzzer sound when pressing the key.
1
In LOCAL mode, press
(MENU)
(twice
) .
• The MACHINE SETUP MENU appears.
2
Press
(>>)
once.
3
Press to select "KEEP BUZZER",
and press the key.
4
Press to select a setting, and
press the key.
• Set Value: ON/ OFF
5
Press the key several times to
end the setting.
• -20 hours to +4 hours can be set.
• Some of the length information displayed for cut-
ting-related functions is always shown in units of
mm, regardless of the setting you specify here.
• When the key buzzer is set to "OFF", the buzzer
sound for errors, warnings, operation completion,
etc. cannot be shut off.
3-17
3
2
2
2
Chapter 3 Machine Setting
Setting of the CONFIRM. FEED
Set whether media feeding is performed for checking the
result of the test printing etc. or not.
1
In LOCAL mode, press
(MENU)
(twice
) .
• The MACHINE SETUP MENU appears.
2
Press
(>>)
once.
3
Press to select "CONFIRM.
FEED", and press the key.
4
Press to select a setting, and
press the key.
• Set Value: ON/ OFF
5
Press the key several times to
end the setting.
Setting of the SPACE FEED MODE
Change the feed mode of the margin included in the
image data (the space of no data to be printed). If print
data with much margin, set to “CONTINUOUS”, then the
print time can be shorten.
1
In LOCAL mode, press
(MENU)
(twice
).
• The MACHINE SETUP MENU appears.
2
Press
(>>)
twice.
3
Press to select "SPACE FEED
MODE", and press the key.
4
Press to select a setting, Press
the key.
INTERMITTENT: Perform intermittent feed
operation of the path division
unit
CONTINUOUS: Feed the no data part at a time
5
Press the key several times to
end the setting.
Setting of the Network
You can also perform network setting with "Network
Configurator", the tool to perform network setting of
Mimaki's product. To download the Network Configurator,
check " Driver / Utility" on the download page at Mimaki
Engineering (https://mimaki.com/download).
1
In LOCAL mode, press
(MENU)
(twice
).
• The MACHINE SETUP MENU appears.
2
Press
(>>)
twice.
3
Press to select "NETWORK", and
press the key.
4
Press to select "CHECK IP
ADDRESS", and press the key.
• The IP address currently used with this machine
is displayed.
• When you have finished the check, press the
[ENTER] key.
5
Press to select "CHECK MAC
ADDRESS", and press the key.
• The MAC address currently used with this
machine is displayed.
• When you have finished the check, press the
[ENTER] key.
6
Press to select "DHCP", and
press the key.
7
Press to select a setting, and
press the key.
• Set Value: ON/ OFF
• When it is ON, the IP address given by the DHCP
server is used.
8
Press to select "AutoIP", and
press the key.
9
Press to select a setting, and
press the key.
• Set Value: ON/ OFF
• When it is ON, the IP address is determined by
the AutoIP protocol. However, DHCP is ON,
DHCP has priority.
10
Press to select "IP ADDRESS",
and press the key.
• Both of DHCP and AutoIP is OFF, you can set IP
Address. For other than above, proceed to the
Step 14.
• After connecting with the network, it takes time
until the IP address is determined. If the IP
address has not been determined, "0.0.0.0" is
displayed.
3-18
Chapter 3 Machine Setting
11
Press to enter the IP address,
and press the key.
12
Press the key.
• The setting items DEFAULT GATEWAY, DNS
ADDRESS and SUBNET MASK will be displayed.
• Both of DHCP and AutoIP is OFF, you can set
DEFAULT GATEWAY/ DNS ADDRESS/ SUBNET
MASK. For other than above, proceed to the Step
14.
13
Press several times to select a setting
item, and press the key.
14
Press to select a setting,
and press the key.
15
Press the key several times to
end the setting.
Setting of Event Mail Function
Set the function to send e-mails to the set e-mail address
when events such as cutting start/ end and stop due to an
error.
You can also perform network setting with "Network
Configurator", the tool to perform network setting of
Mimaki's product. To download the Network Configurator,
check "Driver / Utility" on the download page at Mimaki
Engineering (https://mimaki.com/download).
Enable the event mail function
1
In LOCAL mode, press
(MENU)
(twice
).
• The MACHINE SETUP MENU appears.
2
Press
(>>)
twice.
3
Press to select "EVENT MAIL",
and press the key.
4
Press to select "MAIL
DELIVERY", and press the key.
5
Press to select "ON", and press
the key.
6
Press the key several times to
end the setting.
Set the event to send an event mail
1
In LOCAL mode, press
(MENU)
(twice
).
• The MACHINE SETUP MENU appears.
2
Press
(>>)
twice.
3
Press to select "EVENT MAIL",
and press the key.
4
Press to select "SELECT
EVENT", and press the key.
5
Press to select an event, and
press again to select ON/OFF.
press the key.
• Set Value: ON/OFF
• When the event set to ON occurs, e-mail is sent.
• When the [ENTER] key is pressed, the SETUP
screen for the next event is displayed.
6
Press the key several times to
end the setting.
• To reflect network setting, once turn off the power
supply and turn it on again.
Disclaimer
• The customer is responsible for the communication fee for
Internet communication such as e-mail notification.
• The notification by the event mail function may not be deliv-
ered due to Internet environment, failure of the machine/ the
power supply, etc. Mimaki has absolutely no responsibility for
any damages or loss resulting from non-delivery or delays.
• You can use event mail function by connecting
LAN to this machine. Please prepare for LAN
cable connection beforehand.
• Not compatible with SSL communication.
Event name Description
PRINT START
Sets sending/not sending of an e-mail
when printing starts.
PRINT END
Sets sending/not sending of an e-mail
when printing ends.
ERROR
Sets sending/not sending of an e-mail
when printing is stopped due to
occurrence of an error.
PLOT START
Select whether an e-mail is sent or not
when cutting starts
PLOT END
Select whether an e-mail is sent or not
when cutting ends
WARNING
Sets sending/not sending of an e-mail
when a warning occurs during printing.
etc.
Sets sending/not sending of an e-mail
when an event other than the above
occurs.
3-19
3
2
2
2
Chapter 3 Machine Setting
Set the e-mail address
1
In LOCAL mode, press
(MENU)
(twice
).
• The MACHINE SETUP MENU appears.
2
Press
(>>)
twice.
3
Press to select "EVENT MAIL",
and press the key.
4
Press to select "MAIL
ADDRESS", and press the key.
5
Press to set a mail
address, and press the key.
• Set the e-mail address to which you send the
event mail.
• Set it with alphanumeric characters and symbols
within 96 characters.
6
Press the key several times to
end the setting.
Set the subject
1
In LOCAL mode, press
(MENU)
(twice
).
• The MACHINE SETUP MENU appears.
2
Press
(>>)
twice.
3
Press to select "EVENT MAIL",
and press the key.
4
Press to select "MESSAGE
SUBJECT", and press the key.
5
Press to set a subject,
and press the key.
• Set the characters to write in the subject of the
event mail.
• Set it with alphanumeric characters and symbols
within 8 characters.
6
Press the key several times to
end the setting.
Set the server
1
In LOCAL mode, press
(MENU)
(twice
).
• The MACHINE SETUP MENU appears.
2
Press
(>>)
twice.
3
Press to select "EVENT MAIL",
and press the key.
4
Press to select "SERVER
SETUP", and press the key.
5
Press to select "SMTP
ADDRESS", and press the key.
6
Press to set an SMTP
address and press the key.
•Press [][][][] to set an SMTP address.
• Input the SMTP address name.
7
Press to select "SMTP PORT
No.", and press the key.
8
Press to set an SMTP port
number, and press the key.
• Set an SMTP port number.
9
Press to select a sender mail
address, and press the key.
10
Press to set a sender
mail address, and press the key.
•Press [][][][] to set the e-mail address to
be used as the sender mail address.
• Set it with alphanumeric characters and symbols
within 64 characters.
11
Press to select
"AUTHENTICATION", and press the
key.
12
Press to set an authentication
method, and press the key.
• Set the authentication method of the SMTP
server.
• When you select [OFF], proceed to the Step 20.
13
Press to select "USER NAME",
and press the key.
• Depending on your server, if you do not
set the e-mail address not supporting the
account, sending/ receiving e-mails may
be unavailable.
3-20
Chapter 3 Machine Setting
14
Press to set a user
name, and press the key.
•Press [][][][] to set the user name to be
used for authentication.
• Set it with alphanumeric characters and symbols
within 30 characters.
15
Press to select "PASSWORD",
and press the key.
16
Press to set a
password, and press the key.
•Press [][][][] to set the password to be
used for authentication.
• Set it with alphanumeric characters and symbols
within 15 characters.
• When you select [POP before SMTP] in the Step
11, set the items in the Step 16 to 19.
17
Press to select "POP3
ADDRESS", and press the key.
18
Press to set a POP3
address, and press the key.
•Press [][][][] to set a POP server.
• Input the POP server name.
19
Press to select "APOP", and
press the key.
20
Press to set ON/OFF, and press
the key.
21
Press the key several times to
end the setting.
• On the password setting screen, you can
only check the value that you are currently
inputting.
3-21
1
2
3
4
5
6
Chapter 3 Machine Setting
Send a test e-mail
1
In LOCAL mode, press
(MENU)
(twice
).
• The MACHINE SETUP MENU appears.
2
Press
(>>)
twice.
3
Press to select "EVENT MAIL",
and press the key.
4
Press
(>>)
.
• "TRANSMIT TEST" will be selected.
5
Press the key.
• The transmission result is displayed.
• If the transmission of a test e-mail ends in failure,
an error code is displayed.
Refer to the next page to solve the problem.
6
Press the key several times to
end the setting.
Transmi t Test
Fa i l ed : 12345
Error code
• The sent result of the test e-mail is the result of e-mail sending process performed by this machine to the e-mail server.
It does not indicate that the e-mail was received at the address.
• If the spam e-mail filter etc. has been set in the terminal in which e-mails are received, even if "Sending has been com-
pleted" is displayed, the e-mail cannot be received in some cases.
• If sending test e-mail has failed, the error code below is displayed.
• If the error cannot be solved, try again after a while.
• For the server setting etc., contact with the network administrator or the provider.
Error code Possible cause Remedy
10
Network connection error
• Check that the machine is connected to the network.
• Check that the machine IP address is correct.
• Check that the machine is in the environment where DNS is
available.
20
No valid e-mail address.
• Enter the correct e-mail address.
11003
11004
The POP server cannot be found.
Or cannot access DNS server.
• Check the POP server address.
• Check that the machine is in the environment where DNS is
available.
11021
Cannot connect with the POP server.
• Check the POP server setting.
• Check the firewall setting.
12010
An error returns from the POP server.
• Check the POP server setting.
13000
The POP authentication has failed.
• Check the user name and the password.
• Check the APOP setting.
• Confirm the authentication method.
10013
10014
The SMTP server cannot be found.
Or cannot access DNS server.
• Check the SMTP server address.
• Check that the machine is in the environment where DNS is
available.
10021
Cannot connect with the SMTP server.
• Check the SMTP server setting.
• Check the SMTP port number.
• Check the firewall setting.
10
11
20
21
An error returns from the SMTP
server.
Or, there was no response.
• Check the SMTP server setting.
• Cannot communicate with a server that requires mandatory
SSL communication.
• Check protocol filter settings.
12
It is invalid sender address.
• Check that the e-mail address supporting the account entered
in the user name/ the password is set in SENDER
ADDRESS.
13
The e-mail address cannot be found.
Or, it is invalid sender address.
• Check the e-mail address.
• Even if there is a mistake in the e-mail address, this error can-
not be detected in some cases.
• Check that the e-mail address supporting the account entered
in the user name/ the password is set in SENDER
ADDRESS.
22000
22008
SMTP authentication error
• Confirm the authentication method.
23
24
25
The SMTP authentication has failed.
• Check the user name and the password.
"" is the error code returned from the e-mail server.
3-22
Chapter 3 Machine Setting
Initializing the Settings
You can return the setting of "SETUP", "MAINTENANCE"
and "MACHINE SETUP" to the original status.
1
In LOCAL mode, press
(MENU)
(twice
).
• The MACHINE SETUP MENU appears.
2
Press
(<<)
.
3
Press to select "RESET", and
press the key.
4
Press the key.
• The already configured settings are initialized.
5
Press the key several times to
end the setting.
Chapter 3 NOZZLE CHECK
3-23
1
2
3
4
5
6
About NOZZLE CHECK MENU
Set operations concerning the nozzle missing detection function.
INFORMATION MENU table
Function name Set value Default Description
Printing Check
(P.3-25)
ON/OFF OFF
Set this when you want to conduct nozzle check at the
beginning of online printing.
(ON)
Check
Interval
LENGTH 0.1 to 50.0 m 30.0m Conducts nozzle check at each set length.
FILE 1 to 100 30 files Conducts nozzle check at each set number of files.
*1
*1. When the set length is reached during printing, nozzle check is conducted at the start of the next printing.
Action
CLEANING
OFF/ SOFT/
NORMAL/ HARD
SOFT Sets the type of cleaning performed during recovery work.
RETRY
COUNT
0 to 3 0 Repeats the retry operation for the set number of times.
NOZZLE RECOVERY ( P.3-
25)
ON/OFF OFF Set this when you want to conduct automatic nozzle recovery.
Judgment Condition ( P.3-25) 1 to 64 1
Sets how many missing nozzles are detected for "Nozzle
Missing" judgment to be made according to each color.
(Maximum 16 per 1 nozzle line)
*2
*2. Depending on the print conditions, nozzle recovery is not applied in some cases.
three
times
width:1340mm
REMOTEMENU
TEST PRINT
CLEANING
LOCAL
NOZZLE CHECK
Printing Check
OFF
OFF
NOZZLE RECOVERY
>
Judgement Condition
MENU
SETUP
>
>
MAINTENANCE
>
MACHINE SETTUP
NOZZLE CHECK
>
>
INFORMATION
>><<
width:1340mm
REMOTEMENU
TEST PRINT
CLEANING
LOCAL
Press this to confirm a
setting, etc.
NCU MENUs at-a-glance
Press this to select
INFORMATION MENU, or to
switch to the previous screen.
Press this to switch to the
next screen.
Use these to select a
setting item.
Chapter 3 NOZZLE CHECK
3-24
Printing Check Flow
Nozzle check is conducted according to the following flow at the start of printing.
Printing Operations at "Nozzle Missing" Judgment and Error Occurrence
When judged to be "Nozzle Missing" Printing is stopped.
When error occurs during nozzle check Printing is stopped and "Printing Check" is automatically
turned OFF. After recovering from the error, set "Printing
Check" once again.
• Turn the "Printing Check" setting ON to be enabled.
• Only perform RETRY COUNT and Printing Check settings when the settings are enabled.
1
Nozzle check Judgment
2
3
Recovery operation
Nozzle check Judgment
4
Retry Judgment
Printing Check Judgment
Detects missing nozzles.
If more missing nozzles than "Judgment
Condition" are detected after the nozzle check,
cleaning is performed and nozzle check is
conducted again.
5
Nozzle missing judgment
If more missing nozzles than "Judgment
Condition" are eventually detected, continued
printing will be deemed impossible and printing
will stop.
If more missing nozzles than "Judgment Condition"
are detected after the recovery operation, the
recovery operation is conducted again.
• If the "RETRY COUNT" setting is configured to 1 or more,
this becomes effective.
Nozzle recovery is automatically conducted
following nozzle check and recovery operation.
• Turn the "Printing Check" setting ON to be enabled.
3-25
1
2
3
4
5
6
Chapter 3 NOZZLE CHECK
Setting of the Printing Check
Select ON when you want to conduct nozzle check at the
start of online printing.
1
In LOCAL mode, press
(MENU)
(three times)
.
• The NOZZLE CHECK MENU appears.
2
Select "Printing Check", and then press
the key.
3
Press to select ON, and press the
key.
• The "Check Interval" setting screen will be
displayed.
• Select "OFF" to not set nozzle check. Proceed to
the Step 11.
4
Press the key.
5
Press to select a setting item,
and press the key.
• Select the nozzle check interval from "LENGTH"
or "FILE".
LENGTH: Nozzle check is conducted when the
printed length reaches the set length.
FILE: Nozzle check is conducted when the
number of printed files reaches the set
number.
6
Press to select a setting, and
press the key.
• The set value will differ according to the setting
selected in Step 5.
LENGTH: 0.1 to 30.0 m
FILE: 1 to 100 files
7
Press the key twice.
• The "Action" setting screen appears.
8
Press and then press the
key.
• "CLEANING TYPE" will be selected.
9
Press to select a cleaning time,
and press the key.
Setting value: OFF/SOFT/ NORMAL/ HARD
10
Press to select a retry count, and
press the key.
Setting value: 0 to 3
11
When you are finished setting "Printing
Check", press the key several
times.
Setting of the NOZZLE RECOVERY
Set this if you want to conduct automatic nozzle recovery
when nozzle missing is detected.
1
In LOCAL mode, press
(MENU)
(three times)
.
• The NOZZLE CHECK MENU appears.
2
Press to select "NOZZLE
RECOVERY", and press the key.
3
Press to select ON/OFF, and
press the key.
4
When you are finished setting "NOZZLE
RECOVERY", press the key
several times.
Setting of the Judgment Condition
Set the conditions for judging nozzle missing.
1
In LOCAL mode, press
(MENU)
(three times)
.
• The NOZZLE CHECK MENU appears.
2
Press to select "Judgment
Condition", and press the key.
3
Press the key to select a color.
4
Press to set the number of
nozzles for judgment, and press the
key.
5
When you are finished setting "Judgment
Condition", press the key
several times.
• The type of color changes depending on
the ink set.
Chapter 3 INFORMATION MENU
3-26
About INFORMATION MENU
The information of this machine can be confirmed.
The following items can be confirmed as machine information.
INFORMATION
USAGE
>
>
VERSION
>
LIST
>
>
INK REPLACE REPORT
ERROR HISTORY
four
times
width:1340mm
REMOTEMENU
TEST PRINT
CLEANING
LOCAL MENU
SETUP
>
>
MAINTENANCE
>
MACHINE SETUP
NOZZLE CHECK
>
>
INFORMATION
width:1340mm
REMOTEMENU
TEST PRINT
CLEANING
LOCAL
Press this to confirm a
setting, etc.
Press this to select
INFORMATION MENU, or
to switch to the previous
screen.
Press this to switch to the
next screen.
Use these to select a
setting item.
Chapter 3 INFORMATION MENU
3-27
1
2
3
4
5
6
INFORMATION MENU table
Displaying the Information
1
In LOCAL mode, press
(MENU) (four times)
.
• The information menu appears.
2
Press to select the information you want to view.
• Refer to the "INFORMATION MENU", and select the information to be displayed.
3
Press the key.
• If you selected [LIST] in step 2, the machine's settings will be printed.
4
When you are finished displaying information, press the key several times.
Item Meaning
USAGE
WIPING This displays how many wipings have been done.
WASTE TANK
This displays how much waste ink has built up in the waste ink tank, as a rough
percentage of the tank capacity.
PRINT LENGTH This displays the total length of the printing done to date.
PRINT AREA This displays the total area of the printing done to date.
USE TIME This displays the total time for which the machine has been used to date.
UV LAMP This displays the total time of UV irradiation.
VERSION This displays the version information of this machine.
LIST This allows you to print the settings of this machine.
Ink REPL. Report This prints ink history of this machine.
ERROR HISTORY
This displays a history of errors and warnings that have occurred to date.
When you press [][], the date of occurrence (year/month/day/hour/minute) and the
error/warning information are displayed alternately in the order of occurrence.
• To reset the use count of the wiper, press the [FUNC2] key. When you press the [ENTER] key, the number of wipings is
reset.
• You can reset the use counts by pressing the [FUNC1] or [FUNC2] key while “WIPING information” or “WASTE TANK
information” is displayed in USAGE as follows:
[FUNC2]: Resets the used count for "WIPING".
[FUNC1]: Resets the used count for "WASTE TANK".
3-28
Chapter 3 INFORMATION MENU
Displaying the machine's information
(LOCAL guidance)
1
Press the key in LOCAL
• The subsequent information is displayed every
time the [ENTER] key is pressed.
INK INFORMATION
Displays the ink type, ink remaining amount,
and ink errors.
WARNING INFORMATION
Displays all warnings that occur. This screen
is displayed if any warning occurs.
OTHER EVENT INFORMATION
Displays the Detected media width, Head
height, Machine serial number, firmware
version, command version, and LAN
connection status.
NOZZLE CHECK
Displays the number of defective nozzles for
each color that is detected by nozzle check.
2
Press the or key
several times to return to LOCAL
LUS170
1. 100% No error
2. 100% No error
3. 100% No error
4. 100% No error
LUS170
1. 100% No error
2. 100% No error
3. 100% No error
4. 0% INK END
WARNING EVENT
!MEDIA UNDETECTED
INFORMATION
MEDIA WIDTH 1610mm
HEAD HEIGHT LOW
SERIAL No. xxxxxxxx
UCJV300-160 V1.3.0
MRL-V V1.30
INFORMATION
LAN Status 1000Mbyte
NOZZLE CHECK
C0
M0
Y0
K0
This chapter
describes about cutting function.
Cut Out Data with Register Mark ................... 4-2
The Flow of Cutting out the Registered
Data............................................................. 4-2
Enter register mark detection mode ............ 4-2
Precautions for inputting data with register
marks .......................................................... 4-2
Settings for Detecting register marks .......... 4-5
ID Cut .......................................................... 4-6
About CUTTING MENU ...............................4-11
Cutting MENU table .................................. 4-12
Setting the CUT MODE................................4-13
Perform Multiple Cuttings (Copy function) ...4-13
SETUP SUB MENU .....................................4-14
Make the media without uncut area
(OVER CUT function) ................................ 4-15
Other SETUP SUB MENU......................... 4-15
SETUP RESET.......................................... 4-16
Maintenance Function..................................4-17
Maintenance of Mark Sensor..................... 4-17
Perform SAMPLE CUT to Find out the
Cause of Cutting Error............................... 4-19
Cutting a Medium into Multiple Pieces with
a Certain Length ........................................ 4-19
Cutting out Data without Register Marks
(PC ORIGIN OFFSET) .............................. 4-20
Setting the Scale Adjust............................. 4-21
Chapter 4
Cutting Function
4-2
Chapter 4 Cutting Function
Cut Out Data with Reg-
ister Mark
Create register marks on an output image that you want to
make a seal, and the machine detects them to cut them
out.
There are the following three types of register marks.
The Flow of Cutting out the Regis-
tered Data
Enter register mark detection mode
1
Press (TEST CUT) in LOCAL.
2
Press to select “MARK
DETECTION”, and press the key.
• The machine enters register mark detection
mode.
Precautions for inputting data with
register marks
There are some limitations to preparing data with register
marks.
In order to make full use of this function, read the following
instructions carefully to correctly prepare data with
register marks.
Size of register marks
In addition, for the length of one the side of the register
mark compared to the data, refer to "Size of and distance
between register marks" ( P.4-4).
Make sure that the line width of the register mark is larger
than 1/10 the length of register mark.
• Use the TP4 when performing trapezium compen-
sation to correct the uneven sheet feeding rate
caused by the difference in the diameter between
the right and left grit rollers. If the trapezium com-
pensation is to be omitted, there is no need to set
the TP4. In that case, however, cutting distortion
will increase.
register mark: Type 1
register mark: Type 2
register mark: Zero Margin
Add register marks to the
image that you want to make a
seal, and print it on a sheet.
Set the printed sheet in the
machine.
Send the cut-target image from
the computer for cutting.
There are some
conditions for creating
register marks.
See pages P.4-2
through P.4-4.
Refer to P.2-4 to set
the sheet.
In case it is not
successfully cut,
• Check the register
mark sensor.
• Check the position
of the Light Pointer.
• When register detection is set to OFF, the machine
doesn’t enter register mark detection mode.
(P.4-5)
• While various functions are being set, data entry
may be canceled and the machine may go back to
the previous setting item.
• The register mark described here is intended to
detect the sheet inclination and the lengths along
the X and Y axes. It is not a mark for trimming.
0.5~2.0mm
4~40mm
Chapter 4 Cutting Function
4-3
4
2
2
Area where register marks and designs
can be arranged
The placeable range for the register mark and the image
is as follows.
• Set the start position of the register mark at 100 mm or more
from the media front end.
• Set the end position of the register mark at 110 mm or more
from the media rear end.
• When the data is copied by using RasterLink, make sure to
leave a space of 210 mm or larger at the tail end of the sheet.
Mark Shape:
Type 1
Mark Shape: Type 2
No-plotting area around the register
marks
The area around a register mark (from the mark origin to
the mark size area) is a non-plotting area. There must be
no data plotted and no stains in this area; otherwise, the
origin may be detected incorrectly or a mark read error
could occur.
Incorrect detection example 1
When there is a line outside the register marks
Incorrect detection example 2
When the distance between register marks (TP2 and TP1
or TP4 and TP2) is smaller than the mark length (for Type
2)
Area where cutting is permitted
Available cutting area
110mm or 210mm more
Between 50mm to
3000 mm
20 mm or more
50 mm or more
5mm or more5mm or more
Rear
Front
Area where cutting is permitted
Available cutting area
110mm or 210mm +
(register mark length / 2) or
more
Between 50mm to
3000 mm
50 mm or more
20 mm+ (register mark
length / 2) or more
5mm or more5mm or more
Rear
Front
• If the mark origin is detected incorrectly, cutting will
be performed in the wrong area.
Mark length
register mark: Type 1
No-plotting area
Mark
Mark Origin
register mark: Type 2
Mark length
No-plotting area
No-plotting
area
Mark Origin
Mark origin detected
incorrectly
Space larger
than the mark
length
Space larger
than the mark
length
4-4
Chapter 4 Cutting Function
Size of and distance between register
marks
The size (Y) of a register mark suited for the distance (X)
between the marks is as shown below.
If the mark size (Y) is too small relative to the distance (X),
the marks may not be detected correctly. Be sure to
prepare appropriately sized register marks.
Units (mm)
Distance between register marks for
copied designs
For Type 1 register marks, the distance between the
marks must be no shorter than two times the mark length
and no longer than 1000 mm. For Type 2 register marks,
the distance between the marks must be no shorter than
the mark length and no longer than 1000 mm.
Recommended size of the area defined
with a set of four register marks
It is recommended that the size of the area defined with a
set of four register marks is in the range of A4 size (210
mm x 297 mm) to A3 size (297 mm x 420 mm).
When printing register marks
continuously
When printing register marks continuously, set one side of
the register mark to 8 mm. If 8 mm or shorter register
marks are detected continuously, glitches might occur in
the machine.
Mark color
Marks must be printed in black against a white
background.
register marks will not be detected correctly if the
background is not white or the marks are not black.
Blurred marks
If a mark is blurred, the mark origin might be detected
incorrectly, thus resulting in deviated cutting.
X 200 max. 500 max. 1000 max. 2000 max. 2001 min.
Y 5 to 40 8 to 40 15 to 40 25 to 40 35 to 40
register mark: Type 1
Distance between register
marks =
Between mark length (X)
x2 and 1000 mm
Distance between
register marks =
Between mark length
(X) and 1000 mm
register mark: Type 2
A4 size (210mm
x 297mm) to A3
size (297mm x
420mm)
8 mm or more
Chapter 4 Cutting Function
4-5
4
2
2
Notes for combined of printing & cutting
When using the attached application software to perform
the combined operation of print & cut, be careful with the
following:
(1) When performing combined of printing & cutting
with the attached application software to this
machine (RasterLink / FineCut), the following set
contents will follow the instruction of the
software side. Note that the contents set in this
machine will be invalid.
• Mark length
• Mark shape
(2) For the combined operation of print & cut
without register marks, you can perform print &
cut using the take-up device, but it might be
misaligned.
Settings for Detecting register marks
When you want to cut the data with register marks, you
must set the following without fail.
1
Press the
(MENU) (>>)
key in LOCAL.
• The cutting MENU will be displayed.
2
Press to select “MARK
DETECTION”, and press the key.
3
Press to select the setting item,
and press the key.
• Refer to "Setting items for detecting register
marks" ( P.4-5).
4
Press to select the “CUT MODE”,
and then press the key.
• Setting value: Standard, High Speed, High Quality
5
Press the key several times to
end the setting.
Setting items for detecting register
marks
There are the following seven setting items for register
mark detection.
(1) MARK DETECT
(2) FORM
Select either one of the following types of register
marks.
(3) SIZE
Set the length of one side of the
register mark.
Setting value: 5~40mm
• Other than the above conditions, there is a possi-
bility of the cutting line being misaligned depend-
ing on the printing data size. Therefore, it is also
recommended to perform the operation with data
which has register marks for combined printing &
cutting.
• You can set the register mark detection without
pressing [FUNC1] (MENU) from LOCAL.
(1) Press the [SEL] key twice in LOCAL to
display "TEST CUT".
(2) Press [FUNC2] (TEST CUT).
(3) Press [ ▲ ][ ▼ ] to select [MARK DETECT]
(4) Press the [ENTER] key.
• After this, go to step 3 of "Settings for Detecting
register marks".
Setting Value Description
ON/OFF
The register marks can be detected if this is set
to ON.
• Use the copy function of cutting software, in the
case of continuous cut, select the register mark of
Zero margin, and you will be able to place no mar-
gin between the register marks.
To eliminate the margin between the register
marks to cut efficiently, we recommend using the
"Zero Margin" mark shape.
Setting Value Description
Type 1
Type 2
Zero margin
Length of one
4-6
Chapter 4 Cutting Function
(4) OFFSET X / OFFSET Y
Generally the origin will be set at the position shown
below.
However, depending on your application and the work
to be cut, the cutting position may be misaligned in the
same direction. In this case, the location of the origin
can be corrected.
(5) DETECT END KEY START
(6) SENSOR LEVEL
(7) MARK FILL UP
ID Cut
It is a function that can cut automatically according to the
ID information simply by detecting the ID-contained data.
It is not necessary to output the cut data again after
printing the data.
For details, refer to "ID Cut Guide".
Print data
If you cut the media rotated by 90, 180, or 270 degrees,
set the media margins to the following values at rotated
conditions.
• Front end : 20 mm or more
• Left and right ends : 15 mm or more
• Rear end : 110 mm or more
210 mm or more (if a register mark copy
*1
has been made)
*1: The data whose register mark copy has been made more than one
by RasterLink.
1
Set the media.
2
Check if the print start position (the origin )
is set at 110 mm or more from the media
front end, and 15 mm or more from the
media right end.
• Make sure that the width of the media is equal to
or larger than [Entire image width (including the
register mark) + right 15 mm + left 15 mm].
• If any of the front / left / right margin is insufficient,
the media end may be mistaken as the register
mark, which may cause the register mark
detection to start earlier.
(1) Press the jog key in the local state. Move the
luminous point of the LED pointer so that the
print start position is 100 mm or more from
the media front end, and 15 mm or more
from the right end.
(2) Press the [ENTER] key.
• The print start position is changed.
3
Check if the print end position is set at 110
mm or 210 mm (if the mark copy has been
made) from the media rear end.
• Make sure that the length of the media is equal to
or larger than [Entire image length (including the
register mark) + 100 mm + 110 mm or 210 mm(if
the mark copy has been made)].
Setting Value Description
± 15.00 mm
Use this to shift the origin position in the X
direction or Y direction.
• If the origin is located out of the available cutting
area, “ERR37 MARK ORG” will be displayed. In
this case, write the register marks in the area
closer to the center of the media.
Setting Value Description
ON/OFF
If this is ON, you will be able to detect crop
marks with the [END] key.
• When set to ON, the cutter head moves when the
power is turned off.
Setting Value Description
1 to 7
The bigger the numerical value is, the higher
the sensitivity of the register mark sensor
becomes. If register marks are not detected,
increase the sensitivity. If register marks are
detected by mistake, lower the sensitivity.
Generally, use it with the setting value of “4”.
Setting Value Description
ON/OFF
Make the setting to “ON” when using the “Fill
around the register mark” function of the RIP
software to detect the printed register mark.
Use a register mark size of 10 mm or more
when filling in around the register mark.
Mark: Type 1 Mark: Type 2
Origin
Origin
Plus Y
direction
Plus X directionPlus X direction
Plus Y
direction
Chapter 4 Cutting Function
4-7
4
2
2
4
In the local state, press the
( key ).
• This switches to the remote state.
5
Print data.
Mark Shape: Type 1
(Outer register mark)]
Mark Shape: Type 2
(Inner register mark)]
Patterns placeable range
Effective cut range
110 or 210 mm or more
70mm to 3000 mm
110 mm or more
70 mm or more
15 mm or more15 mm or more
Rear
Front
Patterns placeable range
Effective cut range
100 mm or 210 mm +
(half the length of the
register mark) or more
70mm + register
mark to 3000mm
70 mm or more
110 mm + (half the length
of the register mark) or
more
15 mm or more15 mm or more
Rear
Front
Chapter 4 Cutting Function
4-8
Setting of Detecting the Registration Marks
1
Press the (MENU) (>>) keys in LOCAL
2
Press to select “CUTTING”, and then press the key
3
Select “MARK DETECT”, and then press the key.
4
Press the key.
5
Press to make settings for the following items, and then press the key
Item Value Set value
DETECT AREA -
You can configure various settings for the register mark
operation.
SCAN DIR.
DEFAULT,
0 cm,
5 cm to the
machine width
Configure the detection width for the scanning direction. The
register mark is detected while scanning is performed
bidirectionally at the set detection width.
• DEFAULT: The register mark is detected at half the
media width.
• 0 cm: The register mark is detected only in
the feed (media feed) direction.
• 5 cm to the machine width: The register mark is detected with the
set width.
FEED DIR. 10 cm to 50 cm Set the detection distance in the feed (media feed) direction.
OFFSET X 0 cm to 100 cm Set the Detection start position after the ID Cut.
About [DETECT AREA].
• SCAN DIRECTION, FEED DIRECTION, OFFSET X are as following.
FEED
DIRECTION
Detection start position
SCAN DEIRECTION
OFFSET X
Scan path for Auto MARK DETECT
The ID Cut end
position for the
data
immediately
before
[Front]
[Rear]
4-9
Chapter 4 Cutting Function
4
2
2
ID Cutting
1
Set the printed media.
• Roll media: 「Setting a Roll Media」(P.2-11)
• Leaf media:「Setting Leaf Media」(P.2-15)
2
Detect the register mark
(1) Press the in LOCAL.
(2) Press [] []key to select [MARK DETECTION], and press the key.
• This switches to the mark detection mode.
(3) Press the [] [] [] [] keys to move the luminous point of the LED pointer to the center of the register
mark.
(4) Press the key.
• The register mark is detected.
• The printer is in remote mode.
3
The cut data is automatically received and cut.
• After the ID Cut, the next register mark will be automatically detected.
4
If you have multiple pieces of data, [Auto detection -> ID Cut ] is repeated until all pieces of data
are finished.
• If you print multiple register marks and perform ID Cut, set the same shape and size for all the register marks. If any of the
register marks has a different size or shape, the ID Cut is canceled.
• You can set the area for MARK DETECT in the Mark detect area settings.
Mark Shape: Type 1
Mark Shape: Type 2
Because the shape of the register mark is different,
an error occurs and the ID Cut is canceled.
Mark Shape: Type2
Cutting direction
Mark Shape: Type1
Mark Shape: Type1
Chapter 4 Cutting Function
4-10
• When there are multiple types of data, the register mark's auto detection direction is set to FEED (media feed)
direction.
• You cannot detect register marks automatically in the scan direction. When the data is laid out in the scan direction, detect
the register marks manually.
Scan path for
Manual MARK
DETECT
Feed (media feed)
direction.
Scanning direction
3. The next register
mark will be
automatically
detected.
1. Detects the register
marks manually.
2. Use COPY to
perform cutting
automatically.
4. Copied data, so it
is cut automatically.
The register mark is not
automatically detected. Detect
the register mark manually.
Feed (media feed) direction.
Scanning direction
1. Detects the register
marks manually.
2. Use COPY to perform
cutting automatically.
3. Registration marks cannot be
detected because there is no data.
Scan path for Manual MARK
DETECT
4-11
Chapter 4 Cutting Function
4
2
2
About CUTTING MENU
In the cutting menu, you can configure a variety of settings regarding cutting functions.
MENU
Cutting
>
width:1340mm
REMOTEMENU
TEST PRINT
CLEANING
LOCAL
>><<
Cutting
TP DETECT
>
CUT MODE
NORMAL
>
COPY
>
TOOL CHANGE
>
SETUP SUB MENU
>><<
Cutting
MAINTENANCE
>
>><<
width:1340mm
REMOTEMENU
TEST PRINT
CLEANING
LOCAL
Press this to confirm a
setting, etc..
Cutting MENUs at-a-glance
Press this to select SETUP
MENU, or to switch to the
previous screen.
Press this to switch to the
next screen.
Use these to select a setting
item.
Chapter 4 Cutting Function
4-12
Cutting MENU table
• For each setting item below, you can set it so that the machine may operate according to the value specified when you
printed from your RIP software in the connected host PC.
• When you operate the machine according to the contents specified with the RIP software, set each item to “Host” when
registering this machine type. When you set it other than “Host”, the machine operates according to the machine setting.
• For the specifying method with the RIP software, refer to the operation manual of the RIP software.
Function name Description
TP DETECT ( P.4-5)
MARK DETECT
When you cut the data with register marks, you must set
without fail.
FORM
SIZE
OFFSET X
OFFSET Y
DETECT END KEY START
SENSOR LEVEL
MARK FILL UP
DETECT AREA
CUT MODE ( P.4-13) This is to set the cutting quality.
COPY ( P.4-13)
This function performs cutting for the received data on two or
more sheets.
Tool Change( P.2-24, P.2-24) You select this function when you replace the tool.
SETUP SUB MENU
UP SPEED ( P.4-15)
This is to set the speed of sheet and carriage movement when
the tool is up.
Setting the speed lower makes the sheet misalignment
reduced at the time of long sheet feeding.
DUMMY CUT ( P.4-15)
The blade edge is made to turn to a specific direction before
starting cutting, which allows dummy cutting.
SHEET TYPE ( P.4-15) This is to set the types of sheet according to the sheet you use.
ADJ PRS OFFSET ( P.4-15)
This is used to expand the value in such a case as when the
beginning and end part of the cut are left cut.
Vacuum fan
Set the strength of the vacuum fan at cutting.
Please use "weak" normally.
OVER CUT ( P.4-15)
By over lapping the start point and the end point arbitrarily, you
can make the media without uncut area.
Curve mode
If the cut line bends, set it to "SLOW".
Although the cutting speed decreases, it is possible to prevent
a bent.
RESET SETTING ( P.4-16) Reset the setting values to the initial state.
MAINTENANCE
MARK sensor ( P.4-17) This is for adjusting the register mark sensor.
SAMPLE CUT ( P.4-19)
In case that normal data cutting cannot be performed etc.,
perform cutting with the sample stored in this machine to find
out the cause of cutting error.
AUTO MEDIA CUT( P.4-19) Cutting a medium into multiple pieces with a certain length.
SCALE ADJUST( P.4-21)
When printing and cutting without register marks, adjustment is
performed if the misalignment in the scanning direction occurs
between the left and right edges of the media.
Chapter 4 Cutting Function
4-13
4
2
2
Setting the CUT MODE
This is to set the cutting quality.
There are the following three types for cut mode.
1
Press the
(MENU) (>>)
key in LOCAL.
• The cutting MENU will be displayed.
2
Press to select the "CUT MODE",
and press the key.
3
Press to select the setting item,
and press the key.
• Setting value: Standard, High Speed, High Quality
4
Press the key several times to
end the setting.
Perform Multiple Cut-
tings (Copy function)
This function performs cutting for the received data on two
or more sheets. (Max. 999 sheets)
• You can perform the multiple-sheet cutting for the data saved
in the reception buffer of this machine.
• The receiving buffer can save only one data.
• When a new data is received, the data that has been saved is
overwritten by it.
(You cannot perform multiple cuttings by specifying the data
that was received before.)
1
Press the
(MENU) (>>)
key in LOCAL.
• The cutting MENU will be displayed.
2
Press to select "COPY", and
press the key.
3
Press to select the number of
cuttings (1 to 999), and press the
key.
4
Press to select the interval of
figures to be cut (0 to 30 mm), and press
the key.
Setting Value Description
Standard This is a regular cutting mode.
High speed
This is used to perform cutting in a short time.
(It is not appropriate for heavy media.)
High quality
This is a cutting mode used to give priority to
cutting quality.
• Select “QUALITY” in any of the following cases:
• Characters whose sizes are 10 mm or less are to
be cut
• Picture patterns or characters that have many
sharp corners are to be cut
• Minute cutting is to be performed However, the
edges of finished patterns may be rugged if the
data sent from the host computer is too compli-
cated. In such a case, select “HIGHspd” for
smooth finish.
• With “QUALITY”, the cutting speed is limited to 20
cm/s.
• If the multiple sheet cutting is executed immedi-
ately after cutting in the remote mode, cutting
(plotting) will be overlapped. To avoid this trouble,
be sure to set the new origin.
• While the machine is executing the multiple sheet
cutting, it ignores data sent from the computer.
• To send two or more pieces of data from the com-
puter to the machine, the data has to be sent while
providing an interval of 5 seconds or more
between any two pieces of data. If two pieces of
data are sent from the computer to the machine
within 5 seconds, the two pieces of data will be
subjected to the multiple sheet cutting. The
machine performs cutting for divided cutting data
by the specified number of sheets without dividing
the data. If any error is displayed, refer to “Error
messages” ( P.6-7).
• If there is the origin renewal command in cutting
data, you cannot perform copy function.
When you use FineCut, the default value of Origin
Renewal is “ON”. If you perform [No. COPIES],
uncheck the checkbox. (Refer to FineCut OPERA-
TION MANUAL Chapter5 “Setting Head Position
after Plotting”)
COPY
INTERVAL
Origin position at the
end of multiple cuts.
Origin position when
performing multiple
cuts
Feed direction
Scan direction
4-14
Chapter 4 Cutting Function
SETUP SUB MENU
The SETUP SUB MENU offer convenient functions that
you can use in cutting.
The following items are available in the sub menus.
Function name Description
UP SPEED
(P.4-15)
This is to set the speed of sheet and
carriage movement when the tool is up.
Setting the speed lower makes the sheet
misalignment reduced at the time of long
sheet feeding.
DUMMY CUT
(P.4-15)
The blade edge is made to turn to a
specific direction before starting cutting,
which allows dummy cutting.
SHEET TYPE
(P.4-15)
Set this according to the weight of the
media you have set. When this is set to
"HEAVY", the maximum cutting speed is
set low.
ADJ PRS OFFSET
(P.4-15)
This is used to expand the value in such
a case as when the beginning and end
part of the cut are left cut.
Vacuum fan
Set the strength of the vacuum fan at
cutting.
Please use "weak" normally.
OVER CUT
(P.4-15)
By over lapping the start point and the
end point arbitrarily, you can make the
media without uncut area.
Curve mode
If the cut line bends, set it to "SLOW".
Although the cutting speed decreases, it
is possible to prevent a bent.
SETUP RESET
(P.4-16)
Reset the setting values to the initial
state.
Chapter 4 Cutting Function
4-15
4
2
2
Make the media without uncut area (OVER CUT function)
By over lapping the start point and the end point arbitrarily, you can make
the media without uncut area.
Specify the OVER CUT function (valid/invalid) and the length of the
OVER CUT. If the length of the OVER CUT is set, when cut starts, cut will
be performed from the position to the front by the specified length and the
tool will move up going too far at the end.
Additionally, you can enable the corner cut function to perform overcutting
of corners other than the start and end points.
1
Press the
(MENU) (>>)
key in LOCAL.
• The cutting MENU will be displayed.
2
Press to select the "SETUP SUB
MENU", and press the key.
3
Press to select "OVER CUT", and
press the key.
4
Press to select the setting item
and press the key.
• Set value: OFF/ 0.1 to 1.0 m (in 0.1 mm
increment)
• When you press the [ENTER] key, the setting for
“CORNER CUT” setting will be displayed.
5
Press to select ON/OFF, and
press the key.
6
Press the key several times to
end the setting.
Other SETUP SUB MENU
How to set other convenient functions is explained below. Change the settings according to the types of use.
1
Press the
(MENU) (>>)
key in LOCAL.
• The cutting MENU will be displayed.
2
Press to select the "SETUP SUB
MENU", and press the key.
3
Press several times, and select an
item to set.
• See "List of Settings" to select one.
4
and press the key.
5
Press to select a set value.
• See "List of Settings" to select one.
6
and press the key.
7
Press the key several times to
end the setting.
List of Settings
The setting is as follows when purchasing:
• Setting proper OVER CUT
can reduce uncut area of
start and end point of a
media easy to bend. If too
large value is set, the result
may have a rupture.
OVER CUT : OFF
OVER CUT : 1.0mm
OVER CUT
part
Corner cut
part
• The setting values are kept in memory even when
the power is turned off.
Function name Description Setting Value
*1
Setting the UP SPEED
This is to set the speed of sheet and carriage movement when the tool is up.
Setting the speed lower makes the sheet misalignment reduced at the
time of long sheet feeding.
5,10,20,30, AUTO (cm/s)
Setting the DUMMY CUT ( P.4-16) The operation of dummy cutting is set. OFF / ON
SHEET TYPE
*2
This is to set the types of sheet according to the sheet you use. Standard / Heavy
Setting the ADJ-PRS OFFSET
(P.4-16)
This is used to expand the value in such a case as when the
beginning and end part of the cut are left cut.
0 ~ 3
~ 7
Curve mode
If the cut line bends, set it to "SLOW".
Although the cutting speed decreases, it is possible to prevent a bent.
SLOW / FAST
*1. The underlined values are set at purchase.
*2. If you set “Heavy” for the media setting, the cutting speed will be limited to 20 cm/s.
4-16
Chapter 4 Cutting Function
About Dummy Cutting
This is performed after detecting the media or when
changing the tool type in front of the pinch roller which is
near the both ends from the position of the cutter unit is
placed presently.
Set the dummy cutting function to OFF when you do not
want to damage the media in cutting cut-out characters.
About Pressure Correction Offset (ADJ-
PRS OFFSET)
Some part of a media is left uncut because the pressure
applied when the cutter blade touches the media is weak.
When an optional eccentric blade is used, some part of a
media to be cut with the blade's angle being 120 degrees
or less may be left uncut.
This is because the corners are cut with a low pressure
(about 5 g) automatically applied so that the media does
not turn up. Some part of a media may be left uncut
because the blade edge does not rotate smoothly in its
moving direction with the cutting pressure being low. In
such a case, configure the setting for the pressure to be
increased when the corners are cut.
SETUP RESET
Reset the setting values to the initial state.
1
Press the
(MENU) (>>)
key in LOCAL.
• The cutting MENU will be displayed.
2
Press to select the "SETUP SUB
MENU", and press the key.
3
Press
(>>)
, and press twice.
• “SETUP RESET” will be selected.
4
Press the key.
• The already configured settings are initialized.
5
Press the key several times to
end the setting.
• When “PEN” is selected for the tool condition, the
dummy cutting cannot be set.
• The default of the dummy cutting function is ON.
When you have set the dummy cutting function to
OFF, perform test cutting ( P.2-28) to adjust the
cutter blade orientation before cutting.
Pinch roller
Dummy cut
Chapter 4 Cutting Function
4-17
4
2
2
Maintenance Function
This section gathers together the functions for checking/
adjusting the cutting accuracy when cutting does not go
normally.
Maintenance of Mark Sensor
If cutting does not go normally, check the items below.
In register mark sensor maintenance, you can carry out
maintenance of the following items.
Check the sensor for the register mark
detection
Prepare the media on which the register mark is printed.
1
Press the
(MENU) (>>)
key.
• The cutting MENU will be displayed.
2
Press
(>>)
.
3
Press to select
"MAINTENANCE", and press the
key.
4
Press to select "MARK
SENSOR", and press the key.
5
Press to select "SENSOR
CHECK", and press the key.
6
Press to move LED
pointer to register mark detection position
• Perform register mark detection at a position 1mm
or more away from the register mark.
7
Select the length of the register mark and
shape of the register mark detection.
• For details on setting the [SIZE] and [FORM],
refer to the ”Settings for Detecting register
marks”. ( P.4-5)
8
Press the to perform register
mark detection.
( "Detect operation")
Function name Description
MARK sensor
(P.4-17)
This is for adjusting the register mark
sensor.
SAMPLE CUT
(P.4-19)
In case that normal data cutting
cannot be performed etc., perform
cutting with the sample stored in this
machine to find out the cause of
cutting error.
AUTO MEDIA CUT
(P.4-19)
Cutting a medium into multiple pieces
with a certain length.
PC ORIGIN OFFSET
(P.4-20)
Adjust the misalignment between the
print origin and the cutting origin.
SCALE ADJUST
(P.4-20)
When printing and cutting without
register marks, adjustment is
performed if the misalignment in the
scanning direction occurs between the
left and right edges of the media.
Item Description
SENSOR CHECK
(P.4-17)
checking the sensor for the register
mark detection.
POINTER OFFSET
(P.4-18)
If the cutter unit fails to recognize any
register mark properly, the possible
cause is an error in the positional
relationship between the mark sensor
and the light pointer. In this case,
correct the position of the light pointer.
• If you move the head and sheet manually, you
cannot perform the right response check. Be sure
to perform it via the following operations.
• For conditions of already printed register marks,
refer to "Precautions for inputting data with register
marks" ( P.4-2).
• The setting values are kept in memory even when
the power is turned off.
• The settings performed here for shape of the
register mark and length of the register mark are
reflected in the settings of “MARK DETECT”.
( P.4-5)
• The detection speed selected here will be used in
the register mark detection operations that are
executed from here on.
• The pointer offset value selected by this operation
is not initialized by SETUP RESET operation.
1mm or more
Mark detection
position
Mark shape
: Type 1
Mark shape
: Type 2
4-18
Chapter 4 Cutting Function
Detect operation
1
Scan in the X direction (plus direction) to
detect the line.
• The buzzer sounds when the line is detected. If
the line is not detected, the buzzer does not
sound.
2
Scan in the X direction (minus direction) to
detect the line.
3
Scan in the Y direction (plus direction) to
detect the line.
4
Scan in the Y direction (minus direction) to
detect the line.
5
Follow the Steps 1 to 4, and confirm if the
buzzer sounds 4 times.
• When the detection behavior completes
successfully, the buzzer sounds 4 times.
• If the buzzer does not sound, contact our service
desk or your local distributor for service.
Correct the light pointer position
If the machine fails to recognize any register mark
properly, the possible cause is an error in the positional
relationship between the MARK sensor and the light
pointer. In this case, adjust the position of the light pointer.
1
Install a pen in the tool holder
2
Load the copy paper.
3
Press the
(MENU) (>>)
key in LOCAL.
• The cutting MENU will be displayed.
4
Press
(>>)
.
5
Press to select
"MAINTENANCE", and press the
key.
6
Press to select "MARK
SENSOR", and press the key.
7
Press to select "POINTER OFS",
8
Press the key.
• A 10 mm by 10 mm cross pattern will be cut.
• The light pointer turns on and moves to the center
of the cross pattern.
9
Press to adjust the light
pointer position so that the center of the
light pointer is in alignment with the center
of the cross pattern.
10
Press the key.
• The screen returns to LOCAL.
Minus
direction
Plus direction
Mark length
Plus
direction
Minus
direction
Scan in the Y direction
Scan in the X direction
• The value registered in the [POINTER OFS] is not
initialized even by executing the "SETUP RESET"
( P.4-16).
Chapter 4 Cutting Function
4-19
4
2
2
Perform SAMPLE CUT to Find out the
Cause of Cutting Error.
In case that normal data cutting cannot be performed etc.,
perform cutting with the sample stored in this machine to
find out the cause of cutting error.
1
Press the
(MENU) (>>)
key in LOCAL.
• The cutting MENU will be displayed.
2
Press
(>>)
.
3
Press to select
"MAINTENANCE", and press the
key.
4
Press to select the "SAMPLE
CUT", and press the key.
5
Press to select the SAMPLE
DATA to be cut.
• There are two types of samples, “Cut” and “Logo.”
If you select “Cut,” proceed to Step 8.
6
Press the key.
7
Select scale factor using to cut
Logo.
• Scale factor : 1 to 999%
8
Press the key for starting cutting.
Result of SAMPLE CUT
Sample data can be cut successfully, but other data
cannot.
The host computer is faulty.
Sample data as well as other data cannot be successfully
cut either.
The printer is faulty.
(When leaving the start/end lines without cutting off)
Increase the set value of [ADJ-PRS OFS] to raise the
pressure for pressing the cutter blade down. P.4-15
Cutting a Medium into Multiple
Pieces with a Certain Length
You can cut a medium into multiple pieces with a
specified length. (Automatic media-cutting function)
1
Press the
(MENU) (>>)
key in LOCAL.
• The cutting MENU will be displayed.
2
Press
(>>)
.
3
Press to select
"MAINTENANCE", and press the
key.
4
Press to select "AUTO MEDIA
CUT",and press the key.
5
Press to select a cutting interval,
and press the key.
• Set value : 10 to 10,000 mm
6
Press to select a length for the
leading end adjustment cutting, and press
the key.
• Set value : 0 to 500mm
7
Press to select the number of
times a medium is cut (number of pieces
produced by cutting a medium), and press
the key.
• Set value : 1 to 9,999
• The number of cuts that you set here will be
executed.
• You can halt the cutting by pressing the [END/
POWER] key.
8
Press the key several times to
end the setting.
• Execution of SAMPLE CUT will clear the data in
the receiver buffer.
Sample “Cut”
Sample “Logo”
Function name Description
Cutting interval Setting the interval for cutting the media.
Leading end
adjustment cutting
Setting the length for cutting the medias’
leading edges before auto media cut starts.
You can cut off the leading end part of the
media when the leading end of the media is
cut at an angle or the cut surface is rough.
Number of times a
medium is cut
Setting the number of times (sheets) for
media cutting.
Chapter 4 Cutting Function
4-20
Cutting out Data without Register Marks (PC ORIGIN OFFSET)
Adjust the misalignment between printing and cutting by Print & Cut.
Use the attached RIP software (RasterLink) for this adjustment.
Print the adjustment pattern from RasterLink, and enter the adjustment values to the printer.
For Print & Cut without register marks
1
Set the machine to "REMOTE" status.
2
Set the print conditions (profile, cut conditions) of the job that you want to print using RasterLink.
3
Click [print & cut Origin adjust] in the [Cut edit] tab of
RasterLink.
• Click [OK] to print the adjustment pattern.
4
When the pattern is printed, press
(ADJUST)
and select "PC ORIGIN OFFSET".
• When the media is fed, peal the cut part of the pattern, and check the adjustment values
5
Enter the adjustment values
• When you press the [ENTER] key, the media return, and the operation is completed.
• When printing the data that has a different resolution (Y), make adjustment again. (Save an adjustment value per resolu-
tion)
• You cannot print adjustment patterns with multiple conditions continuously, and enter the adjustment values. Make sure
you print and set one adjustment value per condition.
Click
+ -
- +
X enlarged
Y enlarged
Enter the value of the position that has the
least misalignment between top and bottom
The example here shows that -4 has the least
misalignment, so enter “-4”.
Enter the value of the position that has the
least misalignment between right and left
The example here shows that 2 has the least
misalignment, so enter “2”.
4-21
Chapter 4 Cutting Function
4
2
2
For Print & Cut with register marks
1
Set the machine to "REMOTE" status.
2
Set the print conditions (profile, cut conditions) of the job that you want to print using RasterLink.
3
Click [print & cut Origin adjust] in the [Cut edit] tab of RasterLink.
4
Select "Add register mark".
• Click [OK] to print the adjustment pattern.
5
When the pattern is printed, press
(ADJUST)
and select "TP OFFSET".
• When the media is fed, peal the cut part of the pattern, and check the adjustment values
(The actual pattern has register marks.)
6
Enter the adjustment values
• When you press the [ENTER] key, the media return, and the operation is completed.
Setting the Scale Adjust
When printing and cutting without register marks, adjustment is performed if the misalignment in the scanning direction
occurs between the left and right edges of the media.
When you perform scale adjustment, adjustment is performed automatically.
1
Set a media ( P.2-4)
• Set the sheet to print the register mark.
2
Press the (MENU) (>>) keys
• Cutting menu is displayed.
3
Press (<<)
4
Press to select “MAINTENANCE”, and press the [ENTER] key
5
Press to select "SCALE ADJUST", and press the key
6
Press the key on the confirmation screen
• A correction pattern is printed and correction is performed.
7
Press the key several times to end the setting
+ -
- +
X enlarged
Y enlarged
Enter the value of the position that has the
least misalignment between top and bottom
The example here shows that -4 has the least
misalignment, so enter “-0.40”.
Enter the value of the position that has the
least misalignment between right and left
The example here shows that 2 has the least
misalignment, so enter “0.20”.
Chapter 4 Cutting Function
4-22
This chapter
describes the items required to use this machine more comfortably, which are the meth-
ods for the daily care, the maintenance of the ink cartridges etc.
Maintenance ..................................................5-2
When the Machine Is Not Used for a Long
Time ............................................................ 5-2
Precautions for Maintenance ...................... 5-2
Cleaning the Exterior Surfaces ................... 5-2
Cleaning the Platen..................................... 5-2
Cleaning the Media Sensor......................... 5-3
Cleaning the Media Press ........................... 5-3
About MAINTENANCE MENU.......................5-4
MAINTENANCE MENUs table.................... 5-5
Maintaining the
Capping Station .............................................5-6
Cleaning the Wiper and Cap ....................... 5-6
Cleaning the mist filter ................................. 5-7
Clean the NCU ............................................ 5-8
Washing the Head Nozzle........................... 5-9
Cleaning of ink discharge passage ............. 5-9
When the Machine Is Not Used for a Long
Time .......................................................... 5-10
Cleaning the Ink Head and the Area
around It.......................................................5-12
Nozzle Recovery Function ...........................5-13
Reset the set value ................................... 5-14
Eliminate Ink Over Flow ..............................5-14
Automatic Maintenance Function.................5-15
Setting the Refreshing Intervals................. 5-15
Setting the Cleaning Intervals and Type.... 5-15
INK FILLING.................................................5-16
AIR PURGE............................................... 5-16
Replacing consumables ...............................5-18
Replacing the wiper ................................... 5-18
Replacing the mist filter .............................5-18
If a Waste Ink Tank Confirmation Message
Appears ..................................................... 5-19
Replace the waste ink tank with another ... 5-19
Replacing the waste ink tank before the waste
ink tank confirmation message is
displayed.................................................... 5-20
Replacing the Cutter Blade........................ 5-20
Replacing and Adjusting the Cutter Blade ...5-21
Replacing the cutter................................... 5-21
Adjusting the Cutter Blade......................... 5-22
Replacing cutters other than supplied one 5-22
Adjusting blade edge of cutters other than
supplied one .............................................. 5-22
Chapter 5
Maintenance
Chapter 5 Maintenance
5-2
Maintenance
Maintain the machine regularly or as necessary so that its
accuracy will be maintained and it can continue to be
used for a long time.
When the Machine Is Not Used for a
Long Time
When the machine is not going to be used for a week or
more, clean the ink discharge passage. ( P.5-9) Then,
place the machine in storage.
Precautions for Maintenance
Pay attention to the following items when maintaining this
machine.
Cleaning the Exterior Surfaces
When the exterior surfaces of the machine are stained,
dampen a soft cloth with water or a neutral detergent
diluted with water, squeeze it, and wipe the surfaces with
the cloth.
Cleaning the Platen
The platen easily gets dirty with lint, paper dust, etc.
generated when a media is cut.
Wipe off conspicuous stains with a soft-hair brush, a dry
cloth, a paper towel, etc.
• Always keep the main power turned “ON”.
• Remove any media that has been set.
• If water or alcohol becomes mixed into the UV
curingink (UV ink), flocculation could occurred. Be
careful to keep water and alcohol away from both-
the nozzles and the heads.
• This machine uses UV curing ink (UV ink).
When handling ink and cleaning solution, pay close
attention to ventilation and be sure to wear the
included safety glasses and gloves.
• Never disassemble this machine. Disassembling it
can result in electric shock hazards or damage to
the machine.
Before maintenance, be sure to turn off the power
switch and unplug the power cable. Otherwise, an
unexpected accident may occur.
• Prevent moisture from entering the machine. Mois-
ture inside the machine can cause electric shock
hazards or damage to the machine.
• To ensure stable ink jetting, it is necessary for the
machine to eject a small amount of ink (flushing)
regularly when a printing (outputting) operation has
not been performed for a long time.
• When the machine is not to be used for a long time,
turn off only the power switch on the front side,
leave the main power switch at the right side turned
ON (in the position of | ), and leave the power cable
connected.
• Do not wipe the nozzle face of the heads, wiper,
caps, etc. with water or alcohol. Doing so can
cause nozzle clogging or machine failure.
• Do not use benzene, thinner, or any chemical agent
containing an abrasive. Such materials can deterio-
rate or deform the surface of the cover.
• Do not apply a lubricant, etc. to any parts inside the
machine. Doing so can cause printing failure.
• Be careful that the cleaning solution, ink, etc. do
not stick to the cover, because this may cause the
surface of the cover to deteriorate or deform.
• When the platen is stained with ink, wipe it off with
a paper towel containing a small amount of clean-
ing solution for maintenance.
• When ink smears the end face of the media, be
sure to clean it.
• When ink adheres frequently, we recommended to
set the suction fan to "weak" or "standard".
• Because dust and dirt easily accumulate in the
slots for holding a media and cutting paper (cutter
line), be sure to clean these parts carefully.
Chapter 5 Maintenance
5-3
5
2
Cleaning the Media Sensor
The media sensors are located on the platen in the
backside and the bottom surface of the head. When the
sensor is covered with dust, etc., it may cause false
detection of media.
Using a cotton swab, remove the dust, etc. accumulated
on the surface of the sensor.
When cleaning the sensor on the lower surface of the
head is cleaned, move the carriage to the left end by the
operations of step 1 of P.5-12“Cleaning the Ink Head and
the Area around It”, and clean it.
Cleaning the Media Press
When the media press is covered with lint, dust, etc., a
media cannot be fed normally during printing or dust
sticks to the nozzles, which may result in abnormal
printing.
Clean the media press regularly.
Media sensor
The backside of the machine
The lower surface of the head
Media sensor
Media Press
5-4
Chapter 5 Maintenance
About MAINTENANCE MENU
This provides various settings for doing maintenance on the machine.
The following items can be set in Maintenance settings.
TEST PRINT
>
>
CLEANING
>
STATION MAINTENANCE
MAINTENANCE
STATION
>
>
NOZZLE RECOVERY
>
AUTO MAINTENANCE
>
INK FILLING
>
INK TANK EXCHANGE
>><<
<<
width:1340mm
REMOTEMENU
TEST PRINT
CLEANING
LOCAL
width:1340mm
REMOTEMENU
TEST PRINT
CLEANING
LOCAL
MAINTENANCE
OVERFLOW MAINTENANCE
>
AIR PURGE
>
>><<
MENU
SETUP
>
>
MAINTENANCE
>
MACHINE SETUP
NOZZLE CHECK
>
>
INFORMATION
>><<
width:1340mm
REMOTEMENU
TEST PRINT
CLEANING
LOCAL
MAINTENANCE MENUs at-a-glance
Screen transition when key is pressed
Press this to confirm a
setting, etc.
Press this to select
MAINTENANCE MENU, or
to switch to the previous
screen.
Press this to use the
maintenance function.
Use these to select a
setting item.
Press this to use the
maintenance function.
5-5
5
2
Chapter 5 Maintenance
MAINTENANCE MENUs table
Item Setting Value Meaning
STATION
MAINTENANCE
For carrying out maintenance on the carriage and station periphery.
CARRIAGE OUT
(P.5-6)
Moves the carriage out, for carrying out cleaning of the cap
periphery, head, wipers, etc.
NOZZLE WASH
(P.5-9)
Fixed to 1 min
Soaks the nozzle surfaces in maintenance cleaning fluid, for
carrying out recovery from nozzle clogging or bent.
DISWAY WASH
(P.5-9)
Executes washing of the suction pump tubes.
CUSTODY WASH
( P.5-10)
Fixed to 1 min
Carried out when the machine is going to be out of use for an
extended period. Washes the nozzles and tubes beforehand,
to keep the machine in fine condition.
Replace WIPER
( P.5-18)
Used when replacing the wiper. If the wiper is replaced, the
number of times the wiper was used that is managed in this
machine is reset.
NOZZLE RECOVERY
( P.5-15)
For printing using another nozzle, if nozzle wash and so forth fail to effect recovery from nozzle clogging, etc.
PRINT Prints a pattern, to identify the nozzle that is clogged.
ENTRY Registers the faulty nozzle identified by “PRINT”.
RESET Resets a registered faulty nozzle.
AUTO
MAINTENANCE
( P.5-15)
For having the various maintenance functions executed automatically. Set the execution interval for each
maintenance function.
REFRESH
The set value will differ
according to the ink
type being used.
For setting the activation interval for refresh.
CLEANING (Interval) For setting the activation interval for head cleaning.
CLEANING
(TYPE)
NORMAL/ SOFT/
HARD
For setting the type of head cleaning.
INK FILLING
( P.5-16)
Supplies ink to correct nozzle clogging.
INK TANK
EXCHANGE ( P.5-
20)
Resets or corrects the used count for the waste ink tank.
OVER FLOW
MAINTENANCE
( P.5-14)
For discharging excessive ink in the sub tank to solve the ink overflow problem.
AIR PURGE( P.5-
16)
For discharging ink and air that is in the head out of a port, to solve mixed color and nozzle clogging problems.
5-6
Chapter 5 Maintenance
Maintaining the
Capping Station
Maintain the ink cap, wiper, etc. located in the capping
station.
(SATION MAINT.)
The ink cap and wiper function as follows.
• Wiper : It wipes off ink sticking to the head nozzles.
• Ink cap : It prevents the head nozzles from clogging due to
dryness.
As the machine is used repeatedly, the wiper and ink cap
gradually become dirty with ink, dust, etc.
If nozzle missing cannot be corrected even after head
cleaning ( P.2-19) has been performed, use F-200 /
LF-200 maintenance liquid and clean stick.
Cleaning the Wiper and Cap
It is recommended that the wiper and cap be cleaned
frequently in order to maintain the high image quality of
the machine and keep the machine itself in good working
order.
1
1Press the (MENU)
and press the key in local.
• Display maintenance menu.
2
Press to select "Station
Maintenance" and press the key.
3
Press to select "Carriage Out"
and press the key.
4
Select “STATION MAINT.”, and then press
the key.
• The carriage moves over the platen.
5
Open the front cover.
6
Remove the wiper.
• Pull out the wiper by holding the protrusions at its
both ends.
7
Clean the wiper and the bracket.
• Wipe off the ink sticking to the wiper and bracket
with a clean stick dipped in cleaning solution for
maintenance.
Wipe off so that cleaning solution for maintenance
will not remain.
• To keep the nozzle status normal, perform wiper
cleaning frequently.
Tools required for Maintenance
• F-200 / LF-200 maintenance liquid (SPC-0569)
• Nozzle swab (SPC-0421)
• Gloves • Safety glasses
• Never look at the illuminated LED UV with your
naked eyes. Doing so could cause pain in your
eyes or visual impairment. Be sure to wear safety
glasses.
• Do not expose your skin directly to ultraviolet (UV)
light. Doing so could cause skin irritation.
• Be sure to wear the supplied safety glasses and
gloves when maintaining the capping station.
Doing so could cause the ink to leak.
• Do not move the carriage out of the capping sta-
tion by hand. When it is desirable to move the car-
riage, press the [FUNK1] key to execute the
carriage-out. ( P.5-6Steps 1 to 2)
• Replace the wiper with a new one when it is
extremely dirty or bent. ( P.5-18)
• When cleaning the wiper, be careful that lint from
the clean stick does not get left on the wiper.
Remaining lint may cause image quality to deterio-
rate.
Carriage
Projection
Wiper
Bracket
5-7
5
2
Chapter 5 Maintenance
8
Clean the wiper cleaner.
• Wipe off the ink sticking to the wiper cleaner with
a clean stick dipped in cleaning solution for
maintenance.
9
Set the wiper at the original position.
• Insert the wiper by holding the protrusions at its
both ends.
10
Clean the cap rubber.
• Wipe off the ink sticking to the cap rubber with a
clean stick dipped in maintenance washing liquid
for maintenance.
• Wipe off so that maintenance solution for
maintenance will not remain.
11
Press the key after the cleaning.
12
Close the front cover, and press the
key.
• After its initial operation, the machine returns to
step 1.
Cleaning the mist filter
1
Press the
(MENU)
and
press the key.
• MAINTENANCE MENU will be displayed.
2
Press the key twice to select the
“CARRIAGE OUT”.
3
Press to select "HEAD
MAINTENANCE", and press the
key.
• The carriage will move to the left end of this
machine.
• A large amount of ink accumulates in the absorp-
tion case. Please absorb with water-absorbing
paper etc. about once a week.
• Do not remove the wiper cleaner from the bracket.
• Clean only the surface of the wiper on the wiper
cleaner. (It is not necessary to clean the rear side.)
• Do not remove the ink pad from the ink pad case.
• After cleaning the wiper cleaner, make sure that
the cleaner is not facing up.
Wiper cleaner
OK NG
Projection
• After cleaning the cap rubber, make sure that the
cap slider is not misaligned.
If the cap slider is misaligned, move the slider
block left and/or right to correct the alignment.
Cap rubber
5-8
Chapter 5 Maintenance
4
Open the left maintenance cover.
5
Remove the mist filter.
• Mist filters are located in two places.
• To remove the mist filter, pull the knob to the front
while pushing the hook in the direction indicated
by the arrow.
6
Clean the filter.
• Remove the filter, and remove the stain by holding
paper towel or the like.
• Wipe off any stain adhering to the filter case.
7
Set the mist filter at the original position.
8
Close the maintenance cover, and press
the key.
• After its initial operation, the machine returns to
LOCAL.
Clean the NCU
Ink and dust adhere to NCU.
If ink or dust adheres, normal operation may not be
possible.
1
Press the (MENU)
and press the key in local.
• Display maintenance menu.
2
Press to select "Station
Maintenance" and press the key.
3
Press to select "Carriage Out"
and press the key.
4
Press to select "STATION
MAINT." and press the key.
• The carriage moves over the platen.
5
Open the front cover.
6
Include maintenance cleaning solution on
clean stick (SPC-0421) and wipe off ink and
dust adhered to NCU.
7
Press the key after the cleaning.
8
Close the front cover, and press the
key.
• After its initial operation, the machine returns to
step 1.
• If the stain strongly attached to the filter, such as
the liquefaction of the ink attached to the filter,
please replace the filter (SPC-0819).( P.5-19)
Maintenance cover
Maintenance cover
Hook
Knob
KnobHook
Carriage
NCU
5-9
5
2
Chapter 5 Maintenance
Washing the Head Nozzle
1
Press the
(MENU)
and press the key.
• MAINTENANCE MENU will be displayed.
2
Press to select "STATION",
and press the key.
3
Press to select “NOZZLE WASH”,
and press the key.
• The carriage moves onto the platen.
4
Clean the wiper and the bracket, and press
the key.
(1) Open the front cover then pull out it by
holding projections at both ends of the wiper.
(2) Clean the wiper and bracket with a clean
stick dipped in cleaning solution for
maintenance.
Wipe off so that maintenance solution for
maintenance will not remain.
(3) Insert it in the original position by holding the
projections at both ends of the wiper.
5
Clean the cap rubber , and press the
key.
• Wipe off the ink sticking to the cap rubber with a
clean stick dipped in maintenance washing liquid
for maintenance.
• Wipe off so that maintenance solution for
maintenance will not remain.
• At this time, the discharge passage is cleaned
automatically.
6
Fill up the cap with cleaning solution for
maintenance.
• Suck cleaning solution into a dropper and fill up
the cap with it. Fill up the cap with cleaning
solution on the verge of overflow from the cap.
7
Close the front cover, and press the
key.
8
Press the key.
• The maintenance washing liquid filled in the cap is
absorbed.
• “Please Wait” will be displayed in the display until
the time you set has elapsed.
• It takes about one minute for NOZZLE WASH.
Cleaning of ink discharge passage
In order to prevent clogging of ink due to coagulation of
ink inside the ink discharge passage, clean the ink
discharge passage periodically (once a week).
1
Press the
(MENU)
and
press the key.
• MAINTENANCE MENU will be displayed.
2
Press to select "STATION", and
press the key.
3
Press to select "DISWAY WASH",
and press the key.
• The carriage moves onto the platen.
Carriage
Projection
• When nozzle missing is not cleared even after this
washing is carried out several times, contact our
service desk or your local distributor for service.
Carriage
5-10
Chapter 5 Maintenance
4
Fill up the cap with cleaning solution for
maintenance.
• Suck cleaning solution into a dropper and fill up
the cap with it. Fill up the cap with cleaning
solution on the verge of overflow from the cap.
5
Press the key.
• Perform the suction of the maintenance cleaning
solution and clean the ink discharge path.
When the Machine Is Not Used for a
Long Time
When the machine is not going to be used for a week or
more, use the cleaning function for storage to clean the
head nozzles and ink discharge passage. Then, place the
machine in storage.
1
Press the
(MENU)
and
press the key.
• MAINTENANCE MENU will be displayed.
2
Press to select "STATION", and
press the key.
3
Press to select "STORAGE
WASH", and press the key.
• The carriage moves onto the platen.
4
Clean the wiper and the bracket.
(1) Open the front cover then pull out it by
holding projections at both ends of the wiper.
(2) Clean the wiper and bracket with a clean
stick dipped in cleaning solution for
maintenance.
Wipe off so that maintenance solution for
maintenance will not remain.
(3) Insert it in the original position by holding the
projections at both ends of the wiper.
5
and press the key.
• Use the machine with always turning “ON” the
main power. The function preventing nozzle clog-
ging operates automatically to protect the head of
the nozzle.
• The head nozzle may result in nozzle clogging if
the main power switch is left OFF for a long time.
Check the items on the right beforehand.
Is [NEAR END] or [INK END] displayed?
• The cleaning solution or ink is absorbed when the nozzles
are washed.
At this time, if the state of "no ink" or "almost no ink" is
detected, the nozzle washing operation cannot start.
• In case of ink end etc., replace with a new bottle.
• When the warning message “Check waste ink” is
indicated, check the waste ink tank, and operate it,
referring to P.5-19 “If a Waste Ink Tank Confirma-
tion Message Appears” according to the situation.
• Until wiper/ bracket cleaning is competed, “COM-
PLETED” is displayed on the screen. After the
work up to the step 3 is completed, press the
[ENTER] key. If you press the [ENTER] key before
cleaning is completed, the machine moves to the
next washing procedure.
• Until wiper cleaning is competed, [COMPLETED
(NEXT): ENT] is displayed on the screen. After the
work up to the step 5 is completed, press the
[ENTER] key. If you press the [ENTER] key before
cleaning is completed, the machine moves to the
next washing procedure.
Carriage
Projection
5-11
5
2
Chapter 5 Maintenance
6
Clean the cap rubber.
• Wipe off the ink sticking to the cap rubber with a
clean stick dipped in maintenance washing liquid
for maintenance.
• Wipe off so that maintenance solution for
maintenance will not remain.
• At this time, the discharge passage is cleaned
automatically.
7
Press the key.
8
Fill up the cap with cleaning solution for
maintenance.
• Suck maintenance solution into a dropper and fill
up the cap with it. Fill up the cap with
maintenance solution on the verge of overflow
from the cap.
9
Press the key.
• The nozzles are washed.
• When the nozzles have been completely washed,
cleaning is performed automatically, and the head
moves to the maintenance position.
10
Open the front cover.
11
Fill up the cap with cleaning solution for
maintenance.
• Suck maintenance solution into a dropper and fill
up the cap with it. Fill up the cap with
maintenance solution on the verge of overflow
from the cap.
12
Close the front cover, and press the
key.
• After its initial operation, the machine returns to
step 2.
• Until washing liquid is filled, [COMPLETED
NEXT [ENT]] is displayed on the screen. After
the work up to the Step 8 is completed and you
close the front cover, press the [ENTER] key.
Cap rubber
5-12
Chapter 5 Maintenance
Cleaning the Ink Head
and the Area around It
Because the ink head employs a very precise
mechanism, due care needs to be taken when it is
cleaned.
Using a clean stick, etc., rub off gelatinous ink or dust that
may stick to the lower part of the slider and the area
around the ink head. In doing so, never rub the nozzles of
the head.
1
Press the
(MENU)
and
press the key.
• MAINTENANCE MENU will be displayed.
2
Press the key twice to select the
“CARRIAGE OUT”.
3
Press to select "HEAD
MAINTENANCE", and press the
key.
• The carriage will move to the left end of this
machine.
4
Open the maintenance cover.
5
Clean the bottom surface of the UV lamp.
• Wipe off the ink sticking to the bottom
surface of the UV lamp with a clean stick
dipped in maintenance washing liquid for
maintenance. Wipe off so that maintenance
solution for maintenance will not remain.
6
Use a clean stick soaked in maintenance
cleaning fluid to wipe ink off the head
surface or other surfaces.
• Never rub the nozzles.
7
Close the maintenance cover, and press
the key.
8
Press the key several times to
end the cleaning.
Tools required for cleaning
• Clean stick • Gloves
• Safety glasses
• Be sure to wear the attached safety glasses and
gloves when cleaning the area around the ink
head. Otherwise, you may get ink in your eyes.
• If you get ink in your eyes, immediately wash your
eyes thoroughly with a lot of clean water for at
least 15 minutes. Then, consult a doctor as soon
as possible.
• If the ink adheres to your skin, use a large amount
of water and soap or special detergent for skin to
remove the ink.
Maintenance cover
Maintenance cover
Clean the side surface of the head (shown in
red) with a clean stick.
The nozzle part (Never
touch it.)
Clean with a clean stick or a waste cloth.
5-13
5
2
Chapter 5 Maintenance
Nozzle Recovery Func-
tion
NOZZLE RECOVERY: When nozzles missing can not be
improved at specific points, other good nozzles can be
used as alternatives for printing.
1
Press the
(MENU)
and press the key.
• MAINTENANCE MENU will be displayed.
2
Press to select "NOZZLE
RECOVERY", and press the key.
3
Press the key twice.
• Printing of the nozzle pattern will start.
• Select “ENTRY” then “Move to select of the
Nozzle line (Step 4) without drawing a pattern”.
4
Select the Nozzle line that needs NOZZLE
RECOVERY by pressing , and
then press the key.
5
Register the Nozzle number that needs
NOZZLE RECOVERY, and press the
key.
(1) Select the registration number from 1 to 10
by pressing [][] key and press the
[ENTER] key.
(2) Register the nozzle number that needs
recovery by pressing [][] key and press
the [ENTER] key.
6
Press the key several times to
end the setting.
1
10
21
30
41
50
61
70
81
90
101
110
121
130
141
150
161
170
181
190
201
210
221
230
241
250
261
270
281
290
301
310
1
10
21
30
41
50
61
70
81
90
101
110
121
130
141
150
161
170
181
190
201
210
221
230
241
250
261
270
281
290
301
310
1
10
21
30
41
50
61
70
81
90
101
110
121
130
141
150
161
170
181
190
201
210
221
230
241
250
261
270
281
290
301
310
1
10
21
30
41
50
61
70
81
90
101
110
121
130
141
150
161
170
181
190
201
210
221
230
241
250
261
270
281
290
301
310
1
10
21
30
41
50
61
70
81
90
101
110
121
130
141
150
161
170
181
190
201
210
221
230
241
250
261
270
281
290
301
310
1
10
21
30
41
50
61
70
81
90
101
110
121
130
141
150
161
170
181
190
201
210
221
230
241
250
261
270
281
290
301
310
1
10
21
30
41
50
61
70
81
90
101
110
121
130
141
150
161
170
181
190
201
210
221
230
241
250
261
270
281
290
301
310
1
10
21
30
41
50
61
70
81
90
101
110
121
130
141
150
161
170
181
190
201
210
221
230
241
250
261
270
281
290
301
310
Overhead view
H1-A H1-D H2-A H2-C
Nozzle line
H1-B H1-C H2-B H2-D
• For 6-color ink sets, the nozzle patterns “H1-B”
and “H1-D” are not printed.
• When using leaf media, set a media of more than
A3 size put horizontally. If a media with narrow
width is set, printing will only be conducted to mid-
way.
Nozzle pattern
SELECT ENTRY NOZZLE
H1-A
>
>
H1-B
>
H1-C
>
H1-D
>><<
>
****
Head No.
(H1 to H2)
Nozzle
line
• Up to 10 nozzles can be registered per 1 nozzle
line.
• Even if you use this function, time required for
drawing does not change.
• When you use white ink, print on the clear film to
check.
Head1-A
No.1
No.2
16
128
No.3
184
No.4
OFF
No.5
OFF
>><<
Recovery nozzle No. or OFF
Registration number : 1~10
1
10
21
30
41
50
61
70
81
90
101
110
121
130
141
150
161
170
181
190
201
210
221
230
Nozzle missing
No.184
Nozzle
number
Nozzle missing No.16
Nozzle
missing
No.128
Registration
number
Recovery
Nozzle
number
State
1 16 Target for nozzle recovery
2 128 Target for nozzle recovery
3 184 Target for nozzle recovery
4 OFF No registration
5 OFF No registration
Example of nozzle to be recovered
5-14
Chapter 5 Maintenance
Reset the set value
1
Press the
(MENU)
and
press the key.
• MAINTENANCE MENU will be displayed.
2
Press to select "NOZZLE
RECOVERY", and press the key.
3
Press to select "RESET", and
press the key.
4
Press and
(<<)
(>>)
to select the Nozzle line that needs to be
reset, and press the key.
• A reset confirmation message will be displayed.
5
and press the key.
6
Press the key several times to
end the setting.
Eliminate Ink Over
Flow
1
Press
(MENU)
in LOCAL.
2
Press to select
“MAINTENANCE”, and press the
key.
• MAINTENANCE MENU will be displayed.
3
Press
(<<).
4
Press to select “OVER
MAINTENANCE”, and press the
key.
5
Press to select a head.
6
Press the key.
7
Press the key several times
to end the setting.
• If the problem is not eliminated after performing
this operation once, repeat the operation.
If the problem is not eliminated after performing
the operation three times, contact our service desk
or your local distributor for service.
5-15
5
2
Chapter 5 Maintenance
Automatic Mainte-
nance Function
To use this machine comfortably, you can set various
maintenances to be performed automatically.
Here, set performing intervals of various automatic
maintenances.
You can prevent troubles such as ink clogging by
performing automatic maintenance periodically
(Auto maintenance function).
For the auto maintenance functions, the following items
can be set:
Setting the Refreshing Intervals
The interval between each operation of ejecting a small
amount of ink from the nozzles to prevent nozzle clogging
is set.
1
Press the
(MENU)
and
press the key.
• MAINTENANCE MENU will be displayed.
2
Press to select "AUTO
MAINTENANCE", and press the
key.
3
Press to select "REFRESH", and
press the key.
4
Press to set the refreshing
interval, and press the key.
• Set value : The set value will differ according to
the ink type being used.
5
Press the key several times to
end the setting.
Setting the Cleaning Intervals and
Type
The cleaning type and the interval between each cleaning
operation are set.
1
Press the
(MENU)
and
press the key.
• MAINTENANCE MENU will be displayed.
2
Press to select "AUTO
MAINTENANCE", and press the
key.
3
Press several times to select
"Interval" or "Type", and press the
key.
4
Press to select the setting item,
and press the key.
• Set value: The set value will differ
according to the ink type being
used.
• Set value of type: SOFT/ NORMAL/ HARD
5
Press the key several times to
end the setting.
• When you perform maintenance manually, after
manual maintenance is completed and when time
set with the automatic maintenance function has
passed, maintenance starts automatically.
Function
name
Descriptions
REFRESH
The interval between each refreshing
operation is set.
CLEANING
(INTERVAL)
The interval between each cleaning operation
is set.
CLEANING
(TYPE)
The cleaning type is set.
• If the “Check waste ink” warning message is dis-
played, the operation set in the auto maintenance
function is not carried out. Perform the operations
of P.5-19 if required.
• When the power switch on the front of the machine
is turned off, check the waste ink tank.
5-16
Chapter 5 Maintenance
INK FILLING
Supplies ink to correct nozzle clogging.
1
Press the
(MENU)
and
press the key.
• MAINTENANCE MENU will be displayed.
2
Press to select "FILL UP INK",
and press the key.
3
Press to select the filling head,
and press the key.
4
Press the key.
• Ink is supplied automatically.
5
Press the key several times to
end the setting.
AIR PURGE
For discharging ink and air that is in the head out of a port.
Use this function if ink colors become mixed inside a
head, or if air causes a nozzle to clog.
1
Press the
(MENU)
and
key in LOCAL.
• Maintenance menu will be displayed.
2
Press to select "AIR PURGE",
and press the key.
3
Press to select the head to air
purge and check with .
• Checked head is the target head to be air purged.
From the table below, select the head with the
color (port) to be purged. (Head 1 only for
UCJV150 Series)
• For UCJV300 Series, Head 1 and Head 2 can be
selected at the same time. Select both Head 1
and Head 2 when the ink set is 4 colors.
4
Press the key to move the
selection head onto the wiper.
5
Open the front cover.
6
Open the lid on the front of the carriage.
• Remove the screws and slowly lower the lid.
7
Remove the cap of the target port.
• The layout of the port is as shown below.
• Turn the cap about 30 ° counterclockwise and
then remove it.
• The removed cap has ink attached. Temporarily
put on paper towels etc. so as not to contaminate
the surroundings.
• Air purge is done for each head.
• Do not remove the cap of Head 2 when removing
air of Head 1.
Tools required for cleaning
• Gloves • Safety glasses
• Paper towel
• Be sure to wear the attached safety glasses and
gloves when cleaning the area around the ink
head. Otherwise, you may get ink in your eyes.
• If you get ink in your eyes, immediately wash your
eyes thoroughly with a lot of clean water for at
least 15 minutes. Then, consult a doctor as soon
as possible.
• If the ink adheres to your skin, use a large amount
of water and soap or special detergent for skin to
remove the ink.
Ink set Head 1 Head 2
4 colors CMYKYKMC
6 colors+W C M Y K Lm Lc W W
4 colors+CL+W C M Y K CL CL W W
4 colors+W C C M M Y K W W
Head 1 Head 2
UCJV300 Series
4 colors:
CMYK YKMC
UCJV300 Series
6 colors + W
CMYK LmLcWW
UCJV300 Series
4 colors + CL + W:
CMYK CLCLWW
UCJV300 Series
4 colors + W:
CCMM YKWW
UCJV150 Series
4 colors:CMYK
Ink set Head 1 Head 2
ScrewLid
CY
MK
YM
KC
CY
MK
Lm W
Lc W
CY
MK
CL W
CL W
C M
CM
YW
KW
CY
MK
5-17
5
2
Chapter 5 Maintenance
8
Connect the jig to the port.
• Lift the lid on the front of the carriage and pull out
the jig.
• As with the cap, push the end of the jig into the
port and rotate it clockwise by 30 °.
9
Press the
key
to start air purge
.
10
Check inside the transparent tube of the jig
whether ink is being discharged.
• Be sure to discharge until the amount of ink
discharged is constant and there is no air mixing.
After confirming the discharge, please remove the
jig and press the key to finish.
• After 30 second elapse, ink discharge is
automatically stopped.
If ink is not ejected properly, please "retry".
• While ejecting ink, press the to eject ink
vigorously for 3 seconds.
11
If there are other target ports on the
working head, discharge the ink
continuously.
• Connect jigs and discharge ink as well.
• After purging all target ports of the working head,
select "Finish".
12
Remove the jig on the "Remove the air
purge jig" screen, close the lid of the
carriage and close the front cover.
13
Press the key to move the
carriage to the cap position.
• If only one head is selected, cleaning is
automatically performed and it ends.
• If more than one head is selected, Head 2 is
automatically moved to the wiper position.
Purge the target port as in Head 1
• Even if the cap is removed, the ink does not over-
flow by the internal mechanism.
• Lift the tube to let the ink inside. If ink remains in
the tube, it may cure.
• If the retry operation is performed continuously
while the jig is connected to one port, air may be
mixed into the head, which may cause nozzle
missing. Terminate the air purge when the ink is
normally discharged.
Cap
Lid
Jig
5-18
Chapter 5 Maintenance
Replacing consum-
ables
Replacing the wiper
Wiper (part number: SPA - 0271) is consumables.
When the display indicates the warning message
“Replace a WIPER”, it is necessary to check and replace
the wiper with a new one.
Also, wipe ink sticking to the lower surface of the slider off.
1
Press the
(MENU)
and
press the key.
• MAINTENANCE MENU will be displayed.
2
Press to select "STATION", and
press the key.
3
Press to select "WIPER
EXCHANGE", and press the key.
• The number of times the wiper was used will be
reset.
• The carriage moves onto the platen.
4
Remove the wiper.
• Pull out the wiper by holding the protrusions at its
both ends.
5
Insert a new wiper.
• Insert the wiper by holding the protrusions at its
both ends.
6
Press the key.
• After its initial operation, the machine returns to
LOCAL.
Replacing the mist filter
1
Press the
(MENU)
and
press the key.
• MAINTENANCE MENU will be displayed.
2
Press the key twice to select the
“CARRIAGE OUT”.
3
Press to select "HEAD
MAINTENANCE", and press the
key.
• The carriage will move to the left end of this
machine.
4
Open the left maintenance cover.
• The cleaning wiper is sold separately. Buy one
through the dealer in your region or at our service
office.
Carriage
Projection
Projection
Maintenance cover
Maintenance cover
5-19
5
2
Chapter 5 Maintenance
5
Remove the mist filter.
• Mist filters are located in two places.
• To remove the mist filter, pull the knob to the front
while pushing the hook in the direction indicated
by the arrow.
6
Replace with a new filter (SPC-0819).
7
Insert the mist filter.
8
Close the maintenance cover, and press
the key.
• After its initial operation, the machine returns to
LOCAL.
If a Waste Ink Tank Confirmation
Message Appears
Ink that is used for head cleaning is collected in the waste
ink tank on the bottom right side of this machine. This
machine keeps track of the total volume of ink that is
discharged, and displays a confirmation message when a
certain volume is reached. (When this message is
displayed, consider the replacement of the waste ink
tank.)
Confirmation Message in LOCAL
1
The warning message "Check waste
ink"appears on the display.
2
Check the state of the waste ink tank.
• If the actual volume is not displayed correctly,
perform the operation in Step 3.
• If the actual volume is displayed correctly, replace
the waste ink tank.
When you replace (dispose of) the waste tank ink,
perform the procedure in "Replace the waste ink
tank with another". ( P.5-19)
3
Press the
(MENU)
and
press the key.
• MAINTENANCE MENU will be displayed.
4
Press to select "INK TANK
EXCHANGE", and press the key.
5
If the waste ink amount needs to be
adjusted, press to adjust the
level, and then press the key.
Replace the waste ink tank with
another
If the waste ink tank becomes full, use the following
procedure to replace the waste ink tank with another, and
set the waste ink information in the maintenance menu to
0%.
If you replace the waste ink tank before the waste ink tank
confirmation message is displayed (before the 2L tank is
80% (1.6L) full, use the same procedure to replace the
waste ink tank.
1
Press the
(MENU)
and
press the key.
• MAINTENANCE MENU will be displayed.
2
Press to select "INK TANK
EXCHANGE", and press the key.
• Waste ink tank information is displayed.
3
Press to adjust the level, and
press the key.
• The waste ink tank amount that is managed in this
machine will be reset.
4
Open the waste ink tank cover.
5
Pull it frontward to remove by holding the
waste ink tank handle.
• The message is displayed when it reaches 80%
(1.6L) of the 2L tank.
Hook
Knob
KnobHook
Waste ink
tank
5-20
Chapter 5 Maintenance
6
Replace the waste ink tank.
(1) Prepare a new waste ink tank (SPC-0117) or
discard waste ink from current waste ink
tank.
(2) Insert the waste ink tank by holding a handle
of the tank.
7
Close the waste ink tank cover.
8
Press the key.
• The ink discharging amount that is controlled by
the machine is reset and the message is
canceled.
Replacing the waste ink tank before the waste
ink tank confirmation message is displayed
If you replace the waste ink tank before the waste ink tank
confirmation message is displayed (before the 2.0L tank
is 80% (1.6L) full, use the same procedure in the previous
section.
1
Perform steps 3 through 8 in "Replace the
waste ink tank with another" ( P.5-19)
to empty the waste ink tank.
Replacing the Cutter Blade
The media cutter blade is consumable. When the cutter
blade gets dull, replace it with a new one (SPA-0107).
1
Press the
(MENU)
and
press the key.
• Cutting menu is displayed.
2
Press to select “TOOL
CHANGE”, and then press the
key.
• The cutter unit moves.
• Put a cap on the waste
ink tank removed.
• Waste ink is equivalent to waste oil of industrial
waste. Request an industrial waste disposal com-
pany for disposal of waste ink.
Cap
Empty waste ink tank
• The blade is sharp. Be careful not to hurt yourself
or anyone else.
• Store the cutter blade in a place that is out of the
reach of children. In addition, dispose of used cut-
ter blades according to regional laws and regula-
tions.
• When replacing the cutter blade, it is recom-
mended to place a sheet of paper under the cutter
blade. This will help pick up the cutter blade if it
drops.
Cutter Unit
5-21
5
2
Chapter 5 Maintenance
3
Replace the cutter unit by the carriage.
• Now the cutter unit can be moved manually. Move
the cutter unit to the position where you can
assure easy access, and replace the blade edge.
(1) Loosen the screw of the cutter unit.
(2) Remove the cutter unit.
(3) Mount a new cutter unit.
(4) Fasten the screw of the cutter unit to secure
the cutter unit.
4
When replacement is finished, press the
key.
5
Press the key several times.
Replacing and Adjust-
ing the Cutter Blade
Replacing the cutter
The cutter is consumable. If the cutter is chipped or blunt,
replace it with a new one. (Accessory parts number: SPA-
0030)
New cutter (low-pressure blade set for PVC sheets: Model
SPB-0030) are available from your distributor or MIMAKI's
sales office.
1
Remove the cap located at the edge by
rotating it.
2
Replace the cutter with a new one using
tweezers or the like.
Screw
Cutter Unit
• Do not touch the cutter with your fingers.
The sharp cutter tip may injure you.
• Do not shake the tool after having set the cutter.
Otherwise, the blade edge may pop out, causing
you to get injured.
• Keep the cutter out of reach of children.
Dispose of the used cutter blade in compliance
with the applicable regulations.
Name of product
Product
No.
Specifi
cation
Remarks
Decentering blade for
vinyl sheet
SPB-0001
Three
blades
Decentering blade for
small letters
SPB-0003
Three
blades
Decentering blade for
rubber sheet
SPB-0005
Three
blades
Decentering blade for
reflecting sheet
SPB-0006
Two
blades
Decentering blade for
fluorescent sheet
SPB-0007
Three
blades
Replacing the cutter other
than supplied one
SPB-0030
Three
blades
supplied one
Decentering blade for
thick rubber sheet
SPB-0084
Three
blades
Cutter holder
Cutter
Cap
5-22
Chapter 5 Maintenance
Adjusting the Cutter Blade
After adjusting the blade edge, set the cut condition and
perform test cut to check whether cutting is performed
well.
1
Turn the adjusting knob to adjust the
protruding amount of the cutter.
• Turn the knob in the direction of the arrow to
extend the cutter blade.
( 0.5 mm per revolution)
Replacing cutters other than sup-
plied one
1
Loosen the lock nut, and pull the adjusting
knob out of the holder.
2
Insert the cutter into the adjusting knob.
• Use tweezers to insert the cutter into the adjusting
knob.
3
Tighten the lock nut.
Adjusting blade edge of cutters other
than supplied one
1
Loosen the lock nut.
2
Turn the adjusting knob to adjust the
protruding amount of the cutter blade.
3
Tighten the lock nut so that the adjusting
knob will not turn.
Cutter
Adjusting knob
Lock nut
Adjusting knob
• The blade adjuster (Product No.: OPT-S1005) will
facilitate the adjustment of the protruding amount
of the blade.
Lock nut
Adjusting knob
This chapter
describes the corrective measures to be taken for a phenomenon suspected to be
trouble and the procedures to clear the error number displayed on the LCD.
Troubleshooting ...............................................................................6-2
Power does not turn on ...................................................................6-2
The machine does not start printing ................................................6-2
Media get jammed / media is soiled ................................................6-2
Image quality is poor .......................................................................6-3
Nozzle is clogged ............................................................................6-3
An error occurred in the ink bottle ...................................................6-3
When the ink leakage occurs ..........................................................6-3
Warning / Error Messages ...............................................................6-4
Warning messages ..........................................................................6-4
Error messages ...............................................................................6-7
Chapter 6
Troubleshooting
Chapter 6 Troubleshooting
6-2
Troubleshooting
Trouble? Take appropriate actions as described below before taking the trouble as a failure. If still the problem is not
solved after troubleshooting, contact your local distributor or our service desk.
Power does not turn on
In most cases, this is due to improper connection of the power cable for the machine or computer. Check that the power
cable is connected properly.
The machine does not start printing
This occurs when the data is not being transmitted to the machine properly.
It can also occur when the printing function does not work properly or the media is not set correctly.
Media get jammed / media is soiled
Media jamming or stained media is considered to be due to the use of an unsuitable media or improper setting of media.
Has the power cable been connected
between the machine and a power plug
socket ?
Securely connect the power cable.
Is the main switch ON ?
Turn on the main switch. ( P.2-3)
Is the power switch located on the front of
machine "ON" ?
Turn on the power switch on the front of the machine.
(P.2-3)
Is the correct interface cable used ?
Use the cable exclusive for the machine.
Is the interface cable properly connected ?
Securely connect the interface cable.
Yes
Is the message on the display indicating that
ink has run out ?
Replace the ink bottle with a new one.
Is a recommended media used ?
Use recommended media.
Is the media not curled or bent ends ?
Avoid using any media with curls or bent ends.
Yes
Is the media hanging down along the platen
?
Use a take-up unit or Re-load the media on the machine.
P.2-12P.2-4
No
No
No
No
No
Yes
No
No
No
Chapter 6 Troubleshooting
6-3
1
2
2
2
2
6
Image quality is poor
This section describes the corrective actions to be taken in case the image quality is not satisfactory. Take remedy for
particular problems with image quality. If the remedy does not work, contact your local distributor or our service desk.
Nozzle is clogged
When nozzle clogging is not dissolved even after the head cleaning referring to P.2-19, make sure the following
operations.
Wash the head nozzle by the operations of P.5-9.
Follow the procedures described in P.5-16 to perform the FILL UP INK operation.
Follow the procedures described in P.5-16 to perform the AIR PURGE operation.
Recover the nozzle by the operations of P.5-13.
An error occurred in the ink bottle
If an ink bottle fails, a warning message will be displayed.
None of printing, cleaning and all the other operations that use ink is available.
When abnormality occurs, please take following actions.
• Check the amount of ink in the ink bottle and replenish it if the ink volume is low.
When the ink leakage occurs
In case of ink leakage, please turn off the main power, unplug the power cable and contact our service office or distributor.
Phenomenon Measures
White lines / blur / dark stripes
(in the direction of travel of the heads)
(1) Execute the head cleaning. P.2-19
(2) Perform maintenance of the inside of the station. P.5-6
(3) Execute the [FEED COMP.] function. P.3-8
(4) If any pieces of paper or dust is attached on the path of the heads such as
media press, remove it.
Characters are double- or triple-printed in
the media feed direction
(1) Execute the [FEED COMP.] function. P.3-5
Disagreement in print positions in bi-
directional print.
(1) Execute the [DROP POSITION] function. P.3-6
Ink drops falling on media during printing
(1) Clean the wiper. P.5-6
(2) Clean the ink cap. P.5-6
(3) Clean around the head. P.5-12
(4) Execute the head cleaning [NORMAL]. P.2-19
(5) Set the INTERVAL WIPING, operation. P.3-10
• Please do not leave it for a long time with the ink bottle error displayed. Nozzle clogging prevention function will not oper-
ate.
If nozzles are clogged, the machine must be repaired by MIMAKI's service engineer.
Chapter 6 Troubleshooting
6-4
Warning / Error Messages
If some trouble occurs, the buzzer sounds and the display shows a corresponding error message.
Take an appropriate remedy for the displayed error.
Warning messages
Errors when performing operations
Message displayed in LOCAL
Message Cause Measures
Operation cannot be performed because
no media is detected.
• Execute after media is detected.
The motor is OFF after the cover was
opened etc.
• Return to LOCAL and execute the operation
after completion of initialization.
An ink error occurred.
• Execute the operation after replacing with a
new ink bottle.
The front cover or the maintenance
cover is opened.
• Execute the operation after closing the
cover.
Data was received.
• Execute the operation after executing data
clear.
Message Cause Measures
The waste ink tank count has exceeded
the prescribed amount.
• Check the amount of waste ink in the waste
ink tank.
• Conduct maintenance and waste ink tank
replacement, and reset the amount of waste
ink.
The used count of wiper has exceeded
the prescribed number.
• Execute maintenance, station maintenance
and wiper exchange and replace the wiper.
No media is set. Or, the sensor is faulty.
• Set the media.
If the same error message still appears after
setting the media, contact your local
distributor, our sales office, or service center.
Print data is received in LOCAL.
• Shift to REMOTE and execute printing.
Or, execute data clear and cancel printing.
Temperature in the installed environment
(machine) is too high.
Stable printing cannot be done.
• Adjust the ambient temperature to within the
specified scope (20 ℃ to 35 ℃ ).
Temperature in the installed environment
(machine) is too low.
Stable printing cannot be done.
The NCU unit is not connected.
The nozzle check function cannot be
used.
• Turn off the power on the machine and turn it
on after a while.
When displaying again, contact your local
distributor, our sales office, or service center.
INVALID OPERATION
MEDIA UNDETECT
INVALID OPERATION
MOTOR POWER OFF
INVALID OPERATION
INK ERROR
INVALID OPERATION
COVER OPEN
INVALID OPERATION
DATA REMAIN
Check waste ink
Replace WIPER
NO MEDIA
DATA REMAIN
MACHINE TEMP./H **°C
MACHINE TEMP./L **°C
NCU CONNECT
Chapter 6 Troubleshooting
6-5
1
2
2
2
2
6
The NCU sensor sensitivity is too low to
correctly judge nozzle missing.
The nozzle check function cannot be
used.
• NCU replacement is necessary.
• Contact our service desk or your local dis-
tributor to call for service.
• Check the state of the nozzles, and if there
are frequent nozzle missing and ink droplet
misalignment, conduct cleaning to restore.
Because an NCU-related error occurred
during nozzle check, printing was
stopped and the nozzle check function
was turned OFF.
• Check the state of the nozzles, and if there
are frequent nozzle missing and ink droplet
misalignment, conduct cleaning to restore.
• If the same error message still appears after
restoring the state of the nozzles, contact
your local distributor, our sales office, or
service center.
The NCU ink pad is full.
• It is necessary to replace the NCU ink pad.
Contact our service desk or your local dis-
tributor to call for service.
The NCU sensor sensitivity is falling.
• Replacement of the NCU is recommended.
Contact our service desk or your local dis-
tributor to call for service.
The sensitivity of the sensor can not be
adjusted.
The sensitivity of the sensor can not be
adjusted.
Because the nozzle check found nozzles
missing, printing was stopped.
• Perform head cleaning (P.2-19) and
deal with the nozzles clogging (P.3-23).
Because an NCU-related error occurred
during nozzle check, printing was
stopped and the nozzle check function
was turned OFF.
• Contact our service desk or your local dis-
tributor to call for service.
Message Cause Measures
REPLACE NCU
NCU NZK CHK (HW)
Nozzle check OFF
NCU NZK CHK (MARK)
Nozzle check OFF
NCU CENTER POS
Nozzle check OFF
NCU FLUSH POS
Nozzle check OFF
NCU SN ADJST
Nozzle check OFF
REPLACE NCU INK PAD
NCU SENSOR LEVEL LOW
NCU Sens Adj Err H
NCU Sens Adj Err L
Nozzle Missing
Print Stopped
NCU ERROR
Nozzle check OFF
Chapter 6 Troubleshooting
6-6
Ink Error
Ink error is displayed also in the local guidance. ( P.3-27)
Message Cause Measures
• The ink cartridge IC chip cannot be cor-
rectly read.
• An error occurred in the information of
the ink IC chip.
• Make sure there is no nozzle clogging.
(especially for the white ink)
• Make sure that the cartridge is correctly
inserted.
• Reinsert the cartridge.
• Turn off the power on the machine and turn it
on after a while.
When displaying again, contact your local
distributor, our sales office, or service center.
The ink type of loaded ink IC chip is dif-
ferent from the ink type to be loaded.
• Set the ink IC chip of correct ink type.
The ink color of loaded ink IC chip is dif-
ferent from the ink color to be loaded.
• Set the ink IC chip of correct ink color.
No ink IC chip (ink bottle not loaded).
• Set an ink IC chip.
• Make sure that the ink IC chip is correctly
inserted.
• Turn off the power on the machine and turn it
on after a while.
When displaying again, contact your local
distributor, our sales office, or service center.
Ink end (no ink). • Replace the ink with a new one.
INK NEAR END (remains slight ink).
• The ink will soon be used up. See pages
through.
The specified expiration date of an ink
cartridge has passed. (Available)
• Be careful as the expiration date of ink is
coming soon, please use as soon as possi-
ble. Can be used till the next month.
The specified expiration date of an ink
cartridge has passed.
(one month has passed after the speci-
fied expiration date/available)
• Be careful as the expiration date of ink is
coming soon, please use as soon as possi-
ble. Can be used till the next month.
The specified expiration date of an ink
cartridge has passed.
(two month has passed after the speci-
fied expiration date/available)
• Replace the ink with a new one.
WRONG INK IC
INK TYPE
INK COLOR
NON INK IC
Ink end
Ink near-end
Expiration
Expiration:1MONTH
Expiration:2MONTH
Chapter 6 Troubleshooting
6-7
1
2
2
2
2
6
Error messages
When an error message is displayed, eliminate the error according to the chart below.
When displaying again, contact your local distributor or our service desk to call for service.
Message Cause Measures
An error occurred in the head tempera-
ture control.
• Turn off the power to the machine and turn it
on after a while.
When displaying again, contact your local
distributor, our sales office, or service center.
Print head connection error
Print head failure
An error occurred in the main PCB .
An error occurred in the head control.
Detected the battery life end of the main
PCB.
An error occurred in the head control.
An error occurred in the head control.
An error occurred in the log control.
An error occurred in the power supply
system of the main PCB.
An error occurred in the power supply of
the main PCB.
ERROR 108
HD THERMIS [1234]
ERROR 108
HD CONNECT [1234]
ERROR 108
ERROR 108
HD MEM EMP [1234 ]
ERROR 108
HD TYPE [1234]
ERROR 122
CHECK:SDRAM
ERROR 128
HDC FIFO OVER
ERROR 128
HDC FIFO UNDER
ERROR 129
BATTERY EXCHANGE
ERROR 12a
HDC SPEED
ERROR 130
HD DATA SEQ
ERROR 148
E-LOG SEQ
ERROR 151
Main PCB V1R2
ERROR 152
Main PCB V2R5
ERROR 153
Main PCB V3R3
ERROR 154
Main PCB V05
ERROR 155
Main PCB V36-1
ERROR 157
Main PCB VTT
ERROR 158
Main PCB V36-2
ERROR 16e
Main PCB V3R3B
Chapter 6 Troubleshooting
6-8
An error occurred in the power supply of
the main PCB.
• Turn off the power to the machine and turn it
on after a while.
When displaying again, contact your local
distributor, our sales office, or service center.
COM driver becomes the high tempera-
ture.
New Print Head was recognized.
An error occurred in the power supply of
the main PCB.
An error occurred in the head control.
UVLED PCB not connected.
An abnormality occurred in the power
supply of Station 4 PCB.
Memory size is insufficient.
The machine received some data other
than print data. Or, an error occurred in
the transmitted print data.
• Execute data clear and transmit data again.
• Turn the power on again and transmit the
data.
• Check the USB cable connection.
• Use an interface cable conforming to the
specifications.
An error occurred in the transmitted print
data.
The machine received some data
unprintable condition.
• Check the print data output condition of the
RIP software.
• Check the profile.
When displaying again, contact your local
distributor, our sales office, or service center.
An error occurred in the communication
of USB.
• Check the USB cable connection.
• Connect the USB cable again.
• Turn the power on again and transmit the
data.
• Use an interface cable conforming to the
specifications.
Message Cause Measures
ERROR 18a
Main PCB V_CORE
ERROR 18c
Main PCB V12
ERROR 15f
HEAD DRIVE HOT
ERROR 171
NEW HEAD CONNECT
ERROR 18a
Main PCB V_CORE
ERROR 18b
Main PCB V1R5B
ERROR 18c
Main PCB V12
ERROR 18e
FLS NOT COMP
ERROR 18f
OFSET START
ERROR 18f
OFSET END
ERROR 19f
LED Connection Error
ERROR 1dc
Station4 PCB V24
ERROR 1dd
Station4 PCB V24-A
ERROR 1e6
PRAM SIZE SHORTAGE
ERROR 201
COMMAND ERROR
ERROR 202
PARAMETER ERROR
ERROR 206
PRINTING MODE
ERROR 304
USB INIT ERR
ERROR 305
USB TIME OUT
Chapter 6 Troubleshooting
6-9
1
2
2
2
2
6
An error occurred while accessing the
printing condition data.
• Turn off the power on the machine and turn it
on after a while.
When displaying again, contact your local
distributor, our sales office, or service center.
An excessive load was applied to the X
motor.
• Make sure that the media is set correctly.
(Feed without problems?)
• Open the cover and check whether there is
any obstacle in the movement of the car-
riage.
• Turn off the power on the machine and turn it
on after a while.
When displaying again, contact your local
distributor, our sales office, or service center.
An error due to an excessive current of
the X motor was detected.
An excessive load was applied to the Y
motor.
An error due to an excessive current of
the Y motor was detected.
UV unit fan does not work
• Turn off the power on the machine and turn it
on after a while.
When displaying again, contact your local
distributor, our sales office, or service center.
Error on the roller sensor of take-up unit
The roller sensor cannot be correctly
read.
• Make sure that the setting of [Machine set-
ting] -> [feeding / take-up unit] -> [take-up
unit] is "ON".
• Check the set state of the media.
• Confirm that the take-up unit operates using
the manual SW.
Could not separate the print head.
• Turn off the power on the machine and turn it
on after a while.
When displaying again, contact your local
distributor, our sales office, or service center.
Could not connect to the print head.
Could not separate the cutter head.
Could not connect to the cutter head.
Inappropriate pinch roller position.
• Position the pinch roller on the grit roller.
When displaying again again, contact your
local distributor or our service desk to call for
service.
An error occurred in the control position.
• Turn off the power on the machine and turn it
on after a while.
When displaying again, contact your local
distributor, our sales office, or service center.
An error occurred in the Y origin detection
(initialization operation).
Error occurred in the linear scale.
The media width could not be correctly
read.
• Check the media set position.
• Clean the media sensor.
• Turn off the power on the machine and turn it
on after a while.
The media is set outside the proper area.
Raise the clamp lever.
• Check the clamp lever is lowered.
When displaying again, contact your local
distributor, our sales office, or service center.
Message Cause Measures
ERROR 307
MCFD File IF Error
ERROR 401
MOTOR X
ERROR 403
X CURRENT
ERROR 402
MOTOR Y
ERROR 404
Y CURRENT
ERROR 44e
UV UNIT FAN ERROR
ERROR 44 f
Take-UP Roll Sns Err
ERROR 45a
P-HEAD TAKE OFF Err
ERROR 45b
C-HEAD CONNECT Err
ERROR 45c
C-HEAD TAKE OFF Err
ERROR 45d
P-HEAD CONNECT Err
ERROR 45e
CHECK PR/GR POSITION
ERROR 509
HDC POSCNT
ERROR 50a
Y ORIGIN
ERROR 50f
L-SCALE BLACK
ERROR 50c
MEDIA WIDTH SENSOR
ERROR 516
MEDIA SET POSITION R
ERROR 504
CLAMP UP
Chapter 6 Troubleshooting
6-10
MEDIA JAM SENSOR reacted.
• Remove the contacted media and reset it.
• Open the cover and check whether there is
any obstacle in the movement of the car-
riage.
Automatic recognition of negative pres-
sure sensor failed.
• Turn off the power on the machine and turn it
on after a while.
When displaying again, contact your local
distributor, our sales office, or service center.
Cutter head could not be moved due to
connection failure between the cutter
head and the connecting unit.
The internal circuit of the ionizer was
broken or abnormal discharge occurred.
Due to contamination and abrasion of
the electrode needle, the ion generation
amount is reduced.
• Clean the electrode needle by looking at the
ionizer instruction manual.
• If the symptoms do not improve, replace the
corresponding static electrode needle.
When ions are absorbed by the sur-
rounding metal, the static elimination
capability is affected by instability of
installation environment (temperature,
humidity, surrounding metals, etc.).
• Make sure there are no conductors or other
static eliminator near the ionizer.
• Keep away from conductors and static elimi-
nators if they are nearby.
Pump sensor detection error.
• Turn off the power on the machine and turn it
on after a while.
When displaying again, contact your local
distributor, our sales office, or service center.
The linear scale wiring to the DIO PCB is
disconnected.
The IC chip cannot be correctly read.
• Make sure that the IC chip is correctly
inserted.
• Reinsert the bottle.
• Turn off the power on the machine and turn it
on after a while.
When displaying again, contact your local
distributor, our sales office, or service center.
The float sensor of the subtank detected
Limit.
• Perform "Maintenance" "Overflow Mainte-
nance".
When displaying again, contact your local
distributor, our sales office, or service center.
Failed to supply ink to the sub tank
• Turn off the power on the machine and turn it
on after a while.
When displaying again, contact your local
distributor, our sales office, or service center.
It became impossible to maintain the
negative pressure within the proper
range (plus side)
It became impossible to maintain the
negative pressure within the proper
range (minus side)
It became impossible to maintain the
positive pressure within the proper range
(plus side)
IC chip can not be read for a certain
time.
• Make sure that the bottle is correctly
inserted.
• Reinsert the bottle.
• Turn off the power on the machine and turn it
on after a while.
When displaying again, contact your local
distributor, our sales office, or service center.
Message Cause Measures
ERROR 505
MEDIA JAM
ERROR 519
NEGATIVE P.SENSOR
ERROR 522
CUT HOME POSITION
ERROR 525
WRONG IONIZER
ERROR 526
IONIZER ION LEVEL
ERROR 527
IONIZER CONDITION
ERROR 528
PUMP MOTOR SENSOR
ERROR 549
LEnc. Count DIO
ERROR 608
WRONG INK IC
ERROR 61A
InkOverflow
ERROR 61B
SUPPLY INK
ERROR 61D
NEGATIVE P. NotEnough,
ERROR 61E
NEGATIVE P. OVER,
ERROR 620
POSITIVE P.NotEnough,
ERROR 621
POSITIVE P.OVER,
ERROR 627
ERROR627 INK BOTTLE SET
Chapter 6 Troubleshooting
6-11
1
2
2
2
2
6
The NCU unit is not connected. The noz-
zle check function cannot be used.
• Turn off the power on the machine and turn it
on after a while.
When displaying again, contact your local
distributor, our sales office, or service center.
The NCU sensor sensitivity is too low to
correctly judge nozzle missing. The noz-
zle check function cannot be used.
• NCU replacement is necessary.
Contact our service desk or your local dis-
tributor to call for service.
The NCU cannot correctly recognize the
ink discharge, because there are fre-
quent nozzle missing and ink droplet
misalignment.
• Check the state of the nozzles, and if there
are frequent nozzle missing and ink droplet
misalignment, conduct cleaning to restore.
Adjustment of the discharge position to
the NCU has failed.
Sensor sensitivity adjustment has failed.
• Check the state of the nozzles, and if there
are frequent nozzle missing and ink droplet
misalignment, conduct cleaning to restore.
If the same error message still appears after
restoring the state of the nozzles, contact
your local distributor, our sales office, or
service center.
The NCU sensor sensitivity is falling.
• Replacement of the NCU is recommended.
Contact your local distributor, our sales
office, or service center.
The sensitivity of the sensor can not be
adjusted.
Ink heater thermistor broke down.
• Turn off the power on the machine and turn it
on after a while.
When displaying again, contact your local
distributor, our sales office, or service center.
UV-DRV PCB fuse blown.
Due to a certain error, the function can-
not be performed.
• Execute the operation after closing the
cover.
• Execute after media is detected.
• Execute after solving the ink error.
Performed an operation that can not be
executed while receiving print data.
• Execute after clearing the data.
An error occurred in the mounted heads.
• Turn off the power on the machine and turn it
on after a while.
When displaying again, contact your local
distributor, our sales office, or service center.
Message Cause Measures
ERROR 650
NCU CONECT
ERROR 651
REPLACE NCU
ERROR 652
NCU NZK CHK (HW)
ERROR 653
NCU NZK CHK (MARK)
ERROR 654
NCU CENTER POS
ERROR 655
NCU FLUSH POS
ERROR 656
NCU SN ADJST
ERROR 658
NCU SENSOR LV LOW
ERROR 65b
NCU Sens Adj Err H
ERROR 65c
NCU Sens Adj Err L
ERROR 715
InkHeater Thr
ERROR 716
InkHeater Tmp
ERROR 717
InkHeater Brk
ERROR 71a
UV-DRV PCB fuse
ERROR 901
INVALID OPERATION
ERROR 902
DATA REMAIN
ERROR 90d
NO HEAD SELECT
Chapter 6 Troubleshooting
6-12
Insufficient print area in built-in pattern
printing.
• Change the media to the one with enough
width or length.
When the media width narrows because the
origin moved, slide the origin to the right to
widen the effective media width.
An error occurred in the main PCB.
• Turn off the power on the machine and turn it
on after a while.
When displaying again, contact your local
distributor, our sales office, or service center.
Received the code other than the com-
mand date.
• Execute data clear and transmit data again.
• Turn the power on again and transmit the
data.
• Check the USB cable connection.
• Use an interface cable conforming to the
specifications.
Received the parameters outside the
value range.
Received the invalid device control com-
mand.
You have performed "Copy", but the data
is not stored in the reception buffer.
• Execute Copy function using the same data
one more time.
The received data is too big to multiple
sheet cutting.
• Please change the data size.
The feeding direction of the sheet is too
short.
• Use a longer sheet.
Could not detect the register marks.
(1) Check whether the register marks are placed
appropriately. (P.4-2)
(2) Make sure that the media is not curled.
(3) Make sure that the position to start detecting
the register marks is correct.
(4) Make sure that black register marks are
printed on a white base.
(5) Make sure that there are no printed images
or smudges between register marks and that
there is no dust adhered.
(6) Make sure that the register mark detection
settings are correct.
(7) If the register marks still cannot be detected,
even after clearing the check items above,
contact your local distributor, our sales office,
or service center.
(8) If the area around register marks are
colored, set the “MARK FILL UP” of the
register mark detection settings to ON.
The register mark detection result shows
that the origin position was detected out-
side the print range.
• Place the register marks within the sheet.
Could not detect the pen height.
• Turn off the power on the machine and turn it
on after a while.
When displaying again, contact your local
distributor, our sales office, or service center.
The pen height is not correct.
(1) Make sure that the pen line rubber is not
worn out extremely, or it has not come off or
changed form.
(2) Make sure that there is nothing adhered to
the pen line rubber.
(3) After putting the pen in the commercially
available pen holder, check that it is installed
at the correct position.
(4) If an error is still displayed even after clearing
the check items above, contact your local
distributor, our sales office, or service center.
Message Cause Measures
ERROR 90f
PRINT AREA SHORT
ERROR 04
PARAM ROM
ERROR C10
COMMAND
ERROR C11
PARAMETER
ERROR C12
DEVICE
ERROR C31
NO DATA
ERROR C32
DATAtooBIG
ERROR C33
SHEET SIZE
ERROR C36
MARKdetect
ERROR C37
MARK ORG
ERROR C60
PenEncoder
ERROR C61
Pen Stroke
Chapter 6 Troubleshooting
6-13
1
2
2
2
2
6
SYSTEM HALT
Power supply voltage error on CTC
PCB.
• Turn off the power on the machine and turn it
on after a while.
When displaying again, contact your local
distributor, our sales office, or service center.
Power supply voltage error on UV-DRV
PCB.
An error occurred in the power supply of
the STATION IV PCB.
Message Measures
• Turn off the power to the machine and turn it on after a while.
When displaying again again, check the number and contact your local distributor, our
sales office, or service center. (“000” is the error No.)
• Perform cleaning around the wiper.
• Turn off the power to the machine and turn it on after a while.
When displaying again again, check the number and contact your local distributor, our
sales office, or service center.
Message Cause Measures
ERROR B0A
CTC PCB Vpow
ERROR B0B
CTC PCB V24
ERROR B0C
CTC PCB V5R0
ERROR B0D
CTC PCB V3R3
ERROR B0E
CTC PCB V2R5
ERROR B0F
DIO PCB Uvpow
ERROR B19
Station4 PCB V36
SYSTEM HALT (*)
000 :
MESSAGE
SYSTEM HALT (*)
406 : WIPER ORG
Chapter 6 Troubleshooting
6-14
This chapter
contains the lists of the specifications and functions of this machine.
Specification ....................................................................................7-2
Printer Section Specifications ..........................................................7-2
Cutter Section Specifications ...........................................................7-3
Common Specifications ...................................................................7-4
Ink specifications .............................................................................7-6
Ink bottle installation order ...............................................................7-7
Sheet for inquiry ..............................................................................7-8
Chapter 7
Appendix
Chapter 7 Appendix
7-2
Specification
Printer Section Specifications
UCJV300 Series
UCJV150 Series
Item UCJV300-160 UCJV300-130 UCJV300-107 UCJV300-75
Print head
Method Drop-on-demand piezoelectric print heads
Specification 2 heads, 8 nozzles: 4c/6c+WW (in-line)
Printing mode (scan x feed)
300x600dpi
*1
/ 300x900dpi / 600x600dpi / 600x1200dpi / 1200x1200dpi
*1. Depending on the ink type, it may not be installed.
Plotting resolution
x-dpi: 600, 900, 1200
y-dpi: 300, 600, 1200
Usable inks
UV curing ink (genuine Mimaki ink)
C, M, Y, K, Lc, Lm, W, CL
Ink supply Supplied from bottles (UV curing ink)
Ink capacity 1L (1 bottle for each color)
Usable media
Label stock (paper-based) / PVC sheet (including laminated; thickness no more than
0.25 mm) / Fluorescent sheet / Reflective sheet
Margin
Leaf media
Left end and right end : 15 mm (Default) / Min. 5 mm Front : 120 mm Rear : 150 mm
(Left end and right end : 0.6 in (Default) / Min. 0.2 in Front : 4.7 in Rear : 5.9 in)
Roll media
Left end and right end : 15 mm (Default) / Min. 5 mm Front : 120 mm Rear : 150 mm
(Left end and right end : 0.6 in (Default) / Min. 0.2 in Front : 4.7 in Rear : 5.9 in)
Head height adjustment Manual 3-stage (2.0/2.5/3.0)
Waste ink tank Bottle type (2,000 cc)
Command MRL- V
UV unit Two air-cooled LED UV irradiation units (mounted on the head slider)
Item UCJV150-160
Print head
Method Drop-on-demand piezoelectric print heads
Specification 1 heads, 4 nozzles: 4c
Printing mode (scan x feed)
300x600dpi
*1
/ 300x900dpi / 600x600dpi / 600x1200dpi / 1200x1200dpi
*1. Depending on the ink type, it may not be installed.
Plotting resolution
x-dpi: 600, 900, 1200
y-dpi: 300, 600, 1200
Usable inks
UV curing ink (genuine Mimaki ink)
C, M, Y, K
Ink supply Supplied from bottles (UV curing ink)
Ink capacity 1L (1 bottle for each color)
Usable media
Label stock (paper-based) / PVC sheet (including laminated; thickness no more than
0.25 mm) / Fluorescent sheet / Reflective sheet
Margin
Leaf media
Left end and right end : 15 mm (Default) / Min. 5 mm Front : 120 mm Rear : 150 mm
(Left end and right end : 0.6 in (Default) / Min. 0.2 in Front : 4.7 in Rear : 5.9 in)
Roll media
Left end and right end : 15 mm (Default) / Min. 5 mm Front : 120 mm Rear : 150 mm
(Left end and right end : 0.6 in (Default) / Min. 0.2 in Front : 4.7 in Rear : 5.9 in)
Head height adjustment Manual 3-stage (2.0/2.5/3.0)
Waste ink tank Bottle type (2,000 cc)
Command MRL- V
UV unit Two air-cooled LED UV irradiation units (mounted on the head slider)
Chapter 7 Appendix
7-3
1
2
2
2
2
2
7
Cutter Section Specifications
Item Specifications
Maximum speed
*1
*1. The maximum speed may be limited, depending on the size of a used medium. In addition, the cutting section does not operate with both speed and
acceleration being at the maximum.
30 cm/s (42 cm/s in the 45° direction) (118.1 in/s (165.4 in/s in the 45° direction))
Maximum acceleration 0.5G
Cutting pressure 10 to 450g (0.02 to 1.0lb)
Number of times the cutter responds
to a medium
10 times/sec
Usable tools
Eccentric cutter/ water-based ballpoint pen/ oil-based ballpoint pen/ Ballpoint pen for
handwriting (sold on the market)
*2
*2. Use one with a diameter of 8 to 9 Φ whose clamped part has no protrusion or taper. In addition, because the position of the pen point changes, depending on
the types of pens, no good image quality can be ensured.
Usable media
Polyvinyl chloride sheet (Thickness of 0.25mm or less with laminate) /fluorescent
sheet
*3
*4
reflecting sheet
*4
(excluding high-intensity reflecting sheets)/ Label card (paper-
based)/ Heat transfer rubber sheet (Polyvinyl chloride sheet (Thickness of 0.01in or
less with laminate)/ fluorescent sheet / reflecting sheet
*4
(excluding high-intensity
reflecting sheets)/ Label card (paper-based)/ Heat transfer rubber sheet)
*3. This conforms with our specified sheet. This conforms with our specified sheet.
*4. When a blade dedicated for fluorescent sheets (SPB-0007) or a blade dedicated for reflecting sheets (SPB-0006) is used. When a blade dedicated for
fluorescent sheets (SPB-0007) or a blade dedicated for reflecting sheets (SPB-0006) is used.
Margin
Leaf media
Left and right: 15mm (0.6in) (default value), Minimum: 5mm (0.2in), Front: 135 mm
(5.3in), Rear: 150 mm (5.9in)
Roll media
Left and right: 15mm (0.6in) (default value), Minimum: 5mm (0.2in), Front: 135 mm
(5.3in), Rear: 150 mm (5.9in)
Repetition accuracy
*5
*5. For repetition accuracy, see the lower part of this page.
± 0.2 mm or less (excluding expansion and contraction due to temperature)
Reception buffer memory 256 MB
Command MGL-II c2
Program step 25μm/step
Chapter 7 Appendix
7-4
Common Specifications
UCJV300 Series
Item UCJV300-160 UCJV300-130 UCJV300-107 UCJV300-75
Max. printing/ cutting width 1610mm (63.4in) 1361mm (53.6in) 1090mm (42.9in) 800mm (31.5in)
Roll media SIZE
Maximum 1620mm (63.8in) 1371mm (54.0in) 1100mm (43.3in) 810mm (31.9in)
Minimum 210mm (8.3in)
Thickness 1.0 mm or less (0.04 in or less)
Roll outside diame-
ter
*1
*1. It is outside diameter and weight after take-up media.
Paper media : Φ250 mm or less (Φ9.8 in or less) Other media : Φ210 mm or less
(Φ8.3 in or less)
Roll weight
*1,*2
*2. Without deflection of the roll when it is retained at both ends.
40 kg or less (88.2 lb or less)
Roll inside diameter 2 or 3 inches
Printing surface Inside/outside
Roll end treatment
The roll end is gently fixed to the core with weak-adhesive tape or weak glue for
easy removal.
Leaf media SIZE
Maximum 1620mm (63.8in) 1371mm (54.0in) 1100mm (43.3in) 810mm (31.9in)
Minimum 210mm (8.3in)
Distance accuracy
Absolute accuracy
Whichever the larger one of ± 0.3 mm or ± 0.3 % of the designated (Whichever
the larger one of ± 0.01 in or ± 0.3 % of the designated)
Reproducibility
Whichever the larger one of ± 0.2 mm or ± 0.1 % of the designated
(Whichever the larger one of ± 0.08in or ± 0.1 % of the designated)
Perpendicularity ± 0.5 mm / 1000 mm (± 0.02 in / 39.4 in)
Media delivery
Take-up device supplied as a standard accessory (switching possible between
face in and face out).
Interface
Print data transfer
function
USB 2.0, Ethernet 1000 BASE-T
E-mail function Ethernet 10 BASE-T / 100BASE-TX / 1000BA
Noise
During standby Less than 55 dB (A) (FAST-A, Front & Rear & Left & Right 1 m)
During continuous
printing
Less than 65 dB (A)
During discontinu-
ous printing
Less than 70 dB (A)
Safety Standard
VCCI-Class A, FCC-Class A, UL 60950-1 compliant ETL, CE Marking (EMC,Low
Voltage Directive,Machinery Directive, RoHS Directive), CB Report, RoHS,
Energy Star, RCM
Power
Single-phase AC100 - 120V / 200 - 240V ±10%
50/60Hz ± 1Hz
Power consumption [email protected] system / [email protected] system
Recommended
Environment
Available temp. 20 °C to 30 °C (68 °F to 86 °F)
Humidity 35 to 65% Rh (No condensation)
Guaranteed temp.
20 °C to 25 ℃ (68 °F to 86 °F)
Temperature change ± 10 °C / h or less (± 50 °F / h or less)
Dust Equivalent to normal office level
Highest operation
height
2000 m (6561.7ft)
Weight 188kg (414.5lb) 177kg (390.2lb) 161kg (354.9lb) 144kg (317.5lb)
Outside dimensions
Width 2900mm (114.2in) 2650mm (104.3in) 2380mm (93.7in) 2090mm (82.3in)
Depth 776mm (30.6in)
Height 1475 mm (58.1in) (excluding ink bottle height)
Chapter 7 Appendix
7-5
1
2
2
2
2
2
7
UCJV150 Series
Item UCJV150-160
Max. printing/ cutting width 1610mm (63.4in)
Roll media SIZE
Maximum 1620mm (63.8in)
Minimum 210mm (8.3in)
Thickness 1.0 mm or less (0.04 in or less)
Roll outside diame-
ter
*1
*1. It is outside diameter and weight after take-up media.
Paper media : Φ250 mm or less (Φ9.8 in or less) Other media : Φ210 mm or less
(Φ8.3 in or less)
Roll weight
*1,*2
*2. Without deflection of the roll when it is retained at both ends.
40 kg or less (88.2 lb or less)
Roll inside diameter 2 or 3 inches
Printing surface Inside/outside
Roll end treatment
The roll end is gently fixed to the core with weak-adhesive tape or weak glue for
easy removal.
Leaf media SIZE
Maximum 1620mm (63.8in)
Minimum 210mm (8.3in)
Distance accuracy
Absolute accuracy
Whichever the larger one of ± 0.3 mm or ± 0.3 % of the designated (Whichever
the larger one of ± 0.01 in or ± 0.3 % of the designated)
Reproducibility
Whichever the larger one of ± 0.2 mm or ± 0.1 % of the designated
(Whichever the larger one of ± 0.08in or ± 0.1 % of the designated)
Perpendicularity ± 0.5 mm / 1000 mm (± 0.02 in / 39.4 in)
Media delivery
Take-up device supplied as a standard accessory (switching possible between
face in and face out).
Interface
Print data transfer
function
USB 2.0, Ethernet 1000 BASE-T
E-mail function Ethernet 10 BASE-T / 100BASE-TX / 1000BA
Noise
During standby Less than 55 dB (A) (FAST-A, Front & Rear & Left & Right 1 m)
During continuous
printing
Less than 65 dB (A)
During discontinu-
ous printing
Less than 70 dB (A)
Safety Standard
VCCI-Class A, FCC-Class A, UL 60950-1 compliant ETL, CE Marking (EMC,Low
Voltage Directive,Machinery Directive, RoHS Directive), CB Report, RoHS,
Energy Star, RCM
Power
Single-phase AC100 - 120V / 200 - 240V ±10%
50/60Hz ± 1Hz
Power consumption [email protected] system / [email protected] system
Recommended
Environment
Available temp. 20 °C to 30 °C (68 °F to 86 °F)
Humidity 35 to 65% Rh (No condensation)
Guaranteed temp.
20 °C to 25 ℃ (68 °F to 86 °F)
Temperature change ± 10 °C / h or less (± 50 °F / h or less)
Dust Equivalent to normal office level
Highest operation
height
2000 m (6561.7ft)
Weight 183kg (403.4lb)
Outside dimensions
Width 2900mm (114.2in)
Depth 776mm (30.6in)
Height 1475 mm (58.1in) (excluding ink bottle height)
Chapter 7 Appendix
7-6
Ink specifications
Item UV ink
Supply 1 L ink bottle
Color
Black ink
Cyan ink
Magenta ink
Yellow ink
Light cyan ink
Light magenta ink
White ink
Clear ink
Ink capacity 1L
Shelf life
The period is printed on the ink bottle.
Within three months after opening the package even in the available period.
Storage temperature
Storage
5 to 30 ℃ (Up to 1 month at 30 ℃ )
• Be sure to keep a vessel in the airtight condition.
• Be sure to keep a vessel in a dry, well-ventilated, cool and dark location.
Transportation
1 to 60 ℃ (Up to 120 hours at 60 ℃ , up to 1 month at 40 ℃ )
• Avoid the condition lower than 0 °C and higher than 40 °C. (Avoid the condition
lower than 32 °F and higher than 104 °F.)
• Do not disassemble ink bottles and do not refill them with ink.
• Ink could freeze if kept in a cold place for an extended period.
If the ink freezes, defrost it for at least 3 hours at room temperature (25 ℃ ) before use.
Note that the properties of ink that has been frozen will change, resulting in deteriorated print quality. Store the ink in an
environment that will not freeze the ink.
Chapter 7 Appendix
7-7
1
2
2
2
2
2
7
Ink bottle installation order
• The installation order of ink bottles varies depending on the ink set that you are using.
Model Ink Set
Installation Location
1 2 3 4 5 6 7 8
UCJV150 Series 4C - - C M Y K - -
UCJV300 Series
4C CMYKYKMC
6C + W C M Y K Lm Lc W W
4C + CL + W C M Y K CL CL W W
4C + W C C M M Y K W W
1
2
3
4
5
6
7
8
Chapter 7 Appendix
7-8
Sheet for inquiry
Use this sheet for troubles and abnormal functions of the machine.
Fill in the following necessary items, and fax the sheet to our sales office.
Company name
Person in charge
Telephone number
Machine model
Operating system
Machine information
*1
*1. Refer to "Displaying the Information" of "Convenient using" then fill in necessary information. ( P.3-27)
Error message
Contents of inquiry
UCJV300Series/150Series Operation Manual
October, 2018
MIMAKI ENGINEERING CO.,LTD.
2182-3 Shigeno-otsu, Tomi-shi, Nagano 389-0512 JAPAN
D203176-23-19102018
MK
FW : 2.20
© MIMAKI ENGINEERING CO., LTD.2017
Ошибка 504 Gateway Time out – это код состояния HTTP, который означает, что один сервер не получил своевременный отклик от другого сервера, к которому он обратился, пытаясь загрузить веб-страницу или выполнить запрос браузера. Она может возникать вместе с 502 Bad Gateway.
Другими словами, ошибка 504 указывает на то, что у сервера, на котором расположен сайт и у компьютера, на котором выскакивает ошибка 504, отсутствует стабильное достаточно быстрое соединение с интернетом.
- Как можно увидеть ошибку 504 Gateway Time out
- Причины возникновения ошибки 504 Gateway Time out
- Как исправить ошибку 504 Gateway Time out
- Исправление ошибки 504 Gateway Time out на вашем собственном сайте
- Больше способов увидеть ошибку 504 Gateway Time out
- Ошибки похожие на 504 Gateway Time out
Отдельным сайтам разрешено настраивать отображение ошибки Gateway Timeout. Вот несколько распространенных способов вывода подобной ошибки:
504 Gateway Timeout
HTTP 504
504 ERROR
Gateway Timeout (504)
HTTP Error 504 - Gateway Timeout
Gateway Timeout Error
Ошибка 504 Gateway Time out появляется внутри окна браузера, как обычная веб-страница. На ней могут быть знакомые верхние и нижние колонтитулы сайта и красивое английское сообщение. Также подобная ошибка может отображаться на полностью белой странице с большой цифрой 504 вверху. Это одно и то же сообщение, независимо от того, как сайт показывает его вам.
Помните, что ошибка 504 Gateway Time out и 502 Bad Gateway nginx может появиться в любом браузере, операционной системе и на любом устройстве.
В большинстве случаев ошибка 504 Gateway Timeout означает, что любой сервер, который выдает «тайм-аут», «упал» или неправильно работает.
Поскольку эта ошибка обычно возникает между серверами в интернете, то, вероятно, она не связана с вашим компьютером, устройством или интернет-соединением.
Перезагрузите веб-страницу, нажав кнопку обновление / перезагрузка, в F5 или повторив URL-адрес из адресной строки.
Несмотря на то, что 504 Gateway Timeout и ошибка 502 Bad Gateway сообщает о неподконтрольной вам ошибке, проблема может быть временной. Просто перезагрузите страницу — это быстро и легко.
- Перезапустите все сетевые устройства. Временные проблемы с модемом, маршрутизатором, коммутаторами или другим сетевым оборудованием могут вызывать ошибку 504 Gateway Timeout. Простой перезапуск этих устройств может помочь.
Подсказка: При том, что порядок выключения этих устройств не важен, порядок включения их наоборот очень важен.
- Проверьте настройки прокси-сервера в своем браузере или приложении. Убедитесь, что они верны. Неправильные настройки прокси-сервера могут вызвать 504 ошибку.
Подсказка. Смотрите Proxy.org обновленный, проверенный список прокси-серверов, которые можно использовать.
Примечание. Большинство компьютеров не имеют настроек прокси-сервера, поэтому, если ваши настройки пусты, пропустите этот шаг.
- Измените DNS-сервер. Возможно, ошибка 504 Gateway Timeout, которую вы видите, вызвана проблемой с DNS-сервером, который вы используете.
Примечание. DNS-сервер, используемый сейчас, вероятно, автоматически назначается вашим провайдером. К счастью, для использования доступны другие DNS-сервера, которые можно выбрать.
Подсказка. Если не все сетевые устройства получают ошибку HTTP 504 или 502 error Bad Gateway, но все они находятся в одной сети, изменение DNS-сервера не сработает. Если это похоже на вашу ситуацию, переходите к следующей идее.
- Если изменений не произошло, обратитесь к сайту. Это единственное, что вы можете сделать. Велика вероятность, что администраторы сайта уже работают, чтобы исправить первопричину ошибки 504 Gateway Timeout.
На большинстве сайтов есть учетные записи социальных сетей, которые они используют для поддержки. А некоторые даже имеют номера телефонов и адреса электронной почты.
Подсказка. Если начинает казаться, что сайт выдает 504 ошибку для всех, поищите в Twitter в режиме реального времени информацию о недоступности сайта. Лучший способ сделать это — найти #websitedown в Twitter. Например, если Facebook может быть недоступен, выполните поиск по тегу #facebookdown.
- Обратитесь к своему интернет-провайдеру. Вероятнее всего, что после описанного выше устранения неполадок, выскакивающая 504 Gateway Timeout — это проблема, вызванная неполадками в Сети, за которую отвечает ваш провайдер.
- Вернуться позже. На данный момент вы исчерпали все варианты, и ошибка 504 Gateway Timeout устраняется администратором сайта или интернет-провайдером.
Регулярно проверяйте сайт. Без сомнения, он снова начнет работать.
В большинстве случаев это происходит не по вашей вине, но и не по вине пользователей вашего ресурса. Начните с проверки того, что сервер может правильно предоставлять доступ ко всем доменам, к которым требуют доступ ваши приложения.
Большие объемы трафика могут привести к тому, что ваш сервер будет выдавать ошибку 504. Хотя 503 или ошибка 502 Bad Gateway будет более вероятна.
В частности, в WordPress сообщение 504: Gateway Timeout иногда возникает из-за поврежденных баз данных. Установите WP-DBManager и попробуйте применить функцию «Восстановить БД», а затем «Оптимизировать БД». Посмотрите, поможет ли это.
Убедитесь, что ваш файл HTACCESS правильный. Особенно если вы только что переустановили WordPress.
Свяжитесь с технической поддержкой хостинга. Возможно, ошибка 504, возвращаемая вашим сайтом, связана с проблемой на их стороне, которую они должны решить.
Ошибка Gateway Timeout при получении в Windows Update генерирует код ошибки 0x80244023 или сообщение WU_E_PT_HTTP_STATUS_GATEWAY_TIMEOUT.
В программах на базе Windows, которые изначально обращаются к интернету, ошибка 504 может отображаться в небольшом диалоговом окне или окне с ошибкой HTTP_STATUS_GATEWAY_TIMEOUT и/или сообщение The request was timed out waiting for a gateway (истекло время ожидания запроса для шлюза).
Менее распространенная ошибка 504 — это Gateway Time-out: The proxy server did not receive a timely response from the upstream server (прокси-сервер не получил своевременного ответа от вышестоящего сервера), но поиск и устранение неисправностей (указанных выше) продолжается.
Ряд сообщений об ошибках аналогичен ошибке 504 Gateway Timeout, поскольку все они происходят на стороне сервера. Некоторые включают в себя ошибку 500 Internal Server («Внутренняя ошибка сервера»), ошибку 502 Bad Gateway (что это означает — «Неверный шлюз»), и ошибку 503 Service Unavailable («Сервис временно недоступен»), среди нескольких других.
Существуют также коды статуса HTTP, которые не являются серверными, а возникают на клиентской стороне. Например, часто встречающаяся ошибка 404 Not Found («Страница не найдена»).
Проблемы, при которых на дисплее появляются сообщения об ошибке
Если в работе устройства возникают проблемы, то раздается звуковой сигнал, и на дисплее появляется соответствующее сообщение об ошибке.
Выполните необходимые корректирующие действия в соответствии с сообщением на дисплее.
Ошибки, сопровождающиеся предупредительными сигналами
Эти ошибки обычно имеют отношение к элементам устройства, которые связаны с чернилами.


Сообщения об ошибках
В сообщениях об ошибках указан номер ошибки. Если на дисплее появилось какое-либо сообщение об ошибке, отключите питание устройства и затем через некоторое время включите его снова. Если на дисплее вновь появится такое же сообщение, свяжитесь с местным дистрибьютором MIMAKI или обратитесь за помощью непосредственно в сервисную службу компании MIMAKI.
Сообщение об ошибке
Отключите на некоторое время питание устройство, затем включите его снова. При появлении на дисплее того же сообщения, обратитесь к местному дистрибьютору за сервисной помощью.


Приложение
В приложении описаны спецификации и детали устройства, а также структура меню функций.
Содержание
Приложение
ОСНОВНЫЕ спецификации
СПЕЦИФИКАЦИИ ЧЕРНИЛ
РАЗМЕЩЕНИЕ предупредительных НАДПИСЕЙ
Структура меню функций……………………………………………………..
ОСНОВНЫЕ спецификации |
| Наименование | JV3-160SP | |
| Печатающая головка | Метод | Пьезоэлектрическая печатающая головка «c каплей по запросу» |
| Спецификация | 4 линейные головки | |
| Дозатор | 360 дозаторов для каждого цвета | |
| Разрешение | 360, 540, 720, 1440 точек на дюйм (т/д) | |
| Режим печати | Набор из 4-х цветов | 360 x 360 т/д: 1 / 2 / 4 проходов, в одном/ двух направлениях |
| 360 x 720 т/д: 2 / 4 / 8 проходов, в одном/ двух направлениях | ||
| 720 x 720 т/д: 2 / 4 / 8 проходов, в одном/ двух направлениях | ||
| 720 x 1440 т/д: 4 / 8 / 16 проходов, в одном/ двух направлениях | ||
| 1440 x 1440 т/д: 8 / 16 проходов, в одном/ двух направлениях | ||
| Набор из 6-х цветов | 360 x 360 т/д: 2 / 4 / 8 проходов, в одном/ двух направлениях | |
| 360 x 540 т/д: 3 / 6 / 12 проходов, в одном/ двух направлениях | ||
| 360 x 720 т/д: 4 / 8 / 16 проходов, в одном/ двух направлениях | ||
| 720 x 720 т/д: 4 / 8 / 16 проходов, в одном/ двух направлениях | ||
| 720 x 1440 т/д: 8 / 16 / 32 проходов, в одном/ двух направлениях | ||
| 1440 x 1440 т/д: 16 / 32 проходов, в одном/ двух направлениях | ||
| Используемые чернила | Набор из 4-х цветов | 4 цвета (черный, циан, маджента, желтый) по два цвета на 1 картридж для каждого цвета |
| Набор из 6-х цветов | 6 цветов сольвентных чернил (черный, циан, маджента, желтый, светлый циан, светлая маджента), по одному каждого цвета, и 2 картриджа очистительной жидкости для 1 картриджа каждого цвета | |
| Емкость чернильного картриджа | 4-цветный набор: каждый цвет (220 cc 5 cc для каждого картриджа) x 2
6-цветный набор: каждый цвет (220 cc 5 cc для каждого картриджа) x 1 Около 200 cc для каждого картриджа, изменяемая |
|
| Тип материала для печати | Баннер, FF, ПВХ | |
| Макс. ширина печати | 1440 x 1440 т/д: 1610 мм (для 4 цветов), 1000 мм (для 6 цветов) | |
| При нормальном сканировании | 1610 мм | |
| Высокоскоростное сканирование | 1570 мм | |
| Размеры рулонного материала | (макс.) | 1620 мм |
| (мин.) | 210 мм | |
| толщина | 1.0 мм или менее (< 1, 0 мм) | |
| внешний диаметр рулона | 180 мм или менее (< 180 мм) | |
| вес рулона | 25 Кг или менее (<25 кг) | |
| внутренний диаметр рулона | 2 дюйма, 3 дюйма | |
| поверхность печати | Лицом наружу | |
| крепление конца рулона | используется легкая клеящаяся лента для облегчения снятия бумаги с сердечника | |
| Размеры листового материала | (макс.) | 1620 мм |
| (мин.) | 210 мм | |
| Поля | листовой материал | правый и левый край: 15 мм |
| спереди: 65 мм | ||
| сзади: 110 мм | ||
| Поля | рулонный материал | правый и левый край: 15 мм |
| спереди: 25 мм | ||
| сзади: 0 мм | ||
| Точность размера | абсолютная точка | Любая наибольшая из 0.3 мм или 0.3 % от назначенной |
| воспроизводимость | Любая наибольшая из of 0.2 мм или 0.1 % от назначенной | |
| Перпендикулярный | 0.5 мм / 1000 мм | |
| Отклонение материала | 5 мм или меньше / 10 м изменяемая (< 5 мм / 10 м) | |
| Регулировка высоты головки | 2.0 мм / 3 мм изменяемая, от поверхности рабочего печатного стола | |
| Обрезка материала | Обрезка по оси Y при помощи резака на блоке головок,
точность отрезания (шаги): 0.5 мм или менее. |
|
| Подача материала | Стандартное подающее устройство (закрутка внутрь / наружу, на выбор) | |
| Емкость для отхода чернил | Бутылочный тип (2,000 cc [1pcs.])
Необходимость замены определяется визуально. |
|
| Интерфейс | Совместим с IEEE1394 и с IEEE1284. | |
| Команда | MRL-II (база ESC/PV.2, MIMAKI) | |
| Рабочий шум | в режиме ожидания: менее 58 dB (FAST-A, измерено на расстоянии 1 м со всех сторон)
при непрерывной печати: менее 65 dB при прерывании печати: менее 70 dB |
|
| Стандарт безопасности | UL, VCCI-classA, FCC-classA, CEmarking, CBreport | |
| Питание | AC 100 — 120 V± 10%, AC 220 — 240 V± 10%, 50/60 Hz ± 1 Hz | |
| Поглощение энергии | 1.5 KVA
или менее |
|
| рекомендованные условия окружающей среды | допустимая температура | От 20º С до 35º C |
| влажность | 35 to 65 % относительной влажности (без конденсации) | |
| гарантированная температура | От 20º С до 25º C | |
| колебания температуры | ± 10 º C / в час или менее | |
| пыль | Условия обычного офисного уровня | |
| Вес | основной блок | 185 кг (без переднего вытяжного блока: 175 кг или менее) |
| габариты | ширина | 2660 мм |
| глубина | Менее 750 мм | |
| высота | Менее 1240 мм |
СПЕЦИФИКАЦИИ ЧЕРНИЛ |
| Наименование | Спецификация |
| Цвет | Картридж с чернилами черного цвета |
| Картридж с чернилами цвета циан | |
| Картридж с чернилами цвета маджента | |
| Картридж с чернилами желтого цвета | |
| Картридж с чернилами цвета светлый циан | |
| Картридж с чернилами цвета светлая маджента | |
| емкость картриджа с чернилами | 220 cc для каждого картриджа |
| срок хранения | Один год с даты производства (при комнатной температуре) |
| В течение 3 месяцев после открытия упаковки | |
| t хранения | -30 to 40º C
(Хранение при t = 40ºC не более месяца) -30 to 60ºC (Хранение при t = 60ºC не более 120 часов, а при t = 40ºC — не более одного месяца) |

РАЗМЕЩЕНИЕ предупредительныХ НАДПИСЕЙ |
На устройстве приклеены этикетки с предупредительными надписями. Убедитесь в том, что Вы правильно понимаете все, что на них написано. Если хотя бы одна из надписей загрязнится до такой степени, что понять написанное будет невозможно, или если надпись отклеится, приобретите новую у своего местного дистрибьютора или в офисе MIMAKI.
Лицевая сторона
З
адняя сторона
Структура меню функций |


© MIMAKI ENGINEERING Co., Ltd. 2004