Find out four effective solutions to solve DISM issues
by Matthew Adams
Matthew is a freelancer who has produced a variety of articles on various topics related to technology. His main focus is the Windows OS and all the things… read more
Updated on November 2, 2022
Reviewed by
Vlad Turiceanu

Passionate about technology, Windows, and everything that has a power button, he spent most of his time developing new skills and learning more about the tech world. Coming… read more
- Seeing the Elevated permissions are required message when trying to run the DISM command can stop you from repairing your PC.
- This issue can be resolved by running the DISM command with administrator privileges.
XINSTALL BY CLICKING THE DOWNLOAD FILE
This software will repair common computer errors, protect you from file loss, malware, hardware failure and optimize your PC for maximum performance. Fix PC issues and remove viruses now in 3 easy steps:
- Download Restoro PC Repair Tool that comes with Patented Technologies (patent available here).
- Click Start Scan to find Windows issues that could be causing PC problems.
- Click Repair All to fix issues affecting your computer’s security and performance
- Restoro has been downloaded by 0 readers this month.
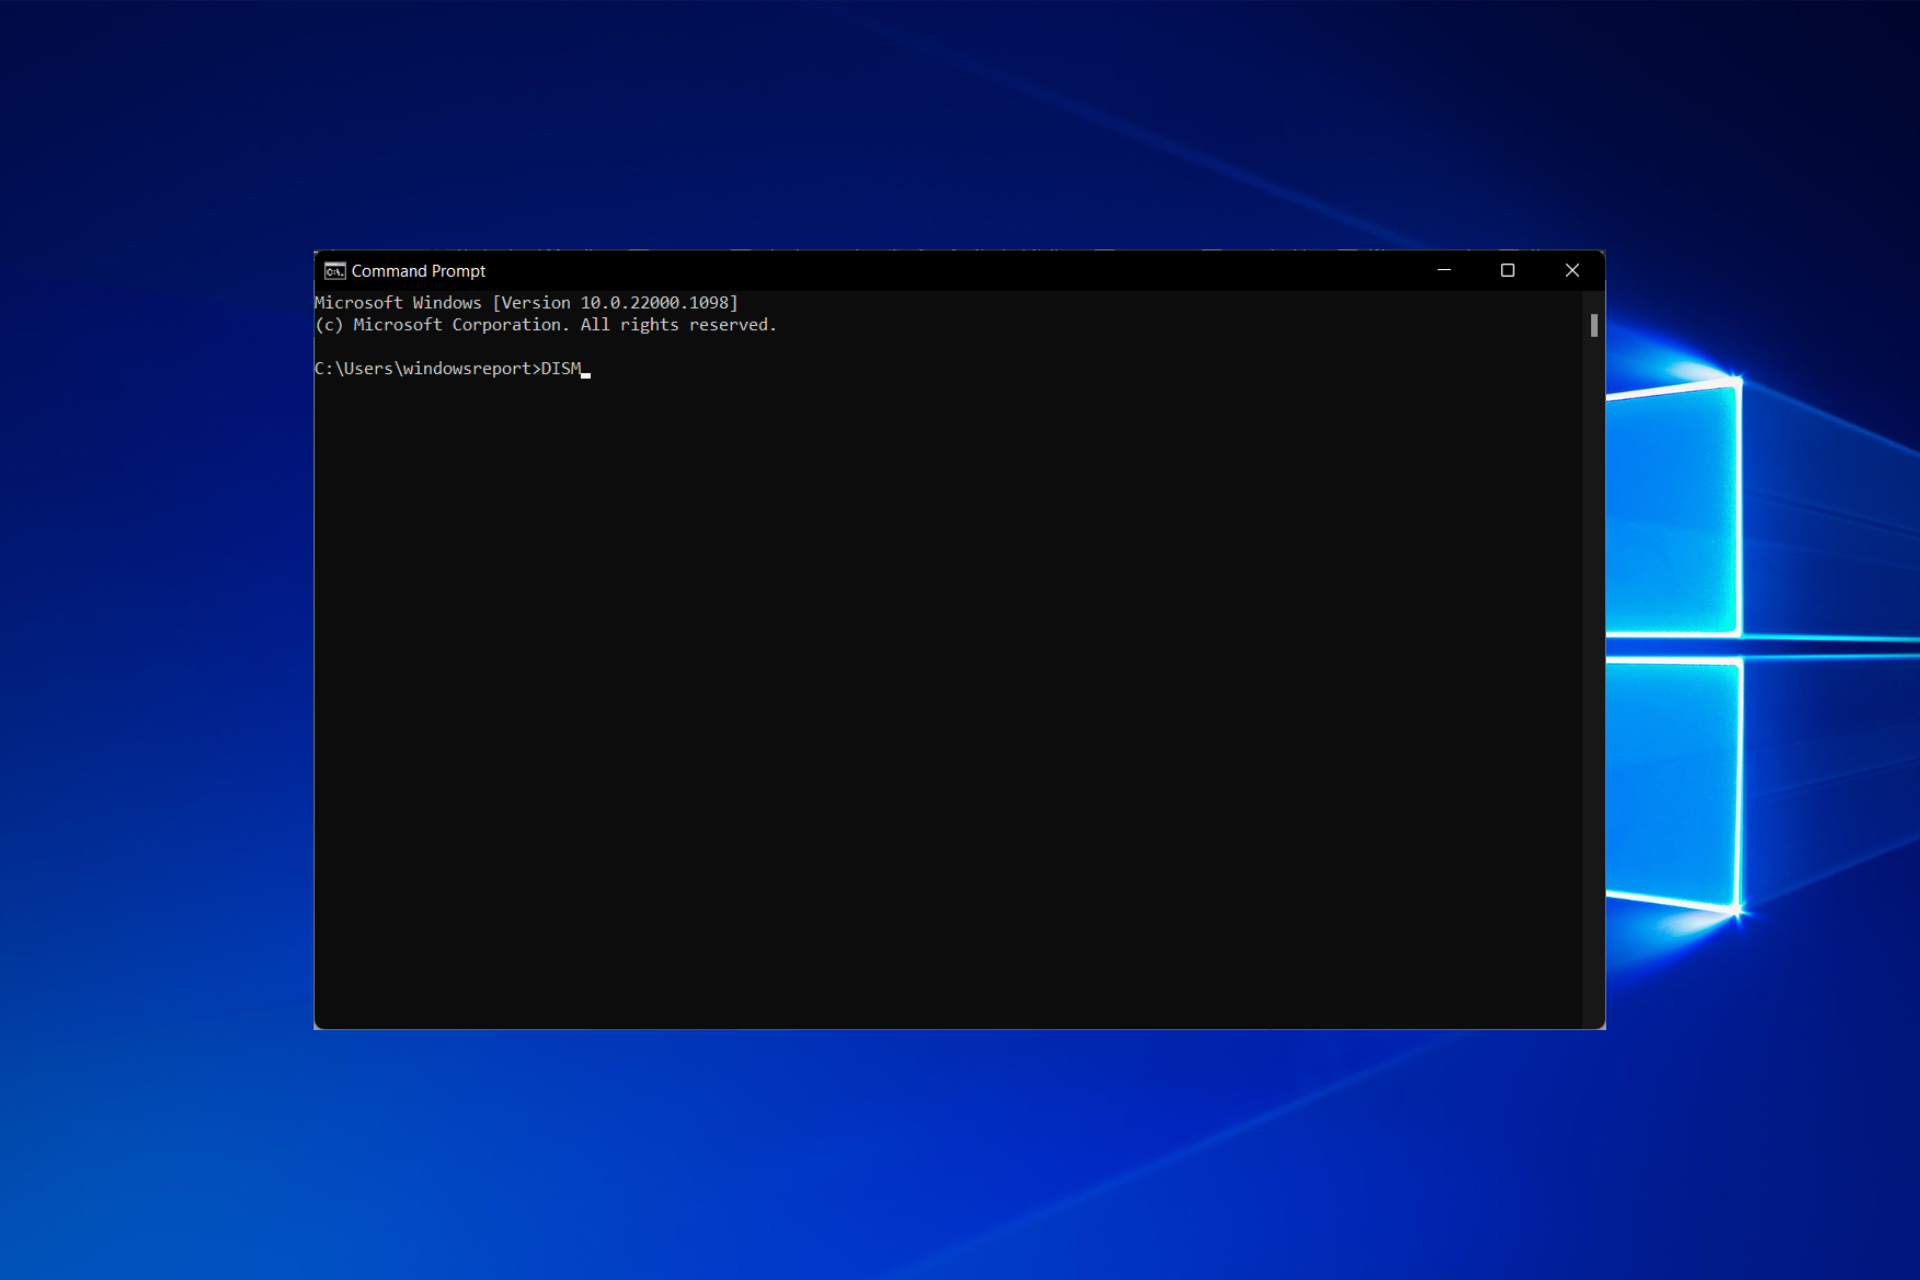
The Deployment Image Servicing and Management (DISM) is a command-line utility you can access within the Command Prompt.
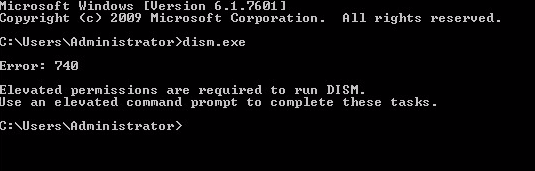
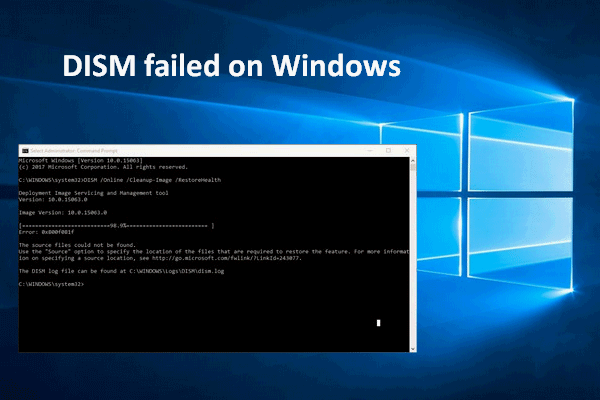
However, the Dism command doesn’t always work for some users. The Command Prompt might sometimes display this error message after users enter the Dism command:
Error: 740 Elevated permissions are required to run DISM. Use an elevated Command Prompt to complete these tasks.
That message drops more than a subtle hint as to how to resolve Elevated permissions are required to run DISM in Windows 10/11. You need to open an elevated Command Prompt (one with administrative rights) to utilize Deployment Image Servicing. So, fixing error 740 is straightforward.
What is an elevated permission?
A user is said to have elevated permission when additional capabilities beyond those of a standard user are assigned to that user.
The administrator account has elevated privileges compared to a standard user.
How do I raise permissions to run DISM?
- What is an elevated permission?
- How do I raise permissions to run DISM?
- 1. Select the Run the Command Prompt as an administrator option
- 2. Select the Run new task option
- 3. Open an elevated Command Prompt with Run
- 4. Set up a Command Prompt shortcut
- How and why are elevated permissions used?
1. Select the Run the Command Prompt as an administrator option
1. First you need to open Windows 10’s search box. To do that, press the Windows key + S keyboard shortcut.
2. Type Command Prompt in the search utility then select Run as administrator from the right side, under the result.
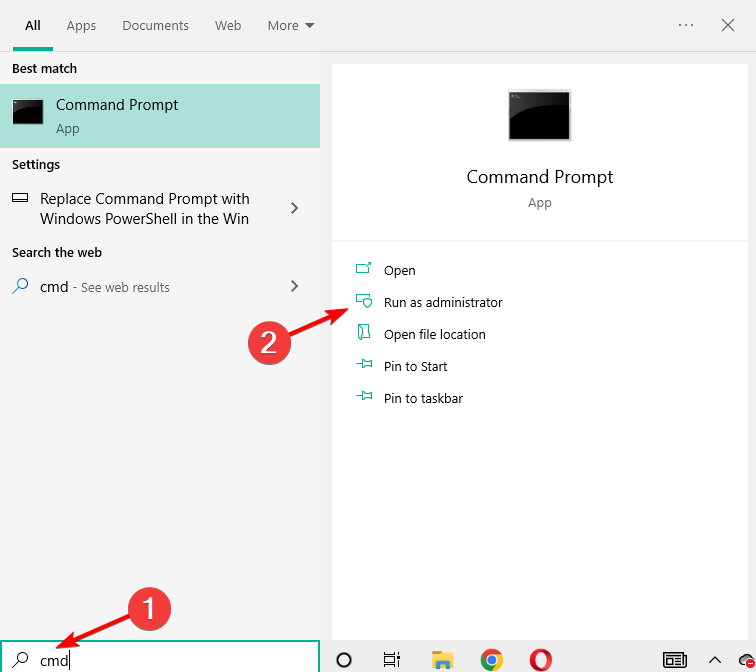
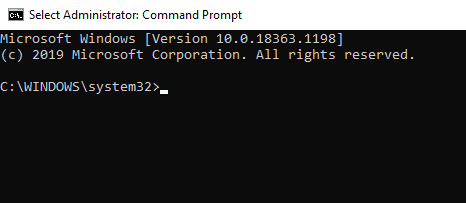
3. Click Yes on the UAC dialog box that might open. An Administrator: Command Prompt window will then open.
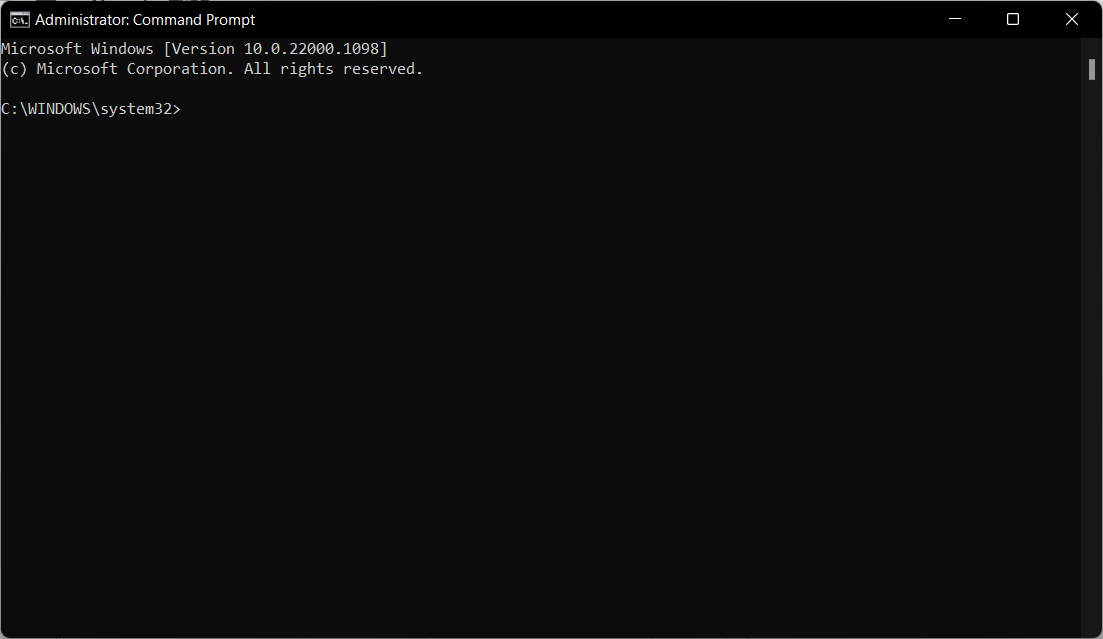
4. Type in the Deployment Image Servicing command.
5. Press the Enter key to run the command. The Elevated permissions are required to run DISM issue should no longer appear.
If you are encountering the Elevated permissions are required to run DISM issue, the first thing you need to try is run the command-line tool you want to run DISM on with administrator rights.
Some users complained that they can’t access the Command Prompt as administrators. If that’s also your case, don’t worry, we got your back!
2. Select the Run new task option
- Alternatively, you can open an elevated Command Prompt via Task Manager. Right-click the taskbar in Windows 10 to select the Task Manager option.
- Next, click File.

- Select the Run new task option to open the window shown directly below.
- Enter cmd in the Open text box.2
- Select the Create this task with administrative privileges option.
- Click OK to open an elevated Command Prompt.

- How to Make Yourself an Administrator in Windows 10
- 5 Ways to Fix Invoke this Utility Running in Elevated Mode
- How to Run a Program Without Admin Rights in Windows 10
- You Need Administrator Permission to Delete on Windows 10
3. Open an elevated Command Prompt with Run
- Run is an accessory you can open an elevated Command Prompt with. To do so, open the Win + X menu by right-clicking the Start menu.
- Select Run to open it. Enter cmd in the Run box.

- Press the Ctrl + Shift + Enter hotkey.
- Select the Yes option on the UAC dialog box.

Some PC issues are hard to tackle, especially when it comes to corrupted repositories or missing Windows files. If you are having troubles fixing an error, your system may be partially broken.
We recommend installing Restoro, a tool that will scan your machine and identify what the fault is.
Click here to download and start repairing.
Note: If your Win+X menu is not working normally, have a look at our detailed guide on this topic.
4. Set up a Command Prompt shortcut
- You can also set up a desktop shortcut that will open an elevated Command Prompt when you click it. To do that, right-click the desktop and select Shortcut.
- Enter cmd.exe in the Type the location of the text box.

- Click the Next button.
- The shortcut title will be cmd.exe by default, but you can change it to an alternative of your preference.
- Click the Finish button.
- Next, right-click the cmd.exe desktop shortcut and select Properties.
- Select the Shortcut tab in the snapshot directly below.

- Click the Advanced button.
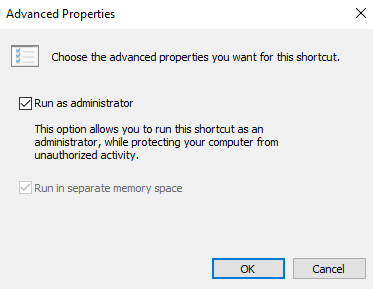
- Select Run this administrator option.

- Click the OK button to exit Advanced Properties.
- Click the Apply option.
- Select OK to close the window and fix error 740 DISM.


How and why are elevated permissions used?
The CMD starts by default with limited rights and this is nothing but a security measure designed to prevent users from running commands that can irreversibly damage their PCs.
While you won’t have any trouble executing most commands in standard mode, there are specific lines that require administrative privileges (aka elevated permissions).
To put it shortly, you will need to run Command Prompt as administrator if you wish to perform SFC or DISM scans, for example. But the list is obviously longer than that.
So what happens if you try to run such a command without admin rights?
That’s easy and you’ve probably seen this behavior already (otherwise, you wouldn’t be here.) The Command prompt will display an error message and urge you to activate elevate permissions.
Let’s see some examples:
- You must be an administrator running a console session in order to use the SFC utility.
- Access Denied as you do not have sufficient privileges or the disk may be locked by another process.
- You have to invoke this utility running in elevated mode and make sure the disk is unlocked.
- Elevated permissions are required to run DISM. Use an elevated command prompt to complete these tasks.
Finally, setting the two instances apart is extremely easy as the title of the elevated Command Prompt window will be marked as Administrator and get you straight to the system root level, while the standard cmd.exe opens to your user’s folder and is simply marked as Command Prompt.
These are the best solutions to try out in order to fix error 740: elevated permissions are required to run DISM. use an elevated command prompt to complete these tasks.
Sometimes, the Run as Administrator option will not work. In this case, we recommend that you remove the problematic application that causes this issue.
Alternatively, if you get access denied while using an administrator account, make sure to refer to our dedicated guide on this issue.
Don’t forget to leave us a comment in the section found below this guide.
Still having issues? Fix them with this tool:
SPONSORED
If the advices above haven’t solved your issue, your PC may experience deeper Windows problems. We recommend downloading this PC Repair tool (rated Great on TrustPilot.com) to easily address them. After installation, simply click the Start Scan button and then press on Repair All.
![]()
Newsletter
Содержание
- How to Fix Elevated Permissions are required to run DISM (Error 740)
- 1. Run Command Prompt as an Administrator.
- 2. Disable User Account Controls.
- 3. Repair the Registry.
- 4. Enable Run New Task Option.
- 5. Set Up a Command Prompt Shortcut.
- 6. Open Elevated Command With Run.
- Для запуска утилиты DISM требуется более высокий уровень разрешений Windows 10
- Что такое DISM
- Как запустить и работать с DISM
- CheckHealth
- ScanHealth
- RestoreHealth
- RestoreHealth и Source
- Использование DISM с файлом install.ESD
How to Fix Elevated Permissions are required to run DISM (Error 740)

Looking for easy solutions to fix the ‘Elevated Permissions are required to run DISM’ (Error 740)?
DISM is a command-line tool that helps configure and install Windows features, create files, run programs, and repair Windows. This tool supports a variety of features and also is capable of replacing other deployment tools like ImageX.
Unfortunately, it is common for users to run into errors while using DISM. This can be frustrating, especially when you are trying to open, create, or delete files on your PC in a hurry. One such DISM error that does not allow users to access files is the DISM error 740. This error suggests that the users need to have local administrative ownership if they want to access a file.
Error 740 occurs when the User Account Control (UAC) section of your PC detects your profile as a “user” instead of an “administrator”. As a result, UAC does not allow you to open programs that can be accessed by administrators only.
If you have been facing this error on your PC, we got you covered.
This guide will walk you through the process of fixing the “Elevated Permissions are required to run DISM” error in a few simple steps.
Let’s get started.
1. Run Command Prompt as an Administrator.
It is common to experience DISM error 740 when you are trying to run a command in the Command Prompt. A simple solution to this is to run the commands in elevated Command Prompt, as it gives administrative rights to the users.
To run Command Prompt as an administrator, follow the steps mentioned below:
- Type Command Prompt in the search bar.
- Select Run as Administrator on the right panel.
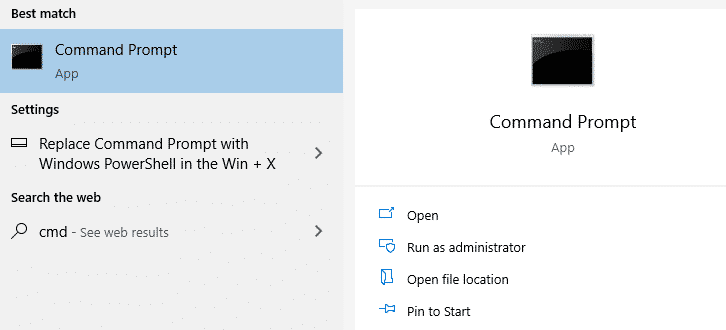
- This will open a new window to confirm the operation. Select Yes to run Command Prompt as an administrator.
- You can now type the Deployment Image Servicing command in the Command Prompt and hit Enter.
This will enable you to execute all the commands in Command Prompt.
However, if you want to open a particular program, follow the steps mentioned below.
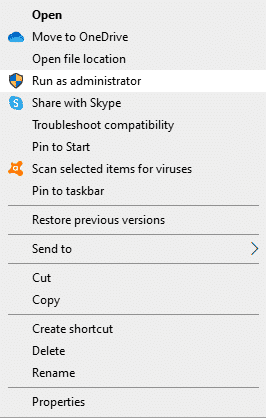
- Locate the icon of the application on your PC’s desktop.
- Right-click the icon and select Run as an administrator option .
Doing so will solve the error and you will be able to run the program.
2. Disable User Account Controls.
As mentioned earlier, UAC (User Account Control) analyzes your profile and determines if you are a user or an administrator. You can simply disable User Account Controls to access all the programs and files on your computer.
To disable User Account Controls, follow the steps mentioned below:
- Type Control Panel in the search bar and hit Enter .
- In the Control Panel window, type UAC in the search box on the top right corner.
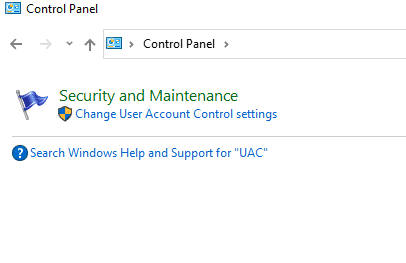
- Click on “Change User Account Control Settings” to open a new window.
- In the new window, move the blue scale down to the last option to solve the error.
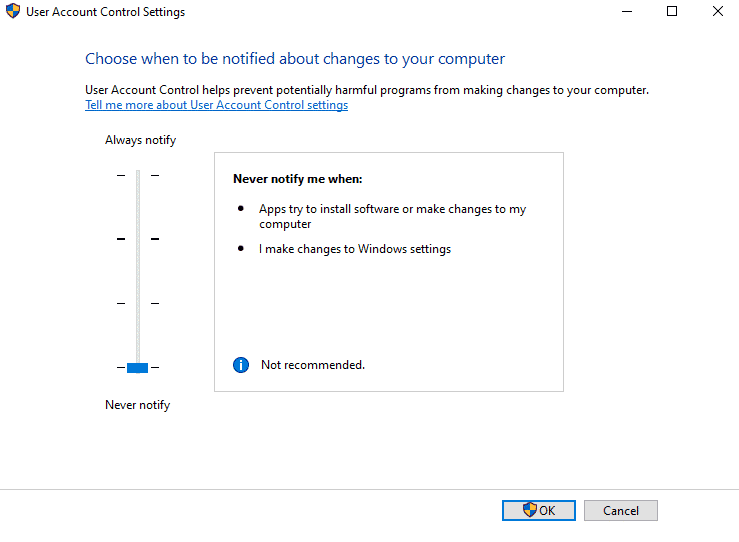
- Finally, select Yes to change User Account Control settings on your PC.
Disabling User Account Controls will give you administrative rights on your PC. If the problem persists, try the method mentioned below.
3. Repair the Registry.
A corrupted registry can also cause DISM error 740 in your PC. To solve this issue, you need to download and run a Registry Cleaner on your PC.
A registry cleaner can run scans through the registry and identify the corrupted files that you need to remove from your PC. Some of the best registry cleaners are listed below:
Using a third-party registry cleaner will remove all the redundant items and keep the system error-free. Moreover, it will also increase the speed of your computer.
4. Enable Run New Task Option.
A Task Manager provides information about the general status of the computer. If you have been facing the DISM error 740 on your PC, you can open Elevated Command Prompt through Task Manager to get the administrative rights.
To do so, follow the steps mentioned below:
- Type Task Manager in the search bar and hit Enter to open the application.
- Select File from the menu bar and click on Run new task to open a dialogue box.
- Type cmd in the box and select the “ Create this task with administrative privileges ” option.
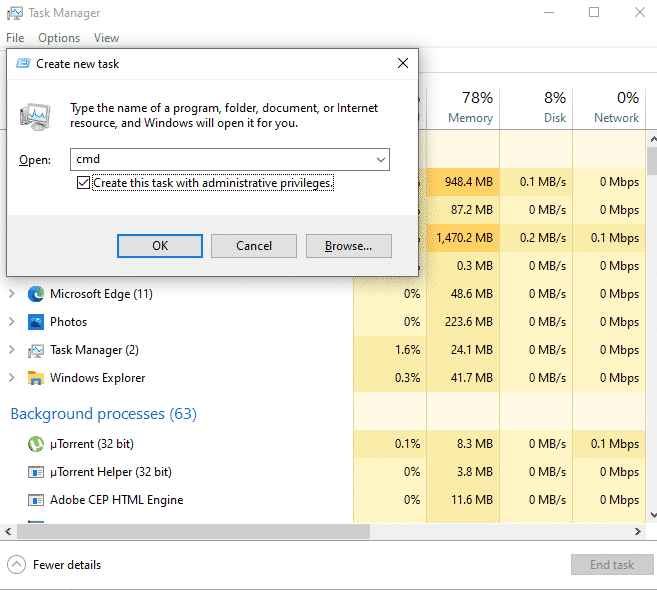
- Now, select OK to open the elevated Command Prompt.
Hopefully, you will now be able to execute all the commands without any issue.
5. Set Up a Command Prompt Shortcut.
Opening Elevated Command Prompt through Task Manager might seem like a time-consuming or complex process. To simplify it, you can create a shortcut for elevated Command Prompt on your desktop.
This shortcut will allow you to open an elevated Command Prompt simply by clicking it.
To create a shortcut, follow the steps mentioned below:
- Right-click the desktop and select the New option.
- Click on Shortcut and type cmd.exe in the text box.
- Click Next and name the shortcut Elevated Command Prompt .
- Hit Enter to create a shortcut.
- Right-click the shortcut and select the Properties option.
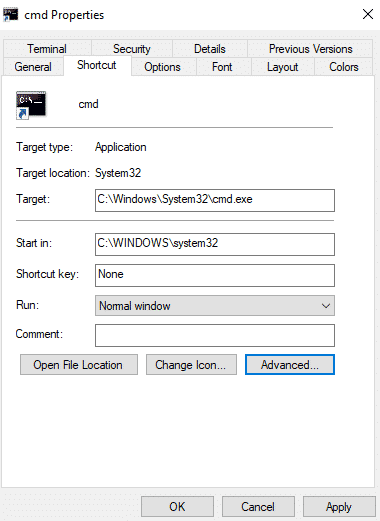
- Click on Advanced and select Run as administrator option.
- Now click OK to save the changes.
- Click Apply and then select OK to close the window.
This method will help you access Command Prompt with administrative rights through a single click. You can then run commands without any error.
6. Open Elevated Command With Run.
Windows offers several ways to open Command Prompt with administrative privileges. Another easy way to open Command Prompt as an administrator is through the Run dialogue. This will give you the administrative rights to execute commands successfully.
To open elevated Command Prompt using the Run dialogue box, follow the steps mentioned below:
- Press the Windows + Xkeys simultaneously and select the Run option.
- Type cmd in the dialogue box and press Ctrl + Shift + Enter simultaneously.
- Doing so will open an elevated Command Prompt. You can try running commands now to see if the problem has been solved.
Hopefully, this will solve the issue and you will be able to execute commands without any errors.
This brings us to the end of our guide on How to Fix Elevated Permissions are required to run DISM (Error 740). We hope this guide helped you solve the error in your PC. Moreover, we have also provided solutions for DISM error 1009 in Windows 10 . If you have been experiencing the Initialization error, don’t forget to read through the guide. In case of queries, feel free to drop them down in the comment section below.
If this guide helped you, please share it. 
Источник
Для запуска утилиты DISM требуется более высокий уровень разрешений Windows 10

Владельцы компьютеров с ОС Виндовс 7, 8.1 и 10 не раз видели ошибку «Запрошенная операция требует повышения» с кодом 740. В «десятке» доступ к папкам максимально защищен, поэтому такого рода сбой здесь происходит чаще. Для нормальной работы ОС в нее встроены софты SFC и DISM. Для запуска утилиты DISM требуется более высокий уровень разрешений Windows 10, работа которой заключается в модификации образов ОС, добавлении драйверов, обновлении пакетов и других действиях.
Что такое DISM
Система обслуживания образов и часть Командной строки применятся при выполнении операций, связанных с модернизацией образа Винды. Софт требуется для просмотра, инсталляции и деинсталляции, настройки компонентов копии в формате WIM. В седьмой версии Виндовса и выше программа установлена по умолчанию.
Регулярные неполадки на устройстве провоцируют проблемы при запуске гаджета. Для устранения сбоев используют средство обнаружения и устранения неполадок – SFC. Утилита анализирует их целостность, заменяет недееспособные или отсутствующие файлы на рабочие объекты. Если инструмент не справляется с задачей, то сначала в ход идет ДИСМ для восстановления образа, а после – SFC для его наладки.
- подготовка образа ОС;
- включение и отключение компонентов внутри копий;
- инсталляция и изменение образов;
- обновление копий до последнего издания;
- добавление и удаление драйверов внутри WIM-образов;
- создание копий сепаративных данных и другие опции.
Софт помогает проводить проверку, сканирует, восстанавливает файлы образов Винды, уменьшает размеры инсталлированных объектов, добавляет апдейты к «десятке».
Как запустить и работать с DISM
Для пользования программным обеспечением применяют специальные опции, чтобы модернизировать образ «десятки». Применяют их в такой последовательности, как описано в инструкции ниже.
CheckHealth
Функция отображает информацию о поврежденных компонентах операционной системы. Но повреждения в локальном образе программа не устраняет, а только указывает на них. Для задействования софта пользователю нужно выполнить следующее:
- Ввести в строку: cmd.
- Нажать «Ok».
- Щелкнуть ПКМ по результату с отметкой от имени Администратора.
- В Командной строке ввести: DISM /Online /Cleanup-Image /CheckHealth.

Утилита помогает отсканировать системные образы Винды для выявления неполадок. Процедура занимает несколько минут.
ScanHealth
Для более углубленного сканирования на предмет обнаружения поврежденных образов системы применяют представленную опцию. Операция может занимать по времени до 10 минут.
Для проведения углубленного сканирования нужно следовать алгоритму:
- Ввести в поисковой строке команду: cmd.
- Нажать «Ok».
- Запустить Командную строку (требуются права Администратора).
- Ввести путь: DISM /Online /Cleanup-Image /ScanHealth.
- Нажать «Enter».

RestoreHealth
Софт выполняет расширенное сканирование, проводит автоматическое устранение поврежденных элементов. Для запуска программного обеспечения юзеру потребуется следовать пунктам плана:
- Запустить Командную строку с администраторскими правами.
- Ввести: DISM /Online /Cleanup-Image /RestoreHealth.
- Нажать «Ok».

Для работы софта требуется вспомогательная утилита – Центр обновления Windows, чтобы загрузить и отремонтировать все неисправные элементы в локальном образе ОС.
RestoreHealth и Source
Приложение позволяет провести автоматизированную регенерацию проблемных файлов ОС. Перед восстановлением неисправных объектов пользователю нужно выполнить резервную копию файлов с установочного диска. Рабочая копия должна соответствовать по версии, редакции, языку операционке, которая имеется на устройстве.
Для того чтобы воспользоваться опцией, юзеру нужно следовать пошаговому плану:
- Ввести значение: DISM /Online /Cleanup-Image /RestoreHealth /Source:repairSourceinstall.wim.
- Тапнуть кнопку «Ok».
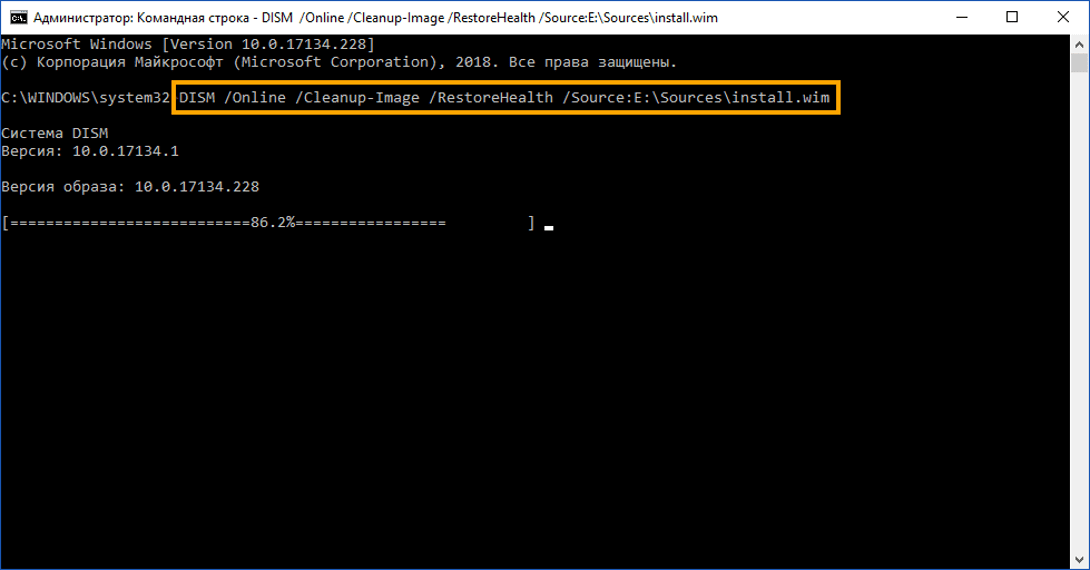
После выполнения всех действий юзер увидит процесс сканирования ОС, который займет от 10 до 20 минут. По завершению на экране появится соответствующее сообщение.
Использование DISM с файлом install.ESD
Технология ESD используется для загрузки приобретенных приложений от «Майкрософт». Скачанные файлы хранятся в зашифрованном виде. Опцией могут пользоваться только лица, которые имеют доступ к внутренним линиям корпорации. Технология не рассчитана на обычных пользователей, хотя на официальном сайте разработчика имеется несколько софтов ESD в открытом доступе.
Если юзер обновил систему до последней версии Виндовса, тогда есть вероятность того, что установочные файлы могли сохраниться на жестком диске.
- Найти и открыть Командную строку.
- Ввести: DISM /Online /Cleanup-Image /RestoreHealth /Source:C:$Windows.
BTSourcesInstall.esd.
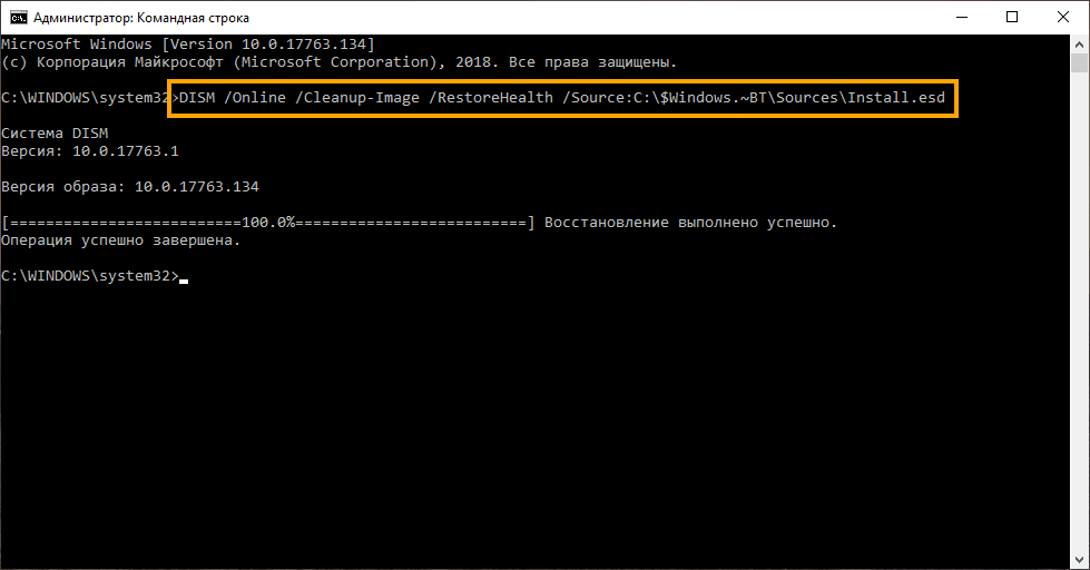
Программное обеспечение ДИСМ по завершении работ создает журнал с подробным описанием процесса обнаружения и исправления проблем.
Быстрая и мощная усовершенствованная программа DISM в операционной системе Windows 10 позволяет управлять устройствами, запущенными процессами, задействованными операциями без появления сбоев. С помощью софта создать новый образ ОС невозможно, программа предполагает работу с уже установленными файлами в системе. Любой пользователь может применить инструмент для устранения распространенных проблем со скрытым образом восстановления на ПК.
Источник
Looking for easy solutions to fix the ‘Elevated Permissions are required to run DISM’ (Error 740)?
DISM is a command-line tool that helps configure and install Windows features, create files, run programs, and repair Windows. This tool supports a variety of features and also is capable of replacing other deployment tools like ImageX.
Unfortunately, it is common for users to run into errors while using DISM. This can be frustrating, especially when you are trying to open, create, or delete files on your PC in a hurry. One such DISM error that does not allow users to access files is the DISM error 740. This error suggests that the users need to have local administrative ownership if they want to access a file.
Error 740 occurs when the User Account Control (UAC) section of your PC detects your profile as a “user” instead of an “administrator”. As a result, UAC does not allow you to open programs that can be accessed by administrators only.
If you have been facing this error on your PC, we got you covered.
This guide will walk you through the process of fixing the “Elevated Permissions are required to run DISM” error in a few simple steps.
Let’s get started.
- 1. Run Command Prompt as an Administrator.
- 2. Disable User Account Controls.
- 3. Repair the Registry.
- 4. Enable the Run New Task Option.
- 5. Set Up a Command Prompt Shortcut.
- 6. Open Elevated Command Prompt with Run.
1. Run Command Prompt as an Administrator.
It is common to experience DISM error 740 when you are trying to run a command in the Command Prompt. A simple solution to this is to run the commands in elevated Command Prompt, as it gives administrative rights to the users.
To run Command Prompt as an administrator, follow the steps mentioned below:
- Type Command Prompt in the search bar.
- Select Run as Administrator on the right panel.
- This will open a new window to confirm the operation. Select Yes to run Command Prompt as an administrator.
- You can now type the Deployment Image Servicing command in the Command Prompt and hit Enter.
This will enable you to execute all the commands in Command Prompt.
However, if you want to open a particular program, follow the steps mentioned below.
- Locate the icon of the application on your PC’s desktop.
- Right-click the icon and select Run as an administrator option.
Doing so will solve the error and you will be able to run the program.
2. Disable User Account Controls.
As mentioned earlier, UAC (User Account Control) analyzes your profile and determines if you are a user or an administrator. You can simply disable User Account Controls to access all the programs and files on your computer.
To disable User Account Controls, follow the steps mentioned below:
- Type Control Panel in the search bar and hit Enter.
- In the Control Panel window, type UAC in the search box on the top right corner.
- Click on “Change User Account Control Settings” to open a new window.
- In the new window, move the blue scale down to the last option to solve the error.
- Finally, select Yes to change User Account Control settings on your PC.
Disabling User Account Controls will give you administrative rights on your PC. If the problem persists, try the method mentioned below.
3. Repair the Registry.
A corrupted registry can also cause DISM error 740 in your PC. To solve this issue, you need to download and run a Registry Cleaner on your PC.
A registry cleaner can run scans through the registry and identify the corrupted files that you need to remove from your PC. Some of the best registry cleaners are listed below:
- Advanced SystemCare
- CCleaner
- RegClean Pro
Using a third-party registry cleaner will remove all the redundant items and keep the system error-free. Moreover, it will also increase the speed of your computer.
4. Enable Run New Task Option.
A Task Manager provides information about the general status of the computer. If you have been facing the DISM error 740 on your PC, you can open Elevated Command Prompt through Task Manager to get the administrative rights.
To do so, follow the steps mentioned below:
- Type Task Manager in the search bar and hit Enter to open the application.
- Select File from the menu bar and click on Run new task to open a dialogue box.
- Type cmd in the box and select the “Create this task with administrative privileges” option.
- Now, select OK to open the elevated Command Prompt.
Hopefully, you will now be able to execute all the commands without any issue.
5. Set Up a Command Prompt Shortcut.
Opening Elevated Command Prompt through Task Manager might seem like a time-consuming or complex process. To simplify it, you can create a shortcut for elevated Command Prompt on your desktop.
This shortcut will allow you to open an elevated Command Prompt simply by clicking it.
To create a shortcut, follow the steps mentioned below:
- Right-click the desktop and select the New option.
- Click on Shortcut and type cmd.exe in the text box.
- Click Next and name the shortcut Elevated Command Prompt.
- Hit Enter to create a shortcut.
- Right-click the shortcut and select the Properties option.
- Click on Advanced and select Run as administrator option.
- Now click OK to save the changes.
- Click Apply and then select OK to close the window.
This method will help you access Command Prompt with administrative rights through a single click. You can then run commands without any error.
6. Open Elevated Command With Run.
Windows offers several ways to open Command Prompt with administrative privileges. Another easy way to open Command Prompt as an administrator is through the Run dialogue. This will give you the administrative rights to execute commands successfully.
To open elevated Command Prompt using the Run dialogue box, follow the steps mentioned below:
- Press the Windows + X keys simultaneously and select the Run option.
- Type cmd in the dialogue box and press Ctrl+Shift+Enter simultaneously.
- Doing so will open an elevated Command Prompt. You can try running commands now to see if the problem has been solved.
Hopefully, this will solve the issue and you will be able to execute commands without any errors.
This brings us to the end of our guide on How to Fix Elevated Permissions are required to run DISM (Error 740). We hope this guide helped you solve the error in your PC. Moreover, we have also provided solutions for DISM error 1009 in Windows 10. If you have been experiencing the Initialization error, don’t forget to read through the guide. In case of queries, feel free to drop them down in the comment section below.
If this guide helped you, please share it.
Join 50,000+ subscribers
Stay updated on the latest discounts, exclusive promos, and news articles from Saint.
Владельцы компьютеров с ОС Виндовс 7, 8.1 и 10 не раз видели ошибку «Запрошенная операция требует повышения» с кодом 740. В «десятке» доступ к папкам максимально защищен, поэтому такого рода сбой здесь происходит чаще. Для нормальной работы ОС в нее встроены софты SFC и DISM. Для запуска утилиты DISM требуется более высокий уровень разрешений Windows 10, работа которой заключается в модификации образов ОС, добавлении драйверов, обновлении пакетов и других действиях.
Что такое DISM
Система обслуживания образов и часть Командной строки применятся при выполнении операций, связанных с модернизацией образа Винды. Софт требуется для просмотра, инсталляции и деинсталляции, настройки компонентов копии в формате WIM. В седьмой версии Виндовса и выше программа установлена по умолчанию.
Регулярные неполадки на устройстве провоцируют проблемы при запуске гаджета. Для устранения сбоев используют средство обнаружения и устранения неполадок – SFC. Утилита анализирует их целостность, заменяет недееспособные или отсутствующие файлы на рабочие объекты. Если инструмент не справляется с задачей, то сначала в ход идет ДИСМ для восстановления образа, а после – SFC для его наладки.
Функции инструмента:
- подготовка образа ОС;
- включение и отключение компонентов внутри копий;
- инсталляция и изменение образов;
- обновление копий до последнего издания;
- добавление и удаление драйверов внутри WIM-образов;
- создание копий сепаративных данных и другие опции.
Софт помогает проводить проверку, сканирует, восстанавливает файлы образов Винды, уменьшает размеры инсталлированных объектов, добавляет апдейты к «десятке».
Как запустить и работать с DISM
Для пользования программным обеспечением применяют специальные опции, чтобы модернизировать образ «десятки». Применяют их в такой последовательности, как описано в инструкции ниже.
CheckHealth
Функция отображает информацию о поврежденных компонентах операционной системы. Но повреждения в локальном образе программа не устраняет, а только указывает на них. Для задействования софта пользователю нужно выполнить следующее:
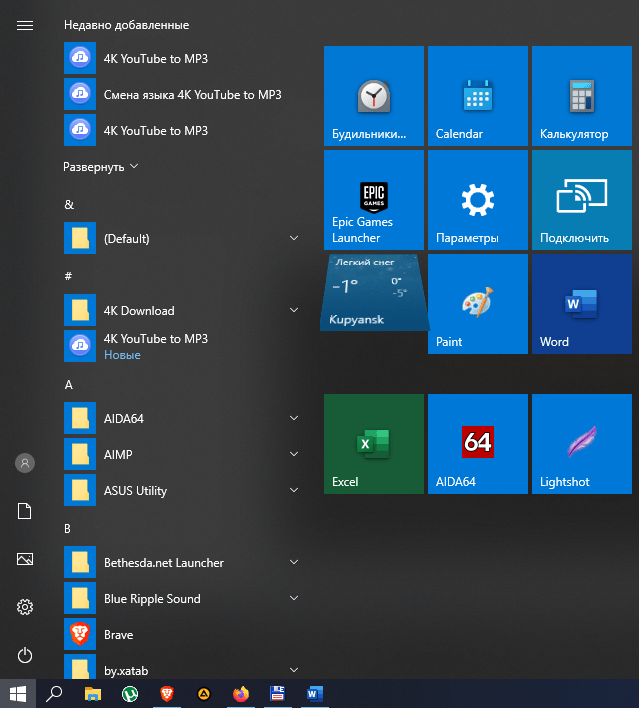
- Открыть Пуск.
- Ввести в строку: cmd.
- Нажать «Ok».
- Щелкнуть ПКМ по результату с отметкой от имени Администратора.
- В Командной строке ввести: DISM /Online /Cleanup-Image /CheckHealth.
Утилита помогает отсканировать системные образы Винды для выявления неполадок. Процедура занимает несколько минут.
ScanHealth
Для более углубленного сканирования на предмет обнаружения поврежденных образов системы применяют представленную опцию. Операция может занимать по времени до 10 минут.
Для проведения углубленного сканирования нужно следовать алгоритму:
- Открыть Пуск.
- Ввести в поисковой строке команду: cmd.
- Нажать «Ok».
- Запустить Командную строку (требуются права Администратора).
- Ввести путь: DISM /Online /Cleanup-Image /ScanHealth.
- Нажать «Enter».
RestoreHealth
Софт выполняет расширенное сканирование, проводит автоматическое устранение поврежденных элементов. Для запуска программного обеспечения юзеру потребуется следовать пунктам плана:
- Открыть Пуск.
- Запустить Командную строку с администраторскими правами.
- Ввести: DISM /Online /Cleanup-Image /RestoreHealth.
- Нажать «Ok».
Для работы софта требуется вспомогательная утилита – Центр обновления Windows, чтобы загрузить и отремонтировать все неисправные элементы в локальном образе ОС.
RestoreHealth и Source
Приложение позволяет провести автоматизированную регенерацию проблемных файлов ОС. Перед восстановлением неисправных объектов пользователю нужно выполнить резервную копию файлов с установочного диска. Рабочая копия должна соответствовать по версии, редакции, языку операционке, которая имеется на устройстве.
Для того чтобы воспользоваться опцией, юзеру нужно следовать пошаговому плану:
- Зайти в Пуск.
- Набрать: cmd, нажать «Ok».
- Ввести значение: DISM /Online /Cleanup-Image /RestoreHealth /Source:repairSourceinstall.wim.
- Тапнуть кнопку «Ok».
После выполнения всех действий юзер увидит процесс сканирования ОС, который займет от 10 до 20 минут. По завершению на экране появится соответствующее сообщение.
Использование DISM с файлом install.ESD
Технология ESD используется для загрузки приобретенных приложений от «Майкрософт». Скачанные файлы хранятся в зашифрованном виде. Опцией могут пользоваться только лица, которые имеют доступ к внутренним линиям корпорации. Технология не рассчитана на обычных пользователей, хотя на официальном сайте разработчика имеется несколько софтов ESD в открытом доступе.
Если юзер обновил систему до последней версии Виндовса, тогда есть вероятность того, что установочные файлы могли сохраниться на жестком диске.
Пошаговая инструкция:
- Кликнуть Пуск.
- Найти и открыть Командную строку.
- Ввести: DISM /Online /Cleanup-Image /RestoreHealth /Source:C:$Windows.~BTSourcesInstall.esd.
- Кликнуть «Ok».
Программное обеспечение ДИСМ по завершении работ создает журнал с подробным описанием процесса обнаружения и исправления проблем.
Быстрая и мощная усовершенствованная программа DISM в операционной системе Windows 10 позволяет управлять устройствами, запущенными процессами, задействованными операциями без появления сбоев. С помощью софта создать новый образ ОС невозможно, программа предполагает работу с уже установленными файлами в системе. Любой пользователь может применить инструмент для устранения распространенных проблем со скрытым образом восстановления на ПК.
Обслуживание образов развертывания и управление ими (DISM) – это инструмент, который используется для сканирования и устранения проблем хранилища WIM, которые могут повлиять на системные файлы Windows.
DISM – это инструмент командной строки, который используется с правами администратора, что означает, что обычные пользователи не могут его использовать.
Он может запускать текущие файлы операционной системы Windows, а также файлы .vim, .vhd .vhdx. Dism может быть запущена в MS-DOS или PowerShell без проблем.
Команде Dism требуются повышенные права (режим администратора)
еред использованием Dism мы должны четко знать, что Dism требует административных привилегий.
Например, когда мы пытаемся получить справочную информацию с помощью /? мы получим ошибку: Error: 740 Elevated permissions are required to run DISM.
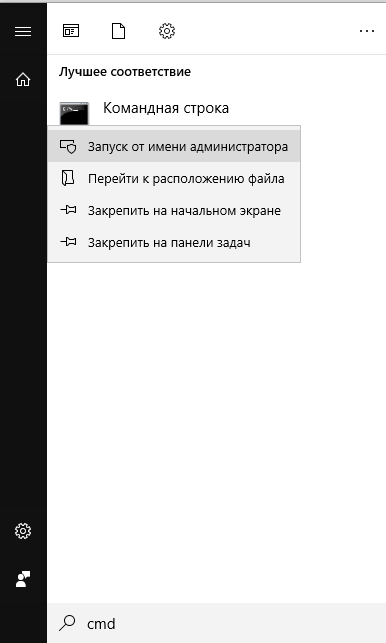
Поэтому мы запустим терминал MS-DOS с правами администратора на обычном рабочем столе пользователя.

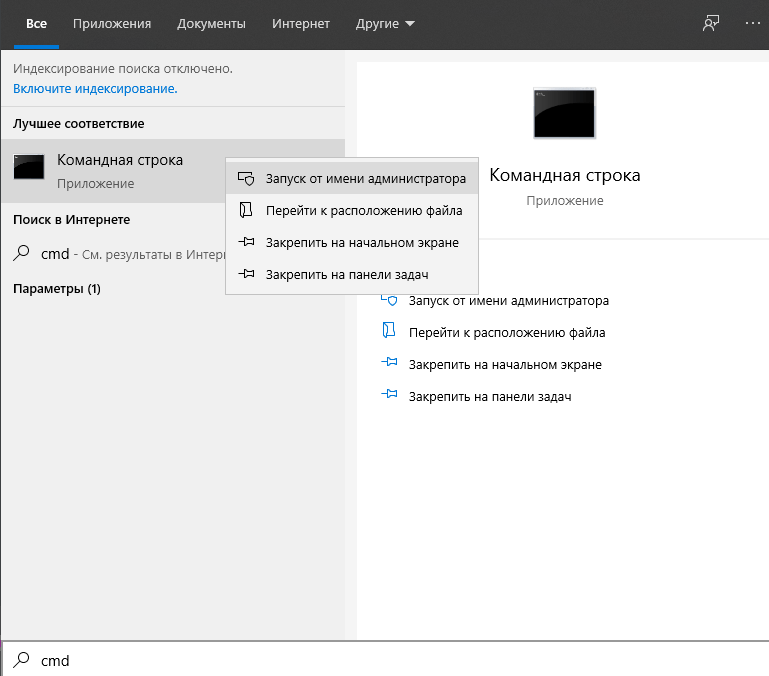
Сначала мы напишем команду cmd в меню «Пуск», как показано ниже, а затем щелкните правой кнопкой мыши приложение командной строки, которое откроет меню.
Затем щелкните «Запуск от имени администратора», который откроет MS-DOS в режиме администратора.
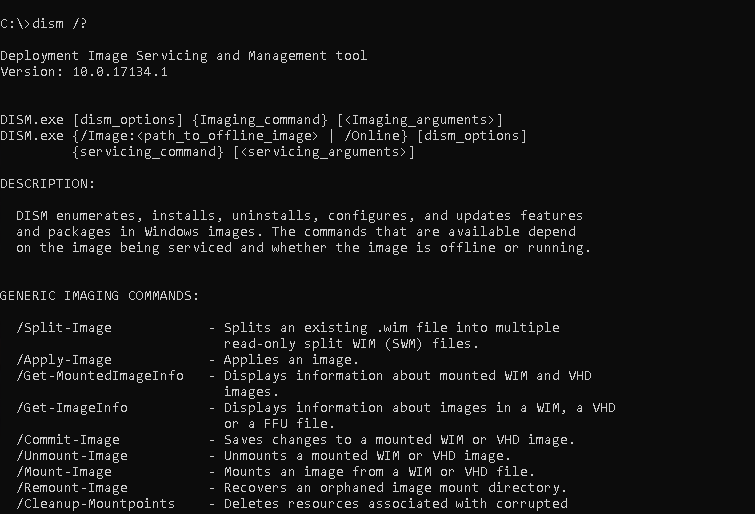
Dism помощь
Dism предоставляет различные команды обработки образов для перечисления, установки, удаления, настройки, обновления.
Мы можем перечислить эти команды и получить информацию о них с помощью /? как показано ниже.
Сканирование образов на наличие проблем быстро
Компоненты операционной системы Windows можно сканировать с помощью следующей команды.
Параметр / CheckHealth будет сканировать быстрее и с меньшим количеством деталей.
> dism /Online /Cleanup-Image /CheckHealth
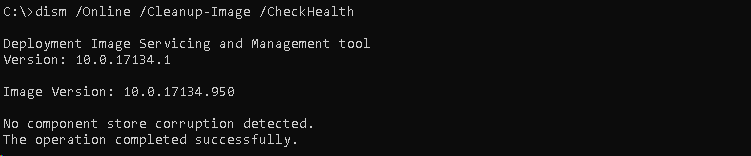
Сканирование на наличие проблем медленнее и детальнее
Если мы хотим более детально сканировать файлы Windows или образ, мы можем использовать параметр / ScanHealth.
Этот вариант процесса займет некоторое время, но предоставит более подробный результат сканирования.
> dism /Online /Cleanup–Image /ScanHealth

Сканирование и автоматическое восстановление
Если есть проблемы, мы можем исправить их автоматически с помощью параметра /RestoreHealth.
> dism /Online /Cleanup–Image /RestoreHealth

Укажите раздел Windows
При использовании dism текущий раздел будет использоваться для сканирования файлов операционной системы Windows.
Мы также можем указать различные разделы для файлов операционной системы Windows.
Мы укажем раздел с параметром /Image:, указав букву раздела.
В этом примере мы будем сканировать файлы операционной системы Windows в разделе D:
> dism /Online /Image:D /Cleanup–Image /ScanHealth
Восстановить из указанного файла WIM
При восстановлении мы можем использовать диск или путь, чтобы указать файл WIM.
Мы можем указать местоположение файла WIM с параметром /Source: и указать путь.
В этом примере мы будем использовать D:install.wim в качестве файла WIM для восстановления.
> dism /Online /Cleanup–Image /RestoreHealth /Source:D:install.wim
Deployment Image Servicing and Management (DISM) is a tool that is used to scan and fix the WIM store issues which can affect Windows system files. DISM is a command-line tool and used with the Administrative privileges which means normal users can not use it. It can run currently running Windows operating system files as well as .vim , .vhd .vhdx files. Dism can be run in MS-DOS or PowerShell without a problem.
Dism Command Requires Elevated Permissions (Administrator Mode)
Before using Dism we need to know that Dism requires Administrative privileges. For example, when we try to get help information with the /? we will get Error: 740 Elevated permissions are required to run DISM.. So we will start the MS-DOS terminal with Administrative privileges in normal user desktop.

First, we will write the cmd command to the Start Menu like below and then right-click to the Command Prompt which will open a menu. Then click to the Run as administrator which will open the MS-DOS in Administrator mode.

Dism Help
Dism provides different imaging commands to enumerate, install, uninstall, configure, update. We can list these commands and get information about them with the /? option like below.

Scan Image For Problems Faster
Windows operating system components can be scanned with the following command. /CheckHealth option will scan faster way with fewer details.
> dism /Online /Cleanup-Image /CheckHealth
Scan Image For Problems Slower and Detailed
If we want to scan a more detailed way the Windows files or Image we can use /ScanHealth option. This option process will take some time to complete but will provide a more detailed scan result.
> dism /Online /Cleanup-Image /ScanHealth
Scan and Repair Automatically
If there are problems we can repair them automatically with the /RestoreHealth option.
> dism /Online /Cleanup-Image /RestoreHealth
Specify Windows Partition
While using dism the current partition will be used to scan Windows operating system files. We can also specify different partitions for Windows operating system files. We will specify the partition with the /Image: option by providing a partition letter. In this example, we will scan the Windows operating system files in partition D:.
> dism /Online /Image:D /Cleanup-Image /ScanHealthRepair From Specified WIM File
While repairing we can use a drive or path in order to specify WIM file. We can specify the WIM file location with the /Source: option and provide the path. In this example, we will use D:install.wim as WIM file to repair.
> dism /Online /Cleanup-Image /RestoreHealth /Source:D:install.wim