Содержание
- Web animations with HTML, CSS, and JavaScript
- Introduction
- What is web animation?
- What CSS properties can I animate?
- Over 200k developers use LogRocket to create better digital experiences
- Different kinds of animations
- Tooltips
- Hover
- Loading
- More great articles from LogRocket:
- Inputs
- Menus
- CSS animation
- @keyframes
- Animation properties
- Why JavaScript?
- Conclusion
- LogRocket: Debug JavaScript errors more easily by understanding the context
- webdesignacademy / animated-icons.css
- Веб-анимация с помощью HTML, CSS и JavaScript
- Что такое веб-анимация?
- Какие свойства CSS можно анимировать?
- Различные виды анимации
- Советы по инструментам
- Hover
- Загрузка
- CSS анимация
- @keyframes
- Свойства анимации
- Почему именно JavaScript?
- Вывод
Web animations with HTML, CSS, and JavaScript
September 30, 2020 5 min read 1447

Introduction
Many years ago, websites were more focused on displaying information to users without consideration for how to create visual experiences to make the site more user-friendly. In the past few years, many things have changed: website owners are now creating visual experiences to keep users on their site.
Developers discovered human beings tend to pay more attention to moving objects because of our natural reflex to notice movement.
By extension, adding animations to your website or application is a very important method of drawing users’ attention to important areas of your website and revealing more information about a product.
Note: Effective animations are capable of building a strong connection between users and the content on the screen.
What is web animation?
Web animation is basically just making things move on the web.
Web animation is necessary for creating eye-catching websites that enable better conversions and attract users to click, view, and buy things on your website.
When done well, animations can add valuable interaction, enhance the emotional experience for users, and add personality to your interface.
Presently, there are hundreds of libraries, tools, and plugins that can be used for creating animations ranging from simple to complex. With CSS Animation, it becomes unnecessary to make use of plugins that slow down your website speed for animations that can be done easily with CSS.
In this article, I will be showing you some animations that can be achieved with HTML, CSS, and JavaScript.
What CSS properties can I animate?
It’s one thing to know how to animate, and it is another thing to know what to animate.
Some CSS properties are animatable, meaning that they can be used in animations and transitions.
These are properties that can change gradually from one value to another, such as size, color, numbers, shape, percentage, e.t.c.

Over 200k developers use LogRocket to create better digital experiences
We can animate properties like background, background-color, border color, filter, flex, and font.
You can get a comprehensive list of all of the properties you can animate here.
Different kinds of animations
There are so many different kinds of animations that are very well-used in websites and play a very important role in user experience.
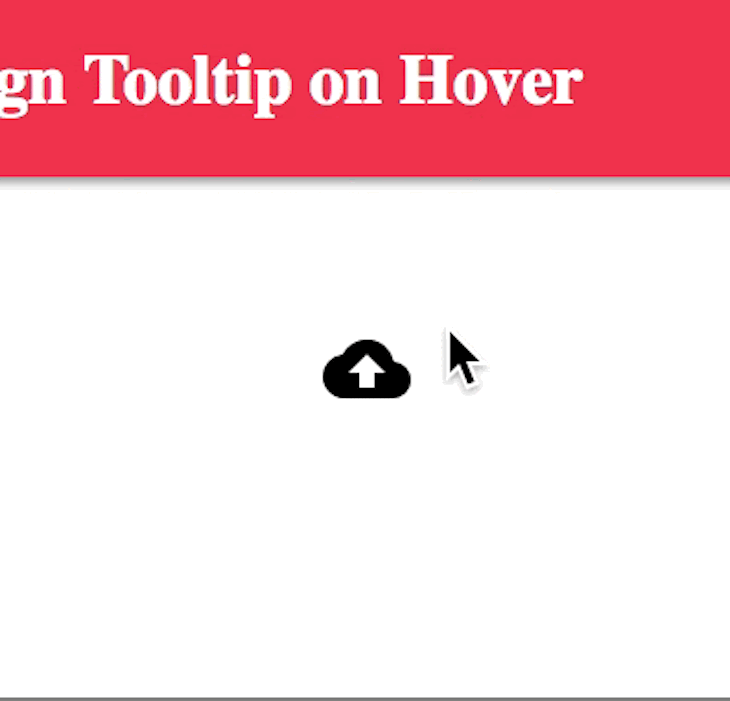
Tooltips
Tooltips are text labels that appear when the user hovers over, focuses on, or touches an element.
In other words, it is a brief, informative message that appears when a user interacts with an element in a graphical user interface (GUI).
Tooltips may contain brief helper text about their functions:

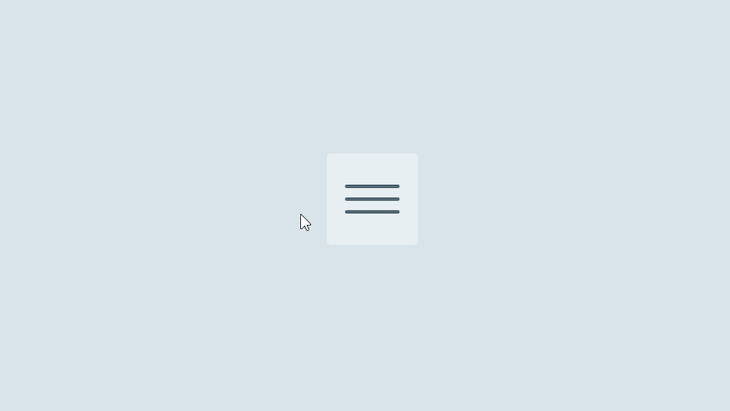
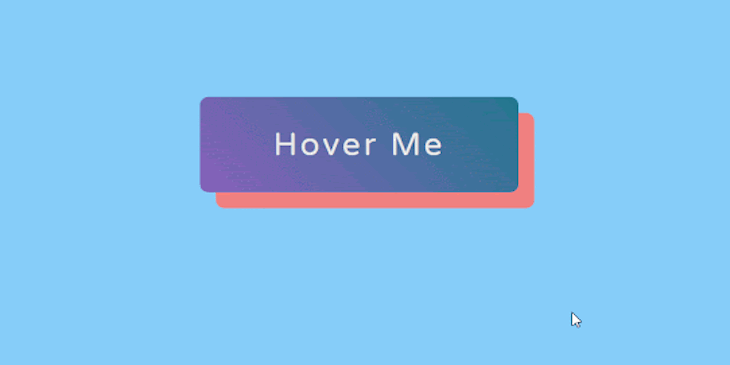
Hover
The hover pseudo-class is used to add a special effect to an element when you guide your mouse over it. This way, it has the ability to catch users’ attention as soon as they hover over an item.
It is a useful way to show which elements are clickable.

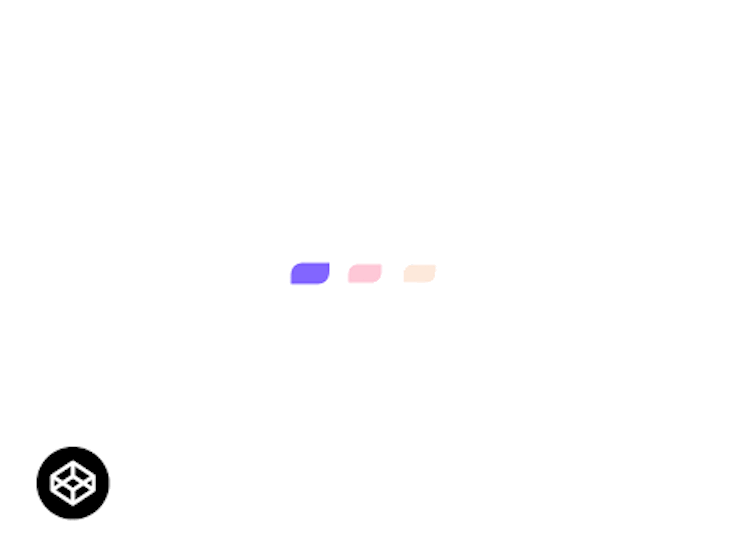
Loading
Loadings are very essential because they helps to keep the user entertained during load time. They also inform users of the level of progress, or how much time is left until a load is complete.
More great articles from LogRocket:
- Don’t miss a moment with The Replay, a curated newsletter from LogRocket
- Learn how LogRocket’s Galileo cuts through the noise to proactively resolve issues in your app
- Use React’s useEffect to optimize your application’s performance
- Switch between multiple versions of Node
- Discover how to animate your React app with AnimXYZ
- Explore Tauri, a new framework for building binaries
- Compare NestJS vs. Express.js
Inputs
Input animations are great and often combined with tooltips and validations. With inputs, the user is able to quickly fix errors and fill missing fields to complete forms.

Animations on menus play a great role in UI/UX. Menus are types of animations that amaze the user and keep them interactive allowing them to see all the content throughout the page.
Note: There are many other animations like page transition, parallax, etc.
CSS animation
So far, we have seen so many different kinds of animations that can be achieved with CSS, but I haven’t explained how it’s done.
CSS allows us to animate HTML elements without making use of JavaScript.
To use CSS animation, you must first specify some keyframes for the animation. Keyframes hold the styles that the element will have at certain times.
For proper understanding, I will be explaining the basic properties we will be using.
The CSS animations are made up of two basic building blocks:
@keyframes
keyframes are used to indicate the start and end of the animation (as well as any intermediate steps between the start and end).
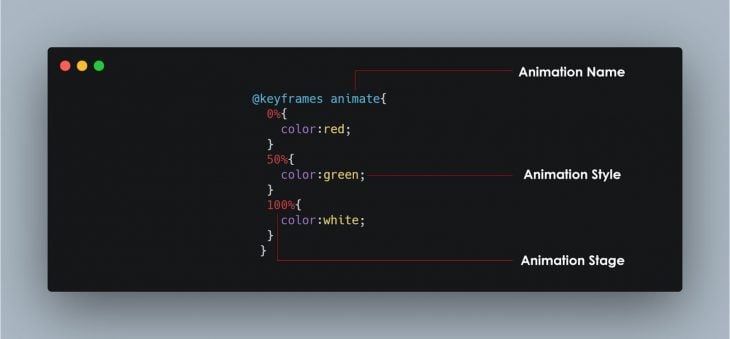
It’s composed of 3 basic things:
- Animation name: This is simply the name given to the animation, as illustrated in the picture above.
- Animation stages: This indicates the stages of the animation. It’s mostly represented as a percentage, as shown in the picture above.
- Animation style or CSS properties: These are the properties expected to change during the the animation.
Animation properties
Once the @keyframes are defined, the animation properties must be added in order for your animation to function.
This is primarily used to define how the animation should happen.
The animation properties are added to the CSS selectors (or elements) that you want to animate.
Two properties are very essential to notice how the animation takes effect. They are the animation-name and the animation-duration .
There are other properties like:
- animation-timing-function : Defines the speed curve or pace of the animation. You can specify the timing with the following predefined timing options: ease , linear , ease-in , ease-out , ease-in-out , initial , inherit .
- animation-delay : This property defines when the animation will start. The value is defined in seconds (s) or milliseconds (ms).
- animation-iteration-count : This property specifies the number of times an animation should be played.
- animation-direction : This CSS property sets whether an animation should play forward, backward, or alternate back and forth between playing the sequence forward and backward.
- animation-fill-mode : This property specifies a style for the element when the animation is not playing (before it starts, after it ends, or both).
- animation-play-state : This property specifies whether the animation is running or paused.
The next big question on your mind will be: Do I have to specify all these properties anytime I want to animate an element?
We have the animation shorthand property. Each animation property can be defined individually, but for cleaner and faster code, it’s recommended that you use the animation shorthand.
All the animation properties are added to the same animation: property in the following order:
Note: For the animation to function correctly, you need to follow the proper shorthand order and specify at least the first two values.
Here is a very simple landing page for a shirt store.
I decided to add a very little animation to the shirt so it can grab users attention as soon as they visit this link.
All I did was apply the transform property and translate it vertically (up and down). You can take your time to check through the code.
Why JavaScript?
As you read through, you might start asking yourself why JavaScript was included in the topic. You will see why now!
So, why JavaScript?
We make use of JavaScript to control CSS animations and make it even better with a little code.
In the above code, I created a form to collect user details, but I want the form fields to shake if there is no input.
With the help of CSS, I can make them shake:
In the above code, the input field will move to and fro (left to right) with 5px and then finally return to its initial position at 100% (we use the CSS transform property to achieve that as seen in the code above).
Then, we add the animation properties to the CSS selector error:
The next thing is: How will I know if these fields are empty and the user clicks the submit button?
This is where JavaScript comes in. We use JavaScript to control our animation.
Step 1: Check if the form submit button has been clicked.
Step 2: Select all form fields.
Step 3: Check if the input fields are empty.
Step 4: Add the CSS selector using JavaScript classList property. You can read more about the classList property here.
Note: I properly added comments to the JavaScript and CSS code in the embedded codepen so you can easily understand the code.
Once the form is submitted with all the appropriate information, some bubbles will begin to slide up. This was achieved with CSS animation.
Conclusion
These are just a few things you need to know about web animation. Remember, this is a very broad topic but I know you saw the importance of animation and why you should think of making use of CSS animation for your projects.
LogRocket: Debug JavaScript errors more easily by understanding the context
Debugging code is always a tedious task. But the more you understand your errors the easier it is to fix them.
LogRocket allows you to understand these errors in new and unique ways. Our frontend monitoring solution tracks user engagement with your JavaScript frontends to give you the ability to find out exactly what the user did that led to an error.

LogRocket records console logs, page load times, stacktraces, slow network requests/responses with headers + bodies, browser metadata, and custom logs. Understanding the impact of your JavaScript code will never be easier!
Источник
webdesignacademy / animated-icons.css
This file contains bidirectional Unicode text that may be interpreted or compiled differently than what appears below. To review, open the file in an editor that reveals hidden Unicode characters. Learn more about bidirectional Unicode characters
| . pinkBg < |
| background-color : # ed184f !important ; |
| background-image : linear-gradient ( 90 deg , # fd5581 , # fd8b55 ); |
| > |
| . intro-banner-vdo-play-btn < |
| height : 200 px ; |
| width : 200 px ; |
| position : absolute; |
| top : 50 % ; |
| left : 50 % ; |
| text-align : center; |
| margin : -30 px 0 0 -30 px ; |
| border-radius : 50 % ; |
| z-index : 1 |
| > |
| . intro-banner-vdo-play-btn i < |
| line-height : 56 px ; |
| font-size : 30 px |
| > |
| . intro-banner-vdo-play-btn . ripple < |
| position : absolute; |
| width : 300 px ; |
| height : 300 px ; |
| z-index : -1 ; |
| left : 50 % ; |
| top : 50 % ; |
| opacity : 0 ; |
| margin : -150 px 0 0 -150 px ; |
| border-radius : 50 % ; |
| -webkit-animation : ripple 1.8 s infinite; |
| animation : ripple 1.8 s infinite |
| > |
| @-webkit-keyframes ripple < |
| 0 % < |
| opacity : 1 ; |
| -webkit-transform : scale ( 0 ); |
| transform : scale ( 0 ) |
| > |
| 100 % < |
| opacity : 0 ; |
| -webkit-transform : scale ( 1 ); |
| transform : scale ( 1 ) |
| > |
| > |
| @keyframes ripple < |
| 0 % < |
| opacity : 1 ; |
| -webkit-transform : scale ( 0 ); |
| transform : scale ( 0 ) |
| > |
| 100 % < |
| opacity : 0 ; |
| -webkit-transform : scale ( 1 ); |
| transform : scale ( 1 ) |
| > |
| > |
| . intro-banner-vdo-play-btn . ripple : nth-child ( 2 ) < |
| animation-delay : .3 s ; |
| -webkit-animation-delay : .3 s |
| > |
| . intro-banner-vdo-play-btn . ripple : nth-child ( 3 ) < |
| animation-delay : .6 s ; |
| -webkit-animation-delay : .6 s |
| > |
This file contains bidirectional Unicode text that may be interpreted or compiled differently than what appears below. To review, open the file in an editor that reveals hidden Unicode characters. Learn more about bidirectional Unicode characters
Источник
Веб-анимация с помощью HTML, CSS и JavaScript

Много лет назад веб-сайты были больше ориентированы на отображение информации для пользователей, не задумываясь о том, как создать визуальный опыт, чтобы сделать сайт более удобным для пользователя. За последние несколько лет многое изменилось: владельцы веб-сайтов теперь создают визуальные эффекты, чтобы удерживать пользователей на своем сайте.
Разработчики обнаружили, что люди склонны уделять больше внимания движущимся объектам из-за нашего естественного рефлекса замечать движение.
В более широком смысле, добавление анимации на ваш сайт или в приложение — очень важный метод привлечения внимания пользователей к важным областям вашего сайта и раскрытия дополнительной информации о продукте.
Примечание. Эффективная анимация позволяет установить прочную связь между пользователями и содержимым на экране.
Что такое веб-анимация?
Веб-анимация в основном просто заставляет вещи двигаться в интернете.
Веб-анимация необходима для создания привлекательных веб-сайтов, которые обеспечивают лучшую конверсию и привлекают пользователей, чтобы нажимать, просматривать и покупать вещи на вашем веб-сайте.
Когда все сделано правильно, анимация может добавить ценное взаимодействие, улучшить эмоциональное восприятие пользователей и добавить индивидуальности вашему интерфейсу.
В настоящее время существуют сотни библиотек, инструментов и плагинов, которые можно использовать для создания анимаций, от простых до сложных. С CSS Animation отпадает необходимость использовать плагины, замедляющие скорость вашего веб-сайта, для анимации, которую можно легко сделать с помощью CSS.
В этой статье я покажу вам некоторые анимации, которых можно добиться с помощью HTML, CSS и JavaScript.
Какие свойства CSS можно анимировать?
Одно дело — знать, как анимировать, а другое — знать, что анимировать.
Некоторые свойства CSS можно анимировать, что означает, что их можно использовать в анимации и переходах.
Это свойства, которые могут постепенно меняться от одного значения к другому, например размер, цвет, числа, форма, процент и т. д.
Мы можем анимировать такие свойства, как фон, цвет фона, цвет границы, фильтр, гибкость и шрифт.
Вы можете получить полный список всех свойств, которые вы можете анимировать здесь.
Различные виды анимации
Существует так много разных видов анимации, которые очень хорошо используются на веб-сайтах и играют очень важную роль в пользовательском опыте.
Советы по инструментам
Всплывающие подсказки — это текстовые метки, которые появляются, когда пользователь наводит курсор, фокусируется на элементе или касается элемента.
Другими словами, это краткое информативное сообщение, которое появляется, когда пользователь взаимодействует с элементом в графическом интерфейсе пользователя (GUI).
Всплывающие подсказки могут содержать краткий вспомогательный текст об их функциях:
Hover
Псевдокласс hover используется для добавления специального эффекта к элементу, когда вы наводите на него указатель мыши. Таким образом, у него есть возможность привлечь внимание пользователей, как только они наводят курсор на элемент.
Это полезный способ показать, какие элементы доступны для нажатия.
Загрузка
Загрузки очень важны, потому что они помогают развлечь пользователя во время загрузки. Они также информируют пользователей об уровне прогресса или о том, сколько времени осталось до завершения загрузки.

Анимация ввода великолепна и часто сочетается с всплывающими подсказками и проверками. С помощью входных данных пользователь может быстро исправить ошибки и заполнить недостающие поля для заполнения форм.
Анимация в меню играет большую роль в UI / UX. Меню — это типы анимации, которые удивляют пользователя и делают их интерактивными, позволяя им видеть весь контент на странице.
Примечание: есть много других анимаций, таких как переход страницы, параллакс и т. д.

CSS анимация
До сих пор мы видели так много разных видов анимации, которые можно реализовать с помощью CSS, но я не объяснил, как это делается.
CSS позволяет нам анимировать элементы HTML без использования JavaScript.
Чтобы использовать CSS-анимацию, вы должны сначала указать несколько ключевых кадров для анимации. Ключевые кадры содержат стили, которые элемент будет иметь в определенное время.
Для правильного понимания я объясню основные свойства, которые мы будем использовать.
CSS-анимация состоит из двух основных строительных блоков:
@keyframes
keyframes используются для обозначения начала и конца анимации (а также любых промежуточных шагов между началом и концом).

Он состоит из 3 основных вещей:
- Название анимации: это просто имя, данное анимации, как показано на рисунке выше.
- Этапы анимации: указывает этапы анимации. В основном это представлено в процентах, как показано на рисунке выше.
- Стиль анимации или свойства CSS: это свойства, которые, как ожидается, изменятся во время анимации.
Свойства анимации
Как только @keyframes определено, свойства анимации должны быть добавлены для того, чтобы ваша анимация функционировала.
Это в основном используется для определения того, как должна происходить анимация.
Свойства анимации добавляются к селекторам (или элементам) CSS, которые вы хотите анимировать.
Два свойства очень важны, чтобы заметить, как действует анимация. Они являются animation-name и animation-duration .
Есть и другие свойства, например:
- animation-timing-function : определяет кривую скорости или темп анимации. Вы можете задать синхронизацию со следующими предопределенными параметрами синхронизации: ease , linear , ease-in , ease-out , ease-in-out , initial , inherit .
- animation-delay : Это свойство определяет, когда начнется анимация. Значение определяется в секундах (с) или миллисекундах (мс).
- animation-iteration-count : Это свойство указывает, сколько раз должна воспроизводиться анимация.
- animation-direction : Это свойство CSS устанавливает, должна ли анимация воспроизводиться вперед, назад или поочередно вперед и назад между воспроизведением последовательности вперед и назад.
- animation-fill-mode : Это свойство определяет стиль для элемента, когда анимация не воспроизводится (до начала, после окончания или и то, и другое).
- animation-play-state : Это свойство указывает, запущена или приостановлена анимация.
Следующий большой вопрос, который вы зададите, будет: нужно ли мне указывать все эти свойства каждый раз, когда я хочу анимировать элемент?
У нас есть свойство сокращения анимации. Каждое свойство анимации можно определить индивидуально, но для более чистого и быстрого кода рекомендуется использовать сокращение анимации.
Все свойства анимации добавляются в одно и то же свойство animation: в следующем порядке:
Примечание. Для правильной работы анимации необходимо соблюдать правильный порядок сокращений и указывать по крайней мере первые два значения.
Вот очень простая целевая страница для магазина рубашек.
Я решил добавить к рубашке очень маленькую анимацию, чтобы она могла привлечь внимание пользователей, как только они перейдут по этой ссылке.
Все, что я сделал, это применил свойство transform и перевел его по вертикали (вверх и вниз). Вы можете не торопиться, чтобы проверить код.
Почему именно JavaScript?
По мере прочтения вы можете начать спрашивать себя, почему в эту тему включен JavaScript. Теперь вы поймете почему!
Итак, почему именно JavaScript?
Мы используем JavaScript для управления анимацией CSS и делаем ее еще лучше с помощью небольшого кода.
В приведенном выше коде я создал форму для сбора сведений о пользователе, но я хочу, чтобы поля формы дрожали, если нет ввода.
С помощью CSS я могу заставить их дрожать:
В приведенном выше коде поле ввода будет перемещаться взад и вперед (слева направо) на 5 пикселей, а затем, наконец, вернется в исходное положение на 100% (мы используем свойство преобразования CSS для достижения этого, как показано в приведенном выше коде).
Затем мы добавляем свойства анимации к ошибке селектора CSS:
Следующее: как я узнаю, пусты ли эти поля и пользователь нажимает кнопку отправки?
Здесь на помощь приходит JavaScript. Мы используем JavaScript для управления нашей анимацией.
Шаг 1: проверьте, была ли нажата кнопка отправки формы.
Шаг 2: Выберите все поля формы.
Шаг 3: Убедитесь, что поля ввода пусты.
Шаг 4: Добавьте селектор CSS с помощью свойства JavaScript classList .
Примечание. Я добавил комментарии к коду JavaScript и CSS во встроенном коде, чтобы вы могли легко понять код.
Как только форма будет отправлена со всей необходимой информацией, некоторые пузырьки начнут скользить вверх. Это было достигнуто с помощью CSS-анимации.
Вывод
Это всего лишь несколько вещей, которые вам нужно знать о веб-анимации. Помните, что это очень обширная тема, но я знаю, что вы понимаете важность анимации и знаете почему вам следует подумать об использовании CSS-анимации в своих проектах.
Источник
If you use animate.css you can create that effect. Here is the github project where you can download the source code. There are other effects you can check out too.
Code for shaking from animate.css:
.animated {
  -webkit-animation-duration: 1s;
  animation-duration: 1s;
  -webkit-animation-fill-mode: both;
  animation-fill-mode: both;
}

.animated.infinite {
  -webkit-animation-iteration-count: infinite;
  animation-iteration-count: infinite;
}

.animated.hinge {
  -webkit-animation-duration: 2s;
  animation-duration: 2s;
}

.animated.bounceIn,
.animated.bounceOut {
  -webkit-animation-duration: .75s;
  animation-duration: .75s;
}

.animated.flipOutX,
.animated.flipOutY {
  -webkit-animation-duration: .75s;
  animation-duration: .75s;
}

@-webkit-keyframes shake {
  from, to {
    -webkit-transform: translate3d(0, 0, 0);
    transform: translate3d(0, 0, 0);
  }

  10%, 30%, 50%, 70%, 90% {
    -webkit-transform: translate3d(-10px, 0, 0);
    transform: translate3d(-10px, 0, 0);
  }

  20%, 40%, 60%, 80% {
    -webkit-transform: translate3d(10px, 0, 0);
    transform: translate3d(10px, 0, 0);
  }
}

@keyframes shake {
  from, to {
    -webkit-transform: translate3d(0, 0, 0);
    transform: translate3d(0, 0, 0);
  }

  10%, 30%, 50%, 70%, 90% {
    -webkit-transform: translate3d(-10px, 0, 0);
    transform: translate3d(-10px, 0, 0);
  }

  20%, 40%, 60%, 80% {
    -webkit-transform: translate3d(10px, 0, 0);
    transform: translate3d(10px, 0, 0);
  }
}

.shake {
  -webkit-animation-name: shake;
  animation-name: shake;
}
JS
$(document).ready(function(){
     $('.submit').click(function(e){
       // Code to check login
       // If fail
        $('.input').addClass('animated shake');
     });
})
Animated Error and Success Icons with CSS
This file contains bidirectional Unicode text that may be interpreted or compiled differently than what appears below. To review, open the file in an editor that reveals hidden Unicode characters.
Learn more about bidirectional Unicode characters
| .pinkBg { | |
| background-color: #ed184f!important; | |
| background-image: linear-gradient(90deg, #fd5581, #fd8b55); | |
| } | |
| .intro-banner-vdo-play-btn{ | |
| height:200px; | |
| width:200px; | |
| position:absolute; | |
| top:50%; | |
| left:50%; | |
| text-align:center; | |
| margin:-30px 0 0 -30px; | |
| border-radius:50%; | |
| z-index:1 | |
| } | |
| .intro-banner-vdo-play-btn i{ | |
| line-height:56px; | |
| font-size:30px | |
| } | |
| .intro-banner-vdo-play-btn .ripple{ | |
| position:absolute; | |
| width:300px; | |
| height:300px; | |
| z-index:-1; | |
| left:50%; | |
| top:50%; | |
| opacity:0; | |
| margin:-150px 0 0 -150px; | |
| border-radius:50%; | |
| -webkit-animation:ripple 1.8s infinite; | |
| animation:ripple 1.8s infinite | |
| } | |
| @-webkit-keyframes ripple{ | |
| 0%{ | |
| opacity:1; | |
| -webkit-transform:scale(0); | |
| transform:scale(0) | |
| } | |
| 100%{ | |
| opacity:0; | |
| -webkit-transform:scale(1); | |
| transform:scale(1) | |
| } | |
| } | |
| @keyframes ripple{ | |
| 0%{ | |
| opacity:1; | |
| -webkit-transform:scale(0); | |
| transform:scale(0) | |
| } | |
| 100%{ | |
| opacity:0; | |
| -webkit-transform:scale(1); | |
| transform:scale(1) | |
| } | |
| } | |
| .intro-banner-vdo-play-btn .ripple:nth-child(2){ | |
| animation-delay:.3s; | |
| -webkit-animation-delay:.3s | |
| } | |
| .intro-banner-vdo-play-btn .ripple:nth-child(3){ | |
| animation-delay:.6s; | |
| -webkit-animation-delay:.6s | |
| } |
This file contains bidirectional Unicode text that may be interpreted or compiled differently than what appears below. To review, open the file in an editor that reveals hidden Unicode characters.
Learn more about bidirectional Unicode characters
| <!doctype html> | |
| <html> | |
| <head> | |
| <meta charset=»utf-8«> | |
| <title>Animated SVG Icons</title> | |
| <link rel=»stylesheet» type=»text/css» href=»animated-icons.css«/> | |
| <link href=»//maxcdn.bootstrapcdn.com/bootstrap/4.1.1/css/bootstrap.min.css» rel=»stylesheet» id=»bootstrap-css«> | |
| <script src=»//maxcdn.bootstrapcdn.com/bootstrap/4.1.1/js/bootstrap.min.js«></script> | |
| <script src=»//cdnjs.cloudflare.com/ajax/libs/jquery/3.2.1/jquery.min.js«></script> | |
| </head> | |
| <body> | |
| <div class=»container«> | |
| <div class=»row«> | |
| <a href=»#» class=»intro-banner-vdo-play-btn pinkBg» target=»_blank«> | |
| <i class=»glyphicon glyphicon-play whiteText» aria-hidden=»true«></i> | |
| <span class=»ripple pinkBg«></span> | |
| <span class=»ripple pinkBg«></span> | |
| <span class=»ripple pinkBg«></span> | |
| </a> | |
| </div> | |
| </div> | |
| </body> | |
| </html> |
Error pages 404 is one of the most neglected web design tasks: its layout is always relegated to the last place and with a very low priority, resulting in an uncreative and standard design. However, we have to view 404 errors as an opportunity to help and guide the users towards the content or section that they are looking for, offering a good user experience.
A search form and a summary of the sections of our website is always a good starting point as content on a 404 error page. But the first thing the user will find is precisely that, a warning that something has failed or that the content you are looking for is no longer there. Why not show that in a creative and funny way?
That is what we have proposed in this article: to design several examples of error page 404 with CSS animations. We had already seen some examples in Silo, but after the demos of the hamburger menu and the showcase of the newsletter form we wanted to show you that, so we hope you like them!
Error 404 with CSS animations in text

For this example we have used two animations, one for each number 4. In the first, we wanted to imitate that the number falls and remains hanging from an invisible axis. The final 4 turns to the right, in two phases. This is the final result:
The necessary HTML is very simple, a container to be able to center the elements and each number within a span element to give it style and assign the animations. In this case we needed a father span element and a son to correctly assign the transformations. You can also choose to include the numbers in an h1 element to make it more semantic:
<section class="error-container">
	<span><span>4</span></span>
	<span>0</span>
	<span><span>4</span></span>
</section>
Regarding CSS, the styles of each number are defined:
.error-container {
	text-align: center;
	font-size: 180px;
	font-family: 'Catamaran', sans-serif;
	font-weight: 800;
	margin: 20px 15px;
}
.error-container > span {
	display: inline-block;
	line-height: 0.7;
	position: relative;
	color: #FFB485;
}
.error-container > span > span {
	display: inline-block;
	position: relative;
}
.error-container > span:nth-of-type(1) {
	perspective: 1000px;
	perspective-origin: 500% 50%;
	color: #F0E395;
}
.error-container > span:nth-of-type(1) > span {
	transform-origin: 50% 100% 0px;
	transform: rotateX(0);
	animation: easyoutelastic 8s infinite;
}
.error-container > span:nth-of-type(3) {
	perspective: none;
	perspective-origin: 50% 50%;
	color: #D15C95;
}
.error-container > span:nth-of-type(3) > span {
	transform-origin: 100% 100% 0px;
	transform: rotate(0deg);
	animation: rotatedrop 8s infinite;
}
There are two animations through @keyframes for the first 4 and for the last one:
@keyframes easyoutelastic {
	0% {
		transform: rotateX(0);
	}
	9% {
		transform: rotateX(210deg);
	}
	13% {
		transform: rotateX(150deg);
	}
	16% {
		transform: rotateX(200deg);
	}
	18% {
		transform: rotateX(170deg);
	}
	20% {
		transform: rotateX(180deg);
	}
	60% {
		transform: rotateX(180deg);
	}
	80% {
		transform: rotateX(0);
	}
	100% {
		transform: rotateX(0);
	}
}

@keyframes rotatedrop {
	0% {
		transform: rotate(0);
	}
	10% {
		transform: rotate(30deg);
	}
	15% {
		transform: rotate(90deg);
	}
	70% {
		transform: rotate(90deg);
	}
	80% {
		transform: rotate(0);
	}
	100% {
		transform: rotateX(0);
	}
}
If you prefer to use JS to animate texts you can choose these other examples, some of which have served as inspiration for this specific demo.
Animating a 404 error graphic design

We love the illustrations and designs of Yoga Perdana, and making one of its works come alive has been a challenge thanks to CSS. The most complex of this demo are undoubtedly the shadows, because in flat design the long shadows are complex to make using only the CSS box-shadow property.
Since the original design does not have any animation, we decided to give it life by playing with the internal shadows of element 0. The HTML is very similar to the previous one, the only difference is that the numbers are not going to be seen, they are graphics, so you have to include them and move them so that they are not readable by the user but for the devices:
<section class="error-container">
	<span class="four"><span class="screen-reader-text">4</span></span>
	<span class="zero"><span class="screen-reader-text">0</span></span>
	<span class="four"><span class="screen-reader-text">4</span></span>
</section>
As for the CSS, there are many multiple CSS backgrounds, as we saw in the example of the responsive banner, with shadows simulated over the backgrounds and real CSS gradients. All very fun!
.error-container > span.four {
	width: 136px;
	height: 43px;
	border-radius: 999px;
	background:
		linear-gradient(140deg, rgba(0, 0, 0, 0.1) 0%, rgba(0, 0, 0, 0.07) 43%, transparent 44%, transparent 100%),
		linear-gradient(105deg, transparent 0%, transparent 40%, rgba(0, 0, 0, 0.06) 41%, rgba(0, 0, 0, 0.07) 76%, transparent 77%, transparent 100%),
		linear-gradient(to right, #d89ca4, #e27b7e);
}
.error-container > span.four:before,
.error-container > span.four:after {
	content: '';
	display: block;
	position: absolute;
	border-radius: 999px;
}
.error-container > span.four:before {
	width: 43px;
	height: 156px;
	left: 60px;
	bottom: -43px;
	background:
		linear-gradient(128deg, rgba(0, 0, 0, 0.1) 0%, rgba(0, 0, 0, 0.07) 40%, transparent 41%, transparent 100%),
		linear-gradient(116deg, rgba(0, 0, 0, 0.1) 0%, rgba(0, 0, 0, 0.07) 50%, transparent 51%, transparent 100%),
		linear-gradient(to top, #99749D, #B895AB, #CC9AA6, #D7969E, #E0787F);
}
.error-container > span.four:after {
	width: 137px;
	height: 43px;
	transform: rotate(-49.5deg);
	left: -18px;
	bottom: 36px;
	background: linear-gradient(to right, #99749D, #B895AB, #CC9AA6, #D7969E, #E0787F);
}

.error-container > span.zero {
	vertical-align: text-top;
	width: 156px;
	height: 156px;
	border-radius: 999px;
	background: linear-gradient(-45deg, transparent 0%, rgba(0, 0, 0, 0.06) 50%,  transparent 51%, transparent 100%),
		linear-gradient(to top right, #99749D, #99749D, #B895AB, #CC9AA6, #D7969E, #ED8687, #ED8687);
	overflow: hidden;
	animation: bgshadow 5s infinite;
}
.error-container > span.zero:before {
	content: '';
	display: block;
	position: absolute;
	transform: rotate(45deg);
	width: 90px;
	height: 90px;
	background-color: transparent;
	left: 0px;
	bottom: 0px;
	background:
		linear-gradient(95deg, transparent 0%, transparent 8%, rgba(0, 0, 0, 0.07) 9%, transparent 50%, transparent 100%),
		linear-gradient(85deg, transparent 0%, transparent 19%, rgba(0, 0, 0, 0.05) 20%, rgba(0, 0, 0, 0.07) 91%, transparent 92%, transparent 100%);
}
.error-container > span.zero:after {
	content: '';
	display: block;
	position: absolute;
	border-radius: 999px;
	width: 70px;
	height: 70px;
	left: 43px;
	bottom: 43px;
	background: #FDFAF5;
	box-shadow: -2px 2px 2px 0px rgba(0, 0, 0, 0.1);
}
Finally, for the animation, an effect playing with the shadows where it seems that the bottom disc of the number 0 moves behind the page … but no, they are only shadows and your eye that plays a trick on you! 😉
@keyframes bgshadow {
	0% {
		box-shadow: inset -160px 160px 0px 5px rgba(0, 0, 0, 0.4);
	}
	45% {
		box-shadow: inset 0px 0px 0px 0px rgba(0, 0, 0, 0.1);
	}
	55% {
		box-shadow: inset 0px 0px 0px 0px rgba(0, 0, 0, 0.1);
	}
	100% {
		box-shadow: inset 160px -160px 0px 5px rgba(0, 0, 0, 0.4);
	}
}
Error 404 with colour palette

If you have a well-defined colour palette on your website it would be a good idea to use it on your error page 404 to design something creative. In this case we suggest using the 0 as a colour wheel that modifies the colour of the numbers 4 in a circular animation:
HTML continues to be as minimal as possible:
<section class="error-container">
	<span>4</span>
	<span><span class="screen-reader-text">0</span></span>
	<span>4</span>
</section>
In CSS we need to define the pseudoelements ::after and ::before</code 0 to create this shadow roulette with the box-shadow property, as well as its animation:
.error-container > span:nth-of-type(1) {
	color: #D1F2A5;
	animation: colordancing 4s infinite;
}
.error-container > span:nth-of-type(3) {
	color: #F56991;
	animation: colordancing2 4s infinite;
}
.error-container > span:nth-of-type(2) {
	width: 120px;
	height: 120px;
	border-radius: 999px;
}
.error-container > span:nth-of-type(2):before,
.error-container > span:nth-of-type(2):after {
	border-radius: 0%;
	content:"";
	position: absolute;
	top: 0; left: 0;
	width: inherit; height: inherit;
	border-radius: 999px;
	box-shadow: inset 30px 0 0 rgba(209, 242, 165, 0.4),
		inset 0 30px 0 rgba(239, 250, 180, 0.4),
		inset -30px 0 0 rgba(255, 196, 140, 0.4),
		inset 0 -30px 0 rgba(245, 105, 145, 0.4);
	animation: shadowsdancing 4s infinite;
}
.error-container > span:nth-of-type(2):before {
	-webkit-transform: rotate(45deg);
	-moz-transform: rotate(45deg);
	transform: rotate(45deg);
}
And finally a simple animation to change the text colour of the 4:
@keyframes colordancing {
	0% {
		color: #D1F2A5;
	}
	25% {
		color: #F56991;
	}
	50% {
		color: #FFC48C;
	}
	75% {
		color: #EFFAB4;
	}
	100% {
		color: #D1F2A5;
	}
}
The importance of unique pages in web design
When we design a web we must follow a structure, some contents, a style guide … in short, a program that often makes it very difficult to introduce new elements or experiment with new properties and values.
Looking for a challenging task to test new CSS rules usually is out of designer daily basis or at least out of projects that take most of work time.
However, in unique pages, like error 404, designers can create and users are able to perceive another feeling in the interaction with the application or web. In a project where the global style is much defined, we can develop something different and use the new trends with minimal risk to make mistakes.
Therefore, through the use of CSS animations as we have seen in the example or using some singular elements (an illustration, a svg …) we can make these pages unique. Let’s turn that singularity into something special. Our users will appreciate it.
Направьте пожалуйста или подскажите. В тестовом проекте было обучение основам JS на примере формы входа. При клике на пункт меню «Вход» выезжала форма вида — «логин», «пароль» и кнопка «войти». Сначала проверяем есть ли данные о логине, если есть — то заполняем поле «логин» и фокусируемся на поле «пароль». Если пользователь нажал кнопку «войти», но в полях пусто или ошибка — форма должна немного потрястись. Она трясется только один раз. Нашла вариант с JQuery, но хочется понять JS. Предполагаю, что нужен какой-то цикл, чтобы этот эффект был каждый раз после нажатия на кнопку при неверно заполненных полях. НО не могу понять как его написать правильно…Подскажите пожалуйста, какие могут быть тут «варианты ответа». Вот код:
<div class="account-menu">
      <a href="#" class="account-menu-enter">Вход </a>
</div>
.form-popup-show {
display: block;
animation: login-open 0.7s;
-webkit-animation: login-open 0.7s;
}
.form-popup-close {
color: #000;
position: absolute;
margin: -35px 0 0 180px;
text-align: center;
text-decoration: none;
width: 360px;
}
.form-popup-error {
animation: login-error 0.2s;
-webkit-animation: login-error 0.2s;
}var link = document.querySelector('.account-menu-enter');
var popup = document.querySelector('.form-popup');
var close = popup.querySelector('.form-popup-close');
var form = popup.querySelector('form');
var login = form.querySelector('.field-popup-login');
var password = form.querySelector('.field-popup-password');
var storage = localStorage.getItem("login");
link.addEventListener('click', function(event) {
event.preventDefault();
popup.classList.add('form-popup-show');
if (storage) {
login.value = storage;
password.focus;
}
else {
login.focus();
}
}, false );
link.addEventListener("click", function(event) {
if (popup.classList.contains("form-popup-error")) {
popup.classList.remove("form-popup-error");
}
}, false);
close.addEventListener('click', function(event) {
event.preventDefault();
popup.classList.remove('form-popup-show');
}, false);
form.addEventListener("submit", function(event) {
if (!login.value || !password.value) {
event.preventDefault();
popup.classList.add("form-popup-error")
}
else {
localStorage.setItem("login", login.value);
}
}, false);CSS3, SVG
31.03.2022
Cписок с некоторыми из лучших анимированных страниц 404
54 креативных страниц с ошибкой 404 с классной анимацией!
Если вы вызываете страницу, которой (больше) не существует, вы перенаправляетесь на страницу 404. Но это неплохо, потому что страницы 404 могут творить чудеса, если проявить немного творчества, чтобы посетители не покидали ваш сайт.
Страницы 404 называются так, потому что в случае, если страница не найдена или больше не существует, сервер возвращает код состояния 404, чтобы показать, что запрошенная страница больше не существует.
Примеры можно использовать в качестве шаблона или в качестве примера для вашего собственного сайта, и давайте будем честными… страницы 404 — лучшие! 🤣 Вы можете найти больше информации о собственном использовании на сайте Codepen.
И так рассмотрим все собранные мной примеры анимированых 404 страниц:
1. Mars 404 Error Page
2. Dripping paint 404 page | Анимация SVG
3. CSS 404 page
4. 404 animation
5. 404 — new
6. 404 — animation
7. Error Page
8. Ark 404 animation
9. 404 Animation
10. 404 Animation
11. Neon 404 — CSS only(Static)
12. 404 svg animated концепция страницы для интернет-магазина
13. Darkmode animation | 404
14. 404 error page
15. Text Wave Animation (404 not found)
16. GSAP: SVG Animation 404 Error Milk Carton)
17. Error 404 Page With Astronaut
18. MJ 404 in Pure CSS
19. 404 error page, Caveman mode — pure CSS
20. Space 404 (pure CSS)
21. StevenGFX Robot 404 Error
22. Weight a Minute — Error 404
23. 404 Page
24. 404 Page
25. Css only 404 Crying Baby
26. 404 Frog
27. Yeti 404 Page
28. 404 Error Example #2
29. 404 Page
30. CSS Train 404 Page
31. Error Page
32. 404 — SVG Animation
33. 404 Page SVG animation
34. 404 Error Page: Animated SVG GSAP
35. 404 Error page — Animated SVG
36. SVG Animation 404 page
37. 404
38. Animated Error page — #Project4
39. 404 Error Page
40. Fargo 404
41. 404 Error Page
42. 404 magnifying glass SVG animation CSS
43. Error 404 bulb SVG animation CSS smil
44. 404 animation CSS Javascript Mousemove
45. Tractor Pull 404 Error
46. Space 404
47. «Lost in Space» — 404 Error
48. «Lost in Space» — 404 Error
49. 404 Page Not Found
50. Challenge: 404 page
51. 404 — Glitched out
52. 404 No signal
53. Neon — 404 Page Not Found
54. Glitchy 404 Page
Надеюсь, вам понравилось! Пользуйтесь!
Статьи по теме
Introduction
Many years ago, websites were more focused on displaying information to users without consideration for how to create visual experiences to make the site more user-friendly. In the past few years, many things have changed: website owners are now creating visual experiences to keep users on their site.
Developers discovered human beings tend to pay more attention to moving objects because of our natural reflex to notice movement.
By extension, adding animations to your website or application is a very important method of drawing users’ attention to important areas of your website and revealing more information about a product.
Note: Effective animations are capable of building a strong connection between users and the content on the screen.
What is web animation?
Web animation is basically just making things move on the web.
Web animation is necessary for creating eye-catching websites that enable better conversions and attract users to click, view, and buy things on your website.
When done well, animations can add valuable interaction, enhance the emotional experience for users, and add personality to your interface.
Presently, there are hundreds of libraries, tools, and plugins that can be used for creating animations ranging from simple to complex. With CSS Animation, it becomes unnecessary to make use of plugins that slow down your website speed for animations that can be done easily with CSS.
In this article, I will be showing you some animations that can be achieved with HTML, CSS, and JavaScript.
What CSS properties can I animate?
It’s one thing to know how to animate, and it is another thing to know what to animate.
Some CSS properties are animatable, meaning that they can be used in animations and transitions.
These are properties that can change gradually from one value to another, such as size, color, numbers, shape, percentage, e.t.c.
We can animate properties like background, background-color, border color, filter, flex, and font.
You can get a comprehensive list of all of the properties you can animate here.
Different kinds of animations
There are so many different kinds of animations that are very well-used in websites and play a very important role in user experience.
These include:
Tooltips
Tooltips are text labels that appear when the user hovers over, focuses on, or touches an element.
In other words, it is a brief, informative message that appears when a user interacts with an element in a graphical user interface (GUI).
Tooltips may contain brief helper text about their functions:
Hover
The hover pseudo-class is used to add a special effect to an element when you guide your mouse over it. This way, it has the ability to catch users’ attention as soon as they hover over an item.
It is a useful way to show which elements are clickable.
Loading
Loadings are very essential because they helps to keep the user entertained during load time. They also inform users of the level of progress, or how much time is left until a load is complete.
Inputs
Input animations are great and often combined with tooltips and validations. With inputs, the user is able to quickly fix errors and fill missing fields to complete forms.
Menus
Animations on menus play a great role in UI/UX. Menus are types of animations that amaze the user and keep them interactive allowing them to see all the content throughout the page.
Note: There are many other animations like page transition, parallax, etc.
CSS animation
So far, we have seen so many different kinds of animations that can be achieved with CSS, but I haven’t explained how it’s done.
CSS allows us to animate HTML elements without making use of JavaScript.
To use CSS animation, you must first specify some keyframes for the animation. Keyframes hold the styles that the element will have at certain times.
For proper understanding, I will be explaining the basic properties we will be using.
The CSS animations are made up of two basic building blocks:
@keyframes
keyframes are used to indicate the start and end of the animation (as well as any intermediate steps between the start and end).
It’s composed of 3 basic things:
- Animation name: This is simply the name given to the animation, as illustrated in the picture above.
- Animation stages: This indicates the stages of the animation. It’s mostly represented as a percentage, as shown in the picture above.
- Animation style or CSS properties: These are the properties expected to change during the the animation.
Animation properties
Once the @keyframes are defined, the animation properties must be added in order for your animation to function.
This is primarily used to define how the animation should happen.
The animation properties are added to the CSS selectors (or elements) that you want to animate.
Two properties are very essential to notice how the animation takes effect. They are the animation-name and the animation-duration.
There are other properties like:
animation-timing-function: Defines the speed curve or pace of the animation. You can specify the timing with the following predefined timing options:ease,linear,ease-in,ease-out,ease-in-out,initial,inherit.animation-delay: This property defines when the animation will start. The value is defined in seconds (s) or milliseconds (ms).animation-iteration-count: This property specifies the number of times an animation should be played.animation-direction: This CSS property sets whether an animation should play forward, backward, or alternate back and forth between playing the sequence forward and backward.animation-fill-mode: This property specifies a style for the element when the animation is not playing (before it starts, after it ends, or both).animation-play-state: This property specifies whether the animation is running or paused.
The next big question on your mind will be: Do I have to specify all these properties anytime I want to animate an element?
Actually, no.
We have the animation shorthand property. Each animation property can be defined individually, but for cleaner and faster code, it’s recommended that you use the animation shorthand.
All the animation properties are added to the same animation: property in the following order:
animation: [animation-name] [animation-duration] [animation-timing-function]
[animation-delay] [animation-iteration-count] [animation-direction]
[animation-fill-mode] [animation-play-state];
Note: For the animation to function correctly, you need to follow the proper shorthand order and specify at least the first two values.
See the Pen
simple landing by Olawanle Joel (@olawanlejoel)
on CodePen.
Here is a very simple landing page for a shirt store.
I decided to add a very little animation to the shirt so it can grab users attention as soon as they visit this link.
All I did was apply the transform property and translate it vertically (up and down). You can take your time to check through the code.
Why JavaScript?
As you read through, you might start asking yourself why JavaScript was included in the topic. You will see why now!
So, why JavaScript?
We make use of JavaScript to control CSS animations and make it even better with a little code.
See the Pen
Form Validation with Html, Css & Javascript by Olawanle Joel (@olawanlejoel)
on CodePen.
In the above code, I created a form to collect user details, but I want the form fields to shake if there is no input.
With the help of CSS, I can make them shake:
@keyframes inputMove {
    0% {
        transform: translateX(5px);
    }
    25% {
        transform: translateX(-5px);
    }
    50% {
        transform: translateX(5px);
    }
    75% {
        transform: translateX(-5px);
    }
    100% {
        transform: translateX(0px);
    }
}
In the above code, the input field will move to and fro (left to right) with 5px and then finally return to its initial position at 100% (we use the CSS transform property to achieve that as seen in the code above).
Then, we add the animation properties to the CSS selector error:
.form-control.error input {
    border: 2px solid red;
    animation-name: inputMove;
    animation-duration: .5s;
}
The next thing is: How will I know if these fields are empty and the user clicks the submit button?
This is where JavaScript comes in. We use JavaScript to control our animation.
Step 1: Check if the form submit button has been clicked.
Step 2: Select all form fields.
Step 3: Check if the input fields are empty.
Step 4: Add the CSS selector using JavaScript classList property. You can read more about the classList property here.
Note: I properly added comments to the JavaScript and CSS code in the embedded codepen so you can easily understand the code.
Once the form is submitted with all the appropriate information, some bubbles will begin to slide up. This was achieved with CSS animation.
Conclusion
These are just a few things you need to know about web animation. Remember, this is a very broad topic but I know you saw the importance of animation and why you should think of making use of CSS animation for your projects.
LogRocket: Debug JavaScript errors more easily by understanding the context
Debugging code is always a tedious task. But the more you understand your errors the easier it is to fix them.
LogRocket allows you to understand these errors in new and unique ways. Our frontend monitoring solution tracks user engagement with your JavaScript frontends to give you the ability to find out exactly what the user did that led to an error.
LogRocket records console logs, page load times, stacktraces, slow network requests/responses with headers + bodies, browser metadata, and custom logs. Understanding the impact of your JavaScript code will never be easier!
Try it for free.
If you call up a page that does not (no longer) exist, you are redirected to 404 pages. But that’s not bad, because 404 pages can work wonders with a little creativity, so that visitors don’t leave your site.
404 pages (or Error Page) are so called because servers return the HTTP status code 404 in case of a non-existent or no longer existing page to show that the requested page does not (no longer) exist.
A creative way with funny animations, designs and fun images often a good way to keep visitors on the go – that is, to make them not leave your website. In this course it is also important to give users the possibility to go directly to another subpage on your website (be sure to check out my 404 page). Also responsive pages have to look good, of course.
The pens can be used as a template template or as examples for your own site, let yourself be inspired! And let’s be honest…404 jokes are the best! ?
The shown pens are licensed with MIT. You can find more information about your own use in the Codepen Blog.
#1 Responsive 404 Stranger things
Author: ARiyou Jahan;
Coded in: HTML, CSS (SCSS);
#2 No Vacancy 404
Author: Riley Shaw;
Coded in: Slim, Sass, CoffeScript;
#3 404 Kittens
Author: nclud team;
Coded in: HTML, CSS (SCSS), JS;
#4 – Glitched out
Author: ZonFire99;
Coded in: HTML, CSS, JS;
#5 Fargo 404

Author: Nathaniel Watson;
Coded in: Pug, CSS (SCSS), JS;
#6 404 No signal
Author: Adem ilter;
Coded in: HTML, CSS, JS;
#7 Glitchy 404 Page
Author: Kay Pooma;
Coded in: HTML, CSS;
#8 Bluescreen – 404 Page
Author: Angela Galliat;
Coded in: HTML, CSS;
#9 404 Space
Author: Keith;
Coded in: HTML, CSS (SCSS), JS;
#10 Error page – #Project 4
Author: Jake;
Coded in: HTML, CSS (SCSS), JS;
#11 404
Author: Metty;
Coded in: HTML, CSS, JS;
#12 Space 404
Author: Ethan;
Coded in: HTML, CSS (SCSS), JS;

#13 404 Error Page
Author: anhat.dev;
Coded in: HTML, CSS, JS;
#14 Daily UI #008 – 404 Page
Author: Rafaela Lucas;
Coded in: HTML, CSS (SCSS), JS;
#15 Lost in Space (ERRORS) (not responsive)
Author: Radu;
Coded in: HTML, CSS (SCSS);
#16 404 Page Not Found
Author: João Sousa;
Coded in: HTML, PostCSS;
#17 404 Error Page
Author: miranda;
Coded in: HTML, CSS;
#18 404 Error page
Author: Abolfazl Arab;
Coded in: HTML, CSS;
#19 404 Makes bear sad ??
Author: Jhey;
Coded in: Pug, Stylus, Babel;
#20 404-magnifying-glass-svg-animation-css
Author: Maelle Gomez;
Coded in: HTML, CSS;
#21 en 404 page
Author: Arman Azizpour;
Coded in: HTML, CSS;
#22 404 Venn Diagram
Author: Michael Richins;
Coded in: HTML, CSS (SCSS);
#23 Tractor Pull 404 Error
Author: Nick Soltis;
Coded in: HTML, CSS (SCSS);
#24 Neon – 404 Page Not Found
Author: Tibix;
Coded in: HTML, CSS;
#25 8-bit mario 404
Author: JFabre;
Coded in: HTML, CSS (SCSS), Babel;
Conclusion
As you can see, there are no limits to your creativity. Which one do you like best, or have you perhaps become creative yourself? Please let me know! And maybe your 404 page will appear here soon. 🙂
Not enough? Then this could be something for you!
- Cool CSS Buttons
- CSS Navigation Menus
- CSS Hamburger Menus
- Satisfying CSS Animations
- Inspiring loading animations
Note: All pens are published on codepen.io and not by me.