It can be easily solved through the Grub rescue prompt. The first answer isn’t quite complete and I got the same error at first. Here is how it works:
1st we need to find the primary partition. This will be where the essential files needed for linux to boot will reside, so we enter this —
Grub> ls
You should now see a list comparable to (hd0) (hd0,msdos5) (hd0,msdos1). Note that you may have different partitions than myself, as well as multiple drives, but the process is the same.
Now search the partitions to find the primary —
Grub> ls (hd0)
Grub> ls (hd0,msdos5)
Grub> ls (hd0,msdos1)
Until grub outputs either a list of files on that partition or shows the filesystem type and date of last modification.
2nd we need to set up a few things once we’ve found our primary partition —
Grub> set prefix=(hd0,msdos1)/boot/grub
Grub> set root=(hd0,msdos1)
Grub> set
Once the last set command is executed Grub will output a list of different parameters. Now lets check that we’ve set the correct root and prefix —
Grub> ls /boot
Grub should output a list of files contained within /boot.
3rd we need to set the mount point and load the kernel —
Grub> linux /vmlinuz root=/dev/sda1
Grub> initrd /initrd.img
And lastly we boot the system —
Grub> boot
If you end up booting into the busybox shell, simply enter fsck /dev/sda1. After that just enter exit and your system will boot normally.
Проинсталлировал на внешний USB-диск Debian 8.6 64 bit. Вся инсталляция прошла нормально. Разбитие разделов делалось инсталлятором на автомате «один раздел на всё», на разделе ext4.
При загрузке с этого USB-диска появляется сообщение:
error: attempt to read or write outside of disk 'hd0'
И grub вываливается в rescue mode.
Смотрю, видит ли Груб диск. Диск есть и виден:
Смотрю корень диска:
ls (hd0,msdos1)/
./ ../ lost+found/ etc/ media/ ... boot/ ... и т. д.
Пытаюсь посмотреть каталог boot. И тут облом:
ls (hd0,msdos1)/boot
error: attempt to read or write outside of disk 'hd0'
Может быть, ему нужен слеш в конце? Нет, со слешем та же картина:
ls (hd0,msdos1)/boot/
error: attempt to read or write outside of disk 'hd0'
Начинаю проверять другие каталоги. И вот какая картина выясняется.
Grub может прочитать каталоги:
— media
— var
— sbin
— bin
— tmp
— sys
— run
— root
— proc
— home
— srv
— opt
И не может прочитать каталоги:
— etc
— usr
— lib
— lib64
— dev
— boot
— mnt
Может быть, файловая система кривая? Гружусь в RescueCD, проверяю через fsck -f -p — ошибок нет. Монтирую этот USB-диск в /mnt/disk, во все каталоги могу зайти.
Решил переставить Груб через chroot.
Прокидываю разделы устройств:
mount --bind /dev /mnt/disk/dev
mount --bind /sys /mnt/disk/sys
mount --bind /proc /mnt/disk/proc
Переключаюсь с помощью chroot на корень USB-диска:
chroot /mnt/disk /bin/bash
Узнаю версию mkcofig груба:
grub-mkconfig -v
grub-mkconfig (GRUB) 2.02~beta2-22+deb8u1
Перегенерирую конфиг груба:
grub-mkconfig -o /boot/grub/grub.cfg
... Все океюшки, ошибок нет ...
И переустанавливаю груб:
grub-install /dev/sdb
... Все океюшки, ошибок нет ...
Пергружаюсь, и снова Grub выпадает в rescue mode. И всё то же самое.
Что делать? Как заставить Grub загружать Linux?
- Печать
Страницы: [1] 2 Все Вниз

Тема: Grub не запускает ubuntu (Прочитано 7000 раз)
0 Пользователей и 1 Гость просматривают эту тему.

DNKru

Здравствуйте. Возникла вот такая проблема: решил установить ubuntu 13.10 (вычитал, что самое то для новичка). Диск поделил на три части: «/», «/home» и «раздел подкачки» (все «первичные»). Соответственно ubuntu поставил на раздел «/». Этот же раздел создал при установке первым (где-то вычитал, что это важно). После перезагрузки поначалу совсем ничего не появлялось (только полосочка _ в левом верхнем углу экрана). Потом вроде с помощью boot repair исправил проблему: Grub стал показывать признаки жизни. Но радоваться было особо нечему: появлялось сообщение:
error: attempt to read or write outside of disk 'hd0'и предлагалось что-то ввести в поле
grab rescue>Пытался что-то в Биосе наменять с AHCI и IDE, но не вышло (AHCI не нашел, был только какой-то RAID).
Потом пробовал делать таким образом:
grub rescue > set root=(hd0,1)Но после ввода «ls /boot/grub» у меня снова появилось первое сообщение. Не понимаю, что делать. На Ubuntu второй день, да и тот с флешки.
grub rescue > set prefix=(hd0,1)/boot/grub
grub rescue > ls /boot/grub
grub rescue > insmod normal
grub rescue > normal
А еще Ubuntu с флешки тоже грузится через раз (по факту, иногда приходится раз по 15 перезагружаться, чтобы запустилось). Появляются сообщения вроде
[секунды] Kernel panic - not syncing: VFS: Unable to mount... что-то тамИ еще один вид сообщений, что-то вроде «System halted».
Возникают они, как мне кажется, абсолютно рандомно, ибо параметры в начальном меню я никогда не меняю (3,4,5,6 ставлю, с ними запускается хоть. Что делают — даже не в курсе.), флешку не переставляю.
Буду очень благодарен за помощь.
maks05
Здравствуйте. Возникла вот такая проблема: решил установить ubuntu 13.10 (вычитал, что самое то для новичка).
Это главная ошибка. «Самое то» — это 12.04.4
DNKru
Это главная ошибка. «Самое то» — это 12.04.4
Возможности сменить не имею — с флешки сижу.
san-alex
1. Для новичков лучше всего 12.04, а не 13,10.
2. Не читай «где-то», читай наше Руководство для новичков. И, вообще, у нас неплохая документация на сайте.
3. Проверь диск и файловую систему на ошибки. Рандомное появления ошибки «Unable to mount» может говорить о проблемах с диском.
4. Попробуй восстановить Груб.
DNKru
4. Попробуй восстановить Груб.
Уже. Попробовал первый способ и chroot. В консоли никаких ошибок не выдало.
3. Проверь диск и файловую систему на ошибки. Рандомное появления ошибки «Unable to mount» может говорить о проблемах с диском.
Как это сделать?
Можно ли с лайв CD (флешки) поменять версию с 13ой на 12ую?
maks05
3. Проверь диск и файловую систему на ошибки. Рандомное появления ошибки «Unable to mount» может говорить о проблемах с диском.
Как это сделать?
Можно ли с лайв CD (флешки) поменять версию с 13ой на 12ую?
Самое простое — запусти дисковую утилиту, выбери носитель и посмотри данные SMART (еcли нужно, запусти проверку SMART). Ищи данные о сбойных секторах и ошибках перераспределения битых секторов.
Сколько лет винчестеру, под какой ОС и как интенсивно использовался?
Нет, поменять нельзя, но можно, работая на Ubuntu с одной флэшки, скачать образ 12.04.4 (сохранить на винчестер) и создать вторую загрузочную флэшку.
DNKru
Нет, поменять нельзя, но можно, работая на Ubuntu с одной флэшки, скачать образ 12.04.4 (сохранить на винчестер) и создать вторую загрузочную флэшку.
Да, я примерно об этом и говорил. А программы (UltraISO) как ставятся? Или есть способ без дополнительных программ обойтись? Что-нибудь из того, что уже установлено и есть в версии на флешке подойдет?
Сколько лет винчестеру, под какой ОС и как интенсивно использовался?
Года три должно быть, я думаю. Стояла Windows 7, использовался достаточно интенсивно.
« Последнее редактирование: 02 Марта 2014, 15:36:49 от DNKru »
maks05
Попробуйте использовать встроенную в Ubuntu программу «Создание загрузочного диска» (в 13.10 може тназываться по другому, но суть та же). Если не поможет, будем разбираться и пробовать другие программы. Флэшку используйте простую, без наворотов и дополнительных функций, но от известных производителей. Лучше всего Transcend или Kingston. Предварительно отформатируйте в FAT32 с помощью Gparted.
3 года — это почти предел, тем более при интенсивном использовании.
« Последнее редактирование: 02 Марта 2014, 16:21:27 от maks05 »
san-alex
maks05, насчет 3 лет для винчестера ты немного перегнул палку. Хотя, — как повезет.
Ты прочитай таки Руководство, ссылку на которое я дал. Чтобы на старые грабли не наступать.
DNKru
Поставил на еще одну флешку Ubuntu 12.04, установил все по инструкции из руководства (даже разделы через ту же программу расставил(см. спойлер)). И, вуаля: прогресс (регресс?). Появилась новая ошибка:
error: out of disk.Решил, что сразу сюда отпишу, не буду сам пока лезть.
san-alex
Груб куда установил? Не на флэшку, случайно?
Восстанови Груб еще раз.
DNKru
Груб куда установил? Не на флэшку, случайно?
Его вообще как-то отдельно ставить нужно? Я инструкции из «Руководства» следовал только.
Вообще, я думал, что Груб вместе с самой системой ставится на тот же диск.
Ставил, кстати, не туда, где пометка «/», а вообще на диск, как в руководстве написали. И, я насколько понял, Груб у меня не сразу появлялся из-за того, что лежал не на самом диске, а в его разделе.
san-alex
Если поставил не на раздел, а на диск — то все правильно. А груб не появляется потому, что Ubuntu — единственная система. Если хочешь увидеть меню — нажми шифт при загрузке.
Но ошибка говорит о том, что что-то с грубом не в порядке. Восстанови еще раз.
DNKru
Восстанови еще раз.
Восстановил по первому и второму способам. Вроде то же самое. Не смог обновить на последних шагах. Мб с этим связано?
san-alex
Он корень не монтирует. Ты точно все правильно делаешь? Раздел правильный указываешь?
- Печать
Страницы: [1] 2 Все Вверх
I am getting the following grub error: attempt to read or write outside of disk 'hd0'.
Is there any way to fix this error? I can’t boot into Debian because of this.
Partitions:
SCSI1 (0,0,0) (sda) - 250.1 GB ATA WDC WD2500BEVE-0
    #1 Primary 249.0 GB B ext4
    #5 logical 1.1 GB F swap swap
SCSI3 (0,0,0) (sdb) - 7.8 GB USB Flash Memory
    #1 primary 7.8 BG B fat32
SCSI3 is a USB device to load in some firmware needed for the install of Debian.
![]()
cas
72.3k7 gold badges112 silver badges178 bronze badges
asked May 25, 2016 at 17:06
![]()
3
Because you’re usign debian, it will be very easy to recover grub, using the installation CD.
Boot the install Debian CD and select Advanced options -> Rescue Mode
There you will have options to reinstall grub or to go to a chroot shell, and reinstall grub using:
grub-mkdevicemap
grub-install /dev/sda
update-grub
answered May 25, 2016 at 17:25
![]()
Introduction
Some situations (such as BIOS limitations or this grub error) may require to create a separate/boot partition at the beginning of the disk and set up Ubuntu to use it
Here’s how to do it easily:
Procedures
Step 1 – boot on Live CD or live USB
Start the computer:
-Linux secure remixlivivecd or liveusb, then select “Try Ubuntu”, and then go directly to Step 3 below
-Or Ubuntu Live CD or live USB, select “Try Ubuntu” and go to step 2 below
Step 2 – install boot repair in a real-time session
After entering the Ubuntu real-time session, install boot repair in this way:
Connect to the Internet
Open the terminal (Ctrl + Alt + T) and type:
sudo add-apt-repository ppa:yannubuntu/boot-repair && sudo apt-get updatesudo apt-get install -y boot-repairStep 3 – run GParted
Start GParted from any of the following:
-Dash (Ubuntu 11.04 and next): click the Ubuntu logo in the upper left corner of the screen, then type GParted and click the GParted icon that will appear
-Or system – > Management – > GParted menu (Ubuntu 10.04)
-Or type gksudo GParted in the terminal
Step 4 – create a 1GB partition at the beginning of the disk
Through GParted:
-Reduce one of the first partitions of the disk so that creates 1GB (= 1000mib) of free space at the beginning of the disk on which Ubuntu is installed. This free space must be within the first 100GB of the disk (the starting position of the disk at its end must not exceed 100GB). Important: to adjust the size of Windows Vista/7/8 partition, use windows tools instead of GParted

-In this free space, create a 1GB partition with format ext4
-On paper, write down the name of the new 1GB partition. This is usually similar to/dev/ sdxy (x is a letter and Y is a number)
Step 5 – run boot repair
Start boot repair from any of the following:
-Dash (Ubuntu 11.04 and next): click the Ubuntu logo in the upper left corner of the screen, then type boot and click the boot repair icon that will appear
-Or system – > Administration-> Boot repair menu (Ubuntu 10.04)
-Or type boot repair in the terminal
Step 6 – choose the right option
In boot repair:
-Click Advanced Options
-Go to the grub location tab
-Check the “separate/boot partition: sdxy” option (sdxy must be your 1GB partition)

-Click “apply”
-Note the URL that will appear on the paper ( paste. Ubuntu. COM/XXXXXX/)
-Turn off the computer
-Remove Live CD and/or live USB
-Turn on the computer. You should be able to boot to Ubuntu by now
English original
Introduction
Some situations (eg BIOS limitations, orthis GRUB bug) may require tocreate a separate /boot partition at the start of the disk, and setup Ubuntu to use it.
Here is how to do it very easily:
Procedure
Step 1 – Boot on a liveCD or liveUSB
Boot your computer either on:
– aLinux-Secure-RemixliveCD or liveUSB, then choose “Try Ubuntu”, then go directly toStep 3 below.
– or a Ubuntu live-CD or live-USB, choose “Try Ubuntu”, then go toStep 2 below.
Step 2 – Install Boot-Repair in the live-session
Once in the Ubuntu live session, installBoot-Repairthis way:
Connect internet
Open a terminal (Ctrl+Alt+T) and type :
sudo add-apt-repository ppa:yannubuntu/boot-repair && sudo apt-get updatesudo apt-get install -y boot-repairStep 3 – Run gParted
Launch gParted from either:
– the Dash (Ubuntu 11.04 and next): click the Ubuntu logo in the top-left corner of the screen, then typegpartedand click on thegPartedicon that will appear.
– or System->Administration->gParted menu (Ubuntu 10.04)
– or by typinggksudo gpartedin a terminal
Step 4 – Create a 1GB partition at the start of the disk
Via gParted:
– Reduce one of the first partitions of the disk in order tocreate 1GB (=1000MiB) of free space at the start of the diskwhere Ubuntu is installed. This free space must be locatedinside the first 100GB of the disk(its end must not be located at more than 100GB from the start of the disk). Important: to resize Windows Vista/7/8 partitions, don’t use gParted but Windows tools instead.
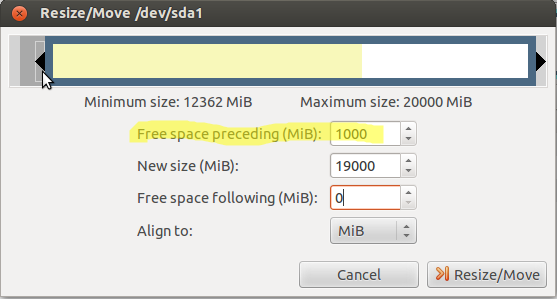
– In this free space, create a1GB partition formatted in EXT4.
– On a paper, note the name of this new 1GB partition. This is generally something like /dev/sdXY(X is a letter, Y is a number).
Step 5 – Run Boot-Repair
Launch Boot-Repair from either:
– the Dash (Ubuntu 11.04 and next): click the Ubuntu logo in the top-left corner of the screen, then typebootand click on theBoot-Repairicon that will appear.
– or System->Administration->Boot-Repair menu (Ubuntu 10.04)
– or by typingboot-repairin a terminal
Step 6 – Choose the right option
In Boot-Repair:
– Click onAdvanced Options
– Go to theGRUB locationtab
– Tick the“Separate /boot partition: sdXY”option (sdXY must be your 1GB partition)

– Click“Apply”
– Note on a paper the URL (paste.ubuntu.com/XXXXXX/) that will appear.
– Shutdown the computer
– Remove the liveCD and/or liveUSB
– Start the computer. You should now be able to boot into Ubuntu.
Similar Posts:
-
The problem referred to in the title has magically gone away but I’d like to understand what happened.
Because of the problems discussed in http://ubuntuforums.org/showthread.php?t=2253931 I decided to upgrade from Lubuntu 14.04 to Lubuntu 14.10. I went through that process but at the reboot I got this error:
Code:
Error: attempt to read or write outside disk 'hd0'
Entering rescue mode...
grub rescue>
Having no idea what to do in rescue mode, I poked around on the internet and found Boot Repair and tried its recommended fix. Upon reboot I got the same error message but instead of going into rescue mode it said, «Press any key to continue…» Couldn’t find the ‘any’ key
, so I pressed enter. Nothing happened so I pressed the space bar. Again nothing happened. In retrospect, I may not have waited long enough.Note: as a result of the Boot Repair, I started to get a boot menu that included ubuntu and a couple of memory check options. Had never seen that before. Always had just booted directly to Lubuntu which was the only OS on the machine. The error occurs upon pressing enter at the boot menu with ubuntu selected. It appears to me that the recommended fix that Boot Repair performs seems to be a reinstall of grub, a grub update and some grub configuration.
Anyway, I shut down the computer, booted into an Lubuntu 14.10 live CD, reinstalled and updated grub, and rebooted. I got the same thing as I had after doing Boot Repair but this time I got a little side tracked after pressing enter at the «Press any key to continue…» prompt and , lo and behold, after a while it booted up successfully. (As I sad previously, maybe I didn’t wait long enough when I booted after to doing Boot Repair.)
So I rebooted. This time I got no error message but during the boot up I got an orange screen with horizontal streaks before the login screen came up. I logged in and rebooted and got neither an error message nor the orange screen — a completely normal boot up (still with the boot menu that I got after doing Boot Repair). I have done several reboots since then without incident.
So everything seems to be working now but what happened?
Thanks
Jim
-
Re: [Lubuntu] Grub error: attempt to read or write outside disk ‘hd0’ after upgrade
How old is hardware?
And can you set BIOS to use AHCI for hard drive, not IDE nor RAID?If in IDE mode or very old BIOS you may not be able to have any boot files beyond 137GB on drive. If newer larger drive in old system, and you have just / (root) and swap you may at random have boot files anywhere on drive.
If that is the case, better to have smaller / of 20 or 25GB and use rest of drive as /home or just as data. Many older instructions suggest separate /boot but if all of / is inside the first 137GB then separate /boot not required.
Also sometimes partition tables get written where extended partition is beyond the end of the drive. Testdisk has been known to do that as it converts from CHS cylinders, heads, sectors to LBA sectors and rounds incorrectly.
-
Re: [Lubuntu] Grub error: attempt to read or write outside disk ‘hd0’ after upgrade
I like the 137 GB limit theory. It would explain why I’ve had a couple of booting issues after software updates.
The hard drive is a 160GB IDE which was empty when I installed Lubuntu 14.04, letting the installer partition the drive as it pleased. It created two partitions, /dev/sda1, the root partition of 148.30 GB, and /dev/sda5 inside the extended partition /dev/sda2, a 766.00 MB swap partition. So /boot files could be placed beyond the 137 GB limit assuming that files are not added to a drive from, physically, beginning to end (there’s only a bit less than 7 GB of used space on the sda1 partition).
Can I use gparted to shrink sda1 in place to less than 137 GB and avoid this problem?
Is there a way to confirm that the BIOS has this 137 GB limitation? The machine was built by my son and I around 2001.
Finally, is the limit 137X1024^3 or 137,000,000,000?
Thanks
Jim
-
Re: [Lubuntu] Grub error: attempt to read or write outside disk ‘hd0’ after upgrade
History of BIOS and IDE limits
http://tldp.org/HOWTO/Large-Disk-HOWTO-4.html
Out of disk error add to grub install disk-module=ata or use Boot-Repair ATA Disk support
HOWTO: dualboot on big disk (BIOS limitations)
https://help.ubuntu.com/community/In…buntuOnBigDisk
http://ubuntuforums.org/showthread.php?t=1998257
Large external drive still needed /boot at beginning:
http://ubuntuforums.org/showthread.php?t=1888497My normal suggestion is to use 25GB for / (root) and the rest as /home or just as data partition(s).
You should be able to use gparted to shrink sda1, I have suggested that many times, but only in about half of those has that worked.Linux ext4 partitions have data randomly(?) written to drive. Where Windows tends to write everything at beginning of drive, but then drive becomes very fragmented over time. Linux writes entire file if new write is larger and in another location.
Often the summary report from Boot-Repair shows the locations on the hard drive of grub & kernels. And those can be anywhere. Now with multiple TB sized drives just having one very large / does not make sense. Drive has to jump all over for just the boot files. So a smaller root also makes sense for new larger drives. Reading data that can be anywhere on drive is ok.
-
Re: [Lubuntu] Grub error: attempt to read or write outside disk ‘hd0’ after upgrade
I resized /dev/sda1 to about 120GB to prevent any boot files being written above the 137GB line and rebooted. The reboot was successful but during the boot up it presented a purplish screen with horizontal streaks before the login screen came up. This was similar to the orange screen I had seen previously and since that did not repeat I tried another reboot. But it did repeat. So I reinstalled and updated grub and rebooted and this time I got no funny colored screen during boot up.
Since the machine was built around 2001 which would be about the right time frame for a 137GB BIOS limitation, I am going to assume that my boot problems have been related to that and are now solved. So I’m marking the thread solved.
Thanks oldfred.
Jim
Good morning to all of You.
Sorry for posting in a [SOLVED] thread but I find the info that I am about to add relevant and I am betting my vital organs that someone else might find it interesting too.
I did an upgrade last night on my Thinkpad 600E. I was not upgrading it for several days (2 weeks tops) as I lost my USB wifi card and had no internet access on this particular machine. So…
As always before upgrade I checked my rss reader for news and sure enough there was a very informative post from Allan (thanks Dude btw.) in there:
https://www.archlinux.org/news/binaries … ervention/
I did as I was told and upgraded in the indicated way. All was peachy till I rebooted to get new kernel to load. I was met with the mentioned error:
error: attempt to read or write outside of disk ‘hd0’.
but the second part was slightly different.
Error: You need to load kernel first
SO since the error was different why am I posting here? Because even after Googling the whole error message this post was the first to come up in my search results so I am betting others will get here as well.
Solution? After an hour or so of fighting (I tried booting up from the Arch CD and fscking partitions, reinstalling / reconfiguring grub, downgrading grub-bios and grub-common packages and many many other things) I finally rebooted to the Arch cd, chrooted (for all those that do not know what that means I would like to recommend this link as chrooting is explained in it https://wiki.archlinux.org/index.php/Be … %27_Guide) to the installation and I have reinstalled the linux (kernel) package and redid the image with the:
and rebooted. Turns out that did the trick. Apparently something went wrong during the kernel upgrade. Possibly due to the changes explained in Allan’s article. Reinstalling kernel / recreating image did the trick for me.
So if You are still wondering what am I doing here and why am I replying in this thread — the answer is — 99% search results from Google suggests that this error means incompatibility between bios and the hard drive AND there is nothing really out there that I found helpful in this case. I mean it could not be a bios / hdd incompatibility. This drive has been used in this machine for few years and it was running Arch since November 2012… so this just could not be the case. I am just giving a shout to all those that will get this error that there is another option too.
Kind regards. Thanks for reading. My apologies again for sticking my nose in.
Andrzej
Edit: Few months later the same error — fix does not work… Trying to figure it out…
Last edited by AndrzejL (2013-10-19 02:43:15)
The worst thing about censorship is ██████ ██ ████ ████████████ and ██████ ███████ ███ ███████████.