-
staticaldave
- Posts: 5
- Joined: 2017/03/29 06:57:53
Installation issue RESLOVED
![]() Hello and Thankyou in advance for any suggestions or comments pertaining to this issues at hand.
Hello and Thankyou in advance for any suggestions or comments pertaining to this issues at hand.
I am attempting to install CentOS 7-64 as a dual boot with Windows 10 Home-64. The problem that I am having is during the installation with Anaconda GUI. I created / @ 10GiB, swap @ 32 GiB and /home with the remainder of the unallocated space which is about 90GiB.
I have made the Device Type set at «LVM» for each of these creations and the File System set at «ext4″( swap is not set to any type).
The problem that I am having is the installer does not accept the settings to continue with the install giving me «error checking storage configuration» message. I have to be honest here I am really new to linux and I have not installed an OS for many years. I have done a lot of reading online and can not seem to figure out what it is that I am doing wrong. I have also checked the checksum for the image before burning to DVD with MD5 CHECKSUM Toast app and verified a match.
The reasoning for this install (CentOS 7) is; I am preparing this computer for RHCSA/RHCSE training here in the next few months. The training that I will be using requires this if I can not use the REHL 7. During the course I will be working with Oracle Virtual Box to install the servers needed for the environment.
My system is as follows
CPU A10-7800 12 Compu Cores
16.0 GB Dual channel DDR3 @ 797MHz (11-11-11-28)
1024 ATI AMD Radeon R7 GRAPHICS
ASUSeK COMPUTER INC. K30BF_M32BF_A_F_K31BF_6(FM+)
1863GB Seagate ST2000DM001-1ER164 (SATA)
Again any help would be greatly apprecited
Last edited by staticaldave on 2017/03/31 11:42:49, edited 1 time in total.
-

TrevorH
- Site Admin
- Posts: 32527
- Joined: 2009/09/24 10:40:56
- Location: Brighton, UK

Re: Installation issue
Post
by TrevorH » 2017/03/29 10:36:26
My first thought is that 32GB for swap is way too large — with 16GB RAM, if you use more than 2GB swap your system will be completely unresponsive. Make it 4GB and you will have plenty.
Can you post the output from fdisk -lu /dev/sda
-
staticaldave
- Posts: 5
- Joined: 2017/03/29 06:57:53
Re: Installation issue
Post
by staticaldave » 2017/03/30 05:29:41
Thankyou for the quick response TrevorH.
Below I believe is what you asked me to post. Again if it is not; like i said,I am very new to linux. Most terms that are used I am unfamiliar with so please be patient with me. As far as the swap size, thankyou for the input and; I will adhere to the response to save some aggrevation. Most of the sites that I have been researching confuse me with doing it this way or, that way. One says use 1.5x, 2x the amount of physical ram for swap. The explanation you have provided sounds logical.
DEVICE Boot Start End Blocks id System
/dev/sda 1 4294967295 2147483647+ ee GPT
Partition 1 does not start on physical sector boundary.
sh-4.2#
And again TrevorH, Thankyou for taking the time out of you day to assist.
-
owl102
- Posts: 408
- Joined: 2014/06/10 19:13:41
Re: Installation issue
Post
by owl102 » 2017/03/30 08:03:29
staticaldave wrote:«error checking storage configuration» message.
Is that all the message says, or is there an additional clue given?
My crystal ball shows: Since you have an GPT/EFI partition layout, did you remember to include the ESP (EFI System Partition) as /boot/efi during installation, not to be formatted?
Last edited by owl102 on 2017/03/30 15:34:56, edited 1 time in total.
-
GBC
- Posts: 3
- Joined: 2017/03/30 13:18:08
Re: Installation issue
Post
by GBC » 2017/03/30 13:38:55
Hi.
I am also relatively new in comparision to some users but I will give this a bash.
As far as I can tell and if I am not wrong you have not assigned any /boot ?
I always (and maybe i am wrong) have the following.
/boot
/home
/
(swap)
Not sure if that was any help.
Also just noticing something, bring down your swap, make sure your / is bigger than you expect (rather more here than less iv learnt the hard way).
Hope it helps
-
staticaldave
- Posts: 5
- Joined: 2017/03/29 06:57:53
Re: Installation issue
Post
by staticaldave » 2017/03/30 21:39:21
Thank-you all for your suggestion(s) with regard to my «Installation Issue» Post.
I am taking all the mentioned input and implementing them into the install parameters. I am pretty sure
[quote=»owl102″]My crystal ball shows: Since you have an GPT/EFI partition layout, did you remember to include the ESP (EFI System Partition) as /boot/efi during installation, not to be formatted? Is correct; And to conclude there were no other details avalable after the info that I posted back to TrevorH asking me to post the outcome of fdisk -lu /dev/sda
I will be posting back the results of the installation once it is completed. I again thank all of you in advance for the suggestions, comments and recommendations to the CentOS 7 install. I am going to review the partition sizes and types that are needed to complete this endeavor.
Thanks again for all the time you have all taken and the efforts and; concerns delivered
staticaldave
-
staticaldave
- Posts: 5
- Joined: 2017/03/29 06:57:53
Re: Installation issue
Post
by staticaldave » 2017/03/31 08:52:31
![]() Hello Again RESOLVED
Hello Again RESOLVED
After I attempted to install CentOS 7 again then; included the ESP (EFI System Partition) sda as /boot/efi during installation. I was still getting the same
«error checking storage configuration» . I went into the setup and set the system reserve partition through the centos installer to standard partition and then mounted it with /boot/efi. I did not reformat it and I still got the same results. As this was puzzling me, I started thinking if this had something to do with the Secure Boot. ![]() Turns out it had to do with the settings of the CSM (Compatability Support Module). The launch CSM was set to Enabled so I switched it to «AUTO». The message «error checking storage configuration» went away and I am now able to continue with the installation.
Turns out it had to do with the settings of the CSM (Compatability Support Module). The launch CSM was set to Enabled so I switched it to «AUTO». The message «error checking storage configuration» went away and I am now able to continue with the installation.
Again Thankyou all for the support.
It is greatly appreciated
staticaldave
-
anweshsahu
- Posts: 1
- Joined: 2018/05/27 20:25:49
Re: Installation issue
Post
by anweshsahu » 2018/05/27 20:33:54
staticaldave wrote:
Hello Again RESOLVED
After I attempted to install CentOS 7 again then; included the ESP (EFI System Partition) sda as /boot/efi during installation. I was still getting the same
«error checking storage configuration» . I went into the setup and set the system reserve partition through the centos installer to standard partition and then mounted it with /boot/efi. I did not reformat it and I still got the same results. As this was puzzling me, I started thinking if this had something to do with the Secure Boot.Again Thankyou all for the support.
It is greatly appreciatedstaticaldave
Can you please tell me how do you get to the «settings of CSM» ? For the life of me I can’t even seem to figure out where the «setup» in «I went into the setup and set the …» is.
-
TrevorH
- Site Admin
- Posts: 32527
- Joined: 2009/09/24 10:40:56
- Location: Brighton, UK
Re: Installation issue RESLOVED
Post
by TrevorH » 2018/05/28 11:48:12
This «CSM» settings stuff is most likely to be found inside your BIOS/UEFI setup that you can access by pressing a special key combination at boot time — usually either Del or F2 but sometimes other keys are used. Each machine will have a different BIOS so you’ll just have to trawl through the various settings yourself to find it.
I tried to install linux centos 7 (dual boot), this is the first time i install linux so i’ve been following some tutorial. In the installation destination I’ve got an error message Error checking storage configuration. I have unallocated disk in my disk management (64GB), when I tried to select it with ‘Automatically configura partitioning’ I got that error message with details Unable to allocate requested partition scheme. Please help me
asked Mar 31, 2019 at 13:42
![]()
7
Boot from Windows and check if you have a «Healthy (Recovery Partition)» of 539MB or so… Delete this partition and you are good to go.
answered Nov 29, 2021 at 19:33
![]()
I am trying to use Kickstart for the first time in order to install RHEL 7.2 on 30 Dell PowerEdge R730xd servers. I’m using a USB key created with the Fedora Live USB Creator and a Kickstart configuration file provided by the customer. After some tweaking the ks.cfg file to boot from the USB instead of the CD-ROM, the installation started and an error immediately appeared on the storage option indicating an «Error checking storage configuration». I am attaching the modified ks.cfg file that I used to perform the install along with a screen shot of the RAID configuration for the server. Any help will be appreciated.
Here is part of the error message that I am receiving:
ActionCreateDevice instance, containing members:
Device: non-existent 8192 MiB lvmlv logvol01-swap (160) with non-existent swap
Container: Already dumped (LVMVolumeGroupDevice instance)
Id: 162
-applied: True
ActionCreateFormat instance, containing members:
Container: Already dumped (LVMVolumeGroupDevice instance)
_format: non-existent swap
origFormat: non-existent None
device: Already dumped (LVMLogicalVolumeDevice instance)
id: 163
_applied: True
Anaconda 21.48.22.56-1 exception report
Traceback (most recent call first):
File “/usr/lib64/python2.7/site-packages/pyanaconda/packaging/init.py”, line 480, in _setupDevice log.info(“setting up device %s and mounting on %s, device.name, mountpoint)
File “/usr/lib64/python2.7/site-packages/pyanaconda/packaging/init.py”, line 816, in _setupMedia self._setupDevice(device, mountpoint=ISO_DIR)
File “/usr/lib64/python2.7/site-packages/pyanaconda/packaging/init.py”, line 883, in _setupInstallDevice self._setupMedia(isodevice)
File “/usr/lib64/python2.7/site-packages/pyanaconda/packaging/yumpayload.py”, line 519, in updateBaseRepo url, mirrorlist, sslverify = self._setupInstallDevice(self.storage, checkmount)
File “/usr/lib64/python2.7/site-packages/pyanaconda/packaging/yumpayload.py”, line 144, in inner_method ret = method(yum_payload, *args, **kwargs)
File “/usr/lib64/python2.7/site-packages/pyanaconda/packaging/__init__.py”, line 1253, in _runThread payload.updateBaseRepo(fallback=fallback, checkmount=checkmount)
File “/usr/lib64/python2.7/threading.py”, line 764, in run self.__target(*self.__args, **self.__kwargs)
File “/usr/lib64/python2.7/site-packages/pyanaconda/threading.py”, line 227, in run threading.Thread.run(self, *args, **kwargs)
AttributeError: ‘NoneType’ object has no attribute ‘name’
Local variables in innermost frame:
device: None
mountpoint: /mnt/install/isodir
Anaconda instance, containing members:
_instClass: DefaultInstall instance, containing members:
_intf: GraphicalUserInterface instance, containing members:
_intf.instclass: Already dumped (DefaultInstall instance)
_intf._mehInterface: GraphicalExceptionHandlingIface instance, containing members:
_intf._mehInterface._Lightbox_func:
_intf.data: #version=DEVEL
System authorization information
Aut –enableshadow –passalgo=sha512
Use graphical install
graphical
Hi,
I am on HP desktop with basic config as follow :
OS Name Microsoft Windows 10 Pro
Version 10.0.10586 Build 10586
Processor Intel(R) Core(TM) i3-3220
CPU @ 3.30GHz, 3300 Mhz, 2 Core(s), 4
Logical Processor(s) BIOS
Version/Date AMI 8.06, 01/24/13 SMBIOS
Version 2.7 Secure Boot
State Unsupported Installed Physical
Memory (RAM) 6.00 GB Total Physical
Memory 3.39 GB Available Physical
Memory 1.67 GB Total Virtual
Memory 6.89 GB Available Virtual
Memory 5.07 GB
I am trying to make it dual-bootable with Fedora 26. I have made a Live USB with media writer and when I am installing it on the configuration page, it is always giving me «Error checking storage configuration» no matter what I am doing. I have initially used windows disk management tool to create 25 GB of «unallocated space» from my C: drive (boot). This 25 GB of «unallocated space» is shown by the Anaconda Installer but when I click on «Done» it asks me to reclaim space as there is 0 «free space». After which I deleted one whole partition of 175 GB hoping it might solve the issue. But it is still giving me the same problem. I have attached screenshot of the error.
(http://i.imgur.com/RSNwYAH.png?1)
(http://i.imgur.com/IAkMlMI.png)
I tired deleting partition from Anaconda installer which failed to do it and had to do it using windows Disk management (Might be the issue?).
Current Partition Setup : (http://i.imgur.com/5uS6m91.png)
I have tried many forums and no able to find a solution to it. This is my first time moving to Linux system and creating Dual-Bootable system.
Thanks in advance.
Edit 1: Fixed Formatting
Edit 2: Finally went past the initial hurdle as per this link https://fedoramagazine.org/anaconda-fedora-26-new-features/
So as per instruction I have created LVM of the 172 GB of free space, of which i allocated 60GB to root (format:ext4) mounted as ‘/’ and 8GB to swap.
On clicking «done» I am now receiving this following error: http://i.imgur.com/SWHiFmP.png
Further googling the error I have found that the disk is using MBR system. Now I will try to find if I can just change a single partition into GPT type or not (hoping i can :C), if not I might have to reformat whole disk ( meaning reinstalling Win10). If you have any idea for a work around this problem please let me know.
I will tackle this issue tomorrow now, Thanks.
P.S — The installer is really bad for letting a user know the error, there is no information on what partition system my disk is using when I check the information tab in the installer.
Дистрибутив CentOS или Community ENTerprise Operating System, это популярный дистрибутив Linux, разрабатываемый сообществом и основанный на Red Hat Enterprise Linux. Операционная система от Red Hat — коммерческая, вы можете ее скачать и установить, поскольку исходные коды доступны, но вы не получите технической поддержки и обновлений, даже важных обновлений безопасности.
Разработчики CentOS исправляют эту проблему. Они собирают на основе исходного кода Red Hat свой продукт, который постоянно поддерживается и получает все необходимые обновления. Если Ubuntu — самая популярная операционная система для домашних пользователей, то CentOS имеет такую же популярность, как и Ubuntu, только уже для серверов. Хотя дистрибутив может быть установлен и дома.
В этой статье будет рассмотрена установка CentOS 7 на ваш компьютер или ноутбук. На данный момент это самая последняя версия системы. Напомню, что мажорные релизы выходят тогда же, когда и Red Hat, а небольшие обновления с периодичностью каждые шесть месяцев.
Системные требования
В официальном руководстве сказано, что для установки CentOS 7 достаточно 1 гигабайта оперативной памяти. Но для нормальной работы рекомендуется как минимум 1344 Мб. Также для установки нам понадобится образ диска с установщиком, скачанный из официального сайта и носитель, на который мы запишем этот образ.
Подготовка к установке
Просто выполняйте все ниже перечисленные шаги и установка CentOS на ваш компьютер пройдет успешно, при условии, что система поддерживает ваше оборудование.
Шаг 1. Загрузка образа
Сначала нам нужно скачать установочный образ на официальном сайте. Архитектура i386 для этой версии не поддерживается и если вам нужна именно она, придется ставить предыдущую версию.

На этой странице вы можете выбрать DVD или Minimal CD. Первый содержит все необходимое программное обеспечение, в том числе несколько окружений рабочего стола, которые вы сможете выбрать во время установки CentOS.
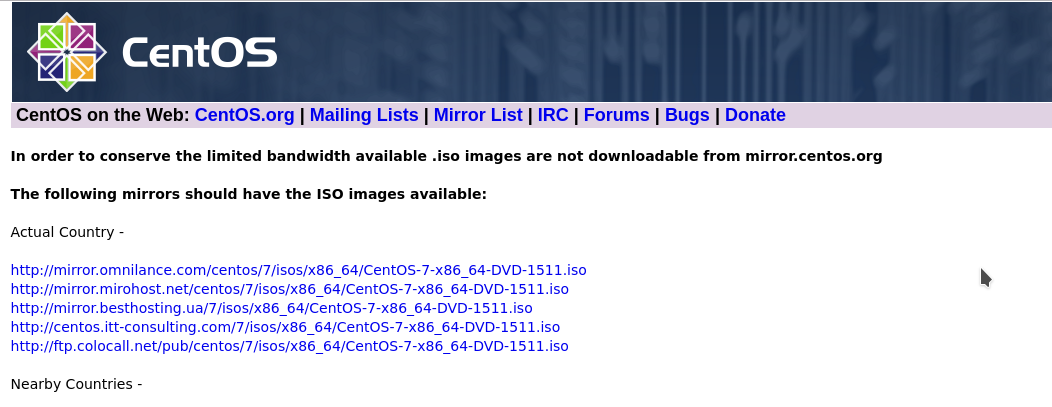
Прежние версии можно скачать по ссылке alternative downloads.
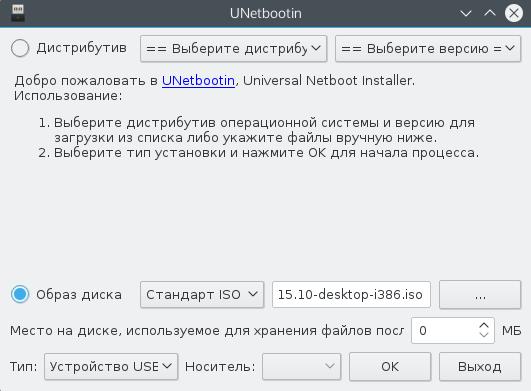
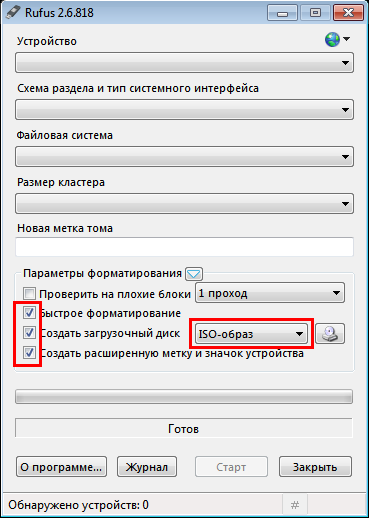
Шаг 2. Запись образа
Для записи образа на флешку в Linux можно воспользоваться программой unetbootin:
А в Windows есть отличная утилита rufus:
Для записи на диск в Linux всегда использовались k3b и brasero, а в Windows UltraISO.
Шаг 3. Загрузка BIOS
После записи образа перезагрузите компьютер и во время заставки BIOS нажмите F2, F8, Shift+F2. Откроется меню настройки BIOS, здесь перейдите на вкладку Boot и в пункте Boot Device Priority или 1st Boot Device выберите вашу флешку или диск:
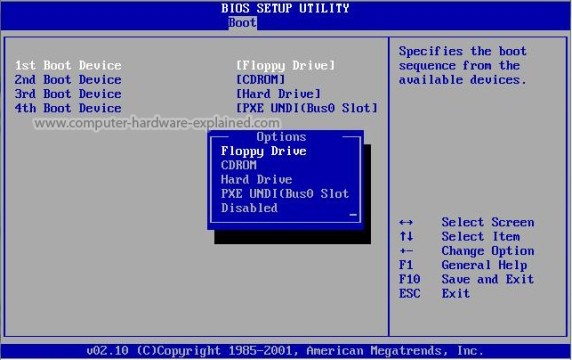
Дальше установка CentOS с флешки ничем не отличается, только будет немного быстрее. Как сделаете перейдите на вкладку Exit и нажмите Save & Exit.
Шаг 4. Запуск
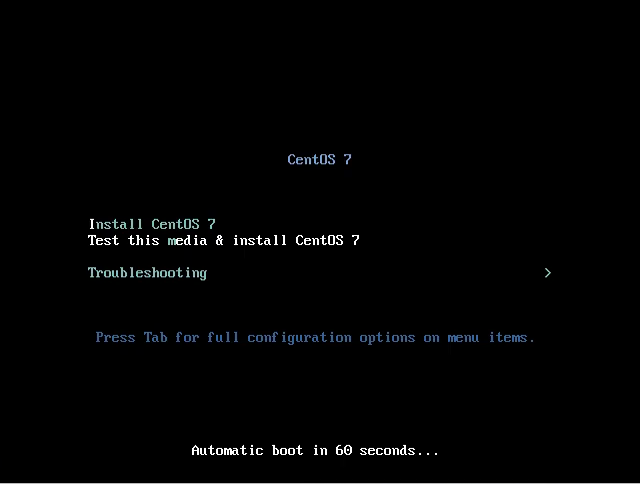
Первое, что вы увидите после перезагрузки, это меню установки CentOS, выберите первый вариант:
Шаг 5. Загрузка компонентов
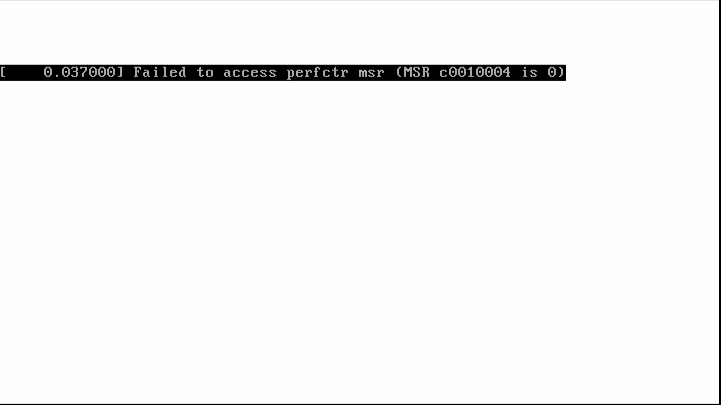
Дождитесь завершения загрузки образа в память:
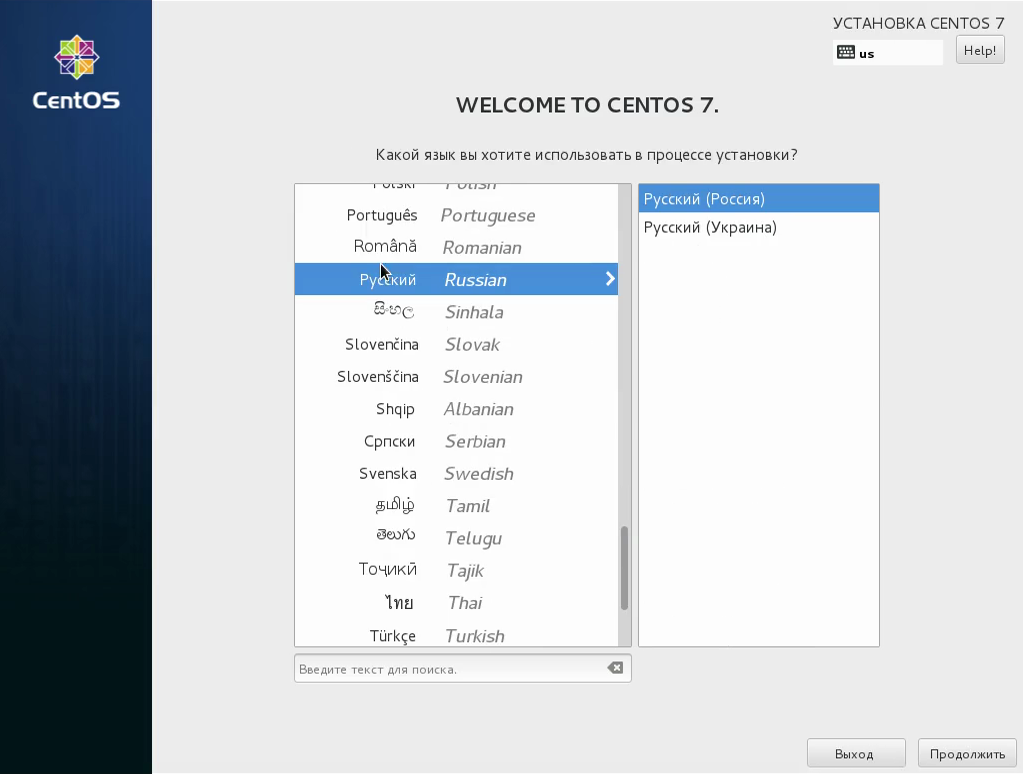
Шаг 6. Язык установщика
Выберите язык, на котором будет работать установщик и в будущем будет установлена система:
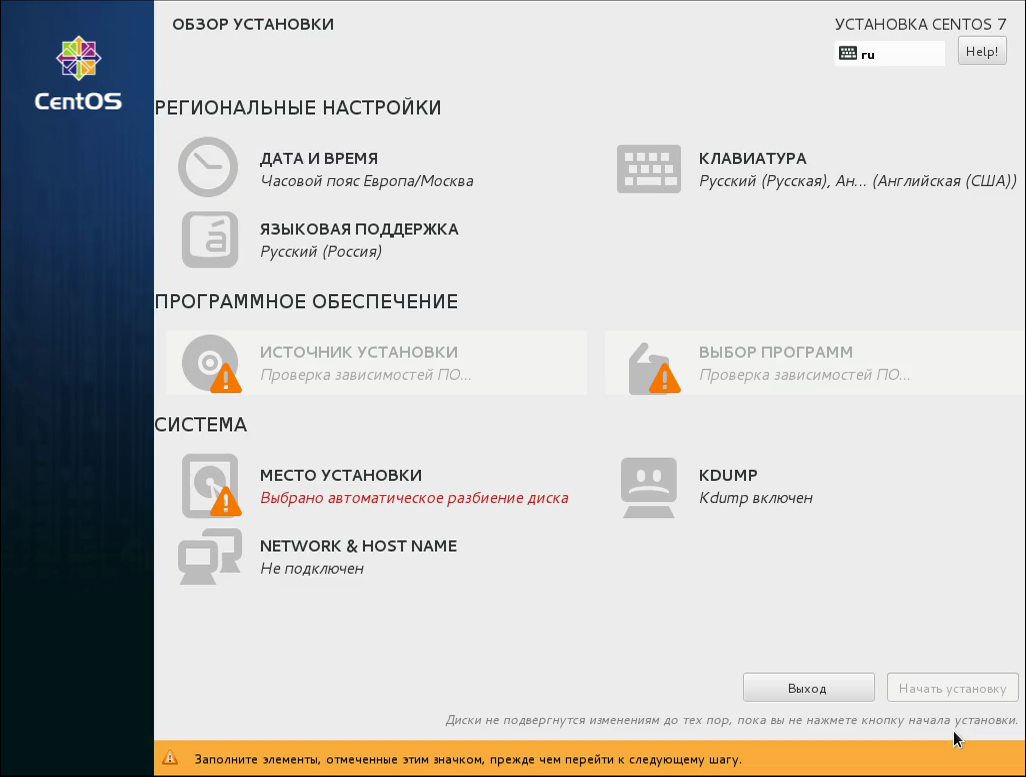
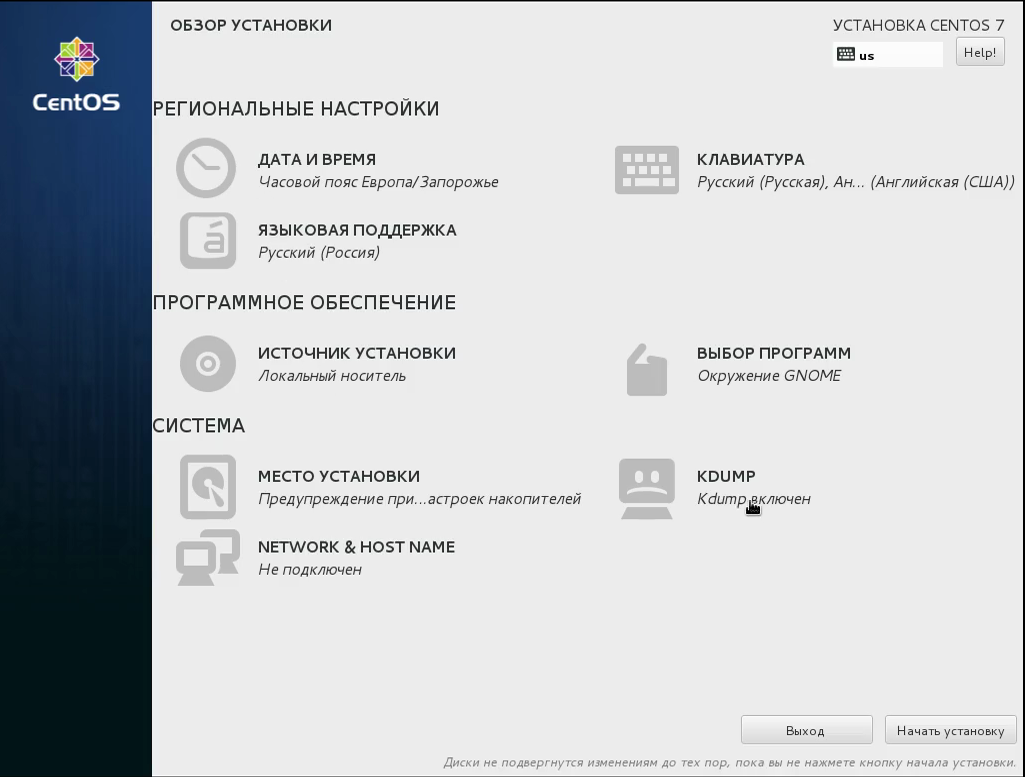
Шаг 7. Главное меню
На этом шаге мастер сильно отличается от других дистрибутивов. Мы имеем главное меню, в котором нужно настроить все параметры, отмеченные треугольником:
Шаг 8. Часовой пояс
Сначала выберите ваш часовой пояс:

Кнопка готово находится в верхнем левом углу.
Шаг 9. Выбор программ
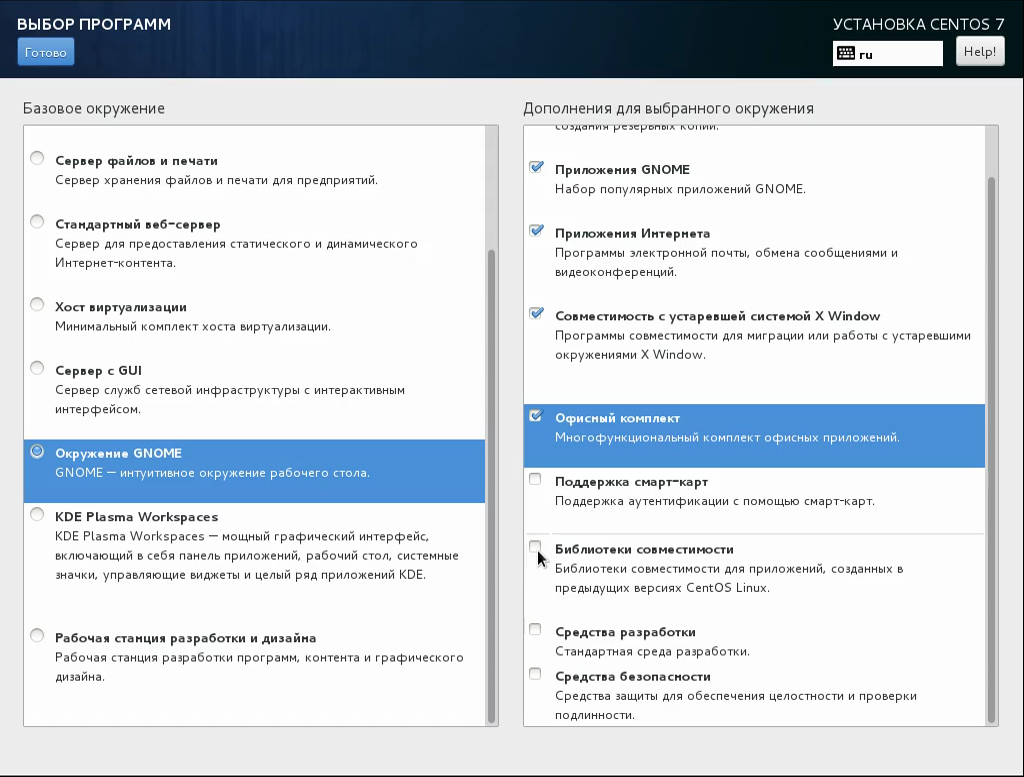
На этом экране вы можете выбрать программное обеспечение и окружение рабочего стола, которое нужно устанавливать. Например, мы будем устанавливать CentOS с Gnome:
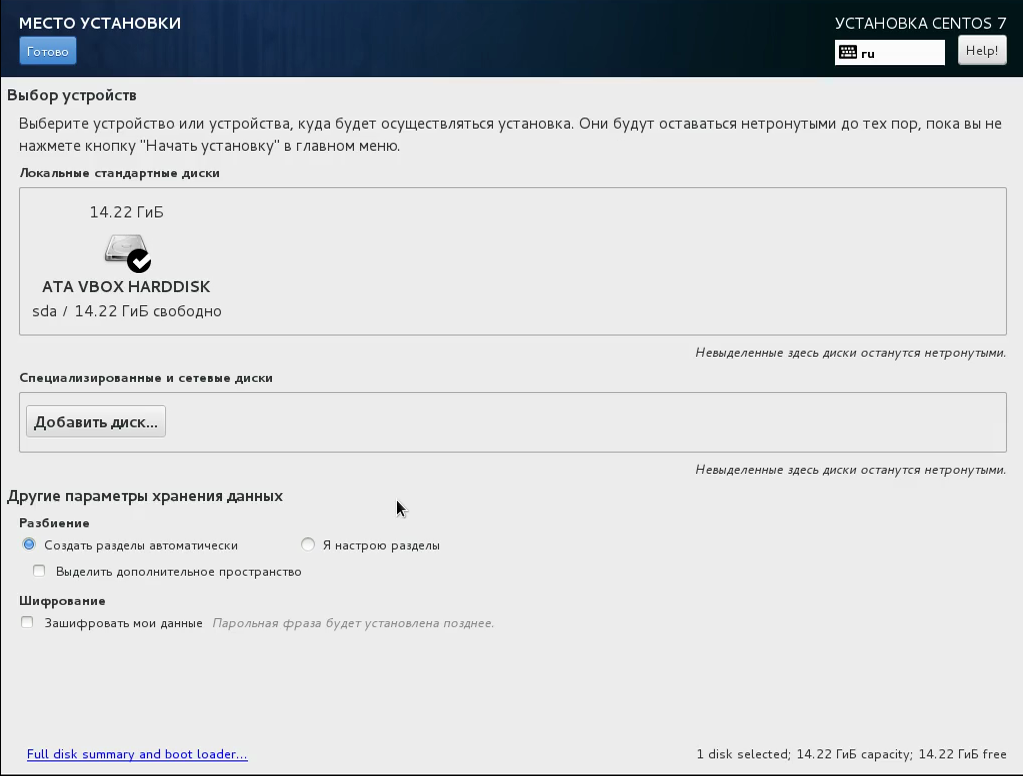
Шаг 10. Выбор диска
Дальше выберите в главном меню место для установки. Здесь выберите диск, на который будете устанавливать систему. Затем поставьте галочку Я настрою разделы:
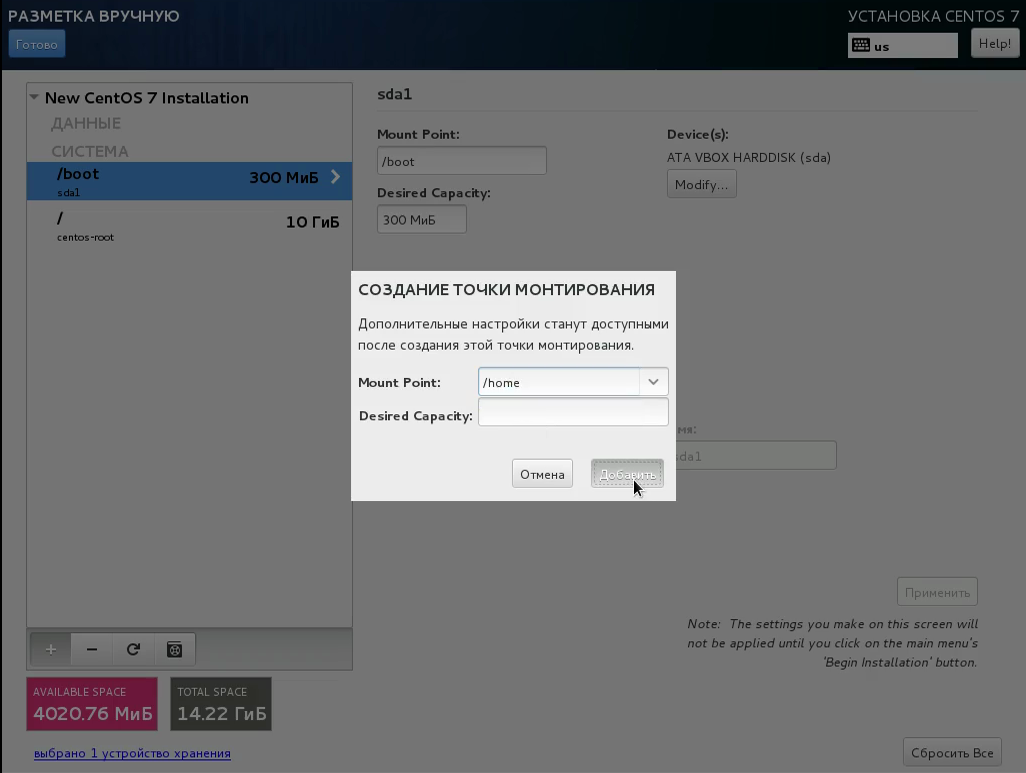
Шаг 11. Настройка разделов
После нажатия кнопки готово появится экран, на котором мы можем создавать разделы с помощью кнопки плюс. Систему разметки LVM оставляем как есть, тогда будет удобнее изменять разделы. Но если хотите, можете переключить на обычный раздел.

Шаг 12. Раздел корня
Нажмите + чтобы создать новый раздел. Введите точку монтирования / в поле Mount point. В поле Desired Capasity введите размер, например, 10G (10 гигабайт):

Шаг 13. Загрузочный раздел
Проделайте все те же действия для загрузочного раздела. Точка монтирования — /boot, размер 300M.

Шаг 14. Домашний раздел
Точно так же создайте домашний раздел. Точка монтирования /home. Размер указывать не нужно. Будет занято все доступное пространство.
Шаг 15. Завершение разметки
Должно получиться что-то похожее на это:
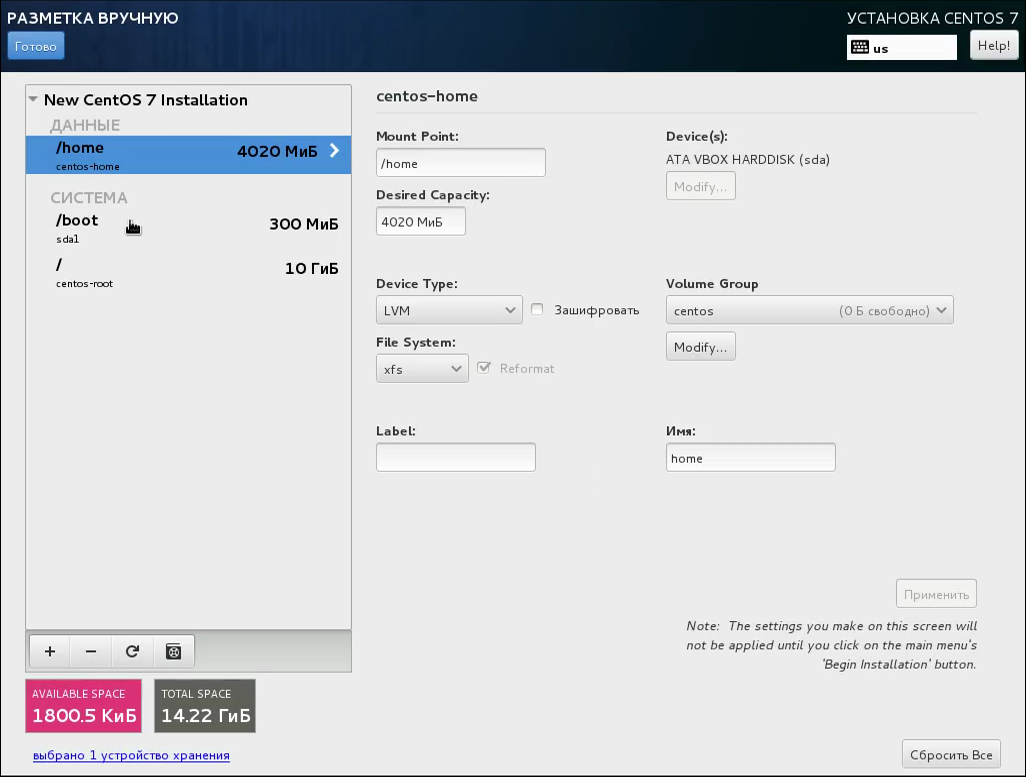
Вы можете настроить каждый из разделов, задать для него файловую систему, метку и так далее. Можно еще создать раздел подкачки. Система будет писать об этом предупреждение. Но можно просто нажать два раза готово. После этого подтвердите действие и вы вернетесь в главное меню.

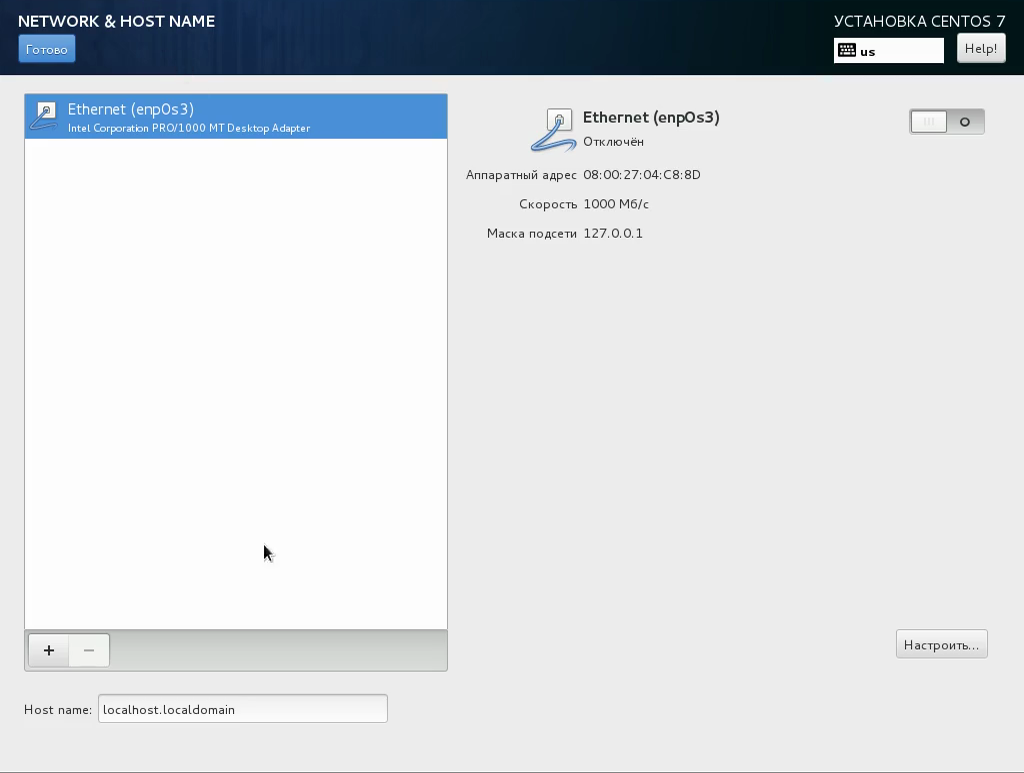
Шаг 16. Настройка сети
В разделе Network & Hostname вы можете настроить сеть. Для выключения сети по DHCP достаточно включить переключатель:
Шаг 17. Начало установки
Все настроено и установка CentOS 7 может быть начата. Нажмите кнопку начать установку. Затем подтвердите действие:
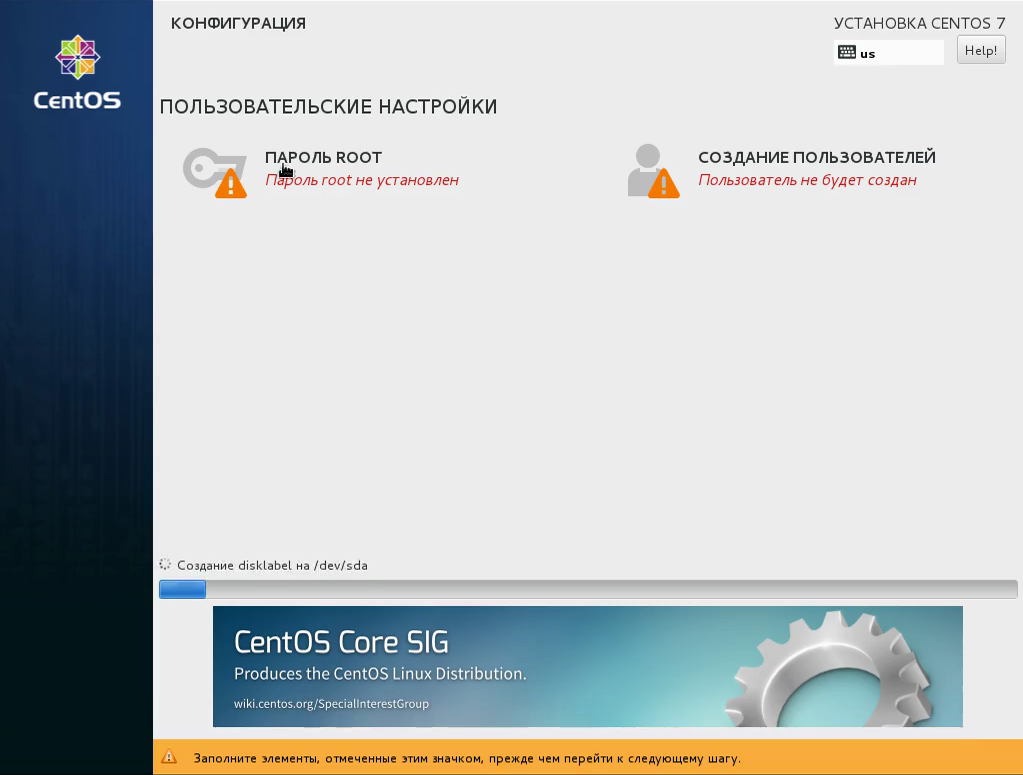
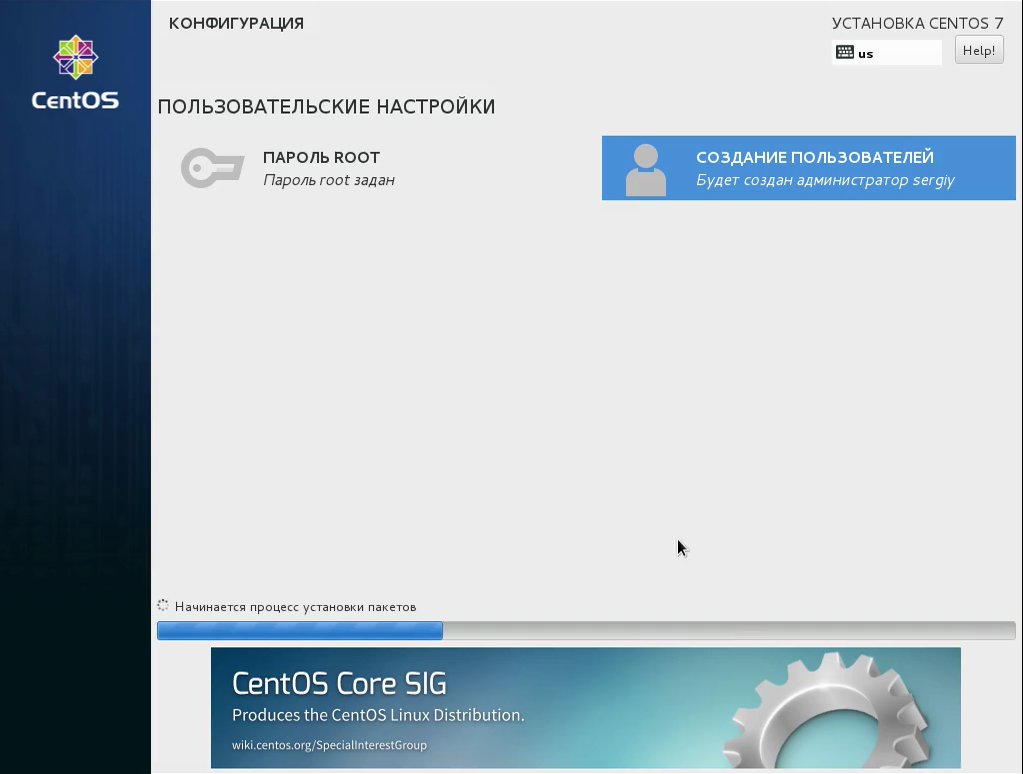
Шаг 18. Пароль суперпользователя
Установка началась. А пока нам нужно указать пароль суперпользователя. Кликните по этому пункту:
Затем введите пароль два раза:
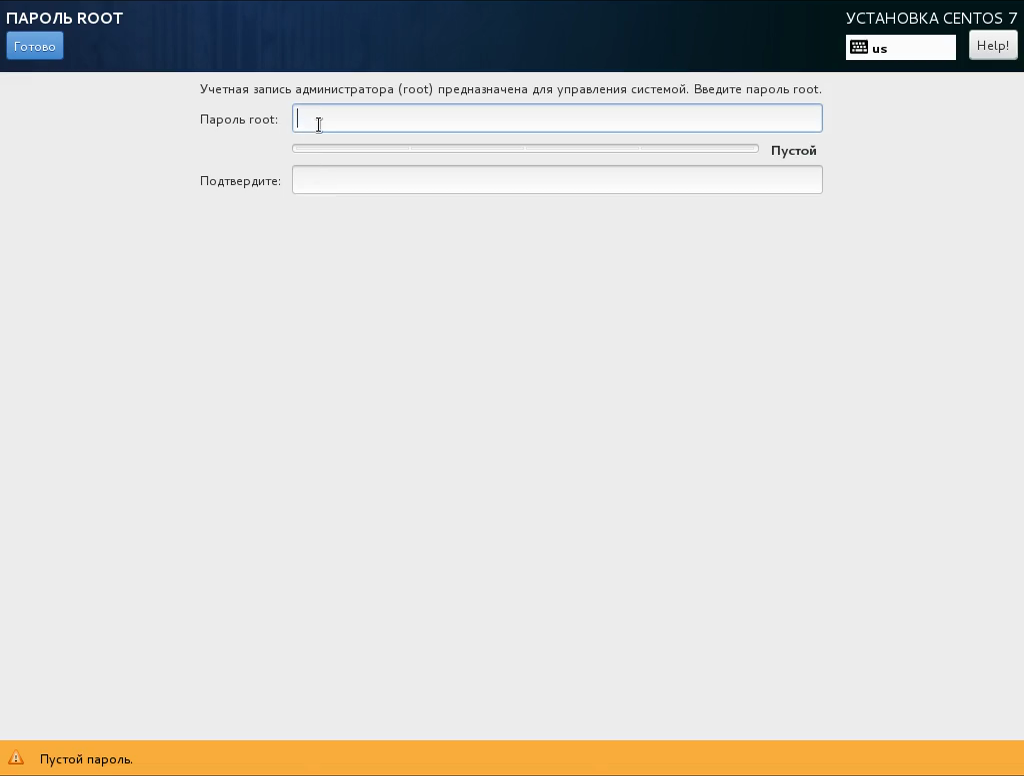
Если пароль недостаточно сложный, система предупредит об этом. Но вы можете проигнорировать это предупреждение и нажать готово два раза.
Шаг 19. Пользователь
В том же самом меню можно выбрать настройку пароля пользователя. Здесь нужно ввести имя, логин и пароль:
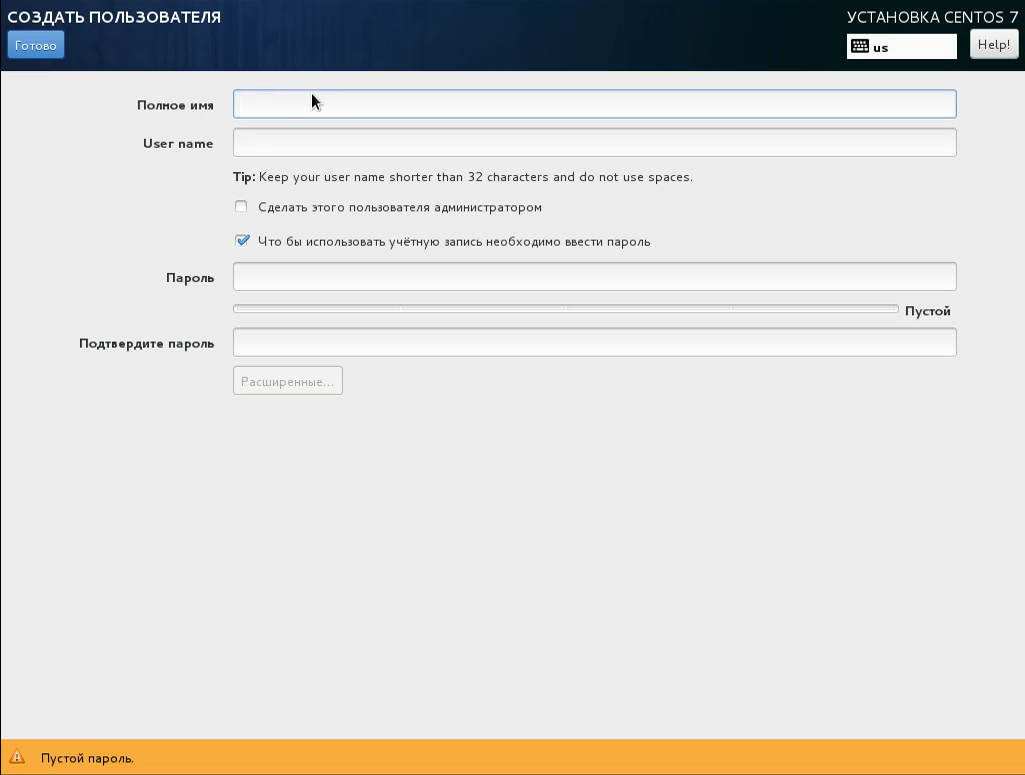
Не забудьте установить галочку сделать пользователя администратором.
Шаг 20. Завершение установки
Теперь ваше вмешательство больше не потребуется. Дождитесь завершения установки системы:
Шаг 21. Перезагрузка
После того как установка CentOS будет завершена нажмите готово и подождите пока компьютер перезагрузится.

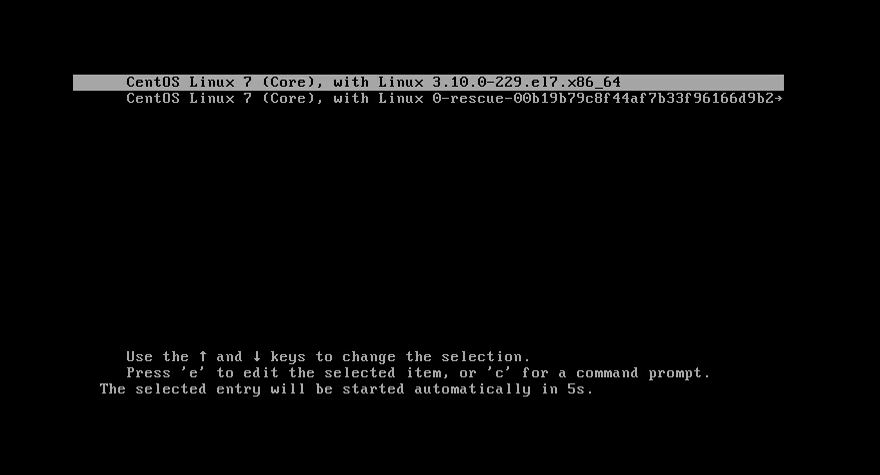
Шаг 22. Загрузчик
Выберите первый пункт в меню Grub:
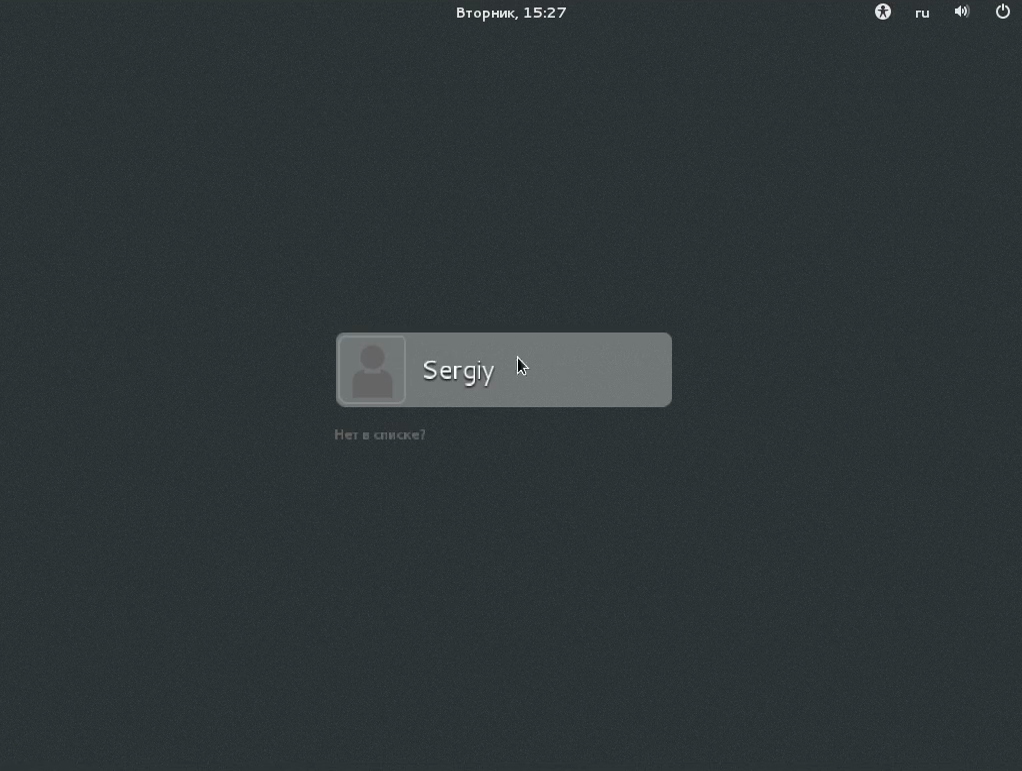
Шаг 23. Логин
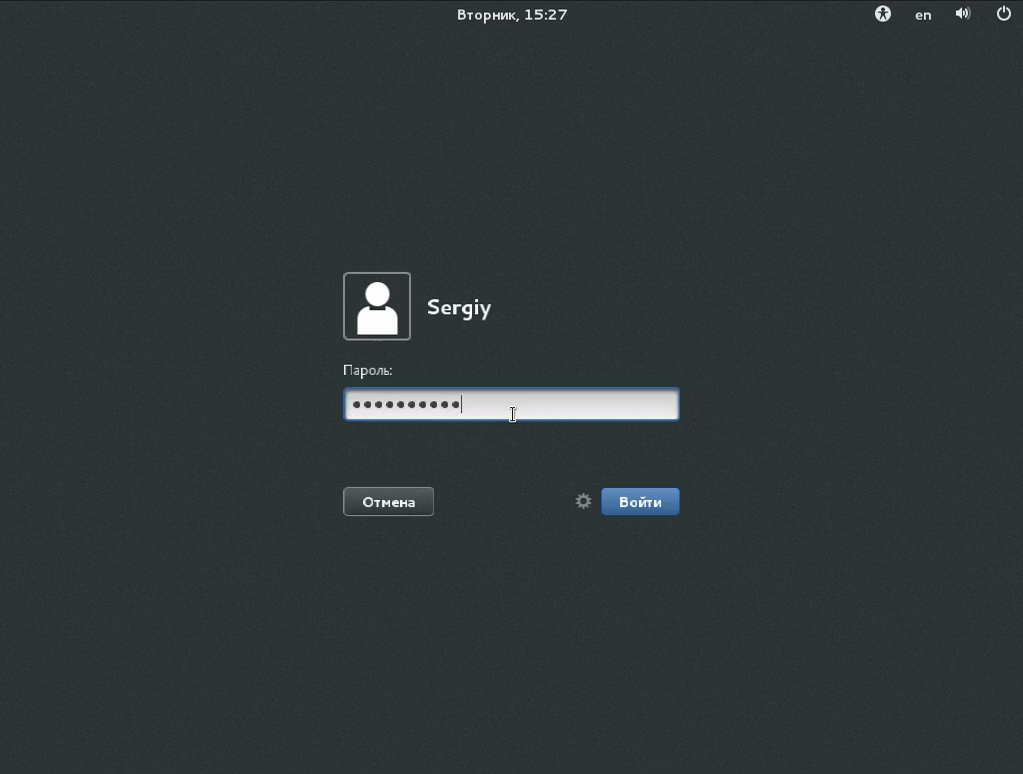
Выберите имя пользователя, которого вы создали при установке:
Шаг 24. Авторизация
Введите пароль этого пользователя.
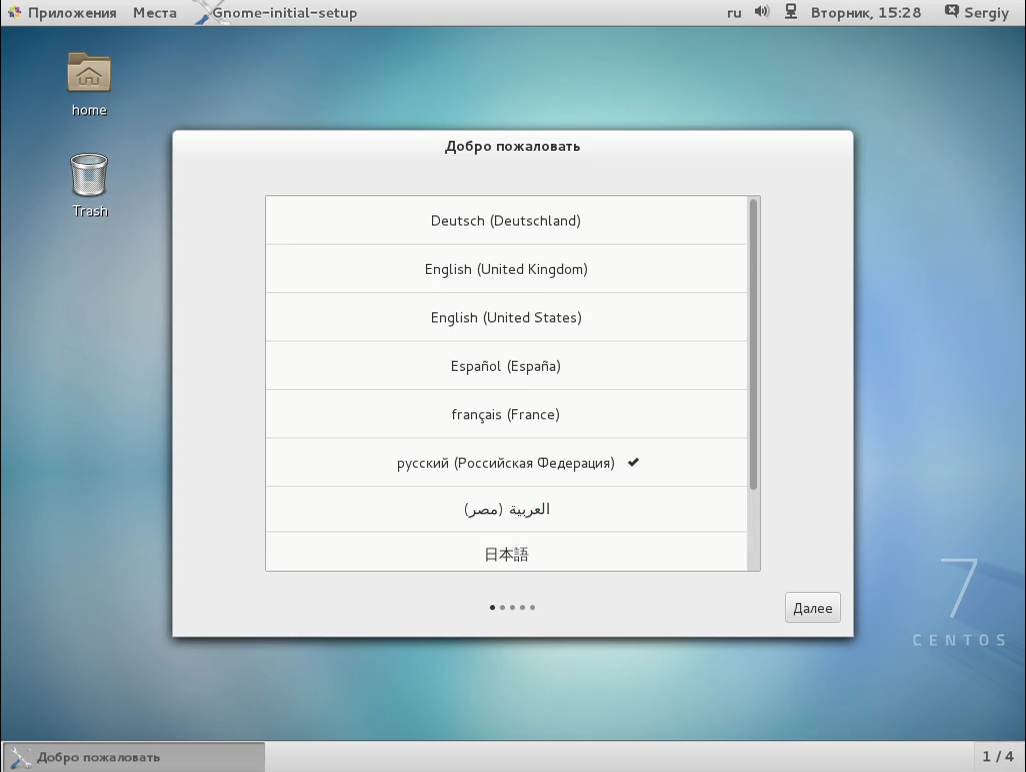
Шаг 25. Настройка Gnome
Ответьте на несколько вопросов мастера начальной настройки Gnome:
Шаг 26. Готово
Вот и все система установлена и полностью готова к работе:
Выводы
Как видите, установка CentOS 7 не так уж сложна, как может показаться на первый взгляд. Да, возможно, здесь все иначе, чем в Ubuntu, и немного не привычно. Но для меня этот установщик даже удобнее, потому что позволяет лучше настроить систему. Если у вас остались вопросы, спрашивайте в комментариях!
Процесс установки заснят на видео:

Статья распространяется под лицензией Creative Commons ShareAlike 4.0 при копировании материала ссылка на источник обязательна .
I’m trying to install the centos netboot install on ppc64le platform but automation installation(kickstart) fails with the following error:
Starting installer, one moment...
find_file: stat /proc/device-tree/chosen/bootpath, No such file or directory
anaconda 21.48.22.56-1 for CentOS AltArch 7 started.
 * installation log files are stored in /tmp during the installation
 * shell is available on TTY2
 * when reporting a bug add logs from /tmp as separate text/plain attachments
Starting automated install..........
Generating updated storage configuration
storage configuration failed: failed to find a suitable stage1 device
================================================================================
================================================================================
Installation

 1) [x] Language settings                 2) [x] Timezone settings
        (English (United States))                (UTC timezone)
 3) [x] Installation source               4) [x] Software selection
        (http://mirror.centos.org/altar          (Custom software selected)
        ch/7/os/ppc64le/)                 6) [x] Kdump
 5) [!] Installation Destination                 (Kdump is enabled)b | Help: F1
        (Error checking storage configu
        ration)
 7) [x] Network configuration
        (Wired (enp0s1) connected)

** (anaconda:1253): WARNING **: Could not open X display

The installation was stopped due to incomplete spokes detected while running in non-interactive cmdline mode. Since there cannot be any questions in cmdline mode, edit your kickstart file and retry installation.
The exact error message is:

The following mandatory spokes are not completed:
Installation Destination.

The installer will now terminate.

[root@llmtul01b qemu]#
And kickstart file looks like:
url --url="http://mirror.centos.org/altarch/7/os/ppc64le/"
install
keyboard us
rootpw --lock --iscrypted locked
timezone --isUtc --nontp UTC
selinux --enforcing
firewall --disabled
network --bootproto=dhcp --device=link --activate --onboot=on
reboot
bootloader --disable
lang en_US

# Repositories to use
repo --name="CentOS" --baseurl=http://mirror.centos.org/altarch/7/os/ppc64le/ --cost=100
## Uncomment for rolling builds
repo --name="Updates" --baseurl=http://mirror.centos.org/altarch/7/updates/ppc64le/ --cost=100

# Disk setup
zerombr
clearpart --all --initlabel
part / --fstype ext4 --size=3000
Looking for the option to select the installation destination through kickstart file.
asked Aug 5, 2016 at 6:50
![]()
This problem solved by adding one more partition which is specific for ppc64le pltform.
Update and working kickstart file looks like :
url --url="http://mirror.centos.org/altarch/7/os/ppc64le/"
install
keyboard us
rootpw --lock --iscrypted locked
timezone --isUtc --nontp UTC
selinux --enforcing
firewall --disabled
network --bootproto=dhcp --device=link --activate --onboot=on
reboot
bootloader --disable
lang en_US

# Repositories to use
repo --name="CentOS" --baseurl=http://mirror.centos.org/altarch/7/os/ppc64le/ --cost=100
## Uncomment for rolling builds
repo --name="Updates" --baseurl=http://mirror.centos.org/altarch/7/updates/ppc64le/ --cost=100

# Disk setup
zerombr
clearpart --all --initlabel
part / --fstype ext4 --size=3000
part prepboot --fstype "PPC PReP Boot" --size=10
answered Aug 16, 2016 at 11:39
![]()
1