Microsoft Office использует механизм, отличный от операционной системы Windows, для таких целей, как обновления и активация. Это приводит к контекстным зависимостям этого механизма от различных процессов и сервисов. Иногда при обновлении или активации Office вы можете получать сообщение об ошибке:
Произошла непредвиденная ошибка. Ваш запрос не может быть обработан в настоящее время. Пожалуйста, повторите попытку позже. (0x80070426)
Эта ошибка вызвана тем, что различные вспомогательные службы и процессы не работают или не запускаются должным образом. Сегодня в этой статье мы обсудим, как исправить эту ошибку.
Мы обсудим следующие исправления, чтобы избавиться от кода ошибки 0x80070426 для активации Microsoft Office в Windows.
- Проверьте ответственные службы.
- Запустите сценарий активации вручную.
1]Проверьте ответственные службы
Тип, services.msc в поле Начать поиск и нажмите Enter, чтобы открыть Диспетчер служб Windows. Нажмите Да для появившегося запроса UAC или управления учетными записями пользователей. Откроется окно служебной программы Windows Services Manager.
В списке, который вы получите, найдите запись службы под названием «Служба лицензирования программного обеспечения» из списка, который заполняется внутри окна.
Щелкните его правой кнопкой мыши и выберите Свойства и убедитесь, что его Тип запуска на автоматический.
Также убедитесь, что вы Начинать сервис, нажав кнопку «Пуск» в окне «Свойства».
Теперь выполните следующие команды в командной строке с повышенными привилегиями:
net start slsvc
sc qc slsvc
sc queryex slsvc
sc qprivs slsvc
sc qsidtype slsvc
sc sdshow slsvc
Проверьте, устранило ли это вашу проблему.
2]Запустите сценарий активации вручную.
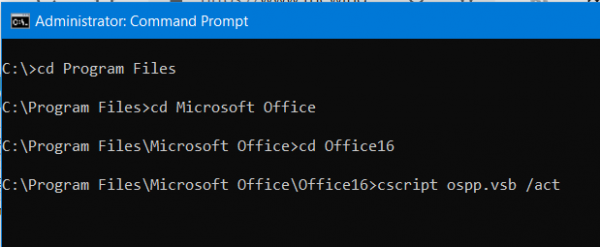
Запустите командную строку с правами администратора.
Если вы используете Office 16, перейдите в следующее место в служебной программе командной строки командной строки:
- x86: C: Program Files (x86) Microsoft Office Office16;
- x64: C: Program Files Microsoft Office Office16
Если вы используете старую версию, это место будет:
- x86: C: Program Files (x86) Microsoft Office OfficeXX.
- x64: C: Program Files Microsoft Office OfficeXX
Как только вы окажетесь там, введите следующее, чтобы запустить сценарий активации, а затем нажмите Enter-
cscript ospp.vbs / act
Позвольте команде попытаться активировать вашу копию Microsoft Office.
Теперь проверьте, решает ли это ваши проблемы.
.
- Remove From My Forums
-
Question
-
Installed Office 2010 Professional Plus KMS version but realized I needed the Retail version for an MSDN key.
Uninstalled then installed Office 2010 Professional Plus Retail.
It accepted the MSDN key but activation failed with error 0x80070426.
Activation by phone shows no installation ID.
Eventually ran this:
C:Program Files (x86)Microsoft OfficeOffice14>cscript ospp.vbs /dinstid
and got …
Microsoft (R) Windows Script Host Version 5.8
Copyright (C) Microsoft Corporation. All rights reserved.—Processing—————————
—————————————
ERROR CODE: 0x80070426
ERROR DESCRIPTION: Run the following: cscript ospp.vbs /ddescr:0x80070426
—————————————
—————————————
—Exiting——————————Please help activate.
Answers
-
Finally found this site providing an updated tool to properly remove office 2010 remnants:
hxxp://whitepages.unlimitedviz.com/2010/05/how-to-completely-remove-all-traces-of-office-2010-from-your-system/
In case the link is broken search for this: «How to Completely Remove All Traces of Office 2010 From Your System»
-
Marked as answer by
Tuesday, April 9, 2013 6:37 PM
-
Marked as answer by
Download PC Repair Tool to quickly find & fix Windows errors automatically
Microsoft Office uses a separate mechanism than the Windows operating system for purposes like Updates and Activation. This brings in the context dependencies of this mechanism on different processes and services. At times when updating or activating Office, you may receive an error message:
An unexpected error has occurred. You request cannot be processed at this time. Please try again later. (0x80070426)
This error is caused due to various supporting services and processes not working or being not triggered as intended. With this article today, we will be discussing how to fix this error.

We will be discussing the following fixes to get rid of error code 0x80070426 for Microsoft Office Activation on Windows-
- Check the responsible Services.
- Run the Activation Script manually.
1] Check the responsible Services
Type, services.msc in the Start search box and hit Enter to open the Windows Services Manager. Click on Yes for the UAC or User Account Control prompt that you get. It will open the Windows Services Manager Utility’s window.
In the listing that you get, look out for the service entry called Software Licensing Service from the list that gets populated inside the window.
Right click on it and select Properties and make sure that its Startup Type to Automatic.
Also, make sure that you Start the service by selecting the Start button inside of the Properties window.
Now execute the following commands in an elevated command prompt:
net start slsvc sc qc slsvc sc queryex slsvc sc qprivs slsvc sc qsidtype slsvc sc sdshow slsvc
Check if this fixed your issue.
2] Run the Activation Script manually
Launch Command Prompt with Administrator Privileges.
If you use Office 16, navigate to the following location inside of the Command Prompt command line utility-
- x86: C:Program Files (x86)Microsoft OfficeOffice16
- x64: C:Program FilesMicrosoft OfficeOffice16
If you use an older version, that location would be-
- x86: C:Program Files (x86)Microsoft OfficeOfficeXX
- x64: C:Program FilesMicrosoft OfficeOfficeXX
Once you get there, type in the following to run the Activation Script, and then hit Enter-
cscript ospp.vbs/act
Let the command attempt to activate your copy of Microsoft Office.
Now check, if that fixes your issues.
You may also see Error Code 0x80070426 associated with Microsoft Store and Windows Update, or Microsoft account.

Ayush has been a Windows enthusiast since the day he got his first PC with Windows 98SE. He is an active Windows Insider since Day 1 and has been a Windows Insider MVP.
In case you don’t know, Microsoft Office uses a separate mechanism than the Windows operating system for specific purposes such as Updates and Activation which brings in the content dependencies of this mechanism on different services and processes. Thus, in such cases, you could encounter errors like the error code 0x80070426. When you get this error, you will see the following error message on your screen:
“An unexpected error has occurred. Your request cannot be processed at this time. Please try again later. (0x80070426)”
This kind of error is caused by various supporting processes and services that are not working or are not being triggered as they were supposed to. If you are currently facing this issue, worry not for this post will guide you in fixing it. There are two potential fixes you can try – you can either check the responsible services or manually run the Activation Script. For more details refer to the given options below.
Option 1 – Try checking the responsible Services
- In the Start search, type “services.msc” in the field and tap Enter or click OK to open the Windows Services Manager.
- If a User Account Control or UAC prompt appears, just click on Yes to proceed to the Windows Services Manager utility window.
- After that, look for the “Software Licensing Service” service entry from the given list of services inside the window.
- Then right-click on it and select Properties and from there, make sure that its Startup Type is set to Automatic.
- Once done, click on the Start button to start the service and then exit the Services Manager.
- Next, tap the Win + R keys to open the Run utility and then type “cmd” in the field and tap Enter to open an elevated Command Prompt.
- After that, type and enter each command below one after the other.
- net start slsvc
- sc qc slsvc
- sc queryex slsvc
- sc qprivs slsvc
- sc qsidtype slsvc
- sc sdshow slsvc
- Now check if the problem is fixed or not.
Option 2 – Try to manually run the Activation Script
- In the Start search, type “cmd” and right-click on Command Prompt from the given search results and then select the “Run as administrator” option to open Command Prompt with admin privileges.
- Next, navigate to the following location inside the Command Prompt command-line utility if you are using Office 16.
- x86: C:/Program Files (x86)/Microsoft Office/Office16
- x64: C:/Program Files/Microsoft Office/Office16
- On the other hand, if you are using an older version, go to the following location instead.
- x86: C:/Program Files (x86)/Microsoft Office/OfficeXX
- x64: C:/Program Files/Microsoft Office/OfficeXX
- Once you’re in the location, type the following command to run the Activation Script and then tap Enter.
cscript ospp.vbs/act
- The command you just entered will activate your copy of Microsoft Office.
Advanced System Repair Pro
One-click automated PC repair solution
![]()
With Advanced System Repair Pro you can easily
DOWNLOAD
Advanced System Repair Pro is compatible with all versions of Microsoft Windows including Windows 11
Share this article:
You might also like
Lately on EA forums question has appeared on what to do when Origin client does not load library. It seems that the latest update for the Origin client has brought some issues as not properly showing one library which appears empty.
Do not worry, we have a solution for you, several to be precise and it will fix the issue guaranteed. It is advisable to try solutions in order how they are presented since they go from the most simple and fastest and most common ones.
-
Delete the cache
Close origin client completely
Press ⊞ WINDOWS + R to bring the run dialog
In the run dialog type in %ProgramData%/Origin and press ENTER
Go into the Origin folder
Delete all files and folders except the LocalContent folder
Press ⊞ WINDOWS + R to bring the run dialog
In the run dialog type in %AppData% and press ENTER
Delete the Origin folder
In the address bar click on AppData
Go into the local folder
Delete Origin folder
Reboot your PC -
Clear the temporary files
Press ⊞ WINDOWS + R to bring the run dialog
In the run dialog type in %AppData% and press ENTER
Go into the roaming folder
Delete Origin folder
Go to the AppData folder and delete the Origin folder from there also
Reboot system -
Try Windows built-in tools to check compatibility
Locate where Origin is installed and right-click on the executable file
Click on properties
Go to the compatibility tab
Click on Run the compatibility troubleshooter and follow on-screen instructions -
Update Origin
Rarely this is the case but check manually to see if you can update your Origin client. Sometimes due to network issues client does not update automatically and can cause this strange behavior.
-
Add origin as an exception to antivirus and firewall
Not rarely game clients can be detected as some form of malicious software and antivirus along with firewall can automatically block it. Go to your security software settings and add it as the exception.
-
Reinstall Origin
If everything else fails, reinstall the Origin client
Read More
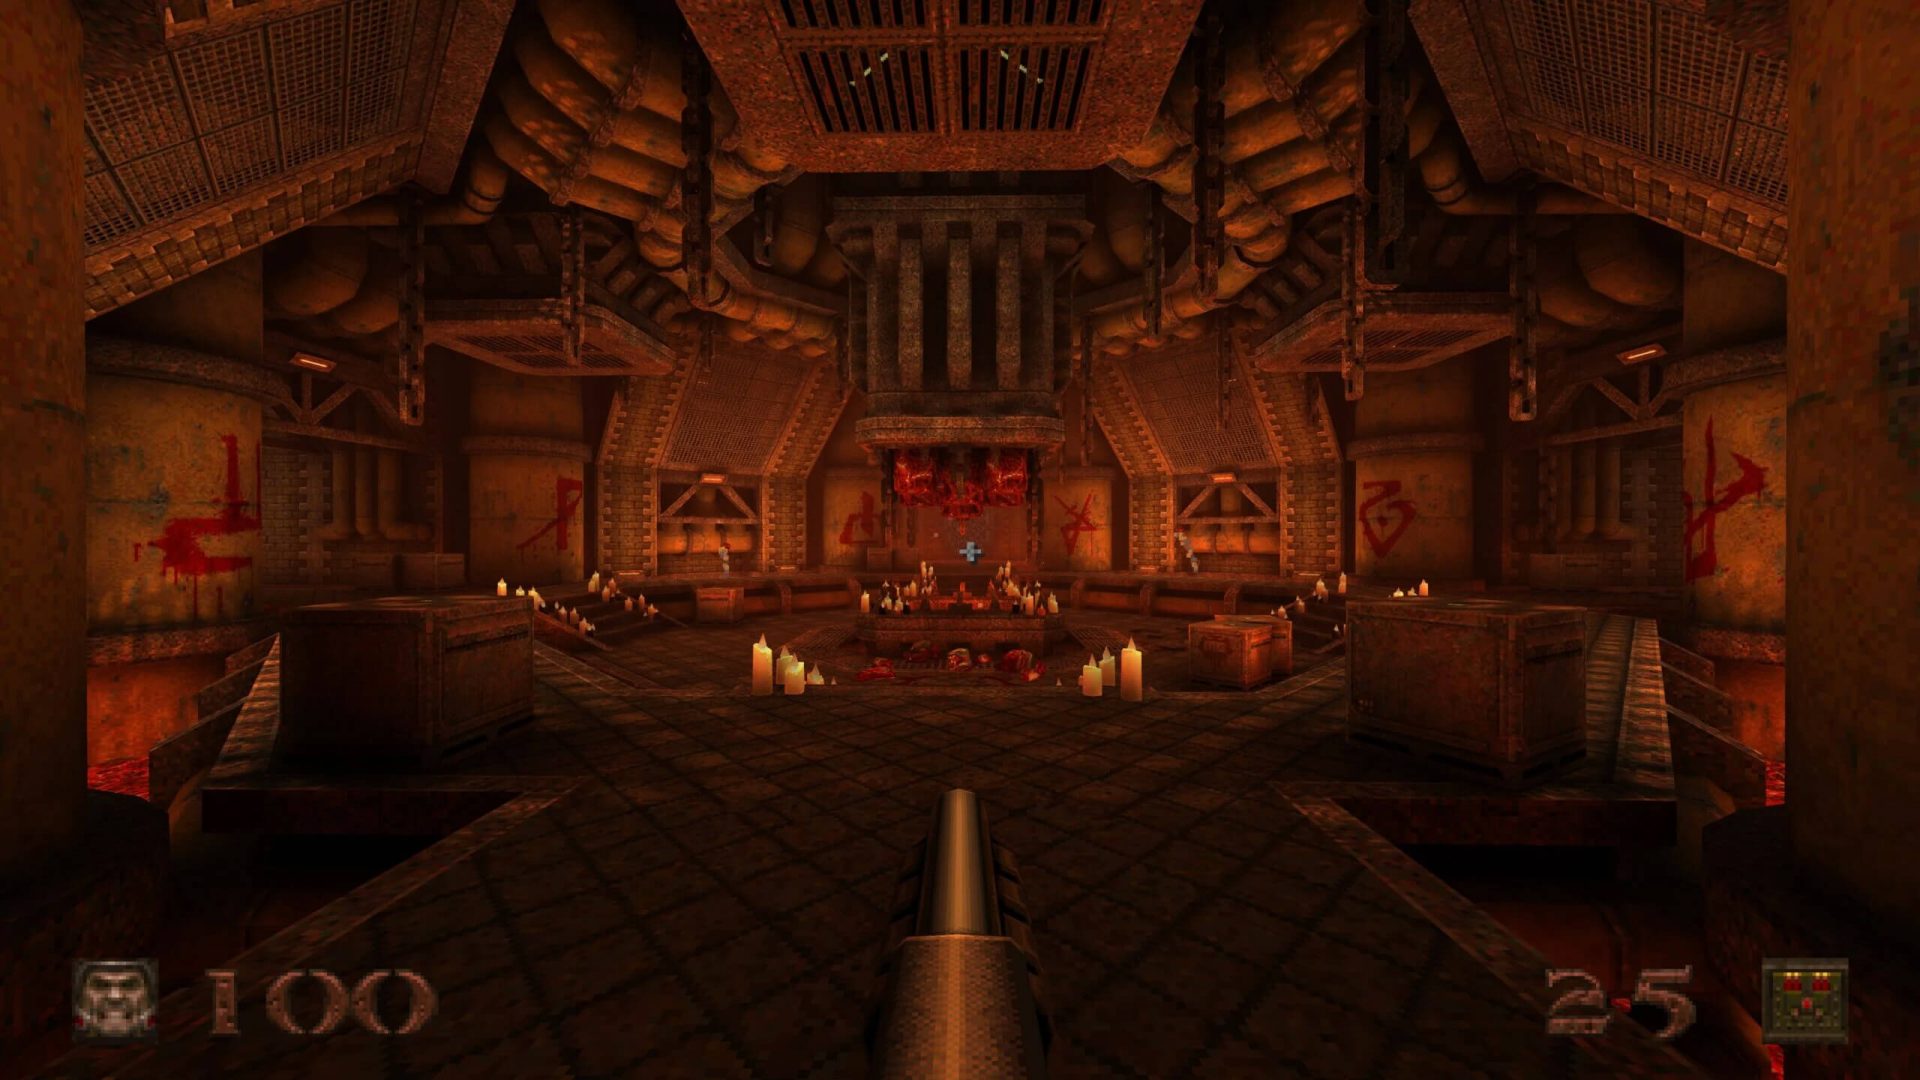 Without any fanfare, news, or information Bethesda has released a completely free upgrade for legendary Quake 1. Free upgrade is automatically applied to all users who possess the original game and it has already been rolled out.
What has changed for good?
New textures, effects, and resolutions are one thing that will come first into your focus when you start the game. From the moment game is started it feels and looks like a game you remember from a long time ago. Models are also upgraded with a higher polygon count.
Another thing that will hit you right away is the legendary OST by Trent Reznor in its full glory. If you have the original Quake and played it you will know that OST was missing from the Steam release and having it fully back is a great feature. I would argue that placing just OST alone in the steam release is enough for people to play it again since it adds so much atmosphere.
Deathmatch and other multiplayer goodies are all here as well and there is a completely free new episode in the game with several levels. Yes, you get a free Quake upgrade in HD with an extra episode completely free.
The bad side of Quake coin
So this might come as a purist or obsessive nit-picking but there were two things that I, personally am not a fan of and have noticed during my gameplay. Please know that this is personal preference and by no other chance reflects the quality of the game itself but I just had to talk about it.
Quake remake is made in a new engine and as such dynamic and gunplay feel different from the original, granted they have done the best they could to replicate the authentic feeling of the original game but there are parts of the game where I have felt that simply put, it feels different.
Another thing is also tied to technology and the overall game is somewhat a little brighter and in some areas little softer in dark areas. Like I said this is purely personal preference and might come as nitpicking but I preferred the darker and grittier look of the original game. Darkplaces, the free custom-made upgrade did this in my opinion better.
Read More
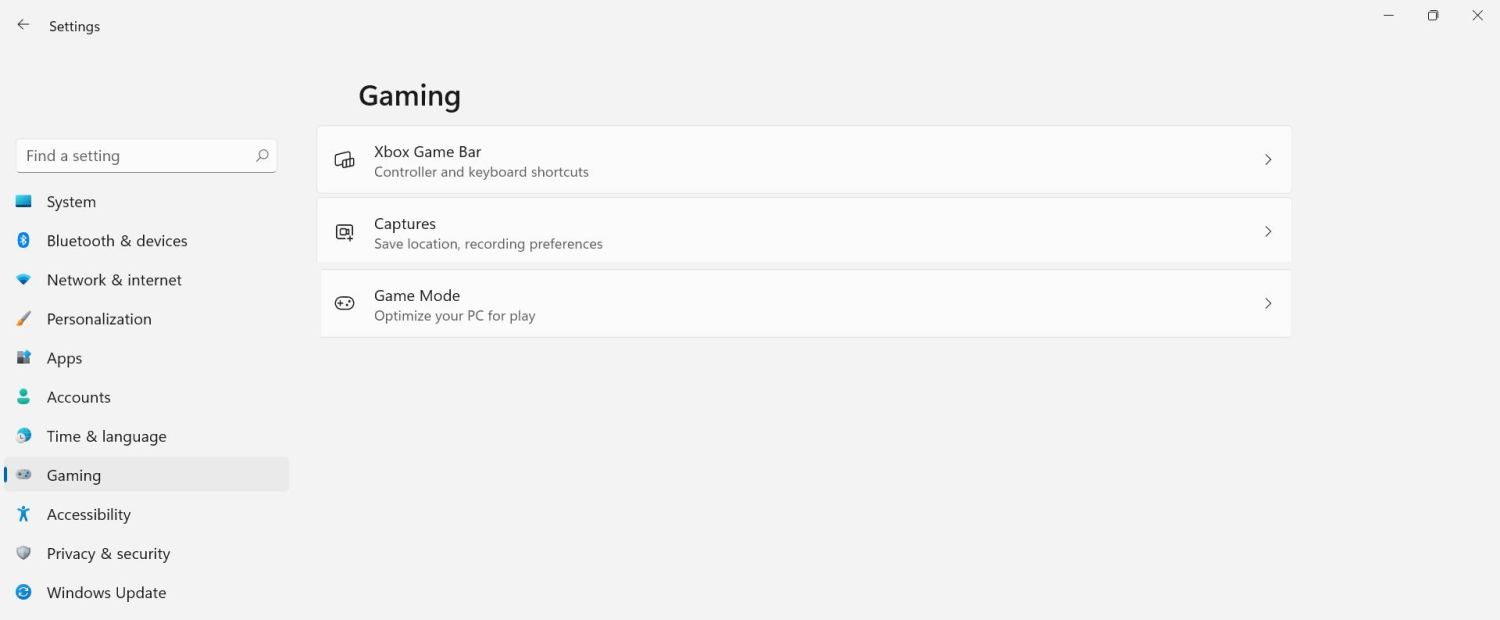
Among other things and innovations, Windows 11 brings to the table is the game mode. The game mode is a system designed to release some resources and optimize your system when Windows 11 detects that you are playing games. It also turns off automatic updates while the game is active.
 The game mode is active at all times and usually, everything works great but in some instances, it can sadly cause some performance issues. If you are one of these unlucky people where game mode is not working as supposed to do, don’t panic, we have a quick guide for you on how to turn it off.
- Press ⊞ WINDOWS + I to open settings
- Inside click on Gaming
- Select Game mode
- Click switch beside Game mode to turn it off
- Close settings
Everything will be automatically saved and applied and you should not have any issues from now on. If for any reason you wish to turn game mode back ON, just follow the same steps and turn the switch to ON.
Read More
What is 0x80040154 Error Code?
0x80040154 is a typical ‘class not registered’ error message. It occurs when PC users try to register and Run a 32-bit DLL (dynamic link library) Windows programs on a 64-bit version of Windows.
Solution
 Error Causes
 Error Causes
- The 0x80040154 error causes include:
- Incompatible software
- Invalid entry command path
- Damaged and corrupt DLL files
- COM components not properly registered
- Active X control and class issues
To avoid the inconvenience of running programs on your Windows PC, it is advisable to resolve the 0x80040154 error.
Further Information and Manual Repair
Here are some of the best methods that you can try to resolve the 0x80040154 error code on your PC:
# 1. Use Regsvr32.exe to Re-register the Failing COM Component
This is one way to resolve the 0x80040154 error code. Regsvr32.exe is a program that you can use to register DLLs (Dynamic Link Libraries) and ActiveX controls in the registry.
To use this file to re-register the failing COM components, simply open an elevated command prompt. If the 32-bit DLL is in the %systemroot%System32 folder, then move it to the %systemroot%SysWoW64 folder.
After that run the following command: %systemroot%SysWoW64regsvr32 <full path of the DLL>. This will help resolve the issue.
# 2. Install and Run Restoro PC Fixer.
Another alternative is to download Restoro. This is a new, advanced, and innovative PC repair tool deployed with multiple utilities like Active X control and class fixer, system optimizer, an antivirus, and a registry cleaner.
It has a user-friendly interface with simple navigation. This makes it quite easy to use for all levels of users. It is safe, fast, and compatible on all Windows versions.
The Active X control and class utility scans your entire PC, detects and resolves all errors like 0x80040154 triggering ActiveX and class ID issues in seconds.
Besides this, Restoro also offers other benefits. By running this software on your system you can also ensure good PC health and performance as it also removes anti-viruses, repairs registry issues, fixes damaged DLL files, and also boosts the speed of your PC.
DLL files often can get damaged and corrupt due to data overload. This is associated with the registry. If you don’t clean the registry frequently, it overloads with data and damages the DLL files.
However, with the help of the registry cleaner utility embedded inside this software, you can repair these files easily. The registry cleaner wipes out all the unnecessary files from your system occupying your disk space and simultaneously fixes the damaged DLL files and restores the registry.
However, if the DLL files are damaged due to a malware attack, the antivirus module takes care of them. It removes all the malicious software like adware, spyware, viruses, and Trojans and restores your files.
Click here to download Restoro on your PC and resolve the error 0x80040154 on your PC now!
Read More
Error code 0xc000021a — What is it?
Error code 0xc000021a occurs when the system is unable to start or there’s a failure in critical system processes. Normally, it would take about several seconds for the system to boot and while on the startup process, error code 0xc000021a may take place to block the system to boot up. Users will get a blue screen of death (BOSD) when this error occurs. When upgrading to Windows 10, be careful; you might encounter other error messages such as error code 8007002c.
Solution
Error Causes
There are several reasons why error code 0xc000021a occurs. It is important to have a full understanding of what caused the blue screen of death before attempting to fix the error by yourself. See below for a few common causes:
• Computer malware has infiltrated your device.
• Important files such as Winlogon.exe and Csrss.exe are damaged. Winlogon.exe file is responsible for handling the login and logout processes while Csrss.exe is a vital part of Microsoft Client or Server ‘Runtime Server Subsystem’. Once one of these files is damaged or deleted, a stop error will occur.
• When there are mismatched system files installed or system upgrading process failed or still incomplete.
• Premature unloading of Wbemprox.dll
• Newly installed third-party software is not compatible with the operating system.
• There are corrupted, outdated, or incorrectly configured device drivers.
• There’s insufficient space in the system partition. Once the system partition is full, certain errors such as error code 0xc000021a will manifest.
• Windows registry is corrupted or damaged due to a software or system change. This means there are registry entries that are not cleared after uninstalling an application.
Further Information and Manual Repair
In fixing error code 0xc000021a, you might want to try and manually do so. Manual repair methods can give users effective and efficient solutions, addressing the root problems in relation to Windows error codes. Once the manual repair method is correctly implemented, users will be able to resolve issues immediately.
However, there might be instances when a Windows professional is needed. In such cases, seek help from a certified Windows expert or you might want to consider using an automated tool whenever necessary.
Method One: Convert the Drive or Partition from NTFS to GPT
In order to fix Error code 0xc000021a in Windows 10, you might need to convert the partition or drive from NTFS to GPT. See below for the procedure:
1. Shut down your device then put in the Windows installation USB key or DVD.
2. Boot your device to the USB key or DVD in UEFI mode.
3. Inside the Windows Setup, open a Command Prompt window by pressing Shift + F10.
4. Type diskpart in the Command Prompt window to open the diskpart tool.
5. Type list disk to identify which drive to reformat.
6. Select which drive to reformat by typing select disk in the command prompt. Afterward, type clean then hit
Enter. Once done, type convert gpt to be able to convert the drive from NTFS to GPT. Finally, type exit and press Enter. You can now close the Command Prompt window.
7. Once the partition or drive is converted from NTFS to GPT, the user can now continue the Windows Setup installation.
NOTE: Select Custom in choosing which installation type to use. The drive will then appear as a single area of unallocated space. Choose that unallocated space then select Next. At this point, Windows will now begin the installation.
Method Two: Fix System File Errors
There are times when system files get corrupted or damaged which will result in system failure. If this is the case, you can use a Windows free tool to repair corrupted or damaged system files.
1. Right-click on the Start button then selects Command Prompt (Admin) from the list to open a Command Prompt window.
2. Once the Command Prompt appears, type sfc /scannow then hit Enter. Wait until the process completes. If the process is completed and it doesn’t report any error or issues that remain unsolved, you might want to employ the next method.
Method Three: Reset Windows 10
Resetting Windows will delete all software and user accounts installed in the operating system and will reinstall a fresh Windows.
1. Boot your device using a Windows installation USB key or DVD. Select Repair your computer to locate the Troubleshoot option. Afterward, choose Reset this PC.
NOTE: If the device is able to boot the system, you can reset Windows without using a Windows installation USB key or DVD. You just have to boot the device then navigate to Settings in the Start button. Choose Update & Recovery then select Recovery found on the left pane. Choose Reset this PC option then select Go back to an earlier build and Advanced startup. Select Get Started button found in the Reset this PC tab.
2. Depending on your device’s condition, you can either select Keep my files or Remove everything. Both options will remove all applications installed in the device and will revert to default settings.
3. Choose either Just remove my files or Remove files and clean the drive depending on the situation. If you choose the Remove files and clean the drive option, the procedure will take longer as it will erase all the files permanently. In this case, deleted files cannot be recovered. However, if you don’t want to remove files permanently, select Just remove my files.
4. Once you’ve decided how to reset your system, click on Next once the Warning screen appears. Afterward, choose Reset once prompted. When the process completed, click on Continue.
Method Four: Download an Automated Tool
Can’t seem to put up with the long and technical manual repair process? You can still fix this error by downloading and installing a powerful automated tool that will surely get the job done in a jiffy!
Read More
What is the Error Code 652?
Error code 652 is a runtime error. It hampers you from accessing and running your program on your system. If not resolved, it can also lead to program corruption.
Solution
Error Causes
Runtime Error 652 can occur due to several causes. These include:
- Conflict of color depth within icons, the desktop, or a particular application in the Visual Basic environment. This happens when the Image
- List control consists of more colors than the depth of what Windows can support.
Other causes include:
- Malicious software and malware attack
- Conflict with Terminate
- Invalid or corrupt registry
Further Information and Manual Repair
If you are not a computer programmer and don’t have any sound technical expertise, then you might think of hiring a professional to resolve the error on your PC. But this can be costly as you may have to pay hundreds of dollars to the technician.
However, an alternative way to resolve the error code 652 is to download the Total System Care. This PC repair tool is integrated with an intuitive registry cleaner and a powerful anti-virus. It is safe, efficient, user-friendly, and available for free.
Restoro is a multi-functional error tool and a one-stop solution to resolve practically all kinds of PC-related problems. By running this repair tool, you can fix runtime error code 652 on your system in seconds.
Restoro
What makes Restoro a hot favorite among PC users is that it is simple and easy to use.
To operate this PC fixer, you don’t need to have the sound technical knowledge or be adept at computer programming. It can be used by all levels of PC users including beginners and intermediates.
It has a neat and clean layout with simple instructions and navigation making it easy for users to resolve even the mightiest errors in just a few clicks.
Restoro features
Whether the underlying reason for the error code 652 is malicious software or registry corruption, Restoro takes care of all. Registry corruption occurs due to unnecessary files and data overload in the hard disk. This includes junk files, internet history, invalid registry entries, and bad registry keys.
The registry cleaner embedded in Restoro intuitively detects and scans all registry issues.
It wipes and clears the hard disk from all the unnecessary and obsolete files and thus cleans up your disk space. It repairs the corrupt registry and also boosts your PC’s performance.
Thus it not only repairs the error code 652 but also resolves system slowdown issues by optimizing your system’s speed.
With the help of its in-built anti-virus, it removes all the malicious software on your system that could be triggering the error code 652.
Data security threats such as malicious software are detected and scanned and listed under the privacy error utility.
It is compatible with all Windows versions including both the latest and old versions. You can run it to scan error code 652 on any Windows version you have installed on your computer.
Restoro for error Code 652
Furthermore, as mentioned above Error Code 652 is safe to use. It is bug-free and besides, it offers users outstanding data safety. It has a backup file feature that helps you save and create backup copies of all the data you have on your system. This is carried for safety purposes.
It enables users to retrieve and recover data in case the data and files are lost during the repair thus sparing you from a big loss.
The error code 652 may be critical but it can be resolved in seconds with Restoro. Here’s how:
- To get started click here to download and install Restoro on your system
- Once installed, run it to scan for errors. It will take only a few seconds to scan your entire PC.
- Then simply create a backup and click on repair to resolve and resume your desired program.
For best results, it is advised to run Restoro on the computer often. This will help you detect PC errors and repair them timely. It will help you ensure proper PC maintenance, health, and performance.
Read More
If you are trying to connect to the internet using a Wi-Fi, Ethernet, or a Wi-Fi connection and you suddenly encounter Error 633, then read on as this post will guide you on how you can fix this problem in your Windows 10 computer.
According to users who encountered the same problem, when they try to connect to the internet, an error pops up that states, “The modem or other connecting device is either already in use or not appropriately configured”. This error is the VPN Error 633 which indicates that the modem is malfunctioning due to some broken configuration. It is possible that this broken configuration is caused by the WAN Miniport device which is associated with your preferred VPN protocol. It could also be due to the TCP port that’s required for the VPN connection to work might be used by another application.
There are instances when Error 622 could occur when there are multiple internet connections set up on one device or when the communication port is exploited by another program. It could also occur when the affected modem is not bound to one specific device. Thus, any model and computer can be affected by this problem.
The first and basic thing you can do to fix the VPN Error 633 is to turn off or unplug the modem your computer is using and then plug it back in to see if the problem is fixed. If not, then there are several other potential fixes you need to check out to resolve the problem. You can try the suggestions provided below and see if any of them help.
Option 1 – Run the Network Adapter Troubleshooter
- Open the Search bar on your computer and type in “troubleshoot” to open the Troubleshoot settings.
- Next, scroll down and select the “Network Adapter” option from the right pane.
- Then click on the Run Troubleshooter” button.
- After that, your computer will check for any possible errors and will pinpoint the root cause of the problem if possible.
Option 2 – Try to explicitly reserve the TCP port
The next thing you can do to fix the error is to reserve the TCP port explicitly and to do that, follow the steps below.
- Tap the Win + R keys to pull up the Run dialog box and type “Regedit” in the field and hit Enter to open the Registry Editor.
- Next, navigate to this registry path: HKEY_LOCAL_MACHINESYSTEMCurrentControlSetServicesTcpipParameters
- After that, follow the path New > Multi-String Value on the edit menu and rename the multi-string value as “ReservedPorts” and then double click on it.
- Now in the value data of ReservedPorts, input “1723-1723” and click OK to save the changes made.
- Close the Registry Editor and restart your PC. Once your computer has restarted, check if the VPN Error 633 is fixed or not.
Option 3 – Try to use the netstat command
- In the Windows Start Search, type “cmd” and from the search results that appear, right-click on Command Prompt and then select the “Run as administrator” option.
- After opening Command Prompt as admin, type this command and hit Enter: netstat –aon
- After that, the output will be displayed and from there, look for the process ID or PID of any program that uses the TCP port 1723 on your computer.
- Next, type this next command and hit Enter: taskkill /PID PID /F
- Once the command has been executed, the concerned program will be forced to close and the TCP port 1723 will be freed up. Keep in mind that the taskkill command ends the process corresponds to the process ID number and the given command above, “/F” option is used to end the program’s process forcefully.
- Now restart your computer and after that, the concerned program should start using a TCP port other than 1723 which leaves the TCP port 1723 free for your internet device to use.
Option 4 – Remove any irrelevant internet device programs
You could also try removing any irrelevant device programs since it is possible that any of these programs could be the one that’s causing the modem to malfunction. These irrelevant programs could be an internet booster or third-party tools that comes with the modem and so on. These programs are not necessarily needed for your modem to function. Thus, if you want to fix the VPN Error 633, you can try uninstalling them and see if it fixed the error.
Option 5 – Update the Network Adapter drivers
You might also want to update the Network Adapter drivers by following these steps:
- Tap the Win + R keys to launch the Run window and then type in the “devmgmt.msc” command and hit Enter to open the Device Manager window.
- Under the Device Manager, you will see a list of drivers. From there, look for the Network Adapters and expand them.
- Then right-click on each one of the Network drivers and update them all.
- Restart your PC and see if it helped in fixing the BSOD error.
Note: If updating the network drivers didn’t help in fixing the VPN Error 633, you can also try to uninstall the very same drivers and restart your Windows 10 PC. After that, the system itself will reinstall the drivers you just uninstalled. Alternatively, you can also download and install the drivers from the manufacturer’s website directly.
To reinstall the network adapter driver, refer to these steps:
- Open the Devices Manager from the Win X Menu.
- Then locate the device drivers and right-click on them to open the Properties.
- After that, switch to the Driver tab and click on the Uninstall Device button.
- Follow the screen option to completely uninstall it.
- Finally, restart your computer. It will just reinstall the device drivers automatically.
Read More
Security on your PC and on your accounts is the important thing. Security on your phone device is also very very important. That is why we are bringing you a list of 8 applications that are marked by the cybersecurity team as ones that could be used to steal data from you. If you have by any chance any of these applications installed, uninstall them immediately.
List is as follows:
- Cake VPN (com.lazycoder.cakevpns)
- Pacific VPN (com.protectvpn.freeapp)
- eVPN (com.abcd.evpnfree)
- BeatPlayer (com.crrl.beatplayers)
- QR/Barcode Scanner MAX (com.bezrukd.qrcodebarcode)
- Music Player (com.revosleap.samplemusicplayers)
- tooltipnatorlibrary (com.mistergrizzlys.docscanpro)
- QRecorder (com.record.callvoicerecorder)
If you would like to read more helpful articles and tips about various software and hardware visit errortools.com daily.
Read More
Error Code C0000135- What is it?
C0000135 is a blue screen of death error code (BSoD) also referred to as the ‘Stop’ error. This error code usually pops up on the screen at startup. The system stops and displays the error code:
Stop: c0000135 {Unable to Locate DLL}
The dynamic link library FILE_NAME could not be found in the specified path Default Load Path
Solution
Error Causes
There are multiple reasons behind the error code C0000135 BSoD such as:
- Missing and damaged .DLL files which is linked to registry corruption
- Malware attack
- Viral infection
When this error code pops, the computer screen turns blue and hampers your ability to use Windows successfully. Nonetheless, if the error C0000135 is not repaired timely this error can cause a great deal of damage to your PC. It puts you at risk of:
- Data Loss with possibly no chances of recovery
- System Failure and crash
- Cybercrime if malware is the underlying cause of the occurrence of the error code C0000135
To avoid serious PC damages and inconvenience it is advisable to repair this error immediately.
Further Information and Manual Repair
There are two ways to fix the error code C0000135:
- Hire a Professional
- Download Error Tools PC Repair
Hire a Technician
Hiring a professional can be costly. You may have to pay hundreds of dollars to the technician to resolve this issue.
However, the latter option is not only money-saving but also time-saving, convenient, and simple. In fact, it is so easy that even if you have no technical knowledge you can still work your way around it and repair the error in seconds.
Download Restoro
Restoro is a top-quality, efficient, and multi-functional PC fixer. It is integrated with cutting-edge technology.
It has a comprehensive suite of advanced utilities like an intuitive registry cleaner, powerful anti-virus, and a smart system stability detector. All of these exciting and highly functional features are combined together in one.
With this helper, you don’t need to search for the underlying cause of the error.
When you experience the BSoD error code C0000135 on your system all you have to do is run it for a scan and its intuitive in-built technology will detect the issues and causes in no time and display them to you in the form of a comprehensive scan report.
Once the scan is complete, you just have to hit the repair tab to resolve it. It’s that easy and fast!
Restoro is powered by a highly functional registry cleaner. This cleaner helps detect all the errors related to the registry.
It cleans the unnecessary files cluttering and damaging the hard disk including the junk files, invalid registry entries, internet history, and the files from the programs that you have uninstalled on your PC.
These files acquire a lot of disk space and damage .dll files as well.
Overloaded registry also slows down the system and the CPU and RAM then require more power to start and function.
The registry cleaner embedded in the Restoro removes and wipes out all this unnecessary clutter, clears up the disk space and repairs the damaged files, and corrupted registry, and thus resolves the error code C0000135 on your system.
Restoro also serves as a system optimizer. And when you repair issues on your PC with this helper, you’ll see a massive difference in the speed and performance of your computer. It will run smoothly and boot efficiently.
Restoro is safe to use. It is bug-free and used widely by PC users experiencing different types of PC-related issues including the error code C0000135. It has easy navigation and a user-friendly interface.
You can download and run Restoro on all Windows versions.
Click here to download Restoro today!
Read More
Graphic cards are essential to our computers but from time to time in the race to make better GPU and to grab a large portion of the market bad drivers get released and can create really unwanted and unpleasant experiences, from Windows freezes to the black screen of death, to AMD driver Windows crashing down and many more.
This article will cover basic troubleshooting with AMD drivers and offer you solutions on how to fix them.
-
Rollback the previous version of the driver.
Installing the new driver version is the reason for this particular error, so naturally rolling back the previous version which was stable and did not cause issues will solve the problem.
To roll back the previous version of drivers follow the next steps:
Open Start menu and click on settings, go to system and choose Apps and features
Find: AMD Catalyst Install Manager, right-click on it, and choose to uninstall
Go to AMD official website and download the previous driver version, install it on your computer
Turn off automatic driver updates and reboot your system -
Reinstall the driver
Sometimes it is not a bug in the released driver, it is a corruption of files because of file transfer or any other specific reason. The reinstalling driver will fix an issue if this is the case.
To reinstall the driver Press ⊞ WINDOWS + X and choose Device Manager
Expand Display adapters, right-click on AMD device and choose to uninstall
Go to the official AMD website, download the latest driver and install it
Reboot your system -
Disable browser extensions
Some users have reported that error occurs only when they are watching videos online, if this is your case, go to your browser options and disable extensions to see if this will remove the problem.
-
Remove Lucid Virty MVP
If by any chance have this relic installed on your system, go to Applications and remove it. It is an old program shipped with old drivers and it is usually present in your Windows that was upgraded from 8.1 to 10. Uninstall it and see if this fixes your issue.
-
Clean your graphic card
Sometimes this error can happen due to excessive dust on your GPU, if you have the expertise, clean it or take it somewhere to be cleaned.
Read More
![]()
Copyright © 2022, ErrorTools. All Rights Reserved
Trademarks: Microsoft Windows logos are registered trademarks of Microsoft. Disclaimer: ErrorTools.com is not affiliated with Microsoft, nor claim direct affiliation.
The information on this page is provided for information purposes only.
![]()
Repair your PC with one click
Please be aware that our software needs to be installed on a PC system with Windows on it, Open this website on a desktop PC and download the software for easy and quick elimination of your issues.
В этой статье рассматривается ошибка 0x80070426, также известная как Ошибка 0x80070426 и означающая Произошла ошибка при инициализации программы.
Об ошибке Windows
Операционная система Windows сегодня используется миллионами пользователей персональных компьютеров и ноутбуков. И вполне вероятно, что большинство из них в свое время сталкивались с тем или иным типом ошибки Windows. Отчеты об ошибках были представлены компанией Microsoft для обеспечения средств сбора и отправки отладочной информации после ошибки или для применения шагов по устранению неполадок в зависимости от того, получил ли пользователь синтаксическую, логическую ошибку или ошибку времени выполнения.
Если пользователь получает код остановки, то вместе с сообщением об ошибке предоставляется краткая информация по устранению неполадок. Затем пользователь может найти конкретное сообщение об ошибке и применить исправление, предоставленное на сайтах поддержки Microsoft, а также в других доступных в Интернете статьях и журналах по данной теме.
В других случаях пользователь получает только уведомление о сбое компьютера, после чего ему предлагается отправить отчет о сбое в Microsoft. Это делается для сбора данных для анализа, чтобы компания Microsoft могла отправить пользователю решение проблемы.
Каким бы ни был случай, вот некоторые общие сведения об устранении неполадок, которые можно использовать для устранения ошибок Windows.
Определения (Бета)
Здесь мы приводим некоторые определения слов, содержащихся в вашей ошибке, в попытке помочь вам понять вашу проблему. Эта работа продолжается, поэтому иногда мы можем неправильно определить слово, так что не стесняйтесь пропустить этот раздел!
- Инициализация . Инициализация связана с задачей инициализации содержимого вашей структуры данных.
Симптомы 0x80070426 — Ошибка 0x80070426
Ошибки Windows можно классифицировать как синтаксические ошибки, логические ошибки или ошибки времени выполнения.
Когда пользователь получает синтаксическую ошибку, компьютер просто внезапно выдает сообщение об ошибке, что в фоновом режиме произошел сбой. Программы, к которым обращается пользователь, могут застопориться или полностью завершиться. Пользователь может продолжать использовать другие приложения, но время от времени появляется непонятное сообщение о том, что запущенная программа не может запуститься, потому что какой-то процесс не работает.
Ошибки времени выполнения происходят во время работы приложения. Поэтому, когда ошибка возникает, она просто происходит без предупреждения, и компьютер выдает уведомление о том, что произошла ошибка.
Логические ошибки связаны с программированием. Ошибка вызывает непреднамеренный вывод или поведение. Если говорить о компьютерных системах, которые прошли все испытания и поступили в продажу, то логические ошибки случаются только тогда, когда произошли значительные изменения в физическом состоянии логической платы. Возможно, часть шин расплавилась или возникла подобная ситуация. Это может привести к тому, что компьютер внезапно издаст громкий звуковой сигнал или скрежещущий звук, и даже может перейти к внезапной нестабильной работе, замерзнуть или резко изменить температуру перед фактическим сбоем.
 Repair Tool")
(Только для примера)
Причины ошибок Ошибка 0x80070426 — 0x80070426
Ошибки Windows могут быть вызваны неисправностью аппаратных компонентов или повреждением ОС. Некоторые из них могут быть даже связаны с проблемами программирования, которые не были решены, поскольку ошибки не были устранены на этапе проектирования. Иногда ошибки Windows могут возникать из-за изменений, внесенных в компьютер.
Методы исправления
Для разных категорий ошибок Windows существуют разные шаги по устранению неполадок. Однако существуют общие шаги, которые можно применить, столкнувшись с этими ошибками. Вот они.
Если метод ремонта вам подошел, пожалуйста, нажмите кнопку upvote слева от ответа, это позволит другим пользователям узнать, какой метод ремонта на данный момент работает лучше всего.
Обратите внимание: ни ErrorVault.com, ни его авторы не несут ответственности за результаты действий, предпринятых при использовании любого из методов ремонта, перечисленных на этой странице — вы выполняете эти шаги на свой страх и риск.
Метод 2 — Исправить неправильную системную дату и время
Иногда Windows может работать неправильно из-за неправильной настройки времени. Чтобы установить время и дату:
В Windows 7
- Нажмите «Пуск», затем «Панель управления».
- Нажмите «Дата и время».
- В окне «Дата и время» нажмите «Изменить часовой пояс», чтобы выбрать правильный часовой пояс.
- Нажмите «Применить» и «ОК».
В Windows 8
- Откройте «Настройки», переместив указатель мыши вправо, при открытии вкладки щелкните значок шестеренки.
- Откроется новая всплывающая вкладка «Настройки», нажмите «Панель управления».
- На панели управления нажмите «Часы, язык и регион». Затем нажмите «Установить время и дату» в разделе «Дата и время».
- Когда откроется окно «Дата и время», нажмите «Изменить дату и время» и перейдите к нужной дате и времени в следующем окне. Чтобы подать заявку, просто нажмите «ОК».
В Windows 10
- Просто щелкните правой кнопкой мыши дату и время на панели задач, расположенной в правой нижней части экрана.
- Нажмите «Настроить дату и время». Откроются настройки даты и времени.
- Вы можете выбрать часовой пояс, а затем закрыть окно. Это автоматически обновит время и дату на панели задач.
Метод 1 — Восстановить базу данных Центра обновления Windows
Когда хороший компьютер внезапно начинает работать странным образом, причиной могут быть обновления Windows. Чтобы исправить это, пользователи могут запустить Восстановление системы, если есть дата восстановления, сохраненная до ошибки. Вот как это делается.
Восстановление в Windows 7:
- Нажмите Пуск и введите Восстановление системы в поле поиска, затем нажмите клавишу ввода.
- Когда появится окно восстановления системы, нажимайте Далее , пока не дойдете до окна, в котором вы можете выбрать точку восстановления. Вы увидите список дат восстановления с описанием.
- Затем снова нажмите Далее и подтвердите процесс восстановления. Подождите, пока он прекратит обработку, и появится окно, в котором вы можете нажать кнопку Готово . Закройте окно и дайте компьютеру перезагрузиться.
Вы также можете восстановить свой компьютер с помощью установочного диска ОС .
- Для этого загрузитесь с компакт-диска с ОС или с носителя для восстановления.
- Следуйте инструкциям, пока не дойдете до экрана, на котором будет предложена опция Восстановить мой компьютер , нажмите и выберите Восстановление системы из списка инструментов восстановления.
- Вы можете выбрать любую точку восстановления в окне «Восстановление системы», но убедитесь, что вы восстановили дату, при которой ваш компьютер работает нормально.
- Дождитесь завершения процесса и позвольте вашему компьютеру перезагрузиться на рабочий стол.
Вы также можете загрузиться в безопасном режиме .
- Загрузите компьютер и нажмите F8. Выберите Безопасный режим с командной строкой , нажимая стрелки на клавиатуре, чтобы переместить выделение вниз к этому элементу.
- В безопасном режиме введите rstrui.exe и нажмите Enter в командной строке. Следуйте указаниям мастера восстановления и перезагрузите компьютер в обычном режиме.
Восстановление в Windows 8:
Восстановление в среде Windows
- В Windows 8 щелкните значок поиска и введите Восстановление системы.
- Продолжайте нажимать кнопку «Далее», пока не дойдете до окна, в котором можно выбрать дату восстановления.
- Подтвердите восстановление, выполнив оставшиеся шаги. После этого перезагрузите компьютер в обычном режиме.
Восстановить при загрузке
- Перезагрузите компьютер и нажмите F11, чтобы начать восстановление системы.
- Вы увидите экран «Дополнительные параметры», на котором вы найдете пункт «Восстановление системы».
- Вам будет предложено выбрать учетную запись администратора, просто выберите и войдите в свою учетную запись администратора.
- Нажимайте кнопку «Далее», пока не дойдете до экрана, на котором можно выбрать даты восстановления.
- Нажимайте кнопку «Далее», пока не дойдете до конца процесса восстановления и не увидите кнопку «Готово».
- Перезагрузите компьютер в обычном режиме.
Восстановление в Windows 10:
Внутри окна
- Запустите восстановление системы, введя его в поле поиска. Щелкните элемент, который появится в результатах поиска.
- Когда откроется окно «Восстановление системы», нажимайте «Далее», пока не получите список для выбора даты восстановления, выберите ту, которая, как вы знаете, лучше всего подходит для вас.
- Подтвердите процесс, нажав «Далее», затем «Да» и, наконец, «Готово». После закрытия окна перезагрузите компьютер.
Использование установочного носителя
- Если вы не можете загрузиться в Windows, вам лучше загрузить файл Media Creator из Microsoft. Создайте загрузочный диск с помощью DVD или флэш-диска.
- После этого перезагрузите компьютер и войдите в BIOS, чтобы изменить загрузочное устройство на DVD или флэш-диск.
- Когда вы перейдете к экрану установки, выберите «Устранение неполадок»> «Дополнительные параметры»> «Восстановление системы» и выполните процесс таким же образом.
Метод 3 — Проверьте отсутствие или повреждение файлов
- Запустить проверку системных файлов
- Чтобы запустить команду, откройте командную строку с повышенными привилегиями, набрав ее в окне поиска, затем щелкните правой кнопкой мыши командную строку и выберите «Запуск от имени администратора».
- Введите в командной строке sfc / scannow и дождитесь успешного завершения процесса проверки.
- Запустите Checkdisk — Chkdsk исправляет многие несоответствия с ОС. Системные ошибки также можно исправить с помощью этой утилиты. Чтобы запустить это,
- Откройте командную строку, введя ее в поле поиска, а затем, когда вы увидите результат в верхней части списка, щелкните его правой кнопкой мыши и выберите «Запуск от имени администратора».
- Ваша система может сказать, что вы не можете запустить ее в данный момент, потому что вы все еще обрабатываете данные, и спросит вас, хотите ли вы запустить ее перед следующим запуском, просто нажмите y для подтверждения, а затем выйдите с экрана и перезагрузите компьютер.
- После перезагрузки компьютера вы увидите, что checkdisk работает вне Windows, просто дайте ему закончить, пока он не даст вам отчет о том, что было найдено, исправлено или отмечено.
- Закройте окно и дайте компьютеру нормально перезагрузиться.
Другие языки:
How to fix 0x80070426 (Error 0x80070426) — An error occurred in program initialization.
Wie beheben 0x80070426 (Fehler 0x80070426) — Bei der Programminitialisierung ist ein Fehler aufgetreten.
Come fissare 0x80070426 (Errore 0x80070426) — Si è verificato un errore durante l’inizializzazione del programma.
Hoe maak je 0x80070426 (Fout 0x80070426) — Er is een fout opgetreden bij de initialisatie van het programma.
Comment réparer 0x80070426 (Erreur 0x80070426) — Une erreur s’est produite lors de l’initialisation du programme.
어떻게 고치는 지 0x80070426 (오류 0x80070426) — 프로그램 초기화에서 오류가 발생했습니다.
Como corrigir o 0x80070426 (Erro 0x80070426) — Ocorreu um erro na inicialização do programa.
Hur man åtgärdar 0x80070426 (Fel 0x80070426) — Ett fel uppstod vid programinitialisering.
Jak naprawić 0x80070426 (Błąd 0x80070426) — Wystąpił błąd podczas inicjowania programu.
Cómo arreglar 0x80070426 (Error 0x80070426) — Ocurrió un error en la inicialización del programa.
![]() Об авторе: Фил Харт является участником сообщества Microsoft с 2010 года. С текущим количеством баллов более 100 000 он внес более 3000 ответов на форумах Microsoft Support и создал почти 200 новых справочных статей в Technet Wiki.
Об авторе: Фил Харт является участником сообщества Microsoft с 2010 года. С текущим количеством баллов более 100 000 он внес более 3000 ответов на форумах Microsoft Support и создал почти 200 новых справочных статей в Technet Wiki.
Следуйте за нами: ![]()
![]()
![]()
Последнее обновление:
16/01/23 09:53 : Пользователь Android проголосовал за то, что метод восстановления 2 работает для него.

Этот инструмент восстановления может устранить такие распространенные проблемы компьютера, как синие экраны, сбои и замораживание, отсутствующие DLL-файлы, а также устранить повреждения от вредоносных программ/вирусов и многое другое путем замены поврежденных и отсутствующих системных файлов.
ШАГ 1:
Нажмите здесь, чтобы скачать и установите средство восстановления Windows.
ШАГ 2:
Нажмите на Start Scan и позвольте ему проанализировать ваше устройство.
ШАГ 3:
Нажмите на Repair All, чтобы устранить все обнаруженные проблемы.
СКАЧАТЬ СЕЙЧАС
Совместимость
![]()
Требования
1 Ghz CPU, 512 MB RAM, 40 GB HDD
Эта загрузка предлагает неограниченное бесплатное сканирование ПК с Windows. Полное восстановление системы начинается от $19,95.
ID статьи: ACX014398RU
Применяется к: Windows 10, Windows 8.1, Windows 7, Windows Vista, Windows XP, Windows 2000
В этой статье мы разберемся с особенностями активации Microsoft Office 2019/2016 и Office LTSC 2021 (включая Project и Visio) на корпоративном KMS-сервере (предварительно желательно познакомиться с подробным FAQ по Key Management Service). Предполагается, что у вас уже имеется развернутый сервер KMS активации на базе Windows Server 2019 или 2022 или других версиях Windows (список поддерживаемых ОС есть ниже).
Благодаря использованию KMS-сервера, корпоративные клиенты могут производить активацию офисных продуктов внутри сети организации без необходимости подключения к серверам активации Microsoft в интернете. Ранее мы уже рассматривали особенности активации MS Office 2013 в корпоративной среде, основные принципы и подходы в вопросах активации MS Office 2021, 2019 и 2016 на KMS сервере остались неизменными.
Совет.
- Инструкция применима только к корпоративным версиям Office 2019/2016 и Office LTSC 2021, и не распространяется на Office 365 ProPlus, управляемого по подписке (отличия в лицензировании Office 2019 и Office 365);
- При развертывании KMS сервера для активации операционных систем Windows вы можете использовать самый новый KMS host key для активации всех старых редакций Windows. Однако для активации предыдущих версий Office на KMS сервере нужно устанавливать соответствующие расширения для нужной версии Office (volume license pack) и активировать их собственным ключом активации. Например, KMS для MS Office 2019 не активирует предыдущие версии Office (Office 2016, 2013 и 2010).
Содержание:
- Требования к KMS серверу для MS Office 2021/2019/2016
- Установка KMS сервера для активации Office 2021/2019/2016
- Встроенная активация Office 2021/2019/2016 в домене Active Directory (ADBA)
- Настройка клиентов MS Office 2021/2019/2016 для активации на KMS сервере
- GVLK ключи для Microsoft Office 2021/2019/2016
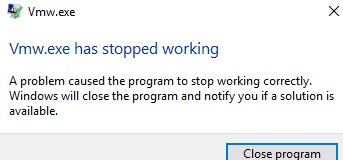
- Ошибка vmw.exe has stopped working на Windows Server 2019/2016
Требования к KMS серверу для MS Office 2021/2019/2016
- KMS сервер для Office 2016 требует ОС не ниже Windows Server 2008 R2 или Windows 7 SP 1 с обновлением KB2757817 (да, вы можете развернуть KMS сервер даже на десктопной редакции Windows);
- KMS сервер для Office 2019 требует ОС не ниже Windows Server 2012 или Windows 8.1;
- KMS сервер для Office 2021 (последний бессрочный выпуск Office, EOL – 13 октября 2026) – возможно развертывание на Windows 10/11 и Windows Server 2016/2019/2022.
Поддерживаются 2 типа активации:
- Активация на KMS сервере;
- Активация через домен – ADBA (Active Directory-Based Activation), требуется версия схемы домена не менее Windows Server 2012
Установка KMS сервера для активации Office 2021/2019/2016
В первую очередь необходимо в персональном разделе на сайте Microsoft Volume Licensing Service Center (VLSC) найти и скопировать ваш KMS host ключ для Office 2021, 2019 или 2016.
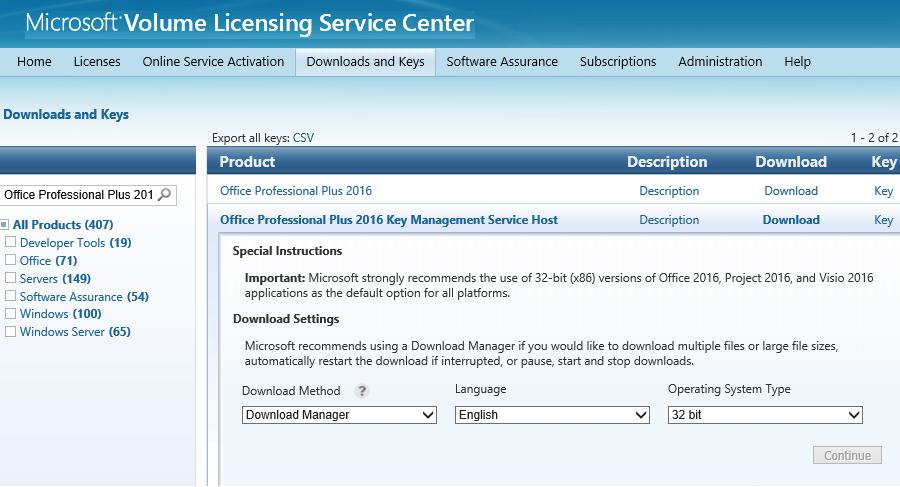
Следующий этап — нужно скачать и установить на вашем KMS сервере пакет расширения KMS — Microsoft Office Volume License Pack. Этот небольшой пакет (около 400 Кб) содержит файлы, необходимые для того, чтобы KMS сервер смог принимать и обрабатывать запросы активации от клиентов c MS Office. В зависимости от версии Office, которую вы планируете использовать вы должны скачать и установить нужную версию Volume License Pack:
- Microsoft Office 2016 Volume License Pack (https://www.microsoft.com/en-us/download/details.aspx?id=49164) – файл office2016volumelicensepack_4324-1002_en-us_x86.exe;
- Microsoft Office 2019 Volume License Pack (https://www.microsoft.com/en-us/download/details.aspx?id=57342) – файл office2019volumelicensepack_x64.exe.
- Microsoft Office LTSC 2021 Volume License Pack (https://www.microsoft.com/en-us/download/details.aspx?id=103446) – файл Office2021VolumeLicensePack_x64.exe
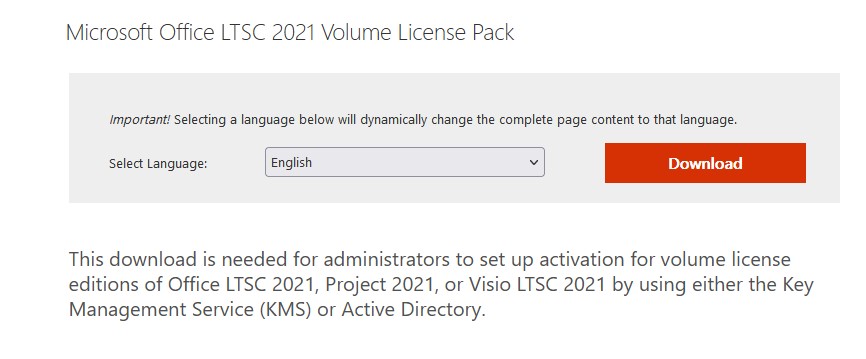
Скачайте файл volumelicensepack из Microsoft Download Center и запустите с правами администратора на KMS сервере.
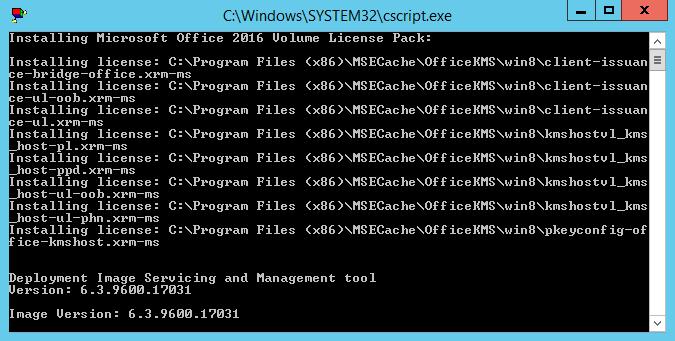
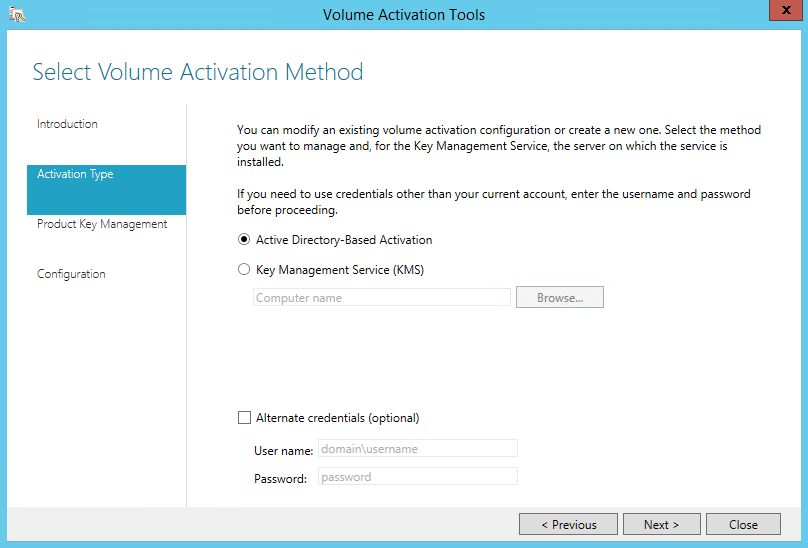
В процессе установки появится окно консоли Volume Activation Tools, в котором нужно выбрать тип активации (KMS или ADBA). Ниже рассмотрены оба варианта.
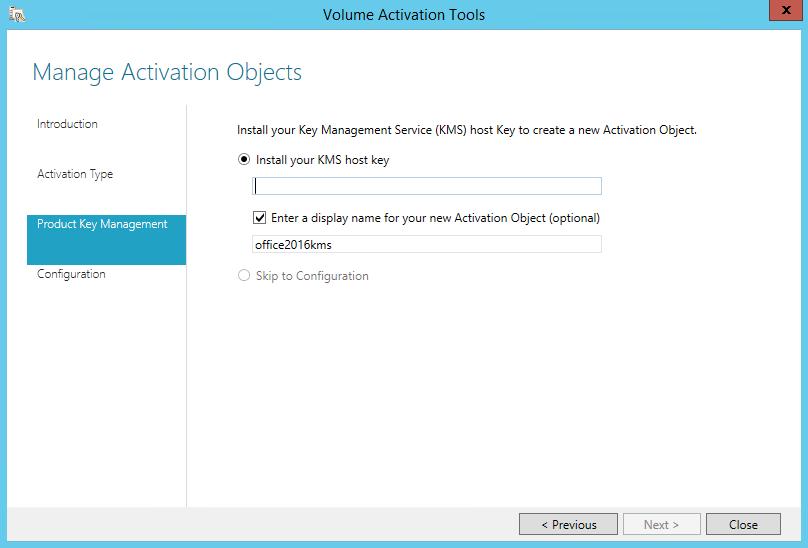
Если вы планируете использовать обычную KMS активацию, нужно выбрать пункт Key Management Service, указать FQDN имя KMS-сервера и KMS ключ (KMS Host Key), полученный ранее.
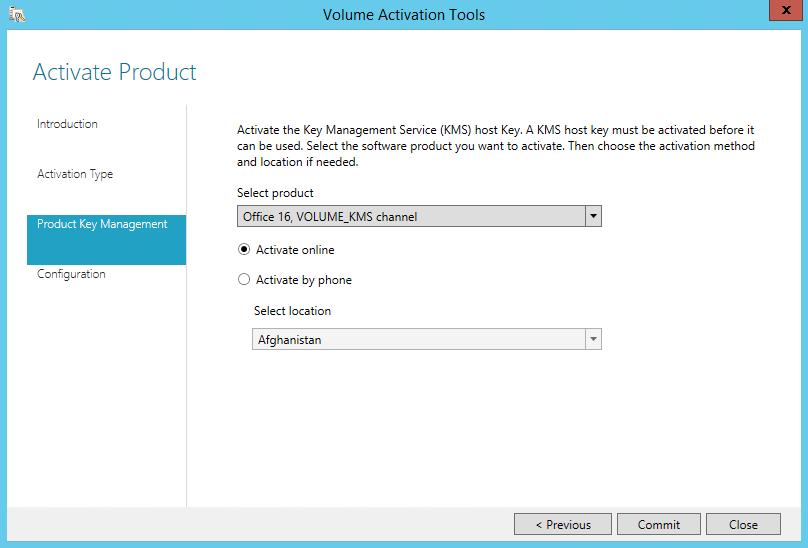
Далее нужно выбрать метод активации: онлайн или по телефону. В первом случае KMS серверу временно придется предоставить прямой доступ в интернет.

После активации KMS сервера на сайтах Майкрософт, отобразится текущая конфигурация KMS сервера. В списке обслуживаемых продуктов должна добавиться запись Name:Office 16, VOLUME_KMS_channel (Office 19 VOLUME_KMSCLIENT channel или Office 21, VOLUME_KMSCLIENT channel) со статусом лицензирования Licensed.
Примечание. В брандмауэре Windows при этом должно включится правило, разрешающее подключение на порт сервера TCP 1688. Вы можете включить это правило вручную из PowerShell:
Enable-NetFirewallRule -Name SPPSVC-In-TCP
В списке Product Key Management должна появиться запись KMS активации для вашей версии Office.
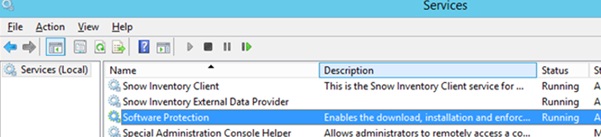
Завершите работу мастера, после чего служба Software Protection будет перезапущена.

Вы можете получить информацию об установленном KMS ключе для вашей версии Office так:
Для Office LTSC 2021:
cscript slmgr.vbs /dlv 47F3B983-7C53-4D45-ABC6-BCD91E2DD90A
Для Office 2019:
cscript slmgr.vbs /dlv 70512334-47B4-44DB-A233-BE5EA33B914C
Для Office 2016:
cscript slmgr.vbs /dlv 98ebfe73-2084-4c97-932c-c0cd1643bea7
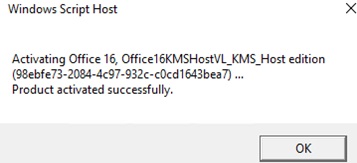
Если вы все сделали правильно, и ваш KMS сервер для Office 2019 успешно настроен, появится примерно такой текст:
Name: Office 19, OfficeKMSHostVL_KMS_Host edition
Description: Office 19, VOLUME_KMS channel
Activation ID: 70512334-47B4-44DB-A233-BE5EA33B914C
License Status: Licensed
Совет. Если автоматическая активация из Volume Activation Tools не выполнилась и завершилась с ошибкой, попробуйте активировать KMS сервер вручную. Для этого перезапустите службу Software Protection:
net stop sppsvc && net start sppsvc
и выполните команду для Office 2016:
slmgr /ato 98ebfe73-2084-4c97-932c-c0cd1643bea7 (для Office 2016)
для Office 2019:
slmgr.vbs /ato 70512334-47B4-44DB-A233-BE5EA33B914C
для Office LTSC 2021:
slmgr.vbs /ato 47F3B983-7C53-4D45-ABC6-BCD91E2DD90A
Встроенная активация Office 2021/2019/2016 в домене Active Directory (ADBA)
Если вы планируете использовать метод активации Active Directory-Based Activation, основанный на возможности автоматической активации Office 2021/2019/2016 на компьютерах в составе домена AD, в утилите Volume Activation Tools на этапе Select Volume Activation Method нужно выбрать пункт Active Directory-Based Activation. Этот метод активации будет работать на Windows Server 2022/2019/2016/2012 2012 R2 и Windows 11/10/8.1.
Совет. Подробнее об особенностях и ограничениях ADBA активации здесь.
Далее нужно указать все тот же KMS ключ (CSVLK) и задать его имя (произвольно).
 Осталось активировать этот KMS ключ.
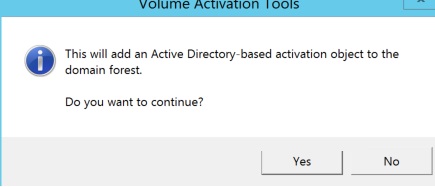
 Появится предупреждение, что в лесу AD будет создан новый объект. Поэтому для корректной установки KMS сервера для ADBA активации вам понадобятся права Enterprise Admin.
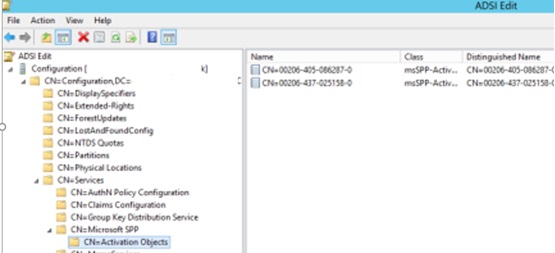
При этом в ветке конфигурации домена CN=Activation Objects,CN=Microsoft SPP,CN=Services,CN=Configuration появятся дополнительные записи.
Закрываем окно VAT, а в консольном окне утилиты обновления жмем Enter. Информацию об установленном KMS ключе можно получить с помощью SKU-ID (отображаться на финальном этапе активации KMS сервера):
slmgr.vbs /dlv 98ebfe73-2084-4c97-932c-c0cd1643bea7
slmgr.vbs /dlv 70512334-47B4-44DB-A233-BE5EA33B914C
slmgr.vbs /dlv 47F3B983-7C53-4D45-ABC6-BCD91E2DD90A
KMS сервер готов для активации клиентов.
Данный KMS сервер теперь готов для активации клиентов с Office 2021/2019/2016 в домене Active Directory.
Настройка клиентов MS Office 2021/2019/2016 для активации на KMS сервере
На компьютерах пользователей нужно устанавливать специальную корпоративную версию Microsoft Office (скачать ее можно из личного кабинета сайта лицензирования Microsoft — VLSC), в ней предустановлен специальный KMS ключ (GVLK ключ) (впрочем, вы можете сменить ключ и у обычной редакции Office, установленной с розничным, MAK или OEM ключом, об этом немного ниже).
Начиная с Office 2019, Microsoft для установки корпоративных продуктов вместо традиционных MSI пакетов Windows Installer использует технологию Click-to-Run (C2R) . В отличии от предыдущих версий, вы не можете скачать продукты Office 2019 из личного кабинета на сайтеVolume Licensing Service Center. Для развертывания продуктов Office 2019 (в том числе Visio и Project) в корпоративной сети, вы должны использовать Office Deployment Tool (ODT).
Для выборочной установки продуктов из Office 2021/2019 на компьютер используйте следующую инструкцию “Как выборочно установить отдельное приложение в Office 2019/2022 и Office 365?”. Обратите внимание, что вы можете установить Office 2021/2019 только на устройства с Windows 10 или Windows 11.
Т.е. если у вас в домене есть корректная запись DNS для KMS сервера (вы можете найти KMS сервер в домене с помощью команды:
nslookup -type=srv _vlmcs._tcp.winitpro.ru
), и вы установили именно корпоративную редакцию MS Office (Volume License), то при соблюдении данных требований, копия Office должна активироваться автоматически после установки на компьютер в домене AD. Чтобы вручную активировать новую версию Office на клиентском компьютере, последовательно выполните команды (в командной строке с правами администратора):
CD Program FilesMicrosoft OfficeOffice16
Примечание. Для 32-битной версии Office, установленной на 64-битной Windows команда другая:
CD Program Files (x86)Microsoft OfficeOffice16
Вы можете указать адрес KMS сервера вручную:
cscript ospp.vbs /sethst:kms01.winitpro.ru
Также можно задать имя или IP адрес KMS сервера через следующий REG_SZ ключ реестра: HKLMSoftwareMicrosoftOfficeSoftwareProtectionPlatformKeyManagementServiceName REG_SZ (для распространения через групповые политики таким методом).
Если KMS сервер запущен на нестандартном порту (не на 1688), сменить порт на клиенте можно так:
cscript ospp.vbs /setprt:1689
Или через реестр: HKLMSoftwareMicrosoftOfficeSoftwareProtectionPlatformKeyManagementServicePort
Активировать вашу копию Office на KMS сервере:
cscript ospp.vbs /act
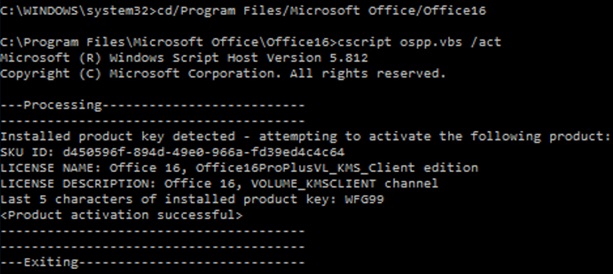
Наличие следующих строк свидетельствует о том, что ваша копия Office 2016 успешно активирована.
License Name: Office 16, Office16ProPlusVL_KMS_client edition
License description: Office 16, VOLUME_KMSCLIENT channel
<Product activation successful>
С помощью следующей команды можно получить информацию об истории активации клиента на сервере KMS (выполняется поиск записей в журнале по Event ID: 12288)
cscript ospp.vbs /dhistorykms
Чтобы разрешить активацию MS Office простым пользователям, выполните команду:
cscript ospp.vbs /puserops
Если выполнять активацию на KMS должны только администраторы:
cscript ospp.vbs /duserops
При возникновении ошибок активации Office 2021/2019/2016, более подробную информацию об ошибках можно получить с помощью команды:
cscript ospp.vbs /ddescr:0xC004F042
где 0xC004F042 – ваш код ошибки активации
Если нужно активировать Microsoft Office 2021/2019/2016 на удаленном компьютере, воспользуйтесь командой следующего формата:
cscript OSPP.VBS <Аргумент> ИмяУдаленногоКомпьютера [username] [password]
Примечание. Чтобы отложить активацию Office на 30 дней (до 5 раз), можно воспользоваться утилитой ospprearm.exe.
Текущий статус активации Office 2016 / 365 можно получить с помощью команды
cscript ospp.vbs /dstatusall
Примечание. Для того, чтобы KMS сервер начал активировать клиентов с MS Office, на него должно поступить как минимум 5 запросов на активацию данного продукта от клиентов. Если запросов недостаточно, на клиентах вы будете видеть ошибку:
LICENSE STATUS:  ---OOB_GRACE---
ERROR CODE: 0x4004F00C
ERROR DESCRIPTION: The Software Licensing Service reported that the application is running within the valid grace period.
Подробную информацию можно найти журнале событий в секции KMS, Event ID события 12290.
GVLK ключи для Microsoft Office 2021/2019/2016
Все корпоративные версии Office 2021/2019/2016 устанавливаются с публичными Generic Volume License Key (GVLK) ключами (эти ключи являются открытыми и доступны абсолютно всем на страницах портала Microsoft TechNet). Благодаря этому они автоматически активируются при наличии в сети KMS сервера. Поэтому, как правило, вводить GVLK ключ в Office не требуется.
Полный список официальных публичных GVLK ключей для продуктов из пакета MS Office 2021, 2016 и 2019 (в таблице ниже), с которыми должны активироваться клиенты на KMS сервере можно найти на странице https://technet.microsoft.com/en-us/library/dn385360(v=office.16).aspx
| Продукт | GVLK ключ для KMS активации |
| Office LTSC Professional Plus 2021 | FXYTK-NJJ8C-GB6DW-3DYQT-6F7TH |
| Office LTSC Standard 2021 | KDX7X-BNVR8-TXXGX-4Q7Y8-78VT3 |
| Project Professional 2021 | FTNWT-C6WBT-8HMGF-K9PRX-QV9H8 |
| Project Standard 2021 | J2JDC-NJCYY-9RGQ4-YXWMH-T3D4T |
| Visio LTSC Professional 2021 | KNH8D-FGHT4-T8RK3-CTDYJ-K2HT4 |
| Visio LTSC Standard 2021 | MJVNY-BYWPY-CWV6J-2RKRT-4M8QG |
| Access LTSC 2021 | WM8YG-YNGDD-4JHDC-PG3F4-FC4T4 |
| Excel LTSC 2021 | NWG3X-87C9K-TC7YY-BC2G7-G6RVC |
| Outlook LTSC 2021 | C9FM6-3N72F-HFJXB-TM3V9-T86R9 |
| PowerPoint LTSC 2021 | TY7XF-NFRBR-KJ44C-G83KF-GX27K |
| Publisher LTSC 2021 | 2MW9D-N4BXM-9VBPG-Q7W6M-KFBGQ |
| Skype for Business LTSC 2021 | HWCXN-K3WBT-WJBKY-R8BD9-XK29P |
| Word LTSC 2021 | TN8H9-M34D3-Y64V9-TR72V-X79KV |
| Office Professional Plus 2019 | NMMKJ-6RK4F-KMJVX-8D9MJ-6MWKP |
| Office Standard 2019 | 6NWWJ-YQWMR-QKGCB-6TMB3-9D9HK |
| Project Professional 2019 | B4NPR-3FKK7-T2MBV-FRQ4W-PKD2B |
| Project Standard 2019 | C4F7P-NCP8C-6CQPT-MQHV9-JXD2M |
| Visio Professional 2019 | 9BGNQ-K37YR-RQHF2-38RQ3-7VCBB |
| Visio Standard 2019 | 7TQNQ-K3YQQ-3PFH7-CCPPM-X4VQ2 |
| Access 2019 | 9N9PT-27V4Y-VJ2PD-YXFMF-YTFQT |
| Excel 2019 | TMJWT-YYNMB-3BKTF-644FC-RVXBD |
| Outlook 2019 | 7HD7K-N4PVK-BHBCQ-YWQRW-XW4VK |
| PowerPoint 2019 | RRNCX-C64HY-W2MM7-MCH9G-TJHMQ |
| Publisher 2019 | G2KWX-3NW6P-PY93R-JXK2T-C9Y9V |
| Skype for Business 2019 | NCJ33-JHBBY-HTK98-MYCV8-HMKHJ |
| Word 2019 | PBX3G-NWMT6-Q7XBW-PYJGG-WXD33 |
| Office Professional Plus 2016 | XQNVK-8JYDB-WJ9W3-YJ8YR-WFG99 |
| Office Standard 2016 | JNRGM-WHDWX-FJJG3-K47QV-DRTFM |
| Project Professional 2016 | YG9NW-3K39V-2T3HJ-93F3Q-G83KT |
| Project Standard 2016 | GNFHQ-F6YQM-KQDGJ-327XX-KQBVC |
| Visio Professional 2016 | PD3PC-RHNGV-FXJ29-8JK7D-RJRJK |
| Visio Standard 2016 | 7WHWN-4T7MP-G96JF-G33KR-W8GF4 |
| Access 2016 | GNH9Y-D2J4T-FJHGG-QRVH7-QPFDW |
| Excel 2016 | 9C2PK-NWTVB-JMPW8-BFT28-7FTBF |
| OneNote 2016 | DR92N-9HTF2-97XKM-XW2WJ-XW3J6 |
| Outlook 2016 | R69KK-NTPKF-7M3Q4-QYBHW-6MT9B |
| PowerPoint 2016 | J7MQP-HNJ4Y-WJ7YM-PFYGF-BY6C6 |
| Publisher 2016 | F47MM-N3XJP-TQXJ9-BP99D-8K837 |
| Skype for Business 2016 | 869NQ-FJ69K-466HW-QYCP2-DDBV6 |
| Word 2016 | WXY84-JN2Q9-RBCCQ-3Q3J3-3PFJ6 |
В случае необходимости вы можете изменить ключ продукта Office на GVLK ключ так:
cscript ospp.vbs /inpkey:xxxxx-xxxxx-xxxxx-xxxxx-xxxxx
Совет. Вариант развертывания Office 2016 на компьютеры конечных пользователей с помощью SCCM подробно описан в этой статье.
Ошибка vmw.exe has stopped working на Windows Server 2019/2016
Если вы пытаетесь установить KMS сервер для Office 2019/2016 на Windows Server 2016/2019, имейте в виду, у нее имеются ряд проблем с запуском мастера Volume Activated Services Tool. При попытке активировать KMS сервер через графический интерфейс Volume Activated Services, описанный в данной статье, появляется ошибка:
Vmw.exe has stopped working. A problem caused the program to stop working correctly. Windows will close the program and notify you if a solution is available.
Где-то я встречал информацию, что VAMT на данный момент поддерживает все ОС, до Windows 8.1. А при установке KMS сервера на Windows Server 2016 или Windows 10, исполняемый файл Vmw.exe аварийно завершается.
В качестве обходного решения, нужно после установки volumelicensepack активировать KMS сервер из командной строки. Установите KMS Host key (который вы получили с VLSC) командой:
slmgr -ipk <Office_2021/2016/2019_KMS_Host_Key>
Затем активируйте сам KMS сервер (нужен доступ в Интернет):
slmgr.vbs /ato 98ebfe73-2084-4c97-932c-c0cd1643bea7
Для Office 2019 используйте SKU ID 70512334-47B4-44DB-A233-BE5EA33B914C.
Теперь ваш KMS сервер на базе Windows Server 2019/2016 активирован и может использоваться для активации клиентов.
- 10.04.2021
В данной статье рассмотрим ошибку активации в Windows 0x80070426 и как ее исправить.
1) Первым делом убедитесь, что Ваш ключ, который Вы пытаетесь активировать — оригинальный и соответствует для Вашей версии системы. Приобрести ключ для различных версий Windows 10 можете в нашем каталоге. Так же в нашем каталоге есть в наличие ключи для Windows 7.
2) Попробуйте активировать Ваш ключ не стандартным способом, а через командную строку по инструкции.
3) Если ошибка не ушла, на время активации рекомендуем отключить антивирусы и файрволлы, если они есть.
4) Так же, можете запустить проверку системы на ошибки и их исправления. Откройте командную строку от имени администратора и поочередно введите следующие команды:
Dism /Online /Cleanup-Image /CheckHealth
Dism /Online /Cleanup-Image /RestoreHealth
sfc /scannow