I just installed the latest Java SDK 7-67 from Oracle on the Mac 10.9.4. I then ran the command java -v in Terminal and I get this message:
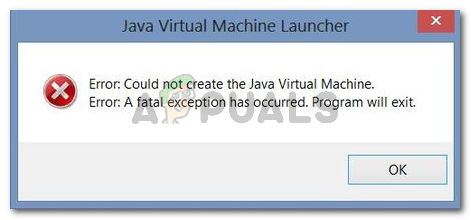
Error: Could not create the Java Virtual Machine.
Error: A fatal exception has occurred. Program will exit.
![]()
Owen Blacker
4,0972 gold badges36 silver badges70 bronze badges
asked Sep 1, 2014 at 15:53
![]()
1
Normally this error occurs when you invoke java by supplying the wrong arguments/options. In this case it should be the version option.
java -version
So to double check you can always do java -help, and see if the option exists. In this case, there is no option such as v.
answered Sep 1, 2014 at 15:58
![]()
BatScreamBatScream
19k4 gold badges49 silver badges67 bronze badges
9
So try uninstalling all other versions other than the one you need, then set the JAVA_HOMEpath variable for that JDK remaining, and you’re done.
That’s worked for me, I have two JDK (version 8 & 11) installed on my local mac, that causes the issue, for uninstalling, I followed these two steps:
- cd /Library/Java/JavaVirtualMachines
- rm -rf openjdk-11.0.1.jdk
![]()
klutt
29.8k17 gold badges54 silver badges92 bronze badges
answered Nov 24, 2018 at 19:09
![]()
0
if you tried running java with -version argument, and even though the problem could not be solved by any means, then you might have installed many java versions, like JDK 1.8 and JDK 1.7 at the same time.
So try uninstalling all other versions other than the one you need, then set the JAVA_HOMEpath variable for that JDK remaining, and you’re done.
![]()
answered Feb 9, 2016 at 8:37
![]()
1
Unrecognized option: —
Error: Could not create the Java Virtual Machine.
Error: A fatal exception has occurred. Program will exit.
I was getting this Error due to incorrect syntax using in the terminal. I was using java — version. But its actually is java -version. there is no space between — and version. you can also cross check by using java -help.
i hope this will help.
answered Jul 6, 2018 at 10:52
![]()
RahulRahul
112 bronze badges
I faced this issue ,when i tried to launch uiautomatorviewer.I had java 13 version . Later i downloaded the java 8 version . Go to terminal and open .bash_profile.
Enter export JAVA_HOME=$(/usr/libexec/java_home -v 1.8).
Save and Exit .
answered Jul 7, 2021 at 7:11
![]()
2
There can be one more reason for such behavior — you delete current working directory.
For example:
# in terminal #1
cd /home/user/myJavaApp

# in terminal #2
rm -rf /home/user/myJavaApp

# in terminal #1
java -jar myJar.jar

Error: Could not create the Java Virtual Machine.
Error: A fatal exception has occurred. Program will exit.
answered Jan 22, 2015 at 9:57
![]()
Alex PovarAlex Povar
4,8503 gold badges29 silver badges43 bronze badges
Try :
java -version , then if you see java 11
try to delete with terminal :
cd /Library/Java/JavaVirtualMachines
rm -rf openjdk-11.0.1.jdk
if it doesn’t try delete manually:
1) click on finder
2) go to folder
3) post /Library/Java/JavaVirtualMachines
4) delete java 11 .
then try java version and you will see :
java version «1.8.0_191»
answered Dec 16, 2018 at 14:09
![]()
Tal HakmonTal Hakmon
4775 silver badges6 bronze badges
bash-3.2$ java -ver
Unrecognized option: -ver
Error: Could not create the Java Virtual Machine.
Error: A fatal exception has occurred. The program will exit.
bash-3.2$
If you are trying to check the Java version on Mac OS X (Lion, Mavericks or Yosemite) and you get the above error message then it may be so that you are specifying the command wrong, let’s try java -help
bash-3.2$ java -help

Usage: java [-options] class [args...]
           (to execute a class)
   or  java [-options] -jar jarfile [args...]
           (to execute a jar file)
where options include:
    -d32	  use a 32-bit data model if available
    -d64	  use a 64-bit data model if available
    -server	  to select the "server" VM
                  The default VM is a server,
                  because you are running on a server-class machine.


    -cp
    -classpath
                  A : separated list of directories, JAR archives,
                  and ZIP archives to search for class files.
    -D=
                  set a system property
    -verbose:[class|gc|jni]
                  enable verbose output
    -version      print product version and exit
    -version:
                  require the specified version to run
    -showversion  print product version and continue
    -jre-restrict-search | -no-jre-restrict-search
                  include/exclude user private JREs in the version search
    -? -help      print this help message
    -X            print help on non-standard options
    -ea[:...|:]
    -enableassertions[:...|:]
                  enable assertions with specified granularity
    -da[:...|:]
    -disableassertions[:...|:]
                  disable assertions with specified granularity
    -esa | -enablesystemassertions
                  enable system assertions
    -dsa | -disablesystemassertions
                  disable system assertions
    -agentlib:[=]
                  load native agent library , e.g. -agentlib:hprof
                  see also, -agentlib:jdwp=help and -agentlib:hprof=help
    -agentpath:[=]
                  load native agent library by full pathname
    -javaagent:[=]
                  load Java programming language agent, see java.lang.instrument
    -splash:
                  show splash screen with specified image
so the correct argument to check java version is -version
Solution:
bash-3.2$ java -version

java version "1.8.0_25"
Java(TM) SE Runtime Environment (build 1.8.0_25-b17)
Java HotSpot(TM) 64-Bit Server VM (build 25.25-b02, mixed mode)

bash-3.2$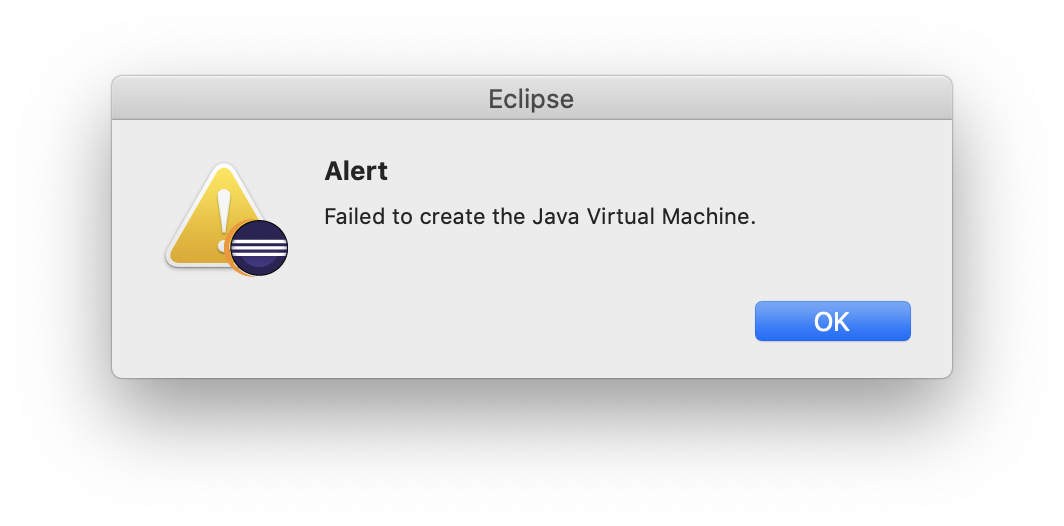
If you’re seeing this popup when you launch Eclipse itself, or the Eclipse installer on your macOS, this post is for you. First, there’s a bit more details on the Eclipse and JDK bug trackers. To fix this, you will need to uninstall the problematic JDK version and install the latest one on your macOS machine:
- Run the
/usr/libexec/java_home -Vcommand to list all installed JVM versions. - Identify the problematic version of the JVM – in my case it was “
14, x86_64: "Java SE 14" /Library/Java/JavaVirtualMachines/jdk-14.jdk/Contents/Home“. - Delete that version – with something like “
sudo rm -rf /Library/Java/JavaVirtualMachines/jdk-14.jdk/“ - Install the latest matching JVM / JDK – at the time of this writing it is 14.0.1
- Verify that it appears in the list of installed JVMs with
/usr/libexec/java_home -V - If needed, point the
Eclipse.app/Contents/Eclipse/eclipse.inito the location of the newly installed JVM (-vmparameter)
If Java is installed correctly on your computer, you should never have any problem running Java-based applications or games.
However, if there’s something wrong with your setup, you may see the error, “Could not create the Java Virtual Machine.” This error means that the Java installation on your computer can’t launch the virtual sandbox (virtual machine) within which it would typically launch the Java app.

In this guide, you’ll learn a few fixes that can eliminate this error, starting with the most common fix to the less likely solution.
Make Sure Java Is Installed Correctly
Before you can troubleshoot any Java errors, you’ll need to ensure that you’ve installed Java correctly.
To do this, open the command prompt by selecting the Start menu, typing cmd, and selecting the Command Prompt app.
In the command prompt window, type java – version and press Enter.
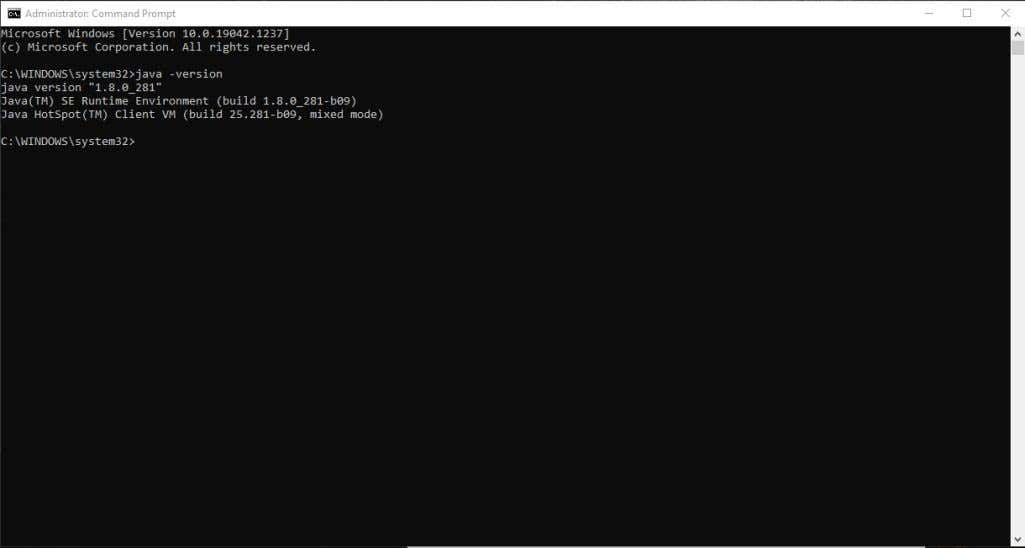
If Java is installed correctly, you should see the version of Java, the SE Runtime Environment, and the Client VM build.
If you don’t have the latest version, you’ll want to make sure to install it. If this looks good, you’re ready to move on to the next troubleshooting step.
Expand Available System Memory for Java
The most common cause for the “Could not create the Java Virtual Machine” error is that Java doesn’t have enough available memory on your system to launch the VM client.
Java is initially set by default to use an initial and maximum “heap size.” So, if you’re running any application that goes beyond the maximum size, it will trigger an error.
You can adjust this by changing the amount of system memory Java can use on your system.
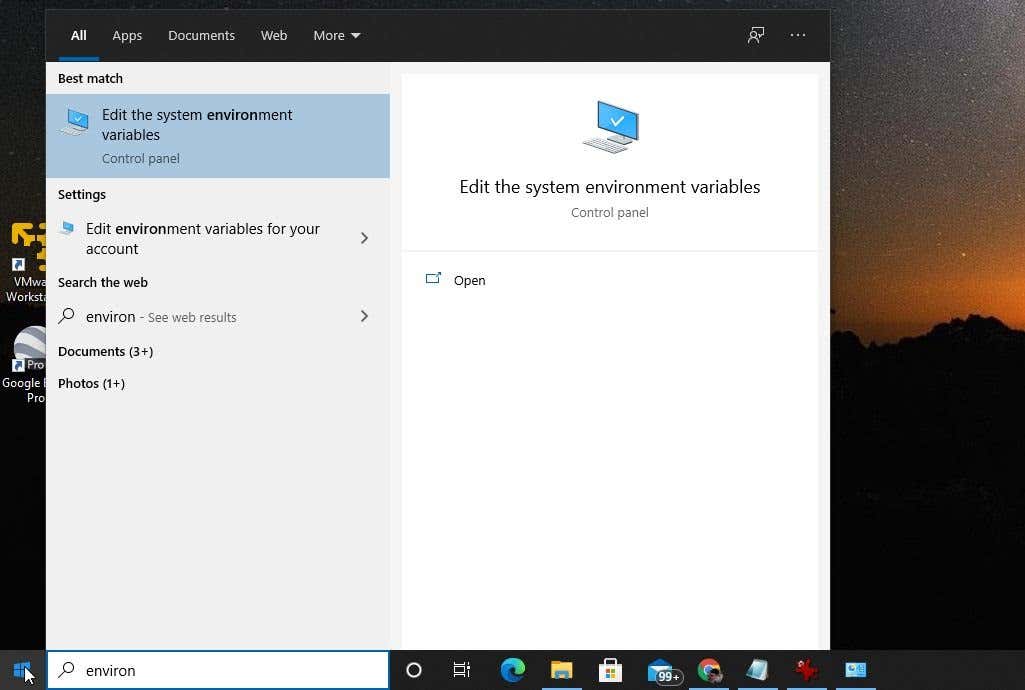
1. Select the Start menu and type environmental variables. Select Edit the System Environment Variables.
2. In the System Properties window, select Environment Variables.
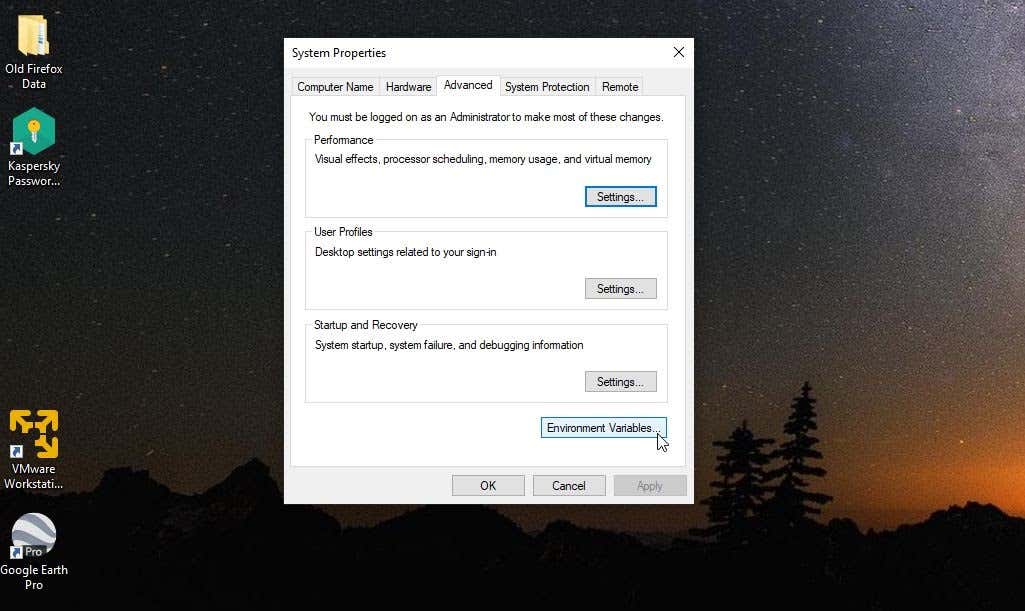
3. Under the System Variables pane, select New.
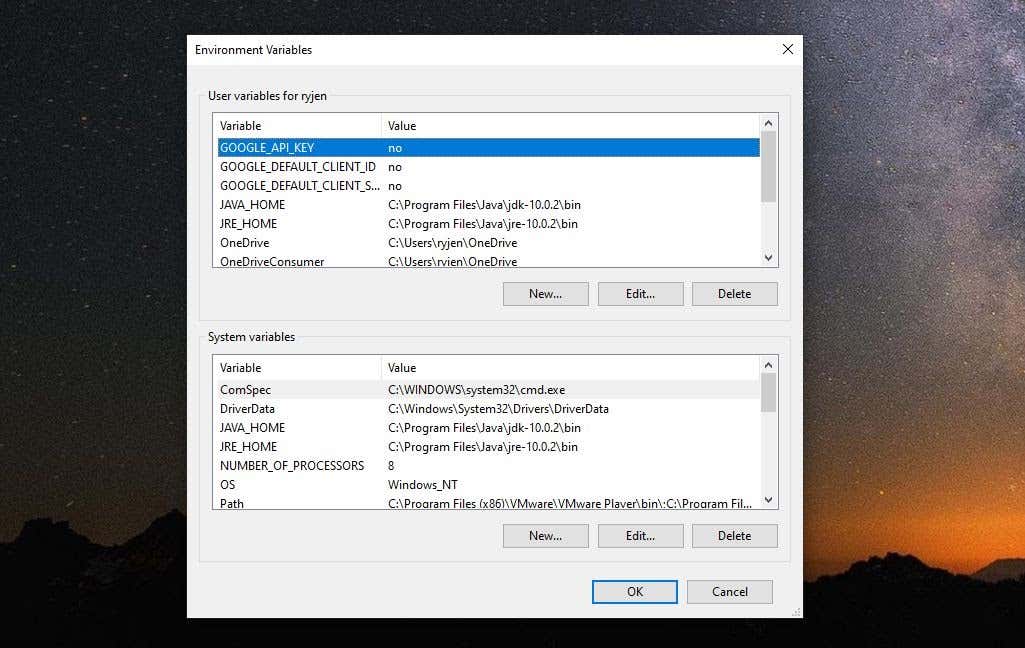
4. Set the Variable name as _JAVA_OPTIONS and set the Variable value as -Xmx512M.
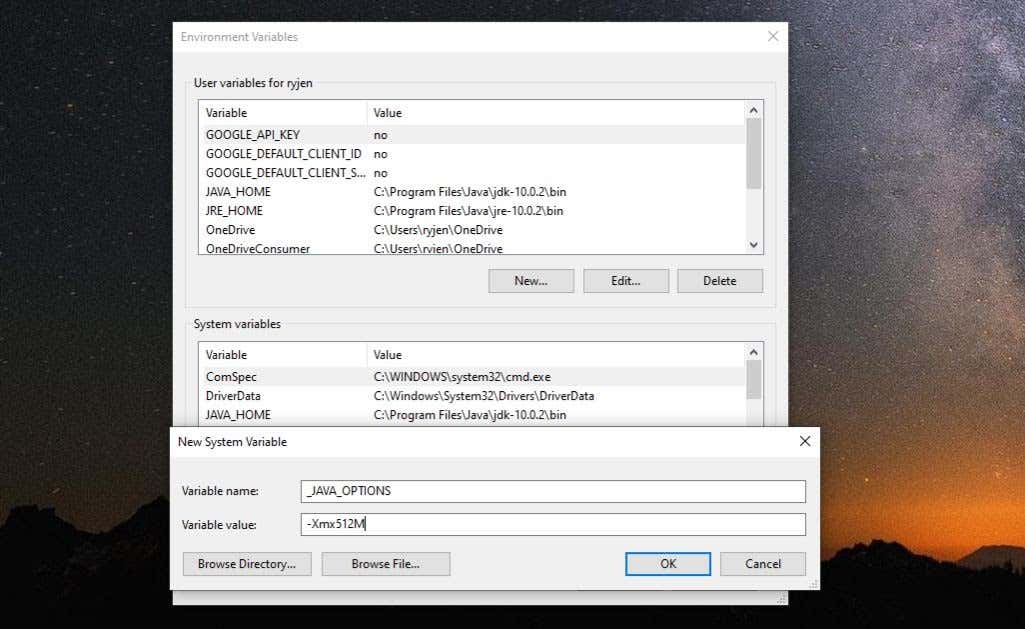
5. Select OK, and then select OK again.
This adjusts the allowable memory for Java to 512 Mb. The setting change takes effect immediately, so relaunch your Java app and see if the error still appears. If it does, repeat the process above but increase the memory to 1024 Mb by setting the value to -Xmx1024M instead.
Run Java As Administrator
Sometimes virtual machine errors can be caused by the lack of appropriate admin rights on your Windows PC. To see if this is the issue, set up the Java app on your PC to run as the system administrator.
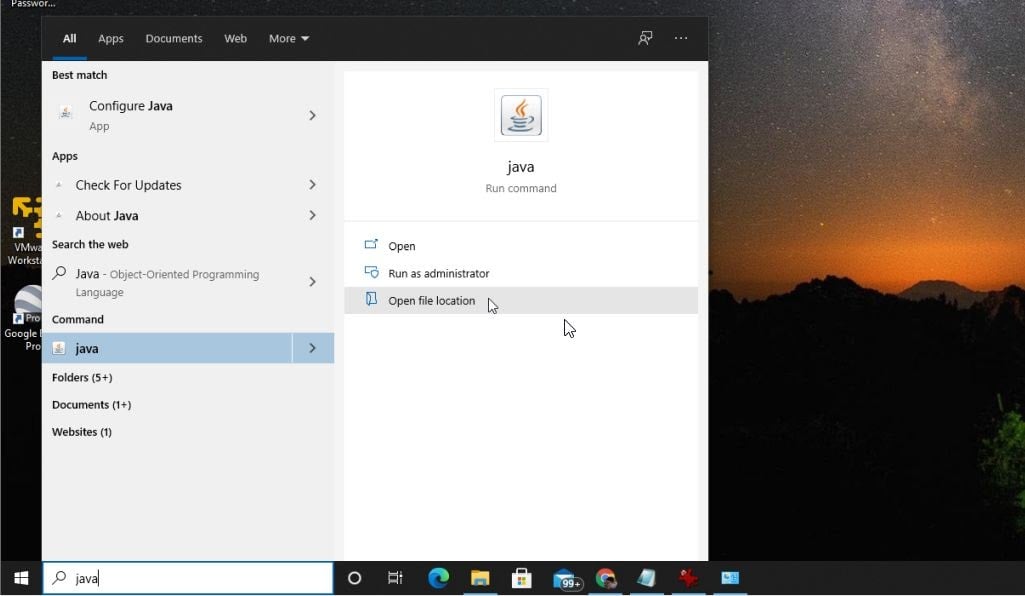
1. Select the Start button and type Java. Select the right arrow next to it and select Open file location.
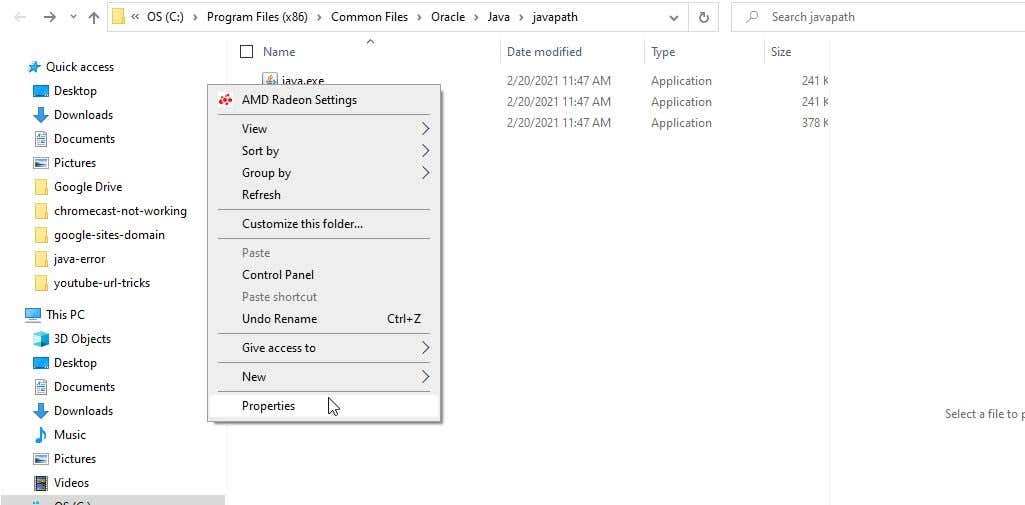
2. Right-click the Java executable file and select Properties.
3. Select the Compatibility tab and enable the Run the program as an administrator checkbox.
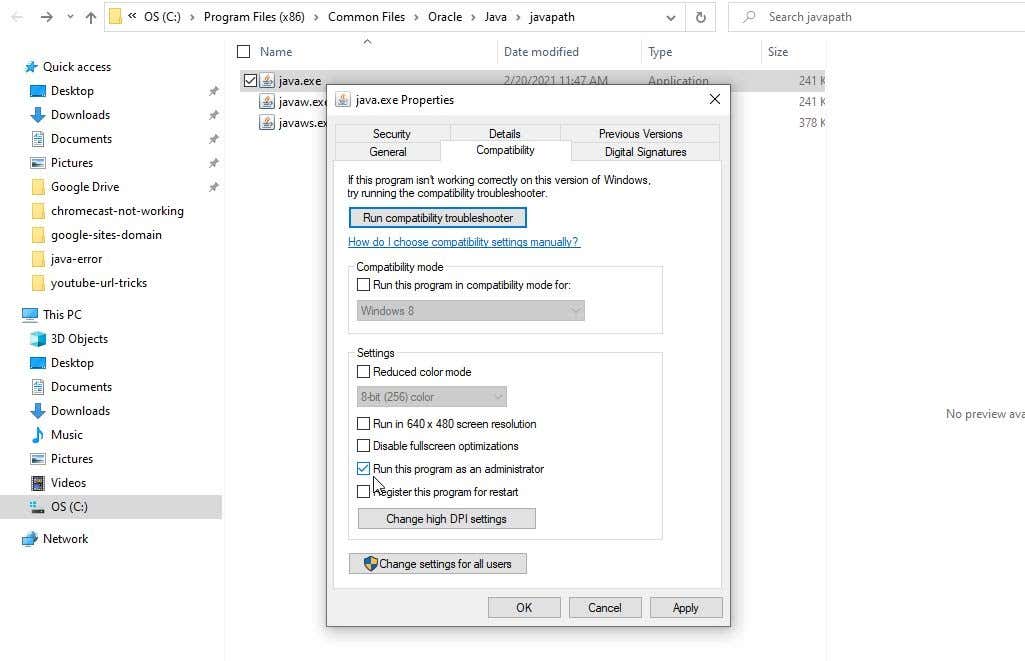
Select OK. Now, the next time Java runs, it will have full administrator rights.
Uninstall and Reinstall Java
Finally, if all else has failed, you may just have a faulty installation of Java.
1. Select the Start menu, type add or remove programs, and select Add or remove programs system settings.
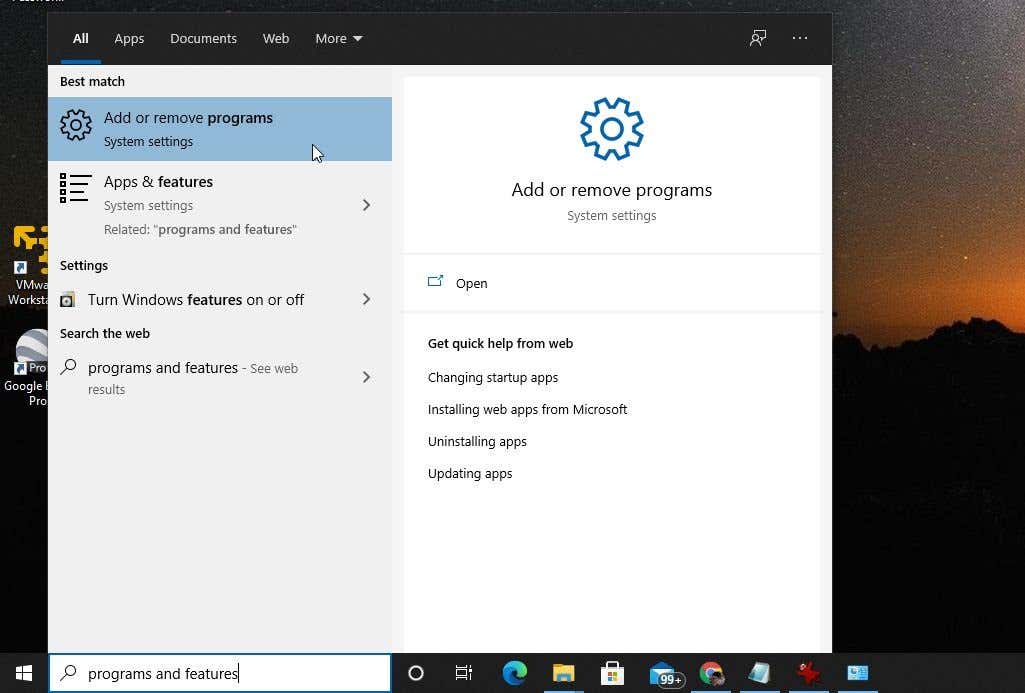
2. In Apps & Features, scroll down to Java, select it, and select Uninstall.
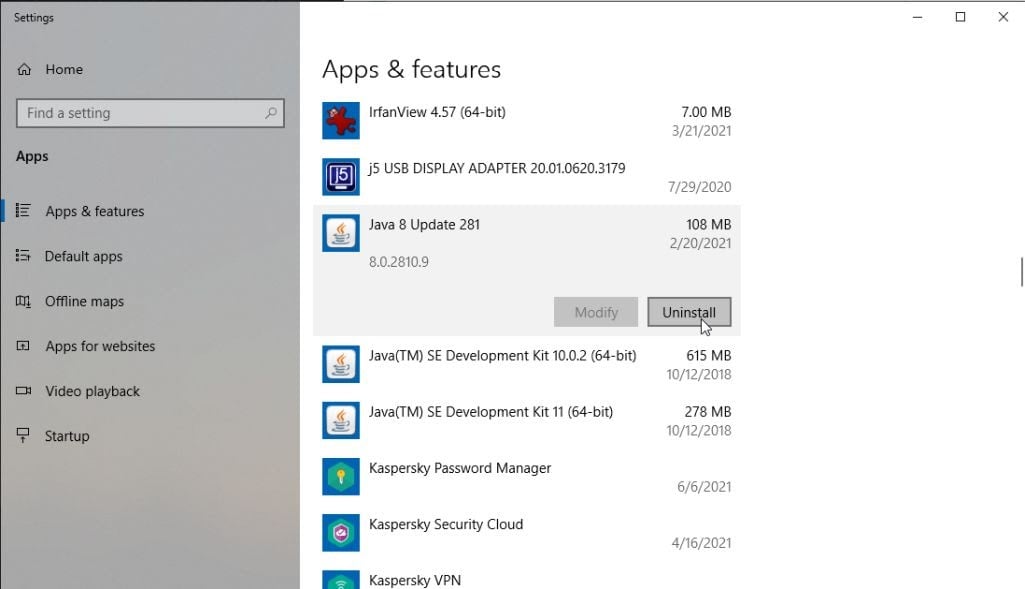
3. Select Yes to confirm, and once Java is fully uninstalled, restart Windows.
4. Download the latest version of Java for your system. Make sure you choose 32 bit if your system is 32 bit or 64 bit if your PC is 64 bit. If you’re not sure which system you have, make sure to check your system type first.
5. Double click the installation file after downloading. Select the Install button to launch the Java installation process.
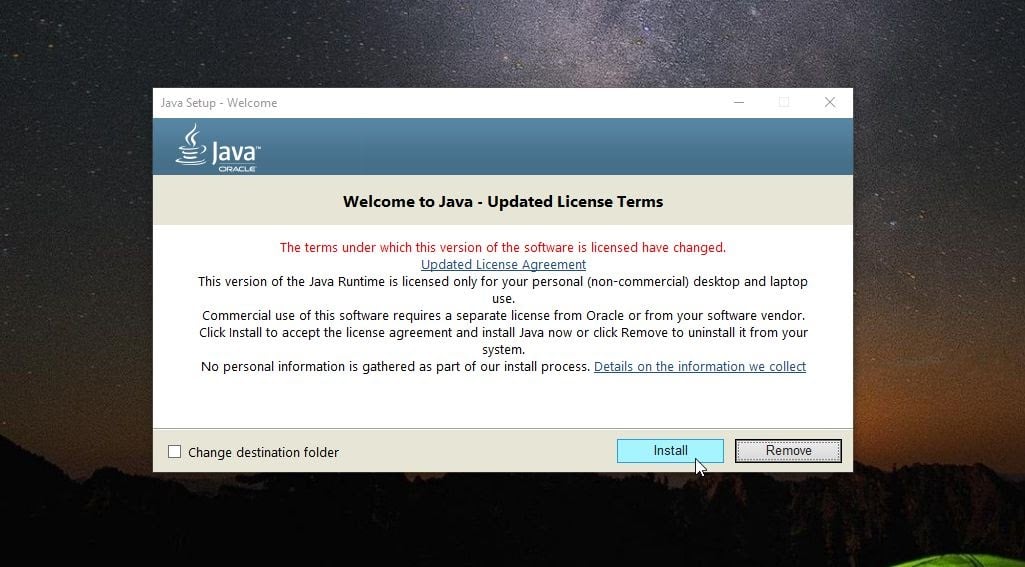
Walk through the rest of the wizard, and once the Java installation is complete, restart your Windows system.
Hopefully, you could clear the error in the first few steps and didn’t have to reinstall Java. However, reinstalling Java is a quick enough process and should get your Java apps running smoothly again.
Were there any other fixes you discovered that also worked with this error? Share them with us in the comments section below!
1 answer to this question.
Hello @kartik,
Normally this error occurs when you invoke java by supplying the wrong arguments/options. In this case it should be the version option.
java -version
So to double check you can always do java -help, and see if the option exists. In this case, there is no option such as v.
Hope this is helpful!!
To know more about Java, join our Java course online today.
Thank you
![]()
answered
May 21, 2020
by
Niroj
• 82,840 points
Related Questions In Java
- All categories
-

ChatGPT
(4) -
Apache Kafka
(84) -
Apache Spark
(596) -
Azure
(131) -
Big Data Hadoop
(1,907) -
Blockchain
(1,673) -
C#
(141) -
C++
(271) -
Career Counselling
(1,060) -
Cloud Computing
(3,446) -
Cyber Security & Ethical Hacking
(147) -
Data Analytics
(1,266) -
Database
(855) -
Data Science
(75) -
DevOps & Agile
(3,575) -
Digital Marketing
(111) -
Events & Trending Topics
(28) -
IoT (Internet of Things)
(387) -
Java
(1,247) -
Kotlin
(8) -
Linux Administration
(389) -
Machine Learning
(337) -
MicroStrategy
(6) -
PMP
(423) -
Power BI
(516) -
Python
(3,188) -
RPA
(650) -
SalesForce
(92) -
Selenium
(1,569) -
Software Testing
(56) -
Tableau
(608) -
Talend
(73) -
TypeSript
(124) -
Web Development
(3,002) -
Ask us Anything!
(66) -
Others
(1,929) -
Mobile Development
(263)


Subscribe to our Newsletter, and get personalized recommendations.
Already have an account? Sign in.
Some users are encountering the Could Not Create The Java Virtual Machine error when trying to launch an application that is using Java. This particular issue is reported to occur with Minecraft and several other applications that are built around Java.
Error: A fatal exception has occurred. The program will exit.
What is causing the Could Not Create The Java Virtual Machine error?
We investigated this particular issue by looking at various user reports and the troubleshooting strategies that they used to resolve the same error message. Based on their conclusions, there are a couple of scenarios that will trigger this particular issue:
- Java is invoked by the wrong arguments or options – This can occur if you’re running a home-brewed application or you’re trying to open an open-source application that is known to cause system instability.
- Java global maximum heap memory is not high enough – One of the most common causes of why you can encounter this particular error is if you try to start a Java application with a maximum heap memory size larger than the one set as the System Variable.
- Java executable and/or application require administrative privileges – This might happen with applications that need admin access in order to function properly.
If you’re currently looking for a way to resolve the, Could Not Create The Java Virtual Machine error, this article will provide you with several verified troubleshooting strategies. Below you have a collection of methods that other users in a similar situation have used to get the issue resolved.
To ensure the best results, follow the methods below in the order that they are presented until you discover a method that is effective in resolving the error for your particular scenario.
Method 1: Adding the _JAVA_OPTIONS to System Variables
Most affected users have managed to get the issue resolved by creating a System Variable for Java called _JAVA_OPTIONS and setting it’s value to Xmx512M. What this essentially does is it sets the global maximum heap memory size for Java.
This will resolve any error message that occurs because the started Java application’s maximum heap memory size is larger than the one set as the System Variable. Several users encountering the same issue have reported that the issue was resolved entirely after they performed the steps below.
Here’s what you need to do to add a _JAVA_OPTIONS entry in System Variables to enlarge the global maximum heap memory size:
- Press Windows key + R to open up a Run dialog box. Then, type “sysdm.cpl” and press Enter to open up the System Properties screen.
- Inside the System Properties screen, go to the Advanced tab and click on Environment Variables.
- In the Environment Variables window, click on New (under System Variables).
- Inside the New System Variable window, set the Variable name to _JAVA_OPTIONS and the Variable value to –Xmx512M and click Ok to save the changes.
- Close the previously opened windows and restart your machine to enforce the changes.
- At the next startup, open the application that was previously showing you the Could Not Create the Java Virtual Machine error and see if is now functioning properly.

If you’re still seeing the same error message at the start of the application, try adding the Java Bin path which might be similar to “%USER PATHJavajdk1.6.0_39bin” to the environment variable as indicated in the above method and see if that works.
Method 2: Opening java.exe with admin rights
Several users struggling to resolve the same issue have managed to get the issue resolved after forcing the main Java executable (java.exe) to open with administrative privileges.
Some users reported that they were able to resolve the issue after applying this fix on both the main java executable and the executable of the application that is showing the error message.
Here’s a quick guide through the whole thing:
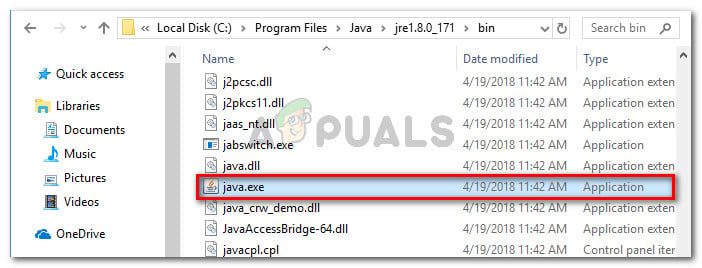
- Open File Explorer and navigate to the location of your java installation. We’ll need to arrive at the location of the main Java executable (java.exe). By default, you should find it in Program Files/Java/*JRE build version*/bin. The exact location will differ depending on which Java Runtime Environment you’re using.

Navigate to the location of java.exe Note: If you installed Java in a custom location, navigate the custom location instead.
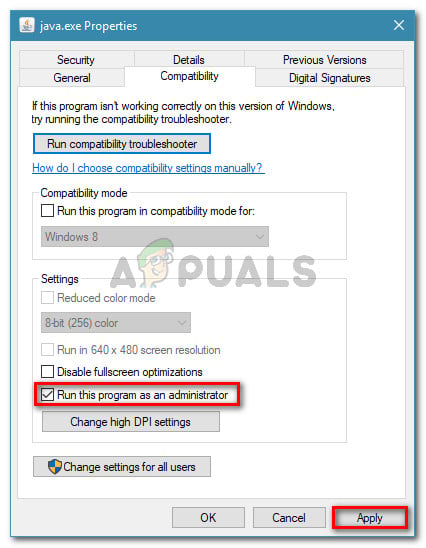
- Right-click on java.exe and choose Properties. Then, go to the Compatibility tab and check the box associated with Run this program as an administrator (under Settings). Click Apply to save the changes.

go to the Compatibility tab and enable Run this program as an administrator - Right-click on the application executable (the one that is triggering the error) and repeat the same procedure: Compatibility > Run this program as an administrator > Apply.
- Run the application and see if the error message is resolved.
Method 3: Reinstalling Java
In some cases, the error is triggered because Java might not be installed properly or its installation might have been corrupted over time. Therefore, in this step, we will be reinstalling Java after uninstalling it completely. For that:
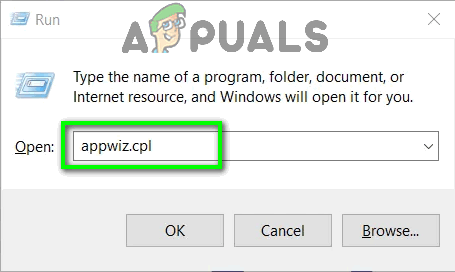
- Press Windows key + R to open up the Run prompt and type in “Appwiz.cpl”.

Type “appwiz.cpl” into the Run dialog and press Enter - Press “Enter” and the Programs and Features screen will open up.
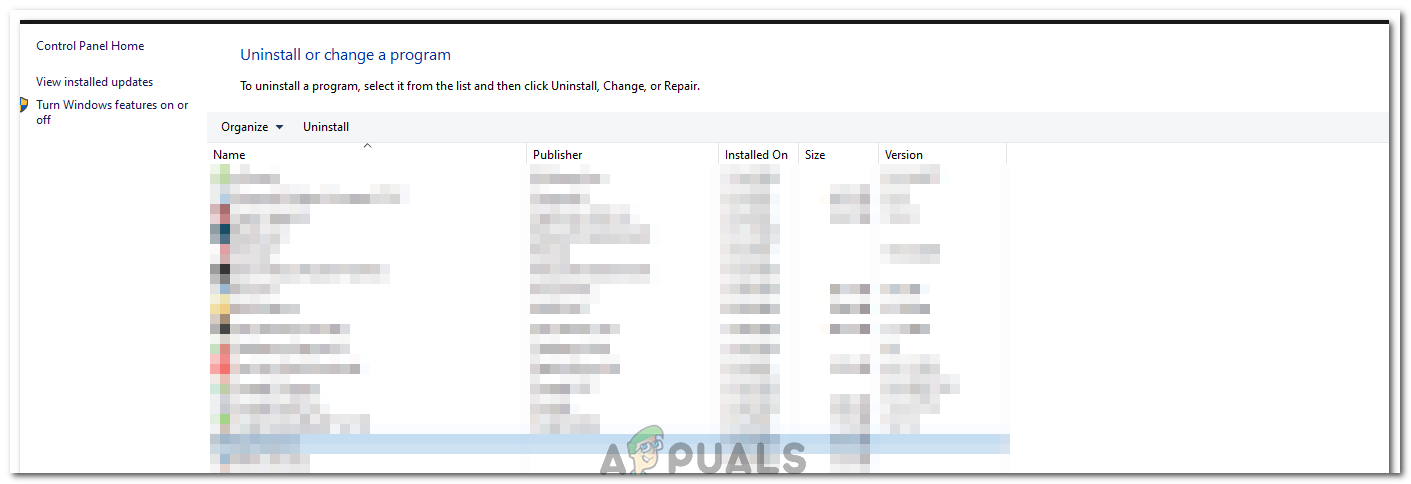
- At the Programs and Features screen, scroll through the installed application list until you find Java.

Checking the Programs and features screen - Right-click on it and select “Uninstall” to remove it completely from the system
- First, delete the primary Java installation and later you should also remove all other Java installations such as updates and other versions.
- After uninstalling all installation, restart your computer.
- After booting up, visit this link and download the latest version of JRE.
- Check to see if the issue persists.
- If the error still persists, download and install the latest version of JDK from here.
Note: If you are already using JDK, try changing its versions or uninstalling the JRE that has been installed along with it. - Verify if the issue still exists.
Method 4: Fixing Errors With Code
There are different reasons behind this error and some of them include if you have some particular errors with your code. We will highlight some below.
- Remove Hyphen: Some users noted that the error was fixed by changing the double hyphen “–” to a single one “-” in their code. For example:
Change the code
“sony@sony-VPCEH25EN:~$ java –version
Picked up JAVA_TOOL_OPTIONS: -javaagent:/usr/share/java/jayatanaag.jar
Unrecognized option: –version
Error: Could not create the Java Virtual Machine.
Error: A fatal exception has occurred. Program will exit.”
To
“sony@sony-VPCEH25EN:~$ java -version
Picked up JAVA_TOOL_OPTIONS: -javaagent:/usr/share/java/jayatanaag.jar
Unrecognized option: –version
Error: Could not create the Java Virtual Machine.
Error: A fatal exception has occurred. Program will exit.” - Also, Try removing the following line from your argument
-Djava.endorsed.dirs=”C:Program FilesApache Software FoundationTomcat 8.5endorsed” - Open your eclipse.ini file and make sure that you add the “-vm” entry above the vm args otherwise, JVM V6 will be selected in env vars.
- If on Ubuntu, you should know that Java 8 is the only version that is supported. Therefore, using the third method. Uninstall Java, and install the previous version.
Method 5: Editing Eclipse.ini File
We can also tweak things inside the Eclipes.ini File to get rid of this issue. There might be a couple of issues with its configuration that need to be addressed therefore, we have divided it into separate issues. Follow the one which suits your scenario the best.
Lowering Memory Use
- Open the Eclipse.ini file inside the Eclipse folder with notepad.
- Find the line similar to “-Xmx256m” (It might be -Xmx1024m or -Xmx 512m).
- Now change the default value to a more reasonable figure depending upon the RAM installed on your computer and add the version number to it as well. For Example:
-Xmx512m
-Dosgi.requiredJavaVersion=1.6
OR
-Xmx512m
-Dosgi.requiredJavaVersion=1.7
OR
-Xmx512m
-Dosgi.requiredJavaVersion=1.8
- Also, try removing the “256m” value from the “-launcher.XXMaxPermSize” line.
- Check to see if the issue persists.
Tinkering Around
- Try to remove the following lines from your file.
-vm P:Programsjdk1.6bin
- Also, change the following lines.
set -Dosgi.requiredJavaVersion=1.5
TO
set -Dosgi.requiredJavaVersion=1.6
- Also, try adding the following line above “-vmargs!” line.
-vm C:Program Files (x86)Javajre6binjavaw.exe
- Also, point to JVM.dll using the following line.
-vm
C:Program FilesJavajre7binclientjvm.dll
- Open the Eclipse file and replace “-vmargs” with the path of javaw.exe. For Example:
-startup
plugins/org.eclipse.equinox.launcher_1.3.0.v20120522-1813.jar
--launcher.library
plugins/org.eclipse.equinox.launcher.win32.win32.x86_1.1.200.v20120522-1813
-product
com.android.ide.eclipse.adt.package.product
--launcher.XXMaxPermSize
256M
-showsplash
com.android.ide.eclipse.adt.package.product
--launcher.XXMaxPermSize
256m
--launcher.defaultAction
openFile
**-vm “c:Program FilesJavajdk1.7.0_07binjavaw.exe”**
-Dosgi.requiredJavaVersion=1.6
-Xms40m
-Xmx768m
-Declipse.buildId=v21.1.0-569685
- Also, you can place the following line at the end and check if that works.
-vmargs
-Xms40m
-Xmx512m
-XX:MaxPermSize=256m
- Furthermore, try removing the following lines from the eclipse.ini and check if that works.
-XX:+UseStringDeduplication
-XX:+UseG1GC
- You can also try removing the eclipse.ini file if the issue still persists as that has reportedly fixed the issue for some but remember to back it up first just in case you need it. Also, try closing all the power-hungry applications before starting Java to make sure proper resources are available.
Checking for JDK Corruption
- Press “Windows” + “R” to open the Run prompt and type in “cmd”.
- Type in the following command and check if that gives an error.
c:> java -version
- If it does give an error, reinstall the JDK completely.

Kevin Arrows
Kevin is a dynamic and self-motivated information technology professional, with a Thorough knowledge of all facets pertaining to network infrastructure design, implementation and administration. Superior record of delivering simultaneous large-scale mission critical projects on time and under budget.
-
MiniTool
-
MiniTool News Center
- Fixes to the “Could Not Create the Java Virtual Machine” Error
By Daisy | Follow |
Last Updated August 05, 2020
![]()
You may encounter the “could not create the Java virtual machine” error when you try to start an application that uses Java. This post from MiniTool tells you the reasons for the annoying issue. Besides, you can find some feasible methods to fix it in this post.
Could Not Create the Java Virtual Machine
It’s annoying to encounter the “could not create the Java virtual machine” issue. There are some main reasons for the error: could not create the Java virtual machine.
1. Wrong parameters or options call Java.
2. Java global maximum heap memory is not high enough.
3. Java executable files and/or applications require administrative permissions.
Now, let’s see how to fix the annoying issue.
Also see: What Version of Java Do I Have? Complete Guide to Check It
How to Fix Could Not Create the Java Virtual Machine
Set up a New System Variable for Java
First, you can try to set up a new system variable for Java to fix the “could not create the Java virtual machine” error. Here is how to do that:
Step 1: Press the Windows + R keys at the same time to open the Run dialogue box. Type sysdm.cpl and press Enter to open the System Properties screen.
Step 2: Navigate to the Advanced tab and click the Environment Variables…. option.

Step 3: Under the System Variables part, you need to click New….
Step 4: Set the Variable name to _JAVA_OPTIONS and the Variable value to –Xmx512M and click OK to save the changes.
After that, restart your PC to check if the “could not create the Java virtual machine” error has gone. If not, try the next solution.
Open Java.exe with Admin Rights
Then, you can also try to open Java.exe with admin rights to fix the “could not create Java virtual machine” issue. Follow the steps below to fix that:
Step 1: Type Java in the Search box. Then right-click it and select Open file location to open the Java’s folder in File Explorer.
Step 2: Now you can right-click the java.exe and select Properties.
Step 3: Select the Compatibility tab. Select the Run this program as an administrator option.
Step 4: Select the Apply option and click OK to close the window.
Reinstall Java
The last method for you to fix the “could not create the Java virtual machine” error is to reinstall Java. You can follow the instructions below.
Step 1: Press Win + S to open Search. Then search for Control Panel and launch it.
Step 2: In Control Panel, select View by: Category on the upper right corner. Then click Uninstall a program.
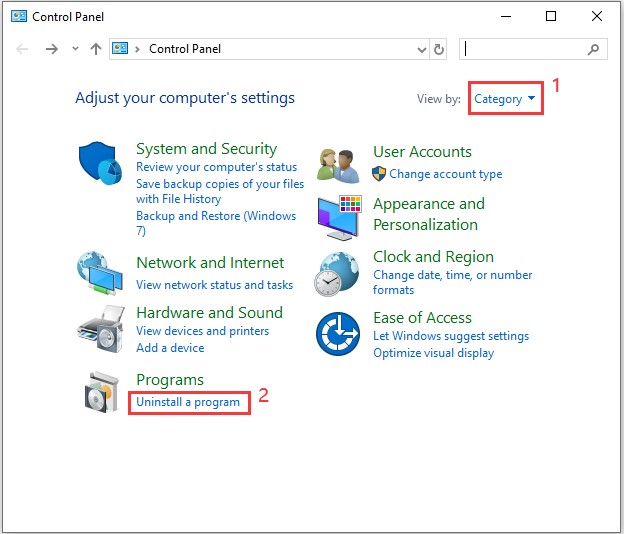
Step 3: Select each Java-related program from the list and then click Uninstall. Follow the on-screen instructions to finish the process.
Step 4: When all the Java programs are uninstalled, restart your computer. Visit the Java official website to reinstall the Java environment.
Then you can check if “could not create the Java virtual machine” error is removed.
Also see: A Quick Fix Guide to Application Blocked by Java Security Issue
Final Words
After reading this post, you should know how to get rid of the “could not create the Java virtual machine” error. If you have any confusion about the methods, leave a comment below and we’ll reply to you as soon.
About The Author

Position: Columnist
She was graduated from the major in English. She has been the MiniTool editor since she was graduated from university. She specializes in writing articles about backing up data & systems, cloning disks, and syncing files, etc. She is also good at writing articles about computer knowledge and computer issues. In daily life, she likes running and going to the amusement park with friends to play some exciting items.