TLDR : check if packaging element inside the pom.xml file is set to jar.
Like this — <packaging>jar</packaging>. If it set to pom your target folder will not be created even after you Clean and Build your project and Maven executable won’t be able to find .class files (because they don’t exist), after which you get Error: Could not find or load main class your.package.name.MainClass
After creating a Maven POM project in Netbeans 8.2, the content of the default pom.xml file are as follows —
<?xml version="1.0" encoding="UTF-8"?>
<project xmlns="http://maven.apache.org/POM/4.0.0" xmlns:xsi="http://www.w3.org/2001/XMLSchema-instance" xsi:schemaLocation="http://maven.apache.org/POM/4.0.0 http://maven.apache.org/xsd/maven-4.0.0.xsd">
   <modelVersion>4.0.0</modelVersion>
   <groupId>com.mycompany</groupId>
   <artifactId>myproject</artifactId>
   <version>1.0-SNAPSHOT</version>
   <packaging>pom</packaging>
   <properties>
       <project.build.sourceEncoding>UTF-8</project.build.sourceEncoding>
   </properties>
</project>
Here packaging element is set to pom. Hence the target directory is not created as we are not enabling maven to package our application as a jar file. Change it to jar then Clean and Build your project, you should see target directory created at root location. Now you should be able to run that java file with main method.
When no packaging is declared, Maven assumes the packaging as jar. Other core packaging values are pom, war, maven-plugin, ejb, ear, rar. These define the goals that execute on each corresponsding build life-cycle phase of that package. See more here
I have a bit of a different but similar scenario so I thought I would share. I have a primary maven application packaged into a war through the build (pom.xml packaging configuration). I wanted to add a jar file that is created from one package within our source code, and added into the assembled output along with the webapp war. This allows us to deliver the web application along with a cli tool separately. I didn’t want to reconfigure the pom.xml to be multi-module, but just to add a jar as a separate executable within our existing structure. I was banging my head against this for a while.
First, I ended up deleting my entire .m2 directory with maven repositories locally. It appears there may have been an issue for me here, because my ultimate code that worked seems to be the same as what wasn’t working originally. I suspect the reasoning for this was I was trying different versions of libraries and was creating conflicts, but who knows. First suggestion I have if you are having issues is delete your .m2 folder and try from scratch.
Also reference @Adam Howell’s answer because that is the fundamentals. I created a simplified example project to figure out why nothing was happening and in there I realized i forgot to prefix the folder structure as src/main/java… doh! Of course in my existing project, this was not the case.
And here is my plugin code i inserted in my pom.xml that worked:
<plugin>
    <groupId>org.apache.maven.plugins</groupId>
    <artifactId>maven-jar-plugin</artifactId>
    <version>3.2.0</version>
    <configuration>
        <archive>
            <manifest>
                <addClasspath>true</addClasspath>
                <mainClass>com.myCompany.app.cli.CLITool</mainClass>
            </manifest>
        </archive>
        <outputDirectory>${project.build.directory}</outputDirectory>
        <finalName>our-cli</finalName>
    </configuration>
    <executions>
        <execution>
            <phase>compile</phase>
            <goals>
                <goal>jar</goal>
            </goals>
        </execution>
    </executions>
</plugin>
I am pretty sure you can change the phase you want this done in, I figured earlier on in compile made since to ensure it was available for packaging later. I’m not very experienced with Maven though, so note that this may not be semantically in-line with Maven conventions.
And it worked! Not sure why this took me hours to work out although it did. This I just updated my bin.xml to include the jar file in my assembled deliverable, and Voilah! I have a jar executable separate from my webapp that I can use as a command-line interface tool.
This tutorial guides you on how to resolve Spring Boot App Program Error: Could not find or load main class. Occasionally, we might see error “Could not find or load main class” while running Spring Boot App or any Java Program. Let’s see how to resolve the same.
Spring Boot App Program Error: Could not find or load main class
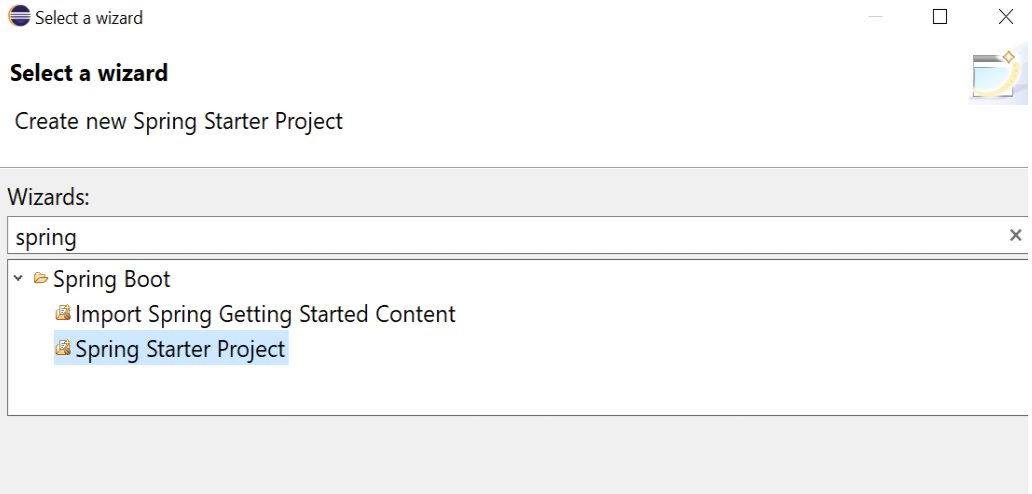
Well, I have created a Spring Boot Application with necessary changes for my App to run. Note, I have created this Spring Boot project using Spring Boot wizard from Eclipse. After, making necessary changes I tried to run the Spring Boot App using the following option:
Right Click Spring Boot Project in Eclipse -> Run As -> Spring Boot App
But it failed with error “Could not find or load main class”.
Error: Could not find or load main class com.de.sneppets.connectivity.ExampleSpringBootApplication
Caused by: java.lang.ClassNotFoundException: com.de.sneppets.connectivity.ExampleSpringBootApplication
And this is the case you might come across even for other Java Program or Projects.
Fix 1: mvn clean install
First, try building the Spring Boot App and check if that resolves the above issue.
What I did was. I tried to build the Spring Boot App from the command line again.
> mvn clean install
And the Build was successful. After building the code successfully, I tried to run the Spring Boot App again. And I don’t see that error any more. Check if this works for you.
Fix 2: Update Project
This is another way which you could try to resolve main class load error. All that you need to do is Update Maven Project using the following option.
Right Click Spring Boot Project -> Maven -> Update Project
And in the Update Maven Project wizard select the Maven Project that you wanted to update with default update options and click “OK”.
After, you do the above step try running your Spring Boot App. Yay! it worked for me. And I don’t see the error any more.
That’s it. The main reason for the error “Could not find or load main class” is due to compiled classes not found in the target directory. Therefore, we need to follow any one of the above approach to build the code to generate classes, so that your Spring Boot App will run successfully.
Hope this is helpful 🙂
You’ll also like:
- Add or install local jar files to the Maven Project
- Build maven project without version
- Create JWT Token and Sign with RSA Private Key
- Replace element in ArrayList at specific index
- Convert Integer List to int array
- ArrayList removeAll() method not removing elements
- Convert floating point number to fixed point in Python
- What is %matplotlib inline and how to use ?
- Java String substring() example program
- Add python3 kernel to jupyter IPython notebook ?
- Reset jupyter notebook theme to default theme
- Jacoco Maven Plugin Junit Code Coverage Example
- Assign value to static variables from application.properties in Spring Boot ?
- Run a Jupyter Notebook .ipynb file from terminal or cmd prompt
- Websocket connection closed automatically – keepalive Ping example
- Check if a file or folder exists without getting exceptions ?
- Python program to find the greatest of three numbers
- Putty Fatal Error No supported authentication methods available
- Find which users belongs to a specific group in linux
- Check if Python Object is a Number ?
- Remove non-numeric characters from string in Python
- Convert negative to positive number in Python
- Extract numbers from a string in python
- Program to Check Given Number is Odd or Even
References:
- maven documentation
- wikipedia
Java Could Not Find or Load Main Class
When starting your Java application, you may encounter this error:
Error: Could not find or load main class MyClass
Caused by: java.lang.ClassNotFoundException: MyClass
Caused by: java.lang.ClassNotFoundException: MyClassThis error is very common when creating new Java based projects. Whether you’re using Gradle or Maven, Spring Boot or Kafka, chances are you’ve encountered this error before.
Sometimes the error will occur unexpectedly. Sometimes the error is specific to your IDE.
Regardless, fixing the error is easy and it starts with understanding the cause:
What Causes the «Could Not Find or Load Main Class» Error?
This error is thrown whenever Java can’t find or load the main class of your application.
Let’s say you define a class like this:
public class MyClass {
  public static void main(String[] args) {
    System.out.println("My class is working!");
  }
}
public static void main(String[] args) { System.out.println("My class is working!"); }}When running this simple class, you could get the «could not find or load main class» error for several reasons…
1. IDE Configuration Issue
Most IDEs let you configure the starting point for your application. For example, in IntelliJ you can edit configuration to select a main class for running the project.
If you’re running your application through an IDE, make sure that it is configured properly to look for the main class in the right place.
2. Wrong Class Name
Remember that class names must be unique in Java. Furthermore, they are case sensitive…
Let’s say you are running your program from the CLI using the java tool..
java myclassThis will result in the «Could not find or load main class» error because class names are case sensitive.
3. Wrong Extension
When running from the command line, many developers accidentally append an extension like:
java MyClass.javaor
java MyClass.classThe correct way is to run without any extension:
java MyClass4. Wrong Location
Let’s say your class is part of a package like this:
package com.myproject;
public class  MyClass {
  public static void main(String[] args) {
    System.out.println("My class is working!");
  }
}
public class MyClass { public static void main(String[] args) { System.out.println("My class is working!"); }}If you don’t run your class with the fully qualified name AND from the right directory, you will get the «Could not find or load main class» error…
5. Wrong Class Path
The class path is where the JVM looks for classes to load into your program. Sometimes developers provide a specified path like this:
java MyClass -cp /usr/local/pathWhile the optional -cp argument allows you to specify your own class path, you can easily get the «Could not find or load main class» error if this is incorrect…
How to fix the «Could Not Find or Load Main Class» Error
1. Make sure your IDE is configured properly
Make sure that your IDE has the correct configuration for finding the main class/entry point of your application.
2. Make sure your class name is correct
If you are running your program from the CLI, make sure that you are specifying the right class name without extensions…
java MyClass3. Make sure you are running your application from the right directory
Make sure you are running your application from the right folder. If your class is part of a package then you must run it from the parent directory….
java com.myproject.MyClass4. Make sure your class path is correct
Make sure your class path is correct. By default, the class path is the current working directory «.». If you override this with the -cp argument then make sure it’s accurate!
Understanding the Java Error «Could Not Find or Load Main Class»
While this error is self explanatory and easy to fix, it’s worth understanding how Class Loaders work behind the scenes. This gives you a better understanding of why the «Could Not Find or Load Main Class» error happens…
When are Classes Loaded in Java?
Classes are loaded dynamically. This means classes are loaded into memory only when they are needed.
Unlike C++, Java is a dynamically compiled language. This means the language is compiled to machine code while the program is running.
Of course, some classes must be loaded initially when your program starts. The JRE utilizes a native class loader to load the main entry point of your application. From here, class loaders are used to dynamically load (lazy load) classes as they are needed by the application.
The Class Loading Mechanism in Java
Java utilizes a delegation mechanism for loading classes at runtime. There are 3 built-in class loaders used by the JRE at runtime:
1. Bootstrap class loader: This loads the standard runtime classes found in rt.jar
2. Extensions: This loads any extension classes used by the JRE
3. System: This loads classes defined by the application and found on the class path
Each class loader first checks a cache to see if the requested class has already been loaded into memory. If nothing is found in the cache, it delegates the finding of the class to the parent class loader.
This process happens recursively…
If the system class loader can’t find the class, it delegates to the extension class loader.
If the extension class loader can’t find the class, it delegates to the bootstrap class loader.
If the bootstrap class loader can’t find the class, it tells the extension class loader to find it
If the extension class loader can’t find the class, it tells the system class loader to find it
If the system class loader can’t find it, it throws an ClassNotFound exception
This mechanism works to ensure uniqueness, visibility and delegation are applied to the class loading mechanism in Java.
Uniqueness explains the reason why no two classes can have the same name. By keeping class names unique, class loaders can easily find the single representation of a defined class.
Visibility explains the child-parent relationship between class loaders. While children can view parent classes, parents can’t view child classes. This ensures an isolation level needed to create the hierarchy between class loaders.
Delegation explains how the class loaders work together to recursively retrieve a unique class. By delegating to parent classes, class loaders ensure only one representation of a defined class exists.
Java Class Loading Order
1) Class loader searches cache for loaded classes
2) If cache has the class, it is returned. Otherwise, the class loader delegates to parent class to retrieve the class
3) Parent class loaders ultimately delegate to the bootstrap class loader. If the class isn’t found, the bootstrap loader returns responsibility to child loader.
4) Either the system loader finds and loads the class, or a ClassNotFound exception is thrown.
Custom Class Loaders
You can create your own class loaders by extending the ClassLoader class:
public class CustomClassLoader extends ClassLoader { ...Most developers don’t need to worry about creating custom class loaders. There are times where it makes sense however. Sometimes custom class loaders are used to implementing class versioning. Other custom class loaders allow you to create classes dynamically or switch implementations etc.
Conclusion
The «Could not find or load main class» error is common and easy to fix. Its cause usually has to do with specifying the wrong class name, extension, or class path.
This error can be easily fixed by checking IDE configurations, class path variables, class names, and making sure you’re running the application from the right directory.
The JRE utilizes a class loading mechanism to dynamically load classes into memory. This mechanism relies on a recursive process where class loaders delegate retrieval to parent loaders if they can’t find the class already loaded in memory.
You can create your own custom class loaders for dynamic class creation and versioning.
Your thoughts?
The Java “Could not find or load main class” error is thrown when the JVM fails to find or load the main class while executing a program. It usually occurs when executing a Java program from the command line.
Install the Java SDK to identify and fix these errors
What Causes Error: Could not find or load main class
The «Could not find or load main class» error occurs when the JVM fails to load the main class. This can happen due to various reasons, such as:
- The class being declared in the incorrect package.
- The file path of the class not matching the fully qualified name.
- Incorrectly specified classpath of the application.
- Missing dependencies from the classpath.
- Incorrect directory path on the classpath.
- A typo in the class name.
Error: Could not find or load main class Example
Here’s an example of the Java «Could not find or load main class» error thrown when an incorrect class name is specified during execution:
Here’s an example Java class MyClass.java:
public class MyClass {
    public static void main(String[] args) {
        System.out.println("Hello World");
    }
}
Now the above class is compiled using the command line:
$ javac MyClass.javaThe compiler generates an executable .class file for MyClass:
$ ls
MyClass.class   MyClass.java
Now if the java command is used to execute the .class file with an incorrect name, the «Could not find or load main class» error is thrown:
$ java Myclass
Error: Could not find or load main class Myclass
The generated .class file has the exact same name as the Java class, which in this case is MyClass.class. Specifying the correct name will execute the program successfully:
$ java MyClass
Hello World
How to Fix Error: Could not find or load main class
There are several ways the «Could not find or load main class» error can occur while executing Java programs. Most of the time, it occurs because of specifying an incorrect class name, class file extension, file path or classpath.
The following tips can be useful to resolve the «Could not find or load main class» error:
- Using correct class name — The spelling and casing of the class name should be checked when executing the program.
- Using the class name without the .class extension — The
javacommand expects the class name for executing the program, without the .class extension. Therefore, the following syntax should be used to execute Java classes: java <classname> - Using the correct file path — The path to the .class file should be checked and corrected if the error occurs. Remember to use the fully qualified name of the class that is in a package if executing it from outside the directory structure of the package.
- Correct classpath definition — The classpath should be checked and defined correctly if the error comes up. It can also be specified using the
java -cpor-classpathcommand line arguments.
Track, Analyze and Manage Errors With Rollbar
Managing errors and exceptions in your code is challenging. It can make deploying production code an unnerving experience. Being able to track, analyze, and manage errors in real-time can help you to proceed with more confidence. Rollbar automates error monitoring and triaging, making fixing Java errors easier than ever. Sign Up Today!