I have used spring 1.5.3.RELEASE version and given pom dependencies like
    <parent>
        <groupId>org.springframework.boot</groupId>
        <artifactId>spring-boot-starter-parent</artifactId>
        <version>1.5.3.RELEASE</version>
    </parent>

   <dependencies>
        <dependency>
            <groupId>org.springframework.boot</groupId>
            <artifactId>spring-boot-starter-web</artifactId>
        </dependency>
   </dependencies>
And my main class was
@SpringBootApplication
public class SpringAppStarter {


    public static void main(String[] args) {

        SpringApplication.run(SpringAppStarter.class, args);
    }

}
But still while execution of main class I was getting:
Could not find or load main class … with my class name.
I could see that class was available in the class path and I was using STS IDE.
I was not getting reason for the issue then I tried manual build through maven with
mvn clean install
Still problem was there then i realize that my project has two libraries
- Reference Library
- Maven Library
What I did:
I have created another mavenRepo folder and build it again and refresh my project. After that it worked and I saw that Maven Library was deleted from project class path.
Issues was while execution it was getting multiple version so it was not able to find proper class to execute my application.
Other Solution listed in this page also resolves the issue but if you are doing mistake in
- Annotating class
- pom entry
- jar version etc.
Hope this may resolve problem if somebody get this issue
This tutorial guides you on how to resolve Spring Boot App Program Error: Could not find or load main class. Occasionally, we might see error “Could not find or load main class” while running Spring Boot App or any Java Program. Let’s see how to resolve the same.
Spring Boot App Program Error: Could not find or load main class
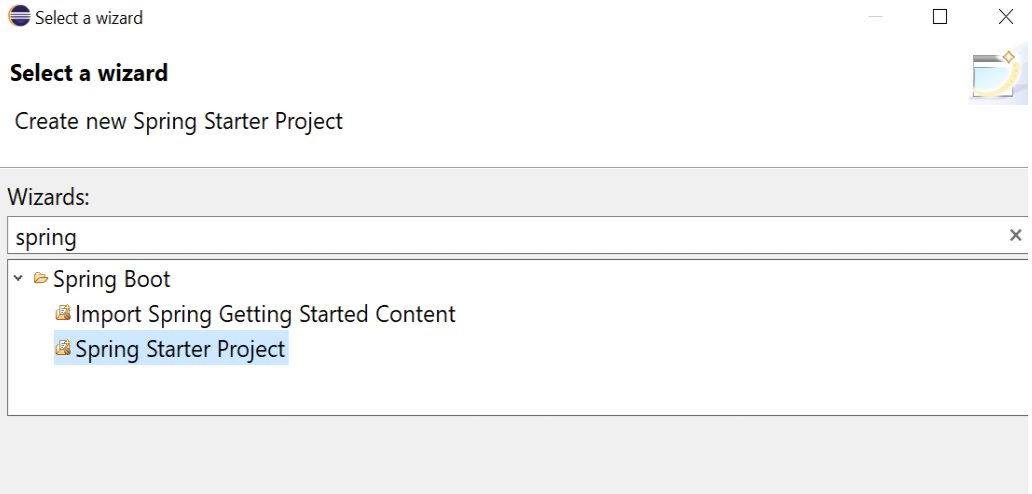
Well, I have created a Spring Boot Application with necessary changes for my App to run. Note, I have created this Spring Boot project using Spring Boot wizard from Eclipse. After, making necessary changes I tried to run the Spring Boot App using the following option:
Right Click Spring Boot Project in Eclipse -> Run As -> Spring Boot App
But it failed with error “Could not find or load main class”.
Error: Could not find or load main class com.de.sneppets.connectivity.ExampleSpringBootApplication
Caused by: java.lang.ClassNotFoundException: com.de.sneppets.connectivity.ExampleSpringBootApplication
And this is the case you might come across even for other Java Program or Projects.
Fix 1: mvn clean install
First, try building the Spring Boot App and check if that resolves the above issue.
What I did was. I tried to build the Spring Boot App from the command line again.
> mvn clean install
And the Build was successful. After building the code successfully, I tried to run the Spring Boot App again. And I don’t see that error any more. Check if this works for you.
Fix 2: Update Project
This is another way which you could try to resolve main class load error. All that you need to do is Update Maven Project using the following option.
Right Click Spring Boot Project -> Maven -> Update Project
And in the Update Maven Project wizard select the Maven Project that you wanted to update with default update options and click “OK”.
After, you do the above step try running your Spring Boot App. Yay! it worked for me. And I don’t see the error any more.
That’s it. The main reason for the error “Could not find or load main class” is due to compiled classes not found in the target directory. Therefore, we need to follow any one of the above approach to build the code to generate classes, so that your Spring Boot App will run successfully.
Hope this is helpful 🙂
You’ll also like:
- Add or install local jar files to the Maven Project
- Build maven project without version
- Create JWT Token and Sign with RSA Private Key
- Replace element in ArrayList at specific index
- Convert Integer List to int array
- ArrayList removeAll() method not removing elements
- Convert floating point number to fixed point in Python
- What is %matplotlib inline and how to use ?
- Java String substring() example program
- Add python3 kernel to jupyter IPython notebook ?
- Reset jupyter notebook theme to default theme
- Jacoco Maven Plugin Junit Code Coverage Example
- Assign value to static variables from application.properties in Spring Boot ?
- Run a Jupyter Notebook .ipynb file from terminal or cmd prompt
- Websocket connection closed automatically – keepalive Ping example
- Check if a file or folder exists without getting exceptions ?
- Python program to find the greatest of three numbers
- Putty Fatal Error No supported authentication methods available
- Find which users belongs to a specific group in linux
- Check if Python Object is a Number ?
- Remove non-numeric characters from string in Python
- Convert negative to positive number in Python
- Extract numbers from a string in python
- Program to Check Given Number is Odd or Even
References:
- maven documentation
- wikipedia
Содержание
- Spring Boot App Program Error: Could not find or load main class
- Spring Boot App Program Error: Could not find or load main class
- Fix 1: mvn clean install
- Fix 2: Update Project
- Can not load class in classpath when package a executable jar #4375
- Comments
- Could not find or load main class #187
- Comments
- Обработка исключений в контроллерах Spring
- Обработка исключений на уровне контроллера — @ExceptionHandler
- Обработка исключений с помощью HandlerExceptionResolver
- Обработка исключений с помощью @ControllerAdvice
- Исключение ResponseStatusException.
Spring Boot App Program Error: Could not find or load main class
This tutorial guides you on how to resolve Spring Boot App Program Error: Could not find or load main class. Occasionally, we might see error “Could not find or load main class” while running Spring Boot App or any Java Program. Let’s see how to resolve the same.
Spring Boot App Program Error: Could not find or load main class
Well, I have created a Spring Boot Application with necessary changes for my App to run. Note, I have created this Spring Boot project using Spring Boot wizard from Eclipse. After, making necessary changes I tried to run the Spring Boot App using the following option:
Right Click Spring Boot Project in Eclipse -> Run As -> Spring Boot App
But it failed with error “Could not find or load main class”.
And this is the case you might come across even for other Java Program or Projects.
Fix 1: mvn clean install
First, try building the Spring Boot App and check if that resolves the above issue.
What I did was. I tried to build the Spring Boot App from the command line again.
And the Build was successful. After building the code successfully, I tried to run the Spring Boot App again. And I don’t see that error any more. Check if this works for you.
Fix 2: Update Project
This is another way which you could try to resolve main class load error. All that you need to do is Update Maven Project using the following option.
Right Click Spring Boot Project -> Maven -> Update Project
And in the Update Maven Project wizard select the Maven Project that you wanted to update with default update options and click “OK”.
After, you do the above step try running your Spring Boot App. Yay! it worked for me. And I don’t see the error any more.
That’s it. The main reason for the error “Could not find or load main class” is due to compiled classes not found in the target directory. Therefore, we need to follow any one of the above approach to build the code to generate classes, so that your Spring Boot App will run successfully.
Источник
Can not load class in classpath when package a executable jar #4375
Hi,
I use Guava ClassPath class to scan and load some class in my project. It works fine when I run application in my IDE, but when I package it in a executable jar, it cannot load class. Spring boot package use a separate catelog ‘lib’ to setup dependency jars, is it not in classpath? How can I load these classes?
The text was updated successfully, but these errors were encountered:
I have had this same problem as you described, to solve it I had to package the executable JAR as ZIP type.
thanks, but it still not work. only change is in manifest, main class change to propertieslauncher
Anybody can give some advice?
Is your project a web module? If yes, you may need to change the code to load resources using Classpath.getResourceAsStream().
Just to tell you on IDE I have got many successful cases, but when I move to create executable jars I am suffering about many issues like yours. It seems the class loader from jar is working different.
no, it is not a web project.
I imagine that Guava isn’t supporting our nested jar format. Are you able to use Spring’s ClassPathScanner instead?
Hi phil,
I do not see a class named ClassPathScanner, where is it?
Sorry, my mistake. I meant PathMatchingResourcePatternResolver
You mean like this?
Y
Take a look at SpringPackageScanClassResolver for an example. This was how we got Liquibase to play nicely with fat jars.
Which finds all classes in a given package.
You might also want to look at ClassPathScanningCandidateComponentProvider .
Thanks, Phil. It works fine, why not export some public interface for this function?
If you don’t find this convenient enough, we could provide a package-name-based method variant in Spring’s core PathMatchingResourcePatternResolver itself. However, if you condense the above code a bit, it’s really just three lines of code that could even be expressed as one long line.
Actually, I need the findAllClasses method in SpringPackageScanClassResolver, it is not just three lines. I feel that you could provide a method with package name arg and return a set of class.
I’ll close this one since there’s not much we can do about Guava. If you’re interested in getting a a convenience method in Spring please raise a JIRA.
FWIW, I’ve also encountered this issue, but had success with the Reflections library.
same happened to me.
All dependencies in one spring boot jar should make thing easier, but actually it makes thing more difficult.
It even make java.lang.ClassLoader.loadClass cannot load dependency class.
I tried many methods and finally succeeded. This is my experience.
@yaohwu As long as you’re using the ClassLoader that’s created by Spring boot, loadClass should be able to load every class and resource that’s packaged in BOOT-INF/classes and within the jars in BOOT-INF/lib . The problem discussed this issue is (at least somewhat) specific to Guava due to faulty assumptions it makes about the structure of the classpath.
@wilkinsona
thanks for your reply.
What I used classloder is generated by ClassLoader.getSystemClassLoader() ,throw classnotfoundexception while the class actually in BOOT-INF/lib.
It looks just like this issue description.
BOOT-INF/lib will not append into classpath like java -cp works. Is that?
Correct. The system class loader cannot see classes in BOOT-INF/classes or from within the jars in BOOT-INF/lib . To be able to load those classes, you should use the ClassLoader created by Spring Boot instead. It will be the thread context class loader when you launch your application. It will also be the class loader that loads your application’s main class.
Correct. The system class loader cannot see classes in BOOT-INF/classes or from within the jars in BOOT-INF/lib . To be able to load those classes, you should use the ClassLoader created by Spring Boot instead. It will be the thread context class loader when you launch your application. It will also be the class loader that loads your application’s main class.
Источник
Could not find or load main class #187
Everything is configured properly. Using jdk1.8 in build path. While trying to run a basic application as Spring Boot App, Error thrown Could Not Find or Load Main Class. .class files not generated in build path
The text was updated successfully, but these errors were encountered:
It works for me. So not sure why it might not be working for you.
Let’s try figure it out.
Can you check if «Automatic Workspace Builds» are enabled?
See this SO question / answer which is about turning it off:
But you can also switch it back on the same way, or just to check if its enabled or not.
If it is already enabled, and still doesn’t work, we’ll need more details to try to reproduce why your project does not seem to be building properly. The easiest is probably if you zip up the entire project contents and attach it here.
Hey kdvolder,
«Build Automatically» is turned on/checked. Also the project is very basic.
I just went to File -> New -> SpringStarterProject -> Name as ‘Demo’, Group and Package as ‘com.demo’, Packaging Jar, Java 1.8, Type Maven, -> Next -> Spring Dependencies -> Check Actuator and Web -> Next -> Finish
After that I just try to Run As -> Spring Boot App. It says in console . Error: Could not find or load main class com.demo.DemoApplication.
As simple as that. It works perfectly fine on another system. What might be the problem?
To be honest, I’m stumped. Something is screwy but I’m really not sure what it could be.
Some things to try, in order from least drastic to more drastic:
- try selecting the project and refresh it (Right click and choose «Refresh»)
- try selecting project and select «Maven >> Update Project» menu
- close STS and reopen it.
- delete the project from workspace (but not the contents on disk) and re-import it into the workspace as ‘Existing Maven project’).
- open a brand new workspace and import project into the new workspace.
- install a fresh copy of STS and open a new workspace, then try again
Also take a look in the error log (Window >> Show View >> Other >> Error log) see any errors in there that may give clues on why project doesn’t seem to be building.
Also, attaching the exact project contents may be useful, maybe its nothing special, or maybe there’s something ‘weird’ that damaged it. I don’t really know, but either way, attaching it really wouldn’t hurt.
I’ve experienced this too. I don’t have a simple project to repro with but the issue has to do with STS/Eclipse not doing an auto-build when the compiled / derived assets are deleted. In my case, the auto-build is turned on but it’s not kicked off after a delete is done via Maven clean from within STS using embedded Maven. I have to do a Maven > Update to force it to build the project. Once that is done, running it as a Boot app works.
Having the same issue. After updating STS to 3.9.1 I’m not able to run any application from Spring Boot Dashboard.
The suggested workarounds above don’t resolve the issue for me.
EDIT:
I was able to resolve the issue, by downgrading Spring Boot to version 1.5.7.RELEASE and re-downloading maven repositories (deleting .m2/repository folder). Since STS 3.9.1, application profile properties also require double quotation marks, if activated through an VM argument (-Dspring.profiles.active=»profile1, profile2″) [tested on Windows 10].
Folks, I’m going to close this ticket. Its turning into a ‘me too’ thread but without really seeming to converge on an actual problem in the IDE we can fix (but more of a collection of various things that can go wrong with workspace settings and maven caches, which aren’t exactly ‘bugs’ we can fix in STS).
It is okay for people to continue to add comments and details and if something that looks ‘fixable’ emerges we can re-open this or create a more specific new ticket around that.
Or. the various comments can just sit here, get indexed by google and may help someone stumbling over it with a similar problem.
I tried commentind the test class under com.java.test packages.
It complied and worked for me .
@JanisSharma Not sure what exactly you are asking about here. This is the issue tracker for the Spring Tools 4 project. Your question doesn’t seem to be related to the IDE at all.
After updating maven , its working fine
after trying all the above possible solutions, nothing worked.Hence happen to delete the .metadata folder in the workspace folder in file explorer and re-importing the project.
To be honest, I’m stumped. Something is screwy but I’m really not sure what it could be.
Some things to try, in order from least drastic to more drastic:
- try selecting the project and refresh it (Right click and choose «Refresh»)
- try selecting project and select «Maven >> Update Project» menu
- close STS and reopen it.
- delete the project from workspace (but not the contents on disk) and re-import it into the workspace as ‘Existing Maven project’).
- open a brand new workspace and import project into the new workspace.
- install a fresh copy of STS and open a new workspace, then try again
That worked for me
To be honest, I’m stumped. Something is screwy but I’m really not sure what it could be.
Some things to try, in order from least drastic to more drastic:
- try selecting the project and refresh it (Right click and choose «Refresh»)
- try selecting project and select «Maven >> Update Project» menu
- close STS and reopen it.
- delete the project from workspace (but not the contents on disk) and re-import it into the workspace as ‘Existing Maven project’).
- open a brand new workspace and import project into the new workspace.
- install a fresh copy of STS and open a new workspace, then try again
Hey Thanks, Its work for me after updating the maven «Maven >> Update Project»
Источник
Обработка исключений в контроллерах Spring

Часто на практике возникает необходимость централизованной обработки исключений в рамках контроллера или даже всего приложения. В данной статье разберём основные возможности, которые предоставляет Spring Framework для решения этой задачи и на простых примерах посмотрим как всё работает. Кому интересна данная тема — добро пожаловать под кат!
Изначально до Spring 3.2 основными способами обработки исключений в приложении были HandlerExceptionResolver и аннотация @ExceptionHandler. Их мы ещё подробно разберём ниже, но они имеют определённые недостатки. Начиная с версии 3.2 появилась аннотация @ControllerAdvice, в которой устранены ограничения из предыдущих решений. А в Spring 5 добавился новый класс ResponseStatusException, который очень удобен для обработки базовых ошибок для REST API.
А теперь обо всём по порядку, поехали!
Обработка исключений на уровне контроллера — @ExceptionHandler
С помощью аннотации @ExceptionHandler можно обрабатывать исключения на уровне отдельного контроллера. Для этого достаточно объявить метод, в котором будет содержаться вся логика обработки нужного исключения, и проаннотировать его.
В качестве примера разберём простой контроллер:
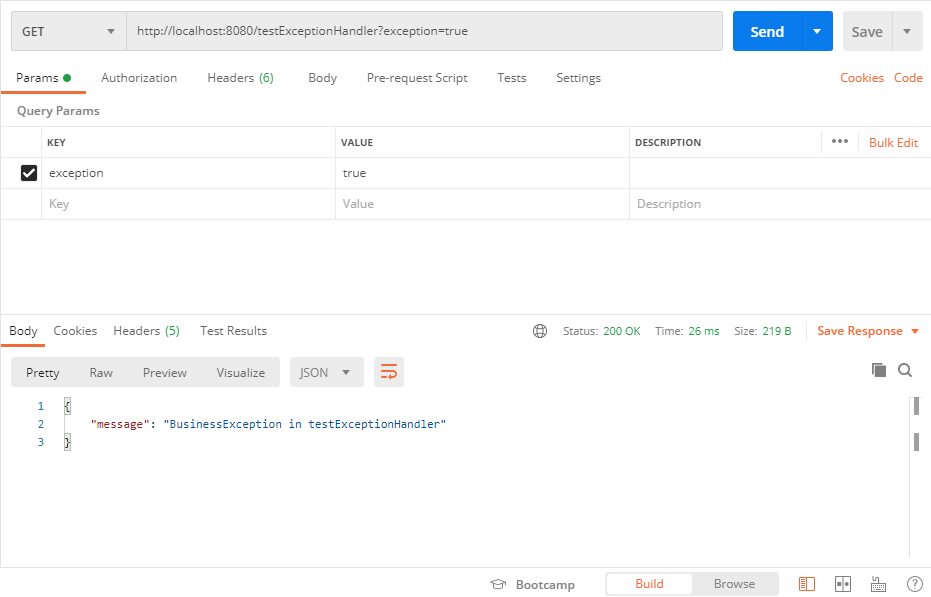
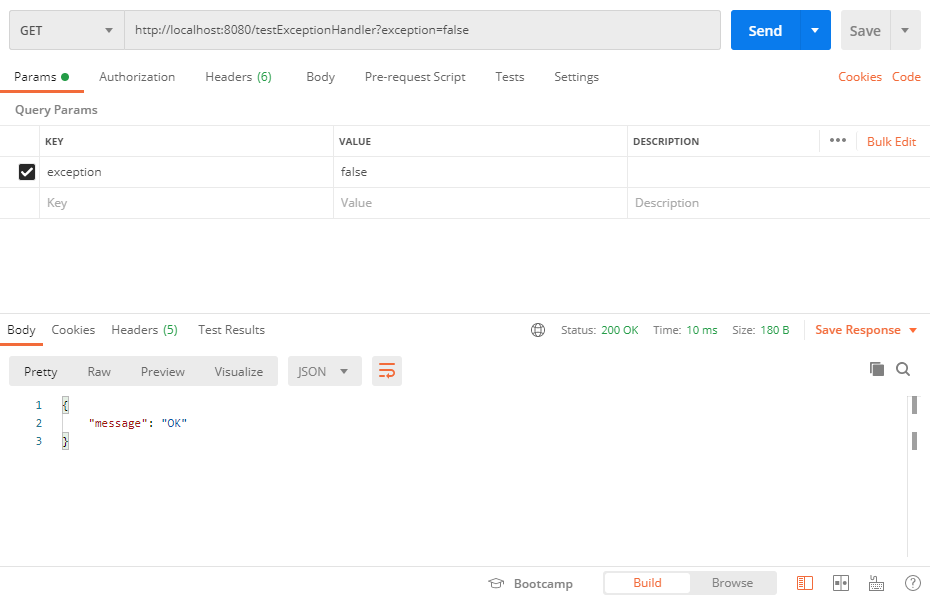
Тут я сделал метод testExceptionHandler, который вернёт либо исключение BusinessException, либо успешный ответ — всё зависит от того что было передано в параметре запроса. Это нужно для того, чтобы можно было имитировать как штатную работу приложения, так и работу с ошибкой.
А вот следующий метод handleException предназначен уже для обработки ошибок. У него есть аннотация @ExceptionHandler(BusinessException.class), которая говорит нам о том что для последующей обработки будут перехвачены все исключения типа BusinessException. В аннотации @ExceptionHandler можно прописать сразу несколько типов исключений, например так: @ExceptionHandler().
Сама обработка исключения в данном случае примитивная и сделана просто для демонстрации работы метода — по сути вернётся код 200 и JSON с описанием ошибки. На практике часто требуется более сложная логика обработки и если нужно вернуть другой код статуса, то можно воспользоваться дополнительно аннотацией @ResponseStatus, например @ResponseStatus(HttpStatus.INTERNAL_SERVER_ERROR).
Пример работы с ошибкой:
Пример штатной работы:
Основной недостаток @ExceptionHandler в том что он определяется для каждого контроллера отдельно, а не глобально для всего приложения. Это ограничение можно обойти если @ExceptionHandler определен в базовом классе, от которого будут наследоваться все контроллеры в приложении, но такой подход не всегда возможен, особенно если перед нами старое приложение с большим количеством легаси.
Обработка исключений с помощью HandlerExceptionResolver
HandlerExceptionResolver является общим интерфейсом для обработчиков исключений в Spring. Все исключений выброшенные в приложении будут обработаны одним из подклассов HandlerExceptionResolver. Можно сделать как свою собственную реализацию данного интерфейса, так и использовать существующие реализации, которые предоставляет нам Spring из коробки. Давайте разберем их для начала:
ExceptionHandlerExceptionResolver — этот резолвер является частью механизма обработки исключений с помощью аннотации @ExceptionHandler, о которой я уже упоминал ранее.
DefaultHandlerExceptionResolver — используется для обработки стандартных исключений Spring и устанавливает соответствующий код ответа, в зависимости от типа исключения:
| Exception | HTTP Status Code |
|---|---|
| BindException | 400 (Bad Request) |
| ConversionNotSupportedException | 500 (Internal Server Error) |
| HttpMediaTypeNotAcceptableException | 406 (Not Acceptable) |
| HttpMediaTypeNotSupportedException | 415 (Unsupported Media Type) |
| HttpMessageNotReadableException | 400 (Bad Request) |
| HttpMessageNotWritableException | 500 (Internal Server Error) |
| HttpRequestMethodNotSupportedException | 405 (Method Not Allowed) |
| MethodArgumentNotValidException | 400 (Bad Request) |
| MissingServletRequestParameterException | 400 (Bad Request) |
| MissingServletRequestPartException | 400 (Bad Request) |
| NoSuchRequestHandlingMethodException | 404 (Not Found) |
| TypeMismatchException | 400 (Bad Request) |
Основной недостаток заключается в том что возвращается только код статуса, а на практике для REST API одного кода часто не достаточно. Желательно вернуть клиенту еще и тело ответа с описанием того что произошло. Эту проблему можно решить с помощью ModelAndView, но не нужно, так как есть способ лучше.
ResponseStatusExceptionResolver — позволяет настроить код ответа для любого исключения с помощью аннотации @ResponseStatus.
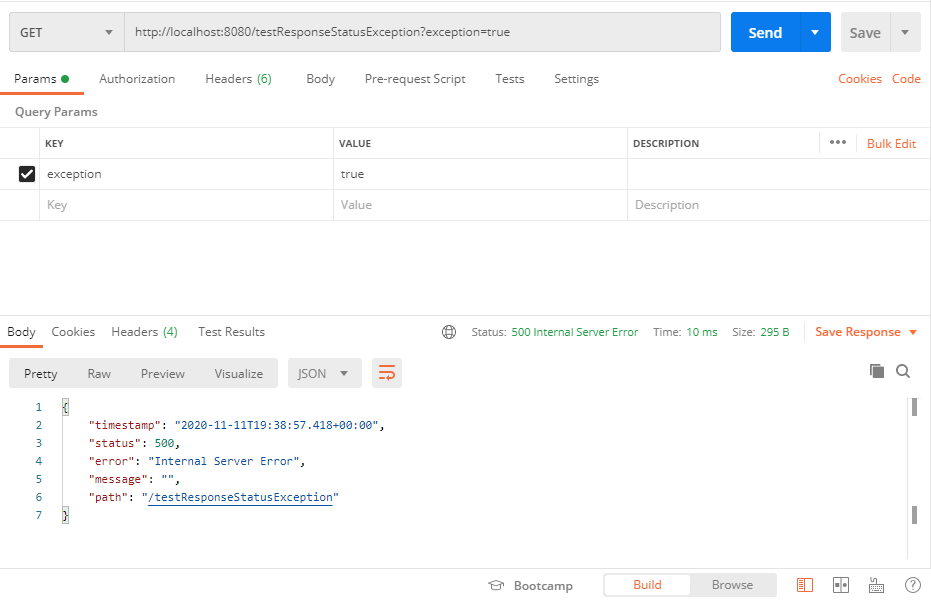
В качестве примера я создал новый класс исключения ServiceException:
В ServiceException я добавил аннотацию @ResponseStatus и в value указал что данное исключение будет соответствовать статусу INTERNAL_SERVER_ERROR, то есть будет возвращаться статус-код 500.
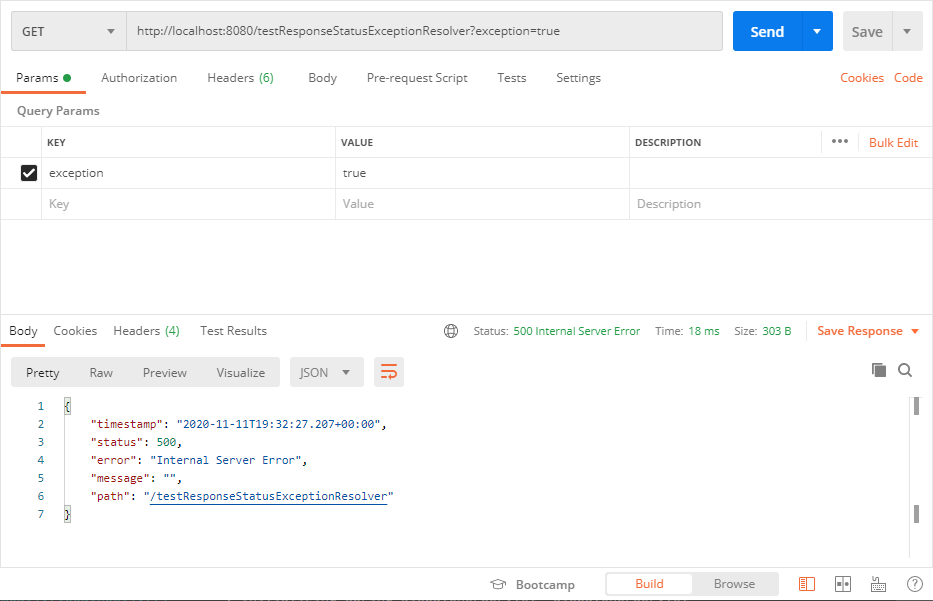
Для тестирования данного нового исключения я создал простой контроллер:
Если отправить GET-запрос и передать параметр exception=true, то приложение в ответ вернёт 500-ю ошибку:
Из недостатков такого подхода — как и в предыдущем случае отсутствует тело ответа. Но если нужно вернуть только код статуса, то @ResponseStatus довольно удобная штука.
Кастомный HandlerExceptionResolver позволит решить проблему из предыдущих примеров, наконец-то можно вернуть клиенту красивый JSON или XML с необходимой информацией. Но не спешите радоваться, давайте для начала посмотрим на реализацию.
В качестве примера я сделал кастомный резолвер:
Ну так себе, прямо скажем. Код конечно работает, но приходится выполнять всю работу руками: сами проверяем тип исключения, и сами формируем объект древнего класса ModelAndView. На выходе конечно получим красивый JSON, но в коде красоты явно не хватает.
Такой резолвер может глобально перехватывать и обрабатывать любые типы исключений и возвращать как статус-код, так и тело ответа. Формально он даёт нам много возможностей и не имеет недостатков из предыдущих примеров. Но есть способ сделать ещё лучше, к которому мы перейдем чуть позже. А сейчас, чтобы убедиться что всё работает — напишем простой контроллер:
А вот и пример вызова:
Видим что исключение прекрасно обработалось и в ответ получили код 400 и JSON с сообщением об ошибке.
Обработка исключений с помощью @ControllerAdvice
Наконец переходим к самому интересному варианту обработки исключений — эдвайсы. Начиная со Spring 3.2 можно глобально и централизованно обрабатывать исключения с помощью классов с аннотацией @ControllerAdvice.
Разберём простой пример эдвайса для нашего приложения:
Как вы уже догадались, любой класс с аннотацией @ControllerAdvice является глобальным обработчиком исключений, который очень гибко настраивается.
В нашем случае мы создали класс DefaultAdvice с одним единственным методом handleException. Метод handleException имеет аннотацию @ExceptionHandler, в которой, как вы уже знаете, можно определить список обрабатываемых исключений. В нашем случае будем перехватывать все исключения BusinessException.
Можно одним методом обрабатывать и несколько исключений сразу: @ExceptionHandler(). Так же можно в рамках эдвайса сделать сразу несколько методов с аннотациями @ExceptionHandler для обработки разных исключений.
Обратите внимание, что метод handleException возвращает ResponseEntity с нашим собственным типом Response:
Таким образом у нас есть возможность вернуть клиенту как код статуса, так и JSON заданной структуры. В нашем простом примере я записываю в поле message описание ошибки и возвращаю HttpStatus.OK, что соответствует коду 200.
Для проверки работы эдвайса я сделал простой контроллер:
В результате, как и ожидалось, получаем красивый JSON и код 200:

А что если мы хотим обрабатывать исключения только от определенных контроллеров?
Такая возможность тоже есть! Смотрим следующий пример:
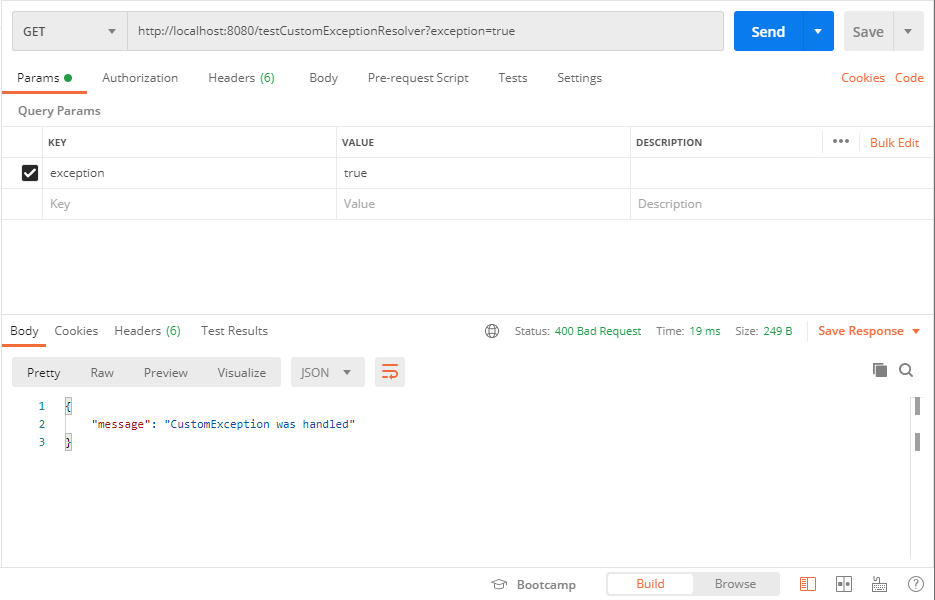
Обратите внимание на аннотацию @ControllerAdvice(annotations = CustomExceptionHandler.class). Такая запись означает что CustomAdvice будет обрабатывать исключения только от тех контроллеров, которые дополнительно имеют аннотацию @CustomExceptionHandler.
Аннотацию @CustomExceptionHandler я специально сделал для данного примера:
А вот и исходный код контроллера:
В контроллере Example5Controller присутствует аннотация @CustomExceptionHandler, а так же на то что выбрасывается то же исключение что и в Example4Controller из предыдущего примера. Однако в данном случае исключение BusinessException обработает именно CustomAdvice, а не DefaultAdvice, в чём мы легко можем убедиться.
Для наглядности я немного изменил сообщение об ошибке в CustomAdvice — начал добавлять к нему дату:

На этом возможности эдвайсов не заканчиваются. Если мы посмотрим исходный код аннотации @ControllerAdvice, то увидим что эдвайс можно повесить на отдельные типы или даже пакеты. Не обязательно создавать новые аннотации или вешать его на уже существующие.
Исключение ResponseStatusException.
Сейчас речь пойдёт о формировании ответа путём выброса исключения ResponseStatusException:
Выбрасывая ResponseStatusException можно также возвращать пользователю определённый код статуса, в зависимости от того, что произошло в логике приложения. При этом не нужно создавать кастомное исключение и прописывать аннотацию @ResponseStatus — просто выбрасываем исключение и передаём нужный статус-код. Конечно тут возвращаемся к проблеме отсутствия тела сообщения, но в простых случаях такой подход может быть удобен.
Резюме: мы познакомились с разными способами обработки исключений, каждый из которых имеет свои особенности. В рамках большого приложения можно встретить сразу несколько подходов, но при этом нужно быть очень осторожным и стараться не переусложнять логику обработки ошибок. Иначе получится что какое-нибудь исключение обработается не в том обработчике и на выходе ответ будет отличаться от ожидаемого. Например если в приложении есть несколько эдвайсов, то при создании нового нужно убедиться, что он не сломает существующий порядок обработки исключений из старых контроллеров.
Так что будьте внимательны и всё будет работать замечательно!
Источник
Problem
When we use docker with spring boot projects, sometimes, we get this error:
➜  bin git:(main) ✗ ./docker-run.sh myharbor.com/bswen/spring
Error: Could not find or load main class com.bswen.app7.Main
The core exception is:
Error: Could not find or load main class com.bswen.app7.Main
Environment
- java 1.8
- Spring Boot 2.3
- Intellij IDEA
- Docker 19
Debug
The Dockerfile:
FROM openjdk:8-jdk-alpine
MAINTAINER [email protected]
ENV APPROOT="/opt/app7"
ARG DEPENDENCY=build/dependency
COPY ${DEPENDENCY}/BOOT-INF/lib ${APPROOT}/lib
COPY ${DEPENDENCY}/META-INF ${APPROOT}/META-INF
COPY ${DEPENDENCY}/BOOT-INF/classes ${APPROOT}

ENTRYPOINT ["java","-Djava.security.egd=file:/dev/./urandom","-cp","/opt/app8:/opt/app7/lib/*","-Droot.dir=/opt/app7","com.bswen.app7.Main"]
EXPOSE 8082
The Main class of this spring boot application:
package com.bswen.app7;

import org.springframework.boot.SpringApplication;
import org.springframework.boot.autoconfigure.SpringBootApplication;
import org.springframework.cloud.client.discovery.EnableDiscoveryClient;

@SpringBootApplication
@EnableDiscoveryClient
public class Main {
    public static void main(String[] args) {
        SpringApplication.run(Main.class,args);
    }
}
If we run the app with gradle directly like this:
It works, and if we run the spring boot docker image directly without kubernetes like this:
We get the error again:
Error: Could not find or load main class com.bswen.app7.Main
Reason
According to the above debug process, we can found that the real problem should be the Dockerfile, it caused the exception in docker environment.
Solution
We found that there is a wrong character in the Dockerfile, which cause the spring boot app starts with a wrong classpath, that’s the key problem, we changed the Dockerfile like this:
FROM openjdk:8-jdk-alpine
MAINTAINER [email protected]
ENV APPROOT="/opt/app7"
ARG DEPENDENCY=build/dependency
COPY ${DEPENDENCY}/BOOT-INF/lib ${APPROOT}/lib
COPY ${DEPENDENCY}/META-INF ${APPROOT}/META-INF
COPY ${DEPENDENCY}/BOOT-INF/classes ${APPROOT}

ENTRYPOINT ["java","-Djava.security.egd=file:/dev/./urandom","-cp","/opt/app7:/opt/app7/lib/*","-Droot.dir=/opt/app7","com.bswen.app7.Main"]
EXPOSE 8082
Pay attention to the last command in the Dockerfile of this spring boot app:
ENTRYPOINT ["java","-Djava.security.egd=file:/dev/./urandom","-cp","/opt/app7:/opt/app7/lib/*","-Droot.dir=/opt/app7","com.bswen.app7.Main"]
EXPOSE 8082
The wrong configuration is “java … -cp /opt/app8…”, the right configuration is “java … -cp /opt/app7..”, this app is installed in “/opt/app7”, not “/opt/app8”, that’s the key point.
It is one of the most common issue newbie developers face while starting with java programming . What does this error mean could not find or load main class in java code.
Let’s take classic HelloWorld example . We have a HelloWorld.java class and I am trying to run the code from command line . This issue is seen mostly when java is not able to find the class it is trying to execute in your CLASSPATH .
In order to fix this error you need to have clear understanding of How Java class loading Works and working of CLASSPATH. For our understanding we won’t go deep into CLASSPATH and class loading .
So for Understanding CLASSPATH is basically a part of our environment variable , While running the Java file if the corresponding .class file is not found on CLASSPATH , java will throw this error : could not find or load class Main . Where Main is the name of the class.
So new Java developers uses lot of IDE like eclipse and intellij to run and debug Java code . It is easier to run and debug java code in IDE than command line . In eclipse or IntelliJ if you get this error you will not be able to understand the reason quickly if you are new java developer .
Have a Look at few Best Spring Courses for Java Developers in 2021
As IDE itself manages all the CLASSPATH related stuff internally , but while you start running the same code from your terminal in linux or windows command line you will actually face this issue due to CLASSPATH .
So now java CLASSLOADERS scans through the classpath to load your classess. Now lets come back to the problem where we get Could not find or load main class.
How do We fix the Error: Could not find or load main class HelloWorld
I bet you this troubleshooting that we are doing here to resolve the issue related to loading main class is going to help you in your future , till you are Java developer . So we will now Write a Simple HelloWorld program and replicate the issue , then we will try to fix it .
package frugalis;
public class HelloFrugalis
{
public static void main(String args[])
{
System.out.println("Welcome , Error Resolved!!");
}
}
Now move the above java file in a folder named as myProject. We will now compile and try to run the code from command line .
mkdir myProject
Bingo !! We have got the error “Error: Could not find or load main class”.
Now , Why this is happening . We have knowingly defined the package as frugalis in our java code and we are trying to execute it from myProject folder . Sounds some issue rite ? Lets try and fix it .
We are going to create a folder named as frugalis inside MyProject like below .
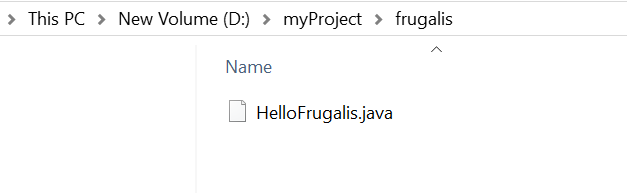
Now once you have added the file under folder frugalis , it perhaps aligns with the package name and this should run successfully. Let’s try and run this .
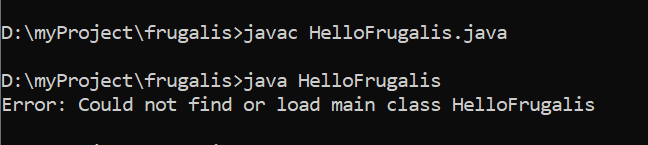
So again we are getting same Error: Could not find or load main class . So the problem here is my class is inside non-default package ex:- frugalis in this case. We do not have any CLASSPATH variable due to which it is looking for path as frugalis/HelloFrugalis from current directory .
But we are already inside the directory where .classfile is present , hence we need to move to parent directory and execute the java class. My parent directory is myProject .

Awesome !! It Works fine now !!!
So the reason it works fine now is in java World one we place a . it looks in current directory and resolves it like ./frugalis/HelloFrugalis . In this is case it is able to locate our .class and hence the code run successfully.
If you are a beginner and just started your Programming on Java , or someone who is not able to understand java .Follow the book Head First Java , One of the Best book.
Now lets tweak the problem a bit More Complex.
What if We want to Run the Above Code from a Separate Directory let’s say in the above example E: drive instead of D: drive . My Code remains in the same location , but I want to execute the code from a different location .
Well , in order to achieve this you need to set CLASSPATH by either -classpath or -cp option in CommandLine . It actually overrides the CLASSPATH environment variable as well .
Now lets run the code from a different directory
E:>java frugalis.HelloFrugalis
Error: Could not find or load main class frugalis.HelloFrugalis
Again we are getting the same error , because java is looking in the working directory which is E: in my case , there are no .class file with resolved path as E:frugalisHelloFrugalis . Now with CLASSPATH option , we will ask java to look at the class file from other directory .
Lets see how we can use CLASSPATH to solve the above issue .
java -cp D:myProject; frugalis.HelloFrugalis
Welcome , Error Resolved!!
It runs successfully now , we have set classpath using -cp option for our java code and my classpath is pointing to D:/myProject where my classfile is present .
Now , in case you have created the Project using any IDE like eclipse or IntelliJ , you will have a target folder where your packages and class files will be present . So target will act as a parent directory .
There are numerous reason due to which Error: Could not find or load main class HelloWorld error is shown . If you are working with lot of external Jars you can also get the error Could not find or load main class in jar as well. This is probably occurring as your jar is not placed in classpath .
But if you understand the basics of CLASSPATH and how it resolves the .class files in Java . You will be able to debug and dig further .
In 99% scenarios where you get this kind of error it is definitely a problem with your CLASSPATH environment variable in popular IDE or you are providing wrong location of your .jar or.class files using -classpath or -cp options .
Fixing Error: Could not find or load main class in Spring boot
In this case , you will mostly get if you are running via any IDE . If you have any confusion make sure you try and run your spring boot project simply using
mvn spring-boot:runOnce the above command gets executed successfully . Now you navigate back to eclipse and try refreshing the project once .
This will load all the compiled classess in classpath and your application should work fine now .
Conclusion :-
As you are aware it can happen due to number of reasons , lets summarize in short and what we could do .
- If you are running your program from a directory where you have your code as well then make sure you are not executing your code from the location where .class file is present instead run it from parent directory .
- Set CLASSPATH environment variable and then try running your code from different locations . You need to set CLASSPATH for java lib as well if you are using java related library from console .
- If you are running a Java based application from Eclipse or Intellij and you are getting the Error:Could not find or load main class . Make sure your CLASSPATH Environment variable is correctly set or your JDK home is added properly in classpath . Most of the time it has been noticed that JRE home is set incorrectly , i would suggest setting JDK location.
- If you are running a Spring Boot based application and you are getting could not find or load main class in spring boot . Make sure your maven is building the classes properly and Java Home is set properly.
- Exception in thread “main” java.lang.NoClassDefFoundError: HelloWorld it also occurs more or less due to same reason . But it happens if you are using latest JDK over 1.6 .
I have tried to provide a quite a lot of suggestions and shown with one example to solve it , if still you guys are facing it let us know in the comments below …..
Happy Coding …………………
Also Read
- How to Change M2_REPO repository location in Eclipse
Last Updated on 10 months by
Plugin name and version
azure-webapp-maven-plugin:1.6.0
Plugin configuration in your pom.xml
<plugin>
  <groupId>com.microsoft.azure</groupId>
  <artifactId>azure-webapp-maven-plugin</artifactId>
  <version>1.6.0</version>
  <configuration>
    <schemaVersion>v2</schemaVersion>
    <appName>***</appName>
    <appServicePlanName>***</appServicePlanName>
    <pricingTier>***</pricingTier>
    <region>westeurope</region>
    <resourceGroup>***</resourceGroup>
    <runtime>
      <os>linux</os>
      <javaVersion>jre8</javaVersion>
      <webContainer></webContainer>
    </runtime>
    <deployment>
      <resources>
        <resource>
          <directory>${project.basedir}/build/libs</directory>
          <includes>
             <include>*.jar</include>
          </includes>
        </resource>
      </resources>
    </deployment>
  </configuration>
</plugin>
Expected behavior
App being deployed and started up.
Actual behavior
App seems to be deployed successfully:
$ ./mvnw clean azure-webapp:deploy
[INFO] Scanning for projects...
[INFO]
[INFO] ------------------------< *** >-------------------------
[INFO] Building ***
[INFO] --------------------------------[ jar ]---------------------------------
[INFO]
[INFO] --- maven-clean-plugin:2.5:clean (default-clean) @ *** ---
[INFO] Deleting ***
[INFO]
[INFO] --- azure-webapp-maven-plugin:1.6.0:deploy (default-cli) @ *** ---
[INFO] Authenticate with Azure CLI 2.0
[INFO] Updating target Web App...
[INFO] Successfully updated Web App.
[INFO] Using 'UTF-8' encoding to copy filtered resources.
[INFO] Copying 1 resource to ***
[INFO] Trying to deploy artifact to ***...
[INFO] Renaming ***.jar to app.jar
[INFO] Deploying the zip package ***.zip...
[INFO] Successfully deployed the artifact to https://***.azurewebsites.net
[INFO] ------------------------------------------------------------------------
[INFO] BUILD SUCCESS
[INFO] ------------------------------------------------------------------------
[INFO] Total time:  02:06 min
[INFO] Finished at: 2019-04-30T16:43:04+02:00
[INFO] ------------------------------------------------------------------------
but it seems to (try) startup something else.
2019-04-30T14:43:13.794248236Z   _____
2019-04-30T14:43:13.794279336Z   /  _   __________ _________   ____
2019-04-30T14:43:13.794284136Z  /  /_  ___   /  |  _  __ _/ __
2019-04-30T14:43:13.794287736Z /    |    /    /|  |  /|  | /  ___/
2019-04-30T14:43:13.794300536Z ____|__  /_____ ____/ |__|    ___  >
2019-04-30T14:43:13.794305136Z         /      /                  /
2019-04-30T14:43:13.794308636Z A P P   S E R V I C E   O N   L I N U X
2019-04-30T14:43:13.794312036Z Documentation: http://aka.ms/webapp-linux
2019-04-30T14:43:13.794315236Z
2019-04-30T14:43:13.794318436Z **NOTE**: No files or system changes outside of /home will persist beyond your application's current session. /home is your application's persistent storage and is shared across all the server instances.
2019-04-30T14:43:13.794323336Z
2019-04-30T14:43:13.794326536Z
2019-04-30T14:43:13.795174143Z Setup openrc ...
2019-04-30T14:43:14.201336476Z  * Caching service dependencies ... [ ok ]
2019-04-30T14:43:14.201351076Z Updating /etc/ssh/sshd_config to use PORT 2222
2019-04-30T14:43:14.201355476Z Starting ssh service...
2019-04-30T14:43:14.992695070Z ssh-keygen: generating new host keys: ***
2019-04-30T14:43:16.237141581Z  * Starting sshd ... [ ok ]
2019-04-30T14:43:16.257004944Z Using SPRINGBOOT_OPTS= --server.port=80 --logging.file=/home/LogFiles/Application/spring.RD0003FF132BFE.log --server.max-http-header-size=16384
2019-04-30T14:43:16.304079330Z STARTUP_FILE=
2019-04-30T14:43:16.304093030Z STARTUP_COMMAND=
2019-04-30T14:43:16.304097430Z No STARTUP_FILE available.
2019-04-30T14:43:16.304101230Z No STARTUP_COMMAND defined.
2019-04-30T14:43:16.304104830Z Running command: java -cp /home/site/wwwroot/app.jar:/tmp/appservice/azure.appservice.jar -Dlogback.configurationFile=logback-prod.xml -Dorg.jooq.no-logo=true -noverify -Djava.util.logging.config.file=/tmp/appservice/logging.properties org.springframework.boot.loader.PropertiesLauncher  --server.port=80 --logging.file=/home/LogFiles/Application/spring.RD0003FF132BFE.log --server.max-http-header-size=16384
2019-04-30T14:43:16.304118930Z Picked up JAVA_TOOL_OPTIONS:  -Djava.net.preferIPv4Stack=true
2019-04-30T14:43:16.548788938Z Error: Could not find or load main class org.springframework.boot.loader.PropertiesLauncher
It seems to break on org.springframework.boot.loader.PropertiesLauncher but this is no Spring Boot application.
I’m also concerned about Running command: java -cp /home/site/wwwroot/app.jar:/tmp/appservice/azure.appservice.jar… what is the azure.appservice.jar here?
I had deployment issues last month (#612 and #616) but they were resolved after these issues were fixed.
I’m wondering if something has changed and if that is the reason why it is failing now.
I can’t see anything else in the logs unfortunately.
Last time just the deploy failed, now startup is failing and my app is broken (not accessible anymore)….
1. Overview
Occasionally when we run a Java program, we might see “Could not find or load main class.” It’s easy to guess the reason: The JVM failed to find the main class and gave this error. But why couldn’t it?
In this tutorial, we’ll discuss the probable reasons for failure to find the main class. We’ll also see how to fix them.
2. Sample Program
We’ll start with a HelloWorld program:
public class HelloWorld {
    public static void main(String[] args) {
        System.out.println("Hello world..!!!");
    }
}
Now let’s compile it:
$ javac HelloWorld.javaHere, the compiler will generate a .class file for our program. This .class file will be generated in the same directory. The .class file will have the same name as the class name given in the Java program. This .class file is executable.
In the following sections, we’ll run this .class file and try to understand the probable reasons for error “Could not find or load main class.”
3. Wrong Class Name
To run a .class file generated by Java compiler, we can use this command:
java <.class filename>Now let’s run our program:
$ java helloworld
Error: Could not find or load main class helloworld
And it failed with the error “Could not find or load main class helloworld.”
As discussed earlier, the compiler will generate the .class file with the exact same name given to the Java class in the program. So in our case, the main class will have the name HelloWorld, not helloworld.
Let’s give it one more try with correct casing:
$ java HelloWorld
Hello world..!!!
This time it ran successfully.
3.1. File Extension
To compile a Java program, we must provide the file name with its extension (.java):
$ javac HelloWorld.javaBut to run a .class file, we need to provide the class name, not the file name. So there is no need to provide the .class extension:
$ java HelloWorld.class
Error: Could not find or load main class HelloWorld.class
Again, let’s run our program using the correct class name:
$ java HelloWorld
Hello world..!!!
4. Java Package Names
In Java, we keep similar classes together in what we call a package.
Let’s move HelloWorld class into the com.baeldung package:
package com.baeldung;

public class HelloWorld {
    public static void main(String[] args) {
        System.out.println("Hello world..!!!");
    }
}
Now let’s compile and run the updated HelloWorld program like before:
$ java HelloWorld
Error: Could not find or load main class HelloWorld
But again, we get the error “Could not find or load main class HelloWorld.”
Let’s try to understand what we missed here.
To run a Java class that is in a package, we must provide its fully qualified name. So in our case, HelloWorld‘s fully qualified name is com.baeldung.HelloWorld.
Now, when we created com.baeldung package, we actually created this folder structure:
com/baeldung/HelloWorld.javaFirst, let’s try to run our program from the com/baeldung directory:
$ java com.baeldung.HelloWorld
Error: Could not find or load main class com.baeldung.HelloWorld
Still, we are not able to run our program.
Here, when we specified the fully qualified class name com.baeldung.HelloWorld, Java tried to find the HelloWorld.class file in com/baeldung, under the directory from where we were running the program.
As we were already inside com/baeldung, Java failed to find and run the HelloWorld program.
Now let’s move back to the parent folder and run it:
$ java com.baeldung.HelloWorld
Hello world..!!!
And we are again able to say “Hello” to the world.
5. Invalid Classpath
Before going ahead, let’s first understand what the classpath is. It’s the set of classes available to our currently running JVM.
We use the classpath variable to tell the JVM where to find the .class files on the file system.
While running a program, we can provide the classpath using -classpath option:
java -classpath /my_programs/compiled_classes HelloWorldHere, Java will look for the HelloWorld.class file in /my_programs/compiled_classes folder, a folder whose name we just made up. By default, the classpath variable is set to “.”, meaning the current directory.
In the above section, we changed our directory to run our program. But what if we want to run it from some other folder? That’s when the classpath variable helps us.
To run our program from the directory com/baeldung, we can simply state that our classpath is two directories up — one for each package part:
$ java -claspath ../../ com.baeldung.HelloWorld
Hello world..!!!
Here, “..” represents the parent directory. In our case “../../” represents the top of our package hierarchy.
6. Conclusion
In this article, we learned the probable reasons for the error “Could not find or load main class.”
Then, of course, we also learned how to solve this error.
Я использовал версию spring 1.5.3.RELEASE и задал зависимости pom, такие как
    <parent>
        <groupId>org.springframework.boot</groupId>
        <artifactId>spring-boot-starter-parent</artifactId>
        <version>1.5.3.RELEASE</version>
    </parent>

   <dependencies>
        <dependency>
            <groupId>org.springframework.boot</groupId>
            <artifactId>spring-boot-starter-web</artifactId>
        </dependency>
   </dependencies>
И мой основной класс был
@SpringBootApplication
public class SpringAppStarter {


    public static void main(String[] args) {

        SpringApplication.run(SpringAppStarter.class, args);
    }

}
Но при выполнении основного класса я получал:
Не удалось найти или загрузить основной класс… с моим именем класса.
Я мог видеть, что класс доступен в пути к классу, и я использовал STS IDE.
У меня не было причин для проблемы, тогда я попробовал ручную сборку через maven с помощью
mvn clean install
Еще проблема была тогда, когда я понял, что мой проект имеет две библиотеки
- Справочная библиотека
- Библиотека Maven
Что я сделал:
Я создал другую папку mavenRepo и снова создаю ее и обновляю свой проект. После этого он работал, и я увидел, что библиотека Maven была удалена из пути к классу проекта.
Проблемы были во время выполнения, когда он получал несколько версий, поэтому он не смог найти подходящий класс для выполнения моего приложения.
Другое решение, перечисленное на этой странице, также решает проблему, но если вы ошибаетесь в
- Аннотирующий класс
- запись pom
- версия jar и т.д.
Надеюсь, что это может решить проблему, если кто-то получит эту проблему