
Сегодня обновившись до Android 10 и попытавшись привычным способом установить ViPER4Android, после перезагрузки устройства я испытал крайнее удивление: телефон словил бутлуп 😳 Ничего страшного, конечно, не случилось, бекапы всего нужного у меня были под рукой (ставил на чистую систему), но неприятная взволнованность появилась: а вдруг V4A на десятом Андроиде не работает? Полез гуглить и нашел как причину, так и решение проблемы как заставить работать ViPER4Android FX на Android 10 (Q), чем спешу поделиться со всеми интересующимися. Проверено на крайнем на момент написания материала crDroid 6.3.
Причина проблемы
Всё оказвлось просто. Во-первых, как известно, ViPER4Android самостоятельно ставит свой драйвер в ядро, тем самым избавляя пользователя от лишнего гемора. Только вот умеет он это делать с Android 9 и ниже, но не с «десяткой». При попытке это сделать с Android Q, V4A просто-напросто ломает процесс загрузки системы, и мы тем самым получаем бутлуп, чему и «радуемся» пока ищем как систему восстановить. Поэтому обычным способом ViPER4Android на Android 10 устанавливать нельзя. Во-вторых, даже установив V4A корректно, он всё равно отказался работать на моем устройстве. После долгих поисков я нашел этому причину: встроенная по умолчанию в прошивку crDroid улучшалка звука AudioFX. Мало того,что она присутствует во всех прошивках, основанных на Lineage OS, к коим относится и crDroid, так она еще и оказывается включена по умолчанию 🤬 Думаю, понятно что с этой софтиной нужно было сделать чтобы V4A заработал. Ну и в-третьих, корректной работе «Вайпера» может помешать Selinux, работающий в режиме «enforce». В этом случае его нужно переключить в режим «permissive», что вроде должно произойти автоматически, если следовать инструкции ниже. Ну что, хватит теории, пора заняться практикой!
Инструкцию по корректной установке ViPER4Android на Android Q можно найти в этом посте на форуме 4pda. Делаем всё, как там описано и получаем установленный V4A. Чтобы качать файлы с 4pda нужна учётная запись! Если её нет — регистрируемся/входим. Далее, если прошивка основана на AOSP, то по идее Вайпер должен заработать сразу (а может и нет, нужно проверять в каждом конкретном случае).
ОБН 8.03.2020. По этой ссылке на 4pda.ru можно скачать модуль для Magisk c ViPER4Android FX 2.7.1.0 и 2.5.0.5, рабочий на Android 10. Качается и ставится вручную через Magisk Manager. Напоминаю, для скачивания файлов c 4pda.ru нужна тамошняя учётная запись, иначе получите 404 not found. Так же рекомендую проверить статус Selinux, который должен быть «permissive» и отключен ли системный эквалайзер (об этом ниже).
Если не заработал, и прошивка основана на Lineage OS — делаем следующие действия:
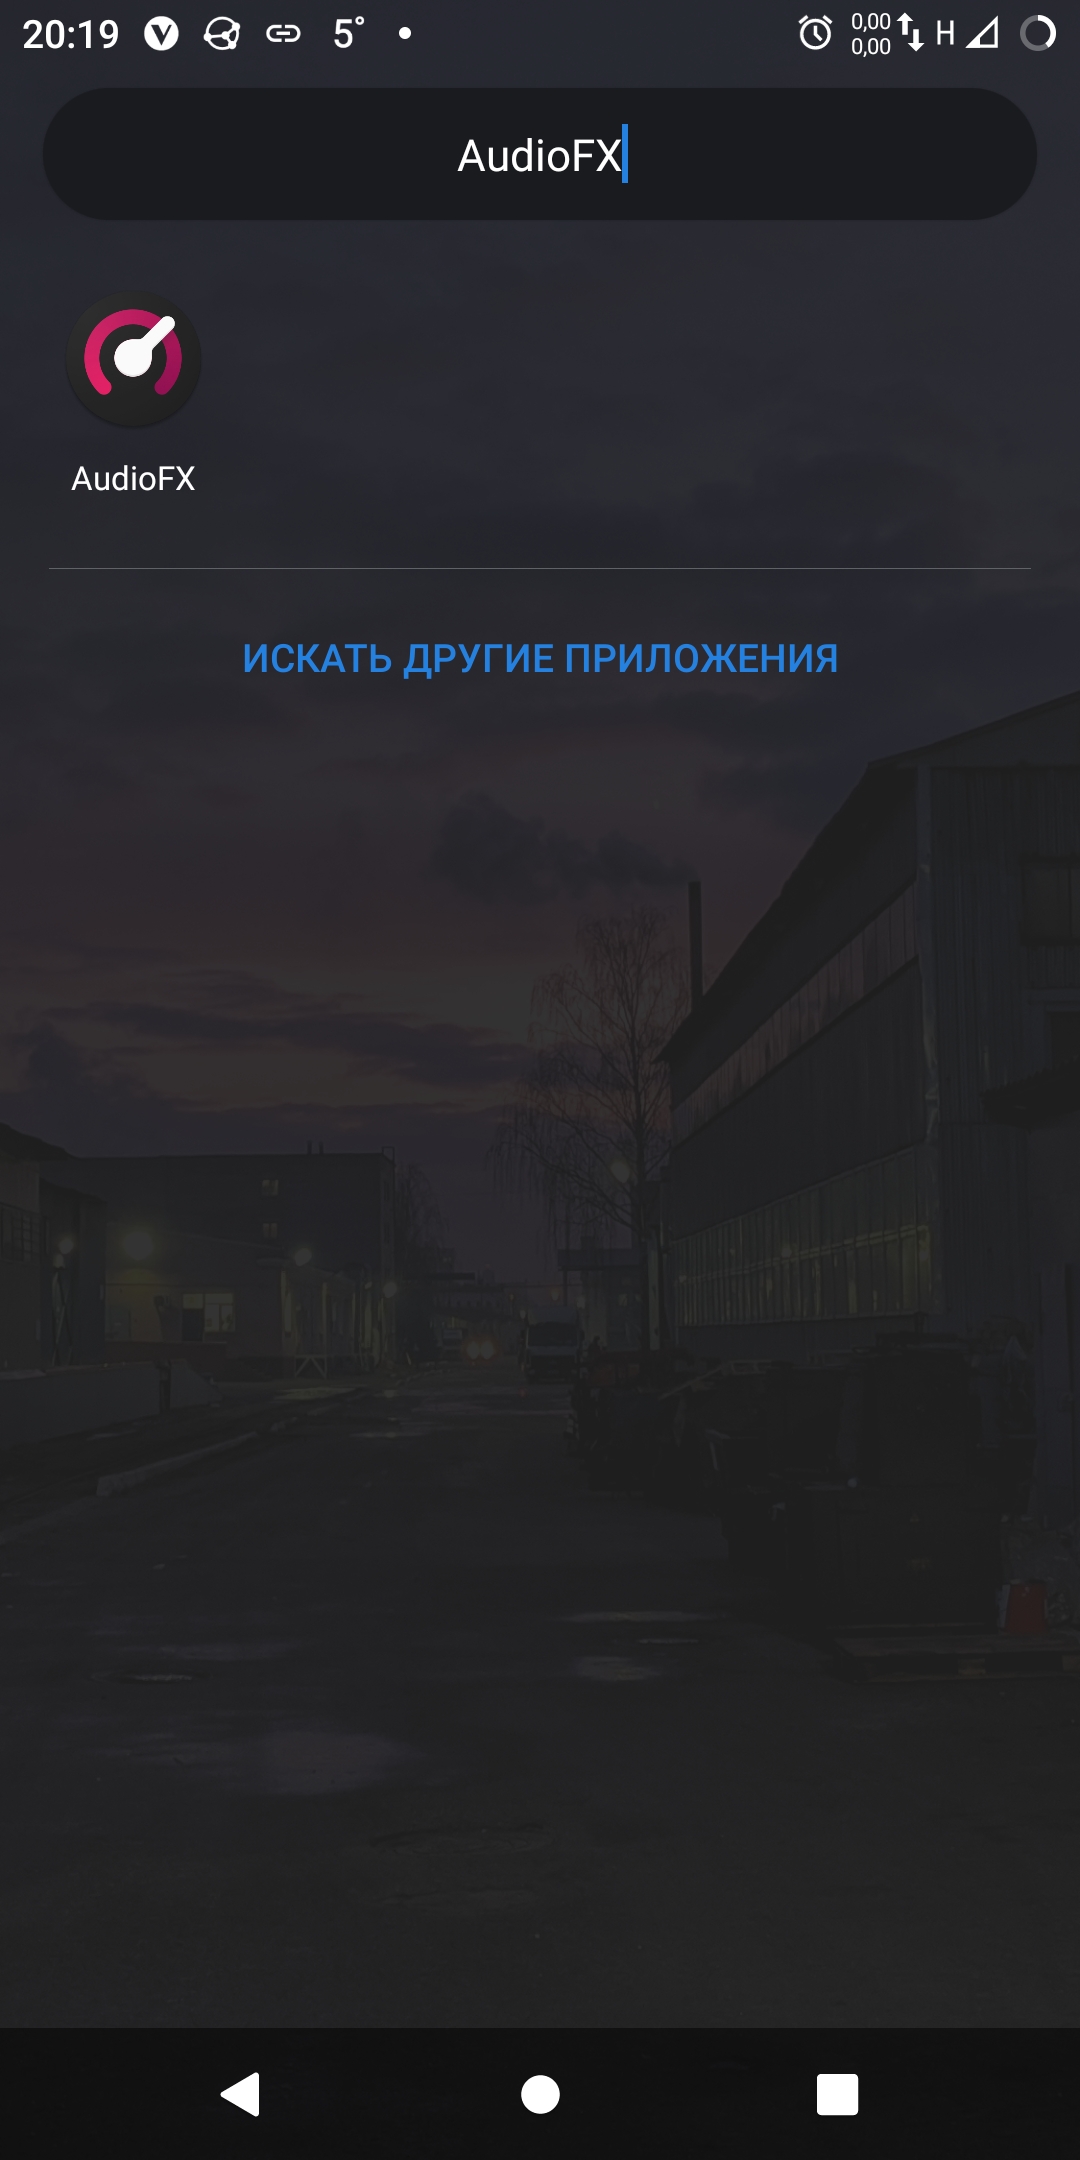
- Находим приложение с названием «AudioFX»;
- Запускаем;
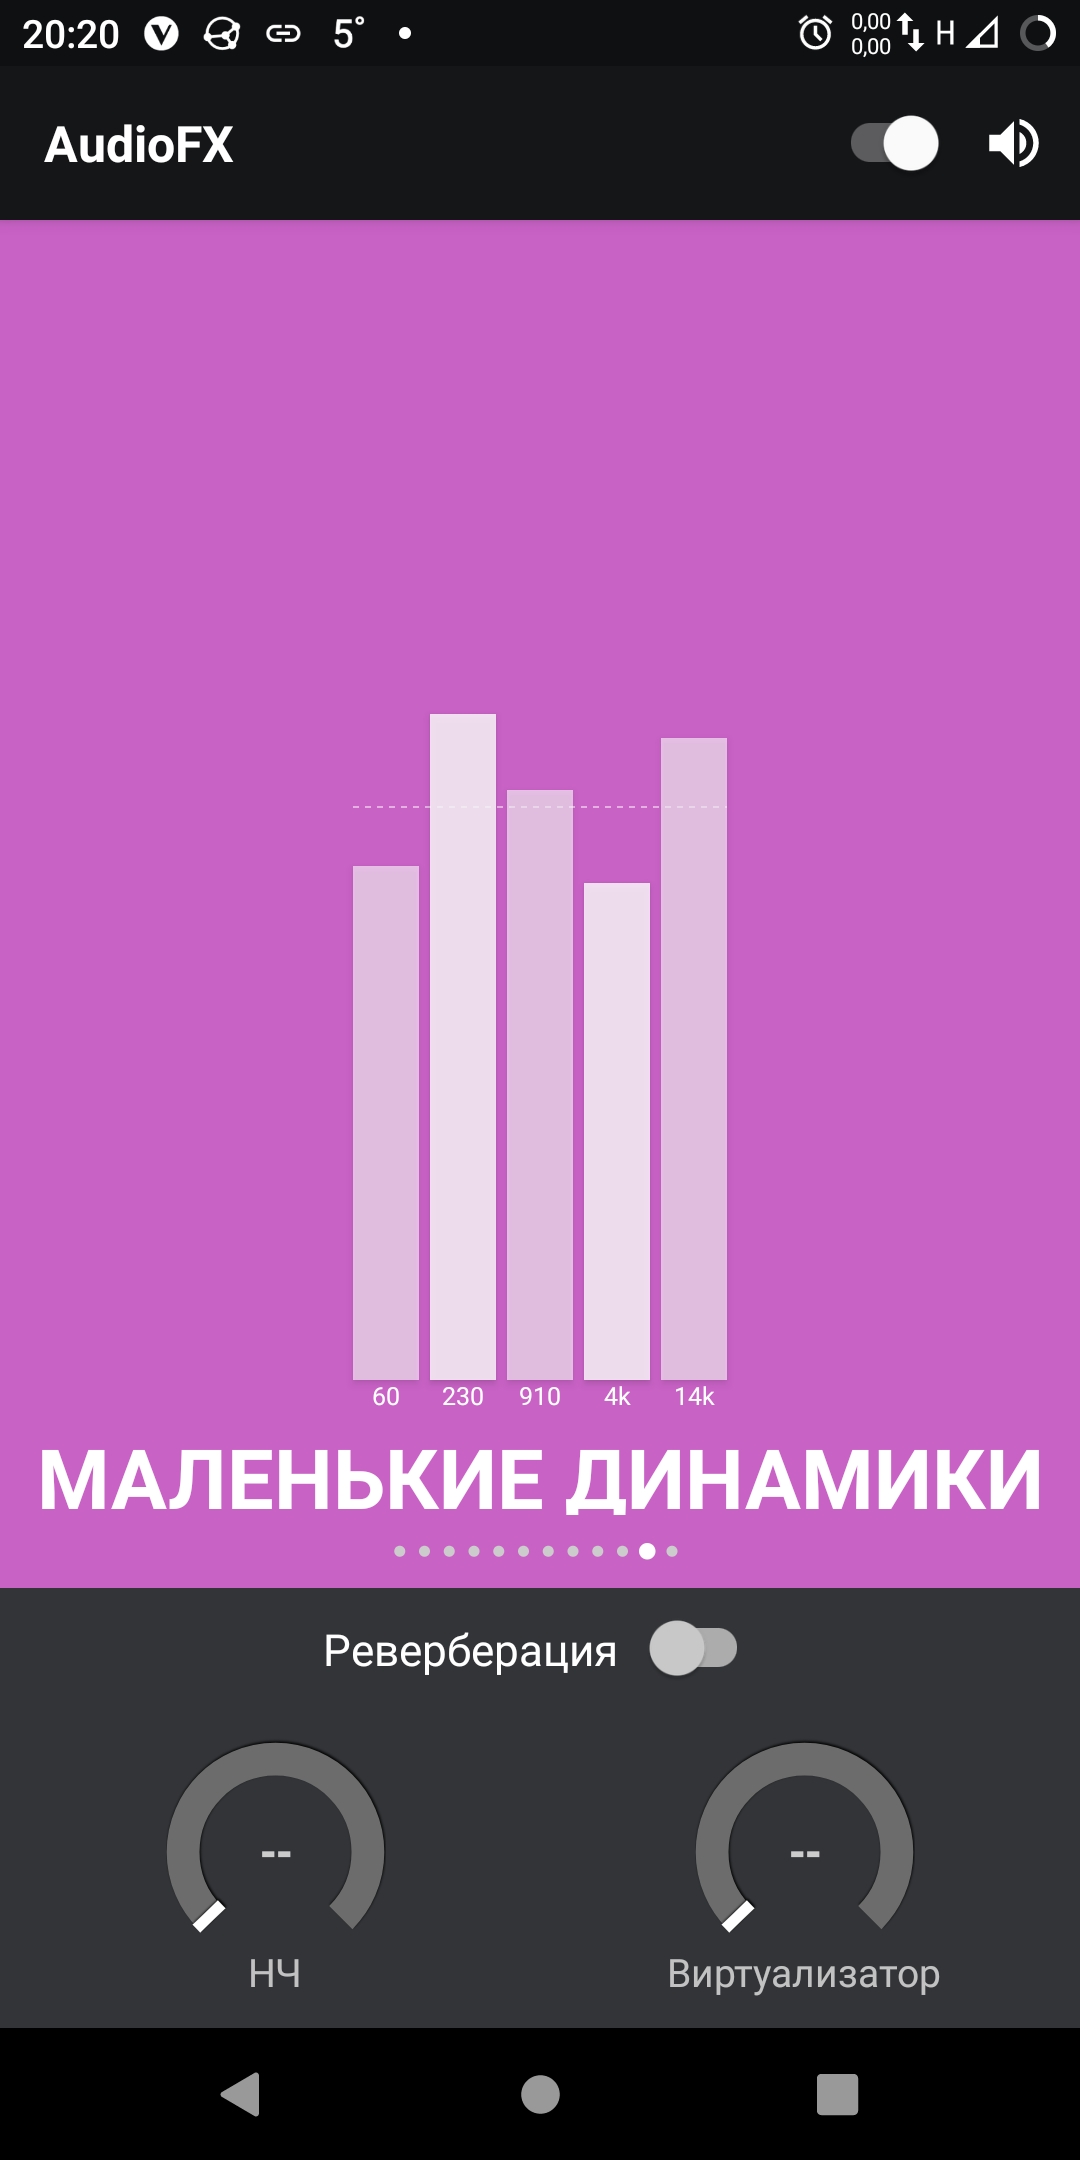
- Если интерфейс цветной и справа вверху переключатель включен вправо — то приложение работает. Отключаем приложение этим выключелем!
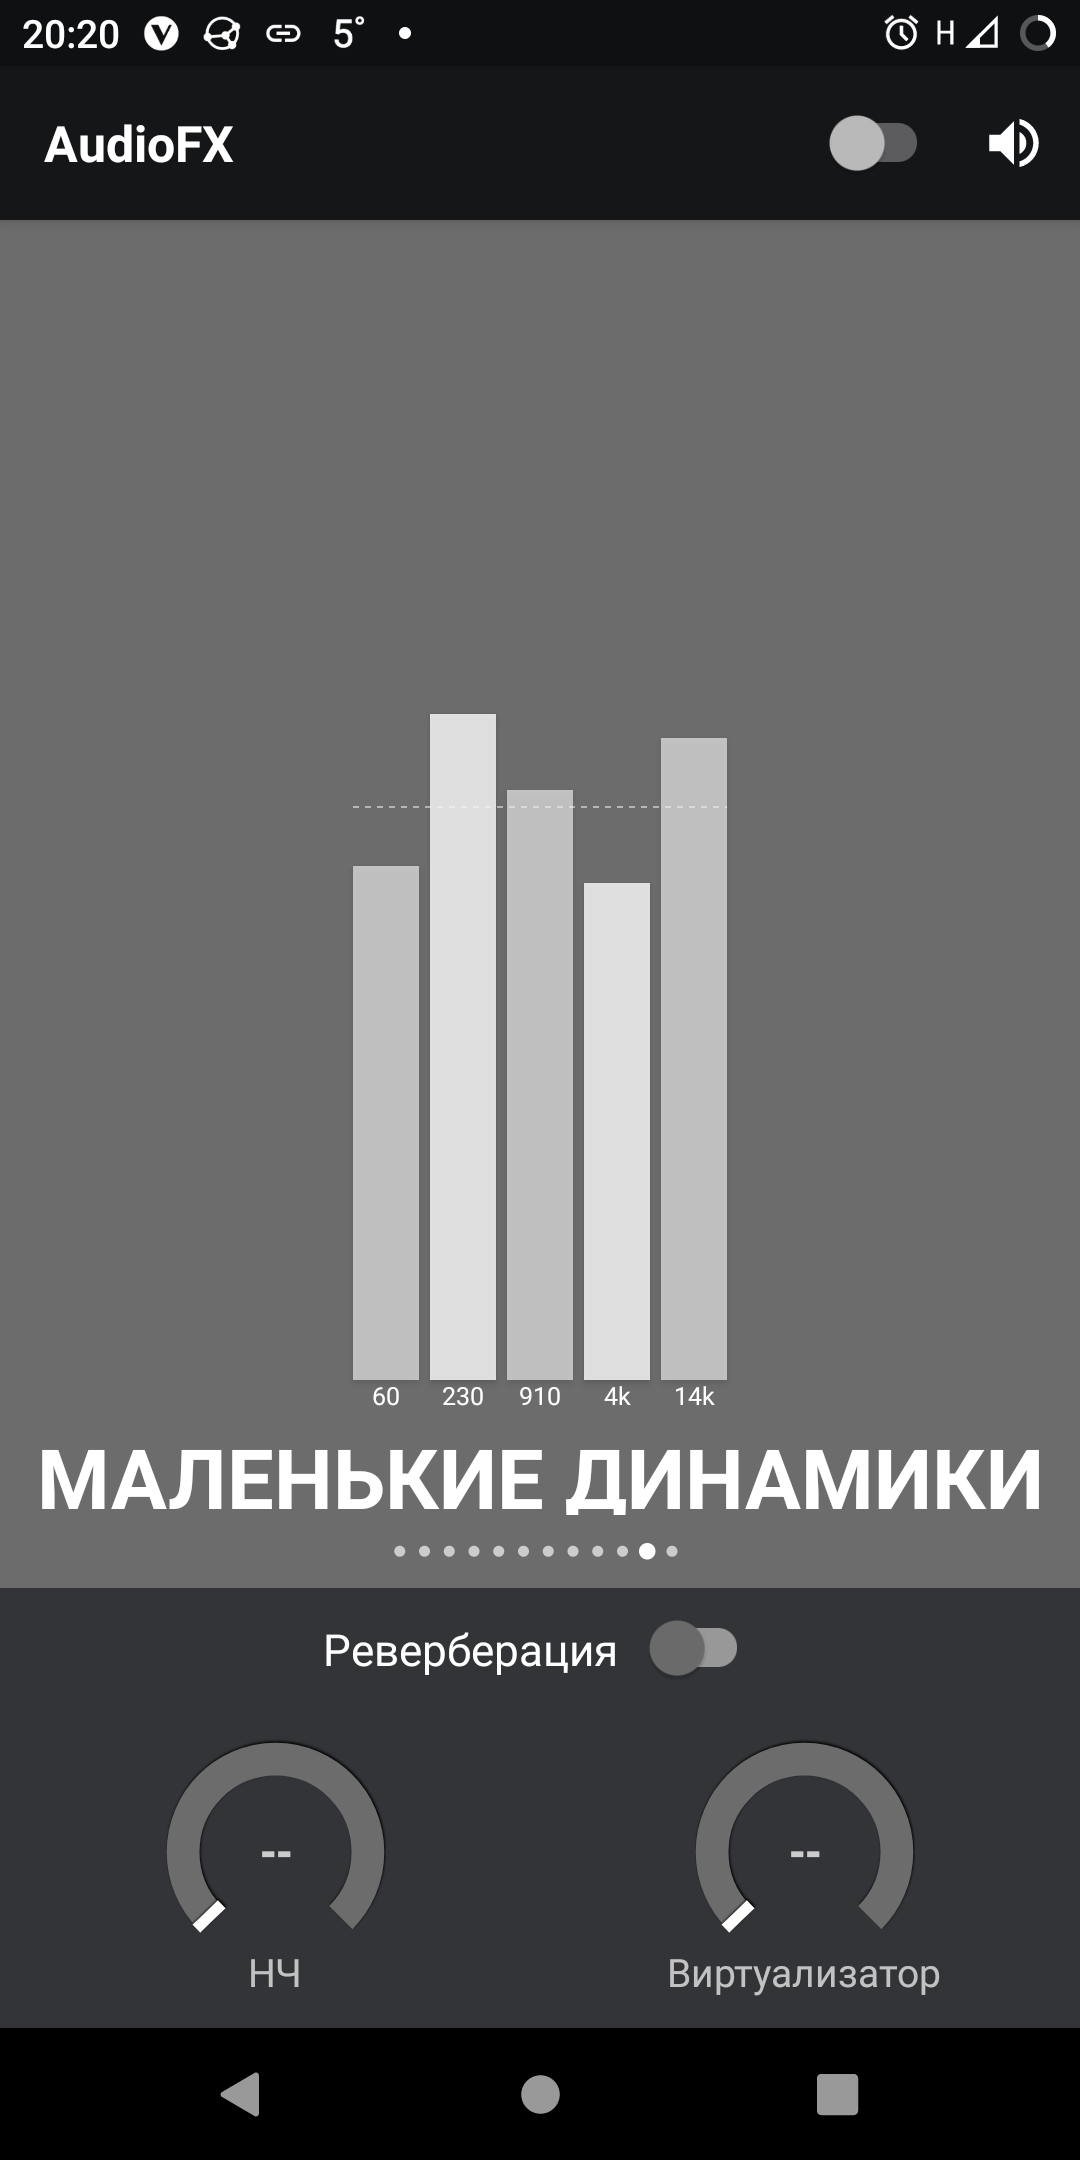
- Удостоверяемся, что интерфейс стал чёрно-белым, а переключатель принял левое положение;
- Перезагружаем устройство.
Наглядно:
Теперь ViPER4Android будет работать без проблем! Смысл был в том, чтобы отключить все остальные DSP обработчики звука в системе, которые могут мешать работе V4A. В моём случае мешал как раз этот вредный AudioFX.
На этом у меня пока что всё, приятного прослушивания любимой музыки и до новых встреч!

TechLatest is supported by readers. We may earn a commission for purchases using our links. Learn more.
Most of the user’s complaint about unsuccessful installation or undefined error while installing ViPER4Android on Android 10/Q. If you are also unable to complete the installation procedure for ViPER4Android on Android 10/Q. It is a common issue that is faced by numerous users and they are able to fix it with some quick fixes.
So if you also got stuck with such error or want to install ViPER4Android on Android 10/Q without any hassle, read out this article and follow the methods discussed below, here in this guide we are going to provide step-by-step installation of ViPERAndroid on Android 10/Q. So, let’s get started
What is ViPER4Android
ViPER4Android (V4A) is said to be one of the best audios enhancing mod for Android devices. If you have tried installing ViPER4Android on previous Android version including, Nougat, Oreo, Pie, and others. And now you have upgraded your device to Android 10/Q so you can’t install ViPER4Android on Android 10/Q by using the same method or technique you were using in other Android versions.
The reason behind this is because Android 10/Q comes up with so many updates and changes but the mod ViPER4Android hasn’t been changed/updated accordingly. So, this causes a compatibility issue between the Android version and mod. To resolve this issue so that you can easily install ViPER4Android on Android 10/Q, follow the given steps, and install the ViPER4Android on Android 10/Q.
At any stage, you must avoid doing something about which you have no idea. Don’t customize any method during the actual implementation. This is precisely what that can be a reason your smartphone can fail to perform other tasks as well. We at TechLatest cannot be held responsible for anything that goes wrong simply because of this reason.
Before You Start
Before getting start with installlation methods, read the following instructions
- Take a Backup of all of your data, it is not recommended but if something went wrong, so it’s a chance of losing data forever. You can keep a backup of your data in cloud storage, tap on the following link to know more about Best Cloud Storage.
- Your Android device must be rooted with Magisk. Read the following articles too, to know more about How to Root Android Device and Best Magisk Modules
- Uninstall all the previous audio modifications and ViPER4Android (if installed previously). Ensure that you have uninstalled them and then reboot the device.
Method 1
- Download the viper form Magisk or APK [DOWNLOAD] and install it.
- Install the required drivers.
- Now, reboot the device.
- Check what the device status says. If it is ‘Status: Normal’, so just turn on the Master Power.
- If it is ‘Status: Abnormal’, so
- Open terminal or ADB shell.
- Type su to grant permission.
- Then type setenforce 0.
- Force stop Viper App, Reopen it, again Check the Status.
- If it is ‘Status: Normal’, so proceed further.
- If it is ‘Status: Abnormal’, so this method is not for you.
- Set SELinux permission and if it worked.
- Download the patch.
- Rename it to (remove.txt),
- And copy it to /system/addon.d [If you are on Magisk module]
- Now Reboot the system.
Method 2
- Download the viper form Magisk or APK [DOWNLOAD] and install it.
- Install the required drivers.
- Now, reboot the device.
- Check what the device status says. If it is ‘Status: Normal’, so just turn on the Master Power.
- If it is ‘Status: Abnormal’, so
- Open terminal or ADB shell.
- Type su to grant permission.
- Type supolicy –live “allow mediaserver mediaserver_tmpfs file { execute }”
- Type supolicy –live “allow audioserver audioserver_tmpfs file { read execute }”
- Force stop Viper App, reopen it, again Check the Status.
- If it is ‘Status: Normal’, so proceed further.
- If it is ‘Status: Abnormal’, so this method is not for you.
- Set SELinux permission and if it worked.
- Download the patch.
- Rename it to (remove.txt),
- And copy it to /system/addon.d [If you are on Magisk module]
- Now Reboot the system.
Method 3
- Download the latest version of ViPER4Android APK.
- Install the downloaded APK using any File Manager.
- After successful installation, Launch the ViPER4Android app.
[Note: DO NOT INSTALL THE DRIVERS RIGHT NOW]
- Open the Magisk Manager app.
- Tap on the hamburger menu from the top-left corner and navigate to Downloads.
- In the downloads, tap on the search bar.
- And search Audio Modification Library, tap on the download icon.
- Tap on Install.
- Magisk modular will prompt a message to reboot, but don’t reboot.
- Now head back to the ViPER4Android app.
- Tap on OK, to install the required drivers.
- Grant the permissions to the Superuser whenever prompted.
- After drivers get installed, the device will get rebooted automatically.
- After rebooting, go to the ‘Magisk Manager’
- Now, to the ‘Modules’.
- Uncheck the ‘Audio Modification Library’ to disable it.
- Now again head back to the ViPER4Android app.
- Repeat the driver installation procedure.
- Reboot the device.
- Launch the ViPER4Android app. If drivers are installed properly then you are done!
- Otherwise, follow the given steps:
- Now, to the ‘Modules’.
- Check the ‘Audio Modification Library’ to enable it.
- Open ViPER4Android, install the drivers when prompted, and let the device restart itself.
Method 4
This is an alternative method and this is especially for the users who entered into the boot loop after performing the above task, and this method is useful for Samsung Galaxy devices with Android 10, and also for OEM users and for those who are using custom ROMs.
- Download the following files
- ViPER4Android v2.7.1.0 APK
- Zackptg5’s Rootless Driver Installer
- Open the Magisk Manager app in your device
- Tap on the hamburger menu icon and go to the Downloads.
- Tap on the search bar, and search Audio Modification Library.
- Tap on the download icon.
- Tap on Install.
- Magisk modular will prompt a message to reboot, but don’t reboot.
- Install the V4A APK file using the file manager.
- One installed, reboot your device into TWRP recovery mode.
- Tap on the Install button in TWRP recovery.
- Choose the Rootless Driver Installer Zip file.
- Swipe the button on the bottom of the screen to flash the file.
- After flashing finishes, tap on the ‘Reboot System’ to restart the system into OS.
- Now you would have ViPER4Android on Android 10/Q.
So that’s it from our side. I hope you have found this guide useful in installing ViPER4Android on Android 10/Q easily. If you have some more suggestions so, please share them with us in the comment section.
- Android Customizations
- viper4android fx
- ViPER4Android install
Leave a Comment
This website uses cookies to ensure you get the best experience on our website
In this guide, we will show you the steps to fix the issue of the Viper4Android module not working with SELinux Enforcing. It wouldn’t be too much of an exaggeration to say that there are some users who root their devices just for the sake of this audio mod. And we can’t blame them either.
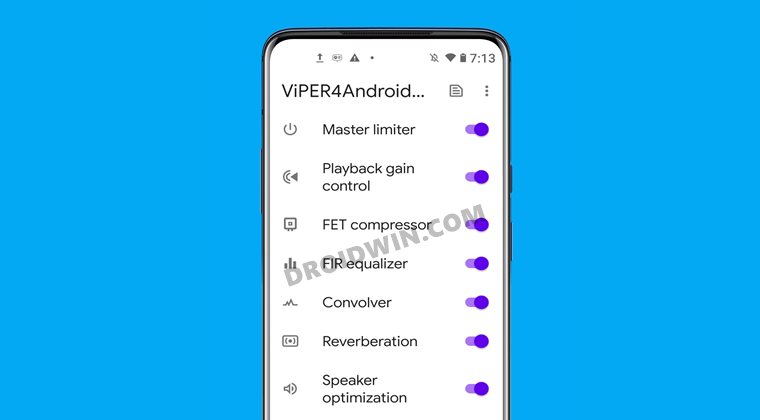
While there are quite a few audio mods out there for a rooted device, it’s hard to argue that anyone could come forward and claim the dominance that Viper has managed to achieve. Master Limiter, Playback gain controller, FET Compressor, FIR Equalizer, Convolver, Reverberation, Speaker Optimization- you name it and it has it in its arsenal. However, as is the case with other rooted mods, this one isn’t free from its fair share of issues as well.
The most recent issue arose after the update of Magisk to v21.1/21.2. Due to some changes in Magisk’s SELinux policy handling, many users aren’t able to use this mod. If you are also on the same page, then this guide shall help you out. Given here are the detailed instructions to fix the Viper4Android not working issue with SELinux Enforcing.
First and foremost, forcefully setting SELinux to permissive might be called a fix for some users, but for me, it is a big No and it is highly recommended that you don’t do so either. Instead, proceed with the below instructions to fix this issue, which would preserve the SELinux Enforcing as well.
And yes, don’t forget to take a complete device backup beforehand, just to be on a safer side. Droidwin and its members wouldn’t be held responsible in case of a thermonuclear war, your alarm doesn’t wake you up, or if anything happens to your device and data by performing the below steps to fix the Viper4Android not working issue with SELinux Enforcing.
Instructions Steps
- To begin with, download and install a File Explorer that supports rooting capabilities. As for this guide, I am using Solid Explorer.
- Now launch the File Explorer app and head over to the following location:
/data/adb/modules/ViPER4AndroidFX/post-fs-data.sh

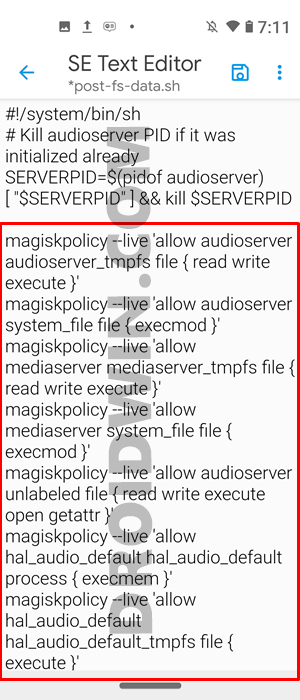
- Open the post-fs-data.sh file and add the following set of lines at the end of this file:
magiskpolicy --live 'allow audioserver audioserver_tmpfs file { read write execute }'
magiskpolicy --live 'allow audioserver system_file file { execmod }'
magiskpolicy --live 'allow mediaserver mediaserver_tmpfs file { read write execute }'
magiskpolicy --live 'allow mediaserver system_file file { execmod }'
magiskpolicy --live 'allow audioserver unlabeled file { read write execute open getattr }'
magiskpolicy --live 'allow hal_audio_default hal_audio_default process { execmem }'
magiskpolicy --live 'allow hal_audio_default hal_audio_default_tmpfs file { execute }'
magiskpolicy --live 'allow hal_audio_default audio_data_file dir { search }'
magiskpolicy --live 'allow app app_data_file file { execute_no_trans }'
magiskpolicy --live 'allow mtk_hal_audio mtk_hal_audio_tmpfs file { execute }'
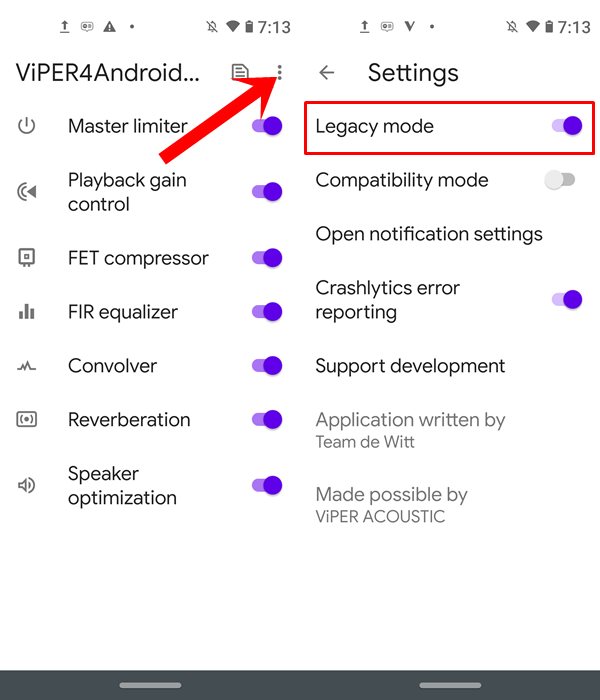
- Once done, save the file. Now reboot your device. Once it boots up, launch Viper4Android, go to its Settings, and toggle the Legacy Mode Off/On.


That’s it. The issue should now have been rectified. So this was all from this guide on how to fix the Viper4Android not working issue with SELinux Enforcing. If you have any queries concerning the aforementioned steps, do let us know in the comments. We will get back to you with a solution at the earliest. NOTE: The entire credit for this method goes to XDA Senior Member_mysiak_.
- Fix Root not working after flashing Magisk patched boot.img
- Fix Magisk patched boot.img issue while Rooting Android 11
- How to Fix Bootloop after Flashing magisk_patched.img
- Fix Magisk Module Bootloop without TWRP Recovery
About Chief Editor

Sadique Hassan
administrator
A technical geek by birth, he always has a keen interest in the Android platform right since the birth of the HTC Dream. The open-source environment always seems to intrigue him with the plethora of options available at his fingertips. “MBA by profession, blogger by choice!”