I also have this error.
Code: Select all
2017-02-19 1:25:42 AM :: Error: Data error (cyclic redundancy check). Failed to read data from the file [\?GLOBALROOTDeviceHarddiskVolumeShadowCopy195]. The block at offset 9293529088 (length 1048576) is corrupt. Failed to upload disk. Agent failed to process method {DataTransfer.SyncDisk}. Exception from server: Data error (cyclic redundancy check). Failed to read data from the file [\?GLOBALROOTDeviceHarddiskVolumeShadowCopy195]. The block at offset 9293529088 (length 1048576) is corrupt. Unable to ret This error refers to the source (computer), right, and not the target backup device?
I wanted to back up my documents before running checkdisk in case checkdisk mangled anything. I created a new folder on the NAS and changed backup from «Entire Computer» to «File Level» and selected the 2 /Program File/ folders, /Program Data/ and /Users/ — this backed up OK.
Windows 10 — I ran Windows checkdisk which reported no errors, then defrag and checkdisk again which again found no issues.
QNAP 2 disks (mirror RAID) — SMART info is all good for both, I am currently in the process of running complete test on those disks nonetheless
After running checkdisk, I tried «Entire Computer» again, with the same CRC error. So something in the Windows system files is corrupt?
Is the error text accurate [truly bad/corrupt] or can it be something else (NAS is ‘low’ on space currently, my C; is 200GB, NAS had 466GB) or a permission error? Since the error references VolumeShadowCopy195 — if I make Windows delete that numbered shadowcopy or some or all other restore points, could that fix it? Does to have to do with space alotted to restore points? Is Veaam absolutely only reading in there or causing any writes in there?
Is there another utility you may suggest that could confirm bad blocks since Windows itself isn’t detecting any issue ?
Applies to: Fix Data Error Cyclic Redundancy Check on the external hard drive, USB, SD card, and even HDD/SSDs in Windows.
On this page, you’ll learn what is «Data error (cyclic redundancy check)» error, how to fix data CRC error on your device in 5 reliable ways.
| Workable Solutions | Step-by-step Troubleshooting |
|---|---|
| Fix 1. Fix Cyclic Redundancy Check Data Error via CHKDSK | CHKDSK can scan and repair file system corruption and bad sectors that cause the CRC error…Full steps |
| Fix 2. Fix CRC Data Error using Disk Check | Disk Check utility can also fix file system errors. Open File Explorer, find the inaccessible hard drive…Full steps |
| Fix 3. Remove CRC Error with System File Checker | System File Checker works to repair corrupted system files. Press Windows + R keys, type cmd…Full steps |
| Fix 4. Format the Inaccessible Device | If your device became RAW with a CRC device error, try formatting the hard drive to troubleshoot…Full steps |
| Fix 5. Look for Manual Repair | If the Cyclic Redundancy Check error can’t be solved by using the disk repair tool. Use a manual repair…Full steps |
Overview: What Is Data Error Cyclic Redundancy Check (CRC)
# Definition: According to Microsoft, Data Error Cyclic Redundancy Check, known as CRC error, indicates the operating system has found a drive with bad sectors or some intermittent problem on your storage devices.
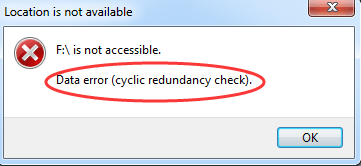
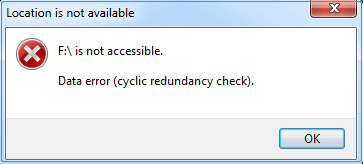
# Symptoms: With Cyclic Redundancy Check error, you’ll receive pop-up error messages as shown below.
- 1. «Drive is not accessible. Data error (cyclic redundancy check).»
- 2. «Virtual Disk Manager. Data error (cyclic redundancy check).»
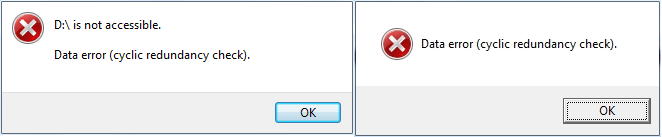
# Result: Storage devices that contain the CRC error will become inaccessible, unopenable, RAW, not initialized.
According to EaseUS data recovery experts, you should recover data first as some fixes may cause file loss. Follow to remove the CRC error on your own.
Part 1. Recover Files from Data Error Cyclic Redundancy Check Device
Reliable EaseUS Data Recovery Wizard — EaseUS Data Recovery Wizard enables you to directly recover files from the Cyclic Redundancy Check error with its powerful data recovery features:
EaseUS Data Recovery Wizard
- Recover lost files from inaccessible cyclic redundancy check devices.
- Recover files from recycle bin, SD card, internal/external HDD/SSD.
- Recover all types of files, like images, documents, videos, etc.
- Complete scan devices, find all hidden files on Windows & Mac.
- Easy to operate, protect your privacy.
Follow the 3 steps to restore your data from the device with Cyclic Redundancy Check error:
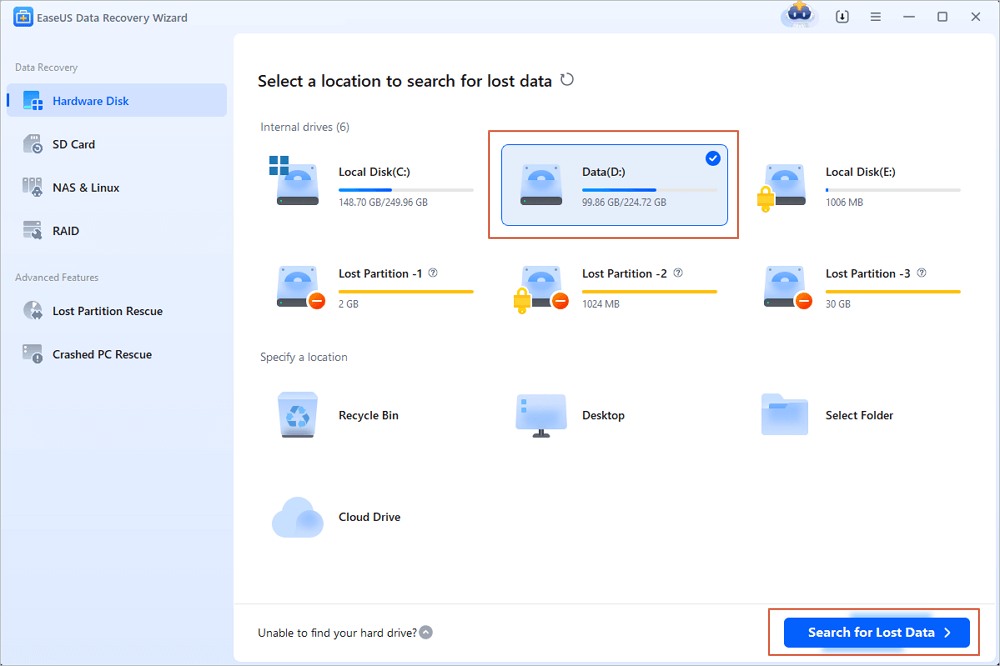
Step 1. Scan the hard drive partition
Select the drive on your hard disk where you lost or deleted files. Click «Scan» and let EaseUS data recovery software scan for all lost data and files on the selected drive.
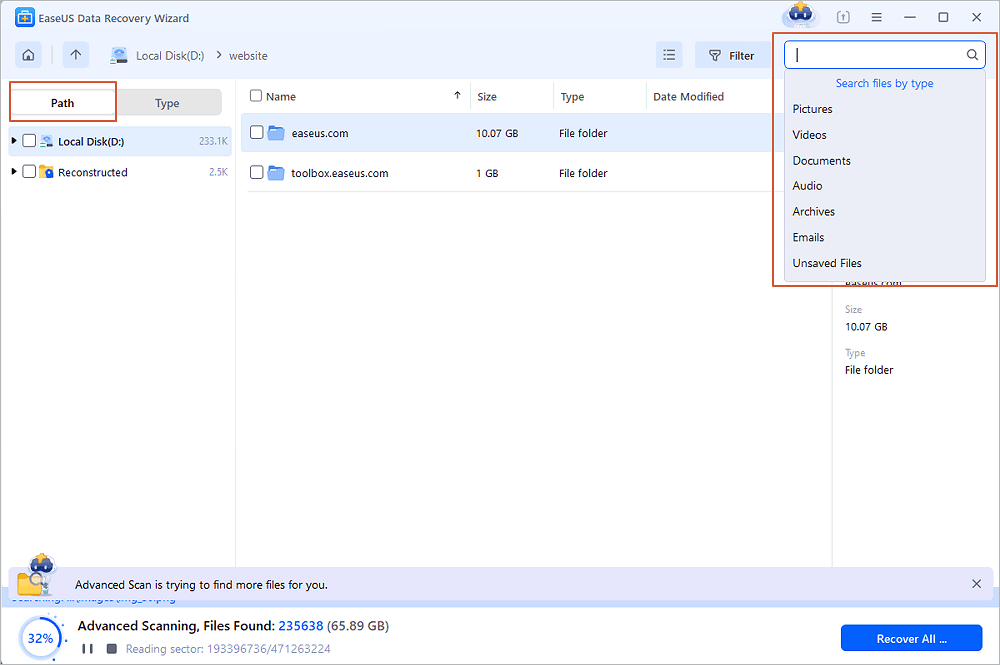
Step 2. Check the results
When the scan completes, you can apply the «Filter» feature or click the «Search files or folders» option to find the lost files on the hard drive.
Step 3. Restore lost hard drive data
Select wanted files that you lost on the drive and click «Recover» to save them to another location.

Remember to save the recovered files to another secure location other than the inaccessible device with CRC error.
Here we collected 5 practical methods that can fully help you fix the «Data error (cyclic redundancy check)» issue and make your storage devices function normally again.
Fix 1. Fix Cyclic Redundancy Check Data Error via CHKDSK
The CHKDSK utility in Windows scans and repairs file system corruption and bad sectors that caused the cyclic redundancy check data error on your device.
- Warning
- Running chkdsk can hopefully fix the cyclic redundancy check error, however, it can also result in total data loss. So, perform data recovery in advance, and then continue with the CMD method.
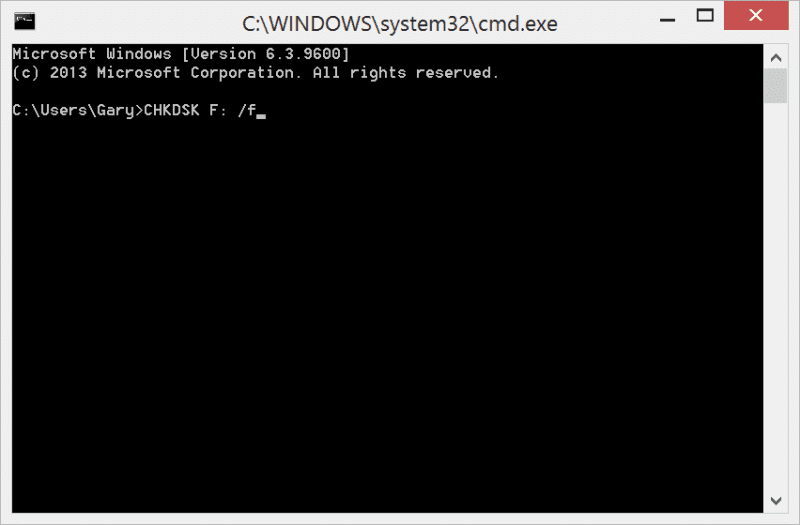
Step 1. Press Windows + S keys, type cmd in the Search box.
Step 2. Right-click Command Prompt, and select «Run as Administrator».
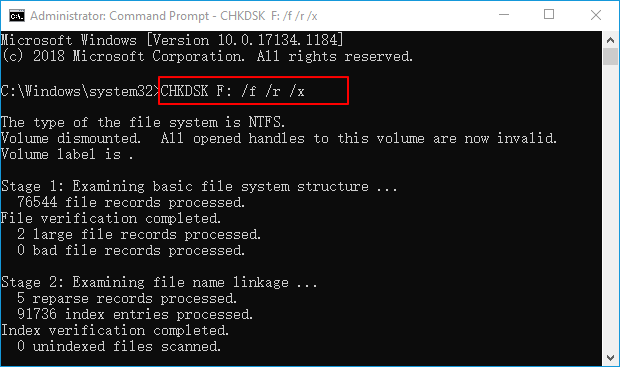
Step 3. Type chkdsk F: /f or chkdsk F: /f /r /x in Diskpart and hit Enter.
Replace ‘F:’ with the drive letter of your hard drive with the Cyclic Redundancy Check error.
Step 4. When the scan completes, type exit and hit Enter to close the window.
After this, you can restart the computer and see if your device is accessible and workable now.
Fix 2. Fix CRC Data Error Using Disk Check
The Disk Check utility in Windows can also help to fix file system errors that caused your device inaccessible with a Cyclic Redundancy Check error. Here are the steps that you can apply to fix the CRC error from your drive:
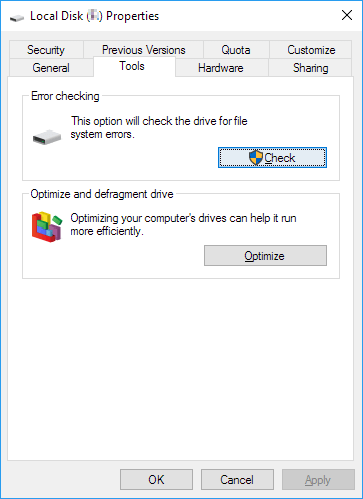
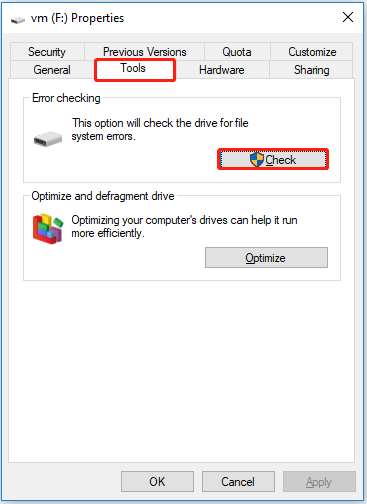
Step 1. On Windows File Explorer, right-click the inaccessible hard drive or device, choose «Properties».
Step 2. Under the Tools tab, click «Check» in the Error-checking section.
Step 3. Choose «Scan drive» or «Repair drive» if errors were found.
When the scanning finishes, restart the computer and check if you can reopen the device and use the saved data again.
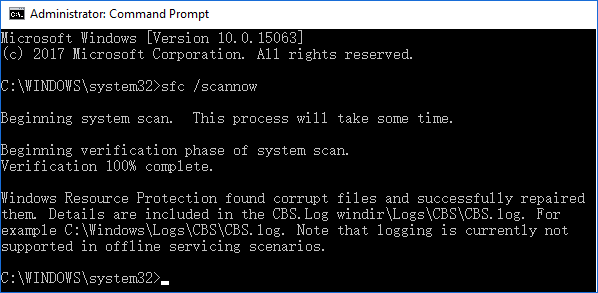
Fix 3. Remove CRC Error with System File Checker
The other Windows built-in tool — System File Checker sometimes also works to repair the missing or corrupted system files on your computer. You can also apply it to fix the cyclic redundancy error resulted from system file corruption.
Step 1. Press Windows + R keys, type cmd in the Run dialog, and click «OK».
Step 2. Type DISM.exe /Online /Cleanup-image /Restorehealth and hit Enter.
This will make a Windows image to protect your data.
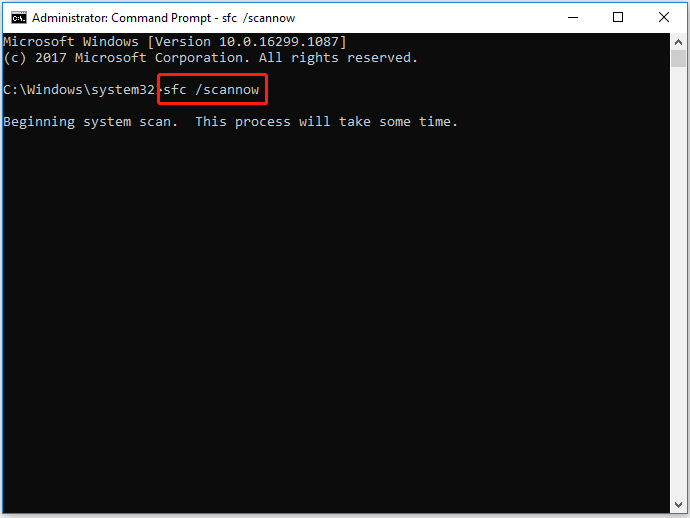
Step 3. When the DISM command completes, type sfc /scannow and hit Enter.
Step 4. Wait for the process to completes, then type exit and hit Enter to close it.
After this, restart your computer and then you can reopen the device and make use of the saved data again.
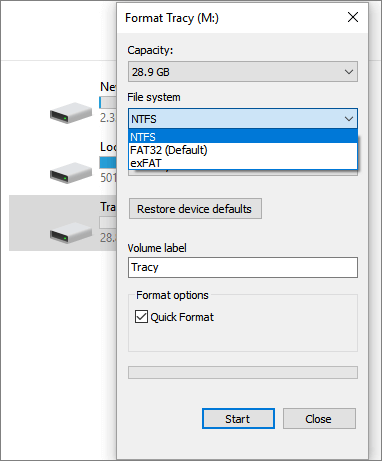
Fix 4. Format to Fix CRC Error on RAW/Inaccessible Device
If your device became RAW or still has CRC device error after trying the above fixes, the last effective DIY method you can try is to format the drive. By resetting the file system to a readable format, the CRC error can be fixed. Here are the steps for you to go:
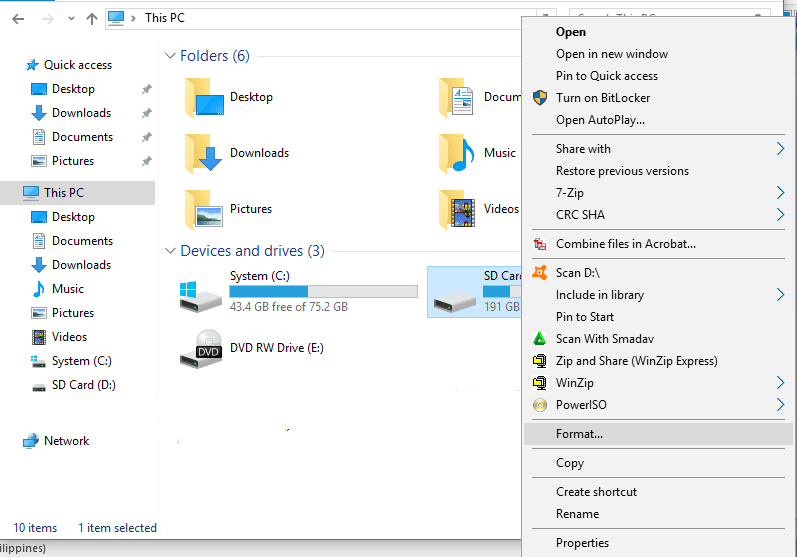
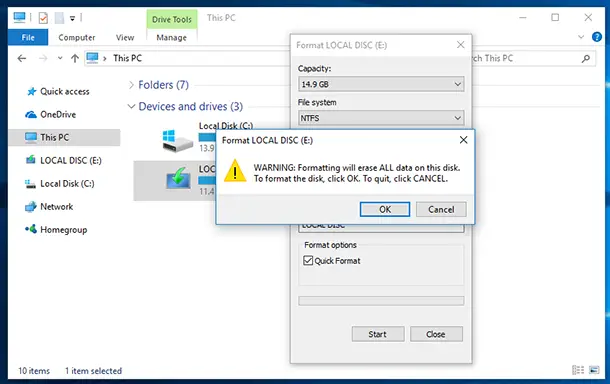
Step 1. Press «Windows key + E» to open Windows Explorer.
Step 2. Right-click on the problematic device with CRC error and select «Format».
Step 3. Select a suitable file system — NTFS or FAT32 for your device.
(NTFS for hard drive or external device; FAT32 for SD card for USB — 32GB or smaller.)
Step 4. Check «Quick Format» and click «Start».
Fix 5. Send for Manual Repair
If none of the fixes works, you can send your hard drive for a repair at a local disk repair center or the device manufacturer’s after-sales service center.
Here we have an alternative solution for you — EaseUS Manual Data Recovery Service. Our professional tech support team will help you remove «Data error cyclic redundancy check» error from your device and fix the drive work again remotely.
Consult with EaseUS Data Recovery Experts for one-on-one manual recovery service. We could offer the following services after FREE diagnosis:
- Repair corrupted RAID structure, unbootable Windows OS and corrupted virtual disk file (.vmdk, .vhd, .vhdx, etc.)
- Recover/repair lost partition and re-partitioned drive
- Unformat hard drive and repair raw drive (BitLocker encrypted drive)
- Fix disks that become GPT-protected partitions
Hope as least one of the solutions above can help you fix the error.
What Causes Data Error Cyclic Redundancy Check Error
The «Data Error Cyclic Redundancy Check» error could be caused by the following reasons:
- A corrupted file system on storage devices
- Registry corruption
- Interrupted file transferring process
- Misconfiguration in files and storage devices
- Unsuccessful program installation
- Misconfigured system files
- Virus or malware infection
Generally, when you receive the error message ‘data error (cyclic redundancy check)’, there is something wrong with the files or the hard drive. Therefore, it’s important that you recover saved data from the problematic device first before you start fixing the issue.
Stop Using Your Drive, Recover Data, and Fix CRC Error Now
On this page, we offered a complete guide with 5 practical ways to show you how to fix this issue without losing any data. We also explained the causes of this error.
If you have precious files on your drive, remember to run EaseUS data recovery software to scan and find your file first. Then run the fixes on this page to remove this error and make your drive work normally again.
Don’t forget to create a full backup of all your important data. Stop using your device when the CRC error pops up, follow the solutions on this page to recover data and fix your drive to work again.
Fix Data Error Cyclic Redundancy Check FAQs
Here, we also give a short answer to the frequently asked questions about the data error cyclic redundancy check.
1. Can Cyclic Redundancy Check errors be solved?
A data problem known as a cyclic redundancy check on your Windows may result from registry corruption. The cyclic redundancy error caused by corrupt system files can therefore be fixed by running the CHKDSK utility to fix the missing or damaged system files on your computer.
2. How do I fix the data Cyclic Redundancy Error?
To fix the Cyclic Redundancy Check error on an external hard drive:
- Fix Cyclic Redundancy Check data error via CHKDSK
- Fix CRC data error using Disk Check
- Remove CRC error with System File Checker
- Format the inaccessible device
- Look for manual repair
3. How do I fix a RAW external hard drive without losing data?
- Run EaseUS data recovery software to restore data.
- Connect the external hard drive to another computer.
When you copy files to the hard drive, if you receive error message “Data error (cyclic redundancy check)”, don’t worry that you may lose the data. Follow steps in this post, you’ll fix the error instantly.
Cyclic Redundancy Check is an error-detecting code used for data verification. When you get this error message, it means there is something wrong with the files or the hard drive.
The error could be caused by the file itself or the hard drive. So first, copy the file to another drive to determine the cause. If you can’t copy the file to another file either, the problem is in fact in the file itself. If you can, the problem is the hard drive.
If the problem is the file itself, you can recover the file.
If the problem is the hard drive, you can repair the drive.
Recover the file
If you don’t care about the data in the file, you can ignore the error and just delete the file. But if the data is important, you may want to recover it. There’re many free data recovery software online you can search for. If you have no idea which one should be trusted, we recommend Stellar Phoenix Windows Data Recovery. It’s a tool that recovers any corrupted data and file automatically.
Repair the drive
To repair the drive, you can run a Windows utility: CHKDSK . CHKDSK can check the integrity of your hard disk and can fix various system errors.
Just follow these steps:
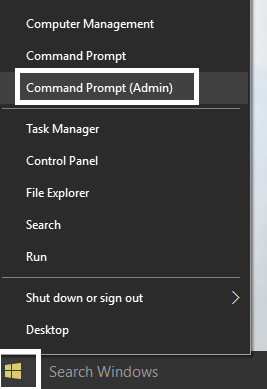
1. Run command prompt as administrator.
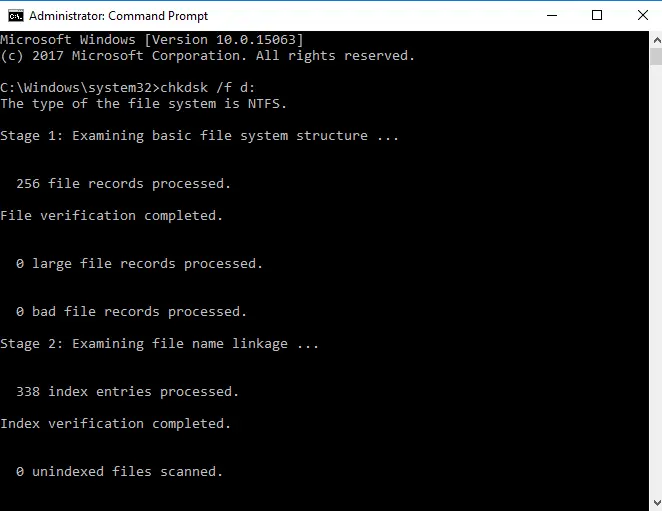
2. Type “chkdsk /f x:”. Replace the x: with the drive that you’re having problem with.
In my case, my drive is d:, so I type “chkdsk /f d:” (see below).
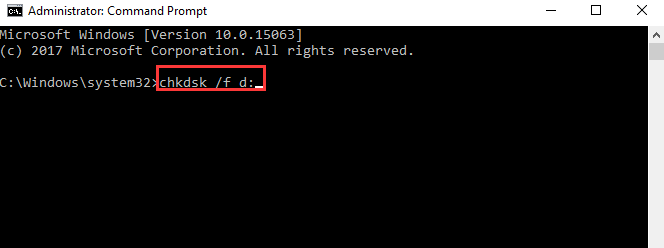
3. Then press Enter button. The process might take longer if there’re problem with many files. So please be patient until it’s finished.

4. Restart your computer.
If the problem persist, you might need to format the disk. Format will remove all data in the disk. So please ensure you know what you are doing. If you are not comfortable doing it yourself, you can take your computer to the near repair store and have it checked.
Summary: This article will suggest you various ways to sort the issue pertaining to Data error cyclic redundancy check with the help of Bitwar Data Recovery Software.
“Location is not available, Data error (cyclic redundancy check)” is an error that is mainly encountered when you copy something from your external hard drive or SD card to your computer system or vice versa.
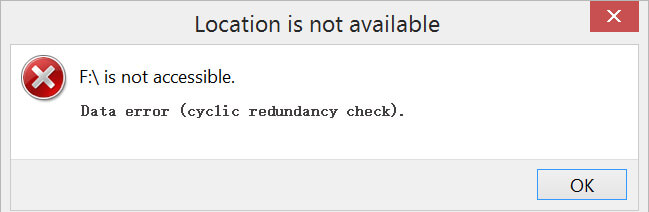
When “Data error cyclic redundancy check” error or “Cannot initialize disk: cyclic redundancy check” occurs, you will find out that the external hard drive is showing as RAW or disk need to initialized in Disk Management.
Don’t worry, and we will take you through the process of how to fix the CRC error and also retrieve data using Bitwar Data Recovery Software.
Reason for “Data Error Cyclic Redundancy Check” Error Occur
“Data error cyclic redundancy check” error can occur due to the following reasons:
- Corrupted registry
- Unsuccessful installation of a program
- A misconfiguration in files and cluttered hard drive
Now, before we move on to the best possible solution to fix the “Data error cyclic redundancy check” error on Windows 10, 8, 7, it is highly essential to retrieve your valuable data after removing the failure of cyclic redundancy check.
Solution 1: Check Utility
Step 1. Select your External device in error by right-clicking on it and then click on the Properties option and select Tools.
Step 2. Click on the Check Now button located in the Error Checking section.
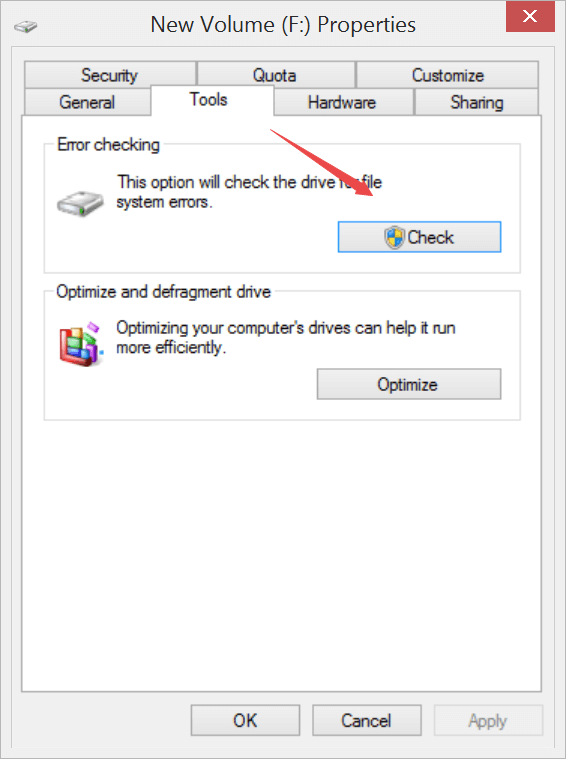
Step 3. After this, check the option Automatically fix file system errors to run a basic check to repair the issue followed by a click on Start.
You may follow this quick heal method to fix the error, but there might be a chance it failed to resolve the problem. So, you might want to apply the below alternative solution to repair the “Data error cyclic redundancy check” error.
Solution 2: Fix “Data error cyclic redundancy check” Error by Running CHKDSK in Command Prompt
Step 1. Launch Command prompt by going to Start and typing cmd in the search field.
Step 2. Type command chkdsk x: /f in Command Prompt (where x is your drive letter) and press Enter.
Step 3. Applying the above step will initialize scan; once the scan is done, CHKDSK will give you a report of the scan and restart your computer.
After restarting the computer, if the problem still exists then, follow the next method to format the external device.
After fixing the CRC error, it’s time to get back the valuable data from the external hard drive, USB flash drive, and SD memory card using Bitwar Data Recovery Software.
Recover Data using Data Recovery Software
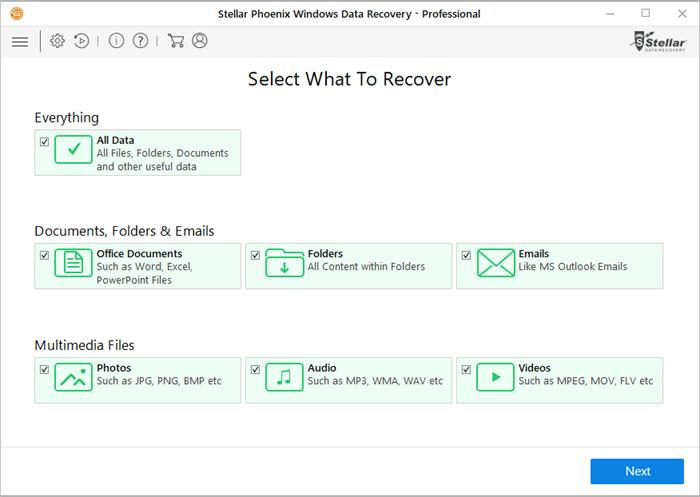
Step 1. Download the data recovery software and Install the software on the PC system.
Download for PC Download for Mac
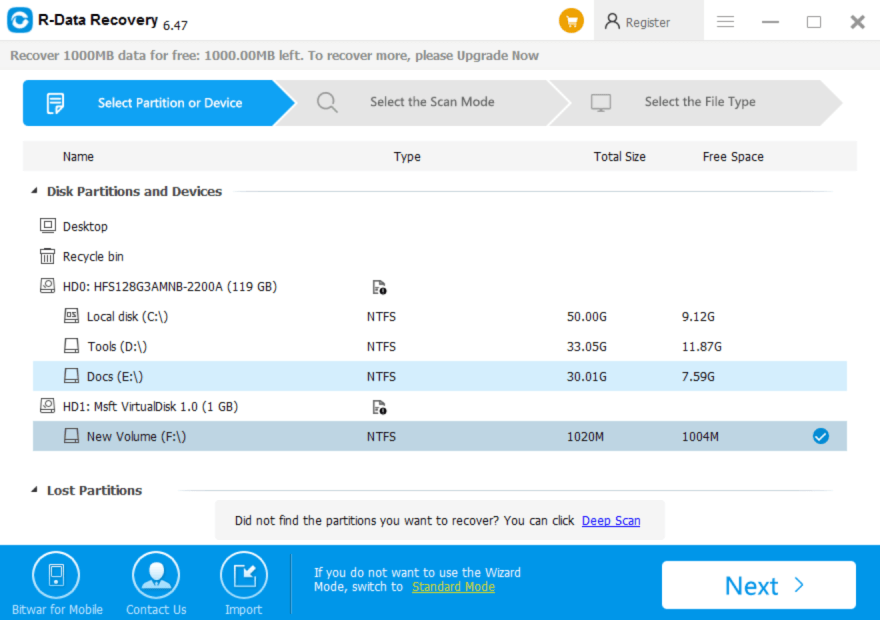
Step 2. Select the External device and click on the Next button.
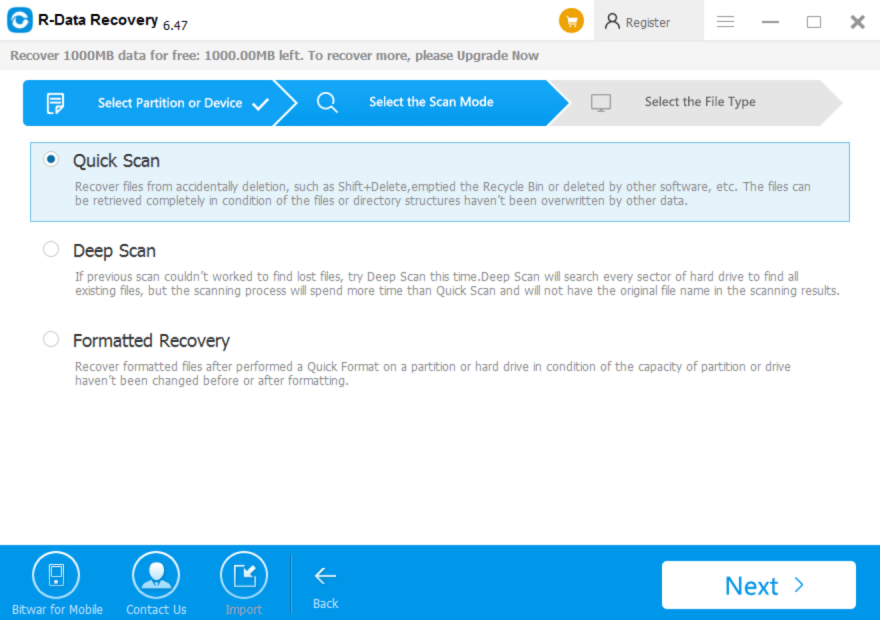
Step 3. Choose the Scan mode and then click Next to continue, after that, select the File types you want to scan.
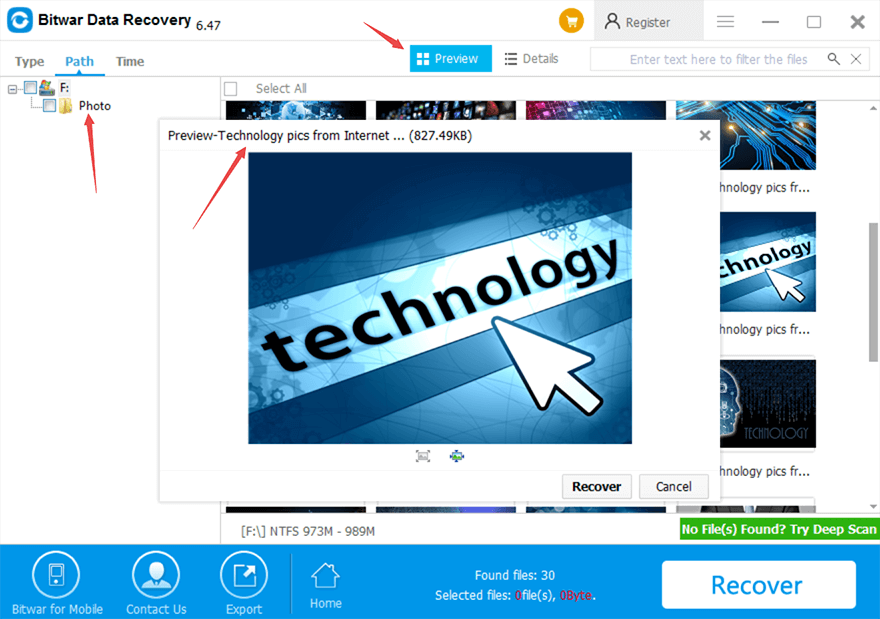
Step 4. After clicking the Scan button, the software starts to scan the data, and you can preview all your selected data, which is to be recovered and click on Recover to start recovery.
Following the above simple steps will help you restore your data, but be sure not to save restored data back to the same device to avoid further harm to data.
Bonus Solutions to Overcome Data Error Cyclic Redundancy Check
Solution 3: Format
Formatting the device will let you lose all your data. Thus, it is recommended to restore data first and then apply the formatting steps.
Step 1. Go to My Computer/This PC and look for the RAW partition.
Step 2. Right-click on the RAW partition and select Format. Now, choose the file system as NTFS and give it a new name.
Step 3. Finally, click on Start, and then OK.
Applying these steps will convert the corrupted partition to the NTFS file system, which can be used again without any hassle.
Don’t Miss: Best Solutions to Fix Windows was Unable to Complete the Format
Solution 4: SFC scan
Step 1. Plug your external hard drive to the computer and then search CMD and right-click on Command Prompt, choose Run as administrator.
Step 2. After opening the CMD window, type sfc /scannow and hit on the Enter key.
Step 3. Restart the computer after the SFC is finished.
Eliminate It!
“Data error cyclic redundancy check” error can occur anytime during data transfer when there is a presence of corrupted registry, failure in the installation of a program, file misconfiguration, and clutter in the hard drive in the external device or drive.
The occurrence of such errors will not only prevent you from accessing your data but also causes data loss. Hence, it becomes highly essential to perform Windows error recovery and then apply suggested solutions to fix the problem with Bitwar Data Recovery Software.
Read More
- 7 Solutions to fix Hard Drive Unallocated Error on Windows 10
- 7 Solutions to Fix USB Device Malfunctioned & Not Recognized Error
- 10 Methods of How to fix SD Card Not Reading Error
- Quick Fix on How to Repair Hard Disk Not Detected By Computer
Windows and errors go hand in hand. Most of these errors have simple fixes which you don’t even have to spend two minutes on. However, if it’s an error related to your data, things can get a little bit messy. The data error cyclic redundancy check is one such error. But first, what is a cyclic redundancy check? A cyclic redundancy check is sort of a verification carried out by your device to check for the accuracy of raw data on the various storage devices. If this check fails due to any reason it leads to the data error (cyclic redundancy check).
This error should not be ignored as it makes it impossible to access the stored data on the device. Luckily, there exist several ways in which you can get out of this problem and we have listed them all in this guide, let’s go through them one by one.

How to Fix Cyclic Redundancy Check Error (CRC)? Step-by-Step Guide
Part 1: Overview of Data Error (Cyclic Redundancy Check)
1. What is Cyclic Redundancy Check Data Error?
As mentioned earlier, a cyclic redundancy check is an oversight mechanism by the system to check the accuracy of raw data on your device. If the check is unable to tally the check values of a processed file with the existing one, it results in what we know as the data error cyclic redundancy check ssd.
2. What Causes Cyclic Redundancy Check Data Error?
A Lot of factors can contribute to this error, the most common ones being network or storage-related issues. Some of the known causes include:
- Corrupted partition, application, file, or storage device.
- Device connected to an unstable or bad network.
- Changes in files metadata or file name while in use.
- Changes in the registry file.
- Abrupt shut down.
- Improperly connected hard drive.
Prepare: Recover Data from Hard Drive with Cyclic Redundancy Check Error
A hard drive affected with a data error cyclic redundancy check external hard drive error runs a high risk of losing all data. You should be ready with a solution to retrieve the data if it gets lost. Tenorshare 4DDiG Data Recovery is that solution. A fast and compact tool that is primed to recover data from almost any situation, the 4DDiG is the only thing you need for data retrieval after fixing the CRC error. Follow these simple steps to get your data back in no time.
- Recover files from inaccessible cyclic redundancy check devices.
- Recover files from internal/external HDD/SSD, SD card, USB flash drive, SD card, etc.
- Support 1000+ files types such as photos, videos, documents and more.
- Supports file systems including as FAT16,FAT32,exFAT,NTFS, APFS and HFS+.
- 100% easy and secure.
- Step 1:Choose a Hard Drive
- Step 2:Scan Hard Drive
- Step 3:Preview and Recover Files
Connect the external drive and locate it on 4DDiG. Then click scan to proceed. In the next pop-up windows, you can customize file types to start scanning.
4DDiG immediately examines the selected drive all around for missing data, and you may pause or stop the searching at any time if you’ve identified the files you want to recover. There are categories like Deleted Files, Existing Files, Lost Location, RAW Files, and Tag Files under the Tree View. You can also switch to File View to check file types such as Photo, Video, Document, Audio, Email, and others. Besides, you can search for target files or use Filter to narrow down your search on the left side of the panel.
Following the discovery of the target files, you can preview and recover them to a secure location. In case of disk overwriting and permanent data loss, please do not save to the same partition where you lost them.
After the data recovery, you can now start fixing this error.
Fix 1: Run Disk Check to Troubleshoot
The great thing about Windows is that it has a variety of tools that you can employ to troubleshoot the data error cyclic redundancy check hard drive error. Disk Check is one of them and amongst the safest at preserving your data during the fix. Here’s how you can use it.
Step 1: Go to My Computer and right-click on the partition with the error and go to Properties.
Step 2: Once in the Properties window, go to the Tools tab and press the ‘Check now’ option under the error checking section.
Step 3: Now, you can choose to scan the drive to troubleshoot it and solve the CRC error.
Fix 2: Use CHKDSK Utility to Repair Hard Drive
CHKDSK is the go-to utility for most of the data-related issues on Windows and the diskpart has encountered an error data error (cyclic redundancy check) is no different. To use the CHKDSK for this problem, follow these steps:
Step 1: Bring up Command prompt select run as Administrator. Type in the following command, ‘chkdsk /r x:’. Here, x is the particular drive that is giving you the error.
Step 2: The CHKDSK utility will now scan the partition and give you the report and restart your PC. Your device will be fixed on startup if this method works. If not, move on to the next one.
Fix 3: Run SFC Scan to Repair System Files
If a logical issue with your hard drive is the source of this error then a System File Check (SFC) scan may also be able to solve your problem. Here’s how:
Step 1: Run command prompt as Admin and type in the following command, ‘sfc /scannow’.
Step 2: The scan will now commence and will troubleshoot the issue.
Fix 4: Format the Devices
If you are using a Seagate or any other company’s hard drive and still can not get around the data error cyclic redundancy check external hard drive seagate error then it’s time to format your hard drive.
Step 1: Open Control Panel and go to Computer Management.
Step 2: In the Disk Management application, select the partition to be formatted and right-click on it. In the menu that pops up, select the Format option.
Step 3: Now a format Window will pop up in which you’ll have to select the type of format you want to do and other related things. Click OK and the Format process will begin.
Tips: If your format the drive, the data on it will be erased. No worries, download Tenorshare 4DDiG data recovery to effortlessly retrieve any lost files from the formatted drive.
Fix 5: Go for Manual Repair
If none of the above methods work then you should get in contact with the registered dealers of your device or hard drive and try to get it fixed there.
Part 3: How to Prevent Data Error Cyclic Redundancy Check External Hard Drive?
The fixes given in this guide will solve your problem, but it’s your responsibility to prevent the virtual disk manager data error cyclic redundancy check error from happening again. For this, you can put the following points into practice.
- Scan your device regularly with Windows Defender and keep it up to date.
- Power off and power on your device correctly. Avoid abrupt shutdowns.
- Do not interfere with the registry or metadata of your device.
- At any given time, keep 20% of free data on your system.
- Use only a genuine copy of Windows.
FAQs
1. How can I solve a data error cyclic redundancy check for a hard drive that is not initialized?
To fix data error cyclic redundancy check initialize disk error you can use the CHKDSK utility. Open up the command prompt and enter the command, ‘chkdsk /r x:’, x being the name of the drive, and run it.
2. How do I fix a cyclic redundancy check without a drive letter?
If you can not find the drive letter of your hard drive, update all the drivers related to the hard disk and restart your computer.
3. How do I fix data error cyclic redundancy check unallocated?
You can fix the data error cyclic redundancy check unallocated by the fixes mentioned here:
- Run Disk Check to Troubleshoot
- Use CHKDSK Utility to Repair Hard Drive
- Run SFC Scan to Repair System Files
- Format the Devices
- Go for Manual Repair
Conclusion:
That was all that you needed to know about the pesky Cyclic redundancy error. Right from the causes to the solution, we have laid down all that’s important along with the supremely important data recovery hack, the Tenorshare 4DDiG Data Recovery. It ensures that your problems get fixed without even losing a byte of data in the process. All of this and more with no costs whatsoever. So what are you waiting for?
Have you ever had difficulties solving the problem «data error (cyclic redundancy check)»? Don’t worry. Check out this post to simply and effortlessly fix cyclic redundancy check error and recover lost data via MiniTool software.
Data Error (Cyclic Redundancy Check)
In the Windows Seven forum and other major forums and portals, a large number of people are talking about the «data error (cyclic redundancy check)» problem. Let’s see a real life example from cnet.com:
My Laptop shows ‘Data error (cyclic redundancy check)’ error while copying data from external HDD to my laptop. How to fix this problem.
When copying files, meeting the cyclic redundancy check data error might lose your data. No need to worry
What Is Cyclic Redundancy Check?
Note: Before fixing CRC error, we think you should know what the cyclic redundancy check is.
A cyclic redundancy check (CRC), invented by W. Wesley Peterson in 1961 and further developed by the CCITT (Comité Consultatif International Telegraphique et Telephonique), is basically an error checking technique used by computers to specially check the data on your hard drive and optical disks.
1: Solved — Drive Is Not Accessible, Data Error (Cyclic Redundancy Check)
Has your hard drive ever been inaccessible because of the data error (cyclic redundancy check)? (picture as below)
Top Recommendation:
When it comes to inaccessible hard drive, I guess you might be interested in this post 10 Situations Where We Can’t Access a Partition in Windows, Along with Solutions.
CRC error can be caused by a variety of factors, such as registry corruption, a cluttered hard disk, an unsuccessful program installation, misconfigured files, etc. What happens when there is data error cyclic redundancy check?
First, they recover lost data from cyclic redundancy check external hard drive, SD card, USB drive, and other storage devices.
Second, they fix cyclic redundancy check data error.
You might be wondering:
«How to successfully recover lost data from drive which reports CRC error?»
To recover lost data from drive with CRC error, MiniTool Power Data Recovery is the best choice. It offers excellent performance, high security and simple operations. Download the file data recovery software and have a try. Here, we take the trial edition for example.
Free Download
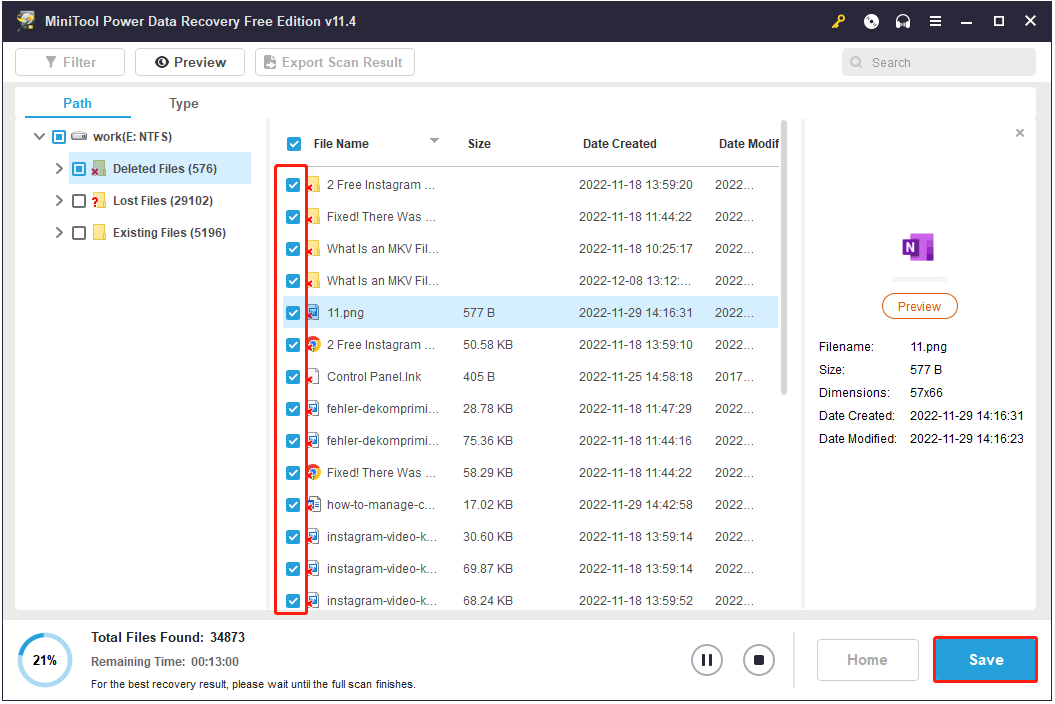
Step 1: Launch this professional data recovery software to get its main interface as follows. Select the target drive that has the error «Drive is not accessible, data error (cyclic redundancy check)», and click Scan.

Step 2: After scanning, all found data are listed in the following window. Now, you can check and preview needed files. Finally, save all selected files in a safe place. It is recommended to store selected files on another drive.
Top Recommendation
The trail edition can only scan lost data. To recover data, you need to choose its advanced edition. For instance, the Personal Ultimate edition not only can recover all found data, but also but also can recover data when PC won’t boot.
With several clicks of the mouse, you are able to recover data from drive with CRC error without affecting the original data.
«MiniTool Power Data Recovery helped me to recover data from data error cyclic redundancy check external hard drive. It also can help you…»Click to Tweet
VIDEO TUTORIAL
I used this software to successfully recover data from drive with CRC error!
Note: If your hard drive is physically damaged, please send it to professional data recovery companies for help.
After recovering data by using MiniTool Power Data Recovery, it is time to check drive error and fix cyclic redundancy check error by the following simple methods.
Data Error Cyclic Redundancy Check Fix/Repair
Method 1. Running the CHKDSK Utility
Step 1: Right-click the target drive you want to check, and then click Properties->Tools. Next, click «Check Now…» under «Error Checking«.
Step 2: Click on «Automatically fix the file system errors» to do a basic check and automatically repair problems with file and folders, and then click «Start».
Sometimes, running CHKDSK via right click makes it unable to run the scan and repair properly, and at this time you can try the alternate method of running CHKDSK.
Want to know the best way?
Step 1: Open the command prompt as Administrator. Only administrator has the necessary privileges to execute the scan.
Step 2: Type «chkdsk /f x:» into the command prompt. The letter «x» should be replaced with the letter name of the drive you’d like to run the scan on. Press Enter to run the command.

Step 3: Wait for the scan to complete. The process might take longer if there are problems with many files. Once CHKDSK has finished, it will give you a report and restart your computer.
If the cyclic redundancy check error still exists, you can try formatting the disk.
Method 2. Formatting the Disk
Note: Format will delete all data in your disk. It is recommended to recover lost data before what you are doing.
To format drive to fix the cyclic redundancy check error, you can try using MiniTool Partition Wizard Free.
Step 1: Download and install MiniTool Partition Wizard on computer. And then, launch it to get its main interface.
Free Download
Step 2: Select the target disk, click «Format Partition» feature from the left panel.
Step 3: Set partition label, file system and cluster size for the selected partition and click «OK«.
Step 4: Click «Apply» button on the top to apply the change.
Step 5: Restart your PC.
«I got a new skill on how to solve «Drive is not accessible, data error (cyclic redundancy check)» problem, it could help you…»Click to Tweet
After learning how to fix the «Drive is not accessible, data error (cyclic redundancy check)» problem, let’s take a look at two other situations where you will encounter the CRC error and their corresponding solutions.
2: Solved — «Data Error (Cyclic Redundancy Check)» Error Message in Outlook
Look:
After downloading emails from Microsoft Outlook to your local computer, you may receive one of the following error messages:
- File pathfilename.pst could not be accessed. Data error. Cyclic redundancy check.
- Data error (cyclic redundancy check)
In this error message, pathfilename.pst correspond to the location and the file name of your Personal Folders (.pst) file—for example, C:mypst.pst.
You may not be able to view some of the downloaded messages. When you click your Deleted Items folder, you may receive the following error message:
Error 0x80040116
Cause
Generally, cyclic redundancy check error occurs when your PST files is corrupted or maybe the hard disk has some issues where your PST file is currently stored. This error manifests, when you try to copy the original PST file to another location.
In this situation, what should we do? Is it possible to recover lost emails? Can we solve this CRC error?
OF COURSE! WE CAN!
To resolve this issue, you may first try using free MiniTool Power Data Recovery to recover lost Outlook emails (There might be little hope for email recovrey to work, but you should give it a try regardless..), and then check your hard drive to fix CRC error. After that, re-create your personal folder files.
Note: The You may receive a «Data Error (Cyclic Redundancy Check)» error message in Outlook post will show you detailed steps on how to solve this issue.
3: Solved — Cyclic Redundancy Check Error on A DVD Disc
Before I show you how to fix CRC error on DVD disc, I will share a story:
I am trying to install sims3 but this installation stops in the middle and says
File: D:GameDatePackagesFullbuild1.package
Error: Data error (cyclic redundancy check)
Cause
This problem can have many different causes, including: problem with the DVD or DVD drive, conflicting software (Paragon NTFS, Metakine DVD Remaster, Roxio Creator, CD emulation software like Alcohol 120%, Nero Image Drive), etc.
How do I fix the cyclic redundancy check error on DVD disc
First, you should ensure that the DVD disc is not damaged or scratched, and then clean it with a cleaning kit. After that, scan and defrag the DVD disc if necessary — make certain that the DVD has enough space left on it to install the game.
If none of the above works, the following may also help you:
- Open Windows Start menu.
- Select Run.
- Type msconfig.
- In the Services tab disable all items.
- In the Startup tab uncheck all items.
- Restart computer in Safe Mode (press F8 during bootup).
- While in Safe Mode insert The Sims 3 DVD disc.
- Use Windows Explorer to locate SETUP.EXE on the disc (actual filename may vary slightly).
- Right-click SETUP.EXE and select the option to run it as an Administrator.
- Installation should now proceed without any CRC errors.
- Reboot the computer normally.
After seeing the 3 situations of CRC error, I guess you may have a basic understanding of this «data error (cyclic redundancy check)» issue. Next, let’s move onto the following part.
2 Necessary Tips for Data Error Cyclic Redundancy Check Fix/Repair
Tip 1. If you receive the warning «data error (cyclic redundancy check)» and your drive contains any important data, it’s best to recover all lost data immediately before attempting to fix the error.
MiniTool Power Data Recover is the secret to recovering lost data from cyclic redundancy check of external hard drive, SD card, USB drive, and other storage devices.
Tip 2. Although MiniTool Power Data Recovery can help recover data, data loss is inevitable. Also, the cylic redundancy data error could come any time, which could be a critical cost.
In order to avoid data loss caused by various reasons like CRC error, the best method is backing up all your needed data. You can get more information and detailed steps from this «Copy Disk» post.
Bottom Line
Hope the instructions in this post help you fix the cyclic redundancy check data error effectively.
If you happen to know of other ways to repair CRC error, don’t hesitate to let us know and we promise we’ll update this guide.
If you have any doubts or suggestions about MiniTool software, please leave it in the following comments or directly send to [email protected]. We will solve it as soon as possible.
Data Error Cyclic Redundancy Check FAQ
How do I fix a data error cyclic redundancy check?
- Recover lost data.
- Running the CHKDSK utility to do a basic check and automatically repair problems with file and folders.
- Format the drive.
How do you check cyclic redundancy error?
- Right-click the target drive you want to check.
- Click Properties->Tools.
- Click Check Now… under Error Checking.
- Click on Automatically fix the file system errors.
- Click Start.
What is cyclic redundancy check error in hard disk?
Cyclic redundancy check, CRC, is an error-detecting code. CRC error is widely used to detect accidental changes to raw data in digital networks and storage devices. A cyclic redundancy check indicates a bad spot on your hard drive.
Why do CRC errors occur?
Packet error, as one of the most common reasons for CRC errors, occurs when network communications are bad or go in and out. Noise and poor wiring also can cause CRC errors.
When you are in the middle of rushed copying some crucial data from one drive to another and suddenly a screen pops up, saying “Data error!” You start to wonder What is Data Error Cyclic Redundancy Check, why it failed and how do I resolve it?
Well, you are in the perfect place to find out. Cyclic Redundancy Check or Simply CRC is a check performed by the file system to check if the source file and the destination file are the same, i.e. if the file has been successfully copied or not. Instead of comparing each bit of data of both the files, some checksums are generated and then they are compared to see if the files are the same.
Now, two things can be wrong with copying the data.
- The source file or the Drive on which the file was stored initially is corrupt, or
The destination drive is corrupt leading to no match in source and destination files, as the file could not be copied accurately. - If the file or files that gave the Data Error Cyclic Redundancy Check messages are not much important, you can simply permanently delete them and copy the rest of the files. But if they are essential, you will have to recover them.
Check Out: Best Data Recovery Software?
Check This: 5 Best Disk Cloning Software for Windows
If you get the Data Error Cyclic Redundancy Check screen while copying some files, here are some things you can try to resolve the problem:
Method #0 Use Advanced System Repair Pro (Strongly Recommended)
Our tool will quickly repair common computer errors, protect you from file or data loss, malware, trojans, hardware failure and optimize your PC to boost for maximum performance. Fix PC issues now using 3 easy steps:
- Download this PC Repair Tool rated as «Excellent» on TrustPilot.com.
- Click on Start Scan button to find errors related to Windows.
- Click Repair All to fix all issues with Patented Technologies.
Method 1: Recover the Source Files
There are many Data Recovery Software available on the internet. Some of them are paid with a free trial and some are free. When you delete or move or overwrite a file from any storage device, the special hidden file that contains metadata about the files and folders simply deletes its entry, not completely removing every byte of the file.
The Recovery software makes use of this, and rebuilds the metadata file, making the deleted or corrupted file available again, and you can copy files now without the Data Error Cyclic Redundancy Check message.
Some of the data recovery software include Minitool Power Data Recovery, EaseUS Data Recovery Wizard, Recuva, etc. All of them are designed to do the same thing: recover corrupt or deleted files from a drive or recover files from a lost partition.
Are You Facing This:-
- Windows Key Not Working on Windows 10
- Error Code 0x8007000D in Windows
- Microsoft Word Not Responding in Windows
Steps to recover files using a recovery software:
- Firstly, Close all running programs first.
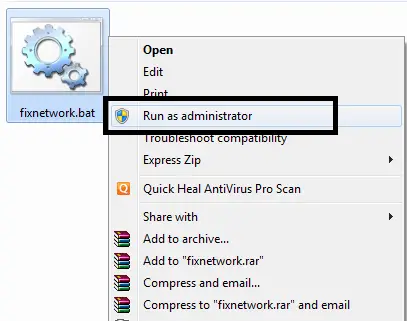
- Secondly, Now run the software as administrator (Right click on the software icon in the start menu or on the Desktop and Choose Run as Administrator from the context Menu).

- Select the Drive you want to recover files from and select file types if you’re going to recover the specific type of files like images, audio, documents, etc.
- Choose to start recovering after setting the destination (where to save the recovered files to). And you are set.
Check Out: 6 Ways to Fix Google Chrome has Stopped Working
Method 2: Repairing the Whole Drive
You can also use the Command Prompt to repair the Drive, using a popular command called chkdsk. Chkdsk is a built-in windows utility to check and repair file system errors, to repair the broken file registry and to repair bad sectors if possible.
If you don’t know How to Run Chkdsk In Windows 10?
To repair a drive using chkdsk, follow these simple steps:
- Firstly, Close all running programs including background apps, because if any apps are using the hard drive during the repair, it may cause the applications to stop or the repair to fail.
- Secondly, Open command prompt as an administrator. Press Windows Key + R to open the Run… dialogue box.

Command Prompt - Type cmd in the box and Press Ctrl + Shift + Enter. This will open the command prompt in administrator mode, allowing you the full access to the drive for repair.
- Now type “chkdsk /f d:” without quotes. Here, replace d: with the drive letter of the drive you want to repair. Press the Enter key.

- Now the chkdsk utility will run and check for the drive errors. Depending upon the condition of the drive, it will take more or less time.
- After the utility completes scan and repair, it will display a report about the condition, and errors found on the drive and if they were successfully repaired or not.


There is a high chance that you can copy files without the Data Error Cyclic Redundancy Check message popping up now. If there are too many errors in the drive, you may want to format it. But before formatting the drive, you can always try to recover the important files and documents from the drive by following the steps mentioned earlier.
Are You Facing: Windows was Unable to Complete the Format
Fix: Windows 10 100% Disk Usage in Task Manager
Method 3: Format the Corrupted Drive
If the drive you are copying from is beyond repair and you want to fix the drive, you can consider formatting it.
Formatting the drive will erase everything on it so make sure you have backed up any important files before proceeding any further.
You can follow our guide to format the drive:
- firstly, Open This PC or Explorer from the Desktop icon or start menu.
- Secondly, Right-click on the drive icon of the drive you want to format.
- Click on Format.

- Deselect Quick format if you want to clean your drive thoroughly.
- Choose NTFS if the drive is a hard disk or FAT32 in case of pen-drives or memory cards as the partition system.
- Complete the format. If there were no errors while formatting, you could now copy files to and from the drive without any Data error cyclic redundancy check message popping up on your screen and ruining everything.
Check Out: 5 Ways To Fix NVIDIA Installer Failed In Windows 10
Method 4: Renaming the Drive (Assigning a drive letter) if a Drive is Not Accessible
In some cases, the windows operating system does not automatically assign a drive letter to a newly connected drive or de-assigns it for safe disconnection when idle. If that is the reason the drive was not accessible, you can rename or assign a drive letter to the drive to access it.
Follow these steps to assign a drive letter to a drive or a partition in Windows:
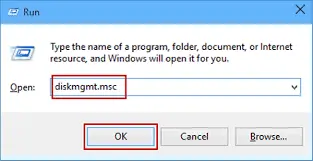
- Firstly, Press the key combination Windows + R to open the run… dialogue box.
- Secondly, Type “diskmgmt.msc” in the text box provided without the quotes and press the Enter key.

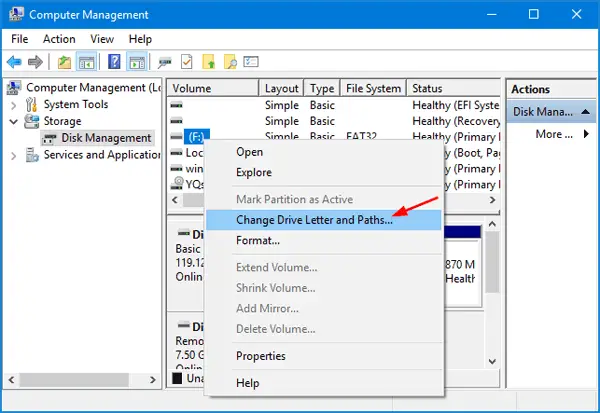
- Disk management tool window will open if you also see the drive you want to assign the letter to. Right-click on it. You can identify different drives from their sizes or file systems. DO NOT mess with small partitions that are reserved for Windows operating system’s safe operation or you may end up screwing up the OS and PC won’t boot, which in turn will end up in you losing all of your data.
- In the menu that pops up, Select Change drive letters or paths.

- If there is any drive letter associated already, select change or select add if there was none.
- Assign a new letter to the drive, ignore any warnings if anything pops up.

- Close the windows and reboot.

See if this change in drive letter allowed you to access the drive now and removed the message Data Error Cyclic Redundancy Check.
Also, Fix Reboot and Select Proper Boot Device
Method 5: Check for Bad Sectors on a Hard Disk
If the source or destination drive is corrupt and hence resulting in a Data Error Cyclic Redundancy Check error. Maybe it is time to replace it or get a warranty replacement if it is still under warranty.
Drive getting corrupt may have many causes like the mechanical failure of the hard drive due to accidental shut down. That too due to bumps or drops causing the head on the hard drive to dislocate and damage the drive. Or ejection or drive when data on it or read from it.
You Might Be Facing: Fix the Directory Name is Invalid in Windows 10
To check for bad sectors on a hard disk. You can use any of the partition tools like Recuva, Minitool, or EaseUS.
- Open the tool and right-click on the drive you want to scan for bad sectors or damage.
- Select the option that resembles something like Scan for bad sectors…

- Let the scan complete and be patient as large drives can take a lot of time to complete the scan.

If the computer freezes during the scan. Wait for a while and if it stays frozen for too much time, you have bad news. And also the drive is beyond repair.
Conclusion
In such a case or if the software reports bad drive, then try to replace the drive. There is no software fix to a hardware problem. Therefore, Data Error Cyclic Redundancy Check will be the start of a long list of problems waiting for you if you don’t replace the drive.

Gravit Sinha is the founder of ValidEdge. Ever since he was a kid, he has been a problem fixer and that passion is what inspired him to start and grow this website! 🙂
I ran across an issue with my VM backups saying that they were failing validation and not backing up properly, even though each VM showed success when checking the logs. I was getting a specific error in the backup logs:
Backup files health check has been completed
Failed to perform backup file verification Error: Data error (cyclic redundancy check). Failed to read data from the file [B:BackupsLDLNET Other BackupLDLNET BackupD2019-01-12T001234.vbk]. Agent failed to process method {Signature.FullRecheckBackup}.
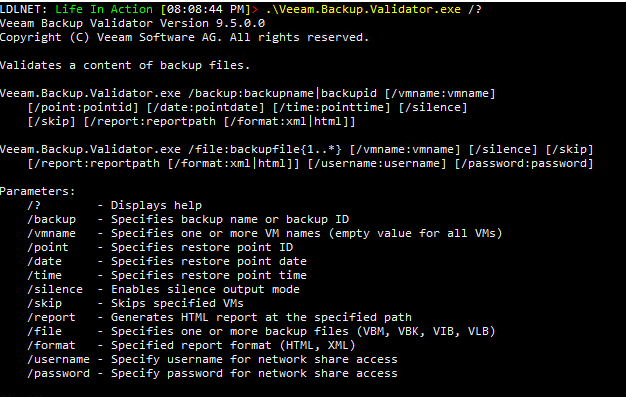
So, I did some research and found a little known tool that is used to manually validate the Veeam backup files, basically because it’s a tool usually executed only by the technical support staff. It is located in the following folder (Version 9.5.0.1922):
C:Program FilesVeeamBackup and ReplicationBackupVeeam.Backup.Validator.exe
Its main use case is to verify the consistency of a backup created with Veeam Backup & Replication. It’s NOT SureBackup, that does another kind of control by starting the VM from the backup file, and is for sure more reliable. But if you do not want to start a SureBackup activity, or if you only have a Standard license lacking SureBackup, this tool can be a good alternative, or you can use it to check a backup file after it has been moved or if you had a consistency problem on the storage holding those files.
Now since I had a specific file that was showing an error, I wanted to run the command against that file to validate the backup. Here is the command that I ran:
.Veeam.Backup.Validator.exe /file:”B:BackupsLDLNET Other BackupLDLNET BackupD2019-01-12T001234.vbk”
It started running against the file and it did fail as it did in the log files from the backup process. Here is the error message:
Skipping VM ‘B:BackupsLDLNET Other BackupLDLNET BackupD2019-01-12T001234.vbk ‘: File “LDLNET-VM01-flat.vmdk” is corrupted. Data error (cyclic redundancy check).
Failed to read data from the file [B:BackupsLDLNET Other BackupLDLNET BackupD2019-01-12T001234.vbk ].
Now, when looking at the backup job, I found that the file listed was the original full backup that I had completed when I originally changed the job for all the new VMs that were now listed in the backup job. Since that was the case and I did not have any VMs that were in a bad state, I deleted all the backup files from my storage and started another full backup of the VMs in the job.
Using the CLI tool to manually validate the backup file was very helpful in this case as it would help me decide to clear out a backup that would not restore properly, even with the incremental backups since the base full file was corrupt.
References:
Veeam Backup Validator: check the consistency of your backup files
Cookies Notice for itblog.ldlnet.net
We use cookies on our website to give you the most relevant experience by remembering your preferences and repeat visits. By clicking “Accept”, you consent to the use of ALL the cookies.
Do not sell my personal information.