В этой статье мы попытаемся устранить ошибку «IS-FC02-3», с которой сталкиваются пользователи Epic Games при обновлении или проверке игры.
Ошибка «IS-FC02-3», с которой сталкиваются пользователи Epic Games при загрузке любой игры, проверке файлов и выполнении процесса обновления, может вызвать проблемы из-за многих проблем. Если вы столкнулись с такой проблемой, вы можете найти решение, выполнив следующие действия.
Что такое ошибка Epic Games IS-FC02-3?
Эта возникающая ошибка связана с какой-либо проблемой и ограничивает процесс загрузки, обновления и проверки. Если у вас медленный прием или скорость интернета, мы можем столкнуться с этой ситуацией и не сможем обработать ваши транзакции. Конечно, мы можем не столкнуться с такой ошибкой только из-за проблем с интернетом. Одна из них может быть вызвана антивирусной системой. Ваш антивирус может препятствовать доступу программы Epic Games к папке и отображать различные коды ошибок. Для этого мы поможем вам решить эту ошибку, предоставив вам несколько предложений.
Как исправить ошибку Epic Games IS-FC02-3?
Чтобы решить эту ошибку, с которой мы столкнулись, мы попытаемся решить ее, сообщив вам несколько предложений.
1-) Отключить антивирусную программу
Прежде всего, мы можем наблюдать, отключив любую антивирусную программу, которую мы используем, чтобы мы могли оценить, с чем связана эта ошибка. Если вы используете антивирусную программу, отличную от Защитника Windows, полностью отключите ее. Если вы используете только Защитник Windows, мы сообщим вам шаги, которые необходимо выполнить по порядку.
- Отключить постоянную защиту
- Сначала закройте программу «Epic Games» с помощью диспетчера задач.
- Затем откройте начальный экран поиска, введя «Настройки безопасности Windows».
- Нажмите на опцию «Защита от вирусов и угроз» на открывшемся экране.
- Нажмите на опцию «Управление настройками» под заголовком «Настройки защиты от вирусов и угроз» в меню.
- Отключите опцию «Постоянная защита» на открывшемся экране.
Отключить защиту файлов с выкупом
Программное обеспечение Защитника Windows, разработанное для обеспечения безопасности операционной системы, может излишне блокировать файлы в некоторых местах. Для этого мы можем запустить игру, отключив эту защиту на ограниченное время, сделав несколько настроек.
- Сначала закройте программу «Epic Games» с помощью диспетчера задач.
- Откройте начальный экран поиска.
- Откройте экран поиска, введя «Настройки безопасности Windows».
- Нажмите на опцию «Защита от вирусов и угроз» на открывшемся экране.
- Нажмите в меню пункт «Защита от программ-вымогателей».
- Отключите «Контролируемый доступ к папкам» на открывшемся экране.
После этого процесса вы можете запустить программу Epic Games, чтобы загрузить, обновить или проверить файл. Если ваша проблема не устранена, давайте перейдем к нашему следующему предложению.
2-) Очистить кеш DNS
Если ни одно из приведенных выше предложений не сработало, мы можем решить проблему, очистив кеш DNS. Для этого;
- Введите cmd на стартовом экране поиска и запустите его от имени администратора.
- Введите команду ipconfig /flushdns на экране командной строки и нажмите Enter.
- После этого процесса он покажет, что ваш кеш DNS был успешно очищен.
- Затем снова введите команду сброса netsh winsock на экране командной строки и нажмите клавишу ввода.
После этого процесса перезагрузите компьютер и запустите программу Epic Games. Если проблема не устранена, давайте перейдем к другому предложению.
3-) Выключите модем
Выключите модем, подождите 20 секунд и снова включите его. Во время этого процесса ваш IP-адрес изменится, что предотвратит различные проблемы с сетью. Если проблема не устранена, давайте перейдем к другому предложению.
4-) Зарегистрируйте другой DNS-сервер
Если ни один из вышеперечисленных процессов не произошел, давайте сохраним еще один DNS-сервер на наш компьютер.
- Откройте панель управления.
- Выберите опцию Сеть и Интернет.
- На открывшемся экране откройте Центр управления сетями и общим доступом.
- Нажмите на опцию «Изменить настройки адаптера» слева.
- Откройте меню «Свойства», щелкнув правой кнопкой мыши тип подключения.
- Дважды щелкните Интернет-протокол версии 4 (TCP/IPv4).
- Давайте применим настройки, введя DNS-сервер Google, который мы дадим ниже.
- Предпочтительный DNS-сервер: 8.8.8.8
- Другой DNS-сервер: 8.8.4.4
- Затем нажмите «Проверить настройки при выходе», нажмите кнопку «ОК» и примените процедуры.
После этого процесса перезагрузите компьютер и запустите программу Epic Games.
5-) Проверьте свой диск
Для бесперебойной работы программа запуска Epic Games должна быть установлена в системе «C:». Если его нет в папке «C:», выполните установку в системе «C:». Если вы не хотите устанавливать его на систему «C:», проверьте размер вашего установленного диска. Если на вашем диске нет места, вы можете столкнуться с такой ошибкой. Для этого вы можете устранить проблему, открыв расположение вашего диска.
6-) Восстановление программы Epic Games
Любые отсутствующие и поврежденные файлы в программе Epic Games могут вызвать ошибку. Для этого мы можем исправить такие проблемы, починив программу Epic Games.
- Введите «Панель управления» на начальном экране поиска и откройте его.
- Нажмите на опцию «Удалить программу» на открывшемся экране.
- Щелкните правой кнопкой мыши программу «Epic Games Launcher» из списка программ и нажмите «Восстановить».
После этого процесса он просканирует неисправные или отсутствующие файлы и выполнит процесс установки. После успешного завершения процесса откройте программу Epic Games и проверьте, сохраняется ли проблема.
Нет, не нужно.
А программу
Цитата
Maskit
удалите.
Затем:
1.
- Запустите повторно (если уже закрыли) AdwCleaner (by Malwarebytes) (программу необходимо запускать через правую кн. мыши от имени администратора).
- В меню Параметры включите дополнительно в разделе Действия по базовому восстановлению:
- Сбросить политики IE
- Сбросить политики Chrome
- В меню Информационная панель нажмите Запустить проверку.
- По окончании нажмите кнопку Карантин и дождитесь окончания удаления.
- Когда удаление будет завершено, отчет будет сохранен в следующем расположении: C:AdwCleanerLogsAdwCleaner[Cxx].txt (где x — любая цифра).
- Прикрепите отчет к своему следующему сообщению.
- (Обратите внимание — C и S — это разные буквы).
Внимание: Для успешного удаления нужна перезагрузка компьютера!!!
Подробнее читайте в этом руководстве.
2.
Скачайте Farbar Recovery Scan Tool (или с зеркала) и сохраните на Рабочем столе.
Примечание: необходимо выбрать версию, совместимую с вашей операционной системой. Если вы не уверены, какая версия подойдет для вашей системы, скачайте обе и попробуйте запустить. Только одна из них запустится на вашей системе.
Когда программа запустится, нажмите Yes для соглашения с предупреждением.
Нажмите кнопку Scan.
После окончания сканирования будут созданы отчеты FRST.txt и Addition.txt в той же папке, откуда была запущена программа. Прикрепите отчеты к своему следующему сообщению.
Подробнее читайте в этом руководстве.
Содержание
- Как исправить ошибку в лаунчере Epic Games с загрузкой контента?
- Лучшие комментарии
- Исправьте коды ошибки Epic Games IS-MF-01 и LS-0009 в Windows 11/10
- Как исправить код ошибки Epic Games Launcher IS-MF-01
- Как исправить код ошибки Epic Games Launcher LS-0009
- IS-MF01-5-5 при установке Control
- Решение
- Как исправить ошибку Epic Games IS-FC02-3?
- В этой статье мы попытаемся устранить ошибку «IS-FC02-3», с которой сталкиваются пользователи Epic Games при обновлении или проверке игры.
- Что такое ошибка Epic Games IS-FC02-3?
- Как исправить ошибку Epic Games IS-FC02-3?
- 1-) Отключить антивирусную программу
- 2-) Очистить кеш DNS
- 3-) Выключите модем
- 4-) Зарегистрируйте другой DNS-сервер
- 5-) Проверьте свой диск
- 6-) Восстановление программы Epic Games
Как исправить ошибку в лаунчере Epic Games с загрузкой контента?
При входе в Epic Games лаунчер не загружается контент и в установленные игры зайти невозможно. Как это можно решить?

Лучшие комментарии

У меня тоже возникала это проблема и решил я её так: нужно удалить папку webcache по пути «C:UsersuserAppDataLocalEpicGamesLauncherSaved», а потом запустить лаунчер (после запуска лаунчера папка webcache заново создастся)
P.S.Эта проблема возникает из-за плохого интернета, потому что из-за него (как лично я понял) загружаются «побитые» файлы в папку webcache в который загружаются и хранятся всякие временные файлы по типу png изображений, текста и т.д.

Написать в поддержку можно, если что, всегда.
А так — ну, попробуй проверь что места на диске с временными файлами (диск С: обычно) хватает, как и на диске с файлами игр.
Источник
Исправьте коды ошибки Epic Games IS-MF-01 и LS-0009 в Windows 11/10
Epic Games — это игровая клиентская служба, в которой размещено множество игр. Коды ошибок IS-MF-01 и LS-0009 относятся к числу многочисленных проблем, с которыми геймеры могут столкнуться на своих игровых компьютерах с Windows 10 или Windows 11. В этом посте представлены решения этих проблем.
Epic Games не без ошибок, таких как ошибки входа в систему, ошибки подключения, ошибки установщика. Мы обсудим эти два Коды ошибок Epic Games в отдельных подзаголовках ниже, каждый со своими потенциальными причинами, а также соответствующими решениями.
Как исправить код ошибки Epic Games Launcher IS-MF-01
Когда вы столкнетесь с этой проблемой, вы получите следующее аналогичное полное сообщение об ошибке;
Программы для Windows, мобильные приложения, игры — ВСЁ БЕСПЛАТНО, в нашем закрытом телеграмм канале — Подписывайтесь:)
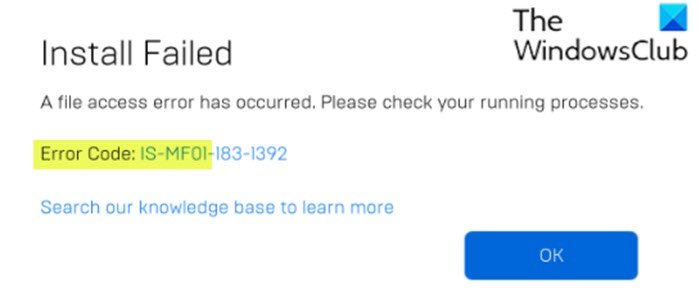
Установить не удалось
Произошла ошибка доступа к файлу. Пожалуйста, проверьте ваши запущенные процессы.
Код ошибки: IS-MF0I-I83-1392
Поищите в нашей базе знаний, чтобы узнать больше
Ошибка IS-MF-01 обычно указывает на то, что Не удалось успешно переместить файл. Вы можете столкнуться с этой проблемой при установке игры из-за того, что программа запуска не может переместить файл во время загрузки.
- Отключить приложения на вкладке Автозагрузка в диспетчере задач
- Запустите средство устранения неполадок установки и удаления программы.
- Связаться со службой поддержки игроков Epic Games
Посмотрим подробнее на решениях.
1]Отключить приложения на вкладке «Автозагрузка» в диспетчере задач.
Фоновые приложения могут мешать работе Epic Games Launcher. В этом случае вы можете отключить приложения на вкладке «Автозагрузка» в диспетчере задач. Если проблема, кажется, решена, то можно с уверенностью предположить, что что-то, что вы работаете в фоновом режиме, запускает Код ошибки Epic Games IS-MF-01 проблема. Чтобы изолировать проблему, вы можете повторно включать запускаемые приложения по одному, пока проблема не вернется.
2]Запустите средство устранения неполадок установки и удаления программы.
Это решение требует, чтобы вы запустили средство устранения неполадок при установке и удалении программы от Microsoft. Мастер разработан, чтобы помочь вам автоматически устранять проблемы, когда вам запрещено устанавливать или удалять программы. Он также исправляет поврежденные ключи реестра.
3]Обратитесь в службу поддержки игроков Epic Games
Если у вас ничего не работает, вы можете связаться со службой поддержки Epic Games Player и надеяться на лучшее.
Как исправить код ошибки Epic Games Launcher LS-0009
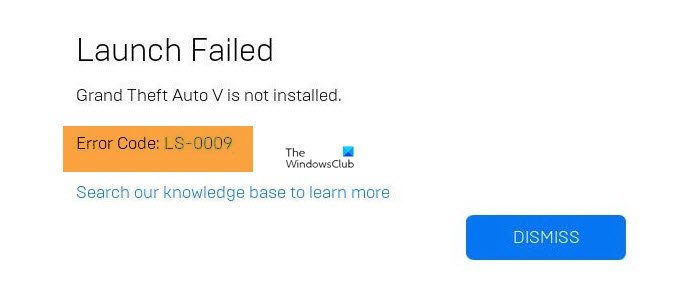
Ошибка LS-0009 обычно указывает на то, что Игра не установлена. Таким образом, вы столкнетесь с этим кодом ошибки, когда пытаетесь играть в игру, которая не установлена.
- Перезагрузите компьютер
- Проверьте, установлена ли игра
- Удалите файлы игры, которые вы переместили или изменили
Посмотрим подробнее на решениях.
Устранение неполадок для Код ошибки программы запуска Epic Games LS-0009 начинается с простой перезагрузки компьютера. Если это действие не помогло, вы можете попробовать следующее решение
2]Проверьте, установлена ли игра
Вы можете проверить, правильно ли установлена игра в программе запуска Epic Games.
- Откройте программу запуска Epic Games.
- Щелкните Библиотека.
- Найдите игру, в которую вы пытаетесь играть, и убедитесь, что на ней написано «Запустить».
Если отображается сообщение «Запуск» и вы видите эту ошибку, удалите и переустановите игру, выполнив следующие действия:
- Запустите программу запуска Epic Games.
- Щелкните свою библиотеку.
- Нажмите на многоточие (три горизонтальные точки) рядом с игрой, в которую вы пытаетесь играть.
- Щелкните Удалить.
Кроме того, вы можете использовать программу удаления стороннего программного обеспечения для удаления игры.
- Перезапустите программу запуска Epic Games и попробуйте снова установить игру.
Но если в игре написано что-то другое, кроме «Запуск», вы можете проверить файлы игры, выполнив следующие действия:
- Откройте программу запуска Epic Games.
- Щелкните Библиотека.
- Нажмите кнопку меню с многоточием рядом с игрой, которую хотите проверить.
- Щелкните Подтвердить.
В зависимости от размера игры этот процесс может занять некоторое время. После завершения операции проверки перезапустите игру.
3]Удалите файлы игры, которые вы переместили или изменили.
Обязательно укажите, что вы можете столкнуться с этим кодом ошибки, если после успешной установки игры вручную переместите или измените файлы игры. В этом случае для решения возникшей проблемы вы можете удалить любые файлы, которые вы переместили или изменили, и загрузить игру через программу запуска Epic Games.
Надеюсь, вы найдете это руководство полезным!
.
Программы для Windows, мобильные приложения, игры — ВСЁ БЕСПЛАТНО, в нашем закрытом телеграмм канале — Подписывайтесь:)
Источник
IS-MF01-5-5 при установке Control
При установке Control в Epic Games Store выплывает ошибка IS-MF01-5-5. Перезапуск лаунчера и компьютера вообще никак не помогает. Пожалуйста, поделитесь какими-то советами! Она раньше у меня вроде как работала, но мне место на харде было нужно и я ее удалил. Теперь вот захотелось еще раз поиграть, когда услышал, что та в Steam выходит, но тут эта гадкая фиговина…
Решение
Хорошенько прошерстив просторы Интернета, становится понятно, что ошибку IS-MF01-5-5 при установке Control (или любой другой игры в EGS) вызывает активный антивирус на компьютере пользователя либо какой-то баг в работе ОС Windows. Сделать в такой ситуации можно следующее:
- деактивировать системный Защитник Windows (или любой другой антивирус);
- внести лаунчер Epic Games Store в список исключений антивируса/брандмауэра;
- перезагрузить компьютер несколько раз подряд.
Для деактивации Защитника Windows нужно сделать вот что:
- нажмите Win+I;
- перейдите в раздел «Обновление и безопасность»;
- откройте подраздел «Безопасность Windows»;
- кликните на пункт «Защита от вирусов и угроз»→«Управление настройками»;
- выключите защиту от вирусов и угроз.
Попытайтесь установить Control в EGS еще раз. Если процессу действительно препятствовал антивирус, то теперь все должно пойти как по маслу.
Как утверждают игроки, последнее решение, перезагрузка ПК, помогает наиболее часто в случае появления IS-MF01-5-5 и других схожих ошибок.
Источник
Как исправить ошибку Epic Games IS-FC02-3?
В этой статье мы попытаемся устранить ошибку «IS-FC02-3», с которой сталкиваются пользователи Epic Games при обновлении или проверке игры.
Ошибка «IS-FC02-3», с которой сталкиваются пользователи Epic Games при загрузке любой игры, проверке файлов и выполнении процесса обновления, может вызвать проблемы из-за многих проблем. Если вы столкнулись с такой проблемой, вы можете найти решение, выполнив следующие действия.
Что такое ошибка Epic Games IS-FC02-3?
Эта возникающая ошибка связана с какой-либо проблемой и ограничивает процесс загрузки, обновления и проверки. Если у вас медленный прием или скорость интернета, мы можем столкнуться с этой ситуацией и не сможем обработать ваши транзакции. Конечно, мы можем не столкнуться с такой ошибкой только из-за проблем с интернетом. Одна из них может быть вызвана антивирусной системой. Ваш антивирус может препятствовать доступу программы Epic Games к папке и отображать различные коды ошибок. Для этого мы поможем вам решить эту ошибку, предоставив вам несколько предложений.
Как исправить ошибку Epic Games IS-FC02-3?
Чтобы решить эту ошибку, с которой мы столкнулись, мы попытаемся решить ее, сообщив вам несколько предложений.
1-) Отключить антивирусную программу
Прежде всего, мы можем наблюдать, отключив любую антивирусную программу, которую мы используем, чтобы мы могли оценить, с чем связана эта ошибка. Если вы используете антивирусную программу, отличную от Защитника Windows, полностью отключите ее. Если вы используете только Защитник Windows, мы сообщим вам шаги, которые необходимо выполнить по порядку.
- Отключить постоянную защиту
- Сначала закройте программу «Epic Games» с помощью диспетчера задач.
- Затем откройте начальный экран поиска, введя «Настройки безопасности Windows».
- Нажмите на опцию «Защита от вирусов и угроз» на открывшемся экране.
- Нажмите на опцию «Управление настройками» под заголовком «Настройки защиты от вирусов и угроз» в меню.
- Отключите опцию «Постоянная защита» на открывшемся экране.
Отключить защиту файлов с выкупом
Программное обеспечение Защитника Windows, разработанное для обеспечения безопасности операционной системы, может излишне блокировать файлы в некоторых местах. Для этого мы можем запустить игру, отключив эту защиту на ограниченное время, сделав несколько настроек.
- Сначала закройте программу «Epic Games» с помощью диспетчера задач.
- Откройте начальный экран поиска.
- Откройте экран поиска, введя «Настройки безопасности Windows».
- Нажмите на опцию «Защита от вирусов и угроз» на открывшемся экране.
- Нажмите в меню пункт «Защита от программ-вымогателей».
- Отключите «Контролируемый доступ к папкам» на открывшемся экране.
После этого процесса вы можете запустить программу Epic Games, чтобы загрузить, обновить или проверить файл. Если ваша проблема не устранена, давайте перейдем к нашему следующему предложению.
2-) Очистить кеш DNS
Если ни одно из приведенных выше предложений не сработало, мы можем решить проблему, очистив кеш DNS. Для этого;
- Введите cmd на стартовом экране поиска и запустите его от имени администратора.
- Введите команду ipconfig /flushdns на экране командной строки и нажмите Enter.
- После этого процесса он покажет, что ваш кеш DNS был успешно очищен.
- Затем снова введите команду сброса netsh winsock на экране командной строки и нажмите клавишу ввода.
После этого процесса перезагрузите компьютер и запустите программу Epic Games. Если проблема не устранена, давайте перейдем к другому предложению.
3-) Выключите модем
Выключите модем, подождите 20 секунд и снова включите его. Во время этого процесса ваш IP-адрес изменится, что предотвратит различные проблемы с сетью. Если проблема не устранена, давайте перейдем к другому предложению.
4-) Зарегистрируйте другой DNS-сервер
Если ни один из вышеперечисленных процессов не произошел, давайте сохраним еще один DNS-сервер на наш компьютер.
- Откройте панель управления.
- Выберите опцию Сеть и Интернет.
- На открывшемся экране откройте Центр управления сетями и общим доступом.
- Нажмите на опцию «Изменить настройки адаптера» слева.
- Откройте меню «Свойства», щелкнув правой кнопкой мыши тип подключения.
- Дважды щелкните Интернет-протокол версии 4 (TCP/IPv4).
- Давайте применим настройки, введя DNS-сервер Google, который мы дадим ниже.
- Предпочтительный DNS-сервер: 8.8.8.8
- Другой DNS-сервер: 8.8.4.4
- Затем нажмите «Проверить настройки при выходе», нажмите кнопку «ОК» и примените процедуры.
После этого процесса перезагрузите компьютер и запустите программу Epic Games.
5-) Проверьте свой диск
Для бесперебойной работы программа запуска Epic Games должна быть установлена в системе «C:». Если его нет в папке «C:», выполните установку в системе «C:». Если вы не хотите устанавливать его на систему «C:», проверьте размер вашего установленного диска. Если на вашем диске нет места, вы можете столкнуться с такой ошибкой. Для этого вы можете устранить проблему, открыв расположение вашего диска.
6-) Восстановление программы Epic Games
Любые отсутствующие и поврежденные файлы в программе Epic Games могут вызвать ошибку. Для этого мы можем исправить такие проблемы, починив программу Epic Games.
- Введите «Панель управления» на начальном экране поиска и откройте его.
- Нажмите на опцию «Удалить программу» на открывшемся экране.
- Щелкните правой кнопкой мыши программу «Epic Games Launcher» из списка программ и нажмите «Восстановить».
После этого процесса он просканирует неисправные или отсутствующие файлы и выполнит процесс установки. После успешного завершения процесса откройте программу Epic Games и проверьте, сохраняется ли проблема.
Источник
Troubleshooting SAN Switching Issues
A storage area network (SAN) is a network of storage devices that provide data storage for servers.
This chapter describes how to identify and resolve problems that can occur with a SAN and the Cisco Nexus 5000 Series switch.
This chapter includes the following sections:
- Overview
- NPV
- Zoning
- SAN Port Channels
- FC Services
- Cisco Fabric Services
- VSANs
- Registers and Counters
Overview
The two most common symptoms of problems in a storage network are:
- A host cannot access its allocated storage.
- An application does not respond after attempting to access the allocated storage.
By answering the questions in this section, you can determine the paths you need to follow and the components that you should investigate further. These questions are independent of host, switch, or subsystem vendor.
Consider the following questions to determine the status of your installation:
- Is this a newly installed system or an existing installation? (It could be a new SAN, host, or subsystem, or new LUNs exported to an existing host.)
- Has the host ever been able to see its storage?
- Does the host recognize any LUNs in the subsystem?
- Are you trying to solve an existing application problem (too slow, too high latency, excessively long response time) or did the problem show up recently?
- What changed in the configuration or in the overall infrastructure immediately before the applications started to have problems?
General SAN troubleshooting steps
Step 1![]() Obtain information on problems in your fabric.
Obtain information on problems in your fabric.
Step 2![]() Verify physical connectivity between your switches and end devices.
Verify physical connectivity between your switches and end devices.
Step 3![]() Verify registration to your fabric for all SAN elements.
Verify registration to your fabric for all SAN elements.
Step 4![]() Verify the configuration for your end devices (storage subsystems and servers).
Verify the configuration for your end devices (storage subsystems and servers).
Step 5![]() Verify end-to-end connectivity and fabric configuration.
Verify end-to-end connectivity and fabric configuration.
NPV
NP Uplink ports on NPV edge switch are stuck in initializing state
NP uplink ports connected to the core NPIV switch do not come online and are stuck in an initializing state.
Possible Cause
The core switch might not have been enabled for NPIV.
Example:
Solution
- Check the status of the NPV external interfaces.
Check that the NPIV is enabled on the core switch.
Example:
- If NPIV is disabled, then enable NPIV on the core switch.
Example:
Server interface does not come up and “NPV upstream port not available” message appears
A server port connected to the NPV edge switch does not come online, and the show interface command indicates a status of NPV upstream port not available.
Possible Cause
The upstream NP_Port(s) and the downstream server F_Port(s) on the NPV edge switch may not be in the same VSAN.
Example:
Solution
- Check the VSAN membership of the upstream port and the server port.
Example:
- In the example above, notice that the upstream ports (fc2/1-2) are in VSAN 1, and the server ports (fc2/7-8) are in VSAN 99.
Move the NP ports on the NPV edge, and the F ports on the NPIV core into the same VSAN as the server ports.
Example:

Note![]() Alternatively, if the NPIV core and NPV edge switch are F_Port Trunking capable switches, then that would be the recommended configuration.
Alternatively, if the NPIV core and NPV edge switch are F_Port Trunking capable switches, then that would be the recommended configuration.
Uneven load balancing on the NPV NP ports
An examination of NP upstream ports that are members in the same VSAN reveals that uneven load balancing is occurring.
Possible Cause
This may be normal and a direct result of the default SID/DID load balancing that is done before the Nexus 5000 4.2(1)N1 release.
Solution
If the upstream switch is an MDS switch that is running 4.1(3) code or above, and it is a NPV F_Port Trunking capable switch, the preferred configuration would be to run the F_Port Trunking Port Channeling feature.
Example (NPIV core):
In this example, fc2/13 and fc2/19 are added to port channel 100 and are disabled. Do the same operation on the switch at the other end of the port channel, then do no shutdown at both ends to bring them up.
Example:
Example (NPV Edge):
In this example, fc2/1 and fc2/2 are added to port channel 1 and are disabled. Do the same operation on the switch at the other end of the port channel, then do no shutdown at both ends to bring them up
Example:
Server on downstream NPV edge switch does not login to the fabric
The server connected to the downstream NPV edge switch does not log in to the fabric.
Possible Cause
The server on the downstream NPV edge switch does not log in to the fabric, and/or you see a “waiting for FLOGI” message.
Example:
Solution
- Verify the configuration of both the NPV edge and core switches. If you are not running the F_Port trunking feature, then verify that there are no VSAN mismatches and that the server ports, NPV NP ports, NPIV Core F_Ports, and storage ports are all in the same VSAN and all are online.
- If the configuration is correct and you can determine where the problem might be, you can collect an Ethanalyzer trace and verify that the Fabric Login (FLOGI) frame is being received and sent to the NPIV core as a Fabric Discovery (FDISC) command.
Example Ethanalyzer trace:
- Recreate the problem by flapping the NPV-attached server port. The trace will be written to bootflash and can be copied off the switch by using the following:
- After the trace has been copied, you can now open and verify the flow using Wireshark.
Example normal NPV login flow:
|
Server ———————> FLOGI ———-> NPV Edge Switch |
Fabric Login frame = FLOGI |
|
NPV Edge Switch ——> FDISC ———-> NPIV Core Switch |
Fabric DISCovery frame maps parameters from Server FLOGI |
|
NPV Core Switch ——> Accept ———> NPV Edge Switch |
NPIV Core assigns an FCID with the Accept to the FDISC from NPV Edge Switch |
|
NPV Edge Switch ——> Accept ———> Server |
Accept to original Server FLOGI with FCID assigned from NPIV Core Switch |
Locating exact port that server is physically attached to
NPIV switches lose visibility into the physical port that a downstream NPV-connected server is attached to. The following process can be used to identify that physical port.
Possible Cause
When you have an NPIV core switch that has several downstream NPV edge switches attached, you might want to locate the exact port that a server is physically attached to.
Solution
- Identify the PWWN of the server and the corresponding switch that it is attached to.
Example:
In the example, the server is identified by this address:
and the switch is identified by this address
- Identify the IP address of the NPV edge switch.
Example:
- Telnet to the NPV edge switch.
Example:
- Identify the PWWN of the server.
Example:
- If the interface is a FCoE (VFC) interface as shown in the previous example, use the show interface vfc3 command to see which port that the VFC is physically bound to.
VSANs stuck in initializing state after configuring the 4.2(1)N1 F_Port trunking feature
Using the show interface command of the F_Port trunking port channel or trunking member of the port channel indicates that certain VSANs are in an initializing state and do not come online.
Possible Cause
After configuring the 4.2(1)N1 F_Port Trunking feature, VSANs on the trunk ports appear to be stuck in an initializing state.
Example:
Under the Trunk Failures tab of Fabric Manager, you might also see the trunk VSAN listed. However, this may be normal. If no downstream devices are logged in for a particular VSAN, that VSAN stays in initializing state.
Solution
For the VSANs that you are working with, verify by using the following command:
Example:
In this example, no devices are logged into VSAN 200.
Zoning
Cannot activate zoneset and cannot configure zoning in enhanced zoning mode
The zone set cannot be activated and zoning cannot be configured in enhanced zoning mode. The error message “Zoning database update in progress, command rejected” might be received.
Possible Cause
Another user on the same switch or on a different switch is holding the enhanced zoning configuration lock.
Solution
Release the zoning lock with the following:
Step 1![]() Determine which switch (domain/ip address) has the lock.
Determine which switch (domain/ip address) has the lock.
Step 2![]() Determine which user has the lock on that switch.
Determine which user has the lock on that switch.
Step 3![]() Clear the lock for that user on that switch.
Clear the lock for that user on that switch.
- On the same switch, enter the show zone status vsan <vsan-id> command to determine which user holds the lock.
Example:
In this example the remote switch with the IP address of 171.165.98.20 has the lock.
- Connect to the remote switch and enter the show zone status vsan command.
Example:
In the example, user Remi is holding the enhanced zoning lock.
- On the remote switch (N5K2 in the example), release the lock with the no zone commit vsan <vsan-id> command.
- To confirm that the lock had been cleared, enter the show zone status vsan <vsan-id> command.
At this point, the session parameter should appear as none.
- If the lock still persists, remove the lock from the switch that holds the lock with the clear zone lock command.
- If the lock continues to persist, use the following commands to collect information to aid further analysis:
Host cannot communicate with storage
In initial SAN deployments or after topology changes in the SAN, some hosts might not be able to communicate with storage. The initiator cannot access the LUNs that were allocated for them in the storage array.
Possible Cause
If the host and storage are connected to two different switches, the ISL link, (the xE port connecting both switches) might be isolated.
The xE port might be isolated in a specific VSAN for possible reasons:
- Misconfigured fabric timers
- Misconfigured port parameters
- Mismatched zoning
Solution
To resolve the VSAN isolation on the TE port:
- Use the show interface fc <slot/port> command on the TE port to determine the VSAN number.
The isolated VSAN number must match the VSAN number where the host and the storage are connected to.
In the display output, you see the Trunk vsans (isolated) (Vsan <vsan-id>).
- Use the show port internal info interface fc <slot/port> command to determine the root cause of the VSAN isolation.
Possible Cause
Host and storage are not in the same VSAN.
Solution
- Use the show vsan membership command to verify that both the host and the storage are in the same VSAN.
- If the host and the storage are in different VSANs, in the configuration mode use the commands vsan database and vsan <vsan-id> interface fc <slot/port> to move the interface connected to the host and storage devices into the same VSAN.
Possible Cause
The host and storage are not in the same zone. The zone is not in the active zone set. There is no active zone set and default zone policy is set to deny.
Solution
- Use the command show zone status <vsan-id> to determine if the default zone policy is set to deny.
Example:
The state default zone policy permit means all nodes can see all other nodes. Deny means all nodes are isolated when not explicitly placed in a zone.
If you are not using zoning, you can change the default zone policy with zone default-zone permit, but this is not a best practice.
- Use the show zone member command for host and storage to verify that they are both in the same zone. If they are not in the same zone, use the zone name <zonename> <vsan-id> command to create a zone in that VSAN.
Example:
Use the show zone vsan <vsan-id> command to verify that host and storage are now in the same zone.
- Use the show zoneset active vsan <vsan-id> command to verify the name of the active zone set.
If the zone that has the host and storage is not in the active zoneset, use the zoneset name command from the configuration mode to enter the zoneset sub-mode and use the member command to add the zone to the active zone set.
Example:
- Use the zoneset activate command to activate the zone set.
Example:
Zone merge failure when two switches connect using E or TE port
A zone merge failure can occur when two switches connect using the E or TE port.
Possible log messages that can be seen in the show logging log are shown in the example.
Example:
Possible Cause
Two switches may have the same zone set name and the same zone names, but different zone members.
When merging switch fabrics, you must ensure that the zones in both active zone sets have unique names, or that any zones with the same name have exactly the same members. If either of these conditions are not met, then the E port connecting the two fabrics will appear in an isolated state.
The process to merge switch fabrics is as follows:
- The software compares the protocol versions. If the protocol versions differ, then the ISL is isolated.
- If the protocol versions are the same, then the zone policies are compared. If the zone policies differ, then the ISL is isolated.
- If the zone merge options are the same, then the comparison is implemented based on the merge control setting.
–![]() If the setting is restrict, the active zone set and the full zone set should be identical. Otherwise the link is isolated.
If the setting is restrict, the active zone set and the full zone set should be identical. Otherwise the link is isolated.
–![]() If the setting is allow, then the merge rules are used to perform the merge. The host and storage are not in the same zone. The zone is not in the active zoneset. There is no active zoneset and default zone policy is set to deny.
If the setting is allow, then the merge rules are used to perform the merge. The host and storage are not in the same zone. The zone is not in the active zoneset. There is no active zoneset and default zone policy is set to deny.
Solution
If there is a zone merge failure, the issue can be resolved by using one of the following methods:
- Modify the zone members in both zone sets to match and eliminate the conflict.
–![]() Use the show zoneset active vsan <vsan-id> command on both switches to compare the zones and their respective members.
Use the show zoneset active vsan <vsan-id> command on both switches to compare the zones and their respective members.
–![]() Change the membership of one of the zones to match the other zone of the same name.
Change the membership of one of the zones to match the other zone of the same name.
- Deactivate the zone set on one of the switches and restart the zone merge process.
–![]() Use the no zoneset activate name <zonesetname> <vsan-id> command to deactivate the zone set configuration from one of the switch.
Use the no zoneset activate name <zonesetname> <vsan-id> command to deactivate the zone set configuration from one of the switch.
–![]() Use the show zoneset active command to confirm that the zone set has been removed.
Use the show zoneset active command to confirm that the zone set has been removed.
–![]() Use the shutdown command to shut down the connection to the zone to be merged, and use the no shutdown command to reactivate the connection to the zone to be merged.
Use the shutdown command to shut down the connection to the zone to be merged, and use the no shutdown command to reactivate the connection to the zone to be merged.
–![]() Use the show zoneset active <vsan-id> to verify that all the members are correct and use the show interface fc <slot/port> to verify that the VSAN is not isolated.
Use the show zoneset active <vsan-id> to verify that all the members are correct and use the show interface fc <slot/port> to verify that the VSAN is not isolated.
- Explicitly import or export a zone set between the switches to synchronize them.
–![]() Use the zoneset import interface <interface-number> vsan <vsan-id> command or the zoneset export interface <interface-number> vsan <vsan-id> command to overwrite the active zone set on one of the switches.
Use the zoneset import interface <interface-number> vsan <vsan-id> command or the zoneset export interface <interface-number> vsan <vsan-id> command to overwrite the active zone set on one of the switches.
–![]() Use the show interface fc <slot/port> to verify that the VSAN is not isolated after this disruptive operation.
Use the show interface fc <slot/port> to verify that the VSAN is not isolated after this disruptive operation.
Zone set activation failure
When a zone set activation failure occurs, the possible log messages that can be seen in the show logging log are shown in the example.
Example:
Possible Cause
Zone set activation can fail if a new switch joins the fabric when the size of the zone database is larger than 2048 KB.
Solution
- Use the show zone analysis active vsan <vsan-id> command to analyze the active zone set database. Verify that the formatted size does not exceed 2048 KB.
If the 2048 KB limit is exceeded, then some zones or devices within a zone must be removed.
Example:

- Use the show zone internal change event-history vsan <vsan-id> command to determine the zone set activation problem.
- To further troubleshoot this issue, capture the output from the show tech-support zone command and the show logging log command.
Full zone database synchronization failure across two switches
A full zone database synchronization failure may occur when two switches connect using the E or TE port and have different zone set distribution policies. As a result of a fabric isolation/merge, one fabric might not have the full zone set database in the running configuration.
Possible Cause
The zone set distribution takes effect while sending merge requests to the adjacent switch or while activating a zone set.
The zone distribute policy can be set differently on two switches and that could cause synchronization failure.
Solution
Use the show zone status command to verify the distribution policy on both switches.
Example:
When the distribute policy is set to active only the active zone set is distributed. Also verify that the distribute policy is set to full.
To enable the full zone set and active zone set distribution to all switches on a per-VSAN basis in the configuration mode, use the zoneset distribute full vsan <vsan-id> command.
Mismatched default zone policy in switches in VSAN causes unexpected results when accessing storage
A mismatched default zone policy in all switches in the VSAN in the basic zone mode might cause unexpected results for any hosts accessing storage.
Possible Cause
If the default zone policy is set to permit and if there is no active zone set for VSAN, then all the members of the VSAN can see all the other nodes.
Solution
One approach is to migrate the zone operation mode from basic to enhanced. Enhanced zoning synchronizes the zone configuration across all switches in the VSAN. This eliminates the possibility of mismatched default zone policies.
- Use the show zone status command to display the status of the zone.
- Use the zone default-zone command to set the default zone policy and use the zone mode enhanced <vsan-id> command to set the operation to enhanced zoning mode.
Another approach is the foillowing:
- Use the show zone status command in all switches in the VSAN to verify the operation mode and the default-zone policy.
- Use the zone mode basic command to change any switches that are not in basic mode.
- Use the zone default-zone command on each switch in the VSAN to set the same default zone policy.
SAN Port Channels
Fibre channel port is down when trying to connect switches via SAN Port Channel
When trying to connect switches using SAN port channel, the Fibre Channel port is down.
The show interface brief command produces
Possible Cause
One of the SAN port channel compatibility parameters is misconfigured in the configuration.
A compatibility check ensures that the same parameter settings are used in all physical ports in the channel. Otherwise, they cannot become part of a port channel. The compatibility check is performed before a port is added to the port channel.
The check ensures that the following parameters and settings match at both ends of a port channel:
- Capability parameters:
type of interface, Gigabit Ethernet at both ends, or Fibre Channel at both ends. - Administrative compatibility parameters:
speed, mode, rate mode, port VSAN, allowed VSAN list, and port security.. - Operational parameters:
remote switch WWN and trunking mode.
Solution
- Use show san-port-channel compatibility-parameters to verify which parameters need to be checked in the configuration.
Generally, if the configuration is fixed and the FC port is shut or no shut, the port recovers normally.
- If the issue persists with a different error message, debug further by running one or more of the following commands:
Newly added Fibre Channel interface does not come online in a SAN Port Channel
When a new Fibre Channel interface is added, it does not come online in a SAN port channel.
The following error message during the configuration operation may appear.
Command failed: port not compatible [reason]
Possible Cause
Port channel mode is configured as on.
If you use the default ON mode to avoid inconsistent states across switches and to maintain consistency across switches, then the ports shut down.
Solution
Explicitly enable the ports again using the no shutdown command.
Possible Cause
Interface parameters are not compatible with the existing SAN port channel.
Solution
Use the force option to force the physical interface to take on the parameters of the SAN port channel. In the interface sub-configuration mode, use the channel-group <channel-group number> force command.
Cannot configure trunking
Trunking cannot be configured under the interface configuration mode.
The following error message may appear in the CLI output:
Possible Cause
Trunking protocol is disabled.
Solution
Enable trunking by using the trunk protocol enable CLI command.
VSAN traffic does not traverse trunk
The VSAN traffic is not able to traverse the trunk.
A host cannot gain access to a target that is on the same VSAN and connected to two different switches using TE ports. The VSAN traffic is not able to traverse the trunk. Depending on the path from host to target, you may observe a performance degradation or you may not be able to access any disks.
Possible Cause
VSAN is not listed in the allowed-active VSAN list.
Solution
Add VSAN to the allowed-active list by using the switchport trunk allowed vsan command.
xE port is isolated in a specific VSAN under interface of SAN Port Channel
The xE port is isolated in a specific VSAN that is under an interface of a SAN port channel.
The following error message may appear in the logging log:
Possible Cause
The xE port can be isolated in a specific VSAN for many reasons:
- Fabric timers might be misconfigured.
- Port parameters might be misconfigured.
- Zoning mismatch.
Solution
To resolve the VSAN isolation on the TE port, use the show interface fc <slot/port> command on the TE port to determine the VSAN number. The isolated VSAN number must match the VSAN number where the host and the storage are connected to.
In the output of the command, look for information such as Trunk vsans (isolated) (Vsan <number>).
Use the show port internal info interface san-port-channel <number> command to determine the cause of the VSAN isolation.
Cannot create a san-port-channel interface
A SAN port channel interface cannot be created.
The following error message may appear while in configuration mode:
Possible Cause
The user receives the following message:
Note![]() You can create a maximum of four SAN port channels (including Release NX-OS 4.2(1)N1(1)). This is a software limitation.
You can create a maximum of four SAN port channels (including Release NX-OS 4.2(1)N1(1)). This is a software limitation.
Solution
If you need to create a SAN port channel with a specific number, but four SAN port channels were already configured, then you have to delete one of the SAN port channels that is not actively used. Use the no interface san-port-channel <x> command to delete one of the SAN port channels.
Possible Cause
You receive the following message:
Solution
You need to choose another number between 1 to 256 to configure the SAN port channel.
Use the show port-channel usage command to determine the numbers that were used for the existing port channels.
Example:
FC Services
This section includes an overview of troubleshooting Cisco Fibre Channel Services followed by a description of common problems and their solutions.
Overview
Fibre Channel fabrics provide a set of services for its clients, which are the Fibre Channel nodes. These Fibre Channel services (FC services) allow the nodes to interact with the storage network to exchange information, such as connection state, connection parameters, configuration, topology changes, and so on.
The FC services can be accessed through login into ports that hold a well known address (WKA). WKAs are port FC IDs that are reserved for internal use of the fabric, usually fabric services.
The following table describes the well-known addresses and the service associated with each:
(Source: www.t11.org)
|
|
|
|---|---|
|
x’FF FC 01′ |
Reserved for Domain Controllers |
|
x’FF FF F0′ |
Reserved for N_Port Controller |
|
x’FF FF F1′ |
Reserved |
|
x’FF FF F4′ |
Event Service (FC-GS-5) |
|
x’FF FF F5′ |
Multicast Server (FC-PH3) |
|
x’FF FF F6′ |
Clock Synchronization Server (FC-PH3) |
|
x’FF FF F7′ |
Security Key Distribution Service (FC-PH3) |
|
x’FF FF F8′ |
Alias Server (FC-PH2) |
|
x’FF FF F9′ |
Quality of Service Facilitator-Class4 (FC-PH2) |
|
x’FF FF FA’ |
Management Service (FC-GS-5) |
|
x’FF FF FB’ |
Time Service (FC-GS-5) |
|
x’FF FF FC’ |
Directory Service (FC-GS-5) |
|
x’FF FF FD’ |
Fabric Controller |
|
x’FF FF FE’ |
F_Port Controller |
|
x’FF FF FF’ |
Broadcast Address/Server |
Fibre channel port remains in initializing state
A fibre channel F type port does not come online and is stuck in an initializing state.
The show interface fc <slot/port> command displays the following message.
A Fibre Channel port goes into the initialization state after a successful completion of link-level initialization. For F type ports, the next step is to complete the FLOGI (fabric login) process. The port remains in the initialization state until the FLOGI process completes.
Possible Cause
The port is up because the link partner has put itself into a bypass mode.
Solution
Use the show hardware internal fc-mac <slot-number> port <port-number> statistics command to check whether the Class-3 input counter is increasing after the successful completion of link initialization.
Example:
Possible Cause
The FLOGI packet was dropped somewhere in the data path, starting from FC-MAC to FLOGI server.
Solution
Consider the following solutions:
- Use the show hardware internal fc-mac <slot-number> port <port-number> statistics command to check for Class-3 packet counters.
- Analyze the output of the show flogi internal all interface fc <slot/port> command for a possible drop of FLOGI packets somewhere in the path.
- Check the Fport server fault-injection table for any Invalid, Drop FLOGI packets.
- Use the shut CLI command followed by the no shut command to disable and enable the FC slot/port.
- If this does not clear the problem, try moving the connection to a different port on the same or another FC module.
- If the problem continues to persist, use the following commands to collect information to aid in further analysis:
Capture debug Flogi with the following:
Specific VSAN traffic is not being routed through SAN fabric
Each configured VSAN needs to support a separate set of fabric services. One such service is the FSPF routing protocol, which can be independently configured per VSAN. You may see that specific VSAN traffic is not being routed if inappropriate traffic engineering capabilities are used.
Possible Cause
The FSPF hello interval is misconfigured.
The following example shows possible log messages from the show logging command log.
Example:
Solution
To resolve a wrong hello interval on an ISL using the NX-OS CLI, perform the following steps.
Step 1![]() Either use the debug fspf all command and look for wrong hello interval messages
Either use the debug fspf all command and look for wrong hello interval messages
or check the last messages in the show logging command log for an error message.
The debug output generates the following messages:
Step 2![]() Use the undebug all command to turn off debugging.
Use the undebug all command to turn off debugging.

Tip![]() Open a second Telnet or SSH session before entering any debug commands. If the debug output overwhelms the current session, you can use the second session to enter the undebug all command to stop the debug message output.
Open a second Telnet or SSH session before entering any debug commands. If the debug output overwhelms the current session, you can use the second session to enter the undebug all command to stop the debug message output.
Step 3![]() Use the show fspf vsan <vsan-id> interface command to view the FSPF configuration on both switches.
Use the show fspf vsan <vsan-id> interface command to view the FSPF configuration on both switches.
Example:
Note In the Example:
- The hello timer is not set to the default (20 seconds) on the first switch. Check the neighboring switch (Nexus 5000) configuration to make sure it matches.
- FSPF is not in FULL state. This indicates a problem.
Step 4![]() In the interface configuration mode, change the fspf hello-interval value to match the same values on both switches.
In the interface configuration mode, change the fspf hello-interval value to match the same values on both switches.
Example:
Step 5![]() Verify that the FSPF is in FULL state after the change.
Verify that the FSPF is in FULL state after the change.
Possible Cause
The FSPF dead interval is misconfigured.
The following example shows possible log messages from the show logging command:
Example:
Solution
To identify a mismatch of dead intervals on an ISL using the NX-OS CLI, perform the following steps:
Step 1![]() Either use the debug fspf all command and look for wrong dead interval messages
Either use the debug fspf all command and look for wrong dead interval messages
or check the last messages in the show logging command log for an error message.
The debug output generates the following messages:
Step 2![]() Use the undebug all command to turn off debugging.
Use the undebug all command to turn off debugging.
Tip![]() Open a second Telnet or SSH session before entering any debug commands. If the debug output overwhelms the current session, you can use the second session to enter the undebug all command to stop the debug message output.
Open a second Telnet or SSH session before entering any debug commands. If the debug output overwhelms the current session, you can use the second session to enter the undebug all command to stop the debug message output.
Step 3![]() Use the show fspf vsan <vsan-id> interface command to view the FSPF configuration on both switches.
Use the show fspf vsan <vsan-id> interface command to view the FSPF configuration on both switches.
Example:
Note In the example:
- The dead timer is not set to the default (80 seconds) on the first switch. Check the neighboring switch (MDS) configuration to make sure it matches.
- FSPF is not in FULL state. This indicates a problem.
Step 4![]() In the interface configuration mode, change the fspf dead-interval value so that the same values match on both switches.
In the interface configuration mode, change the fspf dead-interval value so that the same values match on both switches.
Step 5![]() Verify that the FSPF is in FULL state after the change. Ensure that there is a route for VSAN traffic with the show fspf internal route vsan <vsan-id> command.
Verify that the FSPF is in FULL state after the change. Ensure that there is a route for VSAN traffic with the show fspf internal route vsan <vsan-id> command.
Example:
Possible Cause
There is a region mismatch on the switch.
The following example shows possible log messages from the show logging command log:
Example:
Solution
To identify a region mismatch problem on a switch using the NX-OS CLI, perform the following.
Step 1![]() Use the show fspf vsan <vsan-id> command to display the currently configured region in a VSAN.
Use the show fspf vsan <vsan-id> command to display the currently configured region in a VSAN.
Example (region value is 2; default region value is 0):
Step 2![]() Use the debug fspf all command and look for nonexistent region messages.
Use the debug fspf all command and look for nonexistent region messages.
Example:
The neighboring switch-advertising region is 0. FSPF is in the init state for each ISL.
Example:
Step 3![]() Use the undebug all command to turn off debugging.
Use the undebug all command to turn off debugging.
Step 4![]() Use the show fspf vsan <vsan-id> command to show FSPF configuration and check the autonomous region.
Use the show fspf vsan <vsan-id> command to show FSPF configuration and check the autonomous region.
Example:
Step 5![]() Use the fspf config vsan command to enter the FSPF configuration mode and use the region command to change the region. The region must match on all switches in the VSAN.
Use the fspf config vsan command to enter the FSPF configuration mode and use the region command to change the region. The region must match on all switches in the VSAN.
Example:
Fibre channel port is suspended due to too many invalid FLOGIs
A Fibre Channel node that is connected to an NPV feature-enabled Cisco Nexus 5000 switch or a Cisco Nexus 5000 switch that is running in fabric mode cannot log into the SAN fabric due to a FLOGI rejection.
The following example shows possible log messages from the show logging command log.
Example:
The status of the interface shows invalidFlogis.
Possible Cause
The FC ID persistency table for that VSAN might be full. If the Nexus 5000 Series switch is configured as an NPV edge switch, the FC ID persistency table of the NPV core switch might be full.
FC IDs:
When an N port logs into a Cisco Nexus 5000 Series switch, it is assigned an FC ID. By default, the persistent FC ID feature is enabled. If this feature is disabled, the following situations can occur:
- An N port logs into a Cisco Nexus 5000 Series switch. The WWN of the requesting N port and the assigned FC ID are retained and stored in a volatile cache. The contents of this volatile cache are not saved across reboots.
- The switch is designed to preserve the binding FC ID to the WWN on a best-effort basis. For example, if one N port disconnects from the switch and its FC ID is requested by another device, this request is granted and the WWN with the initial FC ID association is released.
- The volatile cache stores up to 4000 entries of WWN to FC ID binding. If this cache is full, a new (more recent) entry overwrites the oldest entry in the cache. In this case, the corresponding WWN to FC ID association for the oldest entry is lost.
- N ports receive the same FC IDs if disconnected and reconnected to any port within the same switch (as long as it belongs to the same VSAN).
Persistent FC IDs can be purged selectively. Static entries and FC IDs currently in use cannot be deleted.
Solution
Check for FLOGI error messages with the show flogi internal command.
Example:
Use the show fcdomain address-allocation command to check the FC domain address allocation table for any free FC IDs: (If NPV is enabled, enter the command on the NPV core switch.)
Example:
To find the auto area-list and the persistent FCIDs, use the show flogi auto-area-list command and the show fcdomain fcid persistent command.
Example:
If there are not enough FCIDs, you can purge dynamic and unused FC IDs in the specified VSAN with the purge fcdomain command.
Example:
The ports will soon come up.
It is also possible that HBAs are trying to login with S_ID != 0x0.
If this is the situation and there is nothing in the persistency table for the WWN of the HBA, try to assign the S_ID used by HBA to the HBA itself.
If the S_ID is already in use or is in the wrong domain, the request is rejected by fcdomain. After a number of retries, the port is suspended.
When HBAs get into this mode, they try to log in with every FCID in the FCID space, from 0x00.00.01 up to all the 0xDD.AA.PP numbers.
This behavior can be seen in the show flogi internal event-history msgs command output
{HBA is trying to login with different FCIDs}
Example:
In this case, the solution is to manually configure an entry in the persistency table for the WWN of the HBA as shown in the following example. An alternative is to power-cycle the device. This usually makes the HBA start with a normal FLOGI with S_ID=0x0.
Example:
If the problem continues to persist, use the following commands to collect information to aid further analysis.
Capture debug flogi and debug fcdomain via following below steps:
Having stale FCNS entries for Fibre Channel nodes
The Fibre Channel nodes are able to be logged (FLOGI) in to the SAN fabric, but the FCNS entries for those nodes are incomplete. Serves cannot reach their targets.
As a result, fc4-types:fc4_features will be empty in FCNS database.
Possible Cause
The Fibre Channel nodes may not be registering their FC4 types and FC4 features in the FCNS database in a topology where Nexus 5000 Series switches are configured as NPV core (feature NPIV) and connected to legacy gateway switches. The fc4-types:fc4_features can be verified by the show fcns database detail command as shown in the following example:
Example:
Some legacy gateway switches might require that the area part of the FCID be the same for the switch and for all the blades logged in through that port.
However, because of an old issue with Qlogic HBAs, the Cisco Nexus 5000 domain server assigns a separate area for each Qlogic HBA that matches a certain OUI by default. Therefore, a conflict between legacy gateway requirements and the Cisco domain allocation scheme exists. Cisco still implements this set up to support old existing Qlogic HBAs in the field.
Solution
Configure no fcid-allocation area company <oui> for all used Qlogic OUIs (ensuring flat FCID allocation in the future), force all affected blades to log out of the fabric, delete the already created persistent FCID entry from the Nexus 5000 switch configuration, and allow the blade to log in again.
In the following show flogi database command output, all devices obtain a unique area id (x01, x08, x0c):
Example:
Because of the specific area ID requirement of the legacy switch, the last two blades must also have area x01. To force the Qlogic adapters to log in again and obtain FCID in 0x6201xx range, do the following steps:
Step 1![]() Configure (force) the future FCID allocation scheme to be flat for all WWNs matching the OUIs that are in this situation.
Configure (force) the future FCID allocation scheme to be flat for all WWNs matching the OUIs that are in this situation.
Step 2![]() Force the FCID under reconfiguration to log out of the fabric.
Force the FCID under reconfiguration to log out of the fabric.
Note![]() If you shut down the Nexus 5000 interface that serves as the primary uplink for that server, it only will log in through another one. The appropriate method is to shut down the affected blade and ensure that the FLOGI for the WWN is gone.
If you shut down the Nexus 5000 interface that serves as the primary uplink for that server, it only will log in through another one. The appropriate method is to shut down the affected blade and ensure that the FLOGI for the WWN is gone.
Step 3![]() Delete the automatically created configuration entry for persistent FCID allocation as shown in the following example:
Delete the automatically created configuration entry for persistent FCID allocation as shown in the following example:
Example:
Step 4![]() Bring up the blade and ensure that it gets a proper fcid.
Bring up the blade and ensure that it gets a proper fcid.
Example:
Interface is isolated because of FC Domain ID overlap
The Fibre Channel or SAN port channel interface of a Cisco Nexus 5000 switch (in fabric mode) that is connected to an FC switch with the xE port type is isolated because of a domain overlap. The following example shows possible logging messages in the show logging command log:
Example:
Possible Cause
Two switch fabrics might not merge. If two fabrics with two or more switches are connected, have at least one assigned domain ID in common, and the auto-reconfigure option is disabled (this option is disabled by default), then the E ports that are used to connect the two fabrics will be isolated due to domain ID overlap.
In a Fibre Channel network, the principal switch assigns domain IDs when a new switch is added to an existing fabric. However, when two fabrics merge, the principal switch selection process determines which one of the preexisting switches becomes the principal switch for the merged fabric.
The election of the new principal switch is characterized by the following rules:
- A switch with a populated domain ID list takes priority over a switch that has an empty domain ID list. The principal switch becomes the one in the fabric with the populated domain ID list.
- If both fabrics have a domain ID list, the priority between the two principal switches is determined by the configured switch priority. This is a parameter that can be set by the user. The lower the value of the parameter, the higher the priority.
- If the principal switch cannot be determined by the two previous criteria, the principal switch is then determined by the WWNs of the two switches. The lower the value of the WWN, the higher the switch priority.
Solution
To resolve an FC domain ID overlap, you can change the overlapping static domain ID by manually configuring a new static domain ID for the isolated switch, or disable the static domain assignment and allow the switch to request a new domain ID after a fabric reconfiguration.
To assign a static domain ID using the NX-OS CLI
All devices attached to the switch in the VSAN get a new FC ID when a new domain ID is assigned. Some hosts or storage devices may not function as expected if the FC ID of the host or storage device changes.
To verify FC domain ID overlap and reassign a new domain ID using the CLI, perform the following steps:
Step 1![]() Enter the show interface fc <slot/port> command to view the isolation error message for the E port.
Enter the show interface fc <slot/port> command to view the isolation error message for the E port.
Example:
Enter the show interface san-port-channel <channel-id> command to view the isolation error for the specific VSAN.
Example:
Step 2![]() Use the show fcdomain domain-list vsan <vsan-id> command to view which domains are currently in your fabric.
Use the show fcdomain domain-list vsan <vsan-id> command to view which domains are currently in your fabric.
Example (switch is isolated because of a domain ID 44 overlap):
If the isolation occurred for a specific VSAN under a SAN port channel interface, you can view the error with the show port internal info interface san-port-channel <channel-id> vsan <vsan-id> as shown in the following example:
Example:
Step 3![]() Use the fcdomain domain <domain-id> [ static | preferred ] vsan <vsan-id> command to change the domain ID for one of the overlapping domain IDs.
Use the fcdomain domain <domain-id> [ static | preferred ] vsan <vsan-id> command to change the domain ID for one of the overlapping domain IDs.
- The static option tells the switch to request that particular domain ID. If it does not obtain that particular address, it will isolate itself from the fabric.
- The preferred option has the switch request a specified domain ID. If that ID is unavailable, it will accept another ID.
Step 4![]() Use the fcdomain restart vsan command to restart Domain Manager.
Use the fcdomain restart vsan command to restart Domain Manager.
While the static option can be applied to runtime after a disruptive or nondisruptive restart, the preferred option is applied to runtime only after a disruptive restart.
Note![]() A domain ID restart is disruptive. The Fibre Channel nodes that are logged into that domain will be logged out and logged back in. A disruptive reconfiguration might affect data traffic.
A domain ID restart is disruptive. The Fibre Channel nodes that are logged into that domain will be logged out and logged back in. A disruptive reconfiguration might affect data traffic.
To assign a dynamic domain ID after a fabric reconfiguration
You can use fabric reconfiguration to reassign domain IDs and resolve any overlapping domain IDs. If you enable the auto-reconfigure option on both switches before connecting the fabric, a disruptive reconfiguration (RCF) occurs. The RCF functionality automatically forces a new principal switch selection and causes new domain IDs to be assigned to the different switches.
To use fabric reconfiguration to reassign domain IDs for a particular VSAN using the NX-OS CLI, perform the following these steps:
Step 1![]() Use the show fcdomain domain-list command to determine if you have statically assigned domain IDs on the switches.
Use the show fcdomain domain-list command to determine if you have statically assigned domain IDs on the switches.
Step 2![]() If you have statically assigned domain IDs, use the no fcdomain domain command to remove the static assignments.
If you have statically assigned domain IDs, use the no fcdomain domain command to remove the static assignments.
Step 3![]() Use the show fcdomain vsan <vsan-id> command to determine if you have the RCF reject option enabled.
Use the show fcdomain vsan <vsan-id> command to determine if you have the RCF reject option enabled.
Example:
Step 4![]() If you have the rcf-reject option enabled, use the interface command and then the no fcdomain rcf-reject vsan <vsan-id> command in interface mode.
If you have the rcf-reject option enabled, use the interface command and then the no fcdomain rcf-reject vsan <vsan-id> command in interface mode.
Example:
Step 5![]() Use the fcdomain auto-reconfigure vsan <vsan-id> command in the EXEC mode on both switches to enable auto-reconfiguration after a Domain Manager restart.
Use the fcdomain auto-reconfigure vsan <vsan-id> command in the EXEC mode on both switches to enable auto-reconfiguration after a Domain Manager restart.
Step 6![]() Use the fcdomain restart vsan <vsan-id> command to restart Domain Manager.
Use the fcdomain restart vsan <vsan-id> command to restart Domain Manager.
This is a disruptive operation and disruptive reconfiguration and can affect data traffic.
Cisco Fabric Services
This section includes an overview of troubleshooting Cisco Fabric Services (CFS) followed by a description of common problems and their solutions.
Overview
Begin troubleshooting CFS issues by checking the following:
- Verify that CFS is enabled for the same applications on all affected switches.
- Verify that CFS distribution is enabled for the same applications on all affected switches.
If the CFS Regions feature is in use, verify that the application is in the same region on all the affected switches.
- Verify that there are no pending changes for an application and that a CFS commit was issued for any configuration changes in a CFS-enabled application.
- Verify that there are no unexpected CFS locked sessions.
Clear any unexpected locked sessions.
Verifying CFS using CLI
To verify CFS using the CLI, follow these steps:
Step 1![]() By default, CFS distribution is enabled. Applications can distribute data and configuration information to all CFS-capable switches in the fabric where the applications exist. This is the normal mode of operation. To determine the state of CFS distribution on a switch, enter the show cfs status command.
By default, CFS distribution is enabled. Applications can distribute data and configuration information to all CFS-capable switches in the fabric where the applications exist. This is the normal mode of operation. To determine the state of CFS distribution on a switch, enter the show cfs status command.
Example:
Step 2![]() To verify that an application is listed and enabled, issue the show cfs application command to all switches.
To verify that an application is listed and enabled, issue the show cfs application command to all switches.
Example:
Note![]() The Physical scope means that CFS applies the configuration for that application to the entire switch. The Logical scope means that CFS applies the configuration for that application to a specific VSAN.
The Physical scope means that CFS applies the configuration for that application to the entire switch. The Logical scope means that CFS applies the configuration for that application to a specific VSAN.
Step 3![]() Verify the set of switches in which an application is registered with CFS, using the show cfs peers name application-name command for physical scope applications, and the show cfs peers name <application-name> vsan <vsan-id> command for logical scope applications.
Verify the set of switches in which an application is registered with CFS, using the show cfs peers name application-name command for physical scope applications, and the show cfs peers name <application-name> vsan <vsan-id> command for logical scope applications.
Example:
Note![]() The show cfs peers name <application-name> command displays the peers for all VSANs when applied to a logical application.
The show cfs peers name <application-name> command displays the peers for all VSANs when applied to a logical application.
Example:
Step 4![]() To determine if all the switches in the fabric constitute one CFS fabric, or a multitude of partitioned CFS fabrics, enter the show cfs merge status name <application-name> command and the show cfs peers name <application-name> command and compare the outputs. If the two outputs contain the same list of switches, the entire set of switches constitutes one CFS fabric. When this is the case, the merge status should always show success at all switches.
To determine if all the switches in the fabric constitute one CFS fabric, or a multitude of partitioned CFS fabrics, enter the show cfs merge status name <application-name> command and the show cfs peers name <application-name> command and compare the outputs. If the two outputs contain the same list of switches, the entire set of switches constitutes one CFS fabric. When this is the case, the merge status should always show success at all switches.
Example:
If the list of switches in the show cfs merge status name command output is shorter than that of the show cfs peers name command output, then the fabric is partitioned into multiple CFS fabrics and the merge status may show that the merge has failed, is pending, or is waiting.
Merge failure troubleshooting
During a merge, the merge managers in the merging fabrics exchange their configuration databases with each other. The application on one of the fabrics merges the information, decides if the merge is successful, and informs all switches in the combined fabric of the status of the merge.
When a merge is successful, the merged database is distributed to all switches in the combined fabric and the entire new fabric remains in a consistent state. A merge failure indicates that the merged fabrics contain inconsistent data that could not be merged.
If a new switch is added to the fabric and the merge status for any application shows In Progress for a prolonged period of time, then there may be an active session for that application in a switch. Check the lock status for that application on all the switches by using the show cfs lock command. If any locks exist, the merge does not proceed. Commit the changes or clear the session lock so that the merge proceeds.
Note![]() Merge failures must be analyzed correctly. Exercise caution when choosing a switch for blank commit. Small configurations may wipe out the large configurations.
Merge failures must be analyzed correctly. Exercise caution when choosing a switch for blank commit. Small configurations may wipe out the large configurations.
Recovering from a Merge Failure with the CLI
To recover from a merge failure using the CLI, perform the following steps:
Step 1![]() To identify a switch that shows a merge failure, enter the show cfs merge status name <application-name> command.
To identify a switch that shows a merge failure, enter the show cfs merge status name <application-name> command.
Example:
Step 2![]() For a more detailed description of the merge failure, enter the show cfs internal session-history name <application name> detail command.
For a more detailed description of the merge failure, enter the show cfs internal session-history name <application name> detail command.
Example:
Step 3![]() Enter configuration mode and enter the commit command for the application to restore all peers in the fabric to the same configuration database.
Enter configuration mode and enter the commit command for the application to restore all peers in the fabric to the same configuration database.
Example:
Lock failure troubleshooting
In order to distribute a configuration in the fabric, a lock must first be acquired on all switches in the fabric. Once accomplished, a commit can be issued which distributes the data to all switches in the fabric before releasing the lock.
When a lock has been acquired by another application peer, you cannot commit new configuration changes. This is a normal situation and you should postpone any changes to an application until the lock is released. Use the troubleshooting steps in this section only if you believe the lock has not been properly released.
A lock occurs when an administrator configures a change for a CFS-enabled application. If two administrators on the same switch attempt to configure the same application, only one administrator is given the lock. The other administrator is prevented from making changes to that application until the first administrator commits a change or discards any changes. Use the show cfs lock name command to determine the name of the administrator who holds the lock for an application. You should check with that administrator before clearing the lock.
A CFS lock can also be held by another switch in your fabric. Use the show cfs peers name command to determine all the switches that participate in the CFS distribution for the application. Then use the show cfs lock name command on each switch to determine who owns the CFS lock for that application. You should check with that administrator before clearing the lock. Use the CFS abort option to release the lock without distributing the data to the fabric.
Resolving lock failure issues using the CLI
To resolve a lock failure using the CLI, perform the following steps:
Step 1![]() Enter the show cfs lock name <name> command to determine the lock holder.
Enter the show cfs lock name <name> command to determine the lock holder.
Example:
Step 2![]() For a detailed description of the lock failure, enter the show cfs internal session-history name application <name> detail command.
For a detailed description of the lock failure, enter the show cfs internal session-history name application <name> detail command.
Example:
Step 3![]() If the lock is being held by a remote peer, eneter the application-name commit command or an application-name abort command at that switch.
If the lock is being held by a remote peer, eneter the application-name commit command or an application-name abort command at that switch.
Example:
An example of the <application-name> commit command follows:
Example:
An example of the <application-name> abort command follows:
System state inconsistent and locks being held
An inconsistent system state occurs for one of the following situations:
- When locks are not held on all of the switches in the fabric.
- When locks are held on all switches in the fabric, but a session does not exist with the lock holding the switch.
In either case, it is necessary to use the clear option to release the locks.
Clearing locks using the CLI
When a lock is being held on a remote peer and entering the <application-name> commit command or the <application-name> abort command does not clear the lock, issue the clear <application-name> session command to clear all locks in the fabric. After all locks are cleared, a new distribution must be started to restore all the switches in the fabric to the same state.
Example:
Distribution status verification
After configuring an application and committing the changes, you may want to verify that CFS is distributing the configuration change throughout the fabric or VSAN.
Verifying distribution using the CLI
Use the show cfs lock name <application-name> command to determine if a distribution is in progress on the fabric. If the application does not show in the output, the distribution has completed.
Example:
CFS regions troubleshooting
The following rules apply to CFS Regions:
- When using CFS Regions, an application on a given switch can only belong to one region at a time.
- CFS Regions are only applicable to applications within the physical scope. You cannot create a CFS Region in the logical scope of an application.
- Assigning a region to an application takes precedence in distribution over its initial physical scope.
- CFS Regions configuration is not supported for deregistered applications (conditional services) or a physical scope application that is currently locked.
- Regions 1 through 200 are available for user configuration. Regions 201 through 255 are reserved regions and are not available for user configuration.
Distribution failure
To resolve a configuration distribution failure to all switches for a CFS Region, perform the following steps:
Step 1![]() Verify that application distribution is enabled. For more information, see “Overview” section.
Verify that application distribution is enabled. For more information, see “Overview” section.
Step 2![]() Verify that the application is in the same region on all switches.
Verify that the application is in the same region on all switches.
Using the CLI from each switch, enter the show cfs <application> name <application-name> command.
Example (for device-alias application):
Example (application is capable of being merged; application is in Region Default):
Example (application is capable of being merged; application is in Region 1):
Regions for conditional service
When a conditional service goes down (deregisters with CFS), it loses its region configuration. When the conditional service is restarted, it is automatically placed into the default region. To avoid this situation, reconfigure the appropriate region information for the conditional service before starting it again.
Changing regions
If you move an application from one region to another, you might encounter a database mismatch when attempting a merge. To identify and resolve the conflicts, see “Merge failure troubleshooting” section.
Note![]() When an application is moved from one region to another (including the default region), it loses all history.
When an application is moved from one region to another (including the default region), it loses all history.
VSANs
This section includes an overview of troubleshooting VSANs followed by a description of common problems and their solutions.
Overview
Most VSAN problems can be avoided by following the best practices for VSAN implementation.
However, if necessary, you can use the fabric analysis tool in Fabric Manager to verify different categories of problems such as VSANs, zoning, FC domain, admin issues, or switch-specific or fabric-specific issues.
Fabric Manager provides the configuration consistency check tool.
To use the Fabric Configuration option to analyze the configuration of a switch, follow these steps:
Step 1![]() From the Fabric Manager tools menu, choose Health > Fabric Configuration.
From the Fabric Manager tools menu, choose Health > Fabric Configuration.
The Fabric Configuration Analysis dialog box appears.
Step 2![]() Determine whether you want to compare the selected switch to another switch or to a policy file.
Determine whether you want to compare the selected switch to another switch or to a policy file.
- To compare the selected switch to another switch, select Policy Switch and then select a switch from the drop-down list of switches.
- To make a policy file comparison, select Policy File and then click the button on the right to browse your file system and select a policy file (*.XML).
Step 3![]() Click Rules to set the rules to apply when running the Fabric Configuration Analysis tool.
Click Rules to set the rules to apply when running the Fabric Configuration Analysis tool.
The Rules window appears.
Step 4![]() Change the existing rules as appropriate and click OK.
Change the existing rules as appropriate and click OK.
Step 5![]() Click Compare to have the system to compare the configuration.
Click Compare to have the system to compare the configuration.
The results of the analysis are displayed.
Step 6![]() In the Resolve column, select the issues that you want to resolve.
In the Resolve column, select the issues that you want to resolve.
Step 7![]() Click Resolve Issues to resolve the identified issues.
Click Resolve Issues to resolve the identified issues.
Step 8![]() Click Clear to remove the contents of the window.
Click Clear to remove the contents of the window.
Step 9![]() Click Close to complete the operation and close the window.
Click Close to complete the operation and close the window.
For more information about the configuration consistency check tool, see the Cisco DCNM Fundamentals Guide, Release 5.x.
Note![]() When suspending or deleting VSANs, make sure that you suspend and unsuspend one VSAN at a time. You should wait a minimum of 60 seconds after you enter the vsan suspend command before you enter any other configuration command. If you fail to wait, some Fibre Channel interfaces or member ports in a port channel might become suspended or error-disabled.
When suspending or deleting VSANs, make sure that you suspend and unsuspend one VSAN at a time. You should wait a minimum of 60 seconds after you enter the vsan suspend command before you enter any other configuration command. If you fail to wait, some Fibre Channel interfaces or member ports in a port channel might become suspended or error-disabled.
Troubleshooting a SAN problem involves gathering information about the configuration and connectivity of individual devices as well as the status of the entire SAN fabric.
VSAN Troubleshooting Activities
Common troubleshooting tools in Fabric Manager
Verify the VSAN with the following Fabric Manager procedures:
- To view the VSAN configuration in the Information pane, select Fabricxx > VSANxx.
- To view the VSAN members, select Fabricxx > VSANxx, then click the Host or Storage tab in the Information pane.
- To view the FC domain configuration in the Information pane, select Fabricxx > VSANxx > Domain Manager.
Common troubleshooting CLI commands
Use the following CLI commands to display VSAN, FC domain, and FSPF information:
Checklist
Check for the following:
- Verify the domain parameters for switches in the VSAN.
- Verify the physical connectivity for any problem ports or VSANs.
- Verify that both devices are in the name server.
- Verify that both end devices are in the same VSAN.
- Verify that both end devices are in the same zone.
Nexus 5000 trunk port does not connect to upstream SAN switch
The Nexus 5000 trunk port does not connect to the upstream SAN switch because:
- Status of the trunk port connected to the upstream switch is isolated.
- The switch port trunk mode is enabled on both sides.
- Physical cabling has been checked and verified.
- Ports are up on both switches.
By examining the interface state and querying the interface, the issue is displayed as shown in the following example.
Example:
Possible Cause
The VSAN allow list for both interfaces is not the same. Specifically, there is no common VSAN allowed on both interfaces.
This situation might be caused by the following:
- No common VSANs on both switches.
- The trunk allowed VSAN members that do not contain common members.
In the example, the trunk VSAN allow list on the Nexus 5000 and MDS FC interfaces do not match.
Solution
Determine the connected ports and resolve the allowed VSANs on the trunk for both FC interfaces.
Example:
Nexus 5000 E port (non-trunking) does not connect to upstream SAN switch
The Nexus 5000 E port does not connect to the upstream SAN switch because:
- The status of the interconnected non-trunking E ports shows that the status is up. However, all Fibre Channel services are not working between the switches.
- Devices in the same VSAN do not appear in the FCNS database for both switches.
- The show topology command does not list peer switch information.
- Zones show members are not logged in.
Example:
The FC topology does not show a valid peer interface.
Example:
The storage and hosts are in the correct VSAN.
Example:
Possible Cause
The error is displayed by the show interface brief command and the show vsan membership command. They show that the E port on one switch is in the wrong VSAN.
The non-trunking E port on one switch is in the wrong VSAN. (VSAN 100 is the correct VSAN.)
Example:
Solution
Move the non-trunking E-port into VSAN 100.
Example:
The zone set is now active and the FC topology is correct.
Example:
Communication problem between host and storage devices
The communication problem between host and storage devices is because:
- Zones are active.
- Both host and storage are logged into the SAN.
- The storage port is not logged into the active zone set.
Example:
Possible Cause
The host or storage port are in the wrong VSAN.
Example:
Solution
Move the storage port to the correct VSAN. (VSAN 100 is the correct VSAN in the example.).
Example:
VSAN is down between switches
The VSAN is down between switches because:
- VSAN is configured on both switches.
- Trunk allow list allows the VSAN.
- VSAN reported to be down (Initializing state).
- Zones are active.
- Both host and storage are logged into the SAN.
In this failure, the storage port is not logged into the active zone set.
After examining the interface, the error can be seen as in the following example.
Example:
Possible Cause
The VSANs might have the same static Domain ID configured.
Example:
Solution
Change the Domain ID on one of the VSANSs.
Example:
Registers and Counters
Identifying physical layer issues
To troubleshoot physical layer issues with Fibre Channel SFP optics, use the following command:
In the following example, you can see that the results of the command contains useful information such as supported speed, nominal bit rate, and link lengths supported for the SFP.
Example:
The command also provides detailed SFP diagnostic information and warnings and alarms, if any.
Example:
Two example outputs from the command follow. The first shows a low alarm for Rx Power. The second shows low alarms for Tx, Rx, and Current. The interface for the second example was in an Error Disabled state due to the bit error rate being too high.
Low Alarm for RxPower
Low Alarms for Current, Tx Power and R x Power
In the following example that the command does not provide detailed transceiver information for Twinax (copper).
Displaying FcoE bound Ethernet interface counters
The show interface ethernet command, has two versions, brief and detailed. Examples of each follow.
Brief Version
Example:
Note![]() Ensure that the jumbo frames are incrementing, as well as RX or TX pause frames counters, if any. Tx might indicate a congestion problem.
Ensure that the jumbo frames are incrementing, as well as RX or TX pause frames counters, if any. Tx might indicate a congestion problem.
Detailed Version
The output of the detailed version of the show interface ethernet command is shown in different parts in the following example. It includes both normal traffic counters, as well as counters for physical layer and protocol errors. These counters should be monitored anytime there is a connectivity or performance issue.
Example:
Understanding Fibre Channel interface counters
The show interface command is very useful when troubleshooting physical layer or performance issues with a Fibre Channel interface.
In the output of the command, observe the input/output counters and any input/output discards or errors.
When input discards increment, the FC packet does not have a valid route in the Forwarding Information Base (FIB). All packets not having a route are considered discards and sent to the supervisor. These packets are NOT dropped; however, they are policed before being sent to the supervisor. You should also check the MAC ASIC for errors.
When output discards increment, packets are timing out in egress because the egress is too slow. Check the attached device because it may be a slow draining receiver that is not responding, or not replenishing buffer credits. This causes back pressure to occur on the Nexus 5000 FC interface.
Example:
Troubleshooting Fibre Channel MAC issues
The show hardware command is very useful when troubleshooting FC physical layer issues.
The output of the command contains the following useful information:
- Physical layer information
- Performance information
- Class 3 normal traffic counters
- Fibre Channel primitive sequences
Example:
When troubleshooting FC performance problems, review the R_RDY, Link Reset, and Link Reset Response counters. These help determine buffer to buffer credit problems that could lead to performance issues.
Troubleshooting Fibre Channel forwarding issues
To troubleshoot Fibre Channel forwarding issues, it is important to know that GATOS is the MAC/Forwarding ASIC on the Nexus 5000 switch. This section describes commands specific to this ASIC.
Each Fibre Channel interface is assigned a GATOS number. To understand forwarding issues, you must find the GATOS number for the specific FC interface.
Consider the following example:
In the following part of the example, notice that gatos_num 13 is the GATOS instance for Fibre Channel interface 2/1:
In the following part of the example, notice that the command also provides forwarding drop and discard informatio:
You can also display GATOS errors for the GATOS instance that corresponds to the FC interface. In the following part of the example, notice that the command only shows non-zero counters.
In the first of the two parts, drops and discards were described. Notice that the drop and discard counters are separate for vEthernet and VFC interfaces. Review the output in the second example to help correlate the reason for the drops.
In the following part of the example, notice the drops in the second line:
In the following part of the example, notice that the FcoE counters are separate:
In the following part of the example, notice that the command helps find the cause of the drops:
Fortnite players start getting Fortnite Error Code IS-FC02-1392 while installing the game on their PC.
Don’t worry about it!
The CPU Guide brings you the best working solution to solve Fortnite Error Code IS-FC02-1392.
Solution 1: Restart your Fortnite
The most simple solution of all time is to restart your game.
Whenever you encounter Fortnite Error Code IS-FC02-1392 or any game bug, you should restart the PC before trying any further solutions.
Restarting the PC will eliminate any temporary error which is occurring due to the old cache.
Read More: Fortnite Error IS-0002-DP-OS-03
Solution 2: Check for Driver’s Updates of GPU/Video Card
One of the main and highlighted issues is the GPU drivers are outdated when our video card has outdated drivers it’s unable for GPU to go align with the updated/modern gaming experience.
So, we recommend updating the video card drivers.
Giving you direct links to Main GPU making companies:
- AMD
- Nvidia
- Intel
Solution 3: Keep your PC Updated
For PC players, the outdated window is another big hurdle towards Fortnite. You have to update the windows to have an updated patch that will align with your GPU updated drivers and eventually the Fortnite will stop crashing.
So here is how you can do it.
- Click on the Windows icon

- Click on the Settings icon
- A new window will pop up
- Select Windows Update from the left menu
- The new window will pop up
- Then click on Check for updates.
- If there is any update it will start updating the PC.


Read Also: Fortnite Keeps Crashing
Solution 4: Repair the Anti-Cheat Service
Anti-Cheat Service is a service that protects you from cheaters and this software comes with your game.
When this service gets corrupted your game will not run properly.
Here are the steps to repair the Anti-Cheat Service.
- Open the File explorer
- Search Easyanti-cheat
- Select EasyAntiCheat_setup.exe
- Right-Click on the EasyAntiCheat_setup.exe
- And Run as Administrator
- The anti-cheat service software will open
- Select “Fortnite“
- And click on the “Repair Service” button
- And Service is repaired
Read Also: Fortnite Error Code 93? Connectivity Error on Fortnite?
Solution 5: Update Graphics Card Driver with Windows Update
Sometimes some of Windows’s updates have necessary patches which help you to run the game smoothly. And help you to eliminate the Fortnite Won’t Launch.
Here is how you can do it:
- Click on the Windows icon
- Click on the settings icon
- A new window will pop up
- Select Windows Update from the left menuAdvertisements
- The new window will pop up
- Now select Advanced options
- Click on Optional updates

- A new window will open
- Click on the drop-down button for Driver updates
- Now, select your desired drivers
- Now press the Download & Install button

If you are unable to update your drivers through Windows Update, then you can try updating the Graphics Drivers through Device Manager.
Read Also: Fortnite Error Code 91: Unable to Join Party?
Solution 6: Update Graphics Card Driver Thorough Device manager
Outdated graphic drivers can be updated in multiple ways. If you are unable to update your graphic drivers by updating Windows, you can try updating through the Device Manager too.
Here is how you can do it:
- Click on the Search icon
- Type Device Manager
- Click to open device manager
- Then select the Display adapters
- A further menu will open
- Right-click on the graphic card name
- Click on the Update driver

Rolling Back the Driver:
If you experiencing the Fortnite Keeps Crashing issue after updating your graphic driver you can roll back the driver’s recent update to avoid Fortnite won’t open.
Here is how you can do it:
- Click on the Search icon
- Type Device Manager
- Click to open device manager
- Then select the Display adapters
- A further menu will open
- Right-click on the graphic card name
- Click on the Properties

- A graphic card properties Window will open
- Navigate to the driver Tab
- There is an option for “Roll Back Drivers” click on it
- If the option of “Roll Back Drivers” is grey out this means that the driver did not update recently.

Solution 7: Verify Fortnite Game Files
Due to some reason sometimes the Fortnite game file went missing or got broken.
This leads to Fortnite Error Code IS-FC02-1392.
So, it’s better for you to verify the game file to avoid inconvenience while gaming.
Here is how you verify your files in the Epic Game launcher to avoid Fortnite Won’t Launch:
- Open the Epic Game launcher

- Then go to the library
- Select Fortnite Advertisements
- Then select Click on the Gear icon
- Setting menu will
- Click on Verify

Hope the above solution will help you to rectify the error of Fortnite Error Code IS-FC02-1392.
If you have any queries or suggestions feel free to share your experience with us in the comments section down below or you can reach us on our social handles.
Our Social Handles!
Advertisements
I want to create the predicative model in line with the image processing, I have a lot of video files(.mov) on Google Drive (concerned with auto driving) I get data from Google Drive as links to the files. My disk and data are available for all Internet users.
#test
https://drive.google.com/drive/folders/1JidqB3TfHn0Cky8VBXHjbmHu7s0rGLrO?usp=sharing
#train
https://drive.google.com/drive/folders/1WIFQIC23_o1__BPmlRDpnYYwmthH2AP-?usp=sharing
library(«googledrive»)
X=googledrive::drive_ls(path =»test»)
Label=googledrive::drive_ls(path =»train»)
So example structure of dataframe from google disk (If necessary)
dput()
train=structure(list(name = structure(c(1L, 11L, 10L, 9L, 8L, 7L, 6L,
5L, 4L, 3L, 2L), .Label = c("<chr>", "047a188c-1ac1965c.mov",
"047a7ecb-68221e4a.mov", "047c278b-452d36f8.mov", "047e715f-3e47a9aa.mov",
"047e715f-81e81a28.mov", "047e732b-aa79a87d.mov", "0571873b-de675e01.mov",
"0571873b-faf718b2.mov", "0573e933-a8b4cf7d.mov", "0573f031-8ef23cf6.mov"
), class = "factor"), id = structure(c(1L, 5L, 7L, 11L, 9L, 3L,
10L, 8L, 4L, 2L, 6L), .Label = c("<chr>", "115rWp3h3Of3Rx61mqDRfhatFMFOpImRf",
"1EfokXp8UAxYKlpmGAIwU3FRJTTqrgDrS", "1EJa-A0a4_4nVgeF-pBXh6q6DFToGTYFu",
"1HHML9bo4UPY9r1hIL9igSX_t5FXH5n82", "1HzVTOqRwNfxVDey6EYmDe2nd8hnnTbHT",
"1IhMQiiCyb_WcKif8qyQmeK1W0tb8iU-U", "1lQc1a0mFw158T9U_QRvgoF0a33xiehZc",
"1StqEC_7hJO4HJ9uvC0o7sjLLY3tdceNp", "1thEsWrcYFN4qgG57RCUxqCr7WE6ecrmq",
"1xcxAuHamoFKHCD05wHfdVjeVDEN-FW8C"), class = "factor"), drive_resource = structure(c(2L,
1L, 1L, 1L, 1L, 1L, 1L, 1L, 1L, 1L, 1L), .Label = c("<list [41]>",
"<list>"), class = "factor")), .Names = c("name", "id", "drive_resource"
), class = "data.frame", row.names = c(NA, -11L))


test=structure(list(name = structure(c(1L, 2L, 4L, 3L, 11L, 10L, 9L,
8L, 7L, 6L, 5L), .Label = c("<chr>", "ddbd3eb2-ed0fde54.mov",
"ddbf7bbb-c1908e76.mov", "ddd140cc-c54a4e82.mov", "df94066c-654dcae9.mov",
"df94066c-b5e96c4c.mov", "df952550-4cb35087.mov", "df9b2e94-c14fc6a7.mov",
"df9b8801-a11fba46.mov", "df9cc07f-5cec2c16.mov", "dfa06e5c-aa220d9a.mov"
), class = "factor"), id = structure(c(1L, 10L, 2L, 3L, 8L, 6L,
11L, 7L, 9L, 4L, 5L), .Label = c("<chr>", "18fDVBhfyAHqUffG0GNFGti7549G43bhZ",
"1aYVn6L7147dDPcOb5CKC3RHh28fS7qix", "1Evm3EotD1xRoljlVCZ3sDIMnEmKaTbO5",
"1jhbfo3NSKKjbLrMkEh-HRx-UIOUr6R5o", "1kK5AvfwTV_exoWO55dEwEH4QIHaqpVER",
"1mjr8xSRdULPbmkQN-7L5Dx9yMb_zLxWh", "1OSg6d4q9is80c9Oark6ktdXwvZI8IpER",
"1Q3UlVeZXDF2cjglqxToapX2FMgRABhA9", "1uIS-Y3N_ipDuzG8kVT5gP3VScAvS-B9_",
"1yXKCCfgMJVbLqEyTJJCjS_pKQLMnZ6Kp"), class = "factor"), drive_resource = structure(c(2L,
1L, 1L, 1L, 1L, 1L, 1L, 1L, 1L, 1L, 1L), .Label = c("<list [41]>",
"<list>"), class = "factor")), .Names = c("name", "id", "drive_resource"
), class = "data.frame", row.names = c(NA, -11L))
Now i must resize video data to pixels
require(EBImage)
Dataframe of resized images
rs_df <- data.frame()
Main loop: for each image, resize and set it to greyscale
for(i in 1:nrow(X))
{
Try-catch
result <- tryCatch({
# Image (as 1d vector)
img <- as.numeric(X[i,])
# Reshape as a 64×64 image (EBImage object)
img <- Image(img, dim=c(64, 64), colormode = «Grayscale»)
# Resize image to 28×28 pixels
img_resized <- resize(img, w = 28, h = 28)
# Get image matrix (there should be another function to do this faster and more neatly!)
img_matrix <- img_resized@.Data
# Coerce to a vector
img_vector <- as.vector(t(img_matrix))
# Add label
label <- labels[i,]
vec <- c(label, img_vector)
# Stack in rs_df using rbind
rs_df <- rbind(rs_df, vec)
# Print status
print(paste(«Done»,i,sep = » «))},
# Error function (just prints the error). Btw you should get no errors!
error = function(e){print(e)})
}
after i get the list with errors like
<simpleError in labels[i, ]: object of type ‘closure’ is not subsettable>
next
names(rs_df) <- c("label", paste("pixel", c(1:776))) #776 video .mov files
after here error
Error in names(rs_df) <- c(«label», paste(«pixel», c(1:776))) :
object ‘rs_df’ not found
Otherwise, I get the same errors concerned with rs_df
set.seed(100)
Shuffled df
shuffled <- rs_df[sample(1:400),]
Error: object ‘rs_df’ not foundTrain-test split
train_28 <- shuffled[1:360, ]
Error: object ‘shuffled’ not found
test_28 <- shuffled[361:400, ]
Error: object ‘shuffled’ not foundSave train-test datasets
write.csv(train_28, «train_28.csv», row.names = FALSE)
Error in is.data.frame(x) : object ‘train_28’ not found
write.csv(test_28, «test_28.csv», row.names = FALSE)
Error in is.data.frame(x) : object ‘test_28’ not found
I think the problem that it incorrectly loads data from the disk, but I could be wrong, maybe the problem is something else.
How do I properly resize the video in pixels, to continue this analysis. Cause when i run this script, i have many error like
Error in t(test[, -1]) : object ‘test’ not found
#Build model
Clean workspace
rm(list=ls())
Load MXNet
library(«downloader»)
library(«influenceR»)
library(«rgexf»)
require(mxnet)
Load train and test datasets
train <- read.csv(«train_28.csv»)
test <- read.csv(«test_28.csv»)
Set up train and test datasets
train <- data.matrix(train)
train_x <- t(train[, -1])
train_y <- train[, 1]
train_array <- train_x
dim(train_array) <- c(28, 28, 1, ncol(train_x))
test_x <- t(test[, -1])
test_y <- test[, 1]
test_array <- test_x
dim(test_array) <- c(28, 28, 1, ncol(test_x))
Set up the symbolic model
data <- mx.symbol.Variable(‘data’)
1st convolutional layer
conv_1 <- mx.symbol.Convolution(data = data, kernel = c(5, 5), num_filter = 20)
tanh_1 <- mx.symbol.Activation(data = conv_1, act_type = «tanh»)
pool_1 <- mx.symbol.Pooling(data = tanh_1, pool_type = «max», kernel = c(2, 2), stride = c(2, 2))
2nd convolutional layer
conv_2 <- mx.symbol.Convolution(data = pool_1, kernel = c(5, 5), num_filter = 50)
tanh_2 <- mx.symbol.Activation(data = conv_2, act_type = «tanh»)
pool_2 <- mx.symbol.Pooling(data=tanh_2, pool_type = «max», kernel = c(2, 2), stride = c(2, 2))
1st fully connected layer
flatten <- mx.symbol.Flatten(data = pool_2)
fc_1 <- mx.symbol.FullyConnected(data = flatten, num_hidden = 500)
tanh_3 <- mx.symbol.Activation(data = fc_1, act_type = «tanh»)
2nd fully connected layer
fc_2 <- mx.symbol.FullyConnected(data = tanh_3, num_hidden = 40)
Output. Softmax output since we’d like to get some probabilities.
NN_model <- mx.symbol.SoftmaxOutput(data = fc_2)
Pre-training set up
#——————————————————————————-
Set seed for reproducibility
mx.set.seed(100)
Device used. CPU in my case.
devices <- mx.cpu()
Training
#——————————————————————————-
Train the model
model <- mx.model.FeedForward.create(NN_model,
X = train_array,
y = train_y,
ctx = devices,
num.round = 480,
array.batch.size = 40,
learning.rate = 0.01,
momentum = 0.9,
eval.metric = mx.metric.accuracy,
epoch.end.callback = mx.callback.log.train.metric(100))
So how correct get data from google disk and resize it on pixels to create my model? any help is important
Как обновить, скачать и исправить Data.bin
Последнее обновление: 07/01/2021 [Время, требуемое для чтения: 3,5 мин.]
Файл data.bin считается разновидностью файла Binary Disk Image. Наиболее часто он используется в ПО BullGuard Internet Security 2013, разработанном компанией BullGuard. Он использует расширение BIN и считается файлом Исполняемое приложение (Binary Disk Image).
Файл data.bin впервые был создан 09/17/2018 для ОС Windows 10 в SlimCleaner Free 4.0.46. Последним обновлением версии [v2013] для BullGuard Internet Security является 2013, выпущенное 09/10/2012. Файл data.bin включен в BullGuard Internet Security 2013 и SlimCleaner Free 4.0.46.
В этой статье приведены подробные сведения о data.bin, руководство по устранению неполадок с файлом BIN и список версий, доступных для бесплатной загрузки.

Рекомендуемая загрузка: исправить ошибки реестра в WinThruster, связанные с data.bin и (или) BullGuard Internet Security.
![]()

Совместимость с Windows 10, 8, 7, Vista, XP и 2000
Средняя оценка пользователей
Обзор файла
| Общие сведения ✻ | |
|---|---|
| Имя файла: | data.bin |
| Расширение файла: | расширение BIN |
| Тип файла: | Исполняемое приложение |
| Описание: | Binary Disk Image |
| Пользовательский рейтинг популярности: |
| Сведения о разработчике и ПО | |
|---|---|
| Программа: | BullGuard Internet Security 2013 |
| Разработчик: | BullGuard |
| Программное обеспечение: | BullGuard Internet Security |
| Версия ПО: | 2013 |
| Сведения о файле | |
|---|---|
| Размер файла (байты): | 480 |
| Дата первоначального файла: | 10/25/2019 |
| Дата последнего файла: | 02/18/2020 |
| Информация о файле | Описание |
|---|---|
| Размер файла: | 480 bytes |
| Дата и время изменения файла: | 2020:02:18 19:09:16+00:00 |
✻ Фрагменты данных файлов предоставлены участником Exiftool (Phil Harvey) и распространяются под лицензией Perl Artistic.
Что такое сообщения об ошибках data.bin?
data.bin — ошибки выполнения
Ошибки выполнения — это ошибки BullGuard Internet Security, возникающие во время «выполнения». Термин «выполнение» говорит сам за себя; имеется в виду, что данные ошибки BIN возникают в момент, когда происходит попытка загрузки файла data.bin — либо при запуске приложения BullGuard Internet Security, либо, в некоторых случаях, во время его работы. Ошибки выполнения являются наиболее распространенной разновидностью ошибки BIN, которая встречается при использовании приложения BullGuard Internet Security.
В большинстве случаев ошибки выполнения data.bin, возникающие во время работы программы, приводят к ненормальному завершению ее работы. Большинство сообщений об ошибках data.bin означают, что либо приложению BullGuard Internet Security не удалось найти этот файл при запуске, либо файл поврежден, что приводит к преждевременному прерыванию процесса запуска. Как правило, BullGuard Internet Security не сможет запускаться без разрешения этих ошибок.
К числу наиболее распространенных ошибок data.bin относятся:
Не удается запустить программу из-за отсутствия data.bin на компьютере. Попробуйте переустановить программу, чтобы устранить эту проблему.
Таким образом, крайне важно, чтобы антивирус постоянно поддерживался в актуальном состоянии и регулярно проводил сканирование системы.
Поиск причины ошибки data.bin является ключом к правильному разрешению таких ошибок. Несмотря на то что большинство этих ошибок BIN, влияющих на data.bin, происходят во время запуска, иногда ошибка выполнения возникает при использовании BullGuard Internet Security 2013. Причиной этого может быть недостаточное качество программного кода со стороны BullGuard, конфликты с другими приложениями, сторонние плагины или поврежденное и устаревшее оборудование. Кроме того, эти типы ошибок data.bin могут возникать в тех случаях, если файл был случайно перемещен, удален или поврежден вредоносным программным обеспечением. Таким образом, крайне важно, чтобы антивирус постоянно поддерживался в актуальном состоянии и регулярно проводил сканирование системы.
Как исправить ошибки data.bin — 3-шаговое руководство (время выполнения:
Если вы столкнулись с одним из вышеуказанных сообщений об ошибке, выполните следующие действия по устранению неполадок, чтобы решить проблему data.bin. Эти шаги по устранению неполадок перечислены в рекомендуемом порядке выполнения.
Шаг 1. Восстановите компьютер до последней точки восстановления, «моментального снимка» или образа резервной копии, которые предшествуют появлению ошибки.
Чтобы начать восстановление системы (Windows XP, Vista, 7, 8 и 10):
Если на этапе 1 не удается устранить ошибку data.bin, перейдите к шагу 2 ниже.

Шаг 2. Если вы недавно установили приложение BullGuard Internet Security (или схожее программное обеспечение), удалите его, затем попробуйте переустановить BullGuard Internet Security.
Чтобы удалить программное обеспечение BullGuard Internet Security, выполните следующие инструкции (Windows XP, Vista, 7, 8 и 10):
После полного удаления приложения следует перезагрузить ПК и заново установить BullGuard Internet Security.
Если на этапе 2 также не удается устранить ошибку data.bin, перейдите к шагу 3 ниже.

BullGuard Internet Security 2013
Шаг 3. Выполните обновление Windows.
Когда первые два шага не устранили проблему, целесообразно запустить Центр обновления Windows. Во многих случаях возникновение сообщений об ошибках data.bin может быть вызвано устаревшей операционной системой Windows. Чтобы запустить Центр обновления Windows, выполните следующие простые шаги:
Если Центр обновления Windows не смог устранить сообщение об ошибке data.bin, перейдите к следующему шагу. Обратите внимание, что этот последний шаг рекомендуется только для продвинутых пользователей ПК.

Если эти шаги не принесут результата: скачайте и замените файл data.bin (внимание: для опытных пользователей)
Если этот последний шаг оказался безрезультативным и ошибка по-прежнему не устранена, единственно возможным вариантом остается выполнение чистой установки Windows 10.
Источник
Исправить сообщения об ошибках BIN_DATA.DLL отсутствует или не найден
Что такое BIN_DATA.DLL?
Наиболее важные факты о BIN_DATA.DLL:
Это BIN_DATA.DLL безопасно, или это вирус или вредоносная программа?
Файлы DLL полезны, потому что они позволяют программе разделять свои различные компоненты на отдельные модули, которые затем могут быть добавлены или удалены для включения или исключения определенных функций. Если программное обеспечение работает таким образом с библиотеками DLL, программа может использовать меньше памяти, поскольку ей не нужно загружать все одновременно.
Убедитесь, что вы сканируете оба вместе, чтобы вам не пришлось беспокоиться о заражении вашего компьютера чем-то плохим.
Могу ли я удалить или удалить BIN_DATA.DLL?

Программные программы хранят файлы DLL в одной или нескольких папках во время установки. Эти файлы содержат код, который объясняет работу программ.
Если вы планируете удалить BIN_DATA.DLL, лучше оставить его в покое. Причина этой логики заключается в том, что некоторые программы совместно используют эти файлы, поэтому удаление определенного файла DLL может непреднамеренно вызвать проблемы. Это означает, что удаление BIN_DATA.DLL может привести к прекращению работы одной или нескольких других программ или только в ограниченной степени.
Некоторые программы также могут устанавливать файлы DLL в несколько папок вне папки Program Files (где установлено большинство программ). Поиск этих DLL-файлов может быть очень трудным, а удаление их может быть опасным.
Как уже упоминалось выше, если вы не уверены, что BIN_DATA.DLL используется другой программой, мы рекомендуем оставить ее в покое. Однако, если вам нужно удалить файл, мы рекомендуем сначала сделать копию. Если после этого у вас возникнут проблемы с другой программой, требующей использования недавно удаленного DLL-файла, вы можете восстановить файл из резервной копии.
Распространенные сообщения об ошибках в BIN_DATA.DLL

Как вы можете себе представить, некоторые DLL появляются чаще в сообщениях об ошибках, чем другие. Вот некоторые из DLL, которые, как известно, вызывают проблемы.
Как исправить BIN_DATA.DLL
Мы рекомендуем вам попробовать этот новый инструмент. Он исправляет множество компьютерных ошибок, а также защищает от таких вещей, как потеря файлов, вредоносное ПО, сбои оборудования и оптимизирует ваш компьютер для максимальной производительности. Это исправило наш компьютер быстрее, чем делать это вручную:
Если BIN_DATA.DLL отсутствует или поврежден, это может повлиять на многие приложения, включая операционную систему, что может помешать вам выполнить свою работу или использовать критические функции в критически важных программах.
Запустить SFC

Для этого щелкните правой кнопкой мыши кнопку «Пуск» на компьютере Windows 10, чтобы открыть меню WinX, и щелкните ссылку «Командная строка (администратор)».
В окне CMD скопируйте следующую команду и нажмите Enter:
Сканирование может занять 10 минут, и если оно успешно завершено, вы должны перезагрузить компьютер. Запуск sfc / scannow в безопасном режиме или при запуске может дать лучшие результаты.
Обновить драйверы

Обновите драйверы вашего устройства, чтобы увидеть, решит ли это проблему.
Восстановление при загрузке

Загрузите или переустановите BIN_DATA.DLL

В большинстве учебников и руководств авторы предупреждают своих читателей, чтобы они не загружали отсутствующие файлы BIN_DATA.DLL со случайных и непригодных для использования веб-сайтов, которые могли бы предоставить им вредоносное ПО. Это не без причины, конечно. Правда в том, что в Интернете полно сайтов, которые обещают пользователям решить их проблемы, открыв определенные приложения или программы как можно скорее. К сожалению, очень немногие могут действительно оправдать ваши ожидания.
Хотя эта проблема встречается реже, потенциально гораздо более серьезная проблема заключается в том, что библиотеки DLL, которые вы загружаете из источников, отличных от поставщика, иногда могут быть загружены вирусами или другими вредоносными программами, которые могут заразить ваш компьютер. Это особенно верно для веб-сайтов, которые не слишком заботятся о том, откуда берутся их файлы. И это не так, как будто эти сайты сделают что-нибудь, чтобы рассказать вам о своих источниках высокого риска.
Источник
[РЕШЕНО] Как исправить ошибки, связанные с DATA1.BIN
DATA1.BIN проблемы часто являются результатом отсутствия, удаления или случайного перемещения файла из исходного места установки Dragon Naturally Speaking 8 Preferred. Обычно, установка новой версии файла BIN позволяет устранить проблему, из-за которой возникает ошибка. Помимо прочего, в качестве общей меры по профилактике и очистке мы рекомендуем использовать очиститель реестра для очистки любых недопустимых записей файлов, расширений файлов BIN или разделов реестра, что позволит предотвратить появление связанных с ними сообщений об ошибках.
Вы можете скачать новую копию файла DATA1.BIN для %%os%% (и ряда операционных систем Windows) в таблице ниже. Если в настоящий момент отсутствует необходимая вам версия DATA1.BIN, запросите ей, нажав на кнопку Request (Запрос) рядом с необходимой версией файла. В крайнем случае, если ниже отсутствует необходимая вам версия файла, вы всегда можете связаться с ScanSoft Inc..
Настоятельно рекомендуется выполнить проверку и убедиться в том, что файл был размещён в правильном каталоге. Тщательно следуйте настоящим инструкциям, чтобы устранить возникающую ошибку, связанную с файлом DATA1.BIN, однако мы рекомендуем выполнить быструю проверку. Проверьте, результат замены файла, запустив Dragon Naturally Speaking 8 Preferred и убедившись, что сообщение об ошибке больше не выводится.
| DATA1.BIN Описание файла | |
|---|---|
| Расширение: | BIN |
| Функция: | Speech Recognition,usability |
| Новейшие программы: | Dragon Naturally Speaking 8 Preferred |
| Версия выпуска: | 2005 |
| Автор: | ScanSoft Inc. |
| Имя: | DATA1.BIN Запрос |
| Размер (в байтах): | 6541 |
| SHA-1: | 5cd592b14fe6e28ff7d42cd3d73fa2b89176d10c |
| MD5: | d19eb753b0a292af700f2b1129d57935 |
| CRC32: | b8b143f8 |
Идентификатор статьи: 370359

DATA1.BIN
| File | Идентификатор файла (контрольная сумма MD5) | Размер файла | Загрузить | |||||||||||||||
|---|---|---|---|---|---|---|---|---|---|---|---|---|---|---|---|---|---|---|
| + DATA1.BIN | d19eb753b0a292af700f2b1129d57935 | 6.39 KB | Запрос | |||||||||||||||
|
||||||||||||||||||
| + DATA1.BIN | d19eb753b0a292af700f2b1129d57935 | 6.39 KB | Запрос | |||||||||||||||
|
||||||||||||||||||
| + DATA1.BIN | d19eb753b0a292af700f2b1129d57935 | 6.39 KB | Запрос | |||||||||||||||
|
||||||||||||||||||
| + DATA1.BIN | d19eb753b0a292af700f2b1129d57935 | 6.39 KB | Запрос | |||||||||||||||
|
||||||||||||||||||
| + DATA1.BIN | d19eb753b0a292af700f2b1129d57935 | 6.39 KB | Запрос | |||||||||||||||
|
||||||||||||||||||
| + DATA1.BIN | 5b1655f642d8aa692ce4718f1a67e396 | 512.00 MB | Запрос | |||||||||||||||
|
||||||||||||||||||
| + DATA1.BIN | 294e038036133f19ba574d9c4d51cdb1 | 306.80 MB | Запрос | |||||||||||||||
|
||||||||||||||||||
| + DATA1.BIN | fc0ca9580a3bad2a89dff00393ec840b | 512.00 MB | Запрос | |||||||||||||||
|
||||||||||||||||||
| + DATA1.BIN | ae950ac3f52d18cf767311f3a28d7831 | 176.98 KB | Запрос | |||||||||||||||
|
||||||||||||||||||
| + DATA1.BIN | ae950ac3f52d18cf767311f3a28d7831 | 176.98 KB | Запрос | |||||||||||||||
|
||||||||||||||||||
| + DATA1.BIN | ae950ac3f52d18cf767311f3a28d7831 | 176.98 KB | Запрос | |||||||||||||||
|
||||||||||||||||||
| + DATA1.BIN | ae950ac3f52d18cf767311f3a28d7831 | 176.98 KB | Запрос | |||||||||||||||
|
||||||||||||||||||
| + DATA1.BIN | 380bfe9487f5b995a4551815d4742672 | 11.85 MB | Запрос | |||||||||||||||
|
||||||||||||||||||
| + DATA1.BIN | 380bfe9487f5b995a4551815d4742672 | 11.85 MB | Запрос | |||||||||||||||
|
||||||||||||||||||
| + DATA1.BIN | 380bfe9487f5b995a4551815d4742672 | 11.85 MB | Запрос | |||||||||||||||
|
||||||||||||||||||
| + DATA1.BIN | 380bfe9487f5b995a4551815d4742672 | 11.85 MB | Запрос | |||||||||||||||
|
||||||||||||||||||
| + DATA1.BIN | 60f64db9139f5a0f4853c32bcaf516e6 | 1.52 MB | Запрос | |||||||||||||||
|
||||||||||||||||||
| + DATA1.BIN | 60f64db9139f5a0f4853c32bcaf516e6 | 1.52 MB | Запрос | |||||||||||||||
|
Спасибо, ваш файл запроса был получен.
Классические проблемы DATA1.BIN
Частичный список ошибок DATA1.BIN Dragon Naturally Speaking 8 Preferred:
Проблемы Dragon Naturally Speaking 8 Preferred DATA1.BIN возникают при установке, во время работы программного обеспечения, связанного с DATA1.BIN, во время завершения работы или запуска или менее вероятно во время обновления операционной системы. При появлении ошибки DATA1.BIN запишите вхождения для устранения неполадок Dragon Naturally Speaking 8 Preferred и чтобы HelpScanSoft Inc. найти причину.
Создатели DATA1.BIN Трудности
Большинство проблем DATA1.BIN связаны с отсутствующим или поврежденным DATA1.BIN, вирусной инфекцией или недействительными записями реестра Windows, связанными с Dragon Naturally Speaking 8 Preferred.
Особенно эти ошибки DATA1.BIN проистекают из:
Источник
Log2FC data type error in EnhansedVolcano package

@sauuyer-22090
Last seen 3.3 years ago
Hello,
When running function EnhancedVolcano(): I am receiving the error that, log2FC is not numeric, though type(log2FC) returns «double.»
Here is the format of the function:
EnhancedVolcano(df,
lab = ‘Gene’,
x = ‘log2FC’,
y = ‘pvalue’,
xlim = c(-5, 8))
The format of df is:
Gene, log2FC, pvalue
12953, 0.888282, 5.66e-12
…
Any ideas why this function is not liking our data input for x?
software error
enhancedvolcano
• 17k views
@sauuyer-22090
Last seen 3.3 years ago
I was able to resolve this issue. The problem was caused by the data format being imported directly as a csv containing pvalue and log2fc values, rather than going through the data alterations detailed in the bioconductor tutorial (here). This post (here) was a great help in figuring this out.
Forcing the df to be a data.frame within the equation has fixed all of the errors.
EnhancedVolcano(data.frame(df),
lab = rownames(df),
x = ‘log2FC’,
y = ‘pvalue’,
xlim = c(-1.5, 1.5),
ylim = c(0, max(-log10(df[,’pvalue’]))),
title = ‘Your title here’
)
Login before adding your answer.