Forum rules
Read the FAQs and search the forum before posting a new topic.
Please mark any answers that fixed your problems so others can find the solutions.
-

batkov
- Posts: 1
- Joined: Thu Apr 22, 2021 12:51 pm

Error downloading anaconda
Don’t really know what is the problem here, i don’t have conda nor python; the following appears when i try to install faceswap:
(check) CPU Supports AVX Instructions
(check) CPU Supports SSE4 Instructions
(check) Completed check for installed applications
(check) Setting up for: nvidia
Downloading Miniconda3…
Error Downloading Miniconda3
Install Aborted
Thanks
-

torzdf
- Posts: 2221
- Joined: Fri Jul 12, 2019 12:53 am
-
Answers: 142
- Has thanked: 110 times
- Been thanked: 505 times

Re: Error downloading anaconda
Post
by torzdf » Fri Apr 23, 2021 10:19 am
If there was an error downloading Miniconda, then there is an issue with your connection to the Anaconda site. This may be temporary, or it may be permanent.
If the issue persists: download and install Miniconda3 manually, and then point the faceswap installer at your Miniconda location when prompted.
My word is final
If you have a troubleshooting issue that is not listed here, obtain free support
for Anaconda through the
Nucleus community.
For Anaconda installation or technical support options, visit our
support offerings page.
You may also wish to see the Anaconda Navigator Troubleshooting guide.
- 403 error
- HTTP 000 CONNECTION FAILED
- Anaconda installer download problems
- Cannot open Anaconda Prompt after installation
- Cannot see Anaconda menu shortcuts after installation on Windows
- Windows error: Failed to create Anaconda menus or Failed to add Anaconda to the system PATH
- I’m having trouble with the Anaconda installer on Windows. How can I debug my issue?
- Cannot get conda to run after installing
- Recovering your Anaconda installation
- Using Anaconda behind a firewall or proxy
- .zshrc not updated under macOS Catalina
- Insecure Platform Warning
- Conda: command not found on macOS or Linux
- Conda: Channel is unavailable/missing or package itself is missing
- Collecting package metadata (repodata.json): — Killed
- Anaconda interfering with other software on Windows
- Windows error: no environment named “search” exists
- Error message on Miniconda install: Already installed
- Conda update anaconda command does not install the latest version of Anaconda
- Linking problems when Python extensions are compiled with gcc
- Error message: Unable to remove files
- Files left behind after uninstalling Anaconda on Windows
- Spyder errors or failure to launch on Windows
- Problems running Anaconda on macOS 10.12.2
- “execution error: localhost doesn’t understand the “open location” message. (-1708)” when opening a Jupyter notebook on macOS 10.12.5
- Missing libgfortran on Power8
- Missing libgomp on Power8
- Anaconda on Power8 reports “can not execute binary file”
- Uninstaller requests admin privileges on Windows
- Windows permission errors when installing from Favorites folder
- Trouble with activation on PowerShell on Windows
- Cannot install Distribution 2019.07 on a webfaction server
- Segmentation fault on package import with macOS Python 3.7 intepreter
- Using 32- and 64-bit libraries and CONDA_FORCE_32BIT
- “The installation failed” message when running a .pkg installer on OSX
403 error
Cause
A 403 errors is a generic Forbidden error issued by a web server in the event the client is forbidden from accessing a resource.
The 403 error you are receiving may look like the following:
Collecting package metadata (current_repodata.json): failed

UnavailableInvalidChannel: The channel is not accessible or is invalid.
  channel name: pkgs/main
  channel url: https://repo.anaconda.com/pkgs/main
  error code: 403

You will need to adjust your conda configuration to proceed.
Use `conda config --show channels` to view your configuration's current state,
and use `conda config --show-sources` to view config file locations.
There are several reasons a 403 error could be received:
- The user has misconfigured their channels in their configuration (most common)
- A firewall or other security device or system is preventing user access (second most common)
- We are blocking their access because of a potential terms of service violation (third most common)
Solution
-
First, run the following to undo your configuration of Anaconda Professional:
conda config --remove-key default_channels
-
Next, install or upgrade the conda-token tool:
conda install --freeze-installed conda-token
-
Lastly, re-apply the token and configuration settings:
# Replace <TOKEN> with your token
conda token set <TOKEN>
If this doesn’t resolve the issue, Anaconda recommends consulting our Terms of Service error page.
HTTP 000 CONNECTION FAILED
If you receive this error message, run the following command:
conda config --set ssl_verify false
Anaconda installer download problems
Cause
The Anaconda installer files are large (over 300 MB), and some users have
problems with errors and interrupted downloads when downloading large files.
Solution
One option is to download and install the smaller Miniconda (under 60MB) and then use the command
conda install anaconda to download and install all the remaining packages
in Anaconda. If the package downloads are interrupted, just run
conda install anaconda again. Conda only downloads the packages that were
not finished in any previous attempts.
A second option is to download the large Anaconda installer file, and restart
it if the download is interrupted or you need to pause it.
Windows
If you use Internet Explorer:
- Click the Settings icon.
- Click “View Downloads” to open the Download Manager.
- Click on the “Resume” button next to the stopped download to restart
downloading. The download resumes at the point where it stopped.
If you use Edge browser:
- In Windows Explorer, open your downloads folder. There will be
temporary files there associated with the partial downloads. Delete all of
the temporary files except for the download you want to resume. - In Edge, click the file to download it again. Pause the download but do not
cancel it. - In Windows Explorer, open your downloads folder. You will see two files: the
partially downloaded file from earlier, and the paused download you just
started. Copy the name of the file you just started, delete this file, and
rename the other file with the copied name. - In Edge, resume the download.
If you use Chrome browser:
Download the plugin for Chrome called Chrono Download manager. In your Chrome
browser, go to https://chrome.google.com/webstore/category/extensions, search
on “Chrono Download” and select, “Add to Chrome.”
To resume the download using Chrono Download, from your top browser menu, click
on the Chrome menu button, then click “Downloads.” Select the filename, then
click “Resume” to restart your download.
macOS and Linux
-
In your terminal window, download the file with the command
curl -O FILENAME.Note
Replace FILENAME with the full path and name of the file, including
http://orhttps://. -
To pause the download, use
CTRL-c.Note
While a download is paused, you can shut down or restart your computer.
-
When ready to resume your download, use
curl -O -C FILENAME.Where “-C” is the option for “continue”. You can pause and restart a download
as many times as you wish.
Cannot open Anaconda Prompt after installation
I get an error message that says “activate.bat is not a recognized file or command”.
Cause
Anaconda 5.0.1 sometimes does not install completely on Windows.
Solution
Until a new version is released, you can install Miniconda, and then use conda
to install the rest of the packages in Anaconda with these instructions:
Open the command prompt (Windows key + the R key on your keyboard) which brings
up the Run… dialog box. Enter cmd.exe and then press enter)
Copy the following text:
cd %UserProfile%
powershell -command "& { (New-Object Net.WebClient).DownloadFile('https://repo.anaconda.com/miniconda/Miniconda3-latest-Windows-x86_64.exe', 'mc3.exe') }"
start /wait "" mc3.exe /InstallationType=JustMe /AddToPath=0 /RegisterPython=0 /NoRegistry=0 /S /D=%UserProfile%anaconda3
%UserProfile%anaconda3Scriptsactivate.bat
conda install -y anaconda=5.0.1 conda-build _ipyw_jlab_nb_ext_conf
Then paste it into the command prompt window.
Note
This installs to a subdirectory in your User directory named anaconda3.
If you use a different directory, replace anaconda3 with the actual name.
I’m having trouble with the Anaconda installer on Windows. How can I debug my issue?
Cause
The cause could be any number of issues.
Solution
Anaconda 4.4 added a feature to the Windows installer so that the “verbose” install information is printed out to a special debug stream via the Win32 API function OutputDebugStream. To see these messages, during installation you need to run the Microsoft utility https://technet.microsoft.com/en-us/sysinternals/debugview.aspx. This may provide useful clues for troubleshooting or submitting bug reports.
Cannot get conda to run after installing
You may get “conda not found” or “conda is not recognized as an internal or external command” or a similar message, and you cannot execute conda in a terminal window regardless of what path you are on.
Cause
Most likely when you were installing Anaconda or Miniconda, you answered “NO” to the question whether or not to prepend the conda prompt to your path.
Solution
Uninstall and then reinstall Anaconda or Miniconda, answering “YES” to the question about prepending the conda prompt.
Or, you can manually edit your .bashrc file to prepend the Anaconda or Miniconda install location. Open a text editor and in your home directory, locate the hidden file .bashrc. Add this line to it and save:
export PATH=/Users/your-username/anaconda3/bin:$PATH
Close your terminal window and re-open before running a conda command.
Recovering your Anaconda installation
If your Anaconda installation is in a state where normal conda commands
are not functioning, use the following steps to repair Anaconda and
preserve your installed packages and environments.
Step 1
Download a new installer, then follow
the instructions for your system Windows, macOS, or Linux.
Note
Use the actual path, filename, and directory name for your installation.
Windows
Change your original installer’s name so you do not overwrite it:
move Anaconda Professional_old
Run the Anaconda.exe installer as usual and use robocopy to sync the
directories:
robocopy Anaconda_old Anaconda /S
rd /s Anaconda_old
macOS
Change your original installer’s name so you do not overwrite it:
mv Anaconda Professional_orig
Install to same directory as your original installer:
bash Anaconda3-4.0.0-MacOSX-x86_64.sh
rsync -a anaconda_orig/ anaconda/
rm -rf anaconda_orig
Linux
Change your original installer’s name so you do not overwrite it:
mv Anaconda Professional_orig
Install to same directory as your original installer:
bash Anaconda3-4.0.0-Linux-x86_64.sh
rsync -a anaconda_orig/ anaconda/
Step 2
Run conda list to view the packages from the previous installation.
Run conda info -e to list the environments created in the previous installation which are now available in the new installation.
Using Anaconda behind a firewall or proxy
Corporate security policies may prevent a new Anaconda installation from
downloading packages and other functionality that requires connecting
to an external server. To make external connections you may need to connect to a
firewall/proxy. Additionally, your IT team may need to allow connections
to https://anaconda.org and https://repo.anaconda.com as these are the
main package repositories.
Solution
To add the proxy information you will need to add two entries to your
.condarc file located in the user’s home directory. This information
should be made available by your IT team and may contain a username and
password that is included in the URL. Read more about the
.condarc configuration.
Example configuration:
channels:
- defaults

proxy_servers:
- http: http://username:password@proxyurl.com:8080
- https: https://username:password@proxyurl.com:8443
In some situations it may be necessary to export the HTTP_PROXY and
HTTPS_PROXY environment variables.
MacOS/Linux
Windows
If these steps have not allowed connections you should speak to your IT
team to verify that security policies are not blocking connections to
https://anaconda.com and https://repo.continuum.io.
.zshrc not updated under macOS Catalina
Cause
MacOS Catalina changed the default shell from Bash to zsh.
Solution
Run bash -c "conda init zsh" and then restart your shell to initialize conda for zsh.
Insecure Platform Warning
Cause
“InsecurePlatformWarning” appears only when the installed version of Python is
older than version 2.7.9. This message warns only that the validity of the SSL
connection is not being verified. It should not affect your package downloads.
Solution
To resolve this on Windows, install the updated package ndg-httpsclient:
conda install ndg-httpsclient
Note
When initially installing this package, you receive the SSL warning again. Once it is installed, the package will prevent the warnings.
Conda: command not found on macOS or Linux
Cause
The conda shell function is not available, or is not working
properly. Some causes:
- You have set
conda_auto_activate_baseto false. You need to runconda activate [env]. Env is optional, the default if not provided is base. - You haven’t started a new shell after installing Anaconda/Miniconda (assuming you allow it to modify your startup script)
- You didn’t allow the installer to modify your startup script
- Conda has been corrupted, usually by a change in the Python package (e.g. 3.6->3.7)
Solution
Run /full/path/to/bin/conda init to modify ~/.bashrc.
Either start a new shell or source the modified ~/.bash_profile
(Windows/MSYS2, Windows/Cygwin and macOS) or ~/.bashrc (Linux and Windows Subsystem for Linux).
Source them via . ~/.bash_profile.
You may prefer that conda not automatically activate your base
environment when a new shell is started. This behavior shadows
your system Python, and some users prefer to have their conda
environment be inactive until they need it. To achieve this,
you can set a .condarc setting:
conda config --set auto_activate_base false
If you have this set, the conda command will still be available
as a shell function, but your base environment will not be
active when a new shell is started. To activate your base
environment, run conda activate.
Conda: Channel is unavailable/missing or package itself is missing
Cause
After a user has configured their .condarc for either Anaconda Professional or Anaconda Server, in some cases they are unable to install packages. They may receive an error message that the channel or package is unavailable or missing.
Solution
One potential fix for all of these is to run the following command:
This will clear the “index cache” and force conda to sync metadata from the repo server.
Anaconda interfering with other software on Windows
Cause
If a user chooses to add Anaconda to the Windows PATH, this can cause programs
to use the new Anaconda versions of software such as Python and not the
versions that were already in place. In some cases this can cause
incompatibility and errors.
Solution
Anaconda recommends against adding Anaconda to the Windows PATH manually. Instead, use Anaconda
software by opening Anaconda Navigator or the Anaconda Prompt from the
Start Menu.
Windows error: no environment named “search” exists
If anaconda-client is not installed and you search for a package on
anaconda.org using the Anaconda search command:
anaconda search -t conda packagename
You will receive the following error message:
C:Usersusername>anaconda search -t conda packagename
No environment named "search" exists in C:Anacondaenvs
Solution
Anaconda on Windows contains an anaconda.bat file, which is used for setting
environment paths and switching environments. If anaconda-client is not
installed, this batch file is called instead and produces the error.
To resolve the error, install anaconda-client:
conda install anaconda-client
And then search for a package:
anaconda search -t conda packagename
Error message on Miniconda install: Already installed
Cause
This situation can occur if you are getting a conda error and you want to reinstall Miniconda to fix it.
Solution
For macOS and Linux, download and install the appropriate Miniconda for your operating system from the Miniconda download page using the force or -f option:
bash Miniconda3-latest-MacOSX-x86_64.sh -f
Note
For Miniconda3-latest-MacOSX-x86_64, substitute the appropriate filename and version for your operating system.
Be sure that you install to the same location as your existing install so it overwrites the core conda files and does not install a duplicate in a new folder.
Conda update anaconda command does not install the latest version of Anaconda
Cause
For users who have installed packages that are not compatible with the latest version of the Anaconda metapackage, running conda update anaconda updates the Anaconda metapackage to the latest compatible version, but this may not be the latest version.
Solution
Obtain a list of the conflicting packages by running conda update anaconda or conda install anaconda=5.2.
Note
Replace 5.2 with the latest version number.
Once you know which packages are conflicting, you can update all current packages without upgrading to the latest version of Anaconda, or you can remove the conflicting packages and then upgrade to the latest version of Anaconda.
To update all current packages without upgrading to the latest version of Anaconda:
- Use
conda remove anacondato remove the Anaconda metapackage itself. (This will not remove any of the packages included with Anaconda.) - Use
conda update --allto update all currently installed packages.
To remove the conflicting packages and upgrade to the latest version of Anaconda:
-
Remove the conflicting packages by running
conda remove package-namefor each one.Note
Replace
package-namewith the name of the package. -
Run
conda update anaconda.
Linking problems when Python extensions are compiled with gcc
Cause
When compiling Python extensions with gcc on Windows, linking problems may result.
Solution
To resolve these linking problems, use the mingw import library–the conda package libpython–which Anaconda builds and includes with the Anaconda Distribution.
Error message: Unable to remove files
When trying to update or install packages with conda, you may see an error message such as:
Error: Unable to remove files for package: <package-name>
Please close all processes running code from conda and try again.
Cause
This may be caused by a file lock issue.
Solution
Before updating or installing any packages with conda, be sure to terminate any running Anaconda processes such as Spyder or IPython.
You can also force the installation of the package: conda install -f package-name.
Note
Replace package-name with the name of the package that you want to install.
Files left behind after uninstalling Anaconda on Windows
Cause
Some users may need to keep settings files and other users may need to delete them, so Anaconda leaves some settings files in place when it is uninstalled. Specifically, the directories .spyder2, .ipython, .matplotlib, and .astropy remain. Depending on your version of Windows these may be in C:Documents and SettingsYour_User_Name or in C:UsersYour_User_Name.
Note
Replace Your_User_Name with your Windows user name as it appears in the Documents and Settings or Users folder.
Solution
Manually delete any unneeded settings files.
Spyder errors or failure to launch on Windows
Cause
This may be caused by errors in the Spyder setting and configuration files.
Solution
-
Close and relaunch Spyder and see if the problem remains.
-
On the menu, select Start, then select Reset Spyder Settings and see if the problem remains.
-
Close Spyder and relaunch it from the Anaconda Prompt:
- From the Start menu, open the Anaconda Prompt.
- At the Anaconda Prompt, enter
Spyder. - See if the problem remains.
-
Delete the directory
.spyder2and then repeat the previous steps from Step 1. Depending on your version of Windows,.spyder2may be inC:Documents and SettingsYour_User_Nameor inC:UsersYour_User_Name.Note
Replace
Your_User_Name, with your Windows user name as it appears in the Documents and Settings folder.
Problems running Anaconda on macOS 10.12.2
Cause
Some installations of Anaconda on macOS 10.12.2 experienced incorrect file and
directory permissions, which caused a range of errors with Navigator and other
parts of Anaconda.
Solution
Anaconda recommends that any users with Anaconda on macOS 10.12.2 follow these steps:
- Uninstall Anaconda. Open the Terminal.app or iTerm2 terminal application and
remove your Anaconda directory, which will have a name such as “anaconda2”
or “anaconda3”, by entering a command such as this:rm -rf ~/anaconda3 - Use a text editor such as TextEdit to open the file named
.bash_profile
in your home directory. If you see a line that adds Anaconda or Miniconda to
your PATH environment variable, remove this line, and then save and close
the file. For example, if you see a line such as
export PATH="/Users/jsmith/anaconda3/bin:$PATH", remove that line. - Update to macOS 10.12.3 or later.
- Reinstall Anaconda.
“execution error: localhost doesn’t understand the “open location” message. (-1708)” when opening a Jupyter notebook on macOS 10.12.5
Cause
This version of macOS seems to have a bug affecting some of the ways for a program to open a web page in a browser.
Solution
Several possible workarounds have been found for this bug.
You can explicitly set the browser in ~/.jupyter/jupyter_notebook_config.py with a line such as this:
c.NotebookApp.browser = u'Safari'
Or you can copy the Jupyter notebook URL from the log messages on the command line and paste it into your browser.
Or you can set the BROWSER environment variable: export BROWSER=/Applications/Google Chrome.app/Contents/MacOS/Google Chrome
Further information is available at the Jupyter bug tracker, the Python bug tracker, and this blog post.
Missing libgfortran on Power8
Cause
Anaconda 4.4.0.0 for Power8 did not include libgfortran.
Solution
Anaconda 4.4.0.1 and later for Power8 do include libgfortran.
Upgrade to the latest version of Anaconda:
Anaconda 4.4.0.0 users who do not wish to upgrade may instead install libgfortran with this command:
conda install libgfortran
Missing libgomp on Power8
If the Python command “import numpy” fails, the system is likely missing the
libgomp system library.
Cause
Most Power8 Linux distributions include libgomp, but some may not.
Solution
Check whether the system is missing libgomp with this command:
conda inspect linkages -n root numpy
If libgomp.so.1 is listed in the “not found:” section, it must be installed.
Install libgomp on Ubuntu with this command:
Install libgomp on Red Hat Enterprise Linux (RHEL) or CentOS with this command:
Anaconda on Power8 reports “can not execute binary file”
Cause
Anaconda on Power8 only supports little endian mode. The little endian Python binary will not execute on a big endian operating system.
Solution
Install Anaconda on Power8 on a little endian Linux installation or VM.
Uninstaller requests admin privileges on Windows
Cause
After installing Anaconda or Miniconda as a non-administrative user on Windows,
uninstalling may prompt for administrative privileges.
This occurs when running the uninstaller by choosing Control Panel, System,
Apps & features, Python x.x.x (Miniconda3 4.3.xx 64-bit), Uninstall.
Solution
Open the Anaconda or Miniconda installation folder and run the .exe file
uninstaller from that location. Uninstallation will complete without prompting
for administrative privileges.
EXAMPLE: If you installed Miniconda3, the uninstall file will be
Uninstall-Miniconda3.exe. Users who installed Miniconda2 or Anaconda will
find a similar file with the appropriate name.
Windows permission errors when installing from Favorites folder
Cause
The Windows Favorites folder has unusual permissions and may cause permission
errors with installers of any software. If you try launching the installer from
the Favorites folder you may see errors such as “Setup was unable to create the
directory”, “Access is denied”, or “Error opening file for writing”.
Solution
Move the installer to a different folder and run the installer from the new
folder.
Trouble with activation on PowerShell on Windows
Solution
If you run into the following backtrace on Windows:
File "C:UsersdamiaMiniconda3libsite-packagescondaactivate.py", line 550, in _replace_prefix_in_path
assert last_idx is not None
AssertionError
Open a cmd.exe prompt. cd to where you installed conda and run:
Close the cmd.exe prompt and the Anaconda Prompt or the Anaconda
PowerShell Prompt as usual.
If this doesn’t work, try running:
Cannot install Distribution 2019.07 on a webfaction server
You may receive an error when trying to install
Distribution 2019.07 for Linux on a webfaction server:
PREFIX=/home/myname/anaconda3
Unpacking payload ...
[13822] Error loading Python lib '/tmp/_MEI<randomstring>/libpython3.6m.so.1.0': dlopen /tmp_MEI<randomstring>/libpython3.6m.so.1.0: failed to map segment from shared object: Operation not permitted
ERROR: could not extract tar starting at offset 00000000000020980+9231072+2
Cause
This is caused by having TMP as a noexec.
Solution
To enable installation, you can temporarily
set TMP to somewhere else from which you can execute software.
For example:
cd
mkdir TMPconda
TMP=~/TMPconda bash Anaconda3-2019.07-Linux-x86_64.sh
After installing, set the TMP folder back to its initial location.
Segmentation fault on package import with macOS Python 3.7 intepreter
In CPython < 3.8, using python3-config to determine a linking command line to
compile an extension module will cause that extension module to segfault upon import.
python3-config does provide command-line flags but for the different purpose of
embedding a Python interpreter.
Cause
This is because of the command-line flags returned by python3-config. Before Python 3.8,
those are needed to embed the core Python interpreter into a different project altogether
and not those that should be used when linking a Python extension module.
Python modules should never link to the core Python interpreter library directly,
either statically at build time or dynamically at runtime. This is because the Python
executable itself provides all the necessary functions and symbols.
Solution
You should only use python*-config —ldflags when linking to an interpreter library (either static or shared).
| Action | Python < 3.8 | Python >= 3.8 |
|---|---|---|
| Get command line to link to extension module | python -c "import sysconfig; print(sysconfig.get_config_var('LDSHARED'))" |
python3-config --ldflags |
| Get command line to embed Python interpreter | python3-config --ldflags |
python3-config --ldflags --embed |
python3-config doesn’t include the command/compiler name whereas the sysconfig way
does. This works provided none of your arguments have spaces:
python -c "import sysconfig; print(' '.join(sysconfig.get_config_var('LDSHARED').split(' ')[1:]))"
Using 32- and 64-bit libraries and CONDA_FORCE_32BIT
To work with both 32- and 64-bit libraries, Anaconda recommends that you have
two separate installs: Anaconda32 and Anaconda64 or Miniconda32 and Miniconda64.
When working with both versions, add the path to your installer files to the PATH.
Caution
Always specify which version you want to work with because mixing 32- and 64-bit
packages can cause problems in your environment.
To get the information about conda including your PATH, run:
conda info -a
Using CONDA_FORCE_32BIT is not recommended because it forces 32-bit packages to
be installed in the environment, but does not force 32-bit libraries to load at
runtime.
CONDA_FORCE_32BIT should be used only when running conda-build to build 32-bit
packages on a 64-bit system.
“The installation failed” message when running a .pkg installer on OSX
Cause
When running the .pkg installer, you may see this message at the end of the installation:

If so, check for the following:
-
Open your
/var/log/install.logfile and check whether the most recent lines show errors following a call toconda init --all.open /var/log/install.log OR vim /var/log/install.log
-
In your
$HOMEdirectory, check whether the owner of your shell config files isroot:ls -la ~/.bash_profile ~/.config/fish/config.fish ~/.tcshrc ~/.xonshrc ~/.zshrc


Solution
If both of the above are true, do the following:
-
Change the owner of your shell config files to your current user:
sudo chown -R $USER ~/.bash_profile ~/.config/fish/config.fish ~/.tcshrc ~/.xonshrc ~/.zshrc
-
Uninstall the previous installation. Then re-run the installer, making sure to select the “Install for me only” option.

New issue
Have a question about this project? Sign up for a free GitHub account to open an issue and contact its maintainers and the community.
By clicking “Sign up for GitHub”, you agree to our terms of service and
privacy statement. We’ll occasionally send you account related emails.
Already on GitHub?
Sign in
to your account
Comments
![]()
Orange version
v3.15.0, Windows 64 bit version
Expected behavior
Should install without any problem.
Actual behavior
Halfway through the installer reports error:
ERROR conda.core.link: _execute_actions(335): An error occurred while installing package ‘::python-3.6.6-hea74fb7_0’
CondaError: Cannot link a source that does not exist C:UsersNAMiniconda3pkgspython-3.6.6-hea74fb7_0DLLspy.ico
Attempting to roll back,
CondaError: Cannot link a source that does not exist.
•conda• command exited with 1. Cannot continue.
Steps to reproduce the behavior
I get the same error in four different experiments:
- Run the exe normally. Install in the default path.
- Run the exe as administrator. Install in the default path.
3,4: Repeat the above steps with a non-default path.
Additional info (worksheets, data, screenshots, …)
I have not pre-installed Python 3.6 separately. Is that needed?
If so, the latest version of Python is 3.7.0 (not 3.6.6, as reported in the error).
Is that OK?
![]()
raindropsfromsky
changed the title
Problem with miniconda installer- Exists with error
Problem with miniconda installer- Exits with an error
Aug 19, 2018
![]()
update: I explored the path specified in the error.
I confirmed that Python 3.6.6 is installed.
But the DLLs folder does not have the «py.ico» file.
BTW even if this issue is resolved, it may encounter further missing files.
IMHO this installer needs to be tested further.
![]()
Update-2:
I confirmed that several files are missing from the DLLs folder.
I copied and addde the py.ico file, and retried,
This time the error reported that pyc.ico was missing.
I again copied that file into the DLLs folder and retried installation.
The error message changed to another file missing (this time with dll extension).
Thus it is likely that several files are missing from this folder.
![]()
Did you have Miniconda installed before installing Orange? If so which version of conda is installed in it (run Miniconda3Scriptsconda.exe --version)
Can you copy/paste the installer ‘Details’ log when the error happens. Click the ‘Show details’ button, right click on the log view and select ‘Copy Details to Clipboard’.
Also, there should be a second log in your Temp folder (usually in C:Users%USERNAME%AppDataLocalTempOrange3-3.15.0-install-log.txt). Can you please post that too.
![]()
Well, I have not installed Miniconda specifically, but other software may have installed it (just like Orange).
I ran the command, and it says Conda 4.3.14.
BTW I always uninstall all my older software before installing the latest version. But in case of Orange, there is a vestigial 3.10.0 version, which I am unable to uninstall using the Apps & features window of Windows 10. It always gives the following error:
[Window Title]
C:Program FilesUtilOrangeOrange-Uninstall.exe
[Content]
Windows cannot find ‘C:Program FilesUtilOrangeOrange-Uninstall.exe’. Make sure you typed the name correctly, and then try again.
[OK]
I saw this error while installing the last two versions of Orange (3.13, 3.14) also, but it apparently did not cause any more issues. So I was ignoring it.
But is it possible that the Miniconda in that old version could not be uninstalled, and that is why that old version refuses to get uninstalled?
Here is the installer log text (details):
Installer log.txt
As regards the error log files, I could not find the orange install log, but there is an orange uninstall log.
I am attaching both log files I found in that folder.
Orange logs.zip
![]()
Hello!
Is there any progress on this?
![]()
Basically I am unable to reproduce the error.
The pkgs folder is where conda unpacks its package archives and then links or copies the contents of that folder to the destination. The .tar.bz archive does contain the py.ico file and it is unpacked in the folder when I run the installer.
Do you run any antivirus software that maybe moves/quarantines the files as they are unpacked?
![]()
I have AVG, but it did not produce any errors during the installation. (I know its behavior well.)
Secondly, the same file (py.ico) is already installed in several other subdirectories. So logically speaking, my antivirus may not be creating this issue.
BTW all the py.ico files in the different subdirectories have the same size, so I took a chance and copied the file from another subfolder. When I re-attempted to install Orange, it produced a different file missing error message. I kept on copying those file, and each time the next attempt produced another file missing error.
Thus I think an entire set of files is missing.
![]()
Assuming there is no problem with the installer, what should I do to overcome the local factors?
(Please suggest steps including uninstallation, so that there is no mess left behind by the old installation.)
![]()
-
Try running
conda clean --allfollowed byconda update conda. Then try running the installer again. If that does not work then uninstall miniconda completely and try again. -
Try installing one of the installers that are based on the official Python distribution Orange3-3.15.0-Python36-win_amd64.exe (64 bit) ) or Orange3-3.15.0-Python36-win32.exe (32 bit). These use pip for installation so maybe you will have better luck.
Regarding the old 3.10.0 installation: Is the ‘C:Program FilesUtilOrange’ folder still there (and not empty)? I am afraid that if it is there, but the Uninstall-Orange.exe is not, the only options is to delete the folder and remove the ‘uninstall’ entry from windows.
I am not sure about the ‘Apps & Features’ but in the ‘Control Panel -> Programs and Features’, if you run the Uninstall for orange and the uninstall exe is not actaully there you are presented with an option to remove the entry from the registry.
![]()
I deleted the miniconda folder and then removed all registry entries that had «orange» and «miniconda» in them. Then I tried the original exe file, and the installation was completed without any hitch.
I think this may be a registry corruption issue.
2 participants
![]()
![]()
I tried to install anaconda/miniconda3 on Manjaro KDE 18.1.3 and got the following error. No such error when I installed them on a previous KDE version several months ago. This issue was also reported by other users on AUR, but no solution has been provided so far. Any help will be greatly appreciated.
==> Starting package()…
-> Packaging miniconda3 for installation to /opt/miniconda3
PREFIX=/home/user/.cache/yay/miniconda3/pkg/miniconda3/opt/miniconda3
Unpacking payload …
[28428] mod is NULL — structTraceback (most recent call last):
File «/tmp/build/80754af9/conda-standalone_1571943736098/_h_env_placehold_placehold_placehold_placehold_placehold
_placehold_placehold_placehold_placehold_placehold_placehold_placehold_placehold_placehold_placehold_placehold_plac
ehold_placehold_placehold_placeho/lib/python3.7/struct.py», line 13, in <module>
ModuleNotFoundError: No module named ‘_struct’
[28428] mod is NULL — pyimod02_archiveTraceback (most recent call last):
File «/tmp/build/80754af9/conda-standalone_1571943736098/_h_env_placehold_placehold_placehold_placehold_placehold
_placehold_placehold_placehold_placehold_placehold_placehold_placehold_placehold_placehold_placehold_placehold_plac
ehold_placehold_placehold_placeho/lib/python3.7/site-packages/PyInstaller/loader/pyimod02_archive.py», line 28, in
<module>
ModuleNotFoundError: No module named ‘struct’
[28428] mod is NULL — pyimod03_importersTraceback (most recent call last):
File «/tmp/build/80754af9/conda-standalone_1571943736098/_h_env_placehold_placehold_placehold_placehold_placehold
_placehold_placehold_placehold_placehold_placehold_placehold_placehold_placehold_placehold_placehold_placehold_plac
ehold_placehold_placehold_placeho/lib/python3.7/site-packages/PyInstaller/loader/pyimod03_importers.py», line 24, i
n <module>
ModuleNotFoundError: No module named ‘pyimod02_archive’
Traceback (most recent call last):
File «site-packages/PyInstaller/loader/pyiboot01_bootstrap.py», line 15, in <module>
ModuleNotFoundError: No module named ‘pyimod03_importers’
[28428] Failed to execute script pyiboot01_bootstrap
Traceback (most recent call last):
File «entry_point.py», line 68, in <module>
FileNotFoundError: [Errno 2] No such file or directory: ‘pkgs’
[28431] Failed to execute script entry_point
==> ERROR: A failure occurred in package().
Aborting…
Error making: miniconda3
Машинное обучение − это просто. Но знаете ли вы, что можно использовать Python для машинного обучения? Вот инструкция по настройке для Windows.
Люди привыкли выполнять большую часть работы автономно. В этой статье рассказываем о возможностях языка Python для машинного обучения на Windows, описание дистрибутива Anaconda, процесс его установки и создание нейронной сети.
Anaconda и Conda

Используемый в Python pip не идеален. Для оптимизации работы был выпущен дистрибутив Anaconda и система управления Conda, которые могут помочь в настройке Python для машинного обучения.
Хотя Conda тесно связана с Anaconda, эти проекты отличаются своими функциями. Anaconda − дистрибутив ПО в экосистеме PyData, которая включает сам язык программирования Python, а также двоичные файлы для нескольких сторонних проектов. Существует и Miniconda − версия с минимальным исходным пакетом. Conda − система управления пакетами, которая может быть установлена без Anaconda или Miniconda. Она способна решать проблемы внешних зависимостей, путем загрузки скомпилированных версий ПО. Кроме того, Conda является менеджером среды. С ее помощью вы можете настроить отдельную среду. Сейчас мы рассмотрим процесс установки Miniconda.
Установка дистрибутива Miniconda
Скачайте и установите необходимую версию Miniconda на ПК. При установке продвинутых настроек снимите галочку с первого пункта.
Поскольку при установке не был выбран пункт «Add Anaconda to my PATH environment variable», то команды Anaconda не будут работать в командной строке по умолчанию. Для их использования следует запустить дистрибутив отдельно. Когда он откроется, проверьте доступность Conda, запустив conda —version:
(base) C:UsersIEUser>conda --version
conda 4.5.11
Чтобы получить больше информации об установке, запустите conda info:
(base) C:UsersIEUser>conda info

     active environment : base
    active env location : C:UsersIEUserMiniconda3
            shell level : 1
       user config file : C:UsersIEUser.condarc
 populated config files : C:UsersIEUser.condarc
          conda version : 4.5.11
    conda-build version : not installed
         python version : 3.7.0.final.0
       base environment : C:UsersIEUserMiniconda3  (writable)
           channel URLs : https://repo.anaconda.com/pkgs/main/win-64
                          https://repo.anaconda.com/pkgs/main/noarch
                          https://repo.anaconda.com/pkgs/free/win-64
                          https://repo.anaconda.com/pkgs/free/noarch
                          https://repo.anaconda.com/pkgs/r/win-64
                          https://repo.anaconda.com/pkgs/r/noarch
                          https://repo.anaconda.com/pkgs/pro/win-64
                          https://repo.anaconda.com/pkgs/pro/noarch
                          https://repo.anaconda.com/pkgs/msys2/win-64
                          https://repo.anaconda.com/pkgs/msys2/noarch
          package cache : C:UsersIEUserMiniconda3pkgs
                          C:UsersIEUserAppDataLocalcondacondapkgs
       envs directories : C:UsersIEUserMiniconda3envs
                          C:UsersIEUserAppDataLocalcondacondaenvs
                          C:UsersIEUser.condaenvs
               platform : win-64
             user-agent : conda/4.5.11 requests/2.19.1 CPython/3.7.0 Windows/10 Windows/10.0.17134
          administrator : False
             netrc file : None
           offline mode : False
Понимание среды Conda
При работе с чужими проектами у вас может возникнуть потребность в установке определенных версий пакетов. Виртуальные среды − решение проблемы. Они позволяют создать несколько сред, каждая из которых имеет разные версии пакетов. Базовая настройка Python для машинного обучения включает в себя Virtualenv, инструмент для создания изолированных сред.
Conda включает собственный менеджер среды и дает некоторые преимущества относительно Virtualenv. Кроме того, среды Conda полностью совместимы с базовыми пакетами языка Python, которые могут быть установлены с помощью pip.
Используя Anaconda, можно проверить доступные среды Conda, запустив сonda env list:
(base) C:UsersIEUser>conda env list
base                  *  C:UsersIEUserMiniconda3
Базовая среда − корневая среда, созданная Miniconda. Можно создать еще одну, под названием otherenv, путем запуска conda create —name otherenv:
(base) C:UsersIEUser>conda create --name otherenv
Solving environment: done

  environment location: C:UsersIEUserMiniconda3envsotherenv


Proceed ([y]/n)? y

Preparing transaction: done
Verifying transaction: done
Executing transaction: done
После завершения процесса создания среды, можно ее активировать, запустив conda activate otherenv. Заметить изменения среды можно, посмотрев на скобки в начале строки:
(base) C:UsersIEUser>conda activate otherenv

(otherenv) C:UsersIEUser>
Откройте Python interpreter в этой среде, запустив python:
(otherenv) C:UsersIEUser>python
Python 3.7.0 (default, Jun 28 2018, 08:04:48) [MSC v.1912 64 bit (AMD64)] :: Anaconda, Inc. on win32
Type "help", "copyright", "credits" or "license" for more information.
>>>
Среда включает в себя Python 3.7.0, ту же версию, что включена в корневую среду. Чтобы выйти, запустите quit():
>>> quit()

(otherenv) C:UsersIEUser>
Чтобы отключить среду otherenv и вернуться в корневую среду, пропишите deactivate:
(otherenv) C:UsersIEUser>deactivate

(base) C:UsersIEUser>
Conda позволяет легко создавать среды с различными версиями Python. Чтобы включить другую версию в среду, укажите ее, используя python =<version> при запуске conda create. Чтобы создать среду с именем py2 с Python 2.7, запустите conda create —name py2 python=2.7:
(base) C:UsersIEUser>conda create --name py2 python=2.7
Solving environment: done

  environment location: C:UsersIEUserMiniconda3envspy2

  added / updated specs:
    - python=2.7


The following NEW packages will be INSTALLED:

    certifi:        2018.8.24-py27_1
    pip:            10.0.1-py27_0
    python:         2.7.15-he216670_0
    setuptools:     40.2.0-py27_0
    vc:             9-h7299396_1
    vs2008_runtime: 9.00.30729.1-hfaea7d5_1
    wheel:          0.31.1-py27_0
    wincertstore:   0.2-py27hf04cefb_0

Proceed ([y]/n)? y

Preparing transaction: done
Verifying transaction: done
Executing transaction: done

(base) C:UsersIEUser>
Как видно из вывода conda create, были установлены новые пакеты, так как среда использует Python 2.7. Можно проверить, что среда действительно использует его, активировав Python interpreter:
(base) C:UsersIEUser>conda activate py2

(py2) C:UsersIEUser>python
Python 2.7.15 |Anaconda, Inc.| (default, May  1 2018, 18:37:09) [MSC v.1500 64 bit (AMD64)] on win32
Type "help", "copyright", "credits" or "license" for more information.
>>>
Теперь, если вы запустите conda env list, можно увидеть две среды, которые были созданы вами:
(py2) C:UsersIEUser>conda env list

base                     C:UsersIEUserMiniconda3
otherenv                 C:UsersIEUserMiniconda3envsotherenv
py2               *  C:UsersIEUserMiniconda3envspy2


(py2) C:UsersIEUser>
Asterisk указывает на активную среду. Ее можно удалить, выполнив команду conda remove —name <environment name> —all:
(py2) C:UsersIEUser>deactivate

(base) C:UsersIEUser>conda remove --name py2 --all

Remove all packages in environment C:UsersIEUserMiniconda3envspy2:

  environment location: C:UsersIEUserMiniconda3envspy2


The following packages will be REMOVED:

    certifi:        2018.8.24-py27_1
    pip:            10.0.1-py27_0
    python:         2.7.15-he216670_0
    setuptools:     40.2.0-py27_0
    vc:             9-h7299396_1
    vs2008_runtime: 9.00.30729.1-hfaea7d5_1
    wheel:          0.31.1-py27_0
    wincertstore:   0.2-py27hf04cefb_0

Proceed ([y]/n)? y


(base) C:UsersIEUser>
Управление базовыми пакетами с помощью Conda
Пакеты ПО могут быть установлены с помощью Conda. Корневая база Miniconda включает в себя базовые пакеты, которые не являются частью стандартной библиотеки Python для настройки машинного обучения.
Установка по умолчанию включает минимум пакетов Conda. Чтобы проверить список установленных пакетов, нужно убедиться, что она активна, и запустить conda list. В корневой среде устанавливаются эти пакеты:
(base) C:UsersIEUser>conda list

asn1crypto                0.24.0                   py37_0
ca-certificates           2018.03.07                    0
certifi                   2018.8.24                py37_1
cffi                      1.11.5           py37h74b6da3_1
chardet                   3.0.4                    py37_1
conda                     4.5.11                   py37_0
conda-env                 2.6.0                         1
console_shortcut          0.1.1                         3
cryptography              2.3.1            py37h74b6da3_0
idna                      2.7                      py37_0
menuinst                  1.4.14           py37hfa6e2cd_0
openssl                   1.0.2p               hfa6e2cd_0
pip                       10.0.1                   py37_0
pycosat                   0.6.3            py37hfa6e2cd_0
pycparser                 2.18                     py37_1
pyopenssl                 18.0.0                   py37_0
pysocks                   1.6.8                    py37_0
python                    3.7.0                hea74fb7_0
pywin32                   223              py37hfa6e2cd_1
requests                  2.19.1                   py37_0
ruamel_yaml               0.15.46          py37hfa6e2cd_0
setuptools                40.2.0                   py37_0
six                       1.11.0                   py37_1
urllib3                   1.23                     py37_0
vc                        14                   h0510ff6_3
vs2015_runtime            14.0.25123                    3
wheel                     0.31.1                   py37_0
win_inet_pton             1.0.1                    py37_1
wincertstore              0.2                      py37_0
yaml                      0.1.7                hc54c509_2

(base) C:UsersIEUser>
Поиск и установка пакетов
Пакеты устанавливаются из репозиториев, называемых channels by Conda. Чтобы выполнить поиск определенного пакета, запустите поиск <package name>. Вот так вы будете искать keras:
(base) C:UsersIEUser>conda search keras
Loading channels: done

keras                     2.0.8  py35h15001cb_0  pkgs/main
keras                     2.0.8  py36h65e7a35_0  pkgs/main
keras                     2.1.2          py35_0  pkgs/main
keras                     2.1.2          py36_0  pkgs/main
keras                     2.1.3          py35_0  pkgs/main
keras                     2.1.3          py36_0  pkgs/main

... (more)
Для каждой версии существуют разные версии пакетов и сборки. Предыдущий поиск показывает только пакеты с именем keras. Чтобы выполнить более широкий поиск, используйте *. Например, при запуске conda search *keras*, вы получите следующее:
(base) C:UsersIEUser>conda search *keras*
Loading channels: done

keras                     2.0.8  py35h15001cb_0  pkgs/main
keras                     2.0.8  py36h65e7a35_0  pkgs/main
keras                     2.1.2          py35_0  pkgs/main
keras                     2.1.2          py36_0  pkgs/main
keras                     2.1.3          py35_0  pkgs/main
keras                     2.1.3          py36_0  pkgs/main

... (more)

keras-applications           1.0.2          py35_0  pkgs/main
keras-applications           1.0.2          py36_0  pkgs/main
keras-applications           1.0.4          py35_0  pkgs/main

... (more)

keras-base                2.2.0          py35_0  pkgs/main
keras-base                2.2.0          py36_0  pkgs/main

... (more)
Вы можете заметить, что в каналах по умолчанию есть и другие пакеты, связанные с keras.
Чтобы установить пакет, запустите conda install <package name>. По умолчанию самая новая версия пакета будет установлена в активной среде. Установите пакет keras в среду otherenv, созданную вами:
(base) C:UsersIEUser>conda activate otherenv

(otherenv) C:UsersIEUser>conda install keras
Solving environment: done

  environment location: C:UsersIEUserMiniconda3envsotherenv

  added / updated specs:
    - keras


The following NEW packages will be INSTALLED:

    _tflow_1100_select:  0.0.3-mkl
    absl-py:             0.4.1-py36_0
    astor:               0.7.1-py36_0
    blas:                1.0-mkl
    certifi:             2018.8.24-py36_1
    gast:                0.2.0-py36_0
    grpcio:              1.12.1-py36h1a1b453_0
    h5py:                2.8.0-py36h3bdd7fb_2
    hdf5:                1.10.2-hac2f561_1
    icc_rt:              2017.0.4-h97af966_0
    intel-openmp:        2018.0.3-0
    keras:               2.2.2-0
    keras-applications:  1.0.4-py36_1
    keras-base:          2.2.2-py36_0
    keras-preprocessing: 1.0.2-py36_1
    libmklml:            2018.0.3-1
    libprotobuf:         3.6.0-h1a1b453_0
    markdown:            2.6.11-py36_0
    mkl:                 2019.0-117
    mkl_fft:             1.0.4-py36h1e22a9b_1
    mkl_random:          1.0.1-py36h77b88f5_1
    numpy:               1.15.1-py36ha559c80_0
    numpy-base:          1.15.1-py36h8128ebf_0
    pip:                 10.0.1-py36_0
    protobuf:            3.6.0-py36he025d50_0
    python:              3.6.6-hea74fb7_0
    pyyaml:              3.13-py36hfa6e2cd_0
    scipy:               1.1.0-py36h4f6bf74_1
    setuptools:          40.2.0-py36_0
    six:                 1.11.0-py36_1
    tensorboard:         1.10.0-py36he025d50_0
    tensorflow:          1.10.0-mkl_py36hb361250_0
    tensorflow-base:     1.10.0-mkl_py36h81393da_0
    termcolor:           1.1.0-py36_1
    vc:                  14-h0510ff6_3
    vs2013_runtime:      12.0.21005-1
    vs2015_runtime:      14.0.25123-3
    werkzeug:            0.14.1-py36_0
    wheel:               0.31.1-py36_0
    wincertstore:        0.2-py36h7fe50ca_0
    yaml:                0.1.7-hc54c509_2
    zlib:                1.2.11-h8395fce_2

Proceed ([y]/n)?
Conda управляет необходимыми функциями для пакета. Так как у keras их много, при его установке Conda позволяет установить большой список пакетов.
Поскольку новая сборка keras использует Python 3.6, а среда otherenv была создана с использованием Python 3.7, пакет python 3.6.6 был включен как зависимость. После подтверждения установки вы сможете проверить, что версия Python для среды otherenv была понижена до версии 3.6.6.
Но если вы не хотите понижать версию вашего пакета, просто создайте новую среду с необходимой версией Python. Чтобы проверить список пакетов и прочего, необходимого для ее установки, посмотрите на параметр —dry-run:
(otherenv) C:UsersIEUser>conda install keras --dry-run
При необходимости можно изменить базовую версию Python среды Conda, установив определенную версию пакета python. Создайте новую среду под названием envpython:
(otherenv) C:UsersIEUser>conda create --name envpython
Solving environment: done

  environment location: C:UsersIEUserMiniconda3envsenvpython


Proceed ([y]/n)? y

Preparing transaction: done
Verifying transaction: done
Executing transaction: done
Поскольку корневая среда использует Python 3,7, создается envpython с этой же версией.
(base) C:UsersIEUser>conda activate envpython

(envpython) C:UsersIEUser>python
Python 3.7.0 (default, Jun 28 2018, 08:04:48) [MSC v.1912 64 bit (AMD64)] :: Anaconda, Inc. on win32
Type "help", "copyright", "credits" or "license" for more information.
>>> quit()

(envpython) C:UsersIEUser>
Чтобы установить определенную версию пакета , запустите conda install <package name>=<version>. Вот так вы установите Python 3.6 в среду envpython:
(envpython) C:UsersIEUser>conda install python=3.6
Solving environment: done

  environment location: C:UsersIEUserMiniconda3envsenvpython

  added / updated specs:
    - python=3.6


The following NEW packages will be INSTALLED:

    certifi:        2018.8.24-py36_1
    pip:            10.0.1-py36_0
    python:         3.6.6-hea74fb7_0
    setuptools:     40.2.0-py36_0
    vc:             14-h0510ff6_3
    vs2015_runtime: 14.0.25123-3
    wheel:          0.31.1-py36_0
    wincertstore:   0.2-py36h7fe50ca_0

Proceed ([y]/n)?
Если вам нужно установить несколько пакетов, запустите conda install, указав имена пакетов. Вот как вы установите numpy, scipy и matplotlib:
(envpython) C:UsersIEUser>deactivate

(base) C:UsersIEUser>conda install numpy scipy matplotlib
Solving environment: done

  environment location: C:UsersIEUserMiniconda3

  added / updated specs:
    - matplotlib
    - numpy
    - scipy


The following packages will be downloaded:

    package                    |            build
    ---------------------------|-----------------
    libpng-1.6.34              |       h79bbb47_0         1.3 MB
    mkl_random-1.0.1           |   py37h77b88f5_1         267 KB
    intel-openmp-2019.0        |              117         1.7 MB
    qt-5.9.6                   |   vc14h62aca36_0        92.5 MB
    matplotlib-2.2.3           |   py37hd159220_0         6.5 MB
    tornado-5.1                |   py37hfa6e2cd_0         668 KB
    pyqt-5.9.2                 |   py37ha878b3d_0         4.6 MB
    pytz-2018.5                |           py37_0         232 KB
    scipy-1.1.0                |   py37h4f6bf74_1        13.5 MB
    jpeg-9b                    |       hb83a4c4_2         313 KB
    python-dateutil-2.7.3      |           py37_0         260 KB
    numpy-base-1.15.1          |   py37h8128ebf_0         3.9 MB
    numpy-1.15.1               |   py37ha559c80_0          37 KB
    mkl_fft-1.0.4              |   py37h1e22a9b_1         120 KB
    kiwisolver-1.0.1           |   py37h6538335_0          61 KB
    pyparsing-2.2.0            |           py37_1          96 KB
    cycler-0.10.0              |           py37_0          13 KB
    freetype-2.9.1             |       ha9979f8_1         470 KB
    icu-58.2                   |       ha66f8fd_1        21.9 MB
    sqlite-3.24.0              |       h7602738_0         899 KB
    sip-4.19.12                |   py37h6538335_0         283 KB
    ------------------------------------------------------------
                                           Total:       149.5 MB

The following NEW packages will be INSTALLED:

    blas:            1.0-mkl
    cycler:          0.10.0-py37_0
    freetype:        2.9.1-ha9979f8_1
    icc_rt:          2017.0.4-h97af966_0
    icu:             58.2-ha66f8fd_1
    intel-openmp:    2019.0-117
    jpeg:            9b-hb83a4c4_2
    kiwisolver:      1.0.1-py37h6538335_0
    libpng:          1.6.34-h79bbb47_0
    matplotlib:      2.2.3-py37hd159220_0
    mkl:             2019.0-117
    mkl_fft:         1.0.4-py37h1e22a9b_1
    mkl_random:      1.0.1-py37h77b88f5_1
    numpy:           1.15.1-py37ha559c80_0
    numpy-base:      1.15.1-py37h8128ebf_0
    pyparsing:       2.2.0-py37_1
    pyqt:            5.9.2-py37ha878b3d_0
    python-dateutil: 2.7.3-py37_0
    pytz:            2018.5-py37_0
    qt:              5.9.6-vc14h62aca36_0
    scipy:           1.1.0-py37h4f6bf74_1
    sip:             4.19.12-py37h6538335_0
    sqlite:          3.24.0-h7602738_0
    tornado:         5.1-py37hfa6e2cd_0
    zlib:            1.2.11-h8395fce_2

Proceed ([y]/n)?
Обновление и удаление пакетов
Иногда вам будет нужно обновлять пакеты. Для этого запустите conda update <package name>. Если вы хотите обновить все пакеты, активируйте среду и запустите conda update —all.
Чтобы удалить пакеты, пропишите conda remove <package name>, но помните, что при удалении пакета, все зависимые от него тоже удалятся:
(base) C:UsersIEUser>conda remove numpy
Solving environment: done

  environment location: C:UsersIEUserMiniconda3

  removed specs:
    - numpy


The following packages will be REMOVED:

    matplotlib: 2.2.3-py37hd159220_0
    mkl_fft:    1.0.4-py37h1e22a9b_1
    mkl_random: 1.0.1-py37h77b88f5_1
    numpy:      1.15.1-py37ha559c80_0
    scipy:      1.1.0-py37h4f6bf74_1

Proceed ([y]/n)?
Использование каналов
Иногда вы не сможете найти нужные вам пакеты на базовых каналах. Вот так вы будете устанавливать pytorch:
(base) C:UsersIEUser>conda search pytorch
Loading channels: done

PackagesNotFoundError: The following packages are not available from current channels:

  - pytorch

Current channels:

  - https://repo.anaconda.com/pkgs/main/win-64
  - https://repo.anaconda.com/pkgs/main/noarch
  - https://repo.anaconda.com/pkgs/free/win-64
  - https://repo.anaconda.com/pkgs/free/noarch
  - https://repo.anaconda.com/pkgs/r/win-64
  - https://repo.anaconda.com/pkgs/r/noarch
  - https://repo.anaconda.com/pkgs/pro/win-64
  - https://repo.anaconda.com/pkgs/pro/noarch
  - https://repo.anaconda.com/pkgs/msys2/win-64
  - https://repo.anaconda.com/pkgs/msys2/noarch

To search for alternate channels that may provide the conda package you're
looking for, navigate to

    https://anaconda.org

and use the search bar at the top of the page.
В случае, если будете искать pytorch на сайте anaconda, вы получите следующие результаты:
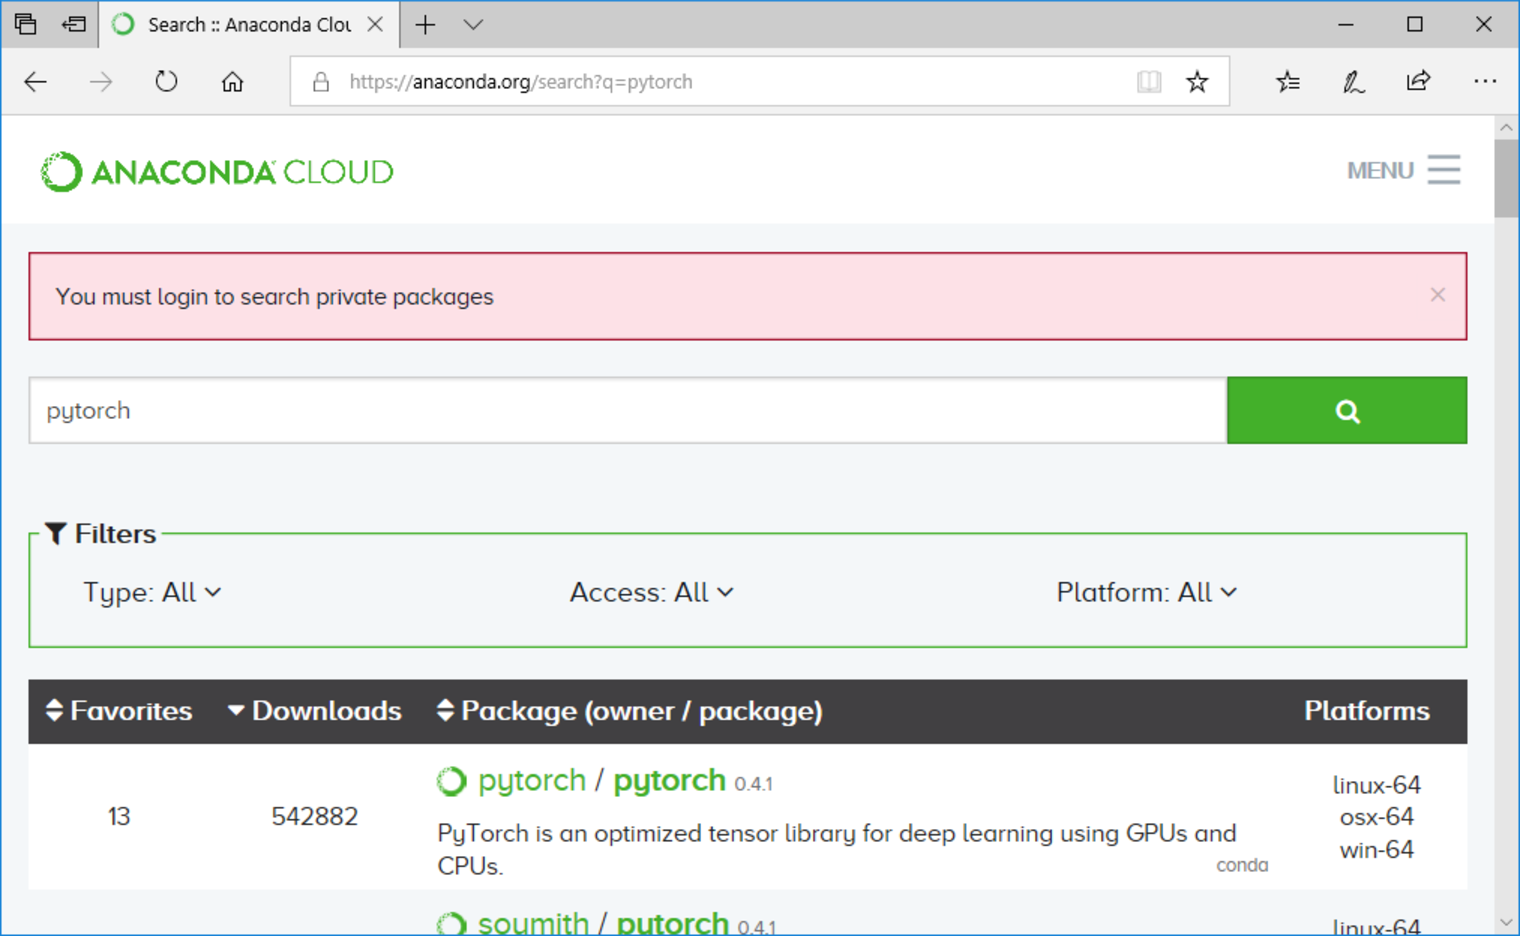
В канале pytorch имеется пакет под названием pytorch с версией 0.4.1. Чтобы установить пакет с определенного канала, используйте параметр -c <chanel> вместе с conda install:
(base) C:UsersIEUser>conda install -c pytorch pytorch
Solving environment: done

  environment location: C:UsersIEUserMiniconda3

  added / updated specs:
    - pytorch


The following packages will be downloaded:

    package                    |            build
    ---------------------------|-----------------
    pytorch-0.4.1              |py37_cuda90_cudnn7he774522_1       590.4 MB  pytorch

The following NEW packages will be INSTALLED:

    pytorch: 0.4.1-py37_cuda90_cudnn7he774522_1 pytorch

Proceed ([y]/n)?
Также можно добавить канал, чтобы Conda производила там поиск пакетов. Чтобы посмотреть текущие каналы, запустите conda config —get channels:
(base) C:UsersIEUser>conda config --get channels
--add channels 'defaults'

(base) C:UsersIEUser>
Когда у вас появится множество каналов,нужно будет выставить приоритет. Чтобы добавить канал с наименьшим приоритетом в список, запустите conda config —append channels <channel name>. С наивысшим − conda config —prepend channels <channel name>. Рекомендуется выставлять новым каналам низкий приоритет, чтобы продолжить использовать каналы по умолчанию. Таким образом, вы можете установить pytorch, добавив канал pytorch и запустив conda install pytorch:
(base) C:UsersIEUser>conda config --append channels pytorch

(base) C:UsersIEUser>conda config --get channels
--add channels 'pytorch'   # lowest priority
--add channels 'defaults'   # highest priority

(base) C:UsersIEUser>conda install pytorch
Solving environment: done

  environment location: C:UsersIEUserMiniconda3

  added / updated specs:
    - pytorch


The following packages will be downloaded:

    package                    |            build
    ---------------------------|-----------------
    pytorch-0.4.1              |py37_cuda90_cudnn7he774522_1       590.4 MB  pytorch

The following NEW packages will be INSTALLED:

    pytorch: 0.4.1-py37_cuda90_cudnn7he774522_1 pytorch

Proceed ([y]/n)?
Использование Pip в среде Conda
Иногда при настройке Python для машинного обучения вам могут понадобиться чистые пакеты Python, которые будут недоступны на каналах Conda. Например, Unipath.
Вы сможете найти пакет, используя другой канал. Но так как unipath − чистый пакет Python, то можно использовать pip для его установки. Следует использовать pip, установленный conda create:
conda create --name newproject
Чтобы установить pip, активируйте среду и установите пакет Conda:
(base) C:UsersIEUser>conda activate newproject

(newproject) C:UsersIEUser>conda install pip
Solving environment: done

  environment location: C:UsersIEUserMiniconda3envsnewproject

  added / updated specs:
    - pip


The following NEW packages will be INSTALLED:

    certifi:        2018.8.24-py37_1
    pip:            10.0.1-py37_0
    python:         3.7.0-hea74fb7_0
    setuptools:     40.2.0-py37_0
    vc:             14-h0510ff6_3
    vs2015_runtime: 14.0.25123-3
    wheel:          0.31.1-py37_0
    wincertstore:   0.2-py37_0

Proceed ([y]/n)?
Наконец, используйте pip, чтобы установить unipath:
(newproject) C:UsersIEUser>pip install unipath
Collecting unipath
Installing collected packages: unipath
Successfully installed unipath-1.1
You are using pip version 10.0.1, however version 18.0 is available.
You should consider upgrading via the 'python -m pip install --upgrade pip' command.

(newproject) C:UsersIEUser>
После установки вы можете посмотреть на пакеты с помощью conda list и проверить, что Unipath был установлен:
(newproject) C:UsersIEUser>conda list

certifi                   2018.8.24                py37_1
pip                       10.0.1                   py37_0
python                    3.7.0                hea74fb7_0
setuptools                40.2.0                   py37_0
Unipath                   1.1                       <pip>
vc                        14                   h0510ff6_3
vs2015_runtime            14.0.25123                    3
wheel                     0.31.1                   py37_0
wincertstore              0.2                      py37_0

(newproject) C:UsersIEUser>
Также можно использовать пакеты из системы VSC с помощью pip. Чтобы активировать supervisor, version 4.0.0dev0. доступный в репозитории Git, для начала установите последний:
(newproject) C:UsersIEUser> conda install git
Теперь установите supervisor, используя pip, с помощью репозитория Git:
(newproject) pip install -e git://github.com/Supervisor/supervisor@abef0a2be35f4aae4a4edeceadb7a213b729ef8d#egg=supervisor
После завершения установки supervisor будет указан в списке установленных пакетов:
(newproject) C:UsersIEUser>conda list

certifi                   2018.8.24                py37_1
git                       2.18.0               h6bb4b03_0
meld3                     1.0.2                     <pip>
pip                       10.0.1                   py37_0
python                    3.7.0                hea74fb7_0
setuptools                40.2.0                   py37_0
supervisor                4.0.0.dev0                <pip>

... (more)
Простой пример машинного обучения
XOR gate − ещё один момент, который стоит знать в процессе настройки Python для машинного обучения: используя Conda обучите нейронную сеть функционировать как XOR gate
XOR gate реализуют операцию OR. Требуется два цифровых входа, равные 0 или 1. И вывода, 1 (true) и 0 (false). Таблица ниже суммирует операции XOR gate:

Операцию XOR можно интерпретировать как classification problem, потому что она принимает два входа и должна классифицировать их как 0 или 1 в зависимости от того, равны они друг другу или нет. Именно этот пример обычно используется в качестве первого случая обучения нейронной сети, поскольку он прост, но в то же время требует нелинейного классификатора, такого как нейронная сеть. Чтобы реализовать нейронную сеть, создайте среду Conda, названную nnxor:
(base) C:UsersIEUser>conda create nnxor
Теперь активируйте и установите пакет keras:
(base) C:UsersIEUser>conda activate nnxor

(nnxor) C:UsersIEUser>conda install keras
keras − высокоуровневый API, который упрощает внедрение нейронных сетей поверх известных библиотек, таких как TensorFlow. Обучите следующую нейронную сеть действовать как XOR gate:

Сеть берет два входа (A, B) и передает их двум нейронам, показанными большими кругами. Затем она принимает входные данные этих нейронов и подает их на выходной нейрон, который должен обеспечивать классификацию в соответствии с таблицей XOR.
Процесс обучения состоит в том, чтобы настроить значения w_1 до w_6, чтобы выход соответствовал таблице. Для этого входные примеры начнут подаваться по одному, вывод станет рассчитываться с текущими значениями, и, сравнивая вывод с желаемым, значения будут корректироваться.
Для этого создайте папку с именем nnxor в директории (C:UsersIEUser) с файлом под именем nnxor.py, чтобы сохранить программу Python для реализации нейронной сети.
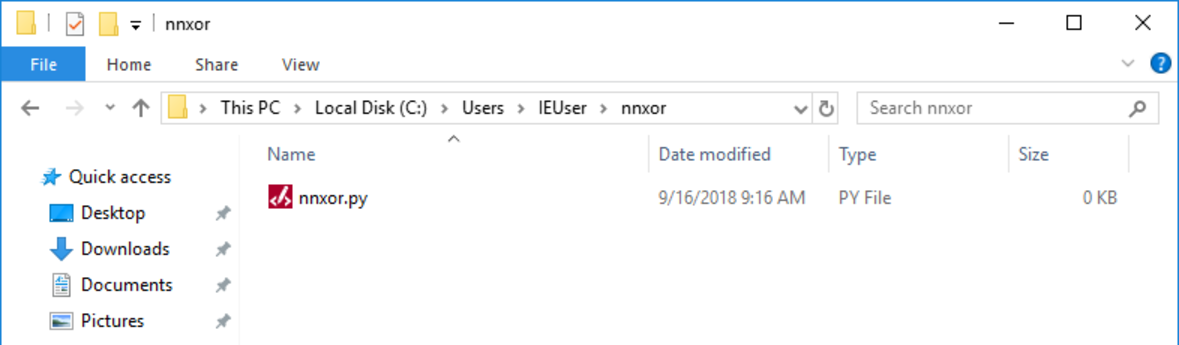
В файле nnxor.py выберите сеть для обучения и тестирования:
import numpy as np
np.random.seed(444)

from keras.models import Sequential
from keras.layers.core import Dense, Activation
from keras.optimizers import SGD

X = np.array([[0, 0],
              [0, 1],
              [1, 0],
              [1, 1]])
y = np.array([[0], [1], [1], [0]])

model = Sequential()
model.add(Dense(2, input_dim=2))
model.add(Activation('sigmoid'))
model.add(Dense(1))
model.add(Activation('sigmoid'))

sgd = SGD(lr=0.1)
model.compile(loss='mean_squared_error', optimizer=sgd)

model.fit(X, y, batch_size=1, epochs=5000)

if __name__ == '__main__':
    print(model.predict(X))
Импортируйте numpy, инициализируйте случайный seed, чтобы можно было воспроизвести те же результаты при повторном запуске программы и импортировать keras, используемый в сети.
Определите массив X, содержащий 4 возможных набора A-B входов, и массив y, содержащий выходные данные.
Следующие пять строк сформируют нейронную сеть. Модель Sequental() − одна из моделей keras для определения нейронной сети. Определите первый слой из двух входных нейронов, определив их функцию активации в качестве sigmond function. Затем обозначьте входной слой их одного нейрона с той же функцией активации.
Следующие две строки определяют детали обучения сети. Чтобы настроить параметры, используйте Stochastic Gradient Descent с оптимальной скоростью обучения, равной 0,1. Наконец, выполните обучение с помощью fit(), используя X и Y в качестве примеров обучения, после того, как каждый пример будет загружен в сеть (batch_size=1). Число epochs представляет собой количество попыток обучения сети.
В этом случае вы повторяете операцию 5500 раз, используя обучающий набор, содержащий 4 примера ввода и вывода. После обращения нейросети к исходным данным тренировочные варианты перемешиваются заново.
На последней строке вы печатаете прогнозируемые значения 4 возможных примеров ввода.
(nnxor) C:UsersIEUser>cd nnxor

(nnxor) C:UsersIEUsernnxor>python nnxor.py
Using TensorFlow backend.
Epoch 1/5000
2018-09-16 09:49:05.987096: I tensorflow/core/platform/cpu_feature_guard.cc:141] Your CPU supports instructions that this TensorFlow binary was not compiled to use: AVX AVX2
2018-09-16 09:49:05.993128: I tensorflow/core/common_runtime/process_util.cc:69] Creating new thread pool with default inter op setting: 2. Tune using inter_op_parallelism_threads for best performance.
4/4 [==============================] - 0s 39ms/step - loss: 0.2565
Epoch 2/5000
4/4 [==============================] - 0s 0us/step - loss: 0.2566
Epoch 3/5000
4/4 [==============================] - 0s 0us/step - loss: 0.2566
Epoch 4/5000
4/4 [==============================] - 0s 0us/step - loss: 0.2566
Epoch 5/5000
4/4 [==============================] - 0s 0us/step - loss: 0.2566
Epoch 6/5000
4/4 [==============================] - 0s 0us/step - loss: 0.2566
После обучения, вы можете проверить прогнозы, которые дает сеть для возможных входных значений:
Epoch 4997/5000
4/4 [==============================] - 0s 0us/step - loss: 0.0034
Epoch 4998/5000
4/4 [==============================] - 0s 0us/step - loss: 0.0034
Epoch 4999/5000
4/4 [==============================] - 0s 0us/step - loss: 0.0034
Epoch 5000/5000
4/4 [==============================] - 0s 0us/step - loss: 0.0034
[[0.0587215 ]
 [0.9468337 ]
 [0.9323144 ]
 [0.05158457]]
Как вы определите X = np.array([[0, 0], [0, 1], [1, 0], [1, 1]]), ожидаемые входные округленные значения станут равны 0,1,1 и 0, что согласуется с прогнозами сети.
Машинное обучение применяется в различных областях, охватывая все большую аудиторию. Тем не менее, создание среды может быть сложней задачей. В этой статье вы узнали об основах создания среды Python на Windows с использованием Anaconda. Теперь, когда у вас есть основа, пришло время начать работу с настоящими приложениями.
- Работа с документацией в Python: поиск информации и соглашения
- Машинное обучение за год
- Машинное обучение для самых маленьких
- 13 лучших книг по Python для начинающих и продолжающих
Источник: Настройка Python для машинного обучения on Realpython
Системные требования
-
Windows 8 и выше, 32-бит или 64-бит.
-
400 МБ дискового пространства.
Наиболее полный список требований для Windows (а также требования для MacOS и Linux) — на
сайте Anaconda. Для Miniconda требования те же, за исключением дискового пространства.
Проверка хеш-суммы дистрибутива
Разработчики Miniconda рекомендуют перед запуском установки проверить хеш-сумму загруженного дистрибутива, чтобы убедиться в его целостности и подлинности.
На странице
документации conda
вы найдете хеш-сумму SHA256 для последней версии дистрибутива. Хеш-суммы для более ранних версий также
доступны.
Проверьте дистрибутив:
-
Запустите PowerShell (например, нажмите Win+R и введите
powershell). -
Введите следующую команду:
Get-FileHash путь-к-вашему-дистрибутиву -Algorithm SHA256 -
Сверьте полученный результат со значением, указанным на странице со ссылкой на загрузку дистрибутива.
Установка Miniconda
Запустите файл скачанного дистрибутива (с расширением exe) и следуйте инструкциям установщика.
В процессе установки вам нужно будет указать:
-
для каких пользователей компьютера устанавливать Miniconda: только для себя (не требуются права администратора) или для всех пользователей (нужны права администратора);
-
в какую папку установить Miniconda;
-
нужно ли добавить Miniconda в переменную окружения PATH (разработчики Miniconda не рекомендуют устанавливать этот флажок, так как это впоследствии может вызвать проблемы, для решения которых придется удалить и переустановить Miniconda);
-
нужно ли зарегистрировать версию Python, устанавливаемую с Miniconda, как используемую по умолчанию другими программами (например, PyCharm или PyDev).