И так продолжаем эксперименты в программе Pix4D Capture теперь уже на Phantom 3 Pro.
На этот раз попробовал сделать облако из фотографий сделанных в так называемой миссии свободного полета (Freeflight mission).
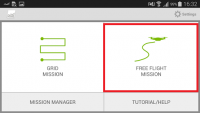
При подключении к коптеру программа выдает предупреждение что вы будете самостоятельно управлять коптером в течении миссии а фото будут делаться автоматически при изменении положения на 5 м по горизонтали и на 3 м по вертикали.
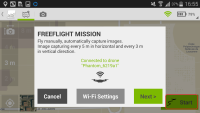
Можно и самостоятельно делать снимки до того как вы нажали кнопку Start в программе, переключившись в режим камеры, нажимая кнопку спуска затвора на пульте когда вам захочется, что я и сделал отлетав первую батарейку, причем фото делал неправильно, под углом где то 45 градусов. (Хотя программе при построении облака это совершенно не помешало)
После замены батарейки в коптере, не выходя из приложения, поднял коптер снова вверх, и нажал зеленую кнопку Start, опустив камеру вертикально вниз.
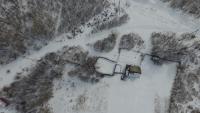
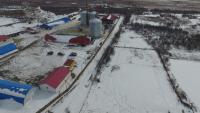
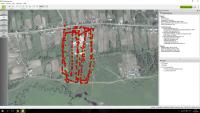
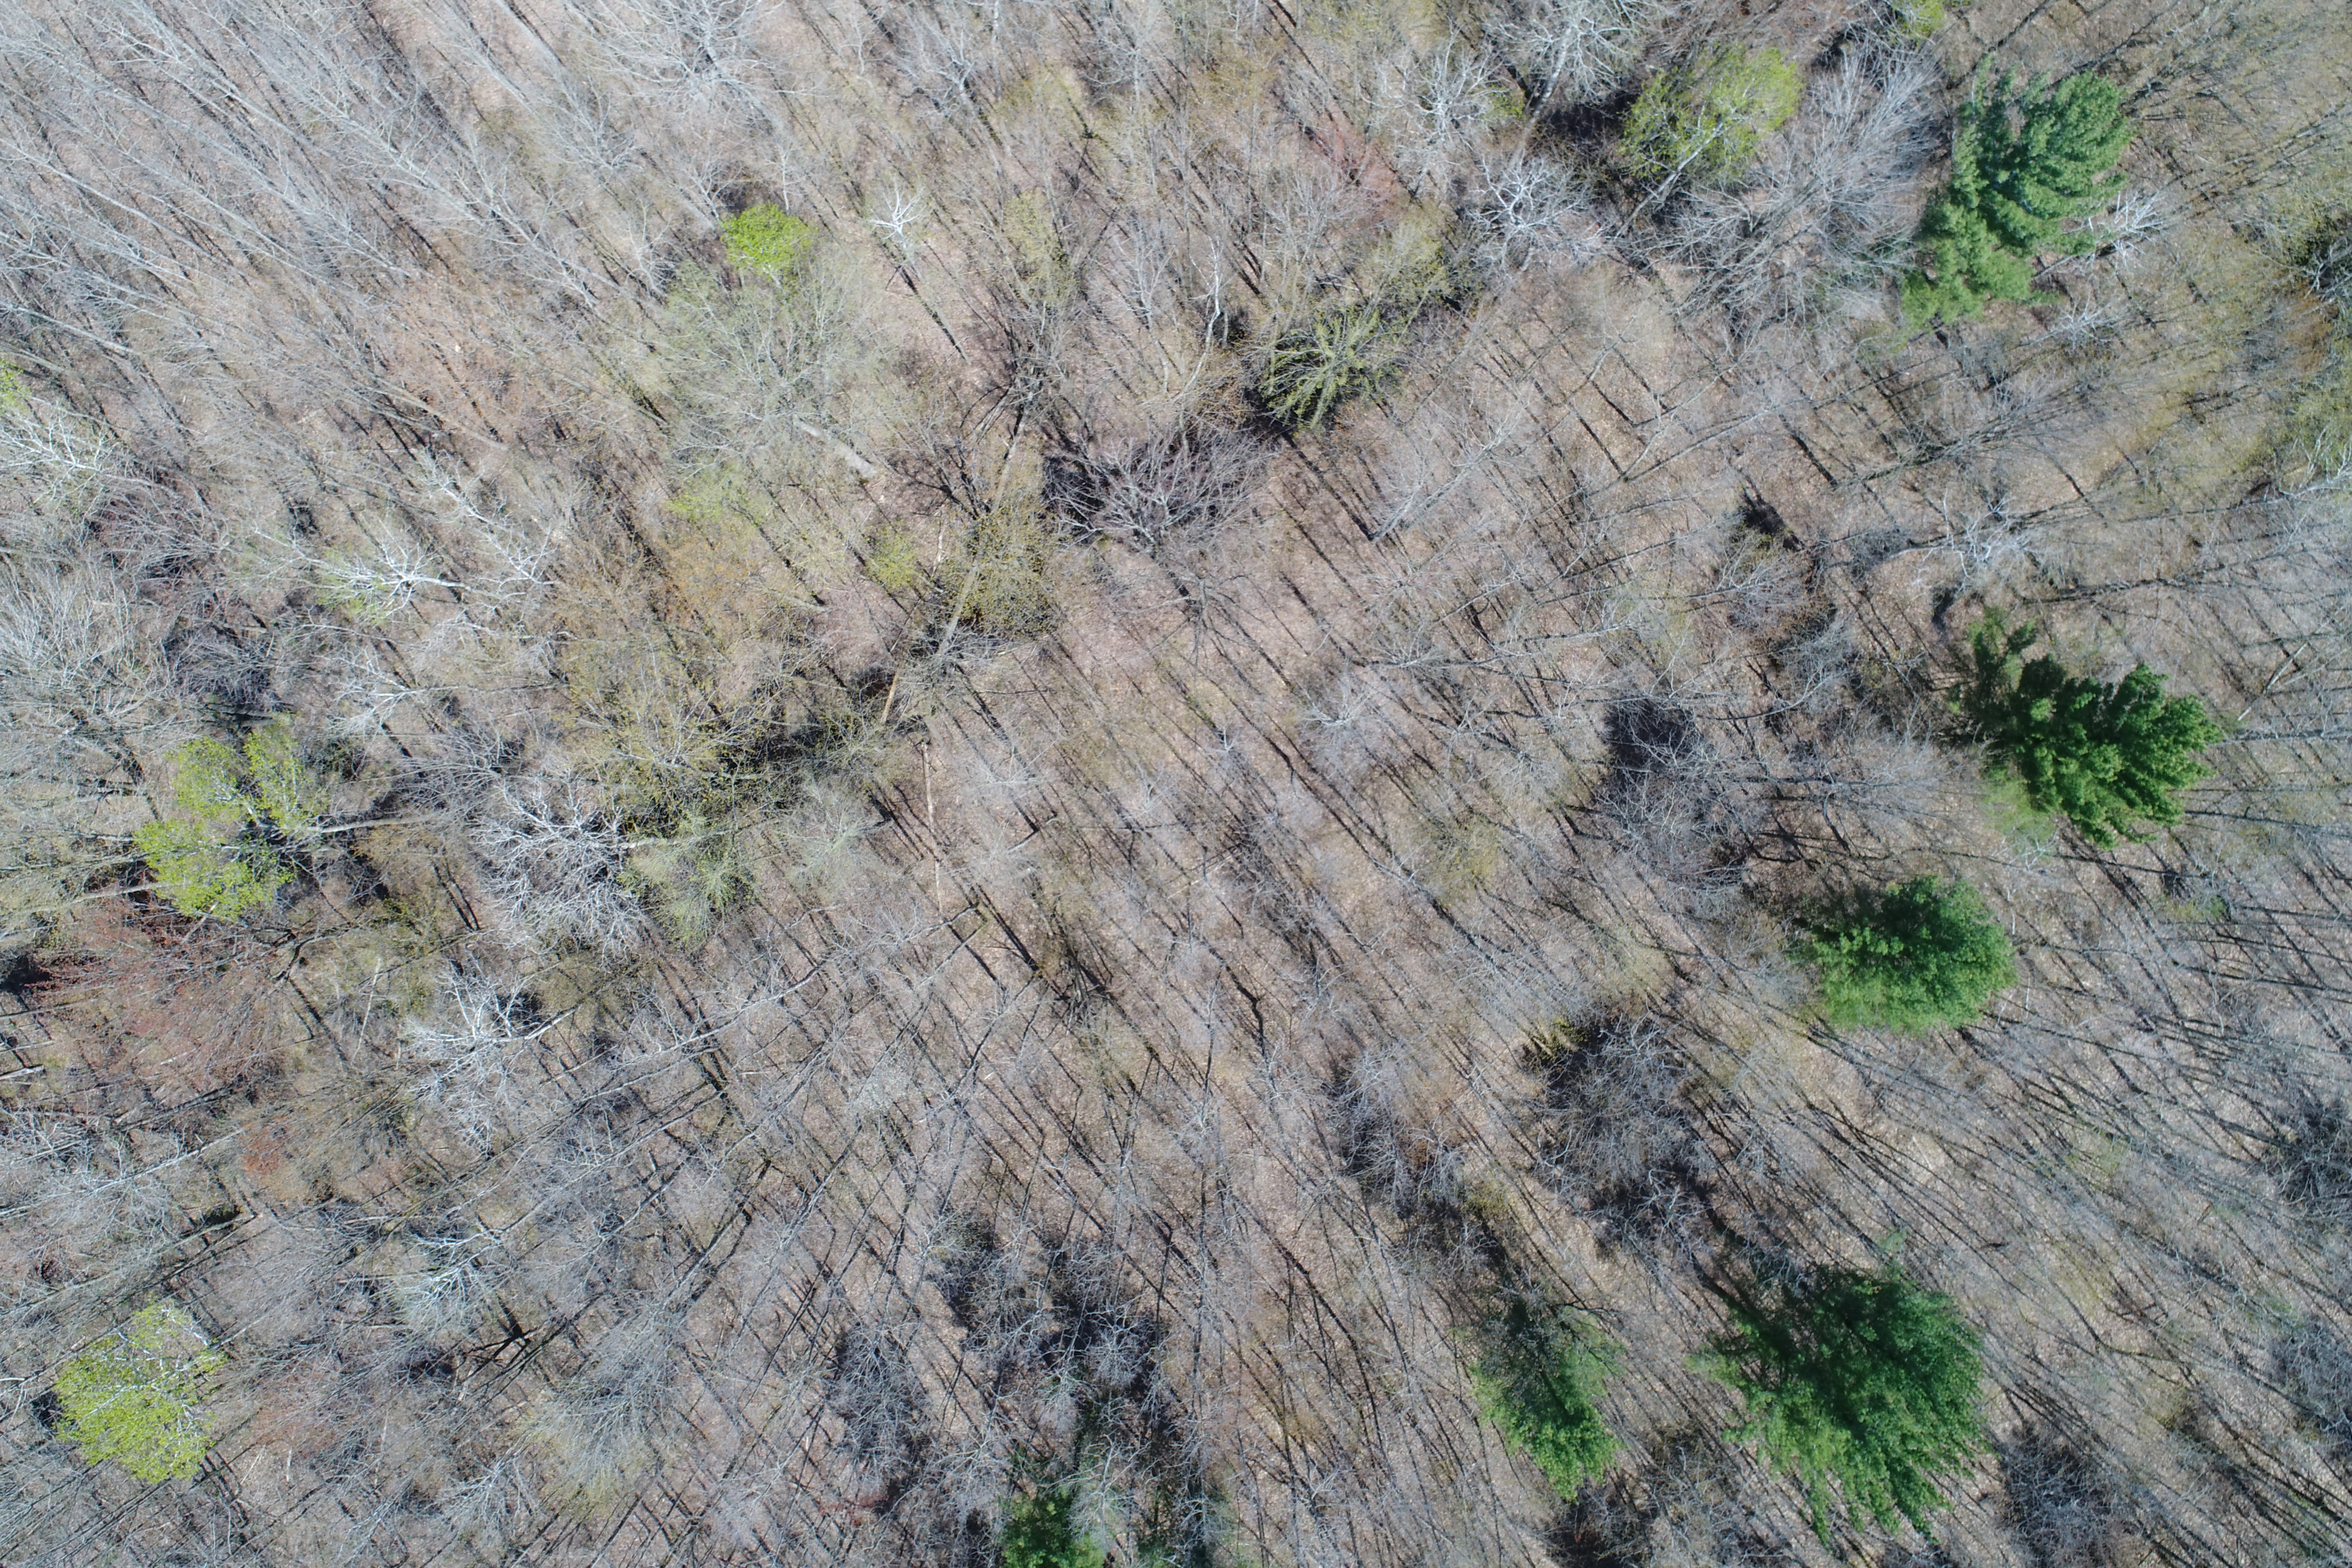
Полетал насколько смог делая ровную траекторию и стараясь держать постоянную скорость, постаравшись захватить те участки которые не отснял в прошлом полете, Но так как был небольшой ветерок особо ровно это сделать не удалось, как видно на скрине.
Подтянул коптер к себе и нажал кнопку Stop в приложении (Важно это делать именно тогда когда коптер возле точки взлета так как после нажатия он начинает медленно снижаться для приземления, либо Stop нажать уже тогда когда вы посадили аппарат)
После этого приложение просит не выключать дрон так как начинает синхронизировать изображения с мобильным устройством, но можно и отменить передачу так как все фото потом можно скинуть с флешки которая в коптере.
В итоге я наснимал где то 400 с лишним фоток.
После переноса файлов на компьютер, запускаем заранее скачанную программу Pix4D Mapper
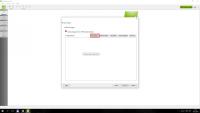
И создаем новый проект (New Project)

Задаем имя и расположение папки с проектом. Нажимаем next.
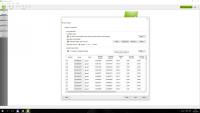
На следующем шаге добавляем фото снятые квадриком по кнопке Add images.
Нажмаем Next.
В следующем шаге происходит чтение информации из Exif файлов о высоте и координатах, оставляем все как есть и жмем next
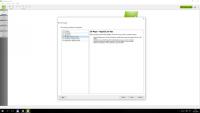
Далее в зависимости от назначения нашего проекта выбираем способ рендеринга фотографий, в моем случае чтобы не занимать много времени на обработку и построение карты я выбрал 3D maps- Rapid/Low Res, что означает что 3d карта будет построена довольно быстро в небольшом разрешении, если у вас позволяют ресурсы компьютера можно попробовать и другие варианты, но это займет больше времени, и построение опорных точек будет более аккуратным, что позволит проводить, например, измерения объектов, с большей вероятностью точности, опять же все зависит от того для чего вы строите данную модель.
В следующем окне программа автоматически определяет координатную систему и метрику, если все ок жмем Finish
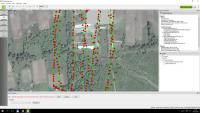
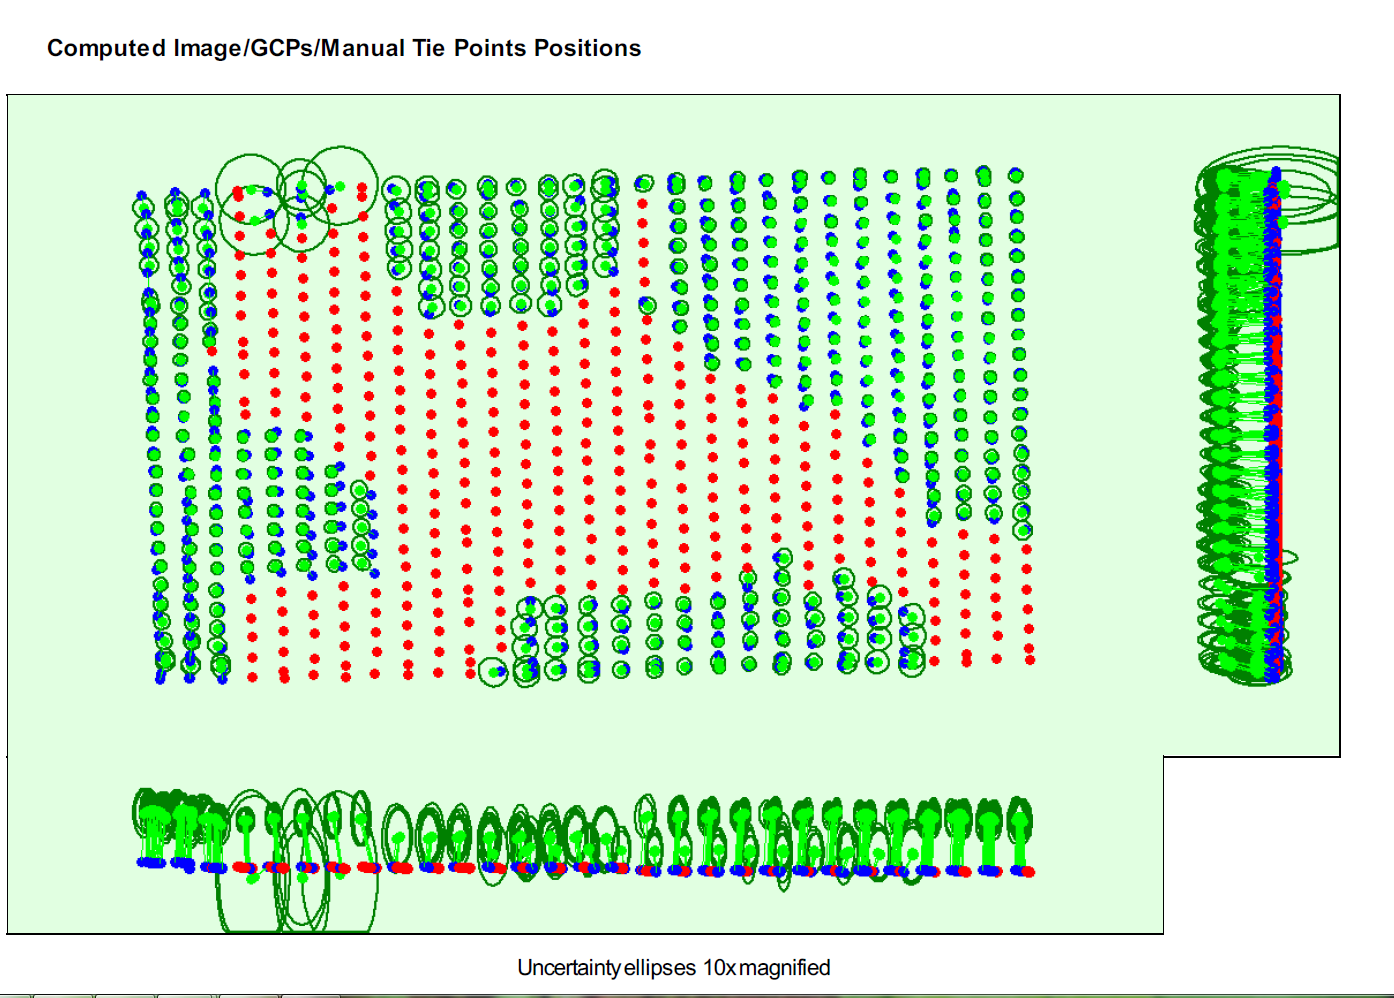
Далее появляется вкладка программы Map View которая отображает снятые вами фото с привязкой к карте и траекторией. Как я говорил ранее, так как я делал фото самостоятельно, у меня сетка траектории и перекрытие фотографий получилась не самая удачная.
Нажимаем кнопку Options…
В пункте 2 Point Cloud and Mesh в разделе Output (Вывод) Выделяем галочками необходимые нам выводы карты, для экспорта, я выделил всё, мало ли какой файл понадобиться. 
И проверьте обязательно стоит ли галочка на Generate 3D Textured Mesh иначе после обработки вы увидите только облако точек без текстуры.
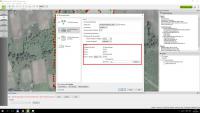
Нажимаем ok и после этого жмем Start.
После этого программа начинает долго и нудно сравнивать фото, расчитывать что то, строить точки, выводить отчеты, в которых отображено количество ошибок, точность, качество перекрытия и тд.
Процесс может занимать от 2х часов до суток, смотря какие настройки выбраны, в моем случае все закончилось через 2ч 25 мин.
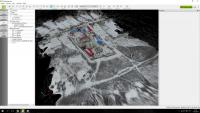
Появиться вкладка rayCloud на рабочем окне которой и будет выведена 3D модель построенная программой.
Добавлено позже:
Как видно получилось довольно неплохо.
В бесплатной версии программа позволяет сделать вывод анимации пролета камеры по точкам
Но можно запросить и триал полной версии в которой открыты возможности экспорта в другие форматы которыми можно поделиться загрузив их на сайт Sketchfab.com
Вот что получилось у меня
https://skfb.ly/LYQH
Добавлено позже:
Для этого нужно в папке в которую мы сохранили наш проект найти путь 2_densification3d_mesh
Внутри этой папки должны быть файлы 3D моделей нашего проекта.
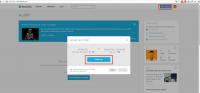
Далее регистрируемся на сайте Sketchfab.com
В своем аккаунте жмем кнопочку Upload в правом верхнем углу.
И Choose file в окне, выбираем поддерживаемый файл из папки проекта 2_densification3d_mesh
Ждем загрузки.
Если все ок через некоторое время появиться 3d модель которой можно поделиться (Share), выбрать освещение, окружение, анимацию, эффекты, и прочие трехмерные штучки в которые я честно говоря не сильно вникал.
Вот как то так. Спасибо за внимание!
Сообщение отредактировал RTFM: 18 Март 2016 — 05:01
I would like to know this too….but it looks like there won’t be an answer.
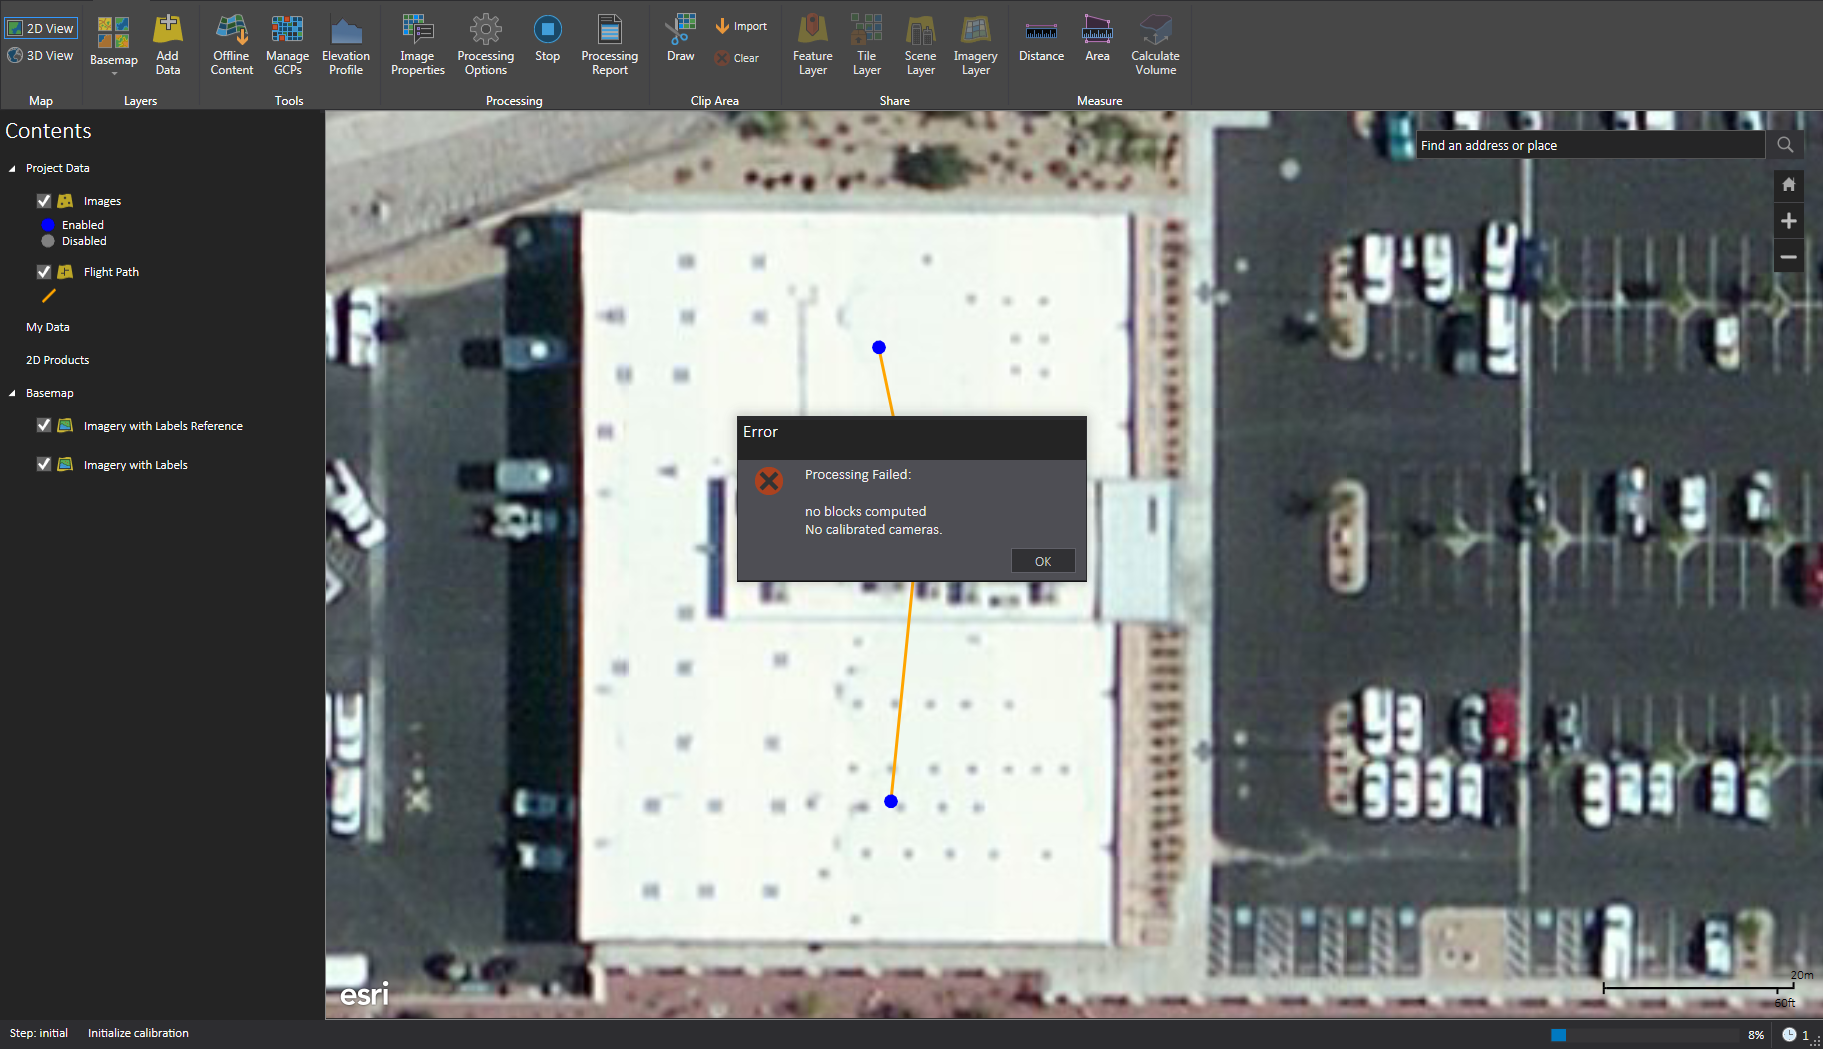
I get the following error message: «Processing Failed: No Blocks Computed No Calibrated Cameras»
I have no idea what that means.
This is typically caused by poor image quality (blurry or lack of texture) or insufficient overlap between the images.
If you are able to share the images, I am happy to have a look and help figure out what is happening.
Thanks
Tony
I just ran into the same issue. Only 3 images of a rooftop taken manually with DJI P4 and guessing 50% overlap approximate. Let me know where to send the images because I can’t find a tool to upload them here.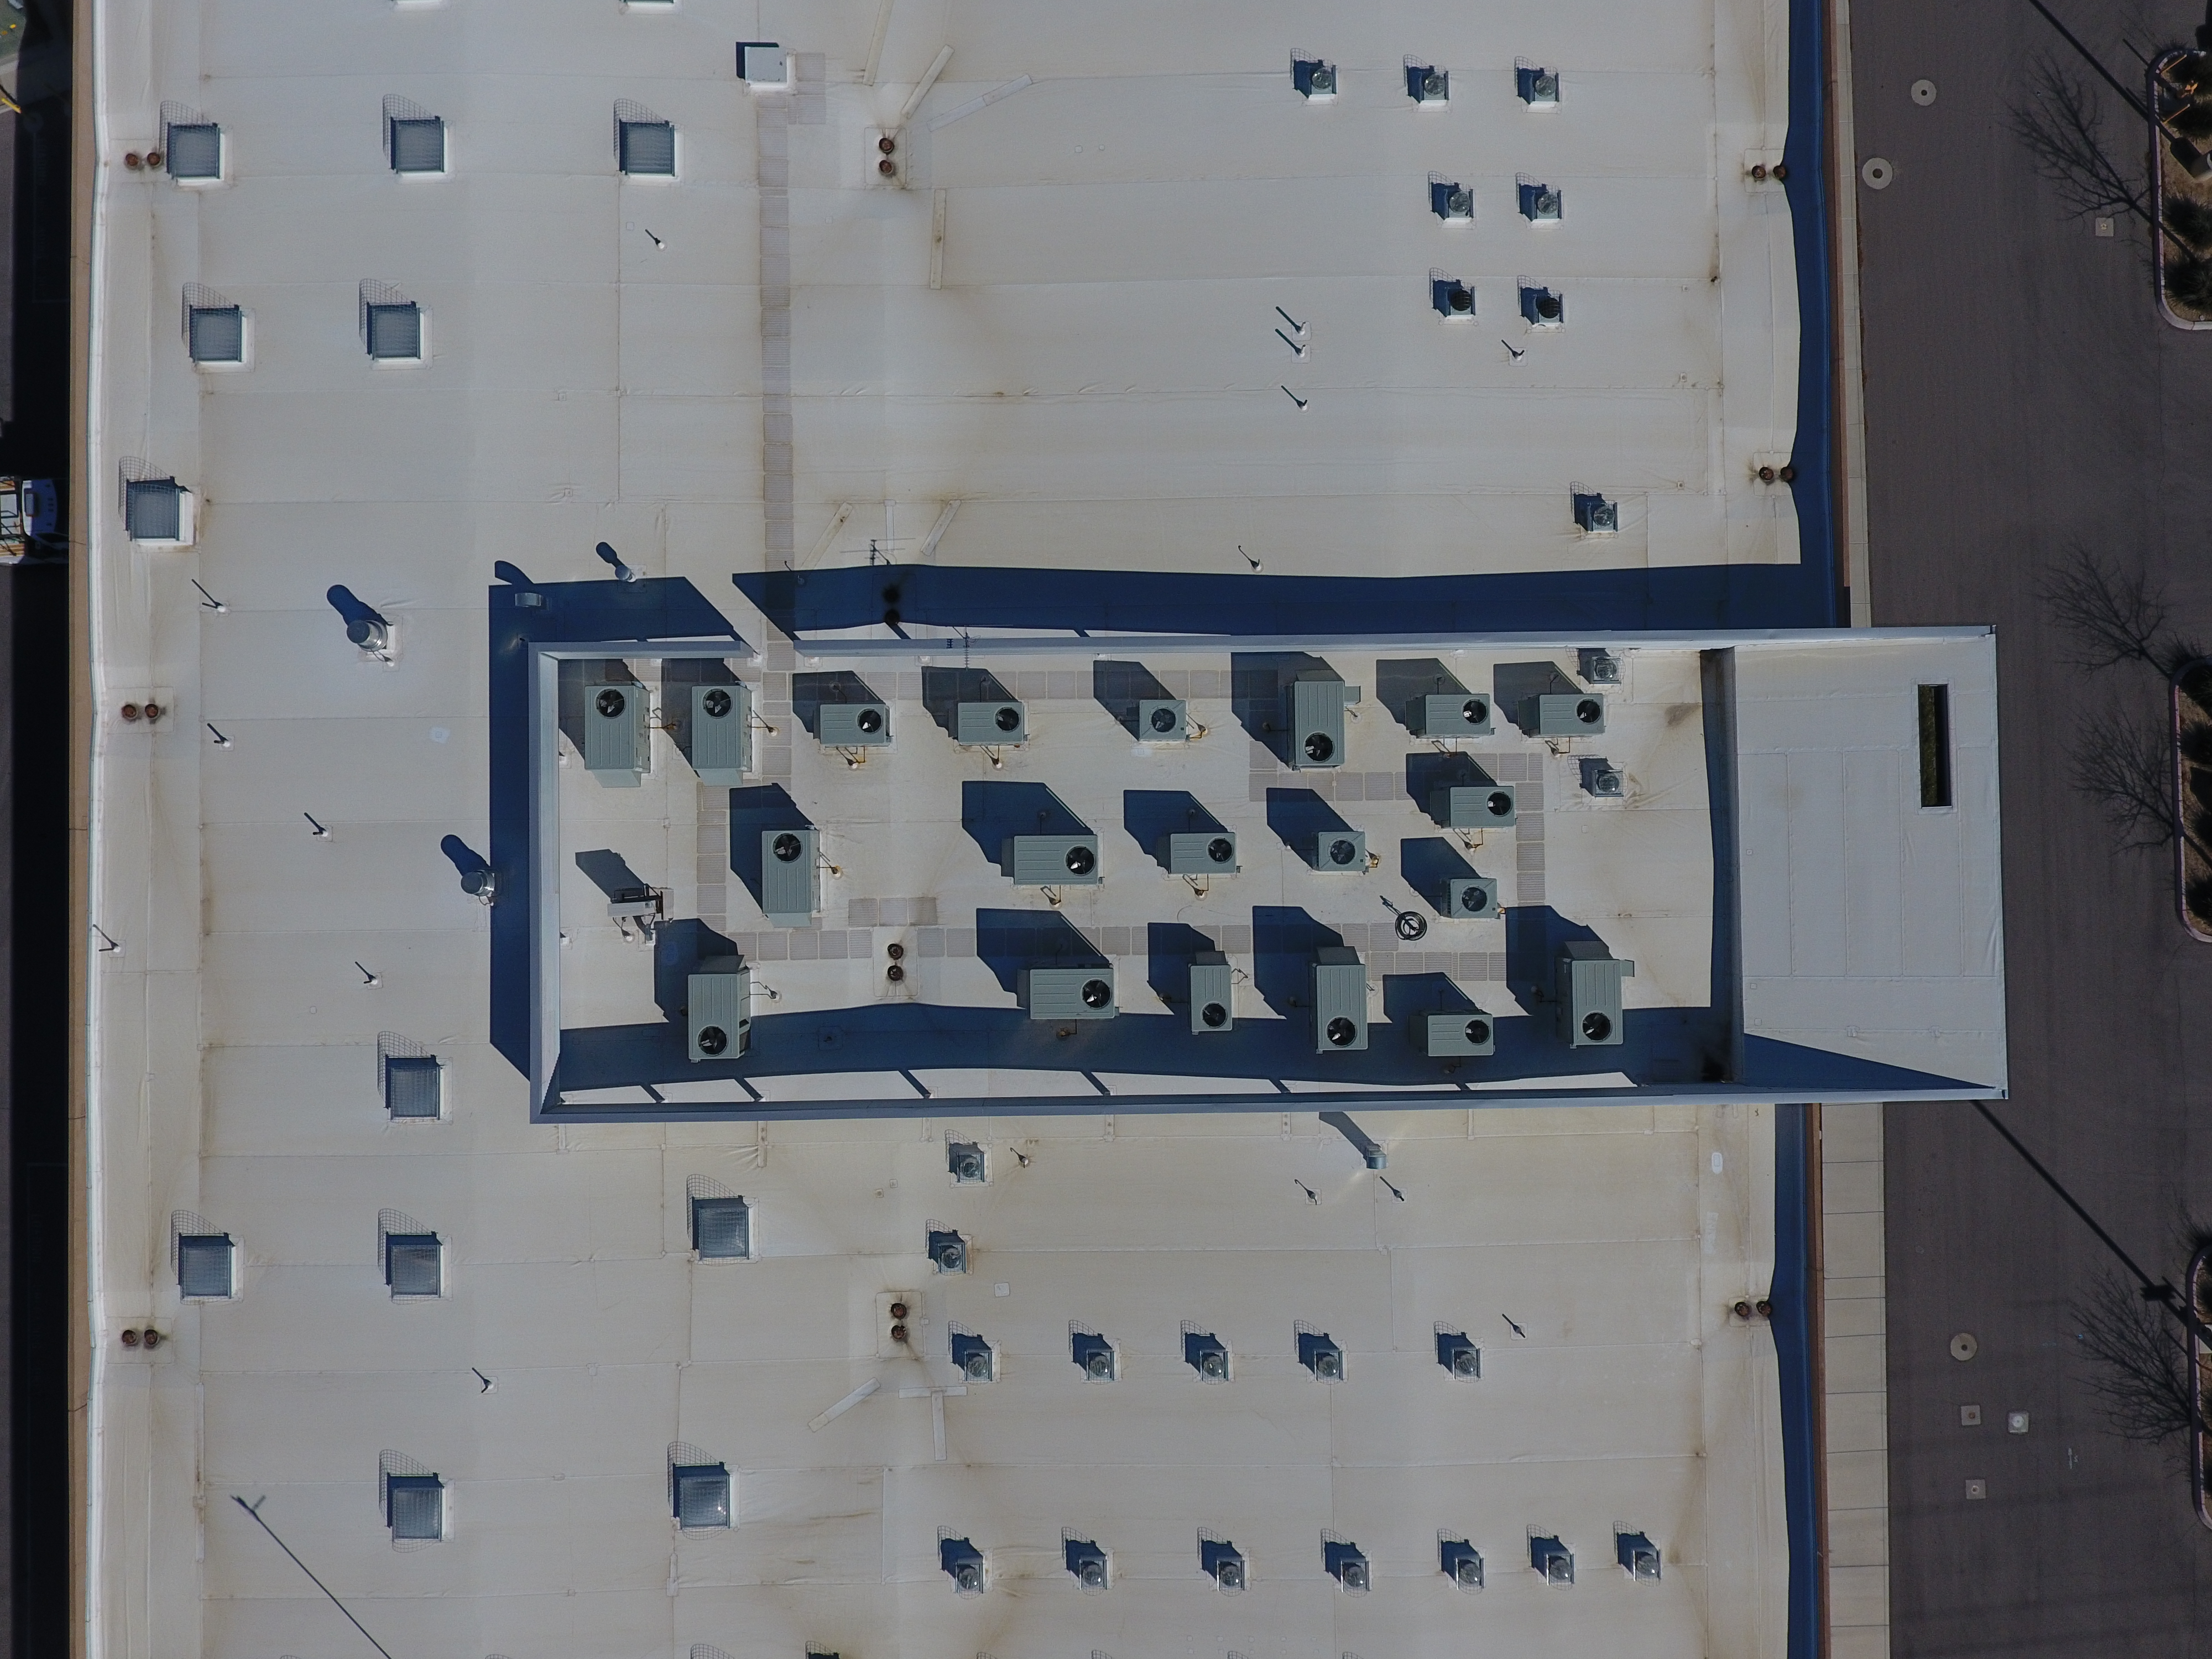
Hi Kalvan Hone,
That message is indicative of either poor image quality or insufficient overlap. We recommend 75% frontal overlap and 60% side overlap. Please try adding additional images with the recommended overlap and run processing again.
Thank you.
Jeremy
We have been having this issue as well. We are fly with a 80 by 80 percent overlap at 300 feet with a Inspire 2. Our issue comes in mainly when we fly over forested areas.
I can not see a difference in image quality between the photos that work, and the ones that do not calibrate.
Kelly,
Try to change the calibration method in the processing options to Alternative.
Processing options—Drone2Map for ArcGIS Help | ArcGIS
This is the preferred method when your images are homogeneous and lack the necessary features to generate key points and matches.
Additionally use the 2D Mapping template when creating the project to make sure you are generating enough keypoints.
Thanks
Tony
I have the same issue but with XT2 RGB dataset. There is nothing wrong with the image quality. I need to change the camera calibration settings…I am able to do so in pix4d. See photo…How can I do this in Drone2Map?
В общем, переставил SP2, ничего лишнего из прог, полная дефрагментация жесткого диска, писал на левую болванку Ritek на 4х(вербатима не было под рукой), вот очередной облом:
http://pic.ipicture.ru/uploads/090112/thumbs/9PWQd754IV.jpg
В конце вдобавок не смог финализировать диск, выдал ещё одну ошибку Power Calibration Error.
Ошибка с финализацией диска всё таки подводит к мысли о том, что трабла с приводом.
Завтро в гарантийку нахер. 
Вот лог:
I 04:42:49 ImgBurn Version 2.4.2.0 started!
I 04:42:49 Microsoft Windows XP Professional (5.1, Build 2600 : Service Pack 2)
I 04:42:49 Total Physical Memory: 1 048 044 KB — Available: 683 460 KB
I 04:42:49 Initialising SPTI…
I 04:42:49 Searching for SCSI / ATAPI devices…
I 04:43:38 Found 1 CD-RW and 1 DVD±RW/RAM!
I 04:45:40 Operation Started!
I 04:45:40 Source File: C:XBOX 360 GAMESVirtua Fighterace-vf5ace-vf5.dvd
I 04:45:40 Source File Sectors: 3 697 696 (MODE1/2048)
I 04:45:40 Source File Size: 7 572 881 408 bytes
I 04:45:40 Source File Volume Identifier: XGD2DVD_NTSC
I 04:45:40 Source File Volume Set Identifier: 34672923
I 04:45:40 Source File Implementation Identifier: Sonic Scenarist 3.1
I 04:45:40 Source File File System(s): ISO9660; UDF (1.02)
I 04:45:40 Destination Device: [0:1:0] ASUS DRW-2014L1T 1.02 (E:) (ATA)
I 04:45:40 Destination Media Type: DVD+R DL (Disc ID: RITEK-D01-01) (Speeds: 4x)
I 04:45:40 Destination Media Sectors: 4 173 824
I 04:45:40 Write Mode: DVD
I 04:45:40 Write Type: DAO
I 04:45:40 Write Speed: 4x
I 04:45:40 Link Size: Auto
I 04:45:40 Test Mode: No
I 04:45:40 OPC: No
I 04:45:40 BURN-Proof: Enabled
I 04:45:41 Optimal L0 Data Zone Capacity: 1 913 760
I 04:45:41 Optimal L0 Data Zone Method: Copied From Original Disc
I 04:46:37 Filling Buffer… (40 MB)
I 04:46:38 Writing LeadIn…
I 04:46:41 Writing Session 1 of 1… (1 Track, LBA: 0 — 3697695)
I 04:46:41 Writing Track 1 of 1… (MODE1/2048, LBA: 0 — 3697695)
I 04:46:41 Writing Layer 0… (LBA: 0 — 1913759)
I 04:58:42 Writing Layer 1… (LBA: 1913760 — 3697695)
W 04:59:29 Failed to Write Sectors 1930592 — 1930623 — Reason: Write Error
W 04:59:29 Retrying (1 of 20)…
W 05:01:40 Retry Failed — Reason: Invalid Address For Write
W 05:01:40 Retrying (227)…
W 05:01:40 Retry Failed — Reason: Invalid Address For Write
E 05:01:41 Failed to Write Sectors 1930592 — 1930623 — Reason: Write Error
E 05:01:41 Next Writable Address: 1930096
I 05:01:41 Synchronising Cache…
I 05:01:45 Closing Track…
I 05:01:49 Finalising Disc…
W 05:02:17 Potential ‘WaitImmediateIO’ Deferred Error — (0%, 0/3) — Power Calibration Area Error
W 05:02:17 Finalise Disc Failed! — Reason: Power Calibration Area Error
W 05:02:17 Retrying (1 of 3)…
W 05:03:44 Potential ‘WaitImmediateIO’ Deferred Error — (99%, 0/3) — Session Fixation Error Writing Lead Out
W 05:03:44 Retry Failed — Reason: Session Fixation Error Writing Lead Out
W 05:03:44 Retrying (2 of 3)…
W 05:04:12 Potential ‘WaitImmediateIO’ Deferred Error — (0%, 0/3) — Power Calibration Area Error
W 05:04:12 Retry Failed — Reason: Power Calibration Area Error
W 05:04:12 Retrying (3 of 3)…
W 05:04:43 Potential ‘WaitImmediateIO’ Deferred Error — (0%, 0/3) — Power Calibration Area Error
W 05:04:43 Retry Failed — Reason: Power Calibration Area Error
I 05:05:36 Finalising Disc (Last Attempt!)…
E 05:06:37 Finalise Disc Failed! — Reason: Power Calibration Area Error
E 05:06:37 Failed to Write Image!
I 05:06:37 Exporting Graph Data…
I 05:06:37 Graph Data File: D:Documents and SettingsClubberApplication DataImgBurnGraph Data FilesASUS_DRW-2014L1T_1.02_12-ЯНВАРЬ-2009-Г-_4-45_RITEK-D01-01_4x.ibg
I 05:06:37 Export Successfully Completed!
E 05:06:37 Operation Failed! — Duration: 00:20:56
I 05:06:37 Average Write Rate: 4 294 KB/s (3.1x) — Maximum Write Rate: 5 592 KB/s (4.0x)
I 05:06:42 Close Request Acknowledged
I 05:06:42 Closing Down…
I 05:06:42 Shutting down SPTI…
I 05:06:42 ImgBurn closed!
Изменено 12 января 2009 пользователем Clubber
На чтение 4 мин. Просмотров 2.6k. Опубликовано 03.09.2019
Вы когда-нибудь получали Ошибка калибровки питания при попытке записать CD или DVD в Windows 10, 8, 7? Если да, то вы можете прочитать эту статью, чтобы быстро решить эту проблему и предотвратить ее повторение. Обычно эта ошибка возникает, когда скорость записи CD или DVD в Nero или другом приложении установлена неправильно.

Когда вы получаете сообщение об ошибке калибровки питания в Windows 10, 8, 7 во время записи компакт-диска, он не должен ломаться. Однако в большинстве случаев вы обнаружите, что если вы получите эту ошибку, ваш CD или DVD не будет работать во второй раз. По этой причине, если у вас возникла эта проблема с определенным компакт-диском, лучший способ решить эту проблему – вставить новый компакт-диск или DVD-диск и выполнить действия, перечисленные ниже.
Содержание
- ИСПРАВЛЕНИЕ: сбой процесса записи ошибки калибровки питания
- 1. Проверьте настройки программного обеспечения Nero
- 2. Очистите свой диск
- 3. Используйте более низкую скорость записи
- 4. Отключите службу IMAPI
- 5. Установите другое программное обеспечение для записи компакт-дисков.
ИСПРАВЛЕНИЕ: сбой процесса записи ошибки калибровки питания
- Проверьте настройки программного обеспечения Nero
- Очистите свой диск
- Используйте более низкую скорость записи
- Отключить службу IMAPI
- Установите другое программное обеспечение для записи CD/DVD
1. Проверьте настройки программного обеспечения Nero
- Вам нужно будет найти в Интернете Nero Burning Rom для установки, но убедитесь, что это последняя версия и она совместима с вашей операционной системой Windows 10, 8, 7.
- Дважды щелкните левой кнопкой мыши на значке «NeroSmartStart», который находится в загруженной папке Nero.
- После того, как вы откроете его, вы увидите, что в главном меню программы есть функция «Extras», щелкните по ней левой кнопкой мыши.
- После того, как вы откроете меню «Extras», щелкните левой кнопкой мыши на «Control Drives Speed».
- Откроется окно «Nero DriveSpeed».
- Щелкните левой кнопкой мыши на вкладке «Параметры» в окне «Nero DriveSpeed».
- Убедитесь, что вы установили флажок «Запускать при запуске».
- Убедитесь, что вы установили флажок рядом с «начать сворачивать».
- Снимите флажок «Восстановить настройки скорости при запуске».
- Оттуда вам нужно выбрать правильную скорость записи для CD или DVD.
- Щелкните левой кнопкой мыши по кнопке «ОК», которая находится в этом окне в нижней части.
- Перезагрузите устройство Windows 10, 8, 7.
- В первом окне (главном окне) в «Nero DriveSpeed» щелкните левой кнопкой мыши «Скорость чтения» и выберите правильную скорость для вашего компакт-диска.
-
Вам также нужно будет проверить скорость записи, если она равна «Текущая скорость», если она не выбрана надлежащей скоростью записи в соответствии с возможностями компакт-диска.
Примечание: «Скорость чтения» должна быть таким же, как «Текущая скорость». - Каждый раз, когда вы хотите записать CD или DVD, вам нужно будет проверить скорость записи с помощью функции «Nero DriveSpeed» и, если она не подходит, отрегулируйте ее соответствующим образом, выполнив шаги, описанные выше.
2. Очистите свой диск
Иногда частицы пыли могут вызывать различные проблемы с записью CD или DVD, включая этот код ошибки. Итак, убедитесь, что ваш дисковод чист. Кроме того, вы можете профессионально очистить лазерный объектив горелки (или вы можете сделать это самостоятельно, если знаете, как это сделать), чтобы убедиться, что все работает гладко с аппаратной точки зрения.
3. Используйте более низкую скорость записи
Многие пользователи подтвердили, что им удалось решить эту проблему, записав свои CD и DVD на более медленной скорости.
4. Отключите службу IMAPI
Если проблема не устранена, вы можете попытаться отключить службу IMAPI. Вот шаги, чтобы следовать:
- Откройте Панель управления> перейдите в Администрирование (просто введите «сервисы» в меню поиска)> перейдите к Сервисам
-

- Найдите IMAPI CD-Burning COM Service> щелкните правой кнопкой мыши на нем> перейдите в Свойства.
- Перейдите к типу запуска> установите его на Отключено.
- Попробуйте снова записать диск или вставьте новый диск.

5. Установите другое программное обеспечение для записи компакт-дисков.
Если ничего не помогло, попробуйте установить новое программное обеспечение для записи CD или DVD на свой компьютер. Некоторые программные решения могут быть не полностью совместимы с вашей ОС или оборудованием, и установка другого инструмента может помочь вам решить проблему.
Эти быстрые и простые шаги помогут вам правильно записать свой CD или DVD в Windows 10, Windows 8 или Windows 7 и исправить ошибку калибровки питания, которую вы можете получить. Если это решение сработало для вас, сообщите нам об этом в комментариях ниже. Если у вас по-прежнему возникает та же ошибка калибровки питания, мы постараемся найти дополнительные способы устранения неполадок.
-
bensailor
- Posts: 17
- Joined: Thu Mar 05, 2020 9:46 pm
Stereo_Camera Calibration error
Hi,
I am running the Stereo Pi Fisheye tutorial. I am on part 4, the calibration. I seem to calibrate both individual cameras but it fails on the Stereo calibration.
File «4_calibration_fisheye.py», line 170, in calibrate_one_camera
result = calibrate_one_camera(objpointsRIght, imgpointsRight, ‘right’)
File «4_calibration_fisheye.py», line 170, in calibrate_one_camera
(cv2.TERM_CRITERIA_EPS+cv2.TERM_CRITERIA_MAX_ITER, 30 1e-6)
cv2.error: OpenCV(3.4.3) /home/pi/opencv-python/opencv/modules/calib3d/src/fisheye.cpp:1371:error:(-215:Assertion failed) fabs(norm_u1) > 0 in function ‘InitExtrinsics’
Any ideas what could be going wrong? Is it the pictures?
Could it be there is a delay between cameras? How to check for this?
-
bensailor
- Posts: 17
- Joined: Thu Mar 05, 2020 9:46 pm
Re: Stereo_Camera Calibration error
Post
by bensailor » Fri Mar 06, 2020 11:34 am
i have taken the photos again and re run the script and the error has changed
Left camera calibration…
Right camera calibration…
Stereoscopic calibration…
./calibration_data/240p/camera_calibration_left.npz
[‘camera_matrix’, ‘distortion_coeff’, ‘imgpoints’, ‘map1’, ‘map2’, ‘objpoints’]
Camera calibration data has been found in cache.
./calibration_data/240p/camera_calibration_right.npz
[‘camera_matrix’, ‘distortion_coeff’, ‘imgpoints’, ‘map1’, ‘map2’, ‘objpoints’]
Camera calibration data has been found in cache.
Calibrating cameras together…
Traceback (most recent call last):
File «4_calibration_fisheye.py», line 299, in <module>
result = calibrate_stereo_cameras()
File «4_calibration_fisheye.py», line 257, in calibrate_stereo_cameras
cv2.CALIB_FIX_INTRINSIC, TERMINATION_CRITERIA)
cv2.error: OpenCV(3.4.3) /home/pi/opencv-python/opencv/modules/calib3d/src/fisheye.cpp:1022: error: (-215:Assertion failed) abs_max < threshold in function ‘stereoCalibrate’
- Attachments
-
- scene_1280x480_1.png (971.1 KiB) Viewed 14683 times
-

Realizator
- Site Admin
- Posts: 884
- Joined: Tue Apr 16, 2019 9:23 am
- Contact:

Re: Stereo_Camera Calibration error
Post
by Realizator » Fri Mar 06, 2020 12:06 pm
Hi Bensailor,
I mentioned this problem in my last article.
The reason is one of your images. You should find this image and exclude it, and I use «halving» method for this. If you will have a problem with this, please send me your images set, and I will try to localize it.
Looks like it is often problem, and I need to try to catch this error and find wrong image automatically (but this is not easy).
UPD> Your left and right cameras are definitely swapped on your image…
Eugene a.k.a. Realizator
-
bensailor
- Posts: 17
- Joined: Thu Mar 05, 2020 9:46 pm
Re: Stereo_Camera Calibration error
Post
by bensailor » Fri Mar 06, 2020 1:51 pm
Hi
I fixed the swapped images, and tried the halving technique, still no success as when i decrease number of photos it claims bad matrix’s.
Do you have a place where i can send photo sets?
thanks
Ben
-
Realizator
- Site Admin
- Posts: 884
- Joined: Tue Apr 16, 2019 9:23 am
- Contact:
Re: Stereo_Camera Calibration error
Post
by Realizator » Sat Mar 07, 2020 2:12 pm
I’ve downloaded your photos.
I don’t know, if you try to turn on checkerboard visualization here. I always turn it on for the first run.
So as I can see chessboard was not found at all. I.e. there are no any images in your set, where OpenCV were able to find checkerboard.
Here are some tips:
— Light. You have a window on the left, and have a «counter light». Light should go from your camera and highlights chessboard, but not vice versa. Try to orient your camera to the area without bright lights
— Size of the chessboard on your images. You use 200 degree camera, and checkerboard looks tiny. Try to keep it closer to the camera. You can look at a sample image set from our repository to estimate acceptable size of the chessboard on the image.
— I noticed your chessboard image is not flat. This will not stop corners detection algorithm, but may affect on the calibration quality.
(For more tips please read part «4. Let’s calibrate..» in our article.)
As a first step I’d recommend you to make another session with no counter light, and with keeping checkerboard closer to the camera.
Next step (if calibration is still not good) — flatten checkerboard setup.
You can also use advanced approach. As I mention in our article, we use a couple of 320×240 images for the depth map, but 640×480 for calibration. You can use a couple of 1280×960 images for calibration — in this case corner finding process will be much more successful. You need to look at this piece of code for this trick.
Eugene a.k.a. Realizator
-
bensailor
- Posts: 17
- Joined: Thu Mar 05, 2020 9:46 pm
Re: Stereo_Camera Calibration error
Post
by bensailor » Sun Mar 08, 2020 4:49 pm
Thank you for the tips. I will take these on board and try again.
I find it strange though when I ran the code it claims to detect checkerboard and successfully calibrate both left and right camera just not stereo.
Thanks again I will try this again.
-
Realizator
- Site Admin
- Posts: 884
- Joined: Tue Apr 16, 2019 9:23 am
- Contact:
Re: Stereo_Camera Calibration error
Post
by Realizator » Tue Mar 10, 2020 1:13 pm
Hi Bensailor,
Are you sure you’re uploaded right the same images you used for calibration? I’ve tested your set on both OpenCV image and on MacOS with OpenCV and Python, and checkerboards are not detected. I’m curious to understand, where our approaches are different and why your code is able to detect them.
Eugene a.k.a. Realizator
-
bensailor
- Posts: 17
- Joined: Thu Mar 05, 2020 9:46 pm
Re: Stereo_Camera Calibration error
Post
by bensailor » Sat Mar 28, 2020 5:09 pm
Hi,
Sorry for long reply been away, and its been chaotic with current situation. I now have some time and really want to solve this.
One thought i had with why you cant detect checkerboards is i used a 8×6 checkerboard. Sorry i should have mentioned this before.
I have tried again, with a bigger 8×6 checkerboard and properly stuck to hard cardboard and better lighting, but still run into same problem with able to calibrate left and right but not stereo pair.
Also i have the same code as you but it doesnt display any images, which i find strange
Cheers,
Ben
-
bensailor
- Posts: 17
- Joined: Thu Mar 05, 2020 9:46 pm
Re: Stereo_Camera Calibration error
Post
by bensailor » Sun Mar 29, 2020 1:15 pm
I have fixed my stereo calibration camera issue.
It seems i had a few bad stereo pairs, using the example mentioned here and the fix I was able to solve it:
https://answers.opencv.org/question/213 … calibrate/
Adding this code to calibration after corner detection and before scaling I was able to detect bad stereo pairs and flip the corners.
if (retL == True) and (retR == True ):
diff = cornersL — cornersR
lengths = np.linalg.norm(diff[:, :, 1], axis=-1)
sum = np.sum(lengths, axis=0)
if (sum > 2000.0):
print(«THIS STEREO PAIR IS BROKEN!!! Diff is: «+str(sum))
cornersR = np.flipud(cornersR)
-
Realizator
- Site Admin
- Posts: 884
- Joined: Tue Apr 16, 2019 9:23 am
- Contact:
Re: Stereo_Camera Calibration error
Post
by Realizator » Sun Mar 29, 2020 1:21 pm
Wow, thank you for sharing the solution!
I planned to use another approach (catching exception), but your solution is more elegant. I will test it with my code and update GitHub repository!
UPD> Just a curious, where «2000» comes from, and how this number should be changed according to the calibration images resolutions…
Eugene a.k.a. Realizator
-
vram
- Posts: 4
- Joined: Mon Jul 27, 2020 1:52 pm
Re: Stereo_Camera Calibration error
Post
by vram » Tue Aug 11, 2020 8:33 am
Hi,
I am new to stereopi.
I just started with the steps suggested for package «stereopi-fisheye-robot-master». I have come across the same error reported in the beginning of this thread while trying to calibrate for the same set of images given under «scenes» folder in the original package.
As I have not introduced any new image, I am confused if I am missing out anything.
The error is:
Traceback (most recent call last):
File «/home/pi/stereopi-fisheye-robot-master/4_calibration_fisheye.py», line 299, in <module>
result = calibrate_stereo_cameras()
File «/home/pi/stereopi-fisheye-robot-master/4_calibration_fisheye.py», line 257, in calibrate_stereo_cameras
cv2.CALIB_FIX_INTRINSIC, TERMINATION_CRITERIA)
cv2.error: /build/opencv-L65chJ/opencv-3.2.0+dfsg/modules/calib3d/src/fisheye.cpp error: (-215) svd.w.at<double>(0) / svd.w.at<double>((int)svd.w.total() — 1) < thresh_cond in function CalibrateExtrinsics
Can you please suggest how to overcome this?
Thanks,
Ram
-
stereomaton
- Posts: 215
- Joined: Tue May 21, 2019 12:33 pm
- Location: France
Re: Stereo_Camera Calibration error
Post
by stereomaton » Wed Aug 12, 2020 9:27 am
I do not have my stereopi here, but since you said that you used only the data of the repo, I tested on my PC.
I had a guess on what could happen and did this test:
1) Execute 4_calibration_fisheye.py directly after a fresh clone. I get the same error.
2) Execute the way I would have, that is execute first 3_pairs_cut.py (1 & 2 are for test camera and capture) then 4_calibration_fisheye.py. It works.
Stereophotographer and hacker
Despite my quite active participation in the forum, I am not in the StereoPi team
StereoPi (v1) Standard Edition + CM3Lite module + a few cameras
-
vram
- Posts: 4
- Joined: Mon Jul 27, 2020 1:52 pm
Re: Stereo_Camera Calibration error
Post
by vram » Thu Aug 13, 2020 6:16 am
Thanks Stereomaton for the response.
As suggested, I tried running step 3 first followed by step 4 on a fresh repo. I continue to get the same error.
In fact, I first observed this issue with my own captured scenes (following steps 2 to 4). As there was a suggestion that there could be issues with some of the captured images, I first wanted to confirm that the SW works fine with the reference pictures but ended up having the same issue.
I have tried it out with a fresh repo separately on raspberry as well as Windows system using python 3.7. Issue exists in both.
-
Realizator
- Site Admin
- Posts: 884
- Joined: Tue Apr 16, 2019 9:23 am
- Contact:
Re: Stereo_Camera Calibration error
Post
by Realizator » Sun Aug 16, 2020 9:18 pm
Hello Vram,
Sorry for my late reply. I will try to check the reference code and images to find this issue and fix the code to avoid it in a few days!
Eugene a.k.a. Realizator
-
Realizator
- Site Admin
- Posts: 884
- Joined: Tue Apr 16, 2019 9:23 am
- Contact:
Re: Stereo_Camera Calibration error
Post
by Realizator » Mon Aug 17, 2020 2:09 pm
Vram, I repeated all experiments. Looks like I didn’t upload the latest fixes.
For the current set, we have a few photos, where chessboard corners are too close to the side. This is an undocumented requirement for the calibration session. I’m uploading the file with the draft fix, please check if it works for you. If everything is ok, I will polish this code and upload it to Github.
I’ve added a row 101 (getting a size of the image loaded), and check for the distance of the closest corners to the 0 of X and Y axis (rows 123-150).
You can adjust the sensitivity of this filter in rows 135-136:
Code: Select all
          border_threshold_x = loadedX/7
          border_threshold_y = loadedY/7
For example, for our photo sequence it means our loadedX = 640, and the border_threshold = 91.4. So, if the distance from the cell corner to the 0 of the X axis is less than 91.4, this pair is ignored.
I commented the checking of the distance to the end of the axis (you may found comments in the code), as looks like this not causing our problem.
- Attachments
-
- 4_calibration_fisheye-clear.py.zip
- (5.84 KiB) Downloaded 285 times
Eugene a.k.a. Realizator
-
vram
- Posts: 4
- Joined: Mon Jul 27, 2020 1:52 pm
Re: Stereo_Camera Calibration error
Post
by vram » Mon Aug 17, 2020 4:49 pm
Realizator, with the fix provided, I am able to complete calibration for the reference images. I don’t see the previously reported error any more. Thank you.
Let me try it out with my own sequence of images and calibrate. Once that goes through fine, let me confirm you.
BTW, I am trying to use this package (fisheye) along with V2 camera for depth measurement. Hope it is not a must to use wide angle cameras here. Please confirm.
-
Realizator
- Site Admin
- Posts: 884
- Joined: Tue Apr 16, 2019 9:23 am
- Contact:
Re: Stereo_Camera Calibration error
Post
by Realizator » Tue Aug 18, 2020 9:12 am
Hello Vram,
This fisheye code can work with both fisheye and non-fisheye images. In this forum thread, I used this fisheye code with the customer’s set, taken on V2 non-fisheye camera. You can see it works, and even does a minor barrel undistortion for V2 camera.
Eugene a.k.a. Realizator