twoibatya

Загрузка
04.04.2017
5630
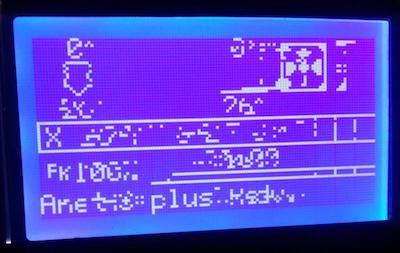
Через пронтерфейс и репетир хост выдаёт эту ошибку. В прошивке еепром активирован, прилагаю скрин.
Различные другие команды а-ля М119 или М501 работают исправно, прилагаю ещё и лог М501.
Как исправить не подскажете? надоело просто заливать по 10 раз прошивку.


Ответы на вопросы
Популярные вопросы
Какой пластик выбрать?
baurey
Загрузка
13.01.2023
723
Народ, подскажите каким пластиком лучше напечатать основание травматического пистолета. На травмате поломало основание (это ложе с рукояткой). К…
Про термистор RTD PT 1000B
Ertil
Загрузка
15.01.2023
795
Добрый день, уважаемые коллеги. По велению собственных «хотелок», приобрёл керамический нагревательный элемент от TriangleLab, CHC KIT PT1…
Шестерня vs зубчатое колесо
mlizart
Загрузка
26.05.2018
42331
Часто участникам портала приходится изготавливать зубчатые колеса и шестерни. Но мало кто задается вопросом, в чем их отличие?
Недавн…
Читайте в блогах
In order to be able to use commands like M500, M501 and M503 in Marlin you have to modify configuration.h file and enable EEPROM settings.
-
Open
Configuration.hfile
-
Find this section
//
// EEPROM
//
// The microcontroller can store settings in the EEPROM, e.g. max velocity...
// M500 - stores parameters in EEPROM
// M501 - reads parameters from EEPROM (if you need reset them after you changed them temporarily).
// M502 - reverts to the default "factory settings".  You still need to store them in EEPROM afterwards if you want to.
//
//#define EEPROM_SETTINGS // Enable for M500 and M501 commands
//#define DISABLE_M503    // Saves ~2700 bytes of PROGMEM. Disable for release!
#define EEPROM_CHITCHAT // Give feedback on EEPROM commands. Disable to save PROGMEM.
-
Uncomment
#define EEPROM_SETTINGand#define DISABLE_M503if you want to use M503 commandAfter changes:
//
// EEPROM
//
// The microcontroller can store settings in the EEPROM, e.g. max velocity...
// M500 - stores parameters in EEPROM
// M501 - reads parameters from EEPROM (if you need reset them after you changed them temporarily).
// M502 - reverts to the default "factory settings".  You still need to store them in EEPROM afterwards if you want to.
//
#define EEPROM_SETTINGS   // Enable for M500 and M501 commands
#define DISABLE_M503    // Saves ~2700 bytes of PROGMEM. Disable for release!
#define EEPROM_CHITCHAT   // Give feedback on EEPROM commands. Disable to save PROGMEM.
-
Recompile and upload changes into printer’s memory
![]()
![]()
![]()
This page needs more content for completeness. Please contribute!
Graphical LCD Artifacts
 After a new install of Marlin your graphical LCD shows glitches or is blank. This is caused by bad timing in the LCD data transmission.
Solution: Define custom delays. Add the following lines to Configuration.h as your starting-point and adjust values upward until the display works reliably. You should keep testing to find the lowest values that produce a reliable display because the LCD update steals time from the main loop.
#define ST7920_DELAY_1 DELAY_NS(200) // After CLK LOW
#define ST7920_DELAY_2 DELAY_NS(400) // After DAT
#define ST7920_DELAY_3 DELAY_NS(200) // After CLK HIGH
Alternative Solutions
- For AVR boards open
ultralcd_st7920_u8glib_rrd_AVR.hand remove#pragma GCC optimize (3)to reduce code optimization. - Add 4.7k pullup resistors to the SPI lines if they are not commonly used for SPI.
Hanging LCD?
Try doubling BLOCK_BUFFER_SIZE to see if the problem goes away.
No LCD / SD on ReARM?
As seen in this Chris’s Basement video, the RRD display doesn’t always work on first install. It didn’t even light up. A custom adapter is needed with the ReARM. See this issue, and this issue, and this page.
G29 Probing Failed!
Marlin uses the Z_PROBE_LOW_POINT value to prevent the probe from pressing too hard against the bed and getting damaged. A value of -2 works well for a flat and level bed, but if the bed isn’t trammed yet, the probe may exceed the low point and trigger a “Probing Failed” error. To prevent this from happening, change the setting to something like -10 during initial setup, and then you can change it back after the bed is perfectly trammed.
One Side High, One Side Low
- Problem: Bed probe done, leveling compensation enabled, and the first layer comes out out too squished on the right side, or too high on the left side, or vice-versa.
- Solution: Make sure the probe is always perpendicular to the bed as the carriage moves. If the wires or Bowden tube are pulling on the carriage, or if the X gantry is even slightly twisted, the probe will not remain perpendicular and its readings will be garbaggio. There is a feature called
MECHANICAL_GANTRY_CALIBRATIONthat can be used to compensate, but it is always best to tackle any mechanical issues first.
Heating Failed!
Thermal Runaway is a constant concern with heaters, so Marlin watches heaters for some common runaway conditions:
- Thermistor shorted or broken (MINTEMP/MAXTEMP).
- Heating Failed: Temperature is rising too slowly (while below target).
- Thermal Runaway: Temperature is too far from target range for too long (after settling). NOTE: Thermal Runaway can be caused by a fan blowing too close to the hotend.
During a first-time setup or firmware upgrade, we recommend leaving Thermal Protection enabled but relaxing the settings. To do this, set WATCH_TEMP_PERIOD and WATCH_BED_TEMP_PERIOD to longer intervals, such as 40 or 60 seconds. You can increase the HYSTERESIS settings to makes thermal protection more tolerant of an untuned PID. You should run M303 on the hotend and bed as soon as possible, and it will help to loosen up thermal protection until all the PID is well tuned.
Depending on your setup, you may get more stable heating using MPCTEMP instead of PIDTEMP.
FTDI USB Bandwidth
At 115K baud use 167 latency, 192 USB block request. As one goes up the other goes down.
Long Beep on Boot
This is a hardware issue due to the connected beeper pin being HIGH when the board is first powered. Marlin turns off the BEEPER pin as soon as it possibly can. A new bootloader for your board might fix the issue in the future.
Random Halting
An under-powered PSU combined with heaters and high speed moves can lead to a frozen board. No kill, no watchdog, heaters stuck on. See #17202. To test for this:
- To test for this, enable the bed and extruder heaters and print at high speed to see if a hard freeze occurs. Try disabling heaters and/or slower printing to see if the problem goes away.
- Read the input voltage from PSU with a meter during fast moves. If you see a drop too far below your expected voltage (e.g., 12V or 24V) this indicates a problem.
EEPROM Errors
After flashing a new version of Marlin, the existing EEPROM contents may no longer conform to the updated EEPROM layout. As a result, you may see an error like one of these:
Error:EEPROM datasize error.
EEPROM CRC mismatch - (stored) 4235 != 6244 (calculated)!
Troubleshooting Procedure
-
If using Octoprint, turn off the option to disconnect on “Error” messages before proceeding.
-
Do
M502andM500and then reboot the machine. This procedure will initialize the EEPROM to your configured “factory” settings. - If you continue to get error messages, use
DEBUG_EEPROM_READWRITEto run a check for mismatched fields duringM501(read) andM500(write). A mismatched field is a bug, so please report these errors to the Marlin project. To do this check, add the following option to yourConfiguration.h, flash, and reboot:#define DEBUG_EEPROM_READWRITE - You can also enable the
EEPROM_AUTO_INIToption to automatically reset the EEPROM when the data structure changes or the data gets corrupted.
Sanity Check Errors
Marlin’s SanityCheck.h files exist to check the validity of settings and make sure obsolete settings get updated for the newest Marlin. Be sure to read and follow all directions provided by these checks.
Build Too Large
A Marlin build can range in size from under 60K to over 200K with a generous complement of features enabled. All features try to use as little SRAM as possible, but some have a higher SRAM cost. As a guide and starting-point, be sure to use the example configuration included with Marlin that best matches your specific machine model.
Delta Height, Z Probe Offset, and G33
Since Marlin 1.1 “Delta Height” is defined as the distance between Z Home Position and the Z-MIN trigger point (so it remains constant). The Z Probe Offset is added to that distance in order to go to the height of the first printed layer and as such is independent from Delta Height. (Printers without a probe have no Z Probe Offset. Instead, the Z-MIN trigger-point comes from the paper test height, aka Z0.)
Trinamic Stepper Drivers
These tips are collected from various reports we have received. See Trinamic troubleshooting for additional guidance.
- Some SilentStepSticks with variable 3-5V logic voltage (VIO) might get damaged if only powered over USB.
- SPI conflict with the SD card? Solutions vary.
- E Stepper won’t move when using Linear Advance with TMC drivers?
- “I ended up using the drivers in legacy mode and setting them to SpreadCycle using the OTP (One Time Programmer). Unfortunately trying to set individual drivers to SpreadCycle via UART by enabling HybridThreshhold and setting the threshold to 0 for the respective axes did not work.” See #11825.
- Loud / grinding TMC2208? Increase the current to ~1500mA and lower the Hybrid Threshold.
- Unreliable printing, shifting layers? Make sure the ‘rsense’ value is configured according to recommendations. See #9368.
- TMC2208 uses SoftwareSerial, and this conflicts with Endstop Interrupts. Disable Endstop Interrupts to proceed.
- Should I use
SOFTWARE_DRIVER_ENABLE? Not unless required by the hardware. See #13326.
Babystep Double-click ignored
- Increase the
DOUBLECLICK_MAX_INTERVALvalue
False Endstop Triggering
- Enable and set
ENDSTOP_NOISE_THRESHOLDto filter the endstop signals.
BLTouch Pin Drop / Blinking
- Servo voltage / signals may be unstable due to heater signal lines being too close to servo traces.
- Solution: Disconnect the servo signal line after the print starts.
![]()
so when i connect my printer to pronterface and testing the x,y,z axes by using x,y,z direction keys in pronterface then the motors works fine but but but when i load gcode file and send to printer then the problem starts the motor makes long and short beeping noises and sometimes the motors runs too much fast and suddenly started beeeping…..
so i made another video so pls watch this video till the end and give me any possible solution..
[youtu.be]
… compare the speeds (or F-values) in your Pronterface settings (to find at «Options»->»Settings»->»Printer Settings» — X&Y or Z feedrates) and in the G-code files (the value after «F») — «beeping» motors is stalling for too high stepping frequencies and accelerations …
Viktor
———
Aufruf zum Projekt «Müll-freie Meere» — [reprap.org] — Deutsche Facebook-Gruppe — [www.facebook.com]
Call for the project «garbage-free seas» — [reprap.org]
So first of all thanks for the reply viktor sir  and i am completely new to 3d printing so firstly i started to make my own printer but get stucked on that problem
Sir i dont have much knowledge about programming, i have just downloaded marlin 1.1.4 and changes some movement setting and then uploaded it to arduino and also i chnges this movement setting 100times but nothing happen well the motors works fine with x,y,z keys on pronterface and when i uploaded gcodes all things go wrong( watch in th video)
//=============================================================================
//============================== Movement Settings ============================
//=============================================================================
// @section motion

/**
 * Default Settings
 *
 * These settings can be reset by M502
 *
 * Note that if EEPROM is enabled, saved values will override these.
 */

/**
 * With this option each E stepper can have its own factors for the
 * following movement settings. If fewer factors are given than the
 * total number of extruders, the last value applies to the rest.
 */
//#define DISTINCT_E_FACTORS

/**
 * Default Axis Steps Per Unit (steps/mm)
 * Override with M92
 *                                      X, Y, Z, E0 [, E1[, E2[, E3[, E4]]]]
 */
#define DEFAULT_AXIS_STEPS_PER_UNIT   { 80, 80, 4000, 94.96 }

/**
 * Default Max Feed Rate (mm/s)
 * Override with M203
 *                                      X, Y, Z, E0 [, E1[, E2[, E3[, E4]]]]
 */
#define DEFAULT_MAX_FEEDRATE          { 200, 200, 10, 25 }

/**
 * Default Max Acceleration (change/s) change = mm/s
 * (Maximum start speed for accelerated moves)
 * Override with M201
 *                                      X, Y, Z, E0 [, E1[, E2[, E3[, E4]]]]
 */
#define DEFAULT_MAX_ACCELERATION      { 100, 100, 5, 100 }

/**
 * Default Acceleration (change/s) change = mm/s
 * Override with M204
 *
 *   M204 P    Acceleration
 *   M204 R    Retract Acceleration
 *   M204 T    Travel Acceleration
 */
#define DEFAULT_ACCELERATION          100    // X, Y, Z and E acceleration for printing moves
#define DEFAULT_RETRACT_ACCELERATION  150    // E acceleration for retracts
#define DEFAULT_TRAVEL_ACCELERATION   100    // X, Y, Z acceleration for travel (non printing) moves

/**
 * Default Jerk (mm/s)
 * Override with M205 X Y Z E
 *
 * "Jerk" specifies the minimum speed change that requires acceleration.
 * When changing speed and direction, if the difference is less than the
 * value set here, it may happen instantaneously.
 */
#define DEFAULT_XJERK                 12.0
#define DEFAULT_YJERK                 12.0
#define DEFAULT_ZJERK                  0.4
#define DEFAULT_EJERK                  5.0
i only changes this setting rather all other setting are default and i downloaded saveral gcodes file from thingiverse for testing
and i dont know how to set exact frequecies and speed for gcodes…
and also pls ellaborate that how to set correct frequencies and acceleration as i dont know how to do that???
Edited 1 time(s). Last edit at 08/05/2018 12:13AM by the robobuilder.
Attachments:
open | download —
20180804_205053.jpeg
(981.9 KB)
… if manual moving in Pronterface is OK, then your motor settings are working.
If you look into the G-code files, then the numbers after «F» shows the predefined speeds — e.g. «G0 X20.0 Y10.0 Z0 F2500» will move the head with max. 2,5m per minute (depends on line length and acceleration).
The F-values in your G-code files seems to be way too fast — so either reduce them manually, or slice the original STL-files anew, with correct speed settings for your setup …
Viktor
———
Aufruf zum Projekt «Müll-freie Meere» — [reprap.org] — Deutsche Facebook-Gruppe — [www.facebook.com]
Call for the project «garbage-free seas» — [reprap.org]
yes sir my manual pronterface setting are working but after loading gcode files all things goes wrong so ..
sir i am not programming or 3d printing expert so thats why below i uploaded the movement setting of my printer and also attached gcode file which i am using…….so by taking my setting and using this gcode file pls tell me how to reduce speed of gcode according to my printer movement setting or tell me anything else that i can do……
gcode file that i am using——>> [www.thingiverse.com]
and here is my movement setting
/**
 * Default Axis Steps Per Unit (steps/mm)
 * Override with M92
 *                                      X, Y, Z, E0 [, E1[, E2[, E3[, E4]]]]
 */
#define DEFAULT_AXIS_STEPS_PER_UNIT   { 80, 80, 4000, 94.69 }

/**
 * Default Max Feed Rate (mm/s)
 * Override with M203
 *                                      X, Y, Z, E0 [, E1[, E2[, E3[, E4]]]]
 */
#define DEFAULT_MAX_FEEDRATE          { 300, 300, 5, 25 }

/**
 * Default Max Acceleration (change/s) change = mm/s
 * (Maximum start speed for accelerated moves)
 * Override with M201
 *                                      X, Y, Z, E0 [, E1[, E2[, E3[, E4]]]]
 */
#define DEFAULT_MAX_ACCELERATION      { 2000, 2000, 100, 10000 }

/**
 * Default Acceleration (change/s) change = mm/s
 * Override with M204
 *
 *   M204 P    Acceleration
 *   M204 R    Retract Acceleration
 *   M204 T    Travel Acceleration
 */
#define DEFAULT_ACCELERATION          2000    // X, Y, Z and E acceleration for printing moves
#define DEFAULT_RETRACT_ACCELERATION  3000    // E acceleration for retracts
#define DEFAULT_TRAVEL_ACCELERATION   2000    // X, Y, Z acceleration for travel (non printing) moves

/**
 * Default Jerk (mm/s)
 * Override with M205 X Y Z E
 *
 * "Jerk" specifies the minimum speed change that requires acceleration.
 * When changing speed and direction, if the difference is less than the
 * value set here, it may happen instantaneously.
 */
#define DEFAULT_XJERK                 17.0
#define DEFAULT_YJERK                 17.0
#define DEFAULT_ZJERK                  0.4
#define DEFAULT_EJERK                  5.0
and here is x&y travel is that travel speed ok or not?????
// X and Y axis travel speed (mm/m) between probes
#define XY_PROBE_SPEED 8000
sir pls help me……
3d printing 101.
You ‘slice’ an object from a stl format into gcode format.
the machine only understands gcodes
There are lots of gcodes see [reprap.org]
But the main ones are G0 and G1 Move commands
some examples
G0 X12 ; move to 12mm on the X axis
G0 F1500 ; Set the feedrate to 1500mm/minute
G1 X90.6 Y13.8 E22.4 ; Move to 90.6mm on the X axis and 13.8mm on the Y axis while extruding 22.4mm of material
the second example is the feed rate, this is the requested rate to move the steppers.
If this is faster than the machine can move the steppers buzz
——————————————
No one without your exact machine can help you set the max feedrates
The line in marlin is #define DEFAULT_MAX_FEEDRATE { 300, 300, 5, 25 } ; (x,y,z,e)
You need to set these values so that no matter what feed rate the gcode requests the machine knows to cap it at the above values
How to determine this, there are a bunch of ways
use proterface
enter commands directly
first set relative positioning mode, send this to the machine
G91
Then move an axis eg
G1 X10 F1800
This move the X axis 5mm
F is in mm/minute while the firmware is in mm/sec
so try this command with various feed rates until you find the value that is to high
Take a little off this number and divide this number by 60 and set it in the firmware for the axis your working on.
when an axis is two far over just change it to
G1 X-10 F{what ever number your working with}
to move it back the other way
Edited 3 time(s). Last edit at 08/05/2018 06:15AM by Dust.
Thanks sir for quick reply
i have done all the thing which you said so for both x and y axes i send similar command and when sending G1 X5 F1700 motors runs or move fast but but when i send G1 X5 F1750 motors started beeeeeeeeping and so i note the feed rate and divide 1700 by 60 which is 28 approx and so i set this below…
these are all values that i have calculated by your method and came to that conclusion
G1 X10 F1700—— above this feedrate X axis motor started beeping
G1 Y10 F1700——above this feedrate Y axis motor started beeping
G1 Z10 F13.2—— above this feedrate Z axis motor started beeping
# max default feedrate (28, 28, 0.22, cold extrusion prevented) x,y,z,e
after setting this feedrate to marlin and uploading program to arduino and then opening pronterface and clicked on load file and selected gcode file and clicked on print now see…………………..
firstly printer started with beeeeeeping and then x&y moving tooooo much fast and sometime started beeeeeping and this thing is continuous «beeeping and moving too much fast all x,y,z axis and only extruder is working fine????
Edited 2 time(s). Last edit at 08/05/2018 07:27AM by the robobuilder.
clear you eeprom as it can over ride these settings
«M502» : Revert to the default «factory settings.»
«M500» : Store parameters in non-volatile storage
These values are really slow… are you using threaded rods and leadscrews or something like that?
yes sir i am using 8mm diameter threaded rod ..
Edited 1 time(s). Last edit at 08/05/2018 11:26AM by the robobuilder.
send the printer a
M502
followed by a
M500
eeprom is now the same as your firmware settings
Firstly thankyou verymuch after trying all your setting i got my printer little bit working
after sending M500 this massage appears is that ok???——->> Error:EEPROM disabled
and one thing that i notice is that after setting above feedrates and again uploading the code to arduino then when i again send command to printer like G1 Z10 F999999( or Fanything) motor run constantly
at same speed and stops after 10mm(as z=10mm)
i watched many diy 3d printer youtube videos and in those videos the people doesnot change anything from marlin they just install the firmware and send print file to printer and magically printer started printing how is that possible becoz they changes nothing and i follow those videos but i face too much problem?????????????????
Edited 4 time(s). Last edit at 08/05/2018 11:53AM by the robobuilder.
If eeprom is disabled, its cant interfere
also check your F values with longer moves. Since the machine has acceleration if it hasn’t reached max acceleration by the end of the move, the f values might still be a little high
sir how to check F values with longer moves  ???????or is it necessary for machine to reach its max acceleration??
i watched many diy 3d printer youtube videos and in those videos the people doesnot change anything from marlin they just install the firmware and send print file to printer and magically printer started printing how is that possible becoz they changes nothing and i follow those videos but i face too much problem?
Edited 1 time(s). Last edit at 08/05/2018 12:06PM by the robobuilder.
1) the internet lies
2) people use more standised parts (belts and pullies)
3) you can just set the slicer to set the freed rates really slow. this is not the best way to do it as you get extra delays by not maxing out the machines capabilities
for larger moves you just increase the distance
ie G1 Y10 F1700 becores G1 Y50 F1700
You do realize that a m8 based printer is extremely slow? (about 1/60th the speed)
I know this from expereience [dustsreprap.blogspot.com]
Edited 1 time(s). Last edit at 08/05/2018 12:33PM by Dust.
ok thanks sir and i started following your blog
OK so i tested my printer with gcode and nothing going well ,, i calibrated feedrates by your method and sets those feedrates(see above) to marlin then i test printer but beeps sound come in time of printing ……………..so again i send M502 command and then again send gcodes but still beeps come…
The major thing that i notice is that when i use repetier host to edit gcodes file by editing Feedrates manually but due to long code i edit only upper few of feedrates because there is thousand of lines sooo when i edit some upperline feedrate which match with my feedrate then send edited gcode to printer then everything works fine but only before the feedrates that i edited after that the printer started again long and short beeps and i think that my pronterface or repetier doesn’t take feed rates from my firmware it takes from gcode file……….
Edited 2 time(s). Last edit at 08/05/2018 02:51PM by the robobuilder.
Attachments:
open | download —
Screenshot (281=2).png
(158.3 KB)
pls answer this above question??
I dont understand why this isnt working…
Are you actually uploading new firmware or just compiling?
regardless…
you can also just manually add in a new first line of the gcode
M203 X28 Y28 Z0.2
then check there are no other M203 lines.
This does the same thing
the rest of the Feed rates are truncated down to these values inside the controler
Edited 1 time(s). Last edit at 08/07/2018 10:03AM by Dust.
yes i am uploading new firmware…
can you share your reprap working firmware…
I also don’t know why my printer accepting gcode feedrates but not my firmware max feedrates
And i followed this video to make my printer but got stucked on just beeeeps
[www.youtube.com]
watch all steps of video parts and tell me what he is doing wrong or anything,,,,,
Edited 1 time(s). Last edit at 08/08/2018 03:18AM by the robobuilder.
Recommend Projects
-

React
A declarative, efficient, and flexible JavaScript library for building user interfaces.
-
Vue.js
🖖 Vue.js is a progressive, incrementally-adoptable JavaScript framework for building UI on the web.
-
Typescript
TypeScript is a superset of JavaScript that compiles to clean JavaScript output.
-
TensorFlow
An Open Source Machine Learning Framework for Everyone
-
Django
The Web framework for perfectionists with deadlines.
-
Laravel
A PHP framework for web artisans
-
D3
Bring data to life with SVG, Canvas and HTML. 📊📈🎉
Recommend Topics
-
javascript
JavaScript (JS) is a lightweight interpreted programming language with first-class functions.
-
web
Some thing interesting about web. New door for the world.
-
server
A server is a program made to process requests and deliver data to clients.
-
Machine learning
Machine learning is a way of modeling and interpreting data that allows a piece of software to respond intelligently.
-
Visualization
Some thing interesting about visualization, use data art
-
Game
Some thing interesting about game, make everyone happy.
Recommend Org
-
Facebook
We are working to build community through open source technology. NB: members must have two-factor auth.
-
Microsoft
Open source projects and samples from Microsoft.
-
Google
Google ❤️ Open Source for everyone.
-
Alibaba
Alibaba Open Source for everyone
-
D3
Data-Driven Documents codes.
-
Tencent
China tencent open source team.