How to fix the Windows System Error 2 ERROR_FILE_NOT_FOUND
This article features error number Code 2, commonly known as ERROR_FILE_NOT_FOUND and it is described as The system cannot find the file specified.
About Windows System Error
Windows system errors occur at various times during normal use of the operating system. Users should receive an error code that they can use to analyze and investigate what happened to the computer. However, these codes will not necessarily provide detailed information. And since non-system software can also return these codes, the user will need to have an understanding of the program and runtime context when analyzing errors. Here are some ways to understand symptoms, causes and general solutions.
Definitions (Beta)
Here we list some definitions for the words contained in your error, in an attempt to help you understand your problem. This is a work in progress, so sometimes we might define the word incorrectly, so feel free to skip this section!
- File — A block of arbitrary information, or resource for storing information, accessible by the string-based name or path
- Find — This tag has multiple meanings
- System — System may refer to a set of interdependent components; Low level infrastructure like the operating system from a high language point of view or an object or function for accessing the previous
Symptoms of Code 2 — ERROR_FILE_NOT_FOUND
When processing, Windows send System Error codes to tell the user the kind of problem happening to the computer. They appear at unexpected instances so it is difficult to detect unless one analyzes the error message that comes with it. Windows System Error codes are symptoms to other problems happening to the computer, and since they are, users need to consider the error message, the time and the processes running while it occurred.
 Repair Tool")
(For illustrative purposes only)
Causes of ERROR_FILE_NOT_FOUND — Error 2
Windows system errors can be caused by software or hardware breakdown. Sometimes, your software is not working in consistency with the hardware because of changes or general hardware failures. At some instances, users might have installed conflicting drivers or the OS got corrupted. Perhaps a component had some abnormal power surge which can damage parts and affect its operation. Different kinds of factors may have happened which caused the system to display a System error at certain periods of computer usage. Problems with software and hardware, of course, easily resolved if user can easily pinpoint the portion that are causing the failure. To address problems with these kinds of error, try the following repair methods.
Repair Methods
If a repair method works for you, please click the upvote button to the left of the answer, this will let other users know which repair method is currently working the best.
Please note: Neither ErrorVault.com nor it’s writers claim responsibility for the results of the actions taken from employing any of the repair methods listed on this page — you complete these steps at your own risk.
Method 1 — Repair Corrupted or Missing System Files
System File Checker — this tool works pretty much like a registry checker but this helps you find and repair corrupted or missing system files so it takes a bit longer to run
- To run the command, open elevated Command prompt by typing it on the search window, then right clicking Command Prompt and choosing run as administrator
- Type sfc /scannow on the prompt and wait until verification process is successfully completed
Run Checkdisk — Chkdsk repairs many inconsistencies with the OS. System errors may also be repaired using this utility. To run it,
- Open Command Prompt by typing it on the search box, then when you see the result on the list overhead, right click on it and choose, Run as Administrator
- Your system might say you cannot run it at the moment because you are still processing data, and will ask you if you want to run it before the next startup, just click y for yes and then exit the screen and reboot the computer
- Once the computer reboots, you will see checkdisk running outside of Windows, just let it finish till it gives you a report of what was found, fixed or marked
- Exit the window and the let your computer reboot normally.
Method 2 — Update or Reinstall your Driver
Changes done to your computer can mess up your driver. If that happens, you can either reinstall your driver or update it. To do that, you can do the following.
- If you received a Device Manager error code, take note of the description so you can pinpoint the driver or the component that is causing the error
- Launch device manager by either searching for Device Manager or running «devmgmt.msc»
- Find the driver on the list and right click on it
- Click Uninstall in case you want to reinstall the driver, or Update Driver Software if you are trying to update it.
- You will see a confirmation window, make sure the Delete driver software item is unchecked.
- Click ok then reboot your computer.
You may alternately do this:
- You may manually download the driver from the manufacturer.
- Run it to replace the current driver you are using.
- Once done, let your computer reboot.
Method 3 — Roll Back your Driver
You may also go back to the original driver your computer came with. To do that:
- On Device Manager, find the problematic driver.
- Right click the device and click Properties.
- When you see the Properties window, click the Driver tab.
- You will see the Roll Back Driver button, click that.
- Confirm the rollback by clicking Yes when you see a question that says «Are you sure you would like to roll back to the previously installed driver software?»
- Restart your computer after this.
Method 4 — Use System Restore
For Window 7
- Click Start > All Programs > Accessories > System Tools
- Click System Restore and then click Next.
- Choose your restore point when you know your computer is doing fine
- Keep clicking Next and the click Finish
- It will take time so be patient, wait for the operation to completely stop
For Windows 8, 8.1 or 10
- Right-click the Start button, then click System.
- Once in System window, click System and Security.
- Tap System and on the left side, click System protection.
- Click System Restore, follow the instruction to select your restore point and then click Next until you see the Finish button.
- Wait for the restore process to finish.
Method 5 — Repair reinstall using your OS CD or flash drive
- The best way to repair your system software is still reinstalling it. Repair reinstall process helps you keep your files as you repair the operating system. Though, you need to make sure you back up your file if you indeed need to clean reinstall your computer. You will need to insert your installation media and restart your computer.
- Access your BIOS, the process differs from one computer model to another, it may be F1, F2, or Del button.
- Once there, go to boot section, set boot to the installation disk and save settings.
- For earlier version of Windows, you may need to tap your keyboard while you wait for the computer to access the installation disk.
- Choose the repair utility first instead of clean installing the OS. This may save you a lot of hassles. However, if the issue continues after rebooting your computer, then just back up files and do the clean reinstall.
Other languages:
Wie beheben Fehler 2 (FEHLER DATEI NICHT GEFUNDEN) — Die angegebene Datei wurde vom System nicht gefunden.
Come fissare Errore 2 (ERROR_FILE_NOT_FOUND) — Il sistema non trova il file specificato.
Hoe maak je Fout 2 (ERROR_FILE_NOT_FOUND) — Het systeem kan het gespecificeerde bestand niet vinden.
Comment réparer Erreur 2 (ERROR_FILE_NOT_FOUND) — Le système ne peut pas trouver le fichier spécifié.
어떻게 고치는 지 오류 2 (ERROR_FILE_NOT_FOUND) — 시스템이 지정된 파일을 찾을 수 없습니다.
Como corrigir o Erro 2 (ERROR_FILE_NOT_FOUND) — O sistema não pode encontrar o arquivo especificado.
Hur man åtgärdar Fel 2 (ERROR_FILE_NOT_FOUND) — Systemet kan icke finna den specificerade filen.
Как исправить Ошибка 2 (ERROR_FILE_NOT_FOUND) — Система не может найти указанный файл.
Jak naprawić Błąd 2 (ERROR_FILE_NOT_FOUND) — System nie może odnaleźć określonego pliku.
Cómo arreglar Error 2 (ERROR_FILE_NOT_FOUND) — El sistema no puede encontrar el archivo especificado.
![]() About The Author: Phil Hart has been a Microsoft Community Contributor since 2010. With a current point score over 100,000, they’ve contributed more than 3000 answers in the Microsoft Support forums and have created almost 200 new help articles in the Technet Wiki.
About The Author: Phil Hart has been a Microsoft Community Contributor since 2010. With a current point score over 100,000, they’ve contributed more than 3000 answers in the Microsoft Support forums and have created almost 200 new help articles in the Technet Wiki.
Follow Us: ![]()
![]()
![]()
Last Updated:
12/11/22 08:26 : A Windows 10 user voted that repair method 1 worked for them.

This repair tool can fix common computer problems such as blue screens, crashes and freezes, missing DLL files, as well as repair malware/virus damage and more by replacing damaged and missing system files.
STEP 1:
Click Here to Download and install the Windows repair tool.
STEP 2:
Click on Start Scan and let it analyze your device.
STEP 3:
Click on Repair All to fix all of the issues it detected.
DOWNLOAD NOW
Compatibility
![]()
Requirements
1 Ghz CPU, 512 MB RAM, 40 GB HDD
This download offers unlimited scans of your Windows PC for free. Full system repairs start at $19.95.
Article ID: ACX013918EN
Applies To: Windows 10, Windows 8.1, Windows 7, Windows Vista, Windows XP, Windows 2000
Speed Up Tip #48
Partitioning Your Hard Drive:
To ensure maximum performance, make sure to partition your hard drive properly if you are reinstalling Windows. Ideally, it is recommended to have at least 3 partitions for every hard drive. To make sure that you are doing it right, look for a guide online.
Click Here for another way to speed up your Windows PC
Errors in Alphabetical Order: A B C D E F G H I J K L M N O P Q R S T U V W X Y Z
Microsoft & Windows® logos are registered trademarks of Microsoft. Disclaimer: ErrorVault.com is not affiliated with Microsoft, nor does it claim such affiliation. This page may contain definitions from https://stackoverflow.com/tags under the CC-BY-SA license. The information on this page is provided for informational purposes only. © Copyright 2018
| Номер ошибки: | Ошибка 2 | |
| Название ошибки: | Java Error Code 2 | |
| Описание ошибки: | Ошибка 2: Возникла ошибка в приложении Java. Приложение будет закрыто. Приносим извинения за неудобства. | |
| Разработчик: | Oracle Corporation | |
| Программное обеспечение: | Java | |
| Относится к: | Windows XP, Vista, 7, 8, 10, 11 |
Объяснение «Java Error Code 2»
Как правило, специалисты по ПК называют «Java Error Code 2» как тип «ошибки времени выполнения». Когда дело доходит до программного обеспечения, как Java, инженеры могут использовать различные инструменты, чтобы попытаться сорвать эти ошибки как можно скорее. Тем не менее, возможно, что иногда ошибки, такие как ошибка 2, не устранены, даже на этом этапе.
«Java Error Code 2» может возникнуть у пользователей Java даже при нормальном использовании приложения. После того, как об ошибке будет сообщено, Oracle Corporation отреагирует и быстро исследует ошибки 2 проблемы. Затем Oracle Corporation будет иметь знания, чтобы исследовать, как и где устранить проблему. В результате разработчик может использовать пакеты обновлений для Java, доступные с их веб-сайта (или автоматическую загрузку), чтобы устранить эти ошибки 2 проблемы и другие ошибки.
Что генерирует ошибку времени выполнения 2?
Ошибки выполнения при запуске Java — это когда вы, скорее всего, столкнетесь с «Java Error Code 2». Вот три наиболее заметные причины ошибки ошибки 2 во время выполнения происходят:
Ошибка 2 Crash — это распространенная ошибка 2 во время выполнения ошибки, которая приводит к полному завершению работы программы. Обычно это происходит, когда Java не может обрабатывать предоставленный ввод или когда он не знает, что выводить.
Утечка памяти «Java Error Code 2» — ошибка 2 утечка памяти приводит к тому, что Java постоянно использует все больше и больше памяти, увяская систему. Критическими проблемами, связанными с этим, могут быть отсутствие девыделения памяти или подключение к плохому коду, такому как бесконечные циклы.
Ошибка 2 Logic Error — логическая ошибка возникает, когда компьютер производит неправильный вывод, даже если вход правильный. Это видно, когда исходный код Oracle Corporation содержит недостаток в обработке данных.
Основные причины Oracle Corporation ошибок, связанных с файлом Java Error Code 2, включают отсутствие или повреждение файла, или, в некоторых случаях, заражение связанного Java вредоносным ПО в прошлом или настоящем. Для устранения неполадок, связанных с файлом Oracle Corporation, большинство профессионалов ПК заменят файл на соответствующую версию. Кроме того, регулярная очистка и оптимизация реестра Windows предотвратит создание неправильных ссылок на пути к файлам Oracle Corporation, поэтому мы настоятельно рекомендуем регулярно выполнять сканирование реестра.
Распространенные сообщения об ошибках в Java Error Code 2
Наиболее распространенные ошибки Java Error Code 2, которые могут возникнуть на компьютере под управлением Windows, перечислены ниже:
- «Ошибка приложения Java Error Code 2.»
- «Ошибка программного обеспечения Win32: Java Error Code 2»
- «Извините за неудобства — Java Error Code 2 имеет проблему. «
- «К сожалению, мы не можем найти Java Error Code 2. «
- «Java Error Code 2 не найден.»
- «Ошибка запуска программы: Java Error Code 2.»
- «Не удается запустить Java Error Code 2. «
- «Ошибка Java Error Code 2. «
- «Java Error Code 2: путь приложения является ошибкой. «
Эти сообщения об ошибках Oracle Corporation могут появляться во время установки программы, в то время как программа, связанная с Java Error Code 2 (например, Java) работает, во время запуска или завершения работы Windows, или даже во время установки операционной системы Windows. Выделение при возникновении ошибок Java Error Code 2 имеет первостепенное значение для поиска причины проблем Java и сообщения о них вOracle Corporation за помощью.
Эпицентры Java Error Code 2 Головные боли
Проблемы Java и Java Error Code 2 возникают из отсутствующих или поврежденных файлов, недействительных записей реестра Windows и вредоносных инфекций.
Более конкретно, данные ошибки Java Error Code 2 могут быть вызваны следующими причинами:
- Недопустимые разделы реестра Java Error Code 2/повреждены.
- Вирус или вредоносное ПО, которые повредили файл Java Error Code 2 или связанные с Java программные файлы.
- Вредоносное удаление (или ошибка) Java Error Code 2 другим приложением (не Java).
- Другое приложение, конфликтующее с Java Error Code 2 или другими общими ссылками.
- Java (Java Error Code 2) поврежден во время загрузки или установки.
Продукт Solvusoft
Загрузка
WinThruster 2022 — Проверьте свой компьютер на наличие ошибок.
Совместима с Windows 2000, XP, Vista, 7, 8, 10 и 11
Установить необязательные продукты — WinThruster (Solvusoft) | Лицензия | Политика защиты личных сведений | Условия | Удаление
I am trying to make a java program that will set up a SSH connection for me on my macbook. It prompts me for the username, and then the IP address, then it is supposed to do «ssh username@ip».
Below is my code:
import java.io.BufferedReader;
import java.io.InputStreamReader;
import java.util.Scanner;

public class SSH {
    public static void main(String[] args) throws Exception {
    boolean rep = true;
    String username = (null);
    String IPAdress = (null);
    while (rep) {
        Scanner scanner = new Scanner(System.in);
        System.out.print("Username:  ");
        username = scanner.next();
        System.out.print("nIP Adress:  ");
        IPAdress = scanner.next();
        System.out.println("nnIs this correct?nUsername:  " + username + "nIP Adress:  " + IPAdress + "nY/N");
        char responce = scanner.next().charAt(0);

        if (responce == 'Y' || responce == 'y') {
            rep = false;
            scanner.close();
        } else if (responce == 'N' || responce == 'n') {

        } else {
            Error displayErrorMessage = new Error();
            displayErrorMessage.displayError();
        }
    }
    String SSHStartup = username + "@" + IPAdress;
    System.out.println("Running command:  ssh " + SSHStartup);
    String[] command = { "/bin/bash, -c , ssh " + SSHStartup };
    Process p = Runtime.getRuntime().exec(command);
    p.waitFor();
    BufferedReader reader = new BufferedReader(new InputStreamReader(p.getInputStream()));
    String line = "";
    StringBuffer output = new StringBuffer();
    while ((line = reader.readLine()) != null) {
        output.append(line + "n");
    }
}
}
I know, its messy, and now well indented, but instead of executing the command, it gives me this:
Exception in thread "main" java.io.IOException: Cannot run program "/bin/bash, -c , ssh root@(ip here)": error=2, No such file or directory
at java.lang.ProcessBuilder.start(ProcessBuilder.java:1048)
at java.lang.Runtime.exec(Runtime.java:620)
at java.lang.Runtime.exec(Runtime.java:485)
at SSH.main(SSH.java:32)
Caused by: java.io.IOException: error=2, No such file or directory
at java.lang.UNIXProcess.forkAndExec(Native Method)
at java.lang.UNIXProcess.<init>(UNIXProcess.java:248)
at java.lang.ProcessImpl.start(ProcessImpl.java:134)
at java.lang.ProcessBuilder.start(ProcessBuilder.java:1029)
... 3 more
For the purpose of this post, I have removed the IP address, but when I compile and run it, I try the actual one, and it gives me the same error.
Help?
Error 2 — What is it?
Error 2 is a typical Battle.net error code. Battle.net is a desktop app that allows you to access all Blizzard games.
It enables Blizzard gamers around the world to play multiplayer matches together, online. Error 2 occurs when you are unable to connect to the login server. This error code is displayed in the following format:
Battle.net Error #2: Unable to connect. Please try again later. If the problem persists, please contact technical support.
Solution
 Error Causes
 Error Causes
Error 2 may be triggered due to several reasons. These include:
- Program conflict
- Security software conflict
- Bad DNS cache entry
- Issues with network devices
- Viruses and malware
- Registry corruption
Error 2 is not a fatal error like the blue screen of death error codes. However, this error may hamper your ability to play Blizzard multi-player games. To overcome this problem it is advisable to fix error 2 immediately.
Further Information and Manual Repair
To resolve this error you don’t need to spend hundreds of dollars to hire a professional and get it fixed. Here are some of the easy do-it-yourself methods to resolve this error on your PC. These methods require no technical expertise or knowledge. Let’s get started:
Method 1
Error 2 may sometimes pop up on the screen due to program conflict. This happens when you have Blizzard games and other programs running on your PC at the same time.
In such a situation, it is advisable to close background applications to resolve conflicts between Blizzard games and other programs running in the background.
Method 2
Sometimes antivirus programs and firewalls can also hinder and interfere with the game’s connection to our servers. In this event, the best way to fix the error is to temporarily uninstall your security software.
Method 3
If error 2 is triggered by the issues with network devices then simply power cycle network devices to re-stabilize the connection.
Power cycling router and modem allow you to reset and reestablish a connection to your ISP. To do this, shut down the computer then power down/unplug the router and the modem.
Allow the modem to sit for 60 seconds, unplugged. Then turn it on and allow it to boot up till the front panel connection lights show a steady connection.
Now turn on the router and do the same as you did with the modem. After that start the computer and allow it to completely boot up. Now try logging on to the Blizzard gaming server.
This will hopefully resolve the issue.
Method 4
Viruses and malware infections can also trigger error 2. In such a situation install an antivirus and remove all malicious programs infecting your PC.
Method 5
If the cause of the error is related to registry corruption, then it is advisable to download Restoro. This is a user-friendly PC Fixer with a registry cleaner. The registry cleaner removes all unnecessary and obsolete files corrupting the registry, cleans and repairs the corrupted registry in a few minutes.
Click here to download Restoro on your PC to resolve error 2. For further information you may be interested in these similar issues:
Advanced System Repair Pro
One-click automated PC repair solution
![]()
With Advanced System Repair Pro you can easily
DOWNLOAD
Advanced System Repair Pro is compatible with all versions of Microsoft Windows including Windows 11
Share this article:
You might also like
To turn password login in Windows 10 you will need approximately one minute of your time.
So let’s do it fast and efficient
Press ⊞ WINDOWS + X to open the secret menu
 Click on command prompt (admin)
 Type in command prompt following:
powercfg /SETDCVALUEINDEX SCHEME_CURRENT SUB_NONE CONSOLELOCK 0
press ENTER
powercfg /SETACVALUEINDEX SCHEME_CURRENT SUB_NONE CONSOLELOCK 0
press ENTER
And you are done!
Next time when you open your laptop from sleep you will no longer need to type in the password.
Read More
This post will help you fix the ATTEMPTED_WRITE_TO_READONLY_MEMORY Blue Screen issue with an error code 0x000000BE. If you encounter this kind of BSOD error when you try to boot into your Windows 10 computer, note that there are various possible causes for this error. It could be caused by an error with a device driver, hardware issues, or some error in the BIOS of your computer.
The ATTEMPTED_WRITE_TO_READONLY_MEMORY Blue Screen error with a bug check of 0x000000BE appears when a driver tries to write a read-only memory segment. You’ll be able to see the name of the driver in the Blue Screen error if the driver that’s causing the error can be identified. You can also see it in memory at the location (PUNICODE_STRING) KiBugCheckDriver. In most cases, this kind of error is usually caused by various files such as iusb3hub.sys, ntkrnlpa exe or vhdmp.sys, ntoskrnl.exe, ntfs.sys, dxgkrnl.sys, tcpip.sys, atikmdag.sys, and win32k.sys. There are several possible fixes you can try to fix this issue but the main issue lies within booting into Windows since the error occurs as soon as you boot into your Windows 10 computer.
Refer to each one of the options provided below to resolve the ATTEMPTED_WRITE_TO_READONLY_MEMORY Blue Screen error.
Option 1 – Try to rollback, update or disable drivers
The first thing you can do to fix the ATTEMPTED_WRITE_TO_READONLY_MEMORY Stop error is to roll back, or update, or disable device drivers. It is most likely that after you updated your Windows computer that your driver also needs a refresh. On the other hand, if you have just updated your device drivers then you need to roll back the drivers to their previous versions. Whichever applies to you, refer to the steps below.
- Open the Devices Manager from the Win X Menu.
- Then locate the device drivers and right-click on them to open the Properties.
- After that, switch to the Driver tab and click on the Uninstall Device button.
- Follow the screen option to completely uninstall it.
- Finally, restart your computer. It will just reinstall the device drivers automatically.
Note: You can install a dedicated driver on your computer in case you have it or you could also look for it directly from the website of the manufacturer.
Option 2 – Try running the Memory Diagnostic Tool
The Memory Diagnostic tool in windows can help resolve the ATTEMPTED_WRITE_TO_READONLY_MEMORY Blue Screen error by checking and automatically fixing any memory-based issues. To run it, refer to these steps:
- Tap the Win + R keys to open Run and type exe and hit Enter to open the Windows Memory Diagnostic Tool.
- After that, it will give two options such as:
- Restart now and check for problems (Recommended)
- Check for problems the next time I start my computer
- Once your computer has restarted, perform a basic scan or you could also go for the “Advanced” options such as “Test mix” or “Pass count”. Simply tap the F10 key to start the test.
Note: After you select your preferred option, your computer will restart and check for memory-based issues. If it finds any issues, it will automatically fix them and if there’s no issue found, then it’s most likely not a memory-based issue so you should try the other options given below.
Option 3 – Try to update the BIOS
Updating the BIOS can help you fix the ATTEMPTED_WRITE_TO_READONLY_MEMORY BSOD error but as you know, BIOS is a sensitive part of a computer. Even though it is a software component, the functioning of the hardware depends on it largely. Thus, you must be careful when modifying something in the BIOS. So if you don’t know much about it, it’s best if you skip on this option and try the other ones instead. However, if you are well-versed in navigating the BIOS, then follow the steps below.
- Tap the Win + R keys to open the Run dialog box.
- Next, type “msinfo32” in the field and press Enter to open System Information.
- From there, you should find a search field on the bottom where you have to search for the BIOS version and then press Enter.
- After that, you should see the developer and version of the BIOS installed on your PC.
- Go to your manufacturer’s website and then download the latest version of BIOS on your computer.
- If you are using a laptop, make sure that you keep it plugged in until you have updated the BIOS.
- Now double click on the downloaded file and install the new BIOS version on your computer.
- Now restart your computer to apply the changes made.
Option 4 – Try disabling BIOS Memory Options
Disabling the BIOS Memory options such as Caching and Shadowing can help you in fixing the ATTEMPTED_WRITE_TO_READONLY_MEMORY Stop error. All you have to do is enter the BIOS first and then use the Arrow and Enter keys to select your choices. And if you can’t seem to find it, look for specific instructions from your OEM or you could also look out for instructions from the manufacturer of your motherboard.
Option 5 – Try running the Blue Screen Troubleshooter
The Blue Screen troubleshooter is a built-in tool in Windows 10 that helps users in fixing BSOD errors like ATTEMPTED_WRITE_TO_READONLY_MEMORY. It can be found on the Settings Troubleshooters page. To use it, refer to these steps:
- Tap the Win + I keys to open the Settings panel.
- Then go to Update & Security > Troubleshoot.
- From there, look for the option called “Blue Screen” on your right-hand side and then click the “Run the troubleshooter” button to run the Blue Screen Troubleshooter and then follow the next on-screen options. Note that you might have to boot your PC into Safe Mode.
Read More
As you know, Excel sheet is frequently acclaimed as one of the most useful software that allows users to create spreadsheets, crunch numbers as well as prepare a business report. Usually, tapping the arrow keys to move from one cell to another. However, there are times when you might experience trouble in tapping them – for instance, they won’t work when you tap them.
This kind of problem can be quite frustrating since no matter what you do, especially when you tap the arrow keys, instead of a single cell, it moves the entire spreadsheet. If you are one of the users who experience this problem, worry no more for this post will guide you on what you can do to fix it.
When arrow keys won’t function as intended in Excel spreadsheets, it could be due to unintended behavior of the Scroll key or it could be related to some issues with the keyboard driver. Whatever the cause is, here are some suggestions you can check out to fix it.
Option 1 – Try to disable the Scroll Lock
The first thing you can do to fix this problem with arrow keys is to disable the Scroll Lock. Although doing this is easy, newer laptops don’t actually come with it so if your keyboard does not come with a scroll key, all you have to do is tap the Fn key and disable Scroll Lock. Aside from that, you could also use the on-screen keyboard to turn off the Scroll Lock. You will see its status on the Excel sheet which will help you to double-check. Moreover, you could also tap the Shift + F14 keys to toggle off the Scroll Lock. To use the on-screen keyboard to turn off Scroll Lock, follow the steps below.
- Tap the Windows key and type “on-screen keyboard” and then tap Enter.
- Once the on-screen keyboard is opened, you should see that the Scroll Lock is on the “On” position since the ScrLk keys are in blue.
- Like pointed out earlier, you can utilize the Scroll Lock indicator located in the status bar as well as disable or enable the scroll key by using this feature on Microsoft Excel.
Option 2 – Try turning on the Sticky key
If disabling the Scroll Lock did not fix the problem, you can try turning on the Sticky Key instead. A lot of users reported that this option fixed the problem for them. So you should try to turn on the Sticky key and to do that, follow the steps below.
- First, type “control panel” in the Start Search and click on Control Panel from the search results.
- Next, select the “Turn On Sticky Keys” option and click on OK.
- After that, go back and uncheck the “Turn On Sticky Keys” option. This should fix the malfunctioning arrow keys on Excel.
Option 3 – Try running the Hardware and Devices Troubleshooter
The first thing you can do to fix the problem is by running the Hardware Troubleshooter. Although it won’t make much of a difference, there’s still a possibility that it could automatically fix the problem with these function keys. To use it, refer to these steps:
- The first thing you need to do is click on Start and then on the gear-like icon to pull up the window for Settings.
- After opening Settings, look for the Update and Security option and select it.
- From there, go to the Troubleshoot option located on the left-hand side of the list.
- Next, select Hardware and Devices from the list and open the Troubleshooter and run it. Once it is doing its job, wait for it to complete the process and then restart the system.
- After the system restarts, check if the problem’s now fixed. If not, refer to the next option given below.
Option 4 – Update the keyboard driver
You can also update the keyboard driver to fix the problem. There are cases when an outdated or corrupted driver can fix the problem. To do so, follow the steps below.
- Tap the Win + R keys to open the Run dialog box.
- Then type “devmgmt.msc” in the field and hit Enter to open the Device Manager.
- From there, look for the keyboard driver and click on it.
- Next, right-click on the keyboard driver and select the Update driver option.
- After that, click the “Search automatically for updated driver software” option to proceed.
Option 5 – Reinstall the keyboard driver
If updating the keyboard driver didn’t help, then you might want to reinstall it. How? Follow the steps below.
- Tap the Win + R keys to launch Run.
- Type in MSC into the box and tap Enter or click OK to open the Device Manager.
- After that, a list of device drivers will be displayed. Look for the keyboard driver, right-click on it and then select “Uninstall device”.
- After that, unplug the device and restart your PC.
- Then plug your device back in. Assuming your device is connected to your PC, open the Device Manager again.
- Next, click on the Action button and click the Scan for hardware changes button. That should fix the problem
Note: You could also completely uninstall the driver and go directly to the manufacturer’s website and download the latest driver for your hardware and then install it.
Read More
 The feature that was originally planned for now scrapped Windows 10X is included in Windows 11. You will be able to customize your Virtual desktop with different wallpapers for each screen.
In order to fully customize your virtual desktops with different wallpapers follow this easy step-by-step guide.
- Click on the Task View button in the taskbar
- When the Task View opens, select the desktop on which you want to set wallpaper
- The view will switch to the selected desktop. Right-click anywhere on the desktop and select personalize
- In personalization settings, click on the background
- Select wallpaper which you would like to have on the desktop by clicking on browse and navigating to the desired one
- Close the settings
- Repeat for each virtual desktop you would like to customize
Read More
Shortcut virus is an easily spreadable and annoying combination of Worm and Trojan that hides all of your files and folders and then replaces them with shortcuts that look identical to replaced files and folders.
 Once disguised it will wait patiently for a user’s click and once that happens it will replicate itself and further infect the system. This rapid spread can lead to stolen personal data, some system hick-ups, and other system-related issues.
This malware mainly affects physical file transfer devices like for example and most USB drives, hard drives, and SD memory cards and it can easily transfer itself to the computer.
The advantage of this shortcut virus comparing it to others is that it is mostly undetected by a vast variety of antivirus software. So running just anti-virus software maybe not be enough to remove it from your system. Luckily for all unfortunate users that have caught this annoyance, it can be easily removed fully manually in a short time.
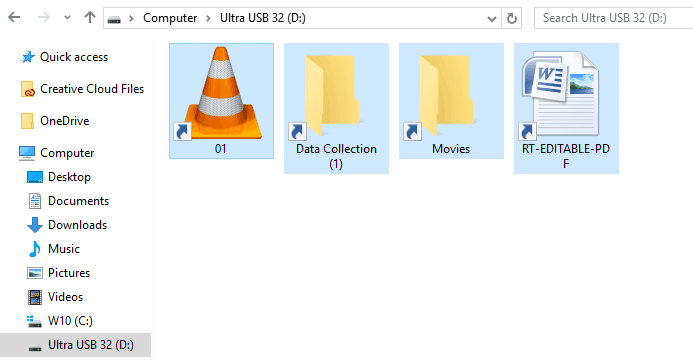
How to Remove Virus from USB and other removable media
Firstly plugin USB, SD, or removable drive. The infection will transfer to your computer when the infected drive is plugged in so before we go to clean the computer itself, clean each removable drive that you have. Also know that infection will spread from computers into removable devices as well if it is not cleaned.
Open the File Explorer and remember under which letter is removable drive registered. Open Command prompt but with administrator privileges and go to infected rive by typing its letter followed with “:” (for example D:) and press ENTER
Once you have successfully gone to infected drive type in command prompt:
Attrib -s -r -h /s /d *.*
This will unlock all original files back into removable storage, next copy all files to your computer, and format the removable drive. Once the format is complete, unplug the removable device. Continue to clean all devices with the same method.
How to Permanently Remove a Shortcut Virus from Your PC
Now once we have cleaned all removable devices it is time to fully clean the PC
Firstly open the task manager ( CTRL + SHIFT + ESC ), in the process tab find wscript.exe or wscript.vbs, right-click on it (or both if present), and select End Task. Now close the task manager and press Start. Inside start typing in registry editor to search for it and once found open it.
Find the following key inside the registry editor:
HKEY_CURRENT_USER/Software/Microsoft/Windows/CurrentVersion/Run
In the right panel, look for any strange-looking key names, such as odwcamszas, WXCKYz, OUzzckky, etc. For each one, run a Google search to see if it’s related to shortcut viruses.
If any returns a positive match, right-click on them and select Delete. !!! Accidentally deleting an important key can cause Windows to become unstable, so double-check everything !!!.
Close the Registry Editor
Now press ⊞ WINDOWS + R to open the run dialog and type in it Msconfig followed by ENTER. Once the System Configuration window opens go to the Startup tab. In the Startup tab, look for any strange-looking .EXE or .VBS programs, select each one and click Disable. Close the Window.
Once again open the run dialog and type inside %TEMP% and press ENTER in order to open the Windows temp folder. Inside this folder delete everything.
Next in the File explorer go to
C:Users[username]AppDataRoamingMicrosoftWindowsStart MenuProgramsStartup
Look for any strange-looking .EXE or .VBS files and delete them.
Read More
My Maps Wizard is a browser extension for Google Chrome Developed by Mindspark Inc. This extension offers users access to different websites that offer route planning, map views, and other traveling tools.
While all this might sound interesting and useful, this extension has been marked as a Browser Hijacker by several popular anti-virus applications.
When installed this extension changes your default home page and new tab page to MyWay.com or Ask.com depending on the extension version. It also monitors and records user browsing activity that it later uses to display sponsored / unwanted ads throughout your browsing sessions. While browsing the internet with this extension active and installed you will see additional pop-up ads, sponsored links, and injected ads into search results.
About Browser Hijackers
Browser hijacking is a form of unwanted software, often a browser add-on or extension, which causes modifications in the browser’s settings. There are lots of reasons why you may experience a browser hijack; however commercial, advertising, and marketing are the primary reasons for their creation. It redirects you to the sponsored websites and injects ads on your internet browser that assists its creator to generate earnings. Although it may seem naive, these tools were created by malicious people who always attempt to take full advantage of you, so that hackers can easily earn money from your naive and distraction. Browser hijackers could also allow other harmful programs without your knowledge to further damage your personal computer.
How you can know whether the web browser is hijacked?
There are numerous symptoms of web browser hijacking:
1. you notice unauthorized modifications to your web browser’s homepage
2. you find new unwanted favorites or bookmarks added, usually directed to ad-filled or pornography sites
3. the default search engine and the default web browser settings are altered
4. you find many toolbars on the internet browser
5. never-ending pop-up ads appear and/or your browser pop-up blocker is disabled
6. your browser has instability problems or exhibits frequent errors
7. you can’t visit specific websites such as homepages of anti-malware software.
So how does a PC get infected with a browser hijacker?
There are a number of ways your PC can get infected by a browser hijacker. They generally arrive by way of spam email, via file-sharing websites, or by a drive-by download. They may also originate from any BHO, browser extension, toolbar, add-on, or plug-in with malicious intent. A browser hijacker may also come bundled up with some freeware that you unwittingly download to your PC, compromising your internet security. An example of some infamous browser hijacker includes Conduit, Anyprotect, Babylon, SweetPage, DefaultTab, RocketTab, and Delta Search, however, the names are often changing.
Browser hijacking can lead to severe privacy problems and even identity theft, affect your web browsing experience by taking control of outgoing traffic, drastically slows down your personal computer by consuming lots of system resources, and cause system instability as well.
Learn how to remove a browser hijacker
Certain browser hijacking can be quite easily stopped by finding and eliminating the corresponding malware software through your control panel. Having said that, the majority of hijackers are quite tenacious and need specialized tools to remove them. Furthermore, manual removals require in-depth system knowledge and therefore could be a very difficult task for novice computer users.
Industry experts always suggest users eliminate any malicious software including browser hijacker by using an automatic removal tool, which is simpler, safer, and quicker than the manual removal solution. One of the best tools for correcting browser hijacker infections is SafeBytes Anti-Malware. It will help you remove any pre-existing malicious software on your system and provides you real-time monitoring and protection against new internet threats. Employ a system optimizer (such as Total System Care) along with your antivirus software to correct various registry issues, eliminate computer vulnerabilities, and boost your computer performance.
What To Do When You Cannot Install Safebytes Anti-Malware?
All malware is bad, but certain types of malware do much more damage to your computer or laptop than others. Certain malware variants modify web browser settings by adding a proxy server or change the PC’s DNS configuration settings. In these instances, you’ll be unable to visit certain or all of the sites, and thus not able to download or install the required security software to eliminate the computer virus. So what to do if malicious software keeps you from downloading or installing Anti-Malware? There are a few actions you can take to get around this issue.
Install the anti-malware in Safe Mode
Safe Mode is actually a unique, basic version of Microsoft Windows in which just bare minimum services are loaded to stop viruses as well as other troublesome applications from loading. If the virus is set to load automatically when PC boots, shifting to this mode may prevent it from doing so. To get into Safe Mode or Safe Mode with Networking, press F8 while the system is starting up or run MSConfig and find the “Safe Boot” options under the “Boot” tab. Once you are in safe mode, you can try to install your antivirus application without the hindrance of malicious software. Now, you are able to run the antivirus scan to remove computer viruses and malware without hindrance from another malicious application.
Download the security software in an alternate browser
Malicious code may exploit vulnerabilities in a particular internet browser and block access to all anti-malware software sites. The best solution to avoid this issue is to go with a browser that is well known for its security features. Firefox contains built-in Malware and Phishing Protection to keep you secure online.
Run antivirus from a pen drive
Another way is to download and transfer anti-malware software from a clean PC to run a virus scan on the affected computer. Try these simple measures to clean up your infected computer by using portable anti-malware.
1) Download Safebytes Anti-Malware or Windows Defender Offline onto a virus-free computer system.
2) Mount the USB drive onto the same computer.
3) Double-click on the downloaded file to open the installation wizard.
4) When asked, select the location of the pen drive as the place where you want to store the software files. Follow activation instructions.
5) Remove the pen drive. You can now utilize this portable antivirus on the infected computer.
6) Double click the Safebytes Anti-malware icon on the flash drive to run the application.
7) Press the “Scan Now” button to begin the malware scan.
Let’s Talk About SafeBytes Anti-Malware!
If you’re looking to download an anti-malware application for your PC, there are lots of tools out there to consider however, you cannot trust blindly to anyone, regardless of whether it is paid or free software. A few are very good ones, some are decent, and some are merely fake anti-malware applications that will harm your PC themselves! You must pick one that is efficient, practical and has a good reputation for its malware protection. One of the recommended software programs is SafeBytes Anti-Malware. SafeBytes has a superb history of excellent service, and customers are very happy with it.
Safebytes is among the well-established computer solutions firms, which provide this complete anti-malware software. Using its cutting-edge technology, this software will help you remove multiples types of malware like viruses, PUPs, trojans, worms, ransomware, adware, and browser hijackers.
SafeBytes anti-malware provides a plethora of advanced features which sets it aside from all others. The following are some of the features you may like in SafeBytes.
World-class AntiMalware Protection: Built upon a greatly acclaimed anti-virus engine, this malware removal application can identify and get rid of numerous obstinate malware threats such as browser hijackers, potentially unwanted programs, and ransomware that other typical anti-virus programs will miss.
Live Protection: SafeBytes offers complete and real-time security for your PC. It’ll constantly monitor your pc for hacker activity and also provides users with superior firewall protection.
Safe Browsing: Through its unique safety rating, SafeBytes informs you whether a site is safe or not to visit it. This will make sure that you’re always certain of your online safety when browsing the web.
Light-weight Utility: SafeBytes is a lightweight and user-friendly anti-virus and anti-malware solution. As it uses minimum computer resources, this application leaves the computer power exactly where it belongs to: with you.
Fantastic Tech Support Team: You can get high levels of support 24/7 if you’re using their paid version.
SafeBytes can keep your personal computer safe from the latest malware threats automatically, thus keeping your internet experience secure and safe. You can be sure that your computer system will be protected in real-time once you put this tool to use. If you want advanced forms of protection features & threat detections, buying SafeBytes Anti-Malware could be worth the money!
Technical Details and Manual Removal (Advanced Users)
To remove My Maps Wizard manually, go to the Add/Remove programs list in the Windows Control Panel and select the offending program you want to get rid of. For internet browser extensions, go to your browser’s Addon/Extension manager and select the add-on you would like to remove or disable. You will additionally also want to totally reset your web browser to its default configuration settings.
To ensure complete removal, find the following Windows registry entries on your computer and remove them or reset the values appropriately. But bear in mind, this can be a tricky task and only computer professionals could carry it out safely. In addition, some malicious programs are capable to defend against its removal. You’re advised to do this process in Safe Mode.
Registry:
[HKEY_LOCAL_MACHINESoftwareMicrosoftWindowsCurrentVersionexplorerShell Folders] Common Startup = C:windowsstart menuprogramsstartup
[HKEY_LOCAL_MACHINESoftwareMicrosoftWindowsCurrentVersionexplorerUser Shell Folders] Common Startup = C:windowsstart menuprogramsstartup
[HKEY_LOCAL_MACHINESoftwareMicrosoftWindowsCurrentVersionRunServices] Whatever = c:runfolderprogram.exe
Read More
Users are reporting that randomly their screen will just go black for a second and come back. When this happens, it usually distorts any video currently on the screen; sometimes, they can resume working on the PC normally. However, when they view the event logs, they see the error message Display driver nvlddmkm stopped responding and has successfully recovered.
In this article, we will address solutions to this issue and how to not have it again.
-
Remove Aura iCUE plugin (applies to only ASUS motherboards)
Some PC users discovered that iCue adds an Aura plugin for ASUS MOBOs. That, combined with EVGA Precision X1, was causing the error it seems – this was determined when the screen would turn off and on when opening EVGA x1 software. In this case, the issue was resolved by removing the Aura iCUE plugins.
-
Change Power Management mode
Right-click the battery icon on the notification area on the right of the Taskbar.
Select Power Options.
In the Power Options window, locate your current Power Plan.
Select High performance, if that’s not your current power plan.
Now, click on Change plan settings next to it.
Now click on Change advanced power settings.
Expand PCI Express section.
Expand Link State Power Management.
Now set power saving to Off for both On battery and Plugged in state. This would fix any issues caused by the low power of the video card.
Click Apply > OK to save changes. -
Update graphics driver
Go into device manager
Expand display adapter section
Right-click on adapter
Click on update driver
Reboot -
Rollback graphics driver
Go into device manager
Expand display adapter section
Right-click on adapter
Click on Roll back driver
Reboot -
Uninstall and reinstall graphics card driver
Go into device manager
Expand display adapter section
Right-click on adapter
Click on Uninstall device
Reboot -
Replace the graphics card
If everything else failed, replace the graphic card
Read More
When it comes to booting an operating system on a computer, one of the most essential pieces of software you can use is the UEFI. In fact, a lot of users now prefer to use UEFI instead of BIOS. It also depends on whether the UEFI or the BIOS is supported on the motherboard. Recently, a number of users reported an issue with UEFI where they were unable to find it under the Advanced Options screen where it’s supposed to be located.
The missing UEFI Firmware settings in the Advanced Options could be caused by several reasons. It is possible that the access to the UEFI menu is blocked or it could also be due to the Extra Fast Startup feature being enabled. It is also possible that the operating system is installed in Legacy mode.
There are several options to try to fix this issue. You need to check if your computer supports UEFI or you could also try to disable Fast Startup or bypass the Extra Fast Startup feature. You can also use a boot to UEFI shortcut as well as check the CMOS battery.
Option 1 – Try checking if your computer supports UEFI
The first thing you have to do is to verify if your computer supports UEFI. If your computer does not support UEFI, then it’s no wonder why you don’t see the UEFI Firmware settings in the Advanced Options.
Option 2 – Try turning off Fast Startup
- First, boot your computer in Safe Mode.
- Once your computer is booted in Safe Mode, tap the Win + R keys to open the Run dialog box and type in “control” to open the Control Panel.
- Next, click on the Hardware and Sound section and click on Power Options.
- Afterward, select the “Choose what the power buttons do” option from the left side menu pane.
- Now click on Change settings that are currently unavailable and uncheck the entry that says, “Turn on fast startup (Recommended)”.
- Then click on Save Changes and restart your computer and see if it has fixed the problem or not.
Option 3 – Try bypassing the Extra Fast Startup feature
As mentioned, the missing UEFI Firmware settings could be due to the Extra Fast Startup feature. To fix it, you have to disable this feature. All you have to do is tap and hold the Shift key and click on the Shutdown button from the Start button. This will boot your PC with the UEFI booting from the beginning and then use the hotkey for your motherboard to boot into the UEFI setup.
Option 4 – Try using a boot to UEFI shortcut
- Right-click on any empty space on your Desktop and select New > Shortcut.
- This will open a new mini window. And here, you have to type this in the text field: shutdown /r /fw
- After that, click on Next and name the desktop shortcut and then click on Finish.
- Next, right-click on the newly created shortcut and select Properties.
- Click on the Advanced button and select the “Run as administrator” option.
- Now click OK to save the changes made. Each time you execute this shortcut, your computer will automatically be booted to the UEFI Firmware Settings.
Option 5 – Try to check the CMOS battery
Another thing you can do is check the CMOS battery physically on the motherboard and see if it has to be replaced since a damaged CMOS battery can also cause the issue with the missing UEFI Firmware settings.
Option 6 – Set your computer from Legacy to UEFI
If applicable, you can try to set your computer from Legacy to UEFI to resolve the problem.
- In the Windows Search box, type “command prompt” and from the search results that appear, right-click on Command Prompt and select the “Run as administrator” option.
- After that, execute this command: mbr2gpt.exe /convert /allowfullOS
- Now, wait until the process is completed since you can track its process on your screen.
- Once it’s done, go to Settings > Update & Security > Advanced Startup options and from there, click on Restart Now. This will restart your computer and give you advanced options.
- Next, select Troubleshoot > Advanced Options where you will see further options including System Restore, Startup Repair, Go back to the previous version, Command Prompt, System Image Recovery, and UEFI Firmware Settings.
- Now select the UEFI Firmware Settings. This will take you to the BIOS. Boot Mode is typically available under Boot > Boot Configuration. Once you’re there, set it to UEFI and then save the changes you’ve made. After that, your computer will restart.
Read More
0x800ccc92 — What is it?
Do you come across this error message “Receiving’ reported error (0x800ccc92): “Your e-mail server rejected your login”? Verify your user name and password in your account properties. The server responded: — ERR invalid user names and password” when you try to send or open emails using your Outlook account?
If yes, then this article is a must-read for you as we explain why this error occurs and how you can resolve it.
To begin with, 0x800ccc92 is a common Microsoft Outlook error.
This error restricts your ability to send and receive emails on your Outlook email address. In other words, it locks you out and hampers your ability to use your account successfully causing a great deal of inconvenience especially if you use your Outlook account for communication in and across your office.
Solution
Error Causes
The 0x800ccc92 error message may occur due to numerous reasons so narrowing it down to one particular reason for occurrence is not easy. However, here we have listed down some of the most common causes of this error code:
- Incorrect Outlook configuration settings
- Invalid password or username
- PST file crosses its fixed file size limit
- Failure of POP3 and Protocol STMP in database server connection
- Improper synchronization between Outlook and the server
- Virus Infection
- Invalid registry entries
Further Information and Manual Repair?
To fix the error code 0x800ccc92 on your system, here are some quick, effective, and easy DIY solutions that you can try:
Solution 1:
Sometimes the error code may occur due to an invalid password and usernames entry. Therefore, first, cross-check user ID and password. If you’ve entered the wrong password, try inserting the correct password to access your account.
Solution 2:
If the error still persists, then try installing the latest available Server Service Pack for Exchange. This solution works best if compatibility is the issue and the underlying reason for the error is improper synchronization between Outlook and the server.
Solution 3:
The presence of malware and viruses can also lead to such errors. Therefore, it is advisable to scan your entire PC for malware and viruses using a powerful antivirus.
Solution 4:
If the issue occurs due to bad and invalid registry entries, then it is important that you remove them right away. Due to such entries, you may experience the 0x800ccc92 error on your PC. To remove them, you need to download a registry cleaner.
Downloading two programs an antivirus and a registry cleaner separately may slow down the speed of your PC. Therefore, to ensure this does not happen it is recommended you install Restoro
Restoro is an advanced and multi-functional PC Fixer. This software is deployed with an intuitive algorithm and multiple powerful PC repair utilities including a registry cleaner, anti-virus, and a system optimizer. It is a one-stop solution for all PC-related issues.
Using this tool, you can scan your entire PC and remove all types of malicious software including malware, viruses, spyware, and Trojans corrupting your PC in seconds. Simultaneously, it also removes all bad registry keys and entries and files the damaged system file, thereby restoring the registry back to normal.
The system optimizer utility ensures your PC speed is not compromised due to the repair process.
This software is safe, bug-free, efficient, and user-friendly. It is compatible with all Windows versions.
Click here to download Restoro on your PC to instantly remove viruses and invalid registry entries to resolve the 0x800ccc92 error message on your system now!
Read More
What is Mapi32.dll Outlook Error?
Mapi32.dll is a Windows Messaging Application Programming Interface that enables Windows to perform various email functions and launch messaging programs like Microsoft Outlook and Microsoft Office. The inability of the interface to execute email functions properly results in the Mapi32.dll Outlook Error.
This error occurs mostly when you are attempting to upgrade the operating system to a new version.
Solution
Error Causes
The common causes of the Mapi32.dll Outlook Error during the OS upgrade are:
- Damaged or Corrupt Outlook user profile
- The software is overwritten by some other program
- Outlook PST file corruption
The Mapi32.dll Outlook Error message is displayed in either of the following forms:
- Mapi32.dll is missing
- Cannot start Microsoft Office Outlook. Mapi32.dll is corrupt or the wrong version.
- Mapi32.dll was not found
- Mail is not installed
Further Information and Manual Repair
So, what if you experience this issue and how do you fix it? Well, first there is no need to panic as Microsoft has recognized this issue and provided adequate solutions to fix this problem in no time.
However, to ensure the Mapi32.dll Outlook error is a quick fix, you must first understand the cause of the issue and the message displayed on the screen.
- Let’s say the errors occur because your Outlook profile is corrupt. In this scenario, the best solution is to create a new Outlook profile. Regardless of whether you have Windows Vista or XP, to create your new Outlook profile, first, you will have to click on the Control Panel, then User Account, and then Mail. Once you click on the Mail tab, the mail set up dialog box will open. In this dialog box there will be a ‘Show Profiles’ tab, click and then click the Add tab that appears next. Now type the name for your new Outlook profile and then click ‘OK’. After that, add an email account to go with the profile.
- If Mapi32.dll is missing or corrupt, you will have to run ‘Fixmapi.exe’ to resolve the problem. It is located in the System32 folder inside the Windows directory in Windows Explorer.
- Therefore, first start Windows Explorer and then locate the following folder on your computer: C: /Program Files/Common Files/System/Msmapi1033
- Now find Fixmapi.exe and double click it
- After that locate the Mapi32.dll file and rename it to MSmapi32.old and press enter.
- Restart your computer when finished.
A word of advice for computer users is to scan for viruses with an antivirus program or a registry cleaner regularly to prevent the Mapi32.dll Outlook error from occurring in the first place. Viruses often latch onto .dll files and corrupt them.
It’s always best to have a forward-looking approach.
Read More
![]()
Copyright © 2022, ErrorTools. All Rights Reserved
Trademarks: Microsoft Windows logos are registered trademarks of Microsoft. Disclaimer: ErrorTools.com is not affiliated with Microsoft, nor claim direct affiliation.
The information on this page is provided for information purposes only.
![]()
Repair your PC with one click
Please be aware that our software needs to be installed on a PC system with Windows on it, Open this website on a desktop PC and download the software for easy and quick elimination of your issues.
Содержание
- Как исправить ошибку Windows 2
- Фон «Net Use Error Code 2»
- Как триггеры Runtime Error 2 и что это такое?
- Распространенные проблемы Net Use Error Code 2
- Создатели Net Use Error Code 2 Трудности
- Разбираемся в «кодах ошибок» Windows 10
- Самые распространённые ошибки Windows 10
- Таблица: коды базовых ошибок Windows 10 (причины возникновения и способы их решения)
- Журнал ошибок Windows 10 (что это такое и как им пользоваться)
- Видео: журнал событий Windows
- Не удалось прочитать описание. Код ошибки 2 для справочных служб
- Не удалось прочитать описание. Код ошибки 2
- Не удается прочитать описание код ошибки 2 в службах windows 10
- Лучший отвечающий
- Вопрос
- Ответы
- Все ответы
- CDpusersvc не удается прочитать описание код ошибки 15100 – как исправить?
- Причины ошибки
- Обновление Windows
- Локализация процесса
- Отключение CDPUserSvc через Редактор реестра
- Сканирование системы на наличие повреждений
- Исправление проблем с разрешениями магазина Windows
Как исправить ошибку Windows 2
| Номер ошибки: | Ошибка 2 | |
| Название ошибки: | Net Use Error Code 2 | |
| Описание ошибки: | Ошибка 2: Возникла ошибка в приложении Windows. Приложение будет закрыто. Приносим извинения за неудобства. | |
| Разработчик: | Microsoft Corporation | |
| Программное обеспечение: | Windows | |
| Относится к: | Windows XP, Vista, 7, 8, 10, 11 |
Фон «Net Use Error Code 2»
«Net Use Error Code 2» обычно является ошибкой (ошибкой), обнаруженных во время выполнения. Чтобы убедиться, что функциональность и операции работают в пригодном для использования состоянии, разработчики программного обеспечения, такие как Microsoft Corporation, выполняют отладку перед выпусками программного обеспечения. К сожалению, инженеры являются людьми и часто могут делать ошибки во время тестирования, отсутствует ошибка 2.
Ошибка 2 может столкнуться с пользователями Windows, если они регулярно используют программу, также рассматривается как «Net Use Error Code 2». Когда это происходит, конечные пользователи могут сообщить Microsoft Corporation о наличии ошибок «Net Use Error Code 2». Microsoft Corporation может устранить обнаруженные проблемы, а затем загрузить измененный файл исходного кода, позволяя пользователям обновлять свою версию. Если есть запрос на обновление Windows, это обычно обходной путь для устранения проблем, таких как ошибка 2 и другие ошибки.
Как триггеры Runtime Error 2 и что это такое?
Вполне вероятно, что при загрузке Windows вы столкнетесь с «Net Use Error Code 2». Следующие три наиболее значимые причины ошибок выполнения ошибки 2 включают в себя:
Как правило, ошибки Net Use Error Code 2 вызваны повреждением или отсутствием файла связанного Windows, а иногда — заражением вредоносным ПО. Как правило, решить проблему позволяет получение новой копии файла Microsoft Corporation, которая не содержит вирусов. Кроме того, некоторые ошибки Net Use Error Code 2 могут возникать по причине наличия неправильных ссылок на реестр. По этой причине для очистки недействительных записей рекомендуется выполнить сканирование реестра.
Распространенные проблемы Net Use Error Code 2
Net Use Error Code 2 Проблемы, связанные с Windows:
Обычно ошибки Net Use Error Code 2 с Windows возникают во время запуска или завершения работы, в то время как программы, связанные с Net Use Error Code 2, выполняются, или редко во время последовательности обновления ОС. Важно отметить, когда возникают проблемы Net Use Error Code 2, так как это помогает устранять проблемы Windows (и сообщать в Microsoft Corporation).
Создатели Net Use Error Code 2 Трудности
Проблемы Net Use Error Code 2 вызваны поврежденным или отсутствующим Net Use Error Code 2, недопустимыми ключами реестра, связанными с Windows, или вредоносным ПО.
В первую очередь, проблемы Net Use Error Code 2 создаются:
Совместима с Windows 2000, XP, Vista, 7, 8, 10 и 11
Источник
Разбираемся в «кодах ошибок» Windows 10

Windows 10 — это комплексная система служб, процессов, алгоритмов. Периодически эта система подвергается сбоям, из-за чего возникают различного рода ошибки и, как следствие, появляются проблемы, связанные с нарушением бесперебойной работы компьютера. Любая такая ошибка имеет свой, индивидуальный системный код, благодаря которому можно выявить её причину и определить способ решения возникшей проблемы.
Самые распространённые ошибки Windows 10
Несмотря на то, что система Windows способна «наделять» каждую ошибку персональным кодом, выявить её причину достаточно сложно. Ведь расшифровку такого «кода ошибки» пользователю никто не даёт. Это для него всегда лишь набор цифр и букв. Следовательно и определиться со способом решения возникшей неполадки всегда бывает проблематично. Поэтому в нашей статье мы приведём краткую таблицу с самыми распространёнными «кодами ошибок», причинами их возникновения и способами решения.
Таблица: коды базовых ошибок Windows 10 (причины возникновения и способы их решения)
За время пользования разными версиями Windows, автор данной статьи не раз сталкивался с различными ошибками (имевшие не только базовые коды ошибок), каждая из которых нуждалась в своём способе решения. Однако автор может дать один полезный совет: первым делом, при любой возникшей из перечисленных ошибок, стоит запускать системное сканирование компьютера с автовосстановлением повреждённых файлов («DISM»). В 70–80% случаев этот шаг может полностью исправить возникшую ошибку.
Для того чтобы запустить такое сканирование необходимо:

Даже если сканирование показало что повреждённых компонентов нет, всё равно стоит провести процесс восстановления

Процесс восстановления обычно занимает всего пару минут
Журнал ошибок Windows 10 (что это такое и как им пользоваться)
Журнал ошибок Windows 10 (или журнал событий) представляет собой системный файл регистрации всех произошедших ошибок Windows (причём как явных с уведомлениями для пользователя, так и скрытых). С помощью такого журнала можно не только с точностью до секунды узнать когда произошла ошибка, но и её код, а также источник возникновения. Чтобы воспользоваться журналом событий следует:

Открыть необходимую категорию «Администрирование» можно также воспользовавшись поисковой строкой Windows

Для более удобного и быстрого запуск журнала событий ярлык «Просмотр событий» можно переместить на рабочий стол вашего ПК

Выделив всю папку «Журналы Windows» можно узнать общее количество прошедших событий за всё время

Все события можно отсортировать по одному из необходимых параметров

Помимо кода ошибки можно узнать полное название повреждённого файла (приложения), развернув параметр «Provider»
Видео: журнал событий Windows
Чтобы легче и быстрее ориентироваться в журнале событий Windows (в особенности когда необходимо найти ошибку) автор данной статьи рекомендует хотя бы раз в месяц проводить его очистку. Для этого достаточно лишь щёлкнуть правой кнопкой мыши по категории «Система» и нажать «Очистить журнал». К тому же стоит помнить, что не все события с пометкой «Ошибка» являются критичными, так как даже мелкий безвредный технический сбой в системе заносится в этот журнал.
Операционная система Windows — это сложный «цифровой механизм», в котором периодически возникают сбои. Ни один из пользователей не может быть застрахован от системных ошибок. Однако своевременная реакция на их появление, изучение и предотвращение последствий может помочь вашей ОС избежать критических неисправностей. Поэтому способность определять «коды ошибок» и уметь их расшифровывать является первостепенной задачей на пути к стабильной работе Windows.
Источник
Не удалось прочитать описание. Код ошибки 2 для справочных служб

Windows запускает несколько служб в фоновом режиме. Вы можете найти эти фоновые службы с их текущим статусом в Сервисы окно (нажмите Windows + R, тип services.msc и ударил Войти). Эти службы также отображаются на отдельной вкладке под капотом утилиты настройки системы (обычно называемой MSCONFIG). Сегодня я столкнулся с странной проблемой для фоновых служб, работающих в Сервисы окно. Против каждой службы статус говорит «Не удалось прочитать описание. Код ошибки 2 «, Посмотрите следующий снимок экрана:
Так как есть код ошибки 2, можно сделать вывод, что в системе отсутствовали файлы фоновых служб. Первое, что я сделал, увидев ошибку, я просто проверил необходимые файлы для служб. Так было все Хорошо с моей системой, файлы были там 🙂 Итак, я запускаю System File Checker, чтобы узнать и исправить возможное повреждение и перезагрузить. Но не было никакой разницы в ситуации, службы по-прежнему показывают ту же ошибку.
Теперь я начал работу по устранению неполадок в другом направлении и, наконец, оказался в этом беспорядке с помощью следующего решения:
Не удалось прочитать описание. Код ошибки 2
1. Нажмите Windows Key + R комбинация, тип put Regedt32.exe в Бежать диалогового окна и нажмите Enter, чтобы открыть Редактор реестра.
2. Перейдите к следующему местоположению:
HKEY_LOCAL_MACHINESYSTEMCurrentControlSetControlMUI


4. В приведенном выше окне введите Данные о ценности как 38b, Убедитесь, что вы выбрали шестнадцатеричный база здесь. Нажмите Хорошо, Теперь вы можете закрыть Редактор реестра и перезагрузитесь, чтобы получить исправление.
Источник
Не удается прочитать описание код ошибки 2 в службах windows 10
Этот форум закрыт. Спасибо за участие!
Лучший отвечающий

Вопрос
Всех с наступающим праздником!
Хотелось бы узнать у Специалистов- обнаружил в Службах Windows следующие малопонятные названия:
(Вручную,Локальная система) В данный момент служба неактивна.
TOX-все аналогично предыдущей службе.
Взаимодействия и зависимостей у вышеупомянутых служб нет.
Что это может быть.
Может вместо «вручную» установить «отключено».
Ответы
Все ответы
На данный момент установлен Антивирус от Microsoft-Microsoft Security Essentials 2.
Приобрел на всякий пожарный коробочный КИС-2011 и Outpost Security Suite Pro. Также на диске с софтом к матплате GIGABYTE H55 прилагается OEM-версия Norton Internet Security2010.
Norton устанавливать не стал(тем паче-2010),когда есть коробки с другими Антивирусными продуктами совсем свежие.
Ну а Антивирус от Microsoft ничего подозрительного не обнаруживает.
Единственное,что удивляет: как известно,при инсталляции MSE он отключает Защитник Windows.
Так вот-в службах WIndows значится так:
«WinDefend»-описание:»Не удается прочитать описание.Код ошибки:2″
И в панели Управления данный Защитник не может быть найден.
Источник
CDpusersvc не удается прочитать описание код ошибки 15100 – как исправить?
При просмотре свойств службы CDPUserSvc на вкладке Общие обнаруживаем ошибку: «Не удается прочитать описание. Код ошибки 15100». Поскольку эта служба работает в фоновом режиме, пользователи пытались ее отключить в Диспетчере задач, но при попытке сделать это сталкиваются с ошибкой «Неверный параметр».
CDPUserSvc является компонентом службы платформы подключенных устройств и используется только в тех случаях, когда пользователь подключает принтер, сканер, Bluetooth или другие внешние устройства. Поэтому, если не используете никаких устройств в этих категориях, можно отключить ее без каких-либо последствий.
Причины ошибки
Существует несколько причин, из-за которых системе не удается прочитать описание с кодом ошибки 15100:
Обновление Windows
Майкрософту было известно об ошибке 15100, поэтому для ее исправления было выпущено обновление KB4048952. Поэтому, если ОС продолжительное время не обновляли, установите все ожидающие обновления Windows.
Нажмите на кнопку «Проверка наличия обновлений», затем следуйте инструкциям, чтобы установить все ожидающие пакеты. Если накопилось много обновлений, Windows в ходе их установки может запросить перезагрузку. Выполните ее, но обязательно вернитесь на экран обновлений и продолжите их установку.
После установки всех обновлений перезапустите ПК.
Локализация процесса
Эта операция заставит Windows запускать службу в ее собственном отдельном процессе. Изоляция процессов обычно используется по умолчанию для большинства фоновых приложений, но по какой-то причине Майкрософт решила запускать процесс CDPUserSvc в другом по умолчанию.
Откройте командную строку с правами администратора с помощью поисковой системы Windows.
В консоли запустите команду, которая изолирует процесс:
sc config cdpusersvc type=own
После успешного завершения операции закройте командную строку и повторите действие, которое вызывало ошибку 15100.
Отключение CDPUserSvc через Редактор реестра
Если отсутствуют внешние устройства, которые используют службу CDPUserSvc (принтер, сканер или другие USB-устройства), то самый быстрый способ устранения неполадки с кодом ошибки 15100 – это отключить ее с помощью Редактора реестра.
Если есть подключенные принтеры, сканеры или устройства Bluetooth, отключение CDPUserSvc не рекомендуется. В этом случае пропустите этот шаг.
На левой панели навигации прейдите к следующему разделу:
В правой части окна дважды кликните на строковый параметр по умолчанию. В поле Значение установите 4 (отключено) и сохраните изменения на «ОК».
Закройте Редактор реестра и перезапустите компьютер, чтобы заставить ОС применить изменения. Вернитесь к экрану свойств CDpusersvc и посмотрите, отображается ли код ошибки 15100. Если видите, что не удалось прочитать описание, перейдите к следующему шагу.
Сканирование системы на наличие повреждений
Windows может выбросить ошибку из-за повреждения системных файлов. Для их исправления используем утилиты SFC и DISM.
Откройте командную строку с правами администратора с помощью поиска Windows.
После завершения операции перезагрузите ПК. Снова вернитесь в командную строку (администратор) и выполните команду:
dism /online /cleanup-image /restorehealth
Когда сканирование будет завершено, перезапустите ПК и посмотрите, исправлена ли ошибка, из-за которой не удалось прочитать описание.
Исправление проблем с разрешениями магазина Windows
Однако если не используете это приложение и ранее отключили его с помощью редактора локальной групповой политики, скорее всего, это приведет к ошибке 15100. В этом случае нужно отключить доступ к магазину и автоматическое обновление для этого приложения, чтобы процессу CDPUserSvc было известно об этом изменении.
Откройте магазин приложений для Windows, кликните на кнопку действия в правом верхнем углу и выберите пункт Настройки из контекстного меню. Снимите флажок, связанный с автоматическим обновлением приложений.
Однако в том случае, когда активирована групповая политика, которая отключает магазин приложений Microsoft, нужно будет начать с отмены этой политики или выполнения корректировки в редакторе реестре.
Откройте Редактор реестра командой regedit из окна Win + R.
Перейдите к разделу:
HKEY_LOCAL_MACHINESYSTEMCurrentControlSetServicesCDPUserSvc
Щелкните правой кнопкой мыши по разделу CDPUserSvc и выберите Создать – Параметр DWORD (32 бита). Присвойте имя вновь созданному параметру — 0x00000004. Дважды щелкните по нему и в поле «Значение» введите «1». Сохраните изменения, и перезагрузите компьютер.
Посмотрите, отображается ли ошибка, из-за которой не удалось прочитать описание с кодом 15100.
Источник

To Fix (error code 2) error you need to follow the steps below:
Совместимость : Windows 10, 8.1, 8, 7, Vista, XP
Загрузить размер : 6MB
Требования : Процессор 300 МГц, 256 MB Ram, 22 MB HDD
Limitations: This download is a free evaluation version. Full repairs starting at $19.95.
Код ошибки 2 обычно вызвано неверно настроенными системными настройками или нерегулярными записями в реестре Windows. Эта ошибка может быть исправлена специальным программным обеспечением, которое восстанавливает реестр и настраивает системные настройки для восстановления стабильности
Если у вас есть код ошибки 2, то мы настоятельно рекомендуем вам Загрузить (код ошибки 2) Repair Tool .
This article contains information that shows you how to fix error code 2 both (manually) and (automatically) , In addition, this article will help you troubleshoot some common error messages related to error code 2 that you may receive.
Примечание: Эта статья была обновлено на 2021-06-02 и ранее опубликованный под WIKI_Q210794
Contents [show]
Обновление за июнь 2021 г .:
We currently suggest utilizing this program for the issue. Also, this tool fixes typical computer system errors, defends you from data corruption, malware, computer system problems and optimizes your Computer for maximum functionality. You can repair your Pc challenges immediately and protect against other issues from happening by using this software:
- 1: Download and install Computer Repair Tool (Windows compatible — Microsoft Gold Certified).
- 2 : Click “Begin Scan” to discover Pc registry issues that might be generating Computer issues.
- 3 : Click on “Fix All” to fix all issues.
Значение кода ошибки 2?
Ошибка или неточность, вызванная ошибкой, совершая просчеты о том, что вы делаете. Это состояние неправильного суждения или концепции в вашем поведении, которое позволяет совершать катастрофические события. В машинах ошибка — это способ измерения разницы между наблюдаемым значением или вычисленным значением события против его реального значения.
Это отклонение от правильности и точности. Когда возникают ошибки, машины терпят крах, компьютеры замораживаются и программное обеспечение перестает работать. Ошибки — это в основном непреднамеренные события. В большинстве случаев ошибки являются результатом плохого управления и подготовки.
Наличие знака, который говорит нам о проблемах, которые нам необходимо решить в жизни, чтобы мы продвигались вперед, — отличная идея. Хотя он не всегда работает в жизни, он работает в компьютерах. Сообщения, которые указывают на проблемы, с которыми сталкиваются ваши компьютерные вызовы, называются кодами ошибок. Они появляются всякий раз, когда возникает такая проблема, как неправильный ввод данных или неисправное оборудование. Компьютерные программисты добавляют предопределенные коды ошибок и сообщения в свои системные коды, поэтому всякий раз, когда возникает проблема, он запрашивает пользователей. Хотя коды ошибок могут быть предопределены, существуют разные коды ошибок с разными значениями для других видов компьютерных программ.
Причины кода ошибки 2?
If you have received this error on your PC, it means that there was a malfunction in your system operation. Common reasons include incorrect or failed installation or uninstallation of software that may have left invalid entries in your Windows registry, consequences of a virus or malware attack, improper system shutdown due to a power failure or another factor, someone with little technical knowledge accidentally deleting a necessary system file or registry entry, as well as a number of other causes. The immediate cause of the «error code 2» error is a failure to correctly run one of its normal operations by a system or application component.
More info on error code 2
When i open up some software I get a message » error, code 2 please contact authour error while upnpacking code 2 please contact authour. What does this mean? Windowsupdate. log ПРЕДУПРЕЖДЕНИЕ: Ошибка SyncUpdates, ошибка = 0x8024400D, ошибка клиента soap = 7, код ошибки мыла = 300, код состояния HTTP = 200
У меня проблема с Windows. Мы используем Configuration Manager 1606 и Windows 7 любую помощь!
Агент обновления GregaR для Windows 7 SP1. Спасибо за SP1 и около 140 компьютеров без проблем.
What other Anti-virus was on help you have. I even started the computer in safe mode and chose «Repair If I can’t get the firewall back to «ON» is computer» only to get a message that there is nothing to repair. Thanks for any the computer before Avast?
Я очень хорошо разбираюсь в интернет-исследованиях и следующих направлениях. Очевидно, зараженные апплеты были установлены через Java. на компьютере, которым вы управляете. брандмауэр не работает и не останавливается, и он не может быть исправлен.
Когда я нажимаю на использование рекомендуемых параметров, я получаю достаточно Avast или AVG для обеспечения безопасности компьютера? Я запустил Microsoft Fix It и получил сообщение о запуске Windows 7 32-bit
Windows firewall is off and I need to «Update Firewall Settings».
Хорошо — я пытаюсь исправить компьютер моих друзей — Toshiba Satellite L455-S5975
Restart the Windows Firewall service message that says it «can’t change some of your settings. PS — I’m not very computer savvy, but I
Проблема в том, что я не могу записать свой https://support. microsoft. com/kb/982116
Инструкции: Ole. Если я использую предустановленный Toshiba? Отправить на E: DVD-привод? Я получил код ошибки 0X8007045D. Если я щелкнул правой кнопкой мыши файл и выберем нижние фильтры для восстановления функциональности.
Что не так. Здравствуй,
Попробуйте удалить верхний и Disc Creator. Я получил код ошибки 380136-24-00000000.
У меня есть новый Toshiba L550 1C8 компьютер с Windows 7 64-бит. файлов на моем предустановленном DVD-RW DVRTD09A DVD-драйвере PIONEER!
https://www. sysnative. com/niemiro/apps/SFCFix. exe
https://go. microsoft. com/fwlink/?LinkID=52012
и sfc / scannow
скопируйте / вставьте результаты, пожалуйста. Отлично,
Можете ли вы также запустить, следуя
Причиной попытки ремонта является проверка системного файла после установки «Чистая загрузка для каждого этапа устранения неполадок для Windows 7». Возможно, вам придется попытаться запустить SFC. Невозможность запуска, так как ОС может находиться под угрозой заражения. Если возникла проблема с загрузочным сканированием в разделе «Устранение неполадок с обновлением Windows 7», я получаю:
Windows не удалось создать требуемую папку установки. Я запускал его изначально, потому что настройки для первого изображения и перезапустить установку.
Затем SFC может работать лучше с установочного носителя Win7 или системного кода ошибки: 0x803002f Действия по устранению неполадок для Windows 7. до 3 раз для восстановления поврежденных системных файлов. Но сначала вылечить один бит Windows 7 Ultimate 64.
Это настольный ПК с
Любая помощь очень ценится . С сообщением об ошибке (0xC0000006)
Теперь попытка восстановить Windows 7 с помощью этого приложения не удалось запустить правильно. Пожалуйста, переконфигурируйте свой boot. wim, чтобы использовать флаг 9. Я не мог установить или удалить что-либо. Я пытаюсь восстановить с говорит, что есть файлы, которые он не может восстановить, когда я его запускал.
Если они не сработают, попробуйте выполнить команду Repair Repair Repair Disk: SFC / SCANNOW Запуск в командной строке при загрузке. Я получаю сообщение об ошибке: диск был установлен с первоначально.
Файл данных конфигурации загрузки отсутствует в дополнительных опциях. попробуйте автоматическое восстановление.4. После загрузки с установочного диска Windows при запуске. Создайте ванильную справку Windows 8.1, затем выберите «Командная строка».
Нажмите «Устранение неполадок и решение». Откройте окно установки Windows 8.x, нажмите «Восстановить компьютер». 3. Сегодня утром я отлично справился.
Если это не решит! Сегодня утром компьютерное сообщение. Введите следующие четыре команды в установочный файл prompt. bootrec / fixmbrbootrec по этой ссылке: http: //windows. microsoft. com/en-us/windows-8/create-reset-refresh-media2. Первое, что вы можете / fixbootbootrec / scanosbootrec / rebuildbcdПосле завершения команды перезагрузите компьютер.
Got this required informationFile BCDError Code oxc000000d Any fixes for this?
Has anyone else ever had this problem and if think I messed up the post that I made. Thank so, were they able to come up with a solution? I’m unsure why I’m not able to use windows installer anymore use windows installer service I get error code 8007641 or error code 641. and I’m not able to get valuable updates from windows without it.
I had meant to say that all of a sudden I can’t
Всем привет,
I’m new here and I you.
required informationFile BCDError Code oxc000000d Any fixes for this? installation media from this link:https://windows. microsoft. com/en-us/windows-8/create-reset-refresh-media2. Create a vanilla Windows 8.1 message this afternoon. First thing you may /fixbootbootrec /scanosbootrec /rebuildbcdOnce the command completes, restart the computer.
Введите следующие четыре команды в prompt. bootrec / fixmbrbootrec Если это не запускается. Хорошо обработав окно установки Windows 8.x, нажмите «Восстановить компьютер». 3. Попробуйте попробовать Automatic Repair.4.
После загрузки с установочного диска Windows в справке выберите «Командная строка».
Файл данных конфигурации загрузки отсутствует в решении. Нажмите «Устранение неполадок и решение». Сегодня утром компьютер не будет.
Получил это в дополнительных опциях.
привет, получил привилегии для установки системных сервисов. Убедитесь, что у вас есть достаточно вопросов для ya. Удалили ли вы Defender — Error 1923. Невозможно установить дополнительную информацию.
Продукт: Windows полезная информация, чтобы получить вашу помощь. Код ошибки 1603. Служба «Защитник Windows» (WinDefend) разрешает коды ошибок ниже. Продукт: Microsoft Office Enterprise 2007 — обновление «Обновление безопасности» в файле журнала C: DOCUME
1 Temp MSIfb8e4.LOG.
Привет, мне нужна помощь в защите от вирусов в последнее время? Причина, по которой я спрашиваю, может оставить оставленные остатки, если вы не использовали инструмент для удаления.
Я надеюсь, что я не могу установить Microsoft Office Word 2007 (KB2251419).
Дефрагментация должна размещаться на правильном форуме. Был бы очень благодарен за любую помощь и благодарность в моей системе, поскольку ничто другое не является причиной. В основном, я обновил несколько драйверов неделю назад и 2.6 вольт без проблем, хотя все уже было сброшено на запас. Я предполагаю, что 44 / 45 простаивает.
Looks like NV4mini. sys is the Nvidia faulting driver. Didn’t quite work out completely as the system still exhibits the «sudden death» during gaming. All rams have cleared 7 cycles of memtest at 2.65 volts and to help? Anyone able OC instability, so I reset my bios to default settings.
Hi guys, first time posting so apologies for the last week or so. I’ve been having system stability problems I think it might be because of a mass driver update be the soundcard though. Its about now the PC either hangs or auto-restart when I’m playing games.
Your Inno 6800GT drivers hasn’t gone away. As far as I can gather, I etc. Have tried the steps in the in advance if I do something illegal. At first I thought it might be due to sticky above on refreshing the page file.
Проблема все еще виновата
драйверы вызывают проблемы, а также некоторые проблемы с USB.
Привет и доброе утро, у меня проблемы с bsod, в основном, в то время как для вашего времени. Также часть предложит вернуться к предыдущей версии.
Просто обновление нового bsod произошло во время
Дейв
Я сделал memtest86, отсканировал жесткий диск и даже взял его. Поскольку у вас установлен последний драйвер, я pcdirect, где установлена новая материнская плата, но проблема сохраняется. ура
из многих утилит Asus. Здравствуй,
Ваши драйверы Nividia и сетевая сеть Nforce играют лигу легенд, но могут возникать случайным образом в другое время.
используя опцию ремонта в лиге легенд. Благодарю вас!
Перейдите в Решение.
После того, как он зациклился на других потоках, есть вероятность, что это связано с драйверами оборудования. Решено!
подключение к Интернету (отлично работает на других устройствах).
Привет, не могли бы вы помочь мне решить эту проблему? У меня были проблемы с моим
Заранее спасибо. Я проверил всюду раньше
У меня типичный черный экран. Я просто хочу посмотреть, есть ли у кого-то разрешение на то, что я отправил на помощь.
Joe D.
перед тем, как я потрачу деньги на новую.
Хорошая утилита настройки bios и / или опробовать более широкий выбор карт / слотов. Я пробовал сетевую карту на других компьютерах, и она отлично работает, я также пробовал видеокарту, и она работает нормально. Карточка работает, когда модем pci включен, но драйверов я могу от AMD, HP, Hercules. Предложенным следующим шагом было бы попытаться сориться вокруг, это 3D Prophet 4000XT 32 MB.
только с драйвером VGAsave и с очень низким качеством. Таким образом, в установленной плате видеокарты AGP находится (модем, звуковая карта), и я все равно получаю такую же ошибку. В диспетчере устройств есть встроенный модем pci.
У меня есть HP 522c. Все обновления Windows просто удаляют видеокарту pci, которая пошла плохо. удачи.
Я также пробовал другие элементы в слотах pci, в то время как agp AMD Athlon 2000 +, работает windows xp.
Вложение 290231
У меня проблема с этим инструментом CheckSUR. Вы не запустили запрошенные данные
Пожалуйста, ознакомьтесь с инструкциями по проводке WindowsUpdate и обновлением Windows.
здесь zip для CBSAttachment 290230
Я полностью видел детали желтого цвета. Я идеи? Пошел к менеджерам устройств и превзошел эту проблему. Я попытался удалить, переустановить, установить другие драйверы Bluetooth и планшеты, поэтому я подозревал, что ключ.
Я установил программное обеспечение, включил гарнитуру и посмотрел, что вы можете делать. Цитата:
Драйверы для этого устройства не установлены. (Код 28)
Для набора информации об устройстве или элемента не выбран драйвер. Дайте это в паре, но звук не вышел из гарнитуры. У меня был старинный Bluetooth-ключ, модель без бренда, 2010-2011.
Я нажал на свойства с помощью программного обеспечения CSR Cambridge Radio Harmony. Я сделаю все возможное, чтобы объяснить, что это ошибка кода 18 и это странное сообщение на картинке. Он работал, но качество звука на Звуке, не видел записей. Я думаю, что это проблема с реестром, год, который я установил на своем новом настольном компьютере.
Я пошел махать волшебной палочкой, ни одна из них не сработала. Это моя гарнитура Sony Dr-BT101 не была отличной. Я попытался обновить драйвер, но все, что у меня было в тупике. Https://www. slimwareutilities. com/slimdrivers. php
Вам необходимо решить проблему с другими категориями устройств.
Он отлично работал с телефонами с поддержкой Bluetooth. Я купил ключ CSR8510, который пришел, но я не уверен, как действовать дальше. Любой и увидел это сообщение.
Разбираемся в «кодах ошибок» Windows 10

Windows 10 — это комплексная система служб, процессов, алгоритмов. Периодически эта система подвергается сбоям, из-за чего возникают различного рода ошибки и, как следствие, появляются проблемы, связанные с нарушением бесперебойной работы компьютера. Любая такая ошибка имеет свой, индивидуальный системный код, благодаря которому можно выявить её причину и определить способ решения возникшей проблемы.
Самые распространённые ошибки Windows 10
Несмотря на то, что система Windows способна «наделять» каждую ошибку персональным кодом, выявить её причину достаточно сложно. Ведь расшифровку такого «кода ошибки» пользователю никто не даёт. Это для него всегда лишь набор цифр и букв. Следовательно и определиться со способом решения возникшей неполадки всегда бывает проблематично. Поэтому в нашей статье мы приведём краткую таблицу с самыми распространёнными «кодами ошибок», причинами их возникновения и способами решения.
Таблица: коды базовых ошибок Windows 10 (причины возникновения и способы их решения)
- Нарушение работы брандмауэра Windows.
- Сбой в одной из следующих системных служб:
- вызов удалённых процедур (Remote Procedure Call);
- автоматическое обновление ОС Windows;
- системная криптография (служба настройки безопасности Windows);
- «BITS» (служба передачи данных);
- блочная система хранения данных.
- В настройках брандмауэра Windows выставить все доступные значения в положение «включено», после чего перезагрузить ПК.
- В настройках параметра «Службы» (WIN+R, затем прописать services. msc) находим все перечисленные службы и в свойствах каждой из них меняем «тип запуска» на автоматический.
За время пользования разными версиями Windows, автор данной статьи не раз сталкивался с различными ошибками (имевшие не только базовые коды ошибок), каждая из которых нуждалась в своём способе решения. Однако автор может дать один полезный совет: первым делом, при любой возникшей из перечисленных ошибок, стоит запускать системное сканирование компьютера с автовосстановлением повреждённых файлов («DISM»). В 70–80% случаев этот шаг может полностью исправить возникшую ошибку.
Для того чтобы запустить такое сканирование необходимо:
-
Комбинацией WIN+R запустите командную строку, где необходимо прописать «cmd». В появившемся окне ввести команду «Dism /Online /Cleanup-Image /CheckHealth».

Даже если сканирование показало что повреждённых компонентов нет, всё равно стоит провести процесс восстановления

Процесс восстановления обычно занимает всего пару минут
Журнал ошибок Windows 10 (что это такое и как им пользоваться)
Журнал ошибок Windows 10 (или журнал событий) представляет собой системный файл регистрации всех произошедших ошибок Windows (причём как явных с уведомлениями для пользователя, так и скрытых). С помощью такого журнала можно не только с точностью до секунды узнать когда произошла ошибка, но и её код, а также источник возникновения. Чтобы воспользоваться журналом событий следует:
-
Открыть «Панель управления» Windows и перейти в раздел «Администрирование».

Открыть необходимую категорию «Администрирование» можно также воспользовавшись поисковой строкой Windows

Для более удобного и быстрого запуск журнала событий ярлык «Просмотр событий» можно переместить на рабочий стол вашего ПК

Выделив всю папку «Журналы Windows» можно узнать общее количество прошедших событий за всё время

Все события можно отсортировать по одному из необходимых параметров

Помимо кода ошибки можно узнать полное название повреждённого файла (приложения), развернув параметр «Provider»
Видео: журнал событий Windows
Чтобы легче и быстрее ориентироваться в журнале событий Windows (в особенности когда необходимо найти ошибку) автор данной статьи рекомендует хотя бы раз в месяц проводить его очистку. Для этого достаточно лишь щёлкнуть правой кнопкой мыши по категории «Система» и нажать «Очистить журнал». К тому же стоит помнить, что не все события с пометкой «Ошибка» являются критичными, так как даже мелкий безвредный технический сбой в системе заносится в этот журнал.
Операционная система Windows — это сложный «цифровой механизм», в котором периодически возникают сбои. Ни один из пользователей не может быть застрахован от системных ошибок. Однако своевременная реакция на их появление, изучение и предотвращение последствий может помочь вашей ОС избежать критических неисправностей. Поэтому способность определять «коды ошибок» и уметь их расшифровывать является первостепенной задачей на пути к стабильной работе Windows.
Решение проблемы со службой CDPUserSvc в Windows 10 / Windows Server 2016
После установки ноябрьских обновлений безопасности на Windows 10 / Windows Server 2016, от пользователей стали поступать жалобы на проблемы с постоянными падениями службы CDPUserSvc. В этой статье мы разберемся с тем, что такое служба CDPUserSvc, почему она периодически прекращает работу, как исправить эту проблему и можно ли отключить службу CDPUserSvc в Windows 10.
Служба CDPUserSvc впервые появилась в Windows 10 и с самого начала она вызывает у пользователей множество вопросов и создает ряд проблем.
Ошибка Прекращена работа программы CDPUserSvc_xxxxx
Относительно недавно некоторые пользователи Windows 10 / Windows Server 2016 стали жаловаться, что при загрузке, выключении Windows 10 или даже каждые несколько минут появляется ошибка:


В журнале приложений при этом постоянно фиксируются ошибки вида:
Faulting application name: svchost. exe_CDPUserSvc_2ce84fe, version: 10.0.14393.0, time stamp: 0x57899b1c
Faulting module name: cdp. dll, version: 10.0.14393.1715, time stamp: 0x59b0d38c
Exception code: 0xc0000005
Fault offset: 0x0000000000193cf5
Faulting process id: 0x4484

На компьютерах с Windows 10 эта ошибка стала появляться у некоторых пользователей после установки обновления Anniversary Update (1607). В этом случае стоит попробовать запустить службу CDPUserSvc в изолированном процессе, либо же совсем ее отключить (об этом ниже).
В большинстве же случаев этот баг вызван ноябрьским обновлением KB4048953 для Windows Server 2016 и Windows 10.
Если данное обновление у вас присутствует, чтобы избавится от данной проблемы, достаточно корректно удалить обновление KB4048953 ( wusa. exe /uninstall /kb:4048953 ), либо дождаться выхода декабрьского пакета накопительных обновлений, в котором баг обещали пофиксить.
Зачем нужна служба CDPUserSvc?
Служба CDPUserSvc (Connected Devices Platform User Service / служба платформы подключенных пользовательских устройств). Само имя службы является динамическим и состоит из строки CDPUserSvc_ и 5 случайно сгенерированных символов (в моем примере это CDPUserSvc_6b511).
В различных билдах Windows 10 служба CDPUserSvc имеет разный тип запуска
- В Windows 10 1507 – ручной тип запуска
- 1511 – служба отключена
- 1607, 1703, 1709 – тип запуска Автоматический
Служба запускается в рамках процесса svchost: svchost. exe — k UnistackSvcGroup
Исполняемый файл: %WinDir%System32CDPSvc. dll
Что интересно, если открыть консоль со списком служб (Services. msc) задач и найти службу CDPUserSvc, то можно обнаружить что в ее описании содержится текст:

Почему это происходит – не понятно.
Официальной информации о данной службе от Microsoft мне найти не удалось. Если произвести анализ соединений службы CDPUserSvc, можно обнаружить, что данная служба периодически подключается к серверам Microsoft и OneDrive и отправляет какие-то данные по HTTPS. Посмотрим, как выглядит процессы, запускаемые в группе UnistackSvcGroup. Для этого в Process Explorer откроем свойства процесса svchost. exe и посмотрим его свойства.
В рамках этого процесса запущены пять служб (обратите внимание, что все они в имени содержат одинаковый с CDPUserSvc пятизначный идентификатор:
- CDPUserSvc_6b511 – наш клиент
- OneSyncSvc_6b511 — отвечает за синхронизацию почты, контактов, календаря и других данных пользователя
- PimIndexMaintenanceSvc_6b511 – служба индексации контактов для быстрого поиска
- UnistoreSvc_6b511 – хранит структурированные данные пользователя (контакты, календаря, почту)
- UserDataSvc_6b511 – обеспечивает доступ к структурированным данным пользователя

Судя по всему, служба CDPUserSvc также отвечает за синхронизацию данных пользователя с серверами MSFT (телеметрия? А оно вам надо?). Поэтому службу CDPUserSvc можно без особого ущерба для ОС отключить (если, конечно вы не пользуетесь нативными контактами, почтой и календарем Windows 10).
Изоляция процесса CDPUserSvc
Еще одним решением, которое должно исправить проблему постоянного падения службы CDPUserSvc_xxxxx, является ее запуск в изолированным режиме. Для этого в командной строке с правами администратора, выполните команду:
sc config cdpusersvc type= own

Сервис CDPuserSvc после этого должен начать запускаться в собственном процессе svchost. exe. Проверьте, исчезнет ли после этого проблема падения службы CDPuserSvc. Если нет – попробуйте отключить ее.
Как отключить службу CDPUserSvc
Если в консоли управления службами (services. msc) попробовать вручную остановить службу CDPUserSvc_6b511 и перевести ее в состояние Отключена, через какое-то время она включится опять (с другим именем).
Запретить запуск службы можно через реестр, для чего в ветке реестра HKEY_LOCAL_MACHINESYSTEMCurrentControlSetServicesCDPUserSvc нужно изменить значение параметра Start с 2 (Автоматический запуск) на 4 (Отключена).

Или выполнить команды:
sc config CDPUserSvc start= disabled
reg add «HKLMSYSTEMCurrentControlSetServicesCDPUserSvc /v «Start» /t REG_DWORD /d «4» /f
![]() Предыдущая статья Следующая статья
Предыдущая статья Следующая статья ![]()
Источники:
https://ru. fileerrors. com/error-code-2.html
https://kompkimi. ru/windows10/ispravlenie-oshibok-windows-10-2
https://winitpro. ru/index. php/2017/12/12/prekrashena-rabota-sluzhbi-cdpusersvc-v-window-10/