New Issue Checklist
- Updated fastlane to the latest version
- I read the Contribution Guidelines
- I read docs.fastlane.tools
- I searched for existing GitHub issues
Issue Description
I’m trying to setup a build pipeline with fastlane where I can build my app and upload it to Crashlytics. My Apple ID isn’t the admin account in the team (I’m a Member). So I try to submit an ad-hoc build, by specifying the following in my FastFile:
gym(scheme: 'MyApp', export_method: 'ad-hoc')
When building, the app is archived just fine but I repeatedly get these errors:
error: exportArchive: No signing certificate «iOS Distribution» found
Error Domain=IDECodesignResolverErrorDomain Code=1 «No signing certificate «iOS Distribution» found» UserInfo={IDEProvisioningError_UserInfoKey_IDEProvisioningErrorPlatform=com.apple.platform.iphoneos, IDEProvisioningError_UserInfoKey_IDEProvisioningErrorAction=5, NSLocalizedRecoverySuggestion=No «iOS Distribution» signing certificate matching team ID «MY TEAM NAME HERE» with a private key was found., IDEProvisioningError_UserInfoKey_IDEProvisioningErrorSpecifier=iOS Distribution, IDEProvisioningError_UserInfoKey_IDEProvisioningErrorTeam=<IDEProvisioningBasicTeam 0x7fa2b8cce270: teamID: MY TEAM NAME ID HERE, teamName: (null)>, NSLocalizedDescription=No signing certificate «iOS Distribution» found}
However, I’ve been able to upload a build to Crashlytics with the same account through their Mac app. So that tells me I can upload builds from my account and it’s just fastlane that’s messing up (and somehow not honouring the ‘ad-hoc’ variable? Just a guess.)
Environment
✅ fastlane environment ✅
Stack
| Key | Value |
|---|---|
| OS | 10.13.1 |
| Ruby | 2.2.4 |
| Bundler? | false |
| Git | git version 2.14.3 |
| Installation Source | ~/.fastlane/bin/bundle/bin/fastlane |
| Host | Mac OS X 10.13.1 (17B1003) |
| Ruby Lib Dir | ~/.fastlane/bin/bundle/lib |
| OpenSSL Version | OpenSSL 1.0.2g 1 Mar 2016 |
| Is contained | true |
| Is homebrew | false |
| Is installed via Fabric.app | false |
| Xcode Path | /Applications/Xcode.app/Contents/Developer/ |
| Xcode Version | 9.0 |
System Locale
| Variable | Value | |
|---|---|---|
| LANG | en_US.UTF-8 | ✅ |
| LC_ALL | en_US.UTF-8 | ✅ |
| LANGUAGE | en_US.UTF-8 | ✅ |
fastlane files:
`./fastlane/Fastfile`
  #
  # Learn more here: https://docs.fastlane.tools/getting-started/ios/beta-deployment/
  #             and: https://docs.fastlane.tools/getting-started/android/beta-deployment/
  #
  lane :beta do |values|
    # Fabric generated this lane for deployment to Crashlytics Beta
    # set 'export_method' to 'ad-hoc' if your Crashlytics Beta distribution uses ad-hoc provisioning
    #get_provisioning_profile
    gym(scheme: 'My APP Name', export_method: 'ad-hoc')

    emails = values[:test_email] ? values[:test_email] : ['email@john.com'] # You can list more emails here
    groups = values[:test_email] ? nil : nil # You can define groups on the web and reference them here

    crashlytics(api_token: 'My Token',
             build_secret: 'My Secret',
                   emails: emails,
                   groups: groups,
                    notes: 'Distributed with fastlane', # Check out the changelog_from_git_commits action
            notifications: true) # Should this distribution notify your testers via email?

    # for all available options run `fastlane action crashlytics`

    # You can notify your team in chat that a beta build has been uploaded
    # slack(
    #   slack_url: "https://hooks.slack.com/services/YOUR/TEAM/INFO"
    #   channel: "beta-releases",
    #   message: "Successfully uploaded a beta release - see it at https://fabric.io/_/beta"
    # )
  end
No Appfile found
fastlane gems
| Gem | Version | Update-Status |
|---|---|---|
| fastlane | 2.68.2 | ✅ Up-To-Date |
Loaded fastlane plugins:
No plugins Loaded
Loaded gems
| Gem | Version |
|---|---|
| CFPropertyList | 2.3.5 |
| activesupport | 4.2.10 |
| addressable | 2.5.1 |
| babosa | 1.0.2 |
| bigdecimal | 1.2.6 |
| bundler | 1.14.6 |
| claide | 1.0.2 |
| cocoapods | 1.3.1 |
| cocoapods-core | 1.3.1 |
| cocoapods-deintegrate | 1.0.1 |
| cocoapods-downloader | 1.1.3 |
| cocoapods-plugins | 1.0.0 |
| cocoapods-search | 1.0.0 |
| cocoapods-stats | 1.0.0 |
| cocoapods-trunk | 1.3.0 |
| cocoapods-try | 1.1.0 |
| colored | 1.2 |
| colored2 | 3.1.2 |
| commander-fastlane | 4.4.5 |
| concurrent-ruby | 1.0.5 |
| declarative | 0.0.10 |
| declarative-option | 0.1.0 |
| domain_name | 0.5.20170404 |
| dotenv | 2.2.0 |
| escape | 0.0.4 |
| excon | 0.55.0 |
| faraday | 0.12.1 |
| faraday-cookie_jar | 0.0.6 |
| faraday_middleware | 0.11.0.1 |
| fastimage | 2.1.0 |
| fourflusher | 2.0.1 |
| fuzzy_match | 2.0.4 |
| gh_inspector | 1.0.3 |
| google-api-client | 0.13.6 |
| googleauth | 0.5.1 |
| highline | 1.7.8 |
| http-cookie | 1.0.3 |
| httpclient | 2.8.3 |
| hurley | 0.2 |
| i18n | 0.9.1 |
| io-console | 0.4.3 |
| json | 1.8.1 |
| jwt | 1.5.6 |
| libxml-ruby | 3.0.0 |
| little-plugger | 1.1.4 |
| logging | 2.2.2 |
| memoist | 0.15.0 |
| mime-types | 3.1 |
| mime-types-data | 3.2016.0521 |
| mini_magick | 4.5.1 |
| minitest | 5.4.3 |
| molinillo | 0.5.7 |
| multi_json | 1.12.1 |
| multi_xml | 0.6.0 |
| multipart-post | 2.0.0 |
| nanaimo | 0.2.3 |
| nap | 1.1.0 |
| netrc | 0.11.0 |
| nokogiri | 1.5.6 |
| os | 0.9.6 |
| plist | 3.2.0 |
| power_assert | 0.2.2 |
| psych | 2.0.8 |
| public_suffix | 2.0.5 |
| rake | 10.4.2 |
| rdoc | 4.2.0 |
| representable | 3.0.4 |
| retriable | 2.1.0 |
| rouge | 1.11.1 |
| ruby-macho | 1.1.0 |
| rubygems-update | 2.5.2 |
| rubyzip | 1.2.1 |
| security | 0.1.3 |
| signet | 0.7.3 |
| slack-notifier | 1.5.1 |
| sqlite3 | 1.3.13 |
| terminal-notifier | 1.7.1 |
| terminal-table | 1.7.3 |
| test-unit | 3.0.8 |
| thread_safe | 0.3.6 |
| tty-screen | 0.6.3 |
| tzinfo | 1.2.4 |
| uber | 0.0.15 |
| unf | 0.1.4 |
| unf_ext | 0.0.7.4 |
| unicode-display_width | 1.1.3 |
| word_wrap | 1.0.0 |
| xcodeproj | 1.5.3 |
| xcpretty | 0.2.6 |
| xcpretty-travis-formatter | 0.0.4 |
generated on: 2017-12-06
Any help is appreciated.
Last time my signing certificate had expired, I regenerated them manually, as described in this old post.
This time I tried to let XCode do it by itself.
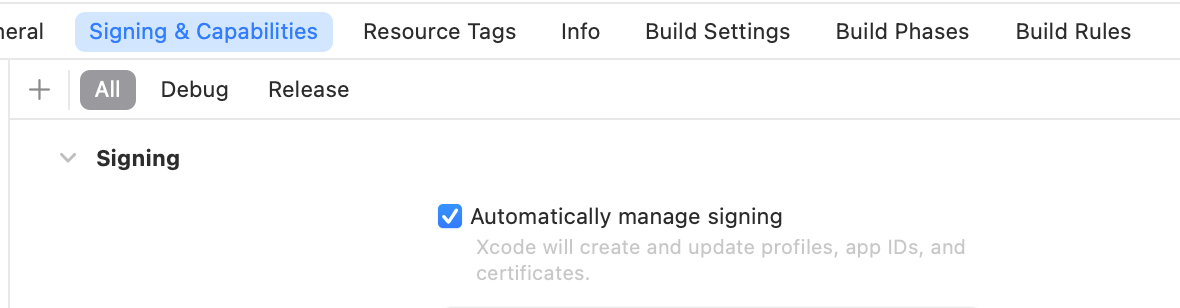
I checked this option. Then it had me sign into my Apple Developer account. After a few seconds of spinning, it successfully created a Signing Certificate. This was so painless, I can hardly believe my eyes!
After running for a bit, compilation failed with this error:
Building a deployable iOS app requires a selected Development Team with a
Provisioning Profile. Please ensure that a Development Team is selected by:
  1- Open the Flutter project's Xcode target with
       open ios/Runner.xcworkspace
  2- Select the 'Runner' project in the navigator then the 'Runner' target
     in the project settings
  3- Make sure a 'Development Team' is selected under Signing & Capabilities > Team.
     You may need to:
         - Log in with your Apple ID in Xcode first
         - Ensure you have a valid unique Bundle ID
         - Register your device with your Apple Developer Account
         - Let Xcode automatically provision a profile for your app
  4- Build or run your project again

For more information, please visit:
  https://flutter.dev/docs/get-started/install/macos#deploy-to-ios-devices

Or run on an iOS simulator without code signing
════════════════════════════════════════════════════════════════════════════════
Encountered error while building for device.
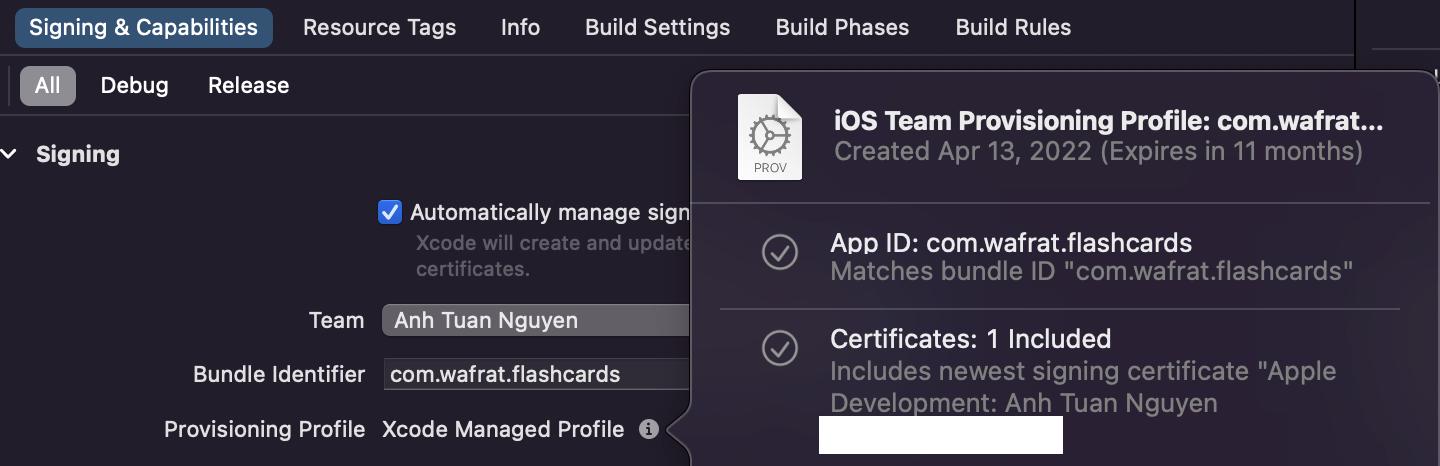
When I opened XCode again, the field Team was indeed marked in red. I opened the dropdown and picked my name and tried again. I compiled the app with flutter build ios --release --no-codesign, then ran Fastlane to publish: FASTLANE_APPLE_APPLICATION_SPECIFIC_PASSWORD=[redacted] fastlane ios beta.
This time the error was:
error: exportArchive: No signing certificate «iOS Distribution» found
When I check in XCode, I can see that the provisioning profile it generated for me does not indeed include an iOS Distribution certificate.
I went over to https://developer.apple.com/account/resources/profiles/list to try and find that Provisioning profile. I thought I could perhaps open it, and manually add a Distribution certificate to it. Unfortunately, the page only contained the expired Provisioning profiles I had created in the past.
I tried to search for «Automatically manage signing» and «Distribution certificate». I ended up on posts that were several years old, and had no luck until I stumbled upon https://docs.flutter.dev/deployment/ios. Their first instruction is to:
Run
flutter build ipato produce a build archive.
When I ran this command, it automatically produced a build specifically for Deployment:
% flutter build ipa
Archiving com.wafrat.flashcards...
Automatically signing iOS for device deployment using specified development team
in Xcode project: [redacted]
Running Xcode build...
 └─Compiling, linking and signing...                        14.9s
Xcode archive done.                                         311.8s
Built [project path]/build/ios/archive/Runner.xcarchive.

Building without sound null safety
For more information see https://dart.dev/null-safety/unsound-null-safety

Building App Store IPA...                                          80.5s
Built IPA to [project folder]/build/ios/ipa.
To upload to the App Store either:
    1. Drag and drop the "build/ios/ipa/*.ipa" bundle into the Apple Transport macOS app
    https://apps.apple.com/us/app/transporter/[redacted]
    2. Run "xcrun altool --upload-app --type ios -f build/ios/ipa/*.ipa --apiKey your_api_key --apiIssuer your_issuer_id".
       See "man altool" for details about how to authenticate with the App Store Connect API key.
This doc also introduces two ways to upload to the App Store. By going onto some Apple webapp, or running a commandline tool. I’d never heard of xcrun before!
After this compiled correctly, I simply re-ran the Fastlane deploy command, and this time it uploaded fine.
[21:17:44]: Successfully exported and compressed dSYM file
[21:17:44]: Successfully exported and signed the ipa file:
[21:17:44]: [project path]/ios/Runner.ipa
[21:17:44]: ----------------------------------
[21:17:44]: --- Step: upload_to_testflight ---
[21:17:44]: ----------------------------------
[21:17:44]: Login to App Store Connect
...
[21:19:59]: Going to upload updated app to App Store Connect
[21:19:59]: This might take a few minutes. Please don't interrupt the script.
[21:21:38]: iTunes Transporter successfully finished its job
[21:21:39]: ------------------------------------------------------------------------------------------------------------------
[21:21:39]: --- Successfully uploaded package to App Store Connect. It might take a few minutes until it's visible online. ---
[21:21:39]: ------------------------------------------------------------------------------------------------------------------
[21:21:39]: Successfully uploaded the new binary to App Store Connect
Even when I come back to XCode and check the Provisioning profile, there’s still only one certificate. So I am not entirely sure how this all worked, especially since my Fastlane script seems to recompile the project:
default_platform(:ios)

platform :ios do
  desc "Push a new beta build to TestFlight"
  lane :beta do
    build_app(workspace: "Runner.xcworkspace", scheme: "Runner")
    upload_to_testflight(
      skip_waiting_for_build_processing: true
    )
  end
end
So how did the flutter build ipa have an effect on it? No clue.
You need to have the private key of the signing certificate in the keychain along with the public key. Have you created the certificate using the same Mac (keychain) ?
Solution #1:
- Revoke the signing certificate (reset) from apple developer portal
- Create the signing certificate again on the same mac (keychain). Then you will have the private key for the signing certificate!
Solution #2:
- Export the signing identities from the origin xCode
- Import the signing on your xCode
Apple documentation: https://developer.apple.com/library/content/documentation/IDEs/Conceptual/AppDistributionGuide/MaintainingCertificates/MaintainingCertificates.html
I had the same issue and I have gone through all these solutions given, but none of them worked for me. But then I realised my stupid mistake. I forgot to change Code signing identity to iOS Distribution from iOS Developer, under build settings tab. Please make sure you have selected ‘iOS Distribution’ there.
Tags:
Ios
Provisioning Profile
Ipa
Ios Provisioning
Mobileprovision
Related
Nov
22
2016
With Unity Cloud Build service, you can create iOS apps, without ever needing Macintosh+XCode!
First steps
– Register as an Apple Developer : https://developer.apple.com/programs/enroll/
– Join Unity Cloud Build (if you haven’t already) : https://unity3d.com/services/cloud-build
– Follow cloud build instructions there, its quite simple to setup iOS project
(but you’ll need to have the project at source control somewhere, for example github.com, bitbucket.com)
Creating .CSR file in Windows (Certificate Signing Request)
– Download openssl binary : https://indy.fulgan.com/SSL/ (i used this version )
– Unzip it
– Open Command Prompt on that folder *Note: Must run command prompt as an Administrator!
– Enter following command> openssl genrsa -out mykey.key 2048
– Download missing openssl.cfg file from this page https://docs.oracle.com/cd/E19509-01/820-3503/ggeyz/index.html and place it to the same folder with openssl (with filename openssl.cnf)
– Enter following command> set OPENSSL_CONF=c:YourOpensslFolderopenssl.cnf
– Enter following command> openssl req -new -key mykey.key -out CertificateSigningRequest.certSigningRequest -subj “/emailAddress=yourAddress@example.com, CN=YourName, C=US”
– Now you can upload the generated “CertificateSigningRequest.certSigningRequest” file into Apple Developer site (when creating the Production Certificate in next step)
Setting Up Apple Developer Licenses
– Login into Apple Developer Account
– Create App ID (make it wildcard, so you can use it for many apps) https://developer.apple.com/account/resources/identifiers/list
– Go to “Certificates, Identifiers & Profiles” https://developer.apple.com/account/resources/certificates/list
– Create Distribution certificate (“iOS Distribution (App Store and Ad Hoc)”, cloud build says so)
– Upload signing certificate (its the file you created in earlier steps here)
– Download it (ios_distribution.cer)
Creating .p12 file in Windows
– Download your “ios_distribution.cer” from previous step (and copy it into your openssl folder)
– Open command prompt (NOTE run as administrator)
– Enter following command> openssl x509 -in ios_distribution.cer -inform DER -out developer_identity.pem -outform PEM
– (Uses the mykey.key we created in CRS creation)
– Enter following command> openssl pkcs12 -export -inkey mykey.key -in developer_identity.pem -out iphone_dev.p12
– enter password (write it down, as you will need it later) *Note: if you paste the password in from notepad, it might not work(?)
Creating .mobileProvision file
– Register a New Provisioning Profile at https://developer.apple.com/account/resources/profiles/list
– Select Adhoc, continue
– Select AppID (select your wildcard id from there), continue
– Select certificate from list (should be todays date), continue
– Select devices (all, you need to have them added first in devices place), continue
– Set “Provisioning Profile Name”
– Click Generate
– Click Download “yourfile.mobileprovision”
Building .ipa with Unity cloud build
– Go to unity cloud build: https://unity3d.com/services/cloud-build
– Create new IOS Project (just follow the instructions on the site, its quite simple)
– And when it asks for the Mobile Prov File and .p12 files, you now have them!
– Then hit Build and download your .ipa file
Copying .ipa to iOS Device
– Note this is not tested on 2022.. since there is no itunes access to pad anymore either? (but you can use those generated cert files in Unity Cloud build)
– Install iTunes
– Connect ios device to your pc
– Click […] and select Apps (shows all available apps on this machine, not from the ipad)
– Remove your old app from the list (if its there), right click, delete
– Then drag and drop the cloud build .ipa file here (cannot drag and drop it directly to the ipad)
– Then click [] Ipad icon to view your ipad
– Click Apps (in left panel)
– Scroll down to see your .ipa app listed there
– Click Install (or Update) button *it changes to Will Install or Will Update
– Click Apply button at the bottom
– Done! You can now run the app on ipad
*Note: First you need to authorize and sync the ipad to this machine
—
References:
https://unity3d.com/learn/tutorials/topics/cloud-build/your-first-cloud-build-project
http://help.adobe.com/en_US/as3/iphone/WS144092a96ffef7cc-371badff126abc17b1f-7fff.html
http://help.adobe.com/en_US/as3/iphone/WS144092a96ffef7cc-371badff126abc17b1f-8000.html
https://www.tbs-certificates.co.uk/FAQ/en/openssl-windows.html
http://docs.telerik.com/platform/appbuilder/cordova/code-signing-your-app/configuring-code-signing-for-ios-apps/create-distribution-certificate
Errors:
“Failed to update credentials! The provisioning profile and .p12 file are not compatible (certificates did not match)!”
Generate your keys again, probably used wrong file or wrong password in some step..