![]()
Following the instructions on the SparkFun Apollo3 SDK page leads me to the following failure on image upload to the device:
Header Size =  0x80
original app_size  0x461c ( 17948 )
load_address  0xc000 ( 49152 )
app_size  0x461c ( 17948 )
w0 = 0xcb00469c
Security Value  0x10
w2 =  0x10008080
addrWord =  0xc000
versionKeyWord =  0x0
child0/feature =  0xffffffff
child1 =  0xffffffff
crc =   0xf79d8bc
Writing to file  bin/main_nonsecure_ota.bin
../../../../../tools/apollo3_scripts/create_cust_wireupdate_blob.py --load-address 0x20000 --bin bin/main_nonsecure_ota.bin -i 6 -o bin/main_nonsecure_wire --options 0x1
Header Size =  0x60
app_size  0x469c ( 18076 )
Writing to file  bin/main_nonsecure_wire.bin
Image from  0x0  to  0x469c  will be loaded at 0x20000
../../../bsp/tools/uart_wired_update_sparkfun.py -b 921600 /dev/ttyUSB0 -r 1 -f bin/main_nonsecure_wire.bin -i 6
Connecting with Corvette over serial port /dev/ttyUSB0...
Sending Hello.
No response for command 0x00000000
received bytes  48
['0x86', '0xd5', '0xa4', '0x80', '0x5', '0x83', '0x80', '0xd0', '0x84', '0x82', '0x80', '0x87', '0x80', '0x81', '0x80', '0xff', '0x5c', '0xf5', '0xff', '0x35', '0x80', '0x20', '0x80', '0x83', '0xf4', '0xb2', '0xff', '0xff', '0xff', '0xff', '0xff', '0xff', '0xff', '0xff', '0xff', '0xff', '0xff', '0xff', '0xff', '0xff', '0xff', '0xff', '0xff', '0xff', '0xff', '0xff', '0xff', '0xff']
Traceback (most recent call last):
  File "../../../bsp/tools/uart_wired_update_sparkfun.py", line 341, in <module>
    main()
  File "../../../bsp/tools/uart_wired_update_sparkfun.py", line 42, in main
    connect_device(ser)
  File "../../../bsp/tools/uart_wired_update_sparkfun.py", line 61, in connect_device
    response = send_command(hello, 88, ser)
  File "../../../bsp/tools/uart_wired_update_sparkfun.py", line 238, in send_command
    raise NoResponseError
__main__.NoResponseError
make: *** [Makefile:195: bootload] Error 1
This is after a long pause at the Sending Hello message. Prior to doing a global sed -i -e 's/115200/921600/g' on all of the files, I was getting:
Connecting with Corvette over serial port /dev/ttyUSB0...
Sending Hello.
No response for command 0x00000000
Traceback (most recent call last):
  File "../../../bsp/tools/uart_wired_update_sparkfun.py", line 341, in <module>
    main()
  File "../../../bsp/tools/uart_wired_update_sparkfun.py", line 42, in main
    connect_device(ser)
  File "../../../bsp/tools/uart_wired_update_sparkfun.py", line 61, in connect_device
    response = send_command(hello, 88, ser)
  File "../../../bsp/tools/uart_wired_update_sparkfun.py", line 238, in send_command
    raise NoResponseError
__main__.NoResponseError
![]()
karma0
changed the title
Not receiving Hello (0x00000000)
Not receiving Hello (0x00000000) response
Apr 15, 2019
![]()
I actually ran into this issue, too, with Google’s code lab and Sparkfuns. I’ve been able to install the pre-compiled examples, but nothing custom.
![]()
This failed me from two different computers with two different Edge boards. I’m running on Arch Linux on both machines. The only other commonality between these setups is that I’m using the same FTDI board.
Additionally, following the instructions here yield the same result: https://codelabs.developers.google.com/codelabs/sparkfun-tensorflow/#5
According to the troubleshooting section on the next page of the codelabs instructions, this is happening because I need to follow the «hold down the button marked 14 while running the script. Hold down button 14, hit the RST button, then run the script, while holding the button marked 14 the whole time.»
Just to confirm: this is exactly what I’m doing.
![]()
karma0
changed the title
Not receiving Hello (0x00000000) response
Sending Hello. No response for command 0x00000000
Apr 15, 2019
![]()
@PaulTR there are no pre-compiled examples. The script tries to install bin/main_nonsecure_wire.bin on the device, and that is where this is failing. That file doesn’t exist in the repository unless you build it using make bootload.
![]()
Hi @karma0, @PaulTR,
@karma0 — since you’re using a unix-like OS I wanted to double check that you’ve seen this: https://stackoverflow.com/questions/55463159/sparkfun-edge-bootloader-problems
Additionally I have found that if the executing code has a lot of serial communication that it can cause the bootloader to miss the initial reset request. To avoid this problem my upload sequence is:
- press and hold button 14
- press and release reset
- start the uploader script (automatically toggles reset again)
- let go of button 14
- press reset again (gets the board into application mode)
Here’s a simplified makefile that I wrote to simply upload a bin, and avoid any compilation (requires a binary file to upload)
SDKPATH	=# note: you need to fill this absolute path out for your system.
BOARDPATH = ${SDKPATH}/boards/SparkFun_Edge_BSP#if this doesn't match your system please modify it
COM_PORT =#this too
BAUD_RATE = 921600#note: 921600 for Edge boards from SparkFun, 115200 for Edge boards received at the TensorFlow dev summit

BINUPLOADTARGET=SparkFun_Edge_Project_Template.bin

all: binupload
binupload:
	${SDKPATH}/tools/apollo3_scripts/create_cust_image_blob.py --bin $(BINUPLOADTARGET) --load-address 0xC000 --magic-num 0xCB -o main_nonsecure_ota --version 0x0
	${SDKPATH}/tools/apollo3_scripts/create_cust_wireupdate_blob.py --load-address 0x20000 --bin main_nonsecure_ota.bin -i 6 -o main_nonsecure_wire --options 0x1
	${BOARDPATH}/bsp/tools/uart_wired_update_sparkfun.py -b 921600 $(COM_PORT) -r 1 -f main_nonsecure_wire.bin -i 6
And here’s a binary to try with it:
SparkFun Edge Project Template Binary
Please let me know how this turns out for you — we’d like to be able to solve this problem for everyone else too. And thank you a lot for taking the time to report this to us!
![]()
I had the same problem and changed the Makefile to correct the baud rate that is by default 115200 but is set too high at 921600 in the Makefile:
../../../bsp/tools/uart_wired_update_sparkfun.py -b 921600 $(SERIAL_PORT) -r 1 -f $(CONFIG)/main_nonsecure_wire.bin -i 6
to:
../../../bsp/tools/uart_wired_update_sparkfun.py -b 115200 $(SERIAL_PORT) -r 1 -f $(CONFIG)/main_nonsecure_wire.bin -i 6
![]()
Thanks for the help! Here’s the output, seems identical:
make
AmbiqSuite-Rel2.0.0/tools/apollo3_scripts/create_cust_image_blob.py --bin SparkFun_Edge_Project_Template.bin --load-address 0xC000 --magic-num 0xCB -o main_nonsecure_ota --version 0x0
Header Size =  0x80
original app_size  0x26dc ( 9948 )
load_address  0xc000 ( 49152 )
app_size  0x26dc ( 9948 )
w0 = 0xcb00275c
Security Value  0x10
w2 =  0x10008080
addrWord =  0xc000
versionKeyWord =  0x0
child0/feature =  0xffffffff
child1 =  0xffffffff
crc =   0xe53594b1
Writing to file  main_nonsecure_ota.bin
AmbiqSuite-Rel2.0.0/tools/apollo3_scripts/create_cust_wireupdate_blob.py --load-address 0x20000 --bin main_nonsecure_ota.bin -i 6 -o main_nonsecure_wire --options 0x1
Header Size =  0x60
app_size  0x275c ( 10076 )
Writing to file  main_nonsecure_wire.bin
Image from  0x0  to  0x275c  will be loaded at 0x20000
AmbiqSuite-Rel2.0.0/boards/SparkFun_Edge_BSP/bsp/tools/uart_wired_update_sparkfun.py -b 921600 /dev/ttyUSB0 -r 1 -f main_nonsecure_wire.bin -i 6
Connecting with Corvette over serial port /dev/ttyUSB0...
Sending Hello.
No response for command 0x00000000
received bytes  48
['0x82', '0xc5', '0xac', '0x80', '0x5', '0x83', '0x80', '0xd0', '0x84', '0x82', '0x80', '0x83', '0x80', '0x81', '0x80', '0xff', '0x5c', '0xf1', '0xff', '0x15', '0x80', '0x0', '0x80', '0x83', '0xf4', '0xaa', '0xff', '0xff', '0xff', '0xff', '0xff', '0xff', '0xff', '0xff', '0xff', '0xff', '0xff', '0xff', '0xff', '0xff', '0xff', '0xff', '0xff', '0xff', '0xff', '0xff', '0xff', '0xff']
Traceback (most recent call last):
  File "AmbiqSuite-Rel2.0.0/boards/SparkFun_Edge_BSP/bsp/tools/uart_wired_update_sparkfun.py", line 341, in <module>
    main()
  File "AmbiqSuite-Rel2.0.0/boards/SparkFun_Edge_BSP/bsp/tools/uart_wired_update_sparkfun.py", line 42, in main
    connect_device(ser)
  File "AmbiqSuite-Rel2.0.0/boards/SparkFun_Edge_BSP/bsp/tools/uart_wired_update_sparkfun.py", line 61, in connect_device
    response = send_command(hello, 88, ser)
  File "AmbiqSuite-Rel2.0.0/boards/SparkFun_Edge_BSP/bsp/tools/uart_wired_update_sparkfun.py", line 238, in send_command
    raise NoResponseError
__main__.NoResponseError
make: *** [Makefile:12: binupload] Error 1
![]()
@genivia-inc thanks for the feedback. That is also something that I’ve tried. Running uart_wired_update_sparkfun.py by hand and passing the correct baud rate yields the 48 bytes response (and occasionally 11 bytes) no matter which bin file I try.
![]()
I just ran that modified makefile to get some example output that you can target… I notice that after ‘Sending Hello’ I get ‘Received Response’ and ‘length = 0x58’ where in your output we’re seeing ‘received bytes 48’
That mismatch in length makes me think that the UART communication is off — either by using the incorrect baud setting ( but you’ve tried both 115200 and 921600 if I recall correctly ) or the USB-serial bridge is misbehaving (possibly due to the same kind of driver issues as in the Stack Overflow post?).
Can you verify the accuracy of your UART output from the FTDI converter?
(p.s. the above makefile text is in MakeUpload.mk in the same directory as SparkFun_Edge_Project_Template.bin)
$ make -f MakeUpload.mk
C:/Users/owen.lyke/AppData/Roaming/AmbiqSDK/AmbiqSuite-Rel2.0.0/tools/apollo3_scripts/create_cust_image_blob.py --bin SparkFun_Edge_Project_Template.bin --load-address 0xC000 --magic-num 0xCB -o main_nonsecure_ota --version 0x0
Header Size =  0x80original app_size  0x26dc ( 9948 )load_address  0xc000 ( 49152 )app_size  0x26dc ( 9948 )
w0 = 0xcb00275c
Security Value  0x10
w2 =  0x10008080
addrWord =  0xc000
versionKeyWord =  0x0
child0/feature =  0xffffffff
child1 =  0xffffffff
crc =   0xe53594b1
Writing to file  main_nonsecure_ota.bin
C:/Users/owen.lyke/AppData/Roaming/AmbiqSDK/AmbiqSuite-Rel2.0.0/tools/apollo3_scripts/create_cust_wireupdate_blob.py --load-address 0x20000 --bin
main_nonsecure_ota.bin -i 6 -o main_nonsecure_wire --options 0x1
Header Size =  0x60
app_size  0x275c ( 10076 )
Writing to file  main_nonsecure_wire.bin
Image from  0x0  to  0x275c  will be loaded at 0x20000
C:/Users/owen.lyke/AppData/Roaming/AmbiqSDK/AmbiqSuite-Rel2.0.0/boards/SparkFun_Edge_BSP/bsp/tools/uart_wired_update_sparkfun.py -b 921600 COM4 -r 1 -f main_nonsecure_wire.bin -i 6
Connecting with Corvette over serial port COM4...
Sending Hello.
Received response for Hello
Received Status
length =  0x58
version =  0x3
Max Storage =  0x4ffa0
Status =  0x2
State =  0x7
AMInfo =
0x1
0xff2da3ff
0x55fff
0x1
0x49f40003
0xffffffff
0xffffffff
0xffffffff
0xffffffff
0xffffffff
0xffffffff
0xffffffff
0xffffffff
0xffffffff
0xffffffff
0xffffffff
Sending OTA Descriptor =  0xfe000
Sending Update Command.
number of updates needed =  1
Sending block of size  0x27bc  from  0x0  to  0x27bc
Sending Data Packet of length  8180
Sending Data Packet of length  1992
Sending Reset Command.
Done.
![]()
FIXED!
Following the suspicion that there may be driver issues with Arch Linux, I was able to find some other people having similar issues with the Linux kernel built-in drivers with various knock-off Arduinos coming from China. That eventually led me to this project that overrides the Linux ch34x drivers and based on the vendor’s drivers (which doesn’t compile against kernels beyond 3.13.x … Arch is currently at 5.0.7!!)
That being said, if you are getting the 48 bytes response, it’s probably safe to say that the ch341 drivers are outdated and you need to find an alternative for your platform/distribution.
Thanks for the help! I’ll leave it up to you if you want to close out this issue or leave it open for others to post their solutions.
![]()
Thanks karma0! This will be very helpful for many folks.
![]()
![]()
All, just got my new SparkFun Edge, trying to build and flash test program, build is OK, but flashing failed.
I’m using Ubuntu 19.10. I’ve followed this link https://learn.sparkfun.com/tutorials/how-to-install-ch340-drivers/all#linux
So CH341 driver issue is not a problem, after plugin the USB serial to my PC, dmesg shows:
[66495.174916] usb 1-1.2: new full-speed USB device number 23 using ehci-pci
[66495.284880] usb 1-1.2: New USB device found, idVendor=1a86, idProduct=7523, bcdDevice= 2.64
[66495.284885] usb 1-1.2: New USB device strings: Mfr=0, Product=2, SerialNumber=0
[66495.284888] usb 1-1.2: Product: USB Serial
[66495.285859] ch34x 1-1.2:1.0: ch34x converter detected
[66495.287652] usb 1-1.2: ch34x converter now attached to ttyUSB3
Following this step, https://learn.sparkfun.com/tutorials/using-sparkfun-edge-board-with-ambiq-apollo3-sdk/, I tried to flash Code to Board
$ make bootload
../../../../../tools/apollo3_scripts/create_cust_image_blob.py —bin bin/example1_edge_test.bin —load-address 0xC000 —magic-num 0xCB -o bin/main_nonsecure_ota —version 0x0
Header Size = 0x80
original app_size 0x4a98 ( 19096 )
load_address 0xc000 ( 49152 )
app_size 0x4a98 ( 19096 )
w0 = 0xcb004b18
Security Value 0x10
w2 = 0x10008080
addrWord = 0xc000
versionKeyWord = 0x0
child0/feature = 0xffffffff
child1 = 0xffffffff
crc = 0xbf984a8b
Writing to file bin/main_nonsecure_ota.bin
../../../../../tools/apollo3_scripts/create_cust_wireupdate_blob.py —load-address 0x20000 —bin bin/main_nonsecure_ota.bin -i 6 -o bin/main_nonsecure_wire —options 0x1
Header Size = 0x60
app_size 0x4b18 ( 19224 )
Writing to file bin/main_nonsecure_wire.bin
Image from 0x0 to 0x4b18 will be loaded at 0x20000
../../../bsp/tools/uart_wired_update_sparkfun.py -b 921600 /dev/ttyUSB3 -r 1 -f bin/main_nonsecure_wire.bin -i 6
Connecting with Corvette over serial port /dev/ttyUSB3…
Sending Hello.
No response for command 0x00000000
Traceback (most recent call last):
File «../../../bsp/tools/uart_wired_update_sparkfun.py», line 343, in
main()
File «../../../bsp/tools/uart_wired_update_sparkfun.py», line 44, in main
connect_device(ser)
File «../../../bsp/tools/uart_wired_update_sparkfun.py», line 63, in connect_device
response = send_command(hello, 88, ser)
File «../../../bsp/tools/uart_wired_update_sparkfun.py», line 240, in send_command
raise NoResponseError
main.NoResponseError
make: *** [Makefile:197: bootload] Error 1
During TLS handshake, client machine makes a request to IIS server by sending Client Hello package. Then the server responds it with Server Hello.
If the server is not sending Server Hello package, the communication won’t be established and the customer is likely to see error messages below:
Internet Explorer:
This page can’t be displayed
Turn on TLS 1.0, TLS 1.1, and TLS 1.2 in Advanced settings and try connecting to again

Chrome:
This site can’t provide a secure connection
The website sent an invalid response
ERR_SSL_PROTOCOL_ERROR

Solution
Keep in mind that the TLS protocol errors above might be misleading. However, you should start the troubleshooting by analyzing TLS negotiation first.
Here are the steps to go through:
- Make sure the website binding in IIS for 443 port has a certificate attached
- Make sure all TLS versions are enabled in Internet Explorer (This is for testing. You can later disable the unsecure versions)
- Check SCHANNEL registry keys to make sure what you set in Internet Explorer is applied at registry level
HKEY_LOCAL_MACHINESYSTEMCurrentControlSetControlSecurityProvidersSCHANNELProtocols - Collect a network trace. Check if the client and server are agreeing on a cipher suite. If they are not, make sure the client’s cipher suite list matches with the server’s list. Related Group Policy setting:
Computer Configuration > Administrative Templates > Network > SSL Configuration Settings > SSL Cipher Suite Order - If the issue sill exists, look for any network device (proxy, firewall, load balancer etc.) in between that might be intercepting or blocking TLS traffic
If you don’t see any issue with TLS protocol and network devices, continue the troubleshooting by focusing on the web server:
- Check the website binding in IIS. The certificate should be valid
- Make sure the port 443 is being listened (netstat -an -p TCP | find /I «listening»)
- Change the port number to 444 and test. If it is accessible, it means there is a software blocking 443 port
- Disable Windows Firewall (If it works, you can enable it back and set up rules accordingly)
- Look for any third-party applications in the server such as Symantec Endpoint Security and Symantec Data Center Security Server Agent (Security Server Agent uses port 443). Uninstall them (Don’t just disable them. Uninstall them completely. If it works, you can install them back and configure them accordingly)
- Check if there is any Microsoft software that is using port 443. Applications like SQL Server Reporting Services (SSRS) and Windows Admin Center might interfere the port 443.
![]()
-
#26
Где скачать последнюю версию софта под UFI Dongle?

-
#27
Redmi note 9 pro ошибка прошивки
Firmware package: joyeuse_id_global_images_V11.0.1.0.QJZIDXM_20200416.0000.00_10.0_global
Scanning for Qualcomm HS-USB QDLoader 9008 device…
Download Port: Qualcomm HS-USB QDLoader 9008 (COM22)
Connection status: EHCI:HUB:HUB[#5]:USB 2.10 High-Speed
USB Driver: [Qualcomm Incorporated] qcusbser, version: 2.1.2.2, date: 3-25-2016
Initializing…
MSM Serial number: 0x8434cf3e
MSM HW ID: 0x001490e1 , OEM ID: 0x0072 (Xiaomi), MODEL ID: 0x0000
OEM Public Key Hash: 1bebe3863a6781db4b01086063007334de9e5ca14971c7c4f4358ec9d79cda4692ce5e948c6fd409408f4c919fcadfe3
Comm error 997: Протекает наложенное событие ввода/вывода
Comm error 997: Протекает наложенное событие ввода/вывода
Error: failed on sending HELLO response!
Disconnect USB cable, battery and try again!
![]()
-
#28
100лет не пользовался уфи. народ подскажите , снимутся ли кредиты при identify через едл? перед прошивкой хотелось бы глянуть определяется ли нормально флешка. аппарат redmi8. заранее спасибо


-
#29
У них вообще есть кастомная Xiaomi-авторизация? Через дырявые лоадеры, как у EFM и z3x_eMMC_Tool.
Пробовал подсовывать лоадеры из сети, все равно авторизацию просит. Раньше вроде работало.


-
#30
Все у кого есть такого вида ошибка обновляйте донгл, дело в том что обновленя лежат где угодно, только не на поддержке
-

5 КБ
Просмотры: 55

Последнее редактирование: 7/12/21


-
#31
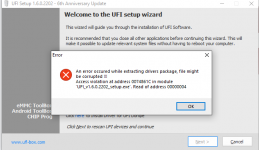
Ошибка при установке. Уже хз где искать проблему.
И как обновить донгл?
-
22,8 КБ
Просмотры: 36
-
#32
Ошибка при установке. Уже хз где искать проблему.
И как обновить донгл?
Попробуйте этот инсталлятор.У меня установился нормально
купить чтобы получить доступ к скрытому контенту.
-
#33
Попробуйте этот инсталлятор.У меня установился нормально
купить чтобы получить доступ к скрытому контенту.
Так эта она и есть…


-
#34
Промелькнуло…
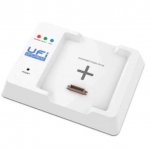
UFI UFS TOOL BOX PROGRAM ORIGINAL
SOCKET UFI UFS PROGRAM ORIGINAL
UFI — UFS ToolBox
Features:
Works as an add-on interface paired with UFI-BOX
USB 3.1 Gen1 SuperSpeed(5 Gpbs)
Supported protocol upto UFS 2.2
Supported upto PWM Gear 4 and High-Speed Gear 3 x 1Lane
High-Speed data access upto 120 MBps read and 80 MBps write
Access (R/W) to UFS registers (flags, attributes, descriptors) including provisioning
Access (R/W) to UFS Luns and Rpmb partition
Come with user-friendly software for a better understanding of UFS technology
Packed with special features used to repair smart-phones
Package includes:
1 x UFS ToolBox
1 x UFS 2in1 Socket Adapter ( BGA254, BGA153)
1 x UFS ISP
1 x USB Data Cable
Coming Soon
Dont Ask Prices From Us It Will Be Release 22-23 January 2022
Once In Stock We Will Post with Prices
Thankyou For Being With Us!
-
12,5 КБ
Просмотры: 34 -
8,7 КБ
Просмотры: 34 -
7,1 КБ
Просмотры: 35


-
#35
цена 279$. это дополнительная приблуда..без самого бокса бесполезна.

-
#36
в новом обнове добавили изменение размера загрузочных разделов для eMMC Micron. Кто пробовал отпишитесь?
![]()
-
#37
Всем привет! Вопрос к тем у кого есть данный девайс. Подскажите, есть ли там в софте нечто подобное eMMC File Manager от z3x?
-
#38
Есть. С небольшими различиями. Но функционал тот же.

![]()
-
#39
Доброго дня. UFI UFS TOOL активировал кто после событий февраля? Что-то не активируется он.
-
#40
Доброго дня. UFI UFS TOOL активировал кто после событий февраля? Что-то не активируется он.
А саму колодку то купили UFS?
![]()
-
#41
А саму колодку то купили UFS?
Ну ест-но, как же ошибку активации получать без неё. Там на самом деле 2 проблемы. Нет активации и нет обновления FW. Кнопки активны, после нажатия есть прогресс и саксесс в конце. Но после перезагрузки оболочки всё сначала.
На официальном форуме есть жалобы на этот счёт, в тч от русского пользователя. Но сказано что последняя оболочка решает проблему активации. Писали про смену языка ОС на английский там.
![]()
-
#42
Ну ест-но, как же ошибку активации получать без неё. Там на самом деле 2 проблемы. Нет активации и нет обновления FW. Кнопки активны, после нажатия есть прогресс и саксесс в конце. Но после перезагрузки оболочки всё сначала.
На официальном форуме есть жалобы на этот счёт, в тч от русского пользователя. Но сказано что последняя оболочка решает проблему активации. Писали про смену языка ОС на английский
Доброго, удалось активировать у Вас? Если да, то как.
![]()
-
#43
Доброго, удалось активировать у Вас? Если да, то как.
Всем добра! В общем активировал я свой бокс следующим образом. 1. Устанавливаем АНГЛИЙСКУЮ виндовс. 2. Устанавливаем софт и драйвера программатора. 3. Активируем.
![]()
-
#44
Здравствуйте, форумцы. Есть вопрос касаемо работы с файловой системой при просмотре раздела, к примеру, userdata. К примеру, мне необходимо сохранить все фотки с камеры на пк , т.е. media→0→dcim→camera. И здесь появляется вопрос — как сохранить сразу все содержимое только этой папки? Поштучно прожимать пкм-save to по файлу не удобно и очень долго, а других методов не нашел) поэтому тем, кто имеет опыт работы с программой, помогите)
Hello, I am new to this arduino stuff. I’m doing a school project that requires a wifi module (Nodemcu Esp8266). The code has been compiled and i have a problem flashing it to Esp8266. It keeps saying «Error: failed sending 0xC0» and «Error: espcomm_upload_mem failed».
I tried changing to different usb cables, shorting the ground and D3 and pressing the flash and reset button but still it wouldnt work. The Led on my Esp8266 also does not blinks when it plugged in to the pc, maybe i do not know how to put the Esp8266 into flashing mode.
Really appreciated if you could help me!
Arduino: 1.8.9 (Windows Store 1.8.21.0) (Windows 10), Board: «NodeMCU 1.0 (ESP-12E Module), 80 MHz, 4M (1M SPIFFS), v2 Prebuilt (MSS=536), Disabled, None, 115200»
Sketch uses 298427 bytes (28%) of program storage space. Maximum is 1044464 bytes.
Global variables use 36716 bytes (44%) of dynamic memory, leaving 45204 bytes for local variables. Maximum is 81920 bytes.
error: failed sending 0xC0
error: failed sending 8 bytes
error: failed sending 36 bytes
error: failed sending 0xC0
error: failed sending 0xC0
error: failed sending 8 bytes
error: failed sending 36 bytes
error: failed sending 0xC0
error: failed sending 0xC0
error: failed sending 8 bytes
error: failed sending 36 bytes
error: failed sending 0xC0
error: failed sending 0xC0
error: failed sending 8 bytes
error: failed sending 36 bytes
error: failed sending 0xC0
error: failed sending 0xC0
error: failed sending 0xC0
error: failed sending 8 bytes
error: failed sending 36 bytes
error: failed sending 0xC0
error: failed sending 0xC0
error: failed sending 8 bytes
error: failed sending 36 bytes
error: failed sending 0xC0
error: failed sending 0xC0
error: failed sending 8 bytes
error: failed sending 36 bytes
error: failed sending 0xC0
error: failed sending 0xC0
error: failed sending 8 bytes
error: failed sending 36 bytes
error: failed sending 0xC0
error: failed sending 0xC0
error: failed sending 8 bytes
error: failed sending 36 bytes
error: failed sending 0xC0
warning: espcomm_sync failed
error: espcomm_open failed
error: espcomm_upload_mem failed
Edit: [SOLVED] if anyone having this problem, try changing the COM to COM6 at the device manager under Silicon Labs and Arduino IDE.
Thanks to this link