I found this link here link and actual author is marc.
Since you followed the guide and have installed CDT.
When CDT launches, it tries to set a breakpoint at main, so it will interrupt execution when your program starts. However, your target is already running so the breakpoint cannot be set and the whole things fails.
You could simply tell your launch not to set that breakpoint and let it connect to your target.
Go to: Run->Debug Configurations… and find your launch configuration. Then select the Startup subtab, scroll down and uncheck «Set breakpoint at» in the «Runtime options» subsection.
****It may be also related to OS you are using since this is an issue with inferior execution.**** and thus a patch may be needed.But before doing anything try above.It may solve your issue.
Also removing the «target» command from the .gdbinit file may help as the eclipse plugin already issues this command.
If nothing works you may look for changing debugger because at last its a gdb compilation problem.
My answer is purely based on r&d.
Содержание
- MCU on Eclipse
- Everything on Eclipse, Microcontrollers and Software
- Workaround for “Error in final launch sequence: Cannot execute this command without a live selected thread.”
- Workaround
- Summary
- Share this:
- Like this:
- Related
- About Erich Styger
- 7 thoughts on “ Workaround for “Error in final launch sequence: Cannot execute this command without a live selected thread.” ”
- What do you think? Cancel reply
- Error in final launch sequence failed to execute mi command
- Breadcrumbs
- Error in final launch sequence failed to execute mi command
- Breadcrumbs
MCU on Eclipse
Everything on Eclipse, Microcontrollers and Software

Workaround for “Error in final launch sequence: Cannot execute this command without a live selected thread.”
Recently I have been running into the following error message in Eclipse when I started the GDB debugger:
Error in Final Launch Sequence
Error in Final Launch Sequence
The error details do not show much more:
It does not happen all the time, but it happens often with the Segger J-Link GDB server. It does not happen for ‘small’ programs (say less than 50 KByte). But it happens more often for larger programs (say > 100 KByte of FLASH).
I have enabled GDB Traces (see “Board Bring-Up Tips, GDB Logs and Traces in Eclipse” how to enable GDB Traces) to get more information about the problem:
Googling around, it seems that GDB throws this message if GDB receives a command, but has not initialized properly yet. So to me it seems that GDB is still busy with doing things after the download, and then it receives a command (in my case the ‘continue’ command), and is not ready yet.
The problem is that with that error message above, I have to restart the download/flashing again.
Workaround
I have not found a solution, but found at least a workaround. Because there seems to be a race condition with the download and the ‘continue’ execution, I have disabled the ‘continue’ in the GNU ARM Eclipse/GDB launch configuration:
Disabled Continue in Launch Configuration
That way, GDB is not instructed to do a ‘continue’ after the download. So it will stay on the reset vector/startup. Then I simply do a ‘continue’ in the debugger UI. I searched for a ‘wait for x ms’ function in the GDB command list, but have not found anything suitable for this situation. That would have been another workaround: say wait 500 ms after the download until executing the ‘continue’ command .
Thanks to John (see comments) there is an even better solution: The Segger GDB server accepts a timeout command, e.g. to wait 500 ms:
That way, the problem was solved for me too :-).
Summary
There seems to be a timing problem between the GDB server and client. As a workaround I do not configure GDB to continue execution after downloading.
Like this:
About Erich Styger
7 thoughts on “ Workaround for “Error in final launch sequence: Cannot execute this command without a live selected thread.” ”
According to the J-Link User Guide, the following GDB command should deliver a 500ms pause when using the J-Link GDB server:
monitor sleep 500
Regardless of the GDB server in use, the following GDB command would deliver a 1 second pause on a Windows host:
shell timeout /nobreak /t 1
and the equivalent command on a Linux host would be:
Hi John,
incredible! I was looking for something like this for a long time, but somehow missed that monitor command. It works perfectly with the Segger J-Link :-).
The other approach with the GDB command did not work:
392,279 &”shell timeout /nobreak /t 5n”
392,295 &”timeout /nobreak /t 5 exited with status 1n”
But the Segger monitor command works, so I’m good for now, and I have updated the article.
Many thanks again for sharing that idea,
Erich
I have noticed another issue along similar lines that you had seen here when using J-link with an older project from KDS 3.0.0 opened in KDS 3.2.0.
I have a project in KDS 3.0.0 that uses KSDK 1.2 along with processor expert. That project I have been using a FRDM-K64F via the 10-pin ribbon to my target using PE micro tools. All that works fine. Target is a K64FX512M12.
I opened that same project in KDS 3.2.0 and I am trying to use a J-link plus with that project. ( KDS 3.2.0 I have done a KSDK 1.2 update.). However, I get similar sort of error window that pops up that you had encountered:
Error in final launch sequence
Failed to execute MI command:
-exec-run
Error message from debugger back end:
Don’t know how to run. Try “help target”.
Don’t know how to run. Try “help target”.
I tried using the J-link with a demo project from the KSDK 2.1 examples and j-link and debugger worked flawlessly. I compared the two launch files (between demo project and my older project) and there is not really much difference other than project information. For fun I made them the same (using file comparison) with only project name differences and still get the same error above in my original project.
Seems like my last resort here is to create a new project and move things over from the old project, but wondering if anyone else has experienced this sort of problem or if there is a better way? We have several older projects we wish to move and I don’t like the idea of rebuilding each project from scratch. Maybe this is another possible blog item in terms of long term project management or migration upgrade strategies when using Freescale/NXP tool chains (especially what to avoid).
Erich, your blog is indispensable for us out here in the wild. Thank you!
Hi Mike,
it sounds that the J-Link is trying to connect to a target it does not know. Are you sure the ‘Device name’ in the Segger debugger launch settings is correct?
Other than that, if you can, you might send me your ‘working’ and ‘not working’ .launch files to the email address listed on the About page of this blog, and I try to spot the problem.
Erich
PS: Thanks, and I’m in the wild too 🙂
Hi Mike,
on another thought: it is possible to copy a working launch configuration into any project, see the basic steps in https://mcuoneclipse.com/2017/02/18/tips-for-making-copy-of-eclipse-cdt-projects-easier/
I hope this helps,
Erich
In STM32 workbench I have been getting the error.
“Cannot insert hardware breakpoint 1.nCould not insert hardware breakpoints:nYou may have requested too many hardware breakpoints/watchpoints.”
Have you tried removing some of your breakpoints? Depending on your STM32 device used, you only have 3 or 4 hardware breakpoints. Other than that, I suggest using a SEGGER J-Link as this comes with ‘unlimited’ flash breakpoints feature.
What do you think? Cancel reply
This site uses Akismet to reduce spam. Learn how your comment data is processed.
Источник
Error in final launch sequence failed to execute mi command
Community
Participate
Eclipse IDE
Home » Language IDEs » C / C++ IDE (CDT) » Error in final launch sequence Failed to execute MI command (When trying to flash program on to a particular MCU we are facing this issue.)
| Error in final launch sequence Failed to execute MI command [message #1084318] | Sun, 11 August 2013 10:04  |
|||||||||||||||||||||||||||||||||||||||||||||||||||||||||||
|
||||||||||||||||||||||||||||||||||||||||||||||||||||||||||||
| Hello i am very new to eclipse. Currently using code sourcery as IDE to develop C/C++ applications.We are able to build the application successfully.But when we try to flash the program on to MCU the below error is displayed.
Error in final launch sequence Источник Error in final launch sequence failed to execute mi commandCommunity Participate Eclipse IDE BreadcrumbsHome » Language IDEs » C / C++ IDE (CDT) » Failure to execute MI command during Debug — Helios
|
 Karunakar Reddy
 Vishesh Garg
Recently I have been running into the following error message in Eclipse when I started the GDB debugger:
Error in Final Launch Sequence
The error details do not show much more:
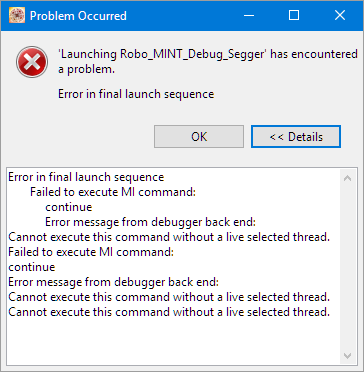
 Error in final launch sequence
 Failed to execute MI command:
 continue
 Error message from debugger back end:
 Cannot execute this command without a live selected thread.
 Failed to execute MI command:
 continue
 Error message from debugger back end:
 Cannot execute this command without a live selected thread.
 Cannot execute this command without a live selected thread.
It does not happen all the time, but it happens often with the Segger J-Link GDB server. It does not happen for ‘small’ programs (say less than 50 KByte). But it happens more often for larger programs (say > 100 KByte of FLASH).
I have enabled GDB Traces (see “Board Bring-Up Tips, GDB Logs and Traces in Eclipse” how to enable GDB Traces) to get more information about the problem:
688,887 (gdb)
688,888 &"flushregn"
688,888 ~"Register cache flushed.n"
688,888 45^done
688,888 (gdb)
688,888 &"continuen"
688,888 ~"Continuing.n"
688,888 &"Cannot execute this command without a live selected thread.n"
688,888 46^error,msg="Cannot execute this command without a live selected thread."
688,888 (gdb)
688,889 47-gdb-exit
688,898 47^exit
688,906 =thread-group-exited,id="i1"
Googling around, it seems that GDB throws this message if GDB receives a command, but has not initialized properly yet. So to me it seems that GDB is still busy with doing things after the download, and then it receives a command (in my case the ‘continue’ command), and is not ready yet.
The problem is that with that error message above, I have to restart the download/flashing again.
I have not found a solution, but found at least a workaround. Because there seems to be a race condition with the download and the ‘continue’ execution, I have disabled the ‘continue’ in the GNU ARM Eclipse/GDB launch configuration:

Disabled Continue in Launch Configuration
That way, GDB is not instructed to do a ‘continue’ after the download. So it will stay on the reset vector/startup. Then I simply do a ‘continue’ in the debugger UI. I searched for a ‘wait for x ms’ function in the GDB command list, but have not found anything suitable for this situation. That would have been another workaround: say wait 500 ms after the download until executing the ‘continue’ command.
Thanks to John (see comments) there is an even better solution: The Segger GDB server accepts a timeout command, e.g. to wait 500 ms:
monitor sleep 500

monitor-sleep-500
That way, the problem was solved for me too :-).
Summary
There seems to be a timing problem between the GDB server and client. As a workaround I do not configure GDB to continue execution after downloading.
Happy Continuing 🙂
Вот как происходит запуск ST-LINK_gdbserver
Atollic TrueSTUDIO gdbserver for ST-Link.  Version 1.7.0 Pro
Copyright 2010-2012, Atollic AB.


Starting server with the following options:
        Persistant Mode            : Enabled
        LogFile Name               : debug.log
        Logging Level              : 31
        Listen Port Number         : 61234
        Status Refresh Delay       : 15s
        Verbose Mode               : Disabled
        SWD Debug                  : Enabled

Connecting to the ST-Link Debugger... OK
Waiting for debugger connection...
В общем эксперимент показал что такую ошибку выдает даже если не запускать ST-LINK_gdbserver вообще. Тоесть он его не видит или отладка вылетает еще до попытки связи с ним.
Попробовал в настройках debug выбрать Standart GDB Hardware Debugging Launcher, по умолчанию было GDB (DSF) Hardware Debugging Launcher.
Теперь с ST-LINK_gdbserver связывается но тот сразу закрывает соединение.
Error while waiting for debugger connection.
Shutting down...
Debugger connection lost.
Shutting down...
Изменено 8 февраля, 2013 пользователем flopix
System Workbench for STM32
Connect to custom board STM32L053 — STLINK-V2 — SWD
![]()
Posted by SyUm75
on 2015-05-04 17:13
Hi ST world,
I have issues connecting to a STM32L053 using openstm32.
The connection configuration is: STLINK-V2 // SWD
I’ve created a project with appropriate parameters and tried many configuration for the debug configuration (changing Mi protocol)
But I only could get this error at debug session start (stopping at 93 %):
””“”“”“””
Error in final launch sequence
Failed to execute MI command:
load C:projectsmicropos_proto1Debugmicropos_proto1.elf
Error message from debugger back end:
Error erasing flash with vFlashErase packet
Error erasing flash with vFlashErase packet
””“”“”“””
What did I do wrong ? Any ideas ?
For note, it’s possible to connect to my board using STLINK32 utility and flash/verify of the binary I want to debug was succesful.
Thanks and regards,
Sylvain
In case the ‘start the J-Link GDB server locally is not checked, and if there is no GDB server running, there is a there is a strange error message:
Error in final launch sequence
Failed to execute MI command:
-target-select remote localhost:2331
Error message from debugger back end:
localhost:2331: The system tried to join a drive to a directory on a joined drive.
Failed to execute MI command:
-target-select remote localhost:2331
Error message from debugger back end:
localhost:2331: The system tried to join a drive to a directory on a joined drive.
localhost:2331: The system tried to join a drive to a directory on a joined drive.
That message shows up at least on Windows (7 in my case).
Would be good if the error message could be improved, otherwise users have no clue what is the problem.
Something like «cannot connect to GDB server. Check that the GDB server is running or enable starting the GDB server locally in the debug configuration».
See https://mcuoneclipse.com/2016/04/13/fix-for-gdb-and-the-system-tried-to-join-a-drive-to-a-directory-on-a-joined-drive/
1 2 3 4 5 6 7 8 9 10 11 12 13 14 15 16 17 18 19 20 21 22 23 24 25 26 27 28 29 30 31 32 33 34 35 36 37 38 39 40 41 42 43 44 45 46 47 48 49 50 51 52 53 54 55 56 57 58 59 60 61 62 63 64 65 66 67 68 69 70 71 72 73 74 75 76 77 78 79 80 81 82 83 84 85 86 87 88 89 90 91 92 93 94 95 96 97 98 99 100 101 102 103 104 105 106 107 108 109 110 111 112 113 114 115 116 117 118 119 120 121 122 123 124 125 126 127 128 129 130 131 132 133 134 135 136 137 138 139 140 141 142 143 144 145 146 147 148 149 150 151 152 153 154 155 156 157 158 159 160 161 162 163 164 165 166 167 168 169 170 171 172 173 174 175 176 177 178 179 180 181 182 183 184 185 186 187 188 189 190 191 192 193 194 195 196 197 198 199 200 201 202 203 204 205 206 207 208 209 210 211 212 213 214 215 216 217 218 219 |
/* USER CODE BEGIN Header */ /** ****************************************************************************** * @file : main.c * @brief : Main program body ****************************************************************************** * @attention * * Copyright (c) 2022 STMicroelectronics. * All rights reserved. * * This software is licensed under terms that can be found in the LICENSE file * in the root directory of this software component. * If no LICENSE file comes with this software, it is provided AS-IS. * ****************************************************************************** */ /* USER CODE END Header */ /* Includes ------------------------------------------------------------------*/ #include "main.h" /* Private includes ----------------------------------------------------------*/ /* USER CODE BEGIN Includes */ /* USER CODE END Includes */ /* Private typedef -----------------------------------------------------------*/ /* USER CODE BEGIN PTD */ /* USER CODE END PTD */ /* Private define ------------------------------------------------------------*/ /* USER CODE BEGIN PD */ /* USER CODE END PD */ /* Private macro -------------------------------------------------------------*/ /* USER CODE BEGIN PM */ /* USER CODE END PM */ /* Private variables ---------------------------------------------------------*/ /* USER CODE BEGIN PV */ /* USER CODE END PV */ /* Private function prototypes -----------------------------------------------*/ void SystemClock_Config(void); static void MX_GPIO_Init(void); /* USER CODE BEGIN PFP */ /* USER CODE END PFP */ /* Private user code ---------------------------------------------------------*/ /* USER CODE BEGIN 0 */ /* USER CODE END 0 */ /** * @brief The application entry point. * @retval int */ int main(void) { /* USER CODE BEGIN 1 */ /* USER CODE END 1 */ /* MCU Configuration--------------------------------------------------------*/ /* Reset of all peripherals, Initializes the Flash interface and the Systick. */ HAL_Init(); /* USER CODE BEGIN Init */ /* USER CODE END Init */ /* Configure the system clock */ SystemClock_Config(); /* USER CODE BEGIN SysInit */ /* USER CODE END SysInit */ /* Initialize all configured peripherals */ MX_GPIO_Init(); /* USER CODE BEGIN 2 */ uint8_t k=0; uint16_t idata[] = {0x1111, 0x2222, 0x3333, 0x4444, 0x5555, 0x6666, 0x7777, 0x8888, 0x9999}; uint32_t address = 0x08004000; HAL_FLASH_Unlock(); HAL_Delay(1); FLASH_Erase_Sector(FLASH_SECTOR_1,FLASH_VOLTAGE_RANGE_3); HAL_Delay(1); for(uint8_t i=0; i< 9; i++) { HAL_FLASH_Program(FLASH_TYPEPROGRAM_HALFWORD, address, idata[i]); HAL_Delay(1); address = address + 2; } HAL_Delay(1); HAL_FLASH_Lock(); /* USER CODE END 2 */ /* Infinite loop */ /* USER CODE BEGIN WHILE */ while (1) { HAL_GPIO_WritePin(GPIOC, GPIO_PIN_13, k=~k); HAL_Delay(300); /* USER CODE END WHILE */ /* USER CODE BEGIN 3 */ } /* USER CODE END 3 */ } /** * @brief System Clock Configuration * @retval None */ void SystemClock_Config(void) { RCC_OscInitTypeDef RCC_OscInitStruct = {0}; RCC_ClkInitTypeDef RCC_ClkInitStruct = {0}; /** Configure the main internal regulator output voltage */ __HAL_RCC_PWR_CLK_ENABLE(); __HAL_PWR_VOLTAGESCALING_CONFIG(PWR_REGULATOR_VOLTAGE_SCALE1); /** Initializes the RCC Oscillators according to the specified parameters * in the RCC_OscInitTypeDef structure. */ RCC_OscInitStruct.OscillatorType = RCC_OSCILLATORTYPE_HSE; RCC_OscInitStruct.HSEState = RCC_HSE_ON; RCC_OscInitStruct.PLL.PLLState = RCC_PLL_NONE; if (HAL_RCC_OscConfig(&RCC_OscInitStruct) != HAL_OK) { Error_Handler(); } /** Initializes the CPU, AHB and APB buses clocks */ RCC_ClkInitStruct.ClockType = RCC_CLOCKTYPE_HCLK|RCC_CLOCKTYPE_SYSCLK |RCC_CLOCKTYPE_PCLK1|RCC_CLOCKTYPE_PCLK2; RCC_ClkInitStruct.SYSCLKSource = RCC_SYSCLKSOURCE_HSE; RCC_ClkInitStruct.AHBCLKDivider = RCC_SYSCLK_DIV1; RCC_ClkInitStruct.APB1CLKDivider = RCC_HCLK_DIV1; RCC_ClkInitStruct.APB2CLKDivider = RCC_HCLK_DIV1; if (HAL_RCC_ClockConfig(&RCC_ClkInitStruct, FLASH_LATENCY_0) != HAL_OK) { Error_Handler(); } } /** * @brief GPIO Initialization Function * @param None * @retval None */ static void MX_GPIO_Init(void) { GPIO_InitTypeDef GPIO_InitStruct = {0}; /* GPIO Ports Clock Enable */ __HAL_RCC_GPIOC_CLK_ENABLE(); __HAL_RCC_GPIOH_CLK_ENABLE(); __HAL_RCC_GPIOA_CLK_ENABLE(); /*Configure GPIO pin Output Level */ HAL_GPIO_WritePin(GPIOC, GPIO_PIN_13, GPIO_PIN_RESET); /*Configure GPIO pin : PC13 */ GPIO_InitStruct.Pin = GPIO_PIN_13; GPIO_InitStruct.Mode = GPIO_MODE_OUTPUT_PP; GPIO_InitStruct.Pull = GPIO_NOPULL; GPIO_InitStruct.Speed = GPIO_SPEED_FREQ_LOW; HAL_GPIO_Init(GPIOC, &GPIO_InitStruct); } /* USER CODE BEGIN 4 */ /* USER CODE END 4 */ /** * @brief This function is executed in case of error occurrence. * @retval None */ void Error_Handler(void) { /* USER CODE BEGIN Error_Handler_Debug */ /* User can add his own implementation to report the HAL error return state */ __disable_irq(); while (1) { } /* USER CODE END Error_Handler_Debug */ } #ifdef USE_FULL_ASSERT /** * @brief Reports the name of the source file and the source line number * where the assert_param error has occurred. * @param file: pointer to the source file name * @param line: assert_param error line source number * @retval None */ void assert_failed(uint8_t *file, uint32_t line) { /* USER CODE BEGIN 6 */ /* User can add his own implementation to report the file name and line number, ex: printf("Wrong parameters value: file %s on line %drn", file, line) */ /* USER CODE END 6 */ } #endif /* USE_FULL_ASSERT */ |