I am really struggling to get a successful response when doing a post request to the google recaptcha api. I am receiving the following response:
{
  "success": false,
  "error-codes": [
    "invalid-input-response",
    "invalid-input-secret"
  ]
}
I had a look at reCAPTCHA — error-codes: ‘missing-input-response’, ‘missing-input-secret’ when verifying user’s response (missing details on POST) and followed the answer as closely as possible but with no success.
Here is my file below:
var request = require('request');

module.exports = {
  verifyCaptcha: function(req, res) {

    var secret = 'SECRET_KEY';
    var response = JSON.stringify(req.body.response);
    request({
        url: 'https://www.google.com/recaptcha/api/siteverify',
        method: 'POST',
        headers: { "Content-Type": "application/x-www-form-urlencoded" },
        body: `secret=${secret}&response=${response}`,
    }, function (err, response, body) {
        if (err) {
            res.status(500).send({
                error: "Could not verify captcha"
            });
        } else {
            res.status(200).send({
                message: body
            });
        }
    });
  },
}
If anyone has a solution to this problem please let me know!
![]()
hong4rc
3,9494 gold badges20 silver badges40 bronze badges
asked Feb 14, 2019 at 16:36
![]()
You need to add the user remote IP address.
var user_ip = req.headers['x-forwarded-for'] || req.connection.remoteAddress;
request({
    url: 'https://www.google.com/recaptcha/api/siteverify',
    method: 'POST',
    headers: { "Content-Type": "application/x-www-form-urlencoded" },
    body: `secret=${secret}&response=${response}&remoteip=${user_ip}`}...
Another thing I see that you are not using template literal, you should change the quotes to ` instead of ‘.
OR, You should use a ready-made module for reCaptcha, like this one:
https://www.npmjs.com/package/recaptcha
answered Feb 14, 2019 at 16:42
![]()
arielbarielb
3823 silver badges10 bronze badges
7
For reCAPTCHA Enterprise, check the official docs: https://cloud.google.com/recaptcha-enterprise/docs/create-assessment.
In short, you need to use the library that Google provides:
const { RecaptchaEnterpriseServiceClient } =
        require('@google-cloud/recaptcha-enterprise');

const client = new RecaptchaEnterpriseServiceClient();
const [ response ] = await client.createAssessment({...});
RecaptchaEnterpriseServiceClient requires a service account to be created beforehand as described here. The key for that account with the right roles set can then be read by the app. Check the arguments of the constructor to see the available options to pass the data if the file cannot be retrieved automatically.
answered Jan 28, 2022 at 8:59
![]()
YuuhnYuuhn
13 bronze badges
var response = JSON.stringify(req.body.response);
The stringifying here is probably the cause of the invalid-input-response error.
If your body is something like {"g-recaptcha-response": "..."}, you need to pull out the response value and pass that directly in your post.
Regarding invalid-input-secret, if you have set up your key and secret through the classic interface at https://www.google.com/u/1/recaptcha/admin/create, then you shouldn’t have a problem.
However if you set up a key with recaptcha Enterprise on Google Cloud, then it requires that you do Oauth authentication to the Google Cloud API and then use the create.assessment endpoint to get back information on the validity of the user. As Yuuhn implied, the Google provided library makes interaction with recaptcha Enterprise easier, without a lot of documentation digging to find where your REST API calls need to go.
answered Apr 7, 2022 at 9:36
![]()
InfineightInfineight
4785 silver badges9 bronze badges
I am trying install reCaptcha v3 in a local website, in the future the website will be launched, but when i send the form I receipt the following message:»object(stdClass)#1 (2) { [«success»]=> bool(false) [«error-codes»]=> array(1) { [0]=> string(22) «invalid-input-response» } }»
I use this video as base of who install the reCaptcha: https://www.youtube.com/watch?v=zGNH_lbpmm8
Here is my code:
FOOTER.PHP
<script>
grecaptcha.ready(function() {
grecaptcha.execute(‘SITE-KEY’, {action: ‘homepage’}).then(function (token){
document.getElementById(‘g-recaptcha-response’).value=»token»;
})
});
</script>
ENVIAR.PHP
function getCaptcha($SecretKey){
$response = file_get_contents(«https://www.google.com/recaptcha/api/siteverify?secret=SECRET-KEY&response={$SecretKey}»);
$return = json_decode($response);
return $return;
};
$return = getCaptcha($_POST[‘g-recaptcha-response’]);
if ($return->success == true && $return->score > 0.7){
//PHP MAILER CODE
}else{
var_dump($return);
}
The var_dump in else statment is just for test, when I finish will print a mesage for the user.
Steam is one of the most popular and widely used gaming apps out there, and for good reason too. Not only can you play games there but also create them. While some games are free, others are to be paid for. In order to access games on Steam, you have to have a Steam account. While signing into your steam account, there’s a captcha prompt that you have to fill in. Several users have reported the captcha not working, declaring the correct captcha response as invalid. The error’s message says:
Your response to the CAPTCHA appears to be invalid. Please re-verify that you’re not a robot below.
In this article, we will discuss what you can do if that’s the case for you too.
If you face this issue, do the following:
- Clear browser cookies and site data
- Change your browser
- Flush DNS Cache & Reset Winsock
- Disable Proxy or VPN server
- Create an account from the Steam server
1] Clear browser cookies and site data
It may help you to get rid of the cookies and clear the cache data before retrying the captcha verification. Here’s how you can do that on Google Chrome:
Open the Chrome Browser and click on the Settings icon on the top-right, the three-dotted icon. Here click on More Tools > Clear Browsing Data.
![]()
From the page that this option subsequently opens, select the Advanced tab. Here, select the time range to be ‘All Time’ and check-mark the ‘Cookies and other site data’ and ‘Cached images and files’ boxes.
![]()
Click on Clear Data, restart the browser and try logging into your Steam account again. Hopefully, you’ll not face any difficulties now.
2] Change your browser
If clearing the browsing data was of no help, then you can try changing your browser. Most people use Steam via Chrome and since Steam’s captcha verification is done via a Chrome fork, it is possible that Chrome is causing the issue.
If that is the case, you can try switching to a different browser, one that isn’t based on Chrome. Examples of that include Microsoft Edge, Firefox, etc.
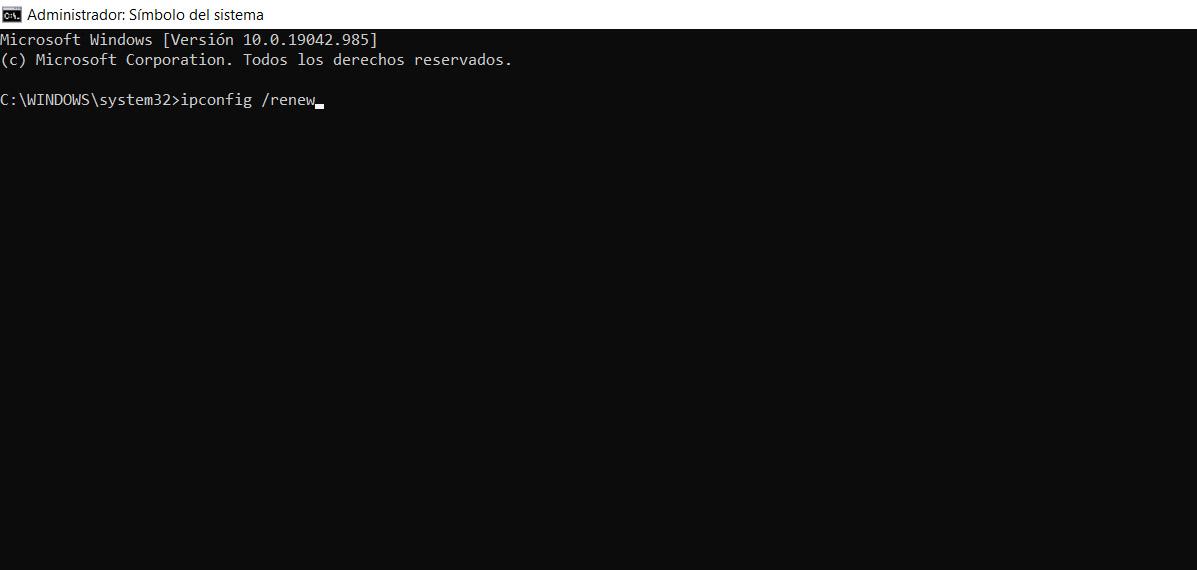
3] Flush DNS Cache & Reset Winsock using Command Prompt
![]()
The DNS cache is a temporary database of some of the most recent visits to websites made on your computer. It is stored by your PC’s Operating System and you can try clearing it using the command prompt to rid yourself of the Steam Captcha error. Here’s how:
- Launch the Command Prompt as administrator
- In the command prompt window, type the following command line and press Enter to execute it
ipconfig /flushdns
netsh winsock reset
The latter command will reset Winsock.
4] Disable Proxy or VPN server
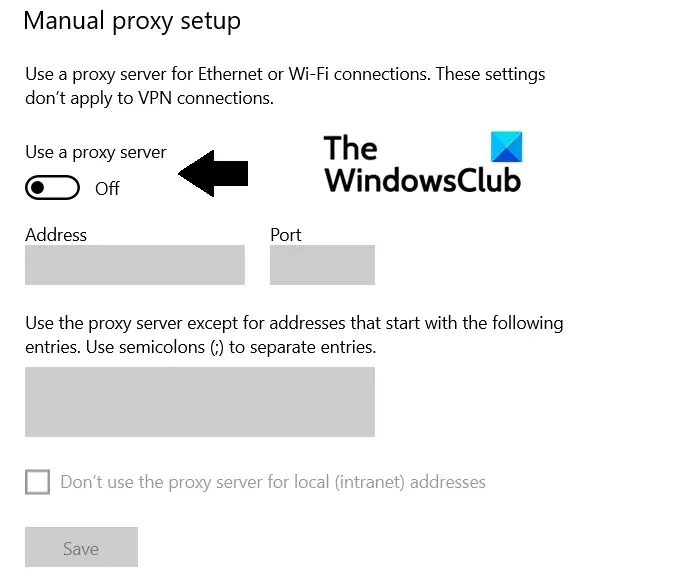
Here’s how you can disable the proxy server on your PC:
- Open the Run command box by pressing the Windows and ‘R’ keys together and in the blank space type ‘ms-settings:network-proxy’. This will open the Proxy settings
- Under the Manual Proxy setup head, toggle off the ‘Use a proxy server’ option
- Log into Steam and check if the issue has been resolved
Since VPN is a third-party application, simply disabling or uninstalling it will also do the job for you.
5] Create an account from the Steam server
Another thing you can try doing is making a Steam account on their server and not the website via your PC. Steam’s server link is steampowered.com/join. Fill in the required credentials like your e-mail ID, country of residence, etc and you’re set. Signing up via the server doesn’t require you to go through a captcha verification, so in this way, you can sidestep it.
How do I automatically fill Captcha?
In all possibilities, there may be some of you out there who don’t want to spend time deciphering what the captcha code means. 0’s and O’s can get confusing, and you may get the letter-case wrong since most captcha codes are case-sensitive. Lucky for those, there are several web browser extensions that can help automate this verification process. These extensions help you auto solve the captcha codes, thus saving you time.
Some of the most popular browser extensions to auto-fill captcha codes are AntiCaptcha, Buster, and ReCaptcha Solver.
How to bypass Google ReCAPTCHA Images?
Google ReCAPTCHA quiz is where you have to answer where a certain object is, for example, a bus or bike, in a set of pictures. They can get a little tricky and also seem to be very unnecessary. There are certain things you can try in an attempt to bypass it successfully such as:
- Use a VPN
- Use ReCAPTCHA Bypass Bots
- Use Sign-in Google Search
We hope that this post was able to clear all your doubts concerning Steam’s Captcha verification code and how you can get out of that problem.
Last Updated on January 27, 2022 by
In this tutorial, we will learn how to add Google reCAPTCHA v3 to a signup page, the trigger for reCAPTCHA v3 will be from the submit button event, the reCAPTCHA v3 will not interact with the user to keep the implementation seamless, and within the submit data we will send the reCAPTCHA v3 token to let the backend server do the verification for the reCAPTCHA v3 response to find whether the action was done by a real human being or a bot.
reCAPTCHA v3 relies on scoring point between 0.0 and 1.0; The score closer to 1.0 means more trusted user and less possibility of being a bot or fraudster.
CAPTCHA stands for Completely Automated Public Turing Test To Tell Computers and Humans Apart, therefore It is an effective and reliable preventive measure that you can take to prevent bots or fraudsters from spamming or abusing your website, by providing either challenges like puzzles or image detection questions that can only be solved by humans, or in the case of Google reCAPTCHA v3, it wouldn’t require any action to be taken by the requester, however the Google reCAPTCHA v3 behind the scenes algorithms are smart enough to detect and tell whether the interaction is done by a human or a bot.
The server will be implemented as an API endpoint using ASP.NET Core Web API using C# 10 and .NET 6.
First thing is that we need to setup a Google reCAPTCHA account to register a key and decide which reCAPTCHA version are we going to use.
Google reCAPTCHA Account Setup
First, open Google reCAPTCHA link to register for a key and then enter a Label, then choose the reCAPTCHA type (in this tutorial we will implement Google reCAPTCHA v3) , however you can feel free to try out v2 , since both are still supported by Google and will continue to be supported at least for the near future.
Next, if you already have a registered domain name and hosted, then you can enter your domain name. Otherwise, type localhost.
To learn more about type of reCAPTCHA check this link from the official documentation.

Once you are done with filling all the needed details, click submit to create your account.
You will get your Site Key to connect your site with reCAPTCHA v3 (client side integration) and Secret Key to connect your backend with reCAPTCHA to do the server verification.

So with the reCAPTCHA v3 account ready, let’s head over to create an HTML signup page integrated with reCAPTCHA
Choose whatever html editing IDE or app you prefer, for this tutorial I will be using Visual Studio 2022 to create the html page, host it on local IIS Express and write the API Endpoint that will be used as the server to do the reCAPTCHA server verification:
Visual Studio 2022 – Blank Solution – reCAPTCHA v3
Let’s start by creating a blank solution that will host our 2 projects:
Open Visual Studio 2022 and choose create project, then search for Blank Solution

Give it a name like reCAPTCHA:

Adding UI project to host the signup page with reCATPCHA v3 integration
Now from the solution explorer, right click on the solution and choose add a new project, choose ‘ASP.NET Core Empty’

Then, set your project name as ‘UI’

Next, choose .NET 6 (in this tutorial we will setup the localhost using IIS Express which can be easily configured and launched using Visual Studio). However, if you prefer other options, you can opt to run your html page on localhost through other server hosting tools that come with node.js, PHP or Python.

Once the project is ready, open your program.cs file, add ‘app.UseFileServer()’:
|
var builder = WebApplication.CreateBuilder(args); var app = builder.Build(); app.UseFileServer(); app.Run(); |
This allows the ASP.NET Core project to read the static files from the wwwroot folder:
Afterwards, in the solution explorer, add a new Folder with name ‘wwwroot’. This will serve as your root folder to host your website files and pages, and inside the root folder, add a new html file with name ‘index.html’ (index.html is used as the default page when a site is requested by its domain name)

index.html
In our tutorial we will build a simple signup page to demonstrate how we can use the reCAPTCHA v3 to ensure that we receive real user data from the signup form not generated through bots or fraudsters that can spam our system and flood our database with false requests.
|
1 2 3 4 5 6 7 8 9 10 11 12 13 14 15 16 17 18 19 20 21 22 23 24 25 26 27 28 29 30 31 32 33 34 35 36 37 38 39 40 41 42 43 44 45 46 47 48 49 50 51 52 53 54 55 56 57 58 |
<!DOCTYPE html> <html> <head> <style type=»text/css»> input { font-size: 20px; } </style> <title>Google reCPATCHA Implementation — Codingsonata.com</title> </head> <body> <h1>Signup Form</h1> <form id=«formSignup» action=«» method=«post»> <input type=«email» id=«txtEmail» placeholder=«Email Address» /> <br /><br /> <input type=«password» id=«txtPassword» placeholder=«Password» /> <br /><br /> <input type=«password» id=«txtConfirmPassword» placeholder=«Confirm Password» /> <br /><br /> <input type=«text» id=«txtName» placeholder=«Full Name» /> <br /><br /> <input type=«hidden» id=«hdnGoogleRecaptcha» required><br /> <p>reCAPTCHA Token (Valid for 2 minutes)</p> <label id=«lblValue»>——</label><br /><br /> <button type=«submit» id=«btnSignup»>Sign up</button> <br /> <label id=«lblMessage»></label> </form> <script src=«https://www.google.com/recaptcha/api.js?render=YOUR_RECAPTCHA_API_KEY»></script> <script src=«https://code.jquery.com/jquery-3.6.0.min.js» integrity=«sha256-/xUj+3OJU5yExlq6GSYGSHk7tPXikynS7ogEvDej/m4=» crossorigin=«anonymous»></script> <script type=«text/javascript»> $(document).ready(function () { $(document).on(‘click’, ‘#btnSignup’, function (e) { e.preventDefault(); grecaptcha.ready(function () { grecaptcha.execute(‘YOUR_RECAPTCHA_API_KEY’, { action: ‘signup’ }).then(function (token) { $(‘#hdnGoogleRecaptcha’).val(token); $(‘#lblValue’).html(token); $.post(«https://localhost:7229/api/signup», { email: $(«#txtEmail»).val(), password: $(«#txtPassword»).val(), confirmPassword: $(«#txtConfirmPassword»).val(), name: $(«#txtName»).val(), recaptchaToken: hdnGoogleRecaptcha.val() }) .done(function (result, status, xhr) { $(«#lblMessage»).html(result) }) .fail(function (xhr, status, error) { $(«#lblMessage»).html(«Result: « + status + » « + error + » « + xhr.status + » « + xhr.statusText) }); }); }); }); }); </script> </body> </html> |
Following to that, press F5 to run this page to see that the form is showing properly and more importantly the reCAPTCHA is displaying on the bottom right corner of the page:

Server API to validate the reCAPTCHA v3 Token:
After creating the UI project with the signup page, add a new project to the solution, choose type ASP.NET Core Web API:

Then give it a name like ‘Api’:

Then choose .NET 6 and press create.
Before we start with the API development, remove the extra classes WeatherForecastController and WeatherForecast.
appsettings.json
We will start by adding a new section with name ‘AppSettings’, this will include any settings that we need for the project, in this tutorial we only need to save the reCAPTCHA Secret Key so it won’t be hardcoded within the code.
|
1 2 3 4 5 6 7 8 9 10 11 12 |
{ «Logging»: { «LogLevel»: { «Default»: «Information», «Microsoft.AspNetCore»: «Warning» } }, «AllowedHosts»: «*», «AppSettings»: { «RecaptchaSecretKey»: «YOUR_RECAPTCHA_SECRET_KEY» } } |
AppSettings Entity
Then the AppSettings will be used as the mapping entity for the AppSettings section:
|
namespace API { public class AppSettings { public string RecaptchaSecretKey { get; set; } } } |
Now in the program.cs file, let’s inject the ConfigSection while mapping it to the AppSettings entity, by adding the below line just before the builder.build() method:
|
builder.Services.Configure<AppSettings>(builder.Configuration.GetSection(nameof(AppSettings))); |
Responses
This include the entities that will be used to return the responses back to the client:
ReCaptchaResponse
|
1 2 3 4 5 6 7 8 9 10 11 12 13 14 15 16 17 18 19 20 21 22 23 24 25 |
using Newtonsoft.Json; namespace API.Responses { public class ReCaptchaResponse { [JsonProperty(«success»)] public bool Success { get; set; } [JsonProperty(«score»)] public float Score { get; set; } [JsonProperty(«action»)] public string Action { get; set; } [JsonProperty(«challenge_ts»)] public DateTime ChallengeTs { get; set; } // timestamp of the challenge load (ISO format yyyy-MM-dd’T’HH:mm:ssZZ) [JsonProperty(«hostname»)] public string HostName { get; set; } // the hostname of the site where the reCAPTCHA was solved [JsonProperty(«error-codes»)] public string[] ErrorCodes { get; set; } } } |
SignupResponse
|
1 2 3 4 5 6 7 8 9 10 11 12 13 |
using System.Text.Json.Serialization; namespace API.Responses { public class SignupResponse { public bool Success { get; set; } [JsonIgnore(Condition = JsonIgnoreCondition.WhenWritingDefault)] public string Error { get; set; } [JsonIgnore(Condition = JsonIgnoreCondition.WhenWritingDefault)] public string ErrorCode { get; set; } } } |
Requests
In this tutorial, we only have 1 endpoint so we will have 1 request entity as the below:
SignupRequest
|
1 2 3 4 5 6 7 8 9 10 11 12 13 14 15 16 17 18 |
using System.ComponentModel.DataAnnotations; namespace API.Requests { public class SignupRequest { [Required] public string ReCaptchaToken { get; set; } [EmailAddress] public string Email { get; set; } [Required] public string Password { get; set; } [Required] public string ConfirmPassword { get; set; } [Required] public string Name { get; set; } } } |
Interfaces
We will have a single interface to handle the signup process:
ISignupService
|
using API.Requests; using API.Responses; namespace API.Interfaces { public interface ISignupService { Task<SignupResponse> Signup(SignupRequest signupRequest); } } |
Services
After adding the interface, we need to write the implementation for it, which will include the Google reCAPTCHA server verification http call along with the different validations needed:
|
1 2 3 4 5 6 7 8 9 10 11 12 13 14 15 16 17 18 19 20 21 22 23 24 25 26 27 28 29 30 31 32 33 34 35 36 37 38 39 40 41 42 43 44 45 46 47 48 49 50 51 52 53 54 55 56 57 58 59 60 61 62 63 64 65 66 67 68 69 70 71 72 73 74 75 76 77 |
using API.Interfaces; using API.Requests; using API.Responses; using Microsoft.Extensions.Options; using Newtonsoft.Json; namespace API.Services { public class SignupService : ISignupService { private readonly AppSettings appSettings; public SignupService(IOptions<AppSettings> appSettings) { this.appSettings = appSettings.Value; } public async Task<SignupResponse> Signup(SignupRequest signupRequest) { var dictionary = new Dictionary<string, string> { { «secret», appSettings.RecaptchaSecretKey }, { «response», signupRequest.ReCaptchaToken } }; var postContent = new FormUrlEncodedContent(dictionary); HttpResponseMessage recaptchaResponse = null; string stringContent = «»; // Call recaptcha api and validate the token using (var http = new HttpClient()) { recaptchaResponse = await http.PostAsync(«https://www.google.com/recaptcha/api/siteverify», postContent); stringContent = await recaptchaResponse.Content.ReadAsStringAsync(); } if (!recaptchaResponse.IsSuccessStatusCode) { return new SignupResponse() { Success = false, Error = «Unable to verify recaptcha token», ErrorCode = «S03» }; } if (string.IsNullOrEmpty(stringContent)) { return new SignupResponse() { Success = false, Error = «Invalid reCAPTCHA verification response», ErrorCode = «S04» }; } var googleReCaptchaResponse = JsonConvert.DeserializeObject<ReCaptchaResponse>(stringContent); if (!googleReCaptchaResponse.Success) { var errors = string.Join(«,», googleReCaptchaResponse.ErrorCodes); return new SignupResponse() { Success = false, Error = errors, ErrorCode = «S05» }; } if (!googleReCaptchaResponse.Action.Equals(«signup», StringComparison.OrdinalIgnoreCase)) { // This is important just to verify that the exact action has been performed from the UI return new SignupResponse() { Success = false, Error = «Invalid action», ErrorCode = «S06» }; } // Captcha was success , let’s check the score, in our case, for example, anything less than 0.5 is considered as a bot user which we would not allow … // the passing score might be higher or lower according to the sensitivity of your action if (googleReCaptchaResponse.Score < 0.5) { return new SignupResponse() { Success = false, Error = «This is a potential bot. Signup request rejected», ErrorCode = «S07» }; } //TODO: Continue with doing the actual signup process, since now we know the request was done by potentially really human return new SignupResponse() { Success = true }; } } } |
Notice in the constructor we are injecting the AppSettings through the IOptions generic Interface and by getting the Value of the IOptions<AppSettings> , we can access the AppSettings properties and use the reCAPTCHA Secret Key.
Also, make sure to install Netwtonsoft.json to be able to use the JsonConvert Class:

Before testing our API, we need to configure the dependency Inject for the SignupService with the ISignupService Interface:
Open the program.cs file again and before the builder.build() method add the below:
|
builder.Services.AddTransient<ISignupService, SignupService>(); |
And for the last part of the API, which is the Controller:
SignupController
This will include a single endpoint that will accept the full signup request through POST body which will include the reCAPTCHA token as well.
|
1 2 3 4 5 6 7 8 9 10 11 12 13 14 15 16 17 18 19 20 21 22 23 24 25 26 27 28 29 30 31 32 33 34 35 36 37 38 39 40 41 42 43 44 45 46 47 48 49 50 51 |
using API.Interfaces; using API.Requests; using API.Responses; using Microsoft.AspNetCore.Mvc; namespace API.Controllers { [Route(«api/[controller]»)] [ApiController] public class SignupController : ControllerBase { private readonly ISignupService signupService; public SignupController(ISignupService signupService) { this.signupService = signupService; } [HttpPost] public async Task<IActionResult> Signup(SignupRequest signup) { if (signup == null) { return BadRequest(new SignupResponse() { Success = false, Error = «Invalid signup request», ErrorCode = «S01» }); } if (!ModelState.IsValid) { var errors = ModelState.Values.SelectMany(x => x.Errors.Select(c => c.ErrorMessage)).ToList(); if (errors.Any()) { return BadRequest(new SignupResponse { Error = $«{string.Join(«,«, errors)}», ErrorCode = «S02» }); } } var response = await signupService.Signup(signup); if (!response.Success) { return UnprocessableEntity(response); } return Ok(new SignupResponse() { Success = true }); } } } |
Eventually, this is the final look for our solution with the 2 projects:

Finally, run the API project and make sure you see the Swagger UI documentation for your API on the browser:

Testing the API on Postman
After finishing the development and integration with the Google reCAPTCHA v3, open Postman and create a new request.
First the URL will be the localhost URL that is hosting our endpoint, then set the request as POST and in the body choose ‘raw’ and ‘JSON’, next input the below request:

Notice that the reCAPTCHA token is only a random string, will which yield an error in the response with message ‘invalid-input-response’ this is one of the error-codes that are returned from Google reCAPTCHA service:
You can check the Google reCAPTCHA documentation for all possible error codes.
Now let’s go and obtain a reCAPTCHA token from Google reCAPTCHA v3 through our signup webpage:

After obtaining an actual token from Google reCAPTCHA, we can now test it again on postman to see the output result of the API:

After we wait for more than 2 minutes, the token will expire and the verification will return an error, like the below:

Google reCAPTCHA Admin Console
You can access the dashboard and view the analytics for your sites’ Google reCAPTCHA requests through the Google reCAPTCHA admin console. Make sure you are connected to the Google account from where you’ve created your reCAPTCHA account.
This is how the Google reCAPTCHA admin console displays:

Summary
In this tutorial we learned about Google reCAPTCHA v3, and how it is important to prevent spam and fraudulent requests to your system. We started created a Google reCATPCHA account, and then continued by adding a simple signup page with the Google reCAPTCHA v3 integration, running it over localhost through IIS Express and after that, we built an API using ASP.NET Core Web API 6 that accepts the signup request with the reCAPTHCA token and lastly verified it using Google reCAPTCHA server verification URL through an HTTP Client call while verifying all the possible responses.
Eventually, we tested the implementation using postman with different test cases that include an invalid reCAPTCHA token request, a successful reCAPTCHA token request and finally a timed out request. Then we have peeked at the number and distribution of the reCATPCHA requests and scores at the Google reCAPTCHA admin console.
References
You can find the solution code in my Github account.
Moreover, please check the Official Documentation of Google reCAPTCHA v3, to learn more about the integration. And for further reading about Captcha in general and its history, check this Wikipedia article.
In addition, check my other articles with different topics in ASP.NET Core Web API:
Bonus
Sharing with you one of my favorite pieces that can reach the inner feelings of a person. Such enchanting masterpiece can only be composed by a unique master and prodigy, Johann Sebastian Bach.
Ray Chen is an award-winning exceptional talent and master in playing violin, who also shows captivating facial expressions that bring a magnificent joy to anyone who enjoys his violin tunes and watches him.
Enjoy and stay safe!
Ray Chen Plays – Partita No. 2 in D minor: “Sarabande” by J.S. Bach
Содержание
- Что такое reCAPTCHA
- Почему в браузере не работает reCAPTCHA
- Мы просматриваем через VPN или прокси
- Браузер устарел
- Вредоносное ПО в системе
- Мы подключены с подозрительного IP
- Что делать для устранения неполадок с reCAPTCHA
- Держите оборудование в безопасности
- Обновите систему и браузер
- Контроль использования VPN и прокси
- Перезагрузите IP
- Перезагрузите роутер
Во многих случаях при доступе к веб-странице появляется сообщение убедитесь, что мы настоящий пользователь а не бот. Это позволяет предлагать правильные услуги без ущерба для самого веб-сайта или любого пользователя.

В основном это то, что делает reCAPTCHA. Это бесплатная служба Google, которая проверяет, что вход на страницу или платформу осуществляется человеком, а не ботом. Он помогает этим сайтам избежать ввода различных автоматизированных инструментов, которые могут даже привести к рассылка спама и угроз .
Использование пользователями очень простое. Интернет-пользователь входит на страницу, и появляется поле, в котором он должен отметить, что он не бот, и тем самым подтвердить, что он человек. Это похоже на другие варианты, которые мы видим, в которых вы должны отметить серию цифр, изображений и т. Д. Однако в этом случае процесс выполняется быстрее и проще.
Однако бывают случаи, когда появляется ошибка и reCAPTCHA не работает в Chrome или любом браузере. Появится сообщение о том, что проверка не удалась. Это помешает нам открыть веб-сайт или войти в систему.
Почему в браузере не работает reCAPTCHA
Важно знать основные причины, по которым reCAPTCHA вылетает в браузере. Нет конкретной причины, но есть ряд возможностей, которые необходимо принять во внимание, а затем решить эту проблему для правильной навигации.
Мы просматриваем через VPN или прокси
Иметь VPN или просматривая полномочие очень распространено. В нашем распоряжении много таких услуг. Они позволяют нам избегать возможных географических блоков, которые могут существовать, а также сохранять личную информацию, если мы подключаемся из общедоступной сети.
Однако это может быть причиной того, что reCAPTCHA не работает в браузере. Это может привести к конфликту с сетью и лишить нас возможности проверить, действительно ли мы являемся законным пользователем, а не ботом.

Браузер устарел
Эта ошибка возникает в браузере, поэтому одна из причин, которая также может вызывать эту проблему, заключается в том, что он не обновлен. Имея устаревшее программное обеспечение может быть источником множества ошибок при подключении к сети и использовании наших устройств.
Вредоносное ПО в системе
Конечно, может случиться так, что у нас есть какое-то вредоносное ПО. Особенно это может быть рекламное ПО в браузере, хотя это может быть троян, вирус или любой другой угроза в системе .
Мы уже знаем, что хакеры используют множество стратегий, чтобы подвергнуть риску наши компьютеры. Многие атаки могут повлиять на правильное функционирование браузера и привести к сбоям, подобным тому, что мы описываем в этой статье.
Мы подключены с подозрительного IP
В таких случаях это очень частая причина. Веб-сайт интерпретирует, что мы подключены к подозрительный IP и считает, что мы можем быть ботом. Это может произойти, если мы просматриваем общедоступный Wi-Fi, например, где внутри много пользователей. Также в случае доступа к сети из VPN.
Что делать для устранения неполадок с reCAPTCHA
Мы увидели, каковы основные причины появления ошибки reCAPTCHA в браузере. Теперь мы собираемся объяснить некоторые проблемы, которые необходимо принять во внимание, чтобы это не превратилось в проблему и чтобы иметь возможность нормально перемещаться.
Держите оборудование в безопасности
Конечно, один из самых важных вопросов избежать сбоя reCAPTCHA и другие подобные сообщения, которые могут появиться в браузере, предназначены для обеспечения безопасности компьютера. Для этого мы можем использовать множество инструментов, доступных для всех типов операционных систем.
Мы можем использовать антивирус, а также брандмауэр и даже расширения для браузера. Все это поможет нам избежать проникновения вредоносных программ, которые могут повлиять на нас. Мы должны поддерживать безопасность на всех уровнях и, таким образом, уменьшать проблемы.
Обновите систему и браузер
Один момент, который мы не можем забыть, — это постоянно обновлять как систему, так и браузер. Во многих случаях появляются уязвимости и сбои, которые могут вызывать эти типы ошибок, а также служить шлюзом для хакеров.
Это означает, что у нас всегда должны быть все патчи и обновления которые доступны. Но особенно вы должны принять во внимание важность наличия последней версии браузера, чтобы предотвратить его устаревание и появление ошибок такого типа.
Контроль использования VPN и прокси
Если мы собираемся перемещаться через VPN или прокси и замечаем, что это может создавать проблемы такого типа, мы должны контролировать использование. Мы можем взглянуть на конфигурацию, посмотреть, может ли это быть ошибка с сервера мы подключены и в конечном итоге пытаемся использовать другой сервис.
Перезагрузите IP
In Windows мы можем легко сбросить IP из командной строки. Для этого нам нужно перейти в Пуск, получить доступ к командной строке в режиме администратора и выполнить ipconfig / обновить . Это могло бы помочь исправить этот сбой, если это было причиной.
Перезагрузите роутер
Мы видели, что могут быть проблемы и с нашим IP. Но сам маршрутизатор мог неправильно обрабатывать запросы. Поэтому важный совет — перезагрузите устройство и посмотрите, устранит ли это неисправность. Теперь вам нужно сделать это правильно. Мы должны выключить роутер и позволить ему оставаться в таком состоянии не менее 30 секунд, прежде чем снова его включить.
Таким образом, это некоторые из основных проблем, которые мы должны учитывать, чтобы избежать проблемы reCAPTCHA в браузере. Мы рассмотрели основные причины возникновения подобных сбоев, а также несколько основных советов по их устранению.