UPDATE 10/2021
Since JavaFX 16 a warning is displayed when JavaFX doesn’t run on the module path, which is the case of an uber/fat jar:
$ java -jar myFatJar-1.0-SNAPSHOT.jar
Oct 02, 2021 1:45:21 PM com.sun.javafx.application.PlatformImpl startup
WARNING: Unsupported JavaFX configuration: classes were loaded from 'unnamed module @14c24f4c'
Also, you get a warning from the shade plugin itself:
[WARNING] Discovered module-info.class. Shading will break its strong encapsulation.
While these warnings can be initially ignored, there is a reason for them.
As explained in this CSR:
JavaFX is built and distributed as a set of named modules, each in its own modular jar file, and the JavaFX runtime expects its classes to be loaded from a set of named javafx.* modules, and does not support loading those modules from the classpath.
And:
when the JavaFX classes are loaded from the classpath, it breaks encapsulation, since we no longer get the benefit of the java module system.
Therefore, even this widely accepted answer explains how can an uber/fat jar can be created on Maven projects, its use is discouraged, and other modern alternatives to distribute your application, like jlink, jpackage or native-image, should be used.
ORIGINAL ANSWER
This answer explains why a fat/uber jar fails on JavaFX 11. In short:
This error comes from sun.launcher.LauncherHelper in the java.base module. The reason for this is that the Main app extends Application and has a main method. If that is the case, the LauncherHelper will check for the
javafx.graphicsmodule to be present as a named module. If that module is not present, the launch is aborted.
And already proposes a fix for Gradle.
For Maven the solution is exactly the same: provide a new main class that doesn’t extend from Application.
You will have new class in your application package (bad name):
// NewMain.java
public class NewMain {

    public static void main(String[] args) {
        Main.main(args);
    }
}
And your existing Main class, as is:
//Main.java
public class Main extends Application {

    @Override
    public void start(Stage stage) {
        ...
    }

    public static void main(String[] args) {
        launch(args);
    }
}
Now you need to modify your pom and set your main class for the different plugins:
<mainClass>application.NewMain</mainClass>
Platform-specific Fat jar
Finally, with the shade plugin you are going to produce a fat jar, on your machine.
This means that, so far, your JavaFX dependencies are using a unique classifier. If for instance you are on Windows, Maven will be using internally the win classifier. This has the effect of including only the native libraries for Windows.
So you are using:
- org.openjfx:javafx-controls:11
- org.openjfx:javafx-controls:11:win
- org.openjfx:javafx-graphics:11
- org.openjfx:javafx-graphics:11:win <— this contains the native dlls for Windows
- org.openjfx:javafx-base:11
- org.openjfx:javafx-base:11:win
Now, if you produce the fat jar, you will bundle all those dependencies (and those other regular third party dependencies from your project), and you will be able to run your project as:
java -jar myFatJar-1.0-SNAPSHOT.jar
While this is very nice, if you want to distribute you jar, be aware that this jar is not cross-platform, and it will work only on your platform, in this case Windows.
Cross-Platform Fat Jar
There is a solution to generate a cross-platform jar that you can distribute: include the rest of the native libraries of the other platforms.
This can be easily done, as you just need to include the graphics module dependencies for the three platforms:
<dependencies>
    <dependency>
        <groupId>org.openjfx</groupId>
        <artifactId>javafx-controls</artifactId>
        <version>11</version>
    </dependency>
    <dependency>
        <groupId>org.openjfx</groupId>
        <artifactId>javafx-graphics </artifactId>
        <version>11</version>
        <classifier>win</classifier>
    </dependency>
    <dependency>
        <groupId>org.openjfx</groupId>
        <artifactId>javafx-graphics </artifactId>
        <version>11</version>
        <classifier>linux</classifier>
    </dependency>
    <dependency>
        <groupId>org.openjfx</groupId>
        <artifactId>javafx-graphics </artifactId>
        <version>11</version>
        <classifier>mac</classifier>
    </dependency>
</dependencies>
Size
There is a main issue with this approach: the size. As you can see in this other answer, if you use the WebView control, you will be bundling around 220 MB due to the WebKit native libraries.
JDK — OpenJDK 11 /using Intellij IDEA/
I already added javafx dependency to my pom.xml. But My jar file doesn’t work.
I was trying to work my jar file by using that command.
java -jar cookorder.1.0.jar
But I got that error:
JavaFX runtime components are missing, and are required to run this application
How to solve that issue?
Pom.xml
<?xml version="1.0" encoding="UTF-8"?>
<project xmlns="http://maven.apache.org/POM/4.0.0"
         xmlns:xsi="http://www.w3.org/2001/XMLSchema-instance"
         xsi:schemaLocation="http://maven.apache.org/POM/4.0.0 http://maven.apache.org/xsd/maven-4.0.0.xsd">
    <modelVersion>4.0.0</modelVersion>

    <groupId>order.application</groupId>
    <artifactId>cookorder</artifactId>
    <version>1.0</version>
    <packaging>jar</packaging>
    <name>Cook order application</name>

    <properties>
        <maven.compiler.source>1.8</maven.compiler.source>
        <maven.compiler.target>1.8</maven.compiler.target>
        <maven.compiler.version>3.8.1</maven.compiler.version>
        <maven.shade.version>3.2.1</maven.shade.version>
        <project.build.sourceEncoding>UTF-8</project.build.sourceEncoding>
    </properties>

    <dependencies>
        <!-- logging -->
        <dependency>
            <groupId>org.slf4j</groupId>
            <artifactId>slf4j-simple</artifactId>
            <version>1.6.1</version>
        </dependency>

        <!-- converting -->
        <dependency>
            <groupId>com.google.code.gson</groupId>
            <artifactId>gson</artifactId>
            <version>2.8.6</version>
        </dependency>

        <dependency>
            <groupId>org.yaml</groupId>
            <artifactId>snakeyaml</artifactId>
            <version>1.21</version>
        </dependency>
        <dependency>
            <groupId>org.openjfx</groupId>
            <artifactId>javafx-controls</artifactId>
            <version>13</version>
        </dependency>
        <dependency>
            <groupId>org.openjfx</groupId>
            <artifactId>javafx-fxml</artifactId>
            <version>13</version>
        </dependency>
        <dependency>
            <groupId>commons-codec</groupId>
            <artifactId>commons-codec</artifactId>
            <version>1.11</version>
        </dependency>
        <dependency>
            <groupId>com.oracle.ojdbc</groupId>
            <artifactId>ojdbc8</artifactId>
            <version>19.3.0.0</version>
        </dependency>

        <dependency>
            <groupId>net.sf.jasperreports</groupId>
            <artifactId>jasperreports</artifactId>
            <version>6.11.0</version>
        </dependency>
    </dependencies>

    <build>
        <plugins>
            <plugin>
                <groupId>org.openjfx</groupId>
                <artifactId>javafx-maven-plugin</artifactId>
                <version>0.0.4</version>
                <configuration>
                    <mainClass>Main</mainClass>
                </configuration>
            </plugin>
            <plugin>
                <groupId>org.apache.maven.plugins</groupId>
                <artifactId>maven-compiler-plugin</artifactId>
                <version>${maven.compiler.version}</version>
            </plugin>
            <!-- fat jar -->
            <plugin>
                <groupId>org.apache.maven.plugins</groupId>
                <artifactId>maven-shade-plugin</artifactId>
                <version>${maven.shade.version}</version>
                <executions>
                    <execution>
                        <phase>package</phase>
                        <goals>
                            <goal>shade</goal>
                        </goals>
                        <configuration>
                            <filters>
                                <filter>
                                    <artifact>*:*</artifact>
                                    <excludes>
                                        <exclude>META-INF/*.SF</exclude>
                                        <exclude>META-INF/*.DSA</exclude>
                                        <exclude>META-INF/*.RSA</exclude>
                                    </excludes>
                                </filter>
                            </filters>
                            <transformers>
                                <transformer
                                        implementation="org.apache.maven.plugins.shade.resource.ManifestResourceTransformer">
                                    <mainClass>Main</mainClass>
                                </transformer>
                            </transformers>
                        </configuration>
                    </execution>
                </executions>
            </plugin>
        </plugins>
    </build>

</project>
Содержание
- IntelliJ IDEA — Error: JavaFX runtime components are missing, and are required to run this application [duplicate]
- 1 Answer 1
- JavaFX Maven project in IntelliJ. JavaFX runtime components are missing only in IntelliJ. JAR through mvn package executes without issues
- 1 Answer 1
- JavaFX 11: «JavaFX runtime components are missing»
- 2 Answers 2
- How to Fix JavaFX’s “Runtime Components are Missing” Error
IntelliJ IDEA — Error: JavaFX runtime components are missing, and are required to run this application [duplicate]
I’m running IntelliJ IDEA Ultimate 2018.2.5 with JDK 11.0.1 and JavaFX 11 from OpenJFX. I know it’s a common error and I tried many of the proposed fixes but nothing works.
No matter which JavaFX project I try to run I get the error:
If I add the following to the VM options
I get these errors:
I tried reinstalling without any luck. I have also tried to change getClass().getResource(. ) to getClass().getClassLoader().getResource(. ) or to something like Parent root = FXMLLoader.load(getClass().getResource(«/sample.fxml»)); but still doesn’t work.

1 Answer 1
There are similar questions like this or this other one.
Before JavaFX 11, whenever you were calling something JavaFX related, you had all the javafx modules available within the SDK.
But now you have to include the modules/dependencies you need.
Your error says that you are using FXML but it can’t be resolved, but you have just added the javafx.controls module:
As you can see in the JavaDoc the javafx.controls module depends on javafx.graphics and java.base , but none of those modules includes the FXML classes.
If you need FXML classes like the FXMLLoader , you need to include javafx.fxml module:
The same will apply if you need media or webkit, those have their own modules.
Источник
JavaFX Maven project in IntelliJ. JavaFX runtime components are missing only in IntelliJ. JAR through mvn package executes without issues
I have a Java Project with Spring Boot and JavaFX added through maven. The code compiles and even i can execute the fat jar without the JavaFX SDK in the computer. But when I try to execute it in IntelliJ it results in
Error: JavaFX runtime components are missing, and are required to run this application
I have seen this output in many questions and in most of those cases the jar wasn’t built at all or code compilation failed.
But in this scenario the mvn package works with no errors and I can execute the JAR with java -jar to cross out the fact that I might have the javafx sdk installed somewhere I tried it in a VM with only the JRE installed.
pom.xml
As for plugins spring-boot-maven-plugin and maven-compiler-plugin .
Attempted Solutions
I tried the solution which said to add the
But what it does is add the ability to run with: mvn clean javafx:run
The need to execute with IntelliJ is to debug the code because Debugging with souts isn’t efficient.
Trying to module build with a module-info.jar with following
This might have worked but due to some of old dependencies not working properly with modularized build this results in lots of breaking changes to the codebase.
- Missed to mention the environment
- JDK — 11.0.8
- IntelliJ IDEA — 2021.2.2
- Added second solution tried.

1 Answer 1
This is more a troubleshooting and research guide than an actual fix. Fixes for environmental issues are difficult to provide in a StackOverflow context. However, if you study the information here, it might help you fix your project.
Recommended troubleshooting approach
Use the Intellij new JavaFX project wizard. Ensure that it works in your environment, then gradually add components from your current project into the working project, checking that everything still works after each small addition.
Debugging when executing via the JavaFX maven plugin
I think the above recommendation is the preferred approach, however, you can alternately get the following to work:
run with: mvn clean javafx:run The need to execute with IntelliJ is to debug the code»
I also think you can just right-click on the maven target for javafx:run and select Debug. I am not sure, I don’t make use of the JavaFX maven plugin.
Creating fat jars for JavaFX applications
This is not a recommended configuration, but if you really must do it, you can review:
That answer doesn’t discuss getting such a configuration to work in conjunction with an Idea run/debug configuration, so it may not assist you.
If you do continue with a fat jar, I would not advise using a module-info, as you will be running code off the classpath anyway.
Modular versus non-modular JavaFX applications
If you don’t use a fat jar, getting all the module dependencies correct for Spring is tricky anyway because Spring is not currently architected to directly support modules well. Spring 6 will be designed to work well with modules, though I think you should be able to get Spring 5 to work if you try hard enough (I have got it to work in the past for some applications).
Alternately you can just have the JavaFX components as modules and run the rest off the classpath. For example, the «Non-modular with Maven» approach at openjfx.io. Note that in that approach, the JDK and JavaFX modules are still loaded as modules off of the module path, it is only Spring your application that is not providing a module-info.java file and running off the classpath.
Creating runtime images for JavaFX applications
Источник
JavaFX 11: «JavaFX runtime components are missing»
I’m trying to run sample JavaFX code (taken from the 5th edition of Java Illuminated) under JavaFX 11 and Java 11, using jGRASP 2 under Windows 10.
I’ve read through the «Getting Started with JavaFX» guide (https://openjfx.io/openjfx-docs/) extensively, and while I’ve made some progress, I’m stuck.
I’ve downloaded the latest ZIP file, unpacked it, and updated the CLASSPATH to include a path to the jar files needed to compile. I can successfully compile the file. However, when I try to run, I get the following error message:
Error: JavaFX runtime components are missing, and are required to run this application
The «Getting Started» guide says that this can be fixed by adding the following options to the runtime call:
—module-path «[path]lib» —add-modules=javafx.controls,javafx.fxml
I’ve added the options, but I’m still getting the error message.
Previous StackOverflow articles usually end with the option setting above; alas, I can’t figure out what else to do.
2 Answers 2
As a first time user, I’ve managed to make it work, but it was not straightforward to me.
I guess there are no many people familiarized with this IDE, so I’m going to post the steps I followed, as a basic tutorial:
Download and install jGRASP version 2.0.5_05 Beta.
Since I have a few JDKs installed, it selected by default JDK 10.0.2, so my first step was to find a way to work with JDK 11. That can be done in Settings -> jGrasp Startup Settings , where I can set the path for my java executable:

Then I restarted jGrasp. You can verify which JDK the IDE is using in Tools -> System Info -> Java Version .
Open HelloFX sample class. I’ve started with the most basic sample from the OpenJFX docs. The code can be found here.
Build -> compile , as expected, will throw a bunch of errors given that JavaFX is no longer part of the JDK:

Following the OpenJFX docs, we need to download the JavaFX SDK from here, and then add the library to the classpath. Go to Settings -> PATH/CLASSPATH -> Workspace , press New, and add, one by one, the different JavaFX jars from the downloaded SDK/lib folder (at least javafx-base.jar , javafx-graphics.jar and javafx-controls.jar ).
Build -> compile should work now.
Next step: Build -> Run . This fails:
That was expected. According to the docs, we need to set the module-path and add-modules arguments.
- First attempt: use Run arguments . After setting:
running again failed with the exact same error message as above, but with one difference in the console log:
What’s wrong with that!? Well. if you try that on command line, it will fail as well, because the order of arguments is wrong, the vm arguments should go before the class name.
In conclusion: Run arguments are not VM arguments !
- Second attempt: In order to provide the VM arguments, the option I found was to edit Settings -> Compiler settings -> Workspace . By default, it is using jdk (integrated debugger) — generic . You can view it and see that for Run it uses:
So instead of ARGS we need to find a way to set FLAGS2 .
Luckily, next to the Environment tab, there is a Flags/Args tab, and there we can set our vm arguments in FLAGS2 :

- Apply, close the dialog, and Build -> Run the class, now it will work!
If you see the console log, it contains exactly the command you would use when running on command line:
I guess the next step will be running a more complex project.
Источник
How to Fix JavaFX’s “Runtime Components are Missing” Error

If you’re not familiar with Java modules, you’re almost guaranteed to get hit with an error: “Runtime Components Are Missing”. It can be a huge frustration if you’re trying to get into JavaFX. Even if you consider yourself to be pretty Java-savvy.
One side effect of Oracle removing JavaFX from the JDK was to make it harder to get started. Honestly, JavaFX should be a very intuitive and easy to use piece of software. But this is one of the few awkward stumbling blocks that trips a lot of people up.
A “Runtime Components are Missing” error is generated by the Java Launcher. It is generated for all non-modular JavaFX projects since Java SE 9. However, it can be corrected by adding JavaFX modules, using command line arguments.
When I first came back to JavaFX after using it in Java 8, every single one of my old prototypes crashed. So if you’ve had this error don’t be disheartened. It’s a relatively easy fix.
How we’re going to fix it
The good news is there are several easy ways to fix your app. Generally, there are two situations you could be in to find this error.
- You’re in an IDE and when you hit ‘Run’ the IDE delivers the error
- You’ve got a JavaFX application packaged as a jar. It won’t run, but you’re smart enough to run it from the command line. Low and behold… error.
The solutions in each case can be similar, although if you can’t make your app modular you will have to apply command-line arguments both in the IDE and with your Jar.
I’ll start with launching from the IDE, because that seems natural. If you’ve got a Jar that won’t run, feel free to skip on down.
I’ll talk a little about why this is happening, because it has to do with JavaFX’s custom windowing and rendering systems. But, I completely understand if you just need those fixes, you can skip ahead to there too.
Fixing Runtime Components in the short term
This is a wildly irresponsible cowboy fix, but if you’re not looking to a long-term stable project (for example university projects or prototyping), it can be a good way to get around the issue for now.
To jury-rig the Java launch process and fool the LauncherHelper into not realising your app is an instance of a JavaFX Application, you can create a dummy class to act as an entry point to the program.
In this case, we’ll set MyLauncher as the main class for the application and the only responsibility of this class will be to launch our actual application!
The benefit of this fix is that it will get rid of this error in both the IDE and with a packaged Jar. That being said, I’d really recommend checking out some of the more sustainable fixes below.
Especially in the case of an app you want to deploy in a production environment, you’ll have a much bigger job changing your application when it’s already in production.
If you’re curious as to why JavaFX needs to check that the runtime components are present, check out the drop-down below.
Why JavaFX needs ‘Runtime Components’
Java has other windowing solutions that don’t need this custom support, so why does JavaFX? Well, the Abstract Window Toolkit (AWT) has been with Java since the beginning. In that sense, it’s baked into the Java runtime. Swing, which also provides a GUI framework, is sat on top of AWT.
Swing, JavaFX uses its own custom windowing toolkit – glass – which is used in combination with prism, its graphics engine. Both of these are inside the javafx.graphics module. When JavaFX was added, the Java launcher was modified to allow JavaFX to set itself up before the application launched.
This is done inside a class called LauncherHelper, which is called whenever any class or jar is run.
As with everything in Java, it also makes sense to delegate where you can. So, when an application is launched, LauncherHelper checks whether it’s a JavaFX program, and if it is, it hands off the responsibilities to the FXLauncher , which runs some pre-flight checks and sets itself up ready to run.
In fact, the main class that the FXLauncher launches isn’t the main class of your application. In this case, FXHelper does the any setup needed before checking back in with our app.

One fix I’ll go through today short-circuits this test by jury-rigging the launch process to fool Java into thinking it’s not a JavaFX application. For small projects, that’s OK, but if you’re looking at developing a production-level or portfolio app, there are other, more sensible ways to do this.
If you’re looking for a really fast fix, though, it does the job.
Fixing JavaFX Runtime Components Issues Responsibly
A lot of these fixes aren’t a lot harder than the cowboy fix above, but they do take a little bit of understanding, or a tiny bit of patience.
in the first case, converting to modules takes a litte bit of understanding. But it’s a fix that will work in both the IDE and the Jar. If you choose to provide VM arguments manually, you’re going to need to provide these to run the Jar too – hence the patience.
1. Make your app modular
By far and away the most future-proof way to fix this error is to convert your project over to a modular one. That being said, it’s not always practical. There are plenty of libraries that currently don’t fully support java 9 modules (Apache POI is a great example)
It can also be a little intimidating if you haven’t migrated yourself across to modular projects yet.
Why convert to Modular
From Java 9 and onwards, Java has modularized. In part, it’s to give you flexibility to add modules easily to your runtime image without including a bunch of jars. But in part it’s because Oracle can no longer assume that Java will exist on every machine you might ship your code to.
A few years ago, when Java aggressively pushed the JRE with manufacturers, it was a safe bet that a JRE existed on most machines. But, nowadays this just isn’t the case. So, developers find themselves shipping their program (which might be quite small) with a 200 MB JRE.
With Java modules, you can include just the modules you need, to make a custom JRE of a much smaller size.
The price you pay for shedding up to 150 MB off the program you’ll eventually ship is that you need to specify which modules your program requires. If there isn’t an overwhelming reason why you need to stay pre-modular, I would suggest the a few lines of code (5 in this case) is more than worth it.
There are three things you need to add some basic modules to a simple App. Obviously, the modules you need will be guided by the modules you use in your program, but the three basic rules are:
1. Getting access to other modules
- Whenever you want to include a module in your program, you need to use the requires keyword
Some modules use the transitive keyword to specify modules that they need, but also that you have access to as well! A good example of this is the javafx.controls module, which requires transitive javafx.graphics and javafx.base . That means your program can access javafx.graphics and javafx.base but you don’t need to include module statements for them.
If course, if you’re not using a build framework, you will still need to download the javafx.graphics and javafx.base jars or jmods for your program to work.
2. Giving reflective access to your module
- We need to give javafx.graphics reflective access.
The JavaFX graphics module injects fields into a Controller using reflection. This is useful, because it facilitates dependency injection, but it means we need to grant reflective access. That requires the opens keyword.
3. Giving other access to your module
- Part of the process of launching our app is to allow JavaFX to set up quickly int he background and then call our main class when it’s ready. To allow this, we need the exports keyword.
Part of that process is that the FXLauncher operates on our main class in order to launch it (check out “Why JavaFX needs Runtime Components” in the dropdown above), we need to allow that too.
3. Putting it all together
All-in-all, our module-info.java file should be in the root of our project directory and for a module called my.project , should look like this:
That’s all we need. If you want more detail on adding modules to a project, check out my post on setting up a modular project with Maven.
Honestly, Java’s module system means that Java is now purpose-built to do things like add in JavaFX. For me this is the logical way to fix the project.
2. Add command-line arguments to your app
This is a pretty flexible fix, which can be done in any IDE. The caveat is that you’ll also need to provide the same arguments when running your Jar. For this to work, you’ll need to know the location of the JavaFX SDK you’ve downloaded on your machine.
I’ll go through what the parameters are first, then how to add them to your IDE. Finally, we’ll cover how to add these arguments when running your jar.
The module parameters you need to add
To fix this, we’re going to pass two sets of parameters to Java as we run our code.
1. Module Path
The first is —module-path , which is going to specify the location in our filesystem where the JavaFX jars are located. Regardless of where you’ve located it, you need to provide the address to the lib folder (this is where the jars are stored).
2. Modules to add
The second argument is —add-modules . This will define which modules to add to our project. For the simplest project, you’ll just need javafx.graphics . However, the basic use-case of an app with buttons (controls), FXML files and so on will require we include javafx.controls and javafx.fxml . Include these separated by a comma but no space.
Make sure you leave a space between the —module-path arguments and the —add-modules arguments or you’ll continue to see errors..
Next, we’ll add them into the IDE run configuration.
Adding VM arguments in an IDE
The most popular are Eclipse and IntelliJ, so I’ll include some screenshots here, but this should work no matter which environment you’re developing in.
a. Eclipse
To add VM arguments in Eclipse, right click the project. Click Run as then Run Configurations . Head to the the Arguments tab and you’ll want the VM Arguments box (not the program arguments one).

b. IntelliJ
In IntelliJ, click the drop-down to the left of the run button, or in the menu bar, Run -> Edit Configurations . In the right-hand panel of your run configuration, specify your main class, and add VM options in the box below.

And that’s it! Your program should run in the IDE.
Adding VM arguments to a Jar
If dependencies or project-constraints are stopping you from converting your project to a modular structure and rebuilding your Jar, you can still run your jar using a batch (or shell) script providing the runtime arguments to the launcher.
Batch scripts allow you to save executable commands into a plain text file to run later. What we’ll save is a combination of the java command to launch a jar ( java -jar myJar.jar ) with the arguments needed to specify the runtime components. So in each case, our script will run:
If you don’t know how to create these files, here’s how. I’ll run through how to create both batch and shell scripts on Windows and Mac/Unix systems. In either case, we’ll be running the same command.
1. Creating a batch file
In Windows, create a file labelled launcher.bat in the same directory as your Jar file. Right click and select “edit” to edit your file.
Add the text, editing your module path so it points to the lib folder of the JavaFX SDK you have on your system, and save.
Источник
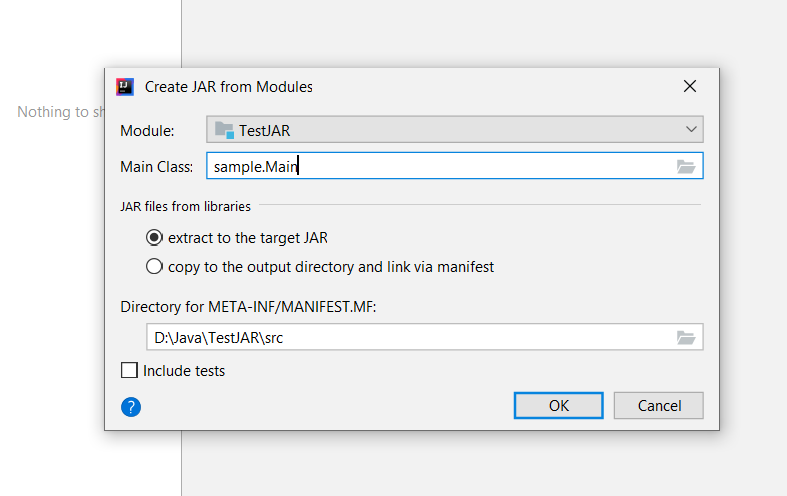
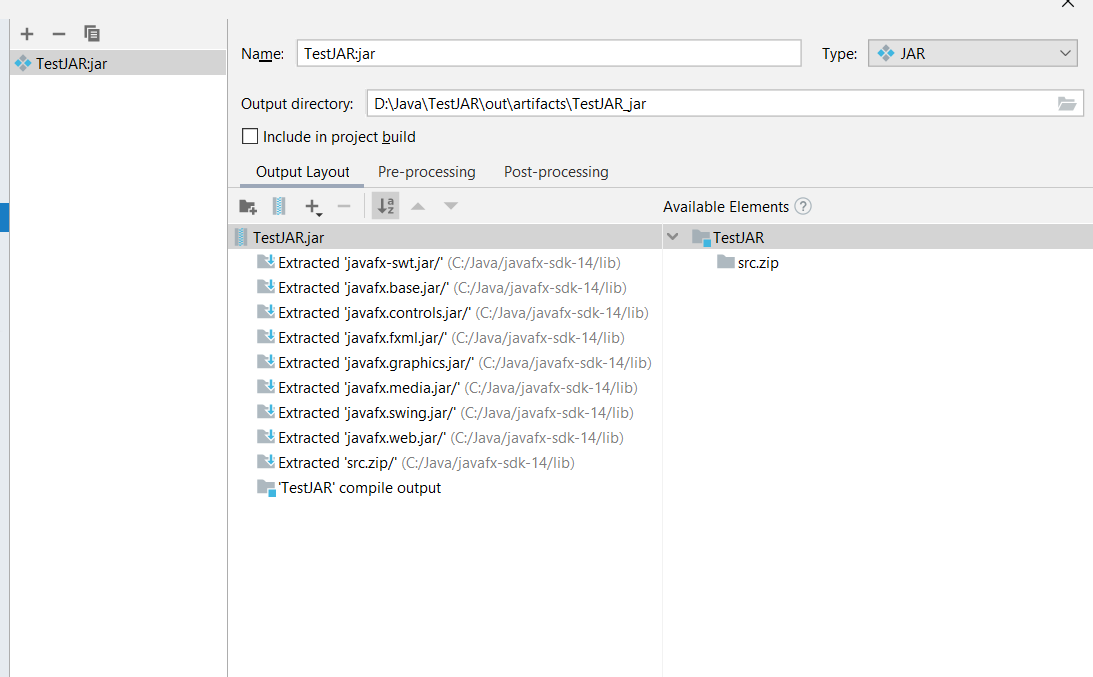
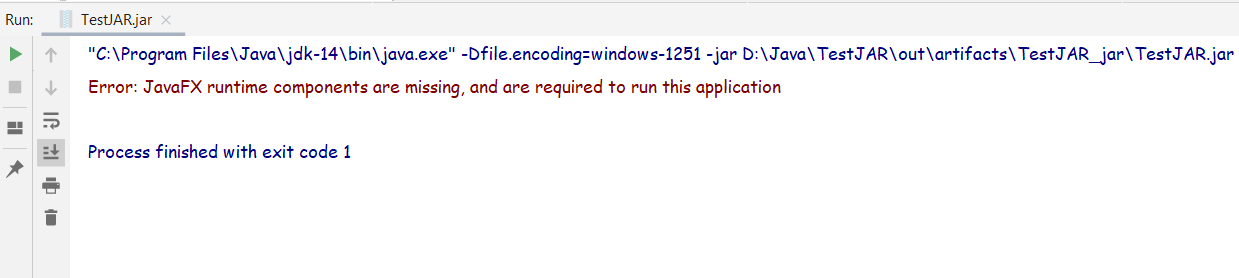
Добрый день. Я новичок в программировании. Моя задача — создать JAR файл из самого простого JavaFX проекта. Файл создаётся без проблем, но при попытке запустить его я получаю ошибку «Error: JavaFX runtime components are missing, and are required to run this application». Уже потрачено двое суток на попытки решить проблему. Помогите, пожалуйста.
Все настройки и процесс создания JARa можно увидеть в скриншотах.
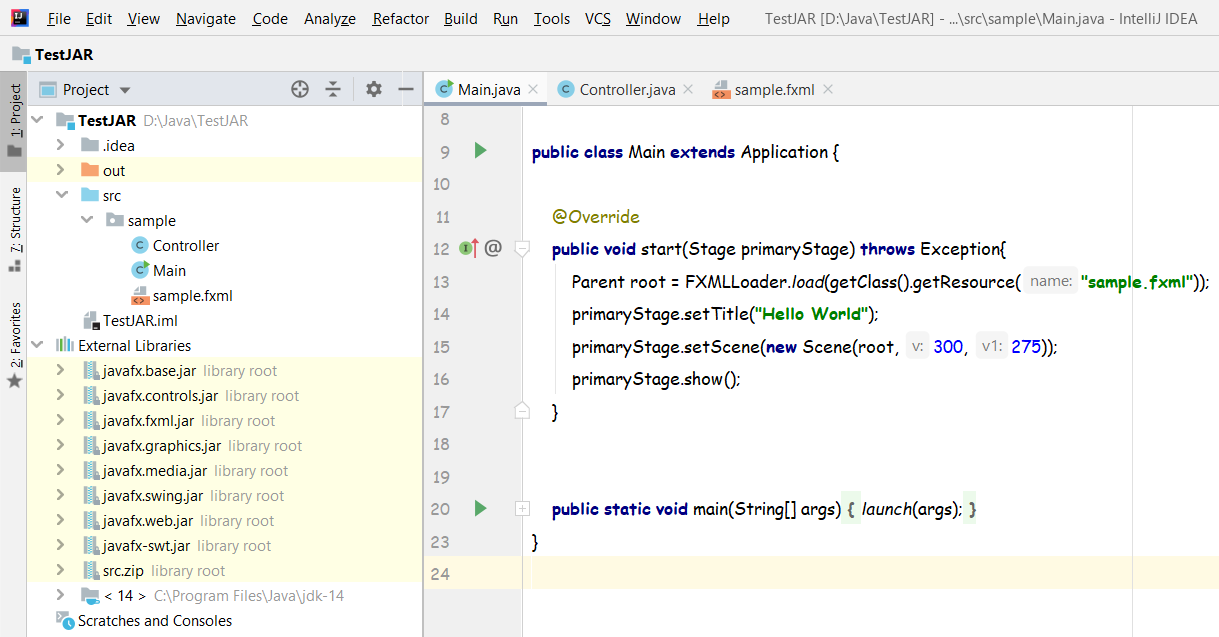
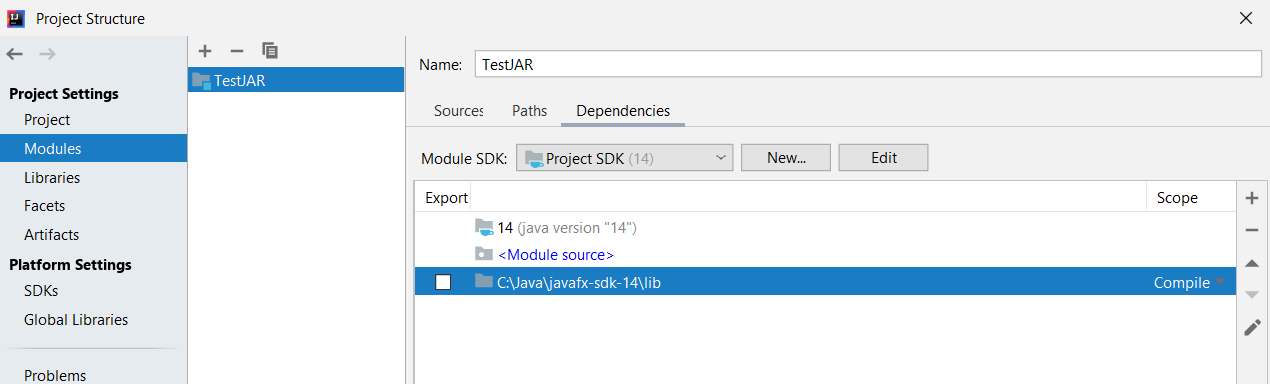

Создание JAR
Результат после попытки запустить JAR.
-
Вопрос заданболее двух лет назад
-
20360 просмотров
Пригласить эксперта
Вот официальная статья от Intellij IDEA, как создать проект с JavaFX: https://www.jetbrains.com/help/idea/javafx.html
p.s. После установки библиотеки JavaFX нужно настроить виртуальную машину в IDEA, всё описано в статье, ничего особо сложного в этом нет.
Error: JavaFX runtime components are missing, and are required to run this application
Ответ кроится в ошибке и если погуглить, то найдете решение.
Коротко о главном — вам понадобится это https://openjfx.io/openjfx-docs/
Вы используете Java 14 версии. Начиная с (помоему) 11 версии они удалили JavaFX и она доступна в качестве отдельного модуля. Соответственно, ее банально в вашем jar’нике и нет.
А нет версии с гредлом или мавеном? Давно пересел на VsCode. Не помню, как там идейка собирает.
Нужно вербозить билд. Посмотрите, что вам идейка собирает. Должен быть какой-то лог обязательно.
-
Показать ещё
Загружается…
09 февр. 2023, в 15:56
20000 руб./за проект
09 февр. 2023, в 15:55
75000 руб./за проект
09 февр. 2023, в 15:13
2000 руб./за проект
Минуточку внимания
If you’re not familiar with Java modules, you’re almost guaranteed to get hit with an error: “Runtime Components Are Missing”. It can be a huge frustration if you’re trying to get into JavaFX. Even if you consider yourself to be pretty Java-savvy.
One side effect of Oracle removing JavaFX from the JDK was to make it harder to get started. Honestly, JavaFX should be a very intuitive and easy to use piece of software. But this is one of the few awkward stumbling blocks that trips a lot of people up.
A “Runtime Components are Missing” error is generated by the Java Launcher. It is generated for all non-modular JavaFX projects since Java SE 9. However, it can be corrected by adding JavaFX modules, using command line arguments.
When I first came back to JavaFX after using it in Java 8, every single one of my old prototypes crashed. So if you’ve had this error don’t be disheartened. It’s a relatively easy fix.
How we’re going to fix it
The good news is there are several easy ways to fix your app. Generally, there are two situations you could be in to find this error.
- You’re in an IDE and when you hit ‘Run’ the IDE delivers the error
- You’ve got a JavaFX application packaged as a jar. It won’t run, but you’re smart enough to run it from the command line. Low and behold… error.
The solutions in each case can be similar, although if you can’t make your app modular you will have to apply command-line arguments both in the IDE and with your Jar.
I’ll start with launching from the IDE, because that seems natural. If you’ve got a Jar that won’t run, feel free to skip on down.
I’ll talk a little about why this is happening, because it has to do with JavaFX’s custom windowing and rendering systems. But, I completely understand if you just need those fixes, you can skip ahead to there too.
Fixing Runtime Components in the short term
This is a wildly irresponsible cowboy fix, but if you’re not looking to a long-term stable project (for example university projects or prototyping), it can be a good way to get around the issue for now.
To jury-rig the Java launch process and fool the LauncherHelper into not realising your app is an instance of a JavaFX Application, you can create a dummy class to act as an entry point to the program.
In this case, we’ll set MyLauncher as the main class for the application and the only responsibility of this class will be to launch our actual application!
package com.edencoding;
public class MyLauncher {
    public static void main(String[] args){
        MyApp.main(args);
    }
}
The benefit of this fix is that it will get rid of this error in both the IDE and with a packaged Jar. That being said, I’d really recommend checking out some of the more sustainable fixes below.
Especially in the case of an app you want to deploy in a production environment, you’ll have a much bigger job changing your application when it’s already in production.
If you’re curious as to why JavaFX needs to check that the runtime components are present, check out the drop-down below.
Why JavaFX needs ‘Runtime Components’
Java has other windowing solutions that don’t need this custom support, so why does JavaFX? Well, the Abstract Window Toolkit (AWT) has been with Java since the beginning. In that sense, it’s baked into the Java runtime. Swing, which also provides a GUI framework, is sat on top of AWT.
Swing, JavaFX uses its own custom windowing toolkit – glass – which is used in combination with prism, its graphics engine. Both of these are inside the javafx.graphics module. When JavaFX was added, the Java launcher was modified to allow JavaFX to set itself up before the application launched.
This is done inside a class called LauncherHelper, which is called whenever any class or jar is run.
As with everything in Java, it also makes sense to delegate where you can. So, when an application is launched, LauncherHelper checks whether it’s a JavaFX program, and if it is, it hands off the responsibilities to the FXLauncher, which runs some pre-flight checks and sets itself up ready to run.
In fact, the main class that the FXLauncher launches isn’t the main class of your application. In this case, FXHelper does the any setup needed before checking back in with our app.
One fix I’ll go through today short-circuits this test by jury-rigging the launch process to fool Java into thinking it’s not a JavaFX application. For small projects, that’s OK, but if you’re looking at developing a production-level or portfolio app, there are other, more sensible ways to do this.
If you’re looking for a really fast fix, though, it does the job.
Fixing JavaFX Runtime Components Issues Responsibly
A lot of these fixes aren’t a lot harder than the cowboy fix above, but they do take a little bit of understanding, or a tiny bit of patience.
in the first case, converting to modules takes a litte bit of understanding. But it’s a fix that will work in both the IDE and the Jar. If you choose to provide VM arguments manually, you’re going to need to provide these to run the Jar too – hence the patience.
1. Make your app modular
By far and away the most future-proof way to fix this error is to convert your project over to a modular one. That being said, it’s not always practical. There are plenty of libraries that currently don’t fully support java 9 modules (Apache POI is a great example)
It can also be a little intimidating if you haven’t migrated yourself across to modular projects yet.
Why convert to Modular
From Java 9 and onwards, Java has modularized. In part, it’s to give you flexibility to add modules easily to your runtime image without including a bunch of jars. But in part it’s because Oracle can no longer assume that Java will exist on every machine you might ship your code to.
A few years ago, when Java aggressively pushed the JRE with manufacturers, it was a safe bet that a JRE existed on most machines. But, nowadays this just isn’t the case. So, developers find themselves shipping their program (which might be quite small) with a 200 MB JRE.
With Java modules, you can include just the modules you need, to make a custom JRE of a much smaller size.
The price you pay for shedding up to 150 MB off the program you’ll eventually ship is that you need to specify which modules your program requires. If there isn’t an overwhelming reason why you need to stay pre-modular, I would suggest the a few lines of code (5 in this case) is more than worth it.
Adding modules
There are three things you need to add some basic modules to a simple App. Obviously, the modules you need will be guided by the modules you use in your program, but the three basic rules are:
1. Getting access to other modules
- Whenever you want to include a module in your program, you need to use the requires keyword
Some modules use the transitive keyword to specify modules that they need, but also that you have access to as well! A good example of this is the javafx.controls module, which requires transitive javafx.graphics and javafx.base. That means your program can access javafx.graphics and javafx.base but you don’t need to include module statements for them.
If course, if you’re not using a build framework, you will still need to download the javafx.graphics and javafx.base jars or jmods for your program to work.
2. Giving reflective access to your module
- We need to give javafx.graphics reflective access.
The JavaFX graphics module injects fields into a Controller using reflection. This is useful, because it facilitates dependency injection, but it means we need to grant reflective access. That requires the opens keyword.
3. Giving other access to your module
- Part of the process of launching our app is to allow JavaFX to set up quickly int he background and then call our main class when it’s ready. To allow this, we need the exports keyword.
Part of that process is that the FXLauncher operates on our main class in order to launch it (check out “Why JavaFX needs Runtime Components” in the dropdown above), we need to allow that too.
3. Putting it all together
All-in-all, our module-info.java file should be in the root of our project directory and for a module called my.project, should look like this:
module my.project {
    requires javafx.fxml;
    requires javafx.controls;
    opens my.project to javafx.graphics;
    exports my.project;
}
That’s all we need. If you want more detail on adding modules to a project, check out my post on setting up a modular project with Maven.
Honestly, Java’s module system means that Java is now purpose-built to do things like add in JavaFX. For me this is the logical way to fix the project.
2. Add command-line arguments to your app
This is a pretty flexible fix, which can be done in any IDE. The caveat is that you’ll also need to provide the same arguments when running your Jar. For this to work, you’ll need to know the location of the JavaFX SDK you’ve downloaded on your machine.
I’ll go through what the parameters are first, then how to add them to your IDE. Finally, we’ll cover how to add these arguments when running your jar.
The module parameters you need to add
To fix this, we’re going to pass two sets of parameters to Java as we run our code.
1. Module Path
The first is --module-path, which is going to specify the location in our filesystem where the JavaFX jars are located. Regardless of where you’ve located it, you need to provide the address to the lib folder (this is where the jars are stored).
--module-path /path/to/javafx-sdk-14/lib
2. Modules to add
The second argument is --add-modules. This will define which modules to add to our project. For the simplest project, you’ll just need javafx.graphics. However, the basic use-case of an app with buttons (controls), FXML files and so on will require we include javafx.controls and javafx.fxml. Include these separated by a comma but no space.
--add-modules javafx.controls,javafx.fxml
Make sure you leave a space between the --module-path arguments and the --add-modules arguments or you’ll continue to see errors..
--module-path /path/to/javafx-sdk-14/lib --add-modules javafx.controls,javafx.fxml
Next, we’ll add them into the IDE run configuration.
Adding VM arguments in an IDE
The most popular are Eclipse and IntelliJ, so I’ll include some screenshots here, but this should work no matter which environment you’re developing in.
a. Eclipse
To add VM arguments in Eclipse, right click the project. Click Run as then Run Configurations. Head to the the Arguments tab and you’ll want the VM Arguments box (not the program arguments one).
b. IntelliJ
In IntelliJ, click the drop-down to the left of the run button, or in the menu bar, Run -> Edit Configurations. In the right-hand panel of your run configuration, specify your main class, and add VM options in the box below.
And that’s it! Your program should run in the IDE.
Adding VM arguments to a Jar
If dependencies or project-constraints are stopping you from converting your project to a modular structure and rebuilding your Jar, you can still run your jar using a batch (or shell) script providing the runtime arguments to the launcher.
Batch scripts allow you to save executable commands into a plain text file to run later. What we’ll save is a combination of the java command to launch a jar (java -jar myJar.jar) with the arguments needed to specify the runtime components. So in each case, our script will run:
java -jar myJar.jar --module-path /path/to/javafx-sdk-14/lib --add-modules javafx.controls,javafx.fxml
If you don’t know how to create these files, here’s how. I’ll run through how to create both batch and shell scripts on Windows and Mac/Unix systems. In either case, we’ll be running the same command.
1. Creating a batch file
In Windows, create a file labelled launcher.bat in the same directory as your Jar file. Right click and select “edit” to edit your file.
Add the text, editing your module path so it points to the lib folder of the JavaFX SDK you have on your system, and save.
Today We are Going To Solve Error: JavaFX runtime components are missing, and are required to run this application in Java. Here we will Discuss All Possible Solutions and How this error Occurs So let’s get started with this Article.
Contents
- 1 How to Fix Error: JavaFX runtime components are missing, and are required to run this application Error?
- 1.1 Solution 1 : follow the steps
- 2 Conclusion
- 2.1 Also Read This Solutions
- How to Fix Error: JavaFX runtime components are missing, and are required to run this application Error?
To Fix Error: JavaFX runtime components are missing, and are required to run this application Error just follow the steps. You can solve this error very easily Just follow the below steps: First of all go to file and select project structure and modules.
Then tap on Dependency and click on +, It will let you designate the directory where you have unpacked JavaFX’s “lib” folder. And you can edit this to call it JavaFX by double-clicking on the line. Then just select run and edit the configuration and add this –module-path /path/to/JavaFX/lib –add-modules=javafx.controls to VM option And at the last just set the SDK It will help you. - Error: JavaFX runtime components are missing, and are required to run this application
To Fix Error: JavaFX runtime components are missing, and are required to run this application Error just follow the steps. You can solve this error very easily Just follow the below steps: First of all go to file and select project structure and modules.
Then tap on Dependency and click on +, It will let you designate the directory where you have unpacked JavaFX’s “lib” folder. And you can edit this to call it JavaFX by double-clicking on the line. Then just select run and edit the configuration and add this –module-path /path/to/JavaFX/lib –add-modules=javafx.controls to VM option And at the last just set the SDK It will help you.
Solution 1 : follow the steps
You can solve this error very easily Just follow the below steps:
- First of all go to file and select project structure and modules.
- Then tap on Dependency and click on +, It will let you designate the directory where you have unpacked JavaFX’s “lib” folder. And you can edit this to call it JavaFX by double-clicking on the line.
- Then just select run and edit the configuration and add this –module-path /path/to/JavaFX/lib –add-modules=javafx.controls to VM option
- And at the last just set the SDK
It will help you.
Conclusion
So these were all possible solutions to this error. I hope your error has been solved by this article. In the comments, tell us which solution worked? If you liked our article, please share it on your social media and comment on your suggestions. Thank you.
Also Read This Solutions
- ERROR: Could not build wheels for scipy which use PEP 517 and cannot be installed directly
- npm WARN old lockfile The package-lock.json file was created with an old version of npm
- numpy.core._exceptions.MemoryError: Unable to allocate array with shape
- Module not found: Error: Can’t resolve ‘react/jsx-runtime’
- Laravel PDOException could not find driver