About Lenovo
-
Our Company
-
News
-
Investor Relations
-
Sustainability
-
Product Compliance
-
Product Security
-
Lenovo Open Source
-
Legal Information
-
Jobs at Lenovo
Shop
-
Laptops & Ultrabooks
-
Tablets
-
Desktops & All-in-Ones
-
Workstations
-
Accessories & Software
-
Servers
-
Storage
-
Networking
-
Laptop Deals
-
Outlet
Support
-
Drivers & Software
-
How To’s
-
Warranty Lookup
-
Parts Lookup
-
Contact Us
-
Repair Status Check
-
Imaging & Security Resources
Resources
-
Where to Buy
-
Shopping Help
-
Sales Order Status
-
Product Specifications (PSREF)
-
Forums
-
Registration
-
Product Accessibility
-
Environmental Information
-
Gaming Community
-
LenovoEDU Community
-
LenovoPRO Community
©
Lenovo.
|
|
|
|
You can use the Lenovo XClarity Essentials Bootable Media Creator (BoMC) to update your IBM X3650 M4 servers firmware and BIOS/UEFI, Device drivers are not included in the bootable image and must be updated separately.
Technical overview
Users can use Lenovo XClarity Essentials Bootable Media Creator (hereinafter referred to as BoMC) to create bootable media suitable for firmware updates, VPD updates, inventory and FFDC collection, advanced system configuration, FoD Keys management, and diagnostics on supported ThinkSystem, System x, BladeCenter systems, and storage platform.Using BoMC, users can create a single bootable image on supported media (such as CD, DVD, ISO image, USB flash drive, or set of PXE files) that bundles multiple ThinkSystem, System x, and BladeCenter systems updates from UpdateXpress System Packs containing firmware update packages. From V11.4.0, BoMC supports users to update firmware on supported storage platforms through bootable ISO. From V11.5.1, BoMC supports users to create a full (all-in-one) bootable image for full management function, including firmware update, VPD update, inventory and FFDC collection, advanced system configuration, FoD Keys management, diagnostics, RAID configuration, and secure erase.
Important: Device drivers are not included in the bootable image and must be updated separately.
Source: https://sysmgt.lenovofiles.com/help/topic/bomc_lenovo/bomc_bk.pdf
You can also use the Lenovo XClarity Essentials UpdateXpress tool to update your IBM servers, but here you first have to check whether your system and OS is supported by the tool. If so this tool will also update device drivers for Windows or Linux.
Finally you could also download firmware, BIOS/UEFI, drivers and software for your IBM servers directly from the following links.
https://support.lenovo.com
https://datacentersupport.lenovo.com/
Below I will describe the steps to update the IBM x3650 M4 servers firmware and UEFI by using the Lenovo XClarity Essentials Bootable Media Creator (BoMC).
I will download and rund the BoMC on a client in the network, from which I will later connect to the server by using the IMM remote control.
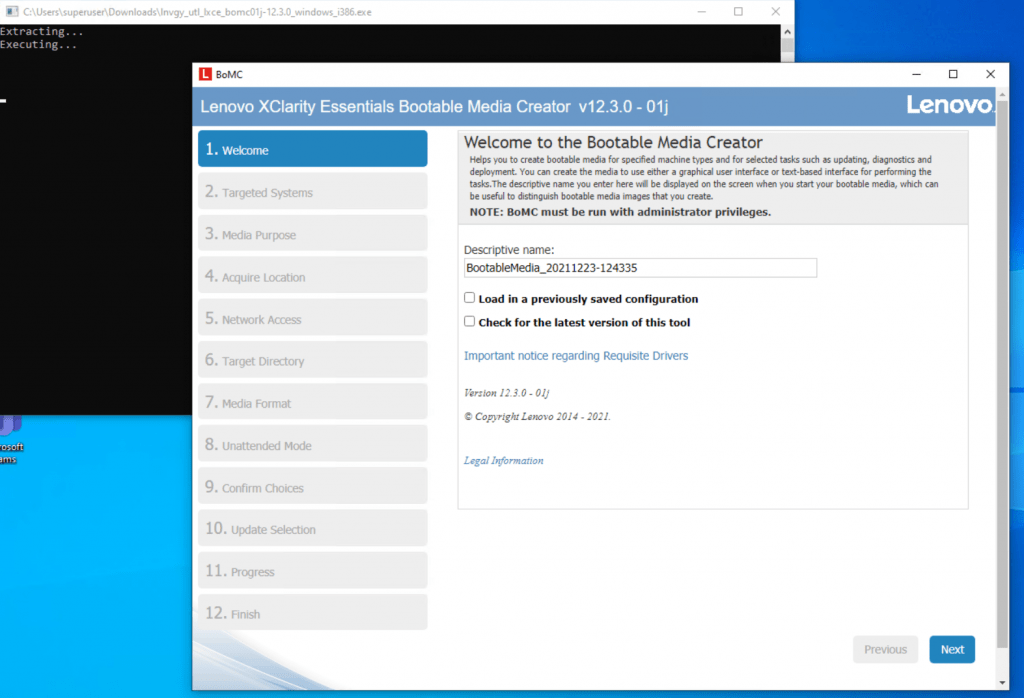
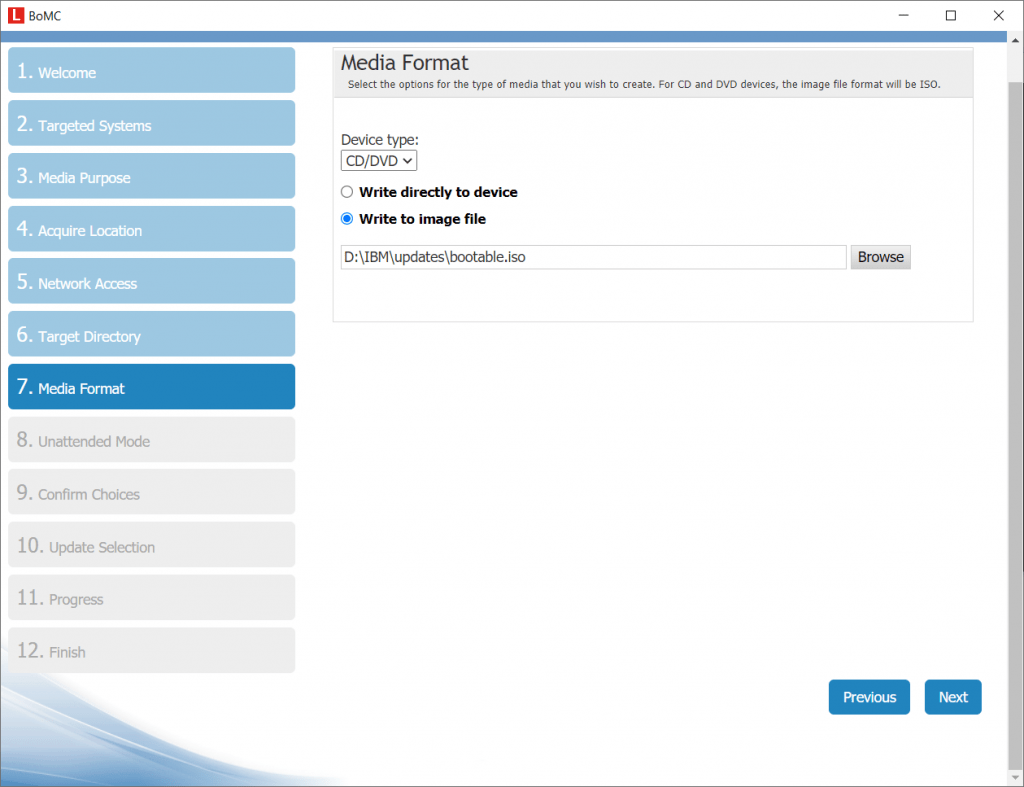
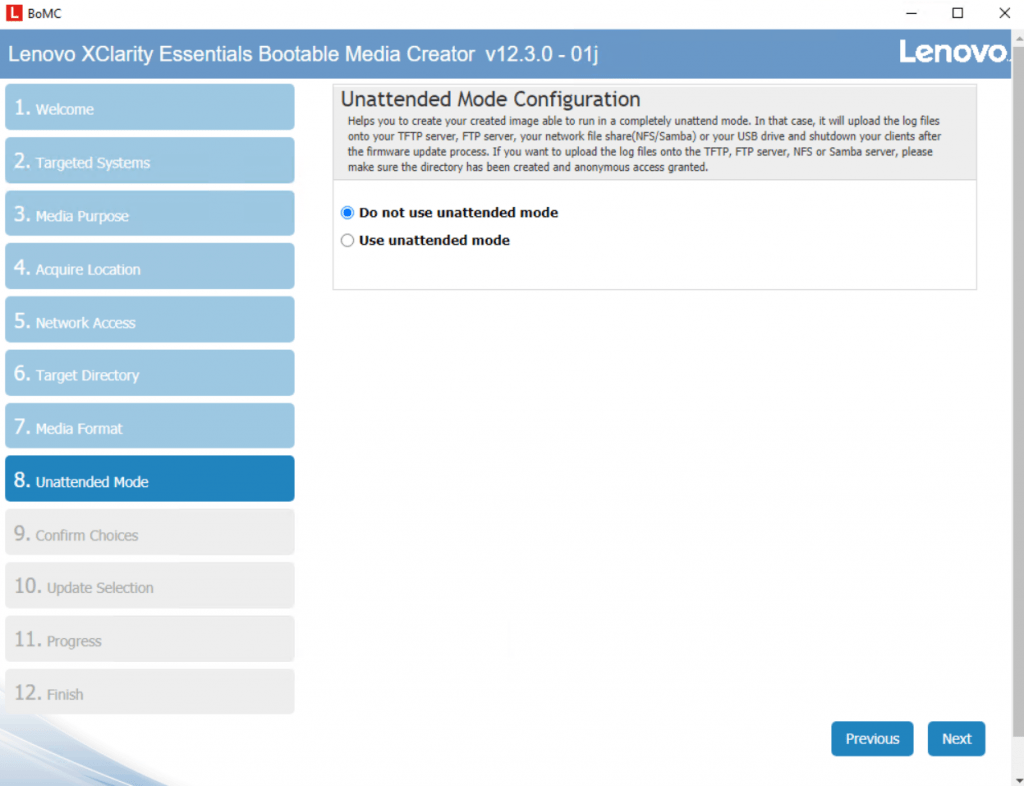
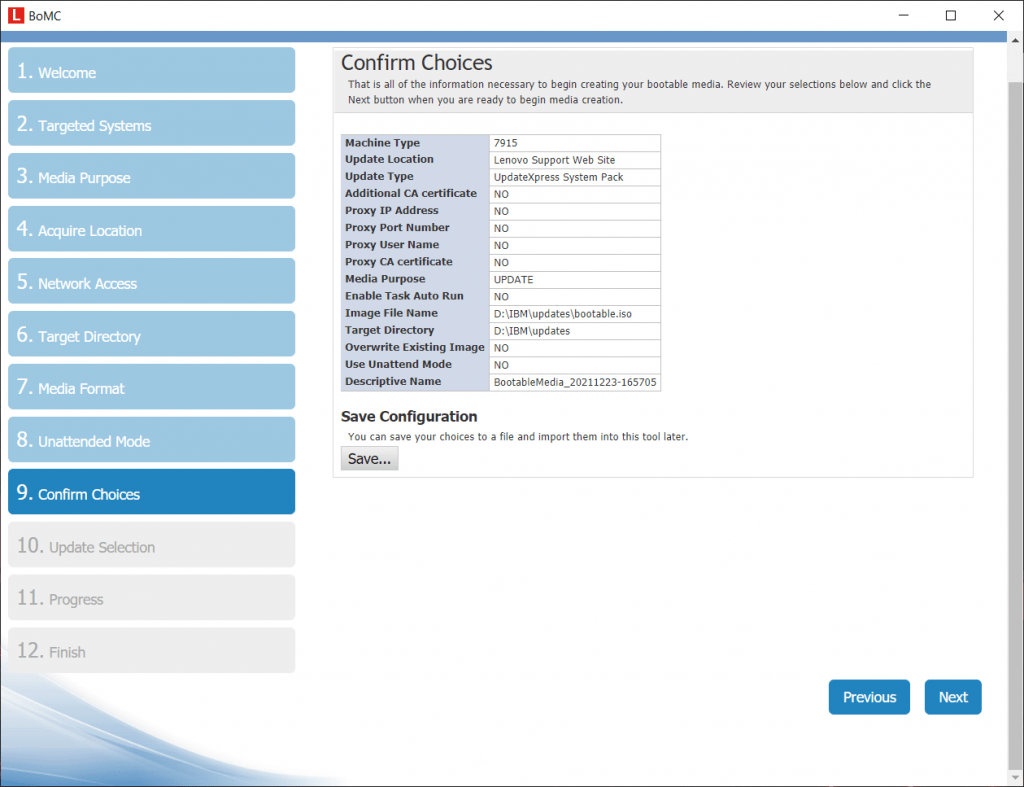
After running the lnvgy_utl_lxce_bomc01g-12.4.0_windows_i386.exe BoMC I will get the following GUI to create the ISO.
It is nearly the same as used to for the legacy IBM UpdateXpress System Pack Installer.
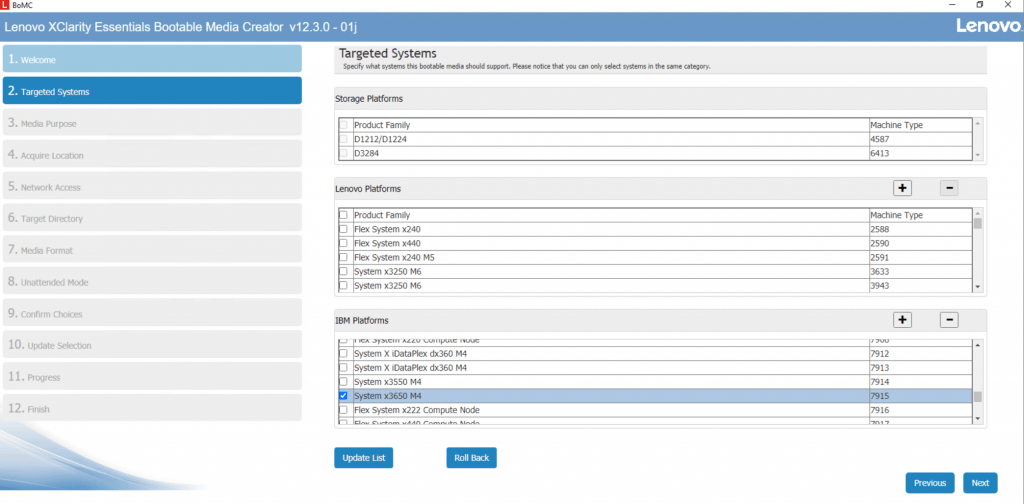
Here I will select under IBM Platforms my System X3650 M4 server.


Under Target Directory check that the path will fulfil the following requirements.
If the path will use not the above requirements like the following path:
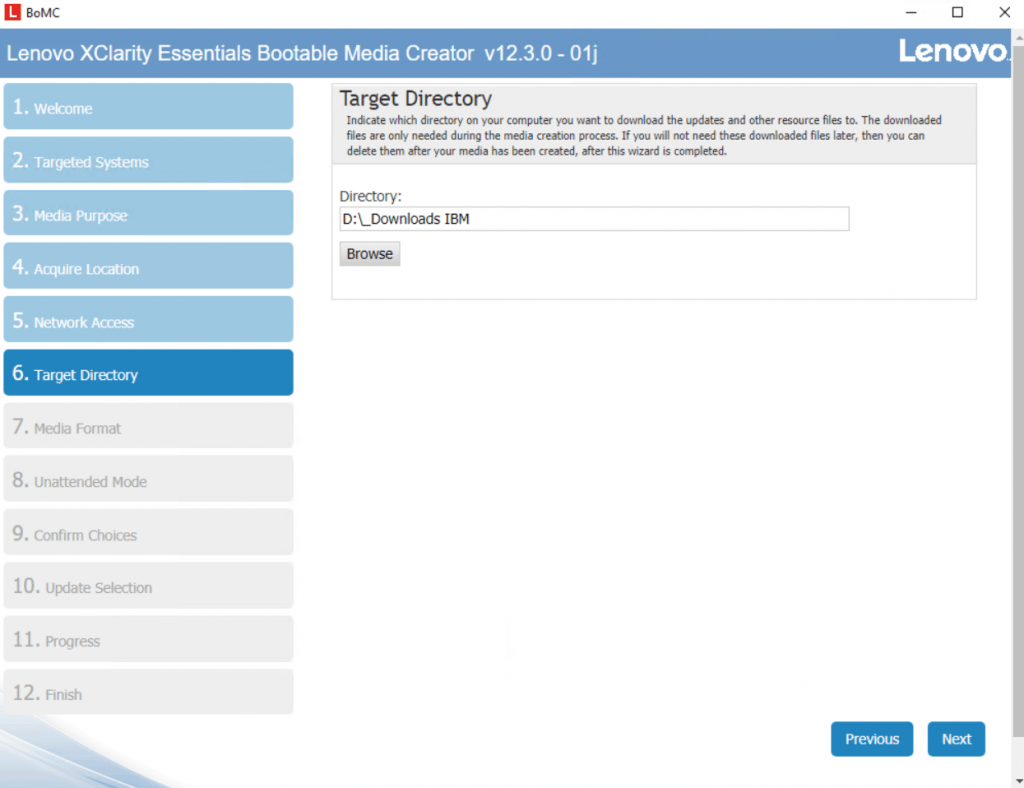
You will run into the following error which will not really indicate a problem with the path.

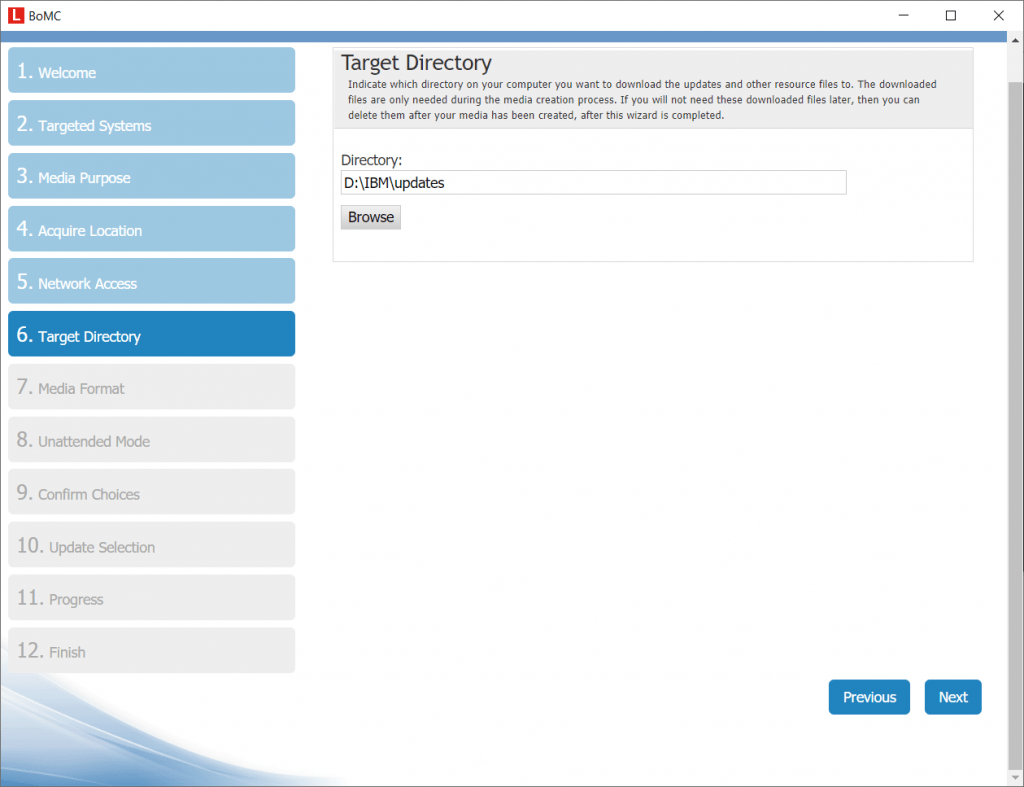
So I changed the path into D:IBMupdates
In case something won’t work as expected, you can check the log files from the BoMC.
BOMC Log File bomc_1240.log
The Bootable Media Creator (BoMC) log file is located in the following directoy on Windows
%SystemDrive%Lenovo_Support
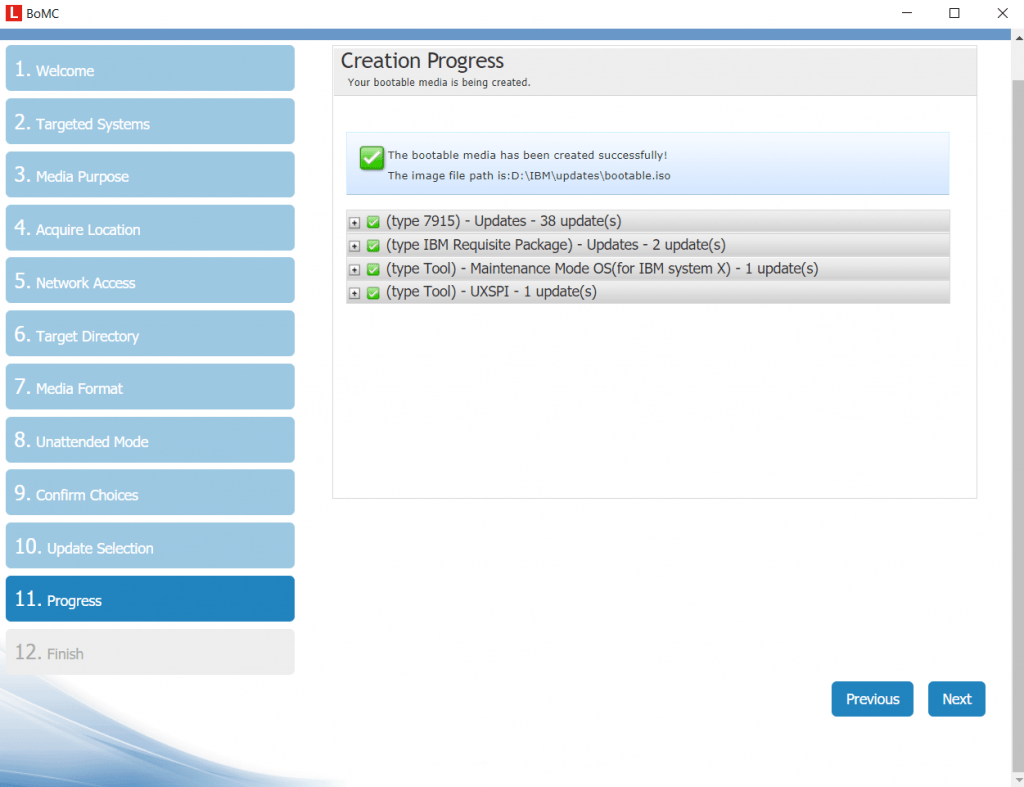
So now after creating the boot ISO I can boot my IBM x3650 M4 server from it.
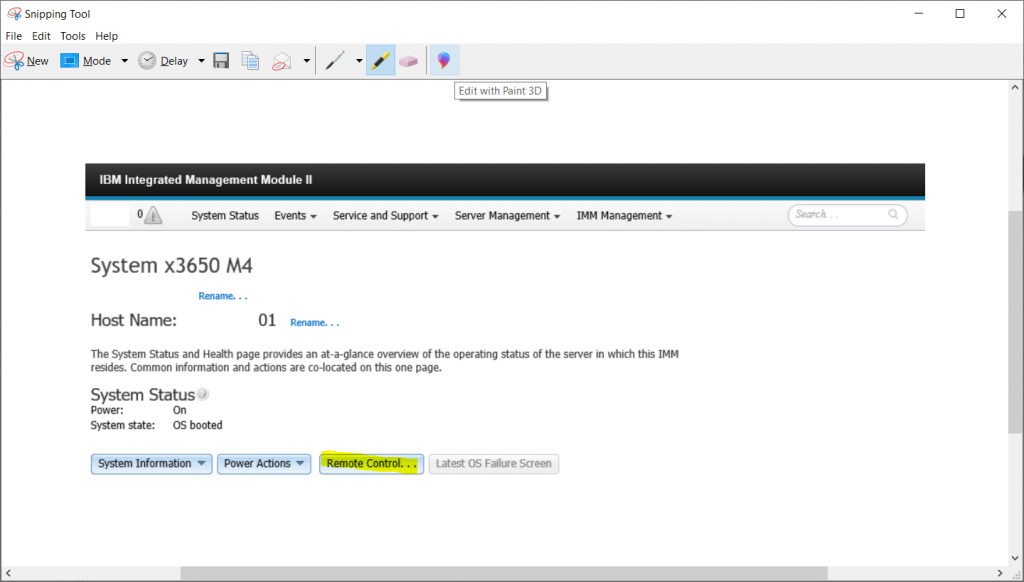
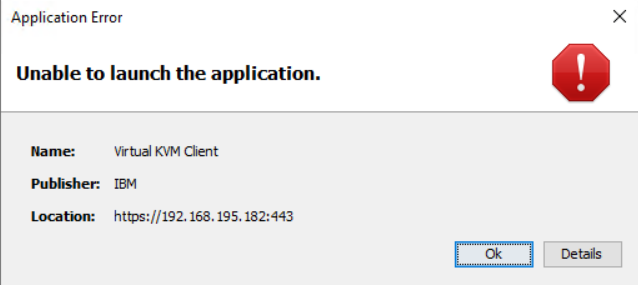
Remote Control IMM need Java Version not be higher than Java 7.8
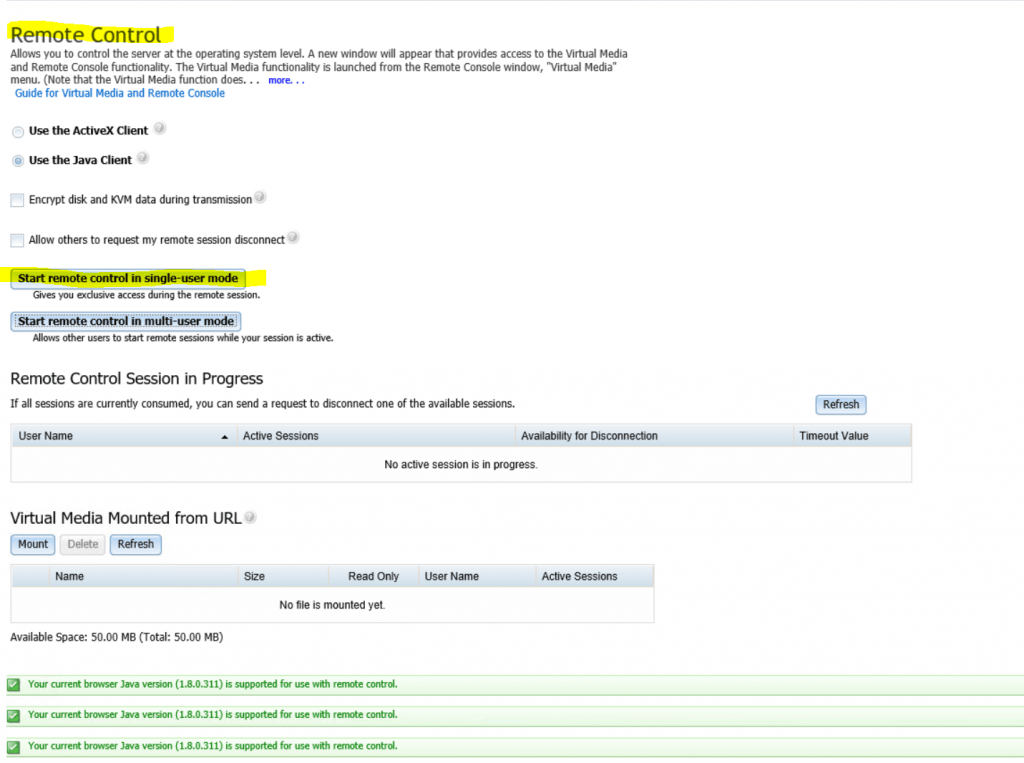
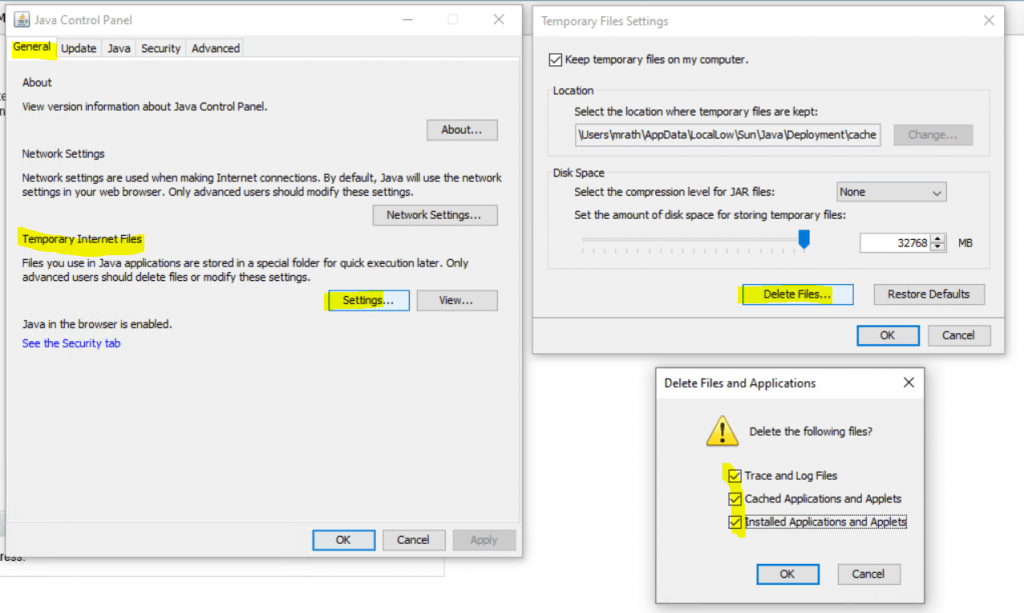
In case you will get the following error during connecting to the console, try to delete the temporary internet files including java as follows, in my case this solved the above error.
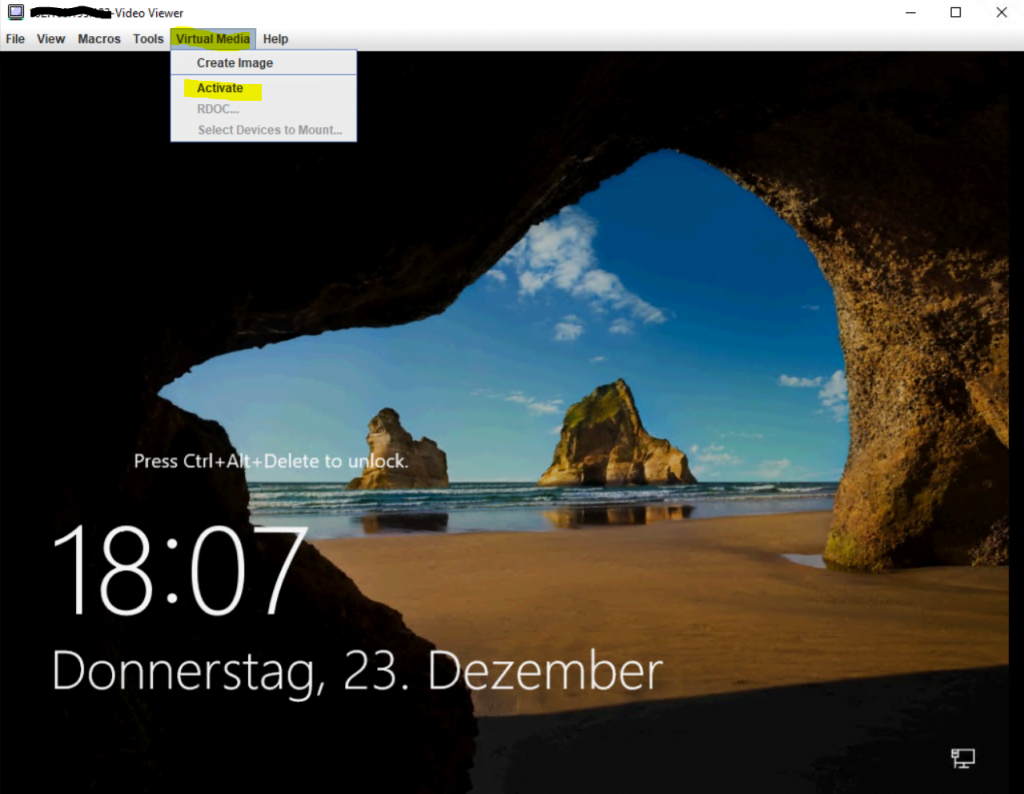
Now I will need to mount the BoMC ISO files as follows.
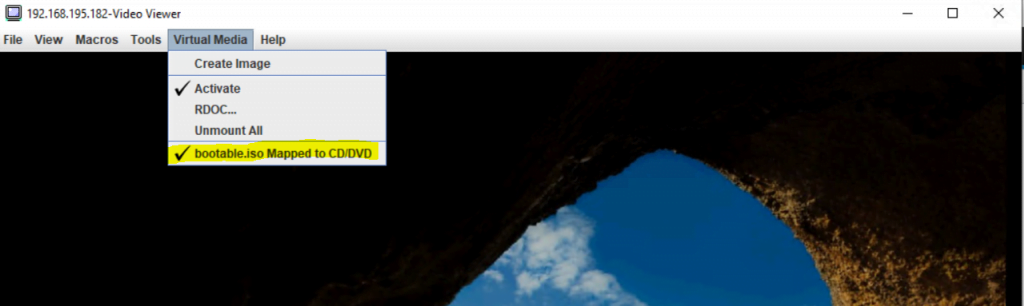
Click on Virtual Media -> Activate
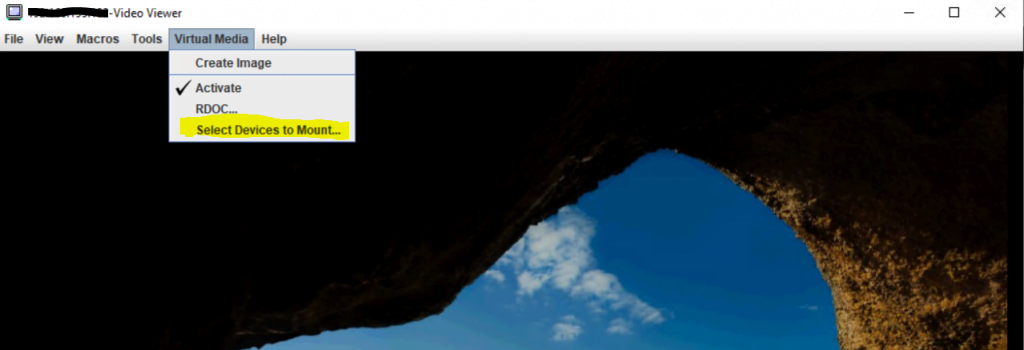
Then click on Select Devices to Mount …
Click on Add Image … and select the BoMC ISO.
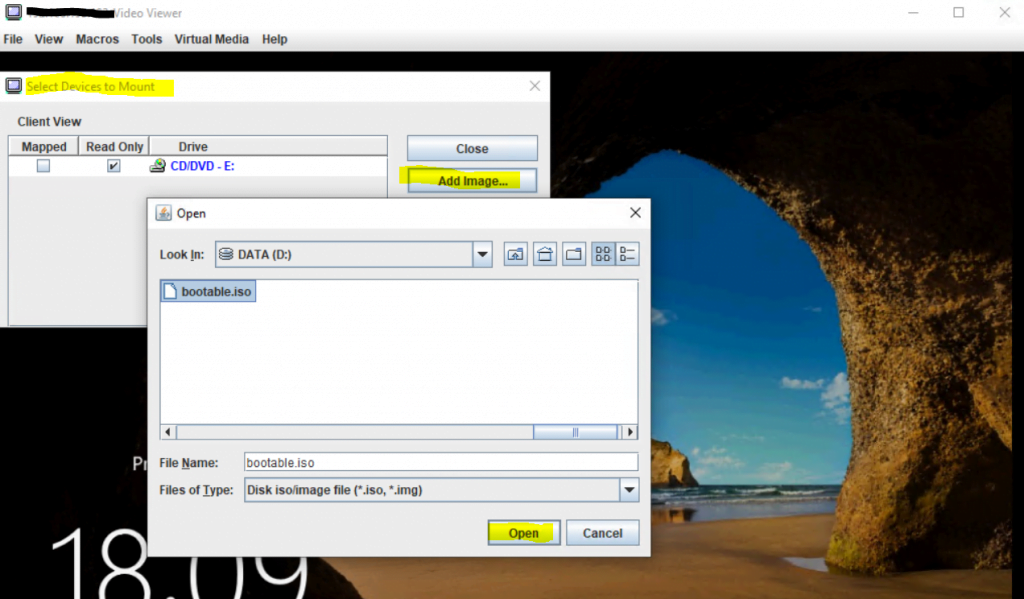
Check under Mapped the CD/DVD ISO file and click finally on Mount Selected.
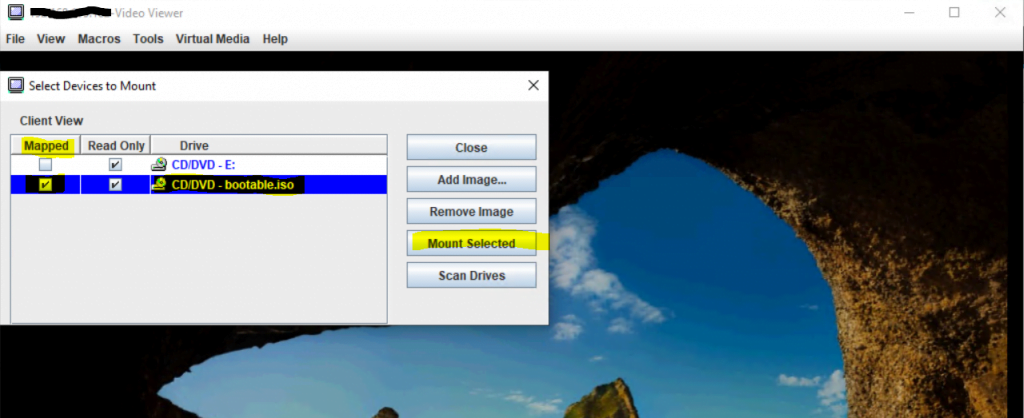
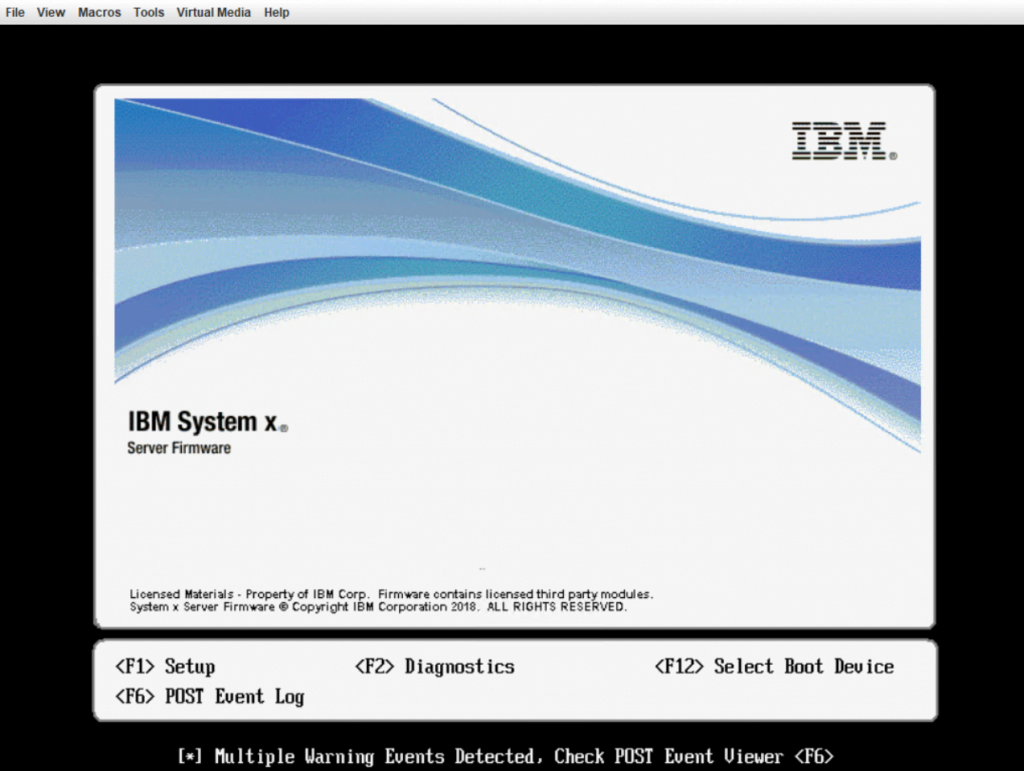
From now on we can reboot the server and during boot we need to press F12 to enter the boot menu – and then select CD/DVD to boot from the ISO file.
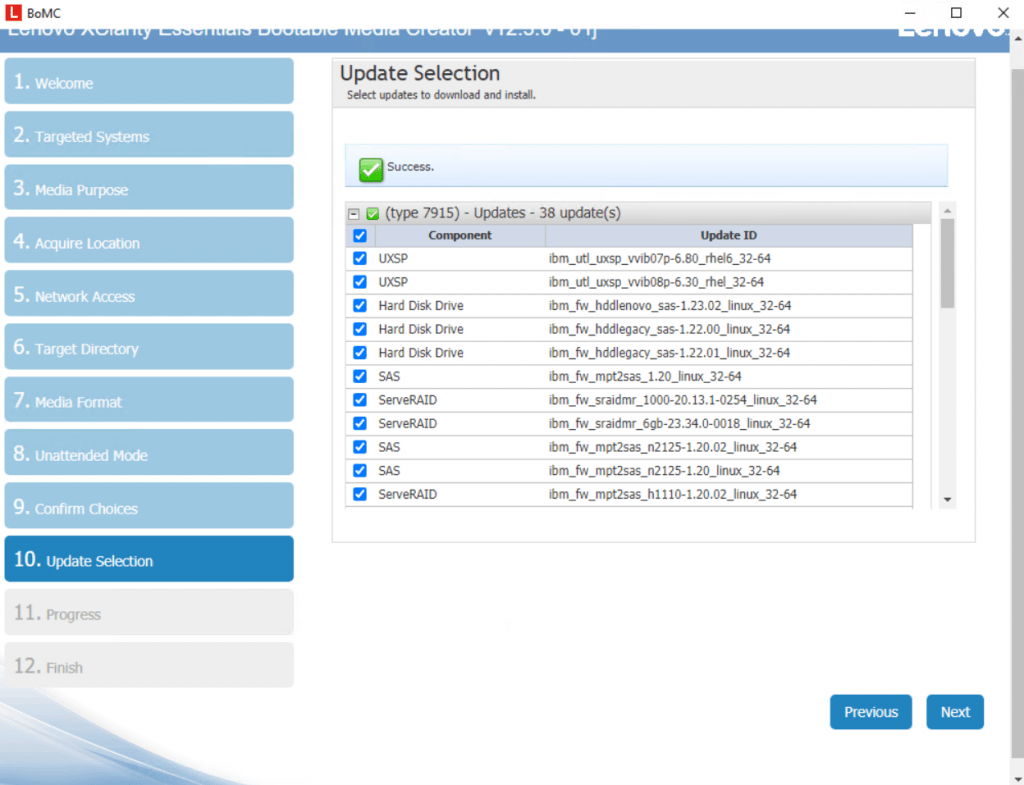
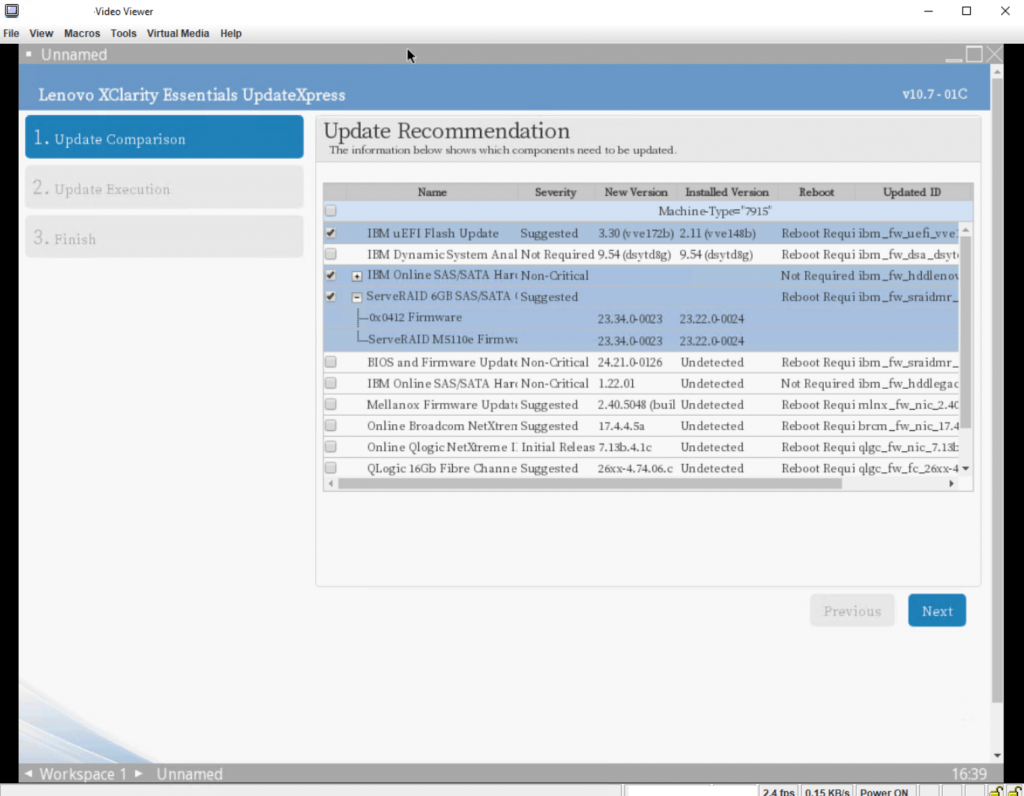
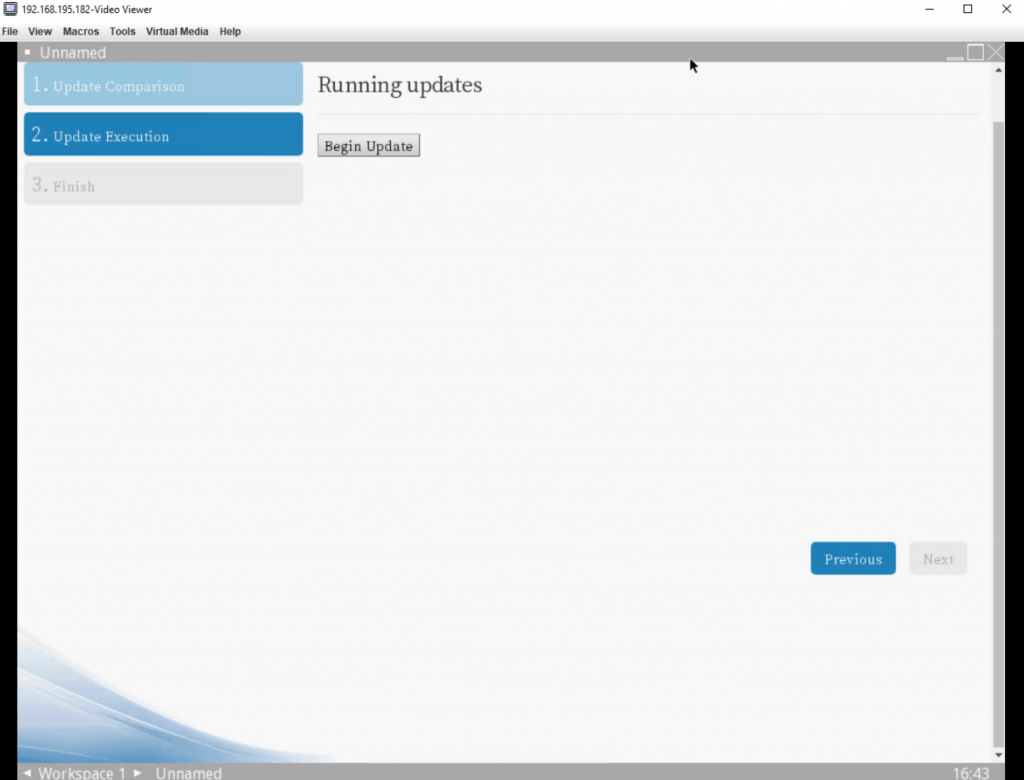
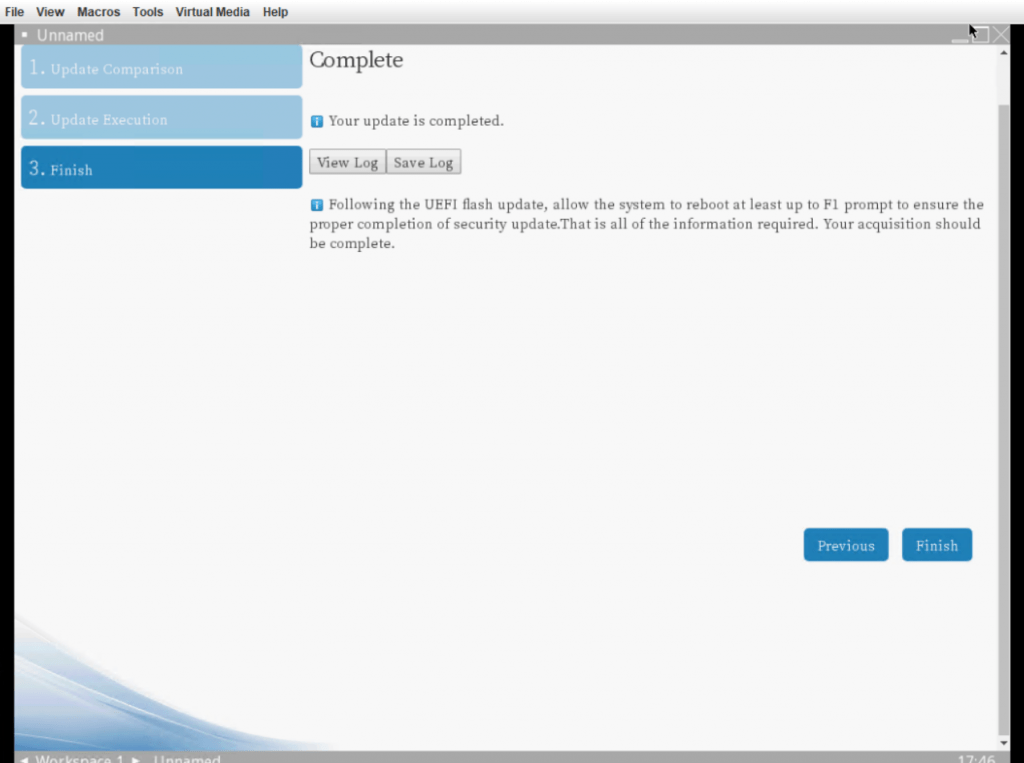
After booting from the ISO file the Lenovo XClarity Essentials Update Express tool will start as follows.
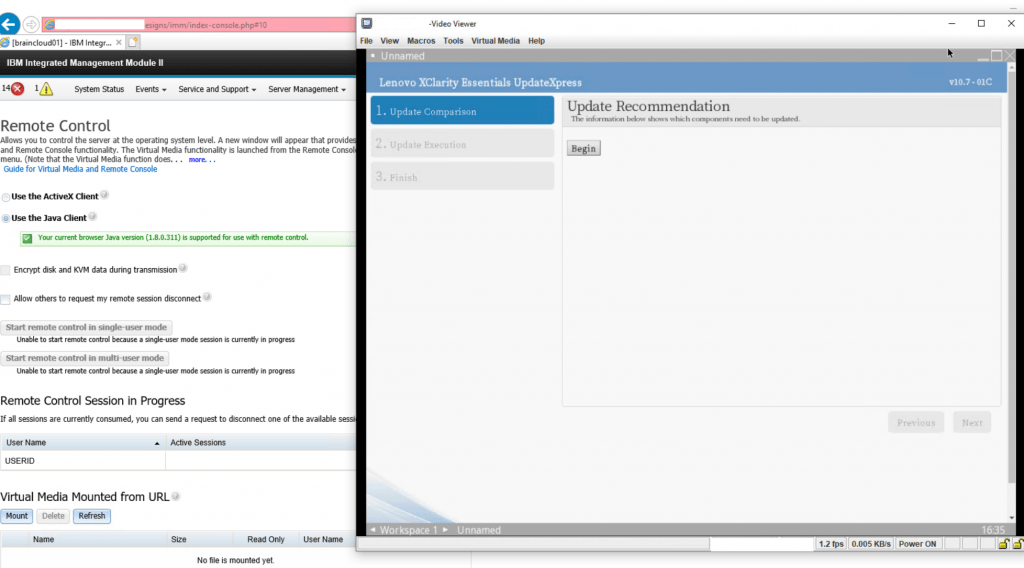
Here we can select what we want to update.
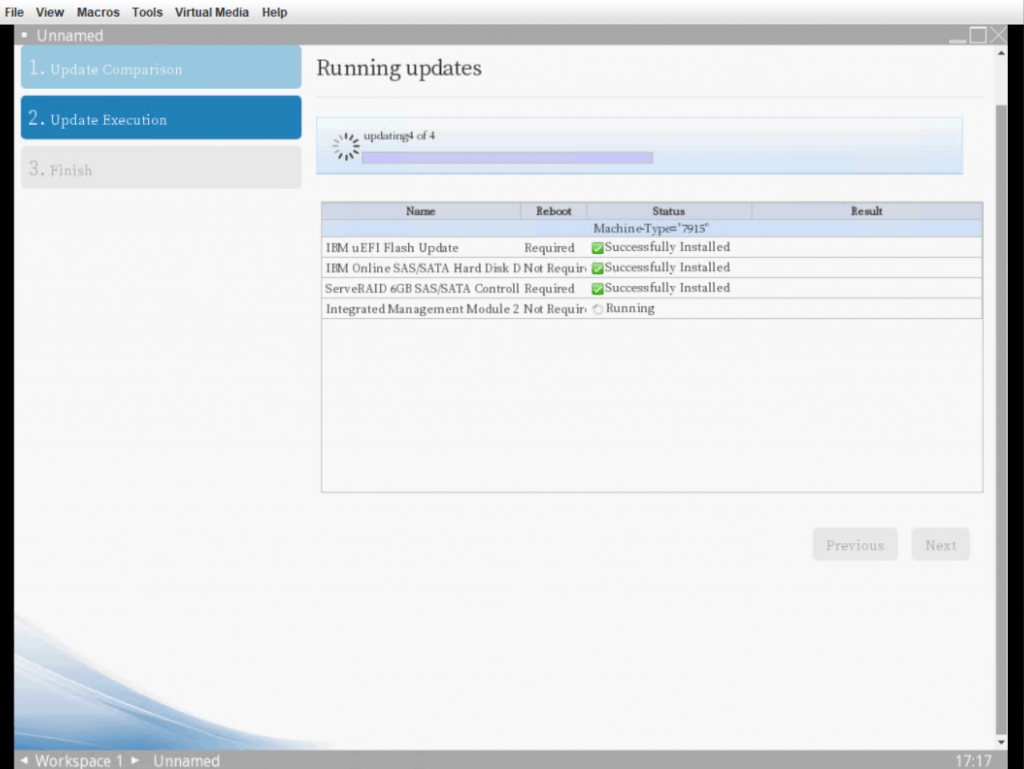
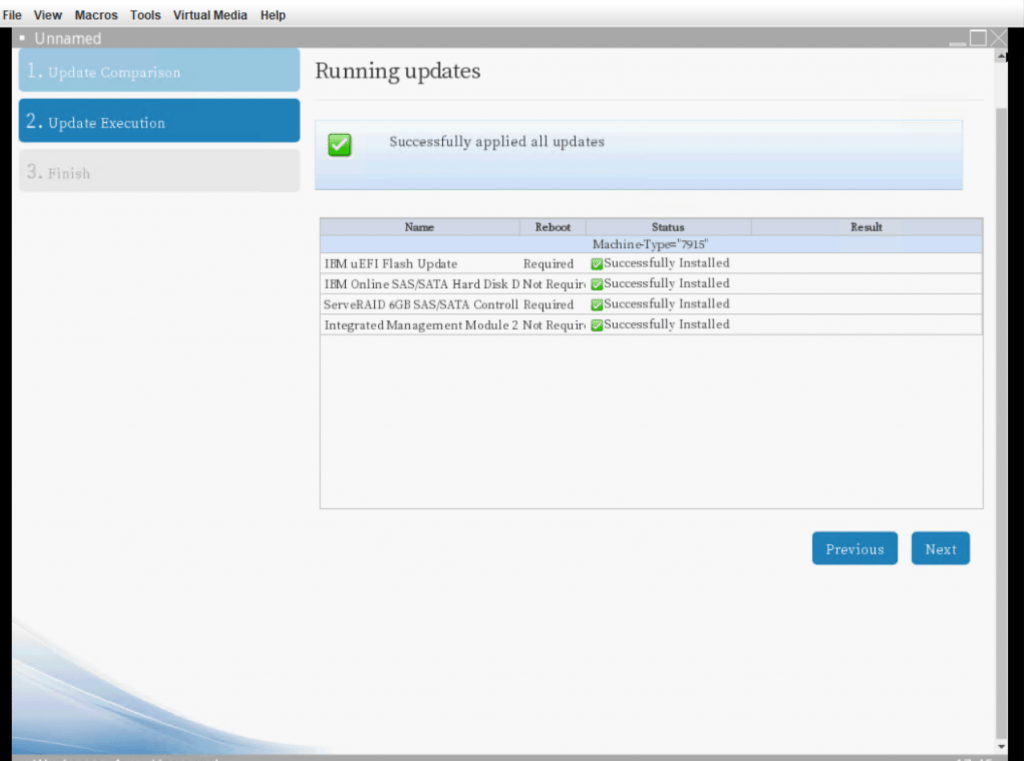
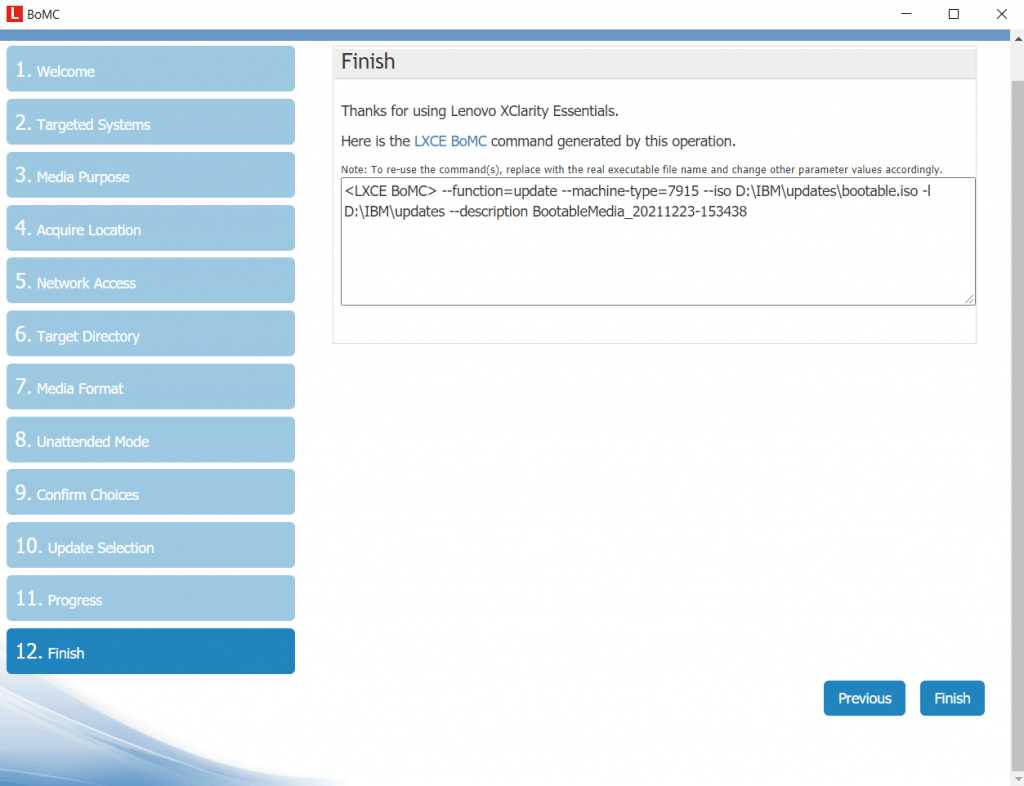
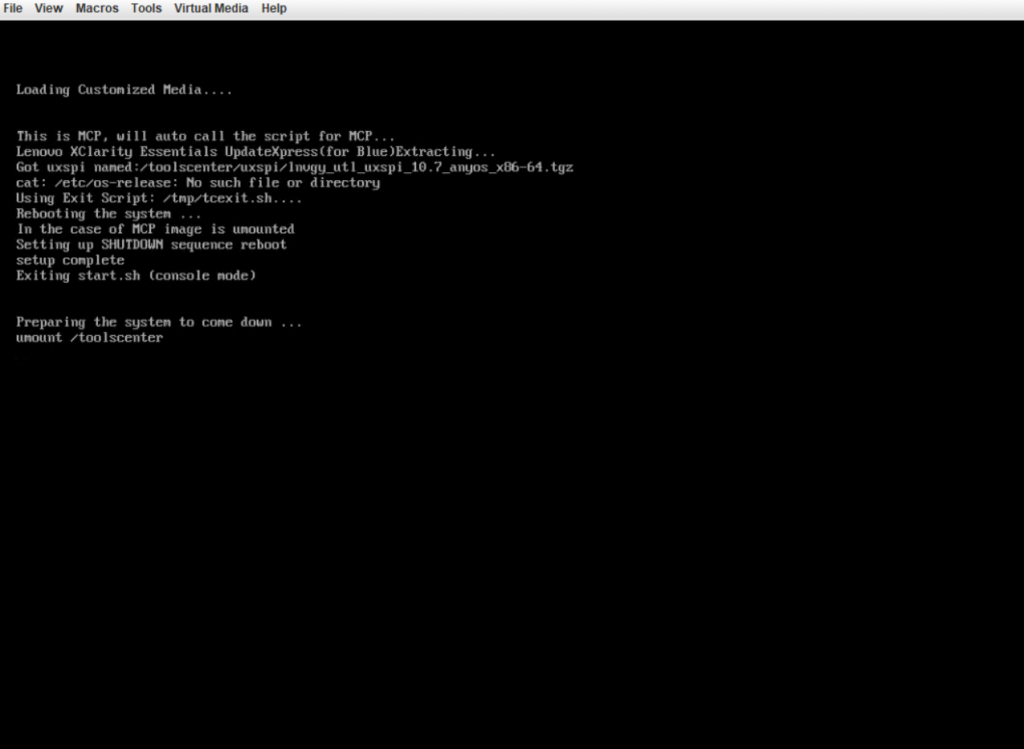
Click on Finish and the system will reboot.
About how to update firmware, UEFI and device drivers for Dell PowerEdge servers, you will find in my following post.
Links

- xCAT Integration with IBM Supported and Licensed Tools
- IBM Bootable Media Creator and Advanced Settings Utility — Introduction
- The Theory on How This Works
- There are three distinct operational phases
- Preparation
- Distribution
- Execution
- xCAT Conventions
- CMOS Settings
- There are three distinct operational phases
- The Practice of Making it Work
- Preparation, Step 1 — Download BoMC and ASU
- Preparation, Step 2 — Are We on a Surrogate or the Management Node?
- Preparation, Step 3 — Run mktoolcenter to Gather Tools and Prepare the Repository
- Mktoolcenter Options
- Distribution — If you are using a Surrogate
- Execution, Step 1 — Use nodeset to Invoke the Configuration
- Execution, Step 2 — Examine the Logs
- Common Problems
- A NIC firmware update may cause the NFS mount to fail
- A system may be flagged as having an error . but there is none.
- Common Problems
- Execution, Step 3 — Verify the Configuration
- Background Information — Building an ASU Batch File
- References
IBM Bootable Media Creator and Advanced Settings Utility — Introduction
The IBM Toolscenter for System X and Bladecenter, see <http://publib.boulder.ibm.com/infocenter/toolsctr/v1r0/index.jsp>, has introduced a number of utilities that are interesting for the automated setup and deployment of systems. One of the things that we’d like to do is to allow xCAT to use IBM.s Bootable Media Creator (BoMC) tool set to flash the firmware on all the subsystems of a machine. The tool downloads all of the required updates from IBM.s website and then creates a Linux netboot image that will run the firmware updates in a consistent and controlled fashion. We’d also like to use IBM’s Advanced Settings Utility (ASU) to set the CMOS values that control the server operating environment in a consistent fashion. xCAT allows us to take these tools and the images they create and make them work in the xCAT netboot framework.
Since the Bootable Media Creator and Advanced Settings Utility are licensed products they can not be distributed as part of xCAT and must be acquired separately.
The BoMC has a dependency on network connectivity to www.ibm.com. If your cluster does not have good external network connectivity, you can create the environment on a machine that does, we’ll refer to it as a .surrogate. and still use it on your cluster in a .static. configuration.
The Theory on How This Works
There are three distinct operational phases
Preparation
Collect the tools (BoMC and ASU) and create or refresh a repository of firmware updates. You use the mktoolscenter script to do this. This phase must occur on a machine that has network connectivity. In the simple case this is the management node of the cluster. In the case of a .surrogate. it isn’t . it’s just a machine with a similar architecture, OS and xCAT installed (but not necessarily configured) to give you the scripts and libraries required. If you have a firewall you may need to specify a proxy host, port, userid and password . options are provided to allow that to occur if required.
Distribution
Distribution of the repository and customization of the server(s) that will serve the updates from the repository. In the simple case this is optional . you already have the repository in place and you may or may not want to set up CMOS definitions for ASU invocation. When you use a .surrogate. you need to move the repository prepared on the .surrogate. to a target management node, untar it and then optionally customize the CMOS definitions as you would in the simple case. When you are using service nodes, if you wish to distribute the firmware update function . you will need to distribute the repository in a similar fashion, treating the .master. as a .surrogate. and the service nodes as target nodes. Most commonly, cluster administrators with service nodes use rsync or syncfiles to effect the distribution. In the case of a service node CMOS definitions are propagated thru the shared database.
Execution
Execution of the firmware updates and (optionally) CMOS updates on the target nodes. Once the tools and repository have been prepared and are in place we can update nodes.
Note that a repository is .static. and that unless you go thru the preparation step above you will not get updates to the tools or firmware. This works well for folks that want to have consistent results. Conversely if you are interested in picking up the latest, greatest firmware and tools you will need to go back and execute all of the steps above on a regular basis.
xCAT Conventions
xCAT allows for OS and architecture specific versions of code and data using a directory path convention . that convention can be used to differentiate between versions of the BoMC tool set and later CMOS values that we will set up using ASU. Since firmware updates are rarely architecture or operating system version specific but device drivers and other tools that can be delivered using BoMC can be — this is a useful framework. It is also potentially useful to have a different set of firmware that would apply to a different version of the operating system . but we don’t have to follow it slavishly and we won’t as you’ll see.
The path that we wil use is /<installroot>/netboot/<osver>/<arch>/<profile> where:
<installroot> is by default /install but can be set to something different in the site table (site.installdir).
<osver> is the target operating system. In our case this will be either toolscenter or bomc because our OS will be a toolscenter anyos image.
<arch> is the target architecture. In our case either x86 or x86_64.
<profile> is the name of an appropriate profile in the nodetype table. In our case it does not need to be in the nodetype table it just needs to be a unique name.
To invoke the tools we will use the nodeset command with the argument netboot=<osver>-<arch>-<profile>. An example would be:
Nodeset node1 netboot=toolscenter-x86_64-bomc
The default path as we set up the environment will be:
/<installroot>/netboot/toolscenter /<arch>/bomc
CMOS Settings
ASU has a batch command facility that we will use. You put whatever commands you wish to execute into a file and assuming that they apply to the machine that you running on ASU will execute them. The firmware table provides the mapping of node or node group to ASU batch file.
There are many different ways that you can associate CMOS setttings with nodes. You can choose to do it by machine type, by group or by specific node. Different machine types may have unique CMOS mappings and at times different firmware versions may introduce new functions that will have new mappings. A set of proposed CMOS settings are supplied for a number of popular machine types. If you have an ASU batch file prepared you can use that as well. If you don’t have one and you have a machine whose configuration you like . you can create one using the ASU .show. function and an editor.
The Practice of Making it Work
Preparation, Step 1 — Download BoMC and ASU
Using your browser, navigate from the IBM home page to the System X support page and select a system you are trying to update, e.g. x3550-m3. Click on download and you should find a link to Bootable Media Creator. Click on the link and select a version of the toolset appropriate for the OS that you are running on the management or service node that will be constructing the netboot images. Options currently are RHEL 3, RHEL 4, RHEL 5, SLES 9, SLES 10, SLES11 and Windows. BoMC is a framework that can be used to download the updates for just about any System X server . you only need one copy to do that and you don’t have to worry about the operating environment of the servers that are going to be flashed. In the examples below we’ll use the version for RHEL 5 x86_64 . but your version may vary, the parameters that we use are version independent. The file we downloaded was:
ibm_utl_bomc_2.20_rhel5_x86-64.bin
We saved it to /root/Desktop. Similarly on the web page where you found the link to Bootable Media Creator you should see a link to Advanced Settings Utility. Click on the link and select a version of ASU appropriate for the OS that you are running on the management or service node that will be constructing the netboot images. For Linux systems do not select the RPM package . use the .tgz version. The file that we downloaded was:
ibm_utl_asu_asut70i_linux_x86-64.tgz
We saved it to /root/Desktop as well.
Preparation, Step 2 — Are We on a Surrogate or the Management Node?
In the introduction we discussed the ability to create the environment on a surrogate and then copy or carry it (sneakernet anyone?) to the .real. system. Because the surrogate will be executing code designed for the .real. system . it will need to be a system of the same architecture and OS version. In addition in the case of a surrogate we will have to know some of the specifics of the .real. environment to be able to set it up. When running in the .real. environment we have the ability to interrogate databases to get the information required. When running in .surrogate. mode — we don’t — so prepare this data. We’ll need to ask for the following:
- The installation directory. In the site table this is site.installdir.
- A .best guess. at the machine types in the cluster. IBM organizes firmware updates by machine type which is a more specific definition than the product family or system name. In the vpd table this is the first four characters of vpd.mtm. You’ll be given the option to add machine types so this can start with a single machine type if need be.
Note: If you are running in .surrogate. mode you will need to invoke mktoolcenter with the -s flag.
Preparation, Step 3 — Run mktoolcenter to Gather Tools and Prepare the Repository
Now run (/opt/xcat/share/xcat/tools/)mktoolcenter with the desired options and answer the questions. Default answers to the questions are in square brackets at the end of the question. If the default is correct . you can just hit <enter> to accept it.
After the BoMC image is created you are given the opportunity to set up the CMOS definitions to be used by ASU when the image is run. If you choose to decline to configure CMOS settings . that’s fine, ASU will not be invoked when the Toolscenter image is run. Basically what mktoolscenter tries to do is to populate the firmware table for known nodes with suggested defaults by machine type if it knows the machine type. You will also be asked if you are using Serial Over LAN (SOL) and if this is an HPC cluster as these generally have unique settings. You can always go back and edit the firmware table by hand and you will need to do that if you want to specify CMOS settings by a method other than machine type. Note that this part of the setup cannot be done on a .surrogate. machine . it must be done on the target because it is manipulating the tables. If you are running in .surrogate. mode . just decline to configure CMOS settings and then when you get to the target machine edit the firmware table by hand. Note that the CMOS settings are .bound. to a node when the nodeset command for that node is invoked so you can change the settings in the file or which file is used up until that time. The .suggested. ASU batch files can be found in:
/<installroot>/netboot/<osver>/<arch>/repo/cmos_settings/[sol | nosol]/[hpc | default]
Our dialog is shown.
    Your target OS version and architecture are: rhels5.5 x86_64
    It appears that you have these machine types in your inventory: 7870,7871
    Would you like to add others? [no]
    Where is the ibm_utl_bomc*.bin file? [/root/Desktop]
    Where is the ibm_utl_asu_asut*.tgz file? [/root/Desktop]
    Do you want to change the target path? [/install/netboot/toolscenter/x86_64/bomc]

    Extracting...
    Executing...

    IBM ToolsCenter Bootable Media Creator Version 2.00.27
    (C) Copyright IBM Corp. 2009. All Rights Reserved.
    This Program is licensed under the terms of the agreement available by invoking this utility
    with the --license option. By extracting, copying, accessing, or using the Program,
    you agree to  the terms of this agreement. If you do not agree to the terms, please
    uninstall the software and return it to IBM or the reseller from whom you acquired
    the software for a refund, if any.

    Acquiring list of updates for Machine-Type=7870 ... Done
    (1 of 10) Acquiring brcm_fw_nic_2.1.3c_linux_32-64...
    Already downloaded.
    (2 of 10) Acquiring ibm_fw_hdd_sas-1.06_linux_32-64...
    Already downloaded.
    (3 of 10) Acquiring ibm_fw_dsa_3.01_dsyt60k_linux_32_64...
    Already downloaded.
    (4 of 10) Acquiring qlgc_fw_fc_f5.02.01-b2.08-e2.18_linux-bc_32-64...
    Already downloaded.
    (5 of 10) Acquiring ibm_utl_uxsp_p9sp06a-1.40_sles10_32-64...
    Already downloaded.
    (6 of 10) Acquiring ibm_fw_uefi_p9e146a_linux_32-64...
    Already downloaded.
    (7 of 10) Acquiring ibm_fw_imm_yuoo57h_linux_32-64...
    Already downloaded.
    (8 of 10) Acquiring qlgc_fw_cna_qmi8142-1.01.57-bc_linux_32-64...
    Already downloaded.
    (9 of 10) Acquiring ibm_fw_mptsas_hs22-2.70_linux_32-64...
    Already downloaded.
    (10 of 10) Acquiring ibm_fw_sraidmr_10ie-11.0.1-0024_linux_32-64...
    Already downloaded.
    Acquiring list of updates for Machine-Type=7871 ... Done
    (1 of 9) Acquiring brcm_fw_nic_2.1.3c_linux_32-64...
    Already downloaded.
    (2 of 9) Acquiring ibm_fw_hdd_sas-1.06_linux_32-64...
    Already downloaded.
    (3 of 9) Acquiring ibm_fw_dsa_3.01_dsyt60k_linux_32_64...
    Already downloaded.
    (4 of 9) Acquiring qlgc_fw_fc_f5.02.01-b2.08-e2.18_linux-bc_32-64...
    Already downloaded.
    (5 of 9) Acquiring ibm_utl_uxsp_p9sp11a-2.00_sles10_32-64...
    Already downloaded.
    (6 of 9) Acquiring ibm_fw_uefi_p9e146a_linux_32-64...
    Already downloaded.
    (7 of 9) Acquiring ibm_fw_imm_yuoo57h_linux_32-64...
    Already downloaded.
    (8 of 9) Acquiring ibm_fw_mptsas_hs22v-2.70_linux_32-64...
    Already downloaded.
    (9 of 9) Acquiring qlgc_fw_cna_qmi8142-1.01.57-bc_linux_32-64...
    Already downloaded.
    Acquiring ibm_utl_uxspi_4.00_sles10_x86-64...
    Already downloaded.
    Acquiring list of updates for tools ...  Done
    (1 of 1) Acquiring ibm_utl_sep_1.01_sles10_x86-64...
    Already downloaded.
    Acquiring ibm_utl_boot_tools-120_anyos_x86-64-mid...
    Already downloaded.
    Do you want to configure CMOS Settings? [yes]
    Are you using SOL? [yes]
    Is this an HPC cluster? [yes]
    Extracting...
    Executing...

    IBM ToolsCenter Bootable Media Creator Version 2.00.27
    (C) Copyright IBM Corp. 2009. All Rights Reserved.
    This Program is licensed under the terms of the agreement available by invoking this utility with the --license option.
         By extracting, copying, accessing, or using the Program, you agree to the terms of this agreement.
         If you do not agree to the terms, please uninstall the software and return it to IBM or the reseller from whom you acquired the software for a refund, if any.

    Warning! You haven't specified any machine type and it will be "all".
    has no updates...
    No applicable updates found in the working directory you specified
    Are you sure you want to continue?(y or n)y Creating bootable media...
    Copying tools for bootable pxe creation...
    Extracting files to working directory...
    Copying files to pxe directory...
    Removing temporary files...
    Zipping files...
    The bootable media was created successfully!
If this is the first time running this command, it may take a while to download all of the files, depending on how many different types of machines you have. This will set up our repository for all our firmware updates. Subsequent invocations of the command will take less time because we may already have some of the required components.
Mktoolcenter Options
Available options include:
-l logfile What this does is output the questions and answers to a log file that can be later used as input to a subsequent invocation of mktoolcenter. If this is not specified it will default to .mktoolcenter.log. in the current directory.
-ph <hostname> Is used to set the proxy host name or IP address if you have a firewall and a proxy is required. You must also specify the proxy port if this option is used.
-pp <port> Is used to set the proxy port if you have a firewall and a proxy is required. You must also specify the proxy host if this option is used.
-puser <userid> Is used to set the userid if required by your proxy.
-ppw <password> Is used to set the password if required by your proxy.
-s Is used to indicate that we are running as a .surrogate. and that configuration data will be supplied by the user and not as a result of table inquires.
<input_file> This is an input file containing the questions and answers from a previous session, i.e. a logfile. If an input file is not specified . an interactive session is assumed.
So one might invoke mktoolcenter thus:
mktoolcenter -l /tmp/foo2 /tmp/foo
Where /tmp/foo2 is the log file and /tmp/foo is the input file . a log from a previous session.
Distribution — If you are using a Surrogate
You will need to move the repository that was created in the previous step to the target machine and then edit the firmware table on the target machine if you wanted to use ASU to customize the CMOS settings.
Execution, Step 1 — Use nodeset to Invoke the Configuration
Now were ready. We tell xCAT to flash the node:
    nodeset node1 netboot=toolscenter-x86_64-bomc
    rpower node1 boot
These netboot parameters are appropriate because we selected the defaults during the setup . yours may be different. Once xCAT completes the required steps it will move the node to the next step in the chain — generally a reboot. The steps that are performed are:
- Collect machine inventory — machine type, adapters and firmware versions.
- NFS mount (RW) the repository to get access to the firmware updates and a place for logs.
- Create a directory based on nodename for logs.
- Decide the updates that need to be performed based on the inventory and the order in which they should be performed.
- Execute the firmware updates, logging the results.
- If a CMOS update was specified in the firmware table for the node then perform the update and log the results.
Execution, Step 2 — Examine the Logs
Node specific log files are saved in subdirectories of the repository. For example the log files associated with node b9 will be found in : /<installroot>/netboot/<osver>/<arch>/repo/b9. The most significant ones will be:
- bomc.log . stdout from bomc
- asu.log . stdout from asu
- bomc.error . stderr from bomc . generally a 0 length file
- asu.error . stderr from asu . generally a 0 length file
- UXSPI_tc<ip_address><machine_type><date>.log . this is detailed output from bomc on actions it took
The most important log file is .bomc.log. as it will show you summary output.
Common Problems
A NIC firmware update may cause the NFS mount to fail
If you see a log file that complains about:
No payload present for update <update name>
See /var/log/IBM_Support/UXSPI_tc-<ip_address><machine_type><date>.log for details.
You can ignore this and you should attempt the update a second time, i.e. nodeset and rpower as shown above.
A system may be flagged as having an error . but there is none.
If you see a log file that complains about:
One or more updates did not succeed. Please verify all required hardware is present and that all pre-requisites are met.
Then you should scan the log to see if the only .errors. are that the update is not applicable to this system configuration.
           Status:         ***Install did not succeed***:
                    Update not applicable to this system configuration
You can ignore this. Future versions of bomc will better differentiate between not applicable and error conditions.
Execution, Step 3 — Verify the Configuration
There may be some cases where either due to a hardware problem or a operational issue a firmware or CMOS update fails or is not applied immediately. Some things are expected, for example . a reboot may be required to change the hyper-threading state of a processor or in the case of Blades you may need to force the reacquisition of firmware VPD by the management module to be able to see firmware updates. Others are not expected but in any case it is useful to verify the changes that have been made.
To ensure that changes made take effect the end of the update process includes a reboot of the system — so that part is taken care of. If we have Blades we still need to telnet into the management module and do an:
To allow us to see firmware updates on the Blades. If you prefer to use the management module web browser interface you can use that as well to force the firmware VPD to be reloaded.
Background Information — Building an ASU Batch File
Here is a sample ASU batch file for a uEFI system, e.g. HS22, x3550-M2, etc:
    loaddefault uEFI
    loaddefault BootOrder
    set uEFI.ProcessorHyperThreading Disable
    set uEFI.RemoteConsoleRedirection Enable
    set uEFI.Com2TextEmul VT100
    set uEFI.Com2ActiveAfterBoot Enable
    set uEFI.Com2FlowControl Hardware
    set BootOrder.BootOrder "Legacy Only=PXE Network=Hard Disk 0"
The normal form of a line is <command> <object> <data>. loaddefault is a .macro. that sets multiple objects to predefined (default) data values. You use the set command to set individual objects. <data> values that are not single words must be quoted. A fragment of the output of the ASU show command looks something like this:
    IBM Advanced Settings Utility version 3.50.68G
    Licensed Materials - Property of IBM
    (C) Copyright IBM Corp. 2007-2009 All Rights Reserved
    Discovered IMM at IP address 169.254.95.118
    Connected to IMM at IP address 169.254.95.118
    uEFI.TurboModeEnable=Enable
    uEFI.OperatingMode=Custom Mode
    uEFI.ProcessorEistEnable=Enable
    uEFI.ProcessorCcxEnable=Enable
    uEFI.PackageCState=ACPI C3
    uEFI.ProcessorC1eEnable=Disable
    uEFI.ProcessorHyperThreading=Disable
    uEFI.ProcessorVmxEnable=Enable
    uEFI.HardwarePrefetcher=Enable
    uEFI.AdjacentCacheLinePrefetch=Enable
    uEFI.DCUStreamerPrefetcher=Enable
    uEFI.IPStreamerPrefetcher=Enable
    uEFI.QPISpeed=Max Performance
    uEFI.DdrSpeed=Max Performance
So if you remove the first few lines, insert a .set. on each line, change .=. to . . and then quote the strings that are not single words . you have a usable batch file. Not a great one . because a number of the values would have been covered by a loaddefaults . but something that can be used to clone settings.
References
- XCAT_iDataPlex_Advanced_Setup#Updating_Node_Firmware
- XCAT_iDataPlex_Advanced_Setup#Using_ASU_to_Update_CMOS,_uEFI,_or_BIOS_Settings_on_the_Nodes
You’re going to have to stop the database system and start a stand-alone back-end, which always unconditionally runs as a superuser.
You can use this backend to ALTER the user you wish to give superuser rights to. Then shut the standalone backend down and start the database normally.
It is important that you completely stop the database server before entering single user mode. PostgreSQL single user mode will refuse to start if there’s a postmaster, but to be sure you should make sure there are no PostgreSQL processes running on your system. Under (almost) no circumstances should you ever delete postmaster.pid — that’s pretty much guaranteed to result in database corruption if there’s still any PostgreSQL process accessing that data directory.
Exactly how to start a standalone back-end depends a bit on your OS/distro and how you installed PostgreSQL. You haven’t included this info, so I can only really point you at the manual for the postgres back-end executable.
Make a backup first.
In the single-user mode, the session user will be set to the user with ID 1, and implicit superuser powers are granted to this user. This user does not actually have to exist, so the single-user mode can be used to manually recover from certain kinds of accidental damage to the system catalogs.
See the section Options for Single User mode and, toward the bottom, Usage. You’ll want to run the postgres backend with --single, as the unix user that owns the database files, with the path to the datadir. On a typical Linux PostgreSQL install this might be something like:
sudo systemctl stop postgresql-9.3.service
sudo -u postgres /usr/pgsql-9.3/bin/postgres --single -D /var/lib/pgsql/9.3/data
Your datadir and postgres executable location are quite possibly different. The above is for a Fedora system running with PGDG PostgreSQL packages from http://yum.postgresql.org/ .
Прямая причина ошибки в том, что да, использовать нельзя. git-add с голым репозиторием. Чистый репозиторий по определению не имеет дерева работ. git-add берет файлы из рабочего дерева и добавляет их в индекс для подготовки к фиксации.
Тем не менее, вам, возможно, придется немного подумать о своей настройке. GIT_DIR — это каталог репозитория, используемый для всех команд git. Вы действительно пытаетесь создать единый репозиторий для всего, что вы отслеживаете, может быть, для всей вашей системы? Репозиторий git по своей природе отслеживает содержимое одного каталога. Вам нужно будет установить GIT_WORK_TREE на путь, содержащий все, что вы хотите отслеживать, и тогда вам понадобится .gitignore чтобы заблокировать все, что вас не интересует.
Возможно, вы пытаетесь создать репозиторий, который будет отслеживать только c:www? Тогда вы должны положить это в c:www (не устанавливайте GIT_DIR). Это обычное использование git с репозиторием в каталоге .git каталога верхнего уровня вашего «модуля».
Если у вас нет действительно веской причины, я бы рекомендовал придерживаться того, как git любит работать. Если вам нужно отслеживать несколько вещей, вы, вероятно, захотите несколько репозиториев!