Working on this. It’s quite the bear. In the meantime, this is my interpretation of the spec, broken down by the productions of ExportDeclaration:
export * FromClause ;
Semicolon belongs to ExportDeclaration.
export ExportClause FromClause ;
Semicolon belongs to ExportDeclaration.
export { foo } from 'foo';
export ExportClause ;
Semicolon belongs to ExportDeclaration.
export VariableStatement
Semicolon belongs to VariableStatement.
export Declaration
Declaration : HoistableDeclaration
No semicolon.
export function foo () { }
export function* foo () { }
Declaration : ClassDeclaration
No semicolon.
Declaration : LexicalDeclaration
Semicolon belongs to LexicalDeclaration.
export let foo;
export const foo = 42;
export default HoistableDeclaration
No semicolon.
export default function () { }
export default function* foo() { }
export default ClassDeclaration
No semicolon.
export default AssignmentExpression ;
Semicolon belongs to ExportDeclaration.
export default foo || bar;
export default (foo) => foo.bar();
export default foo = 42;
export default foo += 42;
tl;dr:
ExportAllDeclarationmay have a semicolon.ExportNamedDeclarationwhosedeclarationisnullmay have a semicolon.ExportNamedDeclarationwith a childdeclarationdoes not have a semicolon, though its child may.ExportDefaultDeclarationmay have a semicolon only if itsdeclarationis an expression.
(end tl;dr)
I find this interesting, from ESTree:
interface ExportNamedDeclaration <: Node {
    type: "ExportNamedDeclaration";
    declaration: Declaration | null;
    specifiers: [ ExportSpecifier ];
    source: Literal | null;
}
Note: Having
declarationpopulated with non-emptyspecifiersor non-nullsourceresults in an invalid state.
If declaration and (specifiers, source) are mutually exclusive, why are they the same node?
Edit: ExportDefaultDeclaration may have a semicolon if its child is an expression.
Содержание
- Error missing semicolon semi
- Rule Details
- Options
- always
- never
- omitLastInOneLineBlock
- beforeStatementContinuationChars
- When Not To Use It
- ESLint: Missing semicolon.(semi) adding multiple semicolons after curly braces #13480
- Comments
- semi reports missing semicolon on export default class #2194
- Comments
- export * FromClause ;
- export ExportClause FromClause ;
- export ExportClause ;
- export VariableStatement
- export Declaration
- Declaration : HoistableDeclaration
- Declaration : ClassDeclaration
- Declaration : LexicalDeclaration
- export default HoistableDeclaration
- export default ClassDeclaration
- export default AssignmentExpression ;
- semi and no-extra-semi rules are conflicting with each other in TypeScript interfaces (vue-cli app) #11585
- Comments
- About Missing semicolon . #9399
- Comments
Error missing semicolon semi
Require or disallow semicolons instead of ASI
Some problems reported by this rule are automatically fixable by the —fix command line option
JavaScript doesn’t require semicolons at the end of each statement. In many cases, the JavaScript engine can determine that a semicolon should be in a certain spot and will automatically add it. This feature is known as automatic semicolon insertion (ASI) and is considered one of the more controversial features of JavaScript. For example, the following lines are both valid:
On the first line, the JavaScript engine will automatically insert a semicolon, so this is not considered a syntax error. The JavaScript engine still knows how to interpret the line and knows that the line end indicates the end of the statement.
In the debate over ASI, there are generally two schools of thought. The first is that we should treat ASI as if it didn’t exist and always include semicolons manually. The rationale is that it’s easier to always include semicolons than to try to remember when they are or are not required, and thus decreases the possibility of introducing an error.
However, the ASI mechanism can sometimes be tricky to people who are using semicolons. For example, consider this code:
This may look like a return statement that returns an object literal, however, the JavaScript engine will interpret this code as:
Effectively, a semicolon is inserted after the return statement, causing the code below it (a labeled literal inside a block) to be unreachable. This rule and the no-unreachable rule will protect your code from such cases.
On the other side of the argument are those who say that since semicolons are inserted automatically, they are optional and do not need to be inserted manually. However, the ASI mechanism can also be tricky to people who don’t use semicolons. For example, consider this code:
In this example, a semicolon will not be inserted after the first line, causing a run-time error (because an empty object is called as if it’s a function). The no-unexpected-multiline rule can protect your code from such cases.
Although ASI allows for more freedom over your coding style, it can also make your code behave in an unexpected way, whether you use semicolons or not. Therefore, it is best to know when ASI takes place and when it does not, and have ESLint protect your code from these potentially unexpected cases. In short, as once described by Isaac Schlueter, a n character always ends a statement (just like a semicolon) unless one of the following is true:
- The statement has an unclosed paren, array literal, or object literal or ends in some other way that is not a valid way to end a statement. (For instance, ending with . or , .)
- The line is — or ++ (in which case it will decrement/increment the next token.)
- It is a for() , while() , do , if() , or else , and there is no <
- The next line starts with [ , ( , + , * , / , — , , , . , or some other binary operator that can only be found between two tokens in a single expression.
Rule Details
This rule enforces consistent use of semicolons.
Options
This rule has two options, a string option and an object option.
- «always» (default) requires semicolons at the end of statements
- «never» disallows semicolons as the end of statements (except to disambiguate statements beginning with [ , ( , / , + , or — )
Object option (when «always» ):
- «omitLastInOneLineBlock»: true ignores the last semicolon in a block in which its braces (and therefore the content of the block) are in the same line
Object option (when «never» ):
- «beforeStatementContinuationChars»: «any» (default) ignores semicolons (or lacking semicolon) at the end of statements if the next line starts with [ , ( , / , + , or — .
- «beforeStatementContinuationChars»: «always» requires semicolons at the end of statements if the next line starts with [ , ( , / , + , or — .
- «beforeStatementContinuationChars»: «never» disallows semicolons as the end of statements if it doesn’t make ASI hazard even if the next line starts with [ , ( , / , + , or — .
Note: beforeStatementContinuationChars does not apply to class fields because class fields are not statements.
always
Examples of incorrect code for this rule with the default «always» option:
Examples of correct code for this rule with the default «always» option:
never
Examples of incorrect code for this rule with the «never» option:
Examples of correct code for this rule with the «never» option:
omitLastInOneLineBlock
Examples of additional correct code for this rule with the «always», < «omitLastInOneLineBlock»: true >options:
beforeStatementContinuationChars
Examples of additional incorrect code for this rule with the «never», < «beforeStatementContinuationChars»: «always» >options:
Examples of additional incorrect code for this rule with the «never», < «beforeStatementContinuationChars»: «never» >options:
When Not To Use It
If you do not want to enforce semicolon usage (or omission) in any particular way, then you can turn this rule off.
Источник
ESLint: Missing semicolon.(semi) adding multiple semicolons after curly braces #13480
Tell us about your environment
- ESLint Version: 7.4.0
- Node Version: 10.16.3
- npm Version: 6.14.5
What parser (default, Babel-ESLint, etc.) are you using? default
Please show your full configuration:
What did you do? Please include the actual source code causing the issue, as well as the command that you used to run ESLint.
What did you expect to happen?
One semi colon to be added at the end of the file (after last curly brace).
What actually happened? Please include the actual, raw output from ESLint.
ESLint rule semi expects semicolon after curly brace: 
After executing ESLint fix command, too many semicolons are added at the end of the file: 
If unnecessary semicolons are removed, ESLint suggests adding missing semicolons again, so we encounter infinite loop.
Are you willing to submit a pull request to fix this bug?
The text was updated successfully, but these errors were encountered:
Источник
semi reports missing semicolon on export default class #2194
Looks like similar cases were addressed in #2178 and this one was missed.
The text was updated successfully, but these errors were encountered:
Imports/exports have so many variations, it’s crazy. 🙂
I have a problem with export as well.
My problem is the following:
and I get error Missing semicolon semi
if I add the semicolon, returns:
Do you know how fix it?
Thanks,
Working on this. It’s quite the bear. In the meantime, this is my interpretation of the spec, broken down by the productions of ExportDeclaration :
export * FromClause ;
Semicolon belongs to ExportDeclaration .
export ExportClause FromClause ;
Semicolon belongs to ExportDeclaration .
export ExportClause ;
Semicolon belongs to ExportDeclaration .
export VariableStatement
Semicolon belongs to VariableStatement .
export Declaration
Declaration : HoistableDeclaration
Declaration : ClassDeclaration
Declaration : LexicalDeclaration
Semicolon belongs to LexicalDeclaration.
export default HoistableDeclaration
export default ClassDeclaration
export default AssignmentExpression ;
Semicolon belongs to ExportDeclaration.
tl;dr:
- ExportAllDeclaration may have a semicolon.
- ExportNamedDeclaration whose declaration is null may have a semicolon.
- ExportNamedDeclaration with a child declaration does not have a semicolon, though its child may.
- ExportDefaultDeclaration may have a semicolon only if its declaration is an expression.
I find this interesting, from ESTree:
Note: Having declaration populated with non-empty specifiers or non-null source results in an invalid state.
If declaration and ( specifiers , source ) are mutually exclusive, why are they the same node?
Edit: ExportDefaultDeclaration may have a semicolon if its child is an expression.
Источник
semi and no-extra-semi rules are conflicting with each other in TypeScript interfaces (vue-cli app) #11585
Tell us about your environment
- ESLint Version: v5.16.0
- Node Version: v8.15.1
- npm Version: 6.4.1
- typescript Version: 3.4.1
What parser (default, Babel-ESLint, etc.) are you using?
@typescript-eslint/parser
Please show your full configuration:
First of all, I’m not sure if this is correct repository to submit this issue — I’m using eslint in a Vue application with typescript support that was created via vue-cli .
Since this bug happens with bundled eslint rules, I decided to submit it here.
The semi and no-extra-semi rules are seems to be conflicting with each other when eslint tries to run them on TypeScript interfaces.
Running eslint on given interface will trigger both Missing semicolon (semi) and Unnecessary semicolon (no-extra-semi) errors pointing to the same character (4:2).
Also, if you add ‘no-extra-semi’: ‘off’, to the rules config, eslint will add 10 semicolons and trigger Missing semicolon (semi) error.
But if we have some TypeScript class, eslint will run without errors:
In this case eslint will remove ending semicolon and will not produce any errors.
I have demo repository that shows this behaviour — https://github.com/tzurbaev/vue-ts-eslint-semi. This is default Vue app that was created via vue create command.
What did you expect to happen?
Running eslint on the given interface example will remove semicolon just like running on given class example without errors.
What actually happened? Please include the actual, raw output from ESLint.
eslint triggers both semi and no-extra-semi errors pointing to the same position.
Are you willing to submit a pull request to fix this bug?
Not sure how to fix it (and how to debug what package is actually bugged — eslint itself or Vue’s eslint plugin or even something else).
The text was updated successfully, but these errors were encountered:
Источник
About Missing semicolon . #9399
Tell us about your environment
- ESLint Version: 4.8.0
- Node Version: 8.6.0
- npm Version: 5.5.0
What parser (default, Babel-ESLint, etc.) are you using?
esprima
Please show your full configuration:
What did you do? Please include the actual source code causing the issue.
I make a repo to show this issue. You could clone it and install dependencies. Then run npm test you’ll see this:

But there is a semi for sure. And i have tried eslint autofix which will add one more semi there and this error is still there.
Here’s what in code.js:
What did you expect to happen?
What actually happened? Please include the actual, raw output from ESLint.
See screenshot above.
Need some help. Thanks.
The text was updated successfully, but these errors were encountered:
thanks for reporting, I can repro this!
emm. probably it’s related to the parser: esprima , when using the default parser, the error was gone.
Thanks. I have tried espree which works well. 👍
So. what should i deal with this issue? Goes to esprima repo?
This is a tough one. esprima probably won’t fix an issue just because «ESLint doesn’t work»; on the other hand, if we can figure out why esprima isn’t working correctly here and we can prove that the issue is with their parse output, then we could create an issue that they would accept and fix.
One possible way to do this is to parse the code example with both espree and esprima and maybe do a diff of their JSON.stringify ‘d outputs. Maybe somewhere in there, we might see that their output data (such as node or token locations) is different, possibly wrong.
I’m going to close this issue because there’s no change for ESLint, but please feel free to keep using this space to document any findings. I for one will be interested to see what you find!
Источник
Ekaterina Lopatina
Коллеги, день добрый. Код правильный, тест проходит. Но выводит другие ошибки.
// removed
Вот такие ошибки выводит
 status: finished → Check your code. Linter failed.

 /usr/src/app/babel.config.js
   3:6  error  Strings must use singlequote                               quotes
   9:2  error  Missing semicolon                                          semi
  10:1  error  Too many blank lines at the end of file. Max of 0 allowed  no-multiple-empty-lines
В чем проблем, помогите разобраться, пожалуйста
4
0
User 34bd397d50137a0f
Проблема, на мой взгляд начинающего программиста, заключается в том, что при использовании больше одного if, последующая конструкция if должна превратится в else if. То есть перед вторым и третьим if следует прописать слово else.
UPD Оказывается (посмотрел решение учителя), что и не нужно тут else if’ов :-). Тогда, что можно сказать, каждый if с новой строки начинать, а не продолжать после } (я так понимаю, ругается на плохую читаемость кода, что if’ы на одном уровне, а то, что выполняется должно быть на другом уровне; а получилось, что второй и третий if заняли места их же return’ов) И удалить пустую строку перед export.
0
Сергей К.
Екатерина, здравствуйте! Это отчёт работы линтера с описаниями стилистических ошибок. Их также нужно всегда исправлять. Давайте разберём, как работать с замечаниями линтера на примере простой ошибки: 9:2 error Missing semicolon semi.
9:2— строка и позиция, где по мнению линтера произошла ошибка;Missing semicolon— описание ошибкиsemi— название ошибки
Переведите и проанализируйте описание. При необходимости загуглите по названию ошибки semi eslint и почитайте документацию с примерами. Исправьте ошибку и запустите повторную проверку линтера.
0
Ekaterina Lopatina
Я понимаю, что это нужно исправлять. Однако, я не понимаю что именно здесь нужно исправлять, ибо:
- 3:6 error Strings must use singlequote quotes
здесь и не должно быть «строки», почему он ругается что строка должна быть в кавычках? - 9:2 error Missing semicolon semi
строка 9, позиция 2 — это перед «}» зачем там «;»? - 10:1 error Too many blank lines at the end of file. Max of 0 allowed no-multiple-empty-lines
Если я удаляю последнюю пустую строку, то потом он ругается, что программа запрашивает новую строку, но не может обнаружить
/usr/src/app/finalGrade.js
15:27 error Newline required at end of file but not found eol-last
Поэтому я и прошу помощи разобраться, ведь даже запуская решение учителя, выдаются те же ошибки линтера
0
Сергей К.
Ого! Мы разобрали, как работать с линтером на примере ошибок системного файла. К вашему коду они не имеют отношения. Поправил ошибку в среде исполнения. Вам нужно получить последнюю версию практики, нажав кнопку Сброс, и после этого проработать замечания линтера повторно.
1
I am configuring ESLint (as TSLint is soon-to-be-deprecated) to work with my .ts files. I have this very little file:
export default interface Departure {
  line: string;
  direction: string;
  time: Date;
};
in the last time, where semicolon is, ESLint in my VSCode signals two errors: one about missing semicolon eslint(semi) and another one about unnecessary semicolon eslint(no-extra-semi).
Below is my .eslintrc.js:
module.exports = {
    "env": {
        "browser": true,
        "commonjs": true,
        "es6": true,
        "node": true
    },
    "extends": [
        "plugin:@typescript-eslint/recommended",
        "airbnb"
    ],
    "globals": {
        "Atomics": "readonly",
        "SharedArrayBuffer": "readonly"
    },
    "parser": "@typescript-eslint/parser",
    "parserOptions": {
        "ecmaFeatures": {
            "jsx": true
        },
        "ecmaVersion": 2018
    },
    "plugins": [
        "react",
        "@typescript-eslint"
    ],
    "settings": {
        "import/resolver": {
            "node": {
                "extensions": [".js", ".jsx", ".ts", ".tsx"]
            }
        }
    },
    "rules": {
    }
};
how can I get rid of this bizarre situation? None of the errors should be there.
In this post, we will look at configuring the ESLint semi-colon rule.
The ESLint semi rule can be configured so when ESLint runs, it will either require or disallow semi-colons. The JavaScript engine does not specifically need semi-colons in many situations such as at the end of lines. The engine will interpret code without semi-colons provided and know how to deal with it using the automatic semicolon insertion feature, or ASI. There is debate as to whether semi-colons are useful when writing JavaScript code, which is a topic beyond this post.
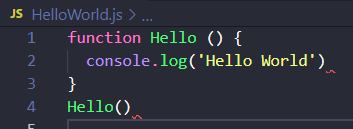
To toggle the semi-colon validation is ESLint, let’s look at a Visual Studio Code project running ESLint. We have a Hello function that does not contain semi-colons on line 2 or 4, for example. ESLint is not complaining – as we can see there are no red lines under the code indicating any problems:
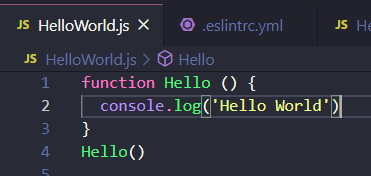
Let’s look at our eslintrc file. In this example we are using YAML, yours may be different:
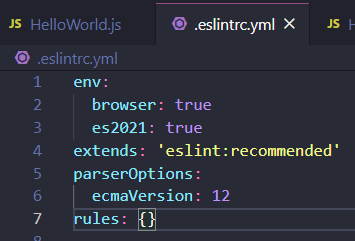
Under rules, let’s add a semi-colon rule:
“semi”: [2, “always”]
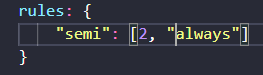
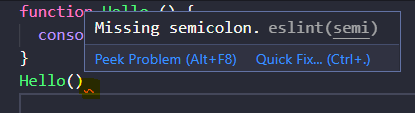
On saving the eslintrc file, we see we have red lines now on lines 2 and 4:
And hovering over it, we see the semi-colon validation message – missing semicolon:
Further options from the ESLint documentation can be found here:

THANKS FOR READING. BEFORE YOU LEAVE, I NEED YOUR HELP.
I AM SPENDING MORE TIME THESE DAYS CREATING YOUTUBE VIDEOS TO HELP PEOPLE LEARN THE MICROSOFT POWER PLATFORM.
IF YOU WOULD LIKE TO SEE HOW I BUILD APPS, OR FIND SOMETHING USEFUL READING MY BLOG, I WOULD REALLY APPRECIATE YOU SUBSCRIBING TO MY YOUTUBE CHANNEL.
THANK YOU, AND LET’S KEEP LEARNING TOGETHER.
CARL
https://www.youtube.com/carldesouza

Cover image from peforce.com
I decided to write this article to sum up a struggle of mine. We’ve started a new project in the company, Prettier was set up, ESLint was set up and at some point, we added Typescript. By the end, Typescript was also set up. CI was linting, commit hooks were also linting, VSCode was fixing the code, and so on (that is what I thought).
At some point I was playing with the project and realized that some files were being warned by my editor but not when running the linter (npm run lint in my case). I got triggered. I have a hard time accepting that something works but I can’t understand unless it is an external tool that I didn’t have to set up myself but that was not the case here.
In this article, I will summarize some understandings that I’ve about integrating all the tools above. The main focus is how to set up Prettier, how to set up ESLint, how to integrate both, and by the end how to add Typescript to it.
Prettier
The first tool I want to explore is Prettier. I would leave it to you to read more about what it is but, in short, it is a code formatter. What does it mean? It means that it will keep your codebase consistent (in terms of coding style). Do you use ;? If yes, it will ensure that all your files have it, for example. I like it for two reasons: we barely have to discuss code formatting and it is easy to onboard new members to the team.
At the time of this writing, Prettier is in version 2.4.1, so keep in mind things might change (especially formatting) in future versions.
How to set up Prettier?
I will consider you have a project set up already so in short, you need to install it:
npm i prettier #--save-dev and --save-exact are recommended
Enter fullscreen mode
Exit fullscreen mode
Right now you can start using Prettier. You don’t need any configuration (if you don’t want it). You can run it against your codebase with:
npx prettier .
Enter fullscreen mode
Exit fullscreen mode
The . at the end means to run across your whole codebase. You can run for a specific file or pattern if you want.
This command will print the files formatted, nothing special. A more useful command happens when you add --write flag. Instead of printing the formatted code, it will write to the origin file.
Let’s create a file called index.js with the following code:
// index.js
const a = 1
Enter fullscreen mode
Exit fullscreen mode
If we run npx prettier index.js, the output will be:
const a = 1;
Enter fullscreen mode
Exit fullscreen mode
It automatically adds the ; for us but it is not saved in the file. If we run npx prettier index.js --write though, the file will change and the ; will be added to it.
Cool, that is the simplest setup we can have with Prettier. The default rules are documented on their website and can be customized (a bit). We will take a look into it next but before I want to mention another flag: --check.
The --check flag, npx prettier index.js --check, is useful if you just want to check if a file (or the codebase with .) is Prettier compliant. It is useful for CIs and git hooks, for example, if you just want to warn the user (you can also enable --write in these scenarios).
If we consider the following code again:
// index.js
const a = 1
Enter fullscreen mode
Exit fullscreen mode
And run npx prettier index.js --check, we get the following output:
Checking formatting...
[warn] index.js
[warn] Code style issues found in the above file(s). Forgot to run Prettier?
Enter fullscreen mode
Exit fullscreen mode
Prettier configuration
You can configure Prettier to some extend. You can do it via the CLI or via a configuration file, which is more adequate. The configuration file could be in a variety of formats so you can choose the one that fits you best.
Add the configuration file to the root of your project (you can have configurations/folder but I would leave it up to you to explore this path) and start adding rules to it:
// .prettierrc
{
  "semi": false
}
Enter fullscreen mode
Exit fullscreen mode
With this configuration file and the following code, again, the --check run will succeed:
// index.js
const a = 1
Enter fullscreen mode
Exit fullscreen mode
npx prettier index.js --check:
Checking formatting...
All matched files use Prettier code style!
Enter fullscreen mode
Exit fullscreen mode
On top of that, you can also extend configuration and set up a few other things. Check their configuration documentation for more details.
ESLint
ESLint has been around for a while. In short, it does a bit more than Prettier as it analyzes your code to find problems (or patterns that you don’t want, like variables that are not used should be removed). Again, I invite you to read ESLint documentation if you want to go deeper into the topic. I like ESLint for the simple reason it helps me to find problems and configure some patterns in the project (it might be useful when onboarding new people). It is extremely extensible as well in case you’re interested.
At the time of this writing, ESLint is in version 7.32.0, so keep in mind things might change (especially formatting) in future versions. Version 8 is in beta at the moment.
How to set up ESLint?
In short, quite similar to Prettier but you need the configuration file. I will consider you have a project set up already so, in short, you need to install it:
npm i eslint #--save-dev is recommended
Enter fullscreen mode
Exit fullscreen mode
You need a configuration file. You can create one by yourself or you can run the command below that bootstraps one for you (it can add a lot of presets already):
npx eslint --init
Enter fullscreen mode
Exit fullscreen mode
Let’s start with an empty configuration file though, it is enough to run ESLint:
// .eslintrc.js
module.exports = {
};
Enter fullscreen mode
Exit fullscreen mode
We can now run it, similar to Prettier:
npx eslint .
Enter fullscreen mode
Exit fullscreen mode
One thing to note here: ESLint runs only on .js files (by default).
Let’s consider the same example as before:
// index.js
const a = 1
Enter fullscreen mode
Exit fullscreen mode
npx eslint index.js and we get:
1:1  error  Parsing error: The keyword 'const' is reserved
✖ 1 problem (1 error, 0 warnings)
Enter fullscreen mode
Exit fullscreen mode
This is simply the issue with a default ESLint configuration. It considers ES5 by default, so const is not allowed yet, and some older setup might make sense to your project but not in general.
We can spend hours configuring ESLint but in general, we get a default from a style guide (AirBnB for example) and apply it to our project. If you use the init command you can do so.
Let’s install Airbnb ESLint configuration, it also requires eslint-plugin-import to be installed (following their documentation) so:
npm i eslint-config-airbnb-base eslint-plugin-import # --save-dev is recommended
Enter fullscreen mode
Exit fullscreen mode
Then we extend it in our configuration, so it will look like:
module.exports = {
  extends: [
    'eslint-config-airbnb-base', // or `airbnb-base`, you can omit `eslint-config-`
  ]
};
Enter fullscreen mode
Exit fullscreen mode
Running npx eslint index.js again we get:
1:7   error  'a' is assigned a value but never used  no-unused-vars
1:12  error  Missing semicolon                       semi

✖ 2 problems (2 errors, 0 warnings)
  1 error and 0 warnings potentially fixable with the `--fix` option.
Enter fullscreen mode
Exit fullscreen mode
Cool! Now we get errors defined by the AirBnB guide. We can use the --fix option, which works similar to --write from Prettier, in case we want to fix the errors when possible.
ESLint allows you to extensively configure it if you want. It goes beyond the scope here and I will leave it up to you to explore and play with it: https://eslint.org/docs/user-guide/configuring/
Prettier + ESLint
There are a lot of tutorials online on how to connect both. I want to take a different approach and try to reason about each tool and how they connect.
I will assume that we have the following Prettier configuration:
// .prettierrc
{
  "semi": false
}
Enter fullscreen mode
Exit fullscreen mode
I will assume that we have the following ESLint configuration:
// .eslintrc.js
module.exports = {
  extends: [
    'eslint-config-airbnb-base',
  ]
};
Enter fullscreen mode
Exit fullscreen mode
I will assume the following script to run both tools:
// index.js
const a = 1

module.exports = { a }
Enter fullscreen mode
Exit fullscreen mode
If we run Prettier check, we get:
Checking formatting...
All matched files use Prettier code style!
Enter fullscreen mode
Exit fullscreen mode
Cool! If we run ESLint, we get:
1:12  error  Missing semicolon  semi
3:23  error  Missing semicolon  semi

✖ 2 problems (2 errors, 0 warnings)
  2 errors and 0 warnings potentially fixable with the `--fix` option.
Enter fullscreen mode
Exit fullscreen mode
Not so cool! Running ESLint with --fix will fix these issues. Now if we run Prettier again we get:
Checking formatting...
[warn] index.js
[warn] Code style issues found in the above file(s). Forgot to run Prettier?
Enter fullscreen mode
Exit fullscreen mode
If we run Prettier with --write it will fix but then ESLint will fail again. It will be like this forever. If the goal were just formatting, I would say pick one of the tools and ignore the other, but we want the power of both tools, especially as ESLint is more than just formatting your code.
Prettier provides two packages that integrate with ESLint.
-
eslint-config-prettier: turns off rules that might conflict with Prettier. -
eslint-plugin-prettier: adds Prettier rules to ESLint.
Let’s go step by step. First let’s go and install eslint-config-prettier:
npm i eslint-config-prettier # --save-dev recommended
Enter fullscreen mode
Exit fullscreen mode
Our new .eslintrc.js will look like:
module.exports = {
  extends: [
    'eslint-config-airbnb-base',
    'eslint-config-prettier',
  ]
};
Enter fullscreen mode
Exit fullscreen mode
Considering the file below, again:
const a = 1

module.exports = { a }
Enter fullscreen mode
Exit fullscreen mode
It was a valid file for Prettier but invalid for ESLint. Using the new configuration, it becomes valid as the conflicting rule semi has been disabled.
It is fine if we want to ignore the rules from Prettier but in general, we want Prettier rules to override ESLint rules.
In case we delete the Prettier configuration file and use its defaults (which requires ;), running Prettier check will result in:
Checking formatting...
[warn] index.js
[warn] Code style issues found in the above file(s). Forgot to run Prettier?
Enter fullscreen mode
Exit fullscreen mode
The file is not valid anymore as it is missing the ; but the ESLint run won’t fail, as the Prettier rules have been disabled when running ESLint.
One important thing to note here: the order used by extends, in the ESLint configuration, matters. If we use the following order we will get an error as AirBnB rules will override Prettier disabled rules when running ESLint:
module.exports = {
  extends: [
    'eslint-config-prettier',
    'eslint-config-airbnb-base',
  ]
};
Enter fullscreen mode
Exit fullscreen mode
Running npx eslint index.js:
1:12  error  Missing semicolon  semi
3:23  error  Missing semicolon  semi

✖ 2 problems (2 errors, 0 warnings)
  2 errors and 0 warnings potentially fixable with the `--fix` option.
Enter fullscreen mode
Exit fullscreen mode
To mitigate this issue let’s install the plugin:
npm i eslint-plugin-prettier # --save-dev recommended
Enter fullscreen mode
Exit fullscreen mode
We can then update our .eslintrc.js file to:
module.exports = {
  extends: [
    'eslint-config-airbnb-base',
    'plugin:prettier/recommended',
  ]
};
Enter fullscreen mode
Exit fullscreen mode
We replaced eslint-config-prettier with plugin:prettier/recommended. Check ESLint docs about extending a plugin: https://eslint.org/docs/user-guide/configuring/configuration-files#using-a-configuration-from-a-plugin
I also recommend you to check what eslint-plugin-prettier is doing with our ESLint configuration: https://github.com/prettier/eslint-plugin-prettier/blob/a3d6a2259cbda7b2b4a843b6d641b298f03de5ad/eslint-plugin-prettier.js#L66-L75
Running ESLint again we will get:
1:12  error  Insert `;`  prettier/prettier
3:23  error  Insert `;`  prettier/prettier

✖ 2 problems (2 errors, 0 warnings)
  2 errors and 0 warnings potentially fixable with the `--fix` option.
Enter fullscreen mode
Exit fullscreen mode
Two things to note here:
- We are getting
;errors again, that have been disabled earlier witheslint-config-prettier; - The error is coming from the rule
prettier/prettier, which is added by the plugin. All prettier validations will be reported asprettier/prettierrules.
Typescript
Let’s start from the very basic: running ESLint against TS files.
Right now, running ESLint against your codebase would be npx eslint .. That is fine until you want to run it against files that are not ending with .js.
Let’s have these two files in our code base:
// index.js
const a = 1
Enter fullscreen mode
Exit fullscreen mode
// index.ts
const a = 1
Enter fullscreen mode
Exit fullscreen mode
Running npx eslint . we get:
1:7   error  'a' is assigned a value but never used  no-unused-vars
1:12  error  Insert `;`                              prettier/prettier

✖ 2 problems (2 errors, 0 warnings)
  1 error and 0 warnings potentially fixable with the `--fix` option.
Enter fullscreen mode
Exit fullscreen mode
It runs against our JS file but not our TS file. To run against TS files you need to add --ext .js,.ts to the ESLint command. By default, ESLint will only check for .js files.
Running npx eslint . --ext .js,.ts
/index.js
1:7   error  'a' is assigned a value but never used  no-unused-vars
1:12  error  Insert `;`                              prettier/prettier

/index.ts
1:7   error  'a' is assigned a value but never used  no-unused-vars
1:12  error  Insert `;`                              prettier/prettier

✖ 4 problems (4 errors, 0 warnings)
  2 errors and 0 warnings potentially fixable with the `--fix` option.
Enter fullscreen mode
Exit fullscreen mode
Working like a charm so far. Let’s add some real TS code and run it again. The TS file will look like this:
const a: number = 1
Enter fullscreen mode
Exit fullscreen mode
Running ESLint only against the .ts file:
1:8  error  Parsing error: Unexpected token :

✖ 1 problem (1 error, 0 warnings)
Enter fullscreen mode
Exit fullscreen mode
ESLint doesn’t know, by default, how to parse Typescript files. It is a similar problem we faced when running ESLint for the first time with ES5 defaults.
ESLint has a configuration in which you can specify the parser you want to use. There is also a package, as you could imagine, that handles this parsing for us. It is called @typescript-eslint/parser.
Let’s install it:
npm i @typescript-eslint/parser # --save-dev recommended
Enter fullscreen mode
Exit fullscreen mode
Now let’s configure ESLint to use the new parser:
module.exports = {
  parser: "@typescript-eslint/parser",
  extends: [
    'eslint-config-airbnb-base',
    'plugin:prettier/recommended',
  ]
};
Enter fullscreen mode
Exit fullscreen mode
Running ESLint again (npx eslint index.ts):
1:7   error  'a' is assigned a value but never used  no-unused-vars
1:20  error  Insert `;`                              prettier/prettier

✖ 2 problems (2 errors, 0 warnings)
  1 error and 0 warnings potentially fixable with the `--fix` option.
Enter fullscreen mode
Exit fullscreen mode
Cool! Now we can run ESLint on TS files. Nonetheless, we don’t have any rules being used so we need to configure or use some styleguide, like the one we used by AirBnB before.
There is @typescript-eslint/eslint-plugin that offers us some defaults. Let’s go with it for now:
npm i @typescript-eslint/eslint-plugin # --save-dev recommended
Enter fullscreen mode
Exit fullscreen mode
Adding it to our configuration:
module.exports = {
  parser: "@typescript-eslint/parser",
  extends: [
    'eslint-config-airbnb-base',
    'plugin:@typescript-eslint/recommended',
    'plugin:prettier/recommended',
  ]
};
Enter fullscreen mode
Exit fullscreen mode
Now running npx eslint index.ts:
1:7   error    Type number trivially inferred from a number literal, remove type annotation  @typescript-eslint/no-inferrable-types
1:7   warning  'a' is assigned a value but never used                                        @typescript-eslint/no-unused-vars
1:20  error    Insert `;`                                                                    prettier/prettier

✖ 3 problems (2 errors, 1 warning)
  2 errors and 0 warnings potentially fixable with the `--fix` option.
Enter fullscreen mode
Exit fullscreen mode
Cool! Now we have also proper linting in our Typescript file. We can also see that the Prettier rule still applies as expected.
Bear in mind that typescript-eslint is overriding eslint-config-airbnb-base in this case. It means that some rules won’t work in TS files that are still valid on JS files. Let’s have the files below to see it in action:
// index.js and index.ts
const a = 1;
a = 2;
Enter fullscreen mode
Exit fullscreen mode
Both files are identical. Running npx eslint . --ext .js,.ts we get:
/index.js
  2:1  error    'a' is constant                         no-const-assign
  2:1  warning  'a' is assigned a value but never used  @typescript-eslint/no-unused-vars

/index.ts
  2:1  warning  'a' is assigned a value but never used  @typescript-eslint/no-unused-vars

✖ 3 problems (1 error, 2 warnings)
Enter fullscreen mode
Exit fullscreen mode
The no-const-assign rule is overwritten by typescript-eslint for .ts files so we don’t get the same error for both files.
To overcome it, we need to change the order of the extended configurations, typescript-eslint comes first and eslint-config-airbnb-base next. If we do so:
module.exports = {
  parser: "@typescript-eslint/parser",
  extends: [
    "plugin:@typescript-eslint/recommended",
    "eslint-config-airbnb-base",
    "plugin:prettier/recommended"
  ]
};
Enter fullscreen mode
Exit fullscreen mode
Running npx eslint . --ext .js,.ts:
/index.js
  2:1  error    'a' is constant                         no-const-assign
  2:1  error    'a' is assigned a value but never used  no-unused-vars
  2:1  warning  'a' is assigned a value but never used  @typescript-eslint/no-unused-vars

/index.ts
  2:1  error    'a' is constant                         no-const-assign
  2:1  error    'a' is assigned a value but never used  no-unused-vars
  2:1  warning  'a' is assigned a value but never used  @typescript-eslint/no-unused-vars

✖ 6 problems (4 errors, 2 warnings)
Enter fullscreen mode
Exit fullscreen mode
Cool! Now we get the same error for both files.
One side note: In this example, I have a codebase with JS/TS, it might not be your case and you might also use another style guide where conflicts won’t happen.
That’s all folks!
I hope this article helped you to learn or clarify some concepts behind ESLint, Prettier, and Typescript playing together.
In short, you’ve to understand which files ESLint will analyze and the order of the configurations you want. Image adding now this into a Vue project, for example, you need to add .vue to --ext .js,.ts,.vue and add (or configure) some style guide which will add some rules to your project.
Most boilerplates will already have some lint set up and you will mostly disable some rules but in case you want to customize it or update packages (especially major bumps), it is important to understand how to perform the changes and the impacts it might have in your project.
That’s is all! Happy linting!
In this article I would like to start very easily and go into more depth from topic to topic. In the first step we will use simple rules and options. Then we will learn the correct use of configs and plugins. During the whole learning process you will get useful tips and information so you will be able to build your own ESLint and Prettier environment.
How it all began
Actually I did not want to use ESLint and Prettier because I never felt the need for it because Angular, which i use in my daily life, brings a linting tool and a simple code formatter. But in the end several other things made my decision to use ESLint and Prettier in a more professional way.
First the endless discussions how code should be written or formatted. This is a really annoying subject, for me at least. Personal preferences should go away here. There are more important things to consider.
Secondly, if I want to introduce this to the team, team members will definitely ask me questions and I don’t want to stand there helplessly. It can happen that colleagues lose interest if you do not answer questions or if you cannot promote it.
Thirdly, the power of these tools. It helps you to focus on the essentials in your daily life instead of consistently being forced out of your flow because of for example code has been formatted incorrectly which is mostly reported by a colleague in a code-review.
At the end of the day its all about business no matter how much fun we have in what we do. It is just waste of time. You can spend your time better.
As you can see, for a developer there are many disruptive factors in daily business. Let’s eliminate these disturbances together based on established web tools.
Info: There will be maybe no TSLint with Angular in the near future because TypeScript decided to support ESLint instead of TSLint. The Angular Team is currently working on a migration from TSLint to ESLint. See here.
What is ESLint and how can it help us?
ESLint is a tool which can analyze written code. Basically it is a static code analyzer and it can find syntax errors, bugs or styling improvements. In other languages such as Go is the a core part of the programming language.
What do I need to get started with ESLint?
I assume that you have node and npm installed on your operating system and are familiar with it.
Create a playground directory
You should change into a directory where your JavaScript or TypeScript project is or like me create a test directory «lint-examples» where we can work on it according to this article. On a Linux-based operating system just type mkdir lint-examples in the command-line and then change to this directory with cd lint-examples.
Install ESLint
Now let’s create a package.json so we can install ESLint. Execute the following command: npm init create a package.json which is required for installing eslint in your directory.
Add eslint to your npm scripts
<>Copy
{ "name": "eslint-examples", "version": "0.0.0", "description": "", "main": "index.js", "scripts": { "eslint": "eslint" }, "devDependencies": { "eslint": "7.1.0" } }
Tip:
"eslint": "eslint"in scripts is a shortcut for node_modules/.bin/eslint
Create test.js
Now let’s create a simple JavaScript file in lint-examples directory where we can apply ESLint on. Don’t worry about why the code sample is weirdly formatted. We need this as a starting point.
<>Copy
var foo = 1 console.log(foo) var bar bar = 1 function test( ) { console.log(baz) } var baz = 123
First try on command-line
If you now run the test.js file through ESLint, nothing will happen. By default, ESLint will only check for syntax errors. It will use ES5 as the default option. See ESLint specifying parser options.
If you had used const or let in the above code example, ESLint would have thrown an error because as already mentioned ES5 is the default setting.
Tip: with
--you can pass arguments trough npm scripts to the eslint command line service.
<>Copy
npm run eslint -- ./test.js
Now it is getting Interesting!
Depending on how modern your project is, you should set the right options. In our examples we assume that you want to use the modern ES6 syntax.
Let’s create our first .eslintrc
There are several ways to provide a configuration to ESLint. I prefer the .eslintrc. Here you can find other formats: Configuration-File Formats
<>Copy
{ "env": { "es6": true } }
Info:
envis required for global variables. When we configureenvwith es6 set to true, ESLint will enable the globals for the new types such as Set. It will also enable the ES6 syntax such asletandconst.
See ESLint specifying-parser-options.
Now we should add some rules to our .eclintrc
Can we just define rules? Yes we can because we have installed ESLint and it brings lot of rules out-of-the-box. For special rules like TypeScript or new features that are not supported by ESLint, we have to install either a eslint-config-xxx or a eslint-plugin-xxx module. But we will come to that later. The rules can be found here: ESLint-Rules.
<>Copy
{ "env": { "es6": true }, "rules": { "no-var": "error", "semi": "error", "indent": "error", "no-multi-spaces": "error", "space-in-parens": "error", "no-multiple-empty-lines": "error", "prefer-const": "error", "no-use-before-define": "error" } }
If you now run npm run eslint you should get roughly the following output.
<>Copy
error 'foo' is never reassigned. Use 'const' instead prefer-const error Missing semicolon semi error Expected indentation of 0 spaces but found 4 indent error 'bar' is never reassigned. Use 'const' instead prefer-const error Multiple spaces found before ')' no-multi-spaces error There should be no space after this paren space-in-parens error There should be no space before this paren space-in-parens error More than 2 blank lines not allowed no-multiple-empty-lines error 'baz' was used before it was defined no-use-before-define error 'baz' is never reassigned. Use 'const' instead prefer-const 26 problems (26 errors, 0 warnings) 20 errors and 0 warnings potentially fixable with the `--fix` option.
Now we are a big step further and know how our coding and styling guidelines should be, but in a real life there are of course more rules. I just wanted to show you how easy it is to configure your own rules.
Maybe you noticed in ESLint’s output that 20 problems of 26 can be solved automatically. We will come to that in next section.
ESLint and code formatting?
Until a certain point, ESLint can format your code automatically. As you may have noticed in the above log output, an additional --fix argument can be used to format written code based on eslint rules. For example if a semicolon is missing it will be added automatically, if there are multiple empty lines it will be removed. The same applies to other fixable rules.
Let’s fix the code by executing: npm run eslint -- ./ --fix
<>Copy
var foo = 1; console.log(foo); var bar; var = 1; function test( ) { console.log(baz); } var baz = 123;
<>Copy 1:1 error  Unexpected var, use let or const instead  no-var
 3:1 error  Unexpected var, use let or const instead  no-var
11:1 error  Unexpected var, use let or const instead  no-var

3 problems (3 errors, 0 warnings)
You have seen that not all rules can be fixed by ESLint. For the remaining 3 errors you have to do this manually but the other reported errors by ESLint such as «Missing semicolon», «Expected indentation», «Multiple spaces», and so on were fixed automatically!
Note: The reason why «var» cannot be fixed has something to do with the browser context. You can find more information here.
In the ESLint documentation you can find which rules can be activated with a «check mark» icon. Code that can be auto-formatted is highlighted with a wrench icon.
- The rules can be found here: ESLint-Rules.
- There are almost 300 rules and it is constantly growing
- About 100 of these are auto-formatting rules
The whole thing becomes even more powerful if the code is formatted by your IDE on file-change (save) or if any pipeline tool such as travis-ci can take over this task when something is pushed by Git.
Knowing that ESLint can format your code, what does Prettier even do?
It seems that ESLint does some code formatting as well. As seen in the code example above, it does not go far enough. The code does not look very nice, especially when you look at the function. This is where the wheat is separated from the chaff. ESLint is primarily intended for code quality. Prettier, as the name implies, makes your code Prettier. Let’s see how far Prettier will take us.
What do I need to get started with Prettier?
Not much. You just need to add the following to your NPM scripts "prettier": "prettier" and run npm install prettier.
As we can remember, this code was formatted by ESLint and it is not well formed.
<>Copy
// test.js const foo = 1; console.log(foo); let bar; bar = 1; function test( ) { console.log(baz); } const baz = 123;
When we apply npm run prettier -- --write ./test.js the code format becomes even better.
<>Copy
const foo = 1; console.log(foo); let bar; bar = 1; function test() { console.log(baz); } const baz = 123;
That’s much better. The larger the code base, the greater the benefit.
Can I also set options with Prettier?
Yes you can. The options for the Prettier parser are by far not as extensive as ESLint’s. With Prettier, you are almost at the mercy of the Prettier parser. It decides based on a few options how your code should look like in the end.
This are my settings which is defined in .prettierrc. The full list of code-style options can be found on prettier-options. Let’s create a .prettierrc file with these options.
<>Copy
{ "semi": true, "trailingComma": "all", "singleQuote": true, "printWidth": 80, "tabWidth": 2, "arrowParens": "avoid" }
Do we need to start ESLint and Prettier at the same time?
It is not desirable to start ESLint and Prettier separately to apply coding and format rules. Furthermore, ESLint and Prettier would get in each other’s way because they have overlapping rules and this could lead to unexpected behavior. In the next section this problem is addressed and will be solved. In short you will just call eslint in our command-line and prettier will be included.
Back to how it all began!
As I described at the beginning of this article, I had never used ESLint and Prettier before. Therefore I did not know how to get the whole tooling working. Like every developer, I copied the best possible code snippet from the depths of the Internet into my .eslintrc without knowing what it actually does. The main thing was to get it working.
Here is a little snippet from my .eslintrc config which was originally copied from several sources and adapted by me over time as I understood what the config does.
In short, there are configs and plugins for ESLint provided by the open source community. We don’t have to do it all ourselves. The main thing is to know what is happening under the hood.
.eslintrc
<>Copy
{ "plugins": [ "@typescript-eslint", "prettier", "unicorn" , "import" ], "extends": [ "airbnb-typescript/base", "plugin:@typescript-eslint/recommended", "plugin:unicorn/recommended", "plugin:prettier/recommended", "prettier", "prettier/@typescript-eslint" ], "parserOptions": { "ecmaVersion": 2020, "sourceType": "module" }, "env": { "es6": true, "browser": true, "node": true }, "rules": { "no-debugger": "off", "no-console": 0 } }
Note: maybe you noticed
prettierin the plugins section and you still remember when I mentioned above: «Do we have to execute ESLint and Prettier for code formatting at the same time?» The answer is no becauseeslint-plulgin-prettierandeslint-config-prettierwill do this job for us.
What do these settings and options mean?
After I made it work, I wondered what it all meant. Literally, it knocked me out. If you would run ESLint on your command line now with these options, an error would be thrown that the configs (extends) and plugins are not installed. But how do we know what to install? Everybody knows this, you find a code snippet on Stackoverflow or in some repositories and then you don’t know how to install them.
You can keep in mind that all the modules inside of extends and plugins can be installed. But first you have to know how to interpret the naming convention within the properties to be able to install them via npm.
What are the «plugins» options?
Plugins contain rules that have been written by using a parser. These can be proposal rules from TC39 that are not yet supported by ESLint or special coding guidelines that are not provided by ESLint such as unicorn/better-regex, import/no-self-import.
Imagine that you want to introduce a rule which says that always at the beginning of a file, before any line of code is written, a comment should start with a emoji code. Sounds weird but you can do that with ESLint Plugin.
<>Copy
// :penguin: emoji
Let’s find out how to interpret plugin naming convention
As long as the plugin name does not start with eslint-plugin- or @ or ./ then you have to just prefix the plugin name with eslint-plugin-.
<>Copy
plugins: [ "prettier", // npm module "eslint-plugin-prettier" "unicorn" // npm module "eslint-plugin-unicorn" ]
This is the same as above example and works as well:
<>Copy
plugins: [ "eslint-plugin-prettier", // the same as "prettier" "eslint-plugin-unicorn" // the same as "unicorn" ]
It gets a little bit more complicated when you come across plugin names that start with a @ (namespace). As you can see in the example below, the use of / is limited to one level. You should consider that @mylint and @mylint/foo are under the same namespace but they are two different plugins (npm modules).
<>Copy
plugins: [ "@typescript-eslint", // npm module "@typescript-eslint/eslint-plugin" "@mylint", // npm module "@mylint/eslint-plugin" "@mylint/foo", // npm module "@mylint/eslint-plugin-foo" "./path/to/plugin.js // Error: cannot includes file paths ]
The code example below it the same as above.
<>Copy
plugins: [ "@typescript-eslint/eslint-plugin", // the same as "@typescript-eslint" "@mylint/eslint-plugin", // the same as "@mylint" "@mylint/eslint-plugin-foo" // the same as "@mylint/foo" ]
Tip: Use the short form (first example) instead of the long form (second example). The important thing is that you know how ESLint converts it internally.
We now know how the naming convention works for plugins. Install the following ESLint plugins via NPM.
<>Copy
npm i eslint-plugin-prettier eslint-plugin-unicorn
In the ESLint documentation you can find further information about the naming convention, see plugin namingconvention.
For testing purposes your .eslintrc should look like this.
<>Copy
{ "plugins": [ "prettier", "unicorn" ], "env": { "es6": true } }
Prettier: ESLint plugin for formatting code. See here.
Unicorn: Additional rules which are not supported by ESLint. See here.
Now if you run npm run eslint on your command-line, you will not get an error but also not a lint output. This is because we have to register the plugin module within the extends property of our .eslintrc or apply it by activating them in the rules section.
Let’s find out how to interpret the extends naming convention
First of all, if you think the naming convention of the extends section is the same as plugins, I have to disappoint you. There are differences. I must honestly admit that it took me a long time to notice the difference. This was partly because ESLint is a complex and extensive topic, at least for me.
As long as you only use the simple name (like foo) without a prefixed namespace (@) or with a path (./to/my/config.js) the principle of the naming conventions in extends is the same as with the plugins option. So foo becomes eslint-config-foo
<>Copy
extends: [ "airbnb-base", // npm module "eslint-config-airbnb-base" "prettier" // npm module "eslint-config-prettier" ]
is equal to
<>Copy
extends: [ "eslint-config-airbnb-base", // shortform is "airbnb-base" "eslint-config-prettier" // shortform is "prettier" ]
Now we come to the point where differences between the plugins and extends naming conventions exist. This is the case when you use namespaces (@) in extends section. The following @mylint ESLint config is still the same, it points to @mylint/eslint-config NPM module but @mylint/foo can lead to an error when it is used in extends because omitting the prefix eslint-config- in @mylint/eslint-congif-foo can result in an error.
<>Copy
extends: [ "@bar", // npm module "@bar/eslint-config" "@bar/eslint-config-foo", // npm module "@bar/eslint-config-foo" "@bar/my-config" // npm module "@bar/eslint-config/my-config" ]
As I wrote in the introduction to the previous section, the following @mylint/my-config is a bit special because it contains an NPM module but at the same time it points internally from ESLint perspective to a rule set (my-config). We will clear this up shortly. Here is the official documentation of the naming convention of extends, see shareable-configs
Let’s install the rest the NPM modules for our example app.
<>Copy
npm i eslint-config-airbnb-base eslint-config-prettier
Note: You may have noticed that we installed
eslint-plugin-prettierearlier and now we have installedeslint-config-prettier. These two modules are two different things but only work together. We will discuss this later.
What does extends exactly do in .eslintrc?
A config provides preconfigured rules. These rules can consist of ESLint rules, third party plugin rules or other configurations such as the parser (babel, esprima, …), options (sourceType, …), env (ES6, …), and so on.
Sounds good? Yes, this is good for us because we don’t have to do this by ourselves. Smart developers and teams have invested a lot of time to provide this to us. All we have to do is activate them by pointing to a config or to a plugin rule set.
Where can I find these rule sets?
There are different ways to find them!
Firstly, you should look at the README.md of the relevant repository and read exactly what is written. Usually these rule sets are called «recommended» and must be activated for plugins. For the extends, it is not always necessary.
Secondly, knowing which rule set to use without reading the README.md is which I personally find much more effective. It is useful if the README.md is incomplete or incorrect.
Basically you can say that «plugins» point to a single file where the configurations (rule sets) are contained in an object and «extends» points to rule sets which are in different files.
eslint-config-airbnb-base
<>Copy
eslint-config-airbnb-base (repository) | -- index.js | -- legacy.js | -- whitespace.js
You can activate all configurations at once, but be careful with that. You should find out in beforehand what they do. I explained that before by looking into related README.md or directly in the corresponding config rule set. Pretty easy once you figure out how to activate them, right?
Usage:
<>Copy
"extends": [ "airbnb-base", // index.js "airbnb-base/whitespace" // whitespace.js ]
Keep in mind: The order plays a role because a ruleset will extend or overwrite the previous ones. So do not overdo with configs and plugins. See good explanation on Stackoverflow.
eslint-plugin-prettier
Now we come to the exciting part of the article. How we can use Prettier directly in ESLint without running it as a separate service on our command line or IDE.
We start by activating the eslint-plugin-prettier in the extends section and then the related config eslint-config-prettier which is responsible for deactivating some ESLint rule sets which can conflict with Prettier.
<>Copy
eslint-plugin-mylint (repository) | -- eslint-plugin-prettier.js (because this is specified as entrypoint in package.json)
eslint-plugin-prettier.js
<>Copy
module.exports = { configs: { recommended: { extends: ['prettier'], plugins: ['prettier'], rules: { 'prettier/prettier': 'error' } } } ... ... ...
Usage:
<>Copy
"extends": [ "plugin:prettier/recommended" ]
Tip: Plugins have to be registered in
pluginsand activated inextendsusing the:pluginprefix.
eslint-config-prettier
<>Copy
eslint-config-prettier (repository) | -- index.js | -- @typescript-eslint.js | -- babel.js | -- flowtype.js | -- react.js | -- standard.js | -- unicorn.js | -- vue.js
Usage:
<>Copy
"extends": [ "prettier", // index.js "prettier/unicorn", // unicorn.js "prettier/@typescript-eslint" // @typescript-eslint.js ]
Note: The standalone «prettier» in
extendsis necessary here because it disables certain ESLint core rules. The others are necessary for disabling rules inunicornand@typescript-eslint.
My personal ESLint config looks like the above usage example. I use TypeScript and the Unicorn plugin. I don’t want them to conflict with ESLint. Therefore, certain rules of TypeScript and Unicorn are disabled via Prettier.
Previously we have activated rule sets which are internally nothing else than grouped rules, but you don’t have to use a combined rule set. You can also change or disable individual rules.
Activating everything yourself instead of using a rule set makes no sense. But it often happens that you don’t agree with one or the other rule or its setting. In this case you can deactivate a single rule. See example.
.eslintrc
<>Copy
"rules": { "unicorn/prevent-abbreviations": "off" }
So, we come back to our test example. Now our .eslintrc should look like this.
<>Copy
{ "plugins": [ "prettier", "unicorn" ], "extends": [ "airbnb-base", "plugin:unicorn/recommended", "plugin:prettier/recommended", "prettier", "prettier/unicorn" ], "env": { "es6": true, "browser": true }, rules: { "unicorn/prevent-abbreviations": "off" } }
Strategy: During a transition to ESLint it can happen that many errors are displayed in ESLint output. Adjusting them immediately can take a lot of time or can even lead to side effects. If you want to have a smooth periodic transition, it is recommended to leave the rules in the
warningmode instead of inerror. See configuring rules.
If you now run our example code through ESLint with npm run eslint -- --fix, Prettier will be executed through ESLint so that you only need one command to run both.
How we can this be integrated into an IDE?
At this point I don’t want to write a tutorial about how to activate ESLint in a IDE of your choice. In any case you can say that all modern IDEs (IntelliJ and VS Code) support ESLint. It is important to note that you have to pass in some cases the --fix parameter as an argument in your IDE settings to make everything work automatically.
Why do different types of «ESLint» parsers exist?
ESLint only supports new JavaScript syntax that reached the final stage in TC39. Maybe not many people know this, but the Babel compiler supports features that are not in the final stage. A well-known feature is the decorator feature. The one Angular is based on was abandoned. The new one has different syntax and semantics. The old one reached stage 2 and the new one is in early state.
In this case ESLint will not help you. Either you have to find the right plugin for it or you write your own eslint plugin which uses for example the babel parser instead of the espree parser which is the default parser of ESLint.
See eslint-parser settings.
How about Angular and ESLint?
The Angular Team hold the opinion that we should wait with the rollout of ESLint. This is legitimate because they want to make it as smooth as possible but if you still want to try it, here are some suggestions. See Github.
Performance and ESLint?
It can happen that ESLint is not as performant as one would expect in some code parts, but that’s normal and can happen also in TSLint. To solve this problem you can use the internal caching of ESLint or another ESLint deamon. Here you can find very useful tips, see Stackoverflow issue.
Does Prettier exist only for Javascript?
Prettier officially supports several other languages. These include PHP, Ruby, Swift, and so on. Furthermore there are community plugins for the following languages like Java, Kotlin, Svelte and many more.
What about ESLint v7?
All examples in our article were originally based on version ESLint v6 but recently ESLint v7 has been released. Don’t worry, even in version 7 ESLint works without having to change anything. If you are interested in what has changed or been added you can check out release notes of ESLint v7.
Example repo in a comprehensive way
My personal open-source project https://github.com/pregular/core also motivated me to use ESLint and Prettier.
Conclusion
I think you don’t need to know more about ESLint and Prettier. From now on you can do the whole thing by yourself. The important thing is that you practice it over and over again so you can solidify that knowledge.
I would like to thank the InDepth community for having published my article. A big thanks goes here to Lars Gyrup Brink Nielsen who supported me on my first article

Олег Бидзан
Технический директор Simtech Development
В этой статье я хочу начать с самого простого и углубляться шаг за шагом. Для начала мы будем использовать простые правила и опции. Потом изучим использование конфигов и плагинов. На протяжении всего процесса вы будете получать полезные советы и информацию, чтобы на выходе создать собственное ESLint и Prettier окружение.
Как все начиналось
Вообще я не хотел использовать ESLint и Prettier, потому что Angular, который я использую в повседневной жизни, даёт мне нужные утилиты и простой инструмент форматирования кода. Но в итоге некоторые вещи заставили меня изменить свое решение об использовании ESLint и Prettier.
Во-первых, бесконечные споры о том, как писать и форматировать код. Это действительно надоевшая всем тема, по крайней мере, для меня. Личным предпочтениям тут не место. Есть более важные вещи, на которые стоит обратить внимание.
Во-вторых, я не хочу казаться беспомощным, когда коллеги начнут задавать вопросы во время демонстрации. Они потеряют интерес, если вы не отвечаете на вопросы или не сможете раскрутить тему.
В-третьих, мощь этих инструментов. Они помогают заниматься действительно важными вещами вместо того, чтобы отвлекаться от процесса, если, например, код отформатирован неправильно, на что чаще всего обращают внимание на code review.
И, в конце концов, это всё про бизнес, неважно насколько нам нравится то, что мы делаем. Это просто трата времени. Вы можете потратить его эффективнее.
Как вы заметили, у разработчиков в течение рабочего дня очень много отвлекающих факторов. Давайте устраним их, используя устоявшиеся инструменты.
Инфо Скорее всего поддержки TSLint в Angular не будет в ближайшее время т.к. TypeScript решили внедрить ESLint вместо TSLint. Команда Angular уже работает нам переездом с TSLint на ESLint. См. issue.
ESLint — это утилита, которая может анализировать написанный код. Фактически, это статический анализатор кода, и он может находить синтаксические ошибки, баги или неточности форматирования. В других языках, например, Go, это является неотъемлемой частью языка программирования.
Что я должен сделать, чтобы начать использовать ESLint?
Я рассчитываю, что у вас уже установлены node и npm, и вы знакомы с ними.
Создание рабочей папки
Перейдите в папку, где находится ваш JavaScript или TypeScript проект, или, как я, создайте тестовую папку lint-examples, где мы можем работать по ходу статьи. В операционных системах на основе Linux наберите mkdir lint-examples в командной строке и затем перейдите в созданную папку с помощью команды cd lint-examples.
Установка ESLint
Теперь давайте создадим package.json, чтобы мы могли установить ESLint. Выполнение команды npm init создаст package.json, который необходим для установки eslint в вашу папку.
Добавьте eslint в ваши npm скрипты
{
  "name": "eslint-examples",
  "version": "0.0.0",
  "description": "",
  "main": "index.js",
  "scripts": {
    "eslint": "eslint"
  },
  "devDependencies": {
    "eslint": "7.1.0"
  }
}
Подсказка "eslint": "eslint" в скриптах — это сокращение для node_modules/.bin/eslint.
Создайте test.js
Давайте создадим простой JavaScript-файл в папке lint-example, куда мы установили ESLint. Не переживайте о плохом форматировании примера. Нам нужно это для старта.
var foo = 1
console.log(foo)
var bar
bar = 1
function test(


    ) {
  console.log(baz)
}
var baz = 123
Первая попытка в командной строке
Если вы сейчас запустите test.js, используя ESLint, ничего не случится. По умолчанию ESLint проверяет только синтаксические ошибки. Он будет использовать ES5 по умолчанию. Описание опций парсинга можно найти по ссылке.
Если вы использовали const или let в примере выше, ESLint генерирует ошибку, потому что, как уже говорилось, ES5 выбран по умолчанию.
Подсказка Используя -- вы можете передать аргументы через npm-скрипты в командную строку eslint.
npm run eslint -- ./test.js
Становится интереснее!
В зависимости от того насколько современен ваш проект, вы должны выставить правильные опции. В наших примерах мы предполагаем, что вы хотите использовать современный ES6 синтаксис.
Давайте создадим наш первый .eslintrc.
Существует несколько способов передать конфигурации в ESLint. Я предпочитаю .eslintrc. По ссылке вы найдете другие способы.
{
  "env": {
    "es6": true
  }
}
Инфо env обязателен для глобальных переменных. Когда мы настраиваем параметры env, устанавливая es6 в true, ESLint включит глобальность для всех новых типов, таких как Set. Это так же включит ES6 синтаксис, например, let и const. Смотрите установка опций парсера.
Сейчас мы должны добавить несколько правил в наш .eslintrc
Можем ли мы просто определить правила? Да, потому что установили ESLint, который содержит множество правил из коробки. Для особых правил, таких как TypeScript или новых функций, которые не поддерживаются ESLint, мы должны установить модули eslint-config-xxx или eslint-plugin-xxx. Но мы можем вернуться к этому позже. Вы можете посмотреть правила по ссылке.
{
  "env": {
    "es6": true
  },
  "rules": {
    "no-var": "error",
    "semi": "error",
    "indent": "error",
    "no-multi-spaces": "error",
    "space-in-parens": "error",
    "no-multiple-empty-lines": "error",
    "prefer-const": "error",
    "no-use-before-define": "error"
  }
}
Если вы запустите npm run eslint, то должны получить результат в точности как ниже:
error 'foo' is never reassigned. Use 'const' instead prefer-const
error Missing semicolon semi
error Expected indentation of 0 spaces but found 4 indent
error 'bar' is never reassigned. Use 'const' instead prefer-const
error Multiple spaces found before ')' no-multi-spaces
error There should be no space after this paren space-in-parens
error There should be no space before this paren space-in-parens
error More than 2 blank lines not allowed no-multiple-empty-lines
error 'baz' was used before it was defined no-use-before-define
error 'baz' is never reassigned. Use 'const' instead prefer-const

26 problems (26 errors, 0 warnings)
20 errors and 0 warnings potentially fixable with the `--fix` option.
Мы сделали большой шаг и теперь знаем, какими должны быть наши стандарты кодирования и форматирования кода, но в реальной жизни правил, конечно же, гораздо больше.
Возможно, вы увидели в выводе результата ESLint, что 20 проблем из 26 могут быть решены автоматически. Мы вернемся к этому в следующем разделе.
ESLint и форматирование кода?
ESLint может автоматически форматировать ваш код до определенной стадии. Как вы возможно видели в выводе лога, дополнительный флаг --fix может быть использован для форматирования написанного кода, основываясь на правилах eslint. Например, пропущенная точка с запятой может быть добавлена автоматически, а несколько пустых строк подряд будут удалены. Это так же работает для других правил.
Давайте исправим код, выполнив npm run eslint -- ./ --fix
var foo = 1;
console.log(foo);
var bar;
var = 1;
function test(

) {
    console.log(baz);
}
var baz = 123;
1:1 error Unexpected var, use let or const instead no-var
3:1 error Unexpected var, use let or const instead no-var
11:1 error Unexpected var, use let or const instead no-var

3 problems (3 errors, 0 warnings)
Вы видите, что ESLint исправляет не все правила. Оставшиеся три ошибки необходимо поправить вручную, однако остальные ошибки из отчета ESLint (такие как «Пропущенная точка с запятой», «Неправильные отступы», «Множественные пробелы») были исправлены автоматически.
Обратите внимание Причина, по которой var не может быть исправлена, — в каких-то действиях с контекстом браузера. Вы можете почитать подробнее по ссылке.
В документации ESLint вы можете найти, какие правила можно активировать с помощью иконки «check mark». Код, который может быть отформатирован автоматически, подсвечивается с помощью иконки гаечного ключа.
- Правила можно найти по ссылке.
- Существует примерно 300 правил, и их число постоянно растет.
- Примерно 100 из этих правил делают автоформатирование.
Всё это становится мощнее, если код форматируется вашей IDE при изменении (сохранении) файла, или если любой инструмент автоматизации, например travis-ci, может взять на себя эту задачу, когда что-то отправляется в Git.
Если ESLint может форматировать ваш код, что тогда делает Prettier?
Похоже, что ESLint хорошо выполняет некоторое форматирование кода. Как видно в примере выше, этого не достаточно. Код всё ещё выглядит недостаточно хорошо, особенно если вы посмотрите функции. Вот где зерна отделяются от плевел. ESLint прежде всего предназначен для качества кода. Prettier, как видно из названия, делает ваш код красивым. Давайте посмотрим, к чему приведет использование Prettier.
Что надо сделать, чтобы начать использовать Prettier?
Не так много. Просто добавьте в ваши npm-скрипты "prettier": "prettier" и запустите npm install prettier.
Как мы помним, этот код был отформатирован ESLint, и он не очень хорошо оформлен.
// test.js
const foo = 1;
console.log(foo);
let bar;
bar = 1;
function test(

) {
    console.log(baz);
}
const baz = 123;
После выполнения npm run prettier -- --write ./test.js код выглядит опрятнее.
const foo = 1;
console.log(foo);
let bar;
bar = 1;
function test() {
  console.log(baz);
}
const baz = 123;
Так намного лучше. Чем больше кода, тем лучше результат.
Могу ли я настраивать Prettier?
Да. Настроек в парсере Prettier не так много, как в ESLint. С Prettier вы полностью во власти парсера Prettier. Основываясь на небольшом количестве опций, он сам решает, как будет выглядеть ваш код.
Это мои настройки, которые описаны в файле .prettierrc. Полный список опций вы можете найти по ссылке. Давайте создадим .prettierrc-файл с такими опциями.
{
  "semi": true,
  "trailingComma": "all",
  "singleQuote": true,
  "printWidth": 80,
  "tabWidth": 2,
  "arrowParens": "avoid"
}
Запускать ли ESLint и Prettier одновременно?
Не рекомендуется запускать ESLint и Prettier по отдельности, чтобы применить правила написания кода и форматирования. Более того, ESLint и Prettier будут мешать друг другу т.к. у них есть пересекающиеся правила, и это может привести к непредсказуемым последствиям. В следующем разделе мы рассмотрим эту проблему и решим ее. Если кратко, то вы просто запускаете eslint в командной строке, а prettier будет уже включаться туда.
Как всё это начиналось!
Как я писал в начале статьи, я никогда не использовал ESLint и Prettier прежде. Следовательно, я не знал, как эти утилиты работают. Как любой разработчик, я копировал наилучший кусок кода из глубин интернета в мой .eslintrc-файл без понимания, что это даст. Главной целью было, чтобы это работало.
Вот небольшой кусочек кода из моего .eslintrc-файла, который я скопировал из нескольких источников и адаптировал под себя, постепенно понимая, что делает конфиг.
Если коротко, то там настройки и плагины для ESLint, предоставленные сообществом открытого исходного кода. Мы не должны делать их сами. Главное понимать, как это работает под капотом.
.eslintrc
{
  "plugins": [
    "@typescript-eslint",
    "prettier",
    "unicorn" ,
    "import"
  ],
  "extends": [
    "airbnb-typescript/base",
    "plugin:@typescript-eslint/recommended",
    "plugin:unicorn/recommended",
    "plugin:prettier/recommended",
    "prettier",
    "prettier/@typescript-eslint"
  ],
  "parserOptions": {
    "ecmaVersion": 2020,
    "sourceType": "module"
  },
  "env": {
    "es6": true,
    "browser": true,
    "node": true
  },
  "rules": {
    "no-debugger": "off",
    "no-console": 0
  }
}
Заметка Возможно, вы заметили prettier в плагинах, и вы все еще помните, что я писал выше: «Должны ли мы одновременно запускать ESLint и Prettier для форматирования кода?» Ответ нет, потому что eslint-plulgin-prettier и eslint-config-prettier сделают всю работу за вас.
Что означают эти настройки и опции?
После того, как я заставил систему работать, то задался вопросом, а что это всё значит. Это буквально выбило меня из колеи. Если вы запустите ESLint в вашей консоли с этими опциями, то получите сообщение об ошибке, что конфига (расширения) и плагины не установлены. Но откуда мы можем знать, что устанавливать? Каждый знаком с процессом, вы находите кусок кода на StackOverflow или в каком-то репозитории и потом не знаете, как правильно запустить его.
Вы должны помнить, что все модули внутри extends и plugins могут быть установлены. Но сначала вы должны узнать, как интерпретировать соглашение об именах в свойствах, чтобы иметь возможность устанавливать их через npm.
Что такое опции «плагина»?
Плагины содержат правила написанные с использованием парсера. Это могут быть правила на рассмотрении из TC39, которые еще не поддерживаются ESLint, или специальные рекомендации по написанию кода, которые не представлены в ESLint, например, unicorn/better-regex, import/no-self-import.
Представьте, что вы хотите ввести правило, которое гласит, что в начале файла перед написанием какой-либо строки кода всегда должен быть комментарий, начинающийся со смайлика. Звучит странно, но вы можете сделать это с помощью ESLint Plugin.
// :penguin: emoji
Давайте узнаем, как интерпретировать соглашение об именах плагинов
Если имя плагина начинается не с eslint-plugin- или @ или ./, вы просто должны добавить префикс eslint-plugin-.
plugins: [
  "prettier", // npm module "eslint-plugin-prettier"
  "unicorn"   // npm module "eslint-plugin-unicorn"
]
Еще пример, работает так же:
plugins: [
  "eslint-plugin-prettier", // the same as "prettier"
  "eslint-plugin-unicorn"   // the same as "unicorn"
]
Становится немного сложнее, когда вы сталкиваетесь с именами плагинов, которые начинаются с @ (пространство имен). Как видно из приведенного ниже примера, использование / ограничено одним уровнем. Вы должны учитывать, что @mylint и @mylint/foo находятся в одном и том же пространстве имен, но это два разных плагина (npm-модуля).
plugins: [
  "@typescript-eslint", // npm module "@typescript-eslint/eslint-plugin"
  "@mylint",        	// npm module "@mylint/eslint-plugin"
  "@mylint/foo",        // npm module "@mylint/eslint-plugin-foo"
  "./path/to/plugin.js  // Error: cannot includes file paths
]
Код примера ниже такой же, как и сверху.
plugins: [
  "@typescript-eslint/eslint-plugin", // the same as "@typescript-eslint"
  "@mylint/eslint-plugin",            // the same as "@mylint"
  "@mylint/eslint-plugin-foo"         // the same as "@mylint/foo"
]
Подсказка Используйте сокращенную форму (из первого примера) вместо длинной формы (из второго примера). Главное, чтобы вы понимали, как ESLint это конвертирует внутри.
Теперь мы знаем, как работает соглашение об именах для плагинов. Установите следующие плагины ESLint через npm.
npm i eslint-plugin-prettier eslint-plugin-unicorn
В документации ESLint вы можете найти дополнительную информацию о соглашении об именах.
Для тестирования ваш .eslintrc должен выглядеть следующим образом:
{
  "plugins": [
    "prettier",
    "unicorn"
  ],
  "env": {
    "es6": true
  }
}
Prettier: ESLint плагин для форматирования кода.
Unicorn: дополнительные правила, которые не поддерживаются ESLint.
Теперь, если вы запустите npm run eslint в командной строке, вы не получите сообщение об ошибке, но также не получите и вывод ESLint. Это потому, что мы должны зарегистрировать модуль плагина в свойстве extends нашего .eslintrc-файла или применить его, активировав в разделе rules.
Давайте выясним, как интерпретировать соглашение об именах в расширениях
Прежде всего, если вы считаете, что соглашение об именах в разделе extends такое же, как и у плагинов, я должен вас разочаровать. Есть отличия. Должен честно признать, что мне потребовалось много времени, чтобы заметить разницу. Это было отчасти потому, что ESLint — сложная и обширная тема, по крайней мере, для меня.
Пока вы используете только простое имя (например, foo) без префикса пространства имен (@) или с (./to/my/config.js), принцип соглашений об именах в extends такой же, как и с параметром plugins. Таким образом, foo становится eslint-config-foo
extends: [
  "airbnb-base", // npm module "eslint-config-airbnb-base"
  "prettier"     // npm module "eslint-config-prettier"
]
идентичен
extends: [
  "eslint-config-airbnb-base", // shortform is "airbnb-base"
  "eslint-config-prettier"     // shortform is "prettier"
]
Итак, мы подошли к тому, что существуют различия в соглашении об именах между plugins и extends. Это тот случай, когда вы используете пространства имен (@) в разделе extends. Следующая конфигурация ESLint @mylint все та же, она указывает на модуль npm @mylint/eslint-config, но @mylint/foo может привести к ошибке при использовании в extends из-за отсутствия префикса eslint-config- в @mylint/eslint-config-foo.
extends: [
  "@bar",                   // npm module "@bar/eslint-config"
  "@bar/eslint-config-foo", // npm module "@bar/eslint-config-foo"
  "@bar/my-config"          // npm module "@bar/eslint-config/my-config"
]
Как я писал в введении к предыдущему разделу, следующий @mylint/my-config немного особенный, поскольку он содержит модуль npm, но в то же время он указывает изнутри ESLint на набор правил (my-config). Мы скоро это выясним. Вот официальная документация по соглашению об именах extends.
Давайте установим остальные модули npm для нашего примера.
npm i eslint-config-airbnb-base eslint-config-prettier
Примечание: возможно, вы заметили, что сначала мы установили eslint-plugin-prettier, а теперь установили eslint-config-prettier. Это разные модули, но работают только вместе. Мы обсудим это позже.
Что конкретно делает extends в .eslintrc?
Конфиг предоставляет предварительно настроенные правила. Эти правила могут состоять из правил ESLint, правил сторонних плагинов или других конфигураций, таких как синтаксический анализатор (babel, esprima, и т.д.), параметров (sourceType, и т.д.), окружений (ES6, и т.д.) и других.
Звучит неплохо? Да, потому что мы не должны делать всё сами. Продвинутые разработчики и команды уже потратили на это много времени. Всё, что нужно сделать, это активировать правила, указав конфиг или набор правил плагинов.
Где я могу найти эти наборы правил?
Есть разные способы их найти.
Во-первых, вы должны посмотреть на README.md соответствующего репозитория и прочитать именно то, что написано. Обычно, эти наборы правил называются «рекомендованными» и должны быть активированы для plugins. Для extends это не всегда необходимо.
Во-вторых, знание того, какой набор правил использовать даже без чтения README.md — вот, что я считаю гораздо более эффективным. Особенно, если файл README.md является неполным или неправильным.
По сути, вы можете сказать, что «плагины» указывают на один файл, где конфигурации (наборы правил), содержащиеся в объекте и «расширениях», указывают на наборы правил, которые находятся в разных файлах.
eslint-config-airbnb-base
eslint-config-airbnb-base (repository)
| -- index.js
| -- legacy.js
| -- whitespace.js
Вы можете активировать все конфигурации одновременно, но будьте осторожны. Вы должны заранее знать, что они делают. Обычно я предварительно изучаю связанные README.md файлы или непосредственно соответствующие наборы правил конфигурации. Довольно легко, когда вы поймете, как их активировать, верно?
Использование:
"extends": [
  "airbnb-base",            // index.js
  "airbnb-base/whitespace"  // whitespace.js
]
Держите в уме Порядок играет роль, потому что набор правил будет расширять или перезаписывать предыдущие. Так что не переусердствуйте с конфигами и плагинами. Смотрите хорошее объяснение на StackOverflow.
eslint-plugin-prettier
Теперь мы подошли к захватывающей части статьи. Как мы можем использовать Prettier напрямую в ESLint, не запуская его в качестве отдельной службы в нашей командной строке или IDE?
Мы начнём с активации eslint-plugin-prettier в разделе extends, а затем связанного с ним config eslint-config-prettier, который отвечает за деактивацию некоторых наборов правил ESLint, которые могут конфликтовать с Prettier.
eslint-plugin-mylint (repository)
| -- eslint-plugin-prettier.js (because this is specified as entrypoint in package.json)
eslint-plugin-prettier.js
module.exports = {
  configs: {
    recommended: {
      extends: ['prettier'],
      plugins: ['prettier'],
      rules: {
        'prettier/prettier': 'error'
      }
    }
  }
  ...
  ...
  ...
Использование:
"extends": [
  "plugin:prettier/recommended"
]
Подсказка Плагины должны быть зарегистрированы в plugins и активированы в extends с использованием :plugin префикс.
eslint-config-prettier
eslint-config-prettier (repository)
| -- index.js
| -- @typescript-eslint.js
| -- babel.js
| -- flowtype.js
| -- react.js
| -- standard.js
| -- unicorn.js
| -- vue.js
Использование:
"extends": [
  "prettier",                   // index.js
  "prettier/unicorn",           // unicorn.js
  "prettier/@typescript-eslint" // @typescript-eslint.js
]
Примечание Отдельно "prettier" в extends требуется для отключения некоторых правил ядра ESLint. В остальных случаях "prettier." необходимы для отключения правил в unicorn и @typescript-eslint.
Мой личный конфиг ESLint выглядит как приведенный выше пример. Я использую TypeScript и плагин Unicorn. Не хочу, чтобы они конфликтовали с ESLint. Поэтому некоторые правила TypeScript и Unicorn отключены через Prettier.
Ранее мы активировали наборы правил, которые внутренне представляют собой не что иное, как сгруппированные правила, но вам не нужно использовать комбинированный набор правил. Вы также можете изменить или отключить отдельные правила.
Активировать всё самостоятельно вместо использования набора правил не имеет смысла. Но часто случается так, что вы не согласны с тем или иным правилом или его настройками. В этом случае вы можете отключить одно правило.
.eslintrc
"rules": {
  "unicorn/prevent-abbreviations": "off"
}
Итак, вернёемся к нашему тестовому примеру. Теперь наш .eslintrc-файл должен выглядеть следующим образом:
{
  "plugins": [
    "prettier",
    "unicorn"
  ],
  "extends": [
    "airbnb-base",
    "plugin:unicorn/recommended",
    "plugin:prettier/recommended",
    "prettier",
    "prettier/unicorn"
  ],
  "env": {
    "es6": true,
    "browser": true
  },
  rules: {
    "unicorn/prevent-abbreviations": "off"
  }
}
Стратегия При переходе на ESLint может случиться так, что в выводе ESLint отображается много ошибок. Правка по ходу дела может занять много времени или даже привести к побочным эффектам. Если вы хотите переходить постепенно, рекомендуется оставить правила в режиме warning, а не error.
Если вы теперь запустите наш пример через ESLint, используя npm run eslint -- --fix, Prettier будет выполняться через ESLint, так что вам потребуется только одна команда для запуска обоих инструментов.
Как мы можем интегрировать это в IDE?
Все современные IDE (IntelliJ и VS Code) поддерживают ESLint. Важно отметить, что в некоторых случаях вы должны передавать параметр --fix в качестве аргумента в настройках IDE, чтобы всё работало автоматически.
Почему существуют разные типы парсеров «ESLint»?
ESLint поддерживает только новый синтаксис JavaScript, который находится на финальной стадии в TC39. Возможно, не многие знают это, но компилятор Babel поддерживает функции, которые ещё не находятся на финальной стадии. Хорошо известная функция — decorator. От функции, на которой был основан Angular, отказались. Новая же функция имеет другой синтаксис и семантику. Предыдущая функция находится на второй стадии, а новая — на раннем этапе.
В этом случае ESLint вам не поможет. Либо вам нужно найти подходящий плагин для него, либо вы пишете свой собственный плагин eslint, который использует, например, анализатор babel вместо анализатора espree, который является анализатором по умолчанию в ESLint.
Смотрите настройки eslint-parser.
Как насчёт Angular и ESLint?
Команда Angular придерживается мнения, что нам следует подождать с применением ESLint. Это допустимо, потому что они хотят сделать переход как можно более плавным, но если вы всё же хотите попробовать, вот несколько советов.
Производительность и ESLint?
Может случиться, что ESLint не так эффективен, как можно было бы ожидать в некоторых частях кода, но это нормально и может произойти также в TSLint. Для решения проблемы вы можете использовать внутреннее кэширование ESLint или другого демона ESLint. Здесь вы можете найти очень полезные советы, см. пост на StackOverflow.
Prettier существует только для Javascript?
Prettier официально поддерживает несколько других языков. К ним относятся PHP, Ruby, Swift и так далее. Кроме того, существуют плагины сообщества для таких языков как Java, Kotlin, Svelte и многих других.
Как насчет ESLint v7?
Все примеры в нашей статье изначально были основаны на версии ESLint v6, но недавно была выпущена версия ESLint v7. Не волнуйтесь, даже в версии 7 ESLint работает без каких-либо изменений. Если вас интересует, что было изменено или добавлено, вы можете ознакомиться с примечаниями к выпуску ESLint v7.
Перевод статьи «Setting up efficient workflows with ESLint, Prettier and TypeScript»