Disallow JSX prop spreading (react/jsx-props-no-spreading)
Enforces that there is no spreading for any JSX attribute. This enhances readability of code by being more explicit about what props are received by the component. It is also good for maintainability by avoiding passing unintentional extra props and allowing react to emit warnings when invalid HTML props are passed to HTML elements.
Rule Details
Examples of incorrect code for this rule:
<App {...props} />
<MyCustomComponent {...props} some_other_prop={some_other_prop} />
<img {...props} />
Examples of correct code for this rule:
const {src, alt} = props;
const {one_prop, two_prop} = otherProps;
<MyCustomComponent one_prop={one_prop} two_prop={two_prop} />
<img src={src} alt={alt} />
Rule Options
...
"react/jsx-props-no-spreading": [<enabled>, {
    "html": "ignore" | "enforce",
    "custom": "ignore" | "enforce",
    "explicitSpread": "ignore" | "enforce",
    "exceptions": [<string>]
}]
...
html
html set to ignore will ignore all html jsx tags like div, img etc. Default is set to enforce.
Examples of correct code for this rule, when html is set to ignore:
Examples of incorrect code for this rule, when html is set to ignore:
<MyCustomComponent {...props} />
custom
custom set to ignore will ignore all custom jsx tags like App, MyCustomComponent etc. Default is set to enforce.
Examples of correct code for this rule, when custom is set to ignore:
<MyCustomComponent {...props} />
Examples of incorrect code for this rule, when custom is set to ignore:
explicitSpread
explicitSpread set to ignore will ignore spread operators that are explicitly listing all object properties within that spread. Default is set to enforce.
Examples of correct code for this rule, when explicitSpread is set to ignore:
<img {...{ prop1, prop2, prop3 }} />
exceptions
An «exception» will always flip the resulting html or custom setting for that component — ie, html set to ignore, with an exception of div will enforce on an div; custom set to enforce with an exception of Foo will ignore Foo.
{ "exceptions": ["Image", "img"] }
Examples of correct code for this rule:
const {src, alt} = props;
<Image {...props} />
<img {...props} />
Examples of incorrect code for this rule:
<MyCustomComponent {...props} />
{ "html": "ignore", "exceptions": ["MyCustomComponent", "img"] }
Examples of correct code for this rule:
const {src, alt} = props;
const {one_prop, two_prop} = otherProps;
<img src={src} alt={alt} />
<MyCustomComponent {...otherProps} />
Examples of incorrect code for this rule:
When Not To Use It
If you are not using JSX or have lots of props to be passed or the props spreading is used inside HOC.
Содержание
- Name already in use
- eslint-plugin-react / docs / rules / jsx-props-no-spreading.md
- Users who have contributed to this file
- Error while configuring react/jsx-props-no-spreading #2387
- Comments
- This comment was marked as outdated.
- This comment has been hidden.
- Footer
- react/jsx-props-no-spreading doesn’t support «sub-components». #2529
- Comments
- Footer
- Getting Started with Next.js — VSCode, ESLint and Prettier
- Setting up Next.js
- Liniting using ESLint
- Installing ESLint extenstion on VSCode
- Setting up ESLint
- Formatting using Prettier
- Installing Prettier extenstion on VSCode
- Setting up Prettier
- Conclusion
Name already in use
eslint-plugin-react / docs / rules / jsx-props-no-spreading.md
- Go to file T
- Go to line L
- Copy path
- Copy permalink
5 contributors
Users who have contributed to this file
Copy raw contents
Copy raw contents
Disallow JSX prop spreading ( react/jsx-props-no-spreading )
Enforces that there is no spreading for any JSX attribute. This enhances readability of code by being more explicit about what props are received by the component. It is also good for maintainability by avoiding passing unintentional extra props and allowing react to emit warnings when invalid HTML props are passed to HTML elements.
Examples of incorrect code for this rule:
Examples of correct code for this rule:
html set to ignore will ignore all html jsx tags like div , img etc. Default is set to enforce .
Examples of correct code for this rule, when html is set to ignore :
Examples of incorrect code for this rule, when html is set to ignore :
custom set to ignore will ignore all custom jsx tags like App , MyCustomComponent etc. Default is set to enforce .
Examples of correct code for this rule, when custom is set to ignore :
Examples of incorrect code for this rule, when custom is set to ignore :
explicitSpread set to ignore will ignore spread operators that are explicitly listing all object properties within that spread. Default is set to enforce .
Examples of correct code for this rule, when explicitSpread is set to ignore :
An «exception» will always flip the resulting html or custom setting for that component — ie, html set to ignore , with an exception of div will enforce on an div ; custom set to enforce with an exception of Foo will ignore Foo .
Examples of correct code for this rule:
Examples of incorrect code for this rule:
Examples of correct code for this rule:
Examples of incorrect code for this rule:
When Not To Use It
If you are not using JSX or have lots of props to be passed or the props spreading is used inside HOC.
Источник
Error while configuring react/jsx-props-no-spreading #2387
While setting up my eslint rules, I ran into some issues when configuring jsx-props-no-spreading
Expected:
Allow props spreading when the following rule is set
Actual:
Getting the following error
Error: .eslintrc.js:
Configuration for rule «react/jsx-props-no-spreading» is invalid:
Value <«html»:»ignore»,»custom»:»ignore»,»exceptions»:[]>should NOT be valid.
Package versions:
The text was updated successfully, but these errors were encountered:
This is intentional; there’s no point in using the rule if you’re ignoring everything and have no exceptions: https://github.com/yannickcr/eslint-plugin-react/blob/master/lib/rules/jsx-props-no-spreading.js#L48-L63
If you add an exception, or change one of the ignores to «enforce», it should work.
I understand that it would be pointless, but unfortunately it’s part of the airbnb rules that comes with its extension, in any case, after keeping it for a while I can already see its benefit, thank you!
The airbnb config doesn’t ignore both kinds of components.
No, as in, this rule came as part of the airbnb config, and I was trying to turn it off.
Set it to «off» then 🙂
Thanks for teaching me that 😛
But I’m going to keep it on for the time being!
after keeping it for a while I can already see its benefit, thank you!
How do u switch it to off?
No worries got it, thanks
Just for the record:
If you wish to use the rule and wish to ignore instead of setting it off . This is how you should use:
In the rule definition, all the fields are made compulsory and specially exceptions is suppose to have an array of string not empty, so the declaration of rules goes like follow
For setting it off you can use either any of the following
This may seem obvious to most people but wasn’t to me, this can be set up in an eslintrc.json or eslintrc.js file or in your package.json file by adding a rules object like so:
This doesn’t work for some reason.. What am I missing? @ljharb
© 2023 GitHub, Inc.
You can’t perform that action at this time.
You signed in with another tab or window. Reload to refresh your session. You signed out in another tab or window. Reload to refresh your session.
Источник
react/jsx-props-no-spreading doesn’t support «sub-components». #2529
Dependencies:
.eslintrc.json
What happens?
The following patterns are considered warnings regardless they are in the exception list:
The following patterns are not considered warnings:
The text was updated successfully, but these errors were encountered:
What I noticed is that sub-components don’t have a JSXIdentifier object instead they have JSXMemberExpression . Being said that the tagName ends up being undefined . For a better reference:
Select:
components.Group
I’m not that familiar with eslint rules but I can get it done if anyone points me in the right direction
This line: https://github.com/yannickcr/eslint-plugin-react/blob/master/lib/rules/jsx-props-no-spreading.js#L86 probably needs to be adjusted to account for namespaced custom components? I’d start by adding test cases, and then play with the rule impl starting at that line.
Thanks for your prompt response @ljharb
As I mentioned before, tagName is undefined when analyzing sub-components, and it is according to the constant definition
it expects name property at the JSXIdentifier but in sub-components the object structure contains a JSXMemberExpression instead of the Identifier, which doesn’t have the expected prop to get the tagName.
So, I don’t think it would make too much sense to start from line 86
until we find a way to identify sub-components pattern structure or at least how to get their tagName
This rule gets the tagName from the name property of the following structure:
However, when analyzing sub-components the object at this exact level is represented by the following structure:
Sounds great, a PR would be most appreciated.
Awesome, I’ll work on it
@ljharb I have added some tests in here, could you please review them prior to proceeding to design my solution?
For better traceability, I will be adding some references to external resources that might help to solve this issue.
According to JSXOpeningElement, name property is required and should be of any of the following types:
- JSXIdentifier -> This one contains the tag name.
- JSXMemberExpression -> This one contains a property property which is required and should be of type JSXIdentifier .
What I could find out through some tests is that when analyzing components (html or custom) the parser returns a JSXIdentifier , whereas analyzing sub-components (i.e. components.Group, Nav.Tab) the parser returns JSXMemberExpression which contains a JSXIdentifier Node with the following structure:
Those tests look great to me!
Note that the rule needs to work with the default eslint parser, the babel parser in babel-eslint, and the typescript parser, and your links only deal with the babel parser. It would be helpful to duplicate each of the test cases, and make sure each one runs on each of these parsers.
© 2023 GitHub, Inc.
You can’t perform that action at this time.
You signed in with another tab or window. Reload to refresh your session. You signed out in another tab or window. Reload to refresh your session.
Источник
Getting Started with Next.js — VSCode, ESLint and Prettier
«Next.js gives you the best developer experience with all the features you need for production: hybrid static & server rendering, TypeScript support, smart bundling, route pre-fetching, and more. No config needed.» — as stated on Next.js home page.
Why use Next.js?
Setting up Next.js
Note: We will be using Visual Studio Code as a code editor, but feel free to use any code editor you are most comfortable with when writing code.
First we need to install some prerequisites:
You can also use npm as a package manager. In this guide, we will make use of yarn.
We then execute the following command to create a new Next.js app.
Exit fullscreen mode
The previous command will create a basic project. In this newly created project, you will find a file called package.json . This file consists of metadata information related to the project, for example; scripts, version and dependencies.
Exit fullscreen mode
The scripts section consists of three different scripts, which when we execute using yarn will:
- yarn dev : Run the application locally
- yarn build : Build the application for production
- yarn start : Starts the production version of the application
Liniting using ESLint
We will be using ESLint as a linter. The main reasons for using this tool is that;
- It helps us to catch bugs (by statistically analysing code)
- It helps us to write code in a consistent style
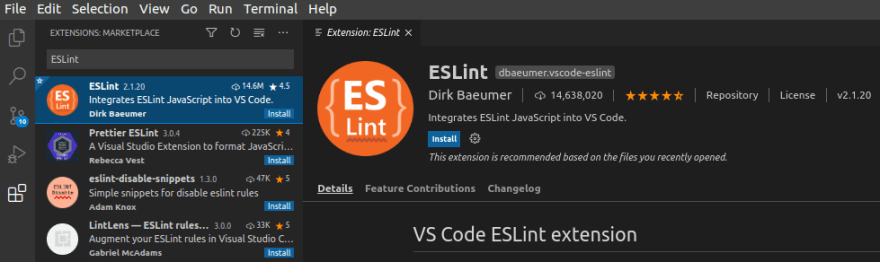
Installing ESLint extenstion on VSCode
Go to the extensions tab (or use CTRL+SHIFT+X), type in ‘ESLint’ and click install.
Setting up ESLint
To set up ESLint, we need to execute the following command (make sure you’re in the root location of the project).
Exit fullscreen mode
The next step is to configure our linter. We need to run the following command to be able to create a new configuration file for ESLint.
Exit fullscreen mode
After executing the previous command, you will be prompted with a set of questions. In our set up we selected the following:
- How would you like to use ESLint?To check syntax, find problems, and enforce code style
- What types of modules does your project use?Javascript modules (import/export)
- Which framework does your project use?React
- Does your project use TypeScript?No
- Where does your code run?Browser
- How would you like to define a style for your project?Use a popular style guide
- Which style guide do you want to follow?Airbnb (In this guide we use this style as it is our personal preference)
- What format do you want your config file to be in?JSON
- When prompted to install dependencies select ‘yes’.
After answering all the questions, a new file will be created called .eslintrc.json . This file holds the configuration for our linter. It is worth noting that we can also specify files that should be ignored by ESLint. This could be done by creating a .eslintignore file. In our projects, we usually ignore the following directories:
Exit fullscreen mode
Well done, we managed to set up ESLint using Airbnb’s JavaScript styling guide to our newly created Next.js project. You could have used another popular styling guide like Google, Standard, or even create your own to your liking.
Formatting using Prettier
We will be using Prettier as a code formatter. The main reason for using a code formatter is that it helps us maintain consistency throughout our codebase.
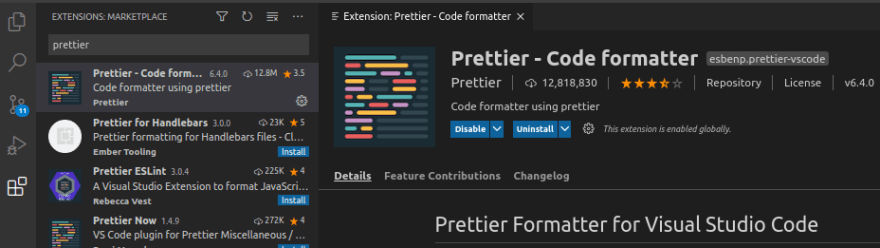
Installing Prettier extenstion on VSCode
Go to the extensions tab (or use CTRL+SHIFT+X), type in ‘Prettier’ and click install.
Make sure to set «editor.formatOnSave»: true into your user settings in VSCode to autoformat code when saving a file (CTRL+SHIFT+P -> Open Settings (JSON) -> Paste Configuration).
Setting up Prettier
To install prettier to our application, we need to execute the following command:
Exit fullscreen mode
Next up is to create an empty configuration file for prettier called .prettierrc.json . The one shown below is the default configuration we mainly use for our apps, but feel free to set up your own rules.
Exit fullscreen mode
Now since some prettier configs may conflict with ESLint, we need to turn off conflicting rules. This can easily be done by adding eslint-config-prettier :
Exit fullscreen mode
Then, add «prettier» to the «extends» array in your .eslintrc.json file. Make sure to put it last, so it gets the chance to override other configs. The file should then look like the one below:
Exit fullscreen mode
Similar to the previous step when configuring ESLint, we may wish to ignore files from being “prettified” in our app. To do so, create a new file called .prettierignore .
It is normally advised to base the .prettierignore on .gitignore and .eslintignore .
Well done, we managed to set up Prettier to our newly created Next.js project to help us maintain consistency throughout our codebase.
Conclusion
If you made use of Airbnb’s styling guide, you may notice that some JavaScript files which were created when we executed the create-next-app command, are highlighted with errors. This is because the code generated by that command does not follow Airbnb’s styling guide conventions. So how do we fix these errors?
Explicitly state what props are to be received by the component.
JSX not allowed in files with extension ‘.js’ react/jsx-filename-extension
Change file from ‘.js’ to ‘.jsx’
‘React’ must be in scope when using JSX react/react-in-jsx-scope
Add React import to the file import React from ‘react’;
Expected indentation of 2 spaces but found 4 indent:
If you followed the previous steps when configuring the prettier extension, save the file and it will auto-format the code. This issue will be solved, as we set the «tabWidth:2» in .prettierrc.json .
As stated previously, see the Airbnb styling guide and react specific linting rules, to better understand the errors outputted by the linter. You may also want to disable specific rules which are not to your liking or do not follow your coding standards.
Happy Coding! Feel free to leave any feedback.
Источник
The topic of this article will be solutions to prevent Prop spreading is forbidden warning in React from appearing. Some solutions can be mentioned, for example, using eslint-disable to prevent warnings or editing rules in the .eslintrc.js file
The reason for the Prop spreading is forbidden warning
This warning appears because Eslint detects that you are using prop spreading for the component. Since this warning is set by default for eslint, it will show a warning for you to revise your code. Follow the example code below.
Code:
import React from "react";
import Header from "./Header";

const App = (props) => {
    return (
        <div>
            <Header {...props} />
        </div>
    );
};

export default App;
import React from "react";

function Header(props) {
    return <div {...props}>Header</div>;
}

export default Header;
Output:
You can see that when we use prop spreading for the Header child component, the IDE will warn us according to the built-in rules. However, this is only a warning, not an error, so we can use the solutions in the next section to prevent this warning from appearing.
How to fix this error
Using eslint-disable to prevent warnings
If you want a project to have good enough code, you need to build coding conventions from the beginning for everyone to follow. Coding conventions don’t usually make code run faster, but they help maintain code that’s easier to read. Eslint is the best choice for projects. It allows us to customize the configuration according to our coding convention, check the coding style, and find bugs and other potential problems.
In this way, we will use eslint-disable to prevent the warning from happening. This is a way to prevent errors in eslint rules by commenting the disable statement before the error code.
Code:
import React from "react";
import Header from "./Header";

const App = (props) => {
    return (
        <div>
            <Header
                //eslint-disable-next-line react/jsx-props-no-spreading
                {...props}
            />
        </div>
    );
};

export default App;
However, the downside of this approach is that you will have to write it in multiple places with the same error to prevent these errors from appearing. You can refer to the following way to prevent Prop spreading is a forbidden warning throughout the project.
Editing rules in the .eslintrc.js file
This way, we will edit the rules section in .eslintrc.js to prevent the warning from appearing. If you have installed eslint but still do not see this file in the directory structure, you can use this command to create the file.
npx eslint --init
Then you go to the eslintrc.js file to edit the rules so the program can update the new error-checking rules.
Code:
module.exports = {
 rules: {
   'react/jsx-props-no-spreading': 'off',
  }
}
After editing the file, you can rerun your React program to update the Eslint rules. Wish you success with the solutions given in the article.
Summary
To summarize, the article introduced you to two solutions to prevent Prop spreading is forbidden warning in React. However,the editing rules in the .eslintrc.js file solution will solve our problem completely.

Hi, my name’s Nathaniel Kirk. I’m interested in learning and sharing knowledge about programming languages. My strengths are C, C++, Python, HTML, CSS, Javascript, and Reactjs. If you have difficulty with them, don’t worry. I’m here to support you.
Name of the university: PTIT
Major: IT
Programming Languages: C, C++, Python, HTML, CSS, Javascript, Reactjs

![]()
Getting Started with Next.js
«Next.js gives you the best developer experience with all the features you need for production: hybrid static & server rendering, TypeScript support, smart bundling, route pre-fetching, and more. No config needed.» — as stated on Next.js home page.
Why use Next.js?
- Image Optimisation
- Internationalisation
- Next.js Analytics
- Zero Config
- Hybrid: SSG and SSR
- Incremental Static Regeneration
- TypeScript Support
- Fast Refresh
- File-System Routing
- API Routes
- Built-in CSS Support
- Code-Splitting and Bundling
Setting up Next.js
Note: We will be using Visual Studio Code as a code editor, but feel free to use any code editor you are most comfortable with when writing code.
First we need to install some prerequisites:
- Node.js
- yarn — Package Manager,
You can also use npm as a package manager. In this guide, we will make use of yarn.
We then execute the following command to create a new Next.js app.
# Replace $PROJECT with your project name
yarn create next-app $PROJECT
# Or using the TypeScript flag for a TypeScript project
yarn create next-app --typescript $PROJECTNAME
Enter fullscreen mode
Exit fullscreen mode
The previous command will create a basic project. In this newly created project, you will find a file called package.json. This file consists of metadata information related to the project, for example; scripts, version and dependencies.
{
    "name": "$PROJECT",
    "version": "0.1.0",
    "private": true,
    "scripts": {
        "dev": "next dev",
        "build": "next build",
        "start": "next start"
    },
    "dependencies": {
        "next": "10.2.3",
        "react": "17.0.2",
        "react-dom": "17.0.2"
    }
}
Enter fullscreen mode
Exit fullscreen mode
The scripts section consists of three different scripts, which when we execute using yarn will:
-
yarn dev: Run the application locally -
yarn build: Build the application for production -
yarn start: Starts the production version of the application
Liniting using ESLint
We will be using ESLint as a linter. The main reasons for using this tool is that;
- It helps us to catch bugs (by statistically analysing code)
- It helps us to write code in a consistent style
Installing ESLint extenstion on VSCode
Go to the extensions tab (or use CTRL+SHIFT+X), type in ‘ESLint’ and click install.
Setting up ESLint
To set up ESLint, we need to execute the following command (make sure you’re in the root location of the project).
# This will add eslint as a dev dependency.
# If open package.json you will see this new dev dependency added
# to the project (once executed).
yarn add eslint --dev
Enter fullscreen mode
Exit fullscreen mode
The next step is to configure our linter. We need to run the following command to be able to create a new configuration file for ESLint.
yarn run eslint --init
Enter fullscreen mode
Exit fullscreen mode
After executing the previous command, you will be prompted with a set of questions. In our set up we selected the following:
- How would you like to use ESLint? To check syntax, find problems, and enforce code style
- What types of modules does your project use? Javascript modules (import/export)
- Which framework does your project use? React
- Does your project use TypeScript? No
- Where does your code run? Browser
- How would you like to define a style for your project? Use a popular style guide
- Which style guide do you want to follow? Airbnb (In this guide we use this style as it is our personal preference)
- What format do you want your config file to be in? JSON
- When prompted to install dependencies select ‘yes’.
After answering all the questions, a new file will be created called .eslintrc.json. This file holds the configuration for our linter. It is worth noting that we can also specify files that should be ignored by ESLint. This could be done by creating a .eslintignore file. In our projects, we usually ignore the following directories:
# .estlintignore file
.next
dist
node_modules/
Enter fullscreen mode
Exit fullscreen mode
See Airbnb JavaScript styling guide and the ESLint configuration docs for more information.
Well done, we managed to set up ESLint using Airbnb’s JavaScript styling guide to our newly created Next.js project. You could have used another popular styling guide like Google, Standard, or even create your own to your liking.
Formatting using Prettier
We will be using Prettier as a code formatter. The main reason for using a code formatter is that it helps us maintain consistency throughout our codebase.
Installing Prettier extenstion on VSCode
Go to the extensions tab (or use CTRL+SHIFT+X), type in ‘Prettier’ and click install.
Make sure to set "editor.formatOnSave": true into your user settings in VSCode to autoformat code when saving a file (CTRL+SHIFT+P -> Open Settings (JSON) -> Paste Configuration).
Setting up Prettier
To install prettier to our application, we need to execute the following command:
yarn add --dev --exact prettier
Enter fullscreen mode
Exit fullscreen mode
Next up is to create an empty configuration file for prettier called .prettierrc.json. The one shown below is the default configuration we mainly use for our apps, but feel free to set up your own rules.
{
    "singleQuote": true, # Use single quotes instead of double quotes
    "tabWidth": 2,       # Number of spaces per indentation level
    "semi": true         # Print semicolons
}
Enter fullscreen mode
Exit fullscreen mode
Now since some prettier configs may conflict with ESLint, we need to turn off conflicting rules. This can easily be done by adding eslint-config-prettier:
yarn add --dev eslint-config-prettier
Enter fullscreen mode
Exit fullscreen mode
Then, add "prettier" to the «extends» array in your .eslintrc.json file. Make sure to put it last, so it gets the chance to override other configs. The file should then look like the one below:
{
    "env": {
        "browser": true,
        "es2021": true
    },
    "extends": ["plugin:react/recommended", "airbnb", "prettier"],
    "parserOptions": {
        "ecmaFeatures": {
            "jsx": true
        },
        "ecmaVersion": 12,
        "sourceType": "module"
    },
    "plugins": ["react"],
    "rules": {}
}
Enter fullscreen mode
Exit fullscreen mode
Similar to the previous step when configuring ESLint, we may wish to ignore files from being “prettified” in our app. To do so, create a new file called .prettierignore.
It is normally advised to base the .prettierignore on .gitignore and .eslintignore.
Well done, we managed to set up Prettier to our newly created Next.js project to help us maintain consistency throughout our codebase.
Conclusion
If you made use of Airbnb’s styling guide, you may notice that some JavaScript files which were created when we executed the create-next-app command, are highlighted with errors. This is because the code generated by that command does not follow Airbnb’s styling guide conventions. So how do we fix these errors?
-
Prop spreading is forbidden react/jsx-props-no-spreading
Explicitly state what props are to be received by the component.
-
JSX not allowed in files with extension ‘.js’ react/jsx-filename-extension
Change file from ‘.js’ to ‘.jsx’
-
‘React’ must be in scope when using JSX react/react-in-jsx-scope
Add React import to the file
import React from 'react'; -
Expected indentation of 2 spaces but found 4 indent:
If you followed the previous steps when configuring the prettier extension, save the file and it will auto-format the code. This issue will be solved, as we set the «tabWidth:2» in
.prettierrc.json.
As stated previously, see the Airbnb styling guide and react specific linting rules, to better understand the errors outputted by the linter. You may also want to disable specific rules which are not to your liking or do not follow your coding standards.
Happy Coding! Feel free to leave any feedback.