Hi @Hypnorino,
Thanks for stopping by the HP community. A very good day to you.  I reviewed the post regarding issues with freeing and errors on the computer after the Creator’s update. I will be delighted to assist you here.
Superb description and stupendous diagnosis of the issue before posting. Kudos to you for that. :). It is greatly appreciated.
For me to assist you with accurately I would require more information regarding this.
- Did you try to update all the drivers using HP support assistant?
Please check these intel and Microsoft community links which suggest to reinstall or roll back the bios for the same.
- Link 1 Microsoft community link: https://answers.microsoft.com/en-us/windows/forum/all/me-fw-update-failed-please-try-again/9ee9d527-…
- Link 2: Intel community link: https://communities.intel.com/thread/99399
- So to roll back the bios please try both the steps prescribed in this link: http://support.hp.com/us-en/document/c02693833
- Then update the bios, chipset and graphics drivers from this link: http://hp.com/drivers please select the country and follow the on-screen instructions.
- If this does not work, use the HP support assistant to update the drivers and windows.
Please perform all these steps patiently as it is critical to resolving the issue. The trick is to remain patient, please. Please note that I am not overloading you with a lot of troubleshooting steps. Instead, just like you, I am eager to ensure that the problem gets resolved. So I am providing you with more resources and information at your disposal to deal with the situation better.
Hope this helps. I genuinely hope the issue gets resolved without hassles and the unit works great. Please reach out for any issues and I’ll be there to assist you.
To simply say thanks, please click the «Thumbs Up« button to give me a Kudos to appreciate my efforts to help. If this helps, please mark this as “Accepted Solution” as it will help several others with the same issue to get it resolved without hassles.
Take care now and have a splendid week ahead.
DavidSMP
I am an HP Employee

Некоторые пользователи сообщают, что их компьютер не может загрузиться. В большинстве случаев затронутые пользователи сообщают, что это происходит через несколько секунд после того, как машина застревает на начальном экране с вентилятором, работающим на максимальной скорости. Через пару секунд отображается следующее сообщение, и Windows возобновляет обычные операции загрузки:
«Ошибка при отправке мне сообщения о конце сообщения»
Это не доставит большого неудобства, но подавляющее большинство пользователей сообщают, что их система выйдет из строя и отключится до того, как ОС будет полностью загружена. Бывают случаи, когда машине удается пройти процедуру запуска — в этих случаях пользователи обычно сообщают о проблемах с Неисправность или Гибернации операции.

Что вызывает ошибку отправки сообщения о конце сообщения в ME error
Изучив проблему и изучив различные отчеты пользователей, нам удалось выявить ряд потенциальных виновников, которые, как подтверждено, являются причиной «Ошибка при отправке мне сообщения о конце сообщения» ошибка:
- Нестабильная версия BIOS — Бывают случаи, когда эта конкретная проблема начинала появляться после обновления пользователем до последней доступной версии BIOS. В этом случае решение — вернуться к предыдущей или, по крайней мере, к последней стабильной версии BIOS.
- Проблема сPOST (Самотестирование при включении) процедура — это наиболее частый элемент, вызывающий данную ошибку. К сожалению, проблема с ПОЧТА обычно указывает на основную проблему с оборудованием.
- Внешнее устройство вызывает проблему — некоторые пользователи обнаружили, что ошибка возникала только при подключении определенных периферийных устройств через USB.
- Проблема с вредоносным ПО — Существуют определенные разновидности вредоносного ПО, влияющие на службы, развертываемые на этапе самотестирования при включении питания. В этом случае рекомендуется сканирование на наличие вредоносных программ.
Как исправить ошибку отправки сообщения о конце сообщения в ME error
Если вы боретесь с этой конкретной проблемой, эта статья предоставит вам серию шагов, предназначенных для устранения ошибки. Ниже у вас есть набор методов, которые другие пользователи в аналогичной ситуации использовали для решения или, по крайней мере, обнаружения источника проблемы.
Для достижения наилучших результатов, пожалуйста, следуйте приведенным ниже инструкциям по порядку и постепенно спускайтесь вниз, пока не найдете исправление, устраняющее «Ошибка при отправке мне сообщения о конце сообщения» ошибка. Давай начнем!
Метод 1: перейти на предыдущую версию BIOS (если применимо)
Если вы начали сталкиваться с «Ошибка при отправке мне сообщения о конце сообщения» вскоре после того, как вы обновили версию BIOS, в первую очередь вы должны попробовать перейти на более раннюю версию.
Есть несколько случаев, когда пользователи начали сталкиваться с ошибкой после обновления своей версии BIOS (особенно на компьютерах DELL). Если этот сценарий применим к вам, обратитесь к веб-сайту производителя вашей материнской платы (в соответствии с вашей конкретной моделью), чтобы узнать, как вернуться к предыдущей версии BIOS.
Имейте в виду, что точная процедура обновления или понижения версии BIOS отличается от производителя к производителю. Однако, если вам ранее удавалось обновить BIOS, вы сможете вернуться к предыдущей версии. Вопрос только в том, чтобы найти правильную версию BIOS.
Примечание: Если возможно, вы должны знать, что INTEL специально выпустила ОБНОВЛЕНИЕ BIOS, которое включает исправление для этой конкретной проблемы. Вы можете скачать его по этой ссылке (Вот).
Если этот метод оказался неэффективным или неприменимым в вашем сценарии, перейдите к следующему методу ниже.
Метод 2: сканирование на наличие вредоносных программ
Есть сообщения о случаях, когда «Ошибка при отправке мне сообщения о конце сообщения» ошибка была вызвана вредоносным ПО, вмешивающимся в ПОЧТА (Самотестирование при включении) этап.
Хотя это потенциально серьезная проблема, с которой необходимо срочно заняться, некоторым пользователям удалось решить проблему с помощью мощного сканера безопасности. Для достижения наилучших результатов мы рекомендуем выполнить глубокое сканирование с помощью Malwarebytes. Если вам нужны дополнительные инструкции, вы можете следовать нашему пошаговому руководству по удалению вредоносных программ с помощью Malwarebytes по этой ссылке (Вот).
После завершения сканирования перезагрузите компьютер и посмотрите, устранена ли ошибка при следующем запуске. Если проблема все еще не решена, перейдите к следующему способу ниже.
Метод 3: отключение внешних дисков и других периферийных устройств
Как отметили некоторые пользователи, проблема также может быть вызвана внешним устройством, подключенным через USB. Чтобы точно определить виновника, каждый внешний диск и ненужное периферийное оборудование (мышь, клавиатура) и перезагрузите компьютер, чтобы проверить, вернется ли ошибка.
Если ваш компьютер запускается нормально, систематически подключайте остальные периферийные устройства, пока не определите причину ошибки. Как только виновник будет идентифицирован, удалите драйвер, принадлежащий этому периферийному устройству, через диспетчер устройств, чтобы заставить Windows переустановить его. Вот краткое руководство, как это сделать:
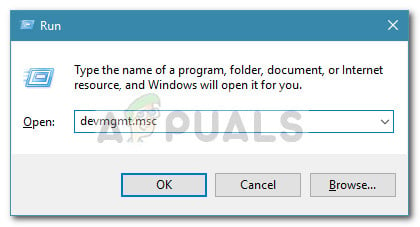
- Нажмите Клавиша Windows + R , чтобы открыть окно «Выполнить». Затем введите «devmgmt.msc”И нажмите Enter, чтобы открыть диспетчер устройств.

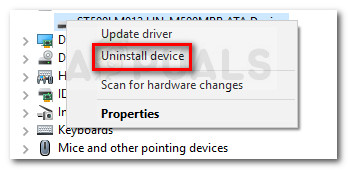
- В диспетчере устройств щелкните правой кнопкой мыши устройство, которое вы ранее идентифицировали, и выберите Удалить устройство.
- После удаления устройства перезагрузите компьютер, чтобы заставить Windows удалить драйвер и увидеть, вернется ли проблема.


Если ошибка все еще возникает при каждом запуске, перейдите к следующему способу ниже.
Метод 4. Выполнение ремонтной установки
В случае, если вмешательство какой-либо стороны (вредоносное ПО или иное) повредило ПОЧТА файлы, вам может потребоваться повторно запустить некоторые компоненты Windows, чтобы решить проблему.
Вы всегда можете уйти чистая установка, но более элегантным решением было бы выполнить ремонтную установку. Эта процедура повторно инициализирует все файлы Windows, позволяя сохранить все ваши личные файлы и приложения.
После завершения процедуры проверьте, видите ли вы по-прежнему «Ошибка при отправке мне сообщения о конце сообщения» ошибка при запуске. Если да, переходите к последнему методу
Метод 5: проверьте оборудование на предмет сбоя
Если вы все еще боретесь с «Ошибка при отправке мне сообщения о конце сообщения» ошибка даже после того, как вы выполнили ремонтную установку (или чистую установку), существует высокая вероятность того, что проблема вызвана отказом оборудования.
В большинстве случаев отказ ЦП вызывает «Ошибка при отправке мне сообщения о конце сообщения» ошибка. Если у вас нет возможности заменить ЦП на компьютере, чтобы проверить, не неисправен ли он, обратитесь к специалисту, способному провести дополнительные исследования оборудования.
Hi,
I have a NUC7i3BNB NUC (https://ark.intel.com/content/www/fr/fr/ark/products/95070/intel-nuc-board-nuc7i3bnb.html)
I had the BIOS version BNKBL357.86A.0080.2019.0725.1139 and the following error https://community.intel.com/t5/Intel-NUCs/NUC7i3BNB-PTT-fTPM-fails-after-Intel-ME-BIOS-update/m-p/14…
Before the BIOS update, I had
root@pve:~# journalctl | grep -i mei
Aug 29 08:42:05 pve kernel: mei_me 0000:00:16.0: enabling device (0004 -> 0006)
Aug 29 08:42:05 pve kernel: mei_hdcp 0000:00:16.0-b638ab7e-94e2-4ea2-a552-d1c54b627f04: bound 0000:00:02.0 (ops i915_hdcp_component_ops [i915])
root@pve:~#
After the BIOS update to version BNKBL357.86A.0088.2022.0125.1102, I noticed a new error message during boot time
Error sending End of Post message to ME: HECI disabled, proceeding with boot!I also noticed that after the BIOS update, the MEI module doesn’t create /dev/mei and no ME/MEI in the log.
I re-flashed the same BIOS again using F7 method but no change.
Any idea ?
Thank you,
1 Solution
Update BIOS in two steps. In Step I (BIOS Recovery), the ME will be unlocked. In the Step II (F7 method, the ME will be updated).
Step I: (if your drive is encrypted, decrypt it, before executing this step)
1. Prepare USB stick fully formatted to FAT32 . Format your USB with Quick Format option unchecked. Do not format your USB in MAC (OS) or Linux machine. Use Windows. Download the BN0088.bio file. Copy the BN0088.bio file to the root of this USB.
2. Disconnect the power adapter and remove the bottom panel from your NUC.
3. Remove the Yellow Bios Security Jumper. (page 55 in Technical Product Specification)
5. Insert the USB with the BN0088.bio file into rear USB slot.
6. Reconnect the power adapter and power ON the NUC. Wait 30 sec — 2min. The Recovery process will start automatically and will end after 2 -5 minutes.
7. When bios recovery is completed, press and hold the Power Button to switch the power OFF, remove the power adapter and replace the Security Jumper (pins 1-2) . Remove the USB and reinstall the bottom panel.
8. Power your NUC ON.
9. Enter Bios setting by pressing F2 during boot process.
10. Press F9(followed by Enter), to set Bios to default settings. Press F10 (followed by Enter), to save the settings and exit to O.S. Let the NUC fully reboot.
Step II
1. Insert the USB with the BN0088.bio file into rear USB slot (your NUC should be OFF)
2. Power ON you NUC and when you see the Intel NUC logo, repeatedly click on F7. NUC will boot into storage menu. You should select your USB stick (mass storage device) and then the BN0088.bio file. Click enter the update will start and end during 2-3 minutes.
3. When update ends, the NUC will reboot.
Leon
-
All forum topics -
Previous topic -
Next topic
5 Replies
You re-flashed BIOS using F7 method. How BIOS was updated for the first time from version 0080 to 0088?
Leon
Hello,
The first time was with F7 too.
I did it a third time using the UEFI shell but same outcome.
I also did a TPM reset removing the yellow jumper from the board. Still the same error.
The SHA-1 from the bios image on my USB dongle matches the one from the Intel download page.
Update BIOS in two steps. In Step I (BIOS Recovery), the ME will be unlocked. In the Step II (F7 method, the ME will be updated).
Step I: (if your drive is encrypted, decrypt it, before executing this step)
1. Prepare USB stick fully formatted to FAT32 . Format your USB with Quick Format option unchecked. Do not format your USB in MAC (OS) or Linux machine. Use Windows. Download the BN0088.bio file. Copy the BN0088.bio file to the root of this USB.
2. Disconnect the power adapter and remove the bottom panel from your NUC.
3. Remove the Yellow Bios Security Jumper. (page 55 in Technical Product Specification)
5. Insert the USB with the BN0088.bio file into rear USB slot.
6. Reconnect the power adapter and power ON the NUC. Wait 30 sec — 2min. The Recovery process will start automatically and will end after 2 -5 minutes.
7. When bios recovery is completed, press and hold the Power Button to switch the power OFF, remove the power adapter and replace the Security Jumper (pins 1-2) . Remove the USB and reinstall the bottom panel.
8. Power your NUC ON.
9. Enter Bios setting by pressing F2 during boot process.
10. Press F9(followed by Enter), to set Bios to default settings. Press F10 (followed by Enter), to save the settings and exit to O.S. Let the NUC fully reboot.
Step II
1. Insert the USB with the BN0088.bio file into rear USB slot (your NUC should be OFF)
2. Power ON you NUC and when you see the Intel NUC logo, repeatedly click on F7. NUC will boot into storage menu. You should select your USB stick (mass storage device) and then the BN0088.bio file. Click enter the update will start and end during 2-3 minutes.
3. When update ends, the NUC will reboot.
Leon
Thanks a lot Leon !
Looks normal again
root@pve:~# ls /dev/tpm* /dev/mei*
/dev/mei0  /dev/tpm0  /dev/tpmrm0
root@pve:~#![]()
-
All forum topics -
Previous topic -
Next topic
Hi @Hypnorino,
Thanks for stopping by the HP community. A very good day to you.  I reviewed the post regarding issues with freeing and errors on the computer after the Creator’s update. I will be delighted to assist you here.
Superb description and stupendous diagnosis of the issue before posting. Kudos to you for that. :). It is greatly appreciated.
For me to assist you with accurately I would require more information regarding this.
- Did you try to update all the drivers using HP support assistant?
Please check these intel and Microsoft community links which suggest to reinstall or roll back the bios for the same.
- Link 1 Microsoft community link: https://answers.microsoft.com/en-us/windows/forum/all/me-fw-update-failed-please-try-again/9ee9d527-…
- Link 2: Intel community link: https://communities.intel.com/thread/99399
- So to roll back the bios please try both the steps prescribed in this link: http://support.hp.com/us-en/document/c02693833
- Then update the bios, chipset and graphics drivers from this link: http://hp.com/drivers please select the country and follow the on-screen instructions.
- If this does not work, use the HP support assistant to update the drivers and windows.
Please perform all these steps patiently as it is critical to resolving the issue. The trick is to remain patient, please. Please note that I am not overloading you with a lot of troubleshooting steps. Instead, just like you, I am eager to ensure that the problem gets resolved. So I am providing you with more resources and information at your disposal to deal with the situation better.
Hope this helps. I genuinely hope the issue gets resolved without hassles and the unit works great. Please reach out for any issues and I’ll be there to assist you.
To simply say thanks, please click the «Thumbs Up« button to give me a Kudos to appreciate my efforts to help. If this helps, please mark this as “Accepted Solution” as it will help several others with the same issue to get it resolved without hassles.
Take care now and have a splendid week ahead.
DavidSMP
I am an HP Employee
Hi @Hypnorino,
Thanks for stopping by the HP community. A very good day to you. I reviewed the post regarding issues with freeing and errors on the computer after the Creator’s update. I will be delighted to assist you here.
Superb description and stupendous diagnosis of the issue before posting. Kudos to you for that. :). It is greatly appreciated.
For me to assist you with accurately I would require more information regarding this.
- Did you try to update all the drivers using HP support assistant?
Please check these intel and Microsoft community links which suggest to reinstall or roll back the bios for the same.
- Link 1 Microsoft community link: https://answers.microsoft.com/en-us/windows/forum/all/me-fw-update-failed-please-try-again/9ee9d527-…
- Link 2: Intel community link: https://communities.intel.com/thread/99399
- So to roll back the bios please try both the steps prescribed in this link: http://support.hp.com/us-en/document/c02693833
- Then update the bios, chipset and graphics drivers from this link: http://hp.com/drivers please select the country and follow the on-screen instructions.
- If this does not work, use the HP support assistant to update the drivers and windows.
Please perform all these steps patiently as it is critical to resolving the issue. The trick is to remain patient, please. Please note that I am not overloading you with a lot of troubleshooting steps. Instead, just like you, I am eager to ensure that the problem gets resolved. So I am providing you with more resources and information at your disposal to deal with the situation better.
Hope this helps. I genuinely hope the issue gets resolved without hassles and the unit works great. Please reach out for any issues and I’ll be there to assist you.
To simply say thanks, please click the «Thumbs Up« button to give me a Kudos to appreciate my efforts to help. If this helps, please mark this as “Accepted Solution” as it will help several others with the same issue to get it resolved without hassles.
Take care now and have a splendid week ahead.
DavidSMP
I am an HP Employee
Some users are reporting that their computer is unable to boot up. Most of the time, affected users report that this happens several seconds after the machine gets stuck on the initial screen with the fan running at max. After a couple of seconds, the following message is displayed and Windows resumes the normal startup operations:
“Error sending End Of Post message to ME”
This wouldn’t be much of an inconvenience, but the vast majority of users report that their system will crash and power down before the OS is fully loaded. There are instances where the machine manages to get through the startup procedure – in these cases users typically report problems with the Shutdown or Hibernation operations.

What causes the error sending end of post message to ME error
After investigating the issue and looking at various user reports, we managed to identify a selection of potential culprits that are confirmed to be causing the “Error sending End Of Post message to ME” error:
- Unstable BIOS version – There are instances where this particular issue started appearing after the user upgraded to the latest available BIOS version. In this case, the solution is to downgrade to the previous or at least to the latest stable BIOS version.
- Problem with the POST (Power On Self Test) procedure – This is the most frequent item that causes the error at hand. Sadly, a problem with POST is usually indicative of an underlying hardware issue.
- An external device is causing the issue – some users have discovered that the error was only occuring while certain peripherals connected through USB where connected.
- Malware issue – There are certain malware variations that affect services that are deployed during the Power on Self Test stage. If that’s the case, an anti-malware scan is advised.
How to fix the error sending end of post message to ME error
If you’re struggling with this particular issue, this article will provide you with a series of steps designed to troubleshoot the error. Below you have a collection of methods that other users in a similar situation have used to solve or at least discover the source of the problem.
For the best results, please follow the steps below in order and work your way down until you discover a fix that eliminates the “Error sending End Of Post message to ME” error. Let’s begin!
Method 1: Downgrade to previous BIOS version (if applicable)
If you started encountering the “Error sending End Of Post message to ME” shortly after you upgraded your BIOS version, downgrading should be the first thing you try.
There are several cases of users that started to encounter the error after upgrading their BIOS version (particularly on DELL computers). If this scenario is applicable to you, refer to your motherboard manufacturer’s website (according to your particular model) for steps on downgrading to the previous BIOS version.
Keep in mind that the exact procedure of updating or downgrading your BIOS version is different from manufacturer to manufacturer. However, if you previously managed to upgrade your BIOS, you’ll be capable of downgrading. It’s just a matter of finding the right BIOS version.
Note: If applicable, you should know that INTEL specifically released a BIOS UPDATE that includes a fix for this particular issue. You can download it from this link (here).
If this method wasn’t effective or wasn’t applicable to your scenario, move over to the next method below.
Method 2: Scanning for a malware infection
There are reported cases where the “Error sending End Of Post message to ME” error was caused by a malware interfering with the POST (Power On Self Test) stage.
While this is a potentially serious problem that should be dealt with urgently, some users have managed to get the issue resolved by using a powerful security scanner. For the best results, we recommend performing a deep scan with Malwarebytes. If you require further guidance, you can follow our step by step guide on removing malware using Malwarebytes from this link (here).
Once the scan is complete, restart your computer and see if the error has been dealt with at the next startup. If you are still dealing with the issue, continue with the next method below.
Method 3: Unplugging external drives and other peripherals
As some users have pointed out, the issue can also be caused by an external device connected through USB. To pinpoint the culprit, every external drive and non-necessary peripheral (mouse, keyboard) and reboot to see if the error returns.
If your computer starts up just fine, systematically connect the rest of peripherals until you pinpoint the cause of the error. Once the culprit is identified, uninstall the driver belonging to that peripheral via Device Manager in order to force Windows to reinstall it. Here’s a quick guide on doing this:
- Press Windows key + R to open up a Run box. Then, type “devmgmt.msc” and press Enter to open up Device Manager.

- Inside Device Manager, right-click on the device that you previously identify and choose Uninstall Device.

- Once the device has been uninstalled, reboot your computer to see force Windows to uninstall the driver and see if the issue returns.
If the error is still occurring at every startup, move down to the next method below.
Method 4: Performing a repair install
In the event that some party interference (malware or otherwise) has damaged POST files, you might need to reinitiate some Windows components in order to resolve the issue.
You can always go of a clean install, but a more elegant solution would be to perform a repair install. This procedure will reinitiate all Windows files while allowing you to keep all your personal files and applications.
Once the procedure is complete, see whether you’re still seeing the “Error sending End Of Post message to ME” error during startup. If you are, move over to the final method
Method 5: Investigate your hardware for failure
If you’re still struggling with the “Error sending End Of Post message to ME” error even after you performed a repair install (or clean install), there’s a high chance that the issue is caused by hardware failure.
Most of the time, a CPU failure is causing the “Error sending End Of Post message to ME” error. If you don’t have the capabilities to replace the CPU from your machine to see if it’s faulty, take it to a professional capable of performing additional hardware investigations.