-
Attention, TrueNAS Community Members.
General Help has now been set to read-only mode.
To make sure you can easily find what you’re looking for, we’ve relocated all relevant categories under their respective version. This change will simplify searching for information and minimize any confusion about where to post.
Register for the iXsystems Community to get an ad-free experience
-
Thread starter
mikee_d
-
Start date
Mar 19, 2018
- Status
- Not open for further replies.
-
#1
If this is in the wrong forum as this seems to be an upgrade issue, I apologize. This is where I found most of the non-answers to my problem when searching, so I’m hoping that this is the best place to help others with a similar issue. I also didn’t find this specific problem reported in the forums with a couple quick searches, so sorry if this has been covered before.
I just made the jump from 9.10 to 11.1, and I was happy with how the upgrade went in almost all areas. However, I found that the connection to my Active Directory didn’t seem to be working. At first I figured upgrades to Samba and friends may have changed or broken things like Kerberos tickets or machine account credentials, so I wiped everything out as best as I could and started over from scratch. I was seeing messages that the join was successful (I could even get list of users using ‘net ads user’), but Samba refused to start after the join. If I disabled AD, I could get the SMB service to start. I kept going back and forth, getting frustrated because I couldn’t find anything in the logs. I even cleared out /var/log/samba4 and found that nothing was even generating a log when trying to start SMB after joining the domain.
Finally, I tried running testparm; lo and behold there was an error:
Code:
ERROR: The idmap range for the domain * (tdb) overlaps with the range of OCONNICICH (rid)!
The dump of the config showed this:
Code:
idmap config oconnicich: range = 20000-9000000000
idmap config oconnicich: backend = rid
idmap config *: range = 90000001-100000000
idmap config * : backend = tdb
I’m honestly not sure what my smb.conf file looked like before the upgrade, but I used the GUI to change the max for my domain from 9 billion to 90 million and magically everything started working again.
- Status
- Not open for further replies.
Проверка конфигурационного файла
Конфигурационный файл Samba можно проверить с помощью утилиты testparm. Данная утилита обнаруживает неверные параметры, значения, а также неправильные настройки. Если testparm сообщает, что проблем нет, службы Samba успешно загрузят файл конфигурации. Обратите внимание, что данной утилитой невозможно проверить доступность или работу настроенных служб.
Внимание: Рекомендуется проверять файл /etc/samba/smb.conf с помощью testparm после каждой правки файла.
Выполнение проверки
Запустите утилиту testparm как root-пользователь:
# testparm
Если утилита выдаст сообщение наподобие:
# testparm
Load smb config files from /etc/samba/smb.conf
rlimit_max: increasing rlimit_max (1024) to minimum Windows limit (16384)
Unknown parameter encountered: "log levell"
Processing section "[example_share]"
Loaded services file OK.
ERROR: The idmap range for the domain * (tdb) overlaps with the range of DOMAIN (ad)!

Server role: ROLE_DOMAIN_MEMBER

Press enter to see a dump of your service definitions

# Global parameters
[global]
	...

[example_share]
	...
Значит, конфигурационный файл содержит ошибки. В данном примере сообщается о несуществующем параметре и неправильной конфигурации сопоставления идентификаторов.
Если testparm выдает неверные параметры, значения или другие ошибки в конфигурации, устраните проблему и снова запустите утилиту.
Если ошибок нет, вы получите такое сообщение:
# testparm
Load smb config files from /etc/samba/smb.conf
Loaded services file OK.
Server role: ROLE_DOMAIN_MEMBER

Press enter to see a dump of your service definitions
| Samba
|
|
|---|---|
| Файловое хранилище | Samba как файловый сервер • Подключение общей папки • Samba как файловый сервер в домене |
| Служба каталогов | |
| Сервер | Samba как служба каталогов (AD) • Изменение IP-адреса AD • Репликация сервера AD • Резервное копирование и восстановление • Управление пользователями • Групповые политики • Групповая политика паролей |
| Клиент | Подключение клиента AD |
| Бэкэнды идентификаторов winbind | idmap config tdb • idmap config ad • idmap config rid • idmap config autorid |
| Прочее | Samba как сервер печати • Проверка конфигурационного файла • Утилиты командной строки • LMHOSTS • Уровень логов • Каталоги Samba |
| Информация | SSSD vs Winbind • Установка Samba |
- Печать
Страницы: [1] 2 Все Вниз

Тема: SAMBA4+winbind+kerberos+AD (Прочитано 4398 раз)
0 Пользователей и 1 Гость просматривают эту тему.

civilization

Суть проблемы: настраиваю SAMBA-сервер на Ubuntu 16.04 (samba 4.3.11) с подключением к виндовому домену (уровня 2003 Server, но схема AD обновлена до 56-й версии).
smb.conf (только секция global):
Керберос и подключение к домену выполнены все норм. Однако в локальную базу nss доменные пользователи не маппируются.
В логах примерно следующее (winbindd-idmap):
Если
idmap config * : backend = tdb (или другой локальный бэкэнд), то маппирование отрабатывает (разумеется в общий домен, с соответствующим преобразованием SID-uid). MYDOM, как я понимаю, преобразуется самбой в mydom и не может найти реалм для авторизации. Собственно, testparm все названия доменов в idmap config выводит в нижнем регистре (просто остальные домены у меня не задействованы). Может кто сталкивался, как можно изменить такое поведение самбы и заставить увидеть указанный домен?
AnrDaemon
samba-tool testparmпод спойлер.
Хотите получить помощь? Потрудитесь представить запрошенную информацию в полном объёме.
Прежде чем [Отправить], нажми [Просмотр] и прочти собственное сообщение. Сам-то понял, что написал?…
civilization
« Последнее редактирование: 16 Ноября 2016, 15:54:07 от civilization »
AnrDaemon
idmap config mydom : range = 1000000 – 1099999А вы в AD UNIX UID пользователям назначаете из этого диапазона?…
idmap config mydom : default = yes
idmap config mydom : backend = ad
По умолчанию там от 10к идёт вообще-то.
Хотите получить помощь? Потрудитесь представить запрошенную информацию в полном объёме.
Прежде чем [Отправить], нажми [Просмотр] и прочти собственное сообщение. Сам-то понял, что написал?…
civilization
По умолчанию, у меня в AD вообще ничего не идёт  , т.е. эти поля в AD пустые, я скромно надеялся, что idmap_uid их и заполнит. Для проверки сделал пользователя с заполненными полями uid и uidNumber и getent passwd опять не выдал ни одного пользователя домена (вывод в логи идентичный). Собственно, диапазон для домена в idmap был в начальных версиях конфига 10000-50000 (это ничего не давало тогда и сейчас тоже ничего не дало). Полагаю, дело всё же в трансляции имени домена в нижний регистр. Но возможно нужно присвоить uid’ы всем пользователям домена и тогда winbind сможет предоставить их в nss.
AnrDaemon
Диапазон в AD и диапазон в конфиге самбы должны совпадать.
И система должна быть настроена на смотрение в эту сторону.
cat /etc/nsswitch.confпоказывайте.
Хотите получить помощь? Потрудитесь представить запрошенную информацию в полном объёме.
Прежде чем [Отправить], нажми [Просмотр] и прочти собственное сообщение. Сам-то понял, что написал?…
civilization
Чем задаётся диапазон в AD?
nsswitch.conf:
AnrDaemon
В AD он задаётся схемой. Но лучше её не менять. Просто настройте Самбу на 10к+ и раздайте UID/GID пользователям, которым нужен доступ к линукс-серверу.
Внимательно смотрите, какую примари группу вы даёте пользователям… Там часто подсовывается «Administrators».
Хотите получить помощь? Потрудитесь представить запрошенную информацию в полном объёме.
Прежде чем [Отправить], нажми [Просмотр] и прочти собственное сообщение. Сам-то понял, что написал?…
civilization
Просто настройте Самбу на 10к+ и раздайте UID/GID пользователям
Про диапазон idmap в Самбе уже говорил — назначал 10к+ раньше (и теперь стоит тоже 10000-50000) — это на сложившуюся проблему не влияет. Раздавать UID/GID (как я понимаю) в AD необходимо руками? Автоматическую генерацию настроить не получится? Достаточно ли будет всем пользователям и группам домена прописать легитимные UID/GID чтобы заработал idmap, или нужно будет проверять-прописывать UID всем объектам в AD (например компьютерам)? И почему тогда не смаппировался пользователь которому я назначил корректный UID (из указанного в Самбе диапазона) и ругань на некорректный диапазон в логах idmap?
AnrDaemon
Я раздавал руками, у меня немного пользователей.
Вероятно, можно что-то сделать скриптом.
Достаточно прописать пользователям и группам, причём только тем, которые вы собираетесь использовать на линухе (ну и системным, типа Domain Users/Admins).
Хотите получить помощь? Потрудитесь представить запрошенную информацию в полном объёме.
Прежде чем [Отправить], нажми [Просмотр] и прочти собственное сообщение. Сам-то понял, что написал?…
civilization
Тогда вопрос остаётся открытым — очевидно, что прописывание UID/GID отдельным пользователям и группам ничем не отличается от прописывания одному пользователю, а это проблему не решило (и даже никак на неё не повлияло). То же отсутствие пользователя домена в базе nss, те же записи в логах idmap. Перепробовал разные бэкэнды (tdb, rid, ad) и разные диапазоны для них — одна и та же запись в логе idmap: invalid range ‘…-…’ specified for domain ‘mydom’. Потом ошибки неинициализирован ADS. Т.е. nss получает доменных пользователей в базу если прописать для idmap config * : backend = tdb (или другой локальный) — пользователи получают uid’ы из диапазона назначенного домену *. А вот домен прописанный по имени не работает…
AnrDaemon
Вы всё слова говорите. А диагностику скрываете.
Хотите получить помощь? Потрудитесь представить запрошенную информацию в полном объёме.
Прежде чем [Отправить], нажми [Просмотр] и прочти собственное сообщение. Сам-то понял, что написал?…
civilization
Так, словами я описал ситуацию быстро и точно, если интересны логи — скажите какие (в логе idmap ничего нового от того, что я приводил в первом посте, только имена бэкэнда и пределы диапазона меняются — смысл ровно тот же). Что касается случая с локальным бэкэндом и доменом * то лог winbind вот (здесь видно, что домен получен в верхнем регистре и доменные пользователи отрабатывают, однако при обращении getpwnam уже нижний регистр домена):
лог idmap вот:
Если этих логов не достаточно — подскажите какие нужны еще.
« Последнее редактирование: 17 Ноября 2016, 12:10:41 от civilization »
AnrDaemon
Диагностику — покажите
getent passwd с системы с настроенным
idmap config mydom : range = 10000-131071
Пользователь добавил сообщение 17 Ноября 2016, 20:32:17:
P.S.
Вотпрямщазрабочая конфигурация.
« Последнее редактирование: 17 Ноября 2016, 20:32:17 от AnrDaemon »
Хотите получить помощь? Потрудитесь представить запрошенную информацию в полном объёме.
Прежде чем [Отправить], нажми [Просмотр] и прочти собственное сообщение. Сам-то понял, что написал?…
civilization
Показываю:
Последние 7 строк — доменные пользователи (и ниже тоже — их много, обрезал — ситуация вроде понятна). Cейчас конфигурация idmap аналогична вашей только диапазон для mydom с 10000 начинается, ну и в AD прописал uid из указанного диапазона только одному пользователю (он в конце списка и здесь обрезан, но uid idmap ему тоже назначил из диапазона домена *, а не из AD, или хотя бы просто из диапазона mydom). А, если не секрет, откуда такая граница диапазона (131071)?
« Последнее редактирование: 17 Ноября 2016, 21:30:55 от civilization »
- Печать
Страницы: [1] 2 Все Вверх
Samba implements the Server Message Block (SMB) protocol in Red Hat Enterprise Linux. The SMB protocol is used to access resources on a server, such as file shares and shared printers. Additionally, Samba implements the Distributed Computing Environment Remote Procedure Call (DCE RPC) protocol used by Microsoft Windows.
You can run Samba as:
- An Active Directory (AD) or NT4 domain member
- A standalone server
-
An NT4 Primary Domain Controller (PDC) or Backup Domain Controller (BDC)
Red Hat supports the PDC and BDC modes only in existing installations with Windows versions which support NT4 domains. Red Hat recommends not setting up a new Samba NT4 domain, because Microsoft operating systems later than Windows 7 and Windows Server 2008 R2 do not support NT4 domains.
Red Hat does not support running Samba as an AD domain controller (DC).
Independently of the installation mode, you can optionally share directories and printers. This enables Samba to act as a file and print server.
1.1. Understanding the different Samba services and modes
This section describes the different services included in Samba and the different modes you can configure.
1.1.1. The Samba services
Samba provides the following services:
smbd-
This service provides file sharing and printing services using the SMB protocol. Additionally, the service is responsible for resource locking and for authenticating connecting users. For authenticating domain members,
smbdrequireswinbindd. Thesmbsystemdservice starts and stops thesmbddaemon.To use the
smbdservice, install thesambapackage. nmbd-
This service provides host name and IP resolution using the NetBIOS over IPv4 protocol. Additionally to the name resolution, the
nmbdservice enables browsing the SMB network to locate domains, work groups, hosts, file shares, and printers. For this, the service either reports this information directly to the broadcasting client or forwards it to a local or master browser. Thenmbsystemdservice starts and stops thenmbddaemon.Note that modern SMB networks use DNS to resolve clients and IP addresses. For Kerberos a working DNS setup is required.
To use the
nmbdservice, install thesambapackage. winbindd-
This service provides an interface for the Name Service Switch (NSS) to use AD or NT4 domain users and groups on the local system. This enables, for example, domain users to authenticate to services hosted on a Samba server or to other local services. The
winbindsystemdservice starts and stops thewinbindddaemon.If you set up Samba as a domain member,
winbinddmust be started before thesmbdservice. Otherwise, domain users and groups are not available to the local system..To use the
winbinddservice, install thesamba-winbindpackage.Red Hat only supports running Samba as a server with the
winbinddservice to provide domain users and groups to the local system. Due to certain limitations, such as missing Windows access control list (ACL) support and NT LAN Manager (NTLM) fallback, SSSD is not supported.
1.1.2. The Samba security services
The security parameter in the [global] section in the /etc/samba/smb.conf file manages how Samba authenticates users that are connecting to the service. Depending on the mode you install Samba in, the parameter must be set to different values:
- On an AD domain member, set
security = ads -
In this mode, Samba uses Kerberos to authenticate AD users.
For details about setting up Samba as a domain member, see Setting up Samba as an AD domain member server.
- On a standalone server, set
security = user -
In this mode, Samba uses a local database to authenticate connecting users.
For details about setting up Samba as a standalone server, see Setting up Samba as a standalone server.
- On an NT4 PDC or BDC, set
security = user - In this mode, Samba authenticates users to a local or LDAP database.
- On an NT4 domain member, set
security = domain -
In this mode, Samba authenticates connecting users to an NT4 PDC or BDC. You cannot use this mode on AD domain members.
For details about setting up Samba as a domain member, see Setting up Samba as an AD domain member server.
Additional resources
-
securityparameter in thesmb.conf(5)man page
1.1.3. Scenarios when Samba services and Samba client utilities load and reload their configuration
The following describes when Samba services and utilities load and reload their configuration:
-
Samba services reload their configuration:
- Automatically every 3 minutes
-
On manual request, for example, when you run the
smbcontrol all reload-configcommand.
- Samba client utilities read their configuration only when you start them.
Note that certain parameters, such as security require a restart of the smb service to take effect and a reload is not sufficient.
Additional resources
-
The
How configuration changes are appliedsection in thesmb.conf(5)man page -
The
smbd(8),nmbd(8), andwinbindd(8)man pages
1.1.4. Editing the Samba configuration in a safe way
Samba services automatically reload their configuration every 3 minutes. This procedure describes how to edit the Samba configuration in a way that prevents the services reload the changes before you have verified the configuration using the testparm utility.
Prerequisites
- Samba is installed.
Procedure
-
Create a copy of the
/etc/samba/smb.conffile:# cp /etc/samba/smb.conf /etc/samba/samba.conf.copy - Edit the copied file and make the desired changes.
-
Verify the configuration in the
/etc/samba/samba.conf.copyfile:# testparm -s /etc/samba/samba.conf.copyIf
testparmreports errors, fix them and run the command again. -
Override the
/etc/samba/smb.conffile with the new configuration:# mv /etc/samba/samba.conf.copy /etc/samba/smb.conf -
Wait until the Samba services automatically reload their configuration or manually reload the configuration:
# smbcontrol all reload-config
1.2. Verifying the smb.conf file by using the testparm utility
The testparm utility verifies that the Samba configuration in the /etc/samba/smb.conf file is correct. The utility detects invalid parameters and values, but also incorrect settings, such as for ID mapping. If testparm reports no problem, the Samba services will successfully load the /etc/samba/smb.conf file. Note that testparm cannot verify that the configured services will be available or work as expected.
Red Hat recommends that you verify the /etc/samba/smb.conf file by using testparm after each modification of this file.
Prerequisites
- You installed Samba.
-
The
/etc/samba/smb.conffile exits.
Procedure
-
Run the
testparmutility as therootuser:#
testparmLoad smb config files from /etc/samba/smb.conf rlimit_max: increasing rlimit_max (1024) to minimum Windows limit (16384) Unknown parameter encountered: "log levell" Processing section "[example_share]" Loaded services file OK. ERROR: The idmap range for the domain * (tdb) overlaps with the range of DOMAIN (ad)! Server role: ROLE_DOMAIN_MEMBER Press enter to see a dump of your service definitions # Global parameters [global] ... [example_share] ...The previous example output reports a non-existent parameter and an incorrect ID mapping configuration.
-
If
testparmreports incorrect parameters, values, or other errors in the configuration, fix the problem and run the utility again.
1.3. Setting up Samba as a standalone server
You can set up Samba as a server that is not a member of a domain. In this installation mode, Samba authenticates users to a local database instead of to a central DC. Additionally, you can enable guest access to allow users to connect to one or multiple services without authentication.
1.3.1. Setting up the server configuration for the standalone server
This section describes how to set up the server configuration for a Samba standalone server.
Procedure
-
Install the
sambapackage:# dnf install samba -
Edit the
/etc/samba/smb.conffile and set the following parameters:[global] workgroup = Example-WG netbios name = Server security = user log file = /var/log/samba/%m.log log level = 1
This configuration defines a standalone server named
Serverwithin theExample-WGwork group. Additionally, this configuration enables logging on a minimal level (1) and log files will be stored in the/var/log/samba/directory. Samba will expand the%mmacro in thelog fileparameter to the NetBIOS name of connecting clients. This enables individual log files for each client. -
Optionally, configure file or printer sharing. See:
- Setting up a share that uses POSIX ACLs
- Setting up a share that uses Windows ACLs
- Setting up Samba as a Print Server
-
Verify the
/etc/samba/smb.conffile:# testparm -
If you set up shares that require authentication, create the user accounts.
For details, see Creating and enabling local user accounts.
-
Open the required ports and reload the firewall configuration by using the
firewall-cmdutility:# firewall-cmd --permanent --add-service=samba # firewall-cmd --reload
-
Enable and start the
smbservice:# systemctl enable --now smb
Additional resources
-
smb.conf(5)man page
1.3.2. Creating and enabling local user accounts
To enable users to authenticate when they connect to a share, you must create the accounts on the Samba host both in the operating system and in the Samba database. Samba requires the operating system account to validate the Access Control Lists (ACL) on file system objects and the Samba account to authenticate connecting users.
If you use the passdb backend = tdbsam default setting, Samba stores user accounts in the /var/lib/samba/private/passdb.tdb database.
The procedure in this section describes how to create a local Samba user named example.
Prerequisites
- Samba is installed and configured as a standalone server.
Procedure
-
Create the operating system account:
# useradd -M -s /sbin/nologin exampleThis command adds the
exampleaccount without creating a home directory. If the account is only used to authenticate to Samba, assign the/sbin/nologincommand as shell to prevent the account from logging in locally. -
Set a password to the operating system account to enable it:
# passwd example Enter new UNIX password:
passwordRetype new UNIX password:passwordpasswd: password updated successfullySamba does not use the password set on the operating system account to authenticate. However, you need to set a password to enable the account. If an account is disabled, Samba denies access if this user connects.
-
Add the user to the Samba database and set a password to the account:
# smbpasswd -a example New SMB password:
passwordRetype new SMB password:passwordAdded user example.Use this password to authenticate when using this account to connect to a Samba share.
-
Enable the Samba account:
# smbpasswd -e example Enabled user example.
1.4. Understanding and configuring Samba ID mapping
Windows domains distinguish users and groups by unique Security Identifiers (SID). However, Linux requires unique UIDs and GIDs for each user and group. If you run Samba as a domain member, the winbindd service is responsible for providing information about domain users and groups to the operating system.
To enable the winbindd service to provide unique IDs for users and groups to Linux, you must configure ID mapping in the /etc/samba/smb.conf file for:
- The local database (default domain)
- The AD or NT4 domain the Samba server is a member of
- Each trusted domain from which users must be able to access resources on this Samba server
Samba provides different ID mapping back ends for specific configurations. The most frequently used back ends are:
| Back end | Use case |
|---|---|
|
|
The |
|
|
AD domains only |
|
|
AD and NT4 domains |
|
|
AD, NT4, and the |
1.4.1. Planning Samba ID ranges
Regardless of whether you store the Linux UIDs and GIDs in AD or if you configure Samba to generate them, each domain configuration requires a unique ID range that must not overlap with any of the other domains.
If you set overlapping ID ranges, Samba fails to work correctly.
Example 1.1. Unique ID Ranges
The following shows non-overlapping ID mapping ranges for the default (*), AD-DOM, and the TRUST-DOM domains.
[global] ... idmap config * : backend = tdb idmap config * : range = 10000-999999 idmap config AD-DOM:backend = rid idmap config AD-DOM:range = 2000000-2999999 idmap config TRUST-DOM:backend = rid idmap config TRUST-DOM:range = 4000000-4999999
You can only assign one range per domain. Therefore, leave enough space between the domains ranges. This enables you to extend the range later if your domain grows.
If you later assign a different range to a domain, the ownership of files and directories previously created by these users and groups will be lost.
1.4.2. The * default domain
In a domain environment, you add one ID mapping configuration for each of the following:
- The domain the Samba server is a member of
- Each trusted domain that should be able to access the Samba server
However, for all other objects, Samba assigns IDs from the default domain. This includes:
- Local Samba users and groups
-
Samba built-in accounts and groups, such as
BUILTINAdministrators
You must configure the default domain as described in this section to enable Samba to operate correctly.
The default domain back end must be writable to permanently store the assigned IDs.
For the default domain, you can use one of the following back ends:
tdb-
When you configure the default domain to use the
tdbback end, set an ID range that is big enough to include objects that will be created in the future and that are not part of a defined domain ID mapping configuration.For example, set the following in the
[global]section in the/etc/samba/smb.conffile:idmap config * : backend = tdb idmap config * : range = 10000-999999
For further details, see Using the TDB ID mapping back end.
autorid-
When you configure the default domain to use the
autoridback end, adding additional ID mapping configurations for domains is optional.For example, set the following in the
[global]section in the/etc/samba/smb.conffile:idmap config * : backend = autorid idmap config * : range = 10000-999999
For further details, see Using the autorid ID mapping back end.
1.4.3. Using the tdb ID mapping back end
The winbindd service uses the writable tdb ID mapping back end by default to store Security Identifier (SID), UID, and GID mapping tables. This includes local users, groups, and built-in principals.
Use this back end only for the * default domain. For example:
idmap config * : backend = tdb idmap config * : range = 10000-999999
1.4.4. Using the ad ID mapping back end
This section describes how to configure a Samba AD member to use the ad ID mapping back end.
The ad ID mapping back end implements a read-only API to read account and group information from AD. This provides the following benefits:
- All user and group settings are stored centrally in AD.
- User and group IDs are consistent on all Samba servers that use this back end.
- The IDs are not stored in a local database which can corrupt, and therefore file ownerships cannot be lost.
The ad ID mapping back end does not support Active Directory domains with one-way trusts. If you configure a domain member in an Active Directory with one-way trusts, use instead one of the following ID mapping back ends: tdb, rid, or autorid.
The ad back end reads the following attributes from AD:
Prerequisites
-
Both users and groups must have unique IDs set in AD, and the IDs must be within the range configured in the
/etc/samba/smb.conffile. Objects whose IDs are outside of the range will not be available on the Samba server. - Users and groups must have all required attributes set in AD. If required attributes are missing, the user or group will not be available on the Samba server. The required attributes depend on your configuration. .Prerequisites
- You installed Samba.
-
The Samba configuration, except ID mapping, exists in the
/etc/samba/smb.conffile.
Procedure
-
Edit the
[global]section in the/etc/samba/smb.conffile:-
Add an ID mapping configuration for the default domain (
*) if it does not exist. For example:idmap config * : backend = tdb idmap config * : range = 10000-999999 -
Enable the
adID mapping back end for the AD domain:idmap config DOMAIN : backend = ad -
Set the range of IDs that is assigned to users and groups in the AD domain. For example:
idmap config DOMAIN : range = 2000000-2999999
The range must not overlap with any other domain configuration on this server. Additionally, the range must be set big enough to include all IDs assigned in the future. For further details, see Planning Samba ID ranges.
-
Set that Samba uses the RFC 2307 schema when reading attributes from AD:
idmap config DOMAIN : schema_mode = rfc2307 -
To enable Samba to read the login shell and the path to the users home directory from the corresponding AD attribute, set:
idmap config DOMAIN : unix_nss_info = yesAlternatively, you can set a uniform domain-wide home directory path and login shell that is applied to all users. For example:
template shell = /bin/bash template homedir = /home/%U
-
By default, Samba uses the
primaryGroupIDattribute of a user object as the user’s primary group on Linux. Alternatively, you can configure Samba to use the value set in thegidNumberattribute instead:idmap config DOMAIN : unix_primary_group = yes
-
-
Verify the
/etc/samba/smb.conffile:# testparm -
Reload the Samba configuration:
# smbcontrol all reload-config
Additional resources
- The * default domain
-
smb.conf(5)andidmap_ad(8)man pages -
VARIABLE SUBSTITUTIONSsection in thesmb.conf(5)man page
1.4.5. Using the rid ID mapping back end
This section describes how to configure a Samba domain member to use the rid ID mapping back end.
Samba can use the relative identifier (RID) of a Windows SID to generate an ID on Red Hat Enterprise Linux.
The RID is the last part of a SID. For example, if the SID of a user is S-1-5-21-5421822485-1151247151-421485315-30014, then 30014 is the corresponding RID.
The rid ID mapping back end implements a read-only API to calculate account and group information based on an algorithmic mapping scheme for AD and NT4 domains. When you configure the back end, you must set the lowest and highest RID in the idmap config DOMAIN : range parameter. Samba will not map users or groups with a lower or higher RID than set in this parameter.
As a read-only back end, rid cannot assign new IDs, such as for BUILTIN groups. Therefore, do not use this back end for the * default domain.
Benefits of using the rid back end
- All domain users and groups that have an RID within the configured range are automatically available on the domain member.
- You do not need to manually assign IDs, home directories, and login shells.
Drawbacks of using the rid back end
- All domain users get the same login shell and home directory assigned. However, you can use variables.
-
User and group IDs are only the same across Samba domain members if all use the
ridback end with the same ID range settings. - You cannot exclude individual users or groups from being available on the domain member. Only users and groups outside of the configured range are excluded.
-
Based on the formulas the
winbinddservice uses to calculate the IDs, duplicate IDs can occur in multi-domain environments if objects in different domains have the same RID.
Prerequisites
- You installed Samba.
-
The Samba configuration, except ID mapping, exists in the
/etc/samba/smb.conffile.
Procedure
-
Edit the
[global]section in the/etc/samba/smb.conffile:-
Add an ID mapping configuration for the default domain (
*) if it does not exist. For example:idmap config * : backend = tdb idmap config * : range = 10000-999999 -
Enable the
ridID mapping back end for the domain:idmap config DOMAIN : backend = rid -
Set a range that is big enough to include all RIDs that will be assigned in the future. For example:
idmap config DOMAIN : range = 2000000-2999999
Samba ignores users and groups whose RIDs in this domain are not within the range.
The range must not overlap with any other domain configuration on this server. Additionally, the range must be set big enough to include all IDs assigned in the future. For further details, see Planning Samba ID ranges.
-
Set a shell and home directory path that will be assigned to all mapped users. For example:
template shell = /bin/bash template homedir = /home/%U
-
-
Verify the
/etc/samba/smb.conffile:# testparm -
Reload the Samba configuration:
# smbcontrol all reload-config
Additional resources
- The * default domain
-
VARIABLE SUBSTITUTIONSsection in thesmb.conf(5)man page -
Calculation of the local ID from a RID, see the
idmap_rid(8)man page
1.4.6. Using the autorid ID mapping back end
This section describes how to configure a Samba domain member to use the autorid ID mapping back end.
The autorid back end works similar to the rid ID mapping back end, but can automatically assign IDs for different domains. This enables you to use the autorid back end in the following situations:
-
Only for the
*default domain -
For the
*default domain and additional domains, without the need to create ID mapping configurations for each of the additional domains - Only for specific domains
If you use autorid for the default domain, adding additional ID mapping configuration for domains is optional.
Parts of this section were adopted from the idmap config autorid documentation published in the Samba Wiki. License: CC BY 4.0. Authors and contributors: See the history tab on the Wiki page.
Benefits of using the autorid back end
- All domain users and groups whose calculated UID and GID is within the configured range are automatically available on the domain member.
- You do not need to manually assign IDs, home directories, and login shells.
- No duplicate IDs, even if multiple objects in a multi-domain environment have the same RID.
Drawbacks
- User and group IDs are not the same across Samba domain members.
- All domain users get the same login shell and home directory assigned. However, you can use variables.
- You cannot exclude individual users or groups from being available on the domain member. Only users and groups whose calculated UID or GID is outside of the configured range are excluded.
Prerequisites
- You installed Samba.
-
The Samba configuration, except ID mapping, exists in the
/etc/samba/smb.conffile.
Procedure
-
Edit the
[global]section in the/etc/samba/smb.conffile:-
Enable the
autoridID mapping back end for the*default domain:idmap config * : backend = autorid
-
Set a range that is big enough to assign IDs for all existing and future objects. For example:
idmap config * : range = 10000-999999Samba ignores users and groups whose calculated IDs in this domain are not within the range.
After you set the range and Samba starts using it, you can only increase the upper limit of the range. Any other change to the range can result in new ID assignments, and thus in losing file ownerships.
-
Optionally, set a range size. For example:
idmap config * : rangesize = 200000Samba assigns this number of continuous IDs for each domain’s object until all IDs from the range set in the
idmap config * : rangeparameter are taken.If you set a rangesize, you need to adapt the range accordingly. The range needs to be a multiple of the rangesize.
-
Set a shell and home directory path that will be assigned to all mapped users. For example:
template shell = /bin/bash template homedir = /home/%U
-
Optionally, add additional ID mapping configuration for domains. If no configuration for an individual domain is available, Samba calculates the ID using the
autoridback end settings in the previously configured*default domain.The range must not overlap with any other domain configuration on this server. Additionally, the range must be set big enough to include all IDs assigned in the future. For further details, see Planning Samba ID ranges.
-
-
Verify the
/etc/samba/smb.conffile:# testparm -
Reload the Samba configuration:
# smbcontrol all reload-config
Additional resources
-
THE MAPPING FORMULASsection in theidmap_autorid(8)man page -
rangesizeparameter description in theidmap_autorid(8)man page -
VARIABLE SUBSTITUTIONSsection in thesmb.conf(5)man page
1.5. Setting up Samba as an AD domain member server
If you are running an AD or NT4 domain, use Samba to add your Red Hat Enterprise Linux server as a member to the domain to gain the following:
- Access domain resources on other domain members
-
Authenticate domain users to local services, such as
sshd - Share directories and printers hosted on the server to act as a file and print server
1.5.1. Joining a RHEL system to an AD domain
Samba Winbind is an alternative to the System Security Services Daemon (SSSD) for connecting a Red Hat Enterprise Linux (RHEL) system with Active Directory (AD). This section describes how to join a RHEL system to an AD domain by using realmd to configure Samba Winbind.
Procedure
-
If your AD requires the deprecated RC4 encryption type for Kerberos authentication, enable support for these ciphers in RHEL:
# update-crypto-policies --set DEFAULT:AD-SUPPORT -
Install the following packages:
# dnf install realmd oddjob-mkhomedir oddjob samba-winbind-clients samba-winbind samba-common-tools samba-winbind-krb5-locator
-
To share directories or printers on the domain member, install the
sambapackage:# dnf install samba -
Backup the existing
/etc/samba/smb.confSamba configuration file:# mv /etc/samba/smb.conf /etc/samba/smb.conf.bak -
Join the domain. For example, to join a domain named
ad.example.com:# realm join --membership-software=samba --client-software=winbind ad.example.comUsing the previous command, the
realmutility automatically:-
Creates a
/etc/samba/smb.conffile for a membership in thead.example.comdomain -
Adds the
winbindmodule for user and group lookups to the/etc/nsswitch.conffile -
Updates the Pluggable Authentication Module (PAM) configuration files in the
/etc/pam.d/directory -
Starts the
winbindservice and enables the service to start when the system boots
-
Creates a
-
Optionally, set an alternative ID mapping back end or customized ID mapping settings in the
/etc/samba/smb.conffile.
For details, see Understanding and configuring Samba ID mapping.
-
Verify that the
winbindservice is running:# systemctl status winbind ... Active: active (running) since Tue 2018-11-06 19:10:40 CET; 15s agoTo enable Samba to query domain user and group information, the
winbindservice must be running before you startsmb. -
If you installed the
sambapackage to share directories and printers, enable and start thesmbservice:# systemctl enable --now smb -
Optionally, if you are authenticating local logins to Active Directory, enable the
winbind_krb5_localauthplug-in. See Using the local authorization plug-in for MIT Kerberos.
Verification steps
-
Display an AD user’s details, such as the AD administrator account in the AD domain:
# getent passwd "ADadministrator" ADadministrator:*:10000:10000::/home/administrator@AD:/bin/bash -
Query the members of the domain users group in the AD domain:
# getent group "ADDomain Users" ADdomain users:x:10000:user1,user2 -
Optionally, verify that you can use domain users and groups when you set permissions on files and directories. For example, to set the owner of the
/srv/samba/example.txtfile toADadministratorand the group toADDomain Users:# chown "ADadministrator":"ADDomain Users" /srv/samba/example.txt -
Verify that Kerberos authentication works as expected:
-
On the AD domain member, obtain a ticket for the
administrator@AD.EXAMPLE.COMprincipal:# kinit administrator@AD.EXAMPLE.COM -
Display the cached Kerberos ticket:
# klist Ticket cache: KCM:0 Default principal: administrator@AD.EXAMPLE.COM Valid starting Expires Service principal 01.11.2018 10:00:00 01.11.2018 20:00:00 krbtgt/AD.EXAMPLE.COM@AD.EXAMPLE.COM renew until 08.11.2018 05:00:00
-
-
Display the available domains:
# wbinfo --all-domains BUILTIN SAMBA-SERVER AD
Additional resources
- If you do not want to use the deprecated RC4 ciphers, you can enable the AES encryption type in AD. See
- Enabling the AES encryption type in Active Directory using a GPO. Note that this can have an impact on other services in your AD.
-
realm(8)man page
1.5.2. Using the local authorization plug-in for MIT Kerberos
The winbind service provides Active Directory users to the domain member. In certain situations, administrators want to enable domain users to authenticate to local services, such as an SSH server, which are running on the domain member. When using Kerberos to authenticate the domain users, enable the winbind_krb5_localauth plug-in to correctly map Kerberos principals to Active Directory accounts through the winbind service.
For example, if the sAMAccountName attribute of an Active Directory user is set to EXAMPLE and the user tries to log with the user name lowercase, Kerberos returns the user name in upper case. As a consequence, the entries do not match and authentication fails.
Using the winbind_krb5_localauth plug-in, the account names are mapped correctly. Note that this only applies to GSSAPI authentication and not for getting the initial ticket granting ticket (TGT).
Prerequisites
- Samba is configured as a member of an Active Directory.
- Red Hat Enterprise Linux authenticates log in attempts against Active Directory.
-
The
winbindservice is running.
Procedure
Edit the /etc/krb5.conf file and add the following section:
[plugins]
localauth = {
module = winbind:/usr/lib64/samba/krb5/winbind_krb5_localauth.so
enable_only = winbind
}
Additional resources
-
winbind_krb5_localauth(8)man page.
1.6. Setting up Samba on an IdM domain member
This section describes how to set up Samba on a host that is joined to a Red Hat Identity Management (IdM) domain. Users from IdM and also, if available, from trusted Active Directory (AD) domains, can access shares and printer services provided by Samba.
Using Samba on an IdM domain member is an unsupported Technology Preview feature and contains certain limitations. For example, IdM trust controllers do not support the Active Directory Global Catalog service, and they do not support resolving IdM groups using the Distributed Computing Environment / Remote Procedure Calls (DCE/RPC) protocols. As a consequence, AD users can only access Samba shares and printers hosted on IdM clients when logged in to other IdM clients; AD users logged into a Windows machine can not access Samba shares hosted on an IdM domain member.
Customers deploying Samba on IdM domain members are encouraged to provide feedback to Red Hat.
Prerequisites
- The host is joined as a client to the IdM domain.
- Both the IdM servers and the client must run on RHEL 9.0 or later.
1.6.1. Preparing the IdM domain for installing Samba on domain members
Before you can set up Samba on an IdM client, you must prepare the IdM domain using the ipa-adtrust-install utility on an IdM server.
Any system where you run the ipa-adtrust-install command automatically becomes an AD trust controller. However, you must run ipa-adtrust-install only once on an IdM server.
Prerequisites
- IdM server is installed.
- You need root privileges to install packages and restart IdM services.
Procedure
-
Install the required packages:
[root@ipaserver ~]# dnf install ipa-server-trust-ad samba-client -
Authenticate as the IdM administrative user:
[root@ipaserver ~]# kinit admin -
Run the
ipa-adtrust-installutility:[root@ipaserver ~]# ipa-adtrust-installThe DNS service records are created automatically if IdM was installed with an integrated DNS server.
If you installed IdM without an integrated DNS server,
ipa-adtrust-installprints a list of service records that you must manually add to DNS before you can continue. -
The script prompts you that the
/etc/samba/smb.confalready exists and will be rewritten:WARNING: The smb.conf already exists. Running ipa-adtrust-install will break your existing Samba configuration. Do you wish to continue? [no]:
yes -
The script prompts you to configure the
slapi-nisplug-in, a compatibility plug-in that allows older Linux clients to work with trusted users:Do you want to enable support for trusted domains in Schema Compatibility plugin? This will allow clients older than SSSD 1.9 and non-Linux clients to work with trusted users. Enable trusted domains support in slapi-nis? [no]:
yes -
When prompted, enter the NetBIOS name for the IdM domain or press Enter to accept the name suggested:
Trust is configured but no NetBIOS domain name found, setting it now. Enter the NetBIOS name for the IPA domain. Only up to 15 uppercase ASCII letters, digits and dashes are allowed. Example: EXAMPLE. NetBIOS domain name [IDM]:
-
You are prompted to run the SID generation task to create a SID for any existing users:
Do you want to run the ipa-sidgen task? [no]:
yesThis is a resource-intensive task, so if you have a high number of users, you can run this at another time.
-
(Optional) By default, the Dynamic RPC port range is defined as
49152-65535for Windows Server 2008 and later. If you need to define a different Dynamic RPC port range for your environment, configure Samba to use different ports and open those ports in your firewall settings. The following example sets the port range to55000-65000.[root@ipaserver ~]# net conf setparm global 'rpc server dynamic port range' 55000-65000 [root@ipaserver ~]# firewall-cmd --add-port=55000-65000/tcp [root@ipaserver ~]# firewall-cmd --runtime-to-permanent
-
Restart the
ipaservice:[root@ipaserver ~]# ipactl restart -
Use the
smbclientutility to verify that Samba responds to Kerberos authentication from the IdM side:[root@ipaserver ~]#
smbclient -L server.idm.example.com -U user_name --use-kerberos=requiredlp_load_ex: changing to config backend registry Sharename Type Comment --------- ---- ------- IPC$ IPC IPC Service (Samba 4.15.2) ...
1.6.2. Enabling the AES encryption type in Active Directory using a GPO
This section describes how to enable the AES encryption type in Active Directory (AD) using a group policy object (GPO). Certain features on RHEL, such as running a Samba server on an IdM client, require this encryption type.
Note that RHEL no longer supports the weak DES and RC4 encryption types.
Prerequisites
- You are logged into AD as a user who can edit group policies.
-
The
Group Policy Management Consoleis installed on the computer.
Procedure
-
Open the
Group Policy Management Console. -
Right-click
Default Domain Policy, and selectEdit. TheGroup Policy Management Editoropens. -
Navigate to
Computer Configuration→Policies→Windows Settings→Security Settings→Local Policies→Security Options. -
Double-click the
Network security: Configure encryption types allowed for Kerberospolicy. -
Select
AES256_HMAC_SHA1and, optionally,Future encryption types. - Click OK.
-
Close the
Group Policy Management Editor. -
Repeat the steps for the
Default Domain Controller Policy. -
Wait until the Windows domain controllers (DC) applied the group policy automatically. Alternatively, to apply the GPO manually on a DC, enter the following command using an account that has administrator permissions:
C:> gpupdate /force /target:computer
1.6.3. Installing and configuring a Samba server on an IdM client
This section describes how to install and configure Samba on a client enrolled in an IdM domain.
Prerequisites
- Both the IdM servers and the client must run on RHEL 9.0 or later.
- The IdM domain is prepared as described in Preparing the IdM domain for installing Samba on domain members.
- If IdM has a trust configured with AD, enable the AES encryption type for Kerberos. For example, use a group policy object (GPO) to enable the AES encryption type. For details, see Enabling AES encryption in Active Directory using a GPO.
Procedure
-
Install the
ipa-client-sambapackage:[root@idm_client]# dnf install ipa-client-samba -
Use the
ipa-client-sambautility to prepare the client and create an initial Samba configuration:[root@idm_client]# ipa-client-samba Searching for IPA server... IPA server: DNS discovery Chosen IPA master: idm_server.idm.example.com SMB principal to be created: cifs/idm_client.idm.example.com@IDM.EXAMPLE.COM NetBIOS name to be used: IDM_CLIENT Discovered domains to use: Domain name: idm.example.com NetBIOS name: IDM SID: S-1-5-21-525930803-952335037-206501584 ID range: 212000000 - 212199999 Domain name: ad.example.com NetBIOS name: AD SID: None ID range: 1918400000 - 1918599999 Continue to configure the system with these values? [no]: yes Samba domain member is configured. Please check configuration at /etc/samba/smb.conf and start smb and winbind services
-
By default,
ipa-client-sambaautomatically adds the[homes]section to the/etc/samba/smb.conffile that dynamically shares a user’s home directory when the user connects. If users do not have home directories on this server, or if you do not want to share them, remove the following lines from/etc/samba/smb.conf:[homes] read only = no -
Share directories and printers. For details, see:
- Setting up a Samba file share that uses POSIX ACLs
- Setting up a share that uses Windows ACLs
- Setting up Samba as a print server
-
Open the ports required for a Samba client in the local firewall:
[root@idm_client]# firewall-cmd --permanent --add-service=samba-client [root@idm_client]# firewall-cmd --reload
-
Enable and start the
smbandwinbindservices:[root@idm_client]# systemctl enable --now smb winbind
Verification steps
Run the following verification step on a different IdM domain member that has the samba-client package installed:
-
List the shares on the Samba server using Kerberos authentication:
$
smbclient -L idm_client.idm.example.com -U user_name --use-kerberos=requiredlp_load_ex: changing to config backend registry Sharename Type Comment --------- ---- ------- example Disk IPC$ IPC IPC Service (Samba 4.15.2) ...
Additional resources
-
ipa-client-samba(1)man page
1.6.4. Manually adding an ID mapping configuration if IdM trusts a new domain
Samba requires an ID mapping configuration for each domain from which users access resources. On an existing Samba server running on an IdM client, you must manually add an ID mapping configuration after the administrator added a new trust to an Active Directory (AD) domain.
Prerequisites
- You configured Samba on an IdM client. Afterward, a new trust was added to IdM.
- The DES and RC4 encryption types for Kerberos must be disabled in the trusted AD domain. For security reasons, RHEL 9 does not support these weak encryption types.
Procedure
-
Authenticate using the host’s keytab:
[root@idm_client]# kinit -k -
Use the
ipa idrange-findcommand to display both the base ID and the ID range size of the new domain. For example, the following command displays the values for thead.example.comdomain:[root@idm_client]# ipa idrange-find --name="AD.EXAMPLE.COM_id_range" --raw --------------- 1 range matched --------------- cn: AD.EXAMPLE.COM_id_range ipabaseid: 1918400000 ipaidrangesize: 200000 ipabaserid: 0 ipanttrusteddomainsid: S-1-5-21-968346183-862388825-1738313271 iparangetype: ipa-ad-trust ---------------------------- Number of entries returned 1 ----------------------------
You need the values from the
ipabaseidandipaidrangesizeattributes in the next steps. -
To calculate the highest usable ID, use the following formula:
maximum_range = ipabaseid + ipaidrangesize - 1
With the values from the previous step, the highest usable ID for the
ad.example.comdomain is1918599999(1918400000 + 200000 — 1). -
Edit the
/etc/samba/smb.conffile, and add the ID mapping configuration for the domain to the[global]section:idmap config AD : range = 1918400000 - 1918599999 idmap config AD : backend = sss
Specify the value from
ipabaseidattribute as the lowest and the computed value from the previous step as the highest value of the range. -
Restart the
smbandwinbindservices:[root@idm_client]# systemctl restart smb winbind
Verification steps
-
List the shares on the Samba server using Kerberos authentication:
$
smbclient -L idm_client.idm.example.com -U user_name --use-kerberos=requiredlp_load_ex: changing to config backend registry Sharename Type Comment --------- ---- ------- example Disk IPC$ IPC IPC Service (Samba 4.15.2) ...
1.6.5. Additional resources
- Installing an Identity Management client
1.7. Setting up a Samba file share that uses POSIX ACLs
As a Linux service, Samba supports shares with POSIX ACLs. They enable you to manage permissions locally on the Samba server using utilities, such as chmod. If the share is stored on a file system that supports extended attributes, you can define ACLs with multiple users and groups.
Parts of this section were adopted from the Setting up a Share Using POSIX ACLs documentation published in the Samba Wiki. License: CC BY 4.0. Authors and contributors: See the history tab on the Wiki page.
1.7.1. Adding a share that uses POSIX ACLs
This section describes how to create a share named example that provides the content of the /srv/samba/example/ directory, and uses POSIX ACLs.
Prerequisites
Samba has been set up in one of the following modes:
- Standalone server
- Domain member
Procedure
-
Create the folder if it does not exist. For example:
# mkdir -p /srv/samba/example/ -
If you run SELinux in
enforcingmode, set thesamba_share_tcontext on the directory:# semanage fcontext -a -t samba_share_t "/srv/samba/example(/.*)?" # restorecon -Rv /srv/samba/example/
-
Set file system ACLs on the directory. For details, see:
- Setting standard ACLs on a Samba Share that uses POSIX ACLs
- Setting extended ACLs on a share that uses POSIX ACLs.
-
Add the example share to the
/etc/samba/smb.conffile. For example, to add the share write-enabled:[example] path = /srv/samba/example/ read only = no
Regardless of the file system ACLs; if you do not set
read only = no, Samba shares the directory in read-only mode. -
Verify the
/etc/samba/smb.conffile:# testparm -
Open the required ports and reload the firewall configuration using the
firewall-cmdutility:# firewall-cmd --permanent --add-service=samba # firewall-cmd --reload
-
Restart the
smbservice:# systemctl restart smb
1.7.2. Setting standard Linux ACLs on a Samba share that uses POSIX ACLs
The standard ACLs on Linux support setting permissions for one owner, one group, and for all other undefined users. You can use the chown, chgrp, and chmod utility to update the ACLs. If you require precise control, then you use the more complex POSIX ACLs, see
Setting extended ACLs on a Samba share that uses POSIX ACLs.
The following procedure sets the owner of the /srv/samba/example/ directory to the root user, grants read and write permissions to the Domain Users group, and denies access to all other users.
Prerequisites
- The Samba share on which you want to set the ACLs exists.
Procedure
# chown root:"Domain Users" /srv/samba/example/ # chmod 2770 /srv/samba/example/
Enabling the set-group-ID (SGID) bit on a directory automatically sets the default group for all new files and subdirectories to that of the directory group, instead of the usual behavior of setting it to the primary group of the user who created the new directory entry.
Additional resources
-
chown(1)andchmod(1)man pages
1.7.3. Setting extended ACLs on a Samba share that uses POSIX ACLs
If the file system the shared directory is stored on supports extended ACLs, you can use them to set complex permissions. Extended ACLs can contain permissions for multiple users and groups.
Extended POSIX ACLs enable you to configure complex ACLs with multiple users and groups. However, you can only set the following permissions:
- No access
- Read access
- Write access
- Full control
If you require the fine-granular Windows permissions, such as Create folder / append data, configure the share to use Windows ACLs.
See Setting up a share that uses Windows ACLs.
The following procedure shows how to enable extended ACLs on a share. Additionally, it contains an example about setting extended ACLs.
Prerequisites
- The Samba share on which you want to set the ACLs exists.
Procedure
-
Enable the following parameter in the share’s section in the
/etc/samba/smb.conffile to enable ACL inheritance of extended ACLs:inherit acls = yes
For details, see the parameter description in the
smb.conf(5) man page. -
Restart the
smbservice:# systemctl restart smb -
Set the ACLs on the directory. For example:
1.8. Setting permissions on a share that uses POSIX ACLs
Optionally, to limit or grant access to a Samba share, you can set certain parameters in the share’s section in the /etc/samba/smb.conf file.
Share-based permissions manage if a user, group, or host is able to access a share. These settings do not affect file system ACLs.
Use share-based settings to restrict access to shares, for example, to deny access from specific hosts.
Prerequisites
- A share with POSIX ACLs has been set up.
1.8.1. Configuring user and group-based share access
User and group-based access control enables you to grant or deny access to a share for certain users and groups.
Prerequisites
- The Samba share on which you want to set user or group-based access exists.
Procedure
-
For example, to enable all members of the
Domain Usersgroup to access a share while access is denied for theuseraccount, add the following parameters to the share’s configuration:valid users = +DOMAIN"Domain Users" invalid users = DOMAINuser
The
invalid usersparameter has a higher priority than thevalid usersparameter. For example, if theuseraccount is a member of theDomain Usersgroup, access is denied to this account when you use the previous example. -
Reload the Samba configuration:
# smbcontrol all reload-config
Additional resources
-
smb.conf(5)man page
1.8.2. Configuring host-based share access
Host-based access control enables you to grant or deny access to a share based on client’s host names, IP addresses, or IP range.
The following procedure explains how to enable the 127.0.0.1 IP address, the 192.0.2.0/24 IP range, and the client1.example.com host to access a share, and additionally deny access for the client2.example.com host:
Prerequisites
- The Samba share on which you want to set host-based access exists.
Procedure
-
Add the following parameters to the configuration of the share in the
/etc/samba/smb.conffile:hosts allow = 127.0.0.1 192.0.2.0/24 client1.example.com hosts deny = client2.example.com
The
hosts denyparameter has a higher priority thanhosts allow. For example, ifclient1.example.comresolves to an IP address that is listed in thehosts allowparameter, access for this host is denied. -
Reload the Samba configuration:
# smbcontrol all reload-config
Additional resources
-
smb.conf(5)man page
1.9. Setting up a share that uses Windows ACLs
Samba supports setting Windows ACLs on shares and file system object. This enables you to:
- Use the fine-granular Windows ACLs
- Manage share permissions and file system ACLs using Windows
Alternatively, you can configure a share to use POSIX ACLs.
For details, see Setting up a Samba file share that uses POSIX ACLs.
Parts of this section were adopted from the Setting up a Share Using Windows ACLs documentation published in the Samba Wiki. License: CC BY 4.0. Authors and contributors: See the history tab on the Wiki page.
1.9.1. Granting the SeDiskOperatorPrivilege privilege
Only users and groups having the SeDiskOperatorPrivilege privilege granted can configure permissions on shares that use Windows ACLs.
Procedure
-
For example, to grant the
SeDiskOperatorPrivilegeprivilege to theDOMAINDomain Adminsgroup:#
net rpc rights grant "DOMAINDomain Admins" SeDiskOperatorPrivilege -U "DOMAINadministrator"Enter DOMAINadministrator's password: Successfully granted rights.In a domain environment, grant
SeDiskOperatorPrivilegeto a domain group. This enables you to centrally manage the privilege by updating a user’s group membership. -
To list all users and groups having
SeDiskOperatorPrivilegegranted:#
net rpc rights list privileges SeDiskOperatorPrivilege -U "DOMAINadministrator"Enter administrator's password: SeDiskOperatorPrivilege: BUILTINAdministrators DOMAINDomain Admins
1.9.2. Enabling Windows ACL support
To configure shares that support Windows ACLs, you must enable this feature in Samba.
Prerequisites
- A user share is configured on the Samba server.
Procedure
-
To enable it globally for all shares, add the following settings to the
[global]section of the/etc/samba/smb.conffile:vfs objects = acl_xattr map acl inherit = yes store dos attributes = yes
Alternatively, you can enable Windows ACL support for individual shares, by adding the same parameters to a share’s section instead.
-
Restart the
smbservice:#
systemctl restart smb
1.9.3. Adding a share that uses Windows ACLs
This section describes how to create a share named example, that shares the content of the /srv/samba/example/ directory, and uses Windows ACLs.
Procedure
-
Create the folder if it does not exists. For example:
#
mkdir -p /srv/samba/example/ -
If you run SELinux in
enforcingmode, set thesamba_share_tcontext on the directory:#
semanage fcontext -a -t samba_share_t "/srv/samba/example(/.*)?"#restorecon -Rv /srv/samba/example/ -
Add the example share to the
/etc/samba/smb.conffile. For example, to add the share write-enabled:[example] path = /srv/samba/example/ read only = no
Regardless of the file system ACLs; if you do not set
read only = no, Samba shares the directory in read-only mode. -
If you have not enabled Windows ACL support in the
[global]section for all shares, add the following parameters to the[example]section to enable this feature for this share:vfs objects = acl_xattr map acl inherit = yes store dos attributes = yes
-
Verify the
/etc/samba/smb.conffile:#
testparm -
Open the required ports and reload the firewall configuration using the
firewall-cmdutility:#
firewall-cmd --permanent --add-service=samba#firewall-cmd --reload -
Restart the
smbservice:#
systemctl restart smb
1.9.4. Managing share permissions and file system ACLs of a share that uses Windows ACLs
To manage share permissions and file system ACLs on a Samba share that uses Windows ACLs, use a Windows applications, such as Computer Management. For details, see the Windows documentation. Alternatively, use the smbcacls utility to manage ACLs.
To modify the file system permissions from Windows, you must use an account that has the SeDiskOperatorPrivilege privilege granted.
1.10. Managing ACLs on an SMB share using smbcacls
The smbcacls utility can list, set, and delete ACLs of files and directories stored on an SMB share. You can use smbcacls to manage file system ACLs:
- On a local or remote Samba server that uses advanced Windows ACLs or POSIX ACLs
- On Red Hat Enterprise Linux to remotely manage ACLs on a share hosted on Windows
1.10.1. Access control entries
Each ACL entry of a file system object contains Access Control Entries (ACE) in the following format:
security_principal:access_right/inheritance_information/permissions
Example 1.3. Access control entries
If the ADDomain Users group has Modify permissions that apply to This folder, subfolders, and files on Windows, the ACL contains the following ACE:
ADDomain Users:ALLOWED/OI|CI/CHANGE
An ACE contains the following parts:
- Security principal
- The security principal is the user, group, or SID the permissions in the ACL are applied to.
- Access right
-
Defines if access to an object is granted or denied. The value can be
ALLOWEDorDENIED. - Inheritance information
-
The following values exist:
Table 1.1. Inheritance settings
Value Description Maps to OIObject Inherit
This folder and files
CIContainer Inherit
This folder and subfolders
IOInherit Only
The ACE does not apply to the current file or directory
IDInherited
The ACE was inherited from the parent directory
Additionally, the values can be combined as follows:
Table 1.2. Inheritance settings combinations
Value combinations Maps to the Windows Applies tosettingOI|CIThis folder, subfolders, and files
OI|CI|IOSubfolders and files only
CI|IOSubfolders only
OI|IOFiles only
- Permissions
-
This value can be either a hex value that represents one or more Windows permissions or an
smbcaclsalias:-
A hex value that represents one or more Windows permissions.
The following table displays the advanced Windows permissions and their corresponding value in hex format:
Multiple permissions can be combined as a single hex value using the bit-wise
ORoperation.
-
For details, see ACE mask calculation.
-
An
smbcaclsalias. The following table displays the available aliases:You can combine single-letter aliases when you set permissions. For example, you can set
RDto apply the Windows permissionReadandDelete. However, you can neither combine multiple non-single-letter aliases nor combine aliases and hex values.
1.10.2. Displaying ACLs using smbcacls
To display ACLs on an SMB share, use the smbcacls utility. If you run smbcacls without any operation parameter, such as --add, the utility displays the ACLs of a file system object.
Procedure
For example, to list the ACLs of the root directory of the //server/example share:
# smbcacls //server/example / -U "DOMAINadministrator"
Enter DOMAINadministrator's password:
REVISION:1
CONTROL:SR|PD|DI|DP
OWNER:ADAdministrators
GROUP:ADDomain Users
ACL:ADAdministrator:ALLOWED/OI|CI/FULL
ACL:ADDomain Users:ALLOWED/OI|CI/CHANGE
ACL:ADDomain Guests:ALLOWED/OI|CI/0x00100021
The output of the command displays:
-
REVISION: The internal Windows NT ACL revision of the security descriptor -
CONTROL: Security descriptor control -
OWNER: Name or SID of the security descriptor’s owner -
GROUP: Name or SID of the security descriptor’s group -
ACLentries. For details, see Access control entries.
1.10.3. ACE mask calculation
In most situations, when you add or update an ACE, you use the smbcacls aliases listed in Existing smbcacls aliases and their corresponding Windows permission.
However, if you want to set advanced Windows permissions as listed in Windows permissions and their corresponding smbcacls value in hex format, you must use the bit-wise OR operation to calculate the correct value. You can use the following shell command to calculate the value:
# echo $(printf '0x%X' $(( hex_value_1 | hex_value_2 | ... )))
Example 1.4. Calculating an ACE Mask
You want to set the following permissions:
- Traverse folder / execute file (0x00100020)
- List folder / read data (0x00100001)
- Read attributes (0x00100080)
To calculate the hex value for the previous permissions, enter:
# echo $(printf '0x%X' $(( 0x00100020 | 0x00100001 | 0x00100080 )))
0x1000A1
Use the returned value when you set or update an ACE.
1.10.4. Adding, updating, and removing an ACL using smbcacls
Depending on the parameter you pass to the smbcacls utility, you can add, update, and remove ACLs from a file or directory.
Adding an ACL
To add an ACL to the root of the //server/example share that grants CHANGE permissions for This folder, subfolders, and files to the ADDomain Users group:
# smbcacls //server/example / -U "DOMAINadministrator --add ACL:"ADDomain Users":ALLOWED/OI|CI/CHANGE
Updating an ACL
Updating an ACL is similar to adding a new ACL. You update an ACL by overriding the ACL using the --modify parameter with an existing security principal. If smbcacls finds the security principal in the ACL list, the utility updates the permissions. Otherwise the command fails with an error:
ACL for SID principal_name not found
For example, to update the permissions of the ADDomain Users group and set them to READ for This folder, subfolders, and files:
# smbcacls //server/example / -U "DOMAINadministrator --modify ACL:"ADDomain Users":ALLOWED/OI|CI/READ
Deleting an ACL
To delete an ACL, pass the --delete parameter with the exact ACL to the smbcacls utility. For example:
# smbcacls //server/example / -U "DOMAINadministrator --delete ACL:"ADDomain Users":ALLOWED/OI|CI/READ
1.11. Enabling users to share directories on a Samba server
On a Samba server, you can configure that users can share directories without root permissions.
1.11.1. Enabling the user shares feature
Before users can share directories, the administrator must enable user shares in Samba.
For example, to enable only members of the local example group to create user shares.
Procedure
-
Create the local
examplegroup, if it does not exist:# groupadd example -
Prepare the directory for Samba to store the user share definitions and set its permissions properly. For example:
-
Create the directory:
# mkdir -p /var/lib/samba/usershares/ -
Set write permissions for the
examplegroup:# chgrp example /var/lib/samba/usershares/ # chmod 1770 /var/lib/samba/usershares/
- Set the sticky bit to prevent users to rename or delete files stored by other users in this directory.
-
-
Edit the
/etc/samba/smb.conffile and add the following to the[global]section:-
Set the path to the directory you configured to store the user share definitions. For example:
usershare path = /var/lib/samba/usershares/
-
Set how many user shares Samba allows to be created on this server. For example:
usershare max shares = 100
If you use the default of
0for theusershare max sharesparameter, user shares are disabled. -
Optionally, set a list of absolute directory paths. For example, to configure that Samba only allows to share subdirectories of the
/dataand/srvdirectory to be shared, set:usershare prefix allow list = /data /srv
For a list of further user share-related parameters you can set, see the
USERSHARESsection in thesmb.conf(5)man page. -
-
Verify the
/etc/samba/smb.conffile:# testparm -
Reload the Samba configuration:
# smbcontrol all reload-configUsers are now able to create user shares.
1.11.2. Adding a user share
After you enabled the user share feature in Samba, users can share directories on the Samba server without root permissions by running the net usershare add command.
Synopsis of the net usershare add command:
net usershare add share_name path [[ comment ] | [ ACLs ]] [ guest_ok=y|n ]
If you set ACLs when you create a user share, you must specify the comment parameter prior to the ACLs. To set an empty comment, use an empty string in double quotes.
Note that users can only enable guest access on a user share, if the administrator set usershare allow guests = yes in the [global] section in the /etc/samba/smb.conf file.
Example 1.5. Adding a user share
A user wants to share the /srv/samba/ directory on a Samba server. The share should be named example, have no comment set, and should be accessible by guest users. Additionally, the share permissions should be set to full access for the ADDomain Users group and read permissions for other users. To add this share, run as the user:
$ net usershare add example /srv/samba/ "" "ADDomain Users":F,Everyone:R guest_ok=yes
1.11.4. Displaying information about existing user shares
Users can enter the net usershare info command on a Samba server to display user shares and their settings.
Prerequisites
- A user share is configured on the Samba server.
Procedure
-
To display all user shares created by any user:
$ net usershare info -l [share_1] path=/srv/samba/ comment= usershare_acl=Everyone:R,host_nameuser:F, guest_ok=y ...
To list only shares created by the user who runs the command, omit the
-lparameter. -
To display only the information about specific shares, pass the share name or wild cards to the command. For example, to display the information about shares whose name starts with
share_:$ net usershare info -l share_*
1.11.5. Listing user shares
If you want to list only the available user shares without their settings on a Samba server, use the net usershare list command.
Prerequisites
- A user share is configured on the Samba server.
Procedure
-
To list the shares created by any user:
$ net usershare list -l share_1 share_2 ...
To list only shares created by the user who runs the command, omit the
-lparameter. -
To list only specific shares, pass the share name or wild cards to the command. For example, to list only shares whose name starts with
share_:$ net usershare list -l share_*
1.12. Configuring a share to allow access without authentication
In certain situations, you want to share a directory to which users can connect without authentication. To configure this, enable guest access on a share.
Shares that do not require authentication can be a security risk.
1.12.1. Enabling guest access to a share
If guest access is enabled on a share, Samba maps guest connections to the operating system account set in the guest account parameter. Guest users can access files on this share if at least one of the following conditions is satisfied:
- The account is listed in file system ACLs
-
The POSIX permissions for
otherusers allow it
Example 1.6. Guest share permissions
If you configured Samba to map the guest account to nobody, which is the default, the ACLs in the following example:
-
Allow guest users to read
file1.txt -
Allow guest users to read and modify
file2.txt -
Prevent guest users to read or modify
file3.txt
-rw-r--r--. 1 root root 1024 1. Sep 10:00 file1.txt -rw-r-----. 1 nobody root 1024 1. Sep 10:00 file2.txt -rw-r-----. 1 root root 1024 1. Sep 10:00 file3.txt
Procedure
-
Edit the
/etc/samba/smb.conffile:-
If this is the first guest share you set up on this server:
-
Set
map to guest = Bad Userin the[global]section:[global] ... map to guest = Bad UserWith this setting, Samba rejects login attempts that use an incorrect password unless the user name does not exist. If the specified user name does not exist and guest access is enabled on a share, Samba treats the connection as a guest log in.
-
By default, Samba maps the guest account to the
nobodyaccount on Red Hat Enterprise Linux. Alternatively, you can set a different account. For example:[global] ... guest account = user_nameThe account set in this parameter must exist locally on the Samba server. For security reasons, Red Hat recommends using an account that does not have a valid shell assigned.
-
-
Add the
guest ok = yessetting to the[example]share section:[example] ... guest ok = yes
-
-
Verify the
/etc/samba/smb.conffile:# testparm -
Reload the Samba configuration:
# smbcontrol all reload-config
1.13. Configuring Samba for macOS clients
The fruit virtual file system (VFS) Samba module provides enhanced compatibility with Apple server message block (SMB) clients.
1.13.1. Optimizing the Samba configuration for providing file shares for macOS clients
This section describes how to configure the fruit module for all Samba shares hosted on the server to optimize Samba file shares for macOS clients.
Red Hat recommends enabling the fruit module globally. Clients using macOS negotiate the server server message block version 2 (SMB2) Apple (AAPL) protocol extensions when the client establishes the first connection to the server. If the client first connects to a share without AAPL extensions enabled, the client does not use the extensions for any share of the server.
Prerequisites
- Samba is configured as a file server.
Procedure
-
Edit the
/etc/samba/smb.conffile, and enable thefruitandstreams_xattrVFS modules in the[global]section:vfs objects = fruit streams_xattr
You must enable the
fruitmodule before enablingstreams_xattr. Thefruitmodule uses alternate data streams (ADS). For this reason, you must also enable thestreams_xattrmodule. -
Optionally, to provide macOS Time Machine support on a share, add the following setting to the share configuration in the
/etc/samba/smb.conffile:fruit:time machine = yes
-
Verify the
/etc/samba/smb.conffile:# testparm -
Reload the Samba configuration:
# smbcontrol all reload-config
Additional resources
-
vfs_fruit(8)man page. -
Configuring file shares:
- Setting up a Samba file share that uses POSIX ACLs
- Setting up a share that uses Windows ACLs.
1.14. Using the smbclient utility to access an SMB share
The smbclient utility enables you to access file shares on an SMB server, similarly to a command-line FTP client. You can use it, for example, to upload and download files to and from a share.
Prerequisites
-
The
samba-clientpackage is installed.
1.14.1. How the smbclient interactive mode works
For example, to authenticate to the example share hosted on server using the DOMAINuser account:
# smbclient -U "DOMAINuser" //server/example Enter domainuser's password: Try "help" to get a list of possible commands. smb: >
After smbclient connected successfully to the share, the utility enters the interactive mode and shows the following prompt:
smb: >
To display all available commands in the interactive shell, enter:
smb: > help
To display the help for a specific command, enter:
smb: > help command_name
Additional resources
-
smbclient(1)man page
1.14.2. Using smbclient in interactive mode
If you use smbclient without the -c parameter, the utility enters the interactive mode. The following procedure shows how to connect to an SMB share and download a file from a subdirectory.
Procedure
-
Connect to the share:
# smbclient -U "DOMAINuser_name" //server_name/share_name -
Change into the
/example/directory:smb: >
d /example/ -
List the files in the directory:
smb: example>
ls. D 0 Thu Nov 1 10:00:00 2018 .. D 0 Thu Nov 1 10:00:00 2018 example.txt N 1048576 Thu Nov 1 10:00:00 2018 9950208 blocks of size 1024. 8247144 blocks available -
Download the
example.txtfile:smb: example>
get example.txtgetting file directorysubdirectoryexample.txt of size 1048576 as example.txt (511975,0 KiloBytes/sec) (average 170666,7 KiloBytes/sec) -
Disconnect from the share:
smb: example>
exit
1.14.3. Using smbclient in scripting mode
If you pass the -c parameter to smbclient, you can automatically execute the commands on the remote SMB share. This enables you to use smbclient in scripts.
The following procedure shows how to connect to an SMB share and download a file from a subdirectory.
Procedure
-
Use the following command to connect to the share, change into the
exampledirectory, download theexample.txtfile:
# smbclient -U DOMAINuser_name //server_name/share_name -c "cd /example/ ; get example.txt ; exit"
1.15. Setting up Samba as a print server
If you set up Samba as a print server, clients in your network can use Samba to print. Additionally, Windows clients can, if configured, download the driver from the Samba server.
Parts of this section were adopted from the Setting up Samba as a Print Server documentation published in the Samba Wiki. License: CC BY 4.0. Authors and contributors: See the history tab on the Wiki page.
Prerequisites
Samba has been set up in one of the following modes:
- Standalone server
- Domain member
1.15.1. Enabling print server support in Samba
By default, print server support is not enabled in Samba. To use Samba as a print server, you must configure Samba accordingly.
Print jobs and printer operations require remote procedure calls (RPCs). By default, Samba starts the rpcd_spoolss service on demand to manage RPCs. During the first RPC call, or when you update the printer list in CUPS, Samba retrieves the printer information from CUPS. This can require approximately 1 second per printer. Therefore, if you have more than 50 printers, tune the rpcd_spoolss settings.
Prerequisites
-
The printers are configured in a CUPS server.
For details about configuring printers in CUPS, see the documentation provided in the CUPS web console (https://printserver:631/help) on the print server.
Procedure
-
Edit the
/etc/samba/smb.conffile:-
Add the
[printers]section to enable the printing backend in Samba:[printers] comment = All Printers path = /var/tmp/ printable = yes create mask = 0600
The
[printers]share name is hard-coded and cannot be changed. -
If the CUPS server runs on a different host or port, specify the setting in the
[printers]section:cups server = printserver.example.com:631 -
If you have many printers, set the number of idle seconds to a higher value than the numbers of printers connected to CUPS. For example, if you have 100 printers, set in the
[global]section:rpcd_spoolss:idle_seconds = 200If this setting does not scale in your environment, also increase the number of
rpcd_spoolssworkers in the[global]section:rpcd_spoolss:num_workers = 10By default,
rpcd_spoolssstarts 5 workers.
-
-
Verify the
/etc/samba/smb.conffile:# testparm -
Open the required ports and reload the firewall configuration using the
firewall-cmdutility:# firewall-cmd --permanent --add-service=samba # firewall-cmd --reload
-
Restart the
smbservice:# systemctl restart smbAfter restarting the service, Samba automatically shares all printers that are configured in the CUPS back end. If you want to manually share only specific printers, see Manually sharing specific printers.
Verification
-
Submit a print job. For example, to print a PDF file, enter:
# smbclient -Uuser //sambaserver.example.com/printer_name -c "print example.pdf"
1.15.2. Manually sharing specific printers
If you configured Samba as a print server, by default, Samba shares all printers that are configured in the CUPS back end. The following procedure explains how to share only specific printers.
Prerequisites
- Samba is set up as a print server
Procedure
-
Edit the
/etc/samba/smb.conffile:-
In the
[global]section, disable automatic printer sharing by setting:load printers = no
-
Add a section for each printer you want to share. For example, to share the printer named
examplein the CUPS back end asExample-Printerin Samba, add the following section:[Example-Printer] path = /var/tmp/ printable = yes printer name = exampleYou do not need individual spool directories for each printer. You can set the same spool directory in the
pathparameter for the printer as you set in the[printers]section.
-
-
Verify the
/etc/samba/smb.conffile:# testparm -
Reload the Samba configuration:
# smbcontrol all reload-config
1.16. Setting up automatic printer driver downloads for Windows clients on Samba print servers
If you are running a Samba print server for Windows clients, you can upload drivers and preconfigure printers. If a user connects to a printer, Windows automatically downloads and installs the driver locally on the client. The user does not require local administrator permissions for the installation. Additionally, Windows applies preconfigured driver settings, such as the number of trays.
Parts of this section were adopted from the Setting up Automatic Printer Driver Downloads for Windows Clients documentation published in the Samba Wiki. License: CC BY 4.0. Authors and contributors: See the history tab on the Wiki page.
Prerequisites
- Samba is set up as a print server
1.16.1. Basic information about printer drivers
This section provides general information about printer drivers.
Supported driver model version
Samba only supports the printer driver model version 3 which is supported in Windows 2000 and later, and Windows Server 2000 and later. Samba does not support the driver model version 4, introduced in Windows 8 and Windows Server 2012. However, these and later Windows versions also support version 3 drivers.
Package-aware drivers
Samba does not support package-aware drivers.
Preparing a printer driver for being uploaded
Before you can upload a driver to a Samba print server:
- Unpack the driver if it is provided in a compressed format.
-
Some drivers require to start a setup application that installs the driver locally on a Windows host. In certain situations, the installer extracts the individual files into the operating system’s temporary folder during the setup runs. To use the driver files for uploading:
- Start the installer.
- Copy the files from the temporary folder to a new location.
- Cancel the installation.
Ask your printer manufacturer for drivers that support uploading to a print server.
Providing 32-bit and 64-bit drivers for a printer to a client
To provide the driver for a printer for both 32-bit and 64-bit Windows clients, you must upload a driver with exactly the same name for both architectures. For example, if you are uploading the 32-bit driver named Example PostScript and the 64-bit driver named Example PostScript (v1.0), the names do not match. Consequently, you can only assign one of the drivers to a printer and the driver will not be available for both architectures.
1.16.2. Enabling users to upload and preconfigure drivers
To be able to upload and preconfigure printer drivers, a user or a group needs to have the SePrintOperatorPrivilege privilege granted. A user must be added into the printadmin group. Red Hat Enterprise Linux automatically creates this group when you install the samba package. The printadmin group gets assigned the lowest available dynamic system GID that is lower than 1000.
Procedure
-
For example, to grant the
SePrintOperatorPrivilegeprivilege to theprintadmingroup:# net rpc rights grant "printadmin" SePrintOperatorPrivilege -U "DOMAINadministrator" Enter DOMAINadministrator's password: Successfully granted rights.
In a domain environment, grant
SePrintOperatorPrivilegeto a domain group. This enables you to centrally manage the privilege by updating a user’s group membership. -
To list all users and groups having
SePrintOperatorPrivilegegranted:# net rpc rights list privileges SePrintOperatorPrivilege -U "DOMAINadministrator" Enter administrator's password: SePrintOperatorPrivilege: BUILTINAdministrators DOMAINprintadmin
1.16.3. Setting up the print$ share
Windows operating systems download printer drivers from a share named print$ from a print server. This share name is hard-coded in Windows and cannot be changed.
The following procedure explains how to share the /var/lib/samba/drivers/ directory as print$, and enable members of the local printadmin group to upload printer drivers.
Procedure
-
Add the
[print$]section to the/etc/samba/smb.conffile:[print$] path = /var/lib/samba/drivers/ read only = no write list = @printadmin force group = @printadmin create mask = 0664 directory mask = 2775Using these settings:
-
Only members of the
printadmingroup can upload printer drivers to the share. -
The group of new created files and directories will be set to
printadmin. -
The permissions of new files will be set to
664. -
The permissions of new directories will be set to
2775.
-
Only members of the
-
To upload only 64-bit drivers for all printers, include this setting in the
[global]section in the/etc/samba/smb.conffile:spoolss: architecture = Windows x64
Without this setting, Windows only displays drivers for which you have uploaded at least the 32-bit version.
-
Verify the
/etc/samba/smb.conffile:# testparm -
Reload the Samba configuration
# smbcontrol all reload-config -
Create the
printadmingroup if it does not exists:# groupadd printadmin -
Grant the
SePrintOperatorPrivilegeprivilege to theprintadmingroup.# net rpc rights grant "printadmin" SePrintOperatorPrivilege -U "DOMAINadministrator" Enter DOMAINadministrator's password: Successfully granted rights.
-
If you run SELinux in
enforcingmode, set thesamba_share_tcontext on the directory:# semanage fcontext -a -t samba_share_t "/var/lib/samba/drivers(/.)?" # *restorecon -Rv /var/lib/samba/drivers/ -
Set the permissions on the
/var/lib/samba/drivers/directory:-
If you use POSIX ACLs, set:
# chgrp -R "printadmin" /var/lib/samba/drivers/ # chmod -R 2775 /var/lib/samba/drivers/
-
If you use Windows ACLs, set:
Principal Access Apply to CREATOR OWNERFull control
Subfolders and files only
Authenticated UsersRead & execute, List folder contents, Read
This folder, subfolders, and files
printadminFull control
This folder, subfolders, and files
For details about setting ACLs on Windows, see the Windows documentation.
-
1.16.4. Creating a GPO to enable clients to trust the Samba print server
For security reasons, recent Windows operating systems prevent clients from downloading non-package-aware printer drivers from an untrusted server. If your print server is a member in an AD, you can create a Group Policy Object (GPO) in your domain to trust the Samba server.
Prerequisites
- The Samba print server is a member of an AD domain.
- The Windows computer you are using to create the GPO must have the Windows Remote Server Administration Tools (RSAT) installed. For details, see the Windows documentation.
Procedure
-
Log into a Windows computer using an account that is allowed to edit group policies, such as the AD domain
Administratoruser. -
Open the
Group Policy Management Console. -
Right-click to your AD domain and select
Create a GPO in this domain, and Link it here. -
Enter a name for the GPO, such as
Legacy Printer Driver Policyand clickOK. The new GPO will be displayed under the domain entry. -
Right-click to the newly-created GPO and select
Editto open theGroup Policy Management Editor. -
Navigate to → → → .
-
On the right side of the window, double-click
Point and Print Restrictionto edit the policy:-
Enable the policy and set the following options:
-
Select
Users can only point and print to these serversand enter the fully-qualified domain name (FQDN) of the Samba print server to the field next to this option. -
In both check boxes under
Security Prompts, selectDo not show warning or elevation prompt.
-
Select
- Click OK.
-
-
Double-click
Package Point and Print - Approved serversto edit the policy:-
Enable the policy and click the
Showbutton. -
Enter the FQDN of the Samba print server.
-
Close both the
Show Contentsand the policy’s properties window by clickingOK.
-
Enable the policy and click the
-
Close the
Group Policy Management Editor. -
Close the
Group Policy Management Console.
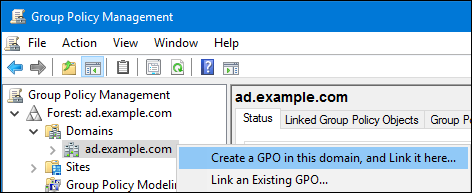


After the Windows domain members applied the group policy, printer drivers are automatically downloaded from the Samba server when a user connects to a printer.
Additional resources
- For using group policies, see the Windows documentation.
1.16.5. Uploading drivers and preconfiguring printers
Use the Print Management application on a Windows client to upload drivers and preconfigure printers hosted on the Samba print server. For further details, see the Windows documentation.
1.17. Running Samba on a server with FIPS mode enabled
This section provides an overview of the limitations of running Samba with FIPS mode enabled. It also provides the procedure for enabling FIPS mode on a Red Hat Enterprise Linux host running Samba.
1.17.1. Limitations of using Samba in FIPS mode
The following Samba modes and features work in FIPS mode under the indicated conditions:
- Samba as a domain member only in Active Directory (AD) or Red Hat Identity Management (IdM) environments with Kerberos authentication that uses AES ciphers.
- Samba as a file server on an Active Directory domain member. However, this requires that clients use Kerberos to authenticate to the server.
Due to the increased security of FIPS, the following Samba features and modes do not work if FIPS mode is enabled:
- NT LAN Manager (NTLM) authentication because RC4 ciphers are blocked
- The server message block version 1 (SMB1) protocol
- The stand-alone file server mode because it uses NTLM authentication
- NT4-style domain controllers
- NT4-style domain members. Note that Red Hat continues supporting the primary domain controller (PDC) functionality IdM uses in the background.
- Password changes against the Samba server. You can only perform password changes using Kerberos against an Active Directory domain controller.
The following feature is not tested in FIPS mode and, therefore, is not supported by Red Hat:
- Running Samba as a print server
1.17.2. Using Samba in FIPS mode
This section describes how to enable the FIPS mode on a RHEL host that runs Samba.
Prerequisites
- Samba is configured on the Red Hat Enterprise Linux host.
- Samba runs in a mode that is supported in FIPS mode.
Procedure
-
Enable the FIPS mode on RHEL:
# fips-mode-setup --enable -
Reboot the server:
# reboot -
Use the
testparmutility to verify the configuration:# testparm -sIf the command displays any errors or incompatibilities, fix them to ensure that Samba works correctly.
1.18. Tuning the performance of a Samba server
This chapter describes what settings can improve the performance of Samba in certain situations, and which settings can have a negative performance impact.
Parts of this section were adopted from the Performance Tuning documentation published in the Samba Wiki. License: CC BY 4.0. Authors and contributors: See the history tab on the Wiki page.
Prerequisites
- Samba is set up as a file or print server
1.18.1. Setting the SMB protocol version
Each new SMB version adds features and improves the performance of the protocol. The recent Windows and Windows Server operating systems always supports the latest protocol version. If Samba also uses the latest protocol version, Windows clients connecting to Samba benefit from the performance improvements. In Samba, the default value of the server max protocol is set to the latest supported stable SMB protocol version.
To always have the latest stable SMB protocol version enabled, do not set the server max protocol parameter. If you set the parameter manually, you will need to modify the setting with each new version of the SMB protocol, to have the latest protocol version enabled.
The following procedure explains how to use the default value in the server max protocol parameter.
Procedure
-
Remove the
server max protocolparameter from the[global]section in the/etc/samba/smb.conffile. -
Reload the Samba configuration
# smbcontrol all reload-config
1.18.2. Tuning shares with directories that contain a large number of files
Linux supports case-sensitive file names. For this reason, Samba needs to scan directories for uppercase and lowercase file names when searching or accessing a file. You can configure a share to create new files only in lowercase or uppercase, which improves the performance.
Prerequisites
- Samba is configured as a file server
Procedure
-
Rename all files on the share to lowercase.
Using the settings in this procedure, files with names other than in lowercase will no longer be displayed.
-
Set the following parameters in the share’s section:
case sensitive = true default case = lower preserve case = no short preserve case = no
For details about the parameters, see their descriptions in the
smb.conf(5)man page. -
Verify the
/etc/samba/smb.conffile:# testparm -
Reload the Samba configuration:
# smbcontrol all reload-config
After you applied these settings, the names of all newly created files on this share use lowercase. Because of these settings, Samba no longer needs to scan the directory for uppercase and lowercase, which improves the performance.
1.18.3. Settings that can have a negative performance impact
By default, the kernel in Red Hat Enterprise Linux is tuned for high network performance. For example, the kernel uses an auto-tuning mechanism for buffer sizes. Setting the socket options parameter in the /etc/samba/smb.conf file overrides these kernel settings. As a result, setting this parameter decreases the Samba network performance in most cases.
To use the optimized settings from the Kernel, remove the socket options parameter from the [global] section in the /etc/samba/smb.conf.
1.19. Configuring Samba to be compatible with clients that require an SMB version lower than the default
Samba uses a reasonable and secure default value for the minimum server message block (SMB) version it supports. However, if you have clients that require an older SMB version, you can configure Samba to support it.
1.19.1. Setting the minimum SMB protocol version supported by a Samba server
In Samba, the server min protocol parameter in the /etc/samba/smb.conf file defines the minimum server message block (SMB) protocol version the Samba server supports. This section describes how to change the minimum SMB protocol version.
By default, Samba on RHEL 8.2 and later supports only SMB2 and newer protocol versions. Red Hat recommends to not use the deprecated SMB1 protocol. However, if your environment requires SMB1, you can manually set the server min protocol parameter to NT1 to re-enable SMB1.
Prerequisites
- Samba is installed and configured.
Procedure
-
Edit the
/etc/samba/smb.conffile, add theserver min protocolparameter, and set the parameter to the minimum SMB protocol version the server should support. For example, to set the minimum SMB protocol version toSMB3, add:server min protocol = SMB3
-
Restart the
smbservice:# systemctl restart smb
Additional resources
-
smb.conf(5)man page
1.20. Frequently used Samba command-line utilities
This chapter describes frequently used commands when working with a Samba server.
1.20.1. Using the net ads join and net rpc join commands
Using the join subcommand of the net utility, you can join Samba to an AD or NT4 domain. To join the domain, you must create the /etc/samba/smb.conf file manually, and optionally update additional configurations, such as PAM.
Red Hat recommends using the realm utility to join a domain. The realm utility automatically updates all involved configuration files.
Procedure
-
Manually create the
/etc/samba/smb.conffile with the following settings:-
For an AD domain member:
[global] workgroup = domain_name security = ads passdb backend = tdbsam realm = AD_REALM
-
For an NT4 domain member:
[global] workgroup = domain_name security = user passdb backend = tdbsam
-
-
Add an ID mapping configuration for the
*default domain and for the domain you want to join to the[global] section in the/etc/samba/smb.conffile. -
Verify the
/etc/samba/smb.conffile:# testparm -
Join the domain as the domain administrator:
-
To join an AD domain:
# net ads join -U "DOMAINadministrator" -
To join an NT4 domain:
# net rpc join -U "DOMAINadministrator"
-
-
Append the
winbindsource to thepasswdandgroupdatabase entry in the/etc/nsswitch.conffile:passwd: files
winbindgroup: fileswinbind -
Enable and start the
winbindservice:# systemctl enable --now winbind -
Optionally, configure PAM using the
authselectutility.For details, see the
authselect(8)man page. -
Optionally for AD environments, configure the Kerberos client.
For details, see the documentation of your Kerberos client.
1.20.2. Using the net rpc rights command
In Windows, you can assign privileges to accounts and groups to perform special operations, such as setting ACLs on a share or upload printer drivers. On a Samba server, you can use the net rpc rights command to manage privileges.
Listing privileges you can set
To list all available privileges and their owners, use the net rpc rights list command. For example:
# net rpc rights list -U "DOMAINadministrator" Enter DOMAINadministrator's password: SeMachineAccountPrivilege Add machines to domain SeTakeOwnershipPrivilege Take ownership of files or other objects SeBackupPrivilege Back up files and directories SeRestorePrivilege Restore files and directories SeRemoteShutdownPrivilege Force shutdown from a remote system SePrintOperatorPrivilege Manage printers SeAddUsersPrivilege Add users and groups to the domain SeDiskOperatorPrivilege Manage disk shares SeSecurityPrivilege System security
Granting privileges
To grant a privilege to an account or group, use the net rpc rights grant command.
For example, grant the SePrintOperatorPrivilege privilege to the DOMAINprintadmin group:
# net rpc rights grant "DOMAINprintadmin" SePrintOperatorPrivilege -U "DOMAINadministrator" Enter DOMAINadministrator's password: Successfully granted rights.
Revoking privileges
To revoke a privilege from an account or group, use the net rpc rights revoke command.
For example, to revoke the SePrintOperatorPrivilege privilege from the DOMAINprintadmin group:
# net rpc rights remoke "DOMAINprintadmin" SePrintOperatorPrivilege -U "DOMAINadministrator" Enter DOMAINadministrator's password: Successfully revoked rights.
1.20.3. Using the net rpc share command
The net rpc share command provides the capability to list, add, and remove shares on a local or remote Samba or Windows server.
Listing shares
To list the shares on an SMB server, use the net rpc share list command. Optionally, pass the -S server_name parameter to the command to list the shares of a remote server. For example:
# net rpc share list -U "DOMAINadministrator" -S server_name Enter DOMAINadministrator's password: IPC$ share_1 share_2 ...
Shares hosted on a Samba server that have browseable = no set in their section in the /etc/samba/smb.conf file are not displayed in the output.
The net rpc share add command enables you to add a share to an SMB server.
For example, to add a share named example on a remote Windows server that shares the C:example directory:
# net rpc share add example="C:example" -U "DOMAINadministrator" -S server_name
You must omit the trailing backslash in the path when specifying a Windows directory name.
To use the command to add a share to a Samba server:
-
The user specified in the
-Uparameter must have theSeDiskOperatorPrivilegeprivilege granted on the destination server. -
You must write a script that adds a share section to the
/etc/samba/smb.conffile and reloads Samba. The script must be set in theadd share commandparameter in the[global]section in/etc/samba/smb.conf. For further details, see theadd share commanddescription in thesmb.conf(5)man page.
The net rpc share delete command enables you to remove a share from an SMB server.
For example, to remove the share named example from a remote Windows server:
# net rpc share delete example -U "DOMAINadministrator" -S server_name
To use the command to remove a share from a Samba server:
-
The user specified in the
-Uparameter must have theSeDiskOperatorPrivilegeprivilege granted. -
You must write a script that removes the share’s section from the
/etc/samba/smb.conffile and reloads Samba. The script must be set in thedelete share commandparameter in the[global]section in/etc/samba/smb.conf. For further details, see thedelete share commanddescription in thesmb.conf(5)man page.
1.20.4. Using the net user command
The net user command enables you to perform the following actions on an AD DC or NT4 PDC:
- List all user accounts
- Add users
- Remove Users
Specifying a connection method, such as ads for AD domains or rpc for NT4 domains, is only required when you list domain user accounts. Other user-related subcommands can auto-detect the connection method.
Pass the -U user_name parameter to the command to specify a user that is allowed to perform the requested action.
Listing domain user accounts
To list all users in an AD domain:
# net ads user -U "DOMAINadministrator"
To list all users in an NT4 domain:
# net rpc user -U "DOMAINadministrator"
Adding a user account to the domain
On a Samba domain member, you can use the net user add command to add a user account to the domain.
For example, add the user account to the domain:
-
Add the account:
# net user add user password -U "DOMAINadministrator" User user added
-
Optionally, use the remote procedure call (RPC) shell to enable the account on the AD DC or NT4 PDC. For example:
# net rpc shell -U DOMAINadministrator -S DC_or_PDC_name Talking to domain DOMAIN (S-1-5-21-1424831554-512457234-5642315751) net rpc>
user edit disabled user: noSet user's disabled flag from [yes] to [no] net rpc>exit
Deleting a user account from the domain
On a Samba domain member, you can use the net user delete command to remove a user account from the domain.
For example, to remove the user account from the domain:
# net user delete user -U "DOMAINadministrator" User user deleted
1.20.5. Using the rpcclient utility
The rpcclient utility enables you to manually execute client-side Microsoft Remote Procedure Call (MS-RPC) functions on a local or remote SMB server. However, most of the features are integrated into separate utilities provided by Samba. Use rpcclient only for testing MS-PRC functions.
Prerequisites
-
The
samba-clientpackage is installed.
Examples
For example, you can use the rpcclient utility to:
-
Manage the printer Spool Subsystem (SPOOLSS).
Example 1.7. Assigning a Driver to a Printer
# rpcclient server_name -U "DOMAINadministrator" -c 'setdriver "printer_name" "driver_name"' Enter DOMAINadministrators password: Successfully set printer_name to driver driver_name.
-
Retrieve information about an SMB server.
Example 1.8. Listing all File Shares and Shared Printers
# rpcclient server_name -U "DOMAINadministrator" -c 'netshareenum' Enter DOMAINadministrators password: netname: Example_Share remark: path: C:srvsambaexample_share password: netname: Example_Printer remark: path: C:varspoolsamba password:
-
Perform actions using the Security Account Manager Remote (SAMR) protocol.
Example 1.9. Listing Users on an SMB Server
# rpcclient server_name -U "DOMAINadministrator" -c 'enumdomusers' Enter DOMAINadministrators password: user:[user1] rid:[0x3e8] user:[user2] rid:[0x3e9]
If you run the command against a standalone server or a domain member, it lists the users in the local database. Running the command against an AD DC or NT4 PDC lists the domain users.
Additional resources
-
rpcclient(1)man page
1.20.6. Using the samba-regedit application
Certain settings, such as printer configurations, are stored in the registry on the Samba server. You can use the ncurses-based samba-regedit application to edit the registry of a Samba server.

Prerequisites
-
The
samba-clientpackage is installed.
Procedure
To start the application, enter:
# samba-regedit
Use the following keys:
- Cursor up and cursor down: Navigate through the registry tree and the values.
- Enter: Opens a key or edits a value.
-
Tab: Switches between the
KeyandValuepane. - Ctrl+C: Closes the application.
1.20.7. Using the smbcontrol utility
The smbcontrol utility enables you to send command messages to the smbd, nmbd, winbindd, or all of these services. These control messages instruct the service, for example, to reload its configuration.
The procedure in this section shows how to to reload the configuration of the smbd, nmbd, winbindd services by sending the reload-config message type to the all destination.
Prerequisites
-
The
samba-common-toolspackage is installed.
Procedure
# smbcontrol all reload-config
Additional resources
-
smbcontrol(1)man page
1.20.8. Using the smbpasswd utility
The smbpasswd utility manages user accounts and passwords in the local Samba database.
Prerequisites
-
The
samba-common-toolspackage is installed.
Procedure
-
If you run the command as a user,
smbpasswdchanges the Samba password of the user who run the command. For example:[user@server ~]$ smbpasswd New SMB password: password Retype new SMB password: password
-
If you run
smbpasswdas therootuser, you can use the utility, for example, to:-
Create a new user:
[root@server ~]# smbpasswd -a user_name New SMB password:
passwordRetype new SMB password:passwordAdded user user_name.Before you can add a user to the Samba database, you must create the account in the local operating system. See the Adding a new user from the command line section in the Configuring basic system settings guide.
-
Enable a Samba user:
[root@server ~]# smbpasswd -e user_name Enabled user user_name.
-
Disable a Samba user:
[root@server ~]# smbpasswd -x user_name Disabled user user_name
-
Delete a user:
[root@server ~]# smbpasswd -x user_name Deleted user user_name.
-
Additional resources
-
smbpasswd(8)man page
1.20.9. Using the smbstatus utility
The smbstatus utility reports on:
-
Connections per PID of each
smbddaemon to the Samba server. This report includes the user name, primary group, SMB protocol version, encryption, and signing information. -
Connections per Samba share. This report includes the PID of the
smbddaemon, the IP of the connecting machine, the time stamp when the connection was established, encryption, and signing information. - A list of locked files. The report entries include further details, such as opportunistic lock (oplock) types
Prerequisites
-
The
sambapackage is installed. -
The
smbdservice is running.
Procedure
# smbstatus Samba version 4.15.2 PID Username Group Machine Protocol Version Encryption Signing ....------------------------------------------------------------------------------------------------------------------------- 963 DOMAINadministrator DOMAINdomain users client-pc (ipv4:192.0.2.1:57786) SMB3_02 - AES-128-CMAC Service pid Machine Connected at Encryption Signing: ....--------------------------------------------------------------------------- example 969 192.0.2.1 Thu Nov 1 10:00:00 2018 CEST - AES-128-CMAC Locked files: Pid Uid DenyMode Access R/W Oplock SharePath Name Time ....-------------------------------------------------------------------------------------------------------- 969 10000 DENY_WRITE 0x120089 RDONLY LEASE(RWH) /srv/samba/example file.txt Thu Nov 1 10:00:00 2018
Additional resources
-
smbstatus(1)man page
1.20.10. Using the smbtar utility
The smbtar utility backs up the content of an SMB share or a subdirectory of it and stores the content in a tar archive. Alternatively, you can write the content to a tape device.
Prerequisites
-
The
samba-clientpackage is installed.
Procedure
-
Use the following command to back up the content of the
demodirectory on the//server/example/share and store the content in the/root/example.tararchive:# smbtar -s server -x example -u user_name -p password -t /root/example.tar
Additional resources
-
smbtar(1)man page
1.20.11. Using the wbinfo utility
The wbinfo utility queries and returns information created and used by the winbindd service.
Prerequisites
-
The
samba-winbind-clientspackage is installed.
Procedure
You can use wbinfo, for example, to:
-
List domain users:
# wbinfo -u ADadministrator ADguest ... -
List domain groups:
# wbinfo -g ADdomain computers ADdomain admins ADdomain users ... -
Display the SID of a user:
# wbinfo --name-to-sid="ADadministrator" S-1-5-21-1762709870-351891212-3141221786-500 SID_USER (1)
-
Display information about domains and trusts:
# wbinfo --trusted-domains --verbose Domain Name DNS Domain Trust Type Transitive In Out BUILTIN None Yes Yes Yes server None Yes Yes Yes DOMAIN1 domain1.example.com None Yes Yes Yes DOMAIN2 domain2.example.com External No Yes Yes
Additional resources
-
wbinfo(1)man page
1.21. Additional resources
-
smb.conf(5)man page -
/usr/share/docs/samba-version/directory contains general documentation, example scripts, and LDAP schema files, provided by the Samba project - Setting up Samba and the Clustered Trivial Database (CDTB) to share directories stored on an GlusterFS volume
- Mounting an SMB Share on Red Hat Enterprise Linux
Предпосылки
До Samba v 4.6.0:
ad бэкэнд поддерживает два режима параметра winbind nss info в разделе файла smb.conf:
-
winbind nss info = rfc2307: из Active Directory (AD) считывается вся информация:
- Пользователи: Имя пользователя, UID, login shell, путь домашнего каталога и основная группа.
- Группы: Имя групп и их GID.
-
winbind nss info = template: из Active Directory (AD) считываются только следующие значения:
- Пользователи: Имя пользователя, UID и основная группа.Login shell и домашний каталог автоматически настраиваются из независимых от пользователя настроек из файла smb.conf.
- Группы: Имя групп и их GID.
security = ADS workgroup = SAMDOM realm = SAMDOM.EXAMPLE.COM log file = /var/log/samba/%m.log log level = 1 winbind nss info = rfc2307 idmap config * : backend = tdb idmap config * : range = 3000-7999 idmap config SAMDOM:backend = ad idmap config SAMDOM:schema_mode = rfc2307 idmap config SAMDOM:range = 10000-999999 vfs objects = acl_xattr map acl inherit = yes store dos attributes = yes
После Samba v 4.6.0:
Параметры:
range = low — high
schema_mode = — Определяет доступные совпадающие диапазоны UID и GID, для которых серверная часть является доверенной
Обратите внимание, что диапазон действует как фильтр. Если указан любой UID или GID, хранящийся в AD, который выходит за пределы диапазона, то он игнорируется, а соответствующая карта отбрасывается
Он предназначен для того, чтобы избежать случайных совпадений UID / GID между локальными и удаленно определенными идентификаторами.
unix_primary_group = yes/no — Определяет, выбирается ли основная группа пользователя из атрибутов SFU или основной группы AD. Если установлено значение yes, членство в основной группе выбирается из атрибутов LDAP (gidNumber). Если установлено значение no, членство в первичной группе рассчитывается с помощью атрибута LDAP «primaryGroupID».
По умолчанию: no
unix_nss_info = yes/no — Если установлено значение yes, winbind будет извлекать оболочку входа и домашний каталог из атрибутов LDAP. Если задано значение no или в записи AD LDAP отсутствуют атрибуты SFU, используются параметры шаблона оболочки и шаблон homedir.
security = ADS workgroup = SAMDOM realm = SAMDOM.EXAMPLE.COM log file = /var/log/samba/%m.log log level = 1 idmap config * : backend = tdb idmap config * : range = 3000-7999 idmap config SAMDOM:backend = ad idmap config SAMDOM:schema_mode = rfc2307 idmap config SAMDOM:range = 10000-999999 idmap config SAMDOM:unix_nss_info = yes vfs objects = acl_xattr map acl inherit = yes store dos attributes = yes
Сохраните файл и перезагрузите настройки Samba:
# smbcontrol all reload-config
USERSHARES
Starting with Samba version 3.0.23 the capability for non-root users to add, modify, and delete
their own share definitions has been added. This capability is called usershares and
is controlled by a set of parameters in the section of the smb.conf.
The relevant parameters are :
- usershare allow guests
-
Controls if usershares can permit guest access.
- usershare max shares
-
Maximum number of user defined shares allowed.
- usershare owner only
-
If set only directories owned by the sharing user can be shared.
- usershare path
-
Points to the directory containing the user defined share definitions.
The filesystem permissions on this directory control who can create user defined shares. - usershare prefix allow list
-
Comma-separated list of absolute pathnames restricting what directories
can be shared. Only directories below the pathnames in this list are permitted. - usershare prefix deny list
-
Comma-separated list of absolute pathnames restricting what directories
can be shared. Directories below the pathnames in this list are prohibited. - usershare template share
-
Names a pre-existing share used as a template for creating new usershares.
All other share parameters not specified in the user defined share definition
are copied from this named share.
To allow members of the UNIX group to create user defined
shares, create the directory to contain the share definitions as follows:
Become root:
mkdir /usr/local/samba/lib/usershares chgrp foo /usr/local/samba/lib/usershares chmod 1770 /usr/local/samba/lib/usershares
Then add the parameters
# (or the desired number of shares)
to the global
section of your . Members of the group foo may then manipulate the user defined shares
using the following commands.
Testing
You can check that the Domain has successfully been joined by:
wbinfo -u
You should get a list of the users of the domain.
I needed to make shadow: compat winbind in /etc/nsswitch.conf to make wbinfo -u work.
And a list of the groups. Be patient these queries can take time.
wbinfo -g
Check Winbind nsswitch module with getent.
This step may or may not work. If you only see local users, try connecting with a Windows machine anyways. (Tested under Ubuntu 9.10 x64)
sudo getent passwd root:x:0:0:root:/root:/bin/bash ... LAB+administrator:x:10000:10000:Administrator:/home/LAB/administrator:/bin/bash LAB+gast:x:10001:10001:Gast:/home/LAB/gast:/bin/bash ...
Note that the domain name (here, «LAB+») is displayed by getent only if you have not set winbind use default domain = yes in smb.conf.
sudo getent group root:x:0: daemon:x:1: bin:x:2: ... LAB+organisations-admins:x:10005:administrator LAB+domänen-admins:x:10006:manuel,administrator LAB+domänen-benutzer:x:10000: LAB+domänen-gäste:x:10001: LAB+linux-admins:x:10004:manuel ...
EXAMPLES
The following example shows how an ldap directory is used as the default idmap backend. It also configures the idmap range and base directory suffix. The secret for the ldap_user_dn has to be set with «net idmap secret ‘*’ password».
-
idmap config * : backend = ldap idmap config * : range = 1000000-1999999 idmap config * : ldap_url = ldap://localhost/ idmap config * : ldap_base_dn = ou=idmap,dc=example,dc=com idmap config * : ldap_user_dn = cn=idmap_admin,dc=example,dc=com
This example shows how ldap can be used as a readonly backend while tdb is the default backend used to store the mappings. It adds an explicit configuration for some domain DOM1, that uses the ldap idmap backend. Note that a range disjoint from the default range is used.
-
# "backend = tdb" is redundant here since it is the default idmap config * : backend = tdb idmap config * : range = 1000000-1999999 idmap config DOM1 : backend = ldap idmap config DOM1 : range = 2000000-2999999 idmap config DOM1 : read only = yes idmap config DOM1 : ldap_url = ldap://server/ idmap config DOM1 : ldap_base_dn = ou=idmap,dc=dom1,dc=example,dc=com idmap config DOM1 : ldap_user_dn = cn=idmap_admin,dc=dom1,dc=example,dc=com
Преимущества и недостатки бэк-энда ad
Преимущества:
- Центральное администрирование идентификаторов внутри Active Directory (AD).
- Согласованные идентификаторы на всех клиентах и серверах Samba, использующих серверную часть ad.
- Требуемые атрибуты нужно создавать только один раз, это можно сделать при создании пользователя или группы.
- Идентификаторы кэшируются только локально, они хранятся в базе данных AD на контроллерах домена. Это означает, что в случае повреждения локального кэша владение файлами не теряется.
Недостатки:
- Если программа Windows Active Directory Users and Computers(ADUC) не используется, необходимо вручную отслеживать значения идентификаторов, чтобы избежать дублирования.
- Значения атрибутов RFC2307 не создаются автоматически, их необходимо добавлять вручную.
Особенности режима информации Winbind NSS:
- rfc2307: Индивидуальные логины и пути к домашним каталогам для пользователей.
- template: Оболочки входа и базовые пути к домашним каталогам одинаковы для всех пользователей.
DESCRIPTION
The idmap_ad plugin provides a way for Winbind to read id mappings from an AD server that uses RFC2307/SFU schema extensions. This module implements only the «idmap» API, and is READONLY. Mappings must be provided in advance by the administrator by adding the uidNumber attributes for users and gidNumber attributes for groups in the AD. Winbind will only map users that have a uidNumber and whose primary group have a gidNumber attribute set. It is however recommended that all groups in use have gidNumber attributes assigned, otherwise they are not working.
Currently, the
ad
backend does not work as the default idmap backend, but one has to configure it separately for each domain for which one wants to use it, using disjoint ranges. One usually needs to configure a writeable default idmap range, using for example the
tdb
or
ldap
backend, in order to be able to map the BUILTIN sids and possibly other trusted domains. The writeable default config is also needed in order to be able to create group mappings. This catch-all default idmap configuration should have a range that is disjoint from any explicitly configured domain with idmap backend
ad. See the example below.
Performing manual LDAP query
It is often useful to run the same query as SSSD manually with
tool. Look for function named
to aquire the search base and filter
that SSSD used against an LDAP server and to
see what server did it connect to. The messages are in form of:
(0x2000): Searching $ip:$port (0x0400): calling ldap_search_ext with
Anonymous bind (no authentication)
ldapsearch -x -H ldap://$ip:$port -b $search-base '$filter'
Simple bind (authentication with credentials)
ldapsearch -x -D "cn=Directory Manager" -w "$password" -H ldap://$ip:$port -b $search-base '$filter'
GSSAPI (authentication through Kerberos)
One last thing
If you want to be able to use an active directory account to manage your Ubuntu box, you need to add it to the sudoers file. For that, you will need to edit the file /etc/group an add your username to the admin group and whatever other group you need(plugdev,audio,cdrom just to mention a few). it will be like:
....... admin:x:117:olduser,ActiveDirectoryUser .......
Where, olduser, is your current linux user and, ActiveDirectoryUser, is the new administrator. Another way to make a Domain Group a sudoer in your ubuntu is to edit the file /etc/sudoers (using the command ‘visudo’) and add the following line
%adgroup ALL=(ALL) ALL
Where, adgroup, is a group from your active directory. Keep in mind that spaces in the group name are not allowed. You can use ‘%domain admins’, without quotes.
Samba Domain Members
ID Mapping Configuration Verification
4.6.0 or later
Previously, Samba did not verified the ID mapping configuration in the file on a domain member. Thus, an incorrect ID mapping configuration could be set, such as overlapping ID ranges or incorrect back ends for the default domain. Consequently, the service started and ID mapping failed or did not work as expected. The utility has been enhanced and now reports incorrect ID mapping configurations. For example:
ERROR: The idmap range for the domain * (tdb) overlaps with the range of SAMDOM (ad)!
ERROR: Do not use the 'ad' backend as the default idmap backend!
Additionally, when using an incorrect ID mapping configuration, the service now fails to start and an error message is logged. For example:
[2017/03/01 12:00:00.000000, 0, pid=980] ../source3/winbindd/winbindd.c:1705(main) main: FATAL: Invalid idmap backend ad configured as the default backend!
Using Samba 4.6.0 and later, users are no longer able to use incorrect ID mapping configurations.
For further details, supported back ends on a domain member, and their configuration, see:
- Identity Mapping Back Ends
- the section in the man page
The ID Mapping Back End Now Supports Enabling RFC2307 or Template Mode Per-domain
4.6.0 or later
Previously, when the parameter was set to , the Samba ID mapping back end retrieved shell and home directory settings for all Active Directory (AD) domains from AD. In Samba 4.6.0, the new parameter has been added. This parameter enables the administrator to set on a per-AD domain basis if the shell and home directory settings of users should be retrieved from AD or if the template settings, set in the and parameters are applied.
The new parameter has a higher priority than the global setting. Therefore, using the default setting for an AD domain, the shell and home directory are no longer retrieved from AD and the values set in the and parameters are applied. To re-enable retrieving the values from AD for a domain, set in the section in your file:
idmap config domain_name:unix_nss_info = yes
REGISTRY-BASED CONFIGURATION
Starting with Samba version 3.2.0, the capability to
store Samba configuration in the registry is available.
The configuration is stored in the registry key
.
There are two levels of registry configuration:
-
Share definitions stored in registry are used.
This is triggered by setting the global
parameter
to “yes” in smb.conf.The registry shares are loaded not at startup but
on demand at runtime by smbd.
Shares defined in smb.conf take
priority over shares of the same name defined in
registry. -
Global smb.conf
options stored in registry are used. This can be activated
in two different ways:Firstly, a registry only configuration is triggered
by settingin the section of smb.conf.
This resets everything that has been read from config files
to this point and reads the content of the global configuration
section from the registry.
This is the recommended method of using registry based
configuration.Secondly, a mixed configuration can be activated
by a special new meaning of the parameterin the section of smb.conf.
This reads the global options from registry with the same
priorities as for an include of a text file.
This may be especially useful in cases where an initial
configuration is needed to access the registry.Activation of global registry options automatically
activates registry shares. So in the registry only case,
shares are loaded on demand only.
Note: To make registry-based configurations foolproof
at least to a certain extent, the use
of and
inside the registry configuration has been disabled:
Especially by changing the
inside the registry
configuration, one would create a broken setup where the daemons
do not see the configuration they loaded once it is active.
SECTION DESCRIPTIONS
Each section in the configuration file (except for the section) describes a shared resource (known as
a “share”). The section name is the name of the shared resource and the parameters within the
section define the shares attributes.
There are three special sections, , and , which are described under
special sections. The following notes apply to ordinary section descriptions.
A share consists of a directory to which access is being given plus a description of the access rights
which are granted to the user of the service. Some housekeeping options are also specifiable.
Sections are either file share services (used by the client as an extension of their native file systems)
or printable services (used by the client to access print services on the host running the server).
Sections may be designated guest services, in which case no password is required to
access them. A specified UNIX guest account is used to define access privileges in this
case.
Sections other than guest services will require a password to access them. The client provides the
username. As older clients only provide passwords and not usernames, you may specify a list of usernames to
check against the password using the option in the share definition. For modern clients
such as Windows 95/98/ME/NT/2000, this should not be necessary.
The access rights granted by the server are masked by the access rights granted to the specified or guest
UNIX user by the host system. The server does not grant more access than the host system grants.
The following sample section defines a file space share. The user has write access to the path . The share is accessed via the share name :
The following sample section defines a printable share. The share is read-only, but printable. That is,
the only write access permitted is via calls to open, write to and close a spool file. The guest
ok parameter means access will be permitted as the default guest user (specified elsewhere):
VARIABLE SUBSTITUTIONS
Many of the strings that are settable in the config file can take substitutions. For example the option
“path = /tmp/%u” is interpreted as “path = /tmp/john” if the user connected with the
username john.
These substitutions are mostly noted in the descriptions below, but there are some general substitutions
which apply whenever they might be relevant. These are:
- %U
-
session username (the username that the client wanted, not
necessarily the same as the one they got). - %G
-
primary group name of %U.
- %h
-
the Internet hostname that Samba is running on.
- %m
-
the NetBIOS name of the client machine (very useful).
This parameter is not available when Samba listens on port 445, as clients no longer
send this information. If you use this macro in an include statement on a domain that has
a Samba domain controller be sure to set in the section . This will cause Samba to not listen on port 445 and will permit include
functionality to function as it did with Samba 2.x. - %L
-
the NetBIOS name of the server. This allows you to change your config based on what
the client calls you. Your server can have a “dual personality”. - %M
-
the Internet name of the client machine.
- %R
-
the selected protocol level after protocol negotiation. It can be one of
CORE, COREPLUS, LANMAN1, LANMAN2, NT1,
SMB2_02, SMB2_10, SMB2_22, SMB2_24,
SMB3_00, SMB3_02, SMB3_10, SMB3_11
or SMB2_FF. - %d
-
the process id of the current server
process. - %a
-
The architecture of the remote
machine. It currently recognizes Samba (),
the Linux CIFS file system (), OS/2, (),
Mac OS X (), Windows for Workgroups (), Windows 9x/ME
(), Windows NT (),
Windows 2000 (),
Windows XP (),
Windows XP 64-bit(),
Windows 2003 including
2003R2 (), and Windows
Vista (). Anything else will be known as
. - %I
-
the IP address of the client machine.
Before 4.0.0 it could contain IPv4 mapped IPv6 addresses,
now it only contains IPv4 or IPv6 addresses. - %J
-
the IP address of the client machine,
colons/dots replaced by underscores. - %i
-
the local IP address to which a client connected.
Before 4.0.0 it could contain IPv4 mapped IPv6 addresses,
now it only contains IPv4 or IPv6 addresses. - %j
-
the local IP address to which a client connected,
colons/dots replaced by underscores. - %T
-
the current date and time.
- %t
-
the current date and time in a minimal format without colons (YYYYYmmdd_HHMMSS).
- %D
-
name of the domain or workgroup of the current user.
- %w
-
the winbind separator.
- %$()
-
the value of the environment variable
.
The following substitutes apply only to some configuration options (only those that are
used when a connection has been established):
- %S
-
the name of the current service, if any.
- %P
-
the root directory of the current service, if any.
- %u
-
username of the current service, if any.
- %g
-
primary group name of %u.
- %H
-
the home directory of the user given by %u.
- %N
-
the name of your NIS home directory server. This is obtained from your NIS auto.map entry.
If you have not compiled Samba with the —with-automount option, this
value will be the same as %L. - %p
-
the path of the service’s home directory, obtained from your NIS auto.map entry. The NIS
auto.map entry is split up as .
Asking for help
If you did not have any luck with debugging the issue yourself you
can reach us through
sssd-users
mailing list or #sssd channel on
freenode.net IRC.
It would be great if you can also provide all the information that you
have found so far to speed things up. Such as:
- Description of the issue
- What do you expect that should happen
- What did you see in the logs
- All SSSD logs with debug level set to (please always
include whole log files, not only snippets) - Version of SSSD an what server do you use
- Other information depending on the area of investigation
- expected group membership
- domains relationships
- HBAC rules
- Other access control settings
- And everything that comes to your mind that you think may be
helpful
HOW CONFIGURATION CHANGES ARE APPLIED
The Samba suite includes a number of different programs. Some of them operate in a client mode, others are
server daemons that provide various services to its clients. The file is processed in the following way:
-
The Samba suite’s client applications read their configuration only once. Any changes made after start aren’t
reflected in the context of already running client code. -
The Samba suite’s server daemons reload their configuration when requested. However, already active connections
do not change their configuration. More detailed information can be found in
smbd(8) and winbindd(8) manual pages.
PARAMETERS
Parameters define the specific attributes of sections.
Some parameters are specific to the section (e.g., security). Some parameters
are usable in all sections (e.g., create mask). All others are permissible only in normal
sections. For the purposes of the following descriptions the and sections will be
considered normal. The letter G in parentheses indicates that a parameter is specific to
the section. The letter S indicates that a parameter can be specified in a
service specific section. All S parameters can also be specified in the section
— in which case they will define the default behavior for all services.
PAM
With this configuration you can access the workstation with local accounts or with domain accounts. On the first login of a domain user a home directory will be created. This PAM configuration assumes that the system will be used primarily with domain accounts. If the opposite is true (i.e., the system will be used primarily with local accounts), the order of pam_winbind.so and pam_unix.so should be reversed. When used with local accounts, the configuration shown here will result in a failed authentication to the Windows/Samba DC for each login and sudo use. This can litter the DC’s event log. Likewise, if local accounts are checked first, the /var/log/auth.log will be littered with failed logon attempts each time a domain account is accessed.
Note: You can use pam-auth-update to add the necessary entries for winbind authentication. If you installed libpam-winbind above, this step is all you need to do to configure pam. You may want to add the line to automatically create the home directory.
sudo pam-auth-update
This PAM configuration does not acquire a Kerberos TGT at login. To acquire a ticket, use kinit after logging in, and consider using kdestroy in a logout script.
file: /etc/pam.d/common-account
account sufficient pam_winbind.so account required pam_unix.so
file: /etc/pam.d/common-auth
auth sufficient pam_winbind.so auth sufficient pam_unix.so nullok_secure use_first_pass auth required pam_deny.so
On a Ubuntu 7.10 (Gutsy Gibbon) and 9.04 (Jaunty Jackalope) systems, these changes to pam.d/common-auth result in not being able to log in as a local user, for example by ssh. Your luck may be better, but test immediately just in case.
This one allows login for AD users and local users (tested with Ubuntu 9.10)
file: /etc/pam.d/common-auth
auth sufficient pam_unix.so nullok_secure auth sufficient pam_winbind.so require_membership_of=domänen-admins use_first_pass auth requisite pam_deny.so auth required pam_permit.so auth optional pam_ecryptfs.so unwrap
ecryptfs does not work with AD users. Login is successful with local users and AD users which are members of AD group domänen-admins
file: /etc/pam.d/common-session
session required pam_unix.so session required pam_mkhomedir.so umask=0022 skel=/etc/skel
file: /etc/pam.d/sudo
auth sufficient pam_winbind.so auth sufficient pam_unix.so use_first_pass auth required pam_deny.so @include common-account
Вывод лога доступа к файлам samba в отдельный файл
Нам нужно отредактировать файл конфигурации rsyslog для направления вывода лога самбы в отдельный файл. В CentOS 7 открываем файл /etc/rsyslog.conf и добавляем в самый конец такую строку:
# mcedit /etc/rsyslog.conf
local5.notice -/var/log/samba/audit.log
Этим параметром мы направили вывод логов аудита посещений в отдельный файл audit.log. Если все оставить как есть, то информация о посещениях будет писаться как в отдельный файл, так и в общий системный. Чтобы в общий не писалось, редактируем еще одну строку, добавляя туда выделенный фрагмент:
*.info;mail.none;authpriv.none;cron.none;local5.none /var/log/messages
Сохраняем файл и перезапускаем rsyslog.
# systemctl restart rsyslog
Теперь все нормально. Все логи посещений шары на samba будут складываться в отдельный файл и только туда. Если у вас есть желание хранить логи на удаленном сервере, то воспользуйтесь моей статье на эту тему — настройка syslog-ng для удаленного сбора логов. Это сделать быстро и просто. Зачастую это может быть оправданно и удобно, особенно с точки зрения безопасности и не только логов от самбы.
Осталось малось — настроить ротацию логов. Сделать это надо обязательно, так как файл аудита будет расти очень быстро. Здесь ничего особенного, используем logrotate. Скорее всего у вас уже есть фал конфигурации logrotate для самбы. Он создается в момент установки. Отредактируем его, добавив новые параметры.
# mcedit /etc/logrotate.d/samba
/var/log/samba/audit.log {
daily
notifempty
olddir /var/log/samba/old
missingok
sharedscripts
copytruncate
rotate 90
compress
}
Я храню логи за последние 90 дней, ротацию делаю раз в день и складываю старые логи в отдельную папку. Если у вас в конфигурации есть параметр с маской, который захватывает сразу все файлы в директории /var/log/samba, например вот так:
/var/log/samba/*
То либо вынесите лог-файл с аудитом в отдельную директорию, либо измените маску.
Заключение
Скажу откровенно — мне не нравится, как работают файловые сервера samba с интеграцией в виндовом домене. Но настраивать их приходится часто, так как востребованный функционал. Востребован в первую очередь потому, что не требует вообще никаких денег за лицензии, и работает на минимальной конфигурации железа. Вот список типичных проблем при работе самбы в домене:
- Иногда через windows acl права перестают выставляться, возникают неинформативные ошибки, по которым невозможно понять, что не так.
- Я достаточно регулярно наблюдаю ситуацию, когда слетают соответствия доменных учеток линуксовым UID. В итоге права доступа превращаются в ничего не значащий набор цифр и перестают работать.
- При переносе данных с одного сервера на другой трудно сохранить права доступа. Можно поступить вот так для копирования прав доступа, либо как-то заморочиться, чтобы на всех серверах у вас были одинаковые UID доменных учетных записей. Я не разбирал этот вопрос подробно.
Если у вас есть возможность настроить файловый сервер на windows, либо обойтись линуксом без домена, то сделайте так. Существенно упростите настройку и дальнейшую эксплуатацию. Данную статью еще можно дополнить некоторыми моментами, которые я рассказал ранее, а что не рассказал, постараюсь раскрыть позже и добавить сюда ссылки на статьи:
- Подробное логирование всех действий с файлами на сервере.
- Настройка корзины для сетевых дисков samba.
- Бэкап файлового сервера.
- Мониторинг за размером файловой шары.
Буду рад любым полезным замечаниям, исправлениям, советам по настройке файлового сервера samba. Я потратил значительное время, чтобы поделиться своими знаниями и опытом с остальными. Надеюсь, кто-то поделится чем-то полезным со мной. В том числе ради этого я и пишу статьи. Они расширяют мой кругозор и закрепляют полученные знания.
Онлайн курс «DevOps практики и инструменты»
Если у вас есть желание научиться строить и поддерживать высокодоступные и надежные системы, научиться непрерывной поставке ПО, мониторингу и логированию web приложений, рекомендую познакомиться с онлайн-курсом «DevOps практики и инструменты» в OTUS. Курс не для новичков, для поступления нужны базовые знания по сетям и установке Linux на виртуалку. Обучение длится 5 месяцев, после чего успешные выпускники курса смогут пройти собеседования у партнеров.
Проверьте себя на вступительном тесте и смотрите программу детальнее по .
Справочник статей
- Блок сообщений сервера (SMB)
- 1. Использование SAMBA
- 1. Обеспечить совместное использование SMB
- 2. Смонтируйте общий ресурс SMB
- 2.1 Поддерживаемая версия протокола SMB
- 2.1.1 Расширенная поддержка UNIX
- 2.1.2 Монтирование общего ресурса SMB вручную
- 2.2.3 SMB-ресурс автоматически монтируется при загрузке системы
- 2.2.4 Использование файла учетных данных для аутентификации общего ресурса SMB
- 2.2.5 Выполнение многопользовательского монтирования SMB
- Используйте многопользовательскую опцию для монтирования общего ресурса
- Убедитесь, что общий ресурс SMB смонтирован с использованием многопользовательской опции.
- Доступ поделиться как пользователь
- 2.2.5 Общие варианты монтажа
- Во-вторых, конфигурация SAMBA
- 1. Самба Сервис
- 2. Используйте утилиту testparm для проверки файла smb
- 3. Понять модель безопасности Samba
- 4. Установите Samba в качестве автономного сервера.
- 4.1 Настройка конфигурации сервера для автономных серверов
- 4.2 Создание и включение локальных учетных записей пользователей
- 5. Установите Samba в качестве члена домена
- 5.1 Присоединение к домену
- 5.2 Убедитесь, что Samba правильно добавлен в качестве члена домена
- Убедитесь, что операционная система может получать учетные записи и группы пользователей домена.
- Убедитесь, что пользователи домена AD могут получить учетные данные Kerberos
- Список доступных доменов
- 5.3 Понимание сопоставления идентификаторов
- 5.3.1 Планирование диапазона идентификаторов
- 5.3.2 * домен по умолчанию
- 5.4 Различные бэкэнды для отображения идентификаторов
- 5.4.1 Отображение бэкэнда с использованием идентификатора tdb
- 5.4.2 Использование идентификатора объявления для сопоставления бэкэнда
- 5.4.2.1 Предварительные условия для рекламного бэкенда
- 5.4.2.2 Настройка рекламного бэкенда
- 5.4.3 Использование Rid ID для сопоставления бэкэнда
- 5.4.3.1 Преимущества и недостатки использования RED Backend
- 5.4.3.2 Настройка RED Backend
- 5.4.4 Использование идентификатора авторизации для сопоставления серверной части [2]
- 5.4.4.1 Преимущества и недостатки использования autorid backend
- 5.4.4.2 Настройка бэкэнда autorid
- 6. Интегрировать файловый сервер Samba в домен IdM.
- 7. Настройте общий доступ к файлам на сервере Samba.
- 7.1 Настройка общего доступа с использованием POSIX ACL [3]
- 7.1.1 Добавление общего доступа с использованием POSIX ACL
- 7.1.2 Настройка ACL
- 7.1.3 Установка разрешений для общего ресурса
- 7.2 Настройка общего доступа с помощью Windows ACL [4]
- 7.2.1 Предоставление разрешения SeDiskOperatorPrivilege
- 7.2.2 Включить поддержку Windows ACL
- 7.2.3 Добавление общего доступа с помощью Windows ACL
- 7.2.4. Управление разрешениями общего доступа и списками управления доступом файловой системы для совместного использования с помощью списков управления доступом Windows
- 7.3 Использование smbcacls для управления ACL на общих ресурсах SMB
- 7.3.1 Понимание записей контроля доступа
- 7.3.2 Использование smbcacls для отображения ACL
- 7.3.3 Рассчитать маску АСЕ
- 7.3.4 Использование smbcacls для добавления, обновления и удаления ACL
- 7.4 Разрешить пользователям совместно использовать каталоги на сервере Samba
- 7.4.1 Разрешить совместное использование пользователей
- 7.4.2 Добавление обмена пользователями
- 7.4.3 Обновление общих настроек пользователя
- 7.4.4 Отображение информации, которой поделились существующие пользователи
- 7.4.5 Список пользовательских акций
- 7.4.6 Удалить пользовательский ресурс
- 7.5 Включение совместного доступа гостевого доступа
- 8. Оптимизация производительности сервера Samba
- 8.1 Установить версию протокола SMB
- 8.2 Оптимизировать совместное использование каталогов, содержащих большое количество файлов
- 8.3 Настройки, которые могут негативно повлиять на производительность
- 9. Обычно используемые утилиты командной строки Samba
- 9.1 Использование утилиты net
- 9.1.1 Используйте команды net ads join и net rpc join
- 9.1.2 Используйте команду net rpc rights
- 9.1.3 Используйте команду net rpc share
- 9.1.4 Использование команды net user
- 9.1.5 Используйте команду net usershare
- 9.2 Использование утилиты rpcclient
- 9.3 Использование приложения samba-regedit
- 9.4 Использование утилиты smbcacls
- 9.5 Использование утилиты smbclient
- 9.5.1. Использование smbclient в интерактивном режиме
- 9.5.2 Использование smbclient в режиме сценария
- 9.6 Использование утилиты smbcontrol
- 9.7 Использование утилиты smbpasswd
- 9.8 Использование утилиты smbstatus
- 9.9 Использование утилиты smbtar
- 9.10 Использование утилиты testparm
- 9.11 Использование утилиты wbinfo
- 10. Другие ресурсы
Блок сообщений сервера (SMB)
Протокол Server Message Block (SMB) реализует сетевой протокол прикладного уровня для доступа к ресурсам на сервере (таким как общий доступ к файлам и общие принтеры). В Microsoft Windows SMB реализован по умолчанию. Если вы используете Red Hat Enterprise Linux, используйте Samba для предоставления общих ресурсов SMB и используйтеcifs-utilsУтилита монтирует общий ресурс SMB с удаленного сервера.
Пометки
В контексте SMB вы иногда читаете протокол Common Internet File System (CIFS), который является диалектом SMB. Поддерживаются протоколы SMB и CIFS, а модули и утилиты ядра, участвующие в совместном использовании имен монтирования SMB и CIFS, используют именаcifs。
1. Использование SAMBA
1. Обеспечить совместное использование SMB
Видеть«Руководство системного администратора Red Hat»В разделе Самба.
2. Смонтируйте общий ресурс SMB
В Red Hat Enterprise Linux ядроcifs.koМодуль файловой системы обеспечивает поддержку протокола SMB. Однако, чтобы смонтировать и использовать общий ресурс SMB, он также должен быть установленcifs-utilsПакет программного обеспечения:
# yum install cifs-utils
Пакет утилит cifs предоставляет утилиты для:
-
Монтировать SMB и CIFS акции
-
Управление учетными данными NT Lan Manager (NTLM) в кольце ключей ядра
-
Установите и отобразите список контроля доступа (ACL) в дескрипторе безопасности, совместно используемом SMB и CIFS
2.1 Поддерживаемая версия протокола SMB
cifs.koМодуль ядра поддерживает следующие версии протокола SMB:
- SMB 1
- SMB 2.0
- SMB 2.1
- SMB 3.0
Пометки
Согласно версии протокола, не все функции SMB реализованы.
2.1.1 Расширенная поддержка UNIX
Samba использует функциональный бит CAP_UNIX в протоколе SMB для обеспечения функций расширения UNIX. Эти расширения также поддерживаются модулем ядра cifs. Однако модули Samba и ядра поддерживают только расширения UNIX в протоколе SMB 1.
Чтобы использовать расширения UNIX:
-
В ** / etc / samba / smb.confВ файле[global]Часть будетserver min protocolВарианты установлены вNT1 **. Это настройка по умолчанию для сервера Samba.
-
Если не установленоvers = protocol_version Опция монтирования, затем используйте протокол SMB 1 для монтирования общего ресурса по умолчанию.
Чтобы убедиться, что расширение UNIX включено, покажите опцию монтирования общего ресурса:
# mount
...
//server/share on /mnt type cifs (...,unix,...)
в случаеUNIXЗапись отображается в списке параметров загрузки, затем включаются расширения UNIX.
2.1.2 Монтирование общего ресурса SMB вручную
Чтобы вручную смонтировать общий ресурс SMB, используйте утилиту монтирования с параметром -t cifs:
# mount -t cifs -o username=user_name //server_name/share_name /mnt/
Password for [email protected]//server_name/share_name:
в-o вариантыВ параметре вы можете указать параметры, которые будут использоваться для подключения общего ресурса. Для получения дополнительной информации см. Раздел 2.2.6 «Общие параметры монтирования» и раздел «ОПЦИИ» на справочной странице mount.cifs (8).
Пример 1 Использование зашифрованного общего ресурса подключения SMB 3.0
Для того, чтобы использоватьDOMAINAdministratorИдентификационные данные пользователя и зашифрованное соединение SMB 3.0 будут ** \ server example Поделиться сВ каталоге / mnt / **:
# mount -t cifs -o username=DOMAINAdministrator,seal,vers=3.0 //server/example /mnt/
Password for [email protected]//server_name/share_name: ********
2.2.3 SMB-ресурс автоматически монтируется при загрузке системы
Чтобы автоматически смонтировать общий ресурс SMB при загрузке системы, добавьте запись общего ресурса в файл ** / etc / fstab **. Например:
//server_name/share_name /mnt cifs credentials=/root/smb.cred 0 0
нота
Чтобы система смонтировала общий ресурс автоматически, вы должны сохранить имя пользователя, пароль и имя домена в файле сертификата. Подробнее см. В разделе 2.2.4 «Использование учетных файлов для аутентификации общих ресурсов SMB».
В четвертом поле файла / etc / fstab укажите параметры монтирования, например, путь к файлу учетных данных. Для получения дополнительной информации см. Раздел 2.2.6 «Общие параметры монтирования» и раздел «ОПЦИИ» на справочной странице mount.cifs (8).
Чтобы убедиться, что общий ресурс успешно смонтирован, введите:
# mount /mnt/
2.2.4 Использование файла учетных данных для аутентификации общего ресурса SMB
В некоторых случаях администратор хочет смонтировать общий ресурс без ввода имени пользователя и пароля. Для этого создайте файл учетных данных. Например:
Процедура 1 Создайте файл учетных данных
-
Создайте файл, например ~ / smb.cred, и укажите имя пользователя, пароль и доменное имя файла:
username=user_name password=password domain=domain_name -
Установите разрешения, чтобы разрешить владельцу доступ к файлу:
# chown user_name ~/smb.cred # chmod 600 ~/smb.cred
Теперь вы можете передать параметр монтирования credentials = file_name утилите монтирования или использовать ее в файле / etc / fstab для монтирования общего ресурса, не запрашивая у вас имя пользователя и пароль.
2.2.5 Выполнение многопользовательского монтирования SMB
Учетные данные, которые вы предоставляете для монтирования общего ресурса, по умолчанию определяют права доступа к точке монтирования. Например, если вы используетеDOMAINexampleПользователь, все операции с общим ресурсом будут выполняться как этот пользователь, независимо от того, какой пользователь выполняет локальную операцию.
Однако в некоторых случаях администраторы хотят автоматически подключать общий ресурс при загрузке системы, но пользователи должны использовать свои собственные учетные данные для выполнения действий с общим содержимым.multiuserОпция монтирования позволяет вам настроить этот сценарий.
нота
нужно использоватьmultiuser, Вы должны такжеsec = security_type Опция монтирования поддерживает тип безопасности, который предоставляет сертификаты неинтерактивным способом, напримерkrb5Или с документомntlmsspОпции. См. Раздел «Доступ к общим ресурсам как пользователь».
rootИспользование пользователяmultipuserПараметры и учетная запись с минимальным доступом к общему контенту для монтирования общего ресурса. Тогда обычные пользователи могут использоватьcifscredsУтилита предоставляет свое имя пользователя и пароль для набора ключей ядра текущего сеанса. Если пользователь получает доступ к содержимому смонтированного общего ресурса, ядро будет использовать учетные данные из набора ключей ядра вместо учетных данных, которые первоначально использовались для подключения общего ресурса.
Используйте многопользовательскую опцию для монтирования общего ресурса
Используется во время загрузки системыmultiuserВозможность автоматического монтирования общего ресурса:
Процедура 2 Создайте запись в файле / etc / fstab с многопользовательской опцией
-
Создайте общую запись в файле ** / etc / fstab **. Например:
//server_name/share_name /mnt cifs multiuser,sec=ntlmssp,credentials=/root/smb.cred 0 0 -
Смонтировать акцию:
# mount /mnt/
Если вы не хотите автоматически монтировать общий ресурс при загрузке системы, введите ** — o multiuser, sec = security_typeПерейти кКоманда mount ** монтирует его вручную. Для получения дополнительной информации о монтировании общих ресурсов SMB вручную см. Раздел 2.2.2, «Монтирование общих ресурсов SMB вручную».
Убедитесь, что общий ресурс SMB смонтирован с использованием многопользовательской опции.
Чтобы проверить, использовать лиmultiuserВозможность монтировать общий ресурс:
# mount
...
//server_name/share_name on /mnt type cifs (sec=ntlmssp,multiuser,...)
Доступ поделиться как пользователь
При использованииmultiuserС возможностью монтирования общего ресурса SMB пользователи могут предоставить учетные данные своего сервера для набора ключей ядра:
# cifscreds add -u SMB_user_name server_name
Password: ********
Теперь, когда пользователь выполняет операцию в каталоге, который содержит смонтированный общий ресурс SMB, сервер будет применять к пользователю разрешения файловой системы вместо тех разрешений, которые первоначально использовались при монтировании общего ресурса.
Пометки
Несколько пользователей могут использовать свои собственные учетные данные для одновременного выполнения операций с подключенным общим ресурсом.
2.2.5 Общие варианты монтажа
При подключении общего ресурса SMB параметры монтирования определяют:
- Как установить соединение с сервером. Например, какую версию протокола SMB использовать при подключении к серверу.
- Как смонтировать значение общего файла в локальную файловую систему. Например, если система переопределяет права доступа к удаленным файлам и каталогам, чтобы разрешить нескольким локальным пользователям доступ к содержимому на сервере.
В ** / etc / fstabЧетвертое поле файла илиmountЗаказал-oУстановите несколько параметров в параметре, используйте запятые для их разделения. Например, см. Процедуру 2.2 «ИспользованиеПараметр multiuser ** создает записи в файле / etc / fstab «.
Следующий список дает обзор часто используемых вариантов монтажа:
Таблица 1 Общие варианты монтажа
| Опции | описание |
|---|---|
| учетные данные = имя кредитного файла | Установите путь к файлу учетных данных. См. Раздел 2.2.4 «Аутентификация общих ресурсов SMB с использованием файлов учетных данных». |
| dir_mode = Режим | Если сервер не поддерживает расширение CIFS UNIX, установите режим каталога. |
| file_mode = Режим | Если сервер не поддерживает расширение CIFS UNIX, установите режим файла. |
| пароль = пароль | Установите пароль для аутентификации на SMB-сервере. Или используйтеcredentialsОпция указывает файл учетных данных. |
| seal | Поддержка шифрования включена для соединений, использующих протоколы SMB 3.0 или новее. Следовательно,sealпротивversОпция монтирования установлена на3.0 Или выше. См. Пример 1 «Использование зашифрованного соединения SMB 3.0 для установки общего ресурса». |
| sec = безопасный режим | Установите безопасный режим (например,ntlmsspi) Чтобы включить хеширование пароля NTLMv2 и включить подпись пакетов. Список поддерживаемых значений см. В описании опций на справочной странице mount.cifs (8). Если сервер не поддерживаетntlmv2Безопасный режим, пожалуйста, используйте sec =ntlmssp,Это значение по умолчанию. В целях безопасности не используйте небезопасныеntlmБезопасный режим |
| имя пользователя = имя пользователя | Установите имя пользователя, используемое для аутентификации на SMB-сервере. Или используйтеcredentialsОпция указывает файл учетных данных. |
| версия = версия протокола SMB | Установите версию протокола SMB, используемую для связи с сервером. |
Полный список см. В разделе «ОПЦИИ» справочной страницы mount.cifs (8).
Во-вторых, конфигурация SAMBA
Samba реализует протокол блока сообщений сервера (SMB) в Red Hat Enterprise Linux. Протокол SMB используется для доступа к ресурсам на сервере, таким как общий доступ к файлам и общие принтеры. Кроме того, Samba также реализует протокол удаленного вызова процедур (DCE RPC) распределенной вычислительной среды, используемой Microsoft Windows.
Вы можете запустить Samba как:
- Active Directory (AD) или члены домена NT4
- Автономный сервер
- Основной контроллер домена NT4 (PDC) или резервный контроллер домена (BDC)
Пометки
Red Hat поддерживает эти режимы только в существующих установках версий Windows, которые поддерживают домены NT4. Red Hat не рекомендует создавать новый домен Samba NT4, поскольку операционные системы Microsoft после Windows 7 и Windows Server 2008 R2 не поддерживают домены NT4.
Независимо от режима установки вы можете выбрать общий доступ к каталогам и принтерам. Это позволяет Samba действовать как файл и сервер печати.
Пометки
Red Hat не поддерживает запуск Samba в качестве контроллера домена AD (DC).
1. Самба Сервис
Samba предоставляет следующие услуги:
smbd
Эта служба использует протокол SMB для предоставления услуг обмена файлами и печати. Кроме того, сервис отвечает за блокировку ресурсов и аутентификацию подключенных пользователей.smb systemdСервис запускается и останавливаетсяsmbdDaemon.
нужно использоватьsmbdУслуги, пожалуйста, установите пакет samba.
nmbd
Эта служба использует протокол NetBIOS через IP для предоставления имени хоста и разрешения IP. В дополнение к разрешению имен,nmbdСлужба также может просматривать сеть SMB для поиска доменов, рабочих групп, хостов, общих файловых ресурсов и принтеров. Для этого служба либо сообщает эту информацию непосредственно широковещательному клиенту, либо перенаправляет ее в локальный или главный браузер.nmb systemdСервис запускается и останавливаетсяnmbdDaemon.
Обратите внимание, что современные сети SMB используют DNS для разрешения клиентских и IP-адресов.
нужно использоватьnmbdУслуги, пожалуйста, установите пакет samba.
winbindd
winbinddСлужба предоставляет интерфейс для обмена службами имен (NSS) для использования пользователей и групп домена AD или NT4 в локальной системе. Например, это позволяет пользователям домена проходить проверку подлинности для служб, размещенных на сервере Samba, или других локальных служб.winbind systemdСервис запускается и останавливаетсяwinbinddDaemon.
нужно использоватьwinbinddСервис, пожалуйста, установите пакет samba-winbind.
2. Используйте утилиту testparm для проверки файла smb
testparmПроверка полезности /etc/samba/smb.confКорректна ли конфигурация Samba в файле? Утилита обнаружит недопустимые параметры и значения, но также обнаружит неправильные настройки, такие как сопоставление идентификаторов. в случаеtestparmО проблемах не сообщается, служба Samba успешно загрузит файл ** / etc / samba / smb.conf **. предостерегают,testparmНевозможно проверить, что настроенная служба доступна или работает должным образом.
нота
Red Hat рекомендует использовать его каждый раз, когда вы изменяете этот файлtestparmПроверьте файл ** / etc / samba / smb.conf **.
Для проверки ** / etc / samba / smb.confФайл, пожалуйста, запустите от имени пользователя roottestparmУтилита. в случаеtestparm ** сообщает о неверных параметрах, значениях или других ошибках в конфигурации, пожалуйста, устраните проблему и снова запустите утилиту.
Пример 1 с использованием тестпарма
Следующий вывод сообщает о несуществующих параметрах и неправильной конфигурации сопоставления идентификаторов:
~]# testparm
Load smb config files from /etc/samba/smb.conf
rlimit_max: increasing rlimit_max (1024) to minimum Windows limit (16384)
Unknown parameter encountered: "log levell"
Processing section "[example_share]"
Loaded services file OK.
ERROR: The idmap range for the domain * (tdb) overlaps with the range of DOMAIN (ad)!
Server role: ROLE_DOMAIN_MEMBER
Press enter to see a dump of your service definitions
# Global parameters
[global]
...
[example_share]
...
3. Понять модель безопасности Samba
/etc/samba/smb.confФайл ** [глобальный]ЧастьПараметр security ** управляет тем, как Samba аутентифицирует пользователей, подключенных к сервису. В зависимости от режима, в котором вы устанавливаете Samba, параметры должны быть установлены на разные значения:
-
В качестве члена домена AD, установитеsecurity = ads。
В этом режиме Samba использует Kerberos для аутентификации пользователей AD.
Подробнее о настройке Samba в качестве члена домена см. Раздел 5 «Настройка Samba в качестве члена домена».
-
В качестве автономного сервера установитеsecurity = user。
В этом режиме Samba использует локальную базу данных для аутентификации подключенных пользователей.
Подробнее о настройке Samba в качестве автономного сервера см. Раздел 4 «Настройка Samba в качестве автономного сервера».
-
Как NT4 PDC или BDC, установитеsecurity = user。
В этом режиме Samba аутентифицирует пользователя в локальной базе данных или базе данных LDAP.
-
В качестве члена домена NT4 установитеsecurity = domain。
В этом режиме Samba аутентифицирует подключающегося пользователя к NT4 PDC или BDC. Вы не можете использовать этот режим на членах домена AD.
Подробнее о настройке Samba в качестве члена домена см. Раздел 5 «Настройка Samba в качестве члена домена».
Для получения более подробной информации, пожалуйста, обратитесь к справочной странице smb.conf (5)securityОписание параметров.
4. Установите Samba в качестве автономного сервера.
В некоторых случаях администраторы хотят настроить серверы Samba, которые не являются членами домена. В этом режиме установки Samba аутентифицирует пользователя в локальной базе данных, а не в центральном контроллере домена. Кроме того, вы можете включить гостевой доступ, чтобы пользователи могли подключаться к одной или нескольким службам без аутентификации.
4.1 Настройка конфигурации сервера для автономных серверов
Шаги по настройке Samba в качестве автономного сервера:
Процедура 1 Настройте Samba в качестве автономного сервера
-
Установите пакет samba:
~]# yum install samba -
редактировать/etc/samba/smb.confФайл и установите следующие параметры:
[global]
	workgroup = Example-WG
	netbios name = Server
	security = user

	log file = /var/log/samba/%m.log
	log level = 1
КонфигурацияExample-WGРабочая группа им.ServerАвтономный сервер. Кроме того, эта конфигурация может быть на самом низком уровне (1) В журнале и файл журнала будет храниться в ** / var / log / samba /Справочник. Самба будетМакрос файла *% в параметре * log file *** расширяется до имени NetBIOS подключенного клиента. Это позволяет отдельный файл журнала для каждого клиента.
Для получения более подробной информации, пожалуйста, обратитесь к описаниям параметров на справочной странице smb.conf (5).
Файл конфигурации или общий доступ к принтеру. Посмотри пожалуйста:
- Раздел 7 «Настройка общего доступа к файлам на сервере Samba»
- Раздел 8 «Настройка сервера печати Samba»
Проверьте файл ** / etc / samba / smb.conf **:
~]# testparm
Для получения дополнительной информации см. Раздел 2 «Проверка файла smb.conf с помощью утилиты testparm».
Если вы настроили общий ресурс, который требует аутентификации, создайте учетную запись пользователя. Для получения подробной информации, пожалуйста, обратитесь к
Раздел 4.2, «Создание и включение учетных записей локальных пользователей».
Откройте необходимые порты и используйте утилиту firewall-cmd для перезагрузки конфигурации брандмауэра:
~]# firewall-cmd --permanent --add-port={139/tcp,445/tcp}
~]# firewall-cmd --reload
запускатьsmbслужба:
~]# systemctl start smb
(Необязательно) включается при запуске системыsmbСервис запускается автоматически:
~]# systemctl enable smb
4.2 Создание и включение локальных учетных записей пользователей
Чтобы пользователи могли проходить аутентификацию при подключении к общему ресурсу, необходимо создать учетную запись на хосте Samba в операционной системе и базе данных Samba. Samba требуется учетная запись операционной системы для проверки списка контроля доступа (ACL) для объекта файловой системы и учетная запись Samba для проверки подключенного пользователя.
Если вы используетеpassdb backend = tdbsamПо умолчанию Samba хранит учетные записи пользователей в базе данных ** / var / lib / samba / private / passdb.tdb **.
Например, создать пользователя Sambaexample:
Процедура 2 Создайте пользователя Samba
-
Создайте учетную запись операционной системы:
~]# useradd -M -s /sbin/nologin exampleПоследняя команда добавленаexampleАккаунт без создания домашнего каталога. Если учетная запись используется только для аутентификации в Samba, пожалуйста, назначьте команду / sbin / nologin в качестве оболочки, чтобы предотвратить вход в учетную запись локально.
-
Установите пароль для учетной записи операционной системы, чтобы включить его:
~]# passwd example Enter new UNIX password: password Retype new UNIX password: password passwd: password updated successfullySamba не использует пароль, установленный в учетной записи операционной системы, для аутентификации. Однако вам нужно установить пароль для включения учетной записи. Если учетная запись отключена, Samba запретит доступ, если пользователь подключится.
-
Добавьте пользователя в базу данных Samba и установите пароль для учетной записи:
~]# smbpasswd -a example New SMB password: password Retype new SMB password: password Added user example.Используйте этот пароль для аутентификации при использовании этой учетной записи для подключения к общему ресурсу Samba.
-
Включить учетную запись Samba:
~]# smbpasswd -e example Enabled user example.
5. Установите Samba в качестве члена домена
Администраторы, использующие домены AD или NT4, обычно хотят использовать Samba для присоединения своего сервера Red Hat Enterprise Linux в качестве члена к домену. Это позволяет вам:
- Доступ к ресурсам домена других членов домена
- Для местных служб (таких какsshd) Проверьте личность пользователей домена
- Совместное использование каталогов и принтеров, размещенных на сервере, для работы в качестве файловых серверов и серверов печати.
5.1 Присоединение к домену
Чтобы присоединить систему Red Hat Enterprise Linux к домену:
Процедура 3 Присоедините систему Red Hat Enterprise Linux к домену
-
Установите следующие пакеты:
~]# yum install realmd oddjob-mkhomedir oddjob samba-winbind-clients samba-winbind samba-common-tools -
Если вы присоединяетесь к AD, пожалуйста, дополнительно установите пакет samba-winbind-krb5-locator:
~]# yum install samba-winbind-krb5-locator
Этот плагин позволяет Kerberos определять местонахождение Центра распространения ключей (KDC) на основе сайта AD с использованием записей службы DNS.
- (Необязательно) Переименуйте существующий ** / etc / samba / smb.conf ** файл конфигурации Samba:
~]# mv /etc/samba/smb.conf /etc/samba/smb.conf.old
-
Присоединяйтесь к домену. Например, добавление доменного имениad.example.comДомен:
~]# realm join --client-software=winbind ad.example.comИспользуйте предыдущую команду,realmУтилита автоматически:
- заad.example.comЧлены домена создают файл ** / etc / samba / smb.conf **
- Будет использоваться для поиска пользователей и группwinbindДобавить модуль в файл ** / etc / nsswitch.conf **
- Настройте клиент Kerberos в файле ** / etc / krb5.conf **, чтобы получить членство в AD
- Обновите файл конфигурации подключаемого модуля аутентификации (PAM) в каталоге /**etc/pam.d/**.
- Запустите сервис winbind и запустите сервис при загрузке системы
связанные сrealmДля получения более подробной информации об утилите, пожалуйста, обратитесь к справочной странице field (8) и «Red Hat Windows Руководство по интеграции».
-
(Необязательно) Задайте параметры резервного копирования и сопоставления идентификаторов в файле ** / etc / samba / smb.conf **. Для получения дополнительной информации см. Раздел 5.3 «Общие сведения о сопоставлении идентификаторов».
-
(Необязательно) Проверьте конфигурацию. См. Раздел 5.2, «Убедитесь, что Samba правильно добавлен в качестве члена домена».
5.2 Убедитесь, что Samba правильно добавлен в качестве члена домена
После добавления Red Hat Enterprise Linux в качестве члена домена в среду вы можете запустить различные тесты, чтобы убедиться, что соединение установлено успешно. Смотрите также:
- Раздел «Убедитесь, что операционная система может получать учетные записи и группы пользователей домена»
- Раздел «Убедитесь, что пользователи домена AD могут получить учетные данные Kerberos»
- Раздел «Список доступных доменов»
Убедитесь, что операционная система может получать учетные записи и группы пользователей домена.
использованиеgetentУтилита проверяет, может ли операционная система извлечь пользователей и группы домена. Например:
-
Чтобы узнатьADВ доменеadministratorСчет:
~]# getent passwd “AD\administrator” ADadministrator:*:10000:10000::/home/[email protected]:/bin/bash -
Чтобы узнатьADВ доменеDomain UsersУчастники группы:
~]# getent group "AD\Domain Users" ADdomain users:x:10000:userЕсли команда работает правильно, убедитесь, что пользователи и группы домена могут использоваться при настройке разрешений для файлов и каталогов. Например, чтобы конвертировать ** / srv / samba / example.txtВладелец файла установлен вадминистратор ** и установите владельца группы наDomain Admins:
~]# chown administrator:"Domain Admins" /srv/samba/example.txt
Убедитесь, что пользователи домена AD могут получить учетные данные Kerberos
В среде AD пользователи могут получать учетные данные Kerberos из DC. Например, чтобы проверитьadministratorМогут ли пользователи получить учетные данные Kerberos:
Пометки
нужно использоватьkinitсklistУтилита, пожалуйста, установите на членов домена Sambakrb5-workstationПакет программного обеспечения.
Процедура 4 Получение учетных данных Kerberos
-
получать[email protected]Учетные данные субъекта:
~]# kinit [email protected] -
Показать кэшированные учетные данные Kerberos:
~]# klist Ticket cache: KEYRING:persistent:0:0 Default principal: [email protected] Valid starting Expires Service principal 11.09.2017 14:46:21 12.09.2017 00:46:21 krbtgt/[email protected] renew until 18.09.2017 14:46:19
Список доступных доменов
Перечислить черезwinbinddДля всех доменов, где доступна услуга, введите:
~]# wbinfo --all-domains
BUILTIN
SAMBA-SERVER
AD
5.3 Понимание сопоставления идентификаторов
Домены Windows различают пользователей и группы по уникальным идентификаторам безопасности (SID). Однако Linux требует, чтобы каждый пользователь и группа имели уникальный UID и GID. Если вы запускаете Samba в качестве члена домена, тогдаwinbinddСлужба будет нести ответственность за предоставление информации о пользователях и группах домена для операционной системы домена.
ДелатьwinbinddСлужба предоставляет пользователям и группам уникальные идентификаторы для Linux. Необходимо настроить сопоставление идентификаторов для следующих элементов в файле ** / etc / samba / smb.conf **:
- Локальная база данных (домен по умолчанию)
- Домен AD или NT4, к которому принадлежит сервер Samba
- Каждый пользователь в доверенном домене должен иметь доступ к ресурсам на этом сервере Samba.
5.3.1 Планирование диапазона идентификаторов
Сохраняете ли вы UID и GID Linux в AD или настраиваете Samba для их генерации, для каждой конфигурации домена требуется уникальный диапазон идентификаторов, которыйМожет нетЛюбые другие поля перекрываются.
предостережение
Если установлены перекрывающиеся диапазоны идентификаторов, Samba не будет работать должным образом.
Пример 3 Диапазон уникальных идентификаторов
Ниже показано значение по умолчанию (*),AD-DOMсTRUST-DOMОбласть отображения перекрывающихся идентификаторов домена.
[global]
...
idmap config * : backend = tdb
idmap config * : range = 10000-999999

idmap config AD-DOM:backend = rid
idmap config AD-DOM:range = 2000000-2999999

idmap config TRUST-DOM:backend = rid
idmap config TRUST-DOM:range = 4000000-4999999
нота
Для каждого домена может быть назначен только один диапазон. Поэтому оставьте достаточно места между доменами. Это позволяет расширить область действия по мере роста домена.
Если впоследствии вы назначите домену разные домены, владение файлами и каталогами, ранее созданными этими пользователями и группами, будет утрачено.
5.3.2 * домен по умолчанию
В среде домена добавьте конфигурацию сопоставления идентификаторов для каждого из следующего:
- Домен, к которому относится сервер Samba
- Должен иметь доступ к каждому доверенному домену сервера Samba
Однако для всех остальных объектов Samba назначит идентификатор из домена по умолчанию. Это включает в себя:
- Локальные пользователи и группы Samba
- Например, встроенные учетные записи и группы SambaBUILTINAdministrators
нота
Домен по умолчанию должен быть настроен в соответствии с инструкциями в этом разделе, чтобы Samba могла нормально работать.
Бэкэнд домена по умолчанию должен быть доступен для записи, чтобы навсегда сохранить назначенный идентификатор.
Для домена по умолчанию вы можете использовать один из следующих бэкэндов:
tdb
При настройке домена по умолчанию для использованияtdbВ качестве бэк-энда, пожалуйста, установите достаточно большой диапазон идентификаторов, чтобы содержать объекты, созданные в будущем, а не часть определенной конфигурации сопоставления идентификаторов домена.
Например, в ** / etc / samba / smb.confДокументальныйВ разделе [global] ** установите следующее:
idmap config * : backend = tdb
idmap config * : range = 10000-999999
Для более подробной информации, пожалуйста, обратитесь к Разделу 5.4.1 «Использованиеtdb Идентификационный бэкэнд «.
autorid
При настройке домена по умолчанию для использованияautoridС другой стороны, добавление других конфигураций сопоставления идентификаторов в домен необязательно.
Например, в ** / etc / samba / smb.confДокументальныйВ разделе [global] ** установите следующее:
idmap config * : backend = autorid
idmap config * : range = 10000-999999
Для получения более подробной информации см. Раздел 5.4.4.2 «Конфигурацияautoridзадняя часть».
5.4 Различные бэкэнды для отображения идентификаторов
Samba предоставляет различные бэкэнды для отображения идентификаторов для определенных конфигураций. Наиболее часто используемые бэкэнды:
Таблица 1 Общий идентификатор сопоставления серверной части
| задняя часть | Случаи использования |
|---|---|
| tdb | * Только домен по умолчанию |
| ad | Только домен AD |
| rid | AD и NT4 домены |
| autorid | AD, NT4 и * домен по умолчанию |
В следующих разделах описываются преимущества использования серверной части, рекомендуемое решение и способы его настройки.
5.4.1 Отображение бэкэнда с использованием идентификатора tdb
по умолчанию, winbindd Использование службы доступно для записиtdb Во внутреннем интерфейсе сопоставления идентификаторов хранятся таблицы сопоставления идентификатора безопасности (SID), UID и GID. Это включает в себя локальных пользователей, группы и встроенные принципалы.
Используйте этот бэкэнд только для * доменов по умолчанию. Например:
idmap config * : backend = tdb
idmap config * : range = 10000-999999
Подробнее о * домене по умолчанию см. В разделе 5.3.2 «* Домен по умолчанию».
5.4.2 Использование идентификатора объявления для сопоставления бэкэнда
ad Бэкэнд отображения идентификаторов реализует API только для чтения для чтения информации об учетной записи и группе из рекламы. Это обеспечивает следующие преимущества:
- Все настройки пользователей и групп хранятся централизованно в AD.
- На всех серверах Samba, использующих этот бэкэнд, идентификаторы пользователя и группы совпадают
- Эти идентификаторы не хранятся в локальной базе данных, которая может быть повреждена, поэтому право собственности на файл не теряется.
ad Бэкэнд читает следующие атрибуты из объявления:
Свойства таблицы 2, считанные из пользовательских и групповых объектов по бэкэнду рекламы
| Имя атрибута AD | Тип объекта | Карта к |
|---|---|---|
| sAMAccountName | Пользователи и группы | Имя пользователя или группы, в зависимости от объекта |
| uidNumber | пользователь | Идентификатор пользователя (UID) |
| gidNumber | группа | ID группы (GID) |
| loginShell[a] | пользователь | Путь оболочки пользователя |
| unixHomeDirectory[a] | пользователь | Путь к домашнему каталогу пользователя |
| primaryGroupID[b] | пользователь | Идентификатор основной группы |
[a] Если вы установитеidmap config DOMAIN:unix_nss_info = yesЗатем Самба читает этот атрибут.
[б] Если вы установитеidmap config DOMAIN:unix_primary_group = yesЗатем Самба читает этот атрибут.
5.4.2.1 Предварительные условия для рекламного бэкенда
нужно использоватьad Бэкэнд для отображения идентификаторов:
- И пользователи, и группы должны устанавливать уникальный идентификатор в AD, и этот идентификатор должен находиться в пределах диапазона, настроенного в файле ** / etc / samba / smb.conf **. Объекты на сервере Samba, чей ID не находится в этом диапазоне, будут недоступны.
- Пользователи и группы должны иметь все обязательные атрибуты, установленные в AD. Если необходимые атрибуты отсутствуют, пользователь или группа будут недоступны на сервере Samba. Обязательные атрибуты зависят от вашей конфигурации. См. Таблицу 2 «Атрибуты, считанные из пользовательских и групповых объектов бэкэндом рекламы».
5.4.2.2 Настройка рекламного бэкенда
Чтобы настроить членов Samba AD на использованиеad Бэкэнд для отображения идентификаторов:
Процедура 5 Настройка рекламного бэкенда для членов домена
-
Редактирование ** / и т.д. / Samba / smb.confВ файле[Глобальный] ** Часть:
А. Если домен по умолчанию (*) не существует, добавьте конфигурацию сопоставления идентификаторов. Например:
idmap config * : backend = tdb idmap config * : range = 10000-999999Подробнее о конфигурации домена по умолчанию см. В разделе 5.3.2 «* Домен по умолчанию».
б) включить для домена ADad Бэкэнд для отображения идентификаторов:
idmap config DOMAIN : backend = adc) Установите диапазон идентификаторов, назначаемых пользователям и группам в домене AD. Например:
idmap config DOMAIN : range = 2000000-2999999**Запись** Этот диапазон не должен перекрываться с любой другой конфигурацией домена на этом сервере. Кроме того, диапазон должен быть достаточно большим, чтобы содержать все идентификаторы, назначенные в будущем. Для получения дополнительной информации см. Раздел 5.3.1 «Диапазон идентификаторов планирования».г. Установите Samba для использования при чтении атрибутов в ADRFC 2307 Программа:
idmap config DOMAIN : schema_mode = rfc2307д. Чтобы Samba могла читать оболочку входа и путь к домашнему каталогу пользователя из соответствующих атрибутов AD, установите:
idmap config DOMAIN : unix_nss_info = yesКроме того, вы можете установить единый для всего домена путь к домашнему каталогу и оболочку входа в систему, которые будут применяться ко всем пользователям. Например:
template shell = /bin/bash template homedir = /home/%UДля получения дополнительной информации о подстановке переменных см. Раздел VARIABLE SUBSTITUTIONS на справочной странице smb.conf (5).
е. по умолчанию Samba использует объект пользователяprimaryGroupIDАтрибут служит основной группой в Linux пользователя. Кроме того, вы можете настроить Samba для использованияgidNumberЗначение, установленное в свойстве:
idmap config DOMAIN : unix_primary_group = yes-
Проверьте файл ** / etc / samba / smb.conf **:
~]# testparmДля получения дополнительной информации см. Раздел 2 «Проверка файла smb.conf с помощью утилиты testparm».
-
Перезагрузите конфигурацию Samba:
~]# smbcontrol all reload-config -
Убедитесь, что настройки работают должным образом. См. Раздел «Убедитесь, что операционная система может получать учетные записи и группы пользователей домена».
Для получения дополнительной информации см. Справочные страницы smb.conf (5) и idmap_ad (8).
-
5.4.3 Использование Rid ID для сопоставления бэкэнда
Samba может использовать относительный идентификатор (RID) SID Windows для создания идентификатора в Red Hat Enterprise Linux.
Пометки
RID является последней частью SID. Например, если SID пользователяS-1-5-21- 5421822485-1151247151-421485315-30014, Затем30014Является ли соответствующий МПОГ. Подробнее о том, как Samba рассчитывает локальный идентификатор, см. Справочную страницу idmap_rid (8).
rid Бэкэнд сопоставления идентификаторов реализует API только для чтения для вычисления информации об учетной записи и группе на основе схемы сопоставления алгоритмов доменов AD и NT4. При настройке бэкэнда вы должныidmap config DOMAIN:rangeУстановите минимальный и максимальный RID в параметре. Samba не будет отображать пользователей или группы с более низким или более высоким RID, чем установлено в этом параметре.
нота
В качестве только для чтения,ridВы не можете назначить новый идентификатор, например, группу BUILTIN. Поэтому не используйте этот бэкэнд для * домена по умолчанию.
5.4.3.1 Преимущества и недостатки использования RED Backend
преимущество
- Все пользователи домена и группы с RID в пределах диапазона конфигурации могут автоматически использоваться членами домена.
- Вам не нужно вручную присваивать ID, домашний каталог и оболочку входа.
Недостатки
- Всем пользователям домена назначается одинаковая оболочка входа и домашний каталог. Тем не менее, вы можете использовать переменные.
- Если все члены домена Samba используют один и тот же параметр диапазона идентификаторовridС другой стороны, идентификаторы пользователя и группы одинаковы среди членов домена Samba.
- Вы не можете исключить отдельных пользователей или группы из доступных на членах домена. Только пользователи и группы за пределами диапазона конфигурации исключаются.
- Согласно формуле, используемой службой winbindd для вычисления идентификаторов, если объекты в разных доменах имеют одинаковый RID, в многодоменной среде могут появиться повторяющиеся идентификаторы.
5.4.3.2 Настройка RED Backend
Настроить членов домена Samba для использованияrid Бэкэнд для отображения идентификаторов:
Процедура 6 Сконфигурируйте rid backend для членов домена
-
Редактирование ** / и т.д. / Samba / smb.confВ файле[Глобальный] ** Часть:
А. Если домен по умолчанию (*) не существует, добавьте конфигурацию сопоставления идентификаторов. Например:
idmap config * : backend = tdb idmap config * : range = 10000-999999Подробнее о конфигурации домена по умолчанию см. В разделе 5.3.2 «* Домен по умолчанию».
б. включить для доменаrid Бэкэнд для отображения идентификаторов:
idmap config DOMAIN : backend = ridc) Установите достаточно большой диапазон, чтобы включить все RID, назначенные в будущем. Например:
idmap config DOMAIN : range = 2000000-2999999Samba игнорирует пользователей и группы в этом домене, RID которых не находится в пределах досягаемости.
нота
Этот диапазон не должен перекрываться с любой другой конфигурацией домена на этом сервере. Для получения дополнительной информации см. Раздел 5.3.1 «Диапазон идентификаторов планирования».
г. Установите пути оболочки и домашнего каталога, которые будут назначены всем сопоставленным пользователям. Например:
template shell = /bin/bash template homedir = /home/%UДля получения дополнительной информации о подстановке переменных см. Раздел VARIABLE SUBSTITUTIONS на справочной странице smb.conf (5).
-
Проверьте файл ** / etc / samba / smb.conf **:
~]# testparmДля получения дополнительной информации см. Раздел 2 «Проверка файла smb.conf с помощью утилиты testparm».
-
Перезагрузите конфигурацию Samba:
~]# smbcontrol all reload-config -
Убедитесь, что настройки работают должным образом. См. Раздел «Убедитесь, что операционная система может получать учетные записи и группы пользователей домена».
-
5.4.4 Использование идентификатора авторизации для сопоставления серверной части [2]
autoridРоль серверной части похожа наrid Сервер сопоставления идентификаторов, но может автоматически назначать идентификаторы для разных доменов. Это позволяет использовать в следующих ситуацияхautoridзадняя часть:
- Используется только для * домена по умолчанию.
- Для домена * по умолчанию и других доменов нет необходимости создавать конфигурацию сопоставления идентификаторов для каждого дополнительного домена.
- Только для конкретных доменов.
5.4.4.1 Преимущества и недостатки использования autorid backend
преимущество
- Все пользователи и группы домена, чьи рассчитанные UID и GID находятся в пределах диапазона конфигурации, будут автоматически использоваться членами домена.
- Вам не нужно вручную присваивать ID, домашний каталог и оболочку входа.
- Даже если несколько объектов в многодоменной среде имеют одинаковый RID, повторных идентификаторов не будет.
Недостатки
- Между членами домена Samba идентификаторы пользователей и групп отличаются.
- Все пользователи домена получают одинаковую оболочку входа и назначенный домашний каталог. Тем не менее, вы можете использовать переменные.
- Вы не можете исключить отдельных пользователей или группы из доступных на членах домена. Исключаются только пользователи и группы, чей рассчитанный UID или GID превышает диапазон конфигурации.
5.4.4.2 Настройка бэкэнда autorid
Чтобы настроить членов домена Samba для использования домена по умолчаниюautorid Бэкэнд для отображения идентификаторов:
Пометки
Если вы используете autorid для домена по умолчанию, добавление других конфигураций сопоставления идентификаторов для домена не является обязательным.
Процедура 7 Сконфигурируйте autorid backend для членов домена
-
редактировать/etc/samba/smb.conf** [глобальная] ** часть файла:
А. Включите бэкэнд сопоставления идентификаторов авторизации для * домена по умолчанию:
idmap config * : backend = autoridБ. Установите достаточно большой диапазон, чтобы назначить идентификаторы всем существующим и будущим объектам. Например:
idmap config * : range = 10000-999999Samba игнорирует пользователей и группы, чей расчетный идентификатор в этом домене находится вне этого диапазона. Дополнительную информацию о расчете внутреннего идентификатора см. В разделе формулы отображения на справочной странице idmap_autorid (8).
предостережение
После установки диапазона Samba начала использовать его и могла только увеличивать верхний предел диапазона. Любые другие изменения в этом диапазоне могут привести к новым назначениям идентификаторов, что приведет к потере права собственности на файл.
c. (Необязательно) Установите размер диапазона. Например:
idmap config * : rangesize = 200000Samba присваивает это количество последовательных идентификаторов объектам в каждом домене доidmap config *:rangeВсе идентификаторы в диапазоне, установленном в параметре, принимаются. Для получения более подробной информации смотрите r на странице руководства idmap_autorid (8)angesizeОписание параметров.
г. Установите путь оболочки и домашнего каталога, который будет назначен всем сопоставленным пользователям. Например:
template shell = /bin/bash template homedir = /home/%UДля получения дополнительной информации о подстановке переменных см. Раздел VARIABLE SUBSTITUTIONS на справочной странице smb.conf (5).
e. (Необязательно) Добавьте другие конфигурации сопоставления идентификаторов для домена. Если нет единой конфигурации домена, Samba будет использовать ранее настроенный * домен по умолчаниюautoridБэкэнд установлен для расчета идентификатора.
нота
Если вы настраиваете другие серверные части для каждого домена, область действия всех конфигураций сопоставления идентификаторов не должна перекрываться. Для получения дополнительной информации см. Раздел 5.3.1 «Диапазон идентификаторов планирования».
Проверьте файл ** / etc / samba / smb.conf **:
~]# testparm
Для получения дополнительной информации см. Раздел 2 «Проверка файла smb.conf с помощью утилиты testparm».
Перезагрузите конфигурацию Samba:
~]# smbcontrol all reload-config
Убедитесь, что настройки работают должным образом. См. Раздел «Убедитесь, что операционная система может получать учетные записи и группы пользователей домена».
6. Интегрировать файловый сервер Samba в домен IdM.
Если вы используете Red Hat Identity Management (IdM) и Samba в своей среде, вы можете настроить сервер Samba на использование Kerberos для аутентификации пользователей IdM при доступе к общему ресурсу.
Для получения дополнительной информации см. «Red Hat Windows Руководство по интеграции».
7. Настройте общий доступ к файлам на сервере Samba.
Чтобы использовать Samba в качестве файлового сервера, добавьте общий ресурс в файл /etc/samba/smb.conf, настроенный отдельным доменом или членом домена.
Вы можете использовать любой из следующих методов для добавления общих ресурсов:
- POSIX ACL. См. Раздел 7.1, «Настройка для совместного использования с помощью POSIX ACL».
- Мелкозернистый Windows ACL. Пожалуйста, обратитесь к Разделу 7.2, «Настройка для совместного использования с помощью Windows ACL».
7.1 Настройка общего доступа с использованием POSIX ACL [3]
Как служба Linux, Samba поддерживает совместное использование с использованием POSIX ACL. Они позволяют использовать такие утилиты, как chmod, для локального управления разрешениями на сервере Samba. Если общий ресурс хранится в файловой системе, которая поддерживает расширенные атрибуты, вы можете использовать несколько пользователей и групп для определения ACL.
Пометки
Если вам нужно использовать детализированный Windows ACL, обратитесь к Разделу 7.2, «Настройка общего доступа с Windows ACL»
Перед добавлением общего ресурса настройте Samba. Посмотри пожалуйста:
- Раздел 4 «Настройка Samba в качестве автономного сервера»
- Раздел 5 «Установить Samba в качестве члена домена»
7.1.1 Добавление общего доступа с использованием POSIX ACL
Чтобы создать файл с именемexampleShare, он предоставляет содержимое каталога ** / srv / samba / example / ** и использует POSIX ACL:
Процедура 8 Добавьте общий ресурс с помощью POSIX ACL
-
(Необязательно) Если папка не существует, создайте ее. Например:
~]# mkdir -p /srv/samba/example/ -
Если вы беретеenforcingРежим запуска SELinux, пожалуйста, установите в каталогеsamba_share_tКонтекст:
~]# semanage fcontext -a -t samba_share_t "/srv/samba/example(/.*)?" ~]# restorecon -Rv /srv/samba/example/ -
Установите ACL файловой системы на каталог. Для получения дополнительной информации см. Раздел 7.1.2 «Настройка ACL».
-
будуexampleОбщий ресурс добавляется в файл ** / etc / samba / smb.conf **. Например, чтобы добавить общий ресурс и включить разрешения на запись:
[example] path = /srv/samba/example/ read only = noПометки
Независимо от ACL файловой системы, если вы не установилиread only = no, Samba разделяет каталог в режиме только для чтения.
-
проверка /etc/samba/smb.confфайл:
~]# testparmДля получения дополнительной информации см. Раздел 2 «Проверка файла smb.conf с помощью утилиты testparm».
-
Откройте нужный порт и используйтеfirewall-cmdУтилита перезагрузит конфигурацию брандмауэра:
~]# firewall-cmd --permanent --add-service=samba ~]# firewall-cmd --reload -
перезагрузкаsmbслужба:
~]# systemctl restart smb -
(Необязательно) включитьsmbСервис запускается автоматически при запуске:
~]# systemctl enable smb
7.1.2 Настройка ACL
Совместное использование поддержки с использованием POSIX ACL:
- Стандартный Linux ACL. Для получения дополнительной информации см. Раздел 7.1.2.1 «Настройка стандартного ACL для Linux».
- Разверните ACL. Для получения дополнительной информации см. Раздел 7.1.2.2 «Настройка расширенного ACL».
7.1.2.1 Настройка стандартного Linux ACL
Стандартный ACL в Linux поддерживает настройку разрешений для владельца, группы и всех других неопределенных пользователей. ты можешь использовать этоchown,chgrpсchmodУтилита для обновления ACL. Если вам нужен точный контроль, используйте более сложный POSIX ACL, см. Раздел 7.1.2.2 «Настройка расширенного ACL».
Например, изменить ** / srv / samba / example /Владелец каталога настроен наrootПользователи, чтобыГруппа «Пользователи домена **» предоставляет разрешения на чтение и запись и запрещает доступ всем остальным пользователям:
~]# chown root:"Domain Users" /srv/samba/example/
~]# chmod 2770 /srv/samba/example/
Пометки
Включение бита set-group-ID (SGID) для каталога автоматически установит группу по умолчанию для всех новых файлов и подкаталогов в группу по умолчанию для группы каталогов, вместо того, чтобы устанавливать ее как обычное поведение основной группы пользователя, создавшего новую запись каталога. ,
Для получения более подробной информации о разрешениях см. Справочные страницы chown (1) и chmod (1).
7.1.2.2 Установка расширенного ACL
Если файловая система, в которой находится общий каталог, поддерживает расширенные списки ACL, вы можете использовать их для установки сложных разрешений. Расширенные ACL-списки могут содержать разрешения для нескольких пользователей и групп.
Расширенный ACL POSIX позволяет вам настраивать сложные ACL для нескольких пользователей и групп. Однако вы можете установить только следующие разрешения:
- Нет доступа
- Доступ для чтения
- Доступ для записи
- полностью контролировать
Если вам нужны детальные разрешения Windows (например,Создать папку / добавить данные), настройте общий ресурс для использования Windows ACL. Пожалуйста, обратитесь к Разделу 7.2, «Настройка для совместного использования с помощью Windows ACL».
Чтобы использовать расширенный POSIX ACL для общего ресурса:
Процедура 9 Включите расширенный POSIX ACL на общем ресурсе
-
Включите следующие параметры в разделе share файла ** / etc / samba / smb.conf **, чтобы включить наследование ACL для расширенных ACL:
inherit acls = yesПодробности смотрите в описании параметров на справочной странице smb.conf (5).
-
перезагрузкаsmbслужба:
~]# systemctl restart smb -
(Необязательно) Включите службу smb и запустите ее автоматически при запуске:
~]# systemctl enable smb -
Установите ACL на каталог. Для получения дополнительной информации об использовании расширенных ACL, пожалуйста, обратитесь к Главе 5Список контроля доступа。
Пример 4 Настройка расширенного ACL
Следующий процессDomain AdminsГруппа устанавливает права на чтение, запись и выполнение дляDomain UsersГруппа устанавливает разрешения на чтение и выполнение и запрещает другим доступ к каталогу ** / srv / samba / example / **.
Процедура 10 Установите расширенный ACL
Отключите автоматическое предоставление разрешений основной группе учетных записей пользователей:
~]# setfacl -m group::--- /srv/samba/example/ ~]# setfacl -m default:group::--- /srv/samba/example/Основная группа каталогов также отображается на динамическийCREATOR GROUPосновной корпус. Когда вы используете расширенный POSIX ACL на общем ресурсе Samba, участник автоматически добавляется и не может быть удален.
Установите права доступа к каталогу:
А. Предоставьте разрешения на чтение, запись и выполнение группе администраторов домена:
~]# setfacl -m group:"DOMAINDomain Admins":rwx /srv/samba/example/б) предоставить права на чтение и выполнение группе пользователей домена:
~]# setfacl -m group:"DOMAINDomain Users":r-x /srv/samba/example/с. дляother Записи ACL устанавливают разрешения для отказа в доступе пользователям, которые не соответствуют другим записям ACL:
~]# setfacl -R -m other::--- /srv/samba/example/Эти настройки применяются только к этому каталогу. В Windows эти ACL сопоставлены сОтносится только к этой папкеРежим.
Чтобы разрешить наследование разрешений, установленных на предыдущем шаге, новыми объектами файловой системы, созданными в этом каталоге, выполните следующие действия:
~]# setfacl -m default:group:"DOMAINDomain Admins":rwx /srv/samba/example/ ~]# setfacl -m default:group:"DOMAINDomain Users":r-x /srv/samba/example/ ~]# setfacl -m default:other::--- /srv/samba/example/С этими настройками субъектТолько эта папкаРежим теперь установлен наЭта папка, подпапки и файлы。
Samba сопоставляет ранее установленные разрешения со следующим списком контроля доступа Windows:
основной корпус Орган власти Применить к DOMAINDomain Admins полностью контролировать Эта папка, подпапки и файлы DOMAINDomain Users Читать и выполнить Эта папка, подпапки и файлы Everyone [a] Отказываться Эта папка, подпапки и файлы owner (Unix Userowner) [b] полностью контролировать Только эта папка primary_group (Unix Userprimary_group) [c] Отказываться Только эта папка CREATOR OWNER [d] и [e] полностью контролировать Только подпапки и файлы CREATOR GROUP [f] и [e] Отказываться Только подпапки и файлы [a] Samba сопоставляет разрешения этого принципала с другими записями ACL. [b] Samba сопоставляет владельца каталога с этой записью. [c] Samba отображает основную группу каталогов на эту запись. [d] В новом объекте файловой системы создатель автоматически наследует разрешения участника. [e] Конфигурация или удаление этих участников в ACL не поддерживается на общих ресурсах, использующих POSIX ACL. [f] В новом объекте файловой системы основная группа создателя автоматически наследует разрешения этого участника.
7.1.3 Установка разрешений для общего ресурса
(Необязательно) Чтобы ограничить или предоставить доступ к общему ресурсу Samba, вы можете установить определенные параметры в разделе общего доступа к файлу ** / etc / samba / smb.conf **.
Пометки
Управление пользователями, группами или хостами на основе общих разрешений для доступа к общему ресурсу. Эти настройки не влияют на ACL файловой системы.
Используйте настройки на основе общего ресурса, чтобы ограничить доступ к общим ресурсам. Например, отказ в доступе с определенного хоста.
7.1.3.1 Настройка общего доступа на основе пользователей и групп
Управление доступом на основе пользователей и групп позволяет предоставлять или запрещать доступ к общим ресурсам для определенных пользователей и групп. Например, чтобы разрешитьDomain UsersВсе члены группы получают доступ к общему ресурсу, при этом отказывая в доступе к учетной записи пользователя, добавьте следующие параметры в общую конфигурацию:
valid users = +DOMAIN"Domain Users"
invalid users = DOMAINuser
invalid usersПриоритет параметра выше чемvalid usersпараметр. Например, еслиuserУчетная записьDomain Users«Члены группы, когда вы используете приведенный выше пример, доступ к учетной записи будет отказано.
Для получения более подробной информации, пожалуйста, обратитесь к описаниям параметров на справочной странице smb.conf (5).
7.1.3.2 Настройка общего доступа на основе хоста
Управление доступом на основе хоста позволяет вам предоставлять или запрещать доступ к общим ресурсам на основе имени хоста, IP-адреса или диапазона IP-адресов клиента.
Например, чтобы включить127.0.0.1 Айпи адрес,192.0.2.0/24 Диапазон IP иclient1.example.comХост, чтобы получить доступ к общему ресурсу, и в противном случае отказатьсяclient2.example.comДля доступа к хосту, пожалуйста, сделайте следующее:
Процедура 11 Настройте общий доступ на основе хоста
-
Добавьте следующие параметры в общую конфигурацию в /etc/samba/smb.conf:
hosts allow = 127.0.0.1 192.0.2.0/24 client1.example.com hosts deny = client2.example.com -
Перезагрузить конфигурацию Samba
~]# smbcontrol all reload-config
*** хосты отрицают *** соотношение параметров **hosts allowИмеет высокий приоритет Например, еслиclient2.example.comРазрешает IP-адрес, указанный в параметре *** hosts allow ***, затем запрещает доступ к этому хосту.
Для получения более подробной информации, пожалуйста, обратитесь к описаниям параметров на справочной странице smb.conf (5).
7.2 Настройка общего доступа с помощью Windows ACL [4]
Samba поддерживает настройку списков ACL Windows для объектов общего доступа и файловой системы. Это позволяет вам:
- Используйте мелкозернистый Windows ACL
- Использование Windows для управления разрешениями общего ресурса и списками управления доступом файловой системы
Кроме того, вы можете настроить общий ресурс для использования POSIX ACL. Для получения дополнительной информации см. Раздел 7.1, «Настройка общего доступа с использованием POSIX ACL».
7.2.1 Предоставление разрешения SeDiskOperatorPrivilege
Только предоставленныйSeDiskOperatorPrivilegeТолько пользователи и группы с разрешениями могут настраивать разрешения для общего доступа с помощью Windows ACL. Например, чтобы предоставить разрешенияDOMAINDomain Adminsгруппа:
~]# net rpc rights grant "DOMAINDomain Admins" SeDiskOperatorPrivilege -U "DOMAINadministrator"
Enter DOMAINadministrator's password:
Successfully granted rights.
Пометки
В среде домена изменитеSeDiskOperatorPrivilegeПредоставьте доменную группу. Это позволяет централизованно управлять разрешениями, обновляя членство пользователя в группе.
К списку предоставленныхSeDiskOperatorPrivilegeВсе пользователи и группы:
~]# net rpc rights list privileges SeDiskOperatorPrivilege -U "DOMAINadministrator"
Enter administrator's password:
SeDiskOperatorPrivilege:
BUILTINAdministrators
DOMAINDomain Admins
7.2.2 Включить поддержку Windows ACL
Чтобы настроить общий доступ, который поддерживает Windows ACL, вы должны включить эту функцию в Samba. Чтобы включить все общие ресурсы, добавьте следующие параметры в ** / etc / samba / smb.confДокументальный[Глобальный] ** Часть:
vfs objects = acl_xattr
map acl inherit = yes
store dos attributes = yes
Кроме того, вы можете включить поддержку Windows ACL для одного общего ресурса, добавив те же параметры в раздел общего доступа.
7.2.3 Добавление общего доступа с помощью Windows ACL
Чтобы создать файл с именемexampleРазделяемый, он разделяет содержимое каталога ** / srv / samb / example / ** и использует Windows ACL:
Процедура 12 Добавление общего ресурса с помощью Windows ACL
-
(Необязательно) Если папка не существует, создайте ее. Например:
~]# mkdir -p /srv/samba/example/ -
Если вы беретеenforcingРежим запуска SELinux, пожалуйста, установите в каталогеsamba_share_tКонтекст:
~]# semanage fcontext -a -t samba_share_t "/srv/samba/example(/.*)?" ~]# restorecon -Rv /srv/samba/example/ -
будуexampleОбщий ресурс добавляется в файл ** / etc / samba / smb.conf **. Например, чтобы добавить общий ресурс и включить запись:
[example]
	path = /srv/samba/example/
	read only = no
Пометки
Независимо от ACL файловой системы, если вы не установилиread only = no, Samba разделяет каталог в режиме только для чтения.
- Если вы не в ** [глобальном]Частично включить поддержку Windows ACL для всех общих ресурсов, добавьте следующие параметры в[пример] ** раздел, чтобы включить эту функцию для этого ресурса:
vfs objects = acl_xattr
map acl inherit = yes
store dos attributes = yes
- Проверьте файл ** / etc / samba / smb.conf **:
~]# testparm
Для получения дополнительной информации см. Раздел 2 «Проверка файла smb.conf с помощью утилиты testparm».
-
Откройте нужный порт и используйтеfirewall-cmdУтилита перезагрузит конфигурацию брандмауэра:
~]# firewall-cmd --permanent --add-service=samba ~]# firewall-cmd --reload -
перезагрузкаsmbслужба:
~]# systemctl restart smb -
(Необязательно) Включите службу smb и запустите ее автоматически при запуске:
~]# systemctl enable smb
7.2.4. Управление разрешениями общего доступа и списками управления доступом файловой системы для совместного использования с помощью списков управления доступом Windows
Чтобы управлять списком ACL для общего ресурса и файловой системы на общем ресурсе Samba с помощью Windows ACL, используйте приложение Windows, напримерКомпьютерное управление, Для получения дополнительной информации, пожалуйста, обратитесь к документации Windows.
(Необязательно) использоватьsmbcaclsУтилита для управления ACL. Для получения дополнительной информации см. Раздел 7.3 «Использование smbcacls для управления ACL на общих ресурсах SMB».
Пометки
Чтобы изменить разрешения файловой системы из Windows, необходимо использовать учетную запись с предоставленными разрешениями SeDiskOperatorPrivilege. Смотрите Раздел 7.2.1 «ГрантSeDiskOperatorPrivilegeПрава доступа».
7.3 Использование smbcacls для управления ACL на общих ресурсах SMB
smbcaclsУтилита может перечислять, устанавливать и удалять списки ACL файлов и каталогов, хранящихся на общем ресурсе SMB. ты можешь использовать этоsmbcaclsДля управления ACL файловой системы:
- На локальном или удаленном сервере Samba, используя расширенный ACL для Windows или POSIX ACL.
- Удаленное управление общими списками ACL, размещенными в Windows в Red Hat Enterprise Linux
7.3.1 Понимание записей контроля доступа
Каждая запись ACL объекта файловой системы содержит запись управления доступом (ACE) в следующем формате:
security_principal:access_right/inheritance_information/permissions
Пример 5 контроля доступа
в случаеADDomain UsersГруппа имеет Windows дляЭта папка,Подпапки и файлыиз»Modify«Разрешения, ACL содержит следующие ACE:
ADDomain Users:ALLOWED/OI|CI/CHANGE
Ниже описывается каждый ACE:
Security principal
Участник безопасности — это пользователь, группа или SID, к которым применяются разрешения в ACL.
Access right
Определяет, предоставляется ли доступ к объекту или нет. Значение может бытьALLOWEDилиDENIED。
Inheritance information
Существуют следующие значения:
Таблица 3 Настройки наследования
| ценность | описание | Карта к |
|---|---|---|
| OI | Наследование объектов | Эта папка и файл |
| CI | Наследование контейнеров | Эта папка и подпапки |
| IO | Наследовать только | ACE не применяется к текущему файлу или каталогу. |
| ID | унаследуют | ACE наследуется от родительского каталога. |
Кроме того, эти значения могут быть объединены следующим образом:
Таблица 4 Комбинация параметров наследования
| Комбинация значений | Карта для Windows для настроек |
|---|---|
| OI|CI | Эта папка, подпапки и файлы |
| OI|CI|IO | Только подпапки и файлы |
| CI|IO | Только подпапки |
| OI|IO | Только файл |
Permissions
Значение может быть шестнадцатеричным значением, представляющим одно или несколько разрешений Windows, или оно может бытьsmbcaclsAlias:
- Шестнадцатеричное значение, представляющее одно или несколько разрешений Windows.
В следующей таблице приведены расширенные разрешения Windows и соответствующие значения в шестнадцатеричном формате:
Таблица 5 Разрешения Windows и соответствующие им значения smbcacls в шестнадцатеричном формате
| Разрешения Windows | Шестнадцатеричное значение |
|---|---|
| полностью контролировать | 0x001F01FF |
| Проходить по папкам / запускать файлы | 0x00100020 |
| Список папок / чтение данных | 0x00100001 |
| Читать атрибуты | 0x00100080 |
| Читать расширенные атрибуты | 0x00100008 |
| Создать файл / записать данные | 0x00100002 |
| Создать папку / добавить данные | 0x00100004 |
| Написать атрибуты | 0x00100100 |
| Написать расширенные атрибуты | 0x00100010 |
| Удалить подпапки и файлы | 0x00100040 |
| удалять | 0x00110000 |
| Разрешения на чтение | 0x00120000 |
| Изменить разрешения | 0x00140000 |
| Взять на себя ответственность | 0x00180000 |
Несколько разрешений могут использовать побитовыеORОперация объединяется в шестнадцатеричное значение. Для получения дополнительной информации см. Раздел 7.3.3, «Расчет маски ACE».
-
smbcaclsАлиас. В следующей таблице приведены доступные псевдонимы:
Таблица 6 Существующие псевдонимы smbcacls и соответствующие разрешения Windows
псевдоним Соответствующие разрешения Windows R Читать READ Читать и выполнить W Специальные включают в себя следующее:
♦ Создать файл / записать данные
♦ Создать папку / добавить данные
♦ Написать атрибуты
♦ Написать расширенные атрибуты
♦ Разрешения на чтениеD удалять P Изменить разрешения O Взять на себя ответственность X Traversal / выполнение CHANGE Modify FULL полностью контролировать Пометки
Вы можете комбинировать псевдонимы одной буквы при настройке разрешений. Например, вы можетеRDУстановить для применения разрешений Windows «Читать«с»удалятьMsgstr «. Однако вы не можете комбинировать несколько не однобуквенных псевдонимов, а также псевдонимы и шестнадцатеричные значения.
7.3.2 Использование smbcacls для отображения ACL
Если работаетsmbcaclsБез каких-либо рабочих параметров (например,-add), утилита отобразит ACL объекта файловой системы.
Например, чтобы вывести список ACL общего корневого каталога ** // server / example **:
~]# smbcacls //server/example / -U "DOMAINadministrator"
Enter DOMAINadministrator's password:
REVISION:1
CONTROL:SR|PD|DI|DP
OWNER:ADAdministrators
GROUP:ADDomain Users
ACL:ADAdministrator:ALLOWED/OI|CI/FULL
ACL:ADDomain Users:ALLOWED/OI|CI/CHANGE
ACL:ADDomain Guests:ALLOWED/OI|CI/0x00100021
Вывод этой команды показывает:
- ПЕРЕСМОТР: Внутренняя версия Windows NT ACL дескриптора безопасности
- КОНТРОЛЬ: Управление дескриптором безопасности
- Владелец (ВЛАДЕЛЕЦ): Имя или SID владельца дескриптора безопасности
- Группа (ГРУППА): Имя или SID группы дескрипторов безопасности
- ACL Записи. Для получения дополнительной информации см. Раздел 7.3.1 «Понимание записей контроля доступа».
7.3.3 Рассчитать маску АСЕ
В большинстве случаев, когда вы добавляете или обновляете ACE, вы можете использовать перечисленные в Таблице 6 «Существующие псевдонимы smbcacls и соответствующие им разрешения Windows».smbcaclsАлиас.
Однако если вы хотите установить расширенные разрешения Windows, перечисленные в таблице 5 «Разрешения Windows и их соответствующие значения в шестнадцатеричном формате», необходимо использовать побитовоеORОперация для вычисления правильного значения. Вы можете использовать следующую команду оболочки для вычисления значения:
~]# echo $(printf '0x%X' $(( hex_value_1 | hex_value_2 | ... )))
Пример 6 Расчет маски АСЕ
Вы хотите установить следующие разрешения:
- Переместить папку / выполнить файл (0x00100020)
- Список папок / чтение данных (0x00100001)
- Чтение атрибутов (0x00100080)
Чтобы вычислить шестнадцатеричное значение предыдущего полномочия, введите:
~]# echo $(printf '0x%X' $(( 0x00100020 | 0x00100001 | 0x00100080 ))) 0x1000A1Используйте возвращенное значение при установке или обновлении ACE.
7.3.4 Использование smbcacls для добавления, обновления и удаления ACL
Согласно тому, что вы передаетеsmbcaclsС помощью параметров утилиты вы можете добавлять, обновлять и удалять ACL из файлов или каталогов.
Добавить ACL
Чтобы добавить ACL к ** / server / exampleКорень доли, доля будетЭта папка **,вложеннаясфайлизCHANGEПредоставление властиADDomain Usersгруппа:
~]# smbcacls //server/example / -U "DOMAINadministrator
--add ACL:"ADDomain Users":ALLOWED/OI|CI/CHANGE
Обновить ACL
Обновление ACL похоже на добавление нового ACL. Используя ** — изменить с существующими участниками безопасностиПараметр переопределяет ACL для обновления ACL. в случаеsmbcacls ** Если в списке ACL найден участник безопасности, утилита обновит разрешения. В противном случае команда завершится с ошибкой:
ACL for SID principal_name not found
Например, чтобы обновитьADDomain UsersСгруппируйте разрешения и установите ихREADЧитатьЭта папка,вложеннаясфайл:
~]# smbcacls //server/example / -U "DOMAINadministrator
--modify ACL:"ADDomain Users":ALLOWED/OI|CI/READ
Удалить ACL
Чтобы удалить ACL, пожалуйста, удалите ** — удалить с точным ACLПерейти кутилита smbcacls **. Например
~]# smbcacls //server/example / -U "DOMAINadministrator
--delete ACL:"ADDomain Users":ALLOWED/OI|CI/READ
7.4 Разрешить пользователям совместно использовать каталоги на сервере Samba
На сервере Samba вы можете настроить пользователей наrootДелитесь каталогами без разрешения.
7.4.1 Разрешить совместное использование пользователей
Прежде чем пользователи смогут делиться каталогами, администратор должен включить совместное использование пользователей в Samba. Например, чтобы разрешить создание общих ресурсов только для членов локальной группы примеров:
Процедура 13 Включение общего доступа пользователей
-
Создайте файл с именемexample‘Локальная группа (если она не существует):
~]# groupadd example -
Подготовьте каталог Samba для хранения определений общих ресурсов пользователей и правильно установите их разрешения. Например:
А. Создайте каталог:
~]# mkdir -p /var/lib/samba/usershares/б) дляexampleГруппа установила разрешение на запись:
~]# chgrp example /var/lib/samba/usershares/ ~]# chmod 1770 /var/lib/samba/usershares/Установите бит закрепления, чтобы пользователи не могли переименовывать или удалять файлы, хранящиеся в этом каталоге другими пользователями.
-
Редактирование ** / и т.д. / Samba / smb.confФайл и добавьте следующее[Глобальный] ** Часть:
А. Установите путь, сконфигурированный для хранения каталога, определенного пользовательским общим ресурсом. Например:
usershare path = /var/lib/samba/usershares/Б. Установите количество пользовательских ресурсов, которые Samba позволяет создавать на этом сервере. Например:
usershare max shares = 100Если ты правusershare max sharesИспользуйте значения по умолчанию для параметров0, Совместное использование пользователя отключено.
c. (Необязательно) Установите список абсолютных путей к каталогам. Например, чтобы настроить Samba только для совместного использования ** / данныхсПодкаталоги каталога / srv **, пожалуйста, установите:
usershare prefix allow list = /data /srvПожалуйста, обратитесь к разделу USERSHARES справочной страницы smb.conf (5) для получения списка других параметров, относящихся к совместному использованию, которые могут быть установлены.
-
Проверьте файл ** / etc / samba / smb.conf **:
~]# testparmДля получения дополнительной информации см. Раздел 2 «Проверка файла smb.conf с помощью утилиты testparm».
-
Перезагрузите конфигурацию Samba:
~]# smbcontrol all reload-config
Пользователи теперь могут создавать общие ресурсы пользователей. Для получения дополнительной информации см. Раздел 7.4.2, «Добавление пользовательских ресурсов».
7.4.2 Добавление обмена пользователями
После настройки Samba в соответствии с разделом 7.4.1 «Включение общего доступа пользователей» пользователи могут запускатьnet usershare addКоманда для совместного использования каталога на сервере Samba без прав root.
net usershare addВведение в команду:
net usershare add Путь к общему имени [[Комментарий] | [ACL]] [guest_ok = y | n]
нота
Если вы устанавливаете ACL при создании общего ресурса пользователя, вы должны указать параметр комментария перед ACL. Чтобы установить пустой комментарий, используйте пустую строку в двойных кавычках.
Обратите внимание, что если администратор находится в файле ** / etc / samba / smb.confиз[global]Установить в разделеusershare allow guest = yes **, пользователь может включить только гостевой доступ для общего ресурса пользователя.
Пример 7 Увеличение доли пользователей
Пользователь хочет поделиться на сервере samba ** / srv / samba /оглавление. Доля названаНапример, ** не имеет наборов комментариев и должен быть доступен для гостевых пользователей. Кроме того, для разрешений общего доступа должны быть установлены разрешения полного доступа для группы AD Domain Users и разрешения на чтение для других пользователей. Чтобы добавить этот общий ресурс, запустите как пользователь:
~]$ net usershare add example /srv/samba/ "" "ADDomain Users":F,Everyone:R guest_ok=yes
7.4.3 Обновление общих настроек пользователя
Если вы хотите обновить общедоступные настройки пользователя, используйте тот же с общим именем и новыми настройкамиnet usershare addКоманда отменяет совместное использование. Пожалуйста, обратитесь к разделу 7.4.2 «Добавить пользовательский ресурс».
7.4.4 Отображение информации, которой поделились существующие пользователи
Пользователь может войти на сервер Sambanet usershare infoКоманда для отображения пользовательских ресурсов и их настроек.
Для отображения всех пользовательских ресурсов, созданных любым пользователем:
~]$ net usershare info -l
[share_1]
path=/srv/samba/
comment=
usershare_acl=Everyone:R,host_nameuser:F,
guest_ok=y
...
Чтобы получить список только общих ресурсов, созданных пользователем, запустившим команду, пропустите параметр ** — l **.
Чтобы отобразить только информацию о конкретном общем ресурсе, передайте имя общего ресурса или подстановочный знак команде. Например, чтобы отобразить его имя сshare_ В начале обмена информацией, пожалуйста, сделайте следующее:
~]$ net usershare info -l share_*
7.4.5 Список пользовательских акций
Если вы просто хотите перечислить доступные общие ресурсы пользователя, которые не настроены на сервере Samba, используйтеnet usershare listкоманда.
Чтобы вывести список акций, созданных любым пользователем:
~]$ net usershare list -l
share_1
share_2
...
Чтобы получить список только общих ресурсов, созданных пользователем, запустившим команду, пропустите параметр ** — l **.
Чтобы отобразить только информацию о конкретном общем ресурсе, передайте имя общего ресурса или подстановочный знак команде. Например, чтобы отобразить его имя сshare_ В начале обмена информацией, пожалуйста, сделайте следующее:
~]$ net usershare list -l share_*
7.4.6 Удалить пользовательский ресурс
Чтобы удалить общий ресурс пользователя, либо как пользователь, который создал общий ресурс, либо какrootПользовательский ввод:
~]$ net usershare delete share_name
7.5 Включение совместного доступа гостевого доступа
В некоторых случаях вы хотите предоставить общий доступ к каталогу, к которому пользователи могут подключаться без аутентификации. Настройте это, чтобы разрешить гостевой доступ к общему ресурсу.
предостережение
Совместное использование, которое не требует аутентификации, может представлять угрозу безопасности
Если на общем ресурсе включен гостевой доступ, Samba сопоставит гостевые соединения сguest accountУчетная запись операционной системы, указанная в параметре. Гостевые пользователи могут получить доступ к этим файлам, если выполнено хотя бы одно из следующих условий:
- Учетная запись указана в ACL файловой системы
- Разрешения POSIX других пользователей позволяют это
Пример 8 Разрешения на совместное использование гостя
Если вы настроите Samba для сопоставления гостевой учетной записи сnobody(По умолчанию), ACL в следующем примере:
- Разрешить гостевым пользователям читать file1.txt
- Разрешить гостевым пользователям читать и изменять file2.txt
- Запретить гостевым пользователям читать или изменять file3.txt
-rw-r--r--. 1 root       root      1024 1. Sep 10:00 file1.txt
-rw-r-----. 1 nobody     root      1024 1. Sep 10:00 file2.txt
-rw-r-----. 1 root       root      1024 1. Sep 10:00 file3.txt
Например, чтобы включить гостевой доступ для существующего общего ресурса ** [example] **:
Процедура 14 Настройка гостевого обмена
-
Отредактируйте файл ** / etc / samba / smb.conf **:
А. Если это первая гостевая папка, которую вы настроили на сервере:
**В ** [глобальный]Часть будетmap to guest = Bad User**:
[global]
        ...
        map to guest = Bad User
С этим параметром Samba отклоняет попытки входа в систему с неверными паролями, если имя пользователя не существует. Если указанное имя пользователя не существует и гостевой доступ включен на общем ресурсе, Samba рассматривает соединение как гостевой логин.
② По умолчанию Samba сопоставляет гостевые учетные записи с учетными записями в Red Hat Enterprise Linux.nobodyСчет. Или вы можете создать другую учетную запись. Например:
[global]
        ...
        guest account = user_name
Учетная запись, заданная в этом параметре, должна существовать локально на сервере Samba. В целях безопасности Red Hat рекомендует использовать учетную запись без назначенной действительной оболочки.
б.guest ok = yesНастройки добавлены в раздел *** [пример] ***:
[example]
        ...
        guest ok = yes
-
Проверьте файл ** / etc / samba / smb.conf **:
~]# testparmДля получения дополнительной информации см. Раздел 2 «Проверка файла smb.conf с помощью утилиты testparm».
-
Перезагрузите конфигурацию Samba:
~]# smbcontrol all reload-config
8. Оптимизация производительности сервера Samba
В этом разделе описывается, какие настройки могут улучшить производительность Samba при определенных обстоятельствах, а также какие настройки могут негативно повлиять на производительность.
8.1 Установить версию протокола SMB
Каждая новая версия SMB добавляет функциональность и улучшает производительность протокола. Новейшие операционные системы Windows и Windows Server всегда поддерживают последнюю версию протокола. Если Samba также использует последнюю версию протокола, клиент Windows, подключенный к Samba, выиграет от повышения производительности. В самбеserver max protocolЗначением по умолчанию является последняя поддерживаемая стабильная версия протокола SMB.
Чтобы всегда включать последнюю стабильную версию протокола SMB, не устанавливайтеserver max protocol, Если вы устанавливаете параметры вручную, вам нужно изменить настройки, используя каждую новую версию протокола SMB, чтобы включить последнюю версию протокола.
Чтобы отменить настройку, выберите ** / etc / samba / smb.confДокументальный[global]Частично удаленмаксимальный протокол сервера ** параметр.
8.2 Оптимизировать совместное использование каталогов, содержащих большое количество файлов
Чтобы повысить производительность совместного использования каталогов, содержащих более 100 000 файлов, выполните следующие действия:
Процесс 20 оптимизирует совместное использование каталогов, содержащих большое количество файлов
-
Переименуйте все файлы на общем ресурсе в нижний регистр.
Пометки
При настройке этого процесса файлы, имена которых не являются строчными, больше не будут отображаться.
-
Установите следующие параметры в разделе общего доступа:
case sensitive = true default case = lower preserve case = no short preserve case = noДля получения дополнительной информации об этих параметрах, пожалуйста, обратитесь к инструкциям на справочной странице smb.conf (5).
-
Перезагрузите конфигурацию Samba:
~]# smbcontrol all reload-config
После применения этих настроек имена всех вновь созданных файлов на этом ресурсе будут использовать строчные буквы. Из-за этих настроек Samba больше не нужно сканировать прописные и строчные буквы в каталоге, что может повысить производительность.
8.3 Настройки, которые могут негативно повлиять на производительность
По умолчанию ядро в Red Hat Enterprise Linux настроено на высокую производительность сети. Например, ядро использует механизм автоматической настройки размера буфера. В ** / etc / samba / smb.confУстановить в файлеПараметры сокета ** параметры будут переопределять эти настройки ядра. Поэтому установка этого параметра в большинстве случаев приведет к снижению производительности сети Samba.
Чтобы использовать оптимизированные настройки в ядре, выберите ** / etc / samba / smb.confсредний[global]Частично удаленпараметры сокета ** параметры.
9. Обычно используемые утилиты командной строки Samba
В этом разделе представлены часто используемые команды при использовании сервера Samba.
9.1 Использование утилиты net
netУтилита позволяет выполнять несколько задач управления на сервере Samba. Этот раздел представляетnetНаиболее часто используемые подкоманды утилит.
Для получения дополнительной информации см. Справочную страницу net (8).
9.1.1 Используйте команды net ads join и net rpc join
использованиеnetУтилитаjoinПодкоманда, вы можете подключить Samba к домену AD или NT4. Чтобы присоединиться к домену, вы должны вручную создать файл ** / etc / samba / smb.conf ** и при необходимости обновить другие конфигурации, такие как PAM.
нота
Red Hat рекомендуетсяrealmУтилита для присоединения к домену.realmУтилита автоматически обновляет все файлы конфигурации. Для получения дополнительной информации см. Раздел 5.1 «Присоединение к домену».
использованиеnetКоманда для присоединения к домену:
Процедура 21 Используйте команду net для присоединения к домену
-
Вручную создайте файл /etc/samba/smb.conf со следующими настройками:
-
Для членов домена AD:
[global] workgroup = domain_name security = ads passdb backend = tdbsam realm = AD_REALM -
Для членов домена NT4:
[global] workgroup = domain_name security = user passdb backend = tdbsam
-
-
Добавьте конфигурацию сопоставления идентификаторов для * домена по умолчанию и домена, который будет добавлен в раздел [global] файла /etc/samba/smb.conf. Для получения дополнительной информации см. Раздел 5.3 «Общие сведения о сопоставлении идентификаторов».
-
Проверьте файл ** / etc / samba / smb.conf **:
~]# testparmДля получения дополнительной информации см. Раздел 2 «Проверка файла smb.conf с помощью утилиты testparm».
-
Присоединитесь к домену как администратор домена:
-
Присоединиться к домену AD
~]# net ads join -U "DOMAINadministrator" -
Присоединиться к домену NT4:
~]# net rpc join -U "DOMAINadministrator"
-
-
будуwinbindИсточник добавлен в ** / etc / nsswitch.confВ файлеpasswdсВ группе ** запись базы данных:
passwd: files winbind group: files winbind -
Включите и запустите службу winbind:
~]# systemctl enable winbind ~]# systemctl start winbind -
(Необязательно) Используйте утилиту authconf для настройки PAM.
Для получения дополнительной информации см. «Руководство по аутентификации на уровне системы Red Hat«В разделе« Использовать сменный модуль аутентификации (PAM) ».
- (Необязательно) Для среды AD настройте клиент Kerberos.
Для получения дополнительной информации см. «Руководство по аутентификации на уровне системы Red Hat«В разделе« Настройка клиента Kerberos ».
9.1.2 Используйте команду net rpc rights
В Windows вы можете назначать разрешения учетным записям и группам для выполнения специальных операций, таких как установка списков ACL для общего ресурса или загрузка драйверов принтера. На сервере Samba вы можете использоватьnet rpc rightsКоманды для управления разрешениями.
Список разрешений
Чтобы просмотреть все доступные разрешения и их владельцев, используйтеnet rpc rights listкоманда. Например:
~]# net rpc rights list -U "DOMAINadministrator"
Enter DOMAINadministrator's password:
SeMachineAccountPrivilege Add machines to domain
SeTakeOwnershipPrivilege Take ownership of files or other objects
SeBackupPrivilege Back up files and directories
SeRestorePrivilege Restore files and directories
SeRemoteShutdownPrivilege Force shutdown from a remote system
SePrintOperatorPrivilege Manage printers
SeAddUsersPrivilege Add users and groups to the domain
SeDiskOperatorPrivilege Manage disk shares
SeSecurityPrivilege System security
Предоставлено разрешение
Чтобы предоставить разрешения учетной записи или группе, используйтеnet rpc rights grantкоманда.
Например,SePrintOperatorPrivilegeПредоставление властиDOMAINprintadminгруппа:
~]# net rpc rights grant "DOMAINprintadmin" SePrintOperatorPrivilege -U "DOMAINadministrator"
Enter DOMAINadministrator's password:
Successfully granted rights.
Отозвать власть
Чтобы отменить разрешения учетной записи или группы, используйтеnet rpc rights revokeкоманда.
Например, чтобы отменитьDOMAINprintadminВ группеSePrintOperatorPrivilegeРазрешение:
~]# net rpc rights remoke "DOMAINprintadmin" SePrintOperatorPrivilege -U "DOMAINadministrator"
Enter DOMAINadministrator's password:
Successfully revoked rights.
9.1.3 Используйте команду net rpc share
net rpc shareКоманда предоставляет функции перечисления, добавления и удаления общих ресурсов на локальном или удаленном сервере Samba или Windows.
Список акций
Чтобы вывести список общих ресурсов на SMB-сервер, используйтеnet rpc share listкоманда. В качестве альтернативы, передайте параметр ** — S server_name ** этой команде, чтобы получить список общих ресурсов удаленного сервера. Например:
~]# net rpc share list -U "DOMAINadministrator" -S example
Enter DOMAINadministrator's password:
IPC$
share_1
share_2
...
Пометки
Размещено на сервере Samba в /etc/samba/smb.confЧасть файла имеетbrowseable = noЗаданная доля не отображается на выходе.
Добавить долю
net rpc share addКоманда позволяет добавить общий ресурс на SMB-сервер.
Например, удаленный сервер совместно использует каталог C: example . Чтобы добавить этот каталог в качестве примера общего ресурса:
~]# net rpc share add example="C:example" -U "DOMAINadministrator" -S server
Пометки
При указании имени каталога Windows конечная косая черта в пути должна быть опущена.
Чтобы использовать эту команду для добавления общего ресурса на сервер Samba, выполните следующие действия:
- В ** — UПользователь, указанный в параметре, должен иметь предоставленныйSeDiskOperatorPrivilege ** разрешения.
- Вы должны написать скрипт для добавления разделяемой части в ** / etc / samba / smb.confФайл и перезагрузите Samba. Сценарий должен быть/etc/samba/smb.confиз[global]частьadd share commandУстановите в параметрах. Для получения более подробной информации, пожалуйста, обратитесь к справочной странице smb.conf (5)Добавить команду Поделиться ** описание.
Удалить долю
net rpc share deleteКоманда позволяет удалить общий ресурс с сервера SMB.
Например, чтобы удалить файл с именемexampleДелится:
~]# net rpc share delete example -U "DOMAINadministrator" -S server
Чтобы использовать эту команду для удаления общего ресурса с сервера Samba:
- В ** — UПользователь, указанный в параметре, должен иметь предоставленныйSeDiskOperatorPrivilege ** разрешения.
- Вы должны написать скрипт для добавления разделяемой части в ** / etc / samba / smb.confФайл и перезагрузите Samba. Сценарий должен быть/etc/samba/smb.confиз[global]частьdelete share commandУстановите в параметрах. Для получения более подробной информации, пожалуйста, обратитесь к справочной странице smb.conf (5)удалить поделиться командой ** описание.
9.1.4 Использование команды net user
net userКоманда позволяет выполнять следующие операции на AD DC или NT4 PDC:
- Список всех учетных записей пользователей
- Добавить пользователя
- удалить пользователей
Вам нужно указывать способ подключения только при перечислении учетных записей пользователей домена, например *** ads *** в домене AD или *** rpc *** в домене NT4. Другие пользовательские подкоманды могут автоматически определять способ подключения.
Передайте параметр ** — U user_name ** этой команде, чтобы указать пользователей, которым разрешено выполнять запрошенную операцию.
Список учетных записей пользователей домена
Список всех пользователей в домене AD:
~]# net ads user -U "DOMAINadministrator"
Список всех пользователей в домене NT4:
~]# net rpc user -U "DOMAINadministrator"
Добавить учетную запись пользователя в домен
На членах домена Samba вы можете использоватьnet user addКоманда добавляет учетную запись пользователя в домен.
Например,userАккаунт добавлен в домен:
Процедура 22 Добавление учетных записей пользователей в домен
-
Добавить аккаунт:
~]# net user add user password -U "DOMAINadministrator" User user added -
(Необязательно) Используйте оболочку удаленного вызова процедур (RPC), чтобы включить учетную запись на AD DC или NT4 PDC. Например:
~]# net rpc shell -U DOMAINadministrator -S DC_or_PDC_name Talking to domain DOMAIN (S-1-5-21-1424831554-512457234-5642315751) net rpc> user edit disabled user no Set user's disabled flag from [yes] to [no] net rpc> exit
Удалить учетную запись пользователя из домена
На членах домена Samba вы можете использоватьnet user deleteКоманда удаляет учетную запись пользователя из домена.
Например, удалить из доменаuserСчет:
~]# net user delete user -U "DOMAINadministrator"
User user deleted
9.1.5 Используйте команду net usershare
См. Раздел 7.4 «Предоставление пользователям общего доступа к каталогам на сервере Samba».
9.2 Использование утилиты rpcclient
rpcclientУтилита позволяет вручную выполнять функции удаленного вызова процедур (MS-RPC) на стороне клиента на локальном или удаленном SMB-сервере. Однако большинство функций интегрированы в отдельную утилиту, предоставляемую Samba. Использовать толькоrpcclientДля проверки функции MS-PRC.
Например, вы можете использовать эту утилиту для:
-
Управление подсистемой буферизации принтера (SPOOLSS).
Пример 9 Назначение драйвера для принтера
~]# rpcclient server_name -U "DOMAINadministrator" -c 'setdriver "printer_name" "driver_name"' Enter DOMAINadministrators password: Successfully set printer_name to driver driver_name. -
Получить информацию о сервере SMB.
Пример 10 Список всех общих файловых и общих принтеров
~]# rpcclient server_name -U "DOMAINadministrator" -c 'netshareenum' Enter DOMAINadministrators password: netname: Example_Share remark: path: C:srvsambaexample_share password: netname: Example_Printer remark: path: C:varspoolsamba password: -
Используйте протокол удаленного управления учетными записями безопасности (SAMR) для выполнения операций.
Пример 11 Список пользователей на SMB-сервере
~]# rpcclient server_name -U "DOMAINadministrator" -c 'enumdomusers' Enter DOMAINadministrators password: user:[user1] rid:[0x3e8] user:[user2] rid:[0x3e9]Если вы запустите эту команду для автономного сервера или члена домена, пользователи в локальной базе данных будут перечислены. Выполнение этой команды для AD DC или NT4 PDC выводит список пользователей домена.
Полный список поддерживаемых подкоманд см. В разделе «КОМАНДЫ» справочной страницы rpcclient (1).
9.3 Использование приложения samba-regedit
Некоторые настройки (например, конфигурация принтера) хранятся в реестре сервера Samba. Вы можете использовать ncurses-basedsamba-regeditПриложение для редактирования реестра сервера Samba.
Чтобы запустить приложение, введите:
~]# samba-regedit
Используйте следующие ключи:
- Курсор вверх и курсор вниз: просмотр дерева реестра и значений.
- ENTER: Открыть ключ или отредактировать значение
- TAB:в»ключ«с»ценность«Pane
- Ctrl+C: Закройте приложение.
9.4 Использование утилиты smbcacls
См. Раздел 7.3 «Использование smbcacls для управления ACL на общих ресурсах SMB».
9.5 Использование утилиты smbclient
использованиеsmbclientУтилита может получить доступ к общим файлам на SMB-сервере, аналогично FTP-клиенту командной строки. Например, вы можете использовать его для загрузки и скачивания общих файлов.
Например, использоватьDOMAINuserАккаунт аутентифицирует *** пример *** общего ресурса, размещенного на *** сервере ***, пожалуйста, сделайте следующее:
~]# smbclient -U "DOMAINuser" //server/example
Enter domainuser's password:
Domain=[SERVER] OS=[Windows 6.1] Server=[Samba 4.6.2]
smb: >
вsmbclientПосле успешного подключения к общему ресурсу утилита переходит в интерактивный режим и отображает следующее приглашение:
smb: >
Чтобы отобразить все доступные команды в интерактивной оболочке, введите:
smb: > help
Чтобы вывести справку по конкретной команде, введите:
smb: > help command_name
Для получения более подробной информации и инструкций по командам, доступным в интерактивной оболочке, см. Справочную страницу smbclient (1).
9.5.1. Использование smbclient в интерактивном режиме
Если вы используете без ** — спараметрическийsmbclient **, утилита перейдет в интерактивный режим.
Следующая процедура показывает, как подключиться к SMB и загрузить файлы из подкаталогов:
Процедура 23 Используйте smbclient для загрузки файлов с общего ресурса SMB
-
Подключитесь, чтобы поделиться:
~]# smbclient -U "DOMAINuser_name" //server_name/share_name -
Перейдите в каталог ** / example / **:
smb: > cd /example/ -
Список файлов в каталоге:
smb: example> ls . D 0 Mon Sep 1 10:00:00 2017 .. D 0 Mon Sep 1 10:00:00 2017 example.txt N 1048576 Mon Sep 1 10:00:00 2017 9950208 blocks of size 1024. 8247144 blocks available -
Загрузите файл example.txt:
smb: example> get example.txt getting file directorysubdirectoryexample.txt of size 1048576 as example.txt (511975,0 KiloBytes/sec) (average 170666,7 KiloBytes/sec) -
Отключиться от обмена:
smb: example> exit
9.5.2 Использование smbclient в режиме сценария
Если ** — c командыПараметр доsmbclient **, вы можете автоматически выполнять команды на удаленном SMB-ресурсе. Это позволяет использовать в скриптеsmbclient。
Следующая команда показывает, как подключиться к общему ресурсу SMB и загрузить файлы из подкаталогов:
~]# smbclient -U DOMAINuser_name //server_name/share_name
-c "cd /example/ ; get example.txt ; exit"
9.6 Использование утилиты smbcontrol
smbcontrolУтилита позволяет отправлять командные сообщенияsmbd,nmbd,winbinddИли все эти услуги. Эти управляющие сообщения инструктируют службу, например, перезагрузить ее конфигурацию.
Пример 12. Перегрузка конфигурации служб smbd, nmbd и winbindd.
Например, перезагрузитьsmbd,nmbd,winbinddКонфигурация, пожалуйстаreload-configТип сообщения отправленallцели:
~]# smbcontrol all reload-config
Для получения дополнительной информации и списков доступных типов командных сообщений см. Справочную страницу smbcontrol (1).
9.7 Использование утилиты smbpasswd
smbpasswdУтилита управляет учетными записями пользователей и паролями в локальной базе данных Samba.
Если вы запустите команду как пользователь, тоsmbpasswdИзменит пароль пользователя Samba. Например:
[[email protected] ~]$ smbpasswd
New SMB password:
Retype new SMB password:
ЕслиrootЗапуск от имени пользователяsmbpasswdВы можете использовать утилиту, чтобы сделать следующее:
- Создать нового пользователя:
[[email protected] ~]# smbpasswd -a user_name
New SMB password:
Retype new SMB password:
Added user user_name.
Пометки
Перед добавлением пользователей в базу данных Samba необходимо создать учетную запись в локальной операционной системе. Смотрите раздел 4.3.1 «Добавить нового пользователя”
-
Включить пользователей Samba:
[[email protected] ~]# smbpasswd -e user_name Enabled user user_name. -
Отключить пользователей Samba:
[[email protected] ~]# smbpasswd -d user_name Disabled user user_name. -
удалить пользователей:
[[email protected] ~]# smbpasswd -x user_name
Deleted user user_name.
Для получения дополнительной информации см. Справочную страницу smbpasswd (8).
9.8 Использование утилиты smbstatus
smbstatusСервисный отчет:
- Каждый подключен к серверу SambasmbdPID демона. Этот отчет включает имя пользователя, основную группу, версию протокола SMB, информацию о шифровании и подписи.
- Количество подключений, разделяемых каждой Samba. Этот отчет содержитsmbdPID демона, IP-адрес подключенного компьютера, отметка времени установления соединения, информация о шифровании и подписи.
- Список заблокированных файлов. Запись отчета содержит более подробную информацию, такую как тип условной блокировки (oplock).
Пример 13: вывод утилиты smbstatus
~]# smbstatus
Samba version 4.6.2
PID Username Group Machine
Protocol Version Encryption Signing
--------------------------------------------------------------------
---------------------------------------------------------
963 DOMAINadministrator DOMAINdomain users client-pc
(ipv4:192.0.2.1:57786) SMB3_02 - AES-128-CMAC
Service pid Machine Connected at Encryption
Signing:
--------------------------------------------------------------------
-----------
example 969 192.0.2.1 Mo Sep 1 10:00:00 2017 CEST - AES-
128-CMAC
Locked files:
Pid Uid DenyMode Access R/W Oplock SharePath
Name Time
--------------------------------------------------------------------
----------------------------------------
969 10000 DENY_WRITE 0x120089 RDONLY LEASE(RWH) /srv/samba/example
file.txt Mon Sep 1 10:00:00 2017
Для получения дополнительной информации см. Справочную страницу smbstatus (1).
9.9 Использование утилиты smbtar
smbtarУтилита выполняет резервное копирование содержимого общего ресурса SMB или его подкаталогов и сохраняет содержимое в архивном файле tar. Кроме того, вы можете записать содержимое на ленточное устройство.
Например, для резервного копирования ** / сервер / пример / поделитьсянаdemoСодержимое каталога и хранить содержимое в/root/example.tar** в архиве:
~]# smbtar -s server -x example -u user_name -p password -t /root/example.tar
Для получения дополнительной информации см. Справочную страницу smbtar (1).
9.10 Использование утилиты testparm
См. Раздел 2 «Проверка файла smb.conf с помощью утилиты testparm».
9.11 Использование утилиты wbinfo
wbinfoУтилита запрашивает и возвращаетwinbinddИнформация о создании и использовании услуг.
Пометки
winbinddСлужба должна быть настроена и запущена для использованияwbinfo。
Например, вы можете использоватьwbinfoПриходить:
- Список пользователей домена:
~]# wbinfo -u
ADadministrator
ADguest
...
-
Список групп домена:
~]# wbinfo -g ADdomain computers ADdomain admins ADdomain users ... -
Показать SID пользователя:
~]# wbinfo --name-to-sid="ADadministrator" S-1-5-21-1762709870-351891212-3141221786-500 SID_USER (1) -
Показать информацию о доменах и трастах:
~]# wbinfo --trusted-domains --verbose
Domain Name DNS Domain Trust Type Transitive In
Out
BUILTIN None Yes Yes
Yes
server None Yes Yes
Yes
DOMAIN1 domain1.example.com None Yes Yes
Yes
DOMAIN2 domain2.example.com External No Yes
Yes
Для получения более подробной информации см. Справочную страницу wbinfo (1).
10. Другие ресурсы
- Пакет Red Hat Samba содержит справочные страницы для всех команд Samba и файлов конфигурации, используемых для установки пакета. Например, чтобы отобразить справочную страницу файла ** / etc / samba / smb.conf **, указав все параметры конфигурации, которые вы можете установить в этом файле:
~]# man 5 smb.conf
-
/usr/share/docs/samba-version/Содержит общие документы, предоставленные проектом Samba, примеры сценариев и файлы режима LDAP.
-
“Руководство по управлению хранилищем Red Hat Cluster»: Предоставить информацию о настройке Samba и Cluster Simple Database (CDTB) для совместного использования каталогов, хранящихся на томе GlusterFS.
-
“Руководство по управлению кластером Red Hat Enterprise Linux 6В разделе «Конфигурация кластера Samba» в разделе «» описано, как настроить установку высокой доступности Samba.
Этот документ в настоящее время не применяется к последней версии Red Hat Enterprise Linux.
-
Для получения дополнительной информации о монтировании общих ресурсов SMB в Red Hat Enterprise Linux см. «Руководство по управлению хранением Red Hat Enterprise Linux».