Содержание
- Исправляем ошибку 0xc0000e9 при загрузке Windows 7, 10
- Описание ошибки
- Отключите функцию защиты ELAM
- Проблемы при установке
- Исправление ситуации с помощью разнообразных программ
- Проблемы в работающей системе
- Windows 7
- Windows 10
- Проверяем шлейфы
- Маловероятные причины и кардинальные решения
- IO Error Symptoms
- Method 5 Cleaning out Windows Registry
- Solution 2 Change your BIOS settings
- Common Causes of the 0xc00000e9 Unable to Boot Error
- Solution 5 Fix the MBR with Windows PE
- Repair your Errors automatically
- Solution 4 Run a disk check
- Windows 10 Boot Error 0xc000000e
- Perform the Automatic repair
- Rebuild the Boot Configuration Data
- Method 1 Checking the Compatibility of your Hardware
- Error this program does not support the version of windows your computer is running ок
- Counter-Strike: Global Offensive
- Error this program does not support the version of windows your computer is running ок
- Answered by:
- Question
- Answers
- All replies
- How to Fix the Error «This App Can’t Run On Your PC»?
- The core of the problem
- The error This app can’t run on your PC
- Use your account with administrator rights
- 32-bit or 64-bit application
- Disable SmartScreen in Windows 10
- Disable SmartScreen in Windows 10 with Windows Defender Security Center
- Disable SmartScreen in Windows 10 with the Registry Editor
- Disable SmartScreen in Windows 10 with the Local Group Policy Editor
Исправляем ошибку 0xc0000e9 при загрузке Windows 7, 10
К самым неприятным нюансам при работе с ОС Windows следует отнести те, которые, вообще, не позволяют запустить операционную систему. Именно такой часто является ошибка 0xc000000e. Впервые столкнувшись с ней, понять причины возникновения достаточно трудно. А борьба с неполадками такого характера должна вестись «с нескольких сторон». Это значит, что стоит применить сразу несколько способов исправить проблему. О них и пойдёт речь.

Причины возникновения и методика устранения ошибки Windows 0xc000000e.
Описание ошибки
Большая часть владельцев ПК при возникновении ошибки даже не пытается вникнуть в содержимое ее описания, появившееся на мониторе. Текст на иностранном языке по умолчанию считается непереводимым или бесполезным. Хотя в данном случае Microsoft дает короткое, но емкое описание проблемы и рецепт ее устранения.
Код ошибки 0xc00000e9 означает, что у ОС проблемы с подключением устройства ввода-вывода информации. Понять это можно, использовав переводчик от Google или Яндекс. Далее приводится перечень вероятных «виновников» проблемы и стандартная рекомендация по перезагрузке.
Не будь ошибка столь «универсальной», этой информации пользователю вполне бы хватило, чтобы ее устранить. Беда в том, что причин, приводящих к ее появлению, гораздо больше, чем содержится в описании.
Отключите функцию защиты ELAM
В том случае, если первый и второй метод не помогли решить проблему—попробуйте отключить технологию ранней защиты от вредоносного ПО — ELAM (Early-launch Anti-Malware ), которая по умолчанию активна.
Примечание. Технология ELAM – позволяет сертифицированным антивирусам загружаться до запуска всего стороннего ПО. Антивирус в этом случае может выполнять раннюю антивирусную проверку и контролировать запуск драйверов и загружаемого ПО.
Проблемы при установке
Проще всего разобраться с тем, как исправить данную ошибку, можно в момент установки операционной системы. Периферия еще не подключена, следовательно, выбор устройств I/O ограничен. Status 0xc00000e9 при установке Windows 7 или 10 может быть вызван следующими причинами:
Возможных источников проблем не так много, следовательно, «вычислить виновника» достаточно просто:
Исправление ситуации с помощью разнообразных программ
Давайте сразу исключим возможное влияние вирусов: устанавливаем хороший антивирусник, диагностируем систему.
Дальше, если возникла неожиданная ошибка ввода/вывода именно с кодом 0xc00000e9, действуем следующим образом:
При продолжении возникновения неприятной ситуации скачиваем Victoria или MHDD. Запускаем проверку. Последний вариант – попытка переустановки операционной системы. Обязательно следует использовать надежный источник. При невозможности завершения установочного процесса, скорее всего, придется распрощаться с жестким диском и бежать в магазин за новым винчестером.
Знаете английский? Тогда вам может помочь это видео:
Проблемы в работающей системе
Уже установленная и работающая ОС может подкинуть «сюрприз», выдав такую ошибку в момент очередной загрузки. В этом случае первым делом следует отключить периферийные устройства, чтобы исключить возможные источники появления проблемы. Если после перезагрузки система не загрузилась в нормальном режиме, следует переходить к более серьезным действиям.
Windows 7
Ошибка 0xc00000e9 при загрузке Windows 7 говорит о возможных проблемах в работе аппаратной конфигурации. Рассмотрим методы ее исправления, сгруппированные по степени сложности и эффективности.
Выбираем безопасный режим с поддержкой командной строки, отмеченный на скриншоте. После запуска потребуется ввести команду проверки диска на ошибки и подтвердить свои действия.
Поскольку в этом режиме меню «Пуск» отсутствует, третьей командой ПК отправляется в перезагрузку. В результате Windows выполнит проверку жесткого диска на наличие ошибок и поврежденных секторов с попутным восстановлением данных. Операция выполняется в пять этапов, а скорость ее завершения зависит от состояния и объема HDD.
Если компьютер загрузится без ошибок, для очистки совести можете выполнить проверку целостности системных файлов.
Таким образом, вы дополнительно убедитесь, что ошибка не вызвана проблемами в работе самой Windows.
Выбираете пункт, отмеченный на скриншоте, чтобы войти в режим восстановления системы.
Здесь можно последовательно опробовать два выделенных варианта. Если не сработает первый, второй восстановит ОС в устойчивом состоянии с использованием точек System Restore.
Windows 10
Сообщение об ошибке 0xc00000e9 при загрузке Windows 10 вызывается теми же причинами, что и в предыдущих версиях. Отличие заключается в технологии ее устранения. Быстрая загрузка исключает использование клавиши F8. Чтобы войти в режим восстановления сразу, потребуется установочный носитель. Исключением из этого правила могут стать ноутбуки. Часть производителей встраивает в свои модели механизм защиты, который при двух неудачных попытках загрузки ОС автоматически запускает режим восстановления. На десктопе такого «подарка» вам никто не сделает.
Проверяем шлейфы
В настройках БИОС можно обнаружить, что жесткий диск не числится в списке устройств. Соответственно, загрузка с него не может быть произведена. В таком случае необходимо проверить подключено ли комплектующее физически, а именно, не отключены ли шлейфы.
В первую очередь понадобится разобрать компьютер или ноутбук. Жесткий диск подключен к материнской плате при помощи шлейфов. Пользователю необходимо убедиться в их работоспособности. Для этого, следует отключить их, а затем, подключить заново. При это рекомендуется убедиться, что сам шлейф не поврежден.
После этого можно включать компьютер. Если проблема возникала именно по этой причине, то она будет устранена, и система загрузится.
Маловероятные причины и кардинальные решения
Незначительная часть пользователей сталкивается с этой ошибкой в результате установки обновлений, нового ПО или заражения вирусами. Если вы точно уверены, что проблемы в программном обеспечении, можете удалить «виновника» в безопасном режиме. Не выходя из Safe Mode, проведите тестирование системы автономной антивирусной утилитой, запустив ее с флешки.
Если аппаратная конфигурация полностью работоспособна, но систему не удается реанимировать ни одним из перечисленных способов, остается только крайняя мера. Придется пожертвовать несохраненными персональными данными и выполнить «чистую» установку Windows.
IO Error Symptoms
This error may occur suddenly.В When you power on your PC, It will show the windows logo. But it won’t bring any login screen. Instead of login screen, You will see the blue screen and messages something like –
«Windows has encountered a problem communicating with a device connected to your pc.This error can be caused by unplagging a removable storage device…,or by faulty hardware such as a hard drive or CD-ROM.Make sure any removable storage is properly connected and then restart your pc. File:BootBcd Status:0xc00000e9 Info an unexpected I/O error has occured.»
Some users may not see any windows logo and they may see these messages in black screen. It completely indicates that it is a boot error.
Method 5 Cleaning out Windows Registry
Before proceeding, remember that the registry is a complex yet sensitive database on Windows. It is essential in ensuring that the system operates smoothly. Moreover, if you modify it and make even a single punctuation error, you may cause more damage to your computer. So, before you try to manually repair damaged Registry files, you have to make sure that you are absolutely confident that you can correctly complete the process.
What we do recommend is opting for a one-click solution like Auslogics Registry Cleaner. This tool automatically scans and repairs corrupted or damaged registry files that may have caused the error 0xc00000e9. It also creates a backup before every scan so you can easily undo the changes.
Another key thing to remember is that Auslogics Registry Cleaner is 100% free. What’s more, it will take care of all the problematic registry files and not just the ones related to the 0xc00000e9 error. After completing the procedure, you can enjoy optimum computer performance and speed.
Solution 2 Change your BIOS settings
You can try to boot your computer with the hard drive to fix 0xc00000e9. Follow the steps below:
1) Shut down your computer, then press the Power button to boot your computer.
2) Press and hold the button to enter the BIOS setting, generally the ESC, F2, F12 or Delete key (please consult your PC manufacturer or go through your user manual).
3) Once you’re in the BIOS Setup Utility screen, go to Boot options.
4) Once you’re in the Boot options, make sure the first boot device is your hard drive. You can press the arrow key to highlight the hard drive and move it to the top of the boot device list.
5) Save your changes, and reboot your computer. This should fix your problem.
Common Causes of the 0xc00000e9 Unable to Boot Error
In most scenarios, this error leads the user to a blank screen when they try to boot their operating system. In other cases, the user may boot Windows in Normal Mode, but the functionalities are available in Safe Mode. There are several reasons why this problem occurs, and we’ll show them to you so you can have a better understanding of how you can resolve 0xc00000e9 error. Here are some of the factors that cause this issue:
Solution 5 Fix the MBR with Windows PE
The error 0xc00000e9 can occur when you install Windows without setting the Master Boot Record (MBR), so you should set your C drive as the MBR to fix 0xc00000e9.
Note: This is a complicated and difficult process. You should attempt it only if you’re confident in your computer skills.
1) Connect the hard drive or external drive with the Windows PE to your computer.
2) Launch Windows PE, and set your C drive as your Master Boot Record.
3) Reboot your computer to reinstall Windows to see if the problem is solved.
That’s all there is to it. Hope the solutions help you through. If you have any idea, feel free to comment below and let us know.
Repair your Errors automatically
ugetfix.com team is trying to do its best to help users find the best solutions for eliminating their errors. If you don’t want to struggle with manual repair techniques, please use the automatic software. All recommended products have been tested and approved by our professionals. Tools that you can use to fix your error are listed bellow:
Compatible with Microsoft Windows Compatible with OS X
Still having problems?If you failed to fix your error using Reimage, reach our support team for help. Please, let us know all details that you think we should know about your problem.
Reimage – a patented specialized Windows repair program. It will diagnose your damaged PC. It will scan all System Files, DLLs and Registry Keys that have been damaged by security threats.Reimage – a patented specialized Mac OS X repair program. It will diagnose your damaged computer. It will scan all System Files and Registry Keys that have been damaged by security threats.This patented repair process uses a database of 25 million components that can replace any damaged or missing file on user’s computer.To repair damaged system, you have to purchase the licensed version of Reimage malware removal tool.
Reimage Terms of Use | Reimage Privacy Policy | Product Refund Policy | Reimage Terms of Use | Reimage Privacy Policy | Product Refund Policy |
Solution 4 Run a disk check
The error 0xc00000e9 can be caused by the disk problem. You should make sure that your disk works properly.
2) In the search box on your desktop, type cmd. Then right click Command PromptВ (right click cmd if you’re using Windows 7) and click Run as administrator. Then click Yes to confirm.
3) Type chkdsk /f /r, then press Enter on your keyboard.
4пј‰ Press Y on your keyboard.
Note: Disk check will start the next time you boot your PC and it might take some time to complete. If you don’t have time to wait for the disk check to complete when restarting your computer, you can skip it or schedule it again.
Windows 10 Boot Error 0xc000000e
Unplug all USB devices and disconnect if possible all other hard drives.В Then unplug power and remove battery, press and hold the Power button down for 30 seconds, plug back in power cable and try starting again.В Check if this helps to boot normally.
Note: As windows wonвЂt start normally to perform troubleshooting steps, we need boot Windows form installation media to access advanced options and perform startup repair and rebuild Boot configuration data. If you donвЂt have check how to create Windows 10 installation media from here.
Perform the Automatic repair
When you are ready with Windows 10 installation media, or UBD put it to your PC. Now follow steps below to access advanced options and perform startup repair that scan and fix problems prevent windows to start normally.
Rebuild the Boot Configuration Data
If after startupВ repair still getting the same error then its now time to look at the BCD (В Boot Configuration Data ). As discussed before the main reason behind this error 0xc000000e is the invalid or corrupted BCD (Boot Configuration Data) configuration. Lets follow steps below to rebuild the Boot configuration file.
Also Read: How to secure all your Windows 10 devices and browse anonymously
Bootrec /scanos Bootrec /fixmbr Bootrec /fixboot Bootrec /rebuildbcd
After that restart Windows and check there is no more Boot Error 0xc000000e while start Windows.
Method 1 Checking the Compatibility of your Hardware
As we’ve mentioned, one of the causes of this error can be malfunctioning or incompatible drivers. As such, we recommend disconnecting external devices, such as USB flash drives and external hard drives. However, leave your keyboard and mouse connected. After disconnecting the external devices, restart your computer.
If this method fixes the issue, you can plug back your devices one at a time. Restart your computer after connecting a device. You should be able to determine which of them causes the error. In this case, you would have to update its driver to the latest manufacturer-recommended version. To complete this step, proceed to Method 3.
Источник
Error this program does not support the version of windows your computer is running ок


Counter-Strike: Global Offensive


No you cant use windows 7 on faceit, faceit stop the support for a long time ago
No you cant use windows 7 on faceit, faceit stop the support for a long time ago
Around 05 2020 they support suppoing windows 7 for the anti cheat and some topic about this are going far way to May 21, 2018
Around 05 2020 they support suppoing windows 7 for the anti cheat and some topic about this are going far way to May 21, 2018
I know why you copy and past this? do you think its Smart info for me? or idk about this. I told you i played faceit with my w7 system. and my FACEIT AC still working on my PC i’am just Asking CSGO CRASHING NOT ANTI CHEAT, JUST try to understand this DUDE
Im just saying that from that date the anti cheat want you to use windows 10 and why you game crash when you are using windows 7 with anti cheat on means that its not supported. When something gets outdata the client don’t crash the games are
Just one more thing you played 08 sep last game long time ago:)
Источник
Error this program does not support the version of windows your computer is running ок
This forum has migrated to Microsoft Q&A. Visit Microsoft Q&A to post new questions.
Answered by:

Question
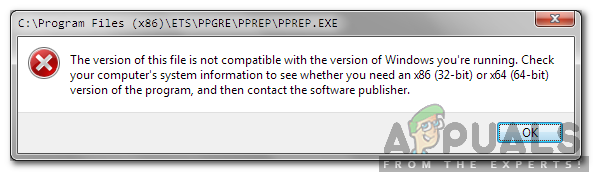
The version of this file is not compatible with the version of Windows you’re running. Check your computer’s system information to see whether you need an x86 (32-bit) or x64 (64-bit) version of the program, and then contact the software publisher.
Running on Windows Server 2008 Standard Service Pack 1.
C:UsersAdministrator>ver
Microsoft Windows [Version 6.0.6001]
Any suggestions you have are very much appreciated,
Dale E. Moore
Answers
Windows Server 2008 fully supports the 64-bit architecture processors from AMD and Intel. The 64-bit version of and Windows Server 2008 can run all 32-bit applications with the help of the WOW64 emulator. However, the kernel does not support 16-bit applications, 32-bit installers, and 32-bit kernel mode drivers.
All 64-bit drivers have to be digitally signed for Windows Server 2008 64-bit editions. Unsigned drivers are not supported and cannot be installed on 64-bit Windows Server 2008. The digital signature check is done during both installation and driver load time. When a 16-bit installer or application is launched, the following error message is displayed:
“ The version of this file is not compatible with the version of Windows you’re running. Check your computer’s system information to see whether you need an x86 (32-bit) or x64 (64-bit) version of the program, and then contact the software publisher.”
Here are few resources which might be helpful for you –
Источник
How to Fix the Error «This App Can’t Run On Your PC»?
Read this article to learn how to fix the problem with running an application on PC, and we will find out why this error appears and how to solve the problem.

The core of the problem
On the Internet, there are lots of websites offering to install various applications and programs. At an early stage, Windows 10 operating system can detect and warn the user of possible issues, or even block a harmful application or program at once.
For this purpose, Microsoft has improved greatly the built-in defense component, SmartScreen. Its main task is to protect the user from apps provided by questionable developers. SmartScreen helps to reveal any previously detected malware, applications or websites created for malicious purposes, and takes informed decisions on blocking their access, download or use on your personal computer or another computing device.
At the first stage, SmartScreen analyzes all applications, programs and webpages for any suspicious activities. The next step will be to compare suspicious apps and webpages with the list of programs and websites recognized to be harmful. In case of a coincidence, SmartScreen will block download or installation for such a program, and display a corresponding notification for the user.
Obviously, SmartScreen is quite a useful feature in Windows 10 and using it seems absolutely justified. However, frequent error messages or warning notifications displayed while you are working with an application or website that you trust can become quite irritating. In that case, SmartScreen is easy to disable – if you know the app we are talking about is absolutely safe.
This security feature can display quite a number of various warnings and error messages, but most of these can be sorted out on your own. Mostly, these are issues related to providing additional permissions or signing in to an account with administrator’s rights.
Still, cases when you see a SmartScreen message saying This app can’t run on your PC are totally different. Such messages only suggest that you contact the program’s developer for advice – and that’s all. Also, you can face such messages when apps that used to run seamlessly on your computer, suddenly can’t start, for no evident reason. Yet don’t worry: even if you see the error This app can’t run on your PC in Windows 10, here’s what you can do.
The error This app can’t run on your PC
If you see such a message, it means there is a compatibility error. The application you are trying to install is incompatible with your operating system, Windows 10. You may also encounter this error if the application requires special permissions to run – and the current user account lacks them. This error only appears when you are trying to install an application, and never does when you start one. If an application is already installed to your computer, starting it will never trigger this error. There are two ways to fix it.

Use your account with administrator rights
When you see this error message, it might be due to your signing in to an account which doesn’t have administrator rights. To exclude this one out, check the account you are using now. If the current account is not the administrator’s one, switch to that account, and try installing the application again. If this method doesn’t work, try another one on the list.
32-bit or 64-bit application
If you’re using the 32-bit version of Windows 10 and trying to run a 64-bit version of the program, the error should have been expected. Similarly, if you’re trying to install a 32-bit program onto a 64-bit version of Windows 10, this error may also take place. If the problem comes from bitness, there’s only one solution – you’ve got to find the proper version of the necessary application and install it.
Disable SmartScreen in Windows 10
Sometimes, the error This app can’t run on your PC may be false. That’s why if the advice I have given you in this article didn’t help you and you still face this error, and you still need to run this app despite the warning, try disabling SmartScreen filter. In this tutorial, we will show you three ways to disable the security feature, as it is applied to the entire Windows 10 operating system, to applications received from Microsoft Store, and to the system’s featured browser, Microsoft Edge.
Disable SmartScreen in Windows 10 with Windows Defender Security Center
In this case, you should open Windows Defender Security Center. It can be done in a few ways.
Click on the Start button on the Taskbar, and open the main Windows menu, then click the gearwheel symbol. Alternatively, drag the scroll bar down until you find the line Settings.

In the application window, drag the slider down and select the section Update and Security.

On the left, select Windows Security, and on the right click on Open Windows Defender Security Center.

It opens the main window of Windows Defender Security Center.

In the side menu on the right, select App & browser control. You will be redirected to the page where you can configure SmartScreen for applications and browsers.

Here, you can disable Check apps & files, SmartScreen for Microsoft Edge and SmartScreen for Microsoft Store apps. Check the Off option in corresponding sections.
When the pop-up notification from Windows User Account Control asks Do you want to allow this app to make changes to your device? click Yes for the changes to take effect.
Disable SmartScreen in Windows 10 with the Registry Editor
Note: It is important to remember that anything you do to the registry is on your own responsibility. Any actions involving the registry may cause irreversible consequences. Windows 10 may begin working with errors, some apps or programs may not be able to start, the operating system can crash or have problems when booting. Before you start modifying the registry, we strongly recommend backing it up, just in case. To do it, open the Registry Editor, choose the File tab in the main menu, and select Export. The operating system will suggest you to give a name to the registry backup and select the directory where to save it. Choose a name that will help you to remember when exactly this backup was created. The best name would be the date of creation, for example, 02-04-2019. After that, click Save. Now you will have a registry backup file which you can use to restore it if necessary.
One more time, open the Run dialogue box in any of the ways described in this article (for example, by pressing the keyboard shortcut Windows + R for quick access to the Runwindow). In the command prompt field, type the command for opening the Registry Editor (regedit) and click ОК to perform the command.

When the pop-up notification from Windows User Account Control asks Do you want to allow this app to make changes to your device? click Yes and open the Registry Editor window.

In the left-side part of the window, follow the path:
You can also use a different method for accessing this particular section of the registry. Just copy and paste it into the address bar of the Registry Editor (it’s under the main menu). This way, you can avoid possible errors when selecting the registry section, as the left panel displays many similar directories, and this specific method helps you make sure you use the correct address.

Right-click on an empty area on the right, select New from the context menu that appears, and click on the nested menu option DWORD value (32 bit).

Give the new DWORD value the name EnableSmartScreen. Double-click on it, or right-click on it and select Modify from the menu.

In the window Edit DWORD value (32 bit) set the Value data to0 (this value data will be used by default). Click ОК or press Enter on your keyboard to save the changes to the value.

Now close the Registry Editor window and restart your computer. After that, SmartScreen will be disabled.
Disable SmartScreen in Windows 10 with the Local Group Policy Editor
If your computer is running Windows 10 Home Edition, you won’t be able to use the functionality of the Local Group Policy Editor, as this utility is not excluded into this particular version of the operating system. For other versions of Windows 10, do the following.
Open the Run dialogue box in any of the ways described in today’s article (for example, right-click on the Start button in the Taskbar, and select the Run dialogue box in the menu that opens). In the Command Prompt window, type the command gpedit.msc.

Click ОК or press Enter on your keyboard to confirm your action, and the Local Group Policy Editor window will appear.

In the left-side panel, follow this path:
Computer Configuration – Administrative Templates – Windows Components – Windows Defender SmartScreen.

There are two subsections, Explorer and Microsoft Edge. Each of them contains a policy setting Configure Windows SmartScreen that allows you to enable or disable the filter as you like. Double-click on it, or right-click on it and select Edit from the menu.

In the window that opens, check the option for Disabled, then click Apply and ОК to save the changes you have made.

Apply this algorithm to every subsection: Explorer and Microsoft Edge. In the first subsection, it disables checking files in Windows 10, and in the second subsection it turns off SmartScreen in Microsoft Edge. After saving the changes, close the Local Group Policy Editor, and the SmartScreen feature will be disabled.
There is also a way to disable SmartScreen in Microsoft Edge in the browser settings. Open Microsoft Edge and click on the three-dot button in the top right corner to open the main menu.


Then click View advanced settings.

Scroll down to find the line Help protect me from malicious sites and downloads with Windows Defender SmartScreen and set the slider to Off.

Finally, when the SmartScreen feature is disabled, make sure that your application starts and works correctly now. If you see the error again, the problem must be in the application itself, not in the security feature.
Then all you can do is to wait for another update to fix this issue, or find another program to replace the faulty app. If you disabled the SmartScreen feature, make sure you turn it on again after the necessary application is installed. It’s not a good idea to leave your system open to threats and without protection, so turn the feature on again and improve the security of your operating system.
See the full article with all additional video tutorials. If you still have any questions, please ask in a comments. Also visit our Youtube channel, there are over 400 video tutorials.
Источник
Щелкните правой кнопкой мыши основной файл «.exe» программы. Выберите «Свойства» и щелкните вкладку «Совместимость». Нажмите «Запустить средство устранения неполадок совместимости» для Windows 10/8 и «Помогите мне выбрать настройки» для Windows 7.… Следуйте инструкциям на экране и повторяйте процесс, пока программа не заработает.
Используйте следующие шаги:
- 1) Щелкните правой кнопкой мыши программу.
- 2) Нажмите на Свойства.
- 3) Щелкните вкладку «Совместимость».
- 4) Выберите «Запустить эту программу в режиме совместимости» и выберите Windows Vista или любую другую операционную систему, в которой программа успешно работала.
12 центов 2010 г.
Как исправить несовместимые программы в Windows 10?
В поле поиска на панели задач введите название программы или приложения, для устранения неполадок. Выберите и удерживайте (или щелкните правой кнопкой мыши) его, а затем выберите Открыть расположение файла. Выберите и удерживайте (или щелкните правой кнопкой мыши) файл программы, выберите «Свойства», а затем перейдите на вкладку «Совместимость». Выберите Запустить средство устранения неполадок совместимости.
Как изменить режим совместимости с Windows?
Изменение режима совместимости
Щелкните правой кнопкой мыши исполняемый файл или файл ярлыка и выберите «Свойства» во всплывающем меню. В окне «Свойства» перейдите на вкладку «Совместимость». В разделе «Режим совместимости» установите флажок «Запускать эту программу в режиме совместимости для».
Какая версия Windows несовместима с запущенной?
Версия этого файла несовместима с используемой вами версией Windows. Проверьте системную информацию своего компьютера, чтобы узнать, нужна ли вам версия программы x86 (32-разрядная) или x64 (64-разрядная), а затем обратитесь к издателю программного обеспечения.
Как решить проблему с неподдерживаемым 16-битным приложением?
Для поддержки 16 бит потребуется включить функцию NTVDM. Для этого нажмите клавиши Windows + R, затем введите: optionalfeatures.exe и нажмите Enter. Разверните «Устаревшие компоненты», затем отметьте NTVDM и нажмите «ОК».
Могу ли я запускать старые программы в Windows 10?
Ожидается, что Windows 10, как и ее предшественники, будет иметь режим совместимости, позволяющий пользователям запускать старые программы, написанные еще в то время, когда предыдущие версии Windows были новейшей операционной системой. Эта опция становится доступной, если щелкнуть приложение правой кнопкой мыши и выбрать совместимость.
Как запустить старые программы в Windows 10?
Щелкните правой кнопкой мыши ярлык вашей программы или EXE-файл и выберите «Свойства». Когда появится экран «Свойства», выберите вкладку «Совместимость», затем выберите, какую версию Windows вы хотите использовать. Конечно, не забудьте нажать OK, чтобы он всегда открывался в установленном вами режиме.
Как исправить несовместимость этого устройства?
Чтобы исправить сообщение об ошибке «ваше устройство несовместимо с этой версией», попробуйте очистить кеш Google Play Store, а затем данные. Затем перезапустите Google Play Store и попробуйте снова установить приложение.
Как проверить, совместима ли программа с Windows 10?
Найдите логотип Windows (на нем написано «Установите Windows 10») на панели задач. Это приведет вас к приложению Get Windows 10, которое позволяет зарезервировать бесплатную копию обновления, указав свой адрес электронной почты. Чтобы проверить наличие проблем с совместимостью, в том же окне щелкните значок меню в левом верхнем углу, а затем ссылку «Проверьте свой компьютер».
Как отключить режим совместимости в Windows 10?
Если вы хотели отключить режим совместимости для программы, вы можете попробовать следующие шаги.
- Щелкните правой кнопкой мыши установочные файлы и выберите свойства.
- Перейдите на вкладку совместимость и снимите флажок Запускать эту программу в режиме совместимости для:
- Нажмите «Применить» и «ОК».
Есть ли в Windows 10 режим совместимости?
Как и в Windows 7, в Windows 10 есть параметры «режима совместимости», которые заставляют приложения думать, что они работают в более старых версиях Windows. Многие старые настольные программы Windows будут нормально работать при использовании этого режима, даже если бы они не работали иначе.
Как исправить проблемы совместимости в Windows 7?
Решение проблемы совместимости программ в Windows 7
- Щелкните значок Pearl, а затем щелкните Панель управления.
- Нажмите «Найти и исправить проблемы» в разделе «Система и безопасность».
- Щелкните Запускать программы, созданные для предыдущих версий Windows, в разделе «Программы».
- Выберите программу и нажмите Далее. …
- Щелкните Попробовать рекомендуемые настройки.
Как запустить 32-битную программу на 64-битной Windows 10?
Запуск 32-битных приложений в Windows 10 64-бит.
- WoW64. Ссылка. По-видимому, это должно позволить вам запускать 32-битную версию на 64-битной Windows. …
- Режим XP. Ссылка. …
- Виртуальная машина коробки. Ссылка. …
- Разделение диска на 32-битные и 64-битные версии По-видимому, вы можете использовать бесплатный инструмент EaseUS, чтобы разделить диск на два, а затем установить отдельные 32-битные и 64-битные версии.
Проблемы с ноутбуком
На ноутбуке появилось сообщение об ошибке
Windows Boot Manager
Windows failed to start. A recent hardware or software change might be the cause. To fix the problem:
1. Insert your windows installation disc and restart your computer.
2. Choose your language settings, and then click »Next.»
3. Click »Repair your computer.»
If you do not have this disc, contact your system administrator or computer manufacturer for assistance.
File: BootBCD
Status: 0xc000000f
Info: An error occurred while attempting to read the boot configuration data.
Или в переводе на русский
Диспетчер загрузки Windows
ОС Windows не удалось запустить. Последние аппаратные или программные изменения могут быть причиной. Для решения этой проблемы:
1. Вставьте установочный диск Windows, и перезагрузите компьютер.
2. Выберите параметры языка, а затем нажмите кнопку» Далее. »
3. Нажмите» ремонтом вашего компьютера. »
Если у вас нет этого диска, обратитесь к системному администратору или изготовителю компьютера для получения помощи.
Файл: Boot BCD
Статус: 0xc000000f
Информация: Произошла ошибка при попытке чтения данных конфигурации загрузки.
Нашла установочный диск Windows 7. Безрезультатно.
А вот установочный диск Windows 8 помог. Хотя и установлен на ноутбуке был Windows 7.
- Перезагрузила компьютер.
- Зашла в BIOS при помощи специальной клавиши, которая для каждой материнской платы своя, у меня F2.
- Открыла раздел биоса Main. Установила F12 Boot Menu Enabled. Далее нажала F10 для сохранения изменений меню и выхода из него.
- Установила установочный диск в CD ROM, который сделала первым в загрузочной иерархии. По умолчанию загрузка производится из жесткого диска.
- Перезагрузила компьютер и нажала F12 для входа в Boot Menu.
- При появлении на экране строки «Press any kay from CD or DVD» нажала любую из клавиш, чтобы запустилась загрузка с CD ROM и началась установка Windows.
- После того, как появится меню установки нажимаем «Далее».
- Теперь необходимо в левом нижнем углу найти «Восстановление».
После нажатия на поле » Восстановить» у меня появилась строка Диск заблокирован. По этой причине пришлось все предыдущие операции проделать повторно и отправится в меню «Диагностика» и «Дополнительные параметры» там «Командная строка».
Теперь займемся открытием доступа к диску, на котором находится Windows.
Необходимо прописать простую команду «Bootrec /fixmbr». Нажимаем «Enter».
- Ключ меняем на «/rebuildbcd». Опять же подтверждаем «Enter».
- Перезагружаем компьютер.
- Теперь появляется доступ к диску.
Главное, что для процедуры необходимо использовать дистрибутив Windows. И даже может понадобиться ключ активации, с помощью которого ранее и была установлена текущая система. В противном случае команда может не сработать, а значит все останется, как есть.
У меня на удивление сработало при запуске диска с Windows 8, и система с Windows 7 восстановилась.
В моем случае думаю что все проблемы связаны с тем, что первоначально на ноут буке была установлена Windows Vista. Возможно аппаратно мой ACER не тянет Windows 7 и поэтому у меня частенько происходит перезагрузка или загорается синий экран.
Источник
This program does not support the version of Windows your computer is running
Hi guys, what’s up there?
I have Windows 7 in several places and Skype works fine. Now I have new laptop also with Windows 7 and this version of Windows is not supported. Why? Skype worked well until update week ago. I tried to install several different Skype versions and same error all the time.
Looks like it’s a time to say goodbye Skype and use something friendly and stable software.
PS! Windows 10 is not an option, because graphical drivers doesn’t work normally with CAD/CAM software.
Replies (8)
Best regards
Vijay Verma
Timezone: UTC+05:30, PST+12:30
Availability Hours (UTC) : 05:00 AM — 05:00 PM
14 people were helped by this reply
Did this solve your problem?
Sorry this didn’t help.
Great! Thanks for marking this as the answer.
How satisfied are you with this reply?
Thanks for your feedback, it helps us improve the site.
How satisfied are you with this response?
Thanks for your feedback.
71 people were helped by this reply
Did this solve your problem?
Sorry this didn’t help.
Great! Thanks for marking this as the answer.
How satisfied are you with this reply?
Thanks for your feedback, it helps us improve the site.
How satisfied are you with this response?
Thanks for your feedback.
Uninstall Skype and reinstall Skype Desktop client
CTRL+SHIFT+ESC to invoke Task Manager > Kill any instance of Skype.exe
Windows Key+R
Type %appdata%skype > Enter
Rename Skype folder to something else say Skype_Old
Reinstall Skype again from https://go.skype.com/windows.desktop.download
When I start installing, then it show on the blue bar on the top — Skype 8.34 is installing. When that window closes, then new will come up with information: Skype 8.33 is installing and it went to loop.
Is new skype sensitive for processor too? I have i7-8550U.
3 people were helped by this reply
Did this solve your problem?
Sorry this didn’t help.
Great! Thanks for marking this as the answer.
How satisfied are you with this reply?
Thanks for your feedback, it helps us improve the site.
Источник
Процессор не поддерживает данную версию Windows. Что это значит?
Microsoft продолжает усиленно радовать, удивлять и шокировать своих пользователей. Буквально на днях ко мне обратился коллега с такой проблемой: он приобрел и собрал новый ПК на базе нового процессора Intel Core i3 7100. На собранный компьютер был успешно установлен образ Windows 7. Но через некоторое время, после того, как Windows 7 закачала и установила все обновления через Windows Update, система перестала получать новые обновления со следующей ошибкой:
Unsupported hardware
Your PC uses a processor that is designed for the latest version of Windows. Because the processor is not supported together with the Windows version that you are currently using, your system will miss important security updates.
Не поддерживаемое оборудование
Ваш процессор не поддерживает данную версию Windows, вы не сможете получать обновления.
Несовместимое оборудование
Ваш компьютер оборудован процессоров, предназначенным для последней версии Windows, вы пропустите важные обновления системы безопасности.
При попытке выполнить поиск обновления через Windows Update появляется ошибка:
Code 80240037 Windows Update encountered an unknown error.
Неподдерживаемые процессоры для Windows 7 и Windows 8.1
Дело в том, Microsoft еще в прошлом году анонсировала, что все обладатели новейших процессоров должны использовать только последнюю версию клиентской платформы — Windows 10. Для более старых версий Windows будет созданы ограничения для использования данных моделей процессоров.
Ограничения распространяется на следующие поколения процессоров:
- 7-ое — поколение процессоров Intel Core (микроархитектура Kaby Lake , выпуск начался в 2017 году)
- Седьмое поколение процессоров AMD (микроархитектура Bristol Ridge , выпуск начался в 3 квартале 2016 года)
- Qualcomm 8996 (в основном используется для мобильных устройств)
В апреле 2017 года MSFT выпустило специальные патчи для предыдущих версий ОС
- KB4012218 – для Windows 7 SP1 и Windows Server 2008 R2
- KB4012219 – для Windows 8.1 и Windows Server 2012 R2
В описании патчей заявляется о появление функционала определения поколения процессора и поддерживаемого оборудования при поиске обновлений через Windows Update.
Enabled detection of processor generation and hardware support when PC tries to scan or download updates through Windows Update.
Соответственно, после установки данных обновлений, система начинает блокировать загрузку новых обновлений (в т.ч для MS Office) и драйверов на старых версиях ОС с ошибкой 80240037 , тем самым вынуждая пользователей переходить на Windows 10 /Windows Server 2016. Таким образом, все старые системы с новым оборудованием перестают получать обновления безопасности и переходят в разряд уязвимых. Похоже на шантаж…
Конечно, временно поможет удаление этих обновлений (wusa.exe /quiet /uninstall /kb:4012218 /promptrestart или wusa.exe /quiet /uninstall /kb:4012219 /promptrestart ) и блокировка их установки, но с высокой долей вероятности они прилетят в следующем месяце в обновлении Monthly Rollup (в рамках новой концепции накопительной модели кумулятивных обновлений ).
Кроме того, блокируется установка драйверов для видеоадаптеров на базе графических процессоров Intel седьмого поколения (Intel HD Graphics 610 — 650). В Windows 7 SP1 он определяется как стандартный VGA графический адаптер.
При попытке установить скачанный с драйвера производителя подписанный видео драйвер, появляется ошибка «Эта система не удовлетворяет минимальным требованиям для установки программного обеспечения».
Как вы видите, непосредственно в установщике драйвера указано, что на оборудовании с седьмым поколением процессоров Intel, драйвер может быть установлен только в Windows 10 x64.
Wufuc – патч для восстановления Windows Update
Существует неофициальный обходной метод, позволяющий убрать сообщение «Оборудование не поддерживается» и восстановить возможность получения и установки обновлений безопасности на компьютерах с Windows 7 и 8.1 с процессорами Intel Kaby Lake, AMD Ryzen, и другими не поддерживаемыми CPU.
Пользователь GitHub под ником Zeffy выпустил небольшой патч Wufuc (windows update …. ну вы поняли), который позволяет избавиться от проблемы «несовместимого оборудования». Патч отключает сообщение Центра обновлений о несовместимости оборудовании и разрешает компьютеру получать обновления с Windows Update. Последнюю стабильную версию патча Wufuc можно скачать тут: https://github.com/zeffy/wufuc/releases/latest .
Есть версия Wufuc как для x86, так и для x64 систем.
Согласно информации от Zeffy функция обнаружения типа процессора и запрета получения обновлений находится в библиотеке wuaueng.dll . Первоначально патч Wufuc заменял данный файл, но т.к. данное решение неустойчиво против обновления файла очередным обновлением Windows Update, в последующих релизах Wufuc логика работы патча была изменена.
Теперь фактическая замена файла wuaueng.dll не производится. Установщик wufuc_setup_x64.msi регистрирует новое задание планировщика, которое запускает wufuc при загрузке компьютера. Затем wufuc внедряет себя в процесс service host или службу wuauserv и перехватывает вызов функций IsDeviceServiceable и IsCPUSupported, модифицируя возвращаемый ответ.
Таким образом патч wufuc отключает сообщение «Оборудование не поддерживается» в Windows Update, и позволяет продолжать устанавливать обновления на системах Windows 7 и 8.1.
Источник
Windows is one of the most popular operating systems out there with more than a billion users. All of this success comes due to the numerous features that have been made part of the operating system over the years. The latest and the greatest version of Windows is the “Windows 10” operating system that Microsoft has been pushing its users to upgrade to.
However, the upgrade does come with some problems, most users are hesitant to upgrade because there have been reports of the “This version of this file is not compatible with the version of Windows you’re running” Error with certain applications and installers after upgrading from an older version of Windows. In this article, we will discuss the reason due to which this error is triggered and also provide you with a viable solution to eradicate it completely.
What Causes the “This version of this file is not compatible with the version of Windows you’re running” Error?
After receiving numerous reports from multiple users, we decided to investigate the issue and devised a solution to eradicate it completely. Also, we looked into the reason due to which it is triggered and listed it as follows.
Lack of Backwards Compatibility: The Error arises from a difference in the architecture of the application that you are trying to run and the architecture of Windows. It can either be caused if the program is too old or too recent for the version of Windows that you are trying to run it on. The problem can be solved if the issue is with backward compatibility, as all Microsoft operating systems do have backward compatibility integrated into them but it has to be manually triggered.
Now that you have a basic understanding of the nature of the problem, we will move on towards the solution. Make sure to follow the steps carefully and accurately to avoid conflict.
Solution: Changing Compatibility Settings
If the software isn’t compatible with the version of Windows that you are using this error is triggered. Therefore, in this step, we will be changing certain compatibility settings. For that:
- Open the installation directory of the program that you are trying to run.
- Right-click on the main “.exe” for the program.
- Select “Properties” and click on the “Compatibility” tab.
- Click on the “Run Compatibility Troubleshooter” for Windows 10/8 and “Help me Choose the Settings” for Windows 7.
- Click on the “Try Recommended Settings” option and click on the “Test” option.
- If the program works, click on the “Yes Save these Settings” option and if it doesn’t select the “No Try Different Settings“.
- Follow the onscreen instructions and repeat the process until the program works.

Running Compatibility Troubleshooter

Note: If you are using a “32-bit” operating system and are trying to install a 64-bit software it is recommended to either upgrade the operating system to a 64-bit one or search for a 32-bit version of the software. Also, if the problem is with Nvidia Graphics installer refer to this article.

Kevin Arrows
Kevin is a dynamic and self-motivated information technology professional, with a Thorough knowledge of all facets pertaining to network infrastructure design, implementation and administration. Superior record of delivering simultaneous large-scale mission critical projects on time and under budget.
Back to top button