Содержание
- Error when trying to open audio device tonelib
- Fix: Audacity ‘Error while opening sound device’
- Please check the recording device settings and the project sample rate
- What Causes Audacity “Error opening sound device” Error?
- Solution 1: Let Apps Use Your Microphone
- Windows 10 Users:
- Further Troubleshooting for Windows 10 and Older Versions of Windows
- Solution 2: Use the Built-in Voice Recorder and Switch to Audacity
Error when trying to open audio device tonelib
Serious problems with Tonelib 4.5.3 plugin and Reaper 6.18. When using Tonelib, next time opening same project — several items are moved. It’s very confusing when both audio and midi items (parts) are misplaced and not on beat. Sometimes even items are missing completely. Brainsalad.
I’m pretty sure it’s Tonelib because I’ve uninstalled SWS. And I’ve gone back to a backup of the same project without Tonelib, added Tonelib to a couple of tracks, recorded new audio and the same happens again. Items get moved after saving and then reopening the project.
This is a project with maybe 8 tracks in total, 1 min 30 s. long. Very few xruns and little CPU usage. Tonelib does not display any unusual CPU usage either.
After removing Tonelib and moving the items to correct beats and record some more guitar with other guitar plugins — the problem does not occur again. It hasn’t occured before on any project I’ve recorded with much heavier usage (more tracks, more plugins)
I will try and post this at the devlopers bug tracker as well.
Seems to me that Tonelib GFX is one of the very best Linux native guitar plugins. And the sounds from it was immediately sounding great — very elaborated presets and possibilities galore. Very sad I can’t use it on my rig.
One more problem:
when Tonelib GFX is used (active) — sliders in Reapers own JS plugins stop to work properly. Goes away when Tonelib isn’t active.
Further testing the vst only and not the vst3 version, after a tip at the Tonelib bug thread:
Tested just the vst instead of the VST3 by installing the whole package and then removing the Tonelib-GFX.vst3 directory from /usr/lib/vst3/. Not good at all.
Tested by setting up a couple of audio parts/items and a midi part/item in a new empty song project. Splitting some audio items and the midi item and saving. Then re-opening the project AND some splits were missing, both in one audio item and in the midi item!
Furthermore; opened an earlier project completley without Tonelib and look and behold — missing parts/items and moved parts/items even in that song! Thx for Reapers auto backup function. 
Reaper shows no error messages at all and starting Reaper from the terminal does not show any error messages either.
I am slow at updating programs! but can say with Reaper 6.16 and Tonelib GFX 4.5.2 everything worked well?
Recorded 5 tracks,
Track 1 was one bar copied and pasted for almost a minute.
Track 2 recorded through split in the center, deleted second half and pasted first half to end.
Track 3 recorded straight to end.
Track 4 recorded straight to end.
Used the .vst for the first three tracks and the .vst3 for the fourth.
Selected all and moved forward one bar.
Track 5 was a MIDI track added after all that using PG8x converted by LinVst.
So I am absolutely no help to you sorry
Oh! also put Event horizon JSFX on the master all controls worked no matter which version used or displayed (vst, vst3).
Something must have changed in either Reaper or Tonelib in newer versions?
I noticed I’m still on Tonelib 4.4.0 and have no issues with Reaper 6.19.
we should also request to Cockos more verbosity in terminal, at least for linux users, as it’s now impossible to track down missing dependencies or find other issues while loading/running Reaper after 6.15..
I have the native Linux 3.8.2 Free version, and thought I should test it. Initially it was loading with a blank UI, but then I noticed Kontakt also was having issues.
After doing a sudo apt update and sudo apt upgrade followed by a reboot, all works again just like before, but it makes me wonder if some out of sync stuff happened in a Linux update that is now maybe back in sync.
I don’t know if this will help, but you can try
ldd (name of plugin.so)
See what dependencies are required for the plugin and if you’re missing any.
I don’t know if this will help, but you can try
ldd (name of plugin.so)
See what dependencies are required for the plugin and if you’re missing any.
It seems the problem jjcale_guitar posted is the same as mine. Recent ToneLib GFX unfortunately broke several of my Reaper projects, active volume knobs turned into -inf, automation scrambled, audio clips shifted and stretch to 0.00001.
This is when I tried to open a project with ToneLib GFX via gdb reaper -ex run -ex bt
Thread 1 «reaper» received signal SIGABRT, Aborted.
__GI_raise (sig=sig@entry=6) at ../sysdeps/unix/sysv/linux/raise.c:49
49 ../sysdeps/unix/sysv/linux/raise.c: No such file or folder.
#0 __GI_raise (sig=sig@entry=6) at ../sysdeps/unix/sysv/linux/raise.c:49
#1 0x00007ffff7935864 in __GI_abort () at abort.c:79
#2 0x00007fff12d89a96 in () at /usr/lib/vst3/ToneLib-GFX.vst3/Contents/x86_64-linux/ToneLib-GFX.so
#3 0x00007fff13051f2d in () at /usr/lib/vst3/ToneLib-GFX.vst3/Contents/x86_64-linux/ToneLib-GFX.so
#4 0x00007fff130525b9 in () at /usr/lib/vst3/ToneLib-GFX.vst3/Contents/x86_64-linux/ToneLib-GFX.so
#5 0x00007fff13051e9d in () at /usr/lib/vst3/ToneLib-GFX.vst3/Contents/x86_64-linux/ToneLib-GFX.so
#6 0x00007fff12d6a92d in () at /usr/lib/vst3/ToneLib-GFX.vst3/Contents/x86_64-linux/ToneLib-GFX.so
#7 0x00007fff12d58752 in () at /usr/lib/vst3/ToneLib-GFX.vst3/Contents/x86_64-linux/ToneLib-GFX.so
#8 0x00007fff12d5131f in () at /usr/lib/vst3/ToneLib-GFX.vst3/Contents/x86_64-linux/ToneLib-GFX.so
#9 0x00007fff12d57548 in () at /usr/lib/vst3/ToneLib-GFX.vst3/Contents/x86_64-linux/ToneLib-GFX.so
#10 0x00000000008dbe94 in ()
#11 0x00000000008c2f0e in ()
#12 0x0000000000748cd7 in ()
#13 0x000000000072a227 in ()
#14 0x000000000072d1b7 in ()
#15 0x00000000004abfb6 in ()
#16 0x0000000000846b39 in ()
#17 0x000000000084a6f4 in ()
#18 0x000000000084b2bb in ()
#19 0x00000000004f4455 in ()
#20 0x0000000000524525 in ()
#21 0x00000000005324c7 in ()
#22 0x0000000000547ee0 in ()
#23 0x000000000075b7f8 in ()
#24 0x000000000075df58 in ()
#25 0x000000000076a2cd in ()
#26 0x00007ffff768dcb6 in () at /opt/REAPER/libSwell.so
#27 0x00007ffff7681387 in () at /opt/REAPER/libSwell.so
#28 0x00007ffff769aa0d in () at /opt/REAPER/libSwell.so
#29 0x00007ffff767e0c0 in () at /opt/REAPER/libSwell.so
#30 0x00007ffff768451b in () at /opt/REAPER/libSwell.so
#31 0x00007ffff768dcd8 in () at /opt/REAPER/libSwell.so
#32 0x00007ffff76aac92 in () at /opt/REAPER/libSwell.so
#33 0x00007ffff76ab125 in () at /opt/REAPER/libSwell.so
#34 0x00007ffff7203733 in () at /lib/x86_64-linux-gnu/libgdk-3.so.0
#35 0x00007ffff723ae36 in () at /lib/x86_64-linux-gnu/libgdk-3.so.0
#36 0x00007ffff6e2784b in g_main_context_dispatch () at /lib/x86_64-linux-gnu/libglib-2.0.so.0
#37 0x00007ffff6e7ac68 in () at /lib/x86_64-linux-gnu/libglib-2.0.so.0
#38 0x00007ffff6e24f83 in g_main_context_iteration () at /lib/x86_64-linux-gnu/libglib-2.0.so.0
#39 0x00007ffff76acc1a in () at /opt/REAPER/libSwell.so
#40 0x00007ffff768e022 in () at /opt/REAPER/libSwell.so
—Type for more, q to quit, c to continue without paging—
#41 0x0000000000415756 in ()
#42 0x00007ffff7937565 in __libc_start_main (main=
0x414e00, argc=1, argv=0x7fffffffddc8, init= , fini= , rtld_fini= , stack_end=0x7fffffffddb8) at ../csu/libc-start.c:332
#43 0x000000000041ae5a in _start ()
Without gdb, project continued to load past ToneLib GFX but it became absolute mess when completed (attach image).
Step to reproduce:
1. Create a new project
2. Load a track with an instrument plugin and ToneLib GFX
3. Load more tracks, filled with samples
4. Save the project, restart REAPER and reload the project
System information:
Kubuntu 21.04, using JACK,
Intel Core i5-4210U, 8GB RAM
I included the test project too, hopefully Justin or someone from ToneLib noticed this. It’s a shame that ToneLib is my favourite guitar effect plugin, yet it tends to break my projects so nasty like this.
Источник
Fix: Audacity ‘Error while opening sound device’
Please check the recording device settings and the project sample rate
Audacity is a free virtual studio software for Windows computers and it’s a great tool to edit music files for free. However, some users have reported having problems when trying to record or play their files using Audacity. The error message read “Error opening sound device” and it has bugged users all over the world.
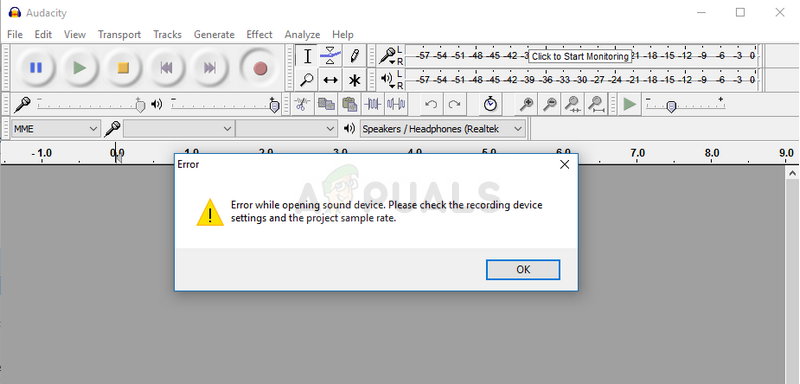 Audacity Error while opening sound device
There are a couple of causes and methods which can be used to solve the problem and we recommend you follow through the rest of the article to find out just what to do to solve the problem.
What Causes Audacity “Error opening sound device” Error?
It’s usually a permissions issue which started to appear after a specific Windows Update because it has reset some permissions settings for apps which are allowed to use your microphone.
Solution 1: Let Apps Use Your Microphone
This little option may have always been turned on before but it might have been changed by new programs being installed or by a Windows Update which might have turned it off for various security reasons. This solution is the simplest and it can save you hours of pain so make sure you don’t skip this method.
Windows 10 Users:
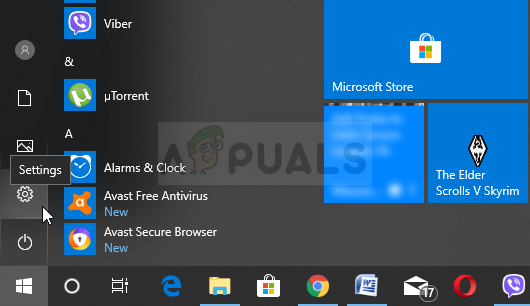
- Click the gear icon in the lower left section of the Start menu in order to open the Settings app. You can also search for it.
 Windows 10 Settings
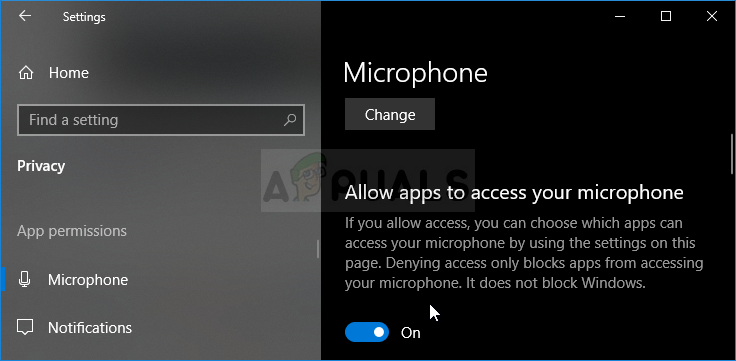
- Scroll down until you see the Privacy section and make sure you click on it. At the left side of the window, you should see the App permissions section. Scroll down until you reach Microphone and click on this option.
- First of all, check if the Microphone access for this device option is on. If it’s not, click on Change and set the slider to on.
 Microphone Permissions in Windows 10 Settings
- After that, switch the slider under the “Allow apps to access your microphone” option to On and scroll down in the list of installed apps on your computer to locate Skype. Switch the slider next to the Skype entry on the list to on.
- Reopen Audacity and check to see if the problem persists.
Further Troubleshooting for Windows 10 and Older Versions of Windows
It’s possible that one of your core sound devices may have been disabled by a program or by a new Windows Update. Also, this can fix the problem if there are other similar tools installed on your computer which might try to access sound devices at the same time as Audacity.
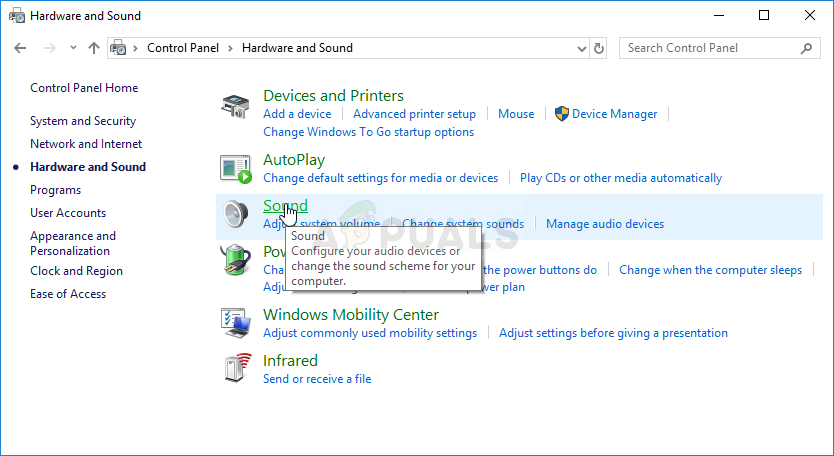
- Right-click on the volume icon located at your taskbar and choose the Sounds option. If this icon is not located at your taskbar, you can locate Sound settings by opening Control Panel, switching the view to Category and selecting Hardware and Sound >> Sound.
 Sound in Control Panel
- Check to see if your microphone is enabled under the Recording tab. Switch to this tab by clicking at the top of the window and locate the Microphone you are using. It should be located at the top and be selected.
- Click on it once and click the Properties button at the lower right part of the window. In the Properties window which opens, check under Device usage and set the option to Use this device (enable) if it wasn’t already and apply the changes.
 Speakers Properties
- Navigate to the Advanced tab in the same properties window and check under Exclusive mode.
- Uncheck the boxes next to the “Allow applications to take exclusive control of this device” and “Give exclusive mode applications priority”. Apply these changes as well and repeat the same process for your Speaker device in the Playback tab before you close these windows. Reopen Audacity and check to see if the error persists.
Note: Even if you are a Windows 10 user, you should still try out the second set of steps as they managed to solve the problem for some Windows 10 users when the above has failed.
Solution 2: Use the Built-in Voice Recorder and Switch to Audacity
It’s quite possible that a third party app is hogging one of your sound devices and it’s almost impossible to take ownership of it once more. The reason why opening Voice Recorder which is built into your Windows OS might work is because this app is verified by Microsoft and it has better permissions than any third-party app.
The Voice Recorder is available on all versions of Windows so make sure you use it to solve the Audacity “Error opening sound device” error!
- Search for Voice Recorder’s shortcut on the Desktop and double-click it, or search for it in the Start menu. If you struggle finding it, you can use the command below.
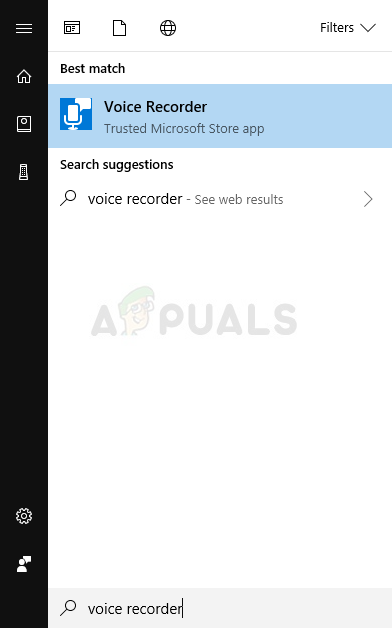 Voice Recorder in Start menu
- Search for “Command Prompt” by typing it either right in the Start menu or by pressing the search button right next to it. Right-click the first entry which will pop up as a search result and select the “Run as administrator” context menu entry.
 Command Prompt via Run box
- Type in the command below in the window and make sure you press Enter after typing each one. Wait for the Voice Recorder window to open to know that the command worked
- Click the microphone button in order to start a recording. Close Voice Recorder and reopen Audacity to see if the problem still appears.
Источник
- Close Menu
- Home
-
All Forums
- Search Forums
- Recent Posts
-
News
-
News & Announcements
-
-
Lounge
-
General discussion
-
Video & Sound clips Demo Areas
-
-
Preset Library
-
ToneLib-GFX presets
-
Zoom MS-50G
-
Zoom MS-60B
-
Zoom MS-70CDR
-
Zoom G3n/G3Xn/G5n
-
Zoom G1on/G1Xon
-
Zoom B1on/B1Xon
-
Zoom B3n
-
Zoom G1/G1X Four
-
Zoom B1/B1X Four
-
Request patch
-
-
Support
-
Tonelib GFX Language files
-
Testimonials & Suggestions
-
Bug Reports
-
Forum Related
-
- Downloads
-
Help
- Smilies
- BB Codes
- Trophies
- Cookie Usage
- Terms and Rules
- Search
It seems the problem jjcale_guitar posted is the same as mine. Recent ToneLib GFX unfortunately broke several of my Reaper projects, active volume knobs turned into -inf, automation scrambled, audio clips shifted and stretch to 0.00001.
This is when I tried to open a project with ToneLib GFX via gdb reaper -ex run -ex bt
Thread 1 «reaper» received signal SIGABRT, Aborted.
__GI_raise (sig=sig@entry=6) at ../sysdeps/unix/sysv/linux/raise.c:49
49 ../sysdeps/unix/sysv/linux/raise.c: No such file or folder.
#0 __GI_raise (sig=sig@entry=6) at ../sysdeps/unix/sysv/linux/raise.c:49
#1 0x00007ffff7935864 in __GI_abort () at abort.c:79
#2 0x00007fff12d89a96 in () at /usr/lib/vst3/ToneLib-GFX.vst3/Contents/x86_64-linux/ToneLib-GFX.so
#3 0x00007fff13051f2d in () at /usr/lib/vst3/ToneLib-GFX.vst3/Contents/x86_64-linux/ToneLib-GFX.so
#4 0x00007fff130525b9 in () at /usr/lib/vst3/ToneLib-GFX.vst3/Contents/x86_64-linux/ToneLib-GFX.so
#5 0x00007fff13051e9d in () at /usr/lib/vst3/ToneLib-GFX.vst3/Contents/x86_64-linux/ToneLib-GFX.so
#6 0x00007fff12d6a92d in () at /usr/lib/vst3/ToneLib-GFX.vst3/Contents/x86_64-linux/ToneLib-GFX.so
#7 0x00007fff12d58752 in () at /usr/lib/vst3/ToneLib-GFX.vst3/Contents/x86_64-linux/ToneLib-GFX.so
#8 0x00007fff12d5131f in () at /usr/lib/vst3/ToneLib-GFX.vst3/Contents/x86_64-linux/ToneLib-GFX.so
#9 0x00007fff12d57548 in () at /usr/lib/vst3/ToneLib-GFX.vst3/Contents/x86_64-linux/ToneLib-GFX.so
#10 0x00000000008dbe94 in ()
#11 0x00000000008c2f0e in ()
#12 0x0000000000748cd7 in ()
#13 0x000000000072a227 in ()
#14 0x000000000072d1b7 in ()
#15 0x00000000004abfb6 in ()
#16 0x0000000000846b39 in ()
#17 0x000000000084a6f4 in ()
#18 0x000000000084b2bb in ()
#19 0x00000000004f4455 in ()
#20 0x0000000000524525 in ()
#21 0x00000000005324c7 in ()
#22 0x0000000000547ee0 in ()
#23 0x000000000075b7f8 in ()
#24 0x000000000075df58 in ()
#25 0x000000000076a2cd in ()
#26 0x00007ffff768dcb6 in () at /opt/REAPER/libSwell.so
#27 0x00007ffff7681387 in () at /opt/REAPER/libSwell.so
#28 0x00007ffff769aa0d in () at /opt/REAPER/libSwell.so
#29 0x00007ffff767e0c0 in () at /opt/REAPER/libSwell.so
#30 0x00007ffff768451b in () at /opt/REAPER/libSwell.so
#31 0x00007ffff768dcd8 in () at /opt/REAPER/libSwell.so
#32 0x00007ffff76aac92 in () at /opt/REAPER/libSwell.so
#33 0x00007ffff76ab125 in () at /opt/REAPER/libSwell.so
#34 0x00007ffff7203733 in () at /lib/x86_64-linux-gnu/libgdk-3.so.0
#35 0x00007ffff723ae36 in () at /lib/x86_64-linux-gnu/libgdk-3.so.0
#36 0x00007ffff6e2784b in g_main_context_dispatch () at /lib/x86_64-linux-gnu/libglib-2.0.so.0
#37 0x00007ffff6e7ac68 in () at /lib/x86_64-linux-gnu/libglib-2.0.so.0
#38 0x00007ffff6e24f83 in g_main_context_iteration () at /lib/x86_64-linux-gnu/libglib-2.0.so.0
#39 0x00007ffff76acc1a in () at /opt/REAPER/libSwell.so
#40 0x00007ffff768e022 in () at /opt/REAPER/libSwell.so
—Type <RET> for more, q to quit, c to continue without paging—<RET>
#41 0x0000000000415756 in ()
#42 0x00007ffff7937565 in __libc_start_main (main=
0x414e00, argc=1, argv=0x7fffffffddc8, init=<optimized out>, fini=<optimized out>, rtld_fini=<optimized out>, stack_end=0x7fffffffddb8) at ../csu/libc-start.c:332
#43 0x000000000041ae5a in _start ()
Without gdb, project continued to load past ToneLib GFX but it became absolute mess when completed (attach image).
Step to reproduce:
1. Create a new project
2. Load a track with an instrument plugin and ToneLib GFX
3. Load more tracks, filled with samples
4. Save the project, restart REAPER and reload the project
System information:
Kubuntu 21.04, using JACK,
Intel Core i5-4210U, 8GB RAM
I included the test project too, hopefully Justin or someone from ToneLib noticed this. It’s a shame that ToneLib is my favourite guitar effect plugin, yet it tends to break my projects so nasty like this.
Скачать Видео
-
Спасибо! Поделитесь с друзьями!
Вам не понравилось видео. Спасибо за то что поделились своим мнением!
![]()
![]()
admin
Издатель Sep 28, 2021
ToneLib GFX Как подключить гитару к компьютеру для новичков…
- Категория
- Усилители
![]()
![]()
Комментариев нет.
![]()
-
08:53

Как подключить колонки к компьютеру
Скачать Видео
-
22:11
Куда подключить гитару в 2021? От БЕСПЛАТНОГО к ТОПОВОМУ
Скачать Видео
-
04:05
Как подключить динамики в 8 ом, как подключить магнитолу в машине
Скачать Видео
-
1:22:20
Эпизод 10 // Сергей Семёнов // построить гитару, продать гитару, купить гитару. PRO МУЗЛО podcast
Скачать Видео
-
06:28
Как правильно ПОДКЛЮЧИТЬ колонки домашнего КИНОТЕАТРА 5 1 к компьютеру через RCA КАБЕЛЬ 3 5 ММ
Скачать Видео
-
10:31
Подключение 5.1 к компьютеру с 3 мя выходами
Скачать Видео
-
24:07
Как подключить несколько динамиков / коммутация динамиков / как подключить громкий фронт
Скачать Видео
-
03:39
Подключаем гитарный процессор l Как подключить гитару к процессору? l Подключаем процессор. Урок 2
Скачать Видео
-
02:13
Как подключить динамик к компьютеру или телефону. Выводим моно звук.
Скачать Видео
-
02:12
Как подключить микшерный пульт к компьютеру?
Скачать Видео
-
02:41
Замена файлов фри фаер
Скачать Видео
-
11:43
CHOP JUMPED INSIDE THE HELL OF ALL RACES IN GTA 5
Скачать Видео
-
02:48
НОВЫЙ УСИЛИТЕЛЬ ОТТЯЖКИ ⚡ ФРИ ФАЕР | BEST APP FOR HEADSHOT FREE FIRE! 9999 DPI⚡
Скачать Видео
-
36:42
Обзор 5 Лучших акустических караоке систем ELTRONIC 2025/2026/2016/2018/2012/1027/1025/1023/1028
Скачать Видео
-
06:48
Как убрать лаги в фри фаер после обновы | Как повысить фпс в фри фаер после обновы | Free Fire
Скачать Видео
-
03:45
Комплект инсталляция Alcaplast AM101/1120 подвесной унитаз безободковый ABRim
Скачать Видео
-
39:48
Как правильно и полезно платить штрафы ГИБДД, и налоги, по коду валют 643 RUB. Оплата по ШТРИХ КОДАМ
Скачать Видео
-
02:48
БИЛОТОН концерт 03 09 2021 часть 3
Скачать Видео
-
15:04
VCR «Elektronika VM-12», first VCR from USSR ПЕРВЫЙ отечественный кассетный видеомагнитофон ВМ-12
Скачать Видео
-
01:00
Сабвуфер Ноэма 300ГДН39-4 ФИ играет Bass i love you! ~30% мощности
Скачать Видео


Пожаловаться
>>> Воспользуйтесь этой ссылкой, пожалуйста <<<
Добавить в плейлист
К сожалению, только зарегистрированные пользователи могут создавать списки воспроизведения.
Поделиться
ToneLib GFX Как подключить гитару к компьютеру для новичков

ToneLib GFX Как подключить гитару к компьютеру для новичков…
Опубликовать в социальную сеть
Поделиться видео
Share via Email
Audacity is a free virtual studio software for Windows computers and it’s a great tool to edit music files for free. However, some users have reported having problems when trying to record or play their files using Audacity. The error message read “Error opening sound device” and it has bugged users all over the world.
There are a couple of causes and methods which can be used to solve the problem and we recommend you follow through the rest of the article to find out just what to do to solve the problem.
What Causes Audacity “Error opening sound device” Error?
It’s usually a permissions issue which started to appear after a specific Windows Update because it has reset some permissions settings for apps which are allowed to use your microphone.
Solution 1: Let Apps Use Your Microphone
This little option may have always been turned on before but it might have been changed by new programs being installed or by a Windows Update which might have turned it off for various security reasons. This solution is the simplest and it can save you hours of pain so make sure you don’t skip this method.
Windows 10 Users:
- Click the gear icon in the lower left section of the Start menu in order to open the Settings app. You can also search for it.
- Scroll down until you see the Privacy section and make sure you click on it. At the left side of the window, you should see the App permissions section. Scroll down until you reach Microphone and click on this option.
- First of all, check if the Microphone access for this device option is on. If it’s not, click on Change and set the slider to on.
- After that, switch the slider under the “Allow apps to access your microphone” option to On and scroll down in the list of installed apps on your computer to locate Skype. Switch the slider next to the Skype entry on the list to on.
- Reopen Audacity and check to see if the problem persists.
Further Troubleshooting for Windows 10 and Older Versions of Windows
It’s possible that one of your core sound devices may have been disabled by a program or by a new Windows Update. Also, this can fix the problem if there are other similar tools installed on your computer which might try to access sound devices at the same time as Audacity.
- Right-click on the volume icon located at your taskbar and choose the Sounds option. If this icon is not located at your taskbar, you can locate Sound settings by opening Control Panel, switching the view to Category and selecting Hardware and Sound >> Sound.
- Check to see if your microphone is enabled under the Recording tab. Switch to this tab by clicking at the top of the window and locate the Microphone you are using. It should be located at the top and be selected.
- Click on it once and click the Properties button at the lower right part of the window. In the Properties window which opens, check under Device usage and set the option to Use this device (enable) if it wasn’t already and apply the changes.
- Navigate to the Advanced tab in the same properties window and check under Exclusive mode.
- Uncheck the boxes next to the “Allow applications to take exclusive control of this device” and “Give exclusive mode applications priority”. Apply these changes as well and repeat the same process for your Speaker device in the Playback tab before you close these windows. Reopen Audacity and check to see if the error persists.
Note: Even if you are a Windows 10 user, you should still try out the second set of steps as they managed to solve the problem for some Windows 10 users when the above has failed.
Solution 2: Use the Built-in Voice Recorder and Switch to Audacity
It’s quite possible that a third party app is hogging one of your sound devices and it’s almost impossible to take ownership of it once more. The reason why opening Voice Recorder which is built into your Windows OS might work is because this app is verified by Microsoft and it has better permissions than any third-party app.
The Voice Recorder is available on all versions of Windows so make sure you use it to solve the Audacity “Error opening sound device” error!
- Search for Voice Recorder’s shortcut on the Desktop and double-click it, or search for it in the Start menu. If you struggle finding it, you can use the command below.
- Search for “Command Prompt” by typing it either right in the Start menu or by pressing the search button right next to it. Right-click the first entry which will pop up as a search result and select the “Run as administrator” context menu entry.
- Type in the command below in the window and make sure you press Enter after typing each one. Wait for the Voice Recorder window to open to know that the command worked
explorer.exe shell:appsFolderMicrosoft.WindowsSoundRecorder_8wekyb3d8bbwe!App
- Click the microphone button in order to start a recording. Close Voice Recorder and reopen Audacity to see if the problem still appears.

Kevin Arrows
Kevin is a dynamic and self-motivated information technology professional, with a Thorough knowledge of all facets pertaining to network infrastructure design, implementation and administration. Superior record of delivering simultaneous large-scale mission critical projects on time and under budget.
Back to top button
Содержание
- ToneLib — редактор пресетов для процессоров Zoom
- Поддерживаемые модели
- Прежде чем начать
- Начало работы
- Интерфейс
- Работа с онлайн пресетами
- Послесловие
- Как настроить tonelib gfx
- Tonelib GFX Language Files
- Introduction
- Download Language Files
- Develop Language Files
- Как играть на электрогитаре через компьютер: 5 лучших программ
- Guitar Rig
- ToneLib-GFX
- Hardcore
- Helix Native
- Neural DSP
ToneLib — редактор пресетов для процессоров Zoom
Опубликовано Them в 12.10.2018
Буквально только что я потестил сервис ToneLib и остался от него в неописуемом восторге. Для лентяев типа меня это просто лучшая в мире находка. И пускай в нем есть пара минусов, всё равно эта штука выводит процессор совершенно на новый уровень. Что это такое? Да просто интерфейс, позволяющий крутить ваш процессор Zoom (серий MS — мультистомпы всякие, а также G, включая G1on, G3, G5 и другие) с компа, писать пресеты, делать бекапы и качать чужие настройки из сети. Подробнее об этом чуде — читайте дальше. Да, и кстати, теперь я всерьез задумался насчет MS-60B.

Итак, ToneLib. Найти его можно, как ни странно, на tonelib.net, и бесплатно скачать клиент. Поддерживаются Windows и Mac OS. Я тестил на втором, а именно — MacOS 10.14 Mojave. Всё работает отлично, разве что дизайн немного топорный, но в целом претензий почти и нет.
Поддерживаемые модели
- Zoom G5n
- Zoom G3Xn
- Zoom G3n
- Zoom B3n
- Zoom G1on
- Zoom G1Xon
- Zoom B1on
- Zoom B1Xon
- Zoom MS-50G
- Zoom MS-60B
- Zoom MS-70CDR
Прежде чем начать
Для начала вам необходимо заглянуть на официальный сайт Zoom и поставить на свой аппарат последнюю прошивку. Пользователям серии Multistomp также советую скачать официальный софт для установки эффектов (Effect Manager), а также таблицу с их описаниями. Всё это находится на странице девайса в разделе «Downloads». Все эффекты в педаль не влезут, более того — в девайсе «из коробки» по умолчанию нет самого вкусного, поэтому выберите нужные и зашейте их в свой аппарат. Лично я, владея MS-50G, выкинул все перегрузы и симуляторы усилителя, запихав все остальное — кучу дилеев, реверов, модуляции и прочих ништяков. В последней версии прошивки появился даже биткрашер и всякие закосы под Eventide (например mangledverb, ice delay и прочие).
Также найдите провод Mini USB (не путать с micro). Если процессор стоит в борде — подумайте, как его подключить. Дополнительное питание не требуется, проц начинает работать сразу при подключении к USB входу компьютера и получает ток от него же.
Во время работы с ToneLib можно «на лету» проверять получившийся результат, поэтому, по возможности, подцепитесь через процессор в аппарат. В моём случае это была звуковая карта Steinberg UR12, и подключившись напрямую я постоянно слышал непонятный цикличный писк, идущий из выхода процессора. Это раздражает, и это, конечно минус. Но на время настройки пресетов можно и потерпеть, впрочем.
Зарегистрируйтесь в ToneLib. Регистрация не обязательна, но она нужна для загрузки чужих пресетов с их форума. Сделано довольно удобно, хотя банков для моего зума пока маловато. Для регистрации зайдите на вкладку Community или воспользуйтесь вот этой ссылкой.
Начало работы
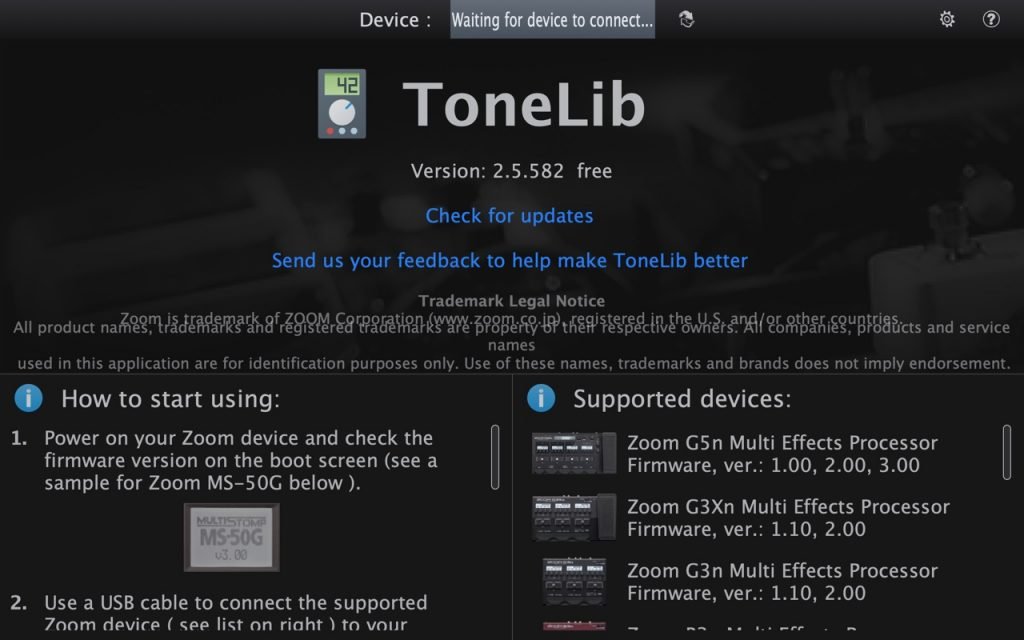
Всё сделали, установили ToneLib, открываем. Софтина встречает нас экраном ожидания подключения процессора, на котором расположен список поддерживаемых девайсов и краткий мануал по подключению. Сначала мой зум упорно не хотел обнаруживаться, но исправно кушал токи от usb-порта. Как оказалось — у меня просто был убитый старый провод. Подключил всё как надо — и программа заработала.
 Если вы заходите впервые, программа начинает предлагать вам сделать бекап и настроить всё это дело как больше нравится. Вот и первое преимущество — бекап (backup) позволит восстановить все текущие настройки на процессоре в случае беды. Например, если вы скинули настройки к заводским, или хвастались по пьяни педалью и попортили все пресеты, в крайнем случае — если хотите зашить эти же настройки на другой зум аналогичной модели.
Интерфейс
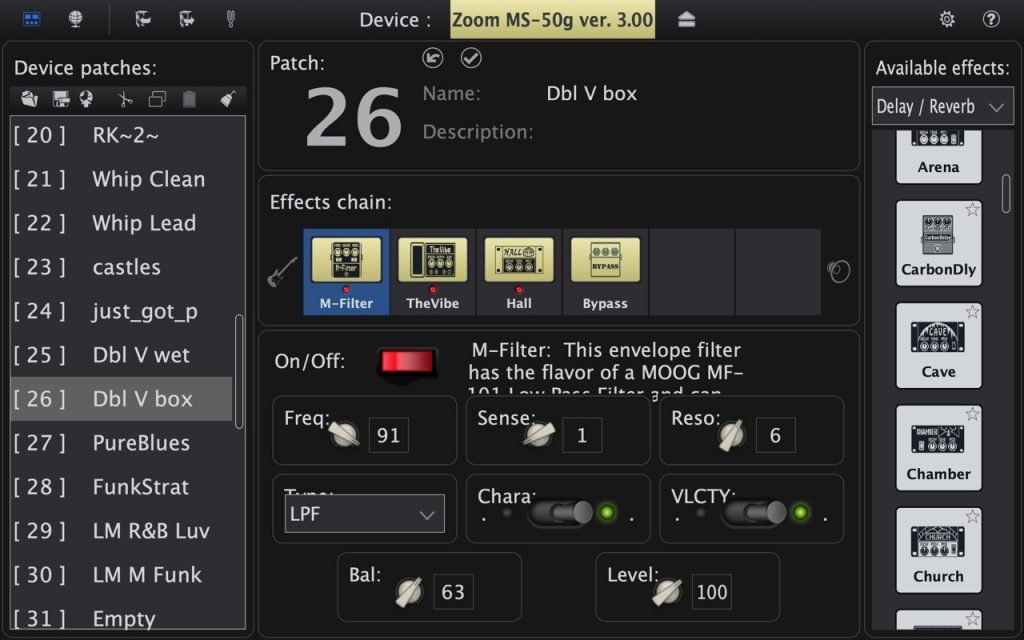
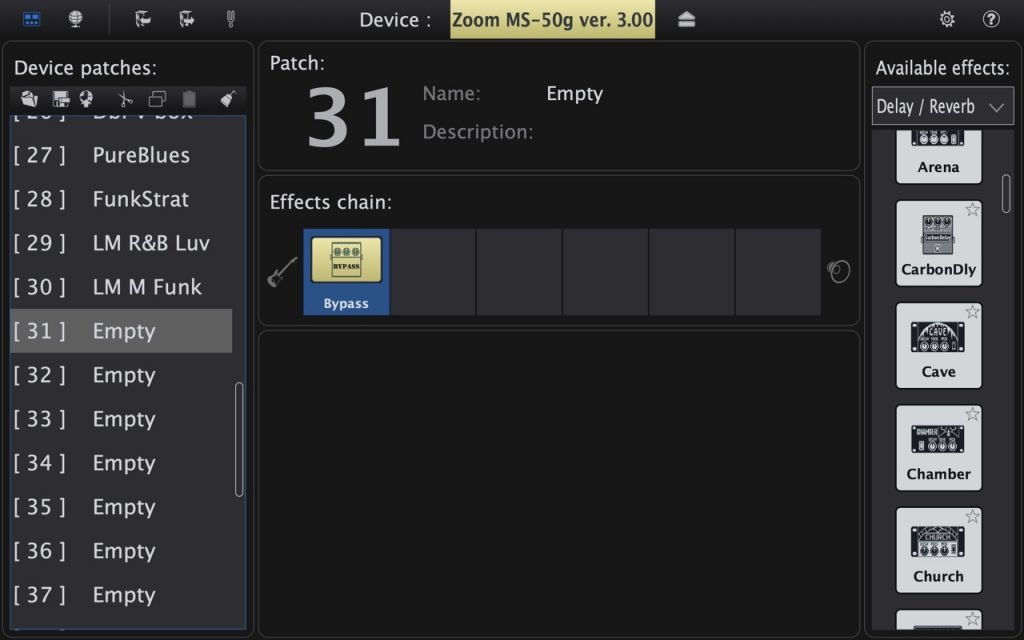 Если всё прошло удачно, вы увидите данное окно. Условно его можно разбить на три панели — список слева отображает текущие пресеты на педали, центральная область отвечает за его начинку (цепь эффектов и настройки каждого звена), правый список — эффекты, которые можно перетаскивать в цепь по своему усмотрению и настраивать. При этом панель с кнопками над левым баром позволяет работать с пресетами — сохранять их в файл и выгружать их из него, выкладывать пресет в сеть, а также вырезать или копипастить отдельные куски пресета для использования в других. Для списка эффектов тоже есть свои плюшки — они рассортированы по группам, в каждой группе раскиданы по алфавиту. А ещё можно помечать их как любимые («Favorite»), чтобы не искать подолгу.
Важный момент, и довольно приятный, кстати — все манипуляции подхватываются процессором в реальном времени. Поменяли имя пресета — в процессоре оно тоже поменялось. Закинули в цепь эффект — если в этот момент процессор обрабатывает гитару — вы сразу услышите результат. Изменяете параметр на компе — он изменяется и на экране зума. Своего рода миди контроллер наоборот — крутишь мышкой, а меняется в девайсе. Удобно. При этом всегда можно отменить изменения и вернуться к исходному варианту.
Небольшим минусом, как я уже сказал, является дизайн. Некоторые элементы наползают друг на друга, заметно на некоторых настройках:
 Но в целом, жить можно. Всё работает как надо. И делать это намного удобнее, чем с самого зума. Кстати, есть еще панелька на самом верху, слева:

Левые две кнопки — режим редактора и режим загрузки онлайн настроек. Потом идут кнопки бекапов (загрузка и выгрузка) и третья — включение метронома. Не знаю, зачем он в данном случае, видимо разработчики дали нам возможность использовать весь функционал процессора через своё детище. Давайте лучше про онлайн поговорим.
Работа с онлайн пресетами
Вишенка на торте — загрузка чужих готовых пресетов. Именно для этого нам нужна регистрация, и если кликнуть на глобус в левом верхнем углу — он предложит залогиниться. Авторизуемся и попадаем к ним же на форум (выглядит как страница в браузере, один в один), в категорию со списком эффектов для текущего подключенного процессора. Выбираем по названию любой понравившийся и заходим на страницу с его описанием.
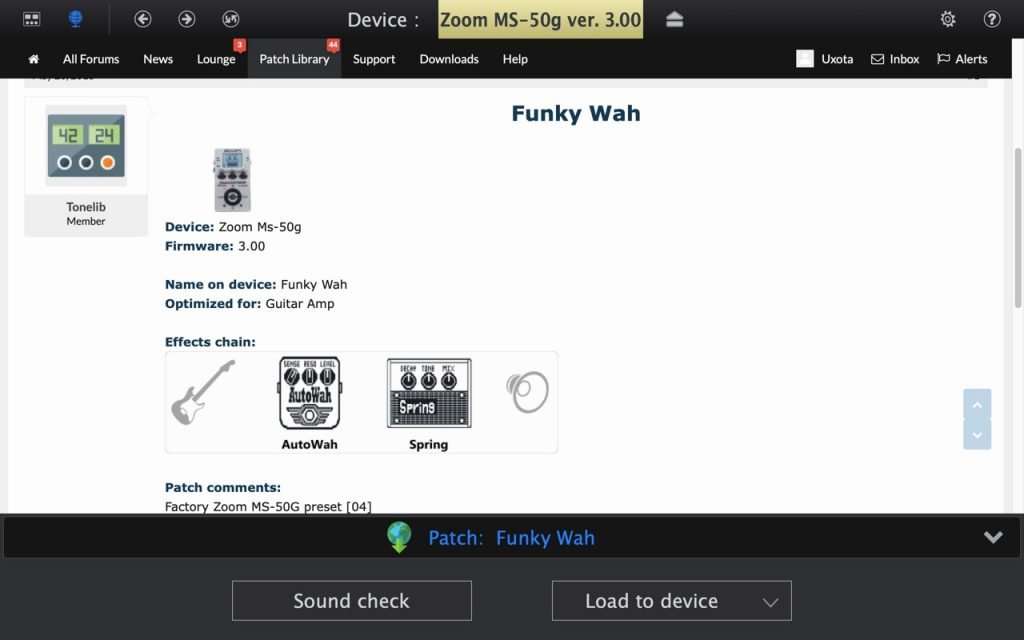
На странице указана цепь эффектов (список и последовательность), а внизу нам предлагают две кнопки — «послушать» (sound check) и «скачать» (load to device). Думаю, понятно, что они делают. Нажимаем «послушать» — и проц автоматически настраивается в этот пресет, не сохраняя его. Понравилось? Нажимаем «скачать», выбираем слот (у меня их 50) и пресет занимает его, сохраняя то название, которое было указано в описании на форуме. Круче некуда.
Послесловие
В целом программа хоть и сыровата местами, но безумно приятная. С её помощью копаться в эффектах процессора реально интересно и удобно. Не знаю, что можно сделать с пресловутым писком, честно говоря, но в остальном всё сделано достаточно круто. Надеюсь, ToneLib останется бесплатным и пополнится в скором времени кучей новых пресетов. Хотя, думаю, это зависит от нас — так что будем стараться.
Источник
Как настроить tonelib gfx

Sk1nnydave запись закреплена
Гитарный плагин ToneLib GFX – бесплатно и официально
Визуально плагин напоминает своих коммерческих «коллег» – Guitar Rig или Amplitube. Тем не менее, он работает быстрее и требует гораздо меньше ресурсов компьютера.
Одна из причин скорости и легкости ToneLib GFX – упрощенные графика и анимация плагина. Небольшие изображения в цепочке эффектов (см. верхний ряд на картинке) показывают модели усилителей, педалей эффектов и других устройств, однако меню детальных настроек у каждого из устройств выполнено в одной стилистике с интерфейсом плагина. То есть подробной и достоверной отрисовки всех ручек, кнопок и переключателей для каждого прибора намеренно не делали.
Программа существует, как в самостоятельной standalone-версии, так и в виде плагина. По количеству усилителей, эффектов и кабинетов GFX может соревноваться с любым коммерческим плагином. Огромный простор для любого жанра, начиная от метала, прогрессива, джента и панка, заканчивая классическим роком, блюзом и джазом.
 ToneLib GFX работает во всех известных аудиоредакторах, как под Windows, так и под Mac OS. Не забудьте забрать пост к себе и поделиться им с друзьями и коллегами. Давайте поддерживать легальный контент.
 Послушать: youtu.be/RE9YIkcDm7U
 Скачать: tonelib.net/gfx-overview
—
#vst@sk1nnydave #vst #plugin #reaper #logic #FLstudio #cubase #protools #семплы #beatmaker #биты #mixing #акустика #reverb #sk1nnydave #сведение #мастеринг #запись #sounddesign #звукорежиссура #звукозапись
Источник
Tonelib GFX Language Files
Introduction
Language Files are small files which can be downloaded and will translate some or most of Tonelib GFX into another language. They are typically files named “LANGUAGE_NAME.gfx_lang”, and if you open them on the computer (either by doubleclicking or drag and dropping into Tonelib GFX) they will be installed into Tonelib GFX’s folder, and Tonelib GFX will switch to use that language. Note that to use language files, you need Tonelib GFX 4.4.0+. Switching languages requires restarting Tonelib GFX.
Download Language Files
A full list of available language files is available on the Tonelib Forum. For your convenience, here are some direct links to some automatically generated languages:
OSX Note: You could simply rename the downloaded file and erase the “.txt” that was added by Safari. Click on yes, you want to change the extension if you get a warning dialog.
Develop Language Files
GFX language files are automatically generated by Google Translate, however, they are constantly being improved and updated. Additionally you can help improve the language files youself by editing the file for your required language.
If you wish to translate Tonelib GFX to another language, you can download the Template Language File and get started editing the relevant lines using a plain text editor. Simply search for the phrase you want to change and save the changes. Some notes:
- You should save your language text file as UTF-8;
- Only left-to-right languages are supported;
- Many dialog controls will automatically size up to fit longer content, although currently it is still constrained by the total space available. If a translated string will not fit in its allocated space, try to re-phrase it to fit.
Источник
Как играть на электрогитаре через компьютер: 5 лучших программ
Это статья для начинающих гитаристов. Она поможет разобраться, какие программы лучше всего подходят для игры на электрогитаре.
Я играю на электрогитаре девять лет. И чаще всего — дома через компьютер. Это проще, чем каждый раз подключать комбоусилитель с примочками.
Чтобы подключить гитару к компьютеру понадобится шнур и внешняя звуковая карта. У меня Fosucrite Scarlett Solo и этого достаточно, чтобы получать качественный сигнал.
Вариант подключения без внешней звуковой карты. Подключайся через переходник jack-minijack в линейный вход компьютера. Установи драйвер ASIO4ALL. Без внешней звуковой карты сигнал гитары будет некачественным: всё будет шуметь.
Когда гитара подключена к компьютеру, нужны специальные программы, чтобы обрабатывать сигнал. Перейдем к обзору программ.
Guitar Rig
Популярная программа, с которой начинают большинство начинающих гитаристов. У Guitar Rig много встроенных пресетов. В программе есть встроенный метроном, тюнер. Возможно записать гитару.
Шумоподавление в Guitar Rig некачественное. Вместе с шумом он срезает качественные частоты — ни флажолетов, ни соло с таким шумоподавлением сложно сыграть хорошо.
В Guitar Rig возможно собрать любую цепочку из его компонентов. Подсмотри схему у встроенных пресетов и попробуй сделать что-то своё.
Если не хочешь создавать цепочку — пользуйся встроенными пресетами или скачай их. В интернете где-то лежит огромная сборка пресетов для разных стилей. Не нашёл — пиши мне. Скину.
ToneLib-GFX
В ToneLib нет ничего лишнего: цепочка эффектов и настройка. Есть встроенные пресеты, но там мало чего хорошего. Подойдёт для рока и лёгких жанров. Нарубить метала через этот плагин не получится.
Hardcore
Harcore крут тем, что это встроенный плагин в FL Studio. Если она у вас есть, ничего дополнительного устанавливать не нужно. Включайте в микшере любой трек, выбирайте гитарный вход и ставьте Harcore в цепь.
Если на втором этапе обнаружили, что нет входа с гитарой — лезем в Options → Audio и проверяем, стоит ли наша звуковая карта в Device. Если играете без внешней звуковой карты, у вас должно стоять Asio4All или FL Studio Asio.
Helix Native
Плагин от Line 6. В нём 256 встроенных пресетов и куча эффектов, которые эмулируют настоящие примочки.
Некоторые программы существуют только в VST формате. Чтобы их запустить, установите любую программу для создания музыки — FL Studio, Reaper, Ableton.
Одно из преимуществ Helix Native — в возможности составления сложной нелинейной цепочки. Это огромное поле для гитарных экспериментов.
Помимо пресетов, в плагине можно загружать импульсы для гитары. Это, если вкратце, ещё один вариант сымитировать аналоговое звучание.
Neural DSP
Плагины от Neural DSP — это искусственный интеллект, который научился копировать ламповый звук. Тем, что играет тяжелый метал и core-жанры, вам это точно понравится. Звучит, как по мне, шикарно.
Каждый плагин включает в себя небольшое количество качественных пресетов и эффектов. Если у вас слабенький компьютер, то иногда будет подвисать.
Чтобы выбрать лучшую для себя программу для гитары, нужно попробовать и сравнивать. Но не увлекайся. Помни, что более первостепенно — это техника игры на инструменте и ваш стиль игры, а не железо и плагины. Пиши, буду рад помочь.
Источник