The solutions below were tested on all major browsers
by Madhuparna Roy
A diploma holder in computers and with a keen interest in technology, Madhuparna is passionate about writing How-to guides and helping people solve the most intricate Windows issues…. read more
Published on July 9, 2022
Fact checked by
Alex Serban

After moving away from the corporate work-style, Alex has found rewards in a lifestyle of constant analysis, team coordination and pestering his colleagues. Holding an MCSA Windows Server… read more
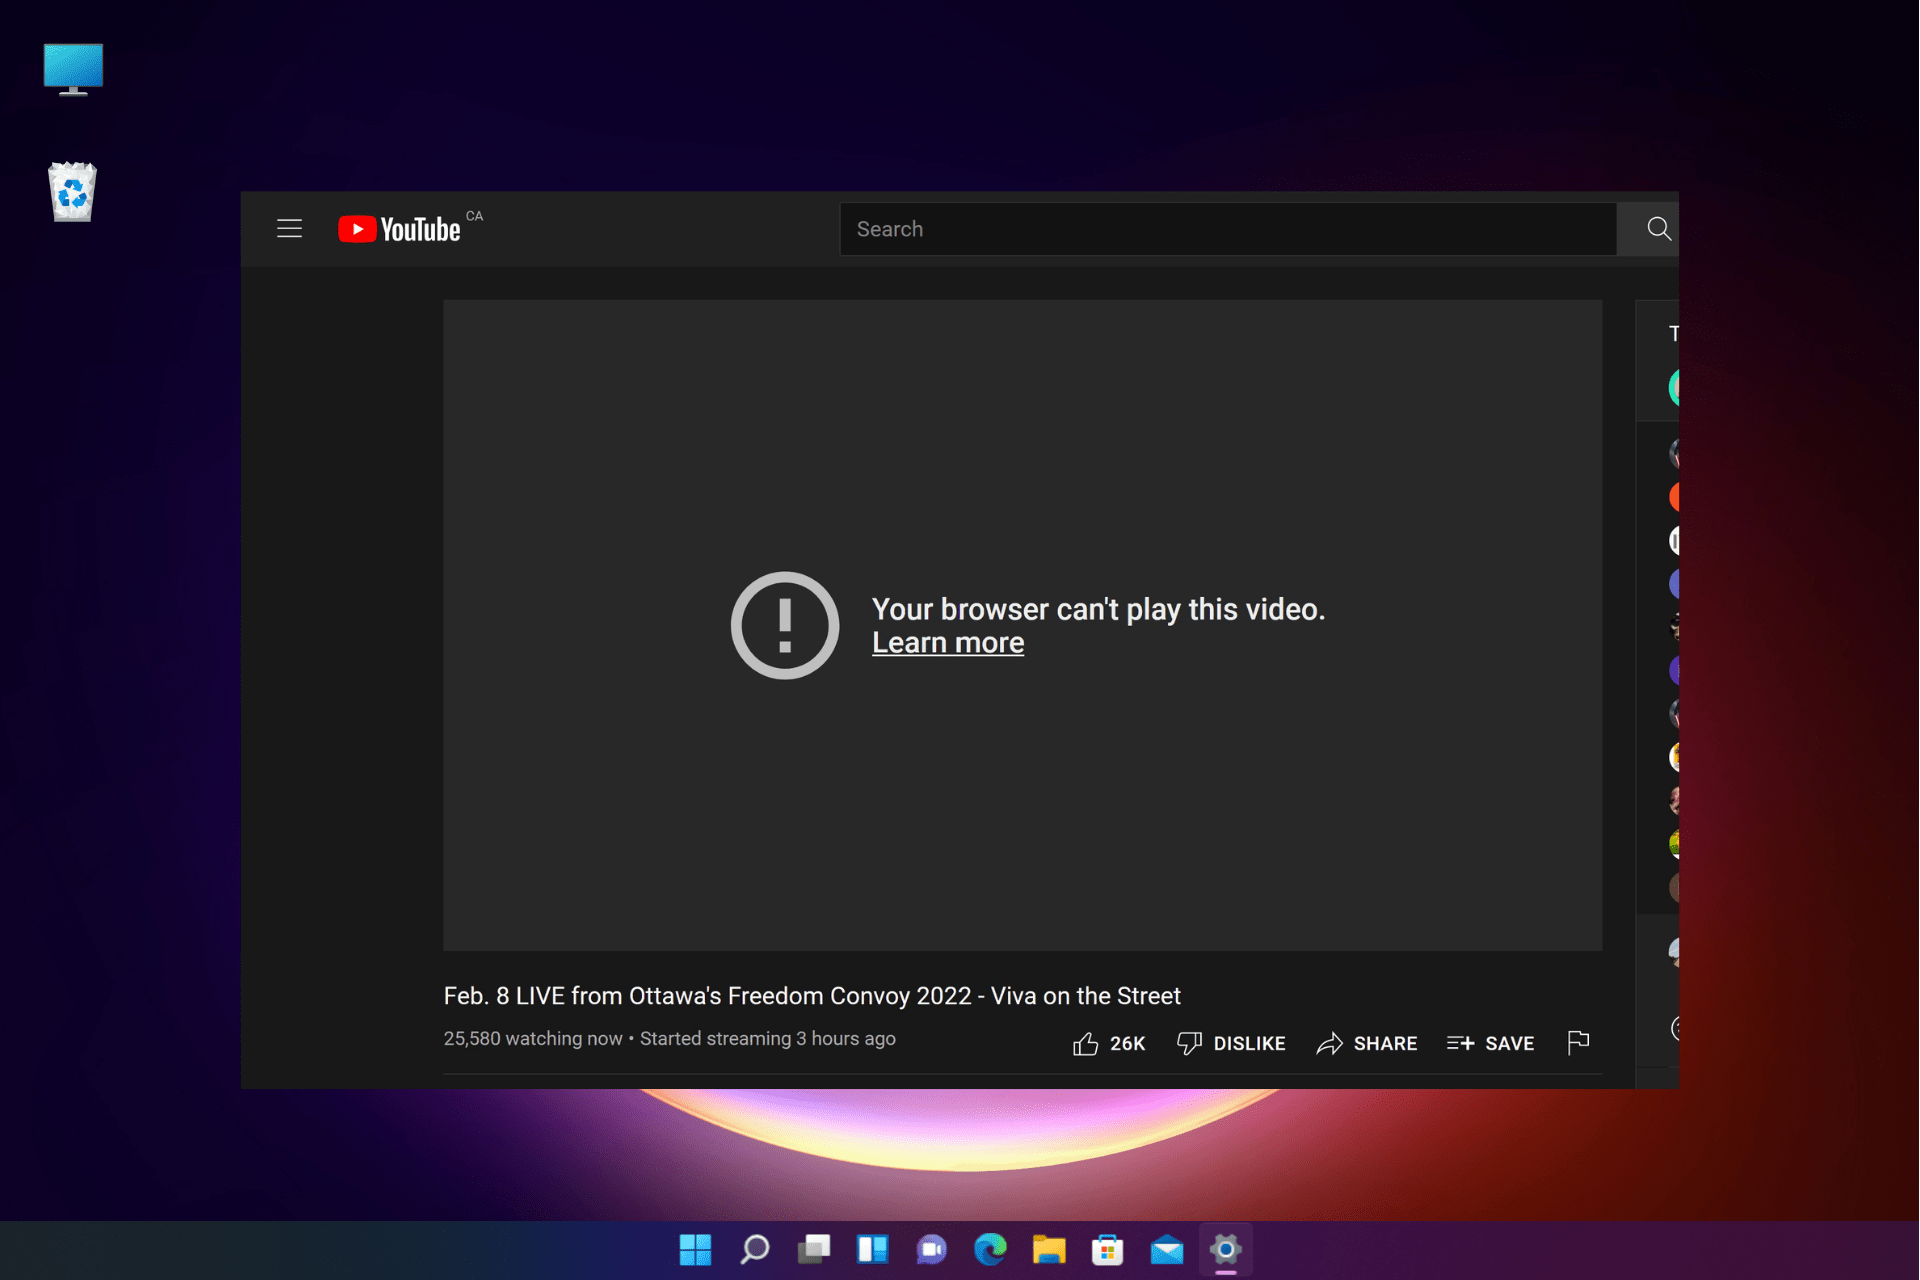
- While trying to play videos, you may often bump into Your browser can’t play this video on YouTube error.
- This problem is not just limited to YouTube but can also occur on any website or any browser, be it Chrome, Opera, Safari, or Firefox.
- While it could occur due to network issues, there could be other reasons also and hence, we have some workarounds for you.
- Easy migration: use the Opera assistant to transfer exiting data, such as bookmarks, passwords, etc.
- Optimize resource usage: your RAM memory is used more efficiently than in other browsers
- Enhanced privacy: free and unlimited VPN integrated
- No ads: built-in Ad Blocker speeds up loading of pages and protects against data-mining
- Gaming friendly: Opera GX is the first and best browser for gaming
- Download Opera
Many users come across an error, Your browser can’t play this video while trying to play videos on a website or video streaming site.
The glitch is more common with YouTube videos, however, it could also show up with videos on other websites, social media, or other streaming sites.
But if you are facing a problem like a video not playing on your Windows 10/11 PC, you can refer to our detailed article for quick solutions.
However, before we move on to the solutions, let’s understand what the error means.
What does it mean Your browser can’t play this video?
There are several possible reasons why your browser may fail to load videos:
- Interference by browser extensions or add-ons
- Too many cache and cookies
- Outdated browser version
- Due to network connection issues
Fortunately, we have a couple of solutions that will help you get rid of Your browser can’t play this video error and continue watching your favorite videos.
How do I fix unable to play this video?
1. Turn off Chrome’s hardware acceleration
- Open Chrome, type the below path in the address bar, and hit Enter:
chrome://settings/system - Now, go to Use hardware acceleration when available on the right.

- Move the toggle switch to the left to turn it off.
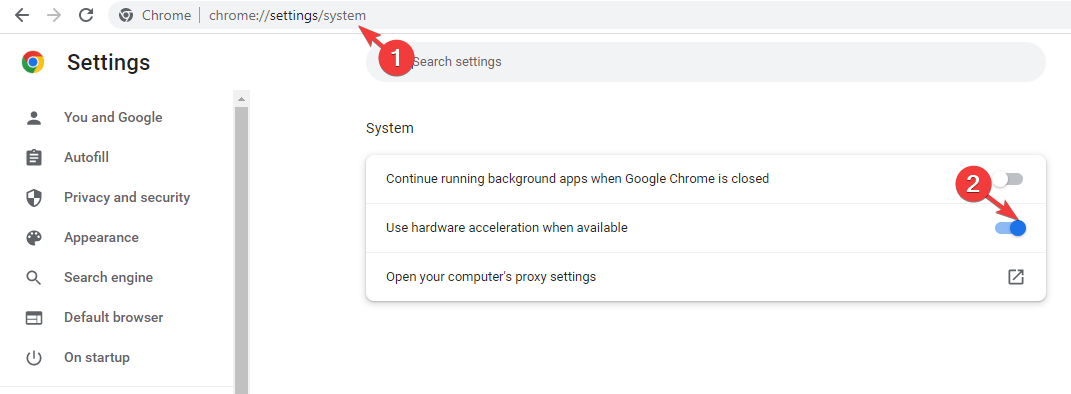
This will free up the GPU from being used for other tasks and can be rather used to render web pages on Chrome.
You can disable the hardware acceleration feature for other browsers also including Opera, Safari, Firefox, and Edge.
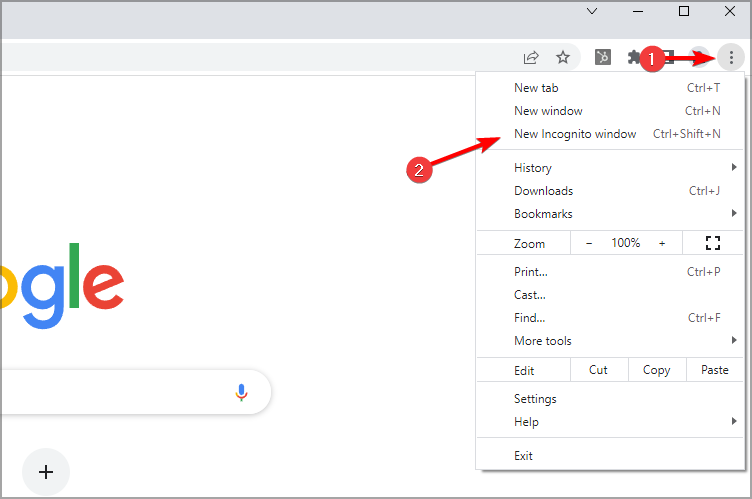
2. Check your extensions and cache & cookies
- Launch Chrome and click on the three dots at the top right.
- Select the New Incognito window option from the menu.

- Try opening the video in Incognito mode and check if it plays.
If the video plays in Incognito mode
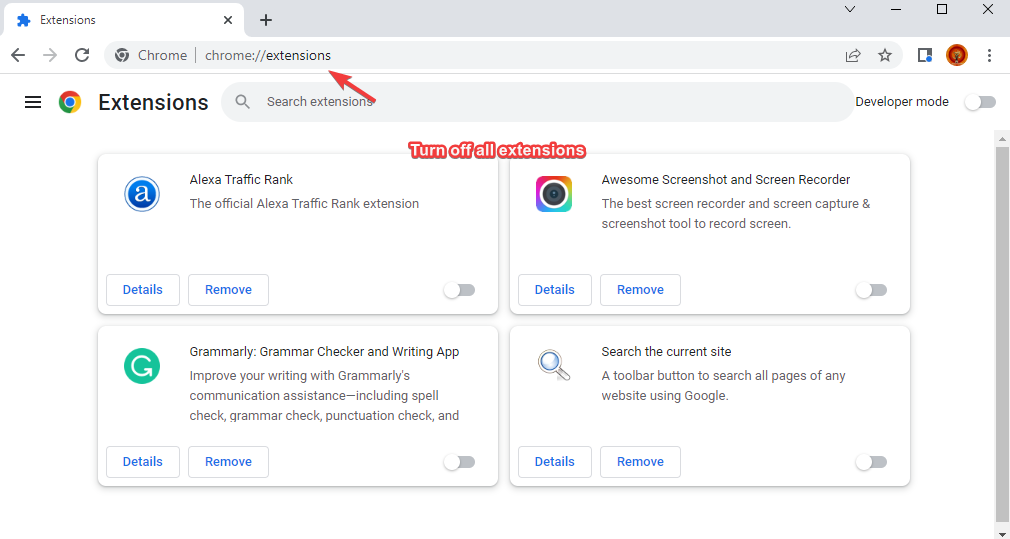
- Exit the Incognito window, and open the new Chrome window (normal).
- Navigate to the below path in Chrome:
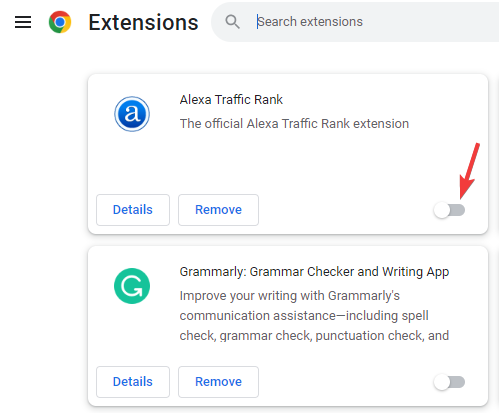
chrome://extensions/ - Turn off all of your Chrome extensions.

- Go to the video on its site and click on the Reload icon on the top left to refresh the page.

- If the video plays normally, then try turning on each extension to find out which one is creating the problem.
- As you detect the problem extension, press Remove to delete.

This should help you fix Your browser can’t play this video error and play the video normally.
But if the video is still not playing, enable all your extensions, and move on to clear the browser history.
If the video does not play in Incognito mode
Clear browsing history, and cache & cookies
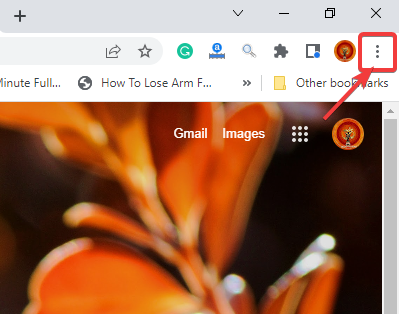
- If you are using Chrome, open the browser and click on the three dots.

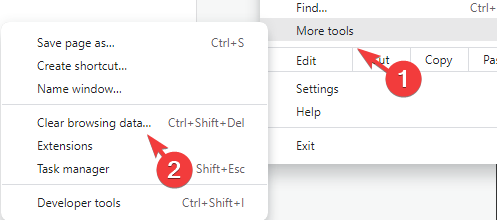
- Next, click on More tools in the menu and select Clear browsing data.

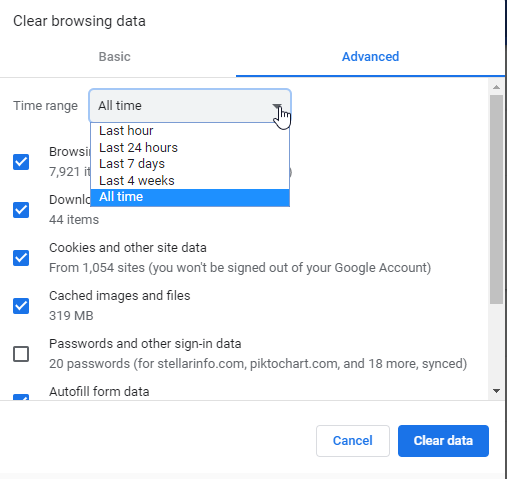
- It will open the Clear browsing data window in Chrome settings.
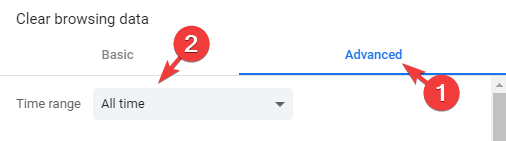
- Here, click on Advanced and then select All time in the Time range field.

- Now, select Browsing history, Cookies and other site data, and cached images files. Press Clear data.


Now, wait till the data is removed. Once done, relaunch Chrome and you should be able to play the videos normally on the web.
This process is also applicable to other browsers including Edge, Firefox, Opera, and Safari.
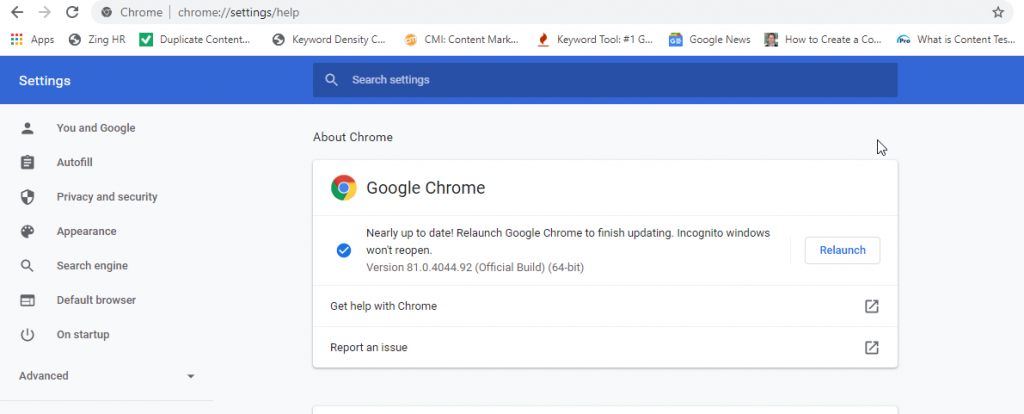
3. Update the browser
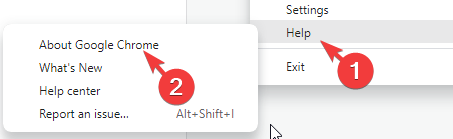
- Open Chrome and click on the three dots located at the top right.
- Click on Help and then About Google Chrome in the menu.

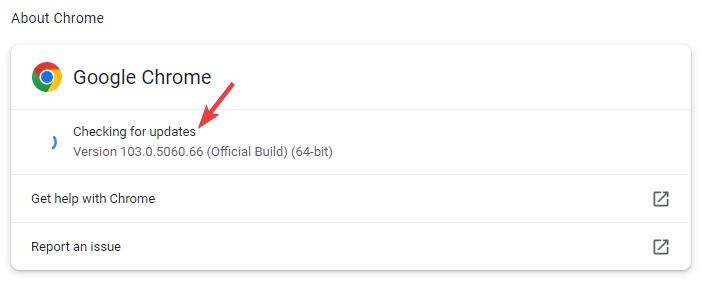
- Now, wait till the browser check for any latest updates. If available, it will install the update automatically.

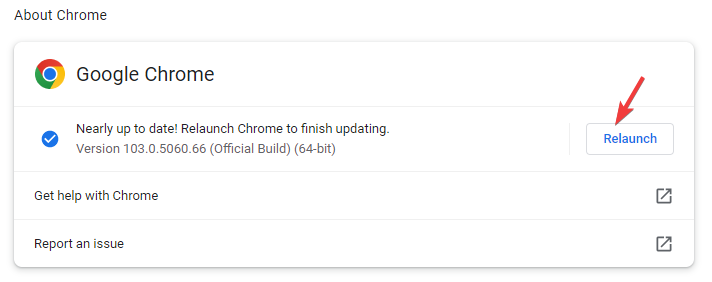
- Click on Relaunch to restart Chrome and check if the video plays normally now.

If you are using any other browser, follow a similar method to install the latest update.
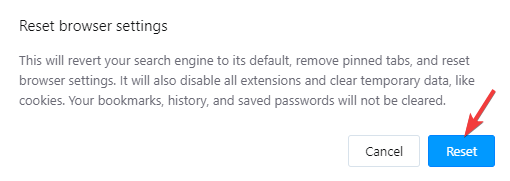
4. Reset browser settings
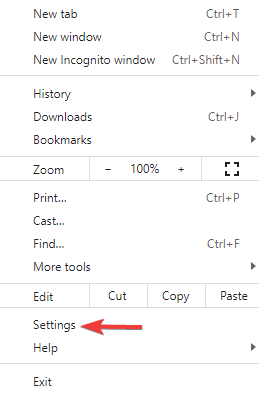
- If using Chrome, launch the browser and click on the three vertical dots.
- From the menu, select Settings.

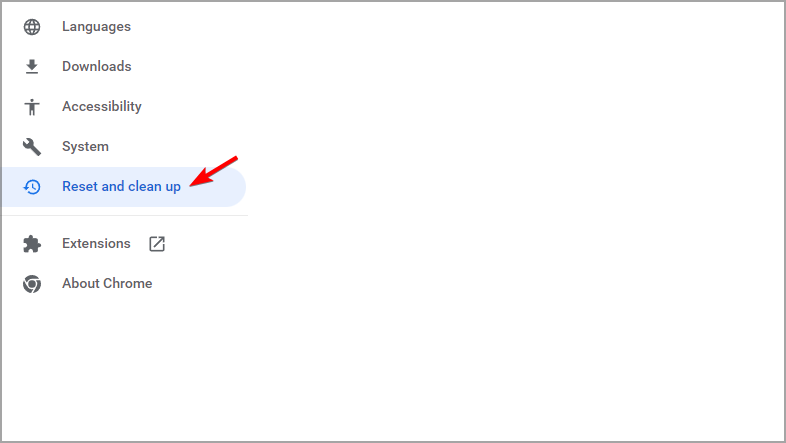
- On the Settings screen, click on Reset and clean up on the left.

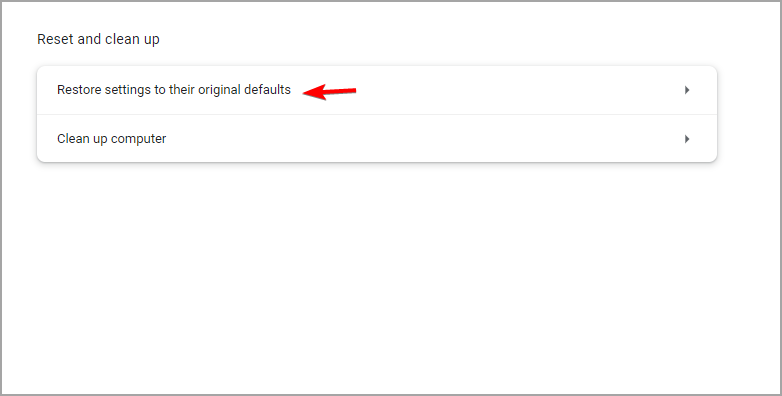
- Now, go to the right and click on Restore settings to their original defaults.

- In the Reset settings pop up, click on Reset settings to confirm.

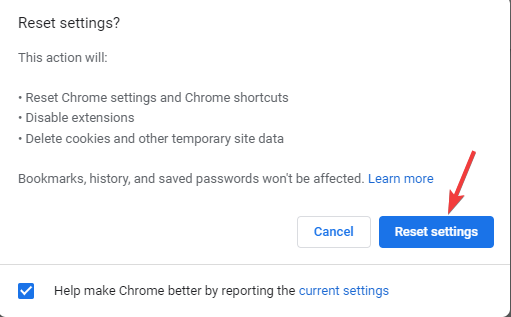
Once done, Chrome will restart automatically. You can now try playing the video on the web and check if the error still persists.
You can reset your browser in a similar manner if you are using anything else apart from Chrome.
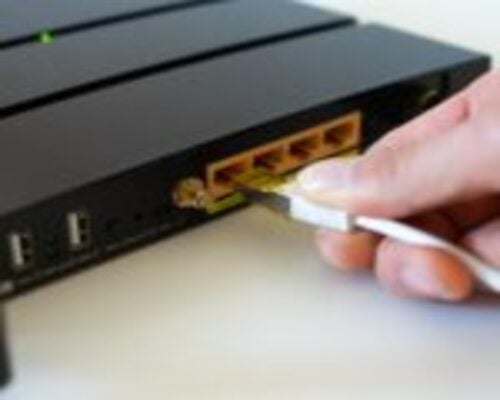
5. Reset your Internet connection
- Shut down your PC and unplug your modem or the wireless router is a separate device.
- Then, wait for about one minute.
- Now, plug in your modem/wireless router and wait for till all the lights to stop blinking.

Some PC issues are hard to tackle, especially when it comes to corrupted repositories or missing Windows files. If you are having troubles fixing an error, your system may be partially broken.
We recommend installing Restoro, a tool that will scan your machine and identify what the fault is.
Click here to download and start repairing.
Boot up your PC, go to the video on its site, and refresh the page. You should not see Your browser can’t play this video error anymore.
The host server is down, so make sure to check the service status page for information on known issues
Your browser can’t play this video Chrome
Chrome may sometimes disable any external plug-ins including JavaScript for security, hence enable the feature as below:
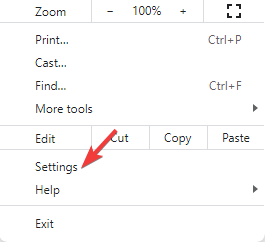
- Open the Chrome browser, and click on the three dots.
- Next, click on Settings.

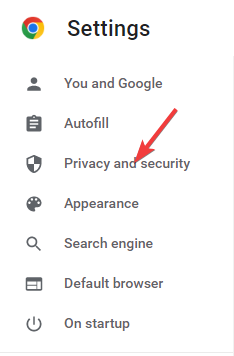
- Now, on the Settings page, click on Privacy and security on the left.

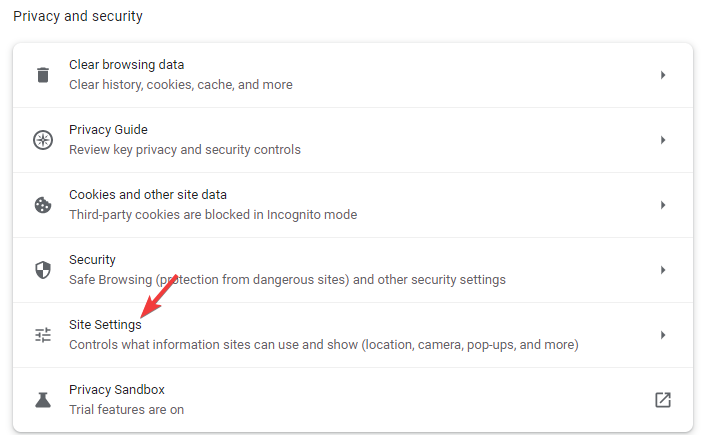
- Go to the right and click on Site Settings.

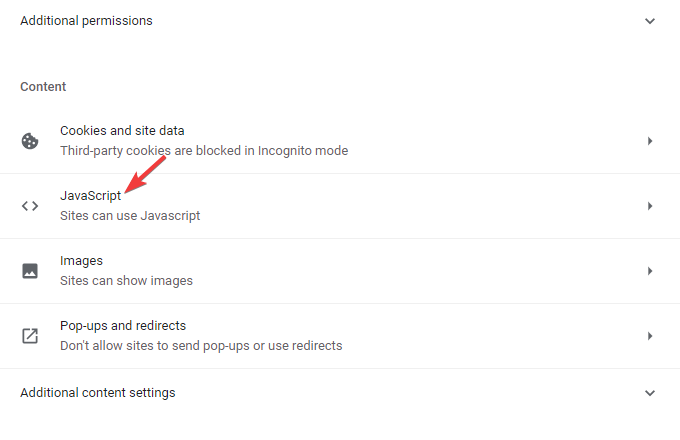
- On the next screen, scroll down and under Content, click on Javascript.

- Next, under Default behavior, select Sites can use Javascript.


Now, refresh the website containing the video and check if it’s playing now.
Your browser can’t play this video Opera
If you notice the error Your browser can’t play this video on the Opera browser, you can fix the issue, by following the below method:
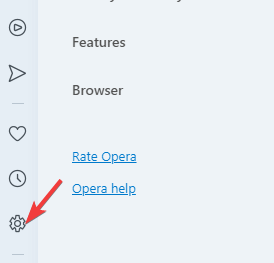
- Open Opera, and click on Settings (gear icon) on the left.

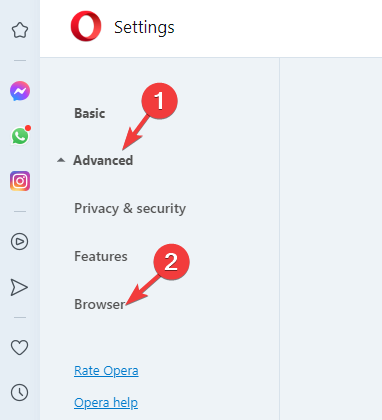
- On the browser settings page, click on Advanced on the left and select Browser.

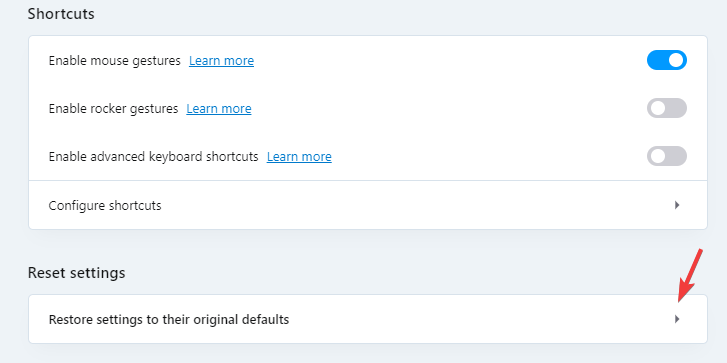
- Now, on the right, scroll down and Reset settings, and click on Restore settings to their original defaults.

- Press Reset again in the prompt to confirm the action.

Once the reset is complete, restart Opera and the video should now play normally.
Alternatively, you can also re-install the browser to check if it helps fix the issue.
Your browser can’t play this video Safari
If the video is not playing on your Safari browser, you can follow the below process:
- Click the Apple icon in the browser menu.
- Click on Force Quit Safari in the menu.

- In the Force Quit Applications dialog, click on the Safari app and press Force Quit.

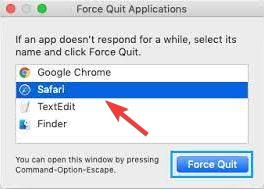
Now, relaunch the Safari app and check if this helps you play the videos again on your browser.
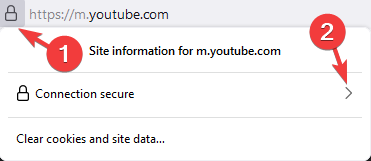
Your browser can’t play this video Firefox
If the video won’t play in Firefox, then you can enable the Autoplay feature as explained below:
- Open the website in Firefox that contains the video and that’s not playing.
- Click on that padlock located on the left side of the URL and click on Connection secure.

- Next, click on More Information.

- In the Page Info dialog, select the Permissions tab.
- Here, locate Autoplay and deselect User Default.
- Now, select Allow Audio and Video.

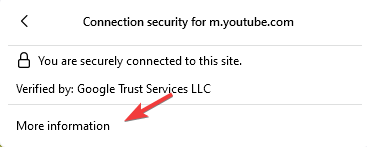
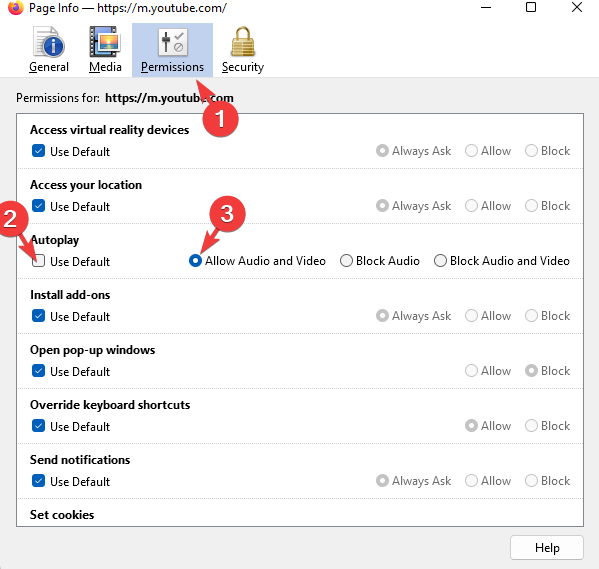
Now, restart your browser, try opening the video and you should not see the error message, Your browser can’t play this video anymore.
- Facebook’s Videos Not Playing in Chrome/Firefox/Safari
- FIX: Your browser does not support video playback
- Whoops! There was a problem playing the video [Google Drive]
- 4 Ways to Fix The Chrome YouTube Embed If It’s Not Working
Alternatively, the issue could also occur if the host server is down, and in such a case, you must wait till the server is back up and running.
But if the video doesn’t play on your browser because it does not support the video format, you can try using another browser.
However, if your browser does not support HTML5 video, you can refer to our detailed guide for some quick fixes.
If you have any other issues with your browser, you can leave a message in the comments box below.
Still having issues? Fix them with this tool:
SPONSORED
If the advices above haven’t solved your issue, your PC may experience deeper Windows problems. We recommend downloading this PC Repair tool (rated Great on TrustPilot.com) to easily address them. After installation, simply click the Start Scan button and then press on Repair All.
![]()
Newsletter
Videos are an indispensable part of our digital world. Whether downloaded movies, YouTube videos, or DSLR HD shoots, we love watching, creating, editing, sharing, and transferring videos. However, any disruption in the videos can make our video viewing experience frustrating.
Below are mentioned some of the common video-related problems with their effective solutions.
1. Choppy, Blurry, or Jerky Video Playback

Choppy, blurry, or jerky videos are frustrating to watch. The issue can be with your recorded or downloaded videos. The poor video quality can be attributed to corrupt SD cards, camera glitches while shooting videos, codec issues, or outdated media players.
Try to play your video in another media player and update your drivers. If the issue does not resolve, the best and assured way to fix choppy, blurry, and jerky videos is through Stellar Repair for Video, which fixes all kinds of corruptions in the video in the AVI, ASF, WMV, MKV, FLV, DIVX, WEBM, MJPEG, MPEG, AVCHD, MTS, MOV, MP4, M4V, 3G2, 3GP, and F4V video files.
2. Video Files Corrupted after Recovery
Whenever you use a not-so-secure or free video recovery application, the chances are that you recover corrupt video files. If your videos are already corrupt, then the recovery software will restore corrupt videos without repairing them.
In any such situation, use the professional Stellar Repair for Video software to repair the corrupt videos. The software is safe and malware free. Moreover, it is capable enough of repairing severely corrupt video files stored on any drive or media.
3. Sluggish or Video Playing Slowly
Your videos can sometimes be sluggish, playing very slowly or taking a long time to buffer, making the video playing experience annoying. The problem could be with the internet speed, browser, computer, or video file itself.
To resolve the slow playing video issue, fix the browser by deleting the cache and temporary files. Then, update the video card drivers or disable hardware acceleration through settings. Also, choosing an Ethernet cable over Wi-Fi increases the speed of online videos.
If none of these methods work, the problem could be with the video file. It may have turned corrupt or damaged. Employ a third-party repair tool like Stellar Repair for Video. It fixes all sorts of corruption in the video and makes it a seamless play.
4. PC Crashes, Lags, or Gets too Slow During Editing
Often during video editing heavy files, the PC crashes or gets too slow. It is probably because your computer might not meet the editing software specifications. Unfortunately, this can also result in video corruption and loss.
To fix the issue, ensure your computer meets the best possible system requirement in terms of RAM, CPU, and GPU. Also, update the OS, device drivers, and editing software. Disconnecting the internet before using editing software also helps. Unfortunately, if your videos get damaged or corrupt during editing, use the Stellar Repair for Video tool to restore them.
5. Out-of-Sync Video or Audio Video Lag Issue
Out-of-sync or mismatched audio is an annoying video quality issue. You can temporarily fix audio video sync or lag issue with the help of VLC Player by setting the audio sync manually. The other manual ways worth trying once are reinstalling the drivers and performing a system reset on your system.
Alternatively, using repair software is a much simpler way to fix audio lag issues in videos. For example, Stellar Repair for Video can fix out-sync videos, making them perfectly playable.
6. No Sound in Video
While playing the video, if there is no sound, ensure the connections of the external speaker are proper. Then, update the sound driver through Device Manager on your system. If this does not work, try uninstalling and reinstalling your system’s audio driver.
Audio troubleshooters on your PC may also be able to fix the audio problems. To run the troubleshooter, go to the Start tab, type Troubleshoot, and select Troubleshoot from the results list; choose Playing Audio > Run the troubleshooter.
If none of the manual methods work, it means the ‘no sound’ issue is due to the corruption in the video file. Leverage Stellar Repair for Video that effectively fixes the missing sound problems in your video file. The tool supports repairing sound issues in AVI, ASF, WMV, MKV, FLV, DIVX, WEBM, MJPEG, MPEG, AVCHD, MTS, MOV, MP4, M4V, 3G2, 3GP, and F4V videos file formats.
7. Videos Playing in Slow Motion
Does it happen to you when you try to play videos online or on your hard drive? Do they play in slow motion?
The ‘slo-mo’ video issue can be tackled by adjusting the speed in the Windows Media Player or QuickTime Player settings. Updating your media player and video drivers in the system also helps fix videos playing in slow motion. A corrupt video file also sometimes causes videos to play in slow motion. Get it fixed using Stellar Repair for Video.
8. Missing Video Codec or Not Supported
‘Windows Media Player cannot play the file because the required video codec is not installed on your computer.’
TCodec errors like this appear when your system lacks the supporting codec of the video file format. Codec files are necessary for encoding and decoding digital data.
Configure Windows Media Player to download the codecs automatically. If the video error reads the codec does not support the video, then get the desired codec pack by first uninstalling the older one. You can obtain the codec from a third-party vendor too.
However, a video repair software like Stellar Repair for Video can also fix the codec error making your videos playable.
9. QuickTime Error 23132 with M4V Files
QuickTime installed on your PC can play stored movies and videos broadcast over the internet. But sometimes, QuickTime Error 23132 with M4V files may not let you play your videos. It is a Windows system files error that can occur due to virus infection, corrupt Windows Registry, or incomplete installation of QuickTime application.
It is advisable to use video repair software to resolve the error and view your M4V videos rather than delving into complex, time-consuming manual methods. Stellar Repair for Video is a quick video repair solution that can restore not playing M4V videos in QuickTime.
Some manual methods may include updating PC drivers, repairing registry entries, cleaning system junk files with cleanmgr, and updating Windows to execute Windows Clean installation.
10. MacBook Pro crashes/freezes when playing YouTube videos
Sometimes the MacBook crashes, freezes, and becomes unresponsive while watching YouTube videos. To play YouTube videos smoothly, you need an updated browser, the latest Adobe Player, and a continuous high-speed internet connection. You will face problems while playing YouTube videos if any of these is not in place.
Disabling the Plugins in Safari or the browser you are using sometimes helps smooth the playing of the YouTube videos.
11. Black Screen while Trying to Play Videos

Seeing a black screen when you open your videos isn’t very pleasant. The problem can be either due to a missing codec, outdated video driver, read/write errors, format changes, etc. In any such situation, use Stellar Repair for Video to get back correctly playing videos.
To fix the black screen problem, you can manually try to reduce video card hardware acceleration by going into your system’s display settings. Reinstalling the media player or the latest driver can also sometimes help.
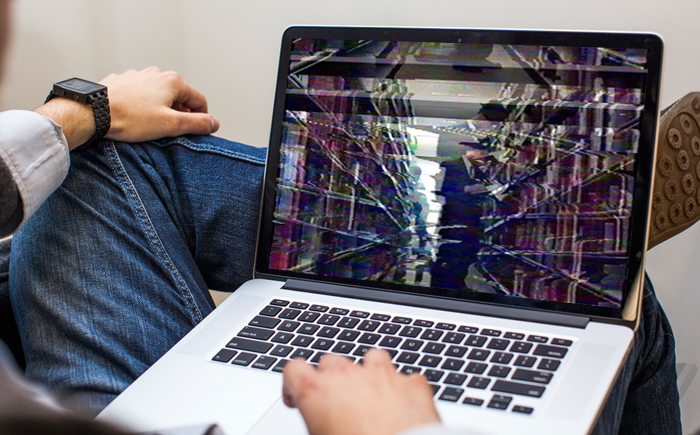
12. Video Distortion after Windows 10 Upgrade
Windows 10 users have been complaining about video distortion after the upgrade. They witnessed their videos were either stretched, broken or pixelated. The problem could be hardware failure, faulty CPU, or issue with graphic drivers or video players.
The easy route to fix the issue and make your videos playable is to use Stellar Repair for Video.
While you can also attempt any of the following to resolve the video distortion problem after the Windows 10 upgrade; update video players, update graphics drivers, clean browser cache, and disable hardware acceleration.
13. Corrupt or Broken MP4 Files
MP4 files saved on your hard drive, SD card, pen drive, etc., can get broken or corrupt due to virus infection, abrupt system shut, or media corruption.
The best way to restore broken MP4 videos is with the help of Stellar Repair for Video. The software has a highly intuitive interface and can quickly repair MP4 videos taken from DSLRs, Go Pro, drones, and security cameras.
You can also use VLC Media Player to fix minor video damage. Updating your system’s video drivers to the latest version may also help to play MP4 videos correctly.
14. Error 2048 in QuickTime Couldn’t Open Video File
QuickTime error 2048 can arise when you cannot play your videos due to virus infection, inappropriate video codec, technical fault in firmware, or your player is outdated. You can fix this error by changing the file format, updating video codecs, or reinstalling QuickTime Player.
If none of these manual techniques help, repair the corrupt video using Stellar Repair for Video.
15. Error Code 0xc00d36c4 on playing video files
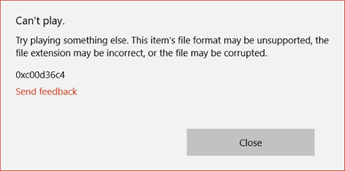
Usually, this error appears when you try to play videos/movies transferred from a DVD or phone to your USB device. The problem is mainly encountered after updating the Windows system. However, Xbox and Grooves users have also commonly reported the error.
The error 0xc00d36c4 indicates your video player does not support the file format or the supporting codec is absent. Try playing the video in a different media player like VLC Player, which usually plays most video file formats. Convert the video file to your player-supported format or install the missing codecs. Another quicker way to fix error code 0xc00d36c4 is simply using the Stellar Repair for Video tool. It is safe and quickly fixes all types of corruption in video files.
16. Google Chrome Freezes/Crashes or not Responding while Loading an Online Video or Game
It may happen while watching videos or downloading video games online; your Chrome freezes or crashes. You may first try restarting your computer. Then update Chrome as videos and games often need the latest browser version. If this does not work, turn on JavaScript in your browser. Also, reset your internet connection and remove all cache and cookies.
Updating the Adobe Player can also resolve Chrome freezing while watching online videos.
17. Video Files Corrupted while Editing
Often video editors face the problem of videos getting corrupt while editing. To fix such corrupt videos, choose a safe application capable of resolving issues with video frames, sound, header, movement of videos, and video slider.
Stellar Repair for Video can fix corrupt MOV, MP4, M4V, 3G2, 3GP, and F4V videos that get damaged or broken while editing, transferring, converting, or processing. It is DIY software for both professionals and beginners.
18. Videos Flickering Issue
Video flickering occurs when your camera’s frame rate and shutter speed capture different fractions of light pulses while shooting.
Usually, you need to reshoot the video, which is not always feasible. The best way is to repair the flickering video fault with Stellar Repair for Video. You can also use filters and plugins in your video editing software to fix the issue.
19. Video Quality Loss after Export
Video playing perfectly in editing software on export often turns noisy and loses quality. It can be due to either wrong export settings combination, old graphic driver, unsupported file formats, or incompatible codecs.
Restart your computer and export again. You can also try to play your video on another media player. Sometimes removing special effects and then exporting also resolves the problem. Also, ensure the export settings are as per the source video clip quality and format. If you find it difficult to fix the video quality loss issue, then professional video repair software, such as Stellar Repair for Video, comes to the rescue. Just upload, scan, and repair your video.
20. Stuck and Dead Pixels on Videos
The stuck and dead pixels are unwanted colored spots on the video screen of your camera. The problem is caused when the transistor does not receive enough power at that point.
Since it is a manufacturing defect, so when you notice the issue, return the camera to the manufacturer for repair or replacement. If your camera cannot be returned/exchanged, you can try to cover up the spots using software plugins.
Conclusion
So now you know the ways to address different video-related problems. In most cases, the issues, regardless of their severity, can be fixed with the help of fast and advanced Stellar Repair for Video software. Its easy-to-use interface can repair corrupt AVI, ASF, WMV, MKV, FLV, DIVX, WEBM, MJPEG, MPEG, AVCHD, MTS, MOV, MP4, M4V, 3G2, 3GP, and F4V files on Windows and Mac and the same can be the savior for all the memories captured in the video.
While for simple issues, manual hacks like updating the drivers, installing the latest media player, deleting the browser’s cache and temp files, etc., can be a workaround.
I hope you find this guide helpful. If you have also come across any video-related issue and its fix, other than the ones mentioned above, do share with us in the comment box below.
Continuously getting an error message ‘Error in Loading Media: File Could Not Be Opened’ when trying to watch an online video on your web browser? Well, if it is so then you don’t have to worry anymore. I am saying so because, in this guide, I am going to share complete info regarding how to fix error loading media file could not be played and what actually causes this issue.
You can fix error could not load media by checking your internet connection, clearing browser cache & cookies, updating the browser, disabling the browser extensions, etc.
However, if you are unable to play your video due to file corruption, you can try the best Video Repair Tool. It will help you to repair corrupt videos and watch online videos without any disturbance.
To fix error loading media: file could not be played, we recommend this tool:
This software will repair flickery, stuttery, jerky, unplayable videos and supports all popular video formats. Now repair your corrupt and broken videos in 3 easy steps:
- Download this Video Repair Tool rated Great on Pcmag.com.
- Click Add File to add the video you want to repair.
- Select Repair to start the repair process and save the repaired video on the desired location after the repair is done.
But, before that, let’s know about ‘JWPlayer error loading media file cannot be played’ in detail.
The ‘error loading media file could not be played’ actually means that you’re trying to load a file in an unsupported video file format in the media player. The most common cause is the loading of a .mov or a .wmv video file format that does not use the H264 video codec.

Besides, there are some other reasons that can also result in the above-shown error on your browser when trying to play a video. They are as follows:
- Weak or slow internet.
- Due to excess cookies and cache data stored in the browser.
- The Video file is corrupted itself.
- Outdated version of a browser.
Now, let’s move ahead to know how to fix error loading media: (file could not be played) on Chrome or other browser and devices.
How To Fix Error Loading Media File Could Not Be Played?
Well, when it comes to fixing the error loading media file not found or unable to play video files, there are several ways that can be tried. But the best options that you can try are mentioned in the below section.
So, let’s try them one by one and check which one works in your case.
- #1: Check Your Internet Speed
- #2: Delete Cookies, Cache & Browser History
- #3: Update To The Latest Version Of the Browser
- #4: Turn Off Hardware Acceleration
- #5: Play Media Player In Incognito Mode
- #6: Disable Browser Extensions
- #7: Reset the Browser Settings
- #8: Try Different Video Player
- Ultimate Solution: Video Repair Tool
Method #1: Check Your Internet Speed
Fluctuation of network connection or unstable internet is the major factor behind can’t play online videos or videos playing in slow motion problem.
Hence, it might possible that a weak internet connection is responsible for the “error loading media: file could not be played” issue. So, make sure that your network has good strength before you try to play an online video.
If this way won’t help you to troubleshoot this error, then try the next one.
Method #2: Delete Cookies, Cache & Browser History
Cookies and cache are just a small piece of information that is stored in directory of the web browser to provide you with the best user experience. Internet browsers like Google Chrome or Internet Explorer stores cookies and cache to spend up the loading process.
But, as time passes by, these cookies and cache pile up in the PC creates issues like ‘error loading media file could not be played on Chrome’. So, it is important to clear the cookies and cache, and browsing history on a regular basis. To do so, you have to follow the below steps:
For PC Users
- First of all, you have to open Google Chrome and then access the action menu in the very top-right corner of the screen.
- Next, you have to go to the option More Tools and then select Clear browsing data.
- After this, you are required to select the tab ‘Basic’ and then use the drop-down menu near Time range just to select the option ‘All Time’.
- You can then check the box just next to Cookies and other site data and then next to Cached images and files. After this, simply hit the option ‘Clear Data’ in order to eliminate or delete the cookies and cached files in Google Chrome.
- After the process gets complete, you have to restart the Google Chrome and then tap the action menu.
For Android Users
- In the first step, you have to launch Google Chrome on the Android device and then simply tap the action menu
- Next, you have to go to Settings and then simply tap on Privacy.
- Now, you have to scroll all the way down and then tap on Clear Browsing Data.
- After this, you have to select the Basic tab and then set the Time Range option to All-time with the use of drop-down menu. Now, you have to check the boxes that are associated with cookies and site data and cached images and files. After this, you have to hit Clear Data to delete the items.

Also Read: Fix This Video File Cannot Be Played Error Code 224003 (2022 Guide)
Method #3: Update To The Latest Version Of the Browser
When you get an error loading media files could not be found issue appears in the browser then make sure that the browser you are using is up to date.
Here are the steps mentioned below individually for PC users and Android users. So, follow them and try to solve error loading media file could not be played Chrome.
How To Update Chrome Browser On PC
- First of all, you have to open Google Chrome and then click the three vertical dots on the very top-right corner of the toolbar. After this, you have to click Help and then go to About Google Chrome.
- If there is a new Chrome version available then you will simply see an option called ‘Update Google Chrome’ or else the Google Chrome is updated. You can see the Relaunch button and if there is any new update available then click on it to end the process.
- However, if you still get the error loading media file could not be found issue, just clear cookies and cached files and then simply play the media files easily.
How To Update Chrome Browser On Android Device
The browser installed on the Android device should update automatically when you have to turn on Auto-update apps in the Play Store settings.
However, you can also check if there is a new browser update available just to resolve error loading media file in Android devices. Here are the steps you can try to update the Chrome browser on an Android device:
- First of all, you have to open Play Store app on the Android device.
- Next, you have to tap Menu and then go to My apps & games option found at the top-left corner.
- After this, you have to find the browser under the Update
- Lastly, you have to tap Update.

Method #4: Turn Off Hardware Acceleration To Fix Error Loading Media File Could Not Be Played
Suppose if there is a problem with the media file you are playing then this could be because of reasons like hardware acceleration. However, when it is enabled, the hardware acceleration passes graphical intensive tasks within the browser so that it can make it perform better.
Well, it may happen because of the error ‘media file could not be played’ and so you have to disable it. This can help you to play the video file.
Steps to Disable Hardware Acceleration in Google Chrome
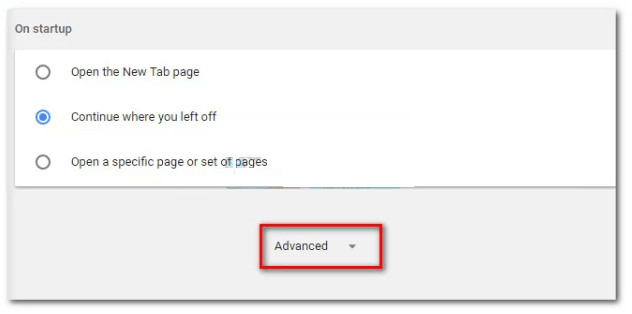
First of all, you have to click the option ‘Settings’ and then go to ‘Advanced’ on Google Chrome.
- Now, you have to toggle-off the option ‘Use hardware acceleration when available’ under Settings
That’s it….you have to do just these two steps to disable hardware acceleration in Chrome.

Method #5: Play Media Player In Incognito Mode

We all know that incognito mode doesn’t store any cache or cookies and it automatically deleted the search and browsing histories.
So, to play media player in Incognito mode, you’ve to press ‘CTRL+SHIFT+ N’ keys together to go to the incognito mode. You can simply enter the website link and then play the video file without any hassle.
Method #6: Disable Browser Extensions
It might possible that the error loading media file could not be played has occurred because of browser extensions. So, you need to disable them as soon as possible.
However, you can check once if the error is causing due to browser extensions. For this, you have to open the video hosting website in Incognito Mode and then play the video.
But, if the video plays smoothly without causing any sort of error then it indicates that an extension was the actual reason for the error could not load media.
4 Easy Steps to Disable Extensions in Google Chrome
- First of all, you have to open Google Chrome and then click on the three vertical dots.
- Next, you have to click on the option ‘More Tools’ and then go to Extensions.
- After this, you can simply choose Remove or toggle-off each extension.
- Now, you have to simply close the window and then reopen the browser. You can then check if the media file could be played or not.

Method #7: Reset the Browser Settings
You can try to fix error loading media file could not be played Chrome is to reset the browser setting. If you clear browser settings then it might help to resolve Error loading media: File could not be played issue. However, when you reset the browser settings, all the extensions, Chrome settings as well as browser history will be removed.
So, here are the steps below:
- First of all, you have to open Chrome browser.
- Next, you have to click the three vertical dots shown on the very top-right portion of the screen.
- Now, after clicking that, you have to click there Settings and then go to Advanced.
- On the Windows PC, you will get this option under Reset and clean up.
- However, on Mac PC, this option will take place when you click Restore settings to their original defaults.
Method #8: Try Different Video Player
Sometimes, the media file that you want to play is not supported via video player and displays such errors, mainly JW player. Though according to the JW player, WMV and MOV video file does not use H264 codec, so it fails to load and play the file on the browser.
Maybe the file that you want to play is one of the MOV or WMV, that’s why you are unable to watch the online video with JW player. In such a case, you should download that video on your device & try to watch it in another media player.
Ultimate Solution: Video Repair Tool To Fix Videos Errors
After trying all the above fixes, if you’re unable to fix error loading media file could not be played, you can try another option. Yes… and the option is to try Video Repair Tool. This tool has the ability to fix any kind of error related to video files.
No matter what file format you are using because this tool repairs all video file formats error in no time. The best part is – it is available for Windows as well as Mac PCs. So, whatever OS you are using, you can fix your issue in any of these platforms easily.
Apart from this, video repair tool also:
- Fix unplayable, corrupted, damaged, inaccessible or broken video files
- Repair all video file formats like 3G2, MOV, MP4, WMV, FLV, M4V, MTS, AVCHD, F4V, etc
- Completely trustworthy tool
- User-friendly interface
- 100% safe, secure and easy to use

* Free version of this program only previews repaired videos.
Here is the step-by-step guide to follow to fix error could not load media.
Steps To Repair Video File Errors
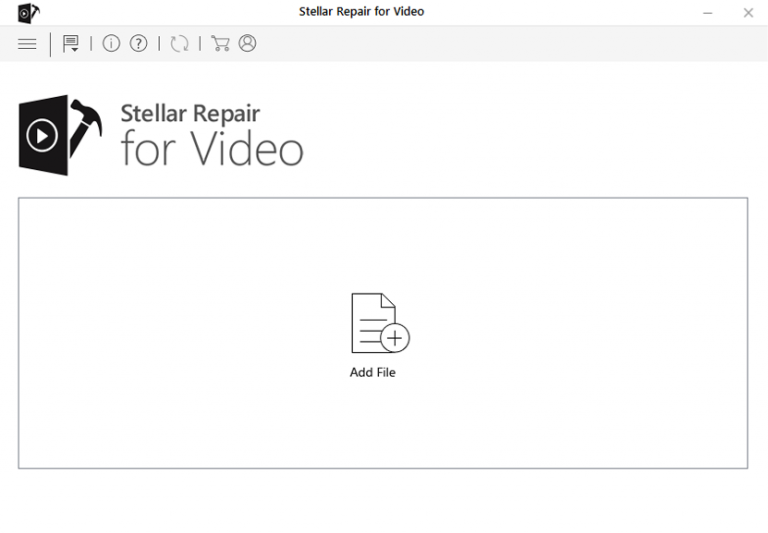
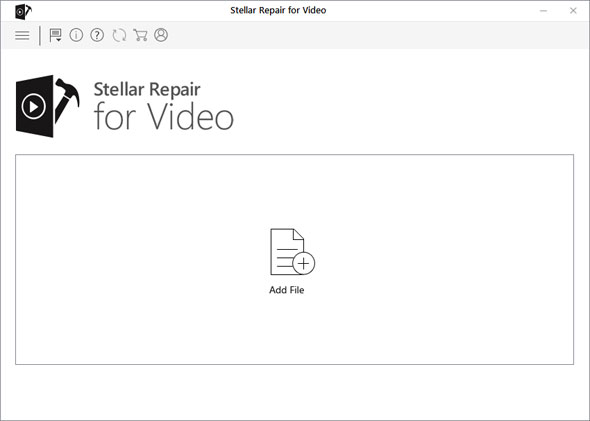
Step 1: Download, install and launch Video Repair software on your system. Click on ‘Add Files‘ to add corrupted video files.
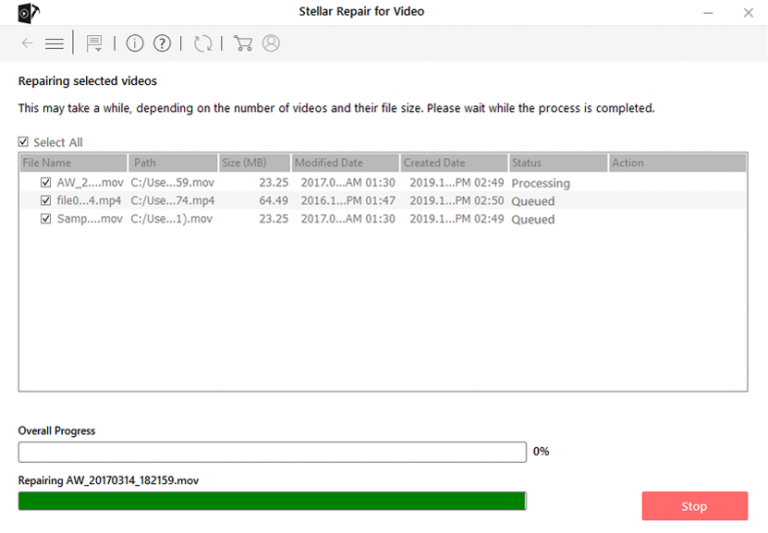
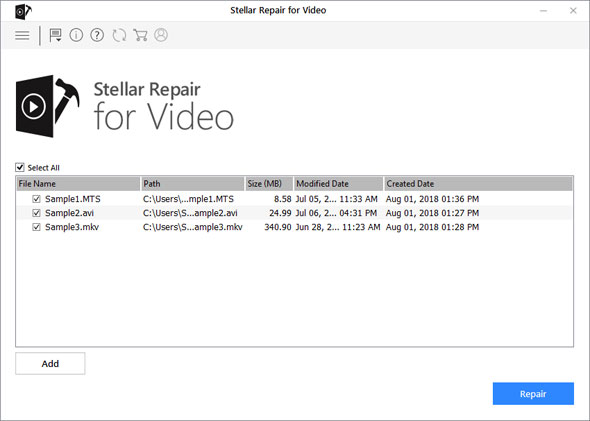
Step 2: Click on ‘Repair‘ button to begin the repairing process. This start repairing your added video files one by one.
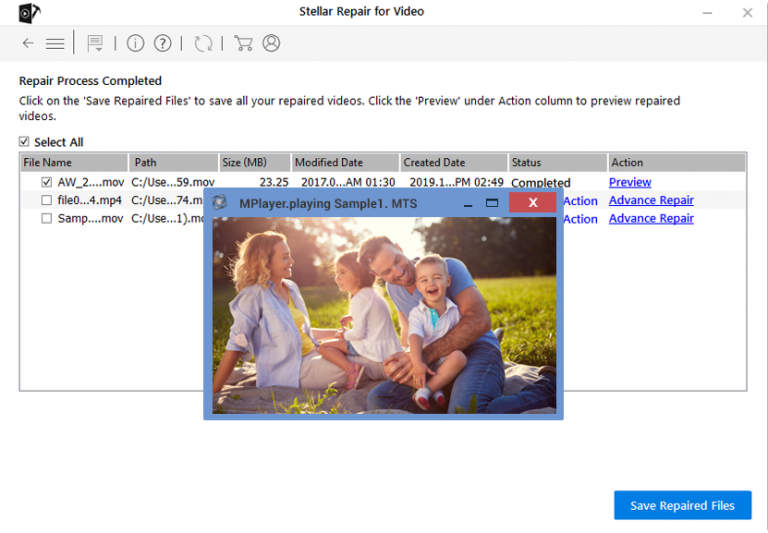
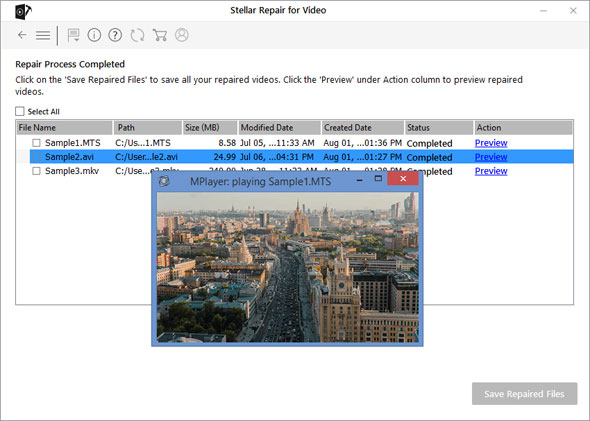
Step 3: You can click on ‘Preview‘, in order to preview the repaired video file within the software and click on ‘Save Repaired Files‘ button to save the repaired videos at desired location.
How Do You Reset Google Chrome To Avoid Online Video Playing Errors?
To know how to reset Google Chrome to avoid getting video file errors, you have to follow the below steps:
- First of all, you have to click the menu icon that is found just next to the address bar.

- After this, you have to select Settings from the drop-down menu.

- Next, you have to scroll down to the Settings page and then click there the Advanced.
- After this, you have to scroll down to the page and then click there ‘Reset’ option.

- Lastly, you have to click the Reset button in the pop-up window.
Frequently Asked Questions:
How Do I Fix Error Loading Media File Cannot Be Played?
You can fix error loading media Android or PC by applying the below tips:
- Improving the network speed
- Clearing the browser’s cache and cookies
- Disabling hardware acceleration
- Disabling extensions and plug-ins
- Using the Video repair Tool.
Why Videos Are Not Loading?
Videos are not loading error mainly occurs in the web browsers like Google Chrome, Firefox and Safari while trying to play a video. Most probably this issue takes place when trying to watch mov or .wmv video that does not use H264 video codec. Apart from that, it can cause due to unstable internet issue, outdated version of the browser, cache and cookies of browser, missing JavaScript or corrupt video file.
How Do I Fix Video Not Playing On Chrome?
To overcome video not playing on Chrome, you need to enable adobe flash in Chrome, update the browser, clear the browser’s cache, reset Chrome browser’s settings, disable hardware acceleration, extensions and plug-ins.
Conclusion
I know it’s quite annoying to face an error loading media Android or PC issue no matter which browser you are using. However, you can try the aforesaid ways to resolve message error loading media file could not be played issue.
I hope after you try the above fixes, at least one of them will definitely work for you. Or, if you fail to do so then you can also try Video Repair Tool. This tool has the ability to fix all video repair related errors including this error could not load media.
So, all the very best to you…..


Taposhi is an expert technical writer with 5+ years of experience. Her in-depth knowledge about data recovery and fascination to explore new DIY tools & technologies have helped many. She has a great interest in photography and loves to share photography tips and tricks with others.
Be it memories, important discussions, tutorials, entertainment, and so on, videos provide a great format to store and consume information. Digitization of data has enabled us to experience the past as if it were the present. Random error messages spoil this fun and may even result in loss of the video file. In this blog post, we will discuss error code 0xc00d5212, its key symptoms, possible causes, and easy step-by-step instructions to fix the error.
What does error code 0xc00d5212 represent?
The complete error message reads like this — “Can’t play. This item was encoded in a format not supported 0xc00d5212 (0xc00d5212)” or “Missing Codec 0xc00d5212”
Any error message that pops up on your Windows machine springs up from a cause. Once you know the cause, you can fix the issue. Following could be the causes of error code 0xc00d5212:
- The player doesn’t support the format of the video file
- The video codec is not supported.
- Display drivers aren’t updated.
- Windows isn’t updated.
- Multiple audio drivers are installed.
- The video file is corrupt.
8 Easy and step-by-step methods to fix the error 0xc00d5212
Based on the probable causes of the error 0xc00d5212 listed above in this blog, we’ll go through the step-by-step methods to fix the error 0xc00d5212. Let’s try these methods.
Method #1: Download and install codecs
A codec is a software that is required at both the ends – the end at which the video is created and the end at which it is required to play. An incompatibility between the two ends wouldn’t allow you to play your video. A missing codec could be the cause of the error 0xc00d5212. Follow the steps given below to install the codecs and then try to play the video.
- Launch Windows Media Player
- Click on “Tools” and then click on “Options”
- On the Player tab, select either “Once a day” or “Once a week” under Automatic updates.
- Click on “OK”
- Right-click on your video file
- Select “open with Windows Media Player” to play the video. If you are prompted to install the codec, click “Install”
Method #2: Convert your video to a supported format
If your player doesn’t support the file format of your video file, convert its file format. MP4 is among the most universal video file formats that most media players can play. You will find many online tools and desktop applications as well to do so. Give it a try and then play your video.
Method #3: Update the display driver
You may get 0xc00d5212 error while trying to play a video if the display driver of your windows machine is obsolete. We’ll now see the steps to update the display driver.
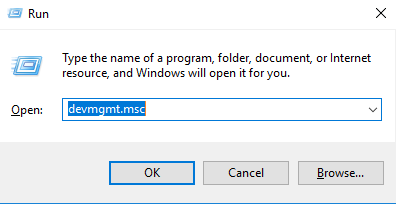
- Press the Windows + R keys, type devmgmt.msc, and click OK. This opens up the device management console.
2. In the “Device Manager”, expand the “Display adapters”, right-click on your graphics adapter and click on “Properties”. The properties window will pop-up.
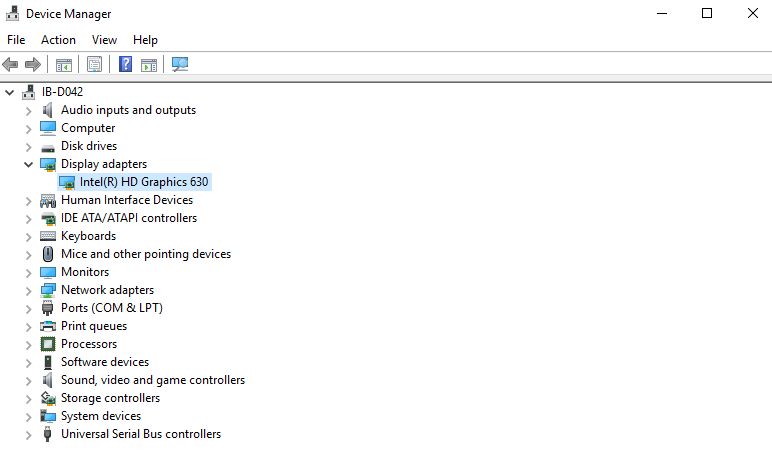
3. Select the “Driver” tab and then Click on “Update Driver”. Next, choose “Search automatically for updated driver software” on the window that pop-up.
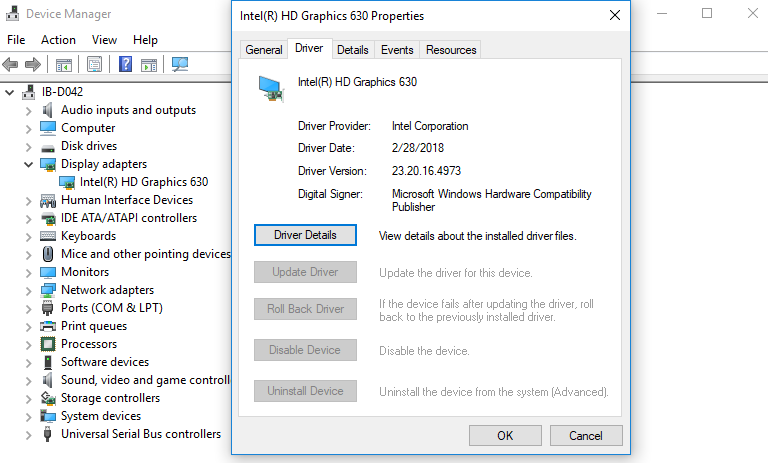
4. Once the updates are done, restart your windows machine and try to play the video.
Method #4: Uninstall and reinstall the display driver
If updating the display drivers automatically doesn’t fix “file format not supported” or “missing codec 0xc00d5212” error, you can try uninstalling the driver, download the display driver and reinstall the driver.
- Right-click the display adapter and click on “Uninstall” and check “Delete the driver software for this device”, and then “OK” to remove the drivers.
- Download the display driver from the website of your PC manufacturer and reinstall the driver.
- Restart the PC.
- Try to play the video.
Method #5: Uninstall 3rd party audio devices
If your PC has 3rd party audio drivers, uninstall them as they could be conflicting. To do this, follow the steps given below.
- Press the Windows + R keys, type devmgmt.msc, and click OK. This opens up the device management console.
- In the “Device Manager”, expand the “Sound, video and game controllers”, right-click on any 3rd party audio device that is installed and click on “Uninstall device”.
- Restart your PC.
- Try to play the video.
Method #6: Use VLC Media Payer to play your videos
Use VLC Media Player which supports a much wider range of file formats and codecs as compared to Windows Media Player. Let’s see how we can do that.
- Download VLC Media Player from VLC’s official website.
- Double-click on the executable and install it.
- Right-click on your video file and choose “Open with VLC Media player”
Method #7: Update Windows
If you still couldn’t play the video and getting the error message with the error code 0xc00d5212, try updating your windows.
- Press the “Windows Key + I” to open Windows settings.
- Select “Update & Security” and select “Check for Updates”. Windows will check for updates. If there are any pending updates, download them.
- Restart your machine and try to play the video.
Method #8: Repair the video file
NOTE: This method is useful only in the case of corrupt or damaged video files.
If you are getting the error 0xc00d5212 for a specific file or only a very few specific files while trying to play them and if you have tried all the methods given above, but none of them worked for you, then probably the video file is corrupt.
A corrupt video file can be repaired by using video repair tools. Once repaired, you should be able to play your video. Choose Stellar Repair for Video that has the capability to repair a wide range of video file types without compromising the quality of the video.
Below given are the 3 steps required to repair your corrupt or damaged videos using the software :
Step 1: Launch the software and click on “Add File” to browse the corrupt or damaged video files.
Step 2: Click on “Repair”. This will start scanning and repairing the selected video files.
Step 3: Once repair process is complete, click on “Save Repaired Files” to save to a desired location on your PC. You can also preview the repaired files before saving them using the “Preview” option.
Conclusion
Error 0xc00d5212 appears cryptic but the error message clearly indicates missing codec as the primary cause. In this blog post, we shared a few methods – such as video codec installation, format conversion, updating drivers etc. – with detailed steps to resolve this issue.
If nothing works, likely the video file is corrupt or unable to be played due to an unknown issue. So, try out repairing the video file, for that might resolve such underlying issues in the video and turn it back into playable condition. Stellar Video repair software could be a good option as it’s available for free trial which repairs and also previews the repaired file.
Try Now


Согласитесь: современный пользователь любого устройства, способного выходить в Интернет, проводит огромное количество времени на невероятно популярном видеохостинге YouTube. Таковы современные реалии. Однако, некоторые пользователи уведомляют, что они частенько сталкиваются с ошибкой «An Error Occurred, Please Try Again Later», когда пытаются посмотреть на YouTube то или иное видео. В сегодняшней статье мы с вами посмотрим на некоторые решения, с помощью которых вы можете устранить эту проблему.
Содержание
- Решения для устранения ошибки «An Error Occurred, Please Try Again Later»
- Решение №1 Использовать функцию «Забыть об этом сайте»
- Решение №2 Отключить Shockwave Flash
- Решение №3 Очистить cookie и кэш, и обновить ваши плагины
- Решение №4 Отключение аппаратного ускорения
- Решение №5 Обновление аудиодрайвера
- Решение №6 Подключите к ПК наушники или колонки
- Решение №7 Удаление антивируса Bitdefender
- Решение №8 Переход на другой браузер
- Решение №9 Изменить свой DNS
- Решение №10 Изменить качество воспроизводимого видео
- Решение №11 Активирование cookie
- Решение №12 Переустановить браузер
Решения для устранения ошибки «An Error Occurred, Please Try Again Later»
Все перечисленные ниже решение, советы и шаги вы можете использовать на любом доступном вам браузере, естественно, немного «подогнав» их под браузер, установленный на вашем компьютере. Мы же будем приводить примеры – в большинстве случаев – на браузере Firefox, так как он является одним из самых используемых.
Решение №1 Использовать функцию «Забыть об этом сайте»
Если вы используете для серфинга в сети браузер от Firefox, тогда у вас есть возможность использовать функцию «Забыть об этом сайте». Данная функция позволяет позволяет вам удалить cookie, сохраненные пароли и кэш-файлы определенного сайта. Чтобы использовать ее, вам нужно сделать следующее:
- Откройте Firefox и перейдите в Журнал. Вы можете запросто перейти в эту часть браузера просто нажав комбинацию клавиш Ctrl+H на клавиатуре.
- Просмотрите вашу историю браузера и найдите любую ссылку, ведущую на YouTube.
- Нажмите на нее правой кнопкой мыши и выберите из контекстного меню пункт «Забыть об этом сайте».
- Перезапустите браузер Firefox и попробуйте проиграть нужное вам видео на YouTube.
Это достаточно простой трюк, который, вероятно, поможет вам избавиться от ошибки «An Error Occurred, Please Try Again Later».
Решение №2 Отключить Shockwave Flash
Shockwave Flash – плагин, необходимый для работы с различным мультимедийным контентом в Интернете. Порой, этот самый плагин от компании Adobe может вызывать ошибку «An Error Occurred, Please Try Again Later» при просмотре различных видео на YouTube. Вам нужно убедиться в том, что он деактивирован. Чтобы отключить Shockwave Flash, вам нужно сделать следующее:
- Откройте Firefox и кликните на иконку с тремя полосками.
- Кликните на пункт «Дополнения».
- Перейдите во вкладку «Плагины» и найдите там Shockwave Flash.
- С помощью ниспадающего меню, располагающегося рядом с Shockwave Flash, выберите опцию «Никогда не включать».
Если вы не используете Firefox, то просто убедитесь в своем браузере, что вы отключили плагин под названием Shockwave Flash. Процесс его деактивации будет сход на всех версиях браузеров, так что у вас не должно возникнуть с этих никаких проблем. Войти в настройки Плагинов и отключить Shockwave Flash – вот так все просто.
Решение №3 Очистить cookie и кэш, и обновить ваши плагины
Чтобы избавиться от ошибки «An Error Occurred, Please Try Again Later», вам нужно попробовать очистить cookie и кэш. Чтобы осуществить эту задачу в браузере Firefox, вам нужно следовать этим шагам:
- Откройте браузер Firefox и кликните на кнопку меню(три полоски в верхнем правом углу).
- Кликните на пункт «Библиотека».
- Далее кликните на «Журнал».
- Далее кликните на «Удалить историю».
- Выберите типы данных, от которых вы хотите избавиться. В нашем случае, вам нужно выбрать кэш и cookie, тем не менее вы можете подвергнуть и другие типы данных к удалению.
- Выберите желаемый временной промежуток и кликните на кнопку «Удалить сейчас».
Завершив процесс удаления кэша и cookie, перезапустите браузер Firefox. Несмотря на то, что мы показали пример на одном браузере, вы можете применять данные шаги к практически любому из них. Если вы используете какие-то из плагинов в вашем браузере, то их нужно обязательно обновить. Сделать это можно с помощью шагов, указанных в предыдущем пункте. Добравшись до списка плагинов, нажмите на нужный вам правой кнопкой мыши и выберите «Найти обновления».
Решение №4 Отключение аппаратного ускорения
Некоторые пользователи указывают, что аппаратное ускорение может вызывать проблемы с YouTube ошибку «An Error Occurred, Please Try Again Later». В связи с этим, давайте взглянем на то, как отключить данный функционал.
- Откройте Firefox и пройдите в «Настройки».
- Перейдите в раздел «Производительность», опустившись в самый низ окна с Настройками.
- Уберите галочку с опций «Использовать рекомендуемые настройки производительности» и «По возможности использовать аппаратное ускорение».
- Перезапустите Firefox, и попробуйте снова проиграть какое-то видео на YouTube.
Аппаратное ускорение может вызывать множество различных проблем, в том числе и ошибку «An Error Occurred, Please Try Again Later», но после отключения данной опции все они благополучно разрешаются.
Решение №5 Обновление аудиодрайвера
Некоторые пользователи утверждают, что обновление аудиодрайвера для звуковой карты может разрешить проблему, возникающую при просмотре видео на YouTube, так что почему бы не попробовать последовать данному совету. Вам понадобится посетить официальный сайт производителя материнской платы или звуковой карт и найти там последнюю версию драйвера или драйвера для Windows 10.
Решение №6 Подключите к ПК наушники или колонки
Да, данное решение наверняка звучит как невероятно странный совет, но некоторые пользователи утверждают, что подключение к компьютеру наушников или колонок во время просмотра видео на YouTube может избавить от ошибки «An Error Occurred, Please Try Again Later».
Так что если в вашем распоряжении есть только встроенные громкоговорители, например, вы владелец ноутбука, то попробуйте подключить к компьютеру наушники или колонки, чтобы устранить проблему с YouTube.
Решение №7 Удаление антивируса Bitdefender
Согласно утверждению некоторых пользователей, антивирусное программное обеспечение Bitdefender может вызывать ошибку «An Error Occurred, Please Try Again Later» на YouTube. Если у вас в системе установлен данный антивирус, то попробуйте удалить его. Также стоит заметить, что несколько пользователей указали на то, что им помогло разрешить проблему простое обновление версии данной антивирусной утилиты. Если же у вас не установлено это программное обеспечение, то попробуйте отключить или временно удалить свой антивирус. При отсутствии антивируса как такового вам потребуется деактивировать Защитник Windows, который является системным антивирусом.
Решение №8 Переход на другой браузер
Если ничего из вышеперечисленного не помогло вам разрешить проблему в виде ошибки «An Error Occurred, Please Try Again Later», то мы рекомендуем вам попробовать сменить браузер. Да, переходить на другой браузер – это далеко не самая приятная процедура, так как вы уже обжили старый, но если это может потенциально разрешить ошибку – почему бы и не попробовать.
Решение №9 Изменить свой DNS
Если вы начали получить ошибку «An Error Occurred, Please Try Again Later» при просмотре видео на YouTube с недавнего времени, то проблема может заключаться в вашем DNS-сервере. По умолчанию, ваш компьютер использует DNS-сервер провайдера, предоставляющего вам доступ к Интернету. Однако, если с ним возникли какие-то проблемы, то вы можете воспользоваться публичными адресами DNS-серверов от компании Google. Сделать это можно следующим образом:
- Нажмите правой кнопкой мыши на значок сетевого подключения в Области уведомлений и выберите «Открыть “Параметры сети и Интернет”».
- Далее кликните на «Настройка параметров адаптера».
- Найдите ваше сетевое подключение и дважды кликните на него левой кнопкой мыши.
- Перейдите в свойства и найдите компонент «IP версии 4…».
- Выделите его и перейдите в «Свойства».
- Поставьте галочку «Использовать следующие адреса DNS-серверов».
- Выставьте для основного сервера адрес 8.8.8.8., а для альтернативного – 8.8.4.4.
- Сохраните изменения и закройте все открытые окна.
После выполнения этой простой процедуры откройте YouTube и проверьте, была ли устранена ошибка «An Error Occurred, Please Try Again Later». Изменив настройки DNS, вы заставите ваше Интернет-подключение использовать DNS-сервера Google, которые находятся в публичном доступе для любого пользователя. Если переход на другие DNS-сервера не помог вам устранить проблему, то можете просто убрать галочку с опции «Использовать следующие адреса DNS-серверов» и вернуть автоматические настройки параметров.
Решение №10 Изменить качество воспроизводимого видео
Ошибка «An Error Occurred, Please Try Again Later» останавливает вас от просмотра того или иного видео, тем не менее пользователи нашли небольшое решение для этой проблемы, выполнение которого не займет у вас и пяти секунд. Согласно утверждениям некоторых пользователей, вы можете устранить данную ошибку просто сменив качество воспроизводимого видео. Нажмите на значок Шестеренки в нижнем правом углу плеера YouTube и выберите другое качество. Держите в уме, что это довольно спорное решение, которое, возможно, потребуется применять на каждом открываемом видео на YouTube.
Решение №11 Активирование cookie
Еще одна причина, стоящая за ошибкой «An Error Occurred, Please Try Again Later», может заключаться в отключенных cookie. YouTube полагается на cookie, и если вы их деактивируйте, то можете столкнуться с подобной ошибкой. Давайте рассмотрим следующие шаги на примере Google Chrome – для разнообразия. Чтобы попытаться устранить ее, вам потребуется сделать следующее:
- Откройте Google Chrome и пройдите в его Настройки.
- Опуститесь в самый низ и кликните на «Показать дополнительные настройки».
- В разделе «Приватность и безопасность», кликните на «Настройки контента».
- Пройдите к разделу «Файлы cookie».
- Найдите опцию «Блокировать данные и файлы cookie сторонних сайтов» и убедитесь, что она отключена.
После отключения опции «Блокировать данные и файлы cookie сторонних сайтов» YouTube наверняка заработает так, как он должен работать. Тоже самое можно проделать и со всеми остальными версиями браузерами, включая Firefox. Покопайтесь в настройках – и вы все найдете.
Решение №12 Переустановить браузер
Если вы столкнулись с ошибкой «An Error Occurred, Please Try Again Later», то можете попробовать попросту переустановить свой браузер. Некоторые пользователи браузера Firefox утверждают, что данная проблема может полностью исчезнуть после переустановки браузера. В общем, почему бы и вам не попробовать это сделать. Естественно, обязательно установите самую актуальную на данный момент версию, чтобы иметь наибольший шанс устранения ошибки «An Error Occurred, Please Try Again Later».
Many factors can cause video playback issues, such as internet or device connection.
If a video is freezing, buffering, or you get one of these errors, you may be experiencing a video playback issue:
- An error has occurred.
- Playback error. Tap to retry.
- Connection to server lost.
- This video is unavailable.
- Something went wrong. Tap to Retry.
By troubleshooting your internet or device connection, your video may play without playback issues. Start by checking your internet speed, then check the steps for your device.
Troubleshoot internet and device connection
Try following the steps below to troubleshoot your internet and device connections.
Internet speed
The quality of your home or mobile network can affect how smoothly YouTube videos play, and whether videos play in HD.
- Check the YouTube video’s resolution and the recommended speed needed to play the video. The table below shows the approximate speeds recommended to play each video resolution.
|
Video Resolution |
Recommended sustained speed |
|---|---|
| 4K | 20 Mbps |
| HD 1080p | 5 Mbps |
| HD 720p | 2.5 Mbps |
| SD 480p | 1.1 Mbps |
| SD 360p | 0.7 Mbps |
- Try running an internet speed test to make sure your internet can support the selected video resolution. You can also change the quality of your video to improve your experience.
Note: The actual speed that your device gets may vary from the number given when you run an ‘internet speed test.’ The difference can be due to numerous factors including:
- Wi-Fi performance
- Time of day
- How your ISP connects to YouTube
- How many devices are on your network: If there are a few devices on your network, then the connection is shared between them. Using multiple devices on the same network may reduce the speed that your device gets.
- You can also find out if your internet Service Provider is HD Verified; by visiting the Video Quality Report.
- If you’re interested in seeing more info on how your videos are played back, check out Stats for Nerds.
- Try restarting your internet connection if the above suggestions don’t improve your connection.
Smart TVs, Chromecast, and game consoles
To fix playback issues with your smart TV, Chromecast, or game console —
- Restart the YouTube app.
- Restart your device: Do a hard restart by disconnecting the power and then reconnecting.
- For game consoles: Uninstall and reinstall the YouTube app.
- Update your device’s firmware/system software.
For the YouTube app or mobile site, try some of these troubleshooting steps:
YouTube app
- Restart the YouTube app.
- Restart your device.
- Turn off your mobile data connection and then turn it on again.
- Clear the YouTube app’s cache.
- Uninstall and reinstall the YouTube app.
- Update to the newest available version of the YouTube app.
- Update to the newest available version of Android.
Mobile site
- Clear your browser’s cache and cookies.
- Restart your mobile browser.
- Restart your device.
Troubleshoot a green or black screen in the video player
If you can hear the audio of a YouTube video, but the video player is green or black, try to:
- Use a different browser to watch the video.
- Clear your browser’s cache and cookies.
If that doesn’t work, try some of these troubleshooting tips.
Troubleshoot audio issues
If you can’t hear any audio from a YouTube video, the volume button may be turned off ![]() . Try some of the following troubleshooting steps:
. Try some of the following troubleshooting steps:
- Make sure the sound/volume is turned on for your browser or device.
- Check your device’s sound settings.
- Restart your browser or device.
Other types of issues
Issues with YouTube Paid Products;
If the above steps don’t work and you:
- Bought a movie or TV show on YouTube, OR
- Are an active paid member of Youtube Music, YouTube Premium, or YouTube TV
You can get in touch with us for support with purchases or memberships.
Age-restricted content
Sometimes content doesn’t violate our policies, but it may not be appropriate for viewers under 18. Age-restricted videos may not be viewable to users who:
- Are under 18 years of age
- Are signed out
- Are watching YouTube videos embedded on most third-party sites
Learn more about watching age-restricted videos.
Restricted Mode
Restricted Mode is an optional setting that screens out potentially mature content you or others using your devices may prefer not to view. When Restricted Mode is turned on, comments may not be viewable. You can turn Restricted mode on or off.
Note: Restricted mode works on the browser or device level, so it must be turned on or off for each browser or device you use.
Issues downloading videos
If you don’t have YouTube Premium or if downloading videos isn’t available to you, you can’t download videos. If you can download videos, but you’re running into issues, try some of these downloading troubleshooting tips.
Account error issues
If you’re running into issues with your account, these articles may have more info:
- Problems accessing YouTube
- Get help signing in to YouTube
If the above steps don’t work and you’re still having trouble, let us know by submitting feedback.
Was this helpful?
How can we improve it?