You should upgrade or use an alternative browser.
-
#1
I’ve reformatted several times. I was able to transfer one folder at a time successfully so that’s fine, however any time I try to launch a game it gives me a Read Save Error and backs out to the game list. After that I reformatted again and put one rom file in the root directory with the kernel and nothing else, and the game launched successfully. I then put 24 roms into the root directory to see what would happen and received an Initial Error on boot.
EDIT — I booted up the system again, the Initial Error popped up for a second, then it loaded to the root directory with all 24 games, which seem to load properly
.png")

.png")
.png")
.png")
-
#2
The #-C folder too.
-
#3
try to remove the non-letter symbols in the filename, including period, brackets, dash, unneeded country name.The #-C folder too.
I cleaned up the folders and file names, then loaded A-C folders for Gameboy / GBA into their respective directories. I was able to populate a game list and launch GB games without issue, but every GBA game boots to a white screen. Progress, I suppose.
-
#4

-
#5
try to remove the non-letter symbols in the filename, including period, brackets, dash, unneeded country name.The #-C folder too.
are spaces still bad, too ?
-
#6
are spaces still bad, too ?
space is safe
-
#7
Write to Nor Flash and Launch sends me to a black screen where the game seems to be written to memory but then kicks me to the NOR tab, which remains empty
The roms are fine, I’ve been using this romset for quite a while on pc / rasp pi with no issue.
-
#8
Write to Nor Flash and Launch sends me to a black screen where the game seems to be written to memory but then kicks me to the NOR tab, which remains emptyThe roms are fine, I’ve been using this romset for quite a while on pc / rasp pi with no issue.
Same rom. rename to aaa.gba. put it at the root folder. direct launch it or write to norflash, see what happen.
-
#9
Same rom. rename to aaa.gba. put it at the root folder. direct launch it or write to norflash, see what happen.
aaa.gba comes up in nor list, but direct launch and write to nor flash then launch both result in a white screen when trying to launch the game
Similar threads
You may also like…
![]()
@
captainbob321:
Eh, Oh Well. I Also Like Game Theory, Along with Film Theory and Food Theory
9 minutes ago
Содержание
- EZ-FLASH Omega
- Видеообзор EZ-FLASH Omega
- Комплект
- Где купить EZ-FLASH Omega?
- Как работать с картриджем EZ-FLASH Omega?
- Как запустить игры?
- Как выйти из игры?
- А как сохраняться в игре?
- Прошивка
- SimplyLight
- Если картридж работает не так как надо.
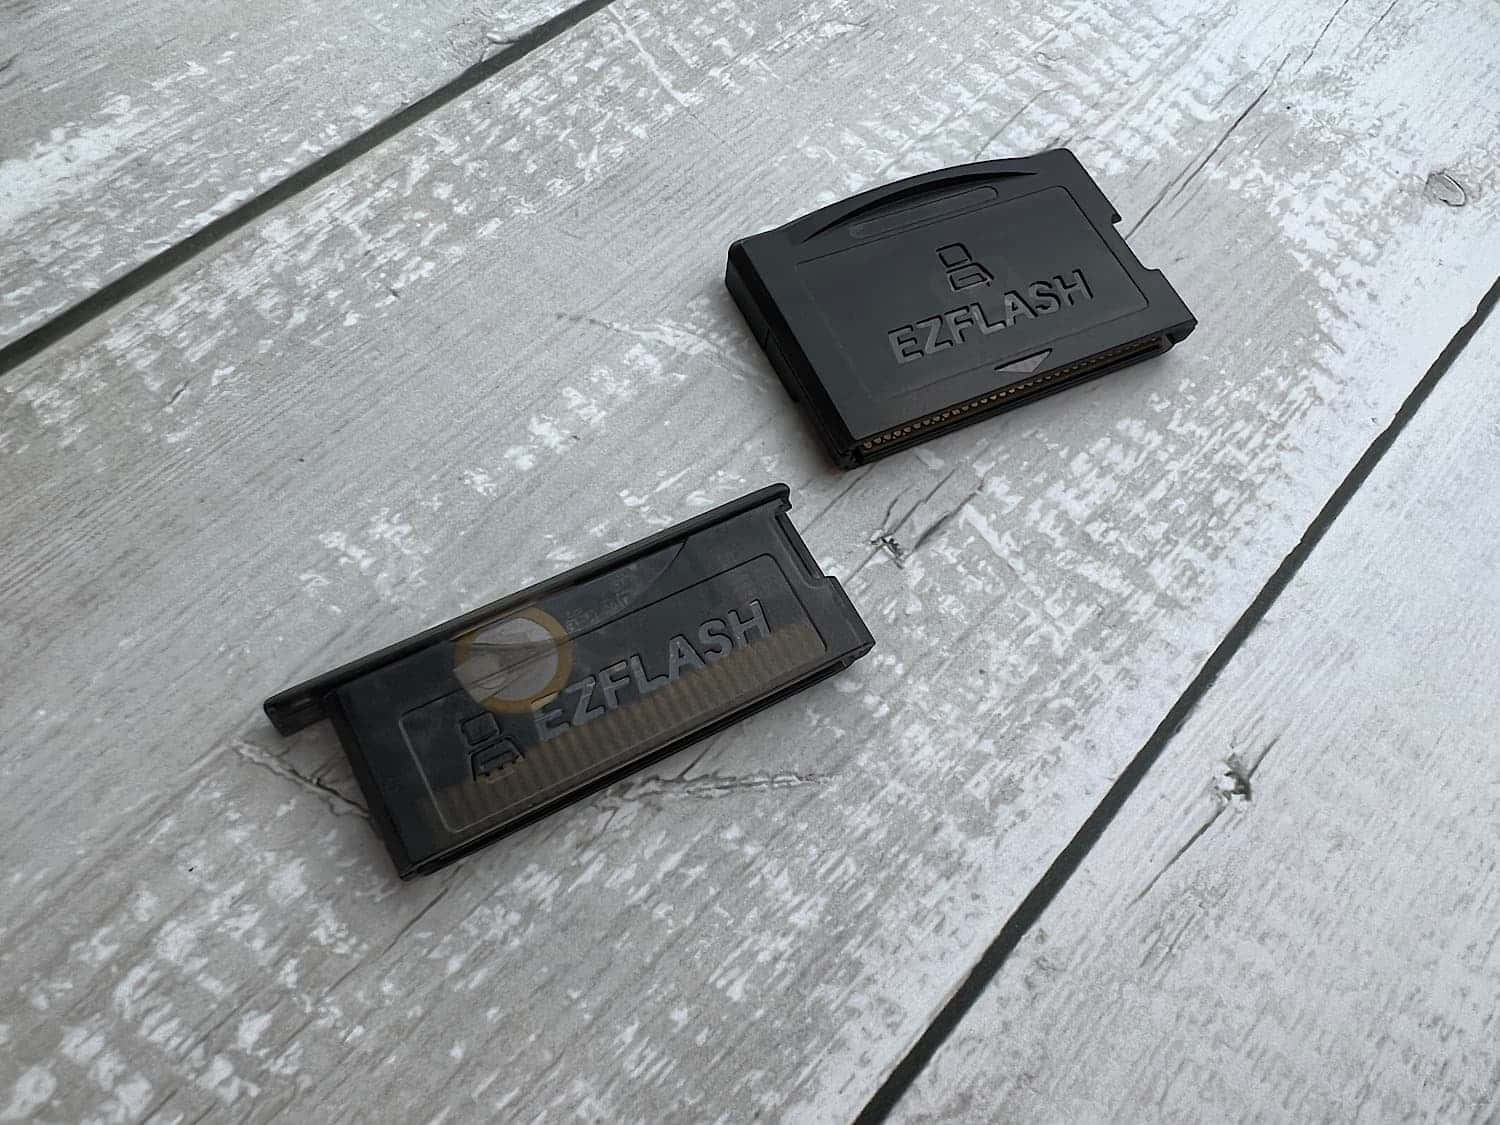
EZ-FLASH Omega
EZ-FLASH Omega – это флеш-картридж для консоли Game Boy Advance.
Концептуальное отличие флеш-картриджа от обычного – это наличие специальной памяти, которую можно спокойно перезаписывать. Туда можно записать любую программу и игру. Такие картриджи используются как разработчиками игр (для тестирования), так и отдельными людьми (как правило для пиратства).
Используя аналогию, можно сказать, что обычный картридж это — CD-диск, на который что-то записать можно только один раз. Тогда как флеш-картридж – это карта памяти для консоли, которую можно перезаписывать и использовать многократно.
EZ-FLASH Omega — это шестое поколение картриджей компании Ez Flash.
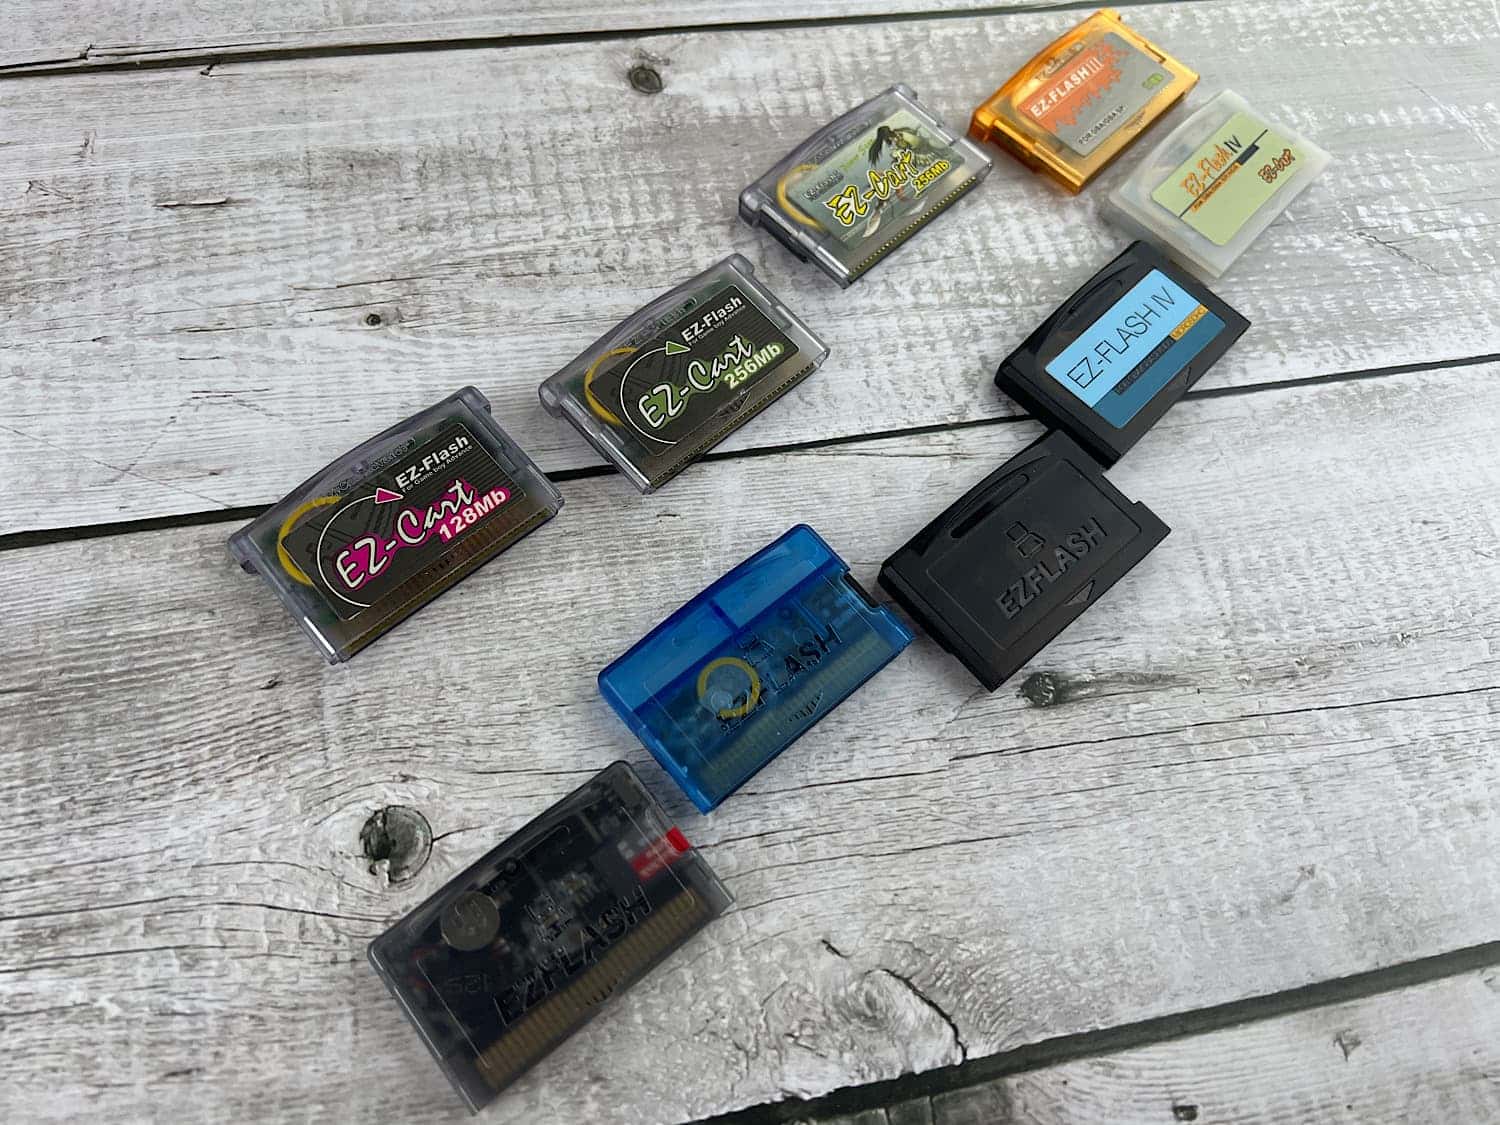
Ez Flash Omega в синем корпусе.
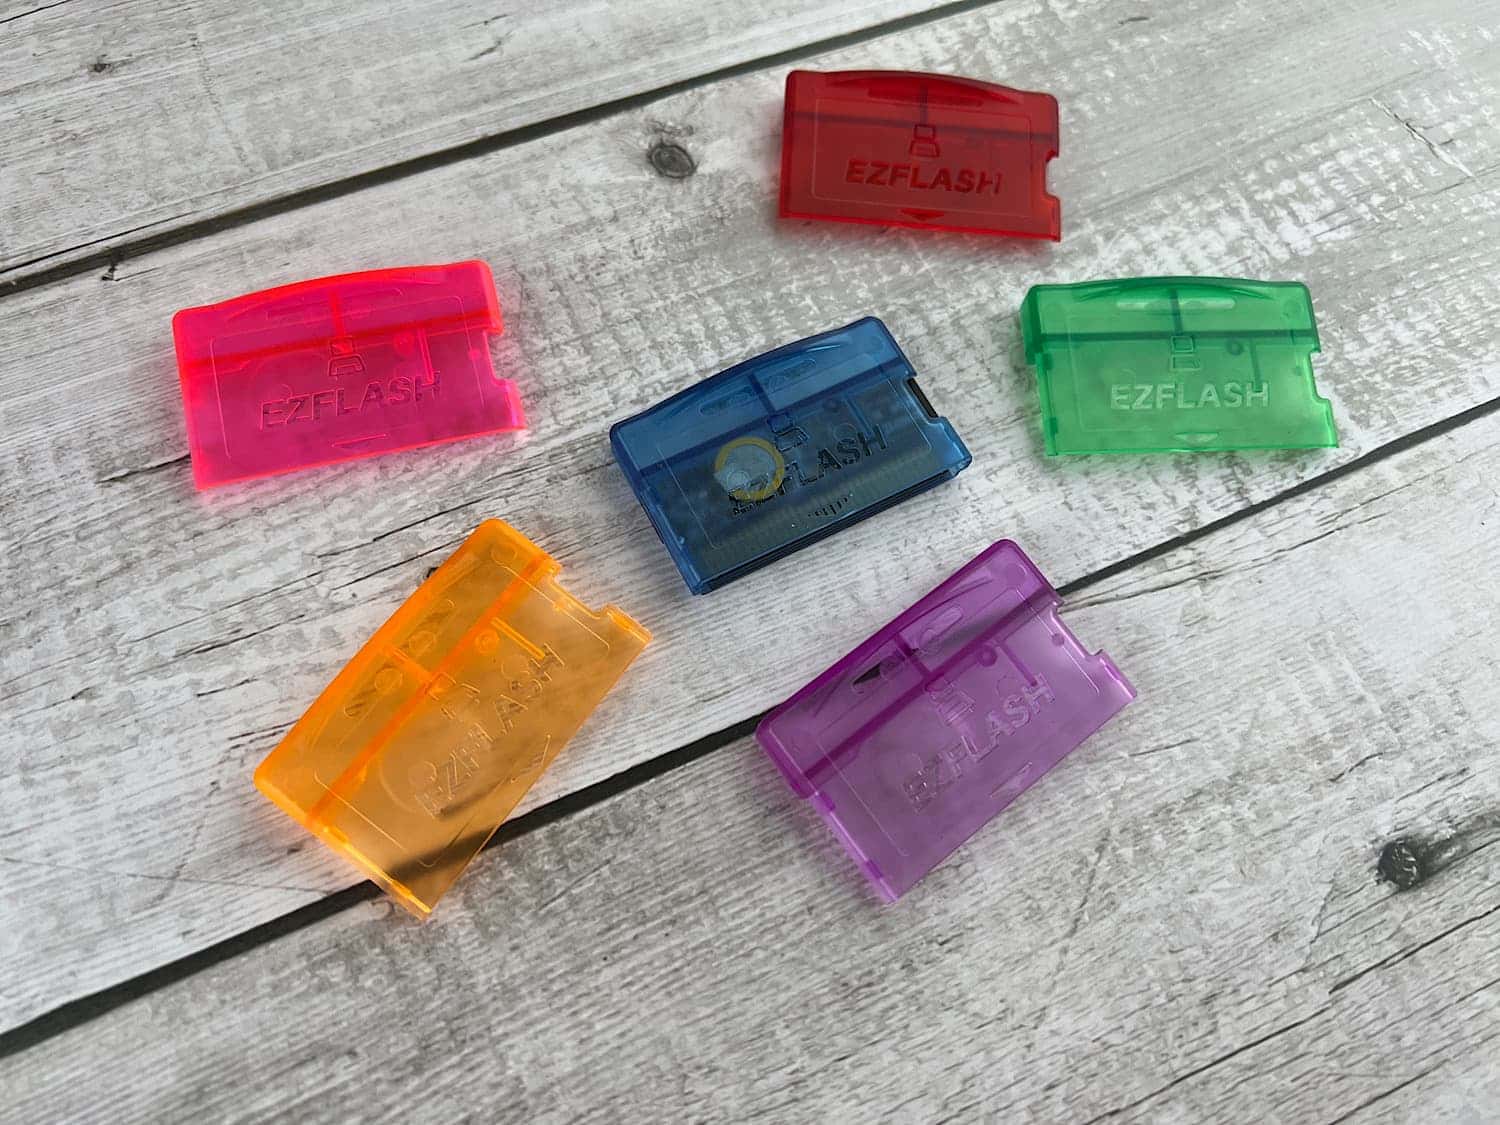
Кстати, этот синий корпус (и корпуса других цветов) мне прислали разработчики картриджа за то, что я написал этот гайд.
Видеообзор EZ-FLASH Omega
Посмотрите наш видеообзор этого картриджа! Там мы наглядно постарались показать вам все плюсы этого картриджа 😉

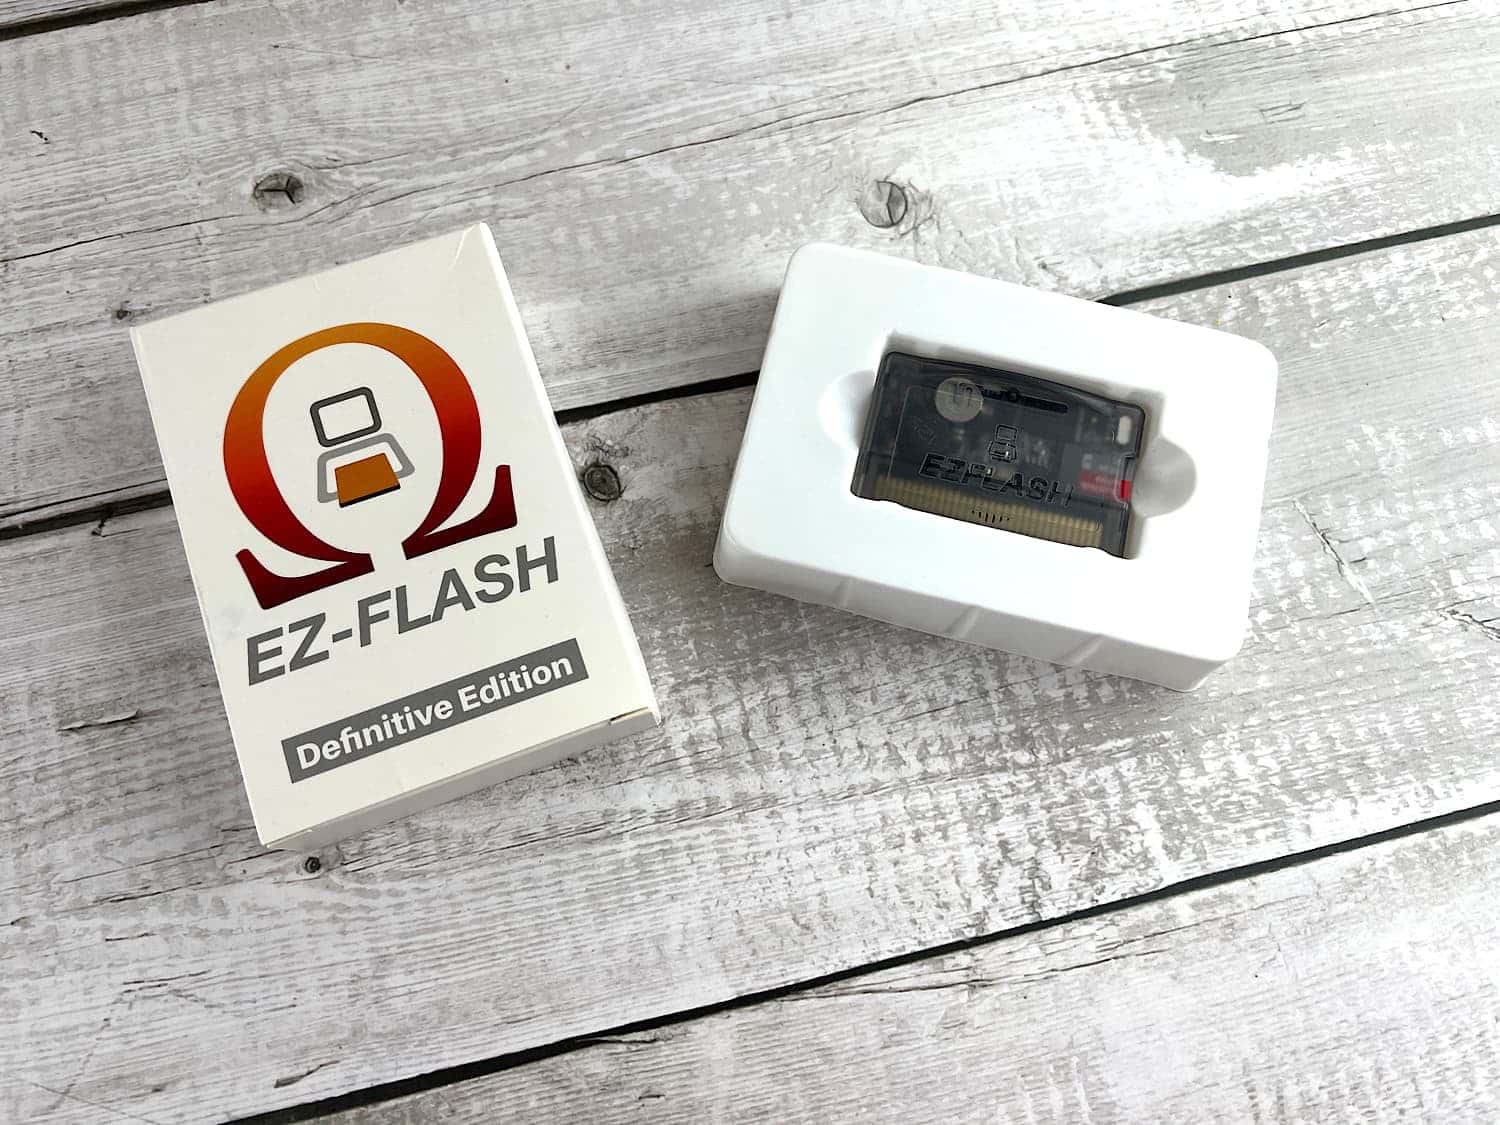
Комплект
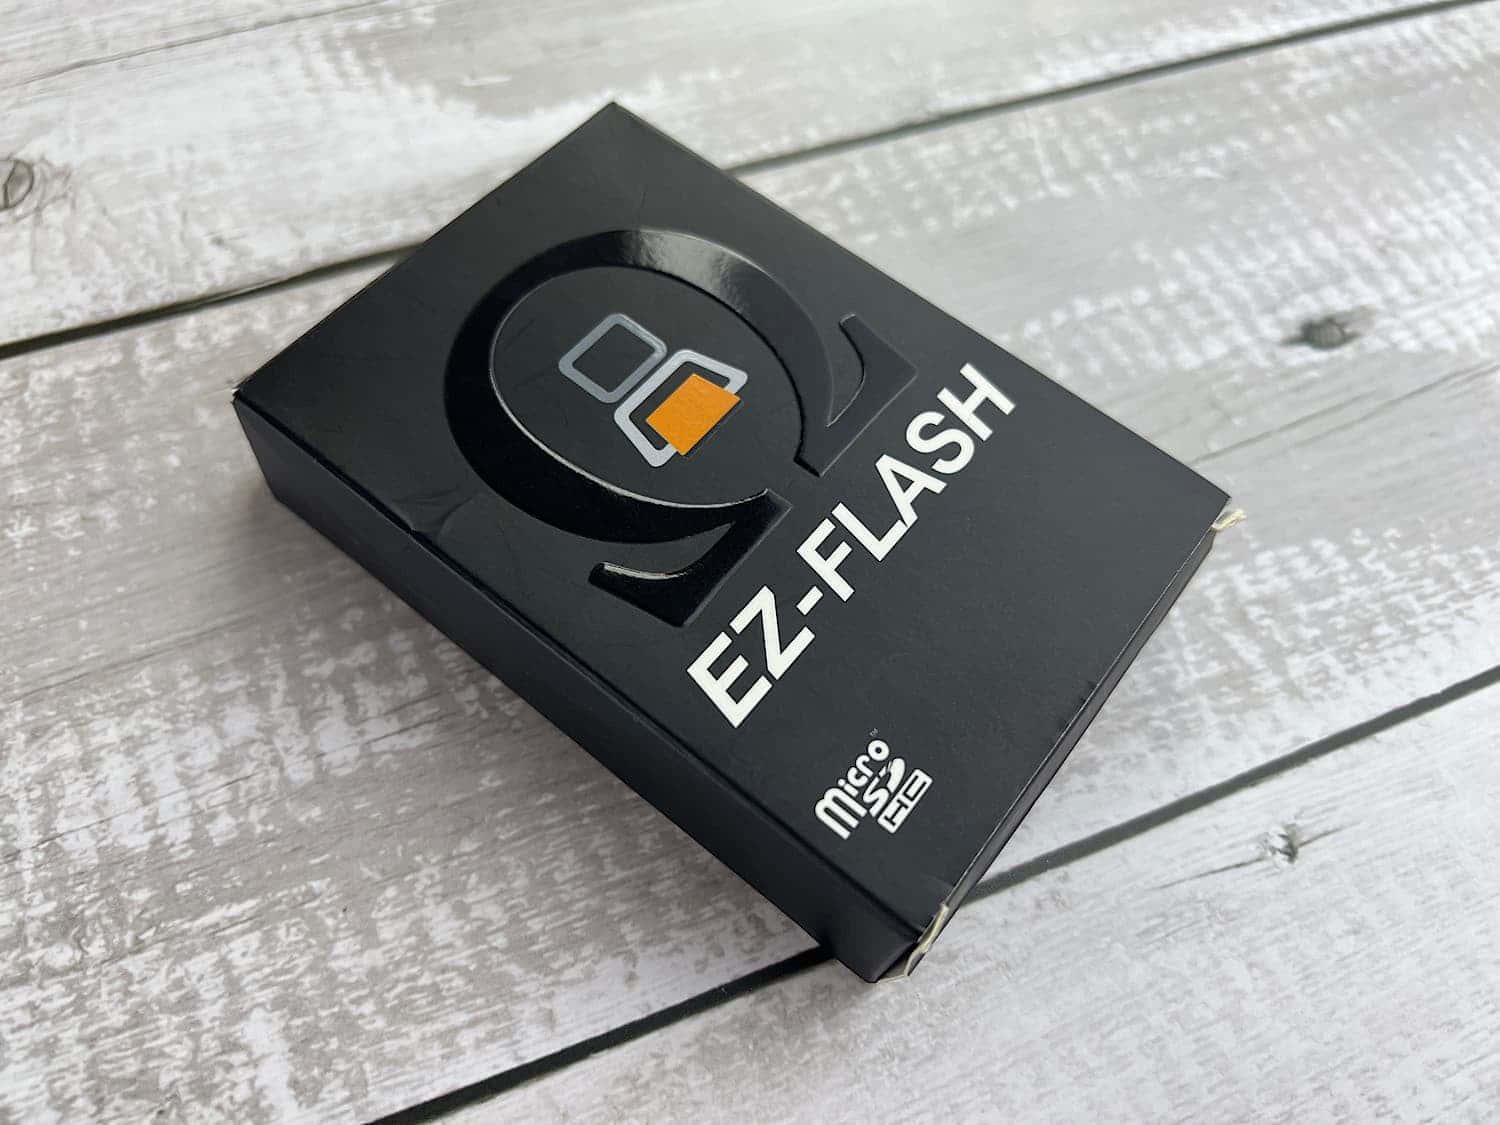
Консоль поставлялась в симпатичной черной коробке.
В комплекте находились:
2. Пластиковая заглушка.
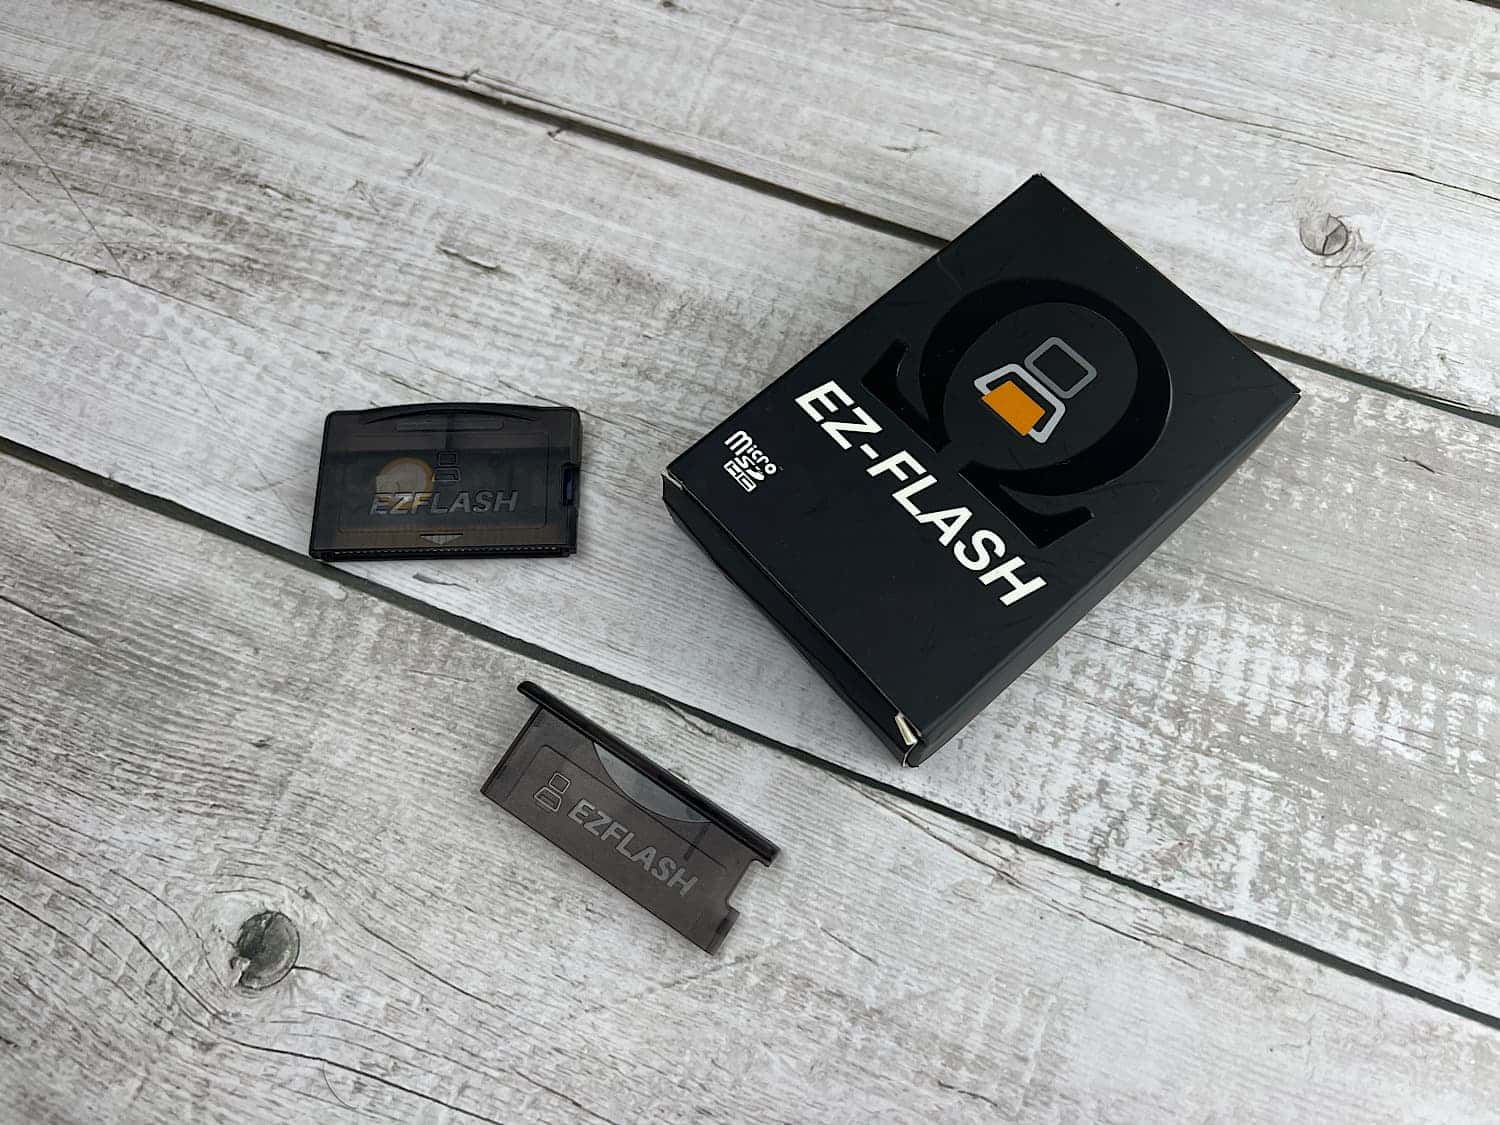
Эта пластиковая заглушка нужна была, чтобы уменьшить размер картриджа. В ней он не торчит из Nintendo DS Lite.
Обратите внимание! В интернете вы можете видеть три разные коробки для EZ-FLASH Omega. Изначально на них были такие надписи: Micro SD HC, Game Boy Advance, Nintendo DS, Nintendo DS Lite. Потом половину из них убрали и осталась только Micro SD HC. По состоянию на 2022 год на Алиэкспресс продается коробка без каких-либо надписей снизу.
Я уточнил у разработчика — это не подделки картриджей. Они сами убрали все эти надписи из-за авторских прав.
Где купить EZ-FLASH Omega?
В начале 2020 года вышел новый картридж EZ-FLASH Definitive Edition. Это продолжение EZ-FLASH Omega (и гораздо лучше его по функциями: вибрация, энергосбережение и т.д.).
Почитать подробнее про этот картридж можно в статье: EZ-FLASH Definitive Edition
Что нам нужно еще приобрести?
Картридж EZ-FLASH Omega поставляется со сменным корпусом для Nintendo DS Lite (чтобы не выпирать из корпуса). Однако, для нормального использования этого картриджа в Gameboy Advance SP необходимо докупить еще несколько вещей:
1. Карта памяти Micro SD. Это может быть карта памяти Micro SDHC (до 128 GB)
В какой формат отформатировать карту памяти?
2. Картридер к карте памяти. Он нужен, чтобы записывать игры с компьютера на карту памяти. Конечно — это не в целях пиратства.
Все это необходимо докупить отдельно. И после того, как у вас будет сам картридж, карта памяти и картридер можно идти дальше.
Как работать с картриджем EZ-FLASH Omega?
Чтобы играть в игры вам понадобятся ROM образы игр (или приложений) с расширением «.rom», найти их можно в интернете.
После этого их нужно записать в корень карты памяти или создать папку (или много папок) и записать ROM образы в них. EZ-FLASH Omega умеет распознавать папки и отображать их содержимое.
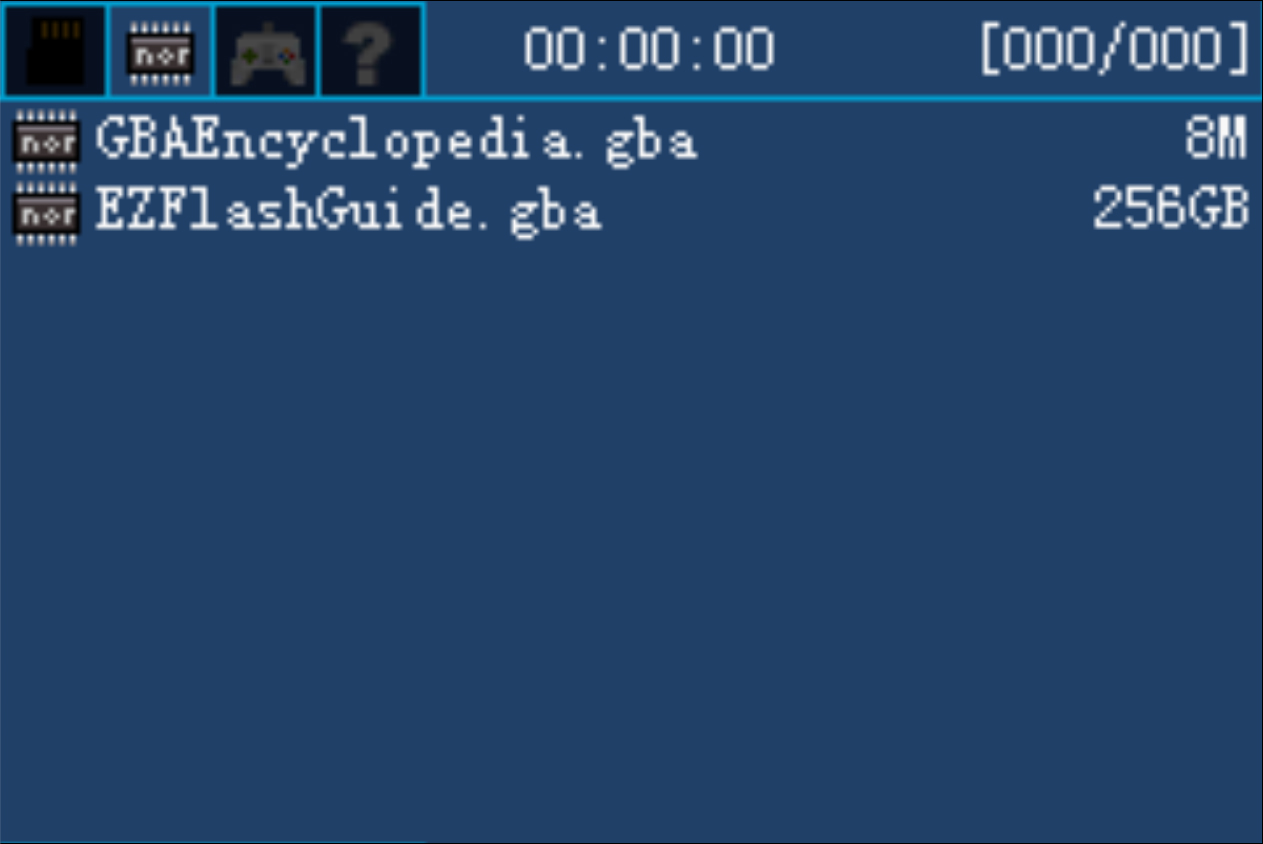
После того как мы записали нужные нам ROM образы на карту памяти, вставляем карту памяти в картридж, а потом картридж в Game Boy Advance SP, включаем его и попадаем в такое меню:

Это стартовый экран и на нем показаны все наши папки и игры. Отсюда мы запускаем игры, тут же мы можем удалить файл и так далее.
Чтобы передвигаться по меню нужно нажимать кнопки и
Следующее меню показывает игры записанные в NOR память. Это просто перечень игр, их можно запустить, или очистить NOR память.
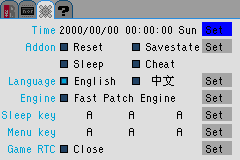
Следующее меню — это настройки.
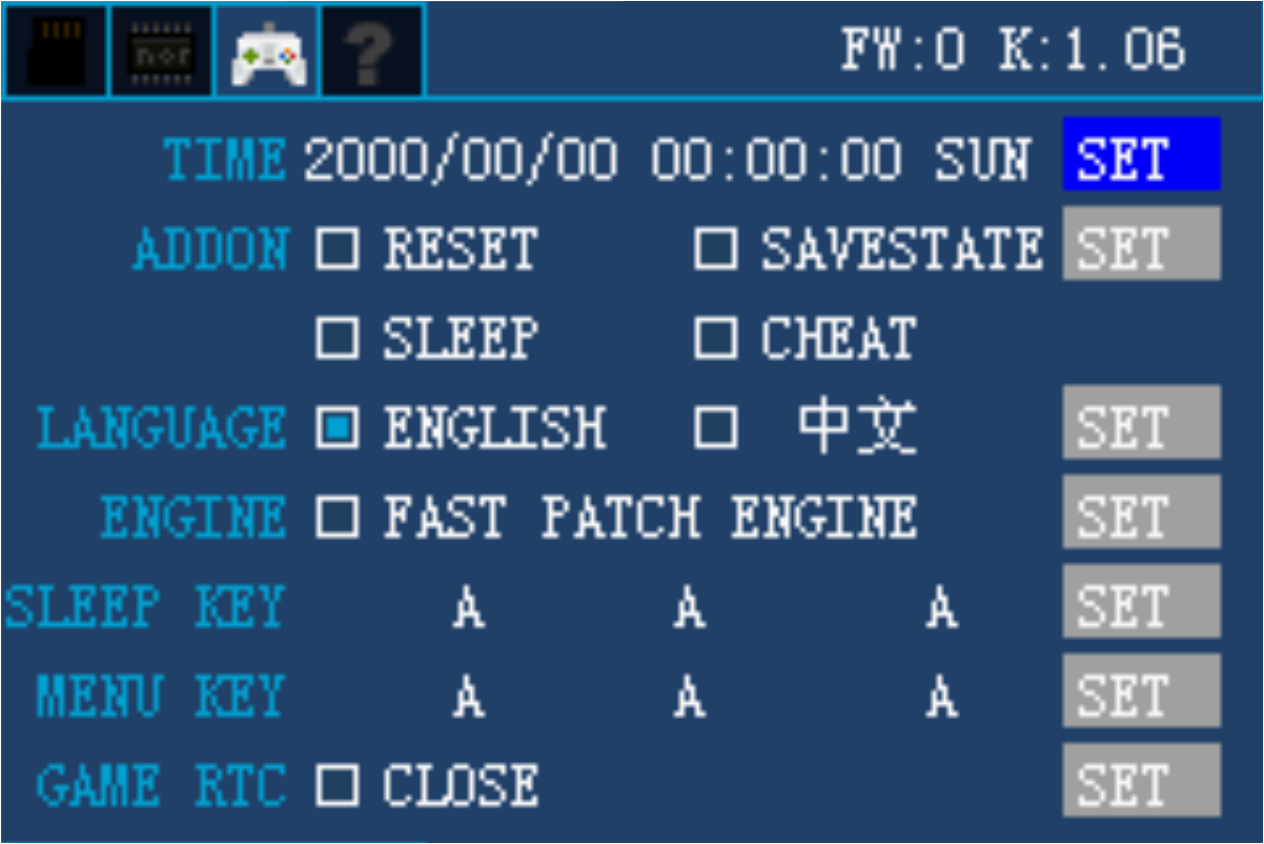
Настроек много, поэтому разберемся в них:
Time – установить время.
Addon – при запуске игр их можно запускать в режиме с аддоном. Есть 4 аддона:
Reset – возможность выйти из игры не перезагружая консоль.
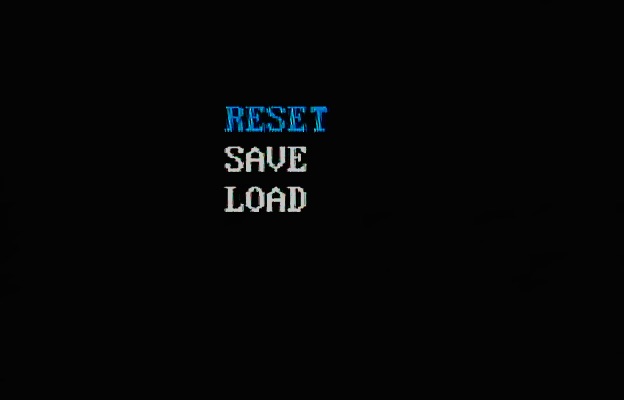
SaveState – дает возможность сохранения в реальном времени. Если активировать эту возможность, то, нажимая определенную комбинацию клавиш, у вас появится меню из трех позиций (Reset, Save и Load).
Если не включать эту возможность, то при нажатии комбинации клавиш для выхода из игры, такой возможности не будет. Вы сразу выйдете на главный экран.
Sleep – возможность отключить экран и отправить игру в режим сна (нужно для коротких пауз, чтобы отвлечься на 10+ минут).
Cheat – возможность вводить коды.
Language – выбор между английским и китайским языком.
Engine – при обычных обстоятельствах опция должна быть включена. Она ускоряет загрузку игры. Отключите ее если у вас самодельная или сильно модифицированная игра.
Sleep Key – возможность изменить комбинацию кнопок, чтобы уйти в сон.
Menu key – изменить комбинацию кнопок, чтобы выйти из игры (сделать быстрое сохранение).
Game RTC – для игр с часами реального времени (например, покемоны). Можно отключить если вы не играете в такие игры.
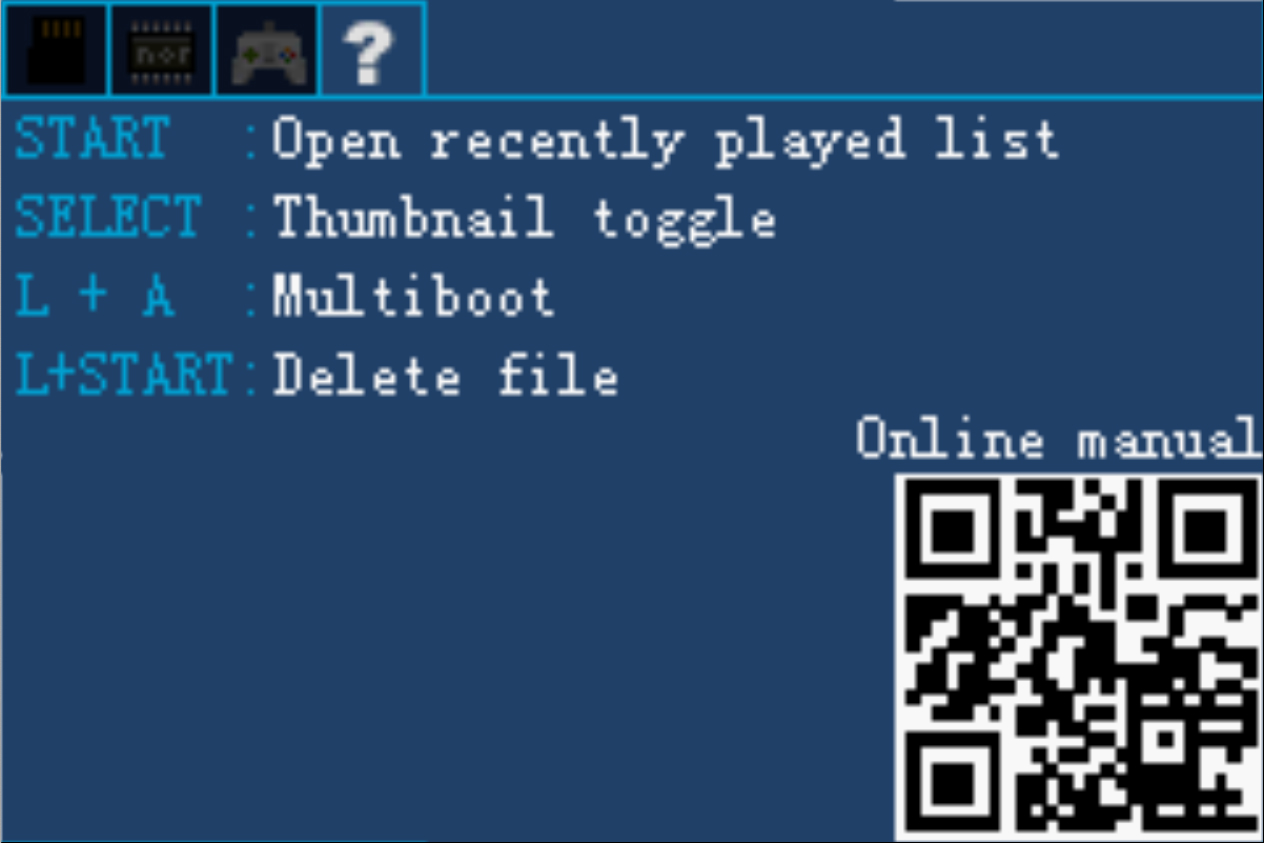
И последнее меню содержит список комбинаций клавиш для картриджа EZ-FLASH Omega (фактически мини-инструкция)
Флеш-картридж также умеет отображать картинки с обложкой игры (thumbnails).

Для этого нужно скачать папку IMGS с сайта разработчика, разархивировать ее и скопировать в корень карты памяти.
Если картинок все еще не видно (после записи в корень карты памяти), то нужно нажать , чтобы они начали отображаться.
Как запустить игры?
Игры можно запускать двумя способами:
1. Идем на первый экран меню (если игры в папке, то заходим в папку) выбираем игру, нажимаем кнопку и открывается подменю:
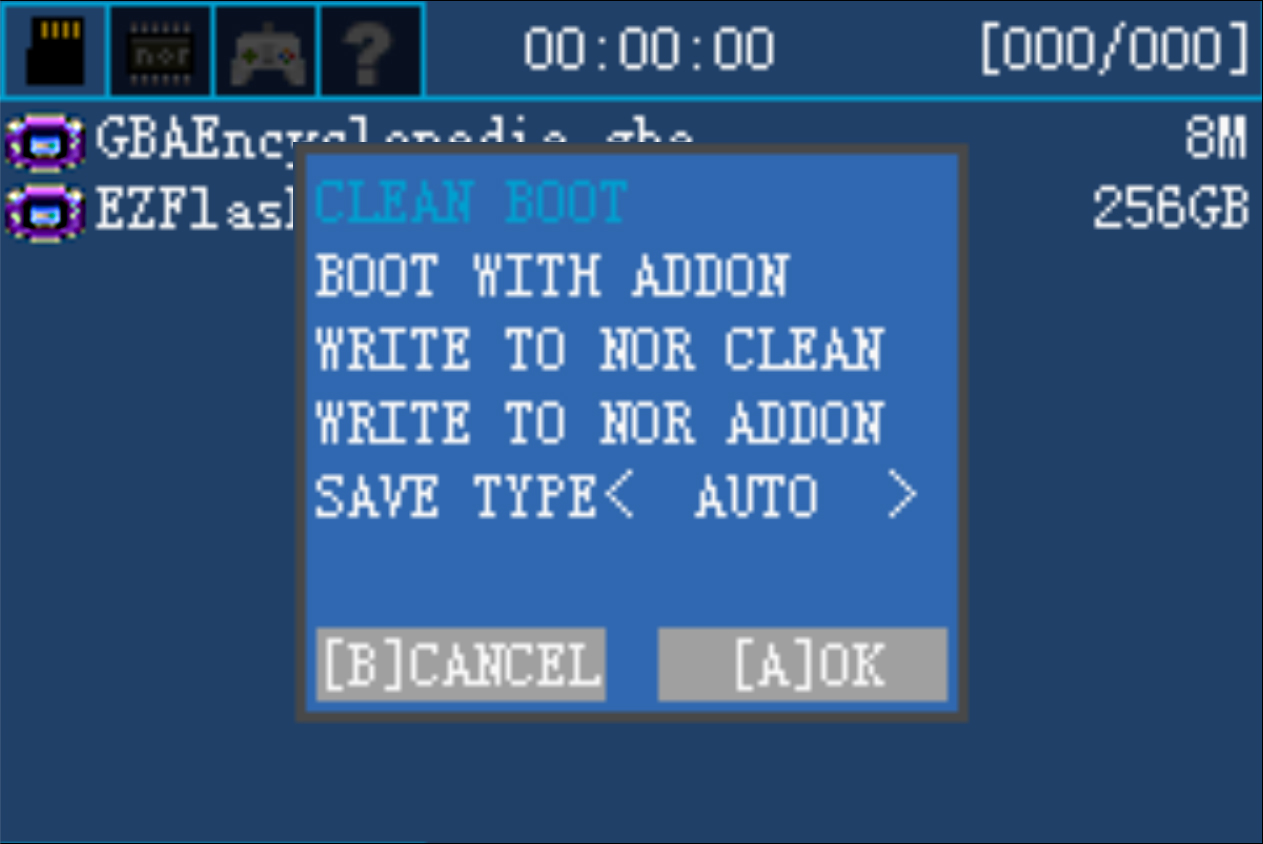
Clean boot – загрузка чистой игры. Запускаем в том случае, если игра не стартует в режиме Boot with Addon. Нужно это для тех игр, которые ломаются если их изменять с помощью аддонов.
Boot with addon – загрузка игры с аддонами, рассмотренными нами выше (выход из игры, чит коды, сохранения в реальном времени, режим сна).
Write to NOR clean – записать игру в NOR память без аддонов.
Write to NOR addon – записать игру в NOR память с аддонами.
Save type — выбрать режим сохранения игры. В 99.9 % случаев будет стоять auto и только в случае жестко модифицированных игр (например, при переводе игры) или самодельной игры, нужно выставить конкретный режим сохранения.
Дальше выбираем из этих 5 вариантов и нажимаем .
В каком режиме запускать игру? Это зависит от вас. Если вы часто играете в одну игру и она поддерживает аддоны, то легче всего записать ее в NOR память (с аддонами). Тогда для запуска игры вы просто переключаетесь на второй экран и сразу запускаете ее. Без необходимости каждый раз выбирать нужный вариант.
Чтобы удалить игры из NOR памяти нужно зайти на второй экран меню и нажать — появится меню:
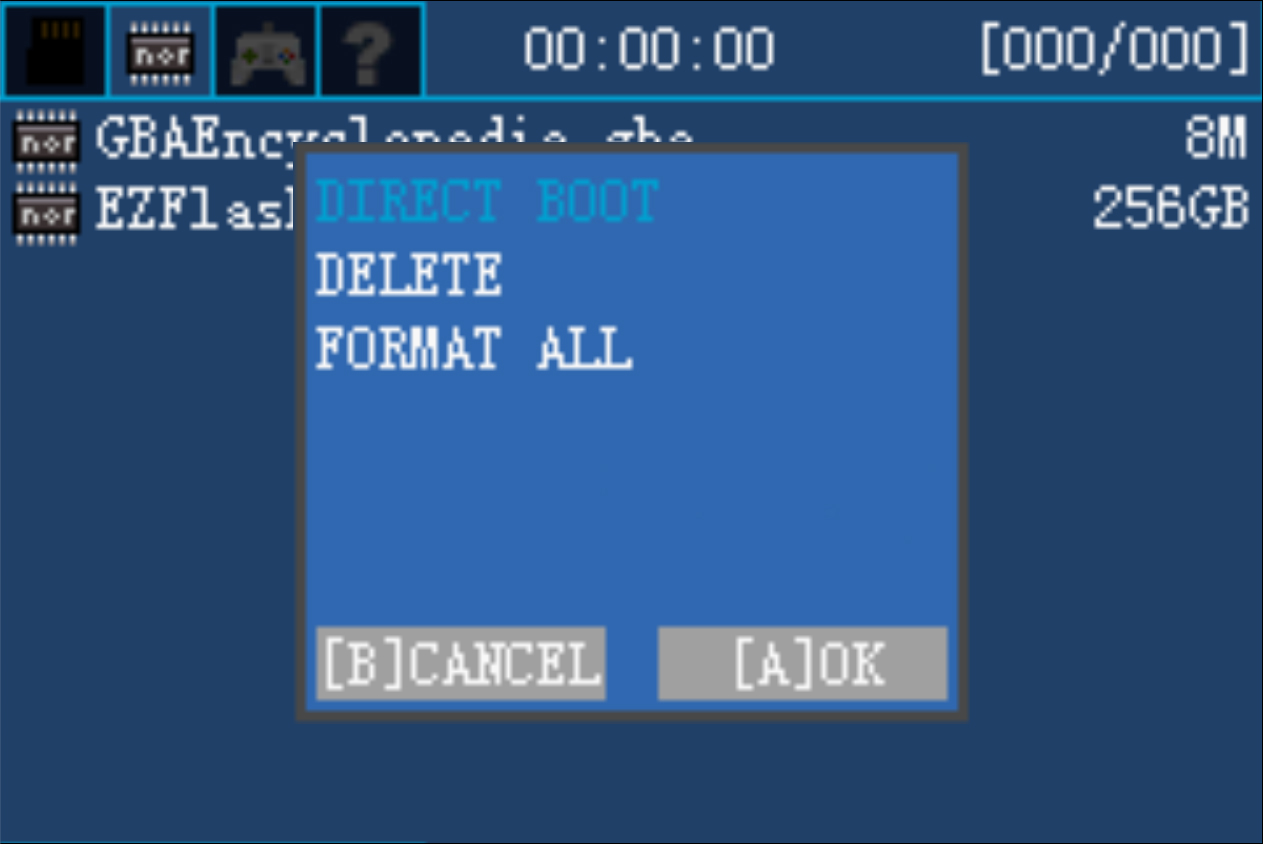
Direct Boot – запустить игру.
Delete – удалить игру из памяти.
Format All – очистить NOR память от всех игр.
Можно ли что-то запустить кроме Gameboy Advance игр?
Да, в отличие от прошлой модели картриджа в EZ-FLASH Omega можно запускать игры NES, а также GB и GBC. Просто скачайте ROM образ игры, запишите его на картридж и запустите. Не нужно ничего дополнительно устанавливать.
Что такое NOR память и зачем она нужна?
На этом картридже находится два вида памяти PSRAM (256 Мбит или 32 MB) и NOR (512 Мбит или 64 MB).
Оба чипа предназначены для запуска игр. В чем же между ними разница?
RAM память более быстрая, но потребляет больше энергии. В свою очередь ROM память (NOR это тип ROM памяти, существует также NAND память) — чуть более медленная, но экономичнее расходует энергию.
Кроме этого, RAM память нуждается в постоянном потреблении энергии, чтобы хранить данные, поэтому очищается каждый раз если выключить устройство. В свою очередь ROM память не нуждается в постоянном питании для хранения данных.
На более ранних версиях этого картриджа, например, EZ Flash IV, RAM память составляла всего 16 MB, а NOR память была 32 MB. Поскольку игры весили от 4 до 32 мегабайт, то в зависимости от размера, для ее запуска, нужно было записывать игру или в NOR память (для больших игр размером 32 MB) или в RAM память (для все остальных, более легких игр).
PSRAM память, на картридже EZ-FLASH Omega, составляет 32 MB. Поэтому даже тяжелую игру можно запустить без NOR памяти. И как таковое отличие стирается.
Возвращаясь к нашему первоначальному вопросу, зачем нужна NOR память, можно сделать следующие выводы:
1. Несмотря на то, что первоначальная загрузка игры в NOR память гораздо дольше, чем в PSRAM память (ведь при загрузке игра еще и автоматически патчится, что тоже бывает долго), последующие загрузки с помощью NOR памяти быстрее. Так как игра уже записана в NOR память и не стирается каждый раз при выключении устройства. В PSRAM записывается каждый раз заново. На тяжелых играх, время запуска игр (не первоначального) из NOR памяти быстрее секунд на 5-6.
2. NOR потребляет меньше энергии, поэтому устройство должно работать дольше. Слово “должно” здесь, потому, что это требует дополнительной проверки. Может быть там выигрыш будет копеечный, но в целом, должно работать дольше.
3. Учитывая, что NOR память — это такая же память, как на оригинальных картриджах, то при записи игры в NOR память должно быть больше совместимости (то есть запускаться из NOR памяти должно больше игр чем из PSRAM памяти).
Теперь про минусы:
1. Объем NOR памяти составляет всего 64 MB. Туда нельзя записать много игр (Не влезет даже две игры по 32 MB, но поместится любая комбинация игр до 64 MB).
2. Первоначальная запись в NOR память чертовски долгая.
3. Удалить из NOR памяти можно только последнюю записанную игру (либо последовательно последнюю, предпоследнюю и так далее. Или отформатировать NOR память полностью).
Итого плюсы и минусы:
Подводя итоги: в NOR память имеет смысл записать тяжелую (32MB) игру, в которую вы планируете играть долго. В случае, если есть проблемы с игрой или вы по какой-либо причине отключили Fast Patch Engine.
Как выйти из игры?
1. Выключить и включить консоль.
2. Чтобы выйти в главное меню, не выключая консоль, нужно нажать + + и выбрать вариант Reset. Это работает только в случае, если игра была запущена в режиме boot with addon.
А как сохраняться в игре?
Картридж EZ-FLASH Omega использует новую технологию сохранений. Сохранение напрямую записывается на Micro SD карту памяти. С одной стороны, это крайне удобно — сохранение не записывается в SRAM память, а значит, что после выключения консоли SRAM память не обнулится (она энергозависимая). Однако, это породило ряд дополнительных проблем: чтобы сохранение записалось на карту памяти, нужно время (
5 секунд). Если сразу выключить консоль, то вы повредите свое сохранение и узнаете об этом только в следующий раз. При этом будете крайне удивлены, что ваше сохранение не работает.
Чтобы предотвратить повреждение save файла, ни в коем случае нельзя выходить из игры или выключать консоль, сразу после сохранения. Нужно выждать 5 секунд! И только потом выходить из игры или выключать консоль.
Эта ситуация распространяется на все типы сохранения:
1. При обычных сохранениях в игре.
2. При Real Time сохранении.
3. При сохранении в эмуляторе.
Есть два вида сохранения:
1. Real Time Save сохранения. Можно сохранится в любое время и в любом месте. Нажимаем + + и появляется меню, где нужно выбрать SAVE (или LOAD, если вы хотите загрузить игру).
2. Normal Save. Нормальные сохранения — это такие сохранения, которые делаются таким-же способом, как если бы вы использовали обычный лицензионный картридж.
Сохранения в картридже EZ-FLASH Omega делаются автоматически. Чтобы сохраниться в игре нужно:
1. Дождаться когда в игре вы пройдете чекпоинт (на котором игра автоматически сохраняется);
2. Сами нажмете кнопку сохранить (если игра поддерживает сохранения).
Во всех случаях нужно выждать пять секунд.
Что делать если вы уже вышли и повредили сохранение?
Чтобы всё починить нужно сделать следующие шаги:
1. Сделайте бэкап всех файлов.
3. Отформатируйте карту памяти.
4. Запишите все обратно, кроме поврежденных сейвов!
5. И начните уже ждать по 5 секунд после каждого сохранения 🙂 Ну и читами не пользуйтесь 😉
Прошивка
Перед тем, как читать дальнейший текст, ознакомьтесь с данной статьей. Вы должны полностью понимать все последствия своих действий!
По некоторым причинам, ваш картридж может быть не с последней прошивкой.
На данный момент (март 2020 г.) последняя прошивка 1.06.
Чтобы перепрошить картридж, нужно скачать с официального сайта архив прошивки omegakernel20190412.zip . После чего распаковать его и перенести файл ezkernel.bin в корень карты памяти.
9 июня 2020 года вышла прошивка версии 1.07.
Чтобы перепрошить картридж, нужно скачать с официального сайта архив прошивки omegakernel20200609.zip . После чего распаковать его и перенести файл ezkernel.bin в корень карты памяти.
24 августа 2021 года вышла прошивка версии 1.09.
Чтобы перепрошить картридж, нужно скачать с официального сайта архив прошивки omegakernel20210824.zip . После чего распаковать его и перенести файл ezkernel.bin в корень карты памяти.
После этого включите консоль и удерживайте клавишу .
Появится такое окно и автоматически пойдет процесс установки прошивки!
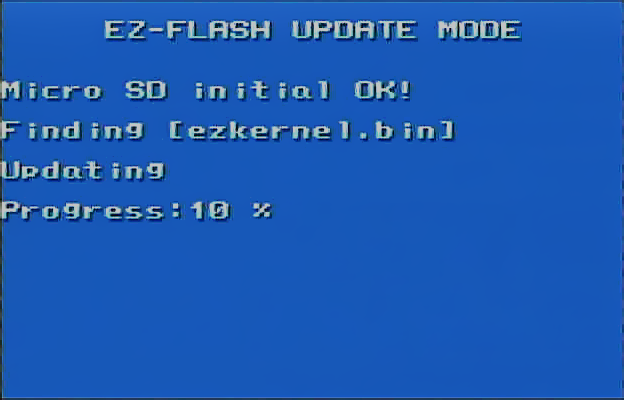
После установки прошивки, консоль сама загрузится, ничего делать не нужно!
SimplyLight
10 февраля 2020 г. человек под ником Sterophonick выпустил свою собственную прошивку картриджа, которую назвал SimplyLight.
Не могу сказать, что мне больше нравится дизайн этой прошивки чем стандартный, но она имеет ряд весомых преимуществ:
После выхода новой версии дизайн, стал гораздо лучше, при этом остались все преимущества:
1. Создана папка System (в нее перемещены все системные папки RTS, SAVER, IMGS, CHEAT, PATCH);
2. Установлено в прошивку большое количество плагинов:
The ModPlayer plugin (.mod)
The JPEG plugin (.jpg .jpeg)
The BMP plugin (.bmp)
SMSAdvance (.sms .gg .sg)
ZXAdvance (.z80 .sna)
PCEAdvance (.pce)
SwanAdvance (.ws .wsc)
MSXAdvance (.rom)
Wasabi (.sv)
NGPAdvance (.ngp .ngc .ngpc);
3. Добавлено два дизайна: ночная тема и обычная.
Выглядит данная прошивка таким образом:
Чтобы ее установить нужно скачать архив simple.zip с этой страницы и распаковать его.
Там будет 5 файлов:

Папка Demo – здесь хранятся демо файлы. Просто копируйте папку на карту памяти и играетесь с файлами.
Папка System – показывает вам как надо расположить системные папки на карте памяти. То есть если у вас на карте памяти есть, например, папки RTS, SAVER, IMGS, CHEAT и PATCH, то их копируете в папку SYSTEM (естественно на карте памяти). Также в этой папке лежит папка PLUG (ее обязательно нужно перенести в папку SYSTEM на карте памяти.
Файл . IMPORTANT. TXT – этот файл рассказывает про то, как обновить систему и какие изменения будут.
Файл ezkernel-dark.bin – файл темной темы прошивки.
Файл ezkernel-light.bin – файл светлой темы прошивки.
Как установить прошивку:
1. Создаете на карте памяти папку SYSTEM.
2. Из папки SYSTEM (из распакованного архива) перенести папку PLUG в папку SYSTEM (на карте памяти).
3. С самой карты памяти (если вы раньше пользовались этим картриджем, у вас наверняка многие папки уже созданы, по типу PATCH, SAVER и так далее), перенесите их в папку SYSTEM.
4. Не нужно переносить в папку SYSTEM папки с играми!
5. Выберите тему прошивки, которую вы хотите установить (светлую или темную). Переименуйте файл прошивки на ezkernel.bin и скопируйте в корень карты памяти! То есть вы берете, например, ezkernel-light.bin, переименовываете его в ezkernel.bin и записываете на карту памяти.
6. Включите консоль удерживая кнопку . Прошивка сама установится и включится.
7. Выключите консоль (вытащите карту памяти, вставьте в компьютер) и удалите файл ezkernel.bin
Теперь установка прошивки окончена.
Если картридж работает не так как надо.
14 октября 2021 года разработчики EZ-FLASH Omega выпустили мини FAQ по техническим проблемам картриджа и их решению.
Конечно, 99% пользователей не смогут использовать этот гайд, но, с другой стороны, вам это и не нужно. Достаточно знать проблему, купить запасную часть к картриджу и отнести его в сервисный центр, где вам перепаяют ту или иную деталь.
Приступим к рассмотрению проблем:
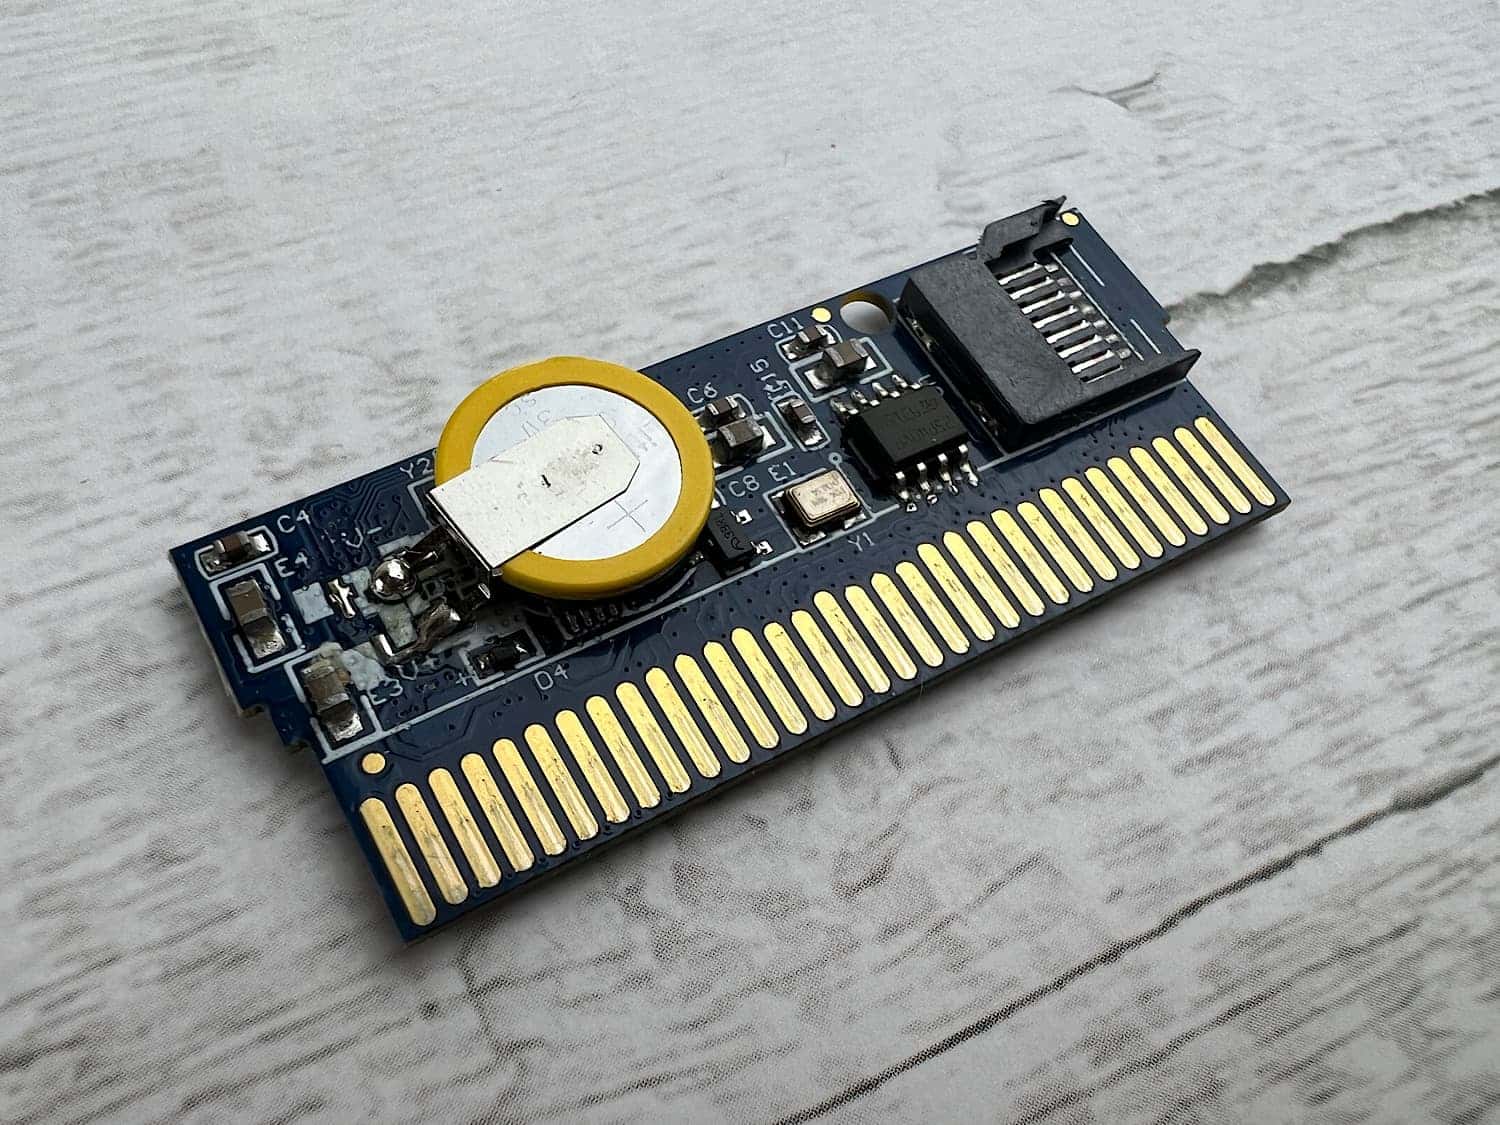
1. Если часы ходят как «сумасшедшие».
Кварцевый стабилизатор частоты на плате поврежден. Его нужно заменить. Тип кварцевого стабилизатора частоты — OSC 3.3V 3225 24.545Mhz.
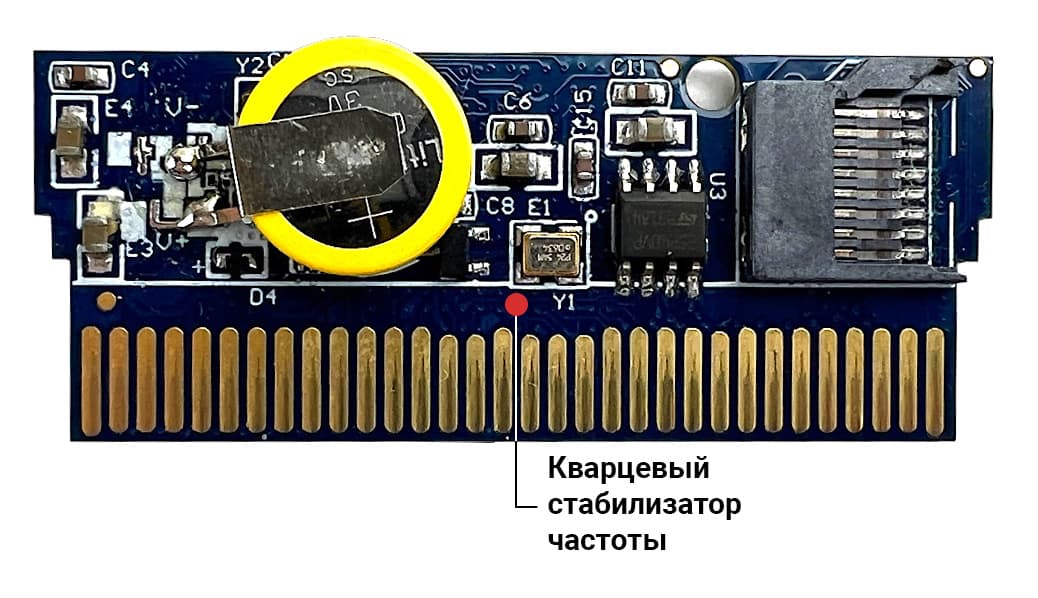
2. Если картридж загружается без логотипа Nintendo.
Проблема все в том же кварцевом стабилизаторе частоты. Его нужно заменить. Тип кварцевого стабилизатора частоты — OSC 3.3V 3225 24.545Mhz.
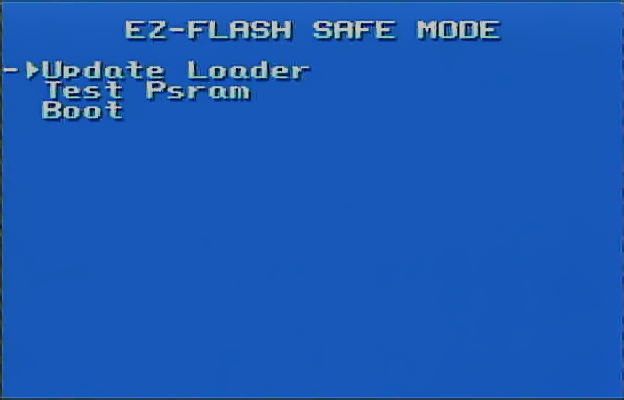
3. Если EZ-FLASH Omega постоянно загружается в синий экран безопасного режима, но внизу экрана нет надписи «no loader found».
Клавиша SELECT на консоли замкнута или коротит.
4. Если при обновлении прошивки картриджа показывается надпись «bad nor id».
Это значит, что микросхема S71 плохо припаяна.
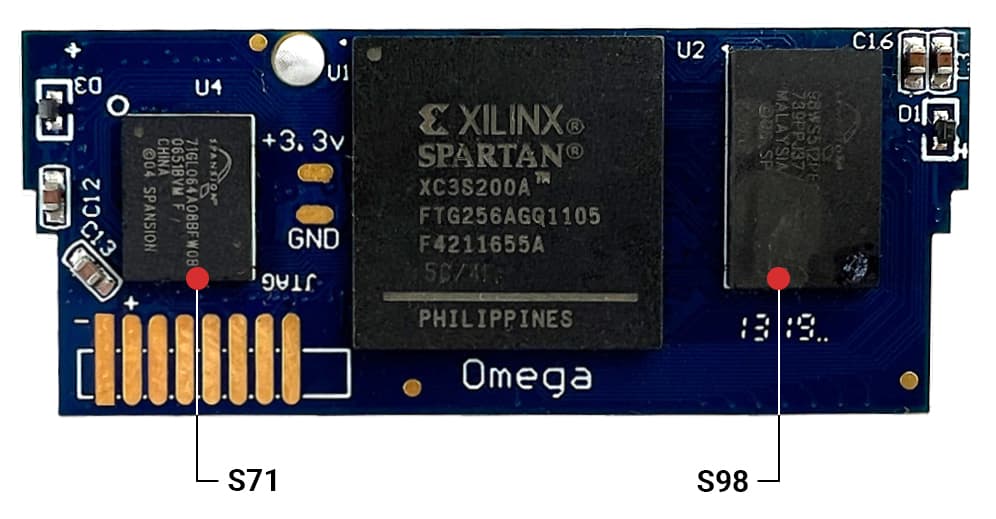
По словам разработчиков нужно использовать воздушную паяльную станцию, чтобы повторно пропаять контакты (не забудьте защитить другие чипы и компоненты от сдувания).
5. Если игра запускается через NOR память, но не загружается напрямую (при загрузке просто белый экран).
Нужно нажать и перейти в безопасный режим картриджа. Дальше провести «Test Psram»: скорее всего появится ошибка S98.
Чип S98 расположен на задней стороне картриджа. Его нужно тоже пропаять.
6. Если при записи игры в NOR память, она не доходит до конца. Нужно пропаять чип S98.
7. Если EZ-FLASH Omega постоянно загружается в синий экран безопасного режима, но внизу есть надпись «no loader found».
Источник
The EZ Flash IV is a dual Game Boy Advance/Nintendo DS flashcart, and is the fourth installment in the EZ Flash series. It has been the only powerful GBA flashcart until EverdriveGBA was released in summer 2016.
Overview[edit]
There are two different EZ Flash IV variations:
- Normal: 256mbit of NOR and 128Mbit of PSRAM inbuilt. It is the size of a normal GBA cart, and is compatible with miniSD cards.
- Lite: Also has 256mbit of NOR and 128Mbit of PSRAM, and is approximately the size of the DS Lite’s GBA slot. It is compatible with microSD cards instead.
There are also two variations of the EZ Flash IV Lite:
- Lite compact: A redesign of the EZ4 Lite, with limited, accessible onboard memory. The lite compact has poor GBA support, and as a result is a lot cheaper than the rest of the range. The lite compact is the size of the DS Lite’s GBA slot cover, and it can only run in a DS. The lite compact only emulates GBA games with the .bin extension. Its technical specs are unknown but are assumed below:
- 64Mb PSRAM (8 megabytes)
- 36Mb NorFLASH (4.5 megabytes)
- 32Mb Loader (4 megabytes)
- 8Mb saver SRAM (1 megabyte)
- Lite deluxe: Another redesigned version of the EZ Flash IV Lite; this variation features 256 Mbit of PSRAM and 384Mbit of NOR memory, which improves GBA compatibility. Compatible with microSD cards.
Software[edit]
EZ4 Loader[edit]
The EZ4 Client is the most essential software for the EZ Flash IV. It patches GBA and DS ROMs so that they can save upon restart. Additionally, some games (such as Super Mario Advance) can be patched so that the player can enter a button combo to soft-reset into the EZ Flash menu. The client can be downloads from here.
EZ4Client+[edit]
EZ4Client+ is an alternate EZ4Client software package. The software is being written by MoleDJ (Spanish) and has been written without the help of the EZTeam.
The software is written entirely in C# and requires the Microsoft .Net Framework. If you would like to help MoleDJ with writing his software the source can be found in the EZ4Client+ CVS Repository.
EZ4Client+ is currently in early beta stage and as such should not be used on data for which you do not have a back up copy of.
Updating[edit]
The clients can simply be downloaded and unzipped, there is a library of DS ROM data contained with the EZ4 Client download which you may wish to update.
The DS rom update thread is located here. The roms are verified by a CRC32 check against a list so if you altered the rom (trainers, translations, NDSTool hacks) you will get an error message. It will also display an error if you have a rom not yet on your list.
There is also an updated GBA library located here: here. The GBA detection is based around header information so alterations should not affect detection.
The EZ4 internal software (the Kernel)
These are updated directly via the NDS and/or the GBA.
In order to update the EZ4 Kernel, copy the ezfla_up.bin file to the root directory of your memory card. This should be done using Windows Explorer, not the EZ4 Client. Then hold down the «R» trigger button and power on your NDS/GBA.
The EZ4 will then update it’s internal ROM to the latest Kernel. After flashing the EZ4 the ezfla_up.bin file may be deleted from your memory card.
Should you have the hide extensions for known file types option in Windows turned on then be careful not to name the file ezfla_up.bin.bin (the second extension will be hidden).
Note: If you are using a nopass device other than the EZPass 3 (Datel Max Media Launcher, Superkey, Passcard3), then you will need to remove this before attempting to update your EZ4 Kernel.
Moonshell[edit]
Warning: Under no circumstances should you attempt to load DS ROMs via Moonshell. This can permanently brick your EZ Flash IV.
The EZ4 supports multimedia functions via Moonshell in the Nintendo DS mode. Files should be converted using the special version of Moonshell DPG conversion tools. Both can be downloaded from here.
To get it to run copy the moonshell.ds.gba file from the EZ4 Client root directory to your miniSD with windows explorer. You can then copy MP3 and your converted video files as you wish (it is advisable to give them their own subdirectory), then when running on your DS open the moonshell.ds.gba file.
Once moonshell is loaded in hit the «..» command and find your miniSD card and your files you wish to play then press a, controls are onscreen and will be transferred to this page shortly.
Moonshell is capable of playing:
- DPG video files
- MP3 Audio files (bitrates up to 320 kbps have been tested)
- NSF Audio files
- JPG Picture files
- BMP Picture files
- PNG Picture files
- GIF Picture files
- TXT Text files
Common errors[edit]
First in or not enough power[edit]
This refers to the EZ4’s SRAM. It can mean one of several things;
A) The internal battery is not charged.
B) The internal battery is dead, or not soldered properly, or otherwise has no connection
C) The SRAM hasn’t been initialised.
You should only see this error once. After an initial charge of the internal battery, either by leaving your NDS on for a few hours or by plugging the EZ4 into an EZ1 — 3 linker for the same period this error should no longer occur.
You may also experience this error if you use an EZPass2. The EZPass2 requires the use of a .sav file that contains executable code. If a game is not played and the NDS just reset, then this error can occur. In this instance the error is normal.
If charging the NDS does not fix your problem, and you are not using an EZPass2, then contact your vendor for further instructions. You may have to return your cart as it could be faulty.
If you are using an EZPass2, then to test if the error should occur, delete the passme2.sav file from your Saver directory and play a GBA game a few times, if the error persists then your cart may be faulty.
For the more savvy user, there has been a history of batteries not being soldered correctly to the PCB- this means quite simply that the battery is just not connected. It may be possible to fix this error by just resoldering it to the board, but be warned as this does violate your warranty, and it is recommended that you call the vendor first. Try running a volt meter across the pins of the battery and make sure it is holding a charge. If it isn’t, the battery you need to replace it with is a Panasonic VL2020, and it is a 3volt, 20mAh button cell battery with vertical soldering pins. It will not be available in your local radioshack, but if you have a more technically oriented electric parts place, it might be available. If all else fails, they are only about two dollars from Mouser Electronics online, with no minimum value to order.
FAT Filesystem error[edit]
This error only usually occurs when the EZ4 has had a problem reading from or writing to the mini/microSD.
Ensure your SD card is formatted for FAT or FAT16. If the card is one of these formats, then back up your data and format the card again and copy the files back.
Delete any suspicious files before copying them back to your SD card, eg:
- Ones that have very large file sizes (in Gigabytes)
- Ones that have 0 Byte file sizes.
Saving issues[edit]
This seems to a common error due to various issues.
- If the game does not save at all, ensure there is a .sav file in the saver directory on your miniSD card.
- If the game saves sporadically (every now and again), then ensure your cart is charged regularly. An hour or two of gameplay every few days should keep the battery charged enough.
- A small percentage of EZ Flash IV Lites have save issues; sometimes they can read the .sav files but not write to them.
- In GBA mode some titles will not correctly save if the filename is too long. For example: «Super Mario Advance 4 — Super Mario Bros. 3 (U) (V1.0).gba» will not save unless it has been renamed to something shorter like «SMB3.gba». The corresponding save file in the «saver» directory must also be renamed and have the same name as the ROM (e.g. SMB3.sav).
Single card during multiplayer[edit]
This issue is specific to the Nintendo DS.
This is when a user has one game cart and two or more people play the game; a small portion of the game is sent via WiFi to other NDS units near by. The downloaded portion of the game will either last until that level is finished or until the NDS is powercycled.
Numerous games do not work entirely from single card play.
GBA games are slow from the DS Loader[edit]
This issue concerns GBA games when played from the DS Loader.
It seems users have been experiencing slow games or frame skips in GBA games. Whilst many users have noticed this issue, just as many have not. Whether this is due to differences in carts or just differences in perception is largely unknown.
At this point there are two ways to avoid the slowdowns.
- Boot into GBA Mode (remove your passme or press Select)
- Use Cory’s boot tools.
Cory1492 (with help and inspiration from suanyuan and meangreenie) has kindly written EZDStoGBA. This program will allow users to boot into GBA mode to run GBA games from within the DSloader.
- EZDStoGBA V1 — Two versions included, one for top screen & one for bottom screen.
- EZDStoGBA V2 — This version will now check what screen you use from the NDS settings and will use that.
- EZSDtoGBA V3 — It will fill the frame around the GBA screen with an image of your choice. If none is present it just uses a black border.
All three versions can also be downloaded from the Internet Archive.
Known issues[edit]
- The EZ4 lite sticks out a little in the Nintendo DS lite, about .8 millimeter… BUT you can mod it easily with the Viscera’s method, just use a piece of sandpaper and it will fit.
- Some ROMs don’t launch at all (e.g. ‘Mario Kart Hacked’ with hidden tracks, «Battle of Prince of Persia»).
- GBA games with built-in sleep mode will wake up immediately as soon as you try to make them sleep.
- The Nintendo DS Browser starts, but shuts down. This is due to the lack of the memory card in the GBA slot. (This is not an EZFlash 4 problem.)
- Some Homebrew applications don’t work well (DS Organize). This is due to a partially working FATLIB. Things are progressing in this area.
- Though there are homebrew applications that do work, for example: ‘BeUp’ (nofat or chism versions) : copy it through EZClient and it can save your login and password BUT you can’t use additional languages or emoticons…, ‘NDSmail’ and ‘No place to hide’.
- The GBA loader after 1.67 no longer hard boot when launching GBA titles. This breaks certain titles such as «Super Mario Advance 3 — Yoshi’s Island (U) [!]» and «Need for Speed — Porsche Unleashed (U)» resulting simply in a blank screen when launching the title. A quick fix is to move the broken rom into the NOR memory of the EZ4 because a hard boot is still initiated when executing from the NOR section.
Compatibility list[edit]
- Nintendo DS games
- Nintendo DS homebrew
EZ-FLASH OMEGA SIMPLE THEME USER MANUAL
This document will be updated frequently with software updating
The author’s native language is not English. There may be grammatical errors in the document. We have done our best to translate and correct.
The current document applies to Kernel 1.06 fw 7, Simple v3.42.
Greetz:
EZ-Flash
Kuwanger
Veikkos
Moonlight
Sasq
DarkFader
CoolHJ
Let’s Emu!
Dwedit
FluBBa
Loopy
The HiVE
James Jacobs
-
EZ-FLASH OMEGA USER MANUAL
- Before everything starts
-
First step
- Update the kernel
- Basic Operation
-
Hotkeys
-
- Recent played games list
- More options menu
- No cold start
- Delete file
-
-
Launch menu on SD card
-
- Clean Boot
- Boot With Addon
- Write To NOR Clean
- Write To NOR Addon
- Save Type
- Cheat
-
-
NORFlash
-
- DIRECT BOOT
- DELETE
- FORMAT
-
-
In Game Menu
-
- RESET
- SAVE
- LOAD
- CHEATON
- CHEATOFF
-
-
Pogoshell
-
- Included File Types
- Plugins
- Playing ColecoVision ROMs
- The Extra Settings Menu
- Converting Wave Files
- Converting JPEG Images
- Plugin Usage
-
— The .wav file plugin
-
— The JPEG image plugin
-
— The text reader plugin
-
-
System
-
- TIME
- ADDON
- LANGUAGE
- FAST PATCH ENGINE
- SLEEP KEY
- ADDON KEY
- GAME RTC
-
- Definitive Edition
- Help
- IMPORTANT NOTE
Before everything starts
We want to let you know EZ-FLASH OMEGA uses a new save technology that is different from the battery save used in previous products.
This technology requires you to slightly change the traditional usage habits, just wait a bit after saving, so that data can be written to MicroSD.
We hope this little inconvenience will not cause too much trouble for your experience.
After all, no battery is needed to save data. Never worry about losing save data due to dead battery.
First step
Please visit the download section on the official site.
http://www.ezflash.cn/download
There are kernel, thumbnails pack, cheat library for EZ-FLASH OMEGA.
Download files.
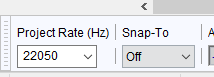
Format your MicroSD card with proper format and suggested cluster.
card size ≤ 2 GB    FAT/FAT16   32KB
card size ≤ 32 GB   FAT32       32KB
card size ≤ 128 GB  exFAT       32KB or Larger
Or you can use the Official SD card formatter to do it automatically. Click here to download
Extract the package to the root folder of MicroSD card. Please note that when decompressing, do not use extract to folder to avoid folder nesting.
Confirm there are two folders which named IMGS and CHEAT in SYSTEM, and a file name EZKERNEL.BIN on the root folder.
Copy your game roms to MicroSD card.
Update the kernel
Choose which kernel you want, either the light theme (ezkernel-light.bin) or the dark theme (ezkernel-dark.bin).
Rename the kernel you want to ezkernel.bin. When booting your Game Boy Advance, hold the R button. The system will boot up after the update process done. The kernel version is displayed on the bottom right corner of System Setting. DO NOT TURN OFF THE POWER WHEN UPDATING!!
If the firmware version is lower than kernel contained, it may need to update automatically. The new firmware needs the game console reboot to take effect. DO NOT TURN OFF THE POWER WHEN UPDATING!!
Basic Operation
-
Press
LandRto toggle between SD Card, NORFlash, Settings, and Help. -
Press
Aon a ROM to popup launch menu. -
Press
↑or↓in launch menus to select different launch option, and pressAagain to confirm. PressBto dismiss launch menu. -
Press
←or→to turn the page in file browser.
Hotkeys
Hotkeys only work in the SD Card tab.
Recent played games list
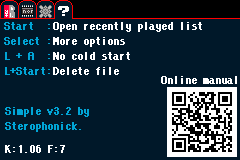
Press START in SD Card tab will popup Recent played games list.
More options
In SD Card tab, press SELECT to open a menu with some more options. Currently, you can toggle the game thumbnails.
No cold start
In SD Card tab, press A to popup the launch menu, highlight the CLEAN BOOT, then press L+A to launch the selected game without the cold start.
Not having a cold start will perform a soft reset instead of Hard Resetting the console.
Delete file
In SD Card tab, select a file and press L+START will popup a windows to confirm deleting a file. Use it at your own risk.
Launch menu on SD card
Clean Boot
Launch the game without any function.
Boot With Addon
Launch the game with functions which enabled in system.
Write To NOR Clean
Write selected game to NORFlash without any extra function.
Write To NOR Addon
Write selected game to NORFlash with extra functions which enabled in system. Cheat must selected before write and not changeable after be written.
Save Type
This option is usually used with fan translated games, most of them are patched to other save mode instead original save type, it will cause AUTO mode failed to identify the correct save mode. Once you encounter the save issues when playing fan translated games, please use ← and → to toggle the save type.
Under normal circumstances just leave it in AUTO.
Cheat
This function only works with the CHEAT folder which you download the cheat library and extract it on the microSD.
The CHEAT option will be visible if there is a correspond cheat file in the cheat library.
Press A to enter cheat selection interface.
Use ↑ and ↓ to select cheat item, Press A to toggle.
Use ← and → to turn the page.
Press B when cheat selection is completed.
The highlighted option will be changed to the Boot With Addon option. Press A to launch game with cheat.
Press L + R + START when playing game to popup in-game menu.
Select CHEATON and press A to enable cheat.
Select CHEATOFF and press A to disable cheat.
The cheat library is collected from the Internet, we provide it only for the convenience of the users. It may have the wrong cheat code which may cause cheating to fail or games to simply crash.
User can put a .cht file which have same file name with game into /SYSTEM/CHEAT folder to override the cheat library.
mario.cht <==> mario.gba
NORFlash
Direct Boot
Launch game, if game was written by Write To NOR Addon, it will equal Boot With Addon
Delete
Select the last game in the list and choose this option will delete the game from NORFLASH, otherwise a warning will be occurred.
Format
Erase the whole NORFLASH completely. it will cost 4 minutes to be done. use it with caution. DO NOT TURN OFF THE CONSOLE POWER WHEN FORMATTING, IT WILL DAMAGE THE NORFLASH.
In Game Menu
When playing game with BOOT WITH ADDON, press L + R + START can active the in game menu, the menu contents are depended on which functions enabled in the system. Press ↑ and ↓ to select function, press A to confirm. The hotkey can be change in system.
QUIT
Reset game immediately to the kernel interface.
If only RESET enabled in system, the in game menu hotkey will be the RESET hotkey
SAVE
Save the games states to the RTS folder on SD card.
LOAD
Load the games states from the RTS folder on SD card.
CHEATON
Enable the selected cheat items.
CHEATOFF
Disable the the selected cheat items.
Pogoshell
Included File Types
.bmp: Windows Bitmap Image
.gg: Sega Game Gear ROM File
.col: ColecoVision ROM File
.jpg/.jpeg: JPEG Image (YUV411, YUV111 or YUV100 formatted)
.mod: ProTracker Module
.ngc/.ngp/.ngpc: Neo Geo Pocket ROM File
.pce: NEC PC-Engine/TurboGrafx-16 ROM File
.rom: MSX ROM File (Not a .DSK)
.sg: Sega SG-1000 ROM File
.sc: Sega SC-3000 ROM File
.sms: Sega Master System ROM File
.sv: Watara Supervision ROM File
.ws/.wsc: WonderSwan ROM File
.z80: ZX Spectrum Z80 Snapshot
.txt: Text Document
.pcx: ZSoft Paintbrush PCX Image
.c8: RCA CHIP-8 ROM
.arc: Emerson Arcadia 2001 ROM
.nsf: NSF Format Music (2A03 Only)
.k3m: Krawall Advance Music
.bgf: BoyScout Module
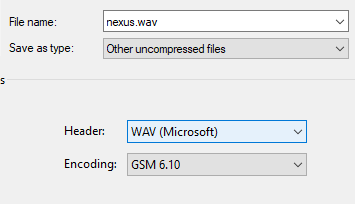
.wav: Wave Format Sound (GSM 6.10 format)
.vgm: SMS/GG VGM Music
.sb: MaxMod Soundbank
.mda: Sharp X68000 Music
.cwz: [Unknown] Music File
Plugins
Every single extension listed above is controlled by a file known as a Pogoshell plugin.
If you want to add or make plugins of your own, the filename has to be the extension that it uses in /SYSTEM/PLUG
Playing ColecoVision ROMs
1. Download the Cologne package here: https://www.zophar.net/download_file/16422
2. Take a blank file and the BIOS (You have to find the BIOS yourself).
3. Compile the Cologne ROM with the Executable in the zip file.
4. Rename the created file to col.gba and place it in the /SYSTEM/PLUG directory.
If done correctly, you should now be able to play ColecoVision ROM files (.col)
These are placed in the /SYSTEM/PLUG directory.
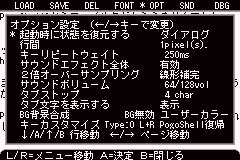
The Extra Settings Menu
Pressing the SELECT button in the SD Card menu will open up a menu.
There are four options there. Thumbnail, reset, backup, and bold.
Thumbnail will toggle whether or not you want to see the thumbnail of GBA Games.
Reset will toggle the hard reset when you launch a game. If you hold L while this is turned on, it will not perform the hard reset. If the option is off, holding L will perform a hard reset.
Backup will toggle the Save backup feature. This feature is to ensure you don’t lose all of your saves when your SD card will inevitably become corrupted due to a flaw in the way saving works.
Bold will make the text bolded for ASCII characters. This may help for people who are nearsighted.
Converting Wave Files
This will require Audacity or other audio manipulation software.
Step 1:
Step 2:
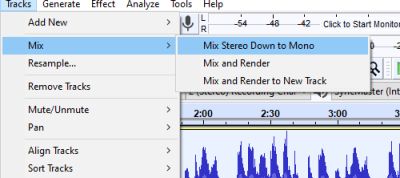
Step 3:
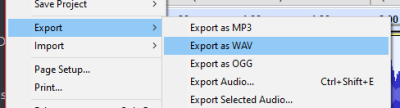
Step 4:
Converting JPEG Images
This requires the tool that is included with the package.
Step 1: Go into the tools folder

Step 2: Double click the ps2jpg_linker.exe

Step 3: Select the bottom option
Step 4: Choose your image
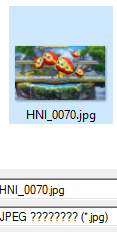
Step 5: Click the option on the right
Step 6: Your converted image should be [imagename]_enc.jpg
Plugin usage
The .wav file plugin
When launching a .wav file, you should see a screen that looks like this.
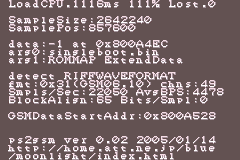
Due to the way this plugin was programmed, you cannot really do anything other than exit to the EZ-Flash Menu.
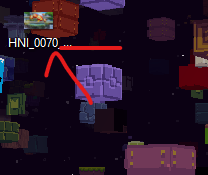
The JPEG file plugin
When viewing a JPEG image, the image will begin drawing in chunks, kinda like Minecraft blocks.
Controls:
A Button: Zoom out
B Button: Zoom in
D-Pad: Scroll image
START Button: Re-draw image
L+R: Quit
The text reader plugin
Unfortunately, this plugin is all in Japanese, and there is nothing I can do about it.
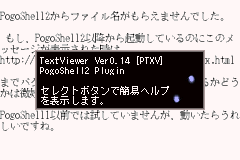
However, I can tell you all that you need to know.
Controls:
A Button / Down: Scroll Down
B Button / Up: Scroll up
Left / Right: Previous/Next Page
START Button: Menu
L+R: Quit
In the previously aforementioned menu, you can use:
L / R: Next Tab
Up / Down: Select
A Button: Confirm choice
B Button: Cancel
Left / Right: Change Setting
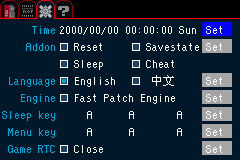
System Settings
Use ↑ and ↓ to select option, press A to confirm.
Time
Use ← and → to select time elements, ↑ and ↓ change the value, select OK and press A to save the time.
Addon
Use ↑ ← ↓ → to select options, press A to toggle them, select OK and press A to save.
Since the 1.04 kernel, check the save-states solely (other items are not checked) to enable the new save-states mode without invoking the in-game menu, and the compatibility is higher. When this feature is activated, the following sleep hotkeys and menu hotkeys become the save and load hotkeys for the save-states.
Language
Use ← and → to select language, press A to save.
Fast Patch Engine
This option is enabled in default under normal circumstances. unless you want to use BOOT WITH ADDON with fan translated rom or other heavily modified rom.
Turn off this option will turn to use the manual patch engine. The patching time will be increased.
Sleep Key
Press this hotkey will turn the console in sleep mode when playing game.
Press Select + Start to wake up the console. This hotkey is unchangeable.
Use ← and → to select, ↑ and ↓ change the key, select OK and press A to save. DO NOT USE OPPOSITE KEY IN SAME TIME, LIKE UP AND DOWN.
Consider the console is still draining the battery in sleep mode. we suggest use the save states and turn off console.
Addon Key
This is the in game menu hotkey, also the reset hotkey if only RESET enabled.
Use ← and → to select, ↑ and ↓ change the key, select OK and press A to save. DO NOT USE OPPOSITE KEY IN SAME TIME, LIKE UP AND DOWN.
Game RTC
If you are not playing RTC games, you can turn off this function to reduce more power consumption. unticked=off
Definitive Edition
Please read the document here for information about your cartridge.
EZ-FLASH OMEGA Definitive Edition Manual
Help
Here are some of the features shortcut keys and a qrcode which is linked to this document.
IMPORTANT NOTE
-
Please wait at least 2-3 seconds after in-game save behavior, then power off the game console or reset game. Because the cache mechanism of NAND on microSD needs time to write data properly. Turn off the console or reset game too fast may cause your save data lost because writing process interrupted. The GBC/NES emulator also need to wait 2-3 seconds after you press L + R, this operation will call up a save action, same theory as above. wait some time then choose exit.
error code
1  game rom error
2  saver folder error
4  save file error
5  create file error
Fast turn off console or reset game when saving and fast exit emulator will cause the data damaged and microSD card FAT error. that’s why you encounter the error code above.
You can use disk-scan application to fix the microSD card, or format it again.
The best way is counting one to five in your mind after saved the game, then turn off game console or reset game.
Which conditions need the counting?
Saved in the game Saved game states Press L + R in emulator before exit -
Sound turn to noise after load game states: The sound register of GBA hardware is write only, it can not be saved and restored. Change a scene should get the sound normally. But there are some game exceptions, the sound will never return to normal. This is a limitation of the GBA hardware itself and it is not a defect of this product.
-
Please use the
press L+R then exitoption in emulator to keep the saver which you saved in game, instead of shutting down directly after saved game in emulator. -
Starting from kernel 1.04, the battle field auto-save in the Fire Emblem series are removed, please use manual battle field save and chapter save point.